

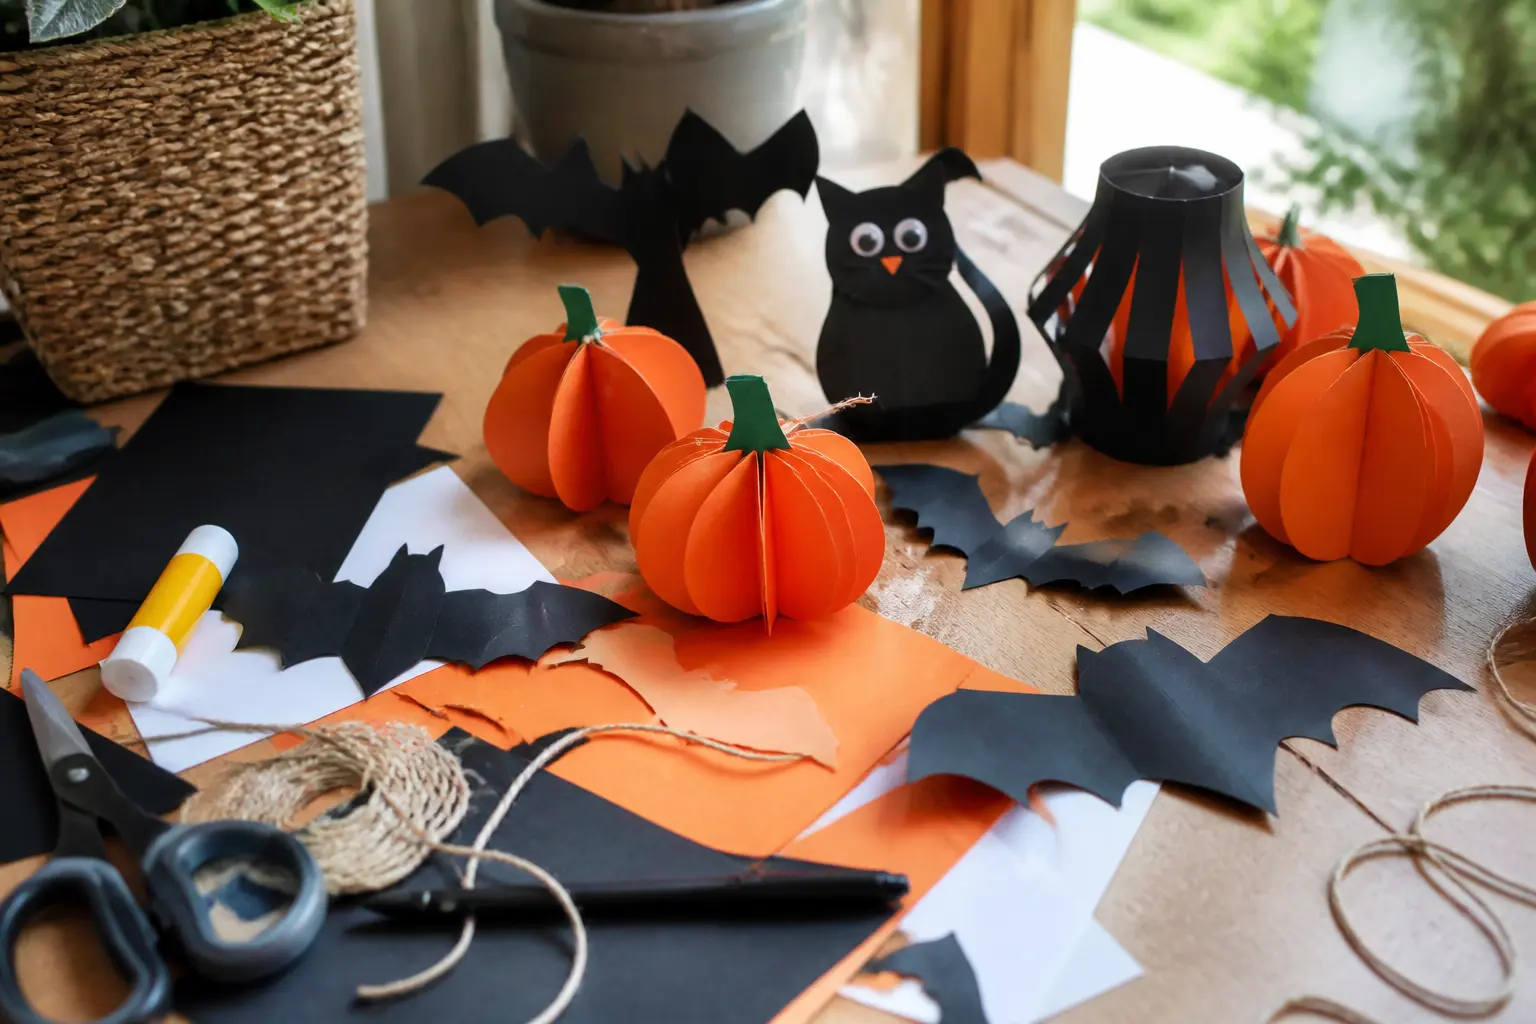
Halloween paper crafts for kids are the sweet spot between a school art project and a party activity: cheap, fast, and genuinely impressive on a windowsill or a front door.
Black card, tissue paper, a glitter glue bottle and about twenty minutes are enough to make something a child will want to keep.
The 33 crafts below cover every skill level from toddler handprints to careful paper-cutting for older kids, and every one of them can be made from materials found in a single craft-shop run or a well-stocked Amazon basket.
A note before you start: cutting steps and anything involving a craft knife are flagged inside the step itself so you know exactly when to hand over, or hold on.
Where drying time is the longest part of the job, that is flagged too, because nobody wants a glitter smear across the car seat on the way to the party.
For games to run alongside the crafting session, 25 Not-Too-Scary Halloween Party Games for Kids has the whole afternoon covered.
And if you want more no-scissors options for the youngest crafters, 15 Halloween Crafts for Preschool That Work at a Table of Twenty is worth a look.
This post contains affiliate links. If you buy through them, I may earn a small commission at no extra cost to you.
- Glitter Spiderweb on Black Card
- Decorated Cardboard Ghost
- Tissue Paper Witch Hat Card
- Handprint Witch on Paper Bag
- Tissue Paper Halloween Wreath
- Black Cat Paper Bag Puppet
- Torn-Paper Pumpkin Collage
- Paper Plate Mummy
- Accordion-Fold Paper Bat
- Coffee Filter Ghost Garland
- Paper Roll Frankenstein
- Watercolour Resist Jack-o-Lantern
- Paper Plate Spider
- Origami Jumping Frog (Halloween Toad)
- Scratch-Art Haunted House
- Paper Chain Monster Bunting
- Pop-Up Spider Card
- Cauldron Pencil Pot
- Newspaper Owl
- Accordion Book Mini Haunted House
- Paper Mosaic Skull
- Rolled Paper Pumpkin
- Ghost Window Silhouette
- Folded Paper Bat Mobile
- Washi Tape Pumpkin Card
- Paper Bag Lantern
- Collage Witch on Black Card
- Paper Straw Skeleton
- Marbled Paper Wrapping Sheets
- 3D Paper Spider Web
- Paper Cup Witch
- Stained Glass Bat Window Hanger
- Paper Roll Pumpkin Stack
- Frequently Asked Questions
Glitter Spiderweb on Black Card
This is the craft that photographs best of all thirty-three: white school glue piped straight from the bottle onto black card, then buried under whatever glitter colours the children can reach first.
Orange and purple together look particularly good, but a single-colour web in gold is just as striking. Prop the finished pieces on a mantelpiece or tape them to a dark window and they catch every candle flicker in the room.
The glue web needs a full hour to dry before the excess glitter comes off, so make these the first craft of the afternoon and come back to shake them out before the party starts. Store flat in a folder; they survive for weeks without curling if the card is heavy enough.

Glitter Spiderweb on Black Card
What You Need
- Black card, A5 or A4, 250 gsm, one sheet per child
- White PVA school glue in a fine-tip squeeze bottle, one per child or shared
- Mixed craft glitter in at least 2 colours, 15 g per child
- A sheet of scrap paper larger than the card, for catching loose glitter
- A soft dry brush for sweeping excess glitter
How to Make It
- Place the black card on the scrap paper. Squeeze a small dot of glue in the centre of the card, then draw straight lines of glue out from the dot toward each edge and corner, like spokes on a wheel. Aim for six to eight spokes.
- Connect the spokes with curved lines of glue, working outward from the centre to make the web sections. The lines do not need to be perfect; slight wobbles look more natural. When done right, you should see a clear web shape before any glitter goes on.
- While the glue is still wet, shake or sprinkle glitter generously over the whole web. Use one colour first, then a second colour over the centre for contrast. Press lightly with a fingertip to help the glitter stick.
- Leave flat for a full hour. Do not try to rush this: lifting it before the glue skins over collapses the web lines.
- Hold the card over the scrap paper and tip it gently to shake off the loose glitter. Use the soft brush to clear any glitter that has strayed onto the black background. Fold the scrap paper into a funnel and return the loose glitter to its pot.
Good to Know
Decorated Cardboard Ghost
Cut a ghost shape from a cereal box or thin corrugated card, paint it white, and hand it to the children with every embellishment on the table: googly eyes, self-adhesive gems, sequins, foam stickers.
The result is a chunky, tactile ghost that stands up against a wall or hangs from a length of ribbon. No two look alike, which makes them perfect party favours: each child takes their own home.
The white paint needs twenty minutes to dry before decorating begins, so prime the shapes in advance if this is a party craft station. Store flat in a paper bag; the gems stay put for months.

Decorated Cardboard Ghost
What You Need
- Thin corrugated card or cereal-box card, one A4 sheet per child
- White acrylic paint, 30 ml per child
- A flat foam brush, 2 cm wide, one per child
- 2 large googly eyes, 20 mm, per child
- Self-adhesive foam gems and star stickers, a small pot to share
- PVA glue or a glue stick for attaching googly eyes
- Black marker, fine tip, one to share
- 30 cm of thin ribbon per child for hanging (optional)
- A craft knife and cutting mat (adult use only, for pre-cutting shapes)
How to Make It
- An adult cuts a simple ghost outline from each piece of card before the session: a rounded head, two small raised arms at the sides, and a wavy bottom edge. The shape should be roughly 15 cm tall. A craft knife cuts corrugated card more cleanly than scissors.
- Brush white acrylic paint over the front of each ghost in smooth strokes. One good coat is enough if the card is pale; two thin coats work better on dark packaging. Set aside to dry for twenty minutes, paint side up.
- Once dry, the child glues the googly eyes onto the face area using a small dot of PVA. Press firmly and hold for thirty seconds.
- An adult or older child draws a simple mouth with the black marker: two rectangular teeth and a curved smile is the easiest route, and it reads clearly from across the room.
- Peel-and-stick the foam gems and star stickers over the body in any pattern. Press each one flat so the edges do not lift.
- If hanging, pierce a small hole at the top of the head with a pencil point and thread the ribbon through, knotting it on the back.
Good to Know
Tissue Paper Witch Hat Card
A pointed hat cut from black card becomes a canvas for torn tissue paper in orange, purple and green. The tissue pieces go on with a glue stick, overlapping like crazy patchwork, then star stickers and a strip of glitter card make the band.
The finished hat is flat enough to mail in an envelope, which makes it a useful Halloween card as well as a display piece.
This craft is forgiving: torn edges look better than cut ones, and the overlapping colours merge in a way that looks deliberately artistic. Lay the finished hats under a heavy book for five minutes if they curl.

Tissue Paper Witch Hat Card
What You Need
- Black card, A4, 250 gsm, one sheet per child
- Tissue paper in orange, purple and green, pre-torn into roughly 3 cm pieces
- A glue stick, one per child
- A strip of gold or yellow glitter card, 2 cm x 10 cm, per child (for the hat band)
- Self-adhesive star stickers in mixed colours, small pot to share
- Scissors for adult use
How to Make It
- An adult cuts a tall pointed triangle from the black card, roughly 20 cm high and 14 cm wide at the base. Then cut a flat oval brim, about 16 cm wide and 5 cm deep, from the remaining card. These two pieces form the hat.
- The child rubs glue stick over the front of the triangle, working in sections. Press torn tissue pieces onto the glue, overlapping the edges so no black shows through. Mix colours freely. When the triangle is covered and the glue is dry, the tissue should be flat and papery, not bunched.
- Glue the glitter-card strip horizontally across the base of the triangle to make the hat band. Press firmly along the full length.
- Stick the triangle onto the oval brim, aligning the base of the cone with the top straight edge of the oval. A generous line of glue stick holds it securely.
- Press star stickers over the tissue surface in a scattered pattern. Add a few to the brim for balance.
Good to Know
Handprint Witch on Paper Bag
A painted handprint becomes a witch face in about ten minutes: the palm is the head, the fingers are wild hair, and a small paper hat glued above the thumb finishes it.
Lime green paint on a white paper gift bag turns it into a trick-or-treat bag the child made themselves, which is a significant upgrade on a plastic pumpkin bucket in terms of pride of ownership.
Wash hands immediately after printing before the paint sets. The faces are drawn on once the green paint is fully dry, about fifteen minutes, so build that pause into your session plan.

Handprint Witch on Paper Bag
What You Need
- White paper gift bags with flat bottom, one per child
- Lime green washable poster paint, 20 ml per child
- A flat sponge or foam brush for applying paint to the palm
- Black card, one A5 sheet per child (for the hat)
- a glue stick
- Black fine-tip marker for drawing the face
- A shallow tray or plate for the paint
How to Make It
- An adult cuts a small pointed triangle from the black card (roughly 7 cm high) and a narrow strip for the hat brim (about 8 cm x 1.5 cm). Set aside.
- Pour a little lime green paint into the tray and spread it into an even layer. The child presses their palm flat into the paint, making sure the full palm and all fingers are covered, then presses their painted hand firmly onto the lower half of one side of the bag. Lift straight up without sliding.
- Leave the handprint to dry for at least fifteen minutes. The paint should be completely matte and no longer shiny before drawing on it.
- Once dry, the child (or adult) draws two small dot eyes, two rosy circles for cheeks, and a curved smile on the palm area with the black marker. Keep the face simple: less is more here.
- Glue the brim strip across the top of the handprint, just above the fingers, then glue the triangle hat above the brim at a slight angle for character.
- An adult or older child can draw wavy black hair lines extending from between the fingers if a fuller witch look is wanted.
Good to Know
🛍 Shopping guide
Tissue Paper Halloween Wreath
A paper plate with the centre cut out becomes the base for a full, generous wreath stuffed with scrunched tissue paper in orange, purple, yellow and black.
Paper witch legs and a hat glued on top make it look like a witch crashed into the front door, which is a classic gag that still lands every year. Hang it with a loop of ribbon through the plate hole.
The tissue stuffing is satisfying and repetitive, which makes it ideal for younger children while an adult handles the paper hat and legs. Finished wreaths last the whole season indoors; store flat in a bag after Halloween.

Tissue Paper Halloween Wreath
What You Need
- 1 large paper plate, 26 cm diameter, per wreath
- Tissue paper in orange, purple, yellow and black, roughly 30 sheets total
- PVA glue or a hot glue gun (adult use only)
- Black card, A4, one sheet for legs and hat
- White card or paper, one small strip for sock stripes
- a pencil and ruler
- 30 cm of thin ribbon for hanging
- Scissors
How to Make It
- An adult cuts out the centre of the paper plate, leaving a ring about 6 cm wide. This is the wreath frame. Cut a length of ribbon and thread it through the top of the ring, knotting it to form a hanging loop.
- Tear or cut the tissue paper into roughly 10 cm squares. The child scrunches each square into a loose ball and dips the base lightly in PVA glue, then presses it onto the paper-plate ring. Pack the balls tightly so the plate does not show through. Work in colour sections or mix randomly; both look good when the ring is full.
- An adult cuts two leg shapes from black card, each about 12 cm long with a simple boot shape at the bottom. Cut four narrow strips of white card and glue them horizontally across the lower legs to make striped stockings.
- An adult cuts a pointed triangle hat from black card (about 10 cm high) and a small oval brim. Glue the hat together, then glue or hot-glue it to the top of the wreath ring at a slight tilt.
- Glue or hot-glue the legs to the bottom of the ring so they hang below the tissue paper, pointing downward and slightly outward.
Good to Know
Black Cat Paper Bag Puppet
A standard brown paper lunch bag becomes a black cat when painted and fitted with card ears, whisker strips and a curling paper tail.
The puppet works over the hand, mouth flap at the top, and puts on a show at the table as easily as it decorates a shelf. Simple, fast and deeply satisfying for children who want something to play with after they have made it.

Black Cat Paper Bag Puppet
What You Need
- Brown paper lunch bags, one per child
- Black acrylic or poster paint, 20 ml per child
- A flat brush, 2 cm wide
- Black card, A5, one sheet per child (ears, nose)
- Green or yellow card, a small offcut (eyes)
- Black and white paper strips for whiskers, pre-cut, 12 strips per child (each 0.5 cm x 8 cm)
- PVA glue or glue stick
- Black marker, fine tip
How to Make It
- Paint the entire outside of the paper bag black, including the flap at the top. Two thin coats cover better than one thick one. Stand the bag upright to dry, about twenty minutes.
- An adult cuts two tall pointed ear shapes from the black card, each about 5 cm high, and a small triangle nose.
- Once the bag is dry, glue the ears to the top corners of the bag flap so they point upward when the bag is held flat.
- Cut two oval eyes from green or yellow card, about 3 cm wide each. An adult draws a black vertical pupil on each one with the marker. Glue the eyes to the front of the bag below the fold line.
- Glue the small triangle nose between and below the eyes, point downward. Draw a curved mouth below the nose with the marker.
- Glue three whisker strips to each side of the nose, fanning them outward horizontally.
- For the tail, roll a strip of black card lengthways into a thin tube and curl the end around a pencil. Glue the straight end to the back bottom edge of the bag.
Good to Know
Torn-Paper Pumpkin Collage
Tearing orange tissue and crinkle paper into strips and layering them onto a pencil-drawn pumpkin outline is the kind of craft that works at every age simultaneously: a three-year-old can tear and stick while an older sibling handles the green vine details.
The finished piece has real texture and depth, and it frames beautifully against a dark wall or cork board.

Torn-Paper Pumpkin Collage
What You Need
- White card, A4, 250 gsm, one sheet per child
- Orange tissue paper, 5 sheets per child
- Green tissue paper or crinkle paper, 2 sheets per child
- Black marker, thick tip, for the outline
- PVA glue thinned with a little water, in a small pot
- A foam brush or old paintbrush for applying the glue
How to Make It
- An adult (or older child) draws a large simple pumpkin shape in thick black marker on the white card, filling most of the page. Add a short stalk at the top and three curved lines down the pumpkin body for the segments. Draw a simple triangular jack-o-lantern face in the centre.
- Tear the orange tissue into rough strips, each about 2 cm wide. Tearing is better than cutting here: the ragged edges create a more interesting texture.
- Brush thinned PVA glue over one section of the pumpkin at a time. Press orange tissue strips onto the wet glue, overlapping the edges. Work from the outside of the pumpkin inward, stopping at the face shapes so the black outline shows through.
- Tear small pieces of green tissue for the stalk and add a few curling green strips around the top of the pumpkin for vines.
- Leave to dry for five minutes. The tissue darkens slightly as it dries and the surface becomes smooth and almost translucent, which is exactly right.
Good to Know
🛍 Shopping guide
Paper Plate Mummy
White crepe paper bandages wound around a paper plate, two googly eyes poking out from the middle, and a small red mouth: done. It takes ten minutes and looks charming on a wall cluster with other Halloween paper plates.
The crepe paper is cheap, the result is instant, and children aged four upward can wind the bandages without help once they understand the method.

Paper Plate Mummy
What You Need
- White paper plates, 22 cm, one per child
- White crepe paper, one roll to share (each child needs about 1 m)
- 2 large googly eyes, 25 mm, per child
- PVA glue or a glue stick
- Red marker or small red card triangle for the mouth
How to Make It
- Tear or cut a strip of white crepe paper about 1 m long and about 4 cm wide. Wind it back and forth across the front of the paper plate in overlapping diagonal strips, leaving a gap in the centre for the face. Glue the end of the strip to the back of the plate.
- Glue the two googly eyes side by side in the face gap. Press firmly and hold for thirty seconds.
- Draw or stick a small red mouth below the eyes. A simple curved line or a tiny red triangle reads well from a distance.
- If any crepe paper lifts at the edges, press a small dot of PVA underneath to secure it.
Good to Know
Accordion-Fold Paper Bat
Two accordion-folded strips of black card, joined at the centre with a staple and spread into wings, become a bat that actually flaps when you hold it up.
Add a small oval head, two white paper fang strips and two googly eyes, and it is done. These look good hanging from a ceiling in a cluster of six or eight at different heights.

Accordion-Fold Paper Bat
What You Need
- Black card, A4, 160 gsm, one sheet per bat
- White paper, a small offcut (for fangs)
- 2 googly eyes, 10 mm, per bat
- A stapler
- PVA glue or glue stick
- a pencil and ruler
- 30 cm of thin black thread or ribbon per bat for hanging
How to Make It
- Cut the black card into two strips, each 20 cm x 4 cm. These are the wings.
- Accordion-fold each strip at 2 cm intervals, creasing each fold sharply. You should end up with a fan-like pleated strip. When you hold it at one end, it should spring open slightly.
- Pinch both strips together at one end of each, then place those ends together and staple through all the layers once. An adult handles the stapler. Spread the free ends outward to open the wings.
- Cut a small oval from the remaining black card, about 5 cm wide and 4 cm tall. This is the head. Glue it over the staple in the centre of the wings so the wings appear to spread from behind the head.
- Cut two small white paper rectangles, 0.5 cm x 1.5 cm, and fringe one end of each to make fangs. Glue them to the lower edge of the oval head.
- Glue the googly eyes to the front of the head. Tie the thread through the staple at the back or loop it around the central join for hanging.
Good to Know
Coffee Filter Ghost Garland
Basket-style coffee filters pulled into ghost shapes, drawn on with black marker and threaded onto a length of white string make a garland that looks deliberately handmade in a good way. Twelve filters fit nicely across a mantelpiece or a doorway. The whole thing takes twenty minutes and costs almost nothing.

Coffee Filter Ghost Garland
What You Need
- 12 large basket coffee filters (white, cone or flat-bottom style)
- Black marker, fine tip
- 2 m of white or cream string or twine
- a hole punch
- A small amount of polyfill or tissue paper, one ball per ghost (for the head)
How to Make It
- Crumple a small ball of tissue paper or polyfill about the size of a large marble. Place it in the centre of a coffee filter and gather the filter around it, twisting the filter below the ball to form a round head with a ruffled skirt below.
- Draw two oval eyes and a small open mouth on the rounded head with the black marker. Keep the face simple; a shocked O-mouth expression is easier to draw than a smile and looks very effective.
- Punch a small hole through the gathered twist at the top of the head. Thread the string through the hole, spacing the ghosts about 15 cm apart along the string.
- Repeat for all twelve filters, threading them onto the string as you go. Tie a loop at each end of the string for hanging.
Good to Know
Paper Roll Frankenstein
A cardboard toilet roll painted green becomes Frankenstein’s monster with a strip of black card for the flat-top hair, two silver brad fasteners for the bolts, and a hand-drawn face. Stand a row of them on a windowsill for an instant Halloween scene that children can make themselves almost entirely without adult help.

Paper Roll Frankenstein
What You Need
- Cardboard toilet rolls, one per child
- Green acrylic or poster paint, 20 ml per child
- A flat brush, 2 cm wide
- Black card, a small strip per child (hair)
- 2 silver or gold paper brad fasteners per child (bolts)
- Black and red markers, fine tip
- White paper, a small offcut (eyes)
- PVA glue or glue stick
How to Make It
- Paint the outside of the toilet roll green. Let it dry upright for twenty minutes until fully matte.
- Cut a strip of black card the same width as the roll, about 2 cm deep, with a slightly uneven top edge for a flat-top hair silhouette. Glue it around the top of the roll.
- An adult presses two brad fasteners through the roll on opposite sides, about a third of the way down, to represent the neck bolts. Splay the backs inside to hold them firm.
- Cut two small circles from white paper, about 1.5 cm diameter. Draw a black pupil on each and glue them to the front of the roll below the hair strip.
- Draw a flat straight-line mouth with the black marker: a single horizontal line with three small vertical stitches above it gives the classic monster look. Add two small red dots for nostrils.
Good to Know
🛍 Shopping guide
Watercolour Resist Jack-o-Lantern
White wax crayon on white card is invisible until orange watercolour paint washes over it and the secret pumpkin face glows through. The effect is genuinely surprising even to older children who know how it works, and the results look like proper art, not a school project. Clip to a string with mini pegs for a gallery wall effect.

Watercolour Resist Jack-o-Lantern
What You Need
- White card, A5, 200 gsm, one sheet per child
- White wax crayons or white oil pastels, one per child
- Orange watercolour paint or thinned orange poster paint
- A round watercolour brush, size 8 or similar
- A pot of clean water
- Old newspaper to protect the table
How to Make It
- Using the white wax crayon, the child draws a large pumpkin outline filling most of the card, then adds a jack-o-lantern face inside it: triangle eyes, a zigzag mouth, and a small stalk at the top. Press firmly with the crayon for a thick waxy line. The drawing will be almost invisible on the white card, which is the point.
- Mix orange watercolour or thinned poster paint to a medium strength, not too watery or the resist will look grey. Load the brush and sweep broad strokes of paint across the whole card in one direction, going over the crayon drawing without hesitating. Watch the face appear as you paint.
- Let the paint dry for ten minutes. The wax lines stay crisp and white while the painted areas settle to a warm translucent orange.
- Once dry, the child can add a green wash for the stalk area and a few black watercolour details for the face shadows if they want more depth.
Good to Know
Paper Plate Spider
A black-painted paper plate, eight crepe paper or card legs and two white eyes: this is the spider that children always want to make and always love when it is done. Suspend it from a thread in a doorway and it spins in every breeze. A cluster of three different sizes hung at different heights looks particularly good.

Paper Plate Spider
What You Need
- White paper plates, 22 cm, one per spider
- Black acrylic paint, 20 ml per spider
- A flat foam brush
- Black card or thick black paper, A5 sheet per spider (legs)
- 2 white self-adhesive circle stickers, 2 cm diameter (eyes)
- Black marker, fine tip
- 50 cm of black thread per spider for hanging
- PVA glue
How to Make It
- Paint the front of the paper plate entirely black. Let it dry flat for twenty minutes.
- Cut eight strips of black card, each 2 cm x 15 cm. Accordion-fold each strip to give it a jointed, leg-like appearance.
- Glue four legs to each side of the underside of the plate, pointing outward and slightly downward. Allow the glue to set for five minutes before turning the spider over.
- Stick the two white circle stickers to the front of the plate, side by side, near the top. Draw a black dot pupil on each with the marker.
- An adult ties the black thread to a small loop of tape on the back of the plate at the top, or makes a small hole with a pencil and threads it through for hanging.
Good to Know
🛍 Shopping guide
Origami Jumping Frog (Halloween Toad)
The classic origami jumping frog, folded from green card and decorated with orange dot eyes and a black marker wart or two, becomes a Halloween toad that actually jumps when you press its back.
Give each child one at the table for an impromptu jumping competition: a good frog clears 20 cm easily. No glue, no paint, just one sheet of paper and a five-minute fold.

Origami Jumping Frog (Halloween Toad)
What You Need
- Green card or thick paper, 15 cm x 10 cm rectangle per child, one sheet
- Orange marker
- Black marker, fine tip
How to Make It
- Place the rectangle landscape. Fold the top right corner down to the left edge to make a triangle, crease sharply, unfold. Fold the top left corner down to the right edge, crease, unfold. You now have an X crease across the top half.
- Push the top edge down and inward along the X crease so it collapses into a triangle pointing upward. Press flat. This is the head and front legs.
- Fold the bottom left and right edges into the centre line, making a narrower rectangle below the triangle.
- Fold the bottom edge up to meet the base of the triangle. Then fold it back down again halfway, creating the back legs fold. The frog should now look like a stubby figure with a pointed head.
- Flip the frog over. Draw two orange dots for eyes near the triangle point and add a few black marker dots for warts.
- To make the frog jump, press down on the back fold with one finger and slide it quickly off the edge. A well-creased frog jumps cleanly every time.
Good to Know
🛍 Shopping guide
Scratch-Art Haunted House
Black wax crayon layered thickly over bright mixed crayon colours, then scratched away with a wooden skewer or orange stick, reveals a glowing haunted house silhouette. The technique takes a little patience in the colouring stage but pays back handsomely: the finished piece looks like stained glass lit from behind, not like a children’s craft at all.

Scratch-Art Haunted House
What You Need
- White card, A5, 200 gsm, one sheet per child
- Oil pastels or wax crayons in bright colours: orange, yellow, red, purple, at least 4 colours
- Black oil pastel or black wax crayon, one per child
- A wooden skewer, toothpick or orange stick for scratching
- Old newspaper to protect the table
How to Make It
- Cover the entire card surface with patches of bright oil pastel or wax crayon, pressing heavily. Fill every part of the card. The exact arrangement does not matter as long as no white shows.
- Cover the entire coloured layer with black oil pastel or crayon, again pressing firmly until the bright colours are completely hidden. This takes time and some elbow grease; do not rush it. The card should look uniformly black when done.
- Using the pointed end of the wooden skewer, scratch a haunted house scene into the black layer: a large house with a pointed turret, arched windows with glowing panes, a full moon, bats, a bare tree. Wherever the skewer removes the black, the bright colours beneath glow through.
- Fine lines make bats; broader scraped areas make the moon and windows. The more detail scratched in, the more dramatic the result. Keep a sheet of newspaper nearby because the black wax shavings scatter.
Good to Know
🛍 Shopping guide
Paper Chain Monster Bunting
The paper chain everyone learned in infancy, but each link gets a tiny face: green Frankenstein links alternate with purple witch links and orange pumpkin links, all drawn on with marker before joining.
Loop it across a doorway and the whole chain becomes a cast of characters. The repetitive cutting and folding is perfect for a group of mixed ages working together.

Paper Chain Monster Bunting
What You Need
- Green, purple and orange card, one A4 sheet of each colour per 30 links
- A ruler and pencil
- Scissors
- Black marker, fine tip
- A stapler or glue stick for joining the links
How to Make It
- Cut each sheet of card into strips, 2 cm wide and 20 cm long. Each strip makes one link. You need roughly ten of each colour for a good length of bunting.
- Before linking, decorate the strips with faces. On green strips, draw a Frankenstein stitch-mouth and flat-top hair lines. On purple strips, draw a witch hat outline and pointy chin. On orange strips, draw a jack-o-lantern triangle eyes and zigzag mouth.
- Curl the first strip into a loop and staple or glue the ends together. Thread the next strip through the first loop, curl and join. Continue until you have the length you want, alternating colours.
- Hang by tying a loop of thread through each end link.
Good to Know
🛍 Shopping guide
Pop-Up Spider Card
A folded piece of black card, a small strip mechanism inside, and a paper spider that leaps out when the card opens: this is a Halloween card that actually does something.
The pop-up mechanism is a simple box pop-up, the easiest of all interior cuts, and it takes about fifteen minutes once you have the hang of it. Send one home with each party guest.

Pop-Up Spider Card
What You Need
- Black card, A4, 250 gsm, one sheet per card (folded to A5)
- Orange or white card, A6, one sheet per card (for the spider body)
- Black marker, fine tip
- Craft knife and cutting mat (adult use only)
- Glue stick
- Ruler and pencil
How to Make It
- Fold the black card in half to A5. Open it flat, spine toward you. In the centre of the card, parallel to the fold, draw two cuts about 2 cm apart and 3 cm long, straddling the fold line. An adult uses a craft knife to cut cleanly along these lines.
- Push the tab created by the two cuts upward and crease sharply at each end so the tab stands out from the card when it is opened. This is the pop-up platform.
- Close the card and make sure the tab folds inward cleanly without catching. If it catches, the cuts need to be slightly longer at each end.
- Cut a small round spider body from the orange card, about 3 cm diameter, and eight thin leg strips from black card. Glue the legs to the back of the body and draw a face on the front.
- Glue the spider to the top face of the pop-up tab. When the card opens, the spider springs upward. Add a simple message with white marker on the inside front panel.
Good to Know
🛍 Shopping guide
Cauldron Pencil Pot
A tin can wrapped in black card, with a strip of purple or green glitter card for the rim and a pair of card handles, becomes a cauldron that holds coloured pencils or Halloween sweets on the party table.
The glitter rim catches the light, the shape reads instantly as a witch cauldron, and it goes home full of pencils as a party favour if you like.

Cauldron Pencil Pot
What You Need
- A clean empty tin can, 400 g size, one per child
- Black card, A4, one sheet per can
- Purple or green glitter card, a strip 3 cm x the circumference of the can (measure before cutting)
- Glue stick and PVA glue
- Scissors
- Black marker
How to Make It
- An adult checks the can for sharp edges and files any down, or covers the rim with a strip of masking tape. Measure the height and circumference of the can.
- Cut a rectangle of black card to fit exactly around the can. Wrap it around the can and glue the overlapping seam with PVA. Hold for thirty seconds until set.
- Measure and cut the glitter card strip to fit around the top of the can. Glue it in place with PVA so it sits like a rim.
- Cut two small D-shaped handles from black card offcuts, each about 4 cm across. Glue one to each side of the can with PVA, pressing for one minute each.
- Once dry, draw three small green bubbles on the front of the cauldron with a green marker for the potion effect. Fill with pencils or wrapped sweets.
Good to Know
🛍 Shopping guide
Newspaper Owl
Rolled and folded newspaper becomes a large textured owl body, with card wings, beak and enormous yellow paper eyes. The newspaper texture looks deliberately rustic and the scale is generous: a finished owl stands about 25 cm tall and looks intentional on a mantelpiece. It uses up scrap newspaper and costs almost nothing beyond the card for the features.

Newspaper Owl
What You Need
- 4 sheets of broadsheet newspaper per owl
- Brown or orange card, A5, one sheet (wings, beak)
- Yellow card, a small offcut (eyes)
- Black marker, fine tip
- Masking tape
- PVA glue
How to Make It
- Roll all four sheets of newspaper into a tall tight cylinder, about 25 cm long and 6 cm in diameter. Wrap it with several strips of masking tape to hold the roll firm.
- Press the top quarter of the roll inward from both sides to create two ear tufts by squeezing the paper and taping the shape in place. The body below should remain cylindrical.
- Tear the bottom edge of the roll into rough fringe strips about 3 cm long, pulling them outward to make tail feathers.
- Cut two rounded wing shapes from the brown or orange card, each about 12 cm long. Glue one to each side of the body with PVA, pressing firmly.
- Cut two large circles from yellow card, about 4 cm diameter. Draw a black pupil on each and glue them to the front of the owl face, side by side.
- Cut a small diamond from the brown card, fold it in half to make a beak, and glue between the eyes.
Good to Know
🛍 Shopping guide
Accordion Book Mini Haunted House
Six pieces of card accordion-folded into a concertina make a tiny standing haunted house scene that opens out flat or stands in a zigzag on a shelf.
Each panel is a different scene: a graveyard, a ghost, a bat in a moonlit sky, a witch on a broomstick. Older children can draw and colour every panel; younger ones can stamp or sticker.
The finished book is about 30 cm wide when open and 5 cm wide when closed.

Accordion Book Mini Haunted House
What You Need
- Black card, 6 pieces each 10 cm x 15 cm per child
- White, orange and purple markers or paint pens
- a glue stick
- Washi tape or masking tape in any colour (optional, for spines)
How to Make It
- Lay all six card pieces in a row. Decorate each panel with a different Halloween scene using the white, orange and purple markers: graveyard with headstones, full moon with bats, witch silhouette, pumpkin patch, ghost, haunted house front. Light-coloured markers show up well on black card. Let the ink dry for two minutes before touching.
- Turn the panels over. Glue the right edge of panel 1 to the left edge of panel 2, overlapping by 1 cm. Continue joining all six panels in a strip.
- Fold the joined strip into an accordion by folding alternate joins forward and backward. When done, the strip should stand on its own and open out flat to display all six scenes.
- Decorate the front cover panel with a title and border in white or gold marker.
Good to Know
🛍 Shopping guide
Paper Mosaic Skull
A skull outline on card, filled with small torn squares of coloured paper in sugar-skull style colours: hot pink, turquoise, orange and yellow on a black background. The tearing is meditative for older children and the colour combinations are completely their own. Pin the finished mosaic on a wall and it holds its own against any bought decoration.

Paper Mosaic Skull
What You Need
- Black card, A4, 250 gsm, one sheet per child
- Coloured paper in hot pink, turquoise, orange and yellow, one sheet of each
- PVA glue thinned slightly with water
- A small foam brush
- White chalk or white pencil
How to Make It
- An adult (or older child) draws a large skull outline in white chalk or white pencil on the black card, roughly 20 cm tall. Include large round eye sockets, a triangular nose hole, and a wide jaw with rectangular teeth.
- Tear the coloured paper into small squares and irregular pieces, roughly 1 cm across. Keep colours in separate piles.
- Brush a small area of the skull interior with thinned PVA and press paper pieces onto it, leaving a tiny gap between each piece so the black card shows through as grout lines. Change colours freely; there is no rule here.
- Leave the eye sockets and nose hole black, or fill them with a single colour for contrast. Fill the teeth area with white paper pieces if you have any, or leave the teeth as undecorated card.
- Let the mosaic dry for ten minutes until the PVA is clear and the pieces are flat.
Good to Know
🛍 Shopping guide
Rolled Paper Pumpkin
Orange paper strips rolled into tight coils and arranged inside a pencil-drawn pumpkin outline on card make a quilling-style pumpkin that looks like proper craftwork.
Children who have never quilled before pick it up within the first three coils, and the finished piece is satisfying enough to frame. Use a pencil as the rolling tool rather than a quilling tool: every household has one.

Rolled Paper Pumpkin
What You Need
- White card, A5, 200 gsm, one sheet per child (base)
- Orange paper strips, 0.5 cm wide and 20 cm long, about 30 per child (pre-cut by adult)
- Green paper strips, 0.5 cm wide and 10 cm long, 4 per child (stalk and vines)
- PVA glue in a small pot
- A pencil
- Black marker, medium tip
How to Make It
- An adult pre-cuts all the orange and green strips. Draw a pumpkin outline in black marker on the white card, roughly 12 cm wide and 10 cm tall, with a small stalk. The outline contains the coils, so make it bold enough to be visible.
- To roll a coil, wrap one end of an orange strip tightly around the pencil tip, then continue rolling to the end of the strip. Slide off the pencil and let it relax slightly into a loose coil.
- Dip the end of the coil into PVA glue and press it into the pumpkin outline on the card. Fill the entire pumpkin interior with loose coils, packed closely together. It takes about twenty to twenty-five coils to fill an A5 pumpkin shape.
- Roll the green strips more loosely and curl the ends around the pencil for vine tendrils. Glue these around the stalk.
- Once the interior is full and all pieces are glued, leave flat for five minutes to set.
Good to Know
🛍 Shopping guide
Ghost Window Silhouette
White tissue paper layered over a ghost template and taped inside a window makes a glowing silhouette that backlit daylight turns translucent. Three layers of tissue make it opaque enough to read as white, not as see-through, and the ghost shape holds its edge cleanly.
Space several at different heights across a window for a haunted-house effect from outside the house.

Ghost Window Silhouette
What You Need
- White tissue paper, 3 sheets per ghost
- A printed or hand-drawn ghost template, A4
- Black marker, medium tip (for features)
- Clear tape
- Scissors
How to Make It
- Draw or print a simple ghost shape on the A4 template, about 20 cm tall, with a slightly wavy bottom edge and two small rounded bumps for arms at the sides. Cut it out as the template.
- Lay three sheets of white tissue paper on top of each other and trace around the template with a light pencil mark. Cut through all three layers at once, or use the template as a guide for tearing a rough edge for a softer look.
- Draw two oval eyes and a small O-mouth on the top layer with the black marker. Press firmly but gently so the marker does not bleed through all three layers.
- An adult tapes the multi-layer ghost to the inside of the window using small pieces of clear tape at the corners and midpoints. When backlit, the layered tissue glows without being see-through.
Good to Know
🛍 Shopping guide
Folded Paper Bat Mobile
Five or seven origami-style folded bats threaded at different heights from a twig or a length of black dowel make a mobile that spins slowly in a room’s air current. The folding is simple: a rectangle, a few valley folds, a cut for the ears.
The visual effect is completely out of proportion to the effort. Hang it above the party table or in a bedroom window.

Folded Paper Bat Mobile
What You Need
- Black card, A5, 160 gsm, one sheet per bat
- Scissors
- A natural twig or 30 cm of black wooden dowel, 6 mm diameter, one per mobile
- Black thread, about 2 m per mobile
- a hole punch
How to Make It
- Cut each A5 sheet into a rectangle, 15 cm x 10 cm. Fold it in half lengthways so you have a long thin rectangle, 15 cm x 5 cm, with the fold at the bottom.
- Fold the left end of the rectangle up at a slight angle (about 30 degrees from the fold edge) to make one wing. Fold the right end up at the same angle in the opposite direction for the other wing. The shape should look like a flattened W from the front.
- At the top centre, make a small scissor cut about 1 cm deep and curve each resulting flap outward to form ear shapes.
- Punch a small hole through both layers at the centre top. Thread a 20-30 cm length of black thread through and knot it.
- An adult ties the threads to the twig or dowel at different heights, spacing the bats along the length. Tie a loop at each end of the twig for hanging.
Good to Know
🛍 Shopping guide
Washi Tape Pumpkin Card
Strips of orange washi tape layered diagonally on white card make a textured pumpkin body without any painting. Add a strip of green tape for the stalk and draw the face in black marker.
The tape peels cleanly from most surfaces, so mistakes are fixable, which makes this the right craft for perfectionists and for children who get frustrated when things go wrong. Card-sized, so it mails easily.

Washi Tape Pumpkin Card
What You Need
- White card, A5, 200 gsm, one sheet per child
- Orange washi tape, one roll to share (about 15 mm wide)
- Green washi tape, one roll to share (about 10 mm wide)
- Black marker, fine tip
- Scissors
How to Make It
- Draw a light pencil outline of a pumpkin on the card: a large oval about 12 cm wide with a small rectangular stalk at the top and three vertical pencil lines to mark the segments.
- Cut strips of orange washi tape slightly longer than the pumpkin is tall. Lay them vertically inside the pumpkin outline, overlapping each strip slightly and following the curve of the outline at the edges. Trim the excess tape at the top and bottom with scissors so the strips stay inside the pencil line.
- Cut a short strip of green washi tape and press it over the stalk area at the top.
- Draw triangle eyes, a zigzag mouth and a small triangular nose over the tape with the black marker. The marker writes on washi tape cleanly.
- Rub out the pencil outline if it shows at the edges.
Good to Know
🛍 Shopping guide
Paper Bag Lantern
A white paper lunch bag, painted orange or left white, with a simple jack-o-lantern face cut out of it, stands over a battery tea light to cast an orange or white glow. Make a row of six along a windowsill or down a garden path. The cutting is the only adult step; everything else is completely child-friendly.

Paper Bag Lantern
What You Need
- White paper lunch bags, one per lantern
- Orange acrylic paint and a foam brush (optional, for orange lanterns)
- A pencil
- Small sharp scissors or a craft knife and cutting mat (adult use only)
- Battery-operated LED tea lights, one per lantern
- Sand or a few small pebbles to weight the base (about 3 tablespoons per bag)
How to Make It
- If making orange lanterns, paint the outside of the bag with orange acrylic paint and let it dry for ten minutes before any cutting. If white lanterns, skip the paint.
- Fold the top of the bag over by about 3 cm to form a cuff, which stiffens the opening and makes the lantern look neater.
- The child draws a jack-o-lantern face on the front of the bag in pencil: two triangle eyes, a triangle nose and a zigzag mouth. Keep the shapes bold, at least 2 cm across each piece.
- An adult cuts out the pencil shapes using small sharp scissors from inside the bag, or a craft knife on a cutting mat. The paper is thin enough for clean scissors cuts if the shapes are large enough.
- Pour a little sand or a few pebbles into the base of the bag to stop it tipping. Place the battery tea light inside and switch it on.
Good to Know
🛍 Shopping guide
Collage Witch on Black Card
A full-length witch figure built entirely from torn and cut coloured paper on black card: purple robe from tissue paper, a pointed hat from glitter card, a lime green face from paint-chip offcuts or coloured paper, wild orange yarn or paper-strip hair.
The technique is collage layering, working from background to foreground, and it produces something that genuinely looks composed. Display on the fridge or mount and frame it.

Collage Witch on Black Card
What You Need
- Black card, A4, 250 gsm, one sheet per child
- Purple tissue paper, 3 sheets (robe)
- Black and gold glitter card offcuts (hat)
- Green paper or paint chip, a small piece (face)
- Orange tissue paper or paper strips for hair
- PVA glue and a foam brush
- Black marker, fine tip
How to Make It
- Tear or cut a large triangular robe shape from purple tissue paper, roughly 18 cm tall and 12 cm wide at the base. Brush the black card with a thin layer of PVA and press the robe onto the lower two-thirds of the card.
- Cut a small oval face from green paper, about 4 cm tall, and glue it above the centre of the robe. Tear orange tissue into thin strips or use paper strips for hair and glue them above and around the face, extending outward.
- Cut a pointed hat from black glitter card (about 8 cm tall with a small brim) and glue it above the face, overlapping the top of the hair slightly.
- Cut two small hand shapes from green paper and glue them at the robe sides.
- Draw the witch's features with the black marker: small eyes, a pointy nose, a crooked smile, and a few wart dots. Add gold glitter card star shapes scattered over the robe for decoration.
Good to Know
Paper Straw Skeleton
Paper straws arranged into a skeleton figure and glued to black card, with a small card skull at the top and a spindly rib cage from shorter straw pieces: it sounds more complicated than it is.
The whole thing is a puzzle of straight and slightly angled pieces, and getting the proportions roughly right is satisfying in a way that surprises children. Pin to a wall in a full-length silhouette.

Paper Straw Skeleton
What You Need
- Black card, A4, 250 gsm, one per child
- White paper straws, about 12 per child (or more for a bigger skeleton)
- White card, a small offcut (skull)
- PVA glue
- Black marker, fine tip
- Scissors
How to Make It
- Cut one straw in half for the spine. Place it vertically in the centre of the black card, about 4 cm from the top, and glue in place.
- Cut two shorter pieces for the shoulders (each about 5 cm), crossing the spine horizontally near the top, and glue them perpendicular to the spine.
- For the rib cage, cut six pieces, each 3 cm long, and glue three on each side of the spine below the shoulders, angled slightly downward.
- Cut two long pieces for the arms and glue them outward from the shoulder pieces, bending them at a slight angle. Cut short pieces for the hands and angle them downward at the end of each arm.
- For the legs, cut two long pieces and glue from the base of the spine downward. Add shorter shin pieces angled outward at the knee, and tiny foot pieces at the base.
- Cut a small oval skull from white card, about 4 cm tall. Draw hollow eyes, a triangular nose hole and a toothy grin with the black marker. Glue at the top of the spine.
Good to Know
🛍 Shopping guide
Marbled Paper Wrapping Sheets
Oil and water marbling with a shallow tray produces Halloween-coloured wrapping paper in orange, black and purple that no one else will have. Drop food-colouring-tinted oil onto water, swirl, and lift with a sheet of paper: the whole process takes five minutes per sheet.
Make enough to wrap a few small treats and the craft becomes functional as well as fun.

Marbled Paper Wrapping Sheets
What You Need
- A shallow tray or baking dish, larger than A4
- Water, enough to fill the tray 2 cm deep
- Vegetable or baby oil, 3 tablespoons
- Orange and black food colouring
- White cartridge paper or newsprint, A4, one sheet per marble print
- A toothpick or skewer for swirling
- Old towels or newspaper for drying
How to Make It
- An adult fills the tray with cold water to about 2 cm deep. Add the oil to a small cup, divide into two portions, and stir in a different food colouring to each: orange to one, black or very dark purple to the other.
- Drop small amounts of each coloured oil onto the water surface using a teaspoon. The oil spreads into irregular circles on the water surface.
- Use a toothpick to swirl the oil gently into a marble pattern. Do not over-swirl or the colours blend into brown.
- Lay a sheet of paper flat on the water surface, pressing gently so the whole sheet touches the water. After five seconds, lift the paper from one corner in a single smooth motion.
- Lay the printed sheet face-up on old newspaper to dry for about fifteen minutes. The oil sets as the paper dries and the print is permanent.
Good to Know
🛍 Shopping guide
3D Paper Spider Web
Concentric circles and straight spokes cut from white card, then bent alternately forward and backward so the web stands up in three dimensions. Hang it in a window or prop it against a dark wall. The result looks architectural and takes fifteen minutes to make.
The bending is the part children enjoy most, and getting a clean crisp web is deeply satisfying.

3D Paper Spider Web
What You Need
- White card, A4, 200 gsm, one sheet per web
- A pencil and compass (or round objects to trace: a cup, a plate)
- A craft knife and cutting mat (adult use only for inner cuts) or small scissors
- A ruler
- 30 cm of white thread for hanging (optional)
How to Make It
- An adult draws a circle about 18 cm diameter on the card, then three more concentric circles inside it at 4 cm, 8 cm and 12 cm from the edge, and a dot at the very centre. Then draw six straight lines through the centre to divide the card into twelve equal sections (like a clock face with lines at every hour).
- An adult cuts along the spoke lines with a craft knife from the outer circle edge to the centre dot, stopping precisely at each concentric circle as you go. This creates separate arc segments between the circles.
- The child bends alternating arc segments forward and backward: the first arc between circles 1 and 2 bends forward, the next backward, the next forward, and so on. When all arcs in all rings are bent, the web has a rippling 3D surface.
- If hanging, punch a tiny hole at the top and thread through the white thread, knotting at the back.
Good to Know
🛍 Shopping guide
Paper Cup Witch
A purple paper cup with a pointed black card hat, green marker skin, yarn hair and googly eyes: this is the craft that takes twelve minutes and earns ten times that in tabletop charm.
Line a row of them across a windowsill for instant Halloween decor, or let children take them home as party favours. The cup is the body; no extra cutting needed for the shape.

Paper Cup Witch
What You Need
- Purple paper cups, one per witch (or white cups coloured with purple marker)
- Black card, a small offcut per hat
- 2 googly eyes, 15 mm, per witch
- Orange or yellow yarn, 8 strips about 12 cm long per witch (hair)
- Green marker
- Black marker, fine tip
- PVA glue or a glue stick
How to Make It
- An adult cuts a pointed triangle from black card, about 8 cm tall, and a narrow oval brim, about 8 cm wide. Glue the triangle base to the flat side of the brim.
- Colour the inside top rim of the cup with green marker to suggest a face area. A circle about 4 cm diameter is enough.
- Glue the googly eyes onto the green area. Draw a crooked nose and a gappy smile with the black marker below the eyes.
- Bunch the yarn strips together and fold them in half. Glue the folded midpoint to the inside top rim of the cup so the strands hang down each side as hair.
- Glue the hat onto the top of the cup, centred over the face and hair.
Good to Know
Stained Glass Bat Window Hanger
Black card cut into a bat outline with the wing sections cut away and replaced with coloured cellophane or tissue paper glued behind: the bat hangs in a window and its wings glow amber, purple and red in the light.
The contrast between the solid black and the translucent colour panels is striking, and these last the whole Halloween season without fading if the tissue paper is double-layered.

Stained Glass Bat Window Hanger
What You Need
- Black card, A4, 250 gsm, one sheet per bat
- Orange, purple and red cellophane or tissue paper, a small piece of each
- A craft knife and cutting mat (adult use only)
- Clear tape or PVA glue
- 30 cm of black thread for hanging
- Pencil and scissors
How to Make It
- Draw a bat shape on the black card filling most of the A4 sheet. Include a clear body in the centre, two large wings, and two small ear points at the top of the body. Divide each wing into three or four sections with curved lines.
- An adult cuts out the bat outline, then uses a craft knife to cut away the interior wing sections, leaving the black lines between each section as ribs. The body and ears remain solid black.
- Turn the bat over. Cut pieces of cellophane or tissue slightly larger than each opening and tape or glue them over the openings from behind, mixing colours across the two wings.
- Punch a small hole at the top of the body between the ears. Thread the black thread through and knot it for hanging. Hold the bat up to the light to check all openings are covered before hanging.
Good to Know
🛍 Shopping guide
Paper Roll Pumpkin Stack
Three cardboard tubes wrapped in orange paper and stacked in a tower, decorated with a cut black card jack-o-lantern face panel on the middle tube, become a pumpkin totem pole that looks cheerful on a bookshelf.
Use kitchen roll tubes for the big pumpkin and toilet roll tubes for the smaller ones on top. A strip of green tissue at the top finishes it as a stalk.

Paper Roll Pumpkin Stack
What You Need
- 1 kitchen roll tube and 2 toilet roll tubes per tower
- Orange paper or card, enough to wrap all three tubes
- Black card, A5, one sheet (face panels)
- Green tissue paper, 1 sheet (stalk)
- PVA glue and glue stick
- Scissors
How to Make It
- Cut three rectangles of orange paper, each sized to wrap one tube with a 1 cm overlap. Wrap each tube and glue the seam with the glue stick.
- An adult cuts small triangle eyes, a triangle nose and a zigzag mouth from black card. Glue these to the front of the largest tube (the kitchen roll) as the pumpkin face.
- Stack the three tubes: the large tube at the base, the two smaller tubes on top of each other. Glue them together at the joints with PVA, pressing each joint for thirty seconds.
- Tear a few strips of green tissue and twist them together loosely. Curl the ends around a pencil and tuck the straight end into the top of the uppermost tube, securing with a dot of PVA.
Good to Know
🛍 Shopping guide
Frequently Asked Questions
What is the easiest Halloween paper craft for toddlers?
The torn-paper pumpkin collage works well for children aged three and up because tearing tissue paper requires no tools and the gluing is simple. An adult draws the pumpkin outline; the toddler fills it. The coffee filter ghost garland is another strong option: crumpling and gathering the filter is satisfying and completely safe for small hands.
How can I make Halloween paper crafts last longer?
Store flat pieces in a large ziplock bag or a cardboard portfolio between layers of tissue paper. Avoid humidity, which buckles card and softens glue.
Glitter pieces last best when the glue is fully dry before handling; rushing that step is the main reason glitter decorations shed. Three-dimensional pieces like the paper roll pumpkin stack or the bat mobile store flat in a box if you disassemble them gently.
Which of these crafts work as a party activity for a group?
The paper plate mummy, the paper chain monster bunting and the washi tape pumpkin card all finish in under twenty minutes with no drying time, which makes them workable at a party table.
Set out the materials in small trays so children can reach everything without crowding. For mixed ages, the paper straw skeleton keeps older children busy while younger ones work on the mummy or the ghost garland alongside them.
For more party ideas, see 25 Not-Too-Scary Halloween Party Games for Kids.
Can these Halloween paper crafts be made in a classroom?
Most of them work well at a classroom table of twenty or more because they use inexpensive materials that scale easily. The torn-paper pumpkin, paper plate mummy, glitter spiderweb and handprint witch are the most classroom-friendly: they need no special equipment and finish quickly.
The scratch-art haunted house and cut-paper haunted house scene are better for smaller groups or one-to-one work because they take longer and need a quieter space.
For a full classroom session plan, 15 Halloween Crafts for Preschool That Work at a Table of Twenty is a helpful starting point.
What paper weight works best for Halloween paper crafts?
For flat cards and collage bases, 200 to 250 gsm card is the right weight: sturdy enough to hold glue and embellishments without buckling, but light enough to cut with household scissors.
For folding crafts like the origami frog or the accordion bat, 160 gsm card folds crisp and sharp. Tissue paper weight is irrelevant because the glue does the structural work; any craft-grade tissue works.
How do I stop glitter going everywhere at a craft session?
Put a sheet of scrap paper, noticeably larger than the craft, under every piece before adding glitter. Tip the loose glitter back into the pot by folding the scrap paper into a funnel. Work on a wipeable surface rather than a tablecloth. Accept that some glitter will migrate: a lint roller on clothing and furniture picks up the rest.
Are any of these crafts suitable for Halloween activities for kids beyond crafting?
Several double as activities in their own right: the origami jumping frog becomes a jumping competition, the pop-up spider card is a Halloween greeting to send, the paper bag lanterns decorate a party table, and the cauldron pencil pot works as a party favour.
For activities that go beyond the craft table, 24 Halloween Activities for Kids With Free Printables to Cut, Count and Colour has a full afternoon covered.
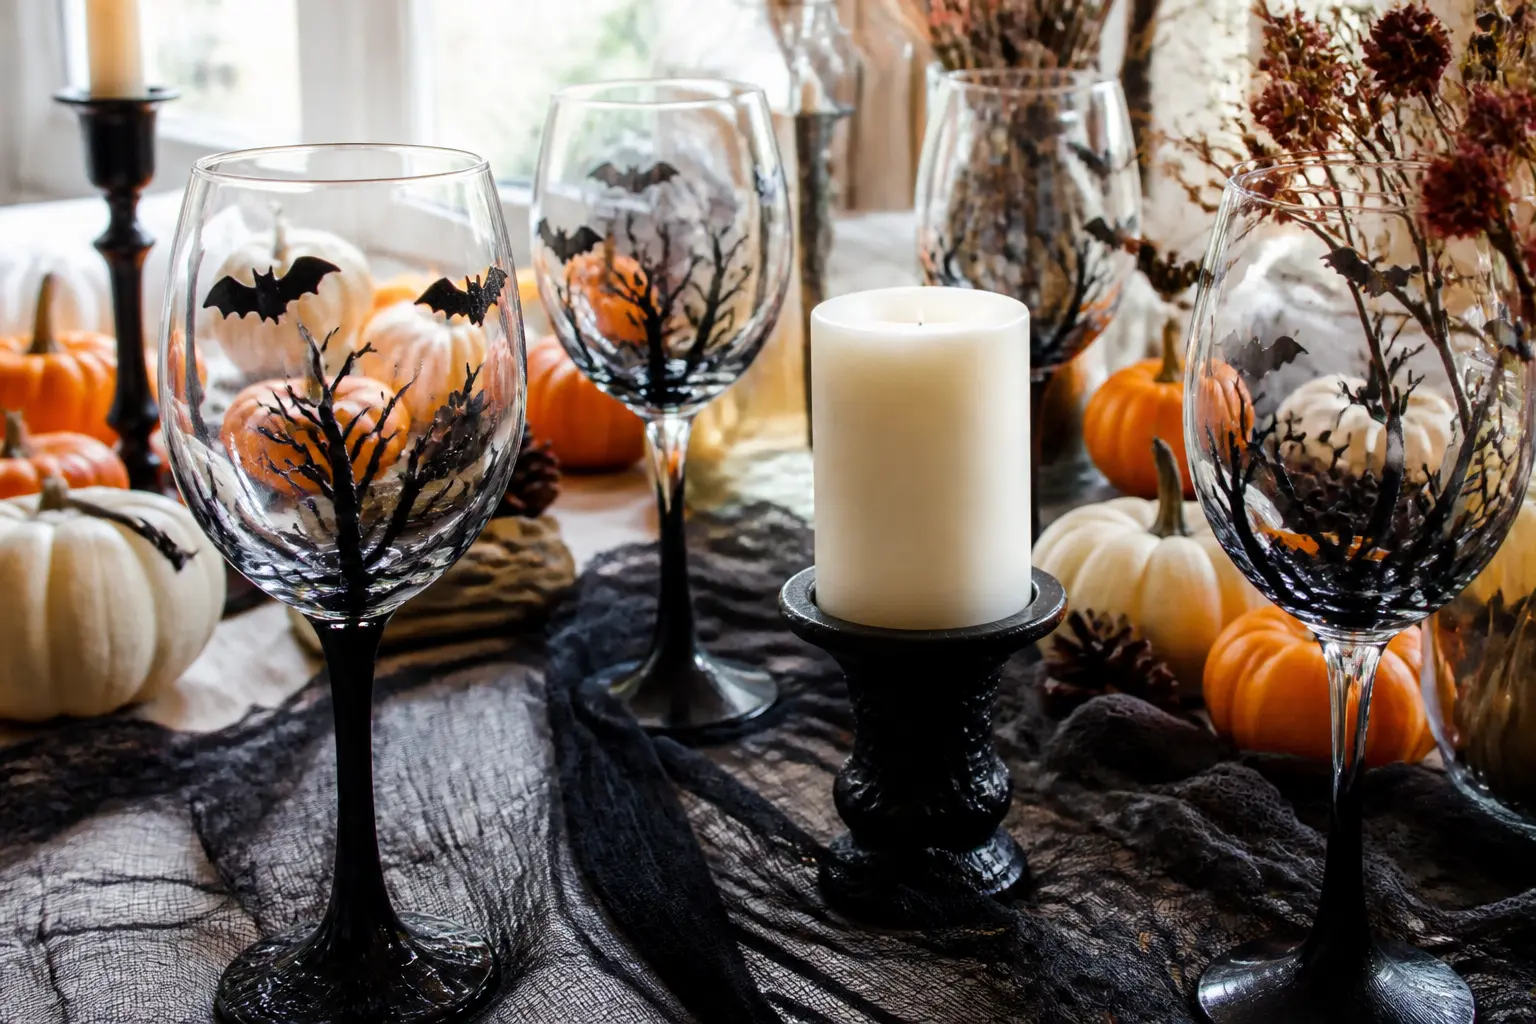
12 DIY Halloween wine glasses ideas for your adult party: painted, stamped, charmed and etched, all
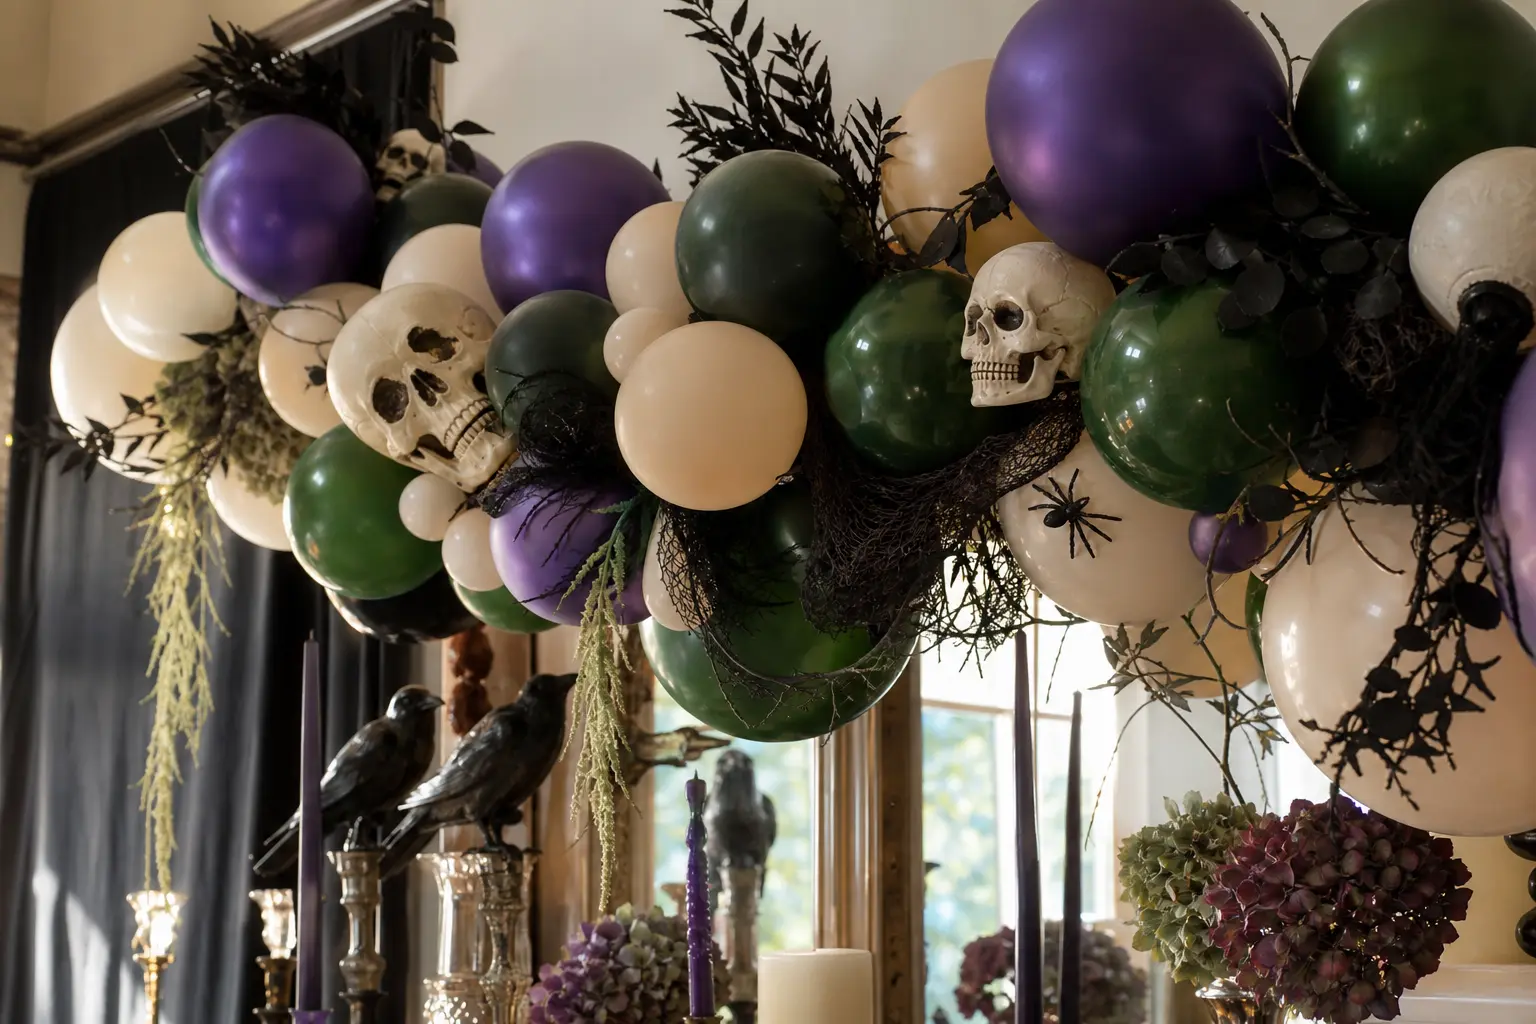
Your halloween balloon garland does not have to be orange and black. These 13 adult palettes borrow
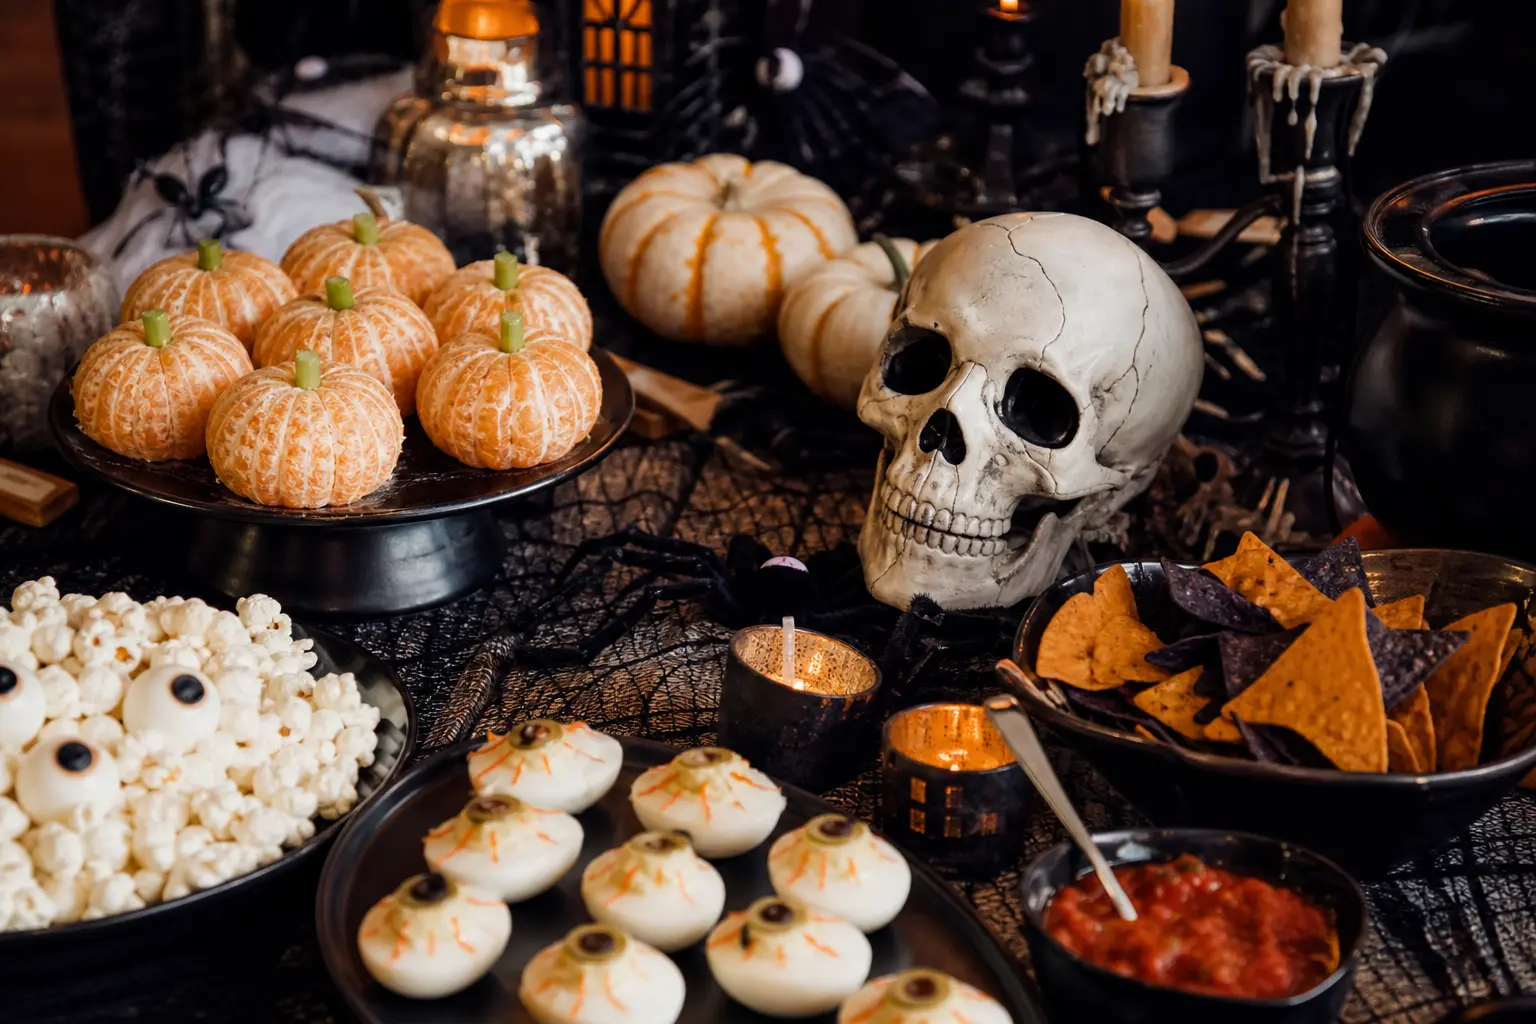
Find the right halloween party games for your crowd size, budget, and guest ages — 22 guides cover
Leave a Reply