

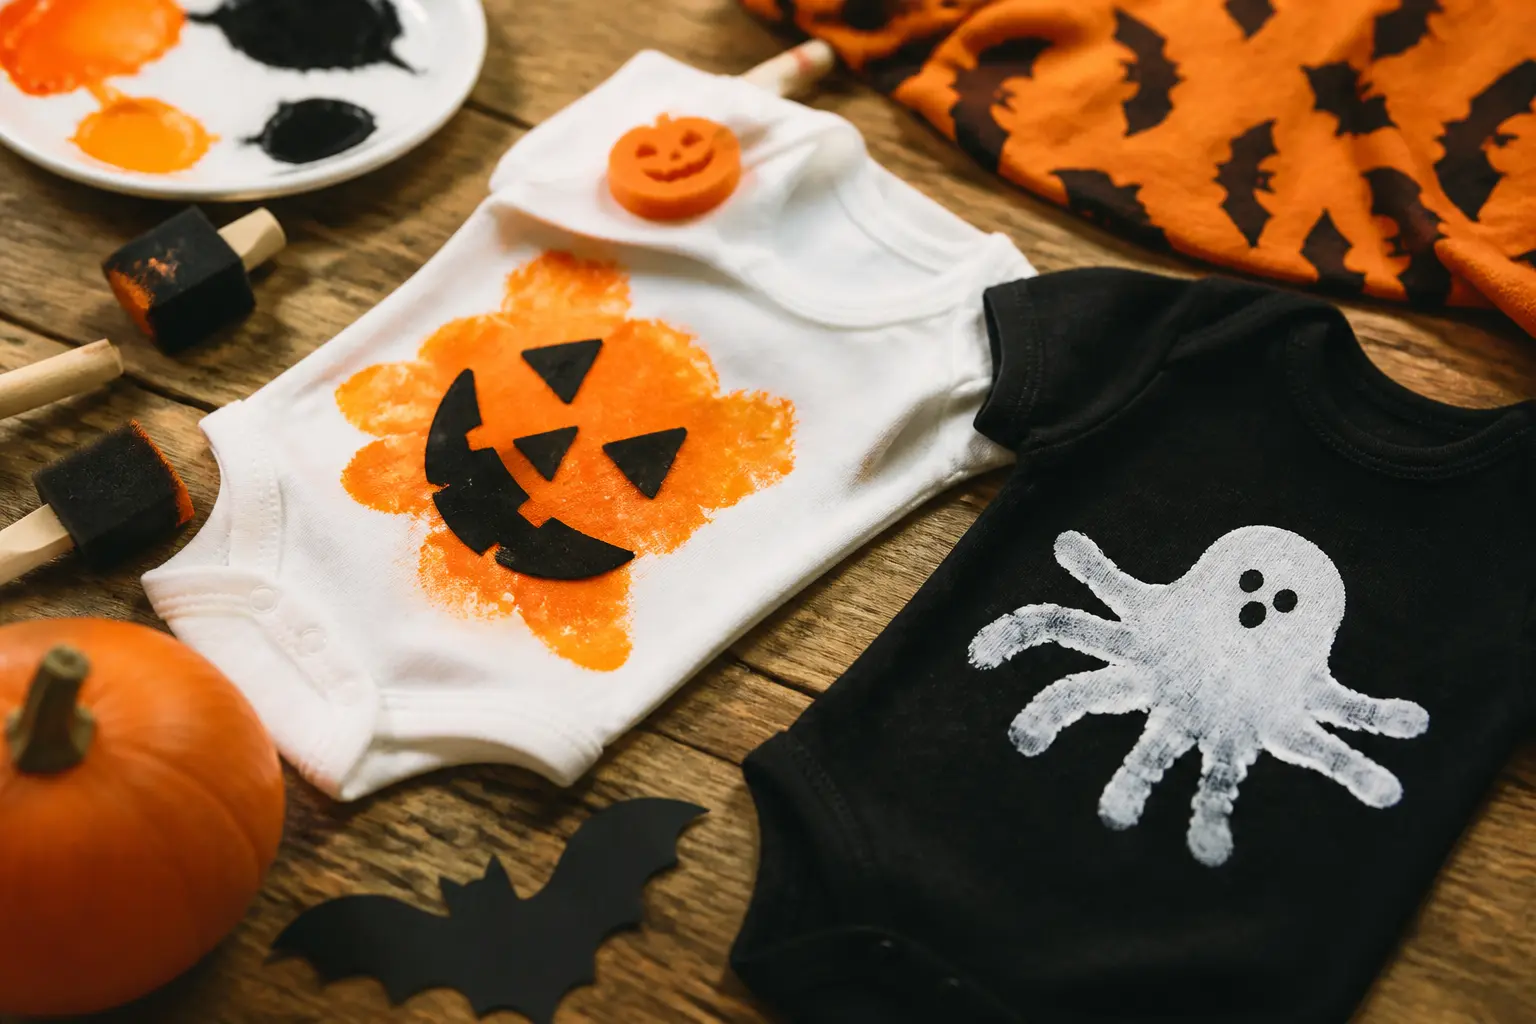
A baby’s first Halloween lasts about four hours before someone needs a nap (and the baby might want one too). What does last is a footprint on card, a tiny handprint fired into clay, a wooden board with two small soles pressed in white paint.
These nine crafts all ask the same thing of the baby: hold still for thirty seconds. The adult does the rest, and what comes out the other side is something worth keeping on a shelf for twenty years.
Every method here uses washable, non-toxic paint or air-dry clay, finishes in one sitting or two, and tells you exactly what to do with it once Halloween is over. Some of them double as gifts.
All of them are genuinely different from each other, so pick the one that suits your time, your surface and how ambitious you are feeling at 8pm on a Tuesday.
And if you are in the middle of planning the whole Halloween day, the Halloween party appetizers round-up is worth bookmarking alongside this one.
This post contains affiliate links. If you buy through them, I may earn a small commission at no extra cost to you.
- Footprint Ghost on Black Card
- Handprint Bat on White Watercolour Paper
- Pumpkin Footprint on Cream Watercolour Paper
- Baby Footprint Spider Hanging Decoration
- Halloween Wooden Board Footprint Keepsake
- Air-Dry Clay Handprint Ornament
- Black and White Footprint Bunting
- Footprint Mummy Picture Frame
- Footprint Crow on Kraft Paper
- Frequently Asked Questions
Footprint Ghost on Black Card
The heel becomes the ghost’s head, the toes become its wispy hem, and the whole thing takes about fifteen minutes including cleanup.
Print it on black card, add two small black-dot eyes with a fine brush, and frame it in a plain black frame for the mantelpiece.
It looks graphic and intentional, the kind of thing a design-minded parent would actually hang year-round if they swapped the black card for cream.
Store the unframed print flat in an acid-free sleeve once Halloween passes. The black card can fade if left in direct sun, so hang it somewhere it gets admired rather than bleached.

Footprint Ghost on Black Card
What You Need
- 1 sheet black card, A4, 300 gsm
- White washable tempera paint, 1 small jar or squeeze bottle
- 1 wide flat brush, at least 2 cm wide
- 1 fine-tipped black paint marker or fine brush with black paint
- Damp cloth and a dry towel for cleanup
- 1 black picture frame, A4 or 8x10 in
How to Make It
- Lay the black card on a firm, flat surface and set everything you need within arm's reach before you touch the baby. Speed matters once the paint goes on.
- Use the wide flat brush to coat the sole of one baby foot evenly with white paint, working from heel to toe. The layer should be opaque but not so thick it will blob: if you can see the brush strokes it is about right.
- Press the foot firmly onto the card with the heel roughly centred and the toes pointing upward. Hold for a count of five, then lift straight up without sliding. You should see a clear print with the heel as a rounded shape at the top and the five toes below it.
- Wipe the foot clean immediately with the damp cloth, then dry it. This is genuinely the most important moment to be quick: babies find wet paint on their feet interesting enough to spread.
- Leave the print to dry completely, at least 30 minutes. When it is dry, it will look bright white with crisp edges.
- Using the fine brush or paint marker, add two small black oval eyes near the top of the heel shape. Keep them close together and smallish: this is what makes it look like a ghost rather than a footprint that has been decorated.
- Once the marker is dry (5 minutes), slide the card into the frame. Hang it or lean it on the mantel.
Good to Know
Handprint Bat on White Watercolour Paper
Both hands make the wings, the heel of one foot becomes the body, and the result is a bat that looks genuinely stylish on a white background rather than crafty and frenetic.
The secret is using black paint and letting the white paper do the work: no background colour, no extra embellishment, just the shapes.
It reads well in a simple white frame with a wide white mat, and it works beautifully as a set if you hang it next to the ghost print above.
Roll the finished, unframed piece loosely around a cardboard tube and secure with a rubber band to store it flat without creasing. It will keep for years.

Handprint Bat on White Watercolour Paper
What You Need
- 1 sheet white watercolour paper or heavy cartridge paper, A4, at least 200 gsm
- Black washable tempera paint, 1 small jar
- 1 wide flat brush, at least 2 cm wide
- Small round brush for details
- White paint pen or fine brush with white paint
- Damp cloth and dry towel
- White picture frame with white mat, A4
How to Make It
- Before any paint appears, decide on the placement: the two handprints will be placed side by side with fingers splayed and pointing outward to form wings, and the single footprint heel will sit between them as the bat's body. Lightly pencil a centre mark on the paper so you know where to aim.
- Paint one hand with black paint, fingers spread wide. Press it firmly onto the left side of the paper with the thumb nearest the centre mark and the fingers fanning left. Lift straight up. Repeat immediately with the other hand on the right side, mirroring the first. You now have two wing shapes.
- Wipe both hands clean, then coat the baby's heel (just the heel, not the toes) with black paint and press it between the two handprints. This oval shape is the bat's body. Hold for a count of five and lift straight up.
- Clean the foot. Let the whole print dry for at least 30 minutes until it is fully matte black with no shiny wet patches.
- Using the white paint pen or fine brush, add two tiny white dot eyes near the top of the heel print. Add two small white triangles just above the heel shape for ears. That is everything the bat needs.
- Let the white paint dry for 10 minutes, then frame it.
Good to Know
🛍 Shopping guide
Pumpkin Footprint on Cream Watercolour Paper
The foot goes on in orange, heel at the top, and the round heel becomes the pumpkin’s body while the toes form the ridged base. A green stem and a curling vine painted on with a fine brush finish it.
The result is loose and warm, closer to a watercolour illustration than a crafty keepsake, and it looks right on a kitchen wall or inside a nursery frame. The cream paper keeps it from looking stark.
This is also the one to make multiples of: paint three prints in a row on a single long sheet and you have a banner. Frame one and tuck the others flat in a memory box.

Pumpkin Footprint on Cream Watercolour Paper
What You Need
- 1 sheet cream watercolour paper, A4 or larger, 200 gsm
- Orange washable tempera paint, 1 small jar
- Forest green acrylic or tempera paint, 1 small tube or jar
- Wide flat brush, at least 2 cm wide
- Fine round brush, size 2 or 3
- Black fine paint marker
- Damp cloth and dry towel
How to Make It
- Position the paper in portrait orientation. The footprint will go roughly in the centre, with space above for the stem and vine.
- Load the wide brush generously with orange paint and coat the sole of one baby foot from heel to toe. The paint should be bright and opaque. Press the foot onto the paper with the heel at the top and the toes pointing down. Hold for five seconds and lift cleanly.
- Wipe the foot clean right away. The print should show a round heel shape at the top and five distinct toe circles at the bottom, which read as a pumpkin with a bumpy base.
- Leave the orange print to dry for at least 20 minutes. It needs to be fully dry before you add anything on top, or the green will bleed into the orange.
- Using the fine brush and green paint, add a short chunky stem rising from the centre top of the heel. Then paint a thin curling vine shooting out to one side, with a loose spiral at the tip. Add two or three small leaf shapes if you like. None of this needs to be perfect: a slightly wobbly vine looks more alive than a rigid one.
- Once the green is dry (about 15 minutes), use the black paint marker to draw a jack-o-lantern face on the heel: two triangular eyes, a triangular nose and a wide toothy grin. Keep the features in the top half of the heel so they sit above the toe-bumps.
- Let everything dry completely (another 10 minutes) before framing or rolling for storage.
Good to Know
🛍 Shopping guide
Baby Footprint Spider Hanging Decoration
A single black footprint becomes the spider’s body, and eight finger-dot legs radiate outward from its sides. Thread a length of black twine through a hole at the top and hang it from a door frame or window latch.
It swings slightly when anyone walks past, which is either delightful or mildly alarming depending on how you feel about spiders. Either way, it is the most three-dimensional result in this collection without requiring any actual construction skills.
Make it on heavy card rather than paper so it holds its shape when hanging. After Halloween, it stores flat in a labelled envelope in a memory box.

Baby Footprint Spider Hanging Decoration
What You Need
- 1 sheet black card, A5, 300 gsm (or cut an A4 sheet in half)
- White washable tempera paint, 1 small jar
- Wide flat brush, at least 2 cm wide
- White paint pen or fine brush with white paint
- Hole punch
- 50 cm black twine or thin black ribbon
- Damp cloth and dry towel
How to Make It
- Coat the sole of one baby foot with white paint, heel to toe. Press it onto the black card with the heel near the top and the toes pointing downward. Hold for five seconds and lift cleanly. Wipe the foot immediately.
- Let the white footprint dry completely, at least 40 minutes. The print needs to be fully dry and slightly raised before you add dots beside it, or the dots will merge into the main print and you will lose the spider shape.
- Once dry, use the white paint pen or a fine brush loaded with white paint to add four small oval dots on each side of the footprint: these are the eight legs. Space them fairly evenly along the sides of the heel and arch, not the toe area. Each dot should be roughly the size of a large pea.
- Add two small white dot eyes near the top of the heel print.
- Let everything dry for another 15 minutes. The finished print should look like a round spider body with symmetrical legs and two small bright eyes.
- An adult punches a hole at the top of the card, about 1 cm from the edge and centred. Thread the twine through and tie a knot to form a hanging loop. Hang from a door frame, window latch or curtain pole.
Good to Know
Halloween Wooden Board Footprint Keepsake
A flat wooden serving board with a handle becomes a permanent wall piece. The two small footprints go on in white paint near the bottom half, and you stencil or hand-letter a Halloween phrase above them.
The board then hangs by its handle on a picture hook or a nail, exactly as it comes.
It is the one in this collection that graduates from decoration to heirloom: dense enough to feel substantial, unusual enough that visitors notice it, and easy enough that it takes one afternoon to make.
Seal the finished board with a brush-on matte varnish once all paint is completely dry, and it will hang for years. Store it flat or hang it in a cupboard between Halloweens.

Halloween Wooden Board Footprint Keepsake
What You Need
- 1 flat wooden board with handle, approximately 30 x 20 cm (an unfinished wooden serving board works well)
- White chalk paint or acrylic craft paint, 1 small jar
- Wide flat brush, at least 3 cm wide
- Fine round brush, size 2
- Black acrylic paint, 1 small tube
- 1 Halloween phrase stencil, approximately 15 cm wide, OR a pencil and steady hand for lettering
- Painter's tape
- Matte decoupage medium or clear matte varnish, 1 small jar
- Damp cloth and dry towel
How to Make It
- If the board is raw wood, give it one thin coat of white chalk paint all over and let it dry for 45 minutes. This is optional but gives you a cleaner background. If you prefer the dark wood look (which is striking against white prints), skip this step entirely.
- Position the stencil in the upper half of the board and secure it with painter's tape. Using a dry brush or a small sponge, dab black or white paint through the stencil. Dab rather than sweep so paint does not bleed under the edges. Remove the stencil carefully, peeling back at a low angle. Let the lettering dry for 20 minutes.
- Load the wide brush with white chalk paint and coat both soles of the baby's feet evenly. Press both feet firmly onto the lower half of the board, side by side. Hold for a count of eight (wooden surfaces need more pressure than paper), then lift both feet straight up. Wipe the feet clean immediately.
- Let the footprints dry for at least one hour. Chalk paint on wood takes longer than tempera on paper, and if you rush this step the varnish will drag the print.
- When the prints are completely dry and you can feel that they are slightly raised, brush a thin even coat of matte varnish over the entire board surface. Let it cure for at least one hour before hanging.
Good to Know
🛍 Shopping guide
Air-Dry Clay Handprint Ornament
Press one small hand into a circle of air-dry clay, cut out the shape with a cookie cutter or a sharp knife (adult), dry it flat, paint it black and thread it with orange twine.
It hangs on a door handle, a wreath, a tree branch in a vase, or a coat hook.
Clay captures the lines of the palm with a fidelity that paint on paper never quite manages, which is why this is the one that tends to end up kept long after the others go into a memory box.
Air-dry clay warps if it dries unevenly, so flip it once during the drying period. Store it wrapped in tissue in a rigid box: it is durable but not indestructible.

Air-Dry Clay Handprint Ornament
What You Need
- 200 g white or natural air-dry clay (one standard small block is enough for two ornaments)
- Rolling pin or smooth glass
- Round cookie cutter or cardboard circle template, approximately 10 cm diameter
- Craft knife or sharp kitchen knife (adult only)
- 1 drinking straw (for making the hanging hole)
- Black acrylic paint, 1 small tube
- Fine round brush, size 2
- Orange twine or narrow orange ribbon, 30 cm
- Baking sheet lined with parchment
How to Make It
- Knead the clay for two minutes until it is pliable and smooth. Roll it out on the parchment-lined tray to about 5 mm thickness, using the rolling pin or glass. A consistent thickness is important: if the slab is uneven it will crack as it dries.
- Press one baby hand firmly into the centre of the clay slab. The fingers should be spread. Press down evenly and hold for five seconds, then lift the hand straight up. You should see a clear impression of every finger and the palm lines.
- An adult uses the cookie cutter or a sharp knife to cut a circle around the handprint, leaving about 1.5 cm of clay around the outside edge. Round shapes are more forgiving than squares for this kind of ornament.
- An adult uses the straw to punch a clean hole near the top of the circle, about 1 cm from the edge. Press the straw straight down and twist slightly, then remove it. The hole needs to be large enough for the twine.
- Transfer the parchment with the ornament on it to a flat surface to dry. Flip it gently after 12 hours so both sides dry at the same rate. Full drying takes 24 to 48 hours depending on the thickness and the humidity in the room. It is ready when it feels completely hard and does not give at all when you press the edge.
- Once fully dry, paint the front of the ornament with black acrylic paint. One thin coat, let it dry for 30 minutes, then assess: you may need a second coat to cover the clay fully. Leave the back plain or paint it too.
- Thread the orange twine through the hole and tie a knot to form a hanging loop. A simple overhand knot on each side of the hole keeps it from sliding.
Good to Know
Black and White Footprint Bunting
Cut pennants from alternating black and white card, stamp a single white or black footprint onto each one, and string them on black ribbon.
The finished bunting runs about 1.2 metres for six pennants and hangs beautifully across a fireplace, a window or a nursery shelf.
It is the most repeatable item here: stamp one pennant, wash the foot, do the next, and you have a garland in under half an hour of actual working time.
Fold the bunting concertina-style and store it in a labelled zip-lock bag. It rehang next year without ironing or fuss.

Black and White Footprint Bunting
What You Need
- 3 sheets black card, A4, 300 gsm
- 3 sheets white card, A4, 300 gsm
- White washable tempera paint, 1 small jar
- Black washable tempera paint, 1 small jar
- Wide flat brush, at least 2 cm wide
- Scissors or craft knife and cutting mat (adult)
- Hole punch
- 150 cm black ribbon, 5-10 mm wide
- Pencil and ruler
- Damp cloth and dry towel
How to Make It
- An adult cuts six pennant shapes from the card: three from black card and three from white, each approximately 14 cm wide at the top and 20 cm tall, tapering to a point at the bottom. A simple triangle template traced in pencil makes this much faster. Punch two holes across the top of each pennant, about 2 cm from the edge and 3 cm in from each side.
- Working one pennant at a time, coat the baby's foot with white paint (for black pennants) or black paint (for white pennants). Press the foot onto the pennant, heel toward the top, toes toward the point. Hold for five seconds and lift straight up. Wipe the foot clean before moving to the next pennant.
- Alternate the colours as you go: black pennant, white pennant, black, and so on. Let each pennant rest flat to dry before stacking; if you stack them wet the prints will transfer onto the back of the pennant above.
- Once all six prints are dry (allow at least 40 minutes), thread the ribbon through the holes in order, leaving about 15 cm of ribbon free at each end for tying. The pennants should sit about 3-4 cm apart on the ribbon.
- Tie the ribbon ends around picture hooks, curtain poles or nails to hang the bunting.
Good to Know
Footprint Mummy Picture Frame
Two side-by-side white footprints on black card become a mummy when you wrap narrow white washi tape across them in overlapping horizontal strips and add two small googly eyes near the heel. Frame it in a plain black frame and stand it on a shelf.
The washi tape gives it a texture and dimension that paint alone never produces, and the result sits right between graphic art and keepsake without tipping into either extreme.
It is also one of the faster ones: the tape work takes about five minutes once the print is dry.
The washi tape peels cleanly from dry paint without lifting the print underneath, so if your strips go wonky you can adjust them. After Halloween, store the framed piece with a sheet of tissue over the front so the tape does not pick up dust.

Footprint Mummy Picture Frame
What You Need
- 1 sheet black card, A4, 300 gsm
- White washable tempera paint, 1 small jar
- Wide flat brush, at least 2 cm wide
- White washi tape, 15 mm wide, 1 roll
- 2 small googly eyes, approximately 8-10 mm
- White craft glue (PVA) or a small dot of clear tape
- Black picture frame, A4
- Damp cloth and dry towel
How to Make It
- Coat both soles of the baby's feet with white paint and press them side by side onto the black card, toes pointing downward and heels at the top, close together but not overlapping. Hold for five seconds and lift. Wipe the feet clean immediately.
- Leave the prints to dry for at least 40 minutes. They need to be fully dry before the tape goes on: fresh paint is slightly sticky and the tape will pull.
- Once dry, tear or cut strips of white washi tape and lay them horizontally across the footprints, overlapping slightly and leaving small irregular gaps. Cover most of the print but not all: a mummy shows wrappings, not a complete blank surface. Leave the very top of the heel area uncovered, because that is where the eyes will go.
- Stick the two googly eyes onto the uncovered heel area using a tiny dot of white glue or a small square of clear tape on the back of each eye. Press firmly and let the glue set for a few minutes.
- Slide the finished card into the frame. The googly eyes will sit just behind the glass, which keeps them in place and adds a slightly eerie depth to the piece.
Good to Know
Footprint Crow on Kraft Paper
A single black footprint with the toes pointing upward becomes a crow perched on a branch when you add a painted twig below the heel and a fine-brush beak and eye at the side of the heel.
Print it on a square of kraft paper, tear the edges softly and mount it on a larger piece of black card.
It is the most unexpected one in the collection: crows read as sophisticated rather than baby-craft, which is exactly why it earns a permanent spot on the wall rather than a seasonal box.
This is also the craft where the detail painting matters most, so set aside five unhurried minutes for the beak and eye once the footprint is dry. The difference between a convincing crow and a smudge with a stick is that five minutes.

Footprint Crow on Kraft Paper
What You Need
- 1 sheet kraft paper (brown parcel paper), 20 x 20 cm, 90 gsm
- 1 sheet black card, A4, 300 gsm (for mounting)
- Black washable tempera paint, 1 small jar
- Wide flat brush, at least 2 cm wide
- Fine round brush, size 1 or 2
- Black acrylic paint, 1 small tube (for detail work: slightly thicker than tempera)
- White paint pen or fine brush with white paint
- Craft glue or glue stick
- Damp cloth and dry towel
How to Make It
- Coat the sole of one baby foot with black tempera paint, heel to toe. Press the foot onto the kraft paper with the heel toward the top and the toes pointing upward (this is the bird's tail feathers). Hold for five seconds and lift cleanly. Wipe the foot immediately.
- Let the footprint dry for at least 40 minutes. The kraft paper absorbs paint a little differently from card, and you will see the print darken slightly as it dries. It is ready when there is no sheen at all.
- Using the fine round brush and the slightly thicker black acrylic paint, paint a short straight twig or branch extending horizontally from the lower side of the heel. The heel rests on the branch, so position it just below the heel's base. Add one or two thin lines extending from the heel down to suggest feet gripping the branch.
- On the left or right side of the heel, paint a small sharp triangle as the beak, pointing outward. Add a tiny white dot for the eye, just above and behind the beak. One small dot is enough: this is what makes the whole thing read as a bird and not an abstract shape.
- Let the detail work dry for 10 minutes. Tear the edges of the kraft paper by hand, tearing inward from each corner to give softly irregular edges. This takes about 30 seconds and makes a large difference to how the finished piece looks.
- Apply craft glue to the back of the kraft paper and centre it on the black card. Press firmly and let it dry flat for 5 minutes. Frame it or hang it as is.
Good to Know
🛍 Shopping guide
Frequently Asked Questions
What kind of paint is safe for baby footprint crafts?
Washable tempera paint labelled non-toxic and suitable for children is the standard choice. It washes off skin quickly with a damp cloth, does not crack on paper once dry, and comes in the black, white and orange you need for Halloween crafts.
Avoid oil-based or acrylic paints directly on skin. For wooden or ceramic surfaces where you need durability, acrylic is fine for the detail work an adult adds after the footprint step.
How do you get a clean baby footprint without them wriggling?
Have everything ready before you pick up the baby: paper in position, brush loaded, damp cloth within reach. Paint one foot, press it, lift straight up and get the foot clean before the baby notices.
Feeding or a favourite toy in their hands during the press helps. A slightly drowsy baby after a feed is genuinely easier than a fully alert one.
If the first print smudges, let it dry and try a second sheet: you usually get a better result on the third attempt when the baby is used to the sensation.
Can you do these crafts with a newborn?
Yes. Newborn feet are small and soft, which actually produces the most striking results against a large sheet of card. The main consideration is keeping the session short: one or two prints and then done.
Newborn skin is sensitive, so use only paint specifically labelled safe for babies, apply it briefly and wash it off immediately. The wooden board keepsake is especially popular for newborns because the small prints on a large board emphasise just how tiny the feet were.
How do you preserve footprint art so it lasts for years?
For paper prints, slide them into an acid-free sleeve or frame them behind glass. UV-filtering glass slows fading if the piece hangs in a bright room. For the wooden board, a coat of matte varnish is enough to protect the paint.
Store any unframed paper prints flat in a rigid box, never rolled tightly, and keep them away from damp. Avoid leaving framed pieces in direct sun: black paint on a dark background fades faster than you expect.
What age can children help with these baby footprint crafts?
The crafts in this collection are designed for adults to make with a baby, so the baby contributes one thing (the print) and an adult does everything else.
If you have an older child who wants to help, they can hold the paper steady, pass the brush or choose which frame to use.
Any step involving a craft knife, hole punch, hot glue or varnish stays with an adult regardless of the older child’s age.
The bunting is the one most suited to an older child helping, since the painting steps are straightforward once the adult has cut the pennants.
Are these crafts good for a Halloween baby shower?
Several of them work well as baby shower activities or keepsakes. The clay handprint ornament and the wooden board are the strongest choices for a shower gift because they feel substantial and permanent.
If you are running the shower, the ghost print and the pumpkin print are fast enough to do as a group activity with guests taking turns.
For more ideas on the occasion itself, the Halloween baby shower games round-up has thirteen activities that pair well with a craft table.
Browse halloween crafts for adults across fabric, clay, crochet and glitter, sorted by time, skill a
35 halloween door decorations that treat the whole door as a canvas, not just a wreath hook. Fast, r

20 Halloween games for large groups that actually work with 20+ guests. Active, printable & quiet �
Leave a Reply