

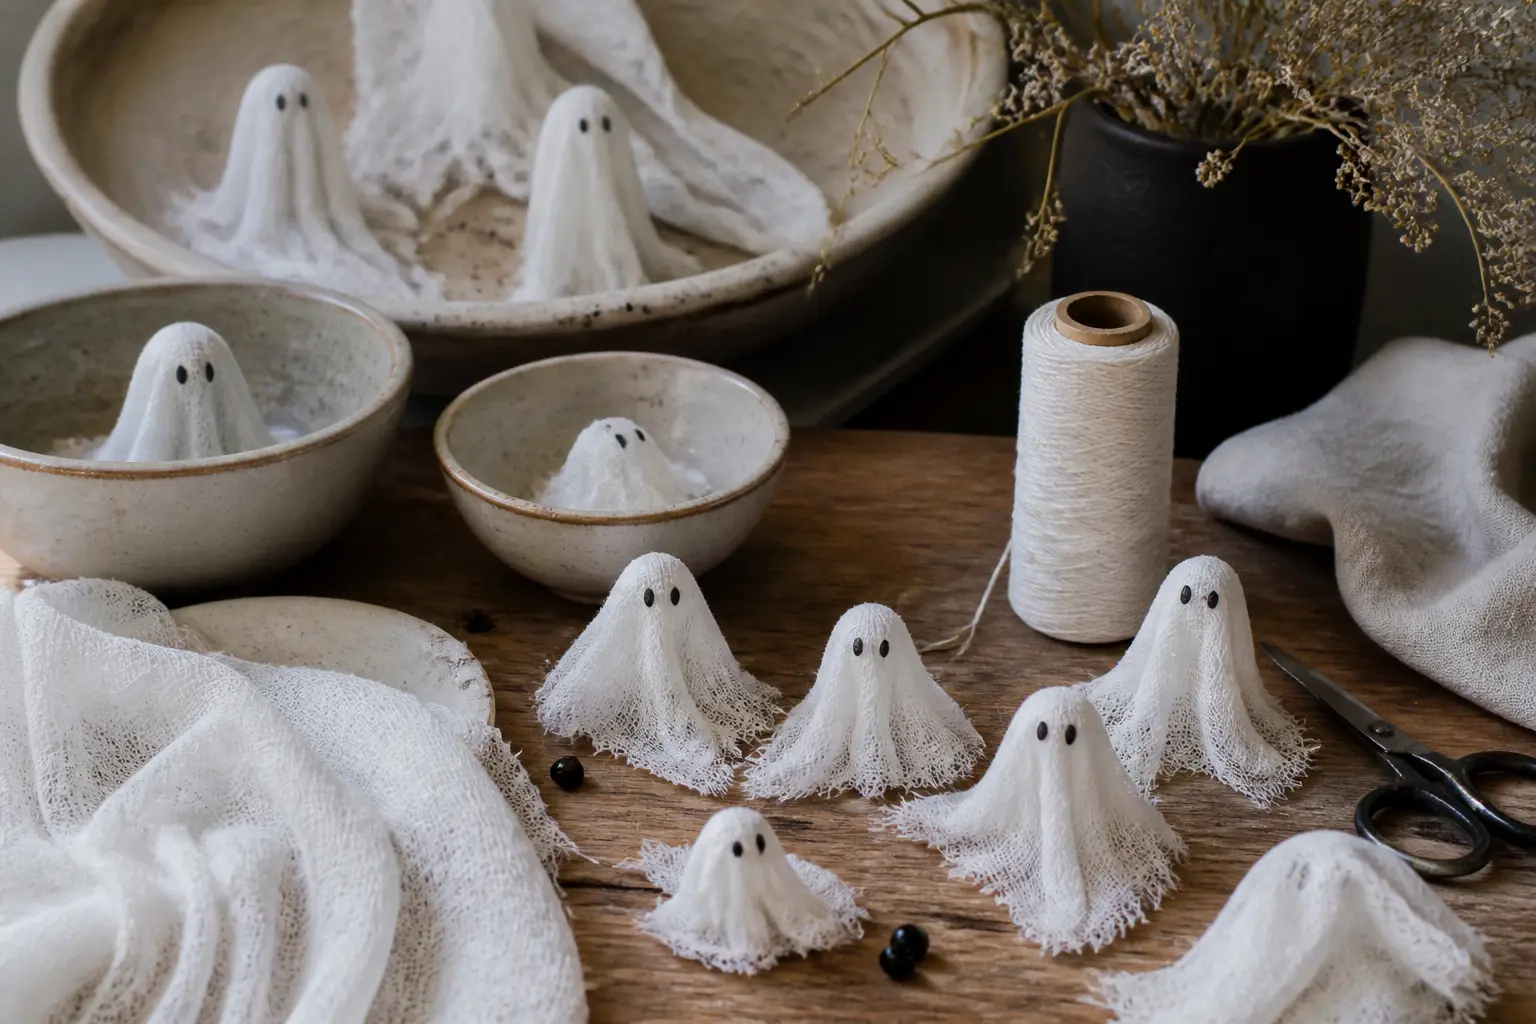
Ghost crafts are one of those rare Halloween projects where the simplest version is also the prettiest. A scrap of tissue paper, a lollipop stick, a dab of black marker and you have something genuinely charming.
The 31 crafts here range from five-minute table fillers to weekend pieces worth keeping year after year, and they all share the same softly romantic palette: dusty pinks, warm creams, a little glitter if the mood strikes.
If you are planning a Halloween party for kids and want the decorations to look considered rather than cobbled together, this is the list.
You will also find a few crafts that suit younger children with no scissors in sight, which pairs nicely with our round-up of 16 Halloween Crafts for Toddlers With Nothing Small Enough to Swallow.
Most of these need nothing beyond a craft shop run or a rummage through the recycling bin. Where a specific material genuinely matters, the instructions say so and give you the size.
Every method is written so that a reader who has never made the thing before can follow it to the same result.
Active times are honest, drying times are included, and the one place people usually get it wrong is named in the step where it happens.
This post contains affiliate links. If you buy through them, I may earn a small commission at no extra cost to you.
- Tissue Paper Ghost Wand
- Painted Wood Slice Ghost
- Lace Doily Ghost Frame
- Ghost Balloon With Ribbon Tail
- Ghost Thumb-Print Card
- Ghost Peg Garland
- Ghost Rock Paperweight
- Ghost Coffee Filter Mobile
- Ghost Window Cling
- Ghost Treat Cone
- Ghost Felt Pouch
- Ghost Paper Bag Luminaria
- Ghost Sock Doll
- Ghost Footprint Canvas
- Ghost Macrame Wall Hanging
- Ghost Egg Carton Figure
- Ghost Terracotta Pot
- Ghost Origami
- Ghost Watercolour Print
- Ghost Ribbon Wand
- Ghost Pinecone Figure
- Ghost Paper Plate
- Ghost Salt Dough Ornament
- Ghost Bubble Wrap Print
- Ghost Glow-in-the-Dark Mobile
- Ghost Yarn Pompom
- Ghost Shadow Box
- Ghost Crayon Resist Card
- Ghost Tealight Holder
- Ghost Stamped Tote Bag
- Ghost Pipe Cleaner Finger Puppet
- Frequently Asked Questions
Tissue Paper Ghost Wand
These are the crafts that actually get used at a party: a ghost on a stick that doubles as a wand, a game prop and a favour to take home.
Use blush, mauve and peach tissue paper rather than white and they photograph beautifully against any background. Finished, each ghost looks like a soft fabric doll about 12 cm tall on a 30 cm bamboo skewer.
Store them upright in a jar or lay flat in a box without stacking anything on top.

Tissue Paper Ghost Wand
What You Need
- 4 sheets tissue paper per ghost, 50 x 70 cm, in dusty pink or peach
- 1 cotton wool ball, approx. 3 cm diameter, per ghost
- 1 bamboo skewer, 30 cm, per ghost
- 30 cm of narrow ribbon or twine per ghost
- Black permanent marker, fine tip
- Scissors (adult use)
How to Make It
- Stack two sheets of tissue paper and lay them flat. Place the cotton wool ball in the centre of the top sheet, about 8 cm from one short edge.
- Gather the tissue paper up and around the ball to form a round head, then hold the gathered neck tightly with one hand. The head should be taut and round, not bunched.
- Slide the blunt end of the skewer up into the gathered neck from below, pushing it gently into the cotton wool ball so it sits snug. An adult should do this step if children are under seven, as the skewer tip is sharp at the other end.
- Wrap the ribbon or twine around the neck several times and tie it firmly in a bow or double knot. Pull the tissue paper skirt down so it falls evenly around the stick.
- Use the black marker to draw two oval eyes on the rounded head. Keep them close together and slightly low on the face for the classic ghost look. If the marker bleeds, let it dry for two minutes before touching.
- Fan out the lower layers of tissue paper slightly for volume. The finished ghost should stand freely in a vase or be held by the stick.
Good to Know
Painted Wood Slice Ghost
A wood slice from the craft shop becomes a year-round-worthy Halloween piece when you paint it in matte dusty rose and add a chalky white ghost in the centre.
This sits on a shelf, leans against a stack of old books or hangs from a door with a loop of twine. Finished, it looks like something from a boutique Halloween shop, not a craft afternoon.
It keeps flat in a box wrapped in tissue between seasons.

Painted Wood Slice Ghost
What You Need
- 1 unfinished wood slice, 18-22 cm diameter
- Acrylic craft paint: dusty rose, off-white, black
- 2 flat paintbrushes: one wide (2.5 cm) for the background, one fine (size 2) for detail
- White texture paste or thick gesso, approx. 2 tablespoons
- Iridescent fine glitter, 1 teaspoon
- Mod Podge or PVA glue, 1 tablespoon
- Fine paintbrush (size 0) for the eyes
How to Make It
- Paint the entire front face of the wood slice in dusty rose acrylic, using the wide brush in even strokes. Allow to dry completely, about 30 minutes. The surface should feel dry to the touch and not tacky before you continue.
- Using the fine brush and off-white paint, sketch a simple ghost shape in the centre: a rounded dome head narrowing slightly then widening into a wavy hem at the bottom third of the slice. It does not need to be perfect. Ghost shapes are forgiving.
- Fill the ghost outline with a thick layer of texture paste using the fine brush, working in short strokes to build a slightly raised, textured surface. This is what gives the finished ghost its dimensional, almost sculptural look. Leave to dry for at least 45 minutes.
- Once the paste is fully dry and matte, paint over it with a coat of off-white acrylic, keeping some of the texture visible through the paint. One coat is enough.
- Mix the iridescent glitter into the Mod Podge and brush a thin layer over the pink background area only, avoiding the ghost. Scatter a few extra glitter flakes while the glue is wet, then leave to dry for 20 minutes.
- Use the size-0 brush and black acrylic to paint two small oval eyes on the ghost's face. Two dots about 1.5 cm wide, positioned in the upper third of the head, centred slightly below the very top of the dome.
Good to Know
Lace Doily Ghost Frame
A vintage-look lace doily pinned over a dark oval frame becomes a ghost with almost no effort at all. The lace naturally drapes and gathers to suggest a figure, and the oval eye holes you cut are the only real craft step.
This piece suits a mantelpiece or a gallery wall and looks expensive in the way that thrifted things often do. Roll the doily loosely in tissue to store it and keep the frame separate.

Lace Doily Ghost Frame
What You Need
- 1 oval picture frame, 30 x 40 cm, with backing board removed and glass replaced by dark-painted MDF or cardboard (spray paint it dark walnut or espresso brown)
- 1 cream or ivory cotton lace doily, at least 30 cm across
- Scissors with sharp points (adult use)
- Approx. 6-8 stems of faux florals: blush roses, eucalyptus, small astilbe-style sprigs in cream or mauve
- Hot glue gun and glue sticks (adult use)
- 2 small pins or a staple gun to anchor the doily to the backing
How to Make It
- Lay the doily flat and find the centre of the top half. Cut two oval eye holes roughly 3 x 4 cm each, positioned about 5 cm apart and about one-third of the way down from the top edge of the doily. An adult should do this step. The holes will be the ghost's eyes once the doily is draped, so make them noticeably larger than you think: lace has a way of making small holes disappear.
- Drape the doily over the dark backing board, centring it so the head of the ghost sits in the upper two-thirds of the frame. Let the lower edge of the doily fall naturally into gentle ripples. Pin or staple the very top edge of the doily to the backing to stop it sliding.
- Reattach the backing to the frame, or simply lean the whole assembly against a wall. The frame holds everything in place once the backing is clipped back in.
- An adult uses the hot glue gun to attach clusters of faux florals to the lower left and right corners of the frame interior, nestling stems behind the doily hem for a layered look. Blush roses at the outer edge, eucalyptus tucked in behind and a few tiny sprigs pointing upward give the arrangement its depth.
- Step back and check the eye holes are centred and visible. If the doily has shifted, lift the backing, re-drape and re-pin. The finished piece should look like a ghost floating inside a botanical oval portrait.
Good to Know
🛍 Shopping guide
Ghost Balloon With Ribbon Tail
A white balloon, a black marker and a handful of curling ribbon turns any corner of a party room into a ghost cluster in under five minutes. Hang three at different heights for the best effect.
The ribbon tails flutter in the slightest breeze, which makes them feel alive. Balloons are single-use, so nothing to store: let them down at the end of the party or send them home with a child.

Ghost Balloon With Ribbon Tail
What You Need
- 1 white latex balloon per ghost, 30 cm (12 inch)
- Black permanent marker, medium tip
- 6 strips of white or pale pink curling ribbon, each 60 cm long, per balloon
- Scissors (adult use)
How to Make It
- An adult inflates the balloon to about three-quarters full so it is rounded but not rock-hard, then ties the neck. A slightly under-inflated balloon is easier to draw on and less likely to pop.
- Hold the balloon neck-down. The rounded top becomes the ghost's head. Draw two large oval eyes in the upper centre of the balloon using the black marker, and if you like, a small open O mouth just below. Keep the features simple: fussy detail disappears at party distance.
- Gather the six ribbon strips and tie them together at one end. Tie this bundle firmly around the balloon's knotted neck so the ribbons hang below the balloon like a flowing hem.
- An adult runs each ribbon strip along the blade of the scissors in a quick, firm pull to curl it. Hold the ribbon against the scissor blade with your thumb, then pull the ribbon through in one smooth motion. One pull per strip is usually enough.
- Hang the balloon at whatever height you want by tying a longer piece of plain ribbon to the neck and looping it over a hook, a curtain rail or a piece of twine strung across the room.
Good to Know
Ghost Thumb-Print Card
A Halloween card that a child makes entirely themselves, using nothing but a stamp pad and a marker. The ghost is a white thumb-print that dries in seconds, given two dots for eyes and a wobbly hem drawn below it.
Make a stack of ten in a craft session and they become place cards, treat bag tags or gift toppers. Store flat; the ink is permanent once dry.

Ghost Thumb-Print Card
What You Need
- White stamp ink pad, or white acrylic paint on a damp sponge
- Blank card blanks or thick white card cut to 10 x 14 cm, 300 gsm
- Black fine-tip permanent marker
- Orange or pink fine-tip marker for extras (optional)
How to Make It
- Press a thumb firmly onto the white stamp pad or the paint-loaded sponge, coating it evenly. Too much paint will blur the print; a light, even coat gives the cleanest ghost shape.
- Press the coated thumb firmly onto the centre of the card blank and lift straight up without rocking. The thumbprint should be a clear oval. Leave it to dry for two minutes. White ink takes a little longer than coloured inks to become fully opaque; hold it to the light to check before drawing on it.
- Once dry, use the black marker to add two small dot eyes near the top of the print and a small mouth if you like. Draw a wavy hem line below the thumbprint, extending slightly wider than the print on each side, to give the ghost its floating skirt shape.
- Write a name, a message or a number on the card. Add tiny stars or dots around the ghost with the orange or pink marker if you want to fill the card a little more. Finished cards look lovely tied to a treat bag with a loop of twine.
Good to Know
🛍 Shopping guide
Ghost Peg Garland
Twelve wooden dolly pegs become twelve ghosts in about 40 minutes, and they string into a garland that works above a fireplace, along a staircase or as a backdrop for a party table.
Paint the peg heads white, add two black dot eyes and tie a small square of cheesecloth or muslin around the neck. The natural wood grain showing through the white paint gives these a slightly vintage, handmade charm.
Store them in a zip-lock bag between seasons.

Ghost Peg Garland
What You Need
- 12 old-fashioned wooden dolly pegs (the kind without a spring)
- White acrylic craft paint
- Small flat paintbrush, size 6
- Black permanent marker or black acrylic paint with a size-0 brush
- 24 squares of natural cheesecloth or muslin, each 12 x 12 cm
- Natural twine, 2 m for the garland
- Hot glue gun (adult use) or craft glue
How to Make It
- Paint the rounded head of each peg with two coats of white acrylic, letting the first coat dry for 20 minutes before adding the second. You only need to paint from the neck up: the unpainted wooden body will be hidden by the cloth.
- Once the second coat is fully dry, use the black marker or size-0 brush to dot two small eyes on the rounded head. Position them in the upper half of the round, fairly close together. If you use a marker and it bleeds slightly, let it dry and then touch up with a tiny dab of white paint.
- Lay one muslin square flat on the table. Centre a peg on it, neck at the centre of the fabric. Gather the fabric up and over the neck of the peg and bunch it around the neck, then tie a 15 cm length of twine around the gathered fabric to hold it in place. The fabric should drape down over the body of the peg like a little cloak.
- Repeat for all 12 pegs. An adult applies a tiny dot of hot glue at the back of the fabric neck to secure it if the twine alone seems loose, but craft glue works just as well with a 30-minute drying time.
- Peg the finished ghost dolls onto the 2 m length of twine, spacing them about 15 cm apart. The pegs grip the twine on their own without glue.
Good to Know
Ghost Rock Paperweight
A smooth, palm-sized river rock painted white with a ghost face holds down table napkins, marks a child’s place at the party table or lines a window sill in a row.
These are the decorations that children fight over at the end of the night, so make one per guest. Rocks last indefinitely and store in a bowl or basket between uses.

Ghost Rock Paperweight
What You Need
- 1 smooth, oval river rock per ghost, roughly 7-10 cm long
- White acrylic craft paint
- Flat paintbrush, size 8
- Black acrylic paint or black permanent marker, fine tip
- Acrylic sealer spray or Mod Podge, for finishing
How to Make It
- Wash the rocks and leave them to dry completely. Paint takes forever to adhere to a damp stone, so this step matters more than it sounds.
- Apply the first coat of white acrylic paint over the entire rock, using smooth strokes in one direction. It will look pink and patchy. That is fine. Leave to dry for 20 minutes.
- Apply a second coat in the opposite direction. Still uneven in places. Third coat, same direction as the first. By the third coat the surface should be a solid, chalky white. If any grey stone still shows through, add a fourth coat after another 20 minutes.
- Once the white is fully dry, use the black paint or marker to draw a simple ghost face: two oval eyes and a slightly open oval mouth, all in the upper half of the rock's widest face. Keep the features small relative to the rock; the ghost shape is created by the white rock itself, not by an outline.
- An adult finishes each rock with a light coat of acrylic sealer spray or a brushed layer of Mod Podge to protect the paint. Let it cure for at least 30 minutes before handling.
Good to Know
Ghost Coffee Filter Mobile
Coffee filters are already the right shape for a ghost: wide at the top, narrowed in the middle and fringed at the hem.
Dye them in diluted pink and mauve food colouring, add black marker faces and hang them from a twig on a length of twine for a mobile that catches the lightest air current.
This is one of the more meditative crafts in the list: the dyeing is quiet, the drying is slow, and the result is softer and more beautiful than the effort suggests. Lay flat to store; the colour is set once dry.

Ghost Coffee Filter Mobile
What You Need
- 12 round basket-style coffee filters
- Pink and purple food colouring
- 2 small bowls of water, approx. 200 ml each, with 3-4 drops of food colouring in each
- Black fine-tip permanent marker
- 1 straight twig or wooden dowel, approx. 35 cm
- Thin twine or fishing line, several lengths of approx. 20-30 cm each
- Scissors (adult use to cut twine)
How to Make It
- Dip each coffee filter into one of the coloured water bowls for about 10 seconds, letting the colour absorb. You can dip the lower half in one colour and the top in a second colour for a gradient. Gently squeeze out excess liquid and lay each filter flat on a sheet of kitchen paper. They will look much darker wet than they will dry.
- Leave the filters to dry completely on the kitchen paper. This takes at least 1 hour 30 minutes at room temperature. Do not rush it with a hair dryer: the filters wrinkle and the shape is ruined.
- Once dry, scrunch the centre of each filter from below to form a round head shape at the top, letting the filter skirt fall open below. Twist the neck gently to hold the shape.
- Tie a length of twine around the twisted neck, leaving a 20-25 cm tail above for hanging. Use the black marker to draw two small eyes on the rounded head.
- Tie the hanging twine of each ghost to the twig at even intervals, varying the lengths slightly so the ghosts hang at different heights. Knot firmly. The twig mobile can be hung from the ceiling with a single central loop of twine.
Good to Know
Ghost Window Cling
Mix PVA glue with a tiny amount of white acrylic, pour it into a ghost shape on a silicone mat and peel it off two days later for a window cling that works on any glass surface.
These clings are translucent and glow beautifully in daylight. Make several different sizes and arrange them as a cluster on a window. They peel off cleanly, reapply repeatedly and store flat on baking parchment.

Ghost Window Cling
What You Need
- PVA glue (school glue), 120 ml
- White acrylic paint, 1 teaspoon
- Iridescent or holographic glitter, 1 teaspoon
- Silicone baking mat or a sheet of clear acetate
- Black acrylic paint, small amount
- Fine detail brush, size 0
- A pencil to sketch the ghost outline under the mat or acetate before pouring
How to Make It
- Draw ghost shapes on a piece of paper: a dome head, gentle body taper and wavy hem. Slide the paper under the silicone mat so the drawing shows through as a guide.
- Mix the PVA glue, white acrylic paint and glitter together until fully combined. The mixture will be white and slightly opalescent.
- Pour the glue mixture slowly over the ghost outline on the mat, following the pencil lines visible through. The pour should be about 4-5 mm deep. Tap the mat gently to level out any ridges or bubbles. If the glue runs outside the line, pull it back with the tip of a toothpick before it sets.
- Leave completely undisturbed for 48 hours. The cling must be dry all the way through before you attempt to peel it: check the edges first, and if they are still white rather than translucent, wait another 12 hours. Fully cured clings peel easily and feel flexible like a rubber sheet.
- Use the size-0 brush and black acrylic to paint two small oval eyes on the dried cling's face. Let the black dry for 15 minutes before pressing the cling onto glass.
Good to Know
Ghost Treat Cone
A square of white card rolled into a cone, filled with sweets and sealed with a sticker or a dab of tape, becomes a ghost when you add a fringe-cut hem and a marker face.
Stack a dozen in a small basket at the party entrance and let children pick their own. The fringing at the bottom flutters as they carry it, which is half the charm.
These take about two minutes each once you have the first one as a template.

Ghost Treat Cone
What You Need
- White card, A4, 160-200 gsm, one sheet per cone
- Scissors (adult pre-cuts if needed)
- Black fine-tip marker
- Sticky tape or a glue stick
- Sweets or small treats to fill
How to Make It
- Roll one A4 sheet diagonally from one corner to form a cone roughly 20 cm tall and 8 cm across at the open end. Tape the outer seam to hold the shape. Trim the wide open end straight if the edge is uneven. An adult does the trimming.
- At the lower open end of the cone, cut a fringe of 1 cm wide strips about 4 cm up from the bottom edge, all the way around the cone. This creates the wavy hem that reads as a ghost skirt. Folds in the card make this slightly fiddly: go slowly and the strips will be even enough.
- Draw a ghost face on the upper pointed section of the cone: two oval eyes positioned about 4 cm from the tip and a small oval or round mouth below. Keep the face in the top quarter of the cone.
- Fill the cone with sweets from the wide end, then fold the top lip inward slightly or seal with a sticker. The fringe holds the cone naturally closed enough to carry without spilling.
Good to Know
🛍 Shopping guide
Ghost Felt Pouch
A small felt pouch shaped like a ghost holds a party favour, a handful of sweets or a tiny toy.
Two layers of cream or white felt, stitched together around the edge with pink embroidery floss, and a pair of black felt eyes stitched on the front. No fastenings needed: the top of the ghost shape is open and the contents sit inside the head.
These are washable, reusable and look lovely arranged in a row along a table runner.

Ghost Felt Pouch
What You Need
- Cream or white felt, 30 x 20 cm per pouch (enough for front and back)
- Pink or dusty rose embroidery floss, one skein
- Embroidery needle
- Small piece of black felt, 5 x 5 cm per pouch, for the eyes
- Scissors with sharp points (adult use)
- A ghost template drawn on paper: approx. 12 cm tall, 8 cm wide at the widest, wavy hem
How to Make It
- Trace the ghost template twice onto the felt and cut out both pieces. An adult does all the cutting. The two pieces should be identical when layered on top of each other.
- From the black felt, cut two small ovals about 1 x 1.5 cm for eyes. An adult cuts these. Position them on the front felt piece in the upper third, centred and about 2 cm apart. Stitch each eye in place with three or four straight stitches through the eye and the front felt layer only.
- Layer the front piece (eyes facing outward) over the back piece. Thread the embroidery needle with two strands of pink floss, knotted at one end. Starting at one side of the ghost's neck opening, work a simple running stitch or blanket stitch all around the edge of the ghost, 5 mm from the edge, stopping when you return to the neck opening on the other side. The top of the head and the open neck area form the opening of the pouch.
- Knot the floss securely on the back at the end. Turn the pouch over to check the stitching is even. Any gaps can be filled with a few extra stitches. The pouch is complete: fill from the top opening.
Good to Know
Ghost Paper Bag Luminaria
A white paper lunch bag, a ghost face punched or cut out of the front, and a battery tea light inside: that is the whole project. Line five or six along a path, a windowsill or a staircase and they glow warmly all evening.
The punched eye-and-mouth holes create a dotted halo of light on the wall behind them. Use sand or rice inside the bag to weigh it down. Store flat by folding the unused bags; they last several seasons if kept dry.

Ghost Paper Bag Luminaria
What You Need
- White paper lunch bags, one per luminaria
- Pencil
- Sharp craft knife or small scissors (adult use)
- Battery-operated tea lights, one per bag
- 2-3 tablespoons of clean sand or dry rice per bag, for ballast
How to Make It
- Fold the top of the bag down about 4 cm to create a neat cuff. This stiffens the bag and gives it a finished look.
- On the front face of the bag, use a pencil to lightly draw a ghost face: two oval eyes and a round or wavy mouth, all contained in the upper quarter of the bag's front panel. Keep the features at least 3 cm from the bag edges so they do not weaken the paper too much.
- An adult carefully cuts out the eye and mouth shapes using a craft knife on a cutting mat, or small sharp scissors. The cut edges should be clean; ragged edges scatter light less prettily. Cut slowly on the curves.
- Pour the sand or rice into the bottom of the bag and spread it level. This weight stops the bag tipping in any light breeze. Place the battery tea light on top of the sand layer, switch it on, then fold the cuff back down.
- Position the luminaria where you want it. Never use a real candle inside a paper bag.
Good to Know
Ghost Sock Doll
A white ankle sock stuffed with polyester filling becomes a ghost doll in about 15 minutes.
Tie off the neck with ribbon, add button eyes and a small embroidered mouth and you have something that looks genuinely handmade in the best sense: softly lumpy, tactile and sweet. Children carry these around all evening. Store in a cotton drawstring bag between parties.

Ghost Sock Doll
What You Need
- 1 white ankle sock per doll
- Polyester toy stuffing, approx. 50 g per doll
- 30 cm of narrow satin ribbon, dusty pink, per doll
- 2 small black buttons, 8-10 mm, per doll
- Black embroidery floss, short length, for the mouth
- Sewing needle (adult use)
How to Make It
- Stuff the sock firmly with polyester filling through the open cuff end until the foot and lower leg sections are round and plump. The ghost's head is the rounded toe area: make sure it is well stuffed and holds a clear sphere shape.
- Pinch the sock about one-third of the way down from the toe to define the neck. Wrap the ribbon around the neck several times and tie it in a neat bow. The ribbon should sit snugly but not cut into the fabric.
- An adult threads the needle with a double length of strong thread and sews one button through the sock fabric in the upper chest of the ghost (i.e. the section between the neck ribbon and the cuff), about 1.5 cm below the neck ribbon and 2 cm apart, to form the eyes. Pull the thread firmly through both buttons to create a slight indent that defines the eye sockets. Knot securely on the inside.
- An adult uses two strands of black embroidery floss to stitch a small curved or straight mouth about 1 cm below the eyes. Three or four stitches are enough.
- Tuck in any excess sock fabric at the open cuff end to neaten the hem of the ghost. The doll is finished and self-standing on a flat surface.
Good to Know
Ghost Footprint Canvas
A toddler’s footprint in white paint on a dark canvas becomes a ghost when you add a face above the toes. The heel is the ghost’s head; the toes are its flowing hem.
These are the crafts that parents actually frame, which means making one as a keepsake while making extras as party decorations. Canvas squares store flat and last decades.

Ghost Footprint Canvas
What You Need
- 1 canvas panel or stretched canvas, 20 x 20 cm, per print
- Dark grey or dark green acrylic paint for the background, approx. 30 ml
- White acrylic paint for the footprint, approx. 20 ml
- Black fine-tip brush or permanent marker for the face
- A shallow tray or plate for the paint
- Baby wipes for quick foot cleaning
How to Make It
- Paint the entire canvas in dark grey or dark green acrylic using a wide brush. One coat is often enough for a good background colour. Leave to dry for 20 minutes.
- Pour a small amount of white acrylic into the shallow tray. A layer about 2 mm deep is plenty. Press the child's clean, bare foot gently into the white paint, coating the sole evenly. Too much paint makes the print blobby and loses the ghost shape; a light, even coat gives the cleanest result.
- Press the painted foot firmly onto the canvas, heel up toward the top of the canvas and toes pointing downward. Lift straight off without sliding. Wipe the child's foot immediately with baby wipes. The print will look like a rounded heel sitting above five toe marks: that is your ghost.
- Leave the footprint to dry for 15 minutes. Once fully dry, add a ghost face in the heel section: two small oval eyes and a tiny mouth, painted or drawn on. The features should sit just below the centre of the heel curve.
- Once the face is dry, the canvas can be framed as-is, hung with a sawtooth hanger, or propped on a shelf.
Good to Know
Ghost Macrame Wall Hanging
A simple ghost shape in natural cotton rope on a wooden dowel.
This is not a beginner macrame project, but it is a beginner-friendly one: the knots are just two alternating square knots and a few gathered fringe sections, and the result looks complex enough that people assume it took much longer than it did.
Finished size is roughly 20 cm wide and 35 cm tall, suitable for a bedroom wall or a party backdrop. It hangs year after year.

Ghost Macrame Wall Hanging
What You Need
- Natural cotton macrame cord, 3 mm, approximately 10 m
- Wooden dowel, 25 cm long, 1 cm diameter
- Scissors (adult use for initial cutting)
- A comb or stiff brush for fringing
- Black felt, one small square, for the eyes
- craft glue
How to Make It
- An adult cuts 16 lengths of macrame cord, each 60 cm long, and 1 length of 80 cm for the hanging loop. Fold each of the 16 shorter lengths in half and attach them to the dowel using a lark's head knot (fold in half, loop over the dowel, pull both ends through the loop). You now have 32 working cords hanging from the dowel.
- Work four rows of alternating square knots across all 32 cords to form the ghost's head. Each square knot uses four cords: the two outer cords are the working cords; the two inner are the filler. The knots should sit snugly against each other and the row should feel solid and compact.
- To shape the wider body, add one extra lark's head knot on each outer edge at the start of rows 5 and 6 (attaching a new doubled cord to the dowel end each time) so the piece widens by 4 cords each side. Work two more rows of square knots across the wider set of cords.
- From row 9 onward, let the cords drop freely as an unworked fringe, gradually angling the outermost strands inward by gathering and tying small overhand knots at irregular intervals. This creates the soft, wavy hem of the ghost without needing to cut into the shape.
- Trim the fringe hem into a gentle wave or leave it uneven for a more relaxed look. Comb or brush the fringe ends to separate the fibres. Cut two small ovals from the black felt and glue them to the knotted head section as eyes. Tie the 80 cm loop cord to both ends of the dowel for hanging.
Good to Know
Ghost Egg Carton Figure
One cup from a cardboard egg carton is exactly the right size and shape for a small ghost figure with a domed head and a flared skirt.
Paint them white, add faces and arrange a crowd of twelve on a windowsill for an effect that looks intentional and theatrical.
These cost nothing to make if you have been saving cartons, which pairs neatly with the spirit of 15 Egg Carton Crafts for Kids Made From Something You Were Throwing Away. They store flat in the original carton.

Ghost Egg Carton Figure
What You Need
- 1 cardboard egg carton per 12 ghosts
- Scissors (adult use)
- White acrylic craft paint
- Small flat paintbrush, size 6
- Black acrylic paint or fine permanent marker
- Pink acrylic paint (optional, for cheeks)
How to Make It
- An adult cuts the egg carton into individual cups, trimming the base of each cup so it sits flat and the flared sides are roughly even. The dome of the cup is the ghost's head; the flared sides are its hem.
- Paint each cup inside and out with white acrylic, using the small brush. The cardboard absorbs the first coat fast. Two coats are needed for a good solid white, with 15 minutes drying time between coats.
- Once fully dry, paint or draw a ghost face on the dome of each cup: two small oval eyes and a round or surprised mouth. If you want rosy cheeks, add a tiny dab of very diluted pink acrylic on each side of the mouth and blend it quickly with a finger.
- Stand the finished figures cut-side down on a flat surface. They are stable on their own. Arrange them in a cluster or a line, with the tallest at the back if your collection has variety.
Good to Know
🛍 Shopping guide
Ghost Terracotta Pot
A small terracotta pot turned upside down looks remarkably like a ghost already: a rounded dome body with a flared base that becomes a hem when inverted.
Paint it chalky white, add a face, tuck a battery tea light inside the drainage hole and it glows from within on a mantelpiece or an outdoor step. These are one of those decorations where the effect far outpaces the effort.
Store stacked right-way up without the tea light.

Ghost Terracotta Pot
What You Need
- Small terracotta pots, 10 cm diameter, one per ghost
- White chalk paint or acrylic mixed with a little baking soda for a matte finish, approx. 30 ml per pot
- Small flat paintbrush, size 8
- Black acrylic paint, fine-tip brush, size 0
- Battery tea light, one per pot
How to Make It
- Wipe the outside of each terracotta pot with a dry cloth to remove any dust or loose clay. Do not wet it: a damp pot will make the first coat of paint bubble.
- Paint the outside of the pot with chalk paint or the acrylic-baking soda mixture, working from the base upward. The first coat will look thin and uneven. That is fine. Let it dry for 30 minutes.
- Apply a second coat in smooth horizontal strokes. The paint should now look matte, solid and slightly grainy, which is exactly the chalky texture you want. Dry for another 30 minutes.
- Turn the pot upside down so the drainage hole faces upward. Using the size-0 brush and black acrylic, paint a ghost face on what is now the front of the dome: two oval eyes and a small round mouth, positioned in the upper half of the curved surface.
- Drop a battery tea light into the drainage hole. The light will glow through the thin terracotta walls and out through the drainage hole, creating a warm halo effect. Switch the tea light on before dropping it in, as the hole is narrow.
Good to Know
Ghost Origami
A single square of white paper folded into a ghost that stands on its own: this is a clean, elegant table decoration that costs nothing and takes four minutes per ghost once a child knows the fold sequence.
Line them along a windowsill or tuck one into each place setting. They can be made from any paper that holds a crease, including pages from an old paperback if you want a more vintage look.

Ghost Origami
What You Need
- 1 square of white paper per ghost, 15 x 15 cm, 80-90 gsm
- Black fine-tip marker
How to Make It
- Lay the paper white side up. Fold the top edge down to meet the bottom edge (a horizontal fold). Crease firmly and unfold. You now have a centre horizontal crease.
- Fold the top right corner diagonally down to touch the centre crease, about two-thirds of the way along its length. Repeat on the top left corner. These two folds form the ghost's rounded head shape: the top edge now looks like a soft dome rather than a straight line.
- Fold the bottom corners up slightly on each side (about 1 cm) to create small pointed feet. These allow the ghost to stand on its own.
- Turn the paper over. The ghost's front is now facing you. Use the black marker to draw two oval eyes in the upper centre of the dome and a small open oval mouth below.
- Stand the ghost by gently curving the left and right sides of the body inward very slightly, which widens the base and adds stability. Adjust until it stands without falling.
Good to Know
🛍 Shopping guide
Ghost Watercolour Print
Watercolour on wet paper bleeds in exactly the right way to make a soft, glowing ghost shape. Drop pale pink and cream watercolour onto a wet page, let it bloom, then add black dot eyes once it dries.
Frame the print or use it as a card insert. This is one of the most pleasing crafts on this list and one of the least predictable, which makes it genuinely exciting for older children. Each print is completely unique.

Ghost Watercolour Print
What You Need
- Watercolour paper, 300 gsm, cut to 15 x 20 cm, one sheet per print
- Watercolour paints: white, pale pink, soft mauve, cream
- 2 watercolour brushes: a medium round (size 8) and a fine (size 2)
- A jar of clean water
- Black watercolour or black fine-tip marker for the eyes
How to Make It
- Use the size-8 brush to wet the entire surface of the watercolour paper with clean water until it looks evenly shiny but has no puddles. Work quickly.
- While the paper is still wet, drop small amounts of pale pink and cream watercolour onto the upper two-thirds of the paper in a rough ghost outline: rounded at the top, slightly wider in the middle, tapering gently. Do not draw an outline; let the paint spread and bloom on its own. The wet paper will diffuse the paint naturally into soft edges.
- Drop a tiny amount of soft mauve at the very edges of the pink area for depth, and a touch of white in the centre of the head for brightness. The paint will continue to move as it dries, so resist the urge to add more after the first 60 seconds.
- Leave completely flat to dry for at least 45 minutes. Watercolour paper that dries on a tilt will warp and the paint will pool to one side.
- Once dry, use the size-2 brush and black watercolour or a fine-tip marker to add two small oval eyes near the top of the ghost's head. A very light touch gives the eyes a softer finish than pressing the brush or marker hard.
Good to Know
🛍 Shopping guide
Ghost Ribbon Wand
A length of ribbon attached to a short dowel makes a wand that streams behind a running child like a proper ghost tail. Use several colours of pale ribbon on each wand and the effect is layered and floaty.
These double as a party activity (decorate the handle with washi tape) and a favour to take home. Store bundled with the ribbons wrapped around the handle.

Ghost Ribbon Wand
What You Need
- 1 wooden dowel, 30 cm long, 6 mm diameter, per wand
- 4-5 ribbons per wand, 80 cm each: white, pale pink, cream, soft mauve
- Washi tape in a ghost or star print, or a neutral pattern, for the handle
- 1 small eyelet screw or a staple gun (adult use) to fix ribbons at the top
- Hot glue gun (adult use) as an alternative fixing
How to Make It
- Wrap the lower two-thirds of the dowel handle in washi tape, overlapping each strip slightly. This gives children a good grip and personalises each wand.
- An adult attaches the ribbons to the top of the dowel. The easiest method: gather all ribbons together, fold them in half to find the midpoint, and wrap a short piece of washi tape around the bundle and the dowel top to hold them. Then an adult adds a dot of hot glue over the tape to secure everything permanently. If you prefer, screw a small eyelet into the very top of the dowel and loop the ribbons through it before tying.
- Spread the ribbons out evenly around the top of the dowel so they fall in a fan shape. Trim any ribbons that are visibly shorter than the others with scissors. An adult does this trim.
- Hold the wand by the handle and give it a shake: the ribbons should stream freely and not tangle. If two ribbons stick together, separate and re-fan. The wand is ready to use.
Good to Know
Ghost Pinecone Figure
A small pinecone wrapped in a square of cream cheesecloth with a cotton ball head makes a ghost figure that looks like it belongs in a woodland or a cottagecore Halloween vignette.
Group three or five together in a shallow tray with a few dried flowers and battery fairy lights scattered in. They store in a paper bag and improve with age as the natural materials deepen in colour.

Ghost Pinecone Figure
What You Need
- 1 pinecone per ghost, medium-sized, roughly 5-7 cm tall
- 1 cotton wool ball per ghost, 3 cm diameter
- 1 square of cream cheesecloth or muslin, 20 x 20 cm, per ghost
- 30 cm natural twine per ghost
- Black fine-tip permanent marker
How to Make It
- Place the cotton wool ball on the centre of the cheesecloth square.
- Gather the cheesecloth up around the cotton ball to form a round head, with the cloth draping down around the pinecone below like a cape. Place the pinecone under the gathered cloth, pointed end upward, so the cloth drapes over it.
- Tie the twine firmly around the neck, i.e. the gathered cloth just below the cotton ball, to define the head. The cloth should drape smoothly over the pinecone scales; tug the fabric down gently to seat it if it rides up.
- Use the black marker to draw two small eyes on the cotton ball face: two dots about 5 mm apart.
- Place the finished ghost standing on its pinecone base. The scales grip the surface it stands on, so these are more stable than they look.
Good to Know
Ghost Paper Plate
A plain white paper plate painted with a ghost face: the oldest ghost craft in the book, and still the most satisfying for the four-year-old doing it.
Use a large plate for the face and hang it on a door or tape it to a window, or use small dessert plates as individual place settings. The pleated edge of the plate is a natural ghost hem.
No template needed; the circle does all the work.

Ghost Paper Plate
What You Need
- White paper plates, 23 cm diameter, one per ghost
- Black acrylic or poster paint
- Medium round paintbrush, size 8
- Optional: pink acrylic paint for cheeks, iridescent glitter glue for a sparkle border
- A length of string or ribbon, 30 cm, for hanging (optional)
How to Make It
- If hanging the plate, use a hole punch or a pencil to poke a small hole in the top of the plate rim before painting. Thread the string through and tie it off so it is ready to hang when the paint is dry.
- Use the size-8 brush and black paint to paint two large oval eyes in the upper centre of the plate, and a round open mouth below. Keep the features bold enough to read from a distance. Thin, neat lines get lost on a textured plate surface.
- Leave to dry for 20 minutes. If adding pink cheeks, dip a fingertip in very diluted pink paint and dab it gently on each side of the mouth. If adding glitter glue, run a line of it along the pleated outer rim once the black paint is fully dry.
- Hang or prop the finished ghost wherever it is needed. Groups of three at different heights look much more composed than a single plate alone.
Good to Know
🛍 Shopping guide
Ghost Salt Dough Ornament
Salt dough baked in a ghost shape is sturdy, paintable and lightweight enough to hang from a branch, a door handle or a ribbon garland. These take about an hour in a low oven and last years if kept dry.
Paint them chalky white with pink cheeks and they look almost like ceramic. Make a batch of twelve in one afternoon and you have decorations plus party favours sorted in a single session.

Ghost Salt Dough Ornament
What You Need
- Salt dough: 1 cup plain flour, 1/2 cup table salt, 1/2 cup warm water
- Rolling Pin
- A ghost cookie cutter or a card template, approx. 8 cm tall
- A drinking straw for the hanging hole
- White, black and pink acrylic paint
- Satin ribbon, 25 cm per ornament, for hanging
- Acrylic varnish or Mod Podge for sealing
How to Make It
- Mix flour and salt, then add water a little at a time, kneading until the dough is smooth and not sticky, about 3-4 minutes. If it cracks, add a few more drops of water. If it sticks to the table, dust with extra flour.
- Roll the dough to about 5 mm thickness on a lightly floured surface. Cut ghost shapes using the cutter or template, pressing straight down and lifting cleanly. An adult does this step if a craft knife is used for the template.
- Use the drinking straw to press a small hole through the top of each ghost, about 1 cm from the top edge. This is the hanging hole; make sure it is actually open all the way through, not just an indent.
- Transfer the shapes to a baking tray lined with baking paper. An adult bakes them at 120 degrees Celsius (250 F) for 1 hour, checking at 45 minutes. They should feel hard and sound hollow when tapped. Leave to cool completely on a wire rack before painting.
- Paint each ornament with two coats of white acrylic, drying between coats. Add a black face with a fine brush: two oval eyes and a small mouth. A dot of diluted pink on each cheek is optional and sweet. Seal with a coat of Mod Podge or varnish and allow to dry fully.
- Thread ribbon through the hanging hole and knot. The ornament is complete.
Good to Know
Ghost Bubble Wrap Print
Bubble wrap dipped in white paint and pressed onto dark card makes a textured, bumpy ghost print that looks like it was achieved with a much more complicated technique. Cut the bubble wrap into a ghost shape before printing and each impression is ready-made.
The bubbles give the ghost a scaled, almost armour-like texture that looks genuinely interesting. These work as cards, framed prints or garland elements.

Ghost Bubble Wrap Print
What You Need
- A piece of bubble wrap, at least 20 x 15 cm
- Scissors (adult use)
- White acrylic or poster paint
- A shallow tray or plate for the paint
- Dark card or paper, A5 size, 160 gsm minimum, one sheet per print
- Black fine-tip marker for the face
How to Make It
- An adult cuts the bubble wrap into a simple ghost shape: a rounded dome head, slight waist, widening again at the hem, with a wavy bottom edge. About 12 cm tall is ideal for an A5 card.
- Pour white paint into the shallow tray to a depth of about 3 mm. Press the bubble side of the ghost-shaped bubble wrap into the paint, coating it evenly. Do not submerge it; just a light press onto the paint surface.
- Press the paint-coated bubble wrap firmly onto the dark card, bubble side down, and hold for three seconds. Lift straight up without sliding. The result should be a white ghost shape made up of dozens of small circles: the bubble impressions.
- Leave to dry for 10 minutes. The white paint dries quickly on dark card. Once dry, add two small black dot eyes with the marker, positioned in the upper third of the ghost shape.
Good to Know
🛍 Shopping guide
Ghost Glow-in-the-Dark Mobile
Cut ghost shapes from heavy white card, coat them in glow-in-the-dark paint, hang them from a length of black string and you have a mobile that does something remarkable when the lights go out.
Charge it under a lamp for two minutes before the party and the ghosts glow green-white for up to twenty minutes in the dark. Hang it in a doorway where guests walk through and the effect is delightful.
Take down between seasons and store flat in a folder.

Ghost Glow-in-the-Dark Mobile
What You Need
- White card, A4, 300 gsm, two sheets for 6-8 ghosts
- Ghost template, approx. 8-10 cm tall
- Scissors (adult use for intricate cutting)
- Glow-in-the-dark craft paint, one small jar
- Flat paintbrush, size 6
- Black or dark string, 1.5 m for the mobile frame
- 1 wooden dowel, 40 cm, for hanging
- Black permanent marker for daytime faces
How to Make It
- Trace the ghost template onto the white card and cut out 6-8 ghost shapes. An adult does the cutting for clean edges. Use a hole punch to make a small hanging hole at the top of each ghost, 1 cm from the edge.
- Paint both sides of each ghost with glow-in-the-dark paint using the size-6 brush. Two coats on each side give a stronger glow; allow 20 minutes between each coat. The paint looks milky and almost invisible when dry in daylight, which is normal.
- Once fully dry, use the black marker to draw a ghost face on the front of each ghost. The glow works through the marker: in the dark, the eyes disappear and the whole ghost glows uniformly.
- Thread a length of black string through each ghost's hole and tie it to the dowel at varying heights, so the ghosts hang at different levels. Space them across the dowel's length so they do not overlap when still.
- Tie a length of string to each end of the dowel to create the mobile hanger and hang from a hook. Before the party, hold the mobile under a bright lamp for two minutes to charge the paint.
Good to Know
Ghost Yarn Pompom
A white yarn pompom with two black bead eyes and a short ribbon tail becomes a ghost that can dangle from a bag zip, clip to a garland or sit in a bowl as a table scatter.
Make a batch of twenty in an evening: they are repetitive in the most satisfying way and each one is slightly different in size, which looks intentional when grouped. Store in a bag; they squash flat and spring back.

Ghost Yarn Pompom
What You Need
- White yarn, double knit, one 50 g ball makes approximately 10 pompoms
- A pompom maker, 4-5 cm size, or two cardboard rings cut from card
- Scissors (adult use)
- 2 small black beads, 5 mm, per pompom, for eyes
- Black thread and needle (adult use)
- 15 cm of narrow ribbon or twine per pompom, for the tail
How to Make It
- Wind yarn around the pompom maker or both cardboard rings until the channel is fully packed. The more yarn you use, the denser and rounder the finished pompom. Keep winding past the point where you think it is enough.
- An adult cuts through all the yarn layers at the outer edge of the pompom maker, running the scissors blade between the two halves. Tie a length of yarn firmly around the centre cut, knotting it twice. This is the moment where the pompom holds together: a loose knot here means a pompom that falls apart.
- Remove the pompom maker and fluff the pompom into a sphere, trimming any long strands that stick out to keep a neat round shape. An adult does the trimming.
- An adult sews two black beads onto the pompom to form the eyes, using black thread. Position them in the upper half of the sphere, about 1.5 cm apart. Pull the thread tight through the pompom and knot on the back.
- Tie the ribbon or twine to the centre knot at the bottom of the pompom so it hangs as a short tail. Attach a clip, loop or pin through the ribbon as needed for hanging.
Good to Know
Ghost Shadow Box
A shadow box frame with a dark velvet or card background, a small lace or tissue ghost layered in the centre and a scattering of dried florals or tiny stars around it: this is the most decor-forward craft in the list and the most giftable.
Finished, it looks like something from a boutique Halloween shop. It takes patience rather than skill, and the result lives on a shelf year-round without looking exclusively seasonal. Seal the box front with the frame glass once satisfied; no glue on the glass.

Ghost Shadow Box
What You Need
- A shadow box frame, 20 x 20 cm, at least 4 cm deep
- Dark velvet ribbon or black card to cover the backing board
- One small white lace motif or a ghost shape cut from cream felt or organza, approx. 8 cm tall
- Assorted tiny dried florals or paper stars, for scattering
- Hot glue gun (adult use)
- Craft glue or Mod Podge for the background covering
- Optional: a few tiny iridescent sequins or glitter stars, for extra sparkle
How to Make It
- Remove the backing board from the shadow box. Cover it in dark velvet ribbon (glued edge-to-edge with Mod Podge) or paint it with dark acrylic. Allow to dry completely before proceeding.
- Cut your ghost shape from cream felt or organza, or use a pre-made lace motif. The ghost should be roughly centred on the backing and scaled so it fills about half the board's height.
- Arrange the ghost and any dried flowers or star confetti on the backing board before gluing anything down. Step back and look at the composition from arm's length. Move elements until the arrangement feels balanced: ghost centred, florals clustered at the lower corners, small stars scattered in the background.
- An adult uses the hot glue gun to fix the ghost in place, then the florals. Work from largest to smallest elements. A dot of glue on the back of each piece is enough; do not use too much or it will show through the organza or lace.
- Scatter any sequins or glitter stars over the surface. A dot of Mod Podge on the backing holds them without a glue gun. Allow everything to dry for 20 minutes, then close the shadow box frame over the backing.
Good to Know
🛍 Shopping guide
Ghost Crayon Resist Card
Draw a ghost in white crayon on white card, then brush over it with diluted dark watercolour and the ghost appears as if from nowhere. Children find this genuinely magical the first time. The wax crayon repels the watercolour wash and the ghost is revealed.
Make these as party invitations, as place cards or as a craft activity during the party itself. Keep flat in an envelope; they last indefinitely.

Ghost Crayon Resist Card
What You Need
- White card, A6 size, 200 gsm, one per card
- White wax crayon
- Dark watercolour paint: navy, dark grey or dark green
- Wide flat watercolour brush, size 10
- A jar of water
How to Make It
- Use the white wax crayon to draw a ghost on the white card: a large rounded dome head, a body narrowing gently at the waist and widening again at a wavy hem. Press firmly with the crayon so the wax is thick on the paper. Add two oval eyes and a small mouth. Draw a few dots and stars around the ghost if you like. The drawing is completely invisible on the white card at this stage.
- Mix dark watercolour paint with water to a medium wash, not too diluted and not too dark: test it on a scrap of the same card first. You want it to be transparent enough to show contrast but dark enough to reveal the white wax clearly.
- Brush the watercolour wash quickly and evenly over the entire card surface, working in one direction with the wide brush. Do not go back over an area you have already painted while it is wet: the wax will smear and the ghost edges will blur. One pass is enough.
- Leave to dry flat for 10 minutes. The ghost will appear in crisp white against the dark background. Write a name or message on the reverse. These are most effective with a dark navy or charcoal wash rather than a pale one.
Good to Know
Ghost Tealight Holder
Wrap a small glass jar in white tissue paper, add a ghost face cut from black card and stick it on the front, then drop a battery tea light inside.
The tissue paper diffuses the light into a soft glow and the black card face casts a silhouette shadow on the wall behind it. Make a row of five or seven and they fill a table runner with warm, flickering light all evening.
Store with the tissue still on; they need no disassembling.

Ghost Tealight Holder
What You Need
- Small glass jars, 200 ml capacity, washed and dried, one per holder
- White tissue paper, one sheet per jar
- Mod Podge or diluted PVA glue
- Black card, small piece, 10 x 10 cm per jar
- Scissors (adult use for the black card cutting)
- Battery tea light, one per jar
How to Make It
- Tear or cut the tissue paper into pieces roughly 10 x 10 cm. Brush a thin layer of Mod Podge over the outside of the jar and press tissue paper pieces onto it, overlapping at the edges and smoothing out large wrinkles with your finger. Cover the whole outer surface of the jar except the base.
- Brush a final coat of Mod Podge over the tissue paper layer to seal it. This also gives the paper a slight sheen that diffuses the light nicely. Allow to dry for 10 minutes.
- An adult cuts a small ghost face silhouette from the black card: two oval eyes and a small mouth, cut as holes, so when you hold it to the light the face shines through. Or simply cut a ghost outline from black card and glue it to the front of the jar as a flat silhouette. Both approaches work.
- Stick the black card ghost face to the front of the jar with a dab of craft glue. Place a battery tea light inside and switch it on. The light glows through the tissue paper and illuminates the face.
Good to Know
Ghost Stamped Tote Bag
A plain cotton tote bag stamped with a ghost shape in white fabric paint becomes a party favour that children actually use.
Cut the stamp from an eraser or a flat piece of foam, ink it with white fabric paint and press it across the bag in a repeat pattern. Add small star stamps between the ghosts and you have a design that looks considered.
Heat-set it once dry and the bag is washable. Make one per child at the party as a craft activity.

Ghost Stamped Tote Bag
What You Need
- Plain natural cotton tote bags, one per child
- A large eraser or a 10 x 8 cm piece of craft foam, for the stamp
- Craft knife (adult use) to carve or cut the ghost shape
- White fabric paint, 30 ml per bag
- A flat plate or tray for loading the stamp
- Black fabric marker for the face detail (optional)
- An iron (adult use) for heat-setting
How to Make It
- An adult draws a simple ghost outline on the eraser or foam and cuts it out with the craft knife, leaving the ghost shape raised. The ghost should be about 5-6 cm tall: small enough to repeat across the bag without overwhelming it.
- Pour a small amount of white fabric paint onto the flat plate and spread it to a thin, even layer. Press the ghost stamp into the paint firmly, then press it onto the bag. The first impression is usually the lightest; do two or three practice stamps on scrap fabric before stamping the bag.
- Stamp across the bag in a grid or scattered pattern, reloading the stamp with paint every two impressions for consistency. Leave the fabric paint to dry for at least one hour before heat-setting. Do not move the bag during this time: smudged fabric paint cannot be removed.
- If adding faces, use the black fabric marker to draw two tiny eyes on each ghost once the white paint is fully dry.
- An adult heat-sets the bag by ironing the painted areas on a medium-high setting with a thin cloth between the iron and the paint, for 30 seconds per section. Heat-setting makes the paint permanent and washable.
Good to Know
Ghost Pipe Cleaner Finger Puppet
A white pipe cleaner twisted into a small ghost shape and bent to fit over a finger: this is the two-minute craft that keeps younger children busy while older siblings work on more involved projects.
Make a set of five in ten minutes and they become a finger puppet show. Store in a small tin; they last as long as the pipe cleaners hold their shape.

Ghost Pipe Cleaner Finger Puppet
What You Need
- White pipe cleaners (chenille stems), one per puppet
- Black permanent marker, fine tip
- Small round-nose pliers (optional, for tighter coils)
How to Make It
- Hold the pipe cleaner in the middle. Bend the two halves together so they run parallel, then fold the top 3 cm over to form a rounded loop: this is the ghost's head. The loop should be about 2 cm in diameter.
- Twist the two strands below the head loop together for about 2 cm to form a neck, then split them apart and spread them outward like two arms, bending the tips of each arm into a small curl so they do not catch on anything.
- Bring the two arm strands back together at the body level and twist them together for another 2 cm to form the body, then let the remaining length of the pipe cleaner hang free as a loose skirt or loop it into a ring that fits over a finger. Bending the lower loop to fit over the fingertip holds the puppet in place during play.
- Use the black marker to draw two tiny eyes on the rounded head loop and a small curved mouth below. The faces will be small, but they read clearly at close puppet-show distance.
Good to Know
🛍 Shopping guide
Frequently Asked Questions
What are the easiest ghost crafts for very young children?
The thumb-print card, dot art on black card, ghost footprint canvas and tissue paper ghost wand are all suitable for children aged three to five. The thumb-print card needs only a stamp pad and a marker, with no cutting involved.
The dot art uses cotton buds rather than brushes, so there is no fine motor skill requirement beyond dabbing. The footprint canvas involves an adult doing most steps while the child contributes the print.
Ghost lollipops and paper plate ghosts also work well from age three upward.
How long do the ghost crafts take, including drying time?
Most crafts in this list take 5-30 minutes of active making time.
The ones with significant drying time are the painted wood slice ghost (two hours total), the ghost window cling (48 hours for the glue to cure fully) and the salt dough ornament (one and a half hours including baking).
Everything else, including the tissue paper wand, the ghost lollipop and the pipe cleaner finger puppet, is done in under fifteen minutes from start to finish.
Which ghost crafts work as party favours children can take home?
The ghost felt pouch, the ghost lollipop, the ghost sock doll, the ghost yarn pompom, the ghost pipe cleaner finger puppet, the ghost ribbon wand and the ghost stamped tote bag all work as favours. The lollipop is the fastest to make in volume.
The tote bag, felt pouch and sock doll are the most kept. The pipe cleaner puppet and origami ghost can be made by the children themselves during the party as an activity, so each child finishes with their own.
Can any of these ghost crafts be made ahead and stored?
Most of them keep well. The peg garland stores in a zip-lock bag, the salt dough ornaments last years in a dry box, the shadow box frame needs no disassembling, and the window clings peel off glass and store flat on baking parchment.
The tissue paper ghosts and balloon ghosts are the ones to make on the day of the party: tissue paper creases in storage and balloons deflate. The felt pouch, sock doll and macrame wall hanging all pack away flat and last indefinitely.
Do these ghost crafts need a craft shop trip or can they be made from things at home?
A significant number require nothing beyond what most households already have: the thumb-print card needs a stamp pad or white paint; the crayon resist card needs a white crayon and watercolour paint; the leaf print ghost needs a fallen leaf and white poster paint; the origami ghost needs one square of paper; the egg carton figure uses a saved carton.
A few crafts, notably the macrame wall hanging, the salt dough ornament with a cookie cutter and the ghost window cling, do need specific materials, but each one can be sourced in a single craft shop run.
18 halloween birthday party games that are actually fun — active, printable & spooky quiet games f
29 printable Halloween cards ready to cut and send tonight. One pack covers every recipient, from ne

20 cozy halloween family party games for all ages — active, printable & quiet ideas perfect for a
Leave a Reply