

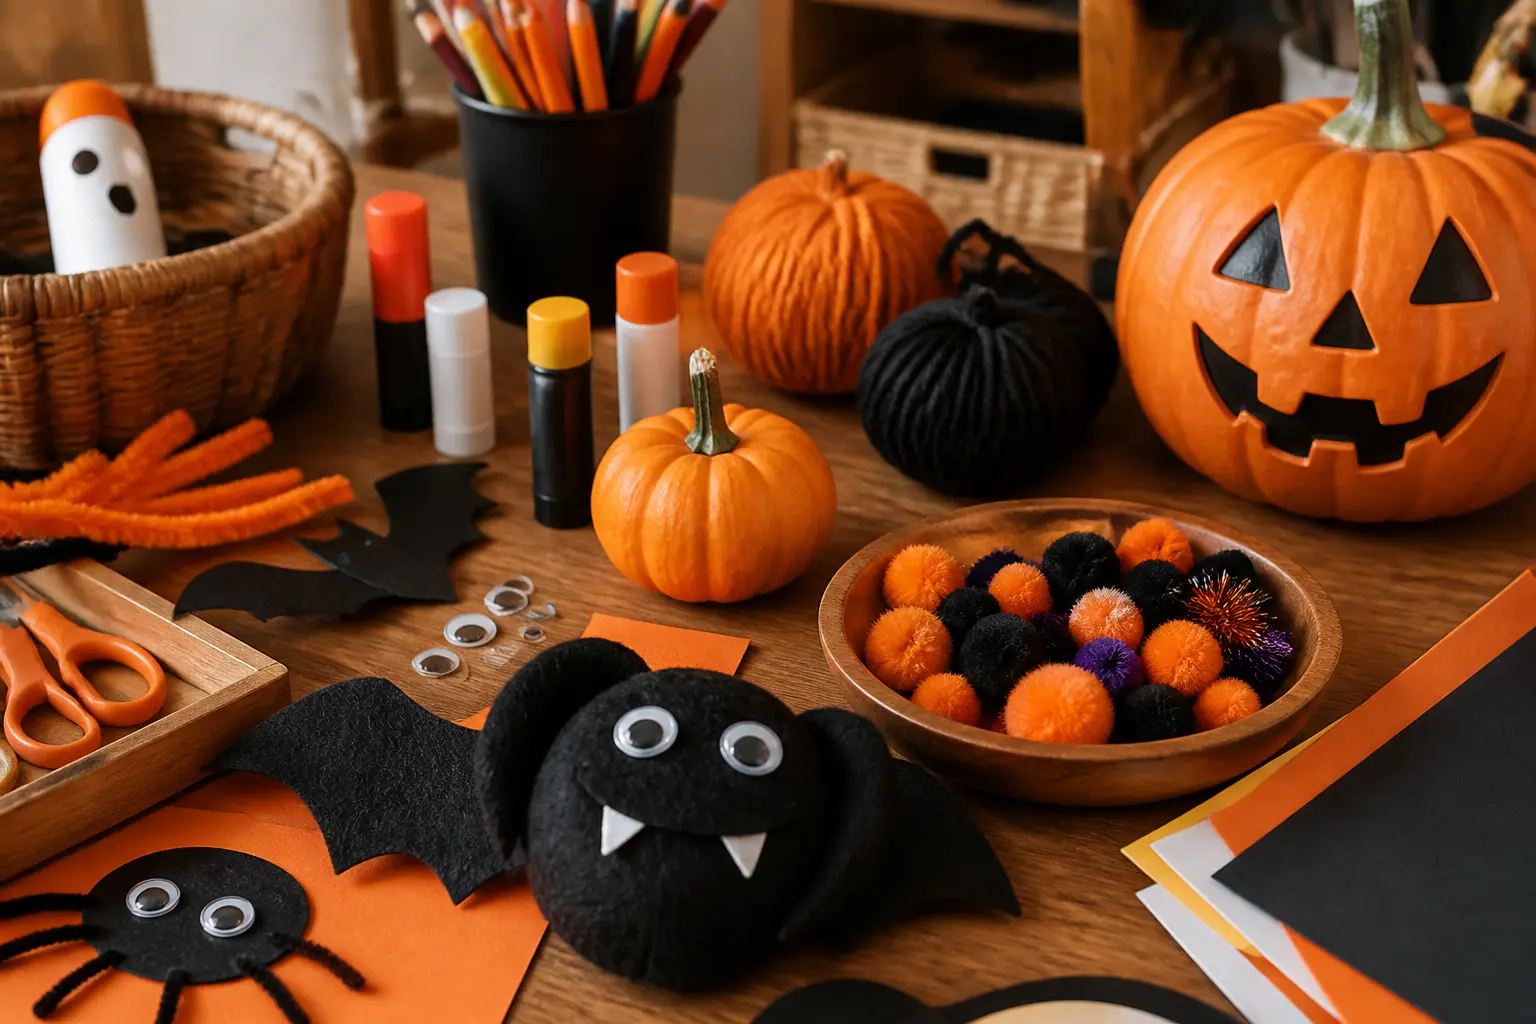
Halloween crafts for toddlers live or die on one rule: if it fits in a nostril, it has no business being on the table. Every craft here uses washable paint, pieces larger than four centimetres, and movements a one-year-old can actually manage, which means open palms, flat feet, and whole-arm sweeps rather than fiddly pinching.
None of these need scissors in a toddler’s hand, none use glitter, and none require googly eyes or beads. An adult does the one or two steps that genuinely need an adult, and the toddler does everything else. The result looks great on a fridge, a window, or a party table, and the whole thing wipes off your floor with a damp cloth.
If you want games to go alongside the making, 15 Adorable Toddler Halloween Party Games and 20 Effortless Easy Halloween Party Games both fit the same age group and the same very low mess bar.
This post contains affiliate links. If you buy through them, I may earn a small commission at no extra cost to you.
- Handprint Ghost
- Sponge Stamped Pumpkin
- Torn Paper Bat
- Footprint Spider
- Bubble Wrap Pumpkin Print
- Cotton Ball Ghost
- Paper Plate Spider
- Finger Paint Web
- Big Sticker Monster
- Sponge Print Moon
- Paper Bag Ghost Puppet
- Handprint Bat
- Rolled Paint Pumpkin
- Torn Tissue Pumpkin
- Big Brush Spooky Sky
- Sticker Web Paper
- Frequently Asked Questions
Handprint Ghost
This is the classic for a reason. One white handprint on black paper, fingers pointing down, and you have a ghost that looks genuinely good displayed in a window. The negative space between the fingers reads as a floating shape even before you add eyes, and black paper makes the white paint pop without any extra effort.
Lay everything out before the toddler sits down: paint poured into a paper plate, black paper flat on the table, and a bowl of warm water for the quick rinse after. The whole active part takes under five minutes, which is exactly the attention span you are working with.
What You Need
- 1 sheet black card or construction paper, at least A4
- White washable paint, enough to fill a paper plate to roughly 5mm depth
- 1 paper plate, for the paint
- 1 black marker or black washable paint for eyes (adult use)
- Bowl of warm water and a towel for cleanup
How to Make It
- Pour the white paint onto the paper plate and spread it to a thin, even layer, roughly the size of the toddler’s palm. Press the toddler’s hand flat into the paint, palm and all five fingers making contact, then lift it cleanly.
- Turn the hand over and press it onto the black paper with the fingers pointing downward. Hold it for three seconds, then peel it up in one smooth movement. The print should show a clear palm blob with five finger shapes below it. If the fingers smudged, that is fine, ghosts are meant to look a little wobbly.
- Once the paint is fully dry, around 30 minutes, an adult draws two small oval eyes on the palm area using a black marker or a fingertip dipped in black paint. Let it dry completely before displaying or stacking.

Sponge Stamped Pumpkin
A sponge cut into a pumpkin shape and dipped in orange paint produces a clean, bold print that genuinely looks like a jack-o-lantern even without a face. Cut several sponges at once and let the toddler stamp a whole row of them across a long strip of paper for an instant party banner.
The sponge holds enough paint to make three or four good prints before it needs re-dipping, which suits toddlers who want to keep going. Store the finished paper flat until completely dry, then roll it loosely for the bin or keep it as wall art.
What You Need
- 1 large kitchen sponge, at least 10cm x 10cm
- Orange washable paint, roughly 3 tablespoons
- 1 sheet white or cream paper, at least A3 for room to repeat
- 1 paper plate or shallow tray for the paint
- Green washable paint (optional), for a stem
How to Make It
- An adult cuts the dry sponge into a rounded pumpkin shape, about 8-10cm across, with a flat bottom and a slight dome at the top. A simple oval with two small bumps works well. Pour the orange paint onto the plate and spread it flat.
- Press the sponge down into the paint, covering the whole face of it, then press it firmly onto the paper. Lift it straight up. The print should show the orange shape with slightly uneven edges, which is the texture the sponge gives and it looks great.
- Re-dip and repeat across the paper. Once the orange is dry, about 30 minutes, an adult can dip a finger in green paint and add a small stem to each pumpkin if desired. Let dry fully before displaying.

Torn Paper Bat
Tearing paper is a genuine developmental win for toddlers, and it produces a bat with ragged, organic edges that look better than anything cut with scissors. The silhouette comes from how the pieces are arranged on the white paper, so there is real creative latitude here, and no two bats ever look the same.
This is a glue-stick craft, which means no heat and no drips. Press the finished bat between two heavy books for ten minutes if any edges lift. Store it flat in a folder or slide it into a clear sleeve on the wall.
What You Need
- 3-4 sheets black construction paper
- 1 sheet white paper or card, A4 minimum
- 1 large glue stick
How to Make It
- Help the toddler tear the black paper into rough chunks, at least 4cm across in every direction. A mix of wide wing-shaped tears and rounder body pieces works well. Do not worry about precision: the tearing is the craft.
- Lay the white paper flat. Guide the toddler to arrange a large oval or round piece near the center for the body, then two big wing-shaped pieces spreading out to each side. Swipe the glue stick generously under each piece before pressing it down. The shape reads clearly even if the pieces overlap or leave small gaps.
- Press each piece down firmly for a few seconds. Once all pieces are glued, lay a clean sheet of paper on top and press with both palms, or pop the whole thing under a heavy book for ten minutes. The bat is ready when no edges curl up.

🛍 Shopping guide
Footprint Spider
Two foot-sized ovals side by side make a convincing spider body, and an adult adds eight thick legs afterwards to complete the illusion. The oversized scale is part of what makes this work: a toddler foot is already big enough that no detail is lost.
Lay the paint tray on an old towel or a bin liner and have a warm water rinse ready before you start, because the foot goes from paint to paper to rinse in one quick sequence. Let the paint dry completely before adding legs, or the marker will smear.
What You Need
- Black washable paint, enough to fill a paper plate to 5mm depth
- 1 paper plate, for the paint
- 1 sheet white paper, A3 or larger
- 1 thick black marker (adult use)
- Warm water and towel for foot rinse
How to Make It
- Pour black paint onto the paper plate to about 5mm depth. Hold the toddler securely and press one foot flat into the paint, heel to toe. Lift the foot and press it onto the left side of the paper, then repeat with the other foot immediately to the right, so the two heel ends touch in the middle. The result looks like a fat figure-eight: that is your spider body.
- Carry the toddler straight to the rinse before they take a step. Let the print dry completely, which takes around 30 minutes at room temperature.
- Once dry, an adult draws eight thick legs radiating out from the sides of the body with the black marker, four on each side. Bend the marker slightly as you draw each leg to give it a natural curve. The spider is done.

🛍 Shopping guide
Bubble Wrap Pumpkin Print
Bubble wrap pressed into orange paint and stamped onto paper produces a surface covered in tiny circles that reads exactly like pumpkin skin texture. It is one of those results that looks more considered than the effort deserves, which is the goal every time.
Cut a generous square of bubble wrap, at least 15cm x 15cm, so the toddler has something they can grip and press without their fingers landing in the paint zone. The wrap can be wiped clean and reused several times. Roll the finished paper into a tube and secure with a rubber band for storage, or display it flat on a window.
What You Need
- Bubble wrap, one piece at least 15cm x 15cm, bubble side out
- Orange washable paint, roughly 3 tablespoons
- 1 sheet white or cream paper, A4 minimum
- 1 paper plate or shallow tray for the paint
- Green washable paint (optional), for stem
How to Make It
- Pour the orange paint onto the plate and spread it to a thin, even puddle. Press the bubble side of the wrap flat into the paint, covering as many bubbles as possible, then lift it off.
- Press the painted bubble side firmly down onto the paper. Hold it flat with both palms for about five seconds, then peel it back in one smooth movement. The paper should show a field of orange circles. If the coverage is thin, press again in the same spot while the paint is still wet.
- Leave to dry for around 30 minutes. An adult can use a fingertip dipped in green paint to add a short rectangular stem at the top, completing the pumpkin shape. Let dry fully before storing.

Cotton Ball Ghost
Large cotton balls glued onto black paper in a rounded tower shape produce a fluffy, three-dimensional ghost that catches the light differently from a painted version. The texture makes it tactile as well as decorative, which toddlers find genuinely satisfying to touch.
Use the biggest cotton balls you can find, at least 4cm across when uncompressed, so the pieces stay well within safe size. The glue stick needs a generous application or the cotton will lift at the edges once dry. Display on a window or a dark wall where the white reads clearly.
What You Need
- Large cotton balls, at least 4cm across when uncompressed, roughly 20 balls
- 1 large glue stick
- 1 sheet black card or construction paper, A4 minimum
How to Make It
- An adult draws a loose ghost outline on the black paper in pencil: a wide oval base narrowing to a rounded head, about 20cm tall. Swipe the glue stick thickly inside the outline, covering the whole area. The glue should look shiny and feel tacky immediately.
- Guide the toddler to press cotton balls onto the glued area, starting at the bottom and working upward. Press each ball down firmly for a second or two. Pack them close together so no black shows through. The head area will need smaller clusters or a single ball on top.
- Leave flat for at least 30 minutes so the glue sets fully. Check the edges and press down any that have lifted. The ghost should hold together as one piece when lifted gently by a corner of the paper.

🛍 Shopping guide
Paper Plate Spider
A painted paper plate with pipe cleaner legs is satisfyingly three-dimensional, and it stands up on a table or hangs from a thread, which gives it more display options than a flat craft. The plate is big enough to hold easily, and the whole thing comes together in two short sessions with a drying gap between them.
Use chunky pipe cleaners at least 30cm long so the toddler can grip and bend them without the ends being a concern. An adult pokes the holes and threads the pipe cleaners; the toddler bends them into leg shapes, which is genuinely good for hand strength.
What You Need
- 1 standard paper plate, at least 20cm diameter
- Black washable paint, roughly 2 tablespoons
- 4 black pipe cleaners, at least 30cm each
- 1 thick paintbrush or sponge for painting
- A pencil or skewer for poking holes (adult use)
How to Make It
- Paint the top of the paper plate solid black. Use a wide brush or a sponge so coverage is even. One coat usually covers; if the plate shows through, add a second coat once the first is tacky. Leave to dry completely, at least 40 minutes.
- An adult uses a pencil or skewer to poke four holes along each side of the plate, evenly spaced, so eight holes in total. Thread one pipe cleaner through each pair of adjacent holes so that an equal length sticks out on each side. Each pipe cleaner makes two legs.
- Let the toddler bend each pipe cleaner outward and then down, creating the classic bent-leg spider shape. No two spiders will look exactly the same, and that is fine. Stand the spider on a surface or thread a loop of string through the top hole to hang it.

Finger Paint Web
Dragging fingers outward through dots of white paint on black paper creates radiating lines that read unmistakably as a spider web. This is the craft where the toddler has the most freedom and the least guidance, and the results are consistently beautiful, because the contrast does all the work.
Squeeze the paint in advance so the toddler can start immediately. Some toddlers drag in neat spokes; others swipe in all directions and end up with something more abstract. Both look excellent on a dark window. Let the paint set fully before stacking sheets.
What You Need
- 1 sheet black card or construction paper, A4 minimum
- White washable finger paint, roughly 2 tablespoons
How to Make It
- Lay the black paper flat. Squeeze four to six generous dots of white paint across the paper, spacing them roughly evenly, or cluster them near the center. Each dot should be about the size of a small coin: big enough to pick up paint on a fingertip.
- Show the toddler how to place a fingertip on a dot and drag it outward toward the edge of the paper in one smooth stroke. Then step back and let them do the rest. Some will drag methodically, some will press and swipe in circles, and the paint picks up some of the black as it moves, which creates a lovely grey gradient.
- Leave the paper flat to dry for about 30 minutes. The white will stay bright once dry. Stack sheets only once completely set, with a piece of scrap paper between them.

🛍 Shopping guide
Big Sticker Monster
This is the only craft in the set that needs zero paint and zero drying time, which makes it ideal when you need something done in five minutes with no setup. Large foam stickers in simple shapes, circles, squares, triangles, build a monster face through composition alone, and toddlers turn out to be surprisingly good at it.
Buy foam stickers at least 4cm across so every piece is well out of swallowing range. The finished piece is already preserved by the stickers themselves and needs no laminating. Frame it or stick it straight onto a window with a small loop of masking tape on the back.
What You Need
- 1 sheet white or coloured card, A4 minimum
- Large foam stickers in assorted shapes, at least 4cm across each
How to Make It
- Peel the backing off a large round sticker and hand it to the toddler to press onto the paper as the face. Some toddlers will peel their own backing; others need the sheet held taut. Either way, press the sticker flat with the whole palm once it lands, so it bonds evenly.
- Continue adding stickers to build the monster: two round shapes for eyes, a wide rectangle or wavy shape for a mouth, pointed triangles along the top for horns or hair. There is no wrong arrangement. If a sticker lands sideways or upside-down, that is a design choice.
- Keep adding until the toddler decides the monster is finished. No drying time needed. Display immediately by sticking the paper to a window or wall with a strip of masking tape across the top edge.

🛍 Shopping guide
Sponge Print Moon
One press of a round sponge loaded with yellow paint onto black paper produces a full moon that needs nothing added to it. Pair this with the Finger Paint Web or the Big Brush Spooky Sky from this list and you have a coordinated Halloween display in under an hour of active making.
A round cosmetic sponge about 8-10cm across works best, or cut a circle from a kitchen sponge. The key is to load the sponge evenly so the print does not have a dark center and pale edges. One deliberate press gives a cleaner result than several light ones.
What You Need
- 1 round sponge, 8-10cm diameter (cosmetic puff or cut kitchen sponge)
- Yellow washable paint, roughly 2 tablespoons
- 1 sheet black card or construction paper, A4 minimum
- 1 paper plate for the paint
How to Make It
- Pour the yellow paint onto the plate and spread it to a circle roughly the size of the sponge. Press the sponge flat into the paint, rotate it once to load all of the surface, then lift it cleanly.
- Press the sponge firmly down onto the black paper, near the top or center depending on whether you plan to add other elements below. Hold it flat for five seconds, pressing evenly with the whole palm, then peel it back in one movement. The moon should appear as a solid yellow circle with soft, slightly textured edges.
- Leave flat to dry for about 30 minutes. The moon is complete as it is, or an adult can use a thin strip of torn white paper to add a crescent shadow across part of the circle once the yellow is dry.

🛍 Shopping guide
Paper Bag Ghost Puppet
A white paper bag stuffed with cotton wool and given a drawn face becomes a ghost puppet that toddlers will actually play with after the crafting is done. The bag needs to be at least 15cm x 25cm so the face has room and the toddler can grip the base to wave it around.
Use a white paper gift bag with no handles, or cut the handles off a handled bag so there is nothing for small fingers to catch on. The marker face is the adult’s job; everything else belongs to the toddler. Store it by deflating it flat inside a drawer.
What You Need
- 1 white paper bag, at least 15cm wide x 25cm tall, no handles
- Cotton stuffing or cotton wool, enough to fill the bag loosely
- 1 black marker (adult use)
- Tape (adult use)
How to Make It
- Open the bag fully. Let the toddler pull cotton stuffing out of a bag and push it into the paper bag until it is loosely full, about three quarters capacity. Too much stuffing makes the bag rigid and hard to hold; the right amount leaves the bag slightly soft and squeezable.
- An adult folds the top of the bag down twice, making two neat folds of about 3cm each, to close it. Tape the folds down flat with two strips of tape across the back so the stuffing cannot escape.
- An adult draws a simple ghost face on the front of the bag: two large oval eyes and a wide oval mouth, each at least 4cm across so they read clearly. Hand the ghost to the toddler and let the playing begin. Deflate and store flat when not in use.

🛍 Shopping guide
Handprint Bat
Two black handprints placed side by side, thumbs inward, form a bat’s wings in one satisfying stamp. The body goes in between as a simple drawn oval, and the whole thing works because bat wings are naturally palm-shaped. This is a sibling or cousin favourite too: stamp two sets of hands side by side for a bat family across one long sheet of paper.
Black paint on white paper gives the highest contrast, but mid-grey craft paper also looks atmospheric. Let each handprint dry before the other set goes down if you are layering colours. Store flat in a folder or roll loosely.
What You Need
- Black washable paint, enough to fill a paper plate to 5mm depth
- 1 paper plate, for the paint
- 1 sheet white paper, A3 or larger
- 1 black marker (adult use)
- Bowl of warm water and towel for cleanup
How to Make It
- Pour black paint onto the plate to about 5mm depth. Press the toddler’s right palm flat into the paint, making sure every finger and the full palm makes contact. Stamp it onto the right side of the paper, thumb pointing inward toward the center. Repeat with the left hand on the left side, thumb pointing inward, so the two thumb edges nearly meet in the middle.
- Rinse the hands straight away. Let the prints dry completely, about 30 minutes. The wings should each show a clear fan of five fingers spreading outward.
- An adult draws a simple oval body between the two thumbs, connecting the wings. Add two small pointed ears at the top of the body. The bat is finished. It can be cut out by an adult to hang from a length of string, or displayed flat.

🛍 Shopping guide
Rolled Paint Pumpkin
Rolling a ball through orange paint in a shallow tray and then onto paper produces unpredictable, looping tracks that fill the page with warm colour. It reads as abstract art on its own, but drawn pumpkin lines on top of the tracks bring it into Halloween territory instantly.
A small rubber ball about 6-7cm across works well. A toy car with wide wheels works even better, leaving two parallel tracks. Use a roasting tray or a storage box lid as the rolling space, lined with paper. The toddler can tilt the tray to steer the ball, which is excellent for both arms working together.
What You Need
- 1 shallow tray or box lid, at least 25cm x 30cm
- 1 sheet white paper, cut to fit inside the tray
- Orange washable paint, roughly 3 tablespoons
- 1 rubber ball, 6-7cm diameter, or a toy car with wide wheels
- 1 green marker (adult use, for stem detail)
How to Make It
- Line the tray with the paper. Drizzle the orange paint across the paper in two or three generous lines. Place the ball in the tray on top of the paint.
- Let the toddler tilt the tray gently in each direction so the ball rolls through the paint and across the paper, leaving tracks. Keep going until the paper has good orange coverage, roughly two to three minutes of rolling. Lift the ball out with a spoon if it is very paint-covered, or tip it into the rinse bowl.
- Lift the paper carefully out of the tray and leave it flat to dry, about 30 minutes. Once dry, an adult uses a green marker to draw simple pumpkin ribs across the orange area, turning the paint tracks into a pumpkin face. Add a small rectangular stem at the top.

Torn Tissue Pumpkin
Torn squares of orange tissue paper glued over a printed pumpkin outline produce a collage with lovely layered depth, because the tissue is slightly translucent and layers of it build colour gradually. The tearing is the toddler’s work; the outline is the adult’s.
Print or draw a pumpkin outline at least 20cm tall on white card. Pre-tear the tissue into rough squares of 4-6cm before you sit down, so the toddler can focus on placing and pressing rather than tearing. Store the finished piece flat, away from moisture, as tissue bleeds when wet.
What You Need
- 1 sheet white card, A4 minimum, with a large pumpkin outline drawn or printed on it (outline at least 20cm tall)
- Orange tissue paper, pre-torn into 4-6cm rough squares, roughly 40 squares
- 1 large glue stick
How to Make It
- An adult draws or prints a simple pumpkin outline on the white card: a large rounded shape with a short stem, at least 20cm tall, lines thick enough to see at a glance. Swipe the glue stick in sections across the inside of the outline, working in patches of about 10cm at a time so the glue stays tacky.
- Guide the toddler to press tissue squares onto the glued area, overlapping slightly. The tissue does not need to be flat or smooth; crumpled squares actually give more depth. Work from one side to the other until the outline is covered. Re-swipe glue on any section that has dried out before laying tissue on it.
- Leave flat for 30 minutes to set. Check the edges of the pumpkin and press down any tissue that has lifted. The finished piece has a warm, layered glow when held up to the light, which makes it a natural window display.

Big Brush Spooky Sky
Wide brushstrokes of black and purple across a large sheet of paper, blended while still wet, create a dramatic night sky that looks genuinely impressive framed on a wall. This is a whole-arm craft: the bigger the brush and the broader the sweeps, the better the result.
Use a decorating brush at least 5cm wide or a large foam brush so each stroke covers real ground. Once the background is dry, combine this with the Sponge Print Moon from this list for a layered display. Lay the paper on the floor rather than a table so the toddler can lean over it and use their full arm.
What You Need
- 1 sheet white paper or card, A3 or larger
- Black washable paint, roughly 3 tablespoons
- Purple washable paint, roughly 3 tablespoons
- 1 wide paintbrush or foam brush, at least 5cm wide
- 1 paper plate or palette for paint
How to Make It
- Lay the paper flat on a covered floor. Put both colours onto the plate, keeping them separate. Dip the brush into the black paint and sweep it across the paper in a broad horizontal stroke from one side to the other. Reload and sweep again, slightly overlapping. Two or three strokes in black is enough to start.
- Rinse the brush briefly, shake off the excess water, then dip it into the purple and sweep it across the paper in the gaps between the black strokes. While the paint is still wet, drag the brush across the boundary between black and purple to blend them slightly. The colours should meet in hazy edges rather than crisp lines.
- Leave to dry flat for about 40 minutes. Once dry, add a sponge-printed moon using the method in the Sponge Print Moon craft, or display the sky painting as it is. Store flat or roll loosely.

🛍 Shopping guide
Sticker Web Paper
A printed or drawn spider web outline gives the toddler a framework to fill with large dot stickers, producing a piece that looks deliberate and complete without any adult finishing it. The stickers define the web shape by sitting on the lines, and the white paper between them stays negative space.
Print or draw the web with thick lines, at least 3mm, so the toddler can see the framework clearly. Use dot stickers at least 2cm in diameter, preferably larger, in white, orange, or black. The whole thing takes under ten minutes and needs no drying. Display immediately with a strip of tape across the top.
What You Need
- 1 sheet white paper, A4 minimum, with a spider web outline printed or drawn on it in thick black lines
- Large round dot stickers, at least 2cm diameter, in white, orange, or black, roughly 20-30 stickers
How to Make It
- An adult draws or prints a simple spider web on the white paper: straight lines radiating from a central point, with curved lines connecting them at regular intervals. Lines should be at least 3mm thick so they are visible at a glance. The web should fill most of the page.
- Help the toddler peel the backing from a dot sticker and press it anywhere along a web line. The sticker does not need to sit perfectly centred on the line; approximate is excellent. Continue peeling and pressing until the page feels full or the toddler decides to stop.
- No drying needed. Display immediately. The piece keeps indefinitely as long as it stays dry, because the stickers are the structure.

🛍 Shopping guide
Frequently Asked Questions
What paint is safe for toddlers aged 1-3?
Use washable tempera paint labelled non-toxic and specifically safe for children. It rinses off skin and most surfaces with warm water, and it does not crack or peel on paper once dry. Avoid acrylic paint for this age group: it is not washable and should not be on toddler skin.
How do you stop a toddler putting paint in their mouth?
Keep sessions short, work quickly, and rinse hands as soon as the stamping or painting step is done. Having a warm wet cloth within reach and redirecting hands to the paper rather than the face is more effective than trying to prevent all mouthing. Washable non-toxic paint is formulated to be safe in small amounts, but none of these crafts leave a toddler sitting with paint within reach for long.
Can a one-year-old do these crafts?
Most of them, yes, with an adult guiding the hand or foot. The handprint ghost, the footprint spider, the sponge moon, and the cotton ball ghost all work at 12 months with adult help. The torn paper bat and the paper plate spider suit ages two and up because they involve more sustained attention.
How do you display toddler Halloween art?
A strip of washi tape or masking tape along the top edge holds paper flat on a window without damaging the surface. A string of pegged paper across a wall works for multiple pieces. Slide flat work into a clear plastic sleeve and hang it as a display panel. Store keepers flat in a folder or cardboard portfolio, away from moisture.
What do you do with the crafts after Halloween?
Most of these can be recycled or composted once you are ready to let them go. Paper plate and pipe cleaner spiders can be taken apart and the pipe cleaners reused. Cotton ball ghosts and tissue pumpkins photograph well before they go in the bin, which is usually enough to satisfy the parent who wanted to keep them.
14 freehand-painted DIY Halloween doormats you can finish in one afternoon, using acrylic paint, ste
15 outdoor Halloween party games for your backyard bash — active, printable, and spooky. Print the
21 paper bag Halloween crafts that actually work: monster treat bags, witch broom bags, painted tric
Leave a Reply