

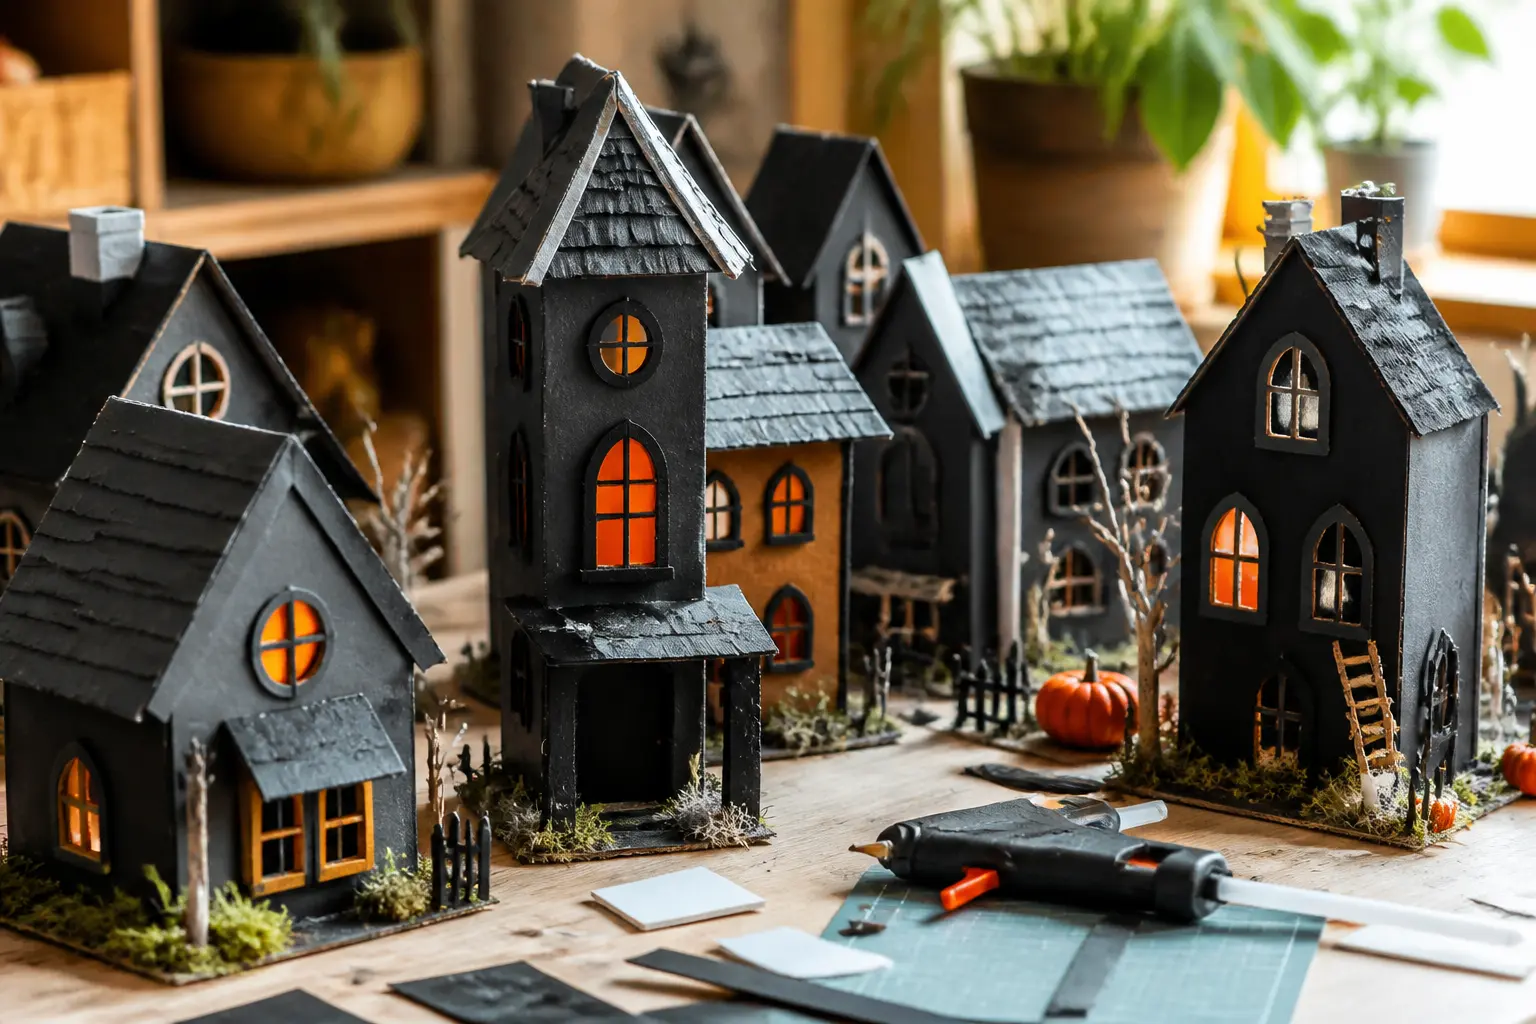
Wood scraps earn their keep here. A handful of craft board offcuts, a bottle of craft paint and an afternoon is genuinely all the starting budget this kind of project needs, and the result looks like something you hunted down at a flea market over three autumn seasons.
The fifteen houses below are grouped by the kind of shop or building they imitate, so you can build one section at a time or mix freely. Each one has its own character: a storefront sign, a painted window scene, a roofline quirk that makes it read instantly as its own address. For more ways to set a scene without spending much, the article on easy DIY Halloween decorations with three steps or fewer runs a similar logic.
Work through them in order or jump to the one that fits your shelf. Every build is sized to sit companionably next to the others, which is the whole point of a village.
This post contains affiliate links. If you buy through them, I may earn a small commission at no extra cost to you.
The Witch District Shops
These three storefronts form the commercial heart of any Halloween village. Each one carries a hand-lettered sign above the door, a painted window display and at least one architectural detail, a crooked chimney, a peaked dormer, a spider-web corner, that separates it from a plain box.
Build them at slightly different heights so they read as a street rather than a lineup. A shared dark wood base ties them together without making them look like a kit.
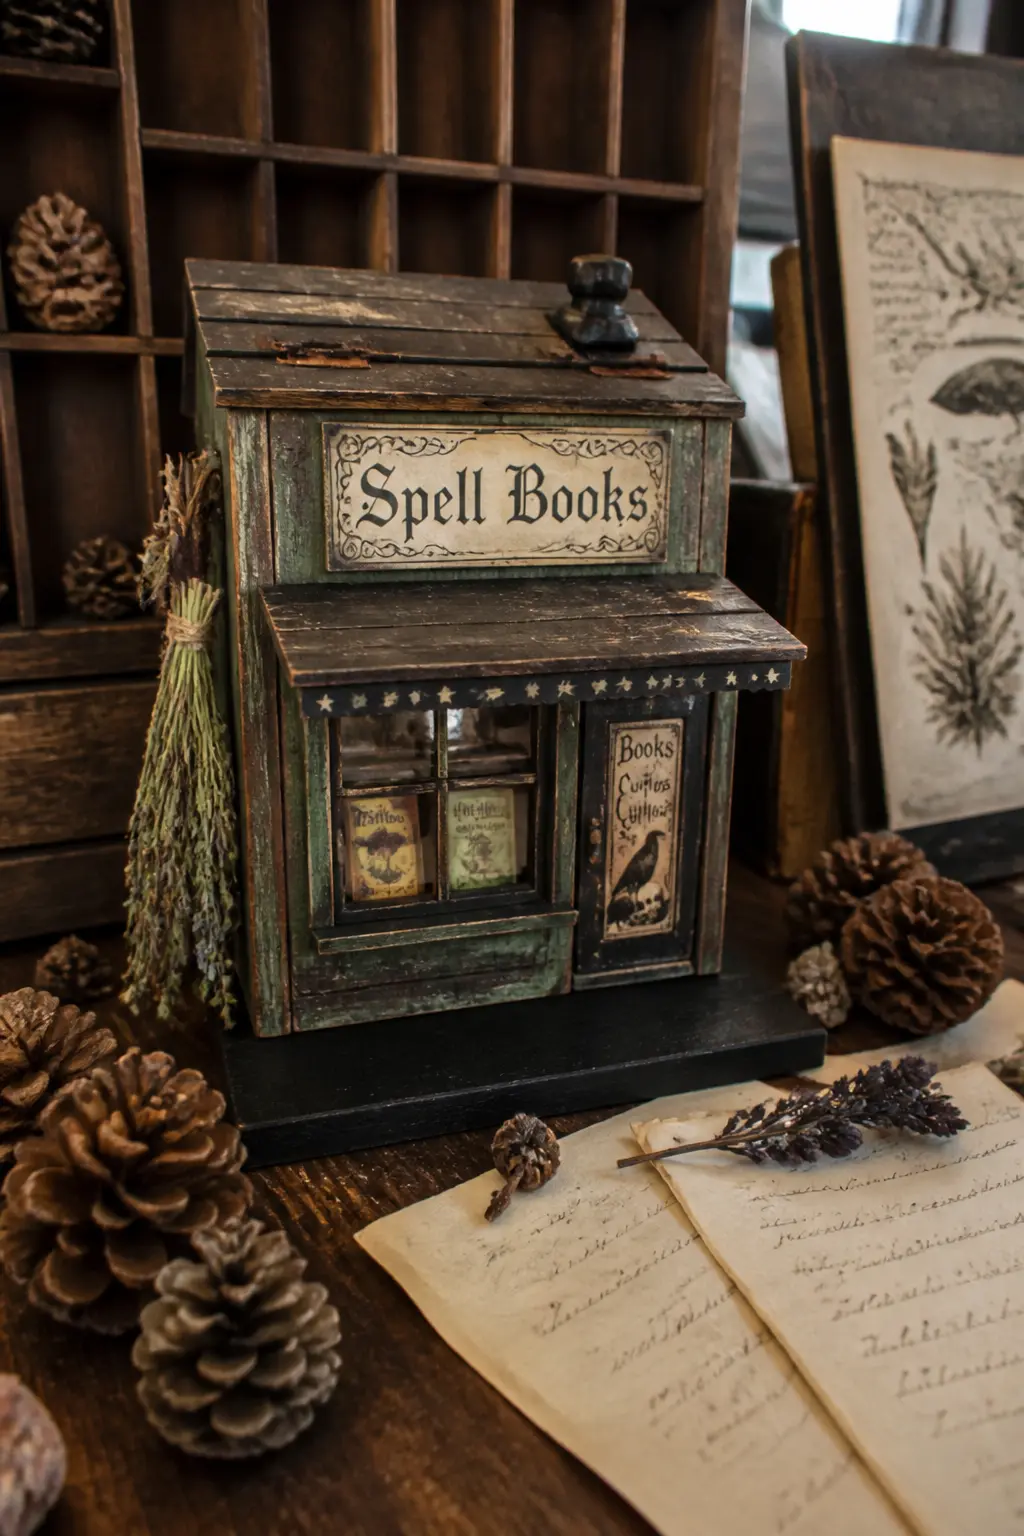
The Spell Books Shop
Cut a rectangle of craft board roughly 10 cm wide and 14 cm tall, then glue a smaller triangular offcut on top as a pitched roof. Sand every edge lightly so the wood drinks paint unevenly, which is the texture that makes it read as old.
Paint the facade in warm tobacco brown. Letter “SPELL BOOKS” in off-white across a narrow strip of balsa glued above the door opening. Paint tiny book spines in the window and a small ghost shape tucked in the lower corner of the glass.
A white bead on the roofline makes a ghost finial. One small black spider cut from craft foam and glued to a thread of black embroidery floss completes the corner web. Seal with a matte medium so the painted details do not chip when pieces are moved.
🛍 Shopping guide
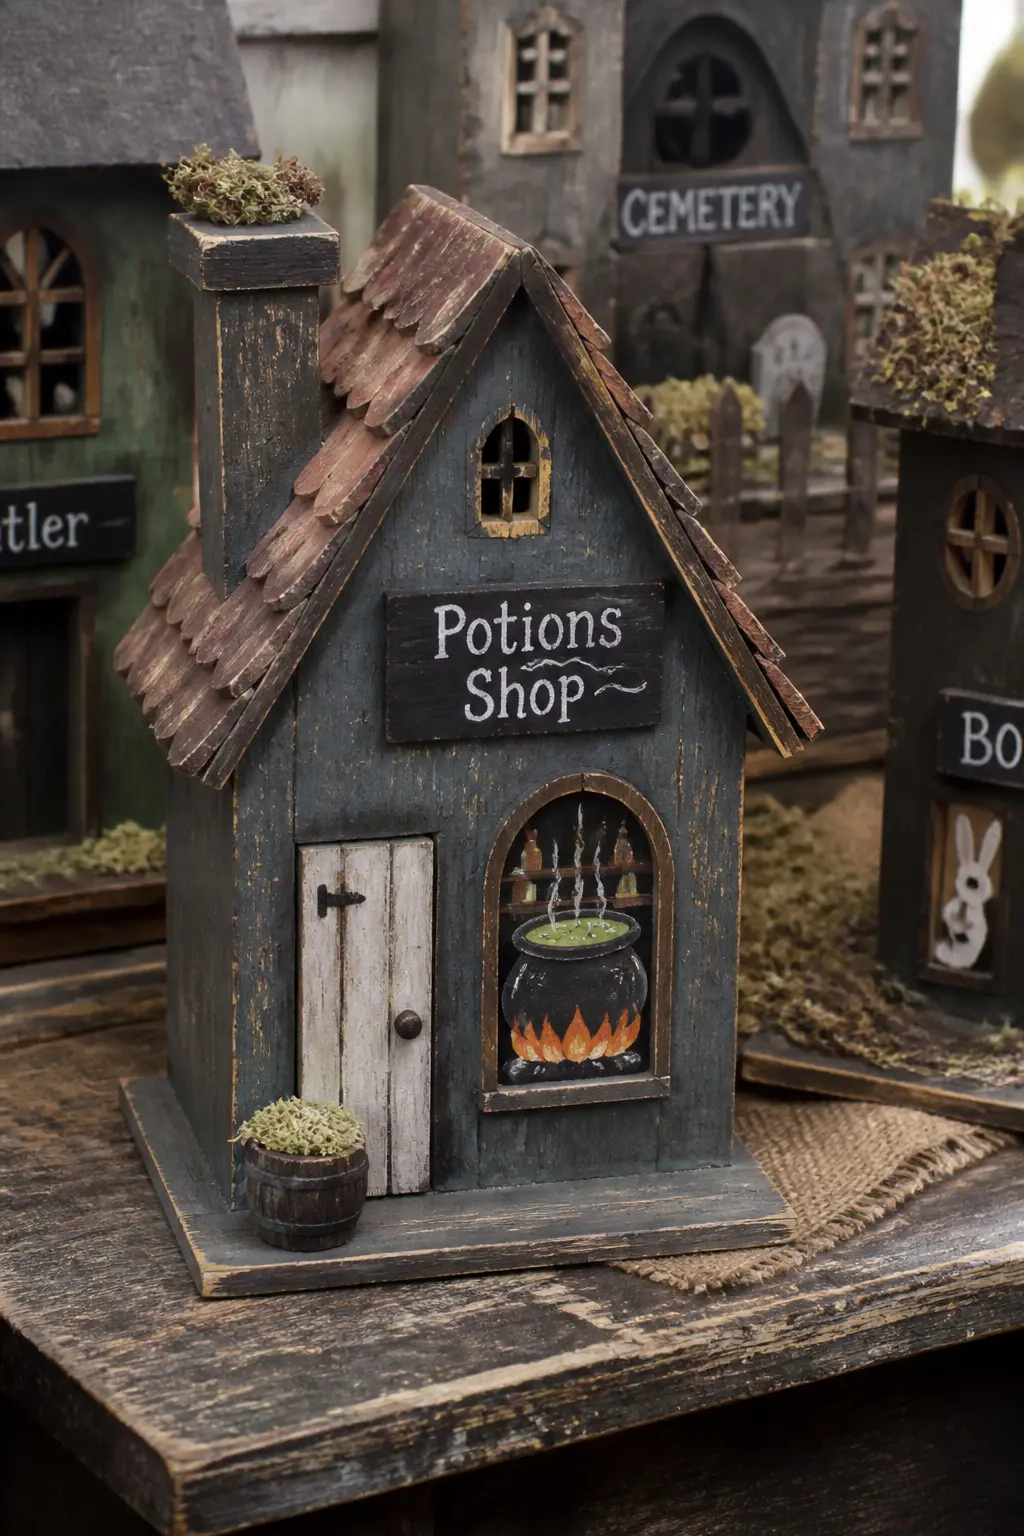
The Potions Shop
This is the tallest of the three witch district shops. Give it a sharply peaked dormer at the top by gluing two angled offcuts above the main roofline. The extra height makes it read as the anchor building of the trio.
Paint it in a cool slate grey with charcoal detailing on the roof. A cauldron silhouette painted in the arched window, with tiny green dots suggesting a bubbling surface, is the whole window scene. Keep it graphic rather than fussy.
A small terra cotta pot (the miniature kind sold for fairy gardens) glued to the peak with a sprig of dried moss spilling over the rim adds texture without paint. Letter the sign in the same off-white used across the set so the three shops read as neighbours.
🛍 Shopping guide
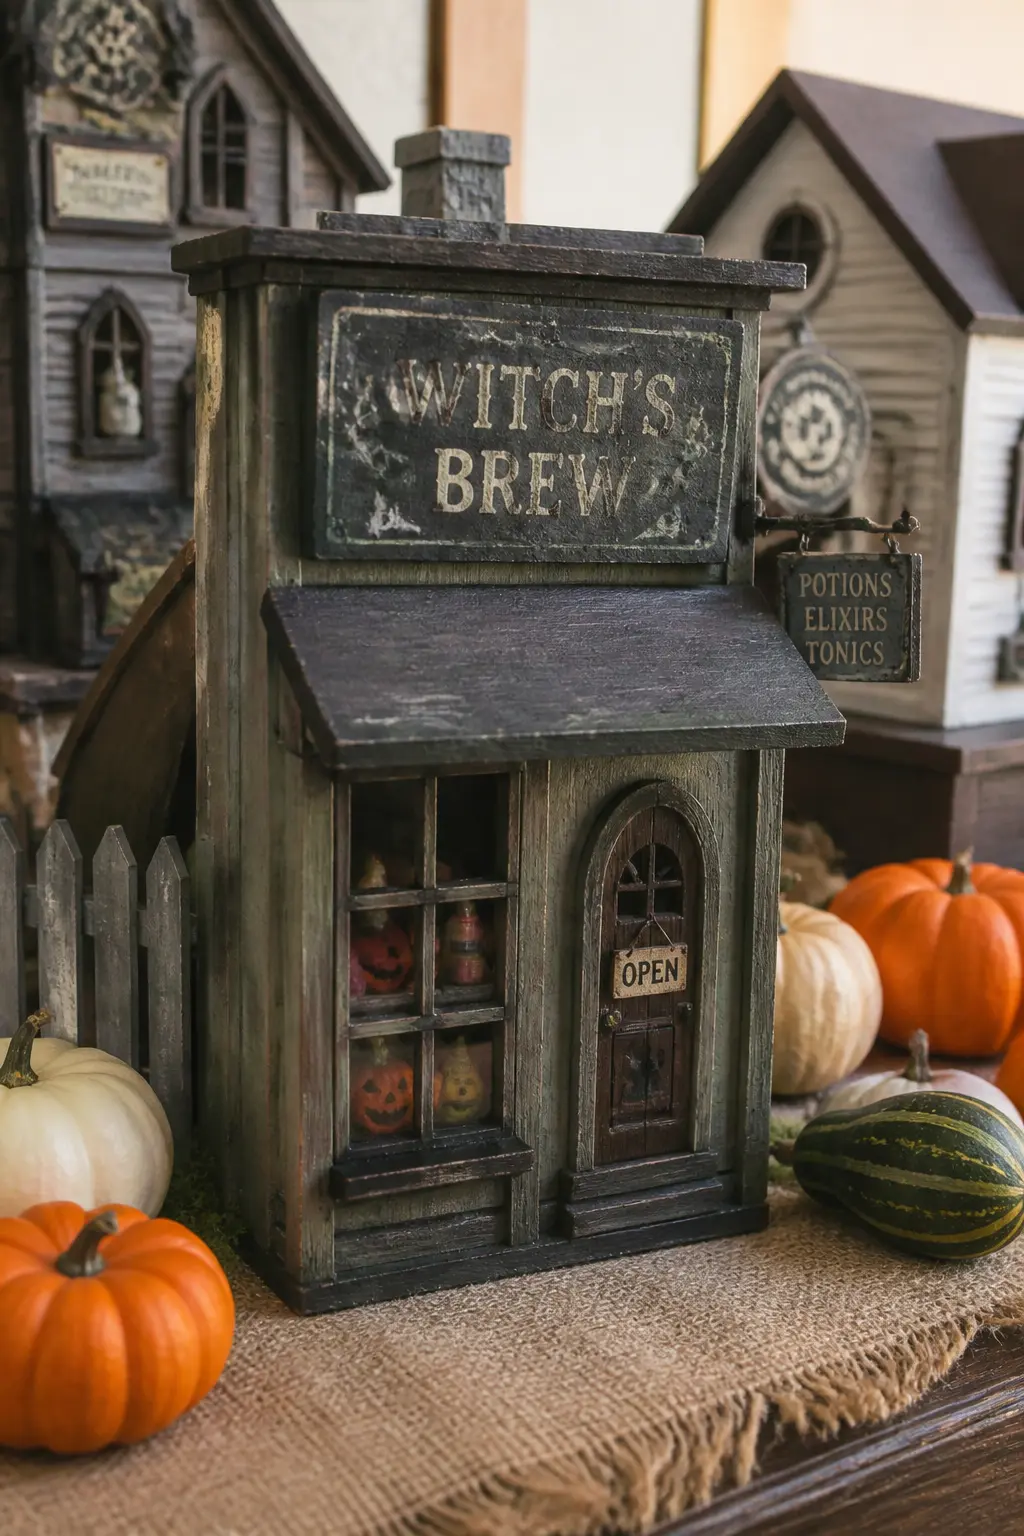
The Witch’s Brew Tavern Shop
Moss green is the colour that makes this one identifiable from across the shelf. Paint the facade in a muted olive green, then dry-brush a lighter sage over it while still slightly tacky for a weathered finish that takes two minutes.
The window display here gets pumpkins: small orange ovals painted on the black interior, stacked casually as if someone arranged a harvest window. A witch hat silhouette sits above the roofline, cut from a scrap and painted black.
The sign reads “Witch’s Brew” on a dark red painted strip. That accent colour appears nowhere else in the village, which makes this building the one the eye finds first. Finish the exterior with two tiny painted lanterns flanking the door, each one a simple rectangular shape with a yellow interior dot.
🛍 Shopping guide
The Haunted Residential Block
A village needs somewhere people supposedly live, and these three houses carry all the domestic detail that makes the shops feel inhabited. Shuttered windows, painted brick courses, a bare tree stenciled up one exterior wall.
Distress the white paint on these more than on the shops. Residents have been there longer. If you enjoy building atmosphere one object at a time, the guide to Halloween yard decorations staged like a real scene uses the same layered thinking at a larger scale.
The White Haunted House
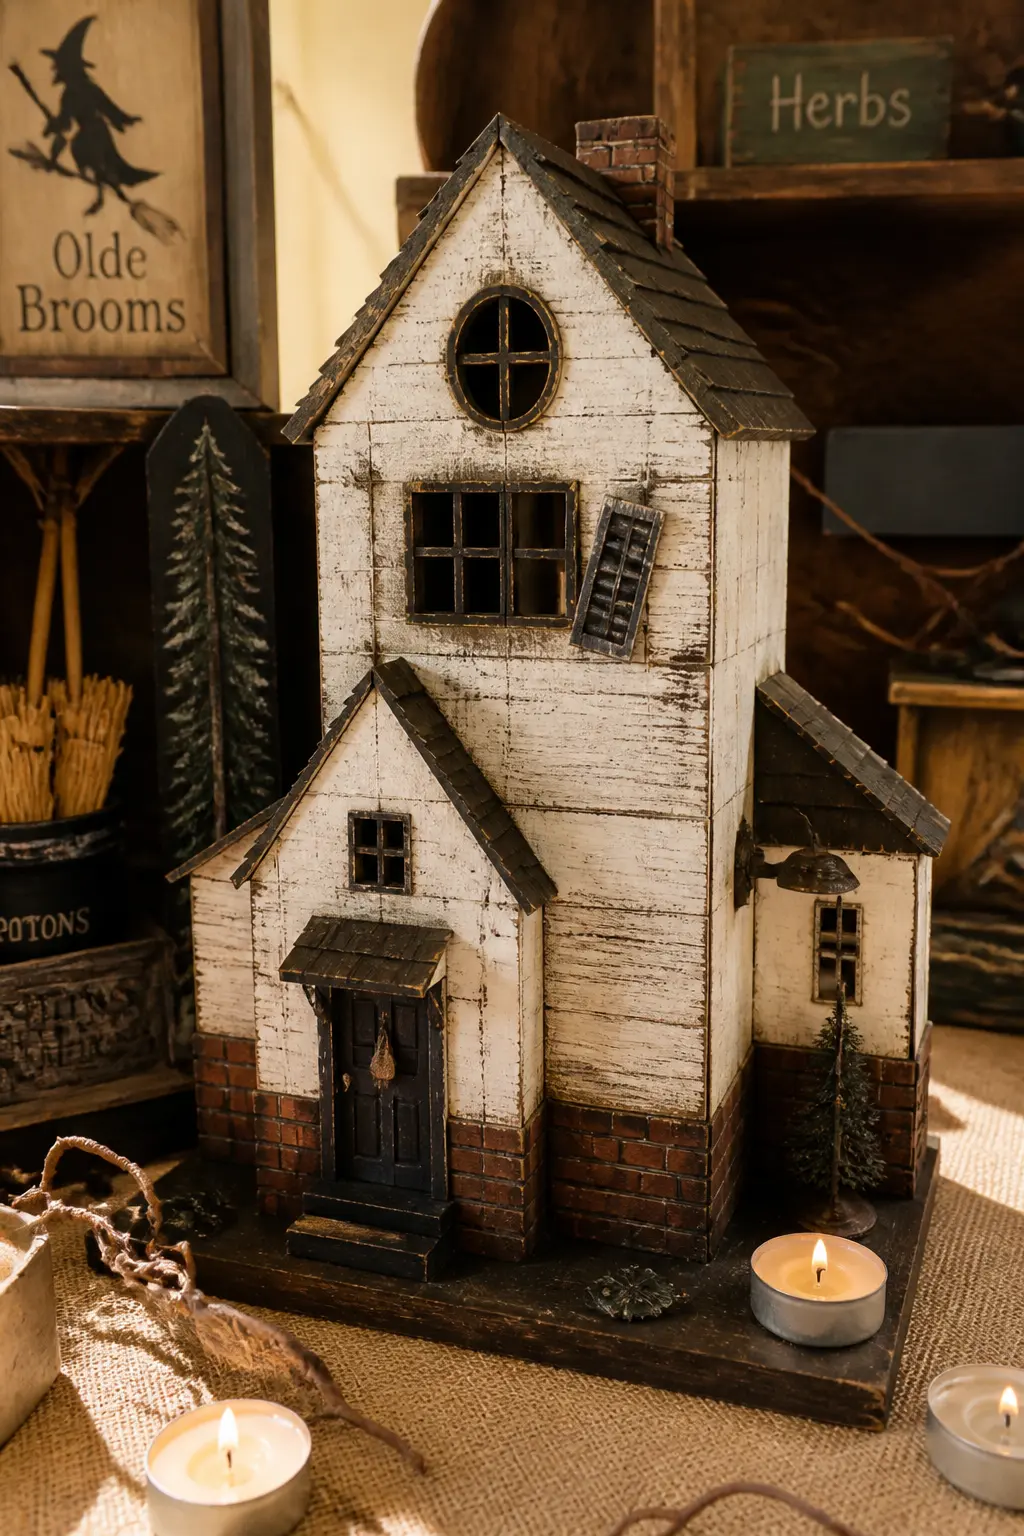
White is the unexpected choice for a haunted house, and it works because the distressing does all the spooky lifting. Paint the facade in an aged white, then drag a dry brush loaded with raw umber in short downward strokes along the edges and corners while the base coat is still slightly soft.
Paint brick courses in a muted terracotta on the lower third of the building using a flat brush held sideways. Add a broken shutter detail: two small rectangles of wood glued at a slight outward angle from the upper window, with a tiny painted cat face just visible behind the gap.
Two painted lanterns flank the front door, yellow ovals on thin black stems. A small bare branch pushed into a drilled hole at the base edge makes a dead garden tree. Painted ghost shapes in two downstairs windows complete the residents.
🛍 Shopping guide
The Narrow Victorian Townhouse
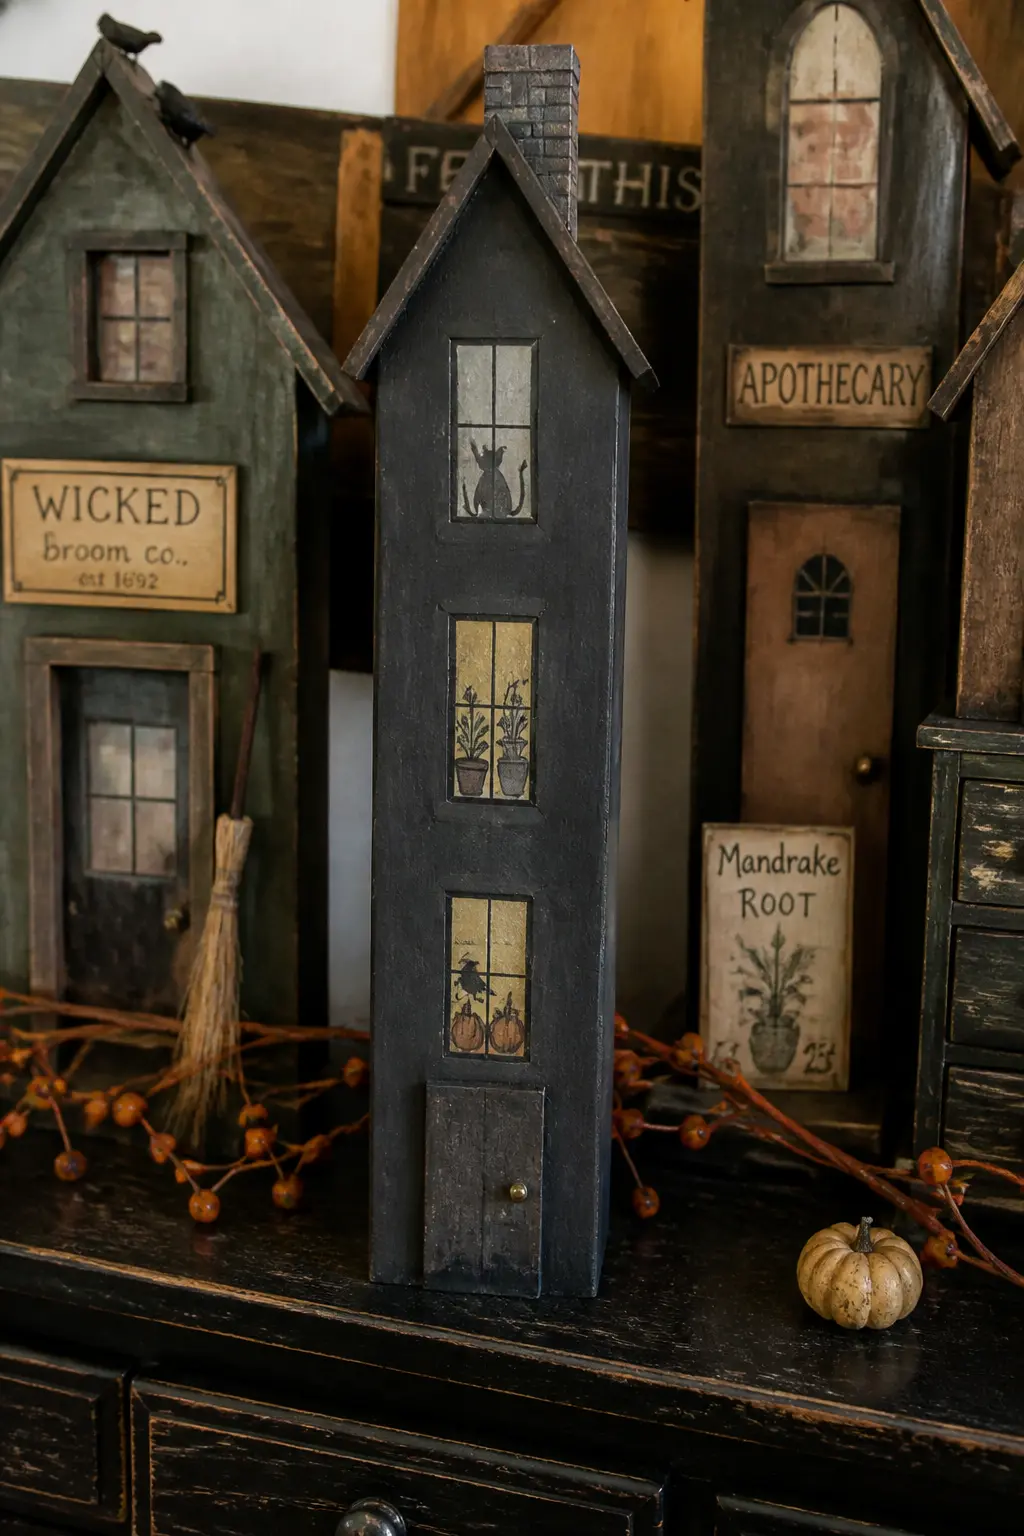
Tall and narrow reads as Victorian without a single ornament. Cut the main body at a 3:1 height-to-width ratio, which is more extreme than a standard house shape and immediately signals a different architectural era.
Paint it in a deep charcoal with the window trim picked out in dusty cream. Three windows stacked vertically on the facade give it a townhouse rhythm. Paint a wreath on the upper window, a candle in the middle one and a spider on a thread in the lower one, each scene simple enough to complete in five minutes.
A small painted number plate next to the door, just two digits in white on a black square of craft foam, adds the domestic detail that grounds the whole piece. It makes the village feel like a real address, which is the uncanny note that makes people look twice.
🛍 Shopping guide
The Cottage With the Warped Roof
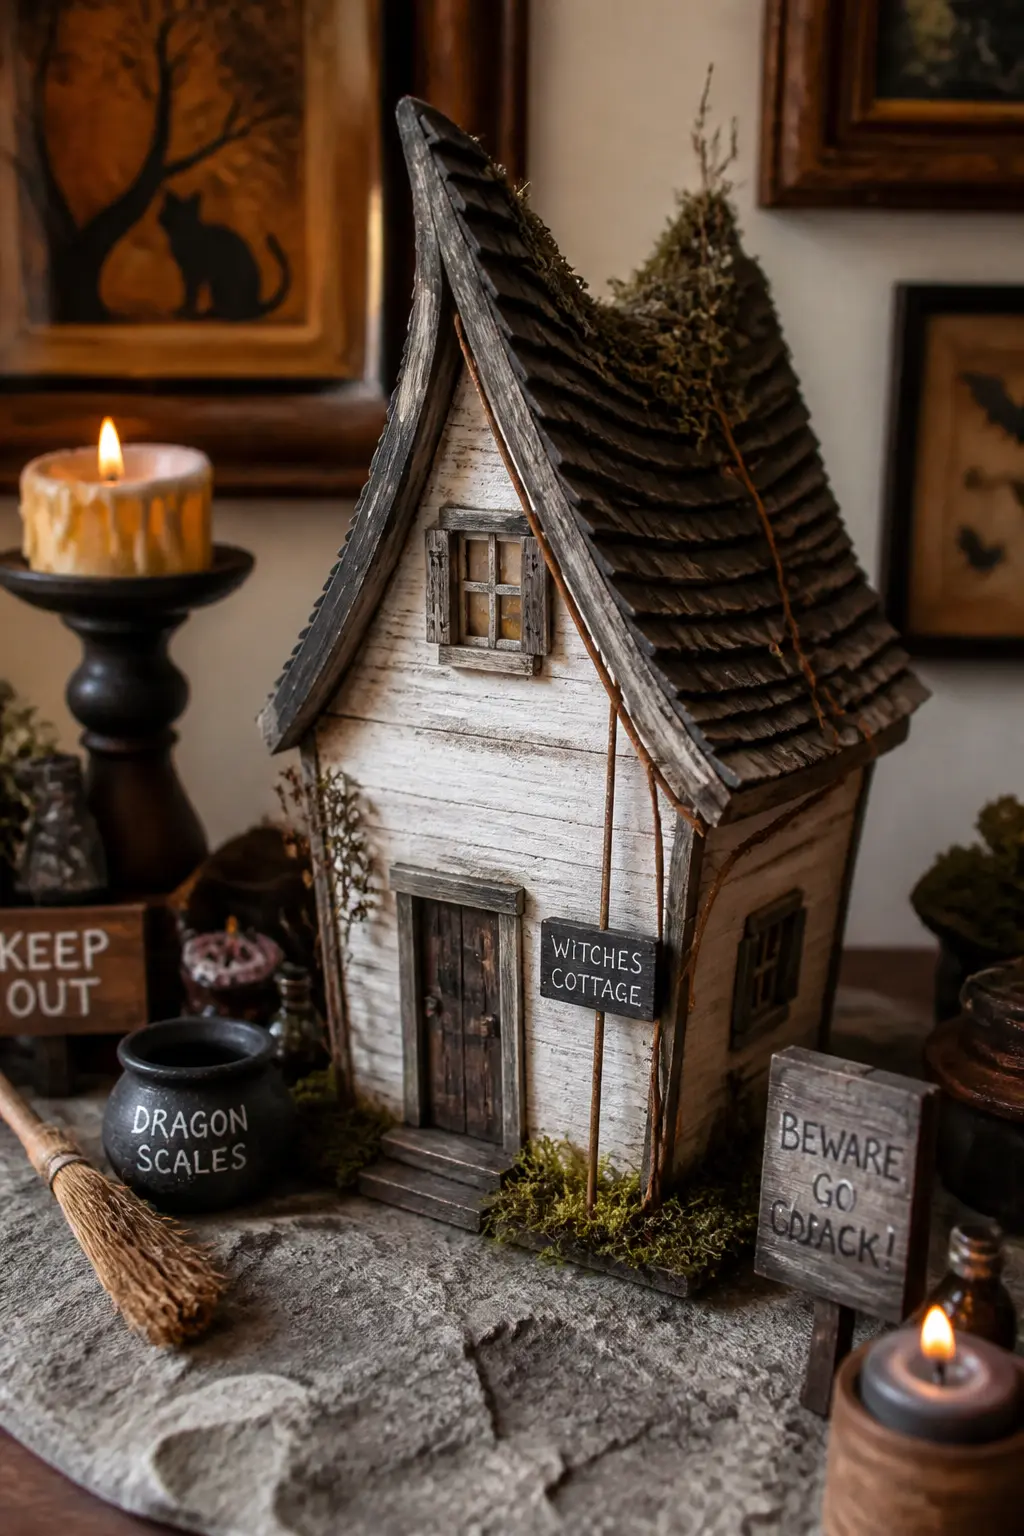
Deliberately off-kilter rooflines are the design shortcut that signals old and slightly dangerous without any complex woodworking. Cut two roof pieces so one side is noticeably longer than the other, glue them at a slight off-centre angle and sand the peak until it looks like it has settled over centuries.
Paint the cottage in a warm mushroom beige, which sits between the tobacco of the Spell Books shop and the white of the haunted house and ties them together as a neighbourhood. A stone-effect window surround, painted in grey with a dry-brushed white highlight, frames a tiny painted interior scene of a rocking chair silhouette.
Finish the base with a ring of dried dark moss pressed against the foundation before sealing, as if the garden has crept in. That one texture addition is what separates a painted box from a building with history.
🛍 Shopping guide
The Apothecary and Laboratory Row
These are the buildings where things get made rather than sold. The aesthetic leans into bottles on painted shelves, bubbling cauldron silhouettes behind arched windows, and roof details that suggest something scientific and slightly dangerous.
A copper-wash paint over the trim reads as old pipe fittings. It costs nothing extra if you already have brown and gold on the table.
The Apothecary With the Copper Roof
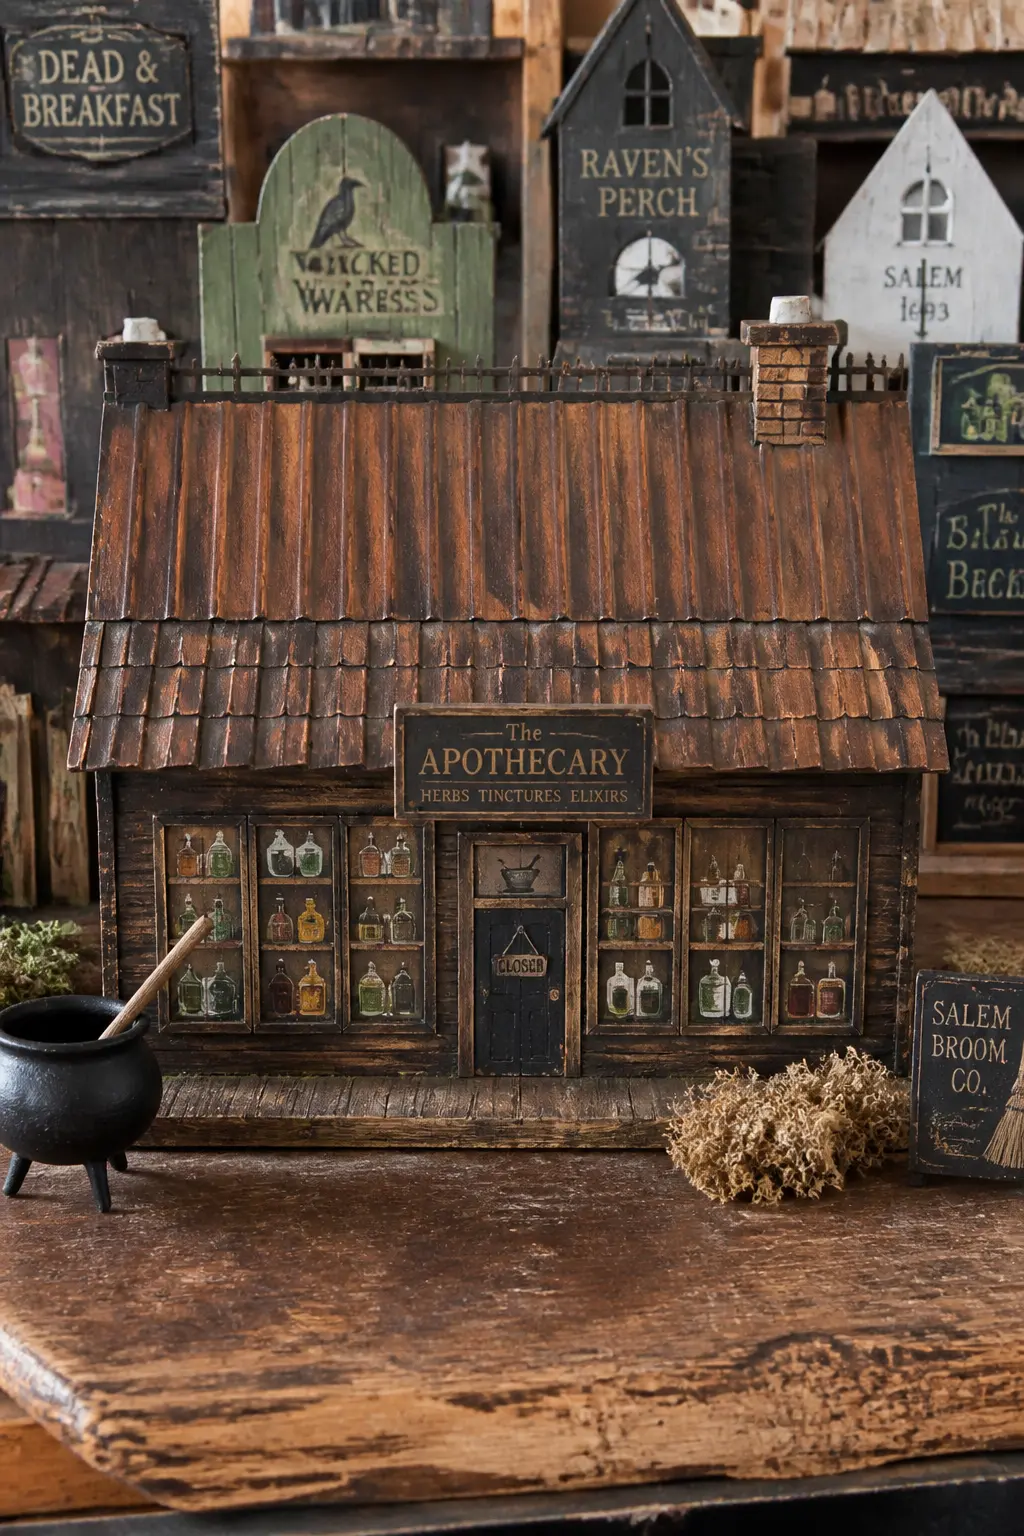
A copper-toned roof is a single paint-mixing decision: brown plus gold plus a touch of green, dry-brushed over a darker base coat. The result reads as aged metal and costs nothing extra if both colours are already on the table.
Build the apothecary slightly wider than the shops in the witch district so it reads as a workroom rather than a retail space. Paint rows of small bottle shapes behind the arched window, varying their heights and colours: amber, deep purple, clear with a green stopper.
A painted mortar-and-pestle symbol above the door functions as a sign without needing lettering. If the hand-lettering in the rest of the set has been good practice, add “Est. MDCCC” in tiny Roman numerals below it. That detail rewards the reader who looks closely.
🛍 Shopping guide
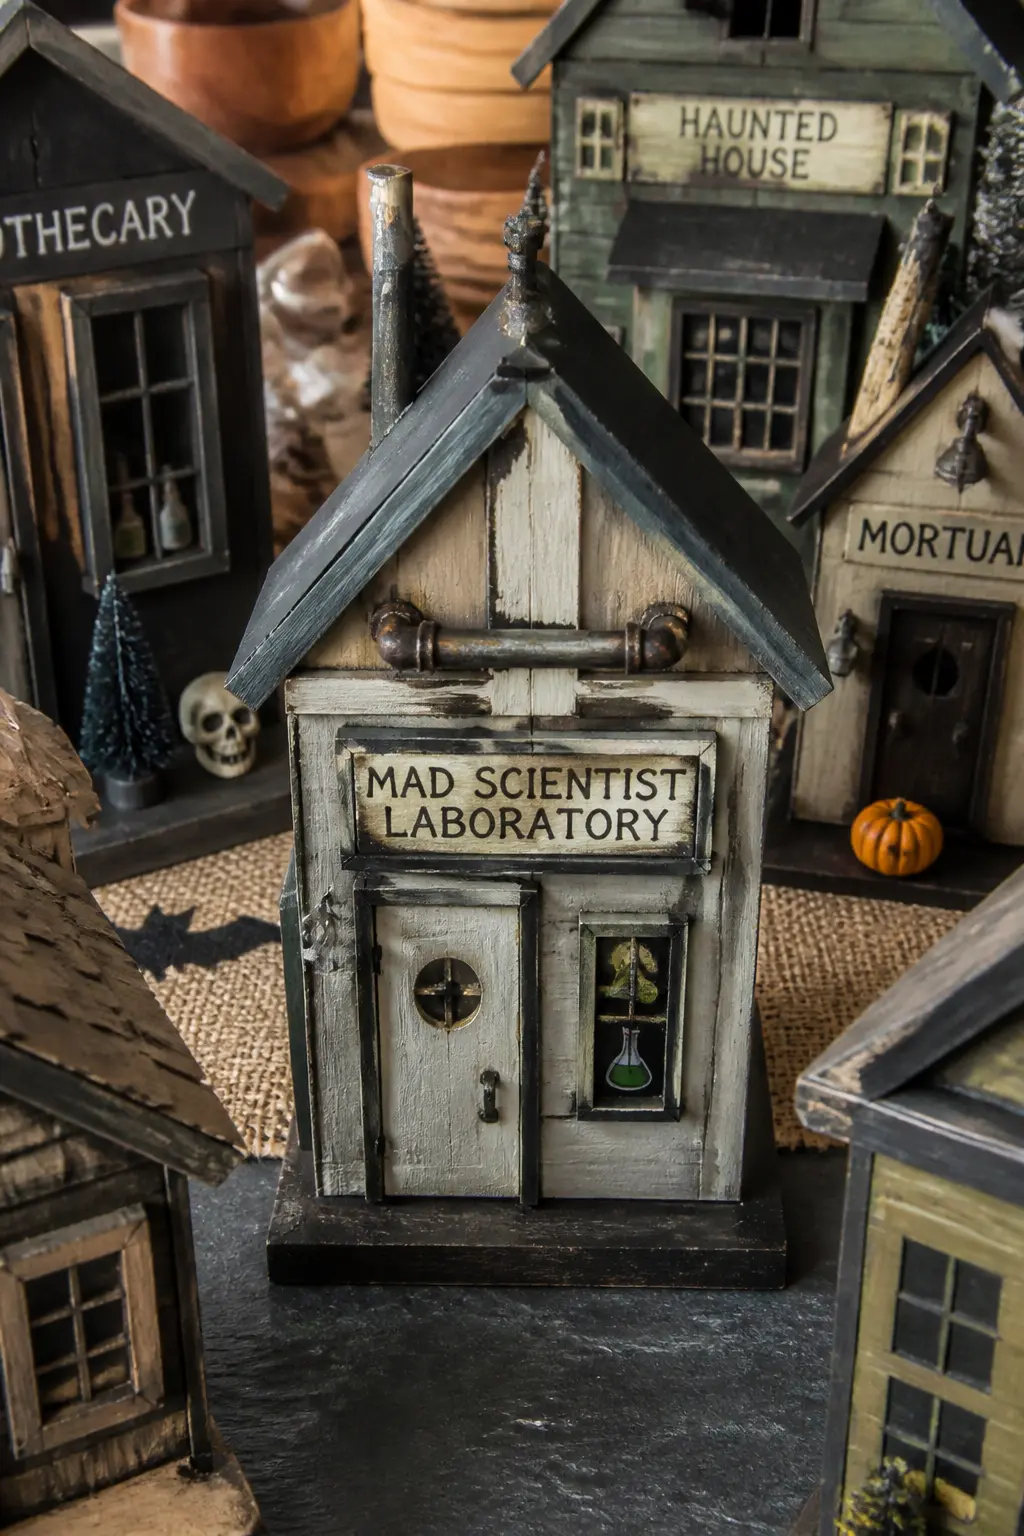
The Mad Scientist Laboratory
This building leans industrial rather than witchy. Paint the lower half in a dark iron grey and the upper half in cream, suggesting a structure that was extended upward by someone who ran out of matching materials. That visual inconsistency makes it feel genuinely eccentric.
The window detail here is the most elaborate in the village: a painted silhouette of a tall flask with a painted electric-arc line in yellow-white connecting it to nothing visible. Keep the strokes loose. Precision would undermine the chaotic character of the building.
Glue two small lengths of thin wooden dowel horizontally above the door to suggest a pipe system. Paint them the same copper tone as the apothecary roof, and the two buildings read as operated by the same person from different ends of the same obsession.
🛍 Shopping guide
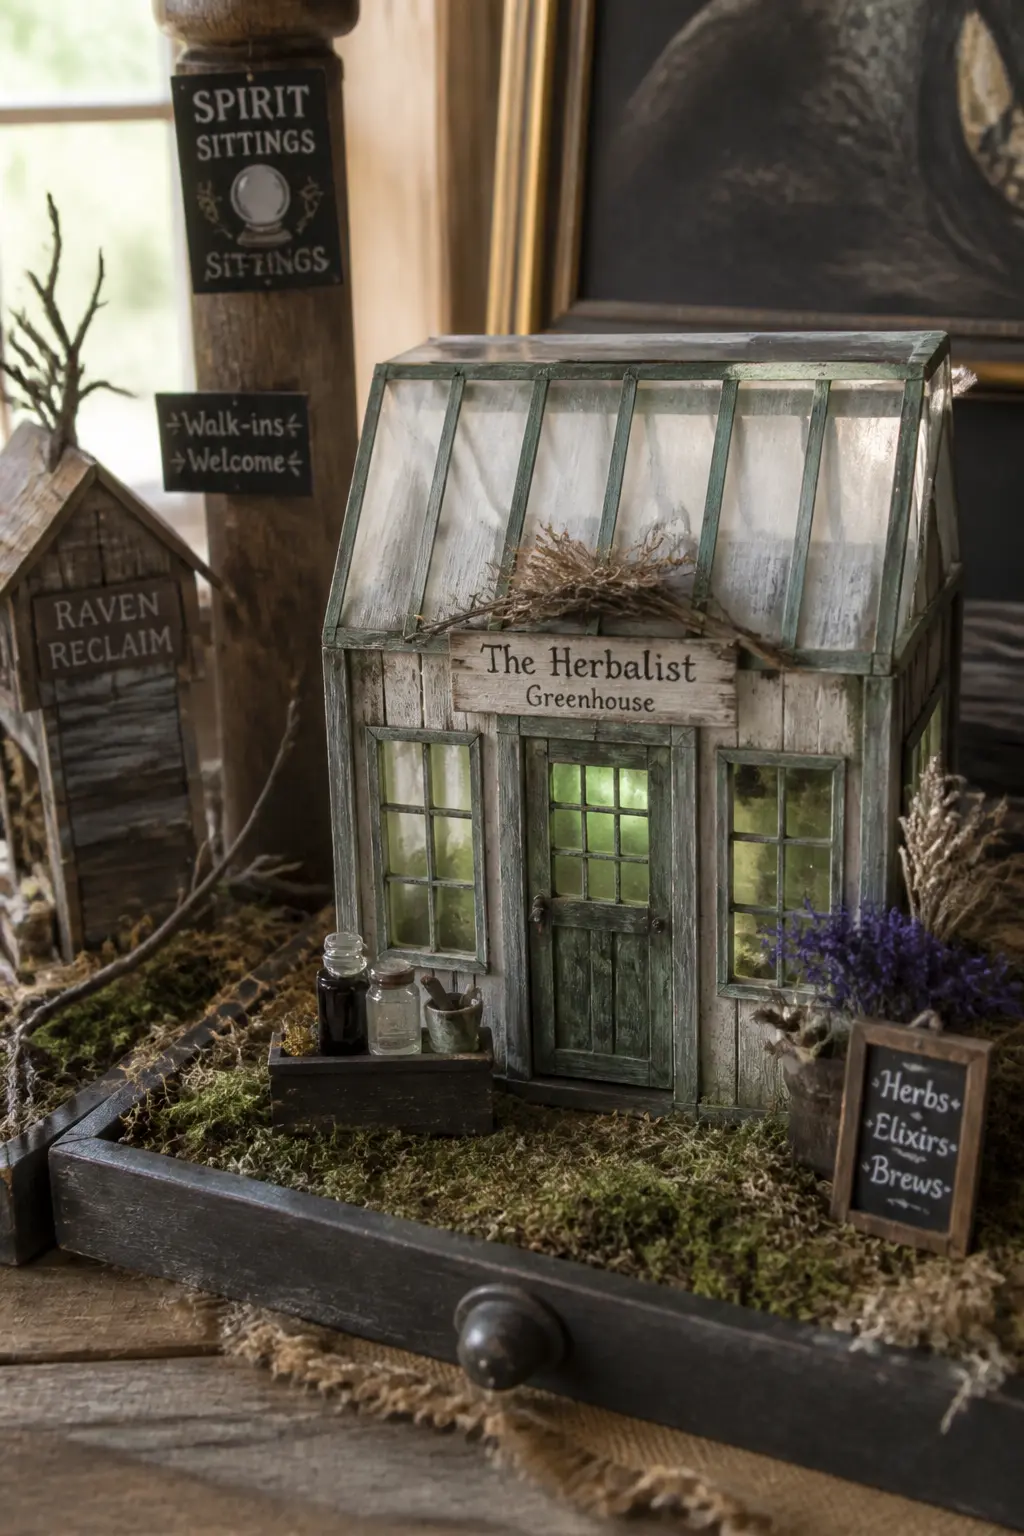
The Herbalist Greenhouse
A greenhouse in a Halloween village reads as sinister in the best way: what, exactly, is growing in there. Build it as a low wide structure with a shallow angled roof, which differentiates it from every vertical building in the set.
Paint the frame lines in a dark forest green to suggest metal glazing bars. The window interior is painted in a slightly glowing yellow-green, as if a grow-light is on behind the glass, achieved by dry-brushing yellow over a lime green base on the black painted interior.
Press a tiny sprig of dried eucalyptus or a few dried herb stems under a small bead of clear gel glue at the roofline to suggest something escaped through a gap. One plant tendril going rogue tells the whole story. For more ideas using natural materials in unexpected places, the piece on DIY living room decor from tree branches uses a similar instinct.
🛍 Shopping guide
The Graveyard Gate and Chapel
Two structures anchor the edge of the village and signal where it ends. They sit lower and darker than the shops, and they do not need a sign. The silhouette does all the work.
Cut the chapel roof at a steeper angle than the houses. That single geometry shift reads as sacred, or at least unsettling, immediately.
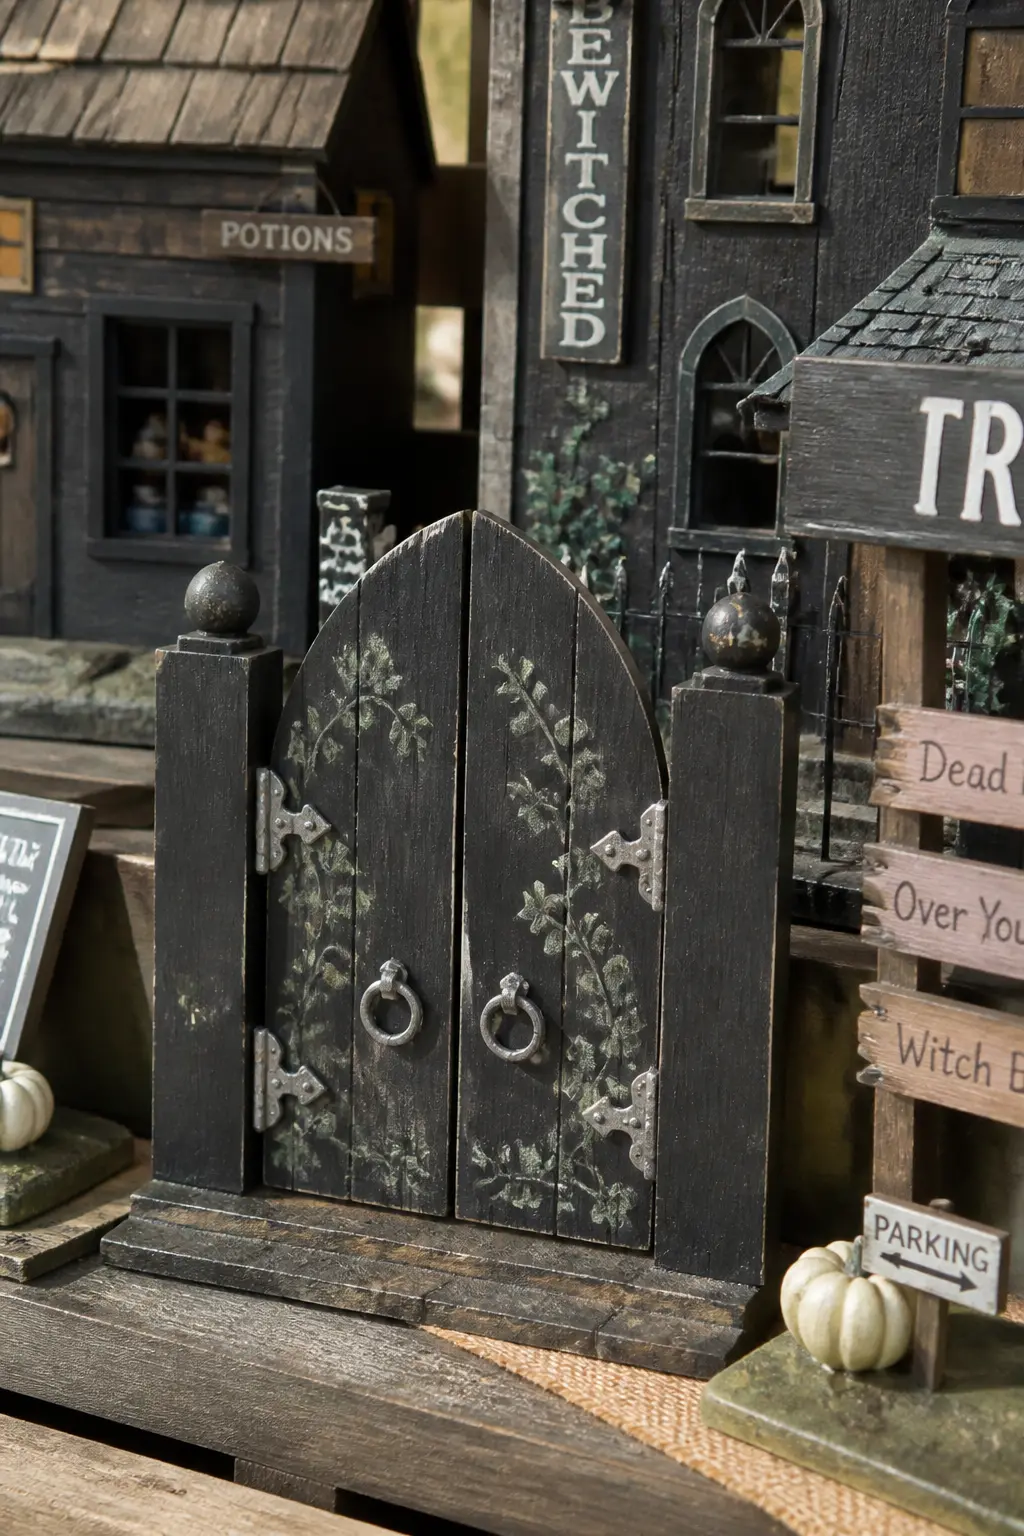
The Graveyard Gate
The gate is not a building: it is a flat facade with two posts and a crosspiece, painted black, suggesting an entrance to something that extends beyond the edge of the shelf. That implied space beyond the frame is what makes it effective.
Cut two rectangles for posts, a thin strip for the top bar and three shorter strips for vertical pickets. Assemble them on a scrap of wood base painted as a stone path. The whole structure is flat and sits in front of the chapel, one step lower on the shelf.
Paint a small iron-look hinge on each post using a dry brush loaded with silver over black. Add a painted ivy vine climbing the left post in very dark green with even darker leaf shapes. Keep the ivy sparse: two or three visible leaves, not a full wreath. Restraint is what makes it look designed.
🛍 Shopping guide
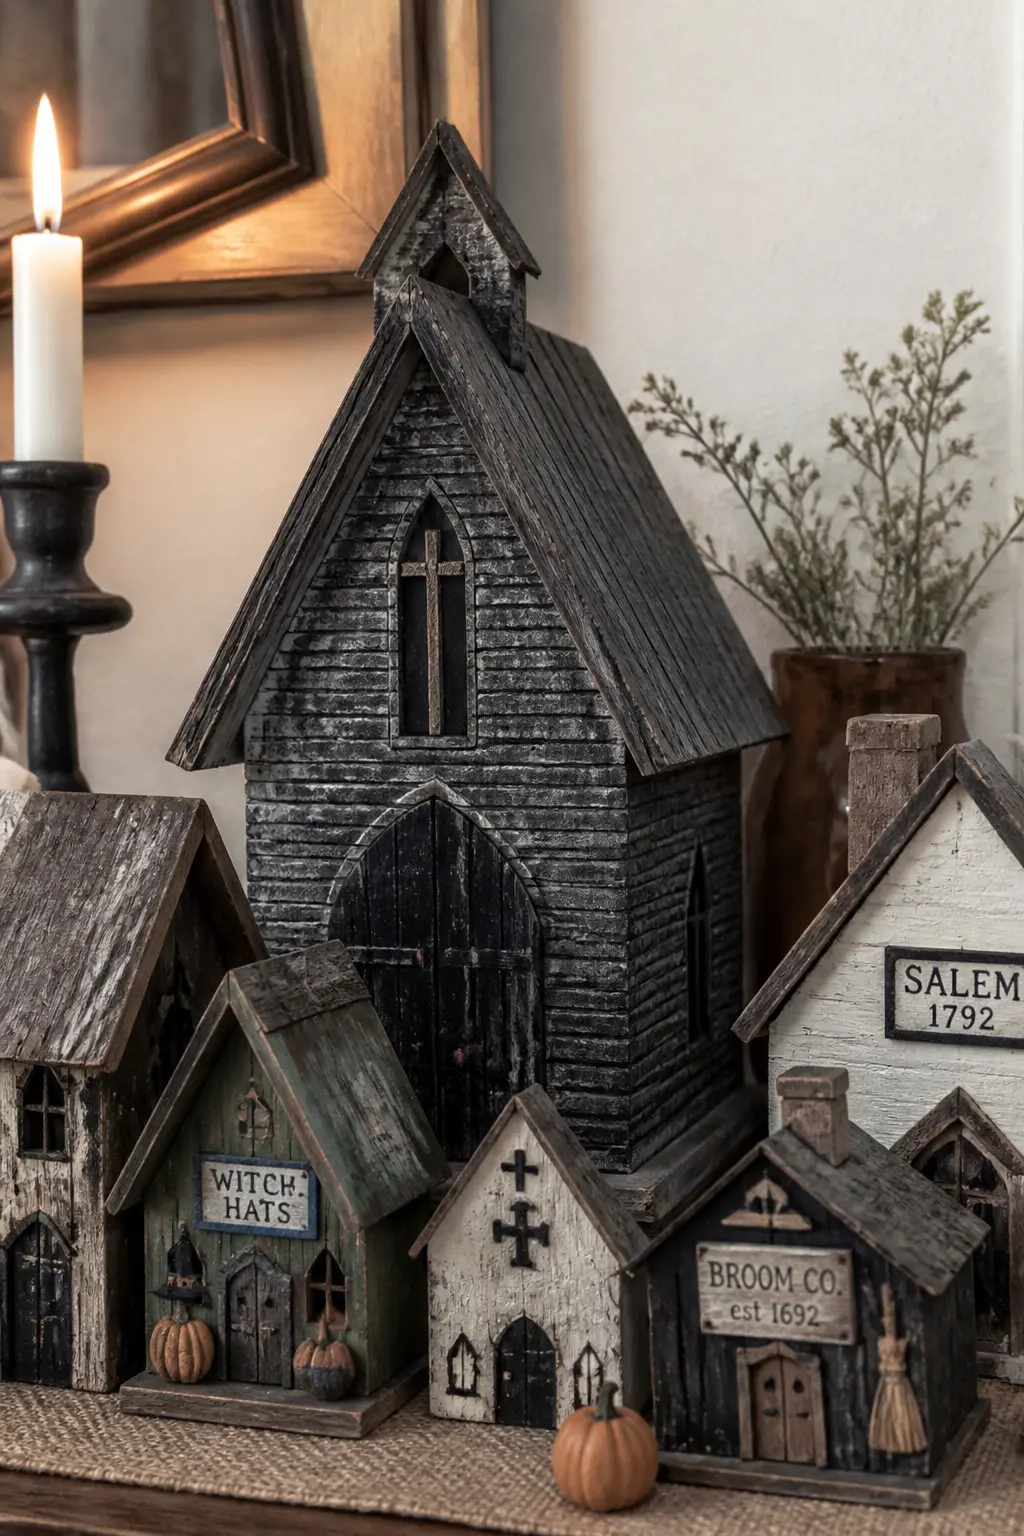
The Stone Chapel
Build this as the darkest and most austere piece in the collection. A very steep roof angle, no sign, no window display colour: just a single narrow painted window with a cross shape in the glazing bars.
Paint the exterior in a cold stone grey, then stipple a darker grey randomly across the surface while still wet to break up the flatness and suggest individual stone blocks. The technique takes three minutes and requires only a crumpled piece of cling film pressed into the wet paint.
A small bell shape cut from craft foam and painted black glues above the door. No bell tower needed: the silhouette of the shape alone reads as ecclesiastical. Place the chapel at the far right or far left of the display so it marks the end of the village as a final punctuation mark.
🛍 Shopping guide
The Inn and the Tavern
Every good village has a place to eat and a place to sleep, and these two buildings give the collection its warmth. Warm ochre paint, a painted lantern above the door, a sign that swings on two tiny screw eyes: these details invite the eye in rather than warning it away.
They sit best in the centre of the display, flanked by the darker buildings, because their colour acts as a visual anchor. Think of them as the reason the village exists at all.
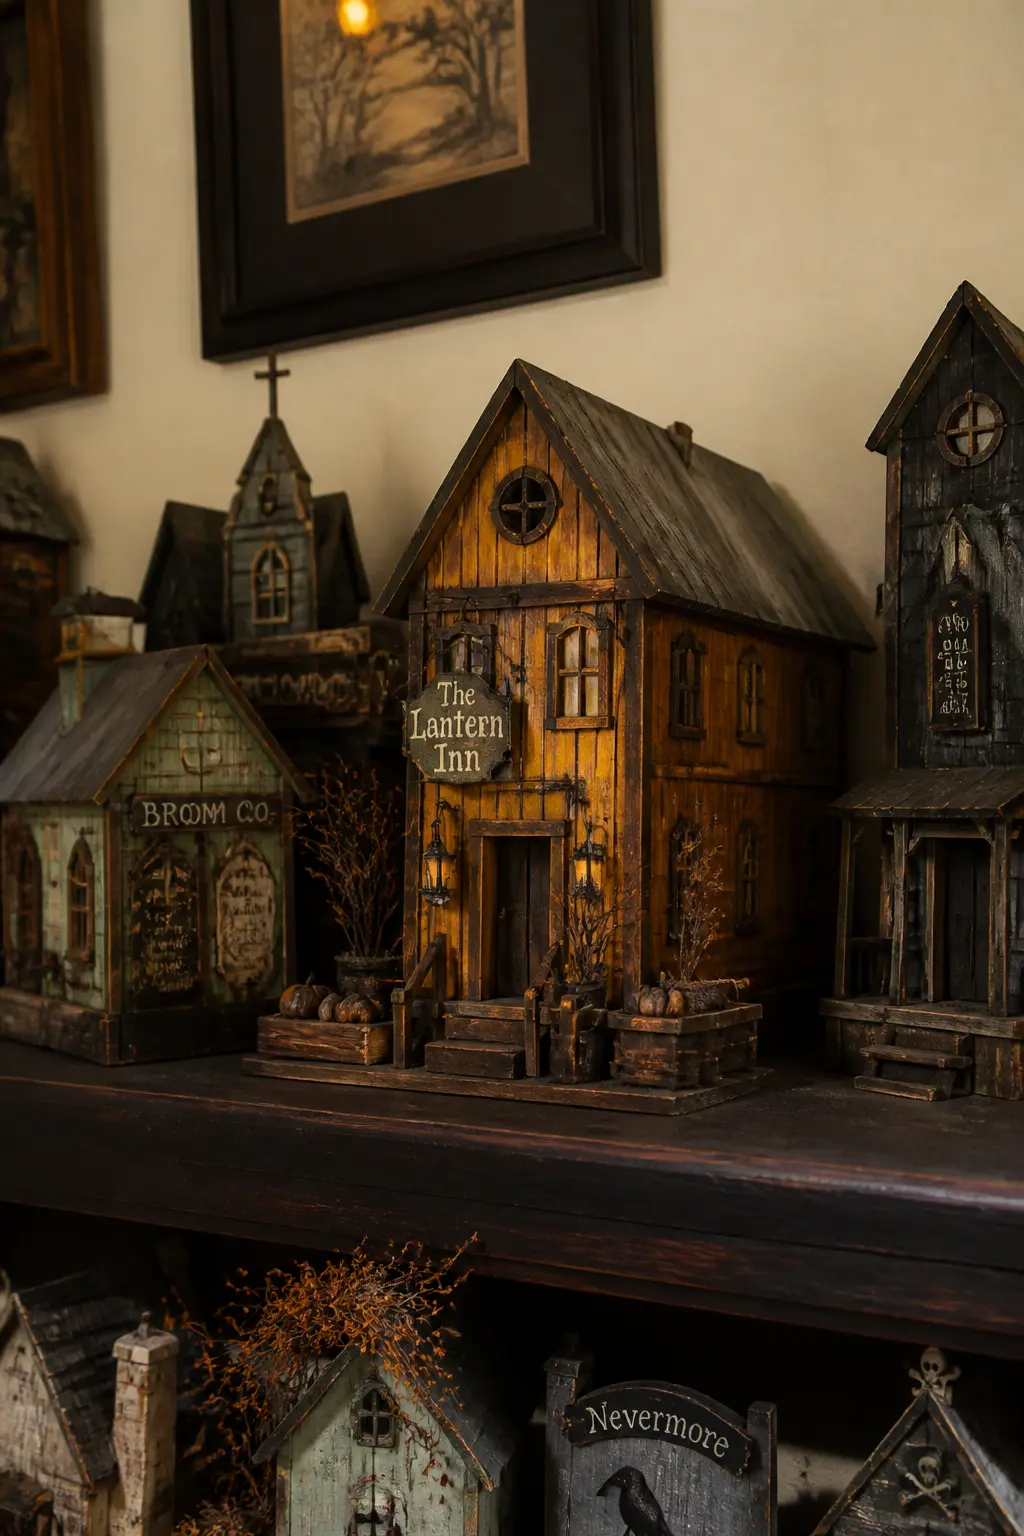
The Lantern Inn
Warm ochre paint is the first decision here, and it carries almost all the work. On a shelf of browns, greys and greens, this building pulls the eye to the centre and signals warmth, which is the architectural role of an inn.
Build it with a second-storey overhang: glue the upper section slightly forward of the lower so it casts a real shadow on the facade below. That small depth addition makes the whole village feel more three-dimensional without requiring any new technique.
Two painted lanterns flank the door, each one a rectangle with a glowing yellow interior. Paint the inn sign as a swinging rectangle hung on two screw eyes with a short loop of black thread: the movement possibility, even though it never actually swings, makes the object feel alive. Letter it “The Black Lantern” or leave it with only a painted lantern symbol and no words.
🛍 Shopping guide
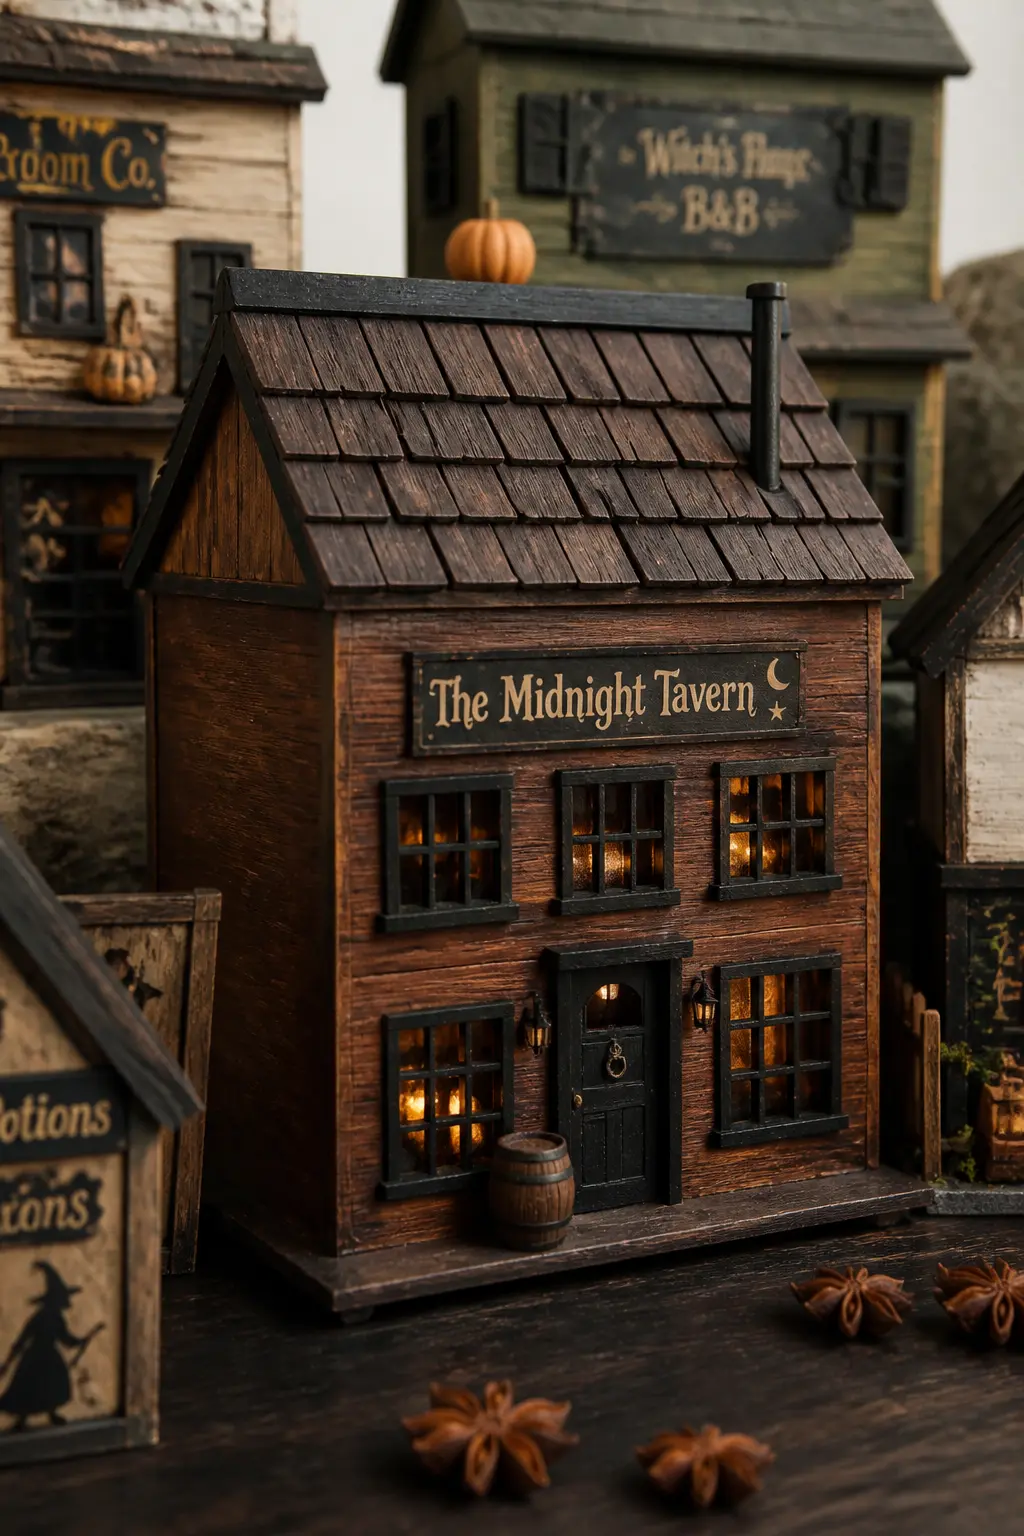
The Midnight Tavern
Where the inn is welcoming, the tavern is a little more ambiguous. Paint it in a deep rust-brown with black window trim, which keeps the warmth of the residential block but adds an edge that suits the commercial side of the street.
The window here shows a painted interior scene: three small mug silhouettes on a counter, a skull in the back corner of the room. The scene takes five minutes to paint with a fine brush and reads immediately as a place where interesting things happen after midnight.
A barrel shape glued beside the front door, cut from a short length of wooden dowel with lines scored around it before painting, adds a floor-level prop that makes the building feel occupied. It is also the smallest object in the whole village, which makes it rewarding to spot on the second look.
🛍 Shopping guide
The Tower and the Windmill
Height variation is what turns a row of similar boxes into a skyline. These two structures are the tallest pieces in the set, and neither one requires complicated joinery: the tower is a taller rectangle with a peaked cap, the windmill gets four flat blade shapes glued at angles.
Build these last so you can judge how tall they need to be against the pieces already on the shelf.
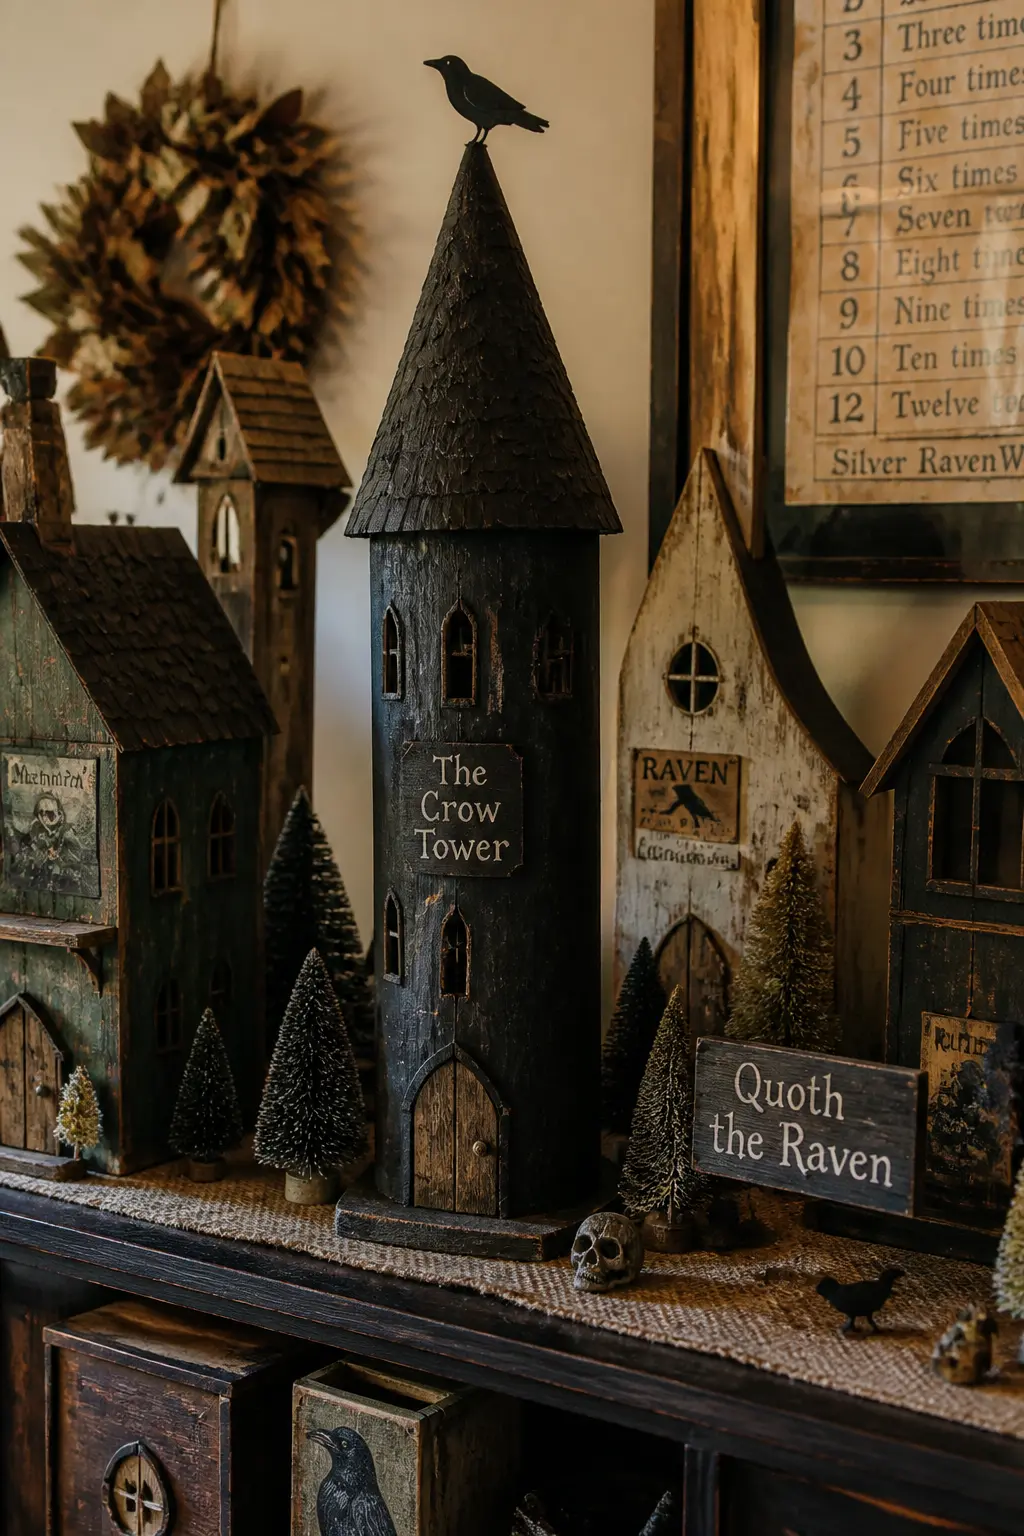
The Crow Tower
The tower is the tallest piece in the village and earns that height by being the simplest in plan: a narrow rectangle with a conical cap, built from a standard craft board strip with a cone of rolled card glued to the top.
Paint it in a near-black with a very dry brushing of dark brown to suggest old stone. Three tiny windows, each one a painted slit rather than an arch, are placed at irregular heights rather than evenly spaced, which reads as organic construction over time rather than a designed facade.
A paper crow cutout, painted flat black, glues to the peak of the cone with the wings angled slightly upward. One crow on the highest point of the display grounds the whole skyline and tells the viewer exactly what kind of village this is. Paper birds can be cut freehand from a scrap of card in two minutes.
🛍 Shopping guide
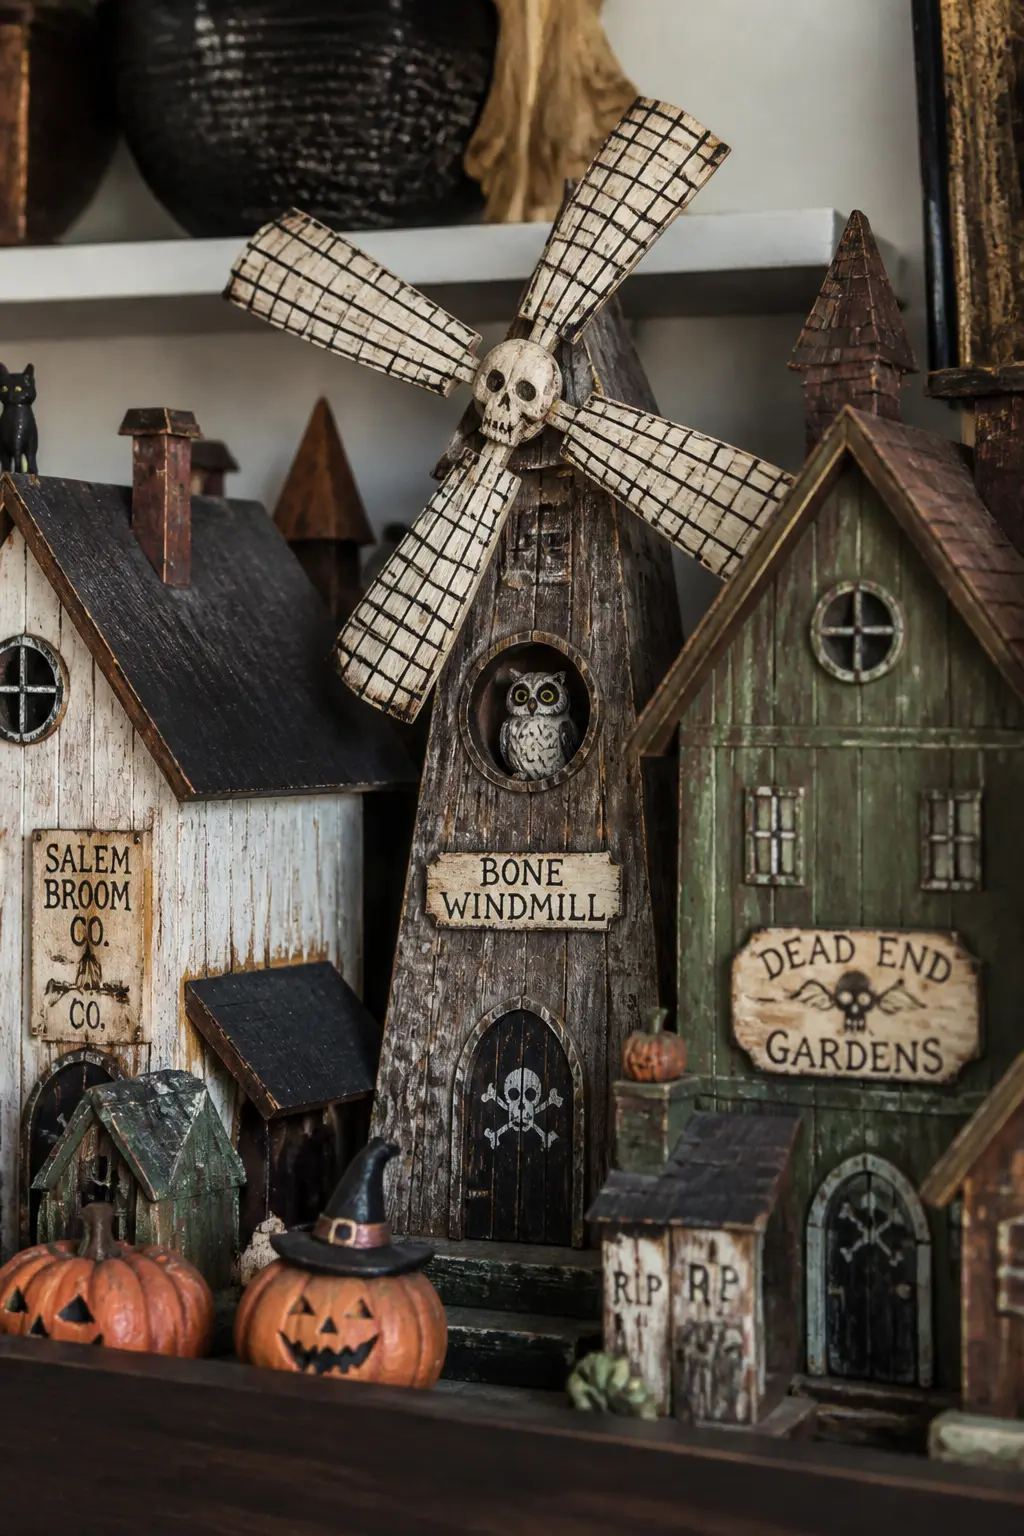
The Bone Windmill
Build the windmill body as a slightly tapered rectangle, wider at the base than the top, to suggest a traditional mill silhouette. The four blades are the key detail: cut them as long thin rectangles and score a crosshatch pattern into each one before painting in a worn cream colour, suggesting aged wood or, if the imagination runs that way, old bone.
Glue the blades through a central hole in the upper facade so they radiate at the four diagonal compass points. They do not spin, which is fine: the visual of blades at 45-degree angles reads as motion stopped.
Paint a small painted owl in the single round window below the blades. The owl is three brushstrokes: a vertical oval body, two ear tufts, two round eyes. Place the windmill behind and to one side of the main street buildings so the blades clear the roofline of everything in front of it. That placement solves a display problem and creates depth at the same time.
🛍 Shopping guide
The Finishing Details That Make It a Collection
A village is more than its buildings. Two small additions, a hand-painted town sign and a bare-branch lamp post, complete the scene without requiring any new woodworking skills. Both use the same materials already on the table.
These are also the pieces to build first if you want to test your palette before committing it to a full house. For more ideas on using raw materials to create decor that looks designed, the piece on fall crafts for adults that look like decor is worth a read alongside this one.
Frequently Asked Questions
What wood should a beginner use for DIY Halloween village houses?
Thin craft board (sometimes sold as basswood sheets or project board) in 3mm to 6mm thickness is the easiest starting point. It cuts with a craft knife on a cutting mat, takes craft paint well without priming and glues cleanly. Balsa is softer and easier to cut but dents too easily for display pieces. Avoid MDF for small-scale village work: it absorbs paint unevenly at the edges and is heavy for the scale.
How do you make the houses look old without a wood burner?
Dry-brushing is the fastest route. Load a stiff brush with a colour two shades darker than the base coat, wipe most of it off on a paper towel until almost nothing transfers, then drag it along the edges and corners of the building. A crumpled piece of cling film pressed into slightly wet paint creates a stone or aged plaster texture in seconds. Sanding the edges of cut pieces before painting softens the outline and makes the shape read as worn.
Can the village be displayed outdoors?
Not reliably. Unpainted craft wood swells when wet, painted joints separate in frost, and even sealed pieces will deteriorate after one damp season. These are indoor display objects. For outdoor Halloween scenes, the article on Halloween yard decorations staged like a real scene covers weather-resistant approaches.
How do you store the village between seasons without damaging it?
Seal every piece with two coats of matte medium or a matte acrylic sealer spray before storing. Wrap each building in a sheet of newsprint or tissue, not bubble wrap, which can lift soft paint. Store flat in a shallow lidded box, not stacked, and keep pieces from touching each other. A shoebox with dividers cut from corrugated card works well for a full fifteen-piece village.
How long does it take to build one building?
Allow roughly two hours per building across two sittings: one session to cut, assemble and apply a base coat, one session the following day to paint details when the base coat is completely dry. Rushing the second session onto a damp base coat causes the detail colours to lift. The lamp post and sign post take thirty to forty minutes each. A full village built one piece a week spreads the project across four to five weeks without any single sitting feeling like a chore.

9 baby first halloween crafts that capture tiny footprints, handprints and keepsakes in under an hou

31 easy Halloween decorations that need no ladder, no tools, and no helper. Put the whole house toge
32 fall halloween decor ideas that layer onto your existing autumn setup, no full swap required. Dar
Leave a Reply