

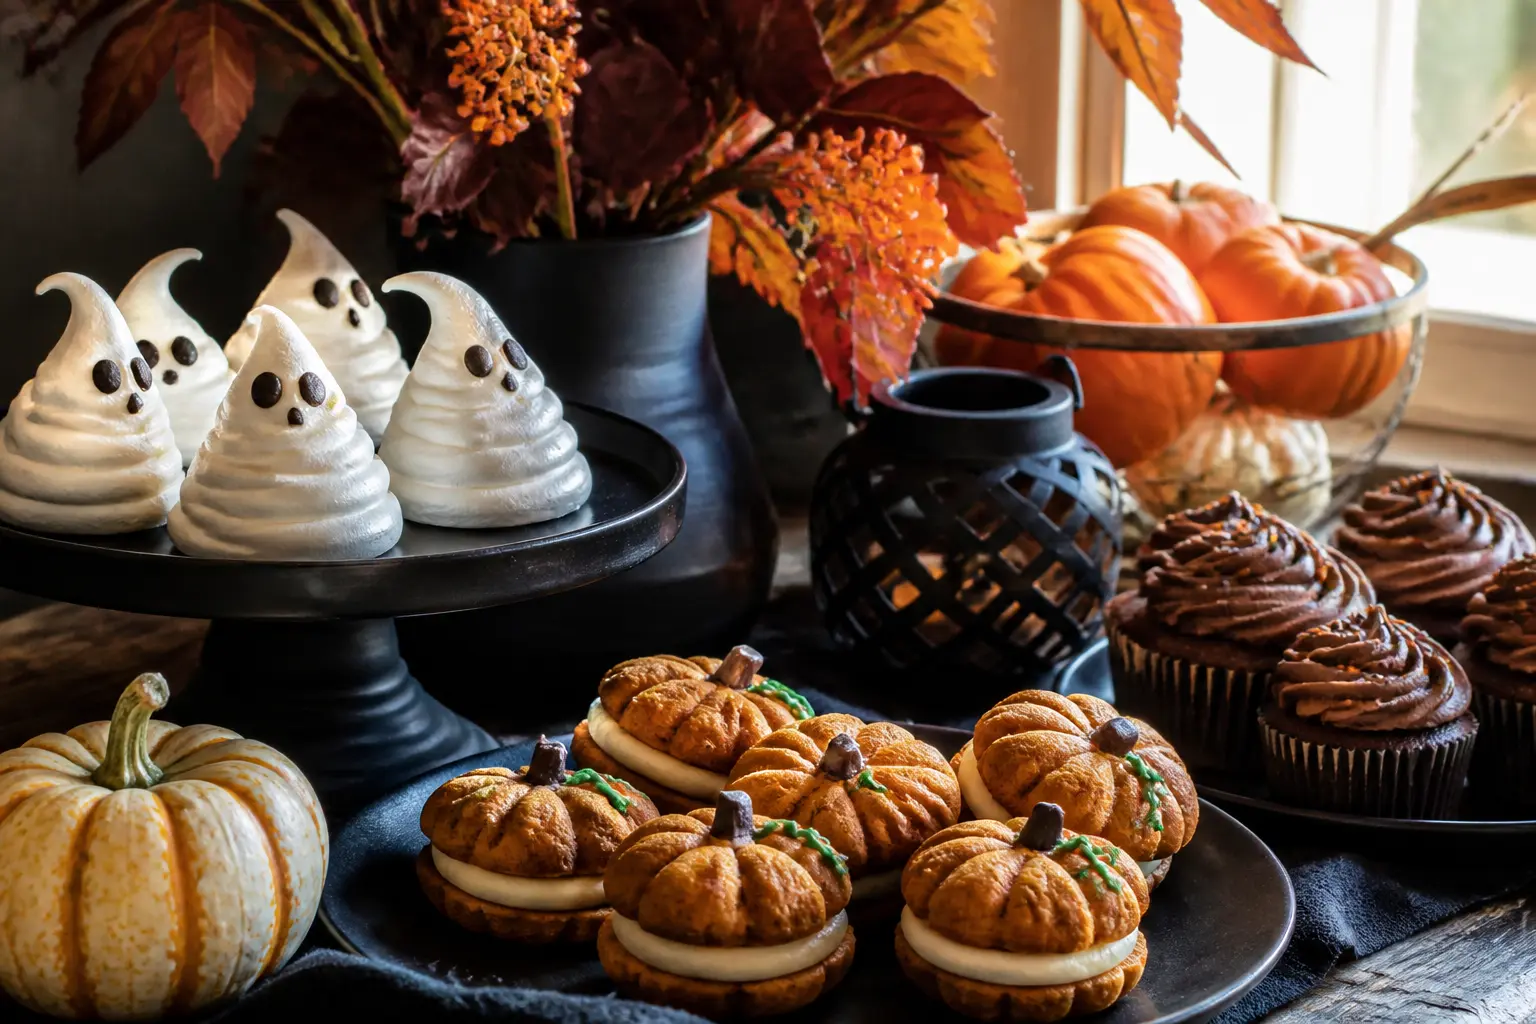
These halloween treats ideas skip the oven entirely. Every single one is assembled, dipped, layered or drizzled, so the kitchen stays cool and the table stays full.
They are sorted below by where they actually land at a party: individual handheld pieces first, then cups and glasses, then the big centrepiece items you set down and let guests help themselves from.
A note on the punch recipe: it contains no alcohol, so it suits every guest at the table without adjustment. If you want to spike it, stir in your spirit of choice just before serving and keep a non-alcoholic portion separate for any designated drivers or guests who do not drink. Drink responsibly.
Common allergens appear in the relevant recipe intros. Most of these contain dairy, gluten or tree nuts in some form, so read the label on every pre-made product you buy. Once you have done that, the rest is just assembly.
Need something to keep guests busy between bites? 30 Unforgettable Halloween Party Ideas and Games has the entertainment side covered, and 23 Hilarious Halloween Games for Adults is worth bookmarking for after the food is gone.
This post contains affiliate links. If you buy through them, I may earn a small commission at no extra cost to you.
- Ghost Strawberries
- Spider Oreo Cookies
- Monster Marshmallow Pops
- Witch Hat Cookies
- Mummy Pretzel Rods
- Eyeball Donut Holes
- Ghost Banana Pops
- Bat Wing Pretzels
- Poison Apple Cake Pops
- Jack-O-Lantern Clementines
- Pumpkin Patch Pudding Cups
- Candy Corn Parfait
- Graveyard Dirt Cups
- Bloody Hand Punch
- Marshmallow Ghost Hot Chocolate
- Frankenstein Rice Cereal Bars
- Spooky Popcorn Mix
- Caramel Apple Slice Board
- Web-Topped Cupcakes
- Skeleton Fruit Tray
- Candy Bark
- Frequently Asked Questions
Ghost Strawberries
These belong at the front of the table where people grab one before they even sit down. The white chocolate shell sets firm, the berry underneath stays juicy, and the whole thing looks genuinely spooky without any effort. Contains dairy and soy (white chocolate). Make them the night before and refrigerate uncovered so the coating stays dry.
Ingredients
- 24 large strawberries, stems on
- 340 g (12 oz) white chocolate chips or white candy melts
- 1 tsp coconut oil
- 48 mini chocolate chips (for eyes)
- 24 small round sprinkles, black (for mouths, optional)
- 2 tbsp vegetable shortening (if chocolate seizes)
- 24 toothpicks or lollipop sticks
- Parchment paper, for setting
Instructions
- Rinse and thoroughly dry the strawberries. Any moisture will cause the chocolate to seize, so pat them with paper towel and let them air-dry on a rack for 10 minutes.
- Melt the white chocolate chips and coconut oil together in a microwave-safe bowl in 30-second bursts, stirring between each, until smooth. If the mixture is too thick to coat, stir in shortening one teaspoon at a time.
- Hold each strawberry by the stem and dip it into the melted chocolate, letting the excess drip back into the bowl. Set it point-up on parchment paper.
- While the chocolate is still wet, press two mini chocolate chips into the upper third of each strawberry for eyes, pointed side in, and add a black sprinkle below for the mouth if using.
- Leave them at room temperature for 20 to 30 minutes until fully set, or slide the tray into the fridge for 15 minutes.
- Arrange on a platter and keep refrigerated until 15 minutes before serving.

🛍 Shopping guide
Spider Oreo Cookies
Pick up and pass. Each cookie takes under a minute to assemble, and the pretzel legs stay put because they press straight into the filling. The contrast between the black cookie and the pale cream centre makes the spider read clearly from across the table.
Contains gluten, dairy, and soy. Assemble these up to four hours ahead and keep them on a flat tray so the legs do not snap.
Ingredients
- 24 regular Oreo cookies
- 96 thin pretzel sticks (about half a 200 g bag), snapped to 4 cm (1.5 in) lengths
- 48 candy eyeballs (small, round)
- 1 tbsp black gel food colouring (optional, to dot pupils on plain eyeballs)
- 60 g (2 oz) black candy melts, melted (for gluing eyes)
- 1 toothpick
- Parchment-lined tray
- Small piping bag or zip-seal bag with one corner snipped
Instructions
- Carefully twist each Oreo apart. Avoid cracking the cookie; the filling side is your working surface.
- Press four pretzel stick pieces into the filling on each side of the cookie, spacing them evenly so they resemble legs. Press firmly so they hold.
- Snap the plain cookie half back on top, sandwiching the pretzel legs between the two halves so they point outward at a slight downward angle.
- Melt the black candy melts in a microwave in 20-second bursts, stirring until smooth. Transfer to a small piping bag.
- Pipe two small dots of black candy melt onto the filling side of the top cookie. Press one candy eyeball onto each dot immediately.
- Let the candy melt set for 5 minutes, then arrange on a serving tray.

Monster Marshmallow Pops
These are the table’s showpiece handheld. Go wild with the colour: green for classic monsters, purple for vampires, orange for pumpkin creatures. The candy melts set with a glossy shell and the jumbo marshmallow gives each pop a satisfying bite. Contains dairy and soy.
The dipped pops keep well in a tall vase or styrofoam block for display, and they hold for up to 24 hours at room temperature.
Ingredients
- 24 jumbo marshmallows
- 24 lollipop sticks or wooden skewers
- 340 g (12 oz) green candy melts
- 170 g (6 oz) purple candy melts
- 1 tbsp coconut oil (divided, to thin melts if needed)
- 48 large candy eyeballs
- Black edible ink pen or black gel food colouring on a toothpick
- Halloween sprinkles or sanding sugar, for texture
- Parchment paper
Instructions
- Push a lollipop stick firmly into the flat base of each marshmallow so it holds without wobbling.
- Melt the green candy melts with half the coconut oil in a microwave in 30-second bursts, stirring between each. Repeat with the purple melts in a separate bowl.
- Dip each marshmallow pop into the chosen colour, turning it slowly to coat all sides. Let the excess drip back into the bowl.
- While the coating is still wet, press two candy eyeballs into the top third of the marshmallow. Scatter a pinch of sprinkles or sanding sugar over the lower half for texture.
- Stand each pop upright in a tall glass, a styrofoam block, or lean them against each other on parchment to set.
- Once the coating is firm (about 15 to 20 minutes), use the edible pen or a toothpick dipped in gel food colouring to draw a jagged mouth below the eyes.
- Display upright in a decorative holder until serving.

Witch Hat Cookies
These sit upright and tall, which makes them visible from the back of the dessert table. A flat round chocolate cookie acts as the brim and a chocolate-coated cone-shaped candy stacks on top as the crown.
Secure the two with a dab of melted chocolate and the whole thing holds together well enough to pick up without it toppling. Contains gluten, dairy, and soy.
Ingredients
- 24 round chocolate cookies (about 5 cm / 2 in diameter, such as a thin chocolate wafer)
- 24 cone-shaped chocolate-covered candy pieces (e.g. a chocolate-dipped sugar cone candy)
- 115 g (4 oz) dark chocolate chips
- 1 tsp coconut oil
- Orange and green tube gel icing (for belt and buckle detail)
- Halloween sprinkles or edible glitter
- Parchment-lined baking sheet
- Small piping bag or zip-seal bag
Instructions
- Melt the dark chocolate chips with coconut oil in the microwave in 20-second bursts, stirring until smooth.
- Lay all the chocolate cookies flat on the parchment sheet. Spoon a small dab of melted chocolate onto the centre of each one.
- Press a cone-shaped candy upright onto each dab of chocolate, holding it steady for 10 seconds so it bonds.
- Pipe a thin ring of orange gel icing around the base of each cone where it meets the cookie brim to form the hat band.
- Add a small square of yellow gel icing on top of the orange band for the buckle.
- Scatter a pinch of edible glitter or sprinkles over the hat while the gel is still tacky.
- Leave to set for 15 minutes before arranging upright on the serving platter.

Mummy Pretzel Rods
Long pretzel rods drizzled in overlapping bands of white chocolate become mummies in under 30 minutes. The trick is working fast while the chocolate is fluid: drag it back and forth across the rod in thin ribbons rather than one thick pour.
Lean them upright in a jar or tall glass on the table for easy grabbing. Contains gluten, dairy, and soy. They keep perfectly at room temperature for two days.
Ingredients
- 24 large pretzel rods
- 340 g (12 oz) white chocolate chips or white candy melts
- 1 tsp coconut oil
- 48 mini candy eyeballs
- Black edible ink pen
- Parchment paper
- Small spoon or fork for drizzling
- Tall jar or cup for display
Instructions
- Melt the white chocolate and coconut oil together in a microwave-safe bowl in 30-second bursts, stirring between each until completely smooth.
- Lay two sheets of parchment side by side on a flat surface.
- Hold a pretzel rod over the bowl and spoon white chocolate over three-quarters of its length, turning as you go to coat it thinly all around.
- Lay the rod on parchment and use a fork or spoon to drizzle additional white chocolate over it in quick back-and-forth motions to create layered bandage lines.
- While the chocolate is still wet, press two mini candy eyeballs onto the uncoated end of the rod.
- Repeat with remaining rods, working quickly so the chocolate stays fluid.
- Leave the rods flat to set for 20 to 25 minutes. Once firm, stand them upright in a tall jar for display.

Eyeball Donut Holes
Plain donut holes become unsettling in the best way once they are rolled in white icing and fitted with a single staring candy eye. Stack them on a pedestal plate for height.
The white icing glaze goes on thin so it sets semi-dry without being sticky. Contains gluten, dairy, eggs, and soy. These are best assembled within two hours of serving so the glaze does not soften the donut hole exterior.
Ingredients
- 36 plain glazed donut holes (store-bought)
- 240 g (2 cups) powdered sugar
- 3 to 4 tbsp whole milk
- 1 tsp clear vanilla extract
- 36 large round candy eyeballs
- Red edible ink pen or red gel food colouring on a toothpick
- Parchment paper
- Wire rack set over a baking sheet
Instructions
- Make the white icing: whisk the powdered sugar, 3 tablespoons of milk and vanilla extract together until smooth and pourable but not watery. Add the fourth tablespoon of milk only if the glaze is too thick to coat.
- Set the wire rack over a baking sheet to catch drips.
- Drop one donut hole into the icing bowl, turn it with a fork to coat all sides, then lift it out and let the excess icing drip off.
- Place it on the wire rack and immediately press one large candy eyeball into the top.
- While the icing is still wet, use the red edible pen or a toothpick dipped in red gel to draw thin red veins radiating out from the eyeball.
- Repeat with all remaining donut holes.
- Let the glaze set for 10 to 15 minutes before stacking on a serving plate.

Ghost Banana Pops
Cut a banana in half crosswise, dip it in white chocolate and give it a face. That is the entire project, and it looks better than it has any right to. The banana keeps the pop cold-ish from the inside, which guests appreciate.
Contains dairy and soy. Freeze the dipped pops for at least one hour before serving so the white chocolate shell holds when handled.
Ingredients
- 6 medium ripe bananas
- 12 popsicle sticks
- 340 g (12 oz) white chocolate chips or white candy melts
- 1 tsp coconut oil
- 24 mini chocolate chips (for eyes)
- 12 small oval chocolate chips or chocolate candy pieces (for mouths)
- Parchment-lined tray that fits in your freezer
Instructions
- Peel the bananas and cut each one in half crosswise. Push a popsicle stick into the flat cut end of each half, going about halfway up through the banana.
- Place the banana pops on the parchment-lined tray and freeze for 30 minutes so they are firm enough to dip.
- Melt the white chocolate and coconut oil together in 30-second microwave bursts, stirring until smooth.
- Remove bananas from the freezer. Dip each one into the melted chocolate, turning slowly to coat all sides. Let excess drip back into the bowl.
- Return each dipped pop to the parchment tray. While the chocolate is still wet, press two mini chocolate chips in as eyes (pointed side facing in) and one oval chip below for the open mouth.
- Freeze for at least 45 minutes until the shell is solid.
- Serve straight from the freezer, standing them in a shallow container of crushed ice to keep them upright.

Bat Wing Pretzels
Snap each pretzel into the two symmetrical halves that already look like wings, then dip them in dark chocolate and they are done. Arrange pairs on a board with the curved edges touching so they read as complete bats. Contains gluten, dairy, and soy. The finished pretzels keep in an airtight container at room temperature for three days.
Ingredients
- 24 large bow-tie or traditional round hard pretzels (each will snap into two wings)
- 340 g (12 oz) dark chocolate chips
- 1 tsp coconut oil
- Black sanding sugar or black sprinkles
- 48 small candy eyeballs (optional, for the centre joint)
- Parchment paper
- Fork for dipping
Instructions
- Snap each pretzel in half along its natural seam so you have two curved, wing-shaped pieces. Discard or snack on any pieces that break unevenly.
- Melt the dark chocolate chips and coconut oil in the microwave in 30-second bursts, stirring between each until glossy and smooth.
- Using a fork, dip each pretzel wing into the dark chocolate so it is fully coated. Tap the fork on the bowl rim to let excess chocolate drip off.
- Lay the dipped wings on parchment paper. Immediately scatter a small pinch of black sanding sugar over each piece while the chocolate is wet.
- Arrange pairs so the straight edges face each other to form bat wing shapes. Press a small candy eyeball at the inner corner of each pair if using.
- Let set at room temperature for 20 to 25 minutes until the chocolate is fully firm.
- Transfer to an airtight container or arrange on a board for serving.

Poison Apple Cake Pops
Deep red candy coating, a caramel-coloured drizzle and a small leaf of green fondant. These look expensive and take about 45 minutes of active work.
Buy plain unfrosted cake pop balls from a bakery counter or make them from crumbled store-bought pound cake mixed with cream cheese frosting. Contains gluten, dairy, and eggs. Finished pops keep at room temperature for up to 48 hours, displayed upright in a foam block.
Ingredients
- 24 plain cake pop balls (about 3 cm / 1.2 in diameter), chilled
- 24 lollipop sticks
- 450 g (16 oz) deep red candy melts
- 2 tbsp coconut oil (to thin the coating)
- 60 g (2 oz) caramel-coloured candy melts or white candy melts tinted with gold food colouring, for drizzle
- 24 small green fondant leaf shapes (pre-cut, or use green candy melts in a leaf mould)
- Styrofoam block or tall glass for setting
- Parchment paper
Instructions
- Melt 2 tablespoons of the red candy melts and dip the tip of each lollipop stick into it. Push the dipped end into a cake pop ball about 2 cm (0.75 in) deep. Freeze for 15 minutes so the stick bonds firmly.
- Melt the remaining red candy melts with the coconut oil in 30-second microwave bursts until smooth and glossy.
- Dip each cake pop straight down into the red coating, rotating slowly. Lift out and spin gently to let the excess fall back into the bowl.
- Push the stick into the styrofoam block to hold the pop upright while the coating sets, about 15 minutes.
- Melt the caramel-coloured candy melts. Drizzle a small amount over each hardened red pop using a fork, creating a streaked drizzle for a poisoned-apple effect.
- While the drizzle is still tacky, press one green fondant leaf into the top of each pop beside the stick.
- Let set fully before moving to a display board or gift box.

Jack-O-Lantern Clementines
These are the fastest entry on the entire table and also the only genuinely healthy one. Peel a clementine, cut a small triangle at the base, slide a piece of celery in for the stem and draw a face with a food-safe marker. Done.
They need no refrigeration and look cheerful clustered in a low bowl or scattered between the richer treats as a visual break. No common allergens. Make up to six hours ahead.
Ingredients
- 24 clementines
- 24 small celery stick pieces, about 2 cm (0.75 in) each, cut from inner stalks
- 2 black food-safe markers (one fine-tip, one broad)
- Small paring knife
- Damp cloth for wiping marker mistakes
Instructions
- Peel the clementines and separate any loose pith. The orange peel stays on; you are drawing on the peel, not the fruit. Wait, re-read the concept: the peel stays on the clementine. The face is drawn on the unpeeled skin.
- Use the fine-tip black food-safe marker to draw triangle eyes and a jagged or grinning mouth on each clementine.
- Use the broad marker to fill in any areas that need heavier black lines.
- With the paring knife, score a small shallow slit in the top of each clementine where the stem indent sits.
- Push one piece of celery stick firmly into the slit so it stands upright as the pumpkin stem.
- Arrange in a low bowl or directly on the table, clustered together for the pumpkin-patch effect.

Pumpkin Patch Pudding Cups
Individual clear cups show off all the layers, so put them somewhere guests can actually see the cross-section. A base of crumbled chocolate cookies stands in for soil, orange pudding fills the middle, and candy pumpkins dot the surface. Contains gluten, dairy, and eggs.
Assemble up to 24 hours ahead and refrigerate; add the cookie topping just before serving so it stays crisp.
Ingredients
- 1 packet (96 g / 3.4 oz) instant vanilla pudding mix
- 480 ml (2 cups) cold whole milk
- Orange gel food colouring (enough to tint the pudding a deep orange)
- 200 g (7 oz) chocolate sandwich cookies, crushed to crumbs (about 20 cookies)
- 36 small candy pumpkins
- 12 clear plastic or glass cups (200 ml / 7 oz capacity)
- Whipped cream in a can, for the base layer (optional)
- 12 short pretzel sticks (optional, as stems in the candy pumpkins)
Instructions
- Whisk the instant pudding mix and cold milk together for 2 minutes until thickened. Add orange gel food colouring a few drops at a time, whisking in, until the pudding is a deep pumpkin orange.
- Refrigerate the pudding for 5 minutes to firm it up slightly.
- Spoon a layer of crushed cookies into the base of each cup, about 2 tablespoons deep.
- Spoon or pipe the orange pudding on top of the cookie layer, filling each cup about two-thirds full.
- Refrigerate for at least 1 hour or up to 24 hours until the pudding is set.
- Just before serving, scatter a second thin layer of cookie crumbs over the pudding surface to look like fresh soil.
- Press three candy pumpkins into each cup, pushing them slightly into the crumbs so they stand upright. If using, tuck a short pretzel stick behind each pumpkin as a stem.

Candy Corn Parfait
Three distinct colour layers in a clear cup: white at the bottom, orange in the middle, yellow at the top, built from tinted pudding and whipped cream. The finished look mirrors real candy corn without any of the divisive flavour.
Guests who hate candy corn will still eat these. Contains dairy, eggs, and gluten (if a cookie crumble is added). Make up to eight hours ahead and refrigerate.
Ingredients
- 2 packets (96 g / 3.4 oz each) instant vanilla pudding mix
- 960 ml (4 cups) cold whole milk
- Yellow gel food colouring
- Orange gel food colouring
- 480 ml (2 cups) heavy whipping cream
- 3 tbsp powdered sugar
- 1 tsp vanilla extract
- 12 clear parfait cups or tall clear plastic cups (300 ml / 10 oz capacity)
- Actual candy corn pieces, for garnish
Instructions
- Whisk both pudding packets with the cold milk for 2 minutes. Divide the pudding evenly between two bowls.
- Tint one bowl deep orange with orange gel food colouring. Tint the other bright yellow with yellow gel food colouring. Refrigerate both for 10 minutes.
- Whip the heavy cream with powdered sugar and vanilla extract until it holds stiff peaks. Keep it white.
- Spoon the white whipped cream into the base of each cup, filling the bottom third.
- Add a layer of orange pudding as the middle third.
- Top with the yellow pudding to fill the cup within 1 cm (0.5 in) of the rim.
- Refrigerate for at least 1 hour until all layers are set.
- Before serving, place three candy corn pieces point-up on the surface of each parfait as garnish.

Graveyard Dirt Cups
Classic for a reason. Dark chocolate pudding dusted with crushed chocolate cookies looks uncannily like actual soil, and Oreo halves etched with white gel icing make convincing tombstones.
Keep these on the cup-and-glass section of the table alongside the parfaits so guests see them as a group. Contains gluten, dairy, and eggs. Make the cups up to 24 hours ahead; add the tombstones and any gummy worms just before the party starts.
Ingredients
- 1 packet (113 g / 4 oz) instant chocolate pudding mix
- 480 ml (2 cups) cold whole milk
- 200 g (7 oz) chocolate sandwich cookies, crushed to fine crumbs
- 12 Oreo cookies, halved, for tombstones
- White tube gel icing, for writing on tombstones
- 12 gummy worms (optional)
- 12 clear plastic cups (200 ml / 7 oz capacity)
- Plastic wrap for covering during chilling
Instructions
- Whisk the chocolate pudding mix with cold milk for 2 minutes until thickened. Refrigerate for 5 minutes to firm slightly.
- Use the white tube gel icing to write “RIP” or a short epitaph on the cream side of each Oreo half. Let the writing set for 5 minutes.
- Spoon the chocolate pudding into each cup, filling about three-quarters full.
- Scatter a generous layer of cookie crumbs over each pudding cup to look like fresh earth.
- Press two Oreo tombstone halves into the crumbs at the back of each cup so they stand upright.
- Tuck a gummy worm into the crumbs at the front of each cup so it appears to emerge from the dirt.
- Refrigerate for at least 1 hour before serving, adding the tombstones and worms just before serving if you want them fresh-looking.

Bloody Hand Punch
The frozen glove is the whole show. Fill a rubber glove with water, freeze it solid overnight, then peel the glove away and float the ice hand in the punch bowl.
The fruit punch goes red with cranberry juice and the hand slowly bleeds colour as it melts. This recipe contains no alcohol.
Adults who want to add spirits can stir them in at the bowl before serving, and please designate a driver or arrange alternative transport. No common allergens in the base recipe; check labels on any sparkling drinks you add.
Ingredients
- 1 clean rubber or latex glove (food-safe, unwashed with detergent)
- Red food colouring (a few drops, added to the water inside the glove)
- 1.5 litres (1.5 qt) cranberry juice cocktail, chilled
- 1 litre (1 qt) ginger ale or lemon-lime sparkling water, chilled
- 480 ml (2 cups) orange juice, chilled
- 240 ml (1 cup) pineapple juice, chilled
- Orange slices, fresh cranberries and black cherry garnishes for the bowl
- Large punch bowl
Instructions
- The night before: fill the rubber glove with cold water and add a few drops of red food colouring. Tie the wrist end tightly with a rubber band so no water leaks. Lay it flat on a small tray and freeze overnight until completely solid.
- When ready to serve, fill the punch bowl with the cranberry juice, orange juice and pineapple juice. Stir to combine.
- Pour in the chilled ginger ale or sparkling water just before guests arrive so the carbonation stays lively.
- Peel the rubber glove away from the frozen hand. The ice will have taken the shape of the glove fingers.
- Lower the ice hand into the punch bowl so it floats in the centre.
- Float orange slices and fresh cranberries around the ice hand and drop in a few black cherries.
- Serve immediately with a ladle, and replenish ginger ale as the punch is served to keep the fizz going.

🛍 Shopping guide
Marshmallow Ghost Hot Chocolate
This is the warm-drink station in a cup, and it keeps guests gravitating to one corner of the table. Premix the hot chocolate powder with boiling water in a large insulated carafe so guests pour their own.
Float three ghost-faced marshmallows on top of each cup. This recipe contains no alcohol. Serve responsibly and keep the carafe out of reach of unsupervised children. Contains dairy and soy.
Ingredients
- 12 heaped tbsp (about 240 g / 8.5 oz) good-quality hot chocolate powder
- 1.8 litres (7.5 cups) just-boiled whole milk or water (or a 50/50 mix)
- 36 large white marshmallows
- Black edible ink pen (fine tip)
- 36 mini chocolate chips (for ghost eyes, optional)
- Caramel sauce or chocolate syrup, for swirling in (optional)
- 12 heat-safe mugs or disposable hot cups
- Large insulated carafe or slow cooker on the lowest setting
Instructions
- Draw a ghost face on each marshmallow using the fine-tip black edible ink pen: two oval eyes and a small open-circle mouth. Alternatively, press two mini chocolate chips into each marshmallow for the eyes.
- Combine the hot chocolate powder with the just-boiled milk (or water) in a large insulated carafe, stirring vigorously until the powder dissolves completely.
- Pour the hot chocolate into each mug, filling about three-quarters full.
- Float three ghost marshmallows on top of each cup, face-side up.
- Drizzle a swirl of caramel sauce or chocolate syrup over the marshmallows if using.
- Serve immediately, or keep the carafe on the lowest setting of a slow cooker so guests can pour at their own pace throughout the party.

Frankenstein Rice Cereal Bars
These belong in the middle of the table because they are substantial, they stack, and the vivid green colour stops guests in their tracks.
Tint the standard rice cereal and marshmallow mixture green before pressing it into a pan, then cut into rectangles and press on candy features while the bars are still pliable. Contains dairy, gluten, and soy.
Press and cut them up to 24 hours ahead and store in an airtight container with parchment between layers.
Ingredients
- 60 g (4 tbsp) unsalted butter
- 400 g (14 oz) mini marshmallows
- Green gel food colouring (about 1 tsp)
- 200 g (6.5 cups) puffed rice cereal
- 48 mini chocolate chips (for eyes, 2 per bar)
- Black tube gel icing (for the mouth and hair details)
- 24 small square black sprinkles or black fondant pieces (for the bolts on the neck)
- Cooking spray
- 9×13 in (23×33 cm) baking pan
Instructions
- Coat the baking pan and a large mixing bowl with cooking spray.
- Melt the butter in a large microwave-safe bowl in 30-second bursts. Add the mini marshmallows and microwave in 45-second bursts, stirring between each, until the marshmallows are fully melted and smooth.
- Stir in the green gel food colouring until the mixture is an even bright green. Work quickly as it starts to firm.
- Pour the puffed rice cereal into the green marshmallow mixture and stir until every piece is coated.
- Press the mixture firmly and evenly into the prepared baking pan. Let it set at room temperature for 30 minutes.
- Once set, cut into 24 equal rectangles.
- Press two mini chocolate chips near the top of each bar as eyes. Use the black gel icing to pipe a straight-line mouth and a short row of hair lines at the top. Press a black sprinkle on each lower corner as a bolt.

Spooky Popcorn Mix
A big centrepiece bowl or a tower of individual paper cones. Toss plain popped popcorn in melted orange and purple candy melts, scatter Halloween sprinkles over the top while it is still sticky, and let it set into clusters.
It has crunch, colour and the kind of addictive quality that empties a bowl without anyone noticing. Contains dairy and soy; check the popcorn bag label for any cross-contamination notes. Make up to two days ahead and store in an airtight container.
Ingredients
- 180 g (12 cups) plain air-popped or plain microwave popcorn, unpopped kernels removed
- 170 g (6 oz) orange candy melts
- 115 g (4 oz) purple candy melts
- 1 tsp coconut oil
- 4 tbsp Halloween sprinkles (orange, black and white mix)
- 2 tbsp black sanding sugar
- Large parchment-lined baking sheet
Instructions
- Spread the popcorn in a single layer over the parchment-lined baking sheet, removing any unpopped kernels.
- Melt the orange candy melts with half the coconut oil in 30-second microwave bursts, stirring until smooth. Repeat with the purple candy melts and remaining coconut oil in a separate bowl.
- Drizzle the melted orange candy melt over the popcorn in thin ribbons, then drizzle the purple candy melt over the top.
- Immediately scatter the Halloween sprinkles and black sanding sugar over the still-wet candy coating.
- Use two large spoons or your hands (lightly oiled) to toss the popcorn gently so the coating begins to coat individual pieces and clusters form.
- Leave the tray flat at room temperature for 20 to 25 minutes until the candy coating is fully set.
- Break into clusters and transfer to a large bowl or individual paper cones for serving.

Caramel Apple Slice Board
A board that invites guests to build their own. Apple slices fanned around small bowls of caramel sauce, melted chocolate, crushed pretzels, mini chocolate chips and Halloween sprinkles. It is low-effort, looks abundant and handles a crowd far better than whole caramel apples ever could.
Contains dairy, gluten, tree nuts (if you add peanuts), and soy. Toss the apple slices in a little lemon juice to keep them pale. Assemble the board up to one hour before the party starts and cover loosely with cling film until guests arrive.
Ingredients
- 8 large apples (a mix of Granny Smith and Honeycrisp), cored and cut into 1 cm (0.5 in) slices
- 2 tbsp fresh lemon juice mixed with 480 ml (2 cups) cold water (for soaking)
- 480 ml (2 cups) thick caramel sauce (store-bought)
- 170 g (6 oz) dark or milk chocolate chips, melted
- 100 g (3.5 oz) pretzels, crushed
- 4 tbsp mini chocolate chips
- 4 tbsp Halloween sprinkles
- 4 tbsp chopped roasted peanuts or pecans (optional)
- Large wooden board or slate board
- 4 to 6 small dipping bowls
Instructions
- Soak the apple slices in the lemon juice and water mixture for 5 minutes to prevent browning. Drain and pat dry with paper towels.
- Pour the caramel sauce into two small bowls. Pour the melted chocolate into another bowl.
- Fill the remaining small bowls with crushed pretzels, mini chocolate chips, Halloween sprinkles and chopped nuts if using.
- Arrange the bowls at intervals across the board, leaving space between them.
- Fan the apple slices in neat overlapping rows around and between the bowls, filling the board generously.
- Place small spoons or toothpicks beside each dipping bowl so guests can drizzle toppings over their slices.
- Cover loosely with cling film until guests arrive, then remove the film and serve.

Web-Topped Cupcakes
Store-bought plain cupcakes with piped white icing spirals that you drag into a web with one toothpick stroke. The technique looks advanced and takes about 10 seconds per cupcake once you understand it. Black icing on white, or white on black, both work.
Contains gluten, dairy, and eggs. Pipe the bases up to four hours ahead and refrigerate; drag the web pattern just before serving so the lines stay sharp.
Ingredients
- 24 plain unfrosted store-bought cupcakes
- 480 g (about 2 cups) black tinted buttercream or black tube gel icing (base coat)
- 240 g (1 cup) white buttercream or white tube gel icing in a piping bag
- 24 toothpicks
- 24 small plastic spider rings or candy spiders (for garnish)
- Black sanding sugar (optional, for texture)
- Offset spatula
- Piping bag fitted with a small round tip (or a zip-seal bag with one corner snipped)
Instructions
- Spread or pipe a smooth layer of black buttercream on top of each cupcake using the offset spatula. The surface should be as flat as possible.
- Fill the piping bag with white buttercream. Pipe a small dot in the centre of each cupcake, then pipe concentric circles outward from the centre, spacing them about 0.8 cm (0.3 in) apart, stopping before the edge.
- Immediately drag a toothpick from the centre dot outward to the outer ring in a straight line, dividing the circle like a clock face. Wipe the toothpick clean and repeat at equal intervals around the circle to create 6 to 8 web sections.
- Scatter a pinch of black sanding sugar around the outer edge of each cupcake if using.
- Press a plastic spider ring or candy spider into the centre of the web.
- Refrigerate until 20 minutes before serving. The web pattern will stay crisp when chilled.

Skeleton Fruit Tray
Arrange cut fruit pieces on a large rectangular board to outline a full skeleton body: a round melon slice for the skull, banana pieces for the ribs, grape clusters for the pelvis, and long strips of kiwi or mango for the limbs.
It feeds a crowd, it is healthy, and it stops the sugar overload in its tracks. No common allergens in the fruit itself; check labels on any dips you add alongside it. Assemble up to two hours ahead and cover with cling film.
Ingredients
- 1 small seedless watermelon or large cantaloupe, for the skull and body sections (cut into rounds and strips)
- 4 bananas, peeled and sliced into rounds (for ribcage)
- 4 cups (about 500 g) green grapes (for pelvis and joints)
- 3 kiwi fruit, peeled and sliced into ovals (for vertebrae and fingers)
- 2 cups (about 250 g) strawberries, hulled (for shoulder and hip joints)
- 2 oranges, peeled and separated into segments (for limb bones)
- 2 tbsp fresh lemon juice (to brush over bananas and kiwi)
- 2 blueberries (for skull eye sockets)
- Large rectangular wooden board or serving platter (at least 45×60 cm / 18×24 in)
Instructions
- Cut a round cross-section from the centre of the melon about 15 cm (6 in) in diameter for the skull. Use a small round cookie cutter or knife to cut two eye-socket circles from the round, then fill the holes with blueberries. Place the skull at the top centre of the board.
- Below the skull, lay five to six banana rounds in two curving parallel rows to form the ribcage shape, leaving a narrow gap between the left and right sides.
- Arrange a cluster of green grapes in an oval shape below the ribcage to represent the pelvis.
- For the spine, lay a single column of kiwi ovals between the ribcage rows and continuing into the pelvis area.
- Build the arm bones: line orange segments end to end outward from the shoulder area (top of the ribcage), bending slightly at the elbow point. Use strawberry halves at the shoulder and elbow joints.
- Build the leg bones: continue orange segments downward from the pelvis, bending at the knee. Add kiwi slices as the lower leg and three small strawberry pieces as the feet and toes.
- Brush banana and kiwi pieces with lemon juice to prevent browning. Serve within 2 hours.

Candy Bark
Melt, pour, top, set, shatter. Candy bark is the one recipe on this table that actually improves the more chaotic it looks.
Use dark and white chocolate in alternating pours, drag through with a skewer for a marbled effect, then press Halloween candy, sprinkles and crushed pretzels over the surface while it is still liquid. Break it into irregular shards and pile them on a board.
Contains dairy, gluten, and soy. Make up to five days ahead and store in a cool, dry container between layers of parchment.
Ingredients
- 450 g (16 oz) dark chocolate chips or dark candy melts
- 225 g (8 oz) white chocolate chips or white candy melts
- 1 tsp coconut oil (total, divided between the two chocolates)
- 100 g (3.5 oz) small Halloween candy pieces (orange and black wrapped candies, candy corn, etc.)
- 4 tbsp Halloween sprinkles (orange, black, white)
- 60 g (2 oz) small pretzel pieces or pretzel nuggets
- 2 tbsp black sanding sugar
- Parchment-lined rimmed baking sheet (33×23 cm / 13×9 in)
Instructions
- Melt the dark chocolate chips with half the coconut oil in 30-second microwave bursts, stirring between each, until smooth and glossy. Repeat separately with the white chocolate chips and remaining coconut oil.
- Pour the dark chocolate onto the parchment-lined sheet and spread it to about 0.6 cm (0.25 in) thick using a spatula.
- Drop spoonfuls of the white chocolate over the dark chocolate at irregular intervals.
- Drag a skewer or toothpick through both layers in long sweeping motions to create a marble or swirl pattern.
- While both chocolates are still fluid, scatter the Halloween candy pieces, pretzel pieces, sprinkles and black sanding sugar across the entire surface, pressing gently so they adhere.
- Leave the bark flat at room temperature for 1 hour, or refrigerate for 20 minutes, until completely set.
- Break into irregular shards by pressing firmly at the centre and snapping outward. Pile on a board for serving.

Frequently Asked Questions
Can I make all of these halloween treats ideas the day before the party?
Most of them, yes. The bark, pretzel rods, bat wing pretzels and Frankenstein bars all keep for two or more days. The dipped strawberries, banana pops, pudding cups, dirt cups and parfaits are best made 24 hours ahead and refrigerated.
The eyeball donut holes are the only ones best left to the day of the party so the glaze does not soften the exterior. Freeze the punch glove at least overnight.
What is the easiest halloween treat on this list for a beginner?
The jack-o-lantern clementines require no cooking equipment at all: just a marker, a paring knife and a handful of celery. The ghost strawberries are a close second and are almost as quick once the chocolate is melted.
Are there any nut-free options in this halloween treats ideas list?
Most treats here are nut-free by default. The caramel apple slice board is the only recipe that lists optional chopped nuts: simply leave them out. Always check the labels on candy melts, chocolate chips and store-bought items for cross-contamination warnings, as manufacturing processes vary by brand.
How many treats should I make for a party of 20 adults?
Aim for four to five different treats and make the full yield of each. Three or four handheld items (two to three pieces per person), one cup-based item per person, and a shared board or punch bowl covers a two-hour party comfortably.
Doing all 21 at once is a project for a much larger crowd or a phased-out spread across several days.
What if I cannot find candy melts in the right colour?
Use white candy melts or white chocolate chips and add oil-based food colouring to reach the colour you want. Do not use water-based colouring in melted chocolate: it will seize the chocolate immediately. Gel food colouring works as long as you use oil-based gel formulas designed for chocolate.
15 DIY Halloween village houses built from wood scraps, craft boards and paint, designed to look lik
21 paper bag Halloween crafts that actually work: monster treat bags, witch broom bags, painted tric
31 girly painted pumpkin ideas finished with bows, pearls, ribbon, lace and lettering. Every pumpkin
Leave a Reply