

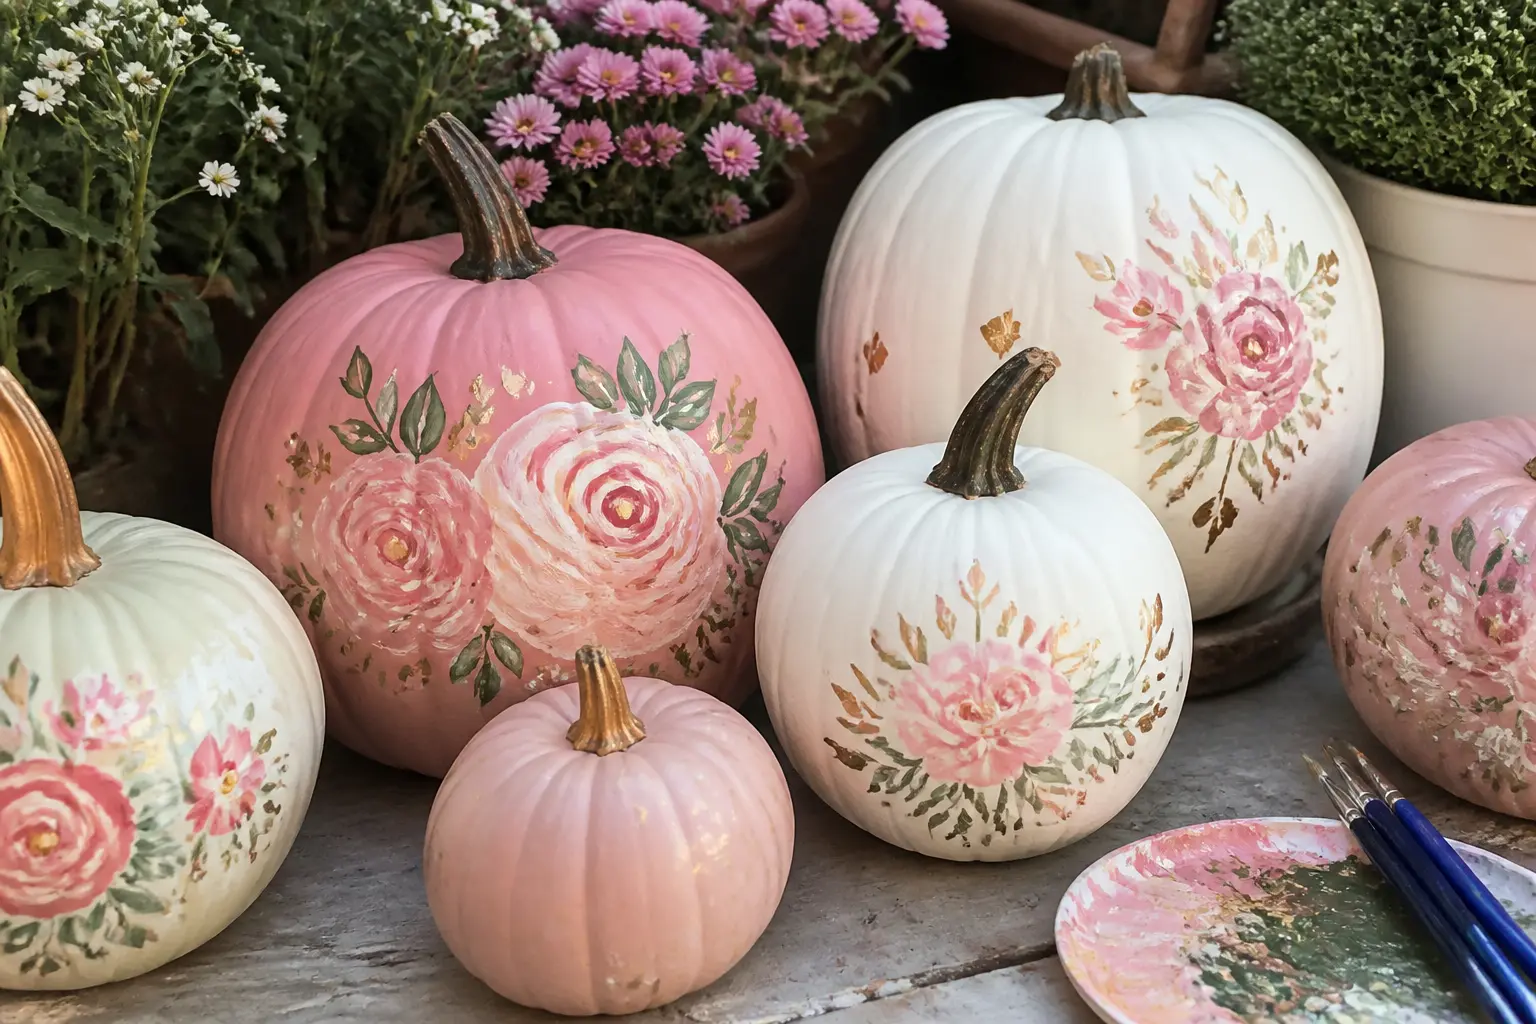
A painted pumpkin is already prettier than a carved one. Add a satin bow, a row of pearl pins or a hand-lettered name and it becomes something you actually want on your mantel, not just your doorstep.
Every idea here starts with a coat of paint in blush, cream, lilac, mint, peach or soft gold. The base color does the heavy lifting; the trim does the personality. No black anywhere, no carving, no glitter explosions.
Whether you are dressing a shelf for autumn or pulling together a feminine fall tablescape, these 31 pumpkins give you a complete range, from five-minute finishes to slow-afternoon projects. Need more pumpkin inspiration beyond paint? 15 Pumpkin Crafts That Go Way Past a Basic Jack-o-Lantern covers the wider world.
This post contains affiliate links. If you buy through them, I may earn a small commission at no extra cost to you.
Bow-Topped Pumpkins
A bow transforms any painted pumpkin in under two minutes. The trick is scale: go bigger than feels right, because a small bow on a round pumpkin just looks like an afterthought.
Satin, velvet ribbon and tulle all read differently. Satin is the dressiest; tulle is the softest; velvet adds warmth without weight. Choose whichever matches the room you are dressing.
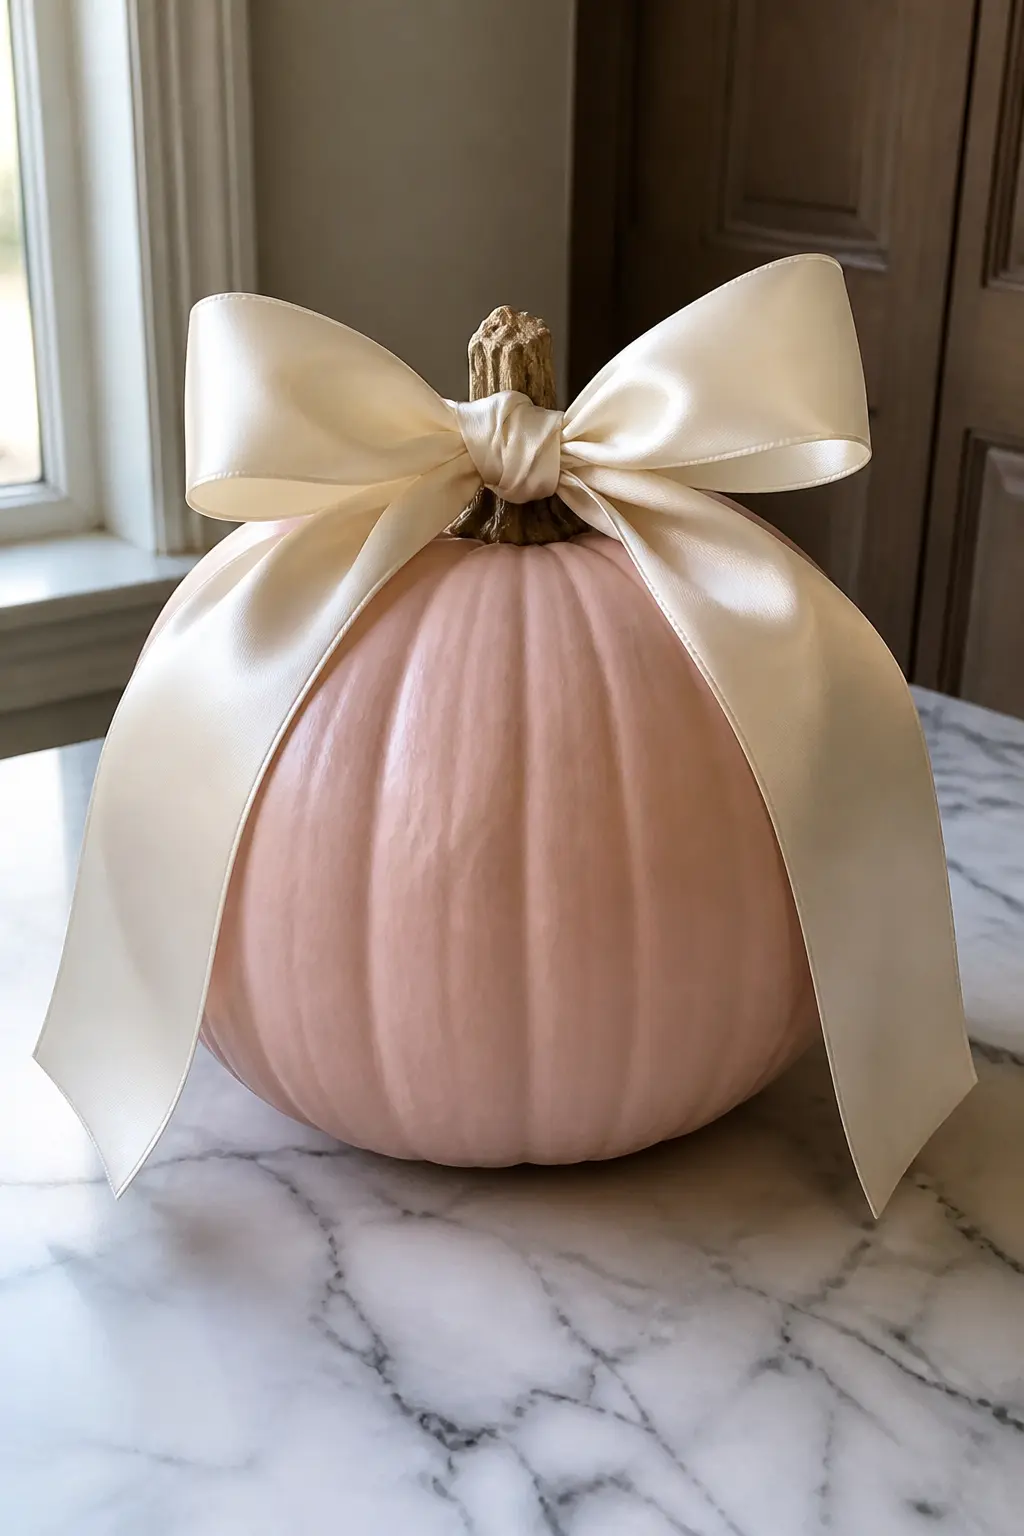
Blush Pumpkin With a Large Cream Satin Bow
Paint the pumpkin in two coats of blush, letting each coat dry fully before the next. A satin finish paint holds a bow better than high-gloss, which can be slippery.
Cut a length of wide cream satin ribbon and tie it directly at the stem, leaving long trailing loops. The bow should be roughly half the width of the pumpkin so it reads from across the room. Trim the ribbon ends at a diagonal to stop fraying.
🛍 Shopping guide
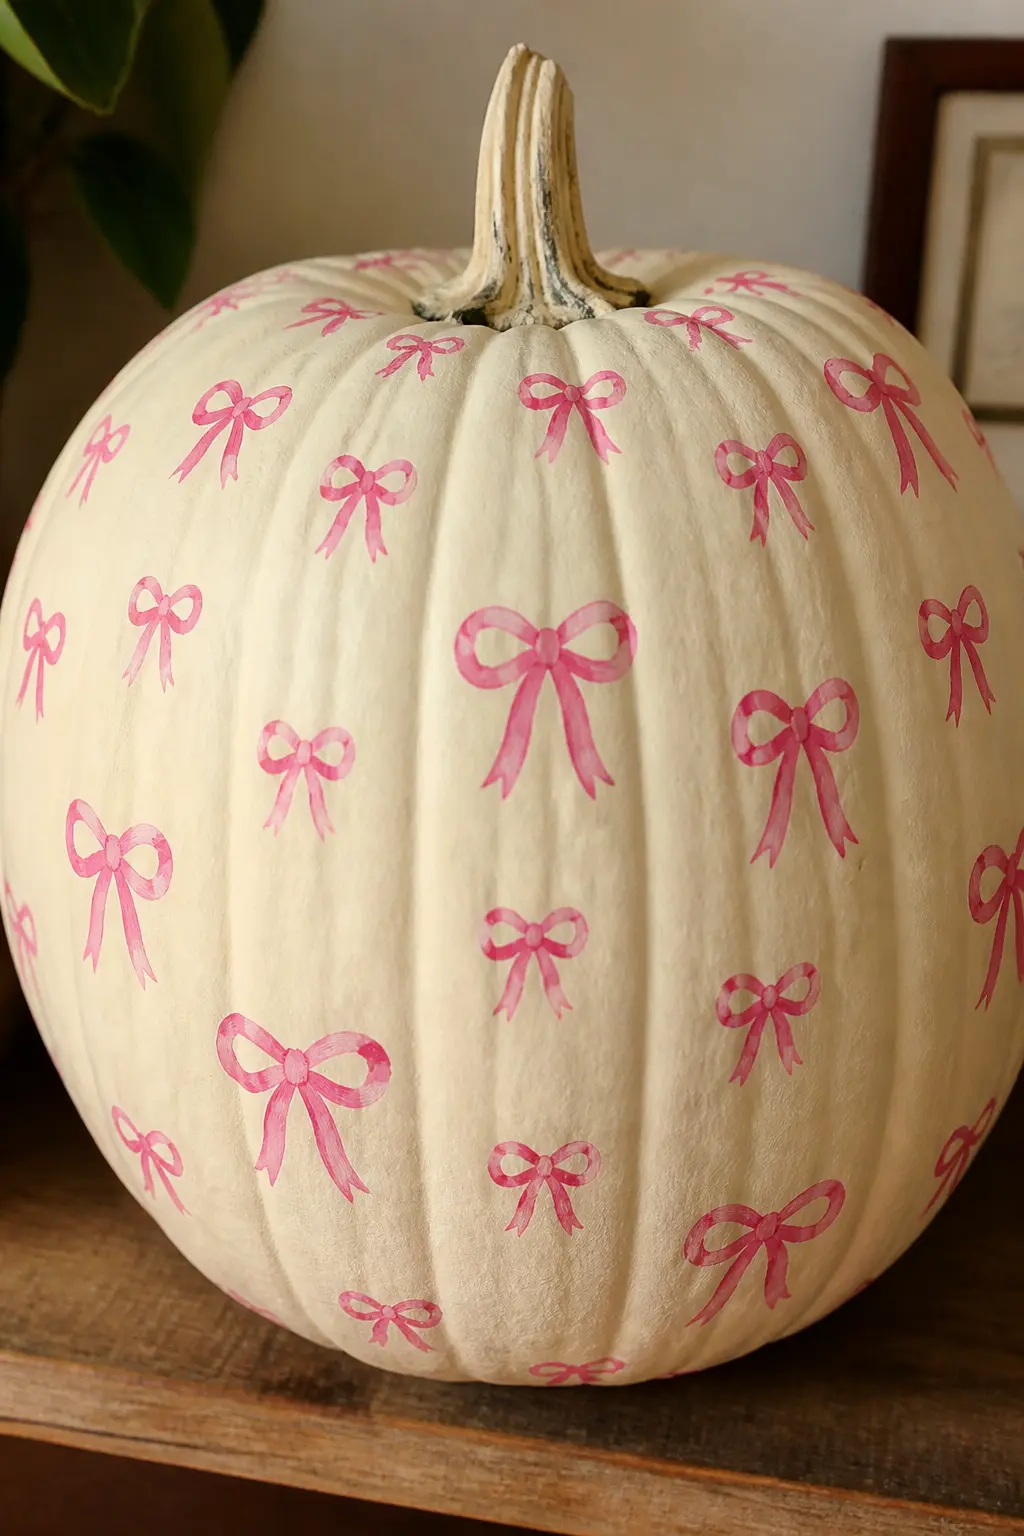
Cream Pumpkin Covered in Tiny Pink Painted Bows
Base coat the pumpkin in warm cream. Once dry, use a fine round brush and soft pink paint to dot tiny bows all over the surface, spacing them evenly across each section of the pumpkin.
A simple bow is just two oval loops with a tiny rectangle between them. Practice ten on paper before moving to the pumpkin. Keep the scale consistent: bows that grow as they approach the base look unplanned rather than deliberate.
🛍 Shopping guide
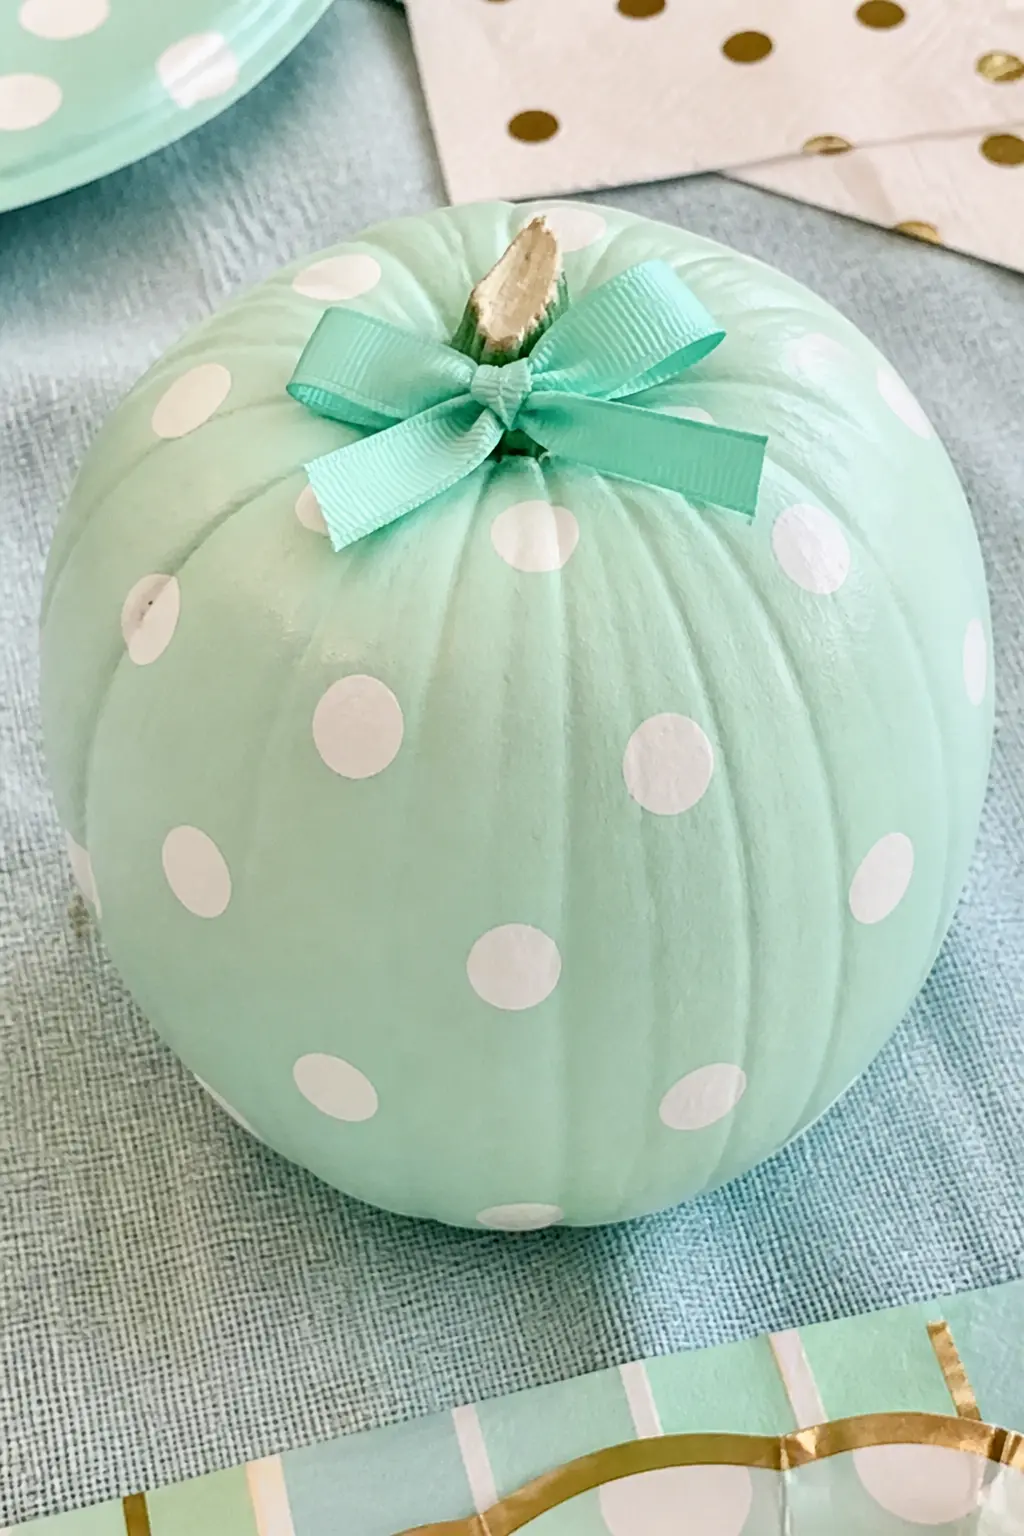
Mint Pumpkin With White Polka Dots and a Mint Bow
Paint the pumpkin in cool mint and let it dry overnight. Dip the flat end of a pencil eraser into white paint and press it onto the surface in evenly spaced dots across every section. The eraser gives a cleaner circle than a brush tip on a curved surface.
Tie a mint grosgrain ribbon into a bow at the stem to bring the color full circle. The white dots lift the whole thing from looking too matchy: a little contrast is what makes a tonal look feel designed rather than timid.
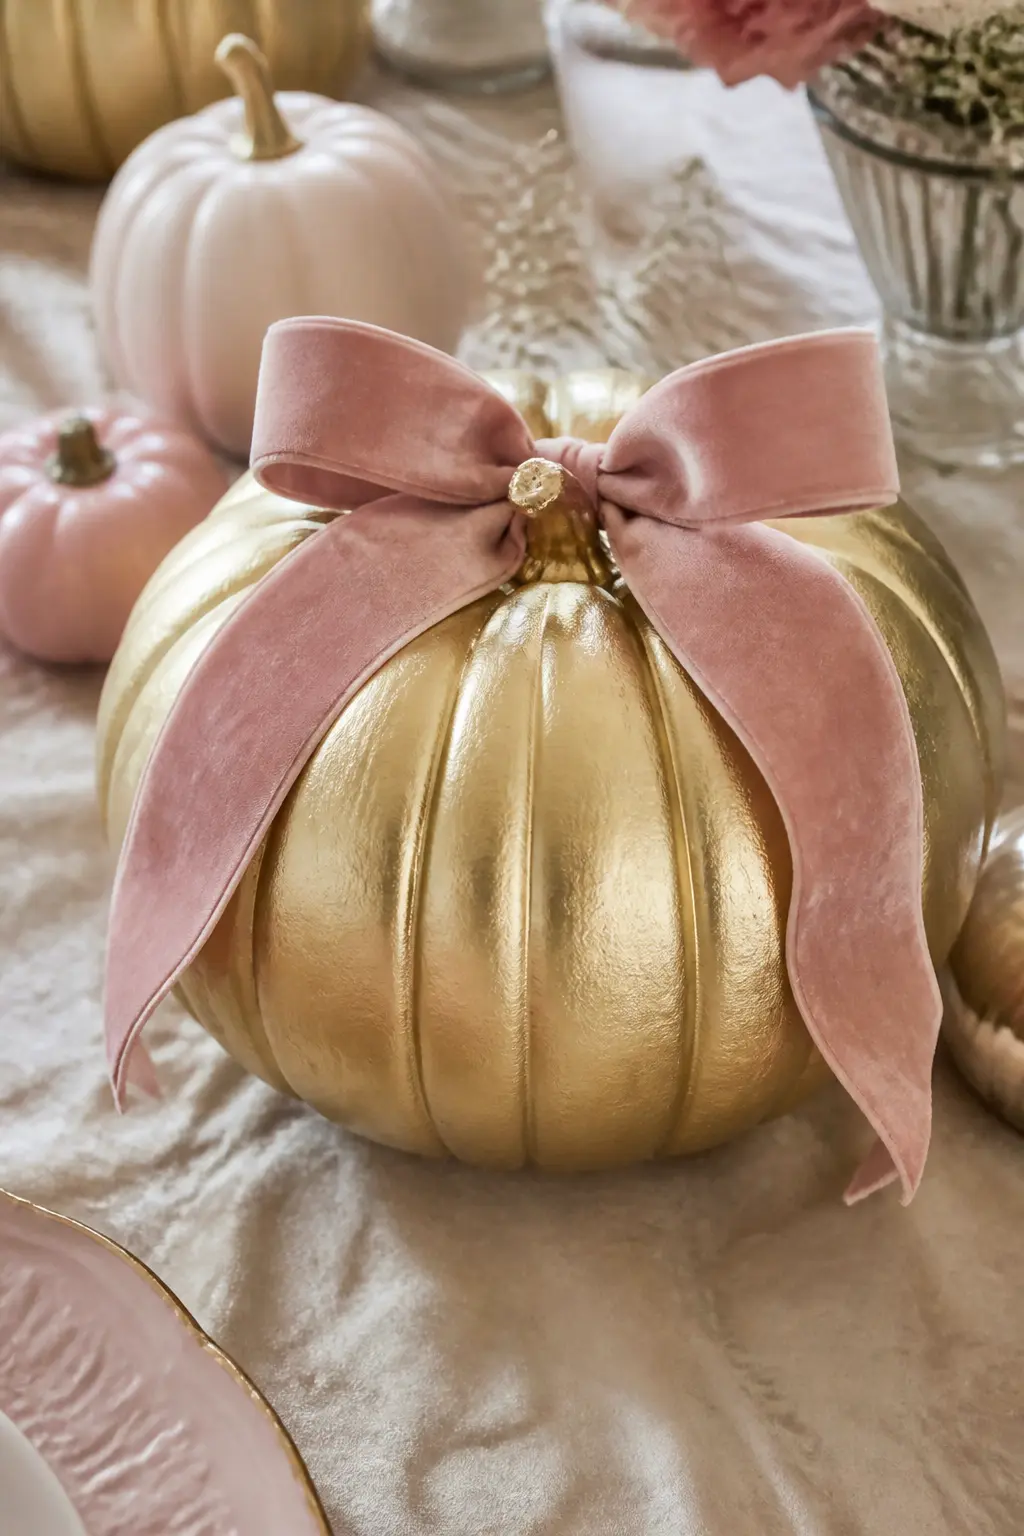
Soft Gold Pumpkin With a Blush Velvet Ribbon Bow on Top
Paint the pumpkin in soft gold using a metallic craft paint. Two thin coats read more luxurious than one thick coat, which tends to streak. Seal with a satin finish so the metallic stays burnished rather than glassy.
Tie a length of blush velvet ribbon into a full, generous bow and hot-glue it directly over the stem. Velvet against metallic paint is a classic pairing: the matte texture of the ribbon makes the gold surface look richer by contrast.
🛍 Shopping guide
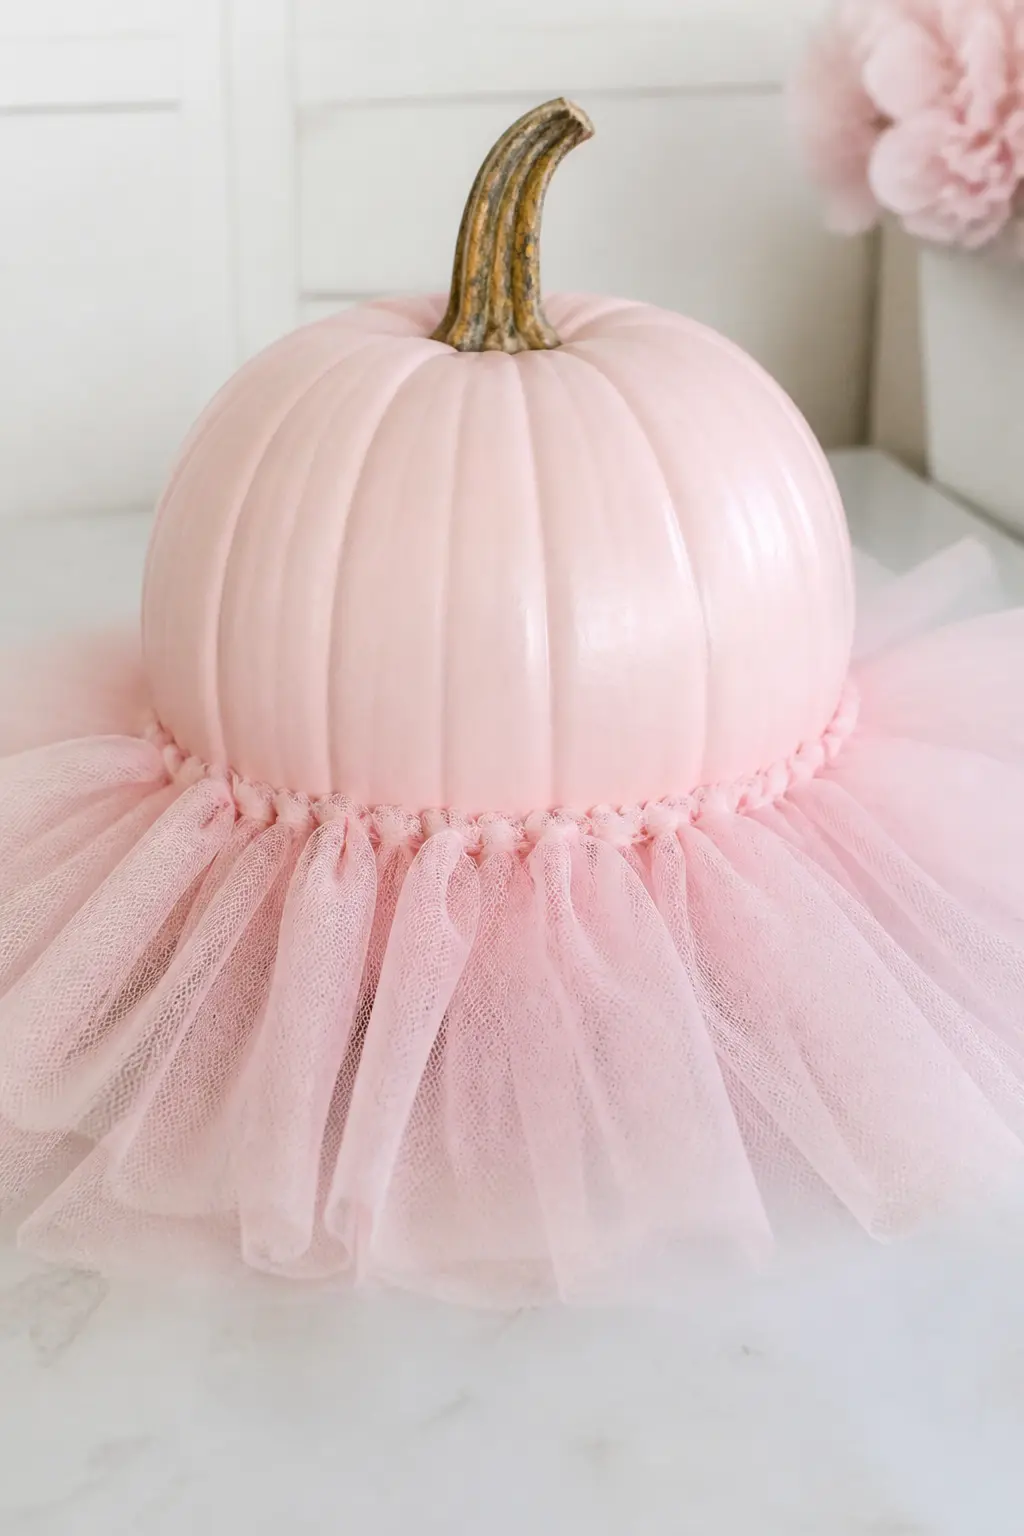
Blush Pumpkin With a Tulle Skirt Gathered Around the Base
Paint the pumpkin blush. Cut a long strip of soft pink tulle, roughly four inches wide and three times the circumference of the pumpkin base. Run a basting stitch along one long edge and gather it tightly, then hot-glue the gathered edge against the base of the pumpkin all the way around.
The tulle skirt should flare out around the base like a small ballet tutu. Fluff each layer after gluing. This is the girliest pumpkin in the collection and it knows it.
🛍 Shopping guide
Pearl and Embellishment Pumpkins
Pearls work two ways on a painted pumpkin: pressed in as pins along the ridges for a structured, architectural look, or glued in flowing curves for something more romantic. Both approaches need a matte or satin base coat so the pearls read clearly against the surface.
Finish with a light coat of matte sealer before adding any embellishments. It stops the paint from chipping when you handle the pumpkin and gives the glue a better grip.
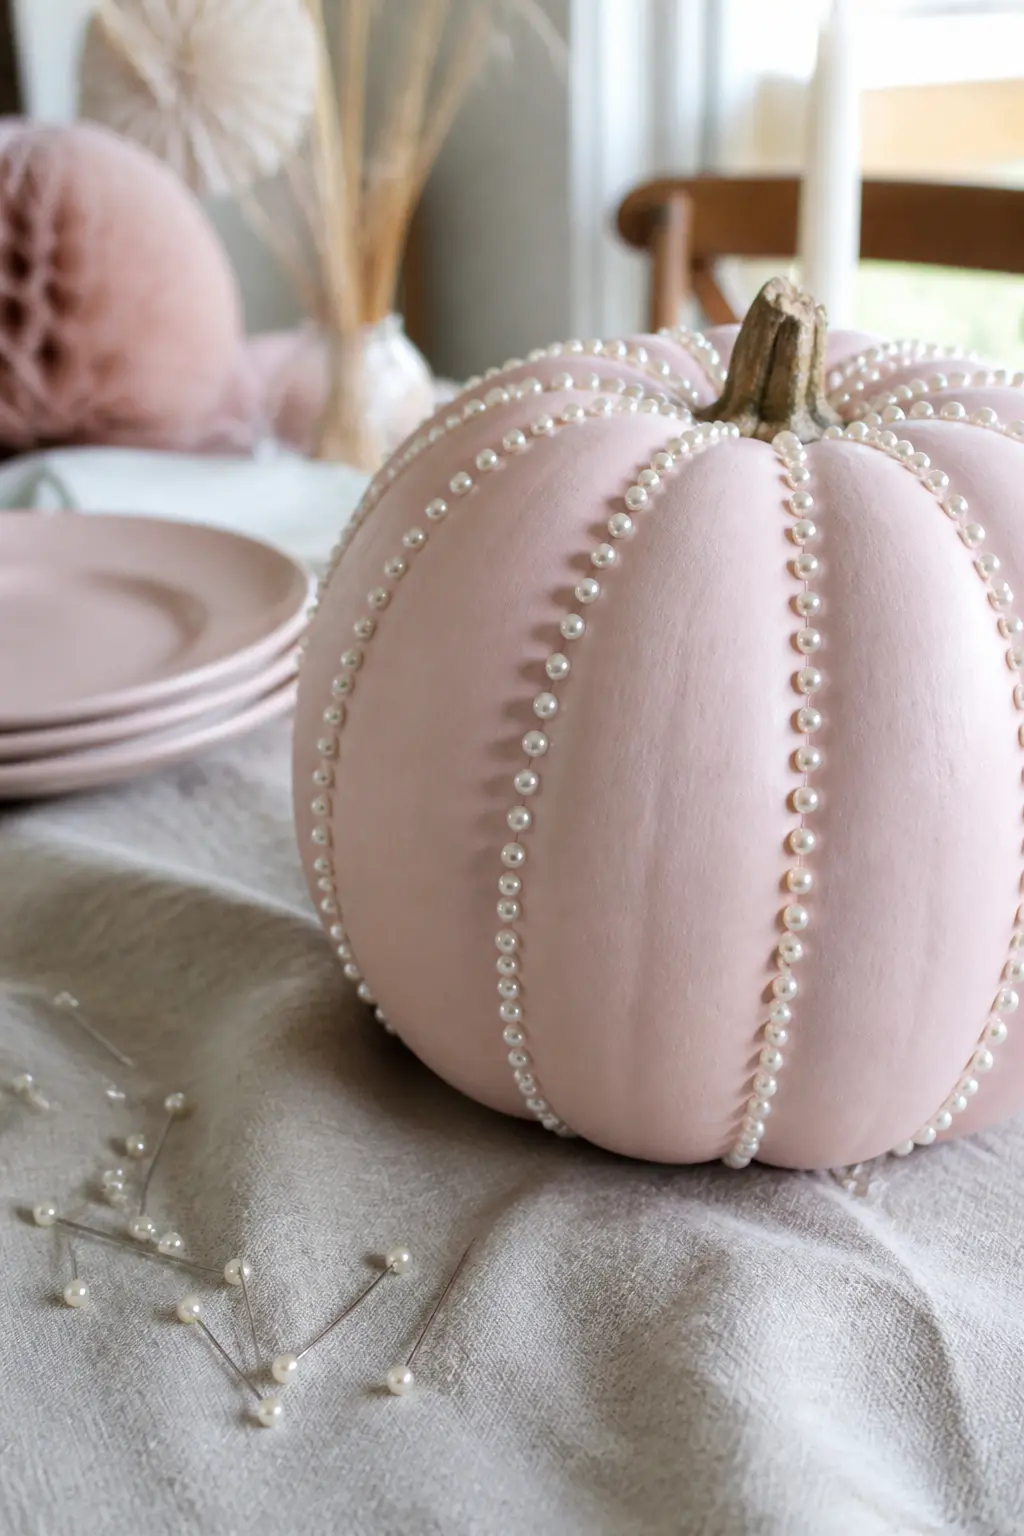
Pale Pink Pumpkin With Pearl-Headed Pins Along Every Ridge
Paint a faux pumpkin in pale pink with a matte finish. Let it cure for at least 24 hours before adding pins, because the foam or resin underneath needs to be stable enough to hold the pin without cracking the paint around the entry point.
Push a pearl-headed pin into the ridge at the very top, then space pins evenly down the full length of every ridge to the base. Step back and adjust any that look crowded before the final press. The result is clean, structured and genuinely elegant.
🛍 Shopping guide
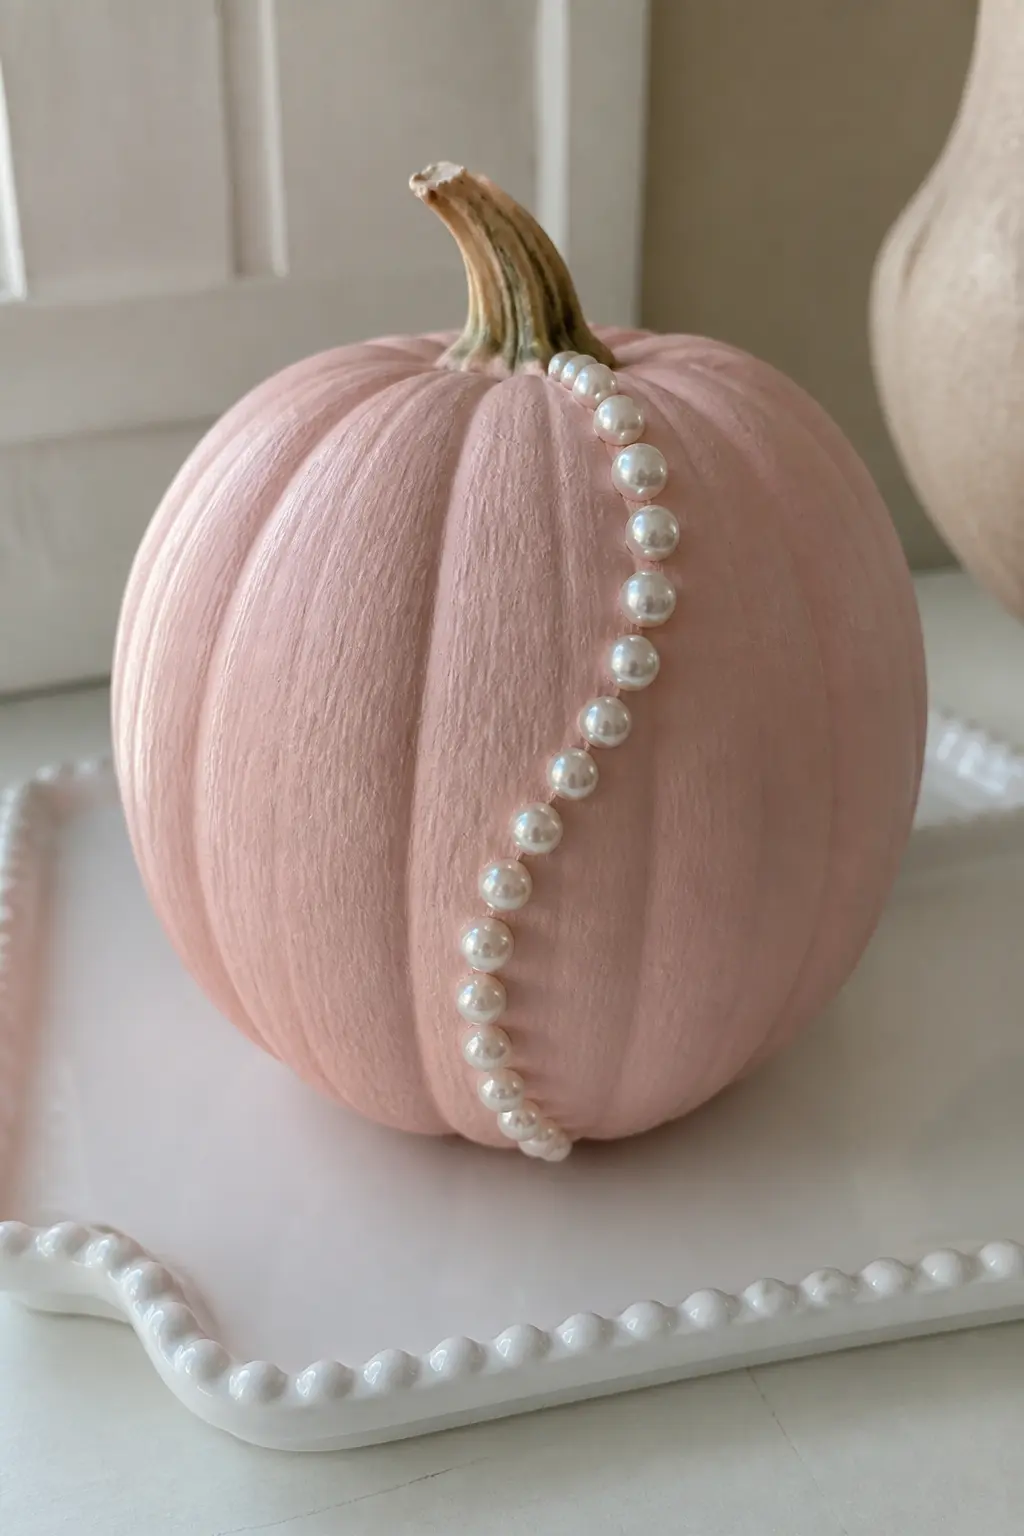
Blush Pumpkin With Pearls Glued in a Curving Line
Sketch a gentle S-curve in pencil from the stem down to the base on one side of the pumpkin. Glue flat-back pearl beads one at a time along the line with jewelry glue, keeping the spacing tight so the line reads as a continuous strand rather than scattered dots.
Let the glue cure fully before moving the pumpkin. Picking it up too soon risks pulling the whole line off in one go, which is the kind of thing that ruins an afternoon.
🛍 Shopping guide
Blush Pumpkin With a Cluster of Pearls at the Stem Only
Paint the pumpkin blush and let it cure. Collect a mix of flat-back pearl beads in two or three sizes and arrange them in a tight cluster around the base of the stem before gluing any of them down. The arrangement matters more than the gluing.
Glue the largest beads first, then fill gaps with smaller ones. The cluster should sit within an inch of the stem on all sides and taper naturally into the open painted surface below. It reads like a piece of jewelry on a very small scale.
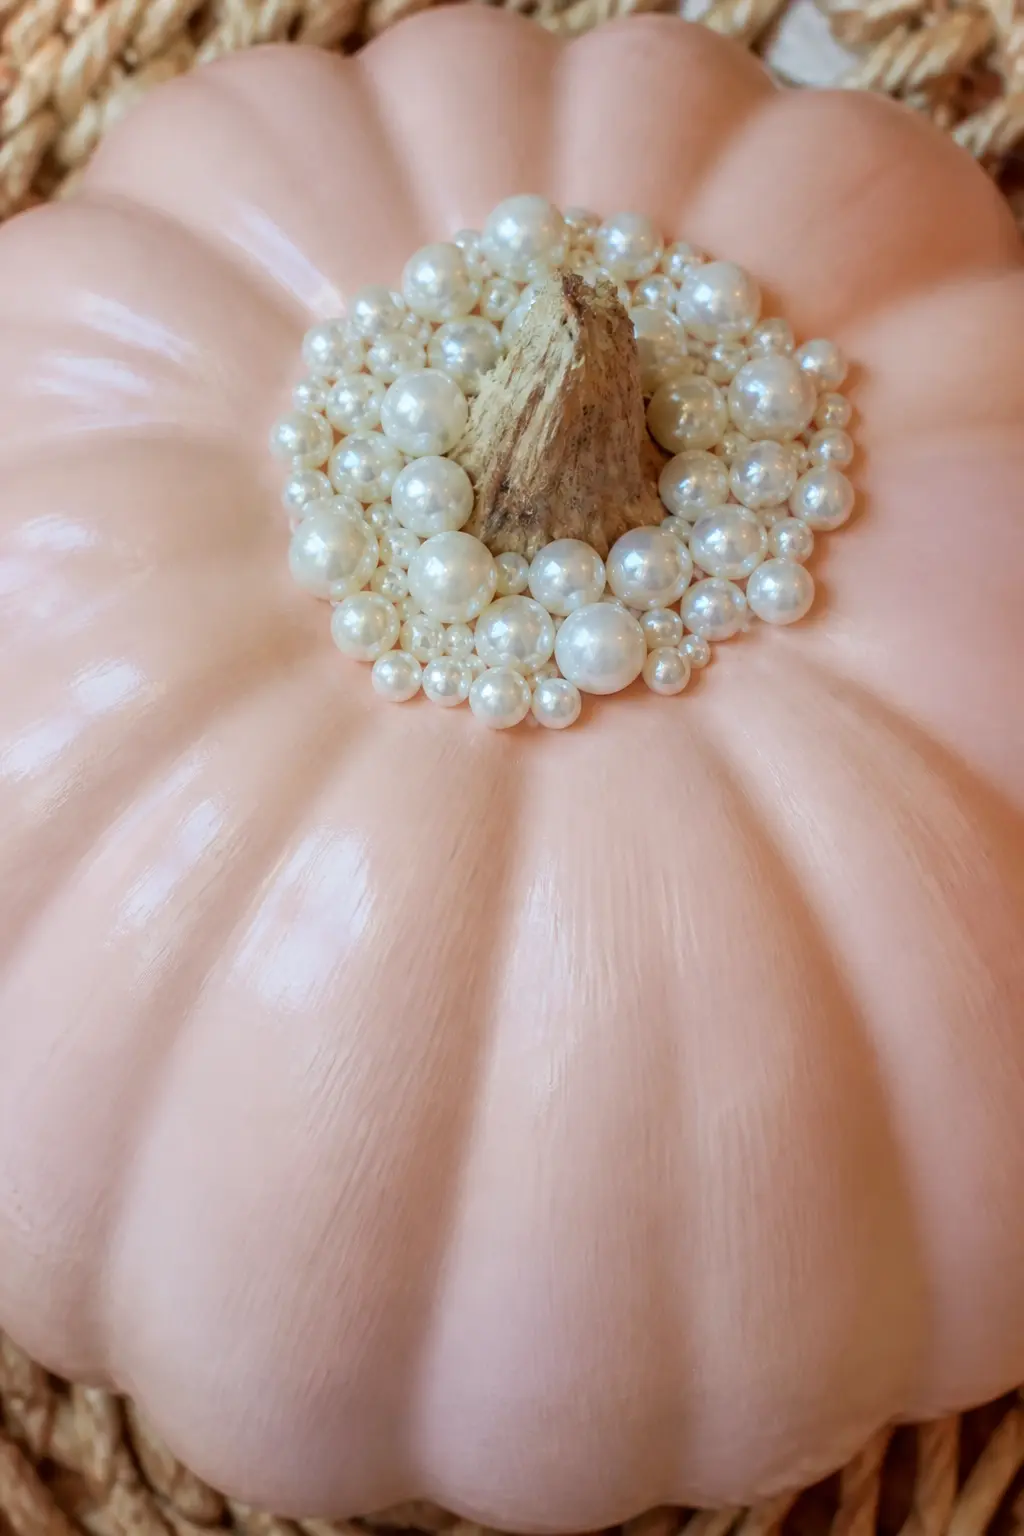
Lilac Pumpkin With Pearls Glued Only Along the Ridges
Paint the pumpkin in lilac and cure fully. Using a fine tip on your jewelry glue, run a thin bead of adhesive down the very top of one ridge, then press small round pearl beads end to end along the glue line. Work one ridge at a time and let each one set before rotating the pumpkin to the next.
This approach emphasizes the natural architecture of the pumpkin rather than covering it. The ridges become the design element, and the pearls trace them like piping on a gown. It is the most structural-looking pearl technique in this collection.
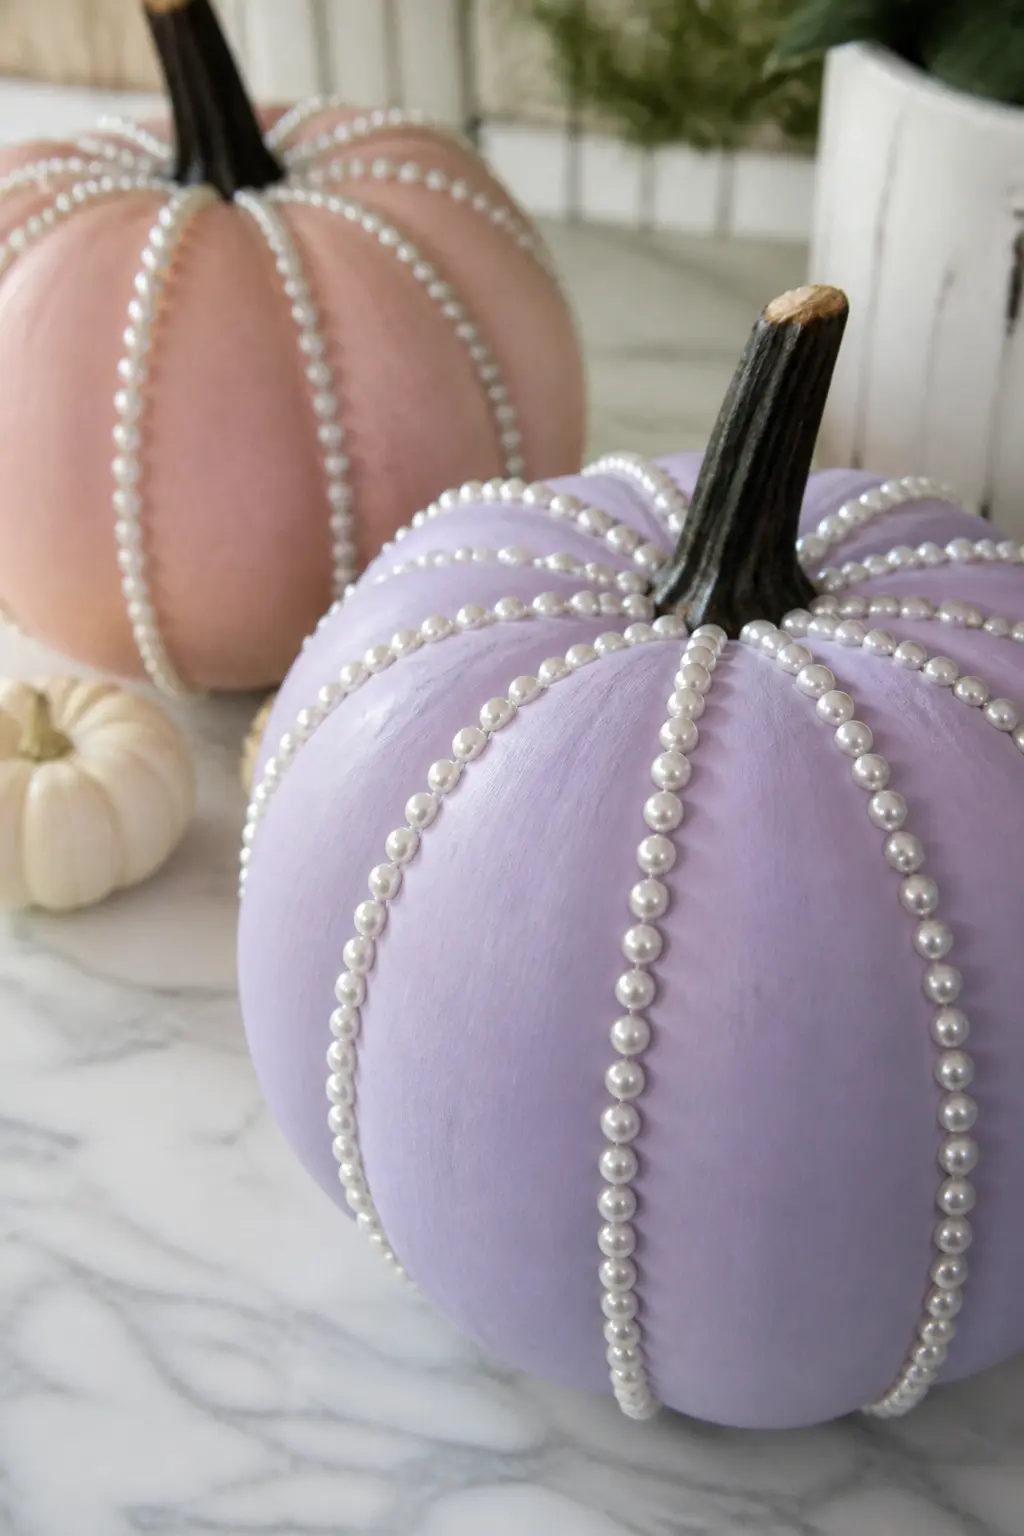
🛍 Shopping guide
Ribbon-Wrapped Pumpkins
Ribbon is the easiest way to add color and texture without any painting skill at all. Wrap it tightly and secure at the back with a dab of hot glue, or wind it in a loose spiral up to the stem for a more relaxed effect.
Wide ribbon works best on larger pumpkins; narrower ribbon suits anything under six inches. Mix widths in the same display for variety without changing your color palette.
Lilac Pumpkin With Pink Satin Ribbon Wound in a Spiral
Start at the base of the stem and wind a length of narrow pink satin ribbon in a tight spiral, angling slightly downward with each wrap. Secure the starting end with a small dab of hot glue hidden under the stem, and secure the finishing end at the base of the pumpkin.
The lilac base paint should remain visible in the gaps between each wrap, so do not pull the ribbon too tight. The two colors working together is the whole point of this look.
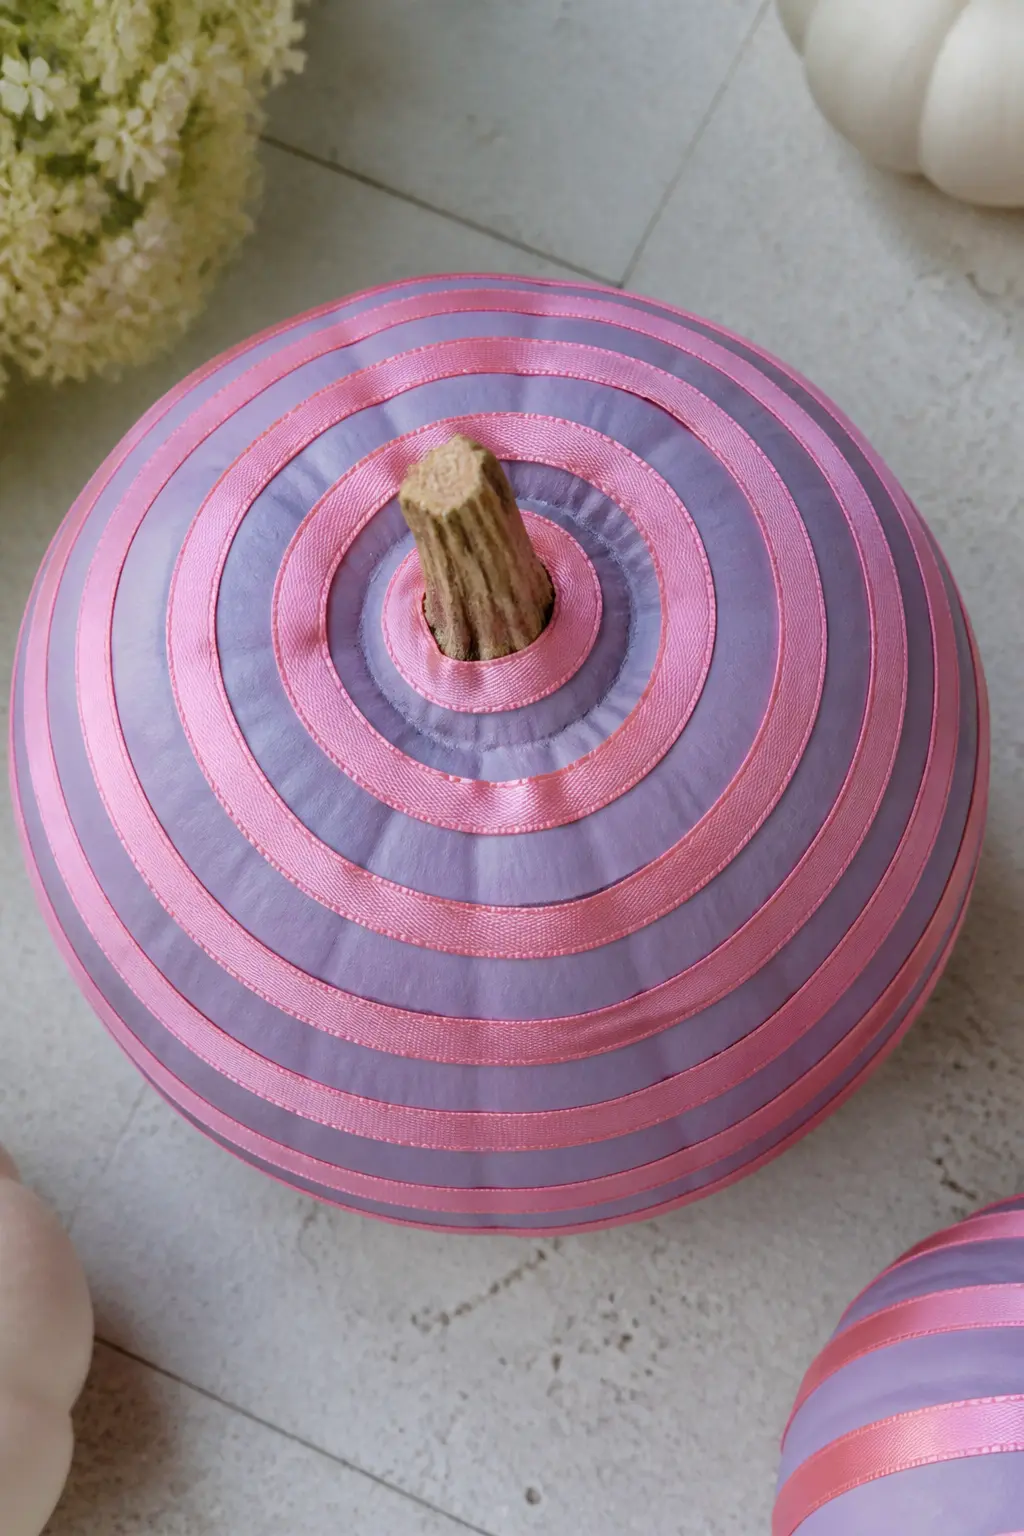
🛍 Shopping guide
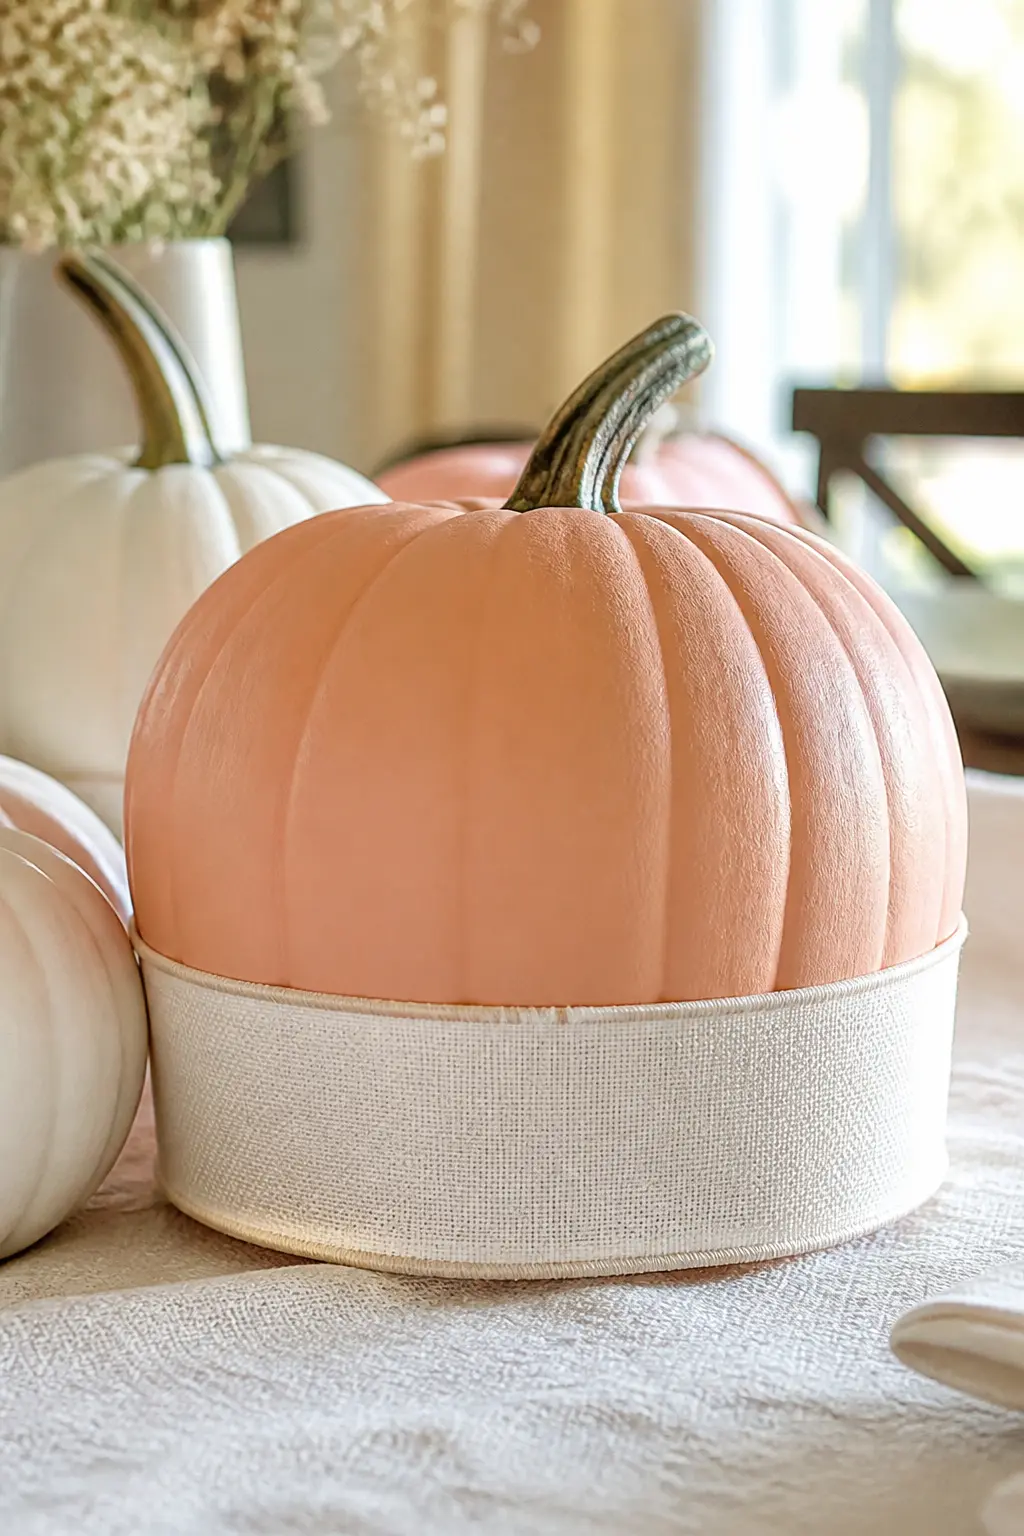
Peach Pumpkin With a Wide Cream Ribbon Band Around the Base
Paint the pumpkin in warm peach and seal it. Cut a length of wide wired cream ribbon long enough to wrap the base of the pumpkin with a two-inch overlap. Glue it at the back seam and press it flat against the painted surface.
Wired ribbon holds its shape without bunching, which matters on a curved base. If the ribbon gaps anywhere, a second dab of hot glue underneath holds it flush. The wide band anchors the pumpkin visually, making it look more substantial on a shelf or tabletop.
Peach Pumpkin With Pink Ribbon Streamers Hanging From the Stem
Paint the pumpkin in warm peach. Cut four to six lengths of narrow pink satin ribbon, each about ten inches long, and tie them in a loose knot directly at the stem, letting the ends hang down in streamers around the sides of the pumpkin.
Trim the ends at different lengths so they fall unevenly, which looks more styled than uniform lengths. The streamers move in any air current, which gives this pumpkin a quality none of the others have: it is the only one in the collection that is slightly alive.
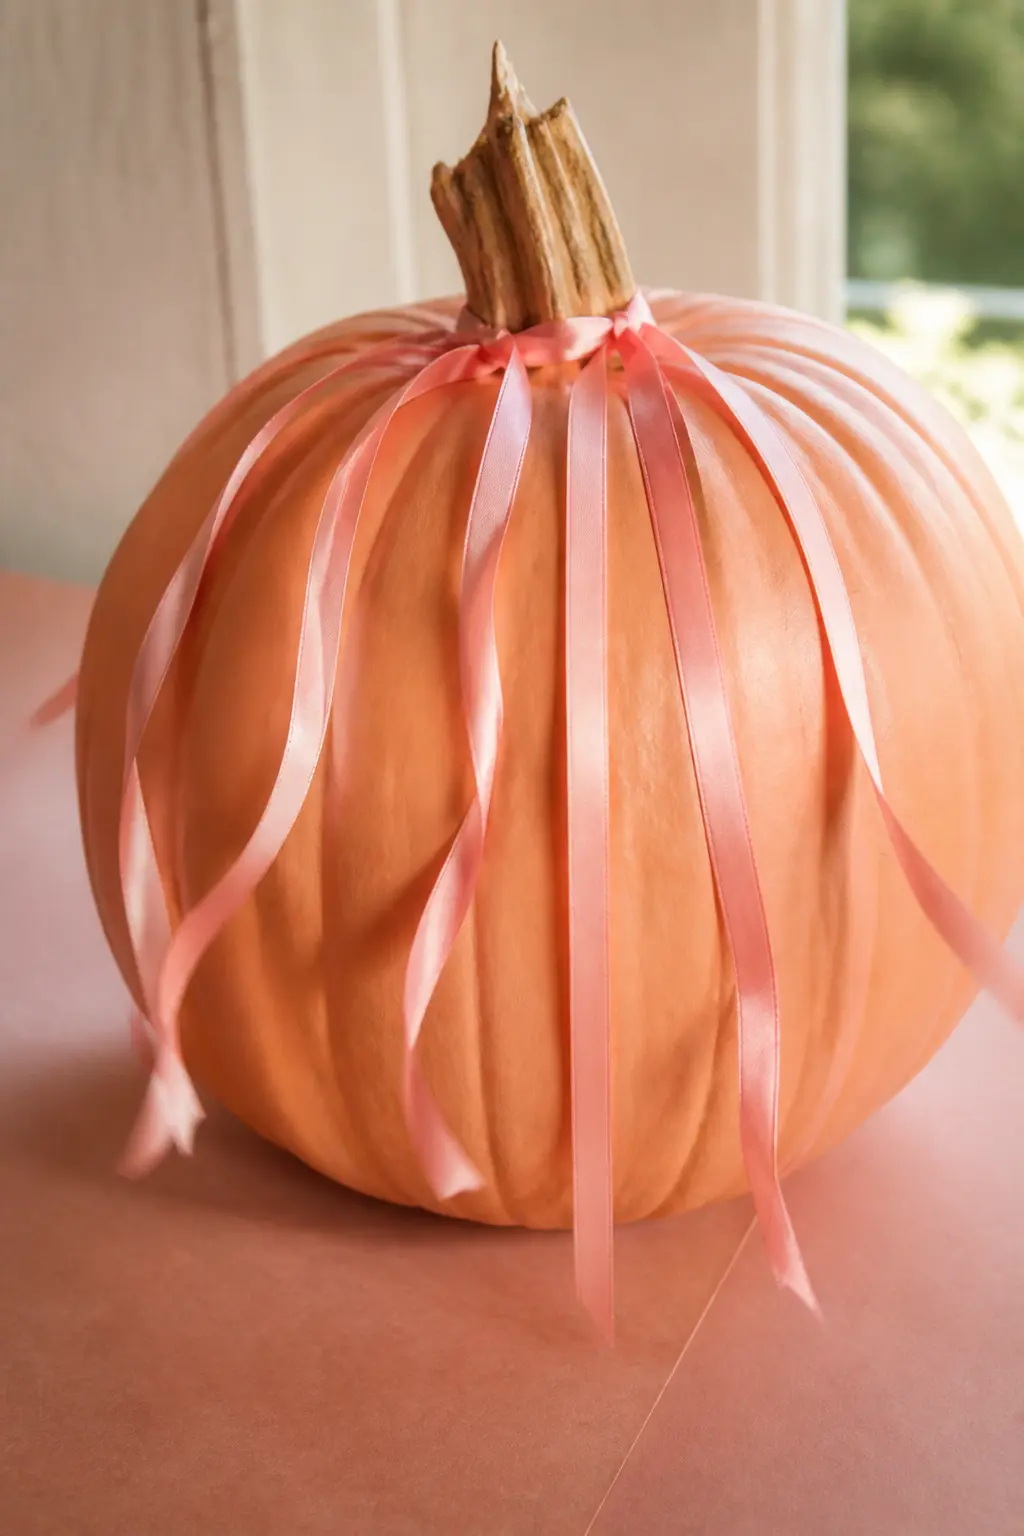
🛍 Shopping guide
Cream Pumpkin With a Charm Hung From the Stem on a Pink Ribbon
Paint the pumpkin in cream. Choose a small metal charm: a heart, a key, a star or a letter. Thread a length of narrow pink satin ribbon through the charm’s loop and tie both ribbon ends tightly at the base of the pumpkin stem so the charm hangs freely against the front of the pumpkin.
The charm swings gently when the pumpkin is moved, which gives this one a jewelry-box quality the others do not have. Choose a charm that means something; this pumpkin tells a small story.
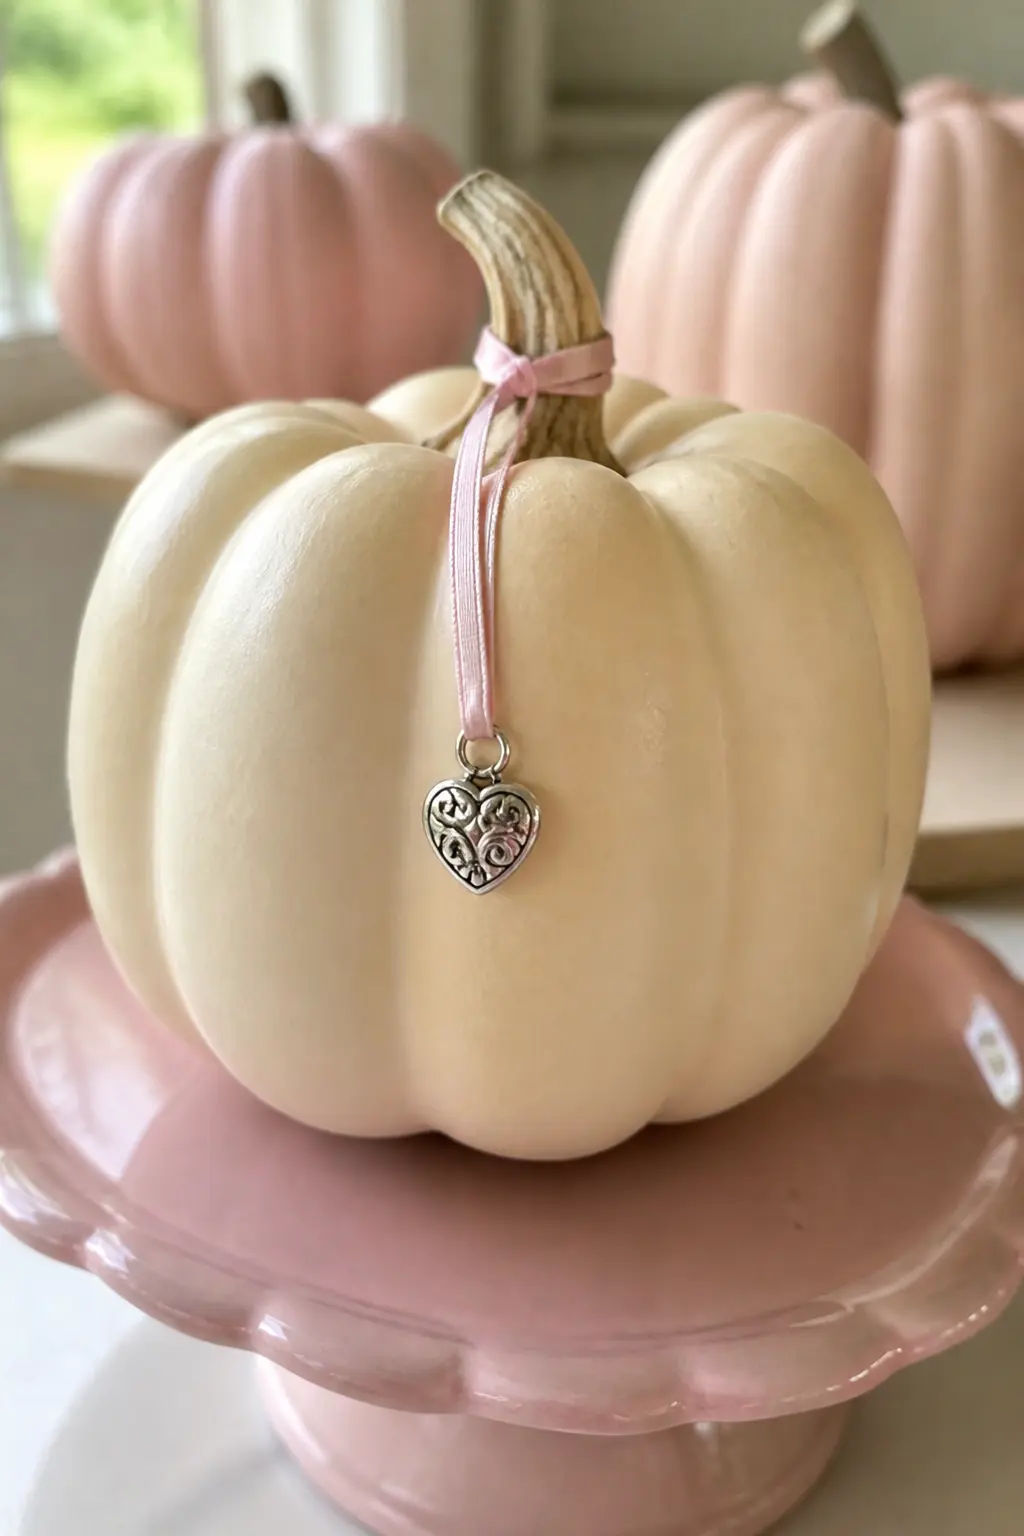
🛍 Shopping guide
Painted-Pattern Pumpkins
A pattern layered over a base coat turns a plain pumpkin into something that looks considered. Hearts, stripes, gingham and lace prints all require nothing more than a small brush and a little patience.
Trace lightly in pencil before you commit. On a curved surface, pencil lines erase cleanly with a barely-damp cloth, so there is no pressure to get it perfect on the first pass. For the lace-sponge technique, cut a doily to fit, hold it flat and dab paint through the holes. Lift straight up so the pattern does not smear.
Cream Pumpkin With a Scalloped Edge Painted Round the Middle
Base coat the pumpkin in cream. Once dry, lightly pencil a horizontal guideline around the widest part of the pumpkin. Use a small round brush and soft pink paint to draw connected scallops along the line, keeping each arc the same width.
Fill in below the scallop line with a thin wash of the same pink, diluted with water to about 30 percent opacity, so the cream base still shows through. It gives the bottom half a watercolor quality without requiring any watercolor skill.
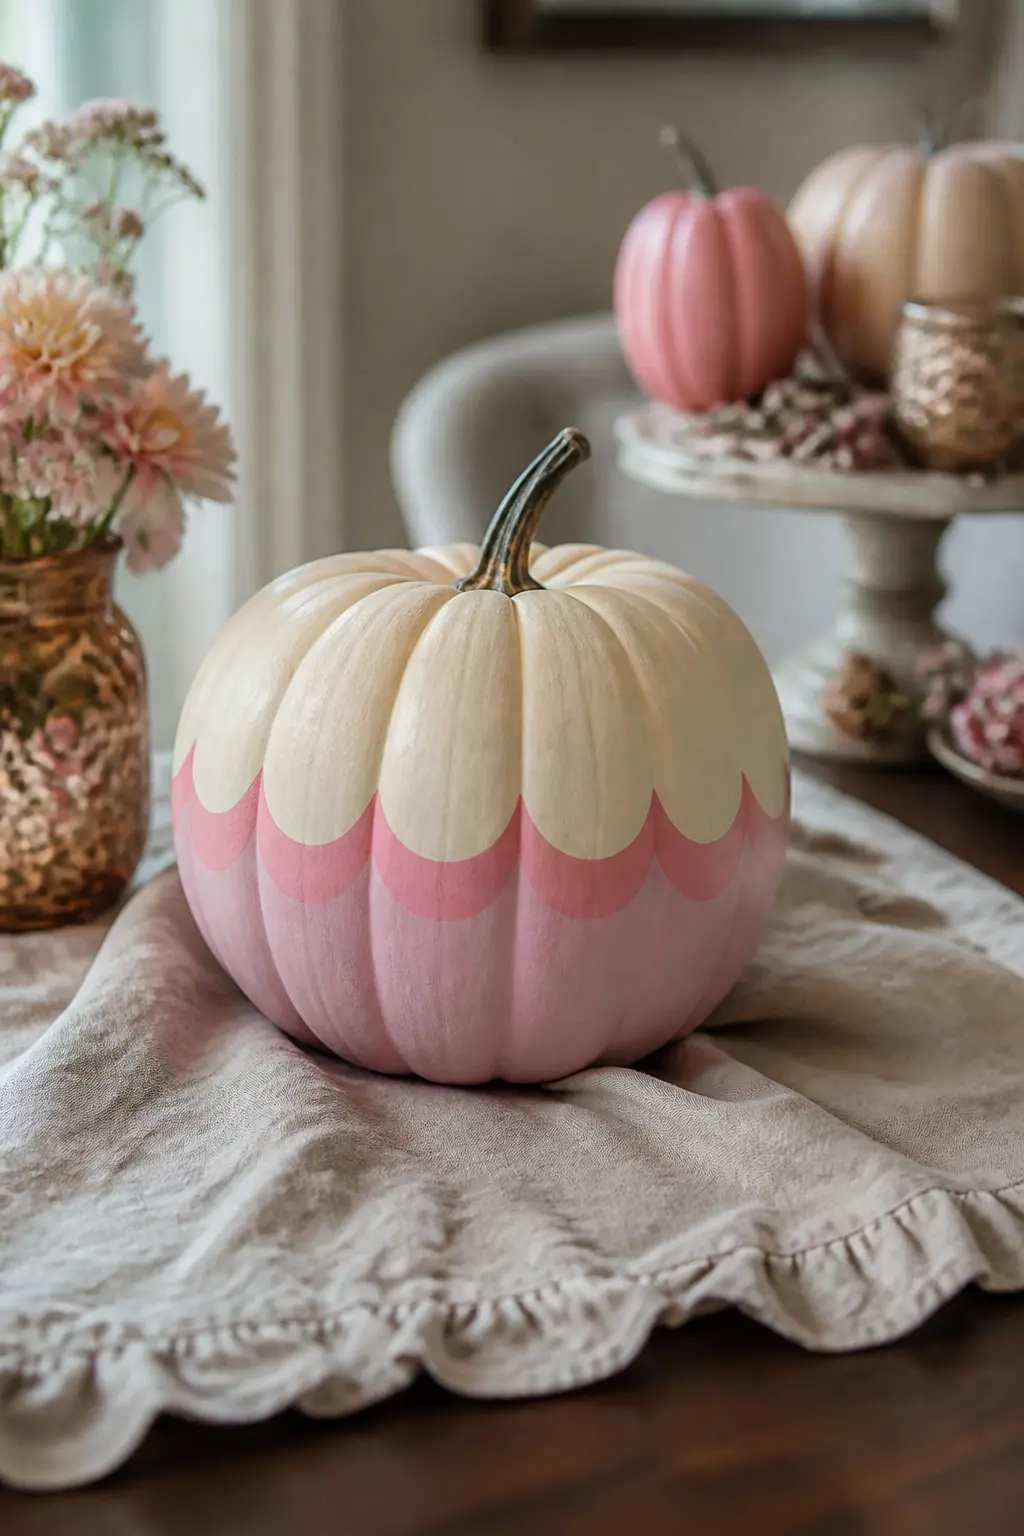
🛍 Shopping guide
White Pumpkin With Painted Pink Hearts Scattered Evenly
Base coat the pumpkin in bright white for the cleanest contrast. Use a small brush loaded with warm pink to paint simple hearts across every section of the pumpkin, varying slightly in angle so they look scattered rather than gridded.
Keep each heart under half an inch wide. Tiny hearts on a white ground look refined; large hearts on a white ground look like a child made it. The difference is almost entirely scale.
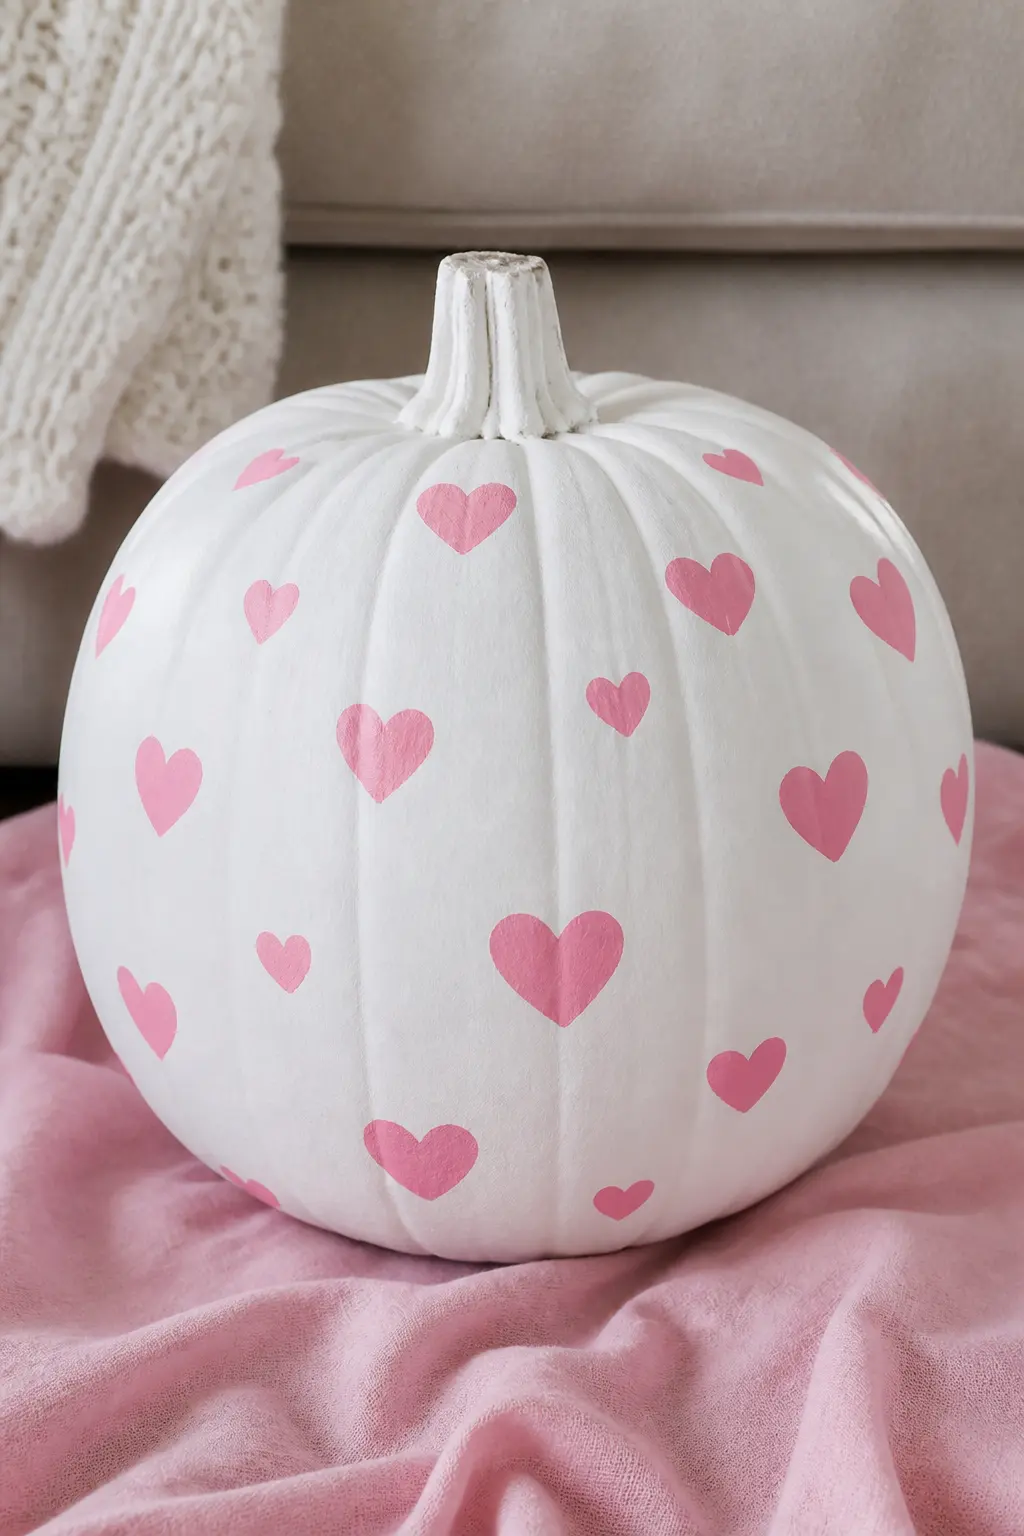
🛍 Shopping guide
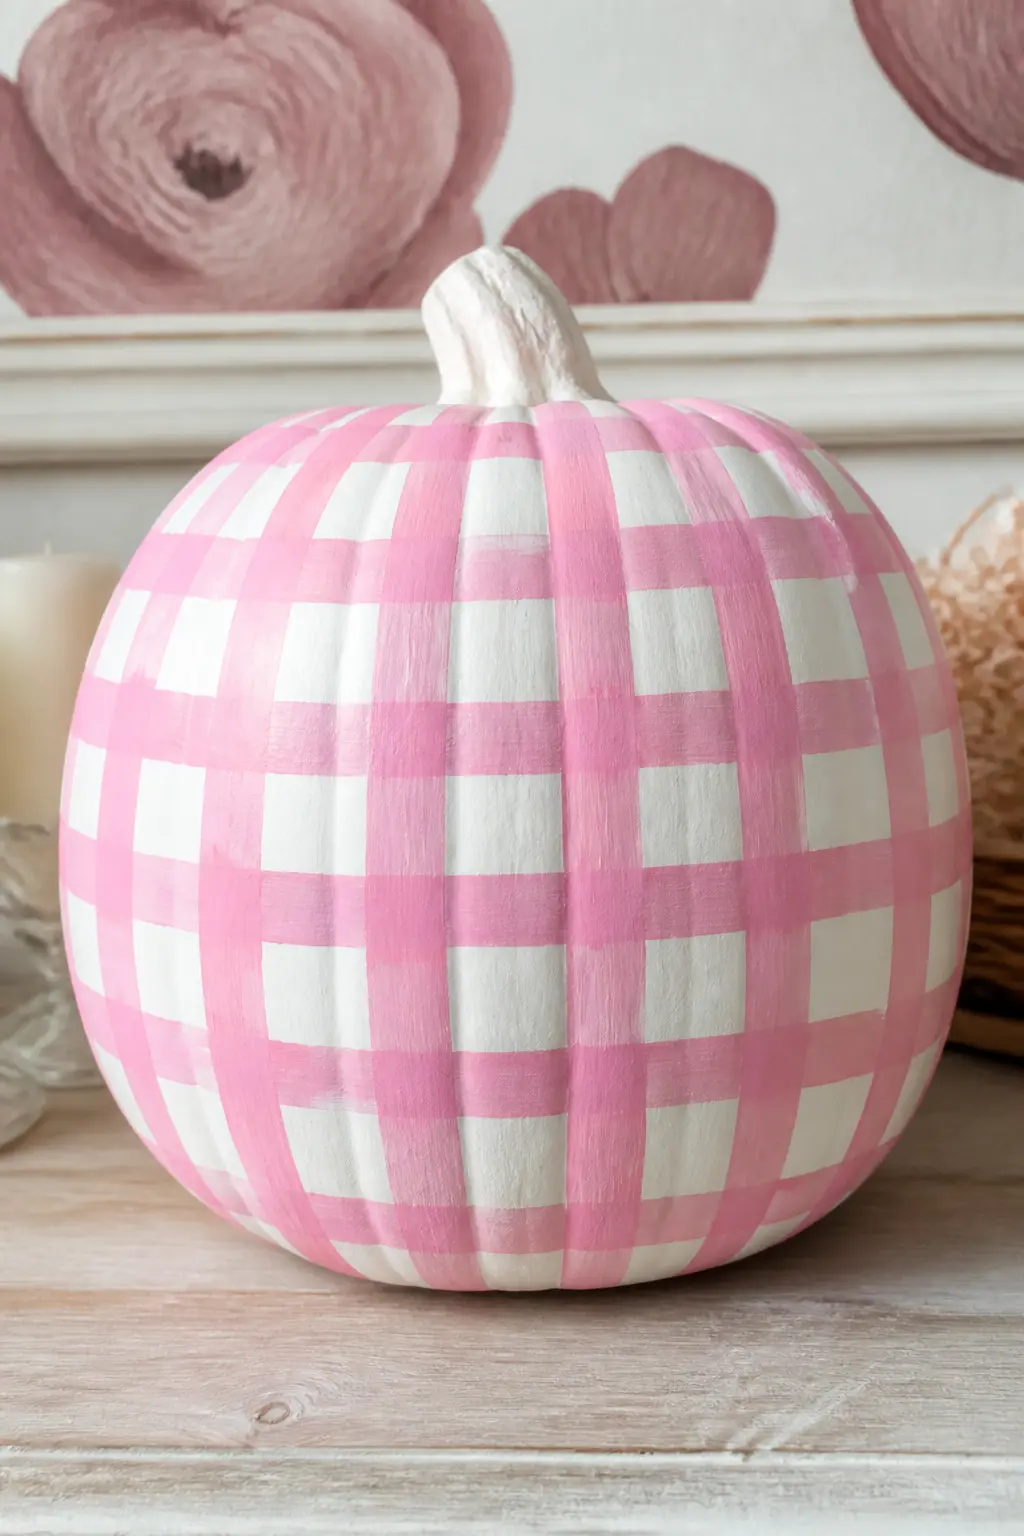
Cream Pumpkin With Painted Pink Gingham Squares
Gingham on a curved surface is simpler than it looks. Base coat in cream. Use a flat brush and a ruler held lightly against the pumpkin to draw evenly spaced horizontal and vertical lines in pink. Where the lines cross, the double layer of paint creates the darker square that makes gingham read correctly.
Work in two passes: all horizontal lines first, let dry completely, then all vertical lines. Rushing the second pass before the first is dry creates muddy intersections instead of clean checks.
🛍 Shopping guide
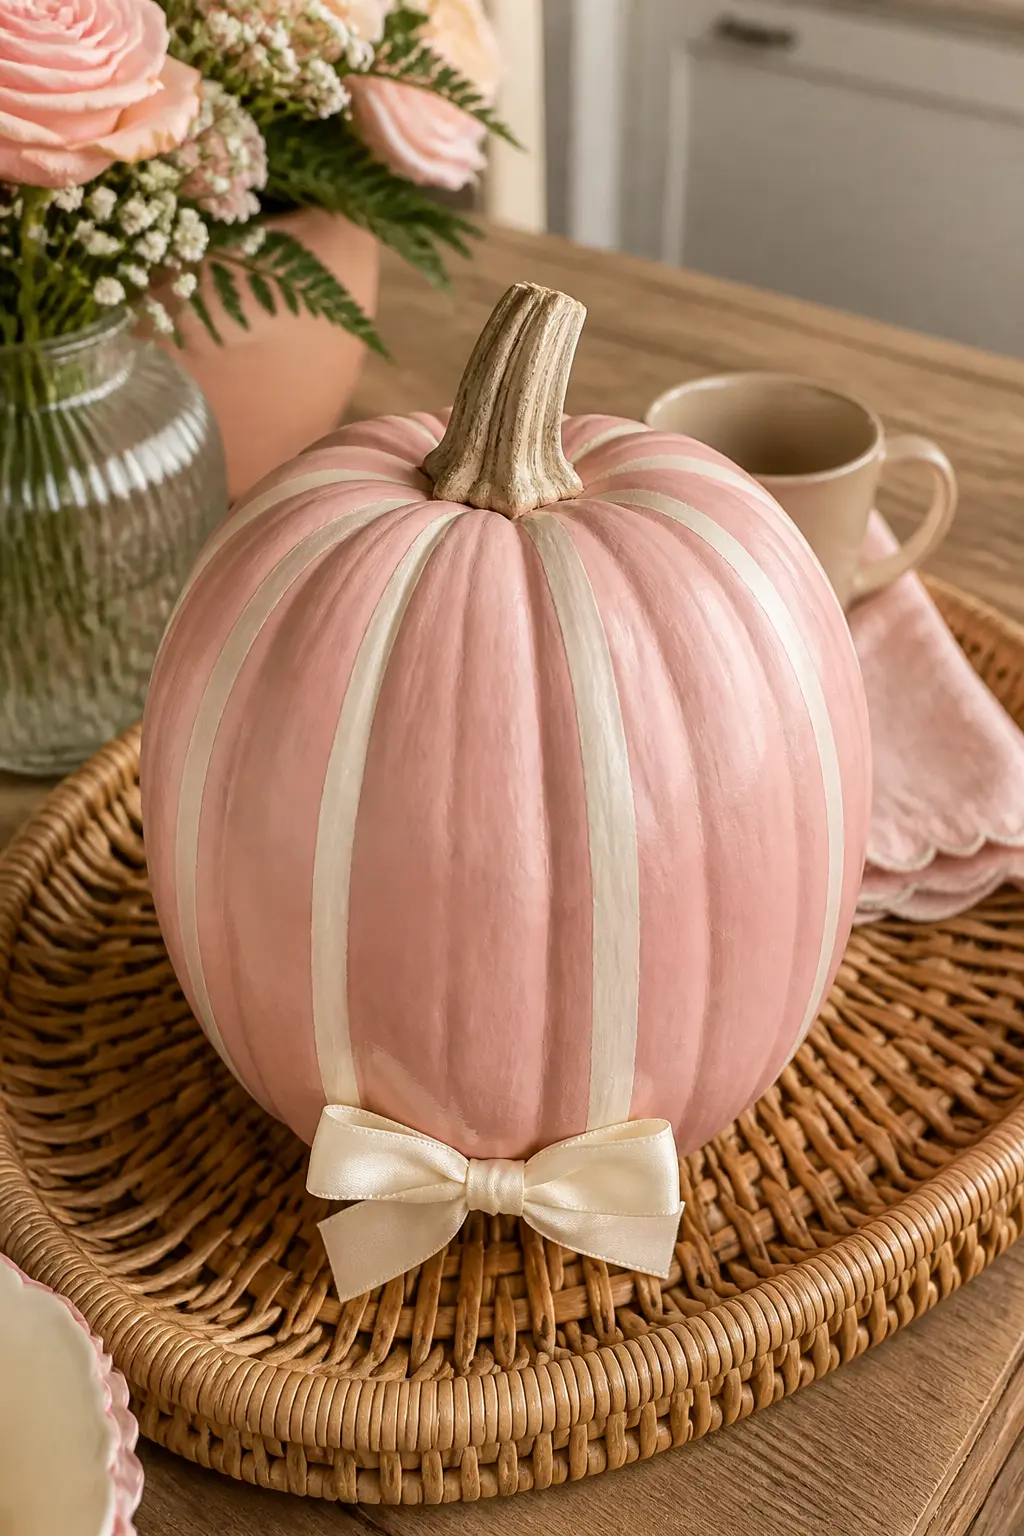
Pink Pumpkin With Cream Painted Stripes and a Small Bow at the Base
Base coat the pumpkin in a warm pink. Use a narrow flat brush and cream paint to paint vertical stripes from the stem to the base, following the natural ridges of the pumpkin as a guide. The uneven surface will give the stripes a slight organic wobble, which looks intentional rather than imprecise.
Once dry, tie a small cream satin ribbon bow and glue it at the very base of the pumpkin front. The bow at the bottom rather than the top gives this one a different silhouette from every other bow pumpkin in the collection.
🛍 Shopping guide
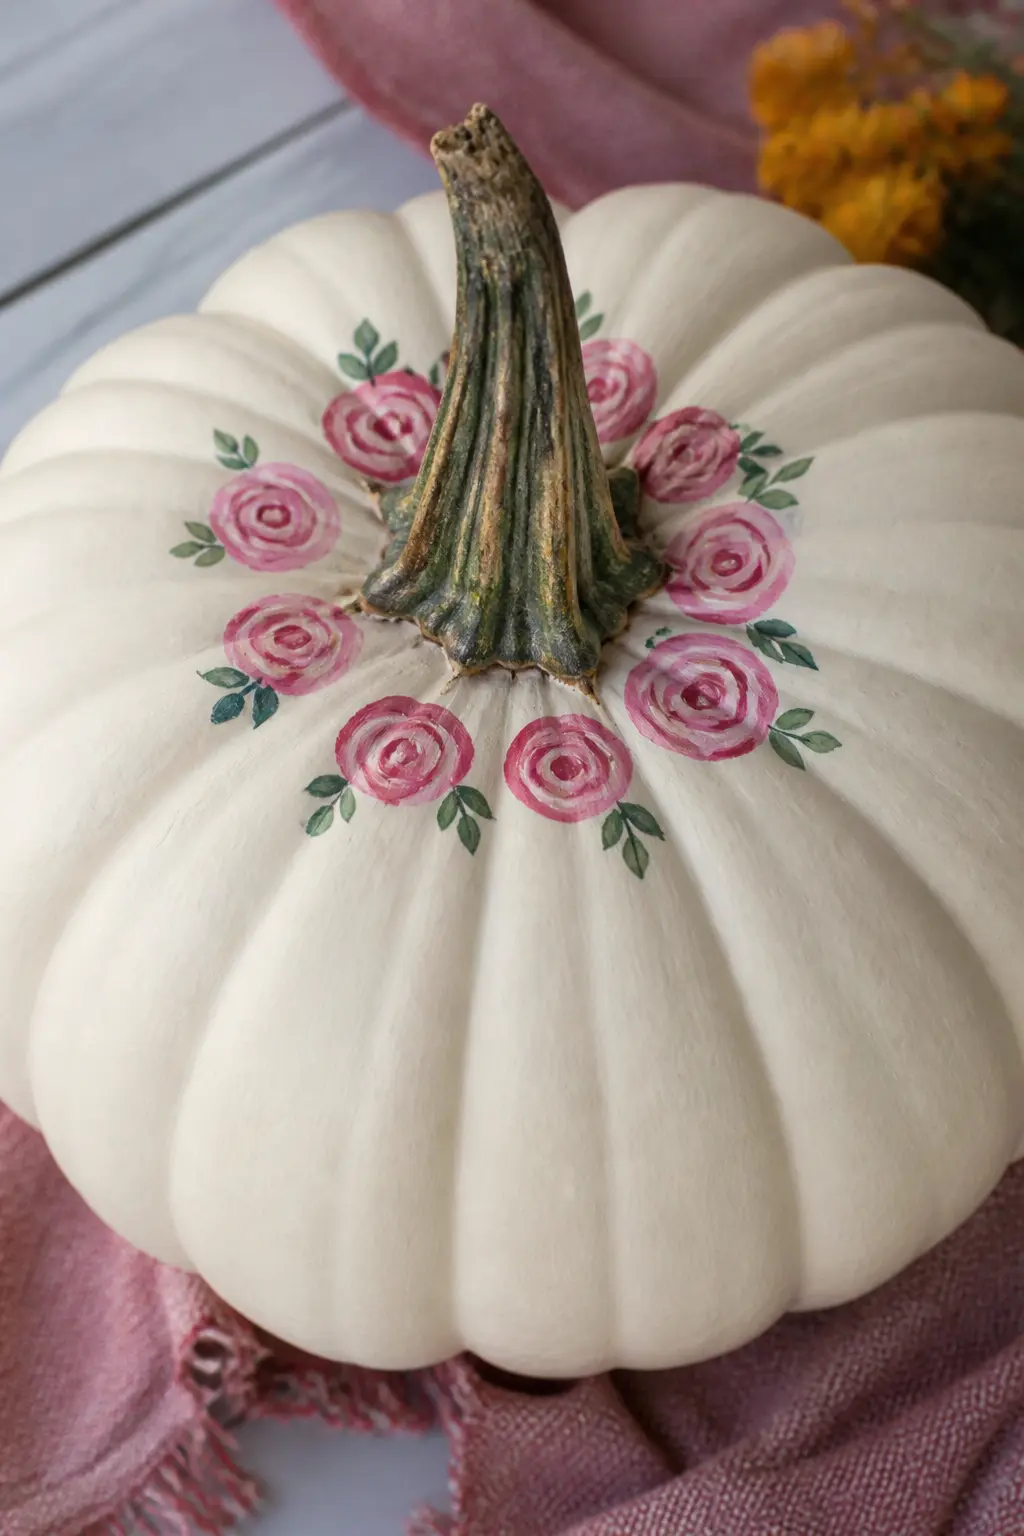
Cream Pumpkin With Painted Pink Roses Around the Stem
Paint the pumpkin in cream. To paint simple roses around the stem, start with a tight spiral of pink in the center of each flower and add three or four curved comma strokes around it for petals. Add a few green leaf strokes between the roses to separate them.
Keep the roses within two inches of the stem so the cream body stays as the main event. A wreath of roses around the stem looks elegant; roses scattered down the sides look unfinished. Placement is the whole decision.
🛍 Shopping guide
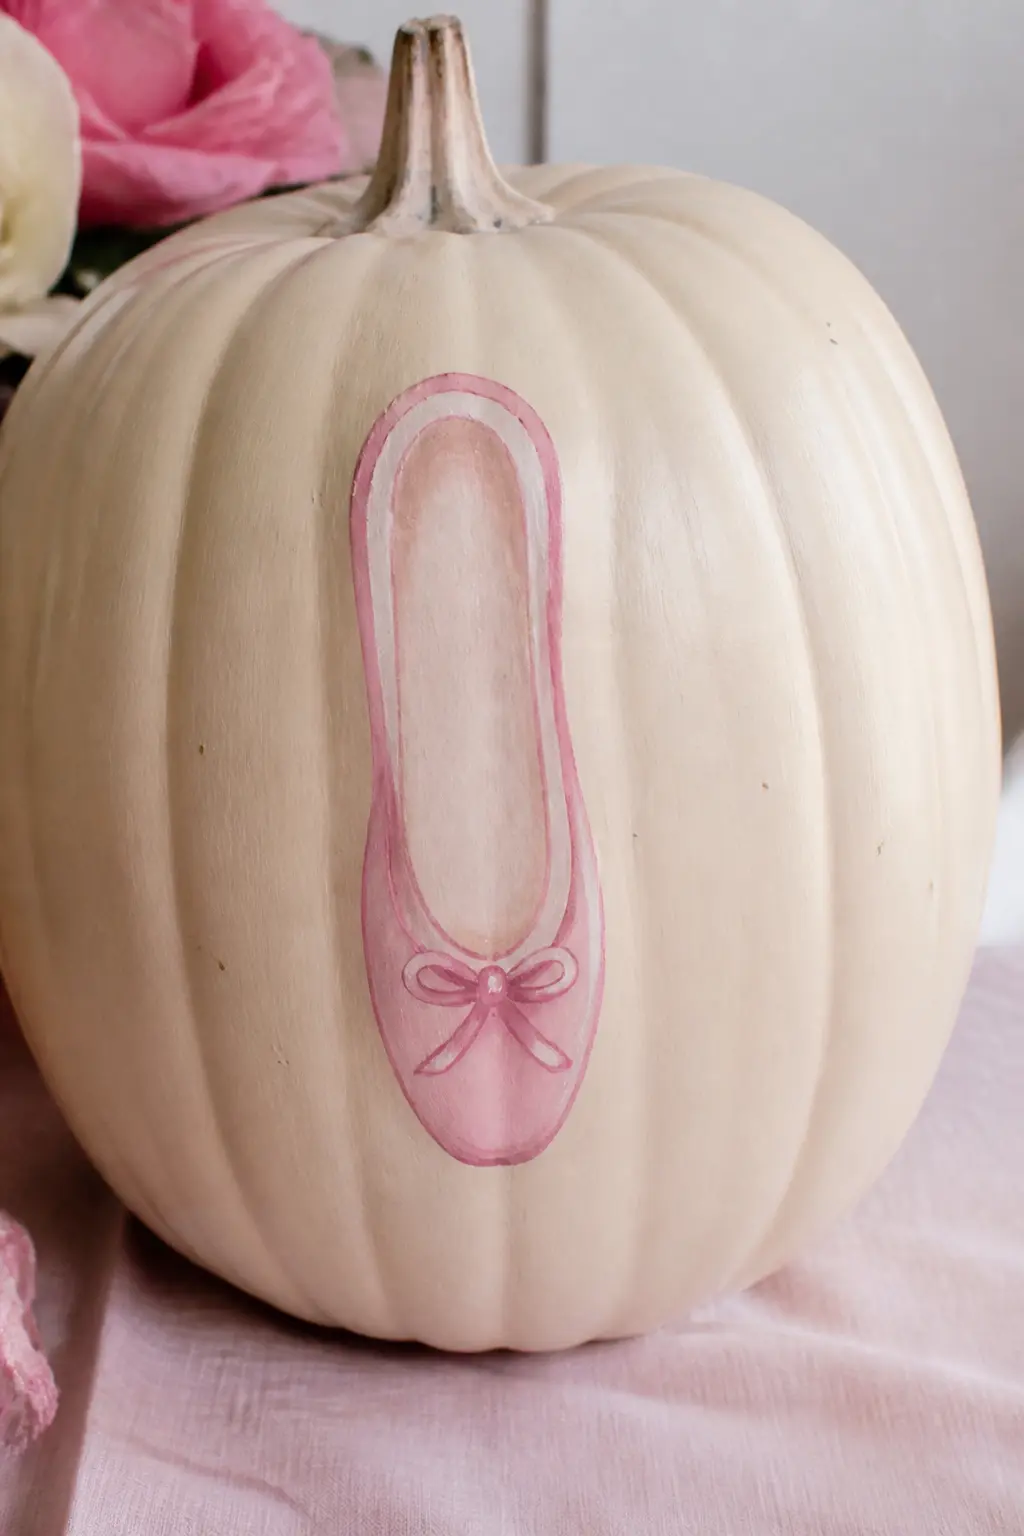
Cream Pumpkin With a Painted Pink Ballet Slipper on the Front
Paint the pumpkin in cream. Sketch a small ballet flat in pencil on the smoothest front section of the pumpkin: a gentle rounded toe, a low vamp, a small bow at the toe. Fill in with two shades of pink, a lighter base and a slightly deeper shadow along the inner sole edge, for a little dimension.
Add a tiny cream bow at the toe in the same cream as the base coat so it reads as a tonal detail. Step back after each stage: on a curved surface, painted shapes can distort as you add color, and it is easier to correct early than to repaint the whole thing.
🛍 Shopping guide
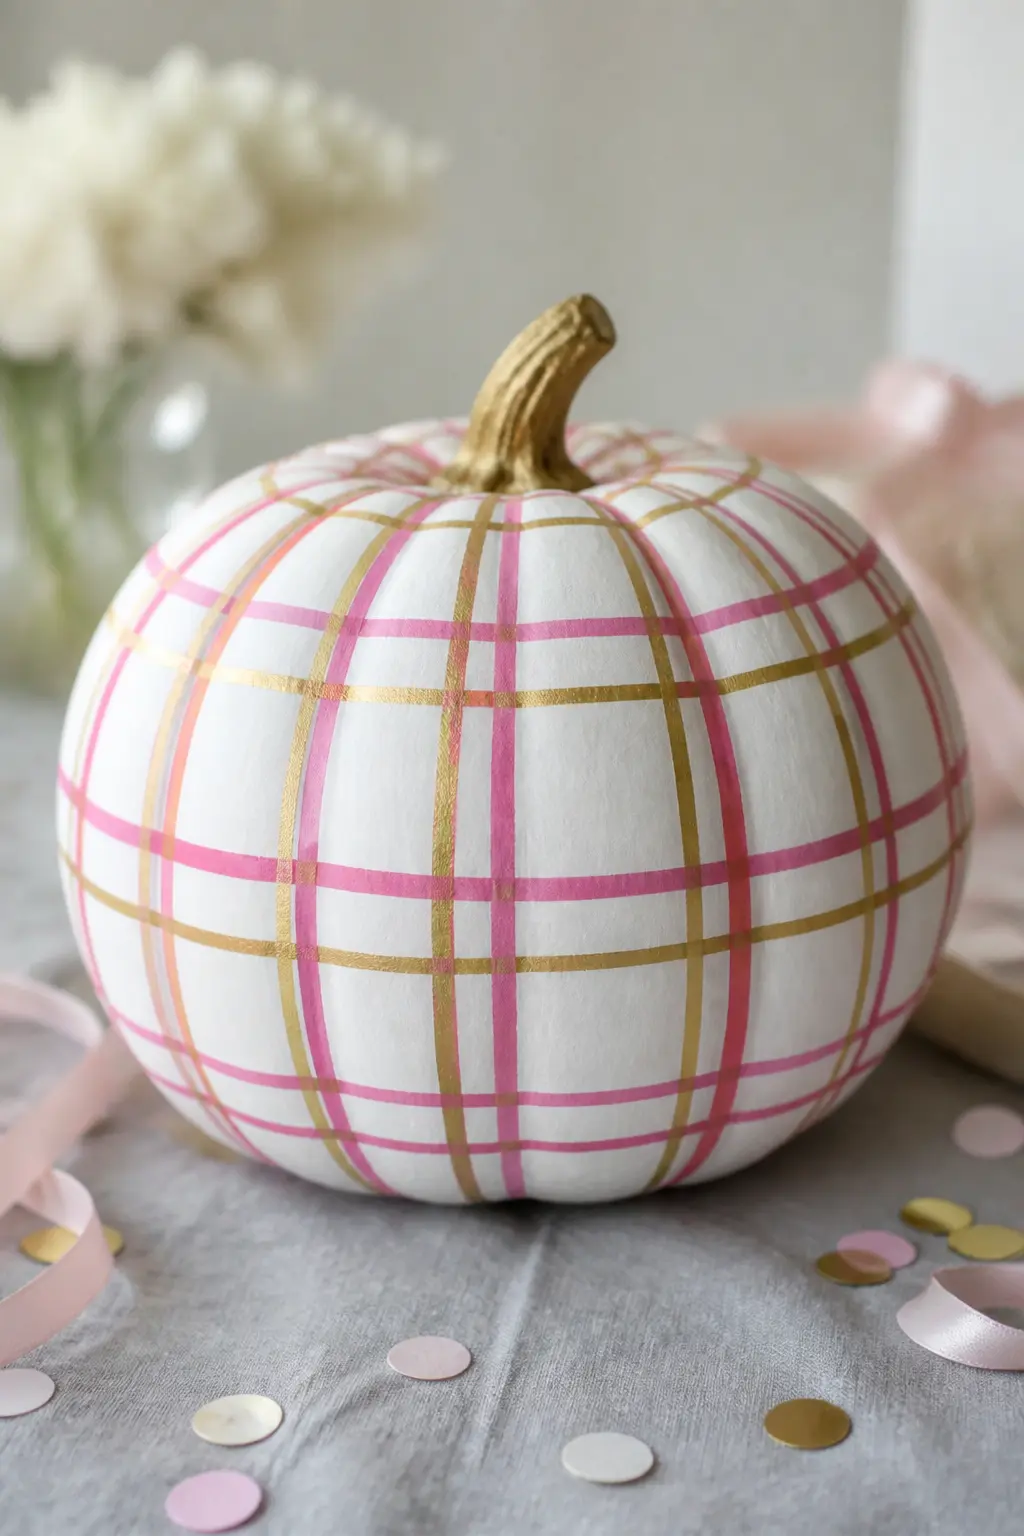
White Pumpkin With a Painted Pink and Gold Plaid Grid
Base coat the pumpkin in bright white. Paint evenly spaced vertical stripes in soft pink from stem to base. Once dry, paint horizontal stripes in the same pink at the same spacing. Where lines cross, you have a basic grid. Now paint a second, thinner set of lines in gold, centered between the pink lines, both vertically and horizontally.
The thinner gold lines create the secondary grid that turns a basic check into a plaid. Use a liner brush for the gold lines to keep them thin. Two colors, two line weights, one very impressive-looking pumpkin.
🛍 Shopping guide
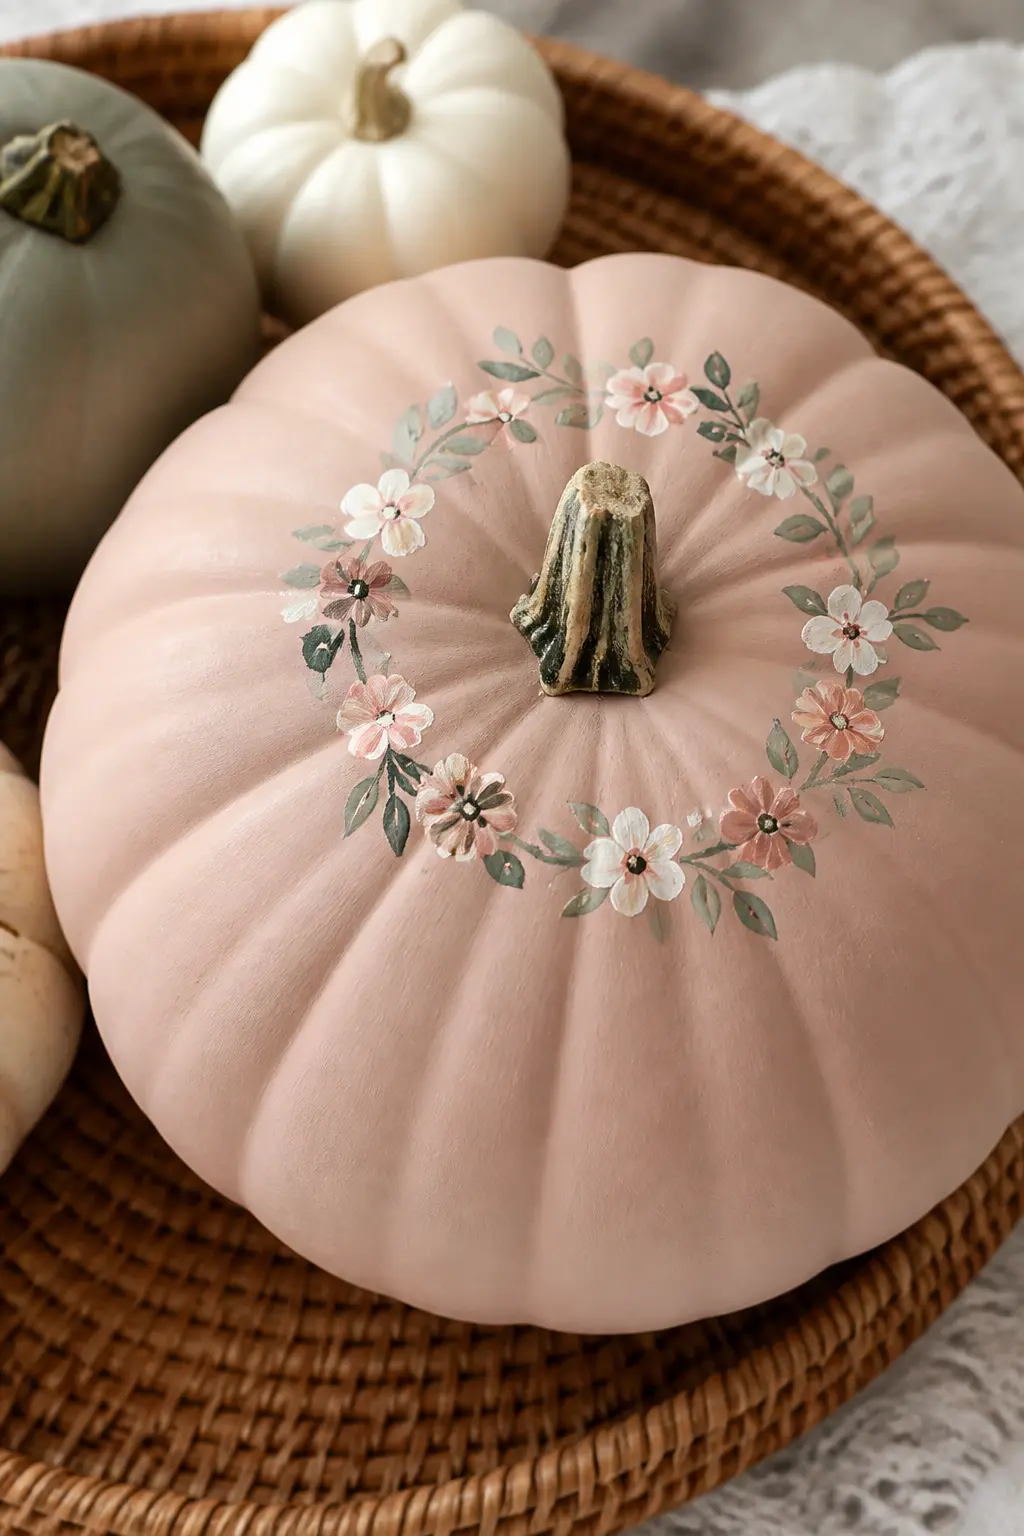
Blush Pumpkin With a Painted Floral Crown Around the Stem
Paint the pumpkin blush. Using a small round brush, paint a ring of small flowers directly around the base of the stem: vary the shapes between simple daisy forms, tiny roses and loose blobs that read as hydrangea blooms. Fill the gaps with small leaf strokes in sage green.
Keep the floral ring tight to the stem rather than spreading down the sides. A contained crown looks intentional; flowers drifting down the pumpkin surface look like a mistake in progress. The blush ground gives the florals room to breathe.
🛍 Shopping guide
Lettering and Monogram Pumpkins
A name or initial on a painted pumpkin makes it feel personal without being precious. Use a fine-tip paint pen for clean lettering or a small round brush loaded with gold craft paint for a calligraphy look.
Practice the letters on paper first and keep the font simple. Thin strokes on a curved surface are harder to control than they look on a flat page, so err toward bold over delicate.
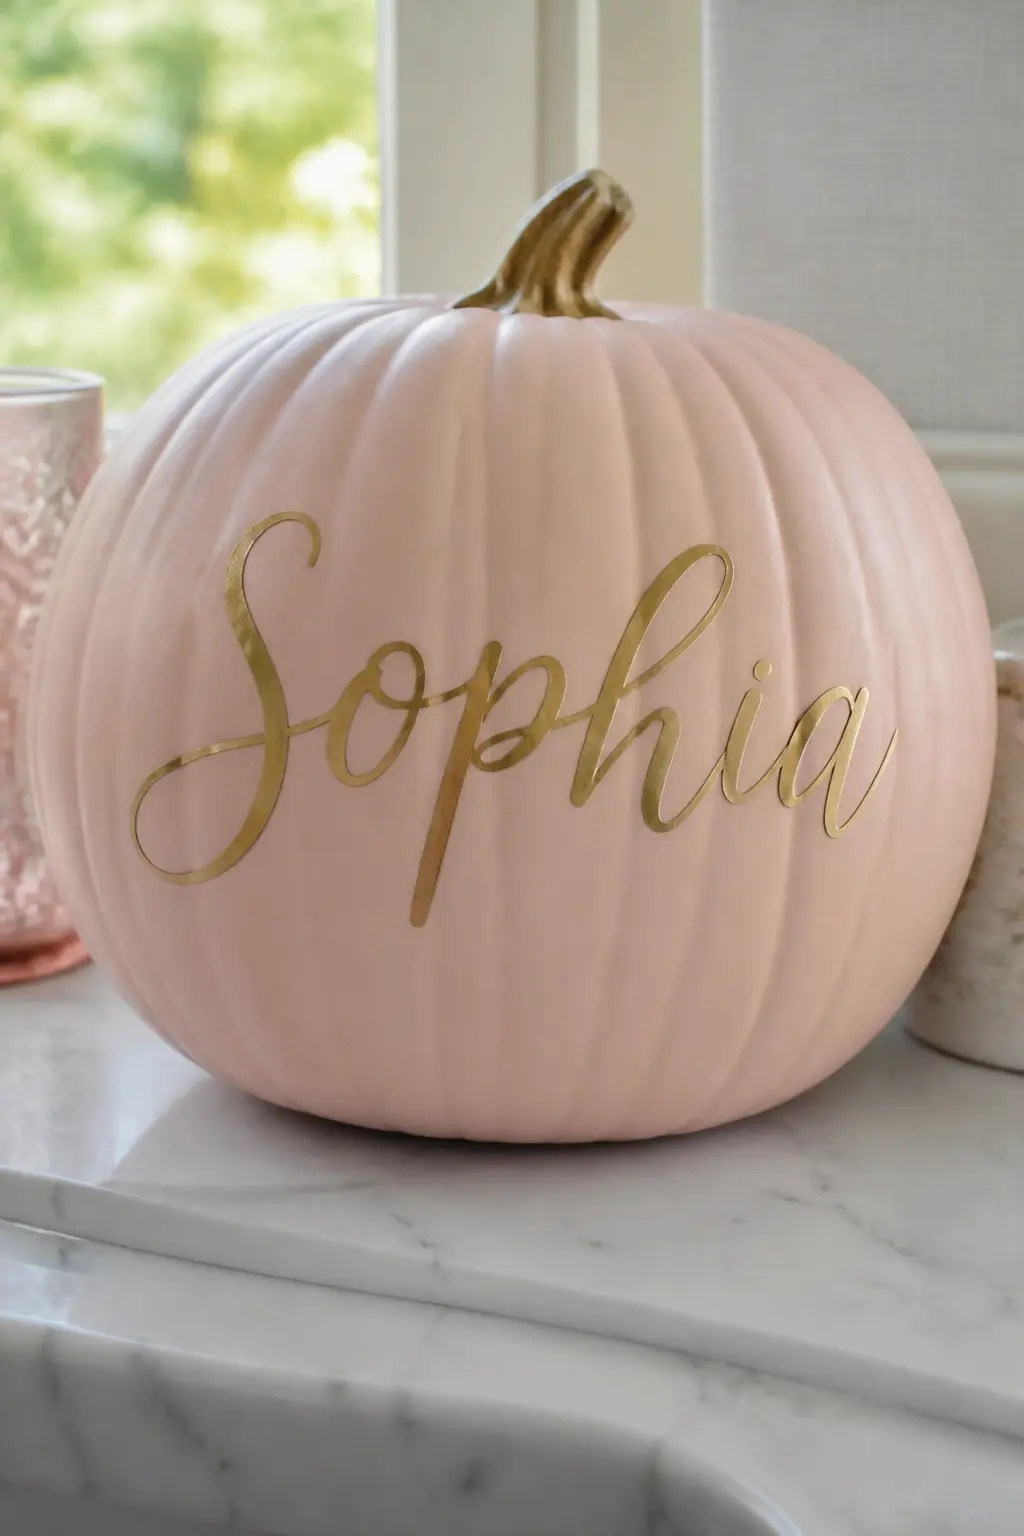
Blush Pumpkin With a Name Hand-Lettered in Gold Script
Paint the pumpkin blush and finish with a matte sealer so the paint pen or brush has a stable surface. Center the name horizontally on the widest, flattest section of the pumpkin, keeping the letters slightly larger than feels intuitive: the curve of the surface makes lettering look smaller once you step back.
A gold fine-tip paint pen is the most forgiving tool. Reload pressure slowly and use thin strokes on the downstroke and lighter strokes on the upstroke for a calligraphy effect without a calligraphy pen.
🛍 Shopping guide
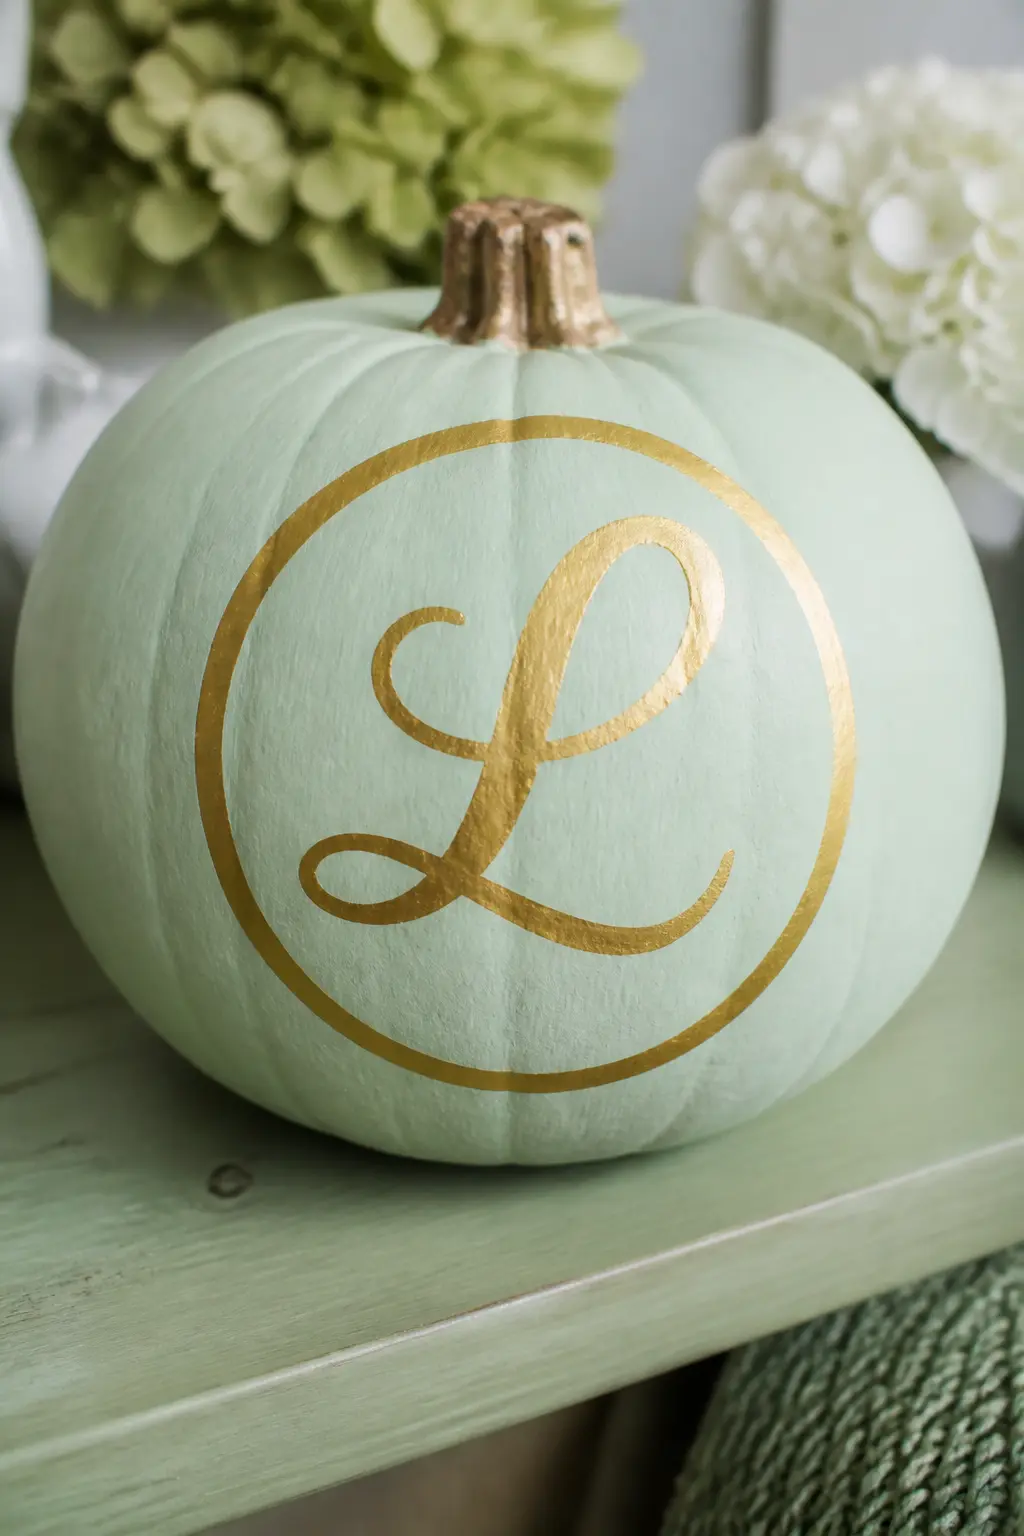
Mint Pumpkin With a Painted Gold Monogram Inside a Painted Circle
Paint the pumpkin in cool mint. Use a small round object (a bottle cap works well) dipped in gold paint to stamp a clean circle on the front face of the pumpkin. Let it dry, then hand-letter a single initial in gold paint pen inside the circle.
The circle acts as a frame for the letter, making even imperfect lettering look deliberate. Center the initial by eye: measure the circle diameter, halve it, and place the letter at that midpoint. A single initial in a circle is a monogram; without the circle it is just a letter.
🛍 Shopping guide
Lace and Texture Pumpkins
Lace reads soft and vintage, which makes it a natural partner for the pale, muted paint colors in this collection. A doily glued flat on top of a lilac pumpkin looks like a little hat; lace ribbon wound around the middle looks like a waistline.
Use a flat decoupage medium to adhere lace doilies so they conform to the curve of the pumpkin. Standard craft glue can bubble under a wide, flat piece.
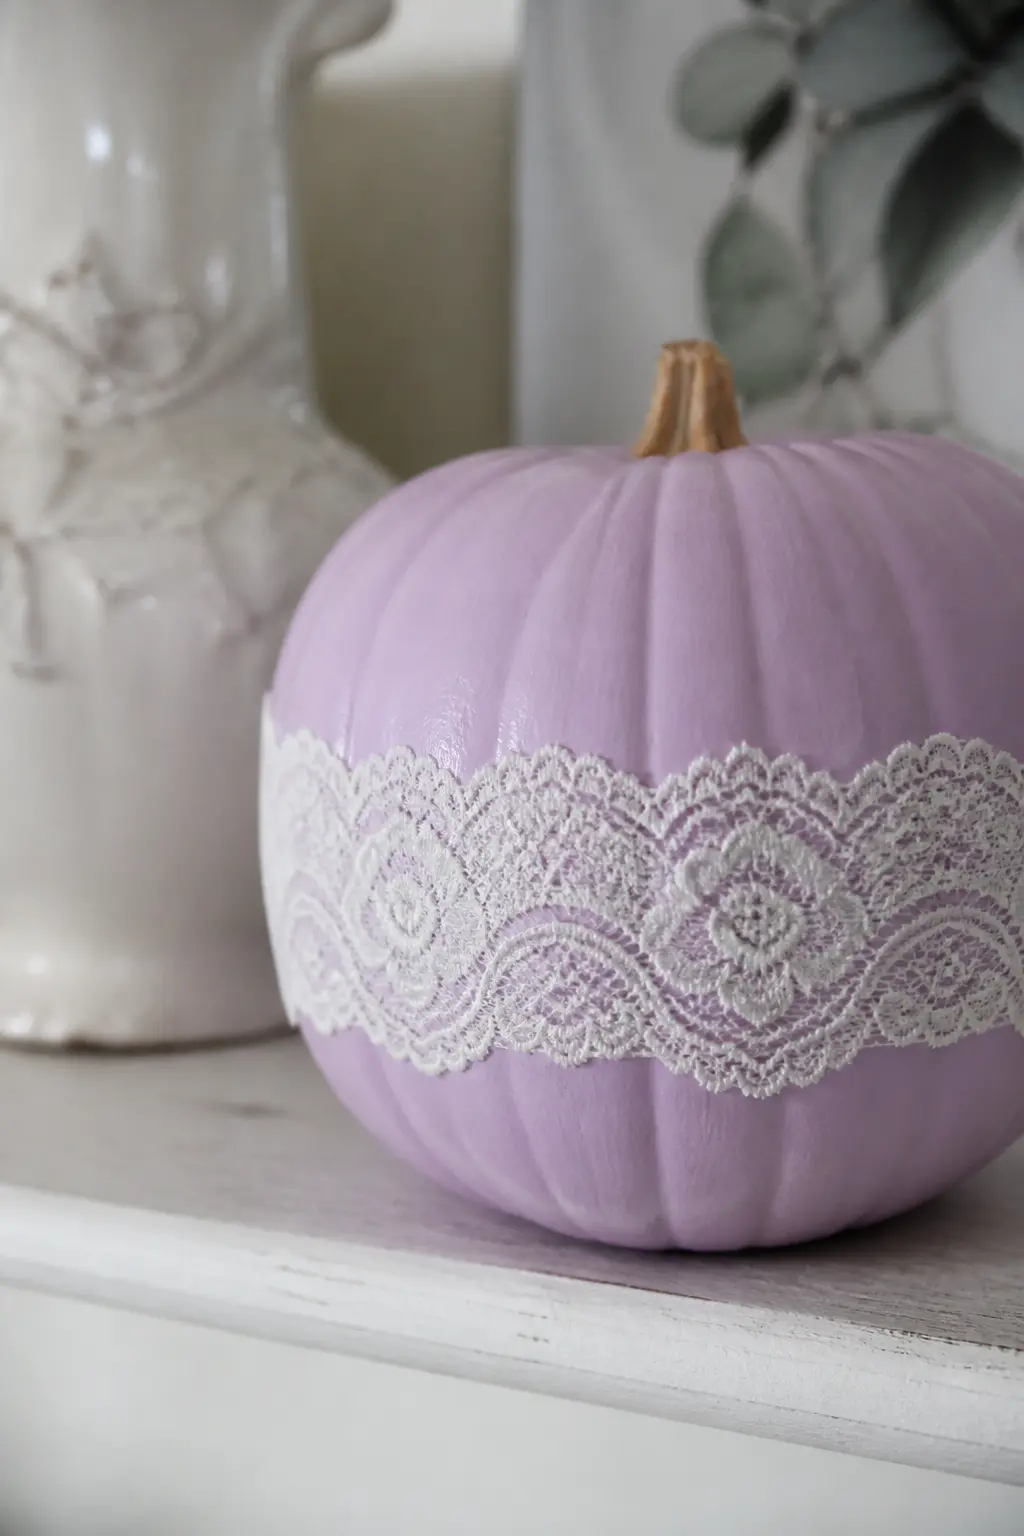
Lilac Pumpkin With a Lace Ribbon Glued Around the Middle
Paint the pumpkin in lilac and let it dry fully. Cut a length of wide lace ribbon and dry-fit it around the widest section of the pumpkin before gluing. The lace should sit at the natural equator of the pumpkin, neither slipping down toward the base nor riding up toward the stem.
Use a fabric glue rather than hot glue here: fabric glue stays flexible as the pumpkin is handled, while hot glue can pull away cleanly from a waxy painted surface. Hold each section against the pumpkin for 30 seconds as you go.
🛍 Shopping guide
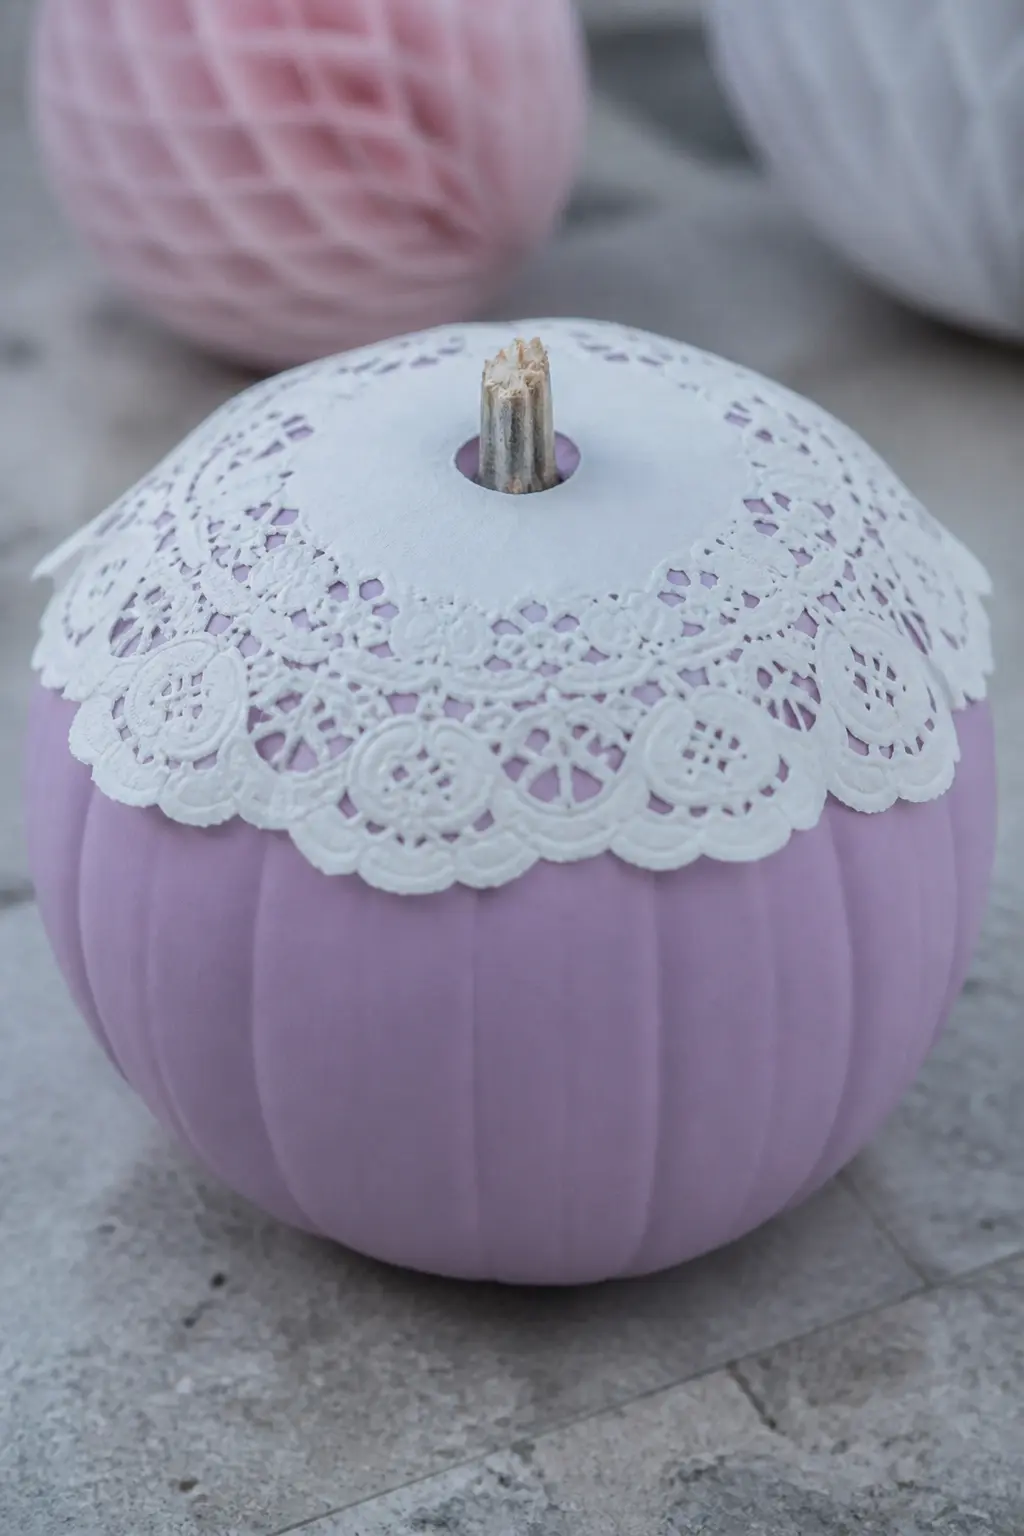
Lilac Pumpkin With a White Lace Doily Glued Flat on Top Like a Cap
Paint the pumpkin in lilac and let it cure fully. Choose a small paper doily with a diameter roughly equal to the width of the top third of the pumpkin. Brush decoupage medium onto the pumpkin surface first, then press the doily down gently from the center outward, smoothing as you go to eliminate bubbles.
Apply one coat of decoupage over the top of the doily once it is flat. The doily will become slightly translucent, letting the lilac color show faintly through the white paper, which only improves the look.
🛍 Shopping guide
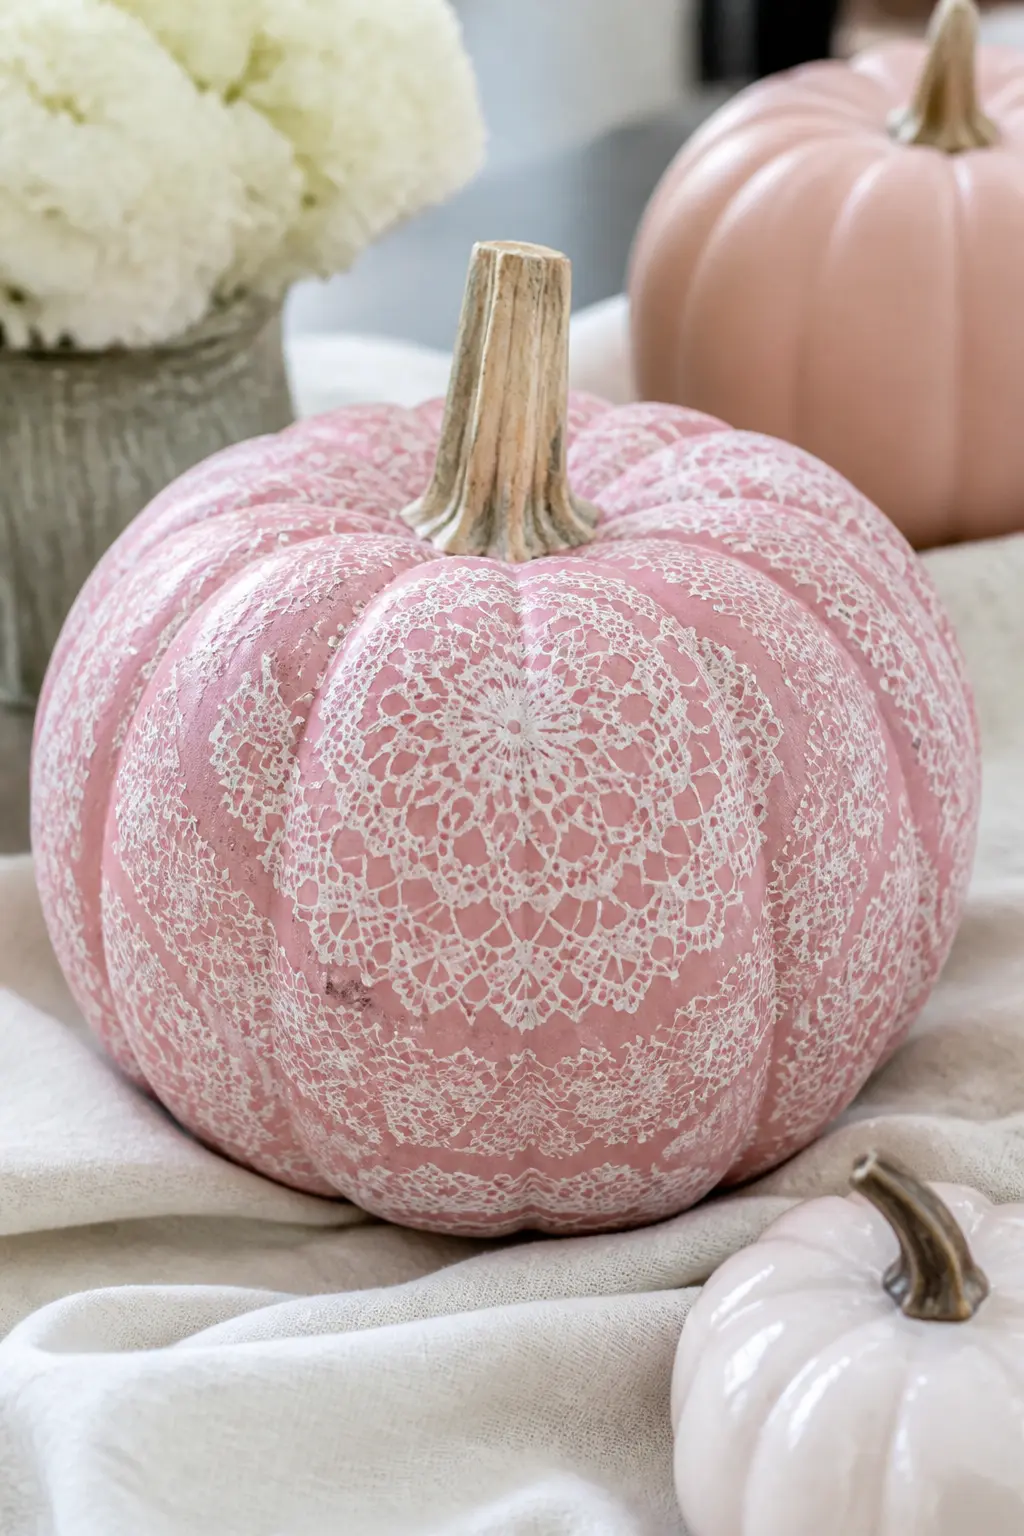
Pink Pumpkin With Painted White Lace Pattern Sponged Through a Doily
Paint the pumpkin in warm pink. Lay a paper doily flat against one section of the pumpkin and hold it in place. Using a cosmetic sponge or a stipple brush, dab white paint through the doily openings in a light, dabbing motion rather than a dragging one. Lift the doily straight up to reveal the lace pattern underneath.
Rotate around the pumpkin, section by section, realigning the doily at each position so the pattern continues. Some overlap between sections adds depth rather than detracting from it. The finished pumpkin looks as though it is wearing a lace overlay over a pink surface, which is exactly what it is.
🛍 Shopping guide
Specialty Finish Pumpkins
A few of these pumpkins lean on a special paint technique rather than an added trim: satin-sheen paint for a ballet-slipper finish, pour-painting for marbled gold, or a plaid grid drawn in two colors over a white base. The finish is the decoration.
Pour painting requires a pouring medium mixed into your craft paint so it flows without cracking. Work outdoors or over a drop cloth; the runoff is part of the effect and it goes everywhere.
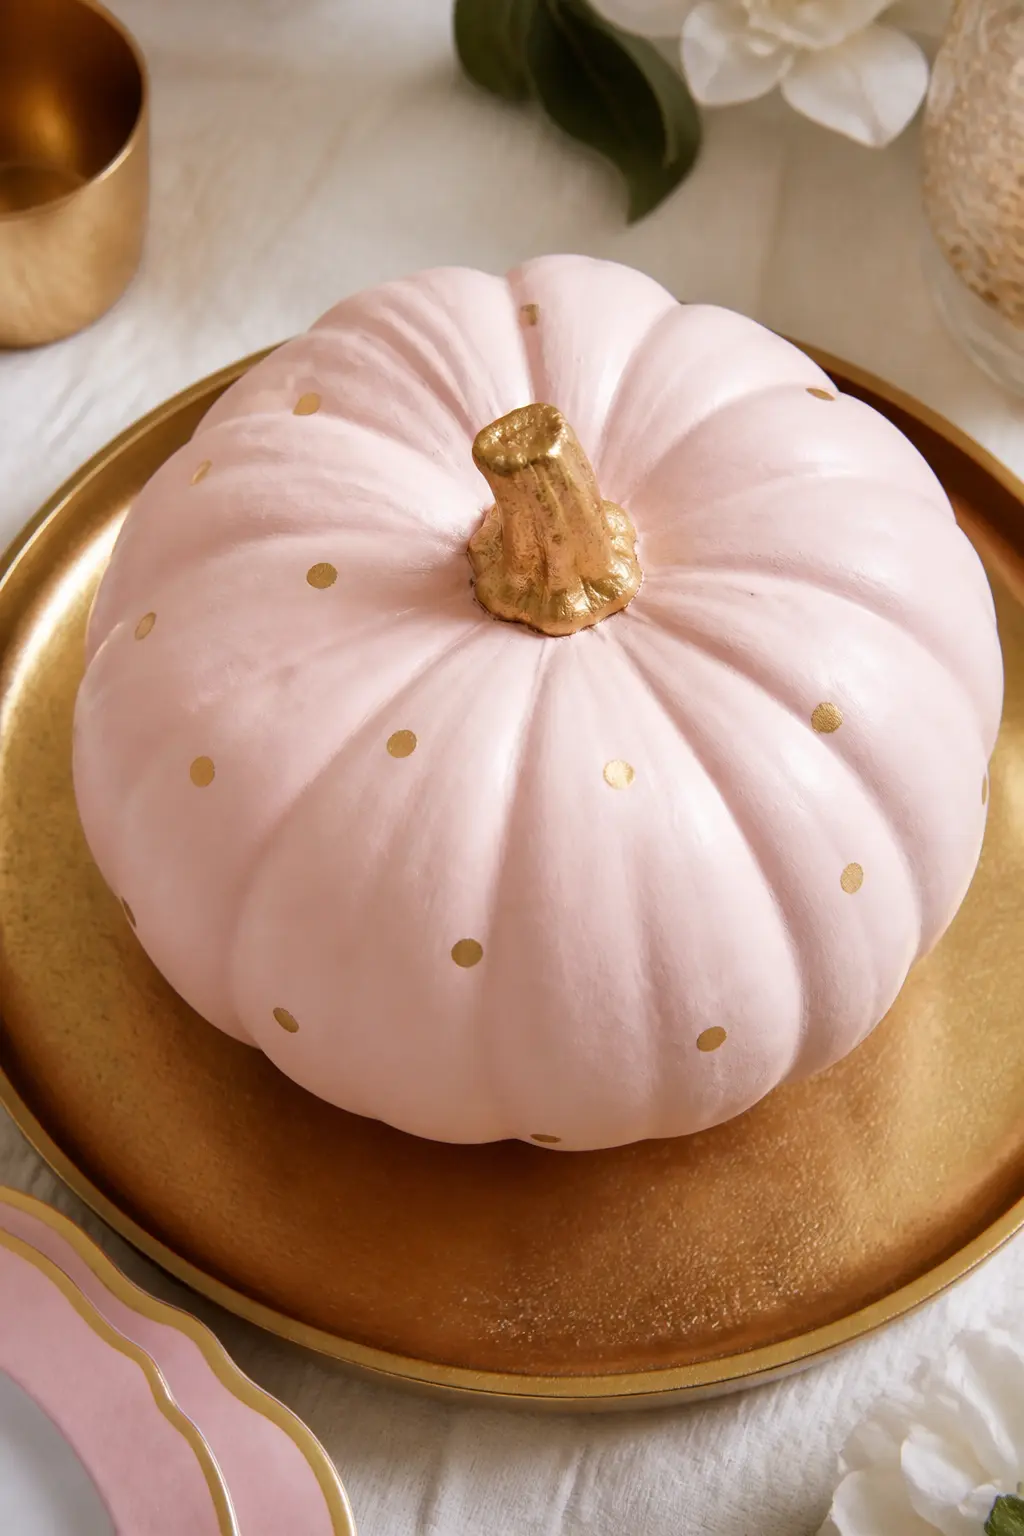
Pale Pink Pumpkin With Gold Dots and a Gold Stem
Paint the pumpkin body in pale pink and the stem in gold craft paint. For the dots, use the tip of a toothpick dipped in gold paint: it gives a finer, more consistent dot than any brush. Scatter the dots across the surface in loose clusters rather than even rows.
Two coats of gold on the stem give it enough coverage to read as metallic rather than muddy. Finish with a gloss sealer on the stem only, keeping the body matte, and the contrast between the two finishes becomes part of the design.
🛍 Shopping guide
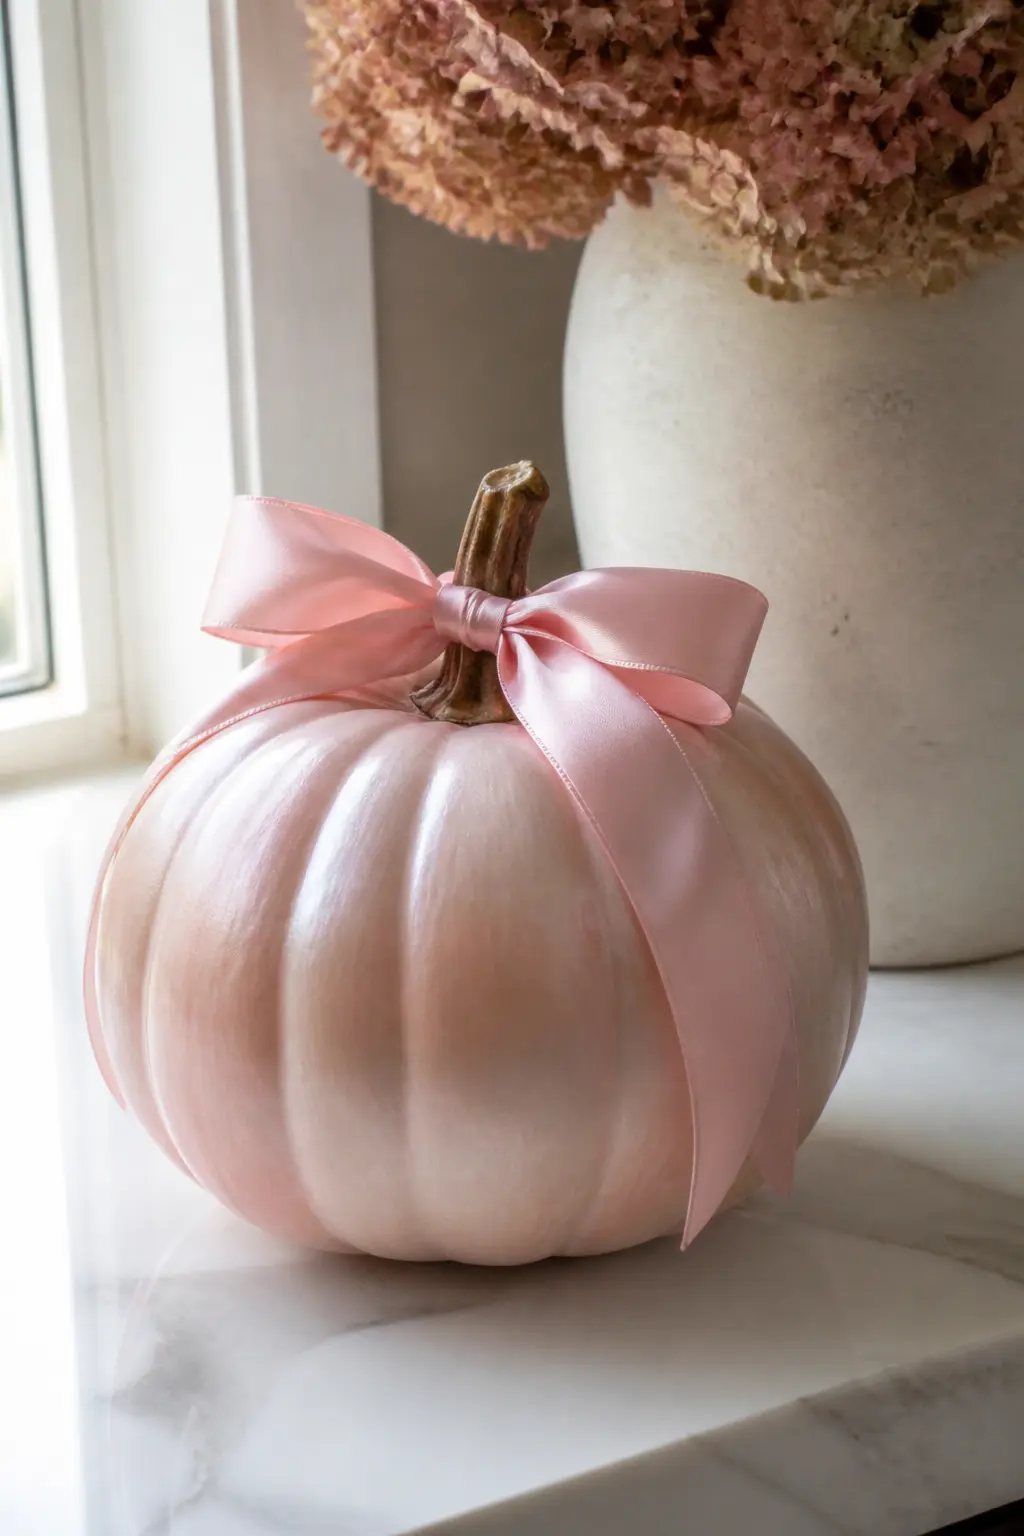
Pale Pink Pumpkin in a Ballet-Slipper Satin Sheen With a Matching Bow
The finish here is the entire project. Use a satin-finish acrylic paint in the palest blush pink available, two coats for depth, and finish with a satin sealer spray rather than matte. The result is a surface that catches light the way the inside of a ballet slipper does: luminous, faintly reflective, and very soft.
Tie a bow from the same pale pink satin ribbon and glue it at the stem. Because the ribbon color and the paint color are almost identical, the bow reads more as a texture addition than a color addition, and the pumpkin looks like a single continuous object.
🛍 Shopping guide
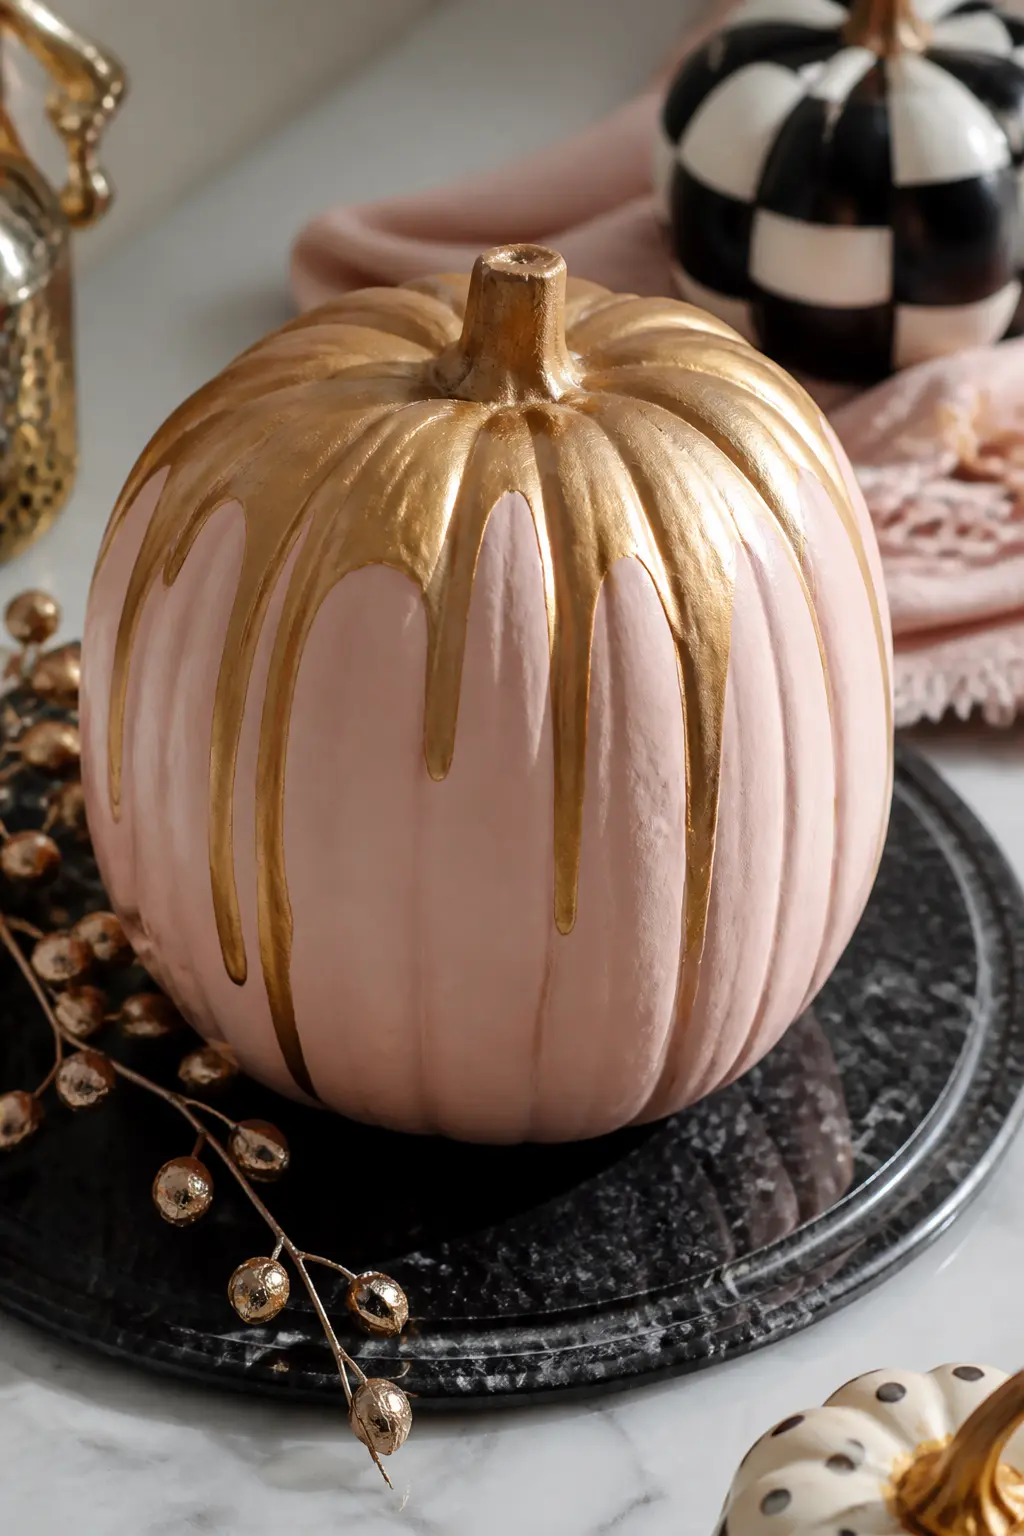
Blush Pumpkin With Gold Marbling Poured Over the Top Half
Paint the full pumpkin in blush and let it cure for 24 hours. Mix gold craft paint with a pouring medium at roughly a 1:3 ratio until it flows like thin syrup. Set the pumpkin on a raised surface over a drop cloth, then pour the mixture slowly from the stem, letting it run down the ridges naturally. Do not spread it; let gravity do the work.
The pour will follow the ridges and create natural marble veins as it reaches the widest point. Stop the pour before it reaches the base so the blush lower half stays clean. The two-tone result looks far more difficult than it is.
🛍 Shopping guide
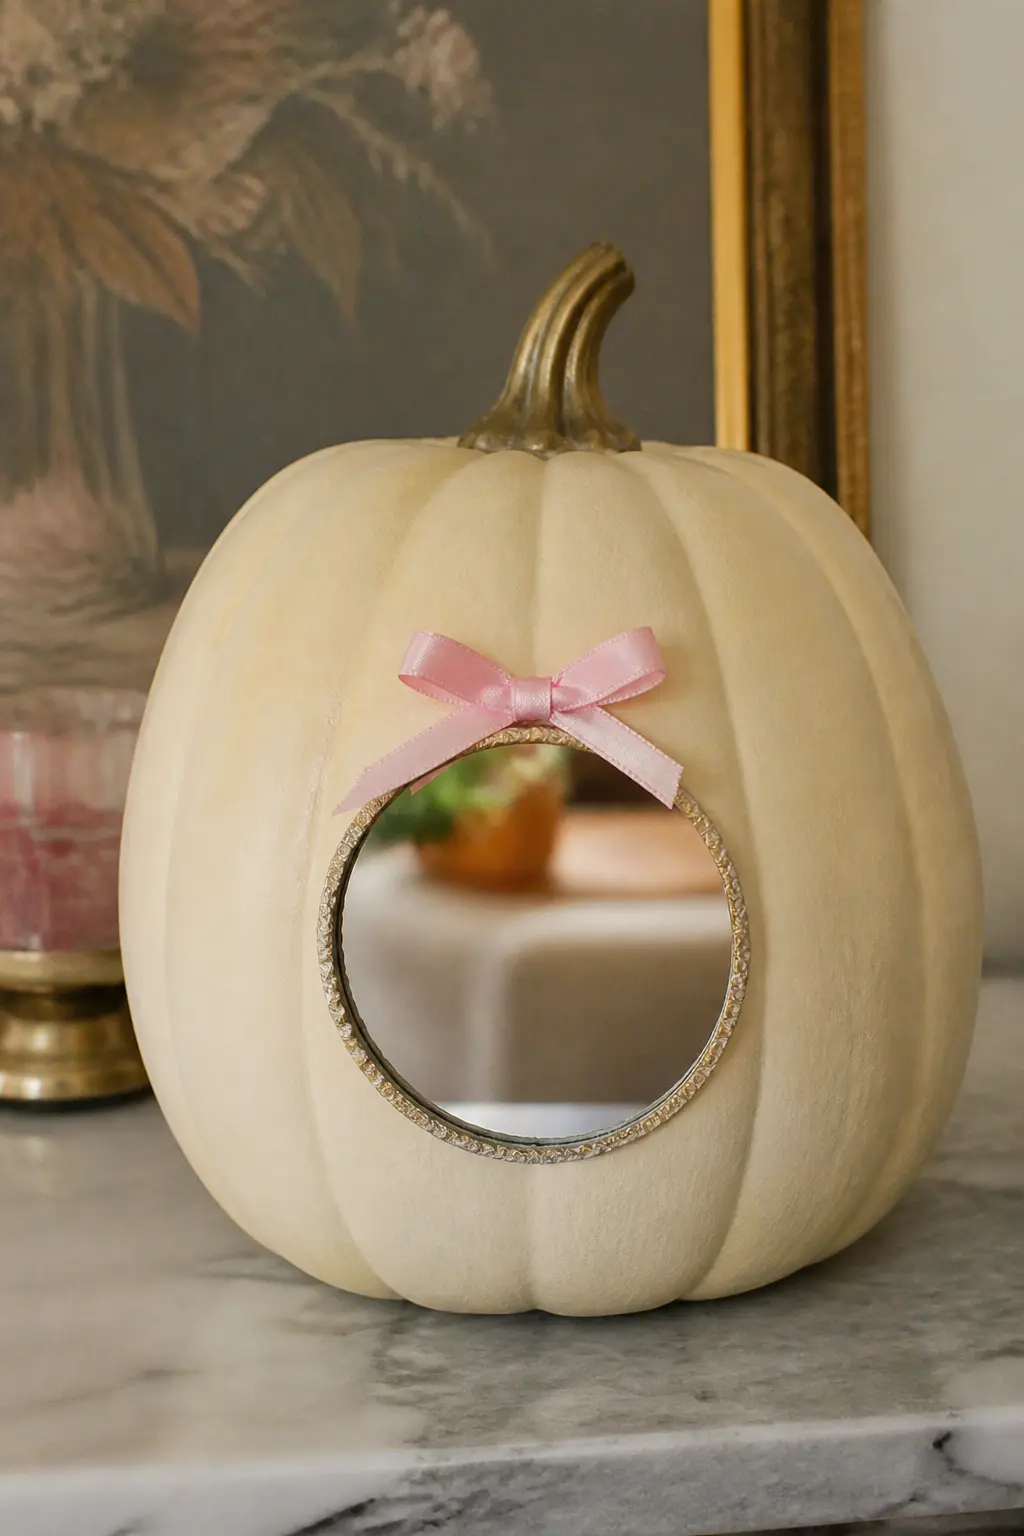
Cream Pumpkin With a Small Mirror Glued on the Front and a Bow Above It
Paint the pumpkin in cream. Choose a small round or oval craft mirror, roughly two inches across, and glue it to the flattest section of the pumpkin front using a strong clear adhesive. Let it cure fully before adding anything above it.
Glue a small pink satin bow just above the mirror so the bow appears to be the mirror’s decoration. The mirror reflects whatever is in front of the pumpkin, which means the display around it becomes part of the pumpkin itself. It is the one idea in this collection that changes depending on where you put it.
🛍 Shopping guide
Display and Grouping
One painted pumpkin is a detail. Three together become a vignette. Vary the heights with small risers or stacked books under a cloth, and let the colors relate without matching exactly.
For more ways to style a feminine autumn display, How to Make Your Room Aesthetic When You’re a Grown Adult, Not a Teenager covers the broader picture. And if the pumpkins are heading to a baby shower table, 14 Little Pumpkin Girl Baby Shower Games Everyone Will Love pairs beautifully with this palette.
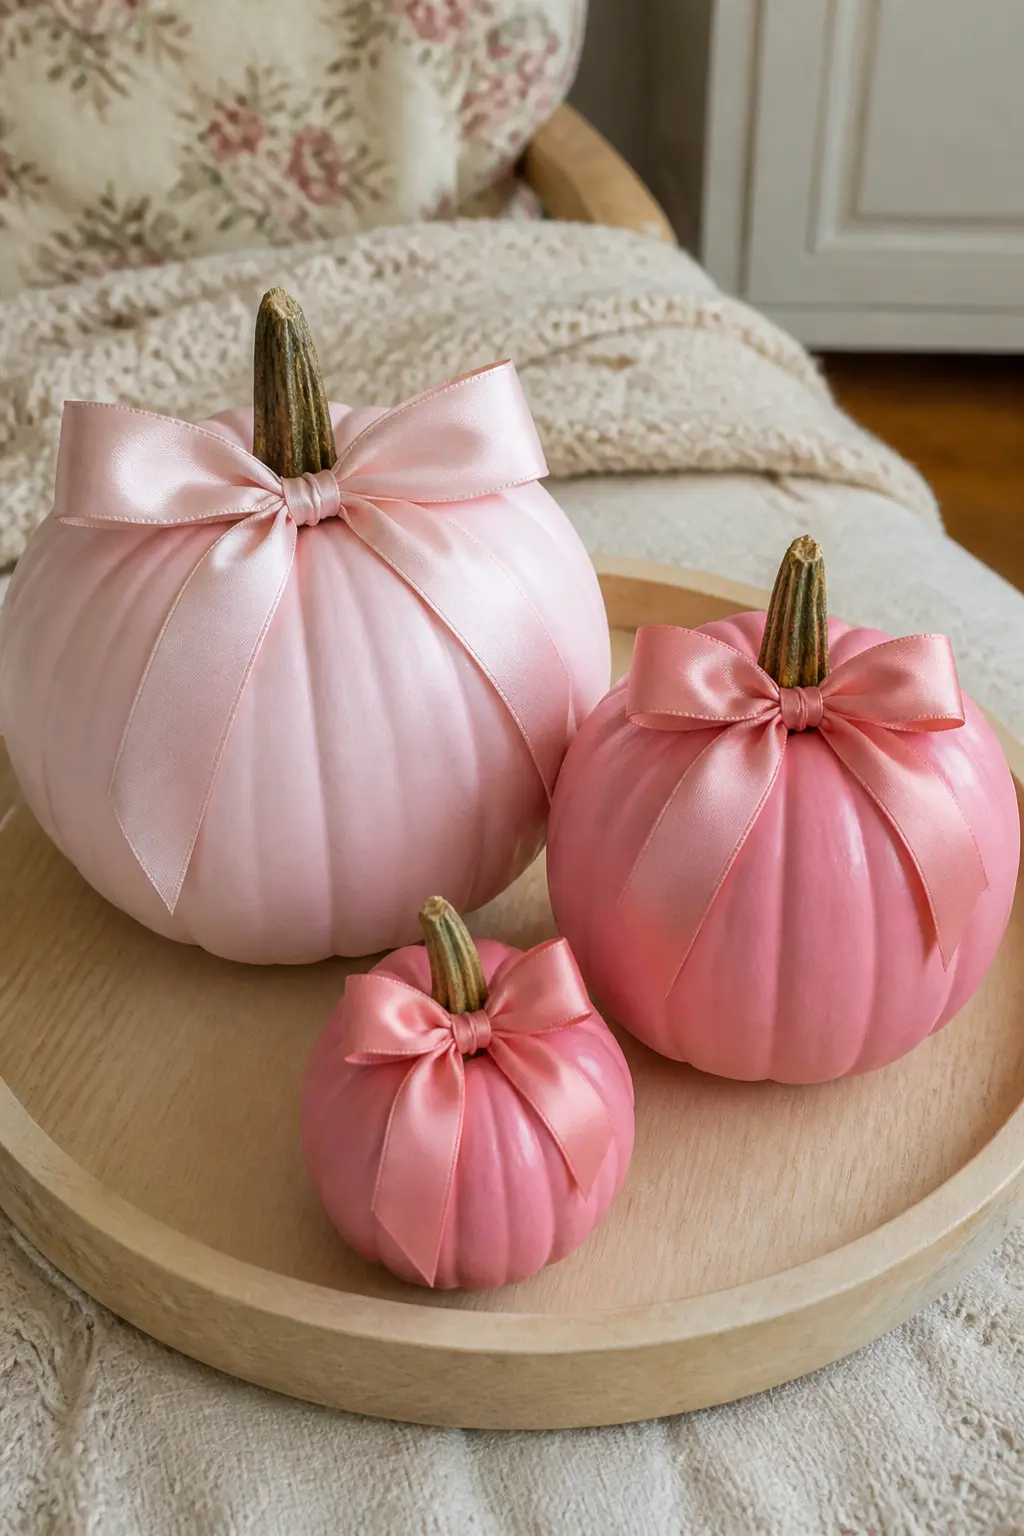
Set of Three Pumpkins in Graduated Pinks, Each With a Matching Bow
Choose three faux pumpkins in small, medium and large. Paint the smallest in the palest blush, the middle in a medium dusty pink, and the largest in a deeper rose. Tie a ribbon bow on each one in a shade that closely matches its own paint color, keeping the bow scale proportional to each pumpkin.
Arrange them in a loose triangle on a tray, largest at the back, smallest at the front. The graduated color works as an ombre when the three sit together. This is the only grouping in the collection, and it earns its entry: three individually pretty pumpkins become something genuinely striking as a set.
🛍 Shopping guide
Quick Answers
The most common questions about painted pumpkins, answered without the filler.
Frequently Asked Questions
What kind of paint works best on a real pumpkin?
Acrylic craft paint adheres well to both real and faux pumpkins. For real pumpkins, apply two thin coats and finish with a matte or satin sealer to slow moisture damage. The sealer adds several weeks to the life of the paint. Avoid chalk paint on real pumpkins: it is too porous and absorbs moisture from the pumpkin skin.
How do you get paint to stick to a faux pumpkin?
Wipe the surface with a lightly damp cloth and let it dry fully before painting. Most faux pumpkins have a slightly waxy coating that resists paint. A very light scuff with fine-grit sandpaper or a coat of gesso primer gives the acrylic something to grip. Skip this step and even two coats of good paint will peel within a week.
Can you use a real pumpkin for pearl-pin ideas?
Yes, but only if the pumpkin skin is firm and dry. Soft or overripe skin will not hold a pin cleanly. Faux pumpkins are a more reliable base for the pearl-pin technique because the foam or resin interior grips the pin shaft without splitting. Real pumpkins also shrink as they age, which can loosen pins over time.
How long do painted real pumpkins last indoors?
A painted and sealed real pumpkin kept indoors at room temperature typically lasts four to eight weeks before showing signs of decay. Keep it away from direct sunlight and do not place it directly on a fabric surface: a small tray or plate underneath allows air circulation and catches any moisture.
What glue holds pearls and charms onto a painted pumpkin?
E6000 or a similar flexible jewelry adhesive holds flat-back pearls, round beads and metal charms reliably on a painted surface. Hot glue works for lighter embellishments like ribbon and bows but can pull away from a smooth painted surface if the pumpkin is handled frequently. For anything you want to stay permanently, use jewelry adhesive and let it cure for the full time stated on the package.
Do these ideas work for a baby shower or Halloween party table?
They work well for any autumn occasion that calls for something feminine and non-spooky. The blush, cream and lilac palette fits a baby shower table naturally. For a Halloween-adjacent event, the gold marbling pumpkin and the pearl-ridge lilac pumpkin add a luxe edge without any of the traditional Halloween color vocabulary. For more Halloween entertaining ideas that skip the gore, 13 Halloween Baby Shower Games That Are Actually Fun is a good companion read.
16 Halloween games and activities for kids — active, printable, and quiet. Perfect for class parti
Find the right halloween party games for your crowd size, budget, and guest ages — 22 guides cover

25 Halloween movie night ideas — printable tickets, snack signs, bingo, games & candy bag toppers
Leave a Reply