

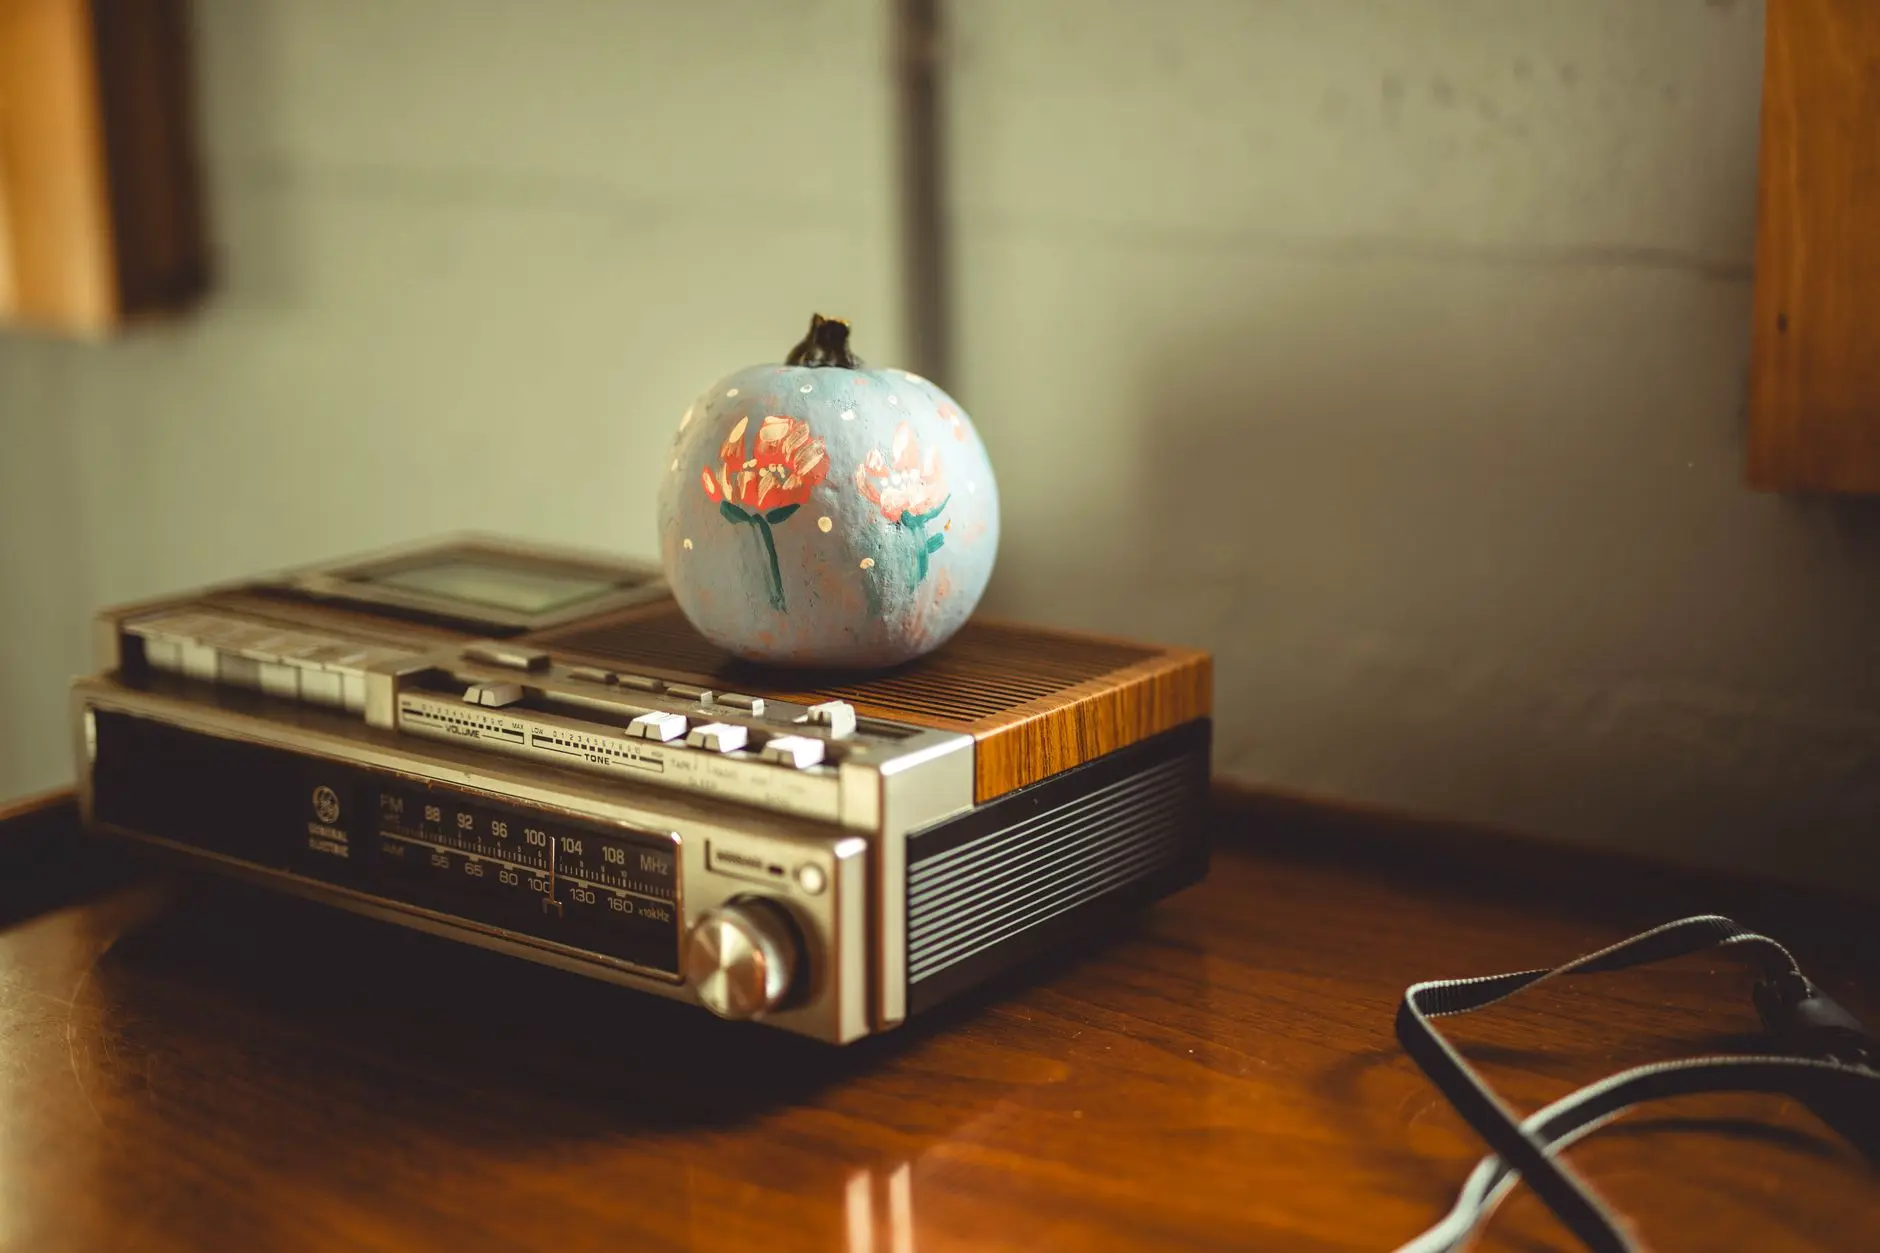
A floral painted pumpkin is the rare autumn decoration that earns its spot in September and is still earning it in November. No candle, no rot, no Halloween countdown clock. Just a real or faux pumpkin that looks as though you bought it somewhere expensive.
The entries here are sorted by technique, because technique is what separates a pumpkin that looks handmade from one that looks homemade. Start at the top if the idea of holding a brush makes you nervous. Work down when you are ready to try something more considered. Every single one uses paint or surface materials that will outlast the season, and none of them involve a knife.
For more ways to make autumn feel properly dressed, the 40 Thanksgiving Games the Whole Table Will Love list and the 23 Christmas Porch Decorating Ideas guide both sit neatly at either end of this pumpkin’s run.
This post contains affiliate links. If you buy through them, I may earn a small commission at no extra cost to you.
No-Skill Techniques
These eight ideas need no brush control whatsoever. The technique does the work: you press, glue, tape or sponge, and the pumpkin looks intentional without a single freehand mark. Use a real pumpkin or a craft-store faux one, primer either with white chalk paint first, and seal everything with a matte varnish spray when you are done.
The results sit closest to “found object” decor, which is exactly the register you want for a mantle or entry table that needs to feel curated rather than crafted.
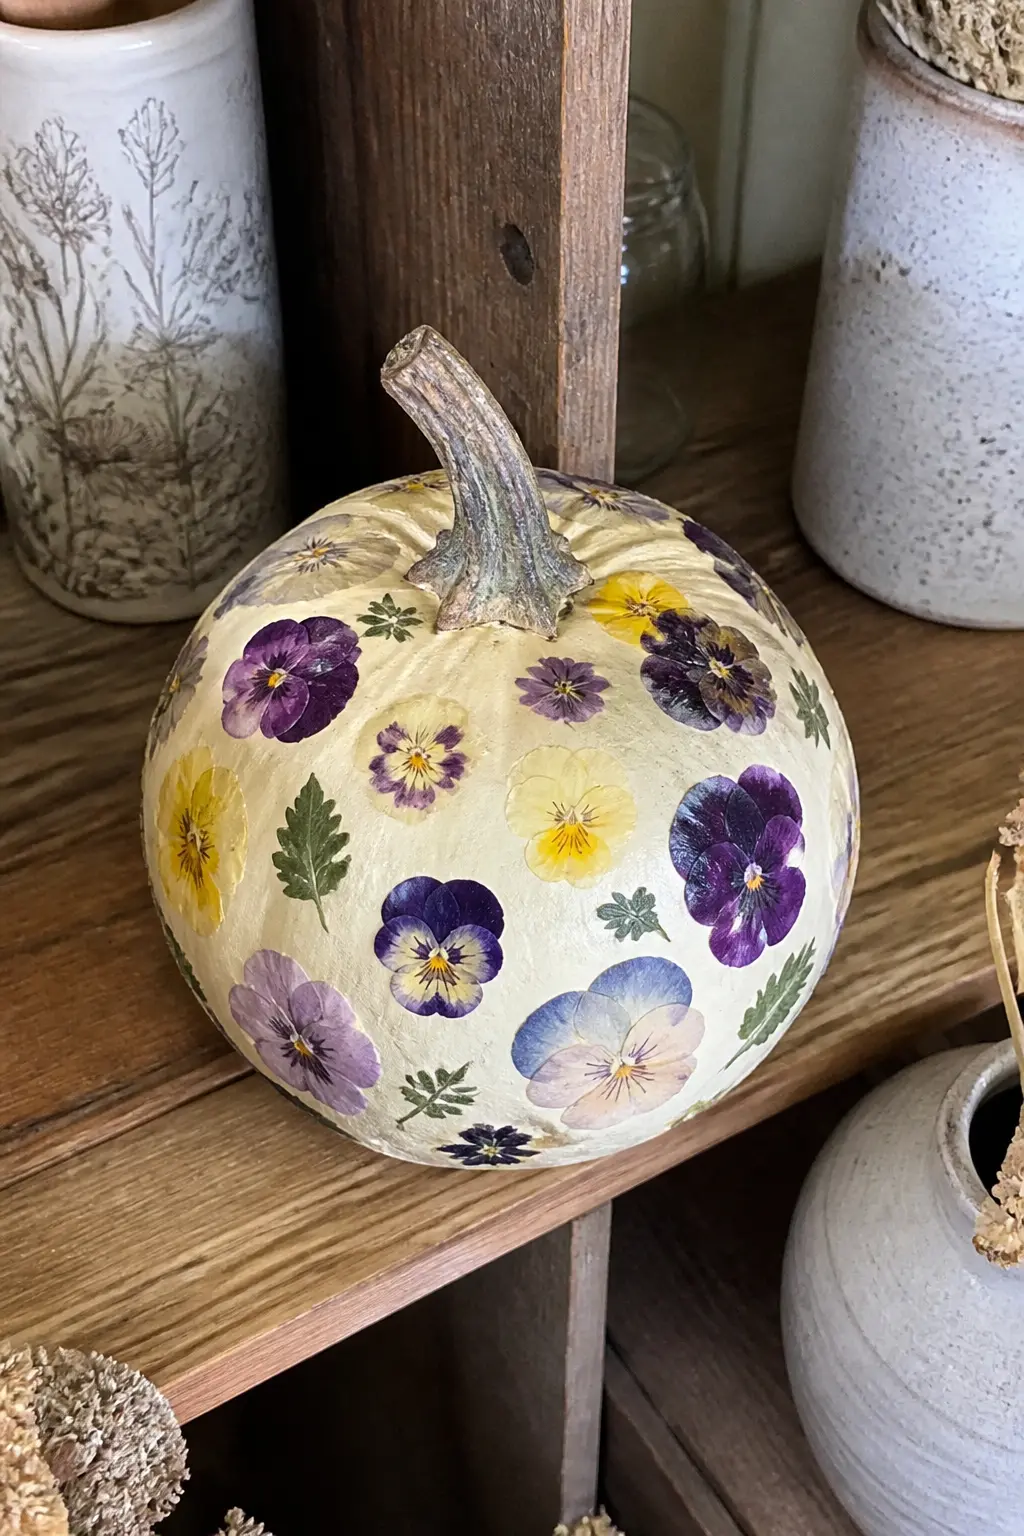
Real Pressed Flowers Glued and Sealed
Collect or buy pressed flowers: pansies, violas and Queen Anne’s lace press flattest. Arrange them on a chalk-painted pumpkin before you glue anything, because repositioning mid-glue is hopeless.
Brush a thin coat of Mod Podge onto a small section of the pumpkin, lay each flower face-down onto it, press gently with a dry brush, then seal the top immediately with another coat. Work in sections. Finish with two coats of matte spray varnish over the entire surface to lock everything flat.
The result is botanical and genuinely beautiful. The flowers keep their colour for the full season under varnish, and no two pumpkins will ever look alike.
🛍 Shopping guide
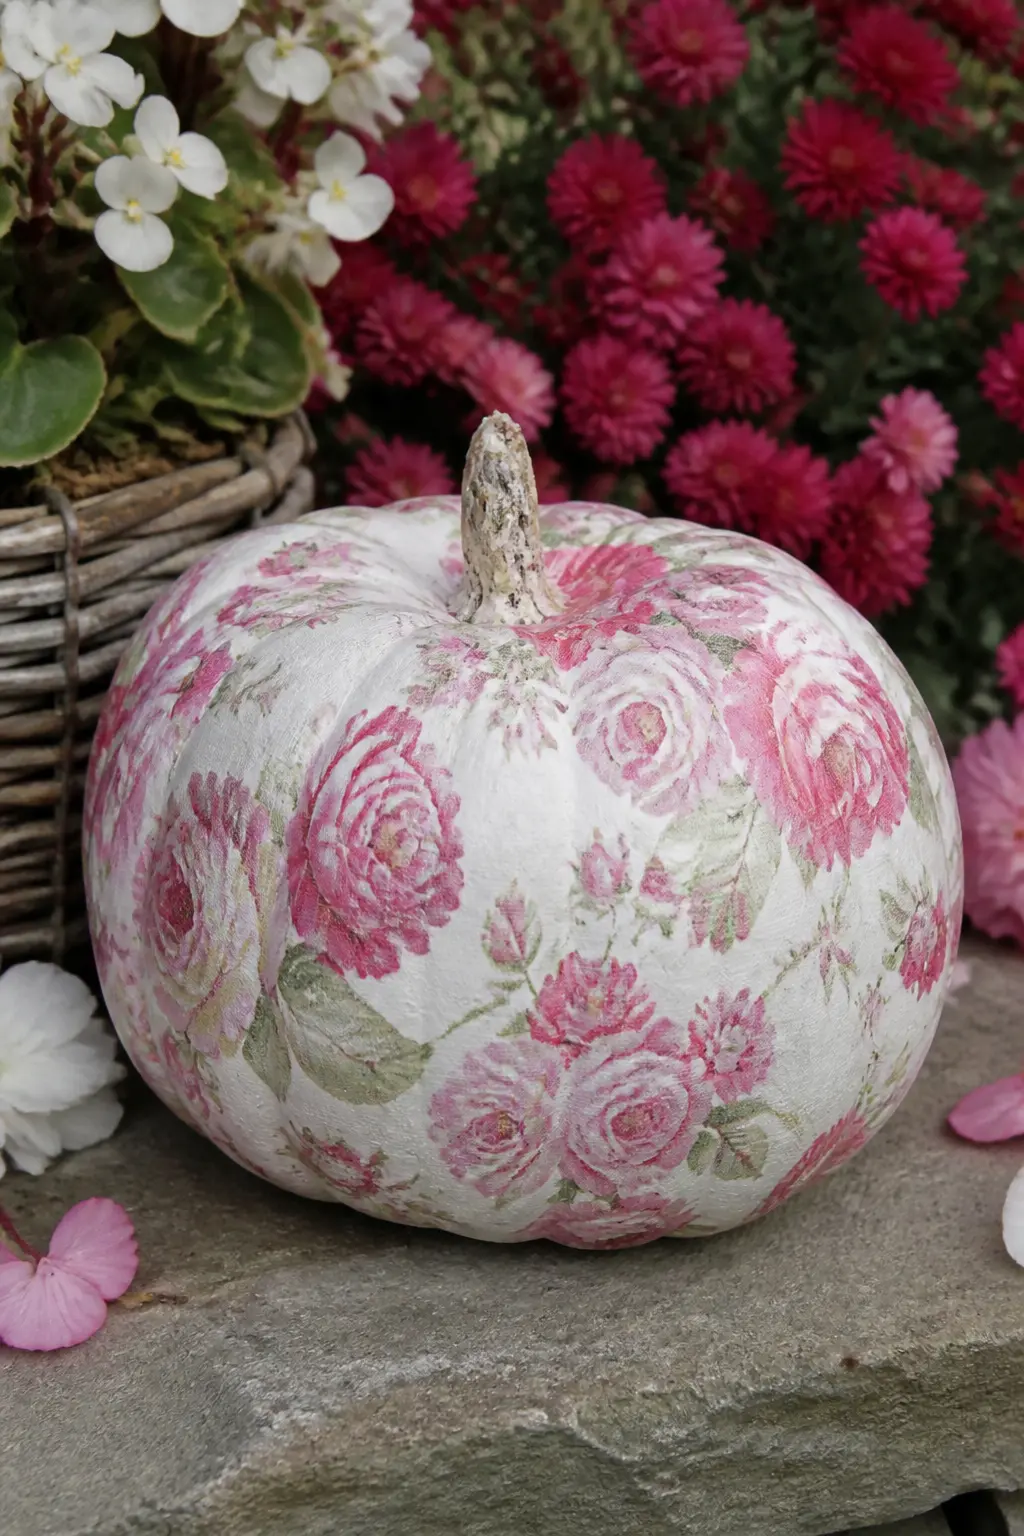
Paper Napkin Decoupaged Over the Whole Pumpkin
Buy a floral paper cocktail napkin with a pattern you like. Separate the ply so you are working with only the printed top layer, which is tissue-thin and will conform to the pumpkin’s curves without wrinkling badly.
Tear (do not cut) the napkin into irregular pieces about five centimetres across. Torn edges blend invisibly; cut edges leave a visible line. Brush Mod Podge onto a section, lay a piece of napkin over it, brush another coat on top, and smooth outward from the centre. Overlap each piece slightly. The whole pumpkin takes about forty minutes.
Seal with two coats of matte spray varnish. The result looks like hand-painted chinoiserie to anyone who does not know the technique.
🛍 Shopping guide
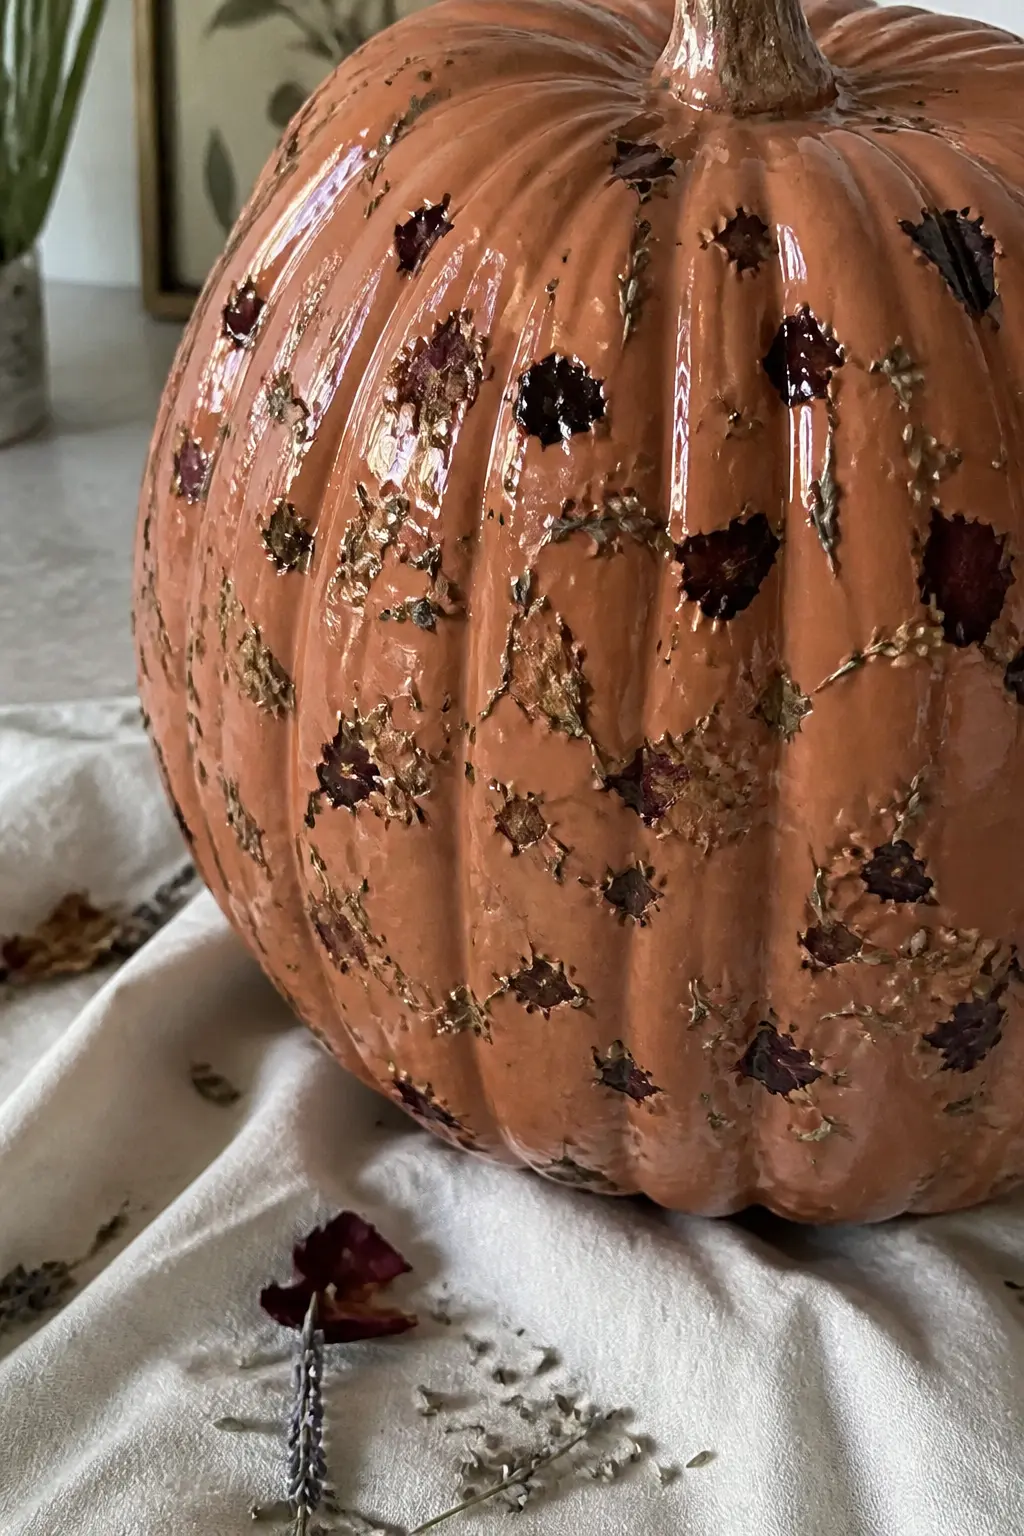
Dried Petals Scattered Into Wet Varnish
This one is tactile and slightly three-dimensional. Paint the pumpkin in a base colour, then brush a thick coat of craft varnish or Mod Podge over the entire surface while it is still very wet. Working quickly, scatter dried rose petals, lavender buds or calendula petals over the surface and press them lightly with your fingertips.
Let it dry completely, at least four hours, before sealing with two more coats of matte varnish on top of the petals. The petals become embedded in the surface and will not fall off.
The finished pumpkin has a texture and depth that painted florals cannot match. It suits a tabletop more than a shelf, because you want people to reach for it.
🛍 Shopping guide
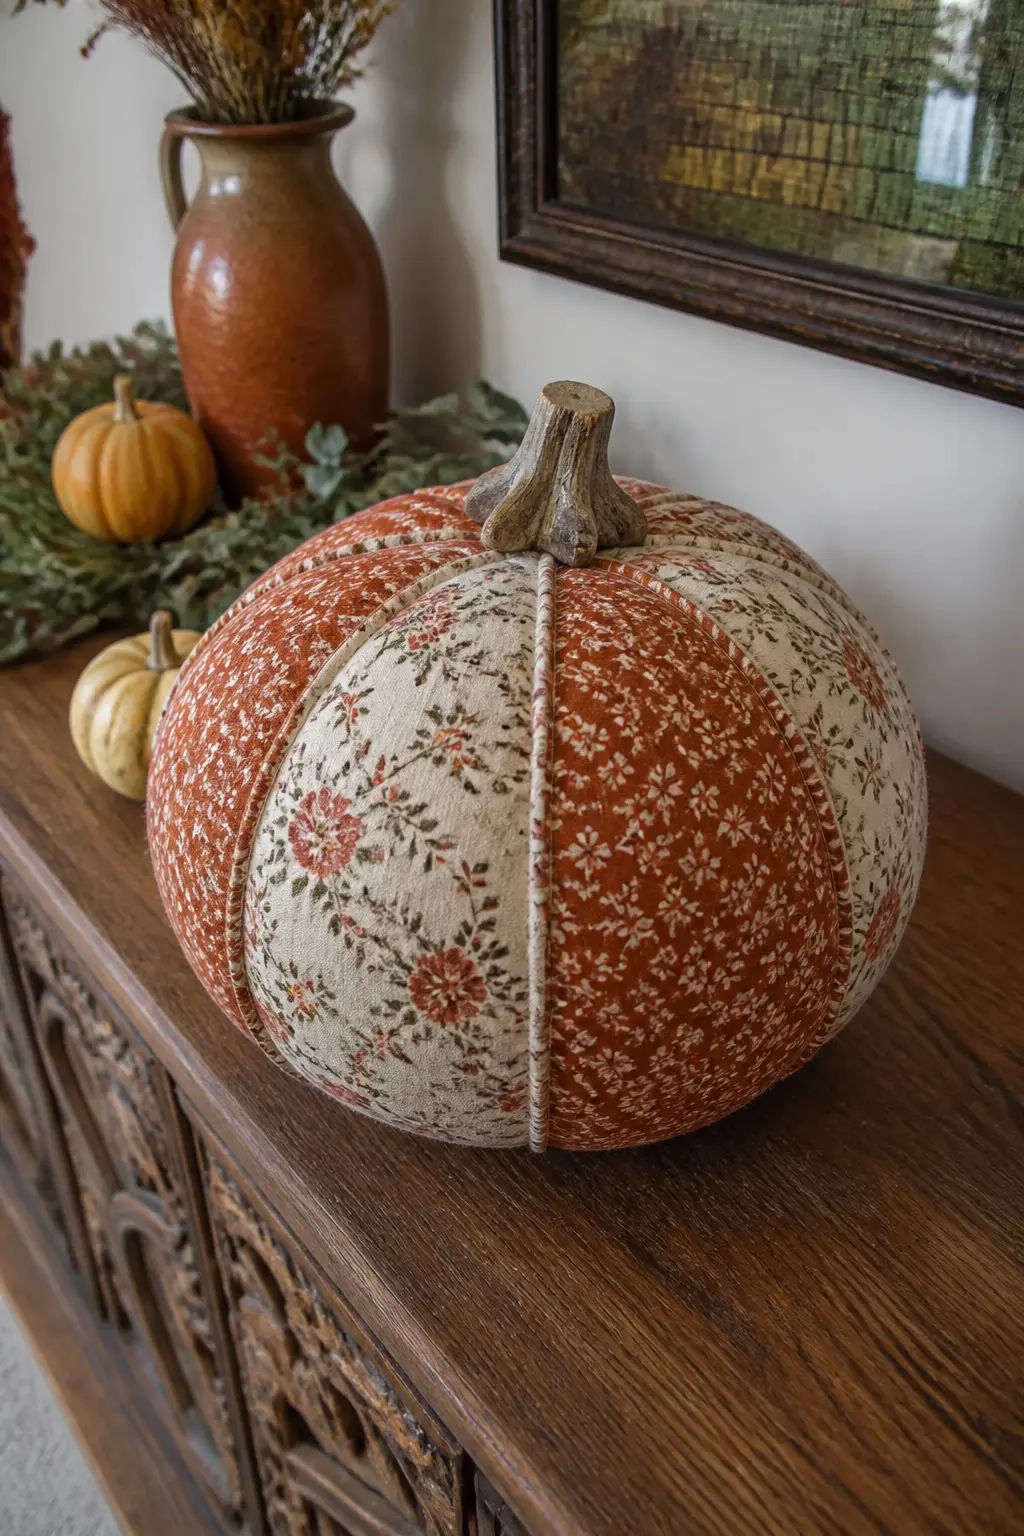
Floral Fabric Remnant Glued in Panels
Find a lightweight cotton or cotton-lawn fabric with a floral print you love: curtain fabric remnants work perfectly. Cut the fabric into panels that follow the natural channels between the pumpkin’s ribs, using the ribs as dividers so each panel sits on a flat section.
Brush fabric glue or Mod Podge onto the pumpkin section, smooth the fabric panel over it, then trim any excess at the rib edge with small scissors. Seal the edges with a thin brush of glue. Let dry, then seal with matte varnish spray.
The result looks upholstered, which is not a word often applied to pumpkins, and that is precisely the appeal. A sprig-print cotton reads as maximally autumnal without a single Halloween note.
🛍 Shopping guide
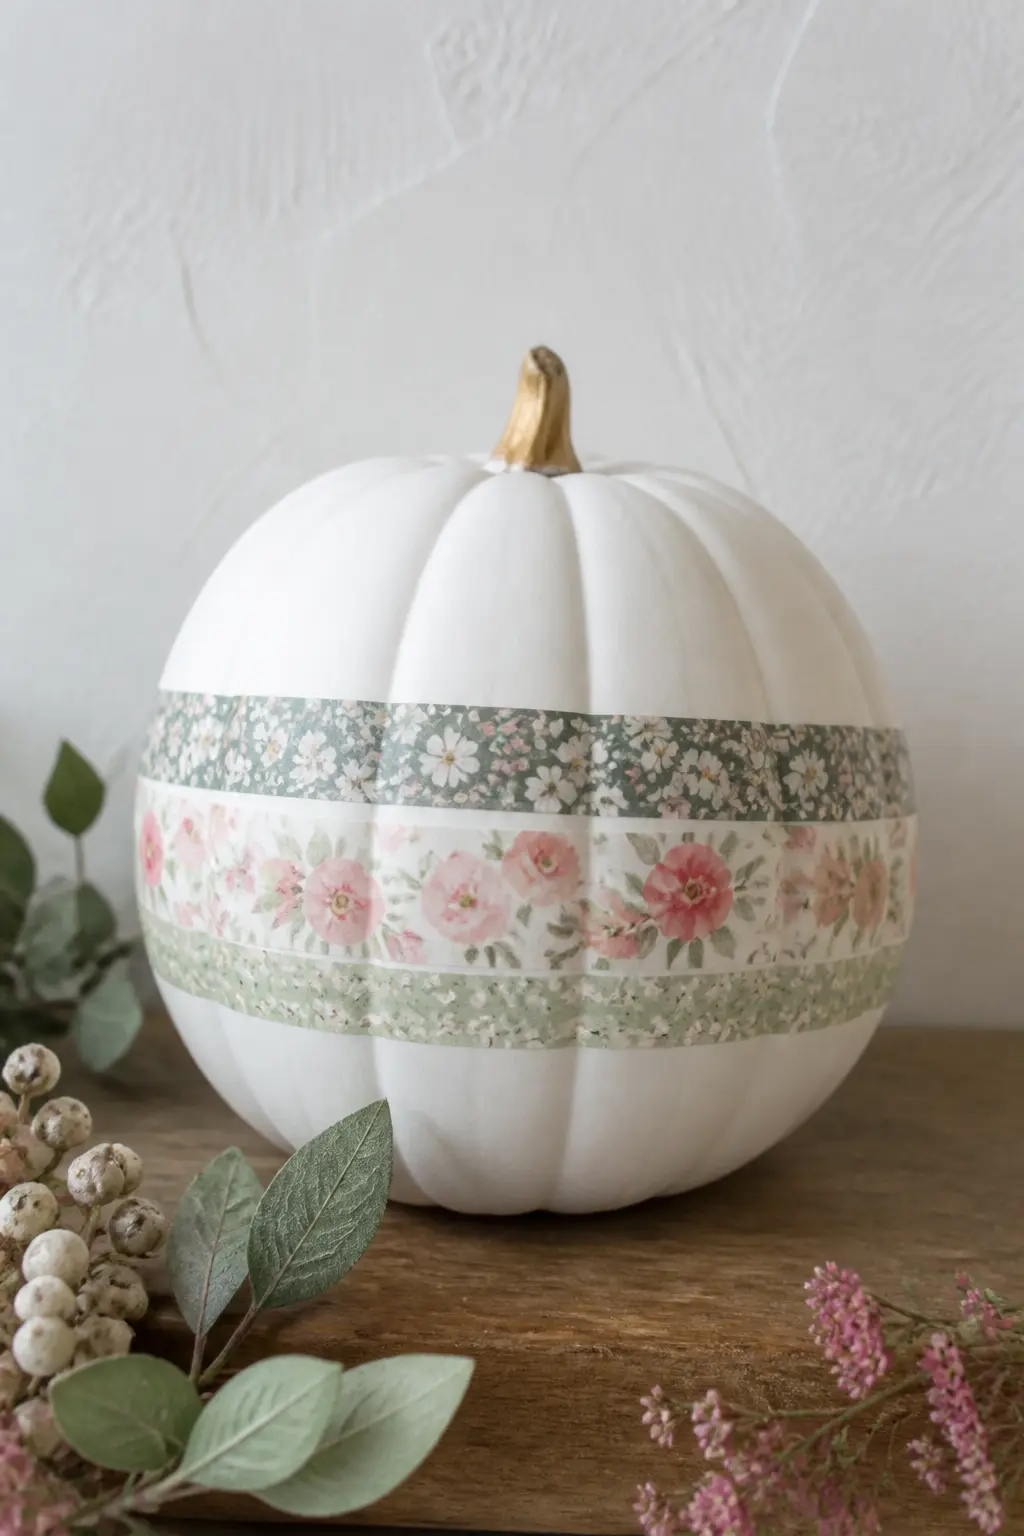
Floral Washi Tape Wrapped in Bands
Washi tape is repositionable, which makes this the most forgiving entry in the list. Choose three coordinating floral washi tape rolls in different widths: a wide one for the middle band, two narrower ones for accent stripes above and below.
Wrap the tape around the widest circumference of the pumpkin, pressing as you go and smoothing any small bubbles. The tape will lift slightly at the ribs on a deeply ribbed pumpkin; press the edges down with a bone folder or your thumbnail.
No sealing needed for indoor use. For a porch, cover with one light coat of matte spray varnish, which fixes the tape permanently. The layered bands read as a decorative ribbon treatment rather than a craft-store project.
🛍 Shopping guide
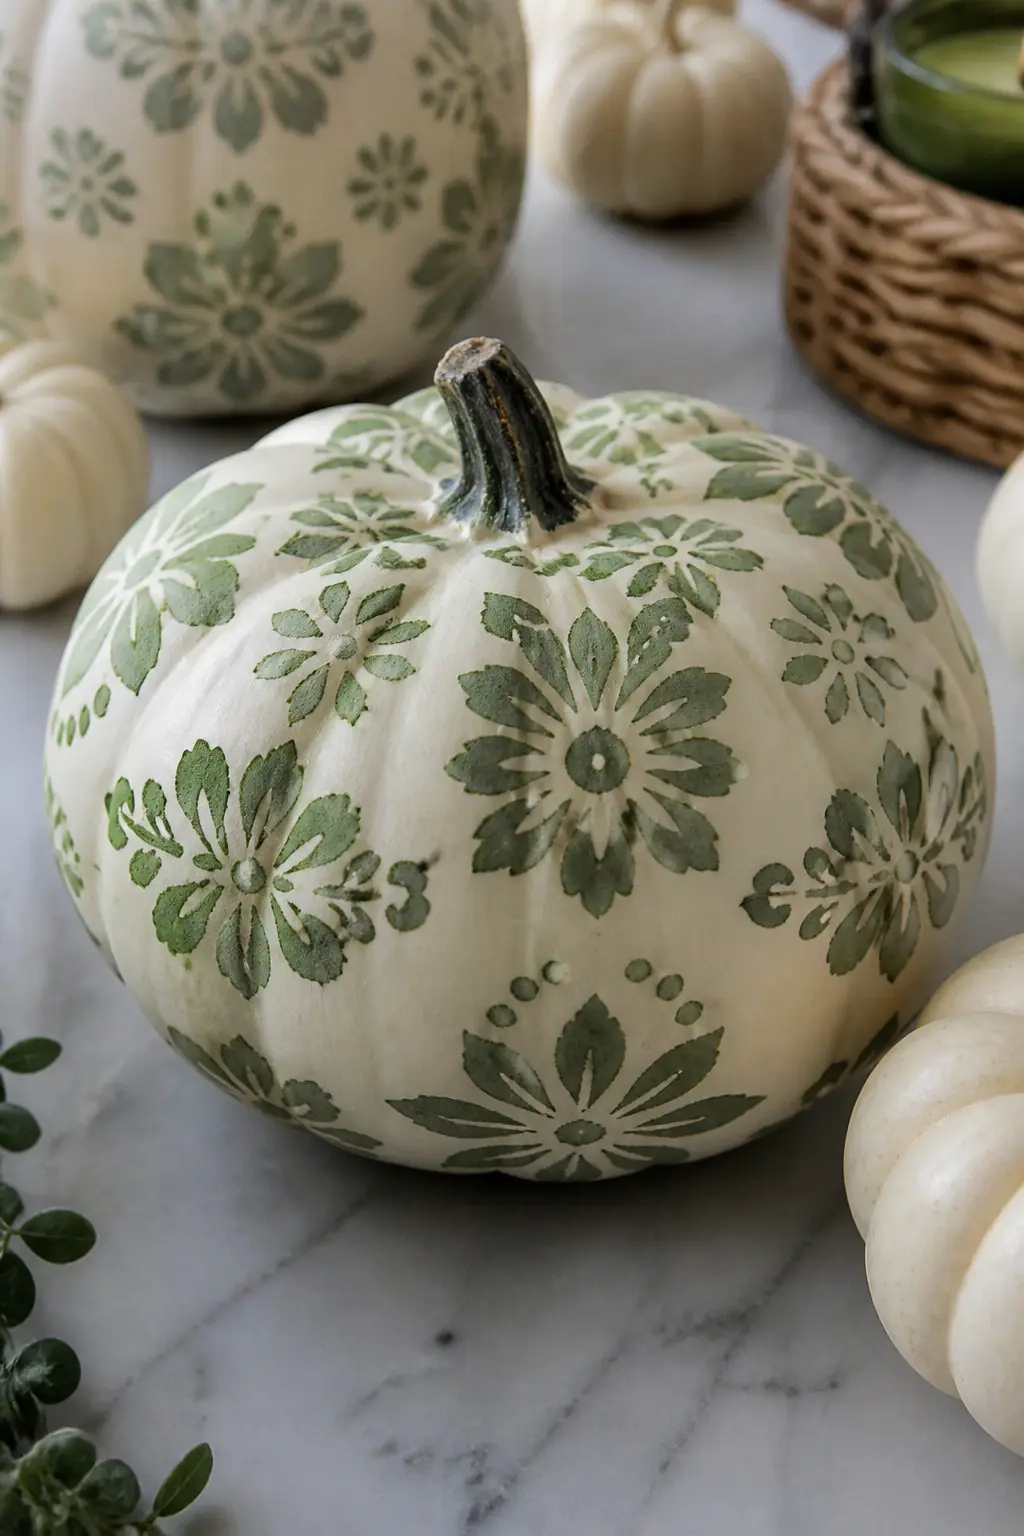
A Stencil Sponged in One Colour
A single-colour stencil is the cleanest and most graphic result available without touching a brush. Buy a floral stencil with open, bold shapes, not fine detail that will bleed under sponging. Position it on the pumpkin with low-tack spray adhesive so it sits flat against the curved surface.
Dab a sea sponge or a stencil brush loaded very lightly with paint in an up-and-down motion, never sideways, which pulls paint under the stencil edge. Lift straight up when done. Reposition and repeat.
One stencil, one colour, one afternoon. A sage green floral on a cream ground looks like proper decorative pottery from any distance.
🛍 Shopping guide
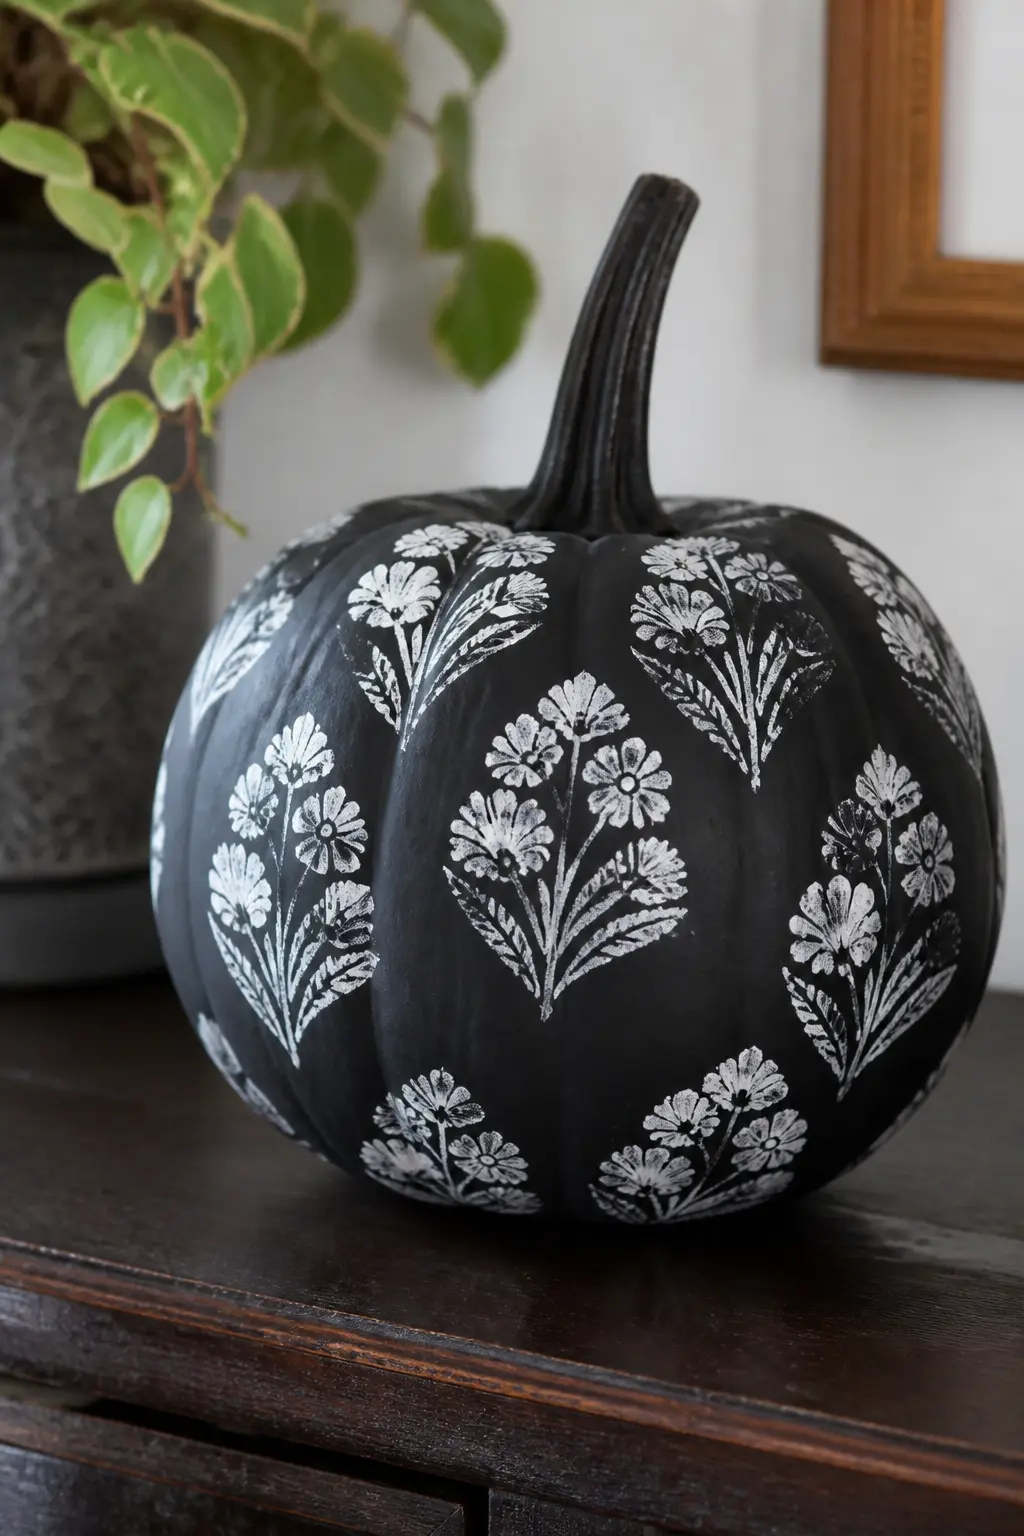
A Rubber Stamp Pressed in Repeat
A large foam or rubber floral stamp gives a block-printed look that reads as intentional pattern-making rather than decoration. Choose a stamp with clear, open shapes: a single peony head, a daisy cluster, or a sprig of leaves all work better than intricate detailed stamps, which lose their lines on a curved surface.
Ink the stamp with a foam ink pad in a contrasting colour, press it firmly onto the painted pumpkin, and rock it very slightly to account for the curve. Lift straight up. Repeat in a loose grid or scatter. Let dry, then seal with matte varnish spray.
The irregularity of hand stamping is the point. Every impression is slightly different, and the overall effect is of a printed textile.
🛍 Shopping guide
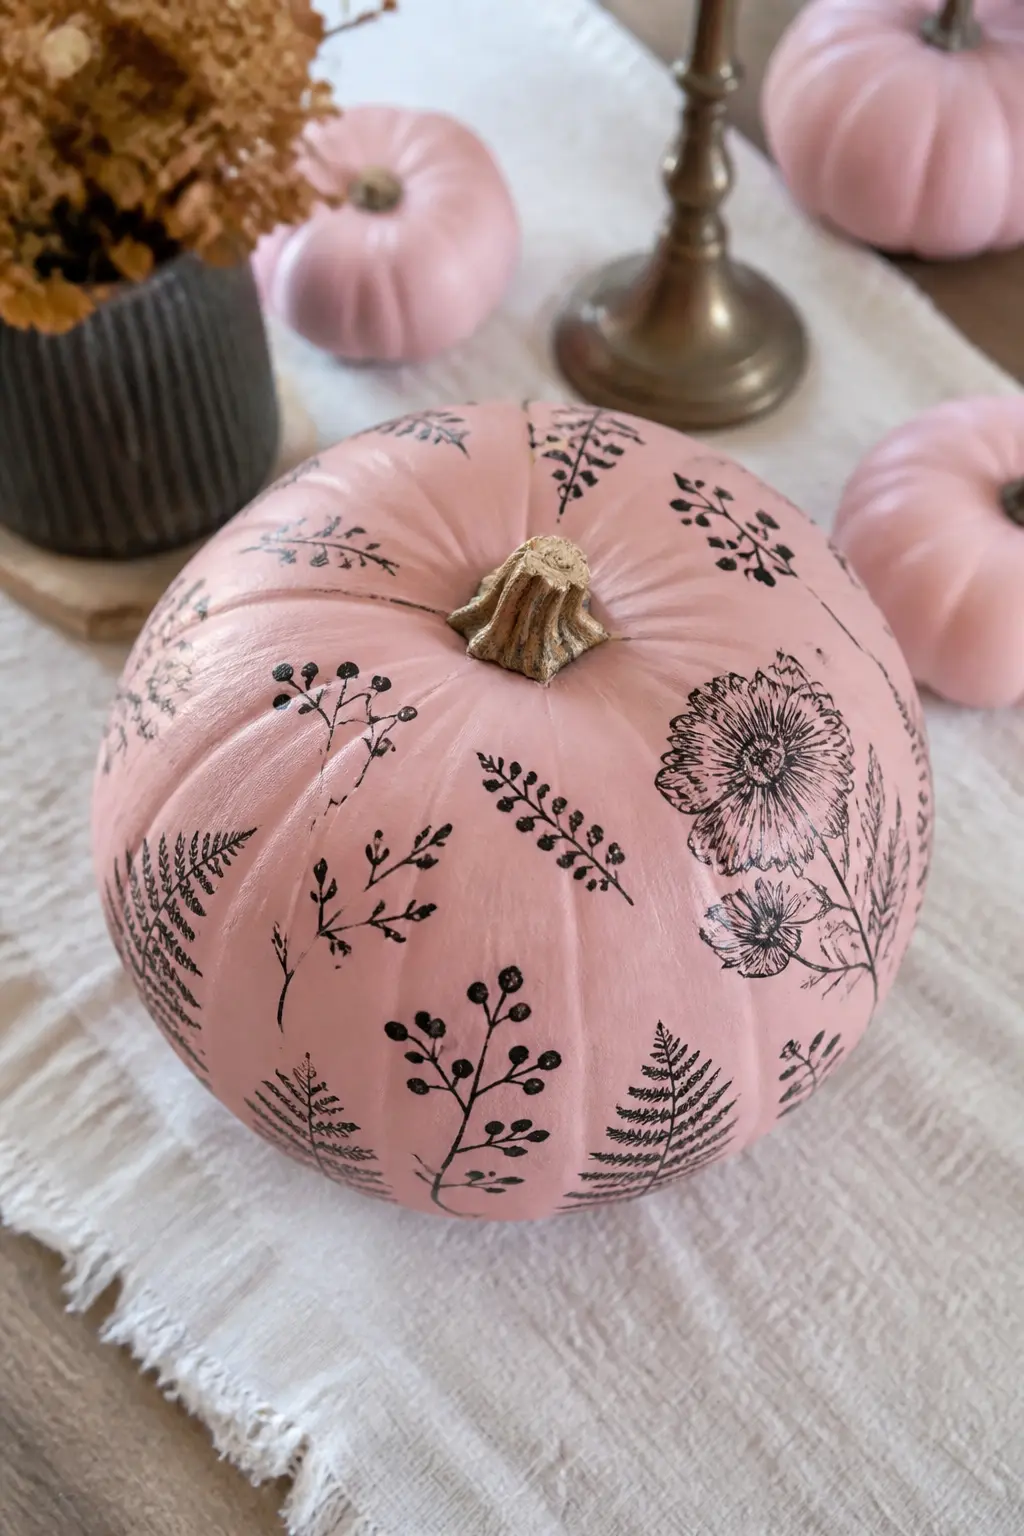
Temporary Tattoo Transfers Applied to a Painted Base
Botanical temporary tattoos, the kind sold for skin, transfer equally well to a sealed painted surface. Paint and seal the pumpkin first with two coats of chalk paint and one coat of matte varnish. Let it cure for twenty-four hours before applying the transfers, or they will lift with the varnish.
Cut out each tattoo sheet, press the printed side down, wet the backing paper with a damp cloth and hold for thirty seconds, then peel away the paper. Seal the whole pumpkin with two further coats of matte varnish once all transfers are placed.
Botanical and wildflower transfers in black, gold or dusty pink are widely available. The result is precise in a way that any freehand painting cannot be, and that precision is exactly what elevates it.
🛍 Shopping guide
Simple Brush Techniques
These eight ideas use a brush, but each one is built from a single repeated motion. A five-stroke daisy is exactly that: five strokes, one flower, repeat. The trick is consistency of spacing rather than skill of execution, and a ruler or a light pencil grid helps with that before you pick up the brush.
Chalk-finish paint works better here than craft acrylics because it is more forgiving on the pumpkin’s curved surface and dries to a flat finish that makes simple marks look considered.
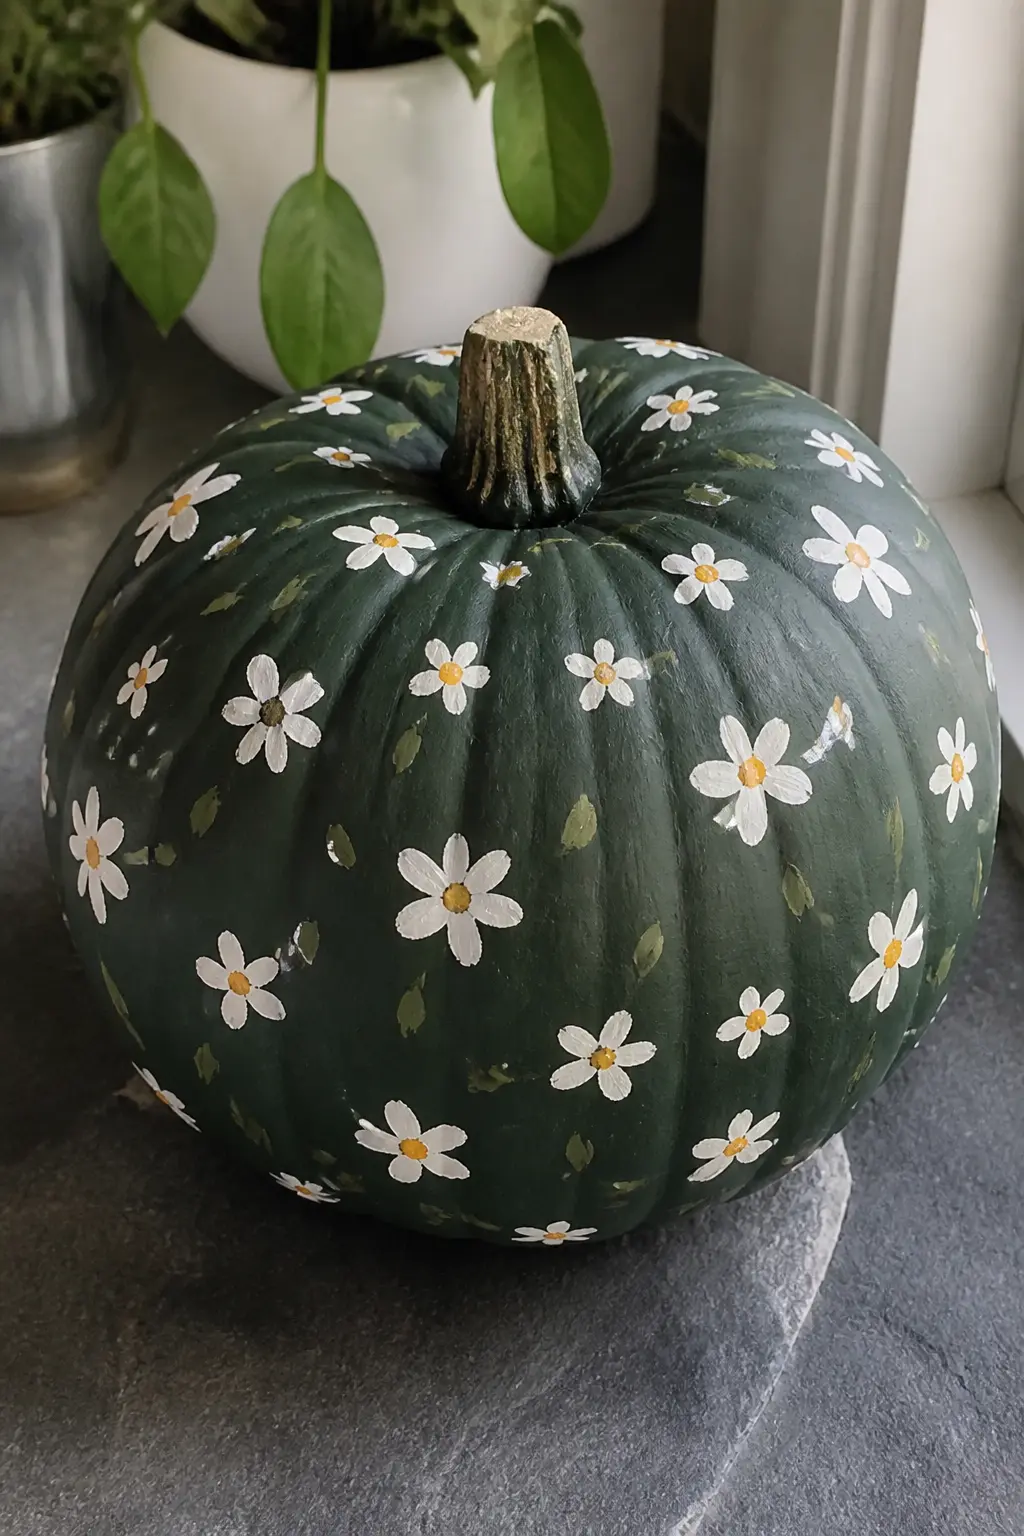
Five-Stroke Daisies Scattered Evenly
A five-stroke daisy is exactly what it says: five petal strokes pulled from a central point, then a dot in the centre. That is the whole technique. Anyone can produce a convincing one within ten minutes of practice on paper.
Use a round brush, size 4 or 6, loaded with white or cream paint. Pull each petal stroke outward from where the centre will be, fanning five petals evenly. Add a yellow or ochre dot at the centre once the petals are dry. Scatter daisies at varying sizes across the pumpkin, with small leaf strokes of sage green between them.
The key to this looking designed rather than doodled is consistent spacing and consistent size within each flower, even if the flowers themselves vary.
🛍 Shopping guide
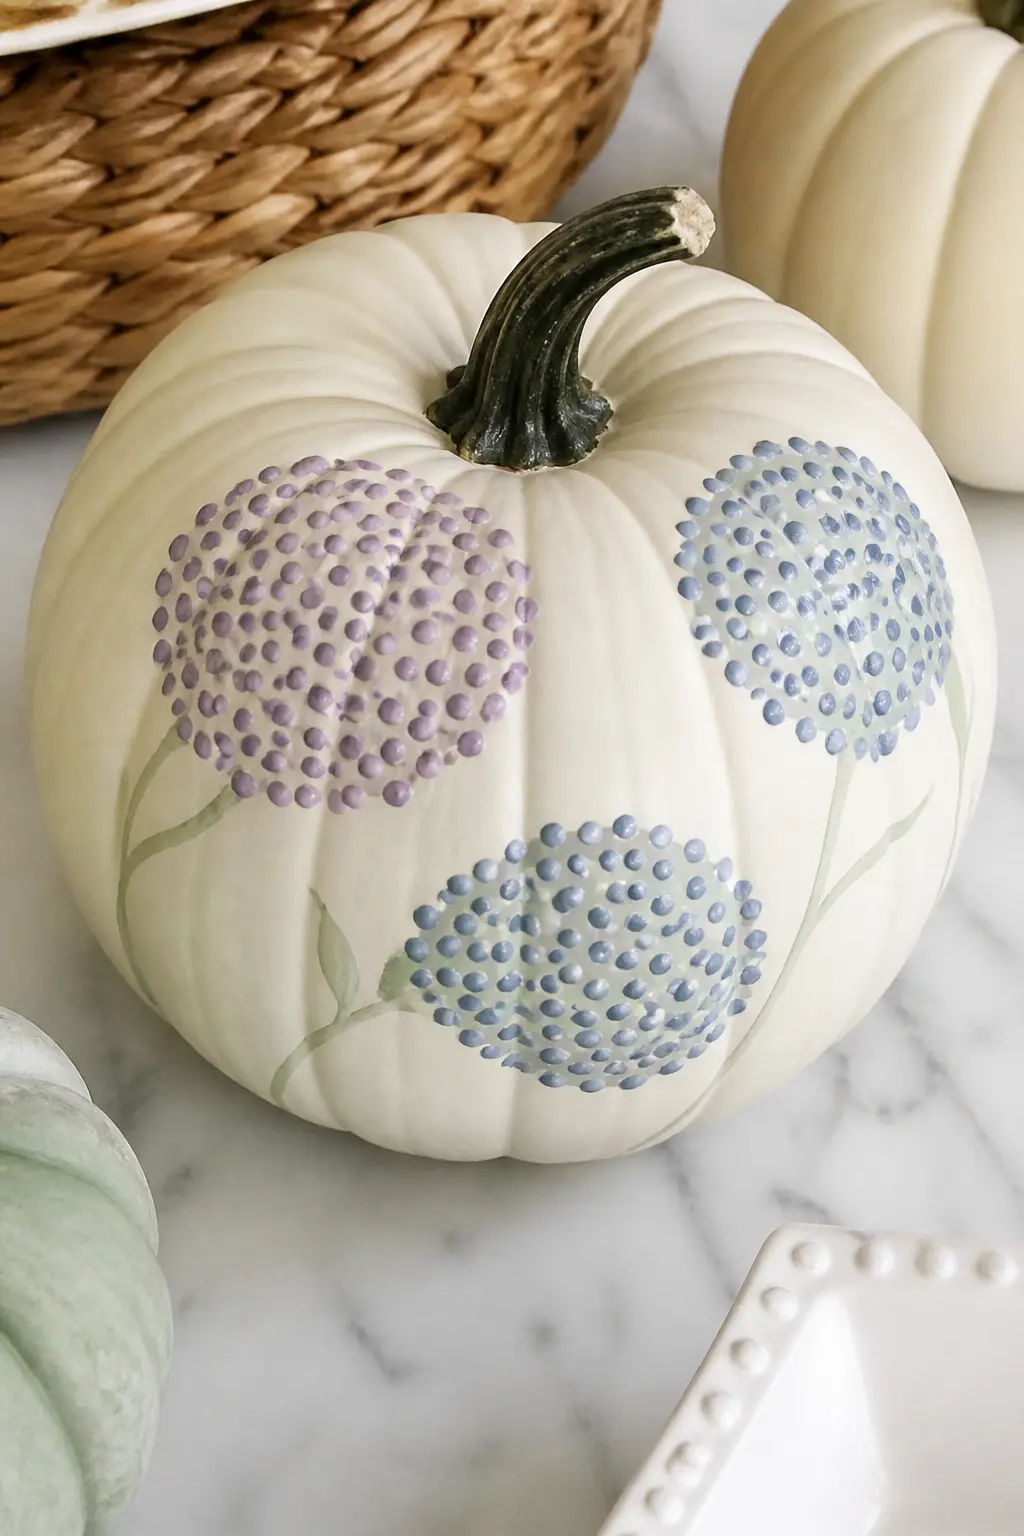
Dots Clustered Into Hydrangea Heads
Hydrangeas are entirely made of clustered dots in two or three tones. You do not paint a single petal: you load a small round brush or the end of a wooden skewer with paint and press repeated oval dots in a loose circle, varying the colour slightly between each press.
Group four to six clusters across the pumpkin, each one about the size of your palm, with simple arching stem lines in sage or olive connecting them at the bottom. Use dusty blue, lilac and soft green tones, or go with blush and mauve for a warmer palette.
The finished pumpkin is almost absurdly close to a painted ceramic vase, which is not a bad thing to be mistaken for.
🛍 Shopping guide
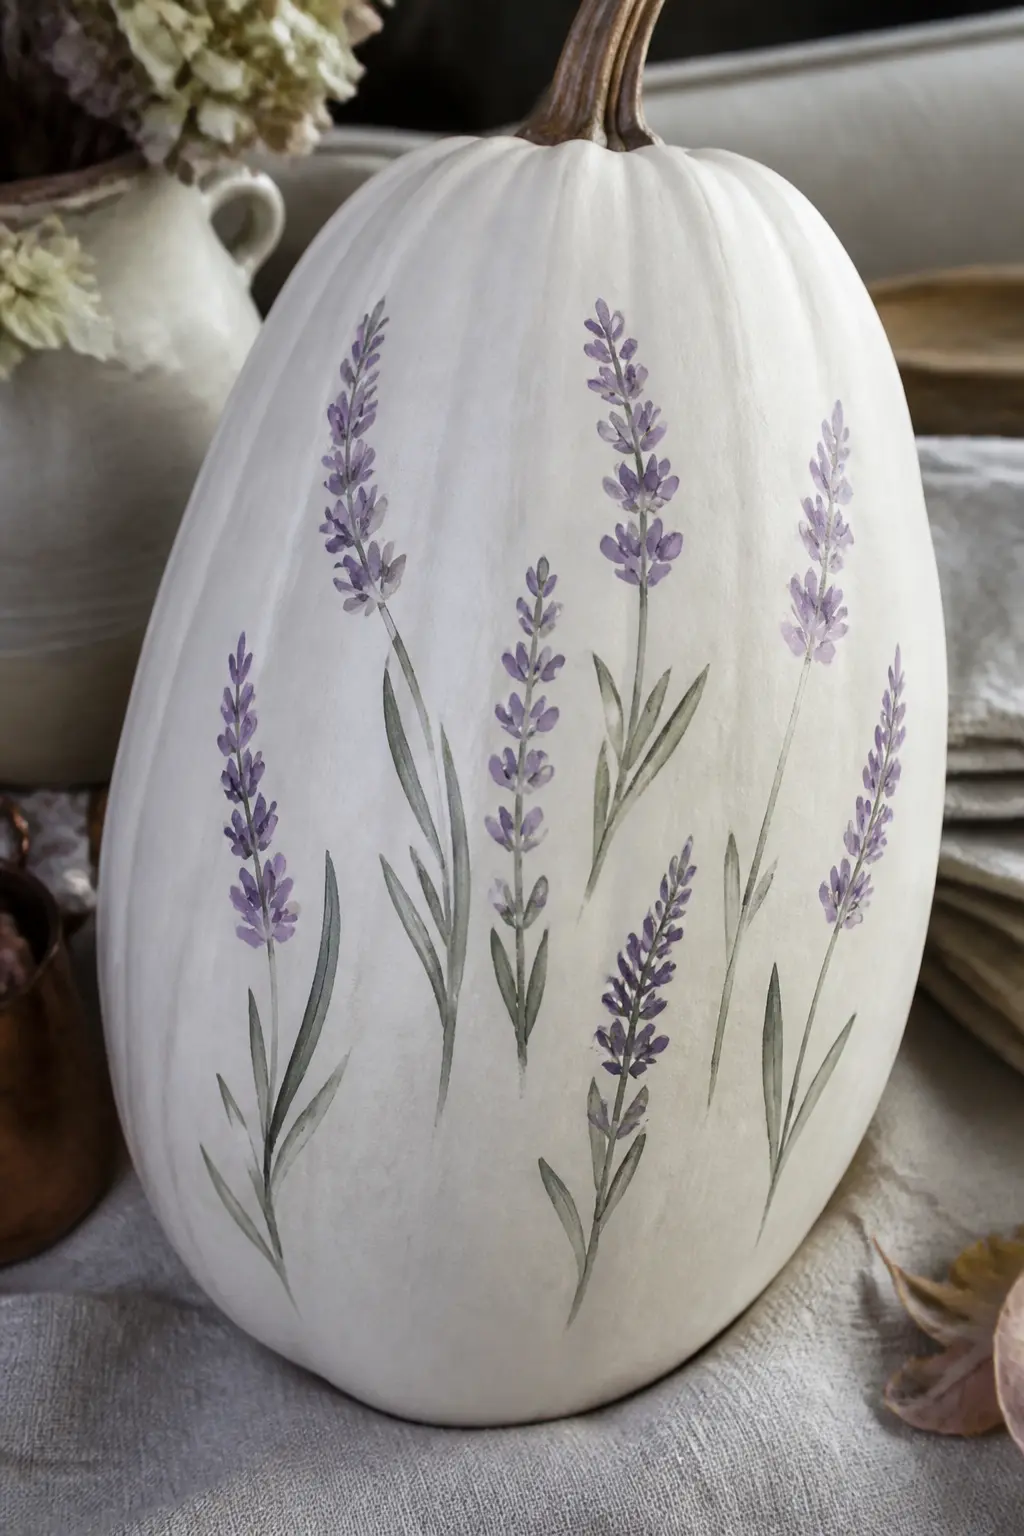
Lavender Sprigs in Short Flicks
Lavender is the easiest floral sprig to paint and one of the most recognisable. Load a small round brush with purple or mauve paint and flick short upward strokes in a column, close together and slightly overlapping, on a thin stem line. Three or four strokes per side of the stem, alternating left and right as you work up.
Paint five or seven sprigs across the pumpkin at slightly different angles, as though they have been laid down loosely. Add fine grey-green stem lines with the tip of the brush. The narrow vertical repeat of lavender looks particularly good on a tall, elongated pumpkin shape.
A bunch of painted lavender on a sage or white ground reads as Provencal and entirely seasonless, which means it earns its keep beyond November.
🛍 Shopping guide
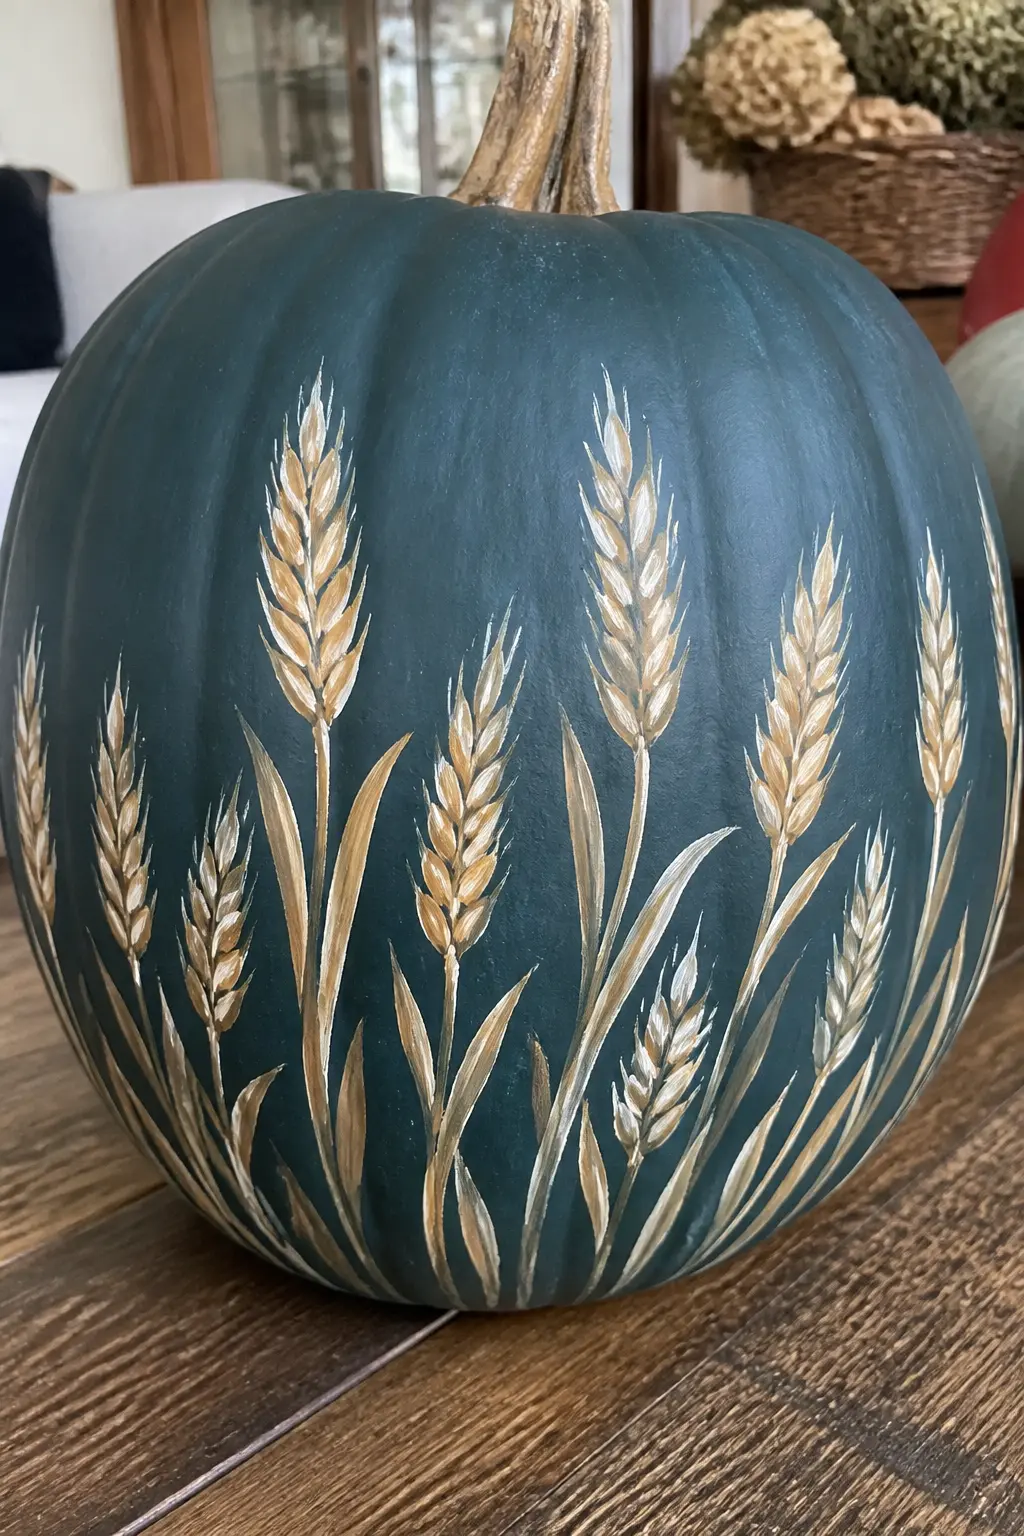
Wheat Stems in Single Strokes
A single wheat stalk is three marks: a long stem line, a thin oval grain head made of short upward flicks on both sides of the top, and a few fine awns extending from the tip. That is it. The motion is fast and gestural, which is what makes a cluster of wheat stems look loose and natural rather than stiff.
Use ochre, raw sienna and cream on a deep teal or matte black ground for maximum contrast. Paint the stems at varying heights and slight angles so they read as a gathered bundle rather than a wallpaper repeat. A few fine grass blades in olive between the stems complete the look.
Wheat sits firmly in the botanical harvest register: autumn without a single ghost or grin.
🛍 Shopping guide
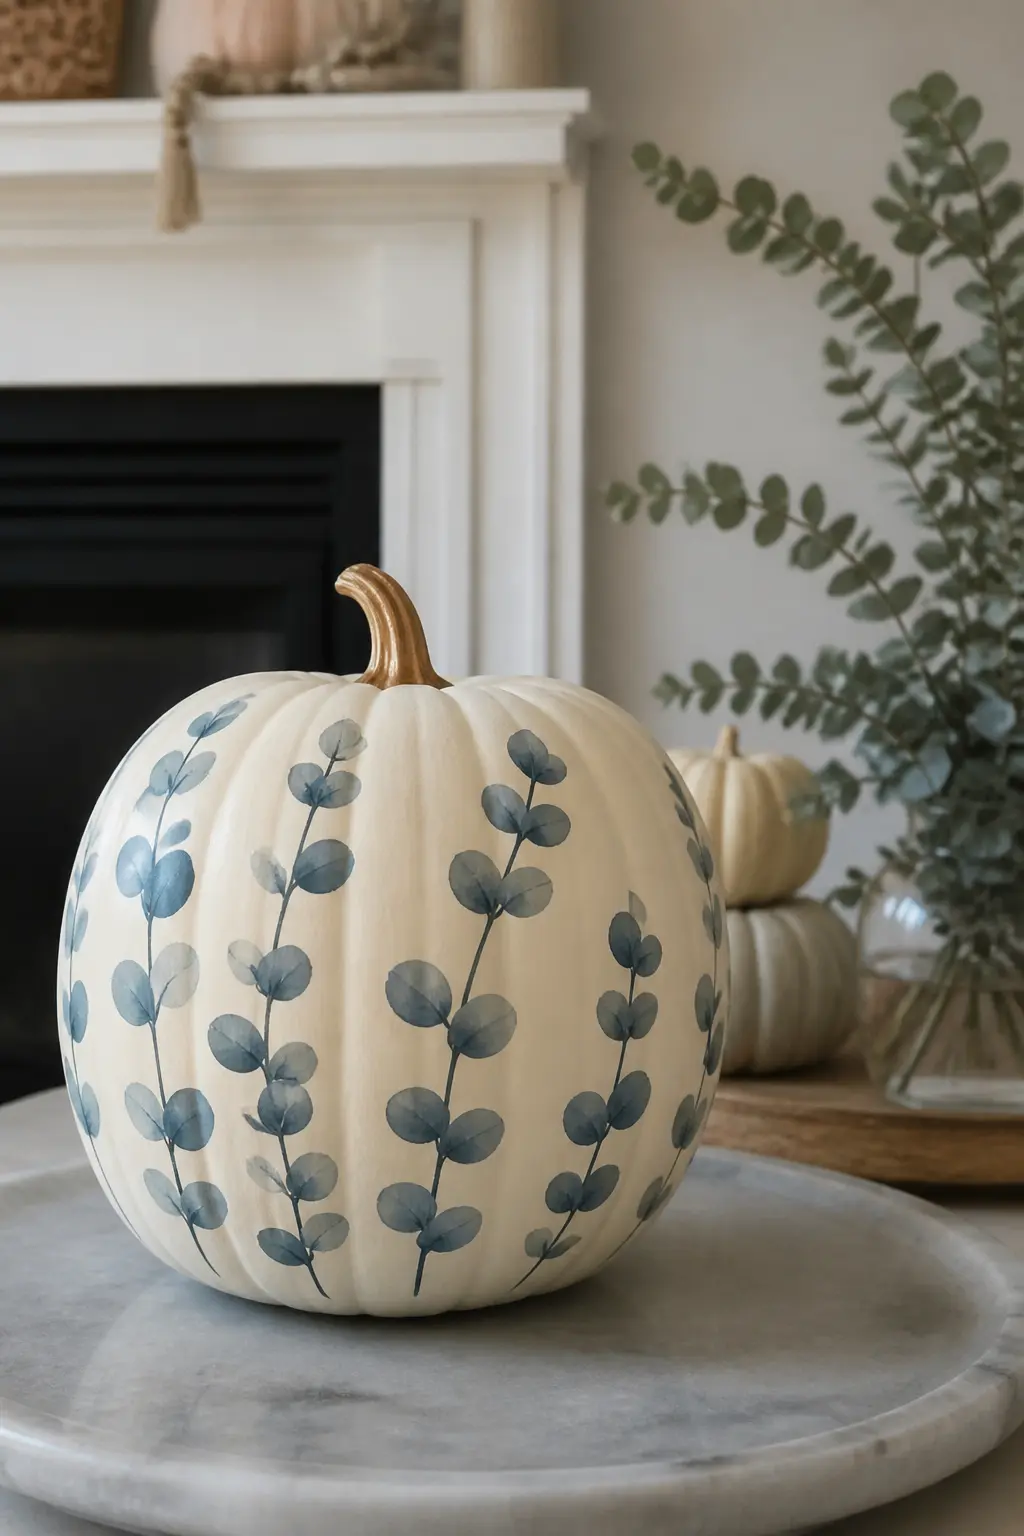
Eucalyptus Leaves in Pairs Along a Stem
Eucalyptus is the decorator’s favourite foliage for a reason: paired oval leaves on a curving stem are both easy to paint and instantly recognisable. Load a flat or filbert brush with blue-grey or sage paint and press two quick leaf shapes on opposite sides of a thin stem, working from the bottom of the stem upward.
Paint three or four stems arching from a central point at the base of the pumpkin, curving up and over the sides. Add a few smaller leaves at the tips. The negative space between stems is as important as the leaves themselves, so resist the urge to fill every gap.
A cream pumpkin with blue-grey eucalyptus branches looks like a decorating magazine prop and costs you a Saturday afternoon.
🛍 Shopping guide
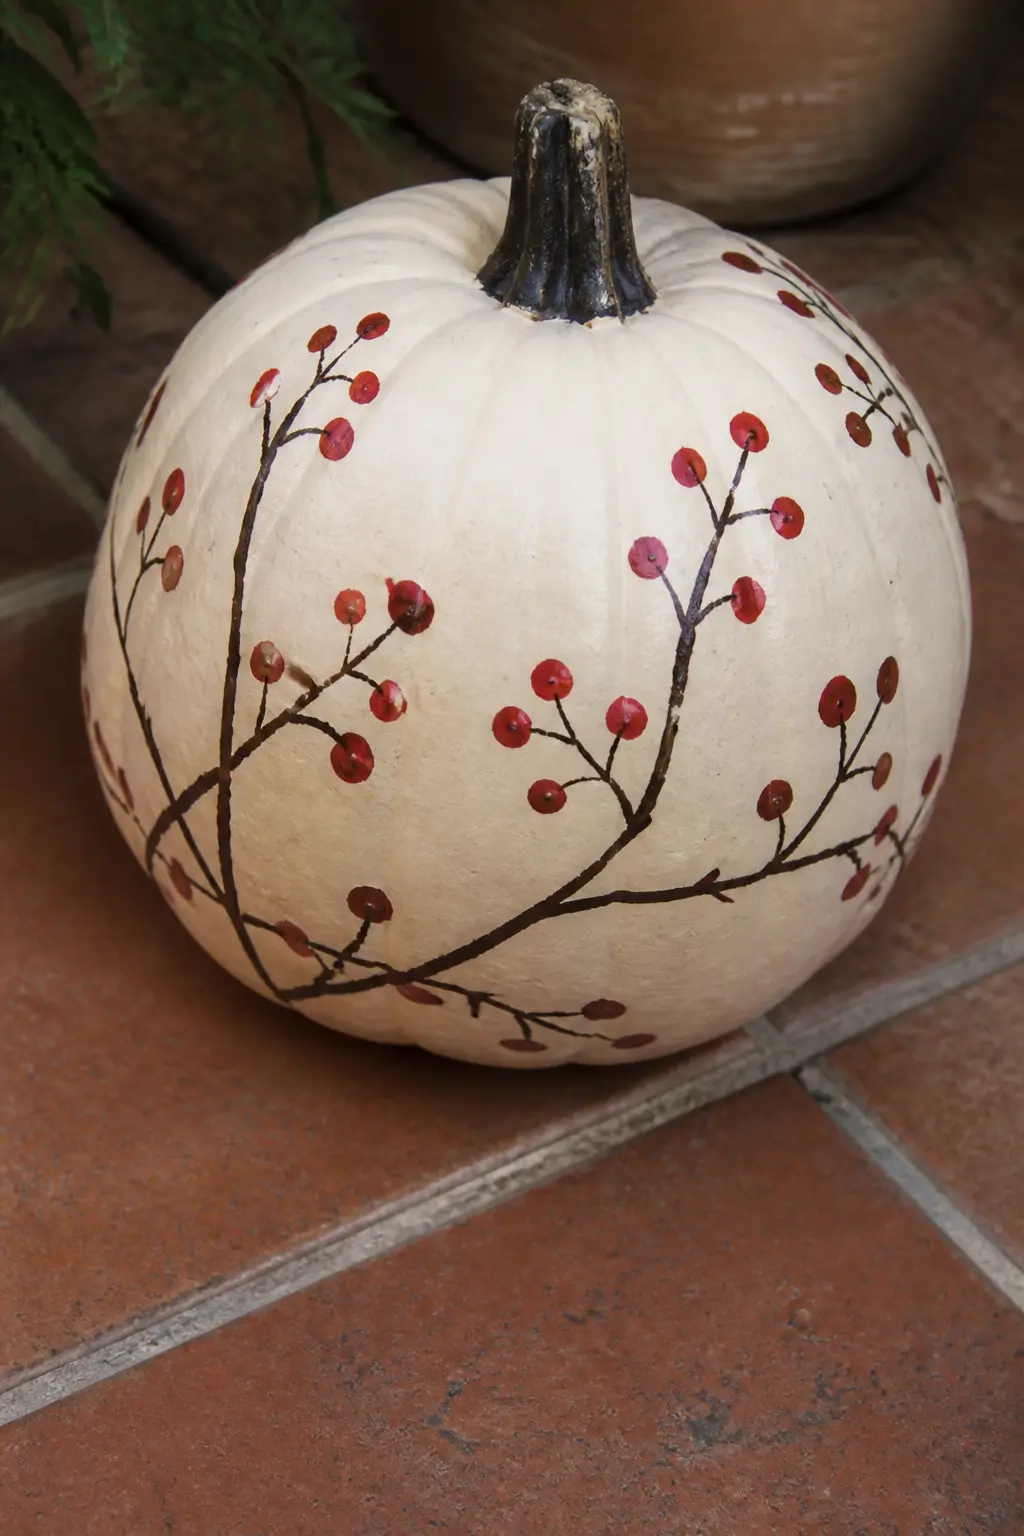
Berries as Clustered Dots on a Branch
Berry branches are painted in two steps: first the branches in burnt umber or dark brown, using a liner brush to draw thin forking lines across the surface. Then the berries, which are simply round dots of colour pressed with the end of a brush handle or a dotting tool over the branch tips.
Use cranberry red, dusty rose or even coral for the berries, pressing each dot with even pressure and a fresh load of paint so each one is a clean circle. Three to five berries per cluster, clustered at the ends of each branch tip.
Berry branches on a warm off-white or pale terracotta ground look like a print from a botanical archive, which is exactly the register this whole list is aiming for.
🛍 Shopping guide
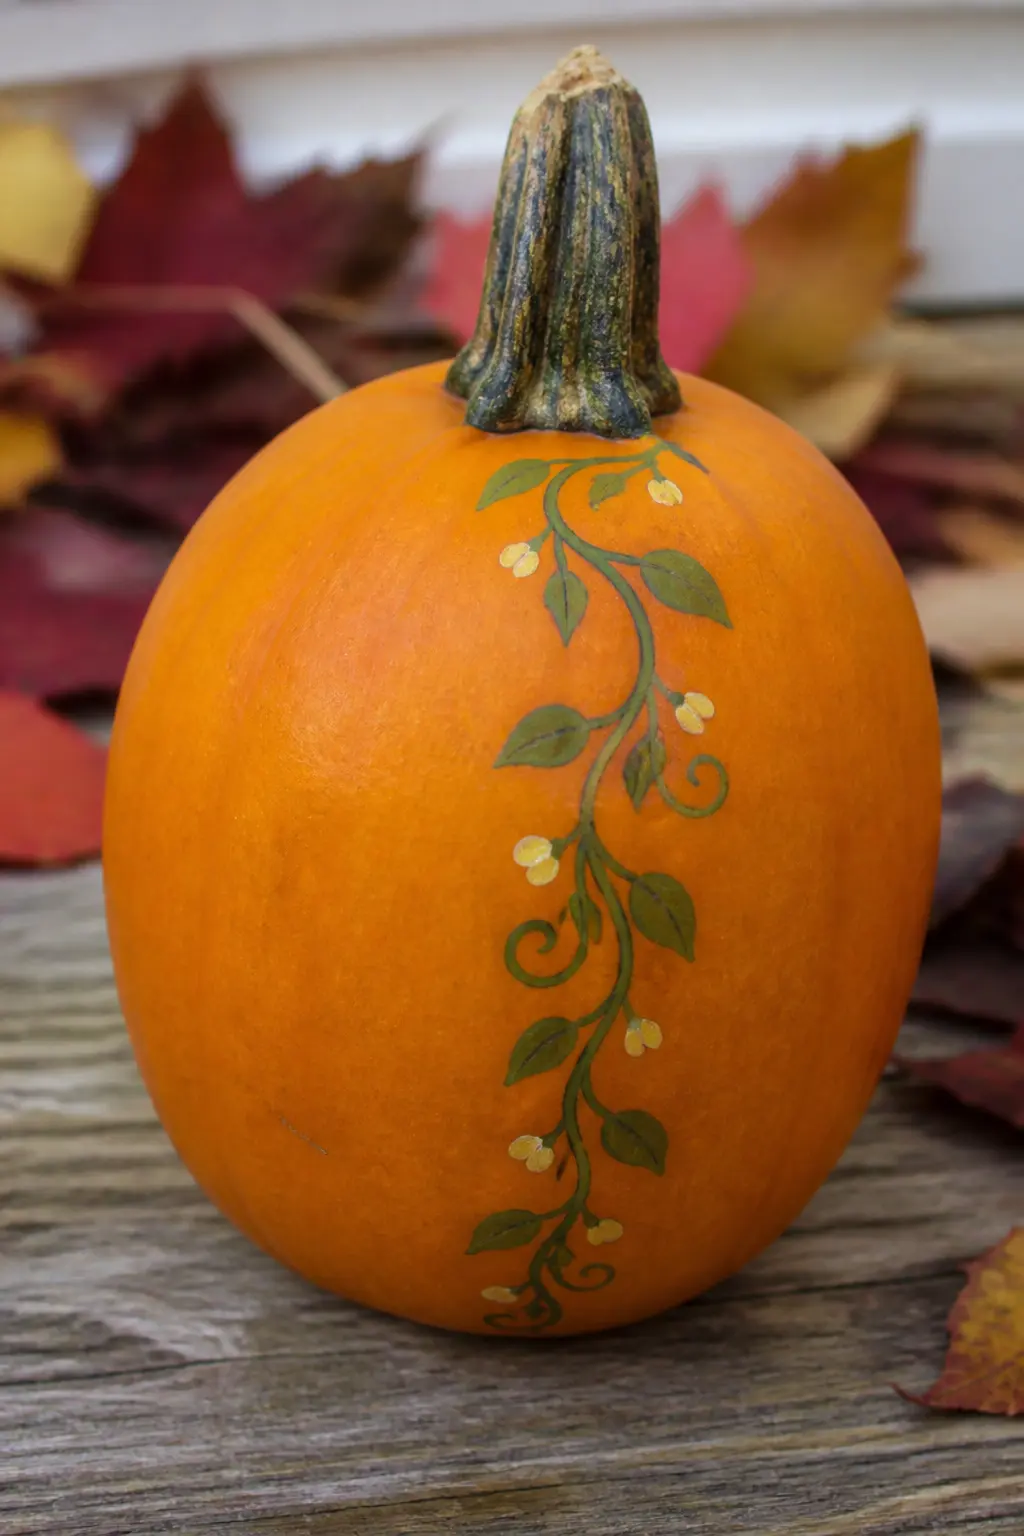
A Single Trailing Vine from the Stem
Start at the top of the pumpkin, right at the base of the stem. Using a liner brush loaded with olive or moss green, draw a long curving line that winds around the pumpkin’s equator and spirals slightly downward. Add small oval leaves at irregular intervals along the vine with a size 4 round brush.
Scatter a few tiny buds or closed flower forms among the leaves: a teardrop shape in cream or blush is enough. Keep the vine as one continuous, confident line rather than a series of short connected marks, which will look hesitant.
The simplicity is what makes this work. One vine, one colour family, the natural texture of the pumpkin showing through. It looks like something from a Scandinavian craft tradition and requires no real drawing ability.
🛍 Shopping guide
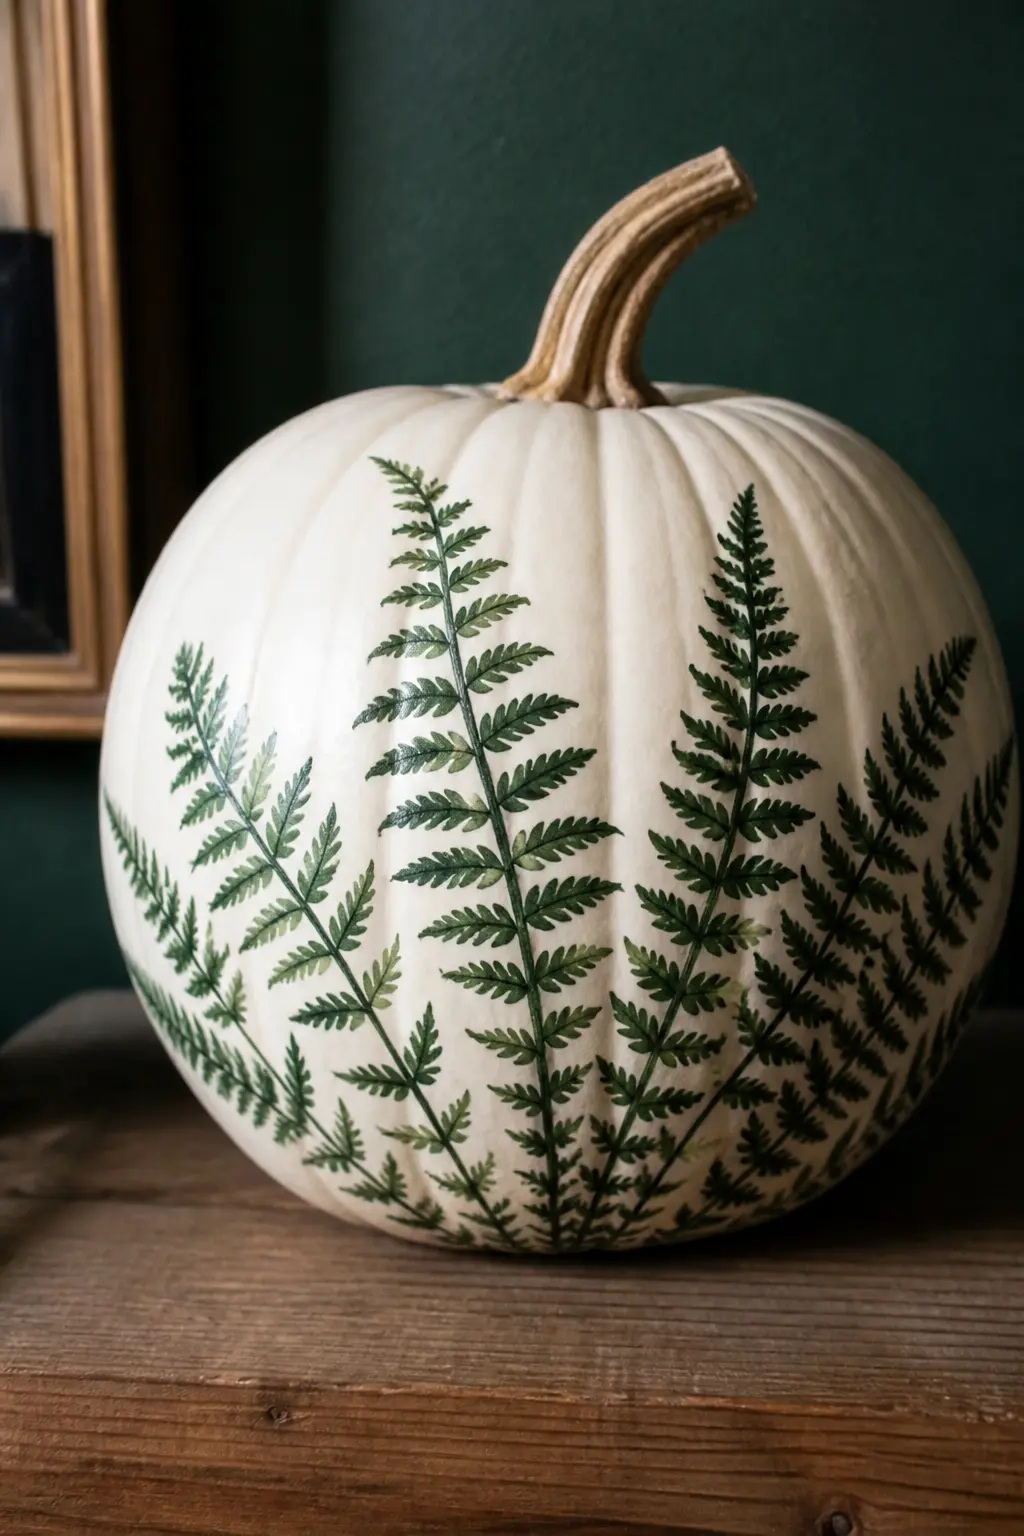
Fern Fronds in One Repeated Motion
A fern frond is a central stem with small leaf pairs flicking off each side, each leaf narrower toward the tip. Load a size 4 round brush with forest green, place the brush at the base of a frond and draw a thin stem. Then work back up the stem, pressing and releasing the brush tip on each side alternately to make the leaf pairs.
Paint four to six fronds radiating from the base of the pumpkin, curving outward and upward. Vary the length of each frond so they read as natural rather than mirrored.
Dark green ferns on a warm white or sage ground are one of the most enduring botanical motifs in decorative arts. On a pumpkin, they are also completely outside of any Halloween association, which is the whole point.
🛍 Shopping guide
Confident Brush Techniques
These six ideas reward anyone who has spent a weekend with a brush before, or who is prepared to practise the key shapes on paper first. None of them require formal art training. They do require a reference image, decent brushes in two or three sizes, and the willingness to let a mark stay rather than overworking it.
Wet-on-wet techniques in particular need confidence: you load the brush and you go, because fussing over wet paint muddies it. Paint on a light pencil sketch, work from background to foreground, and seal with two coats of matte varnish.
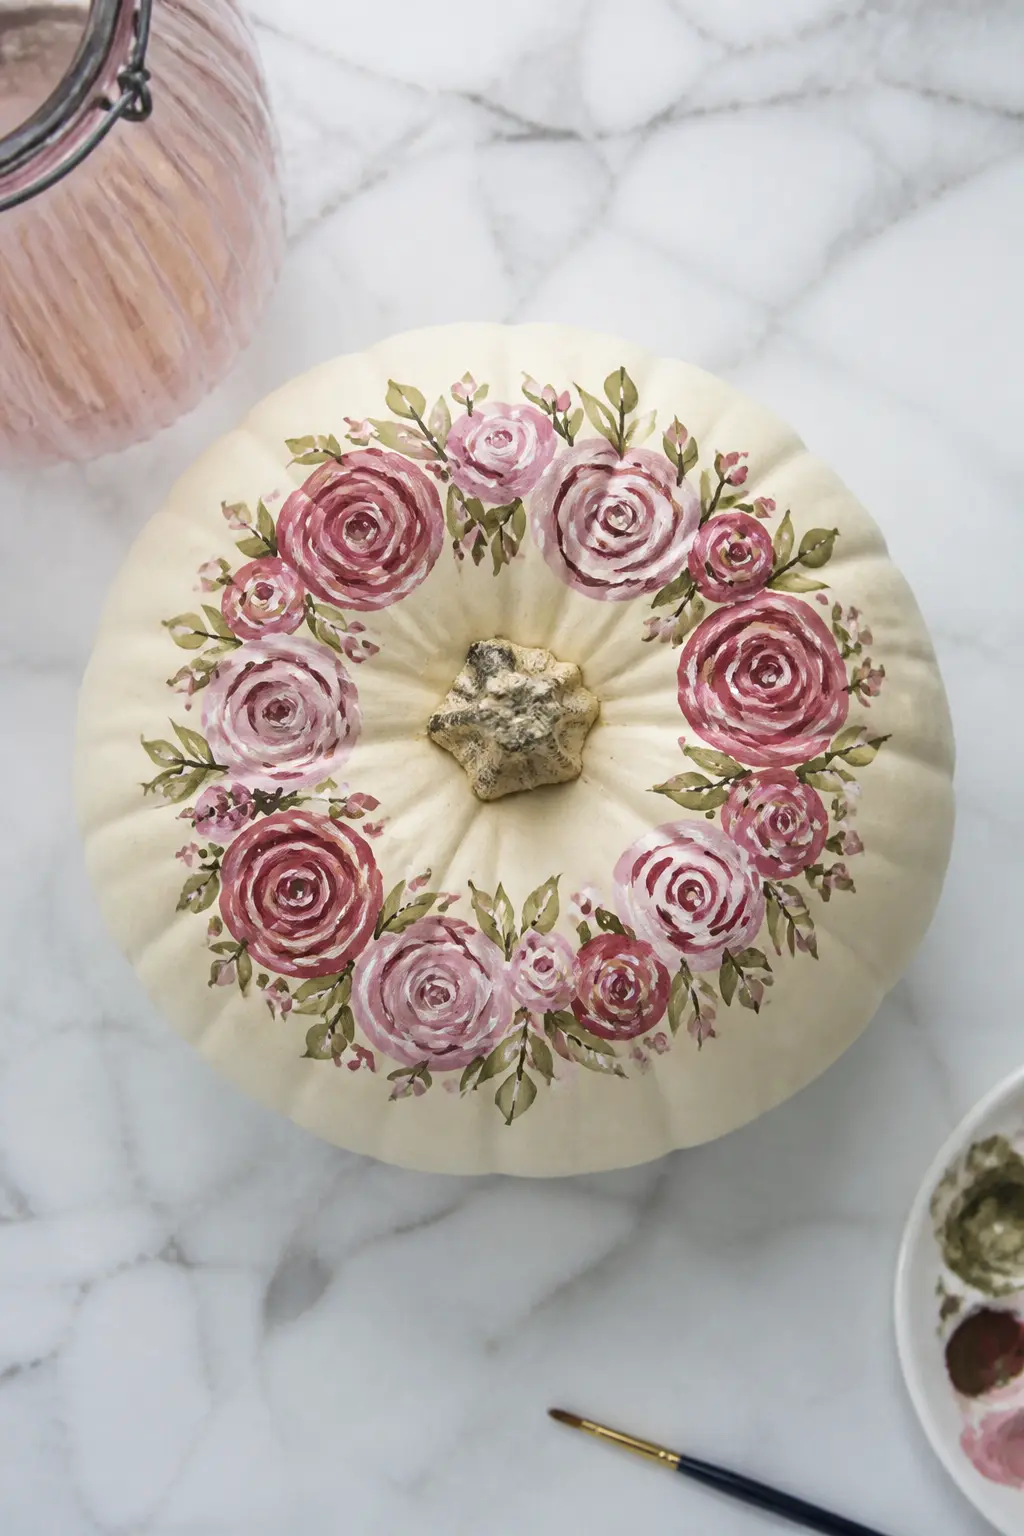
A Full Wreath of Roses Around the Stem
A painted rose wreath around the stem is the showpiece of this list. Start with the roses: each one begins as a small tight spiral, then you add loose C-shaped petal strokes around the outside, working outward in two or three rounds. Practice the motion on paper until it feels natural before touching the pumpkin.
Arrange six to eight roses in a ring around the stem, filling gaps with small leaves and flower buds. Use a palette of dusty rose, antique pink and cream, with olive and moss green for the foliage. The wreath should sit on the top half of the pumpkin, leaving the lower section clean.
Seal with two coats of matte varnish. This pumpkin will be the one guests photograph, and it should be.
🛍 Shopping guide
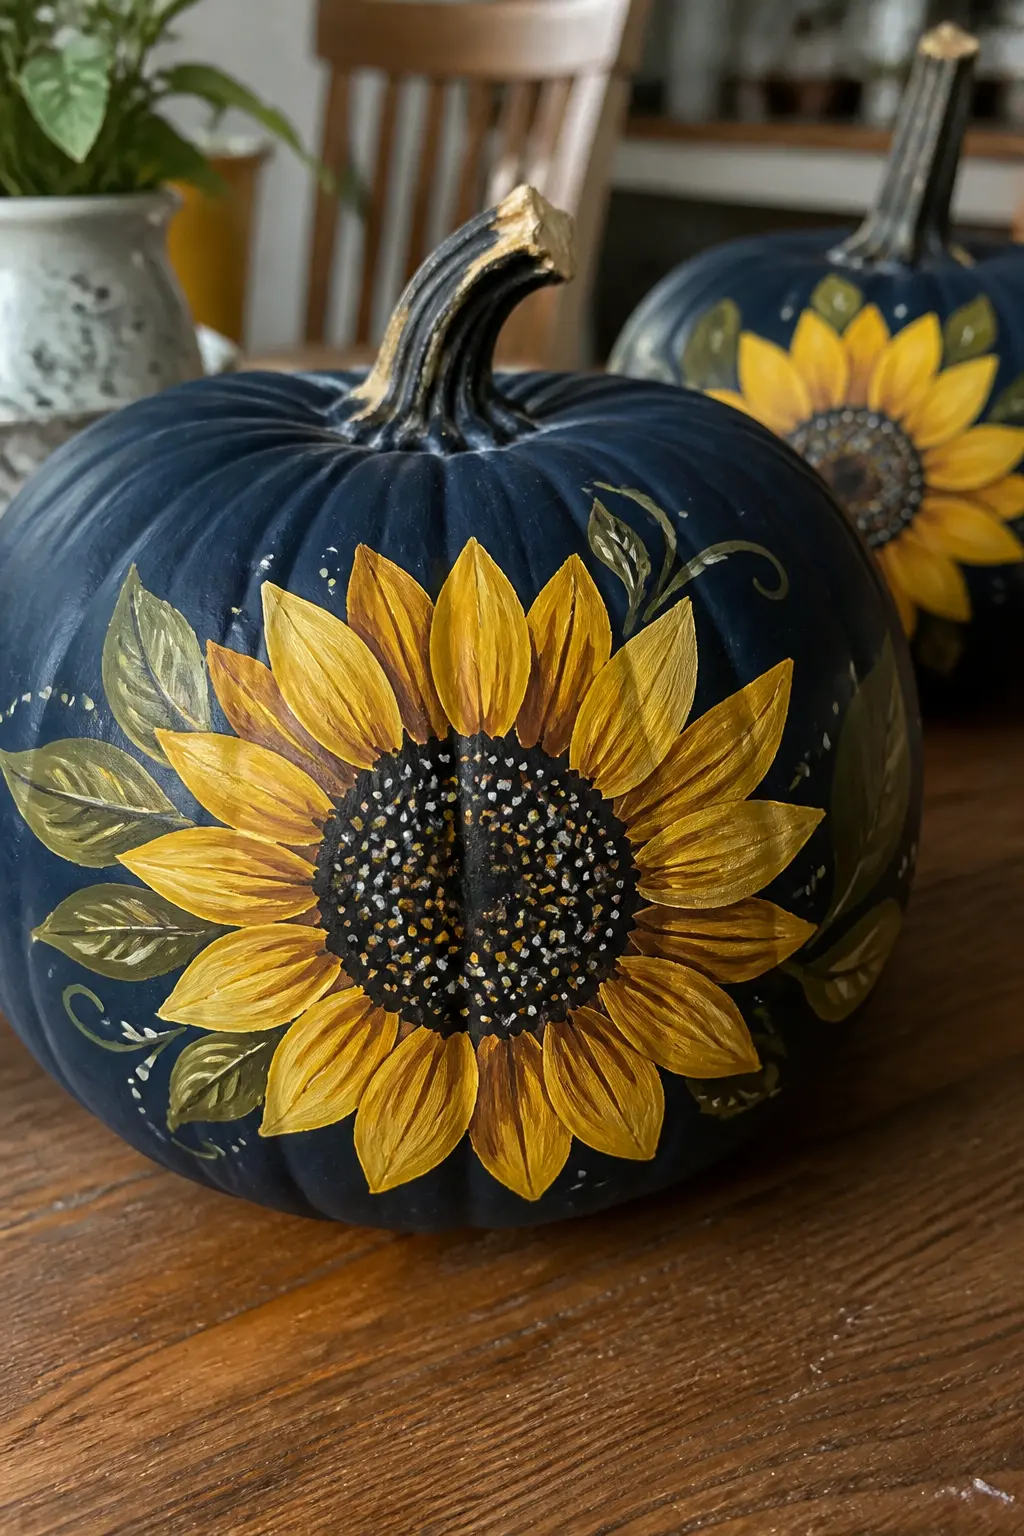
Sunflowers with Dotted Centres
A painted sunflower uses long pointed petal strokes in two tones of yellow and ochre, each petal pulled outward from the centre in a single confident stroke. The centre is a large dark brown circle filled with small dots or crosshatch marks pressed in with a fine brush or a dotting tool.
Paint one large sunflower head covering most of the front face of the pumpkin, with one or two smaller ones at the side. A few broad leaf shapes in olive or tobacco green balance the composition.
Sunflowers on a deep matte navy or forest green ground look dramatic and seasonal without any association with harvest-festival craft tables. The scale and confidence of the brushwork is what lifts it.
🛍 Shopping guide
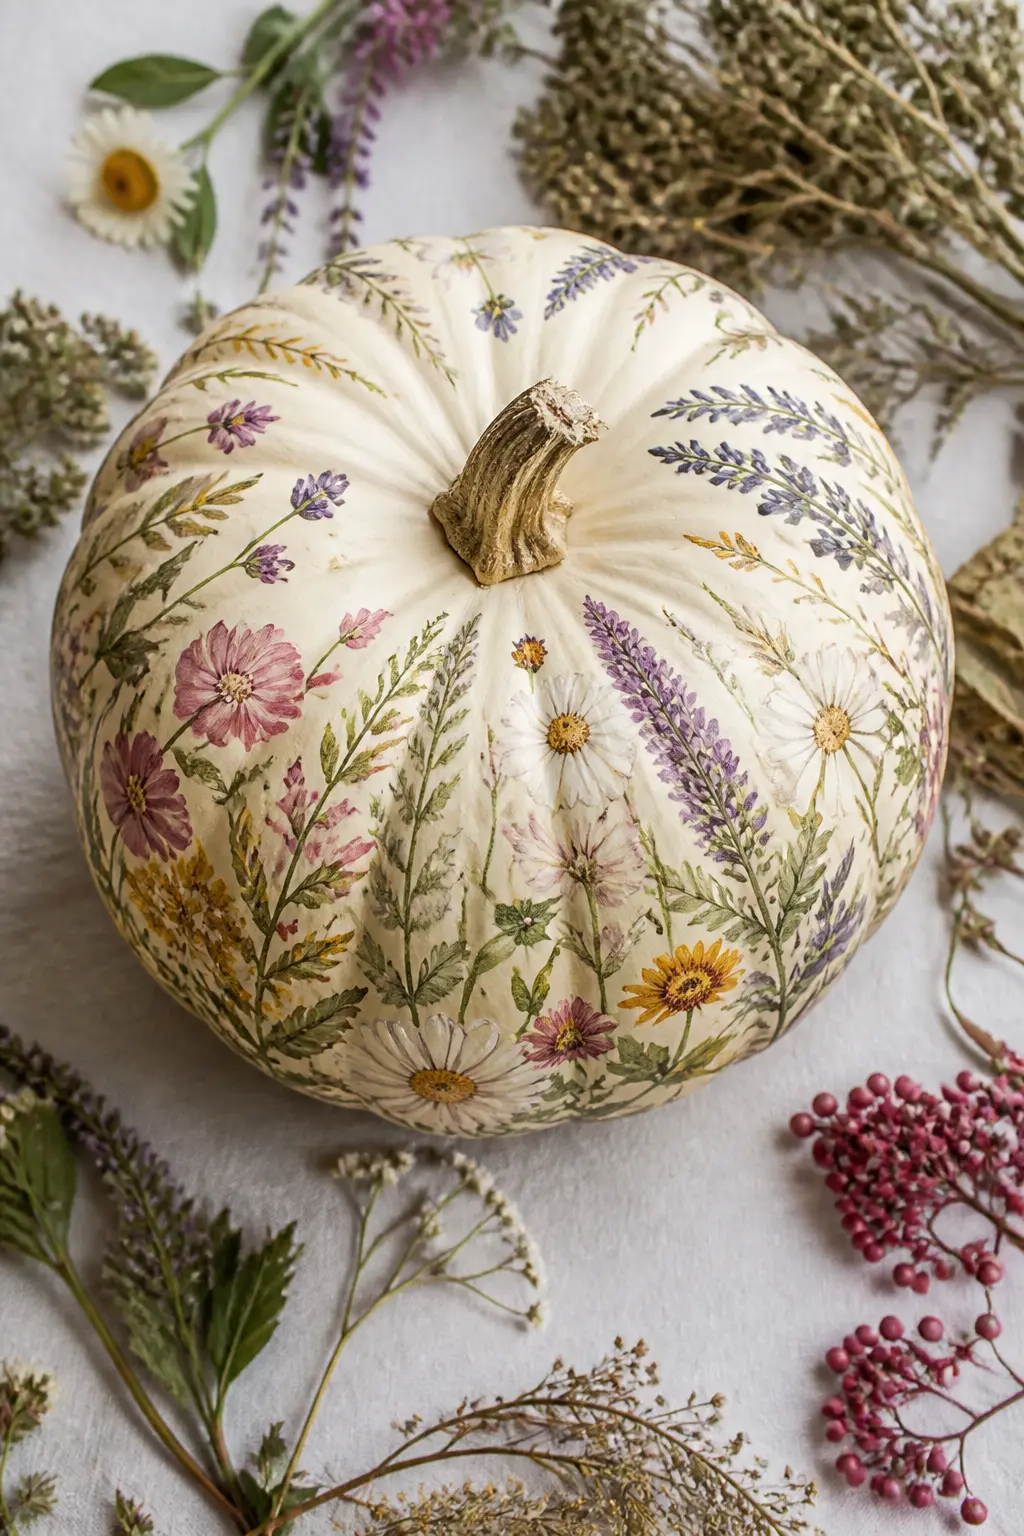
A Wildflower Meadow Wrapping the Pumpkin
A wildflower meadow pumpkin uses every simple brush stroke from the previous section, but layers them all together so the surface reads as a full botanical scene. Start with a base of grass blades and stems in olive, then add lavender sprigs, daisy heads, berry clusters and small buds layered over the top.
Work from background (thin, light stems) to foreground (brighter flowers, larger marks). Keep the palette coherent: warm dusty tones of cream, blush, mauve, olive and soft yellow. Avoid pure white and pure black, which will jump out of the layered softness.
The result looks like a section of a botanical textile, and it wraps the whole pumpkin so there is no front or back: it reads from every angle.
🛍 Shopping guide
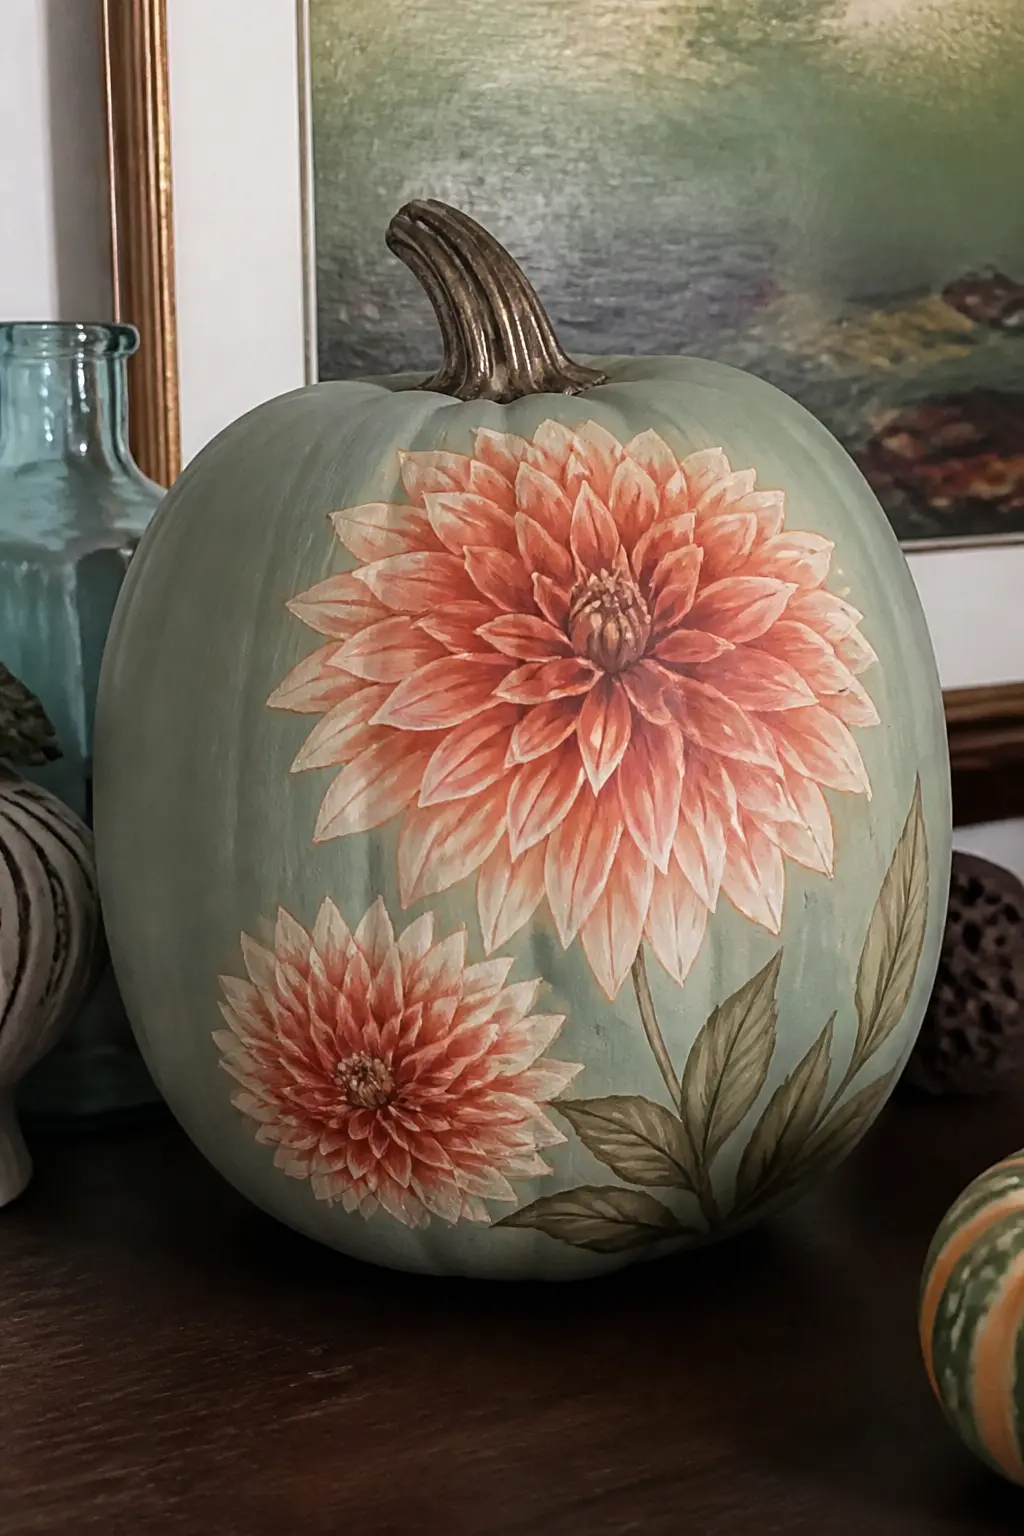
Dahlias in Layered Petals
A painted dahlia builds outward from the centre in rings of petals, each ring slightly larger than the last. Use a small filbert or cat’s tongue brush to press each petal: pointed at the tip, wider at the base where it meets the ring inside it.
Start with the innermost ring of tiny petals in the darkest tone, then work outward through progressively lighter values of the same colour. A deep coral dahlia might move from rust to apricot to cream at the outer petals. Two or three dahlia heads at different sizes on a sage green ground look like a still-life painting.
Let each ring dry before adding the next, or the tones will blend into mud rather than layering cleanly.
🛍 Shopping guide
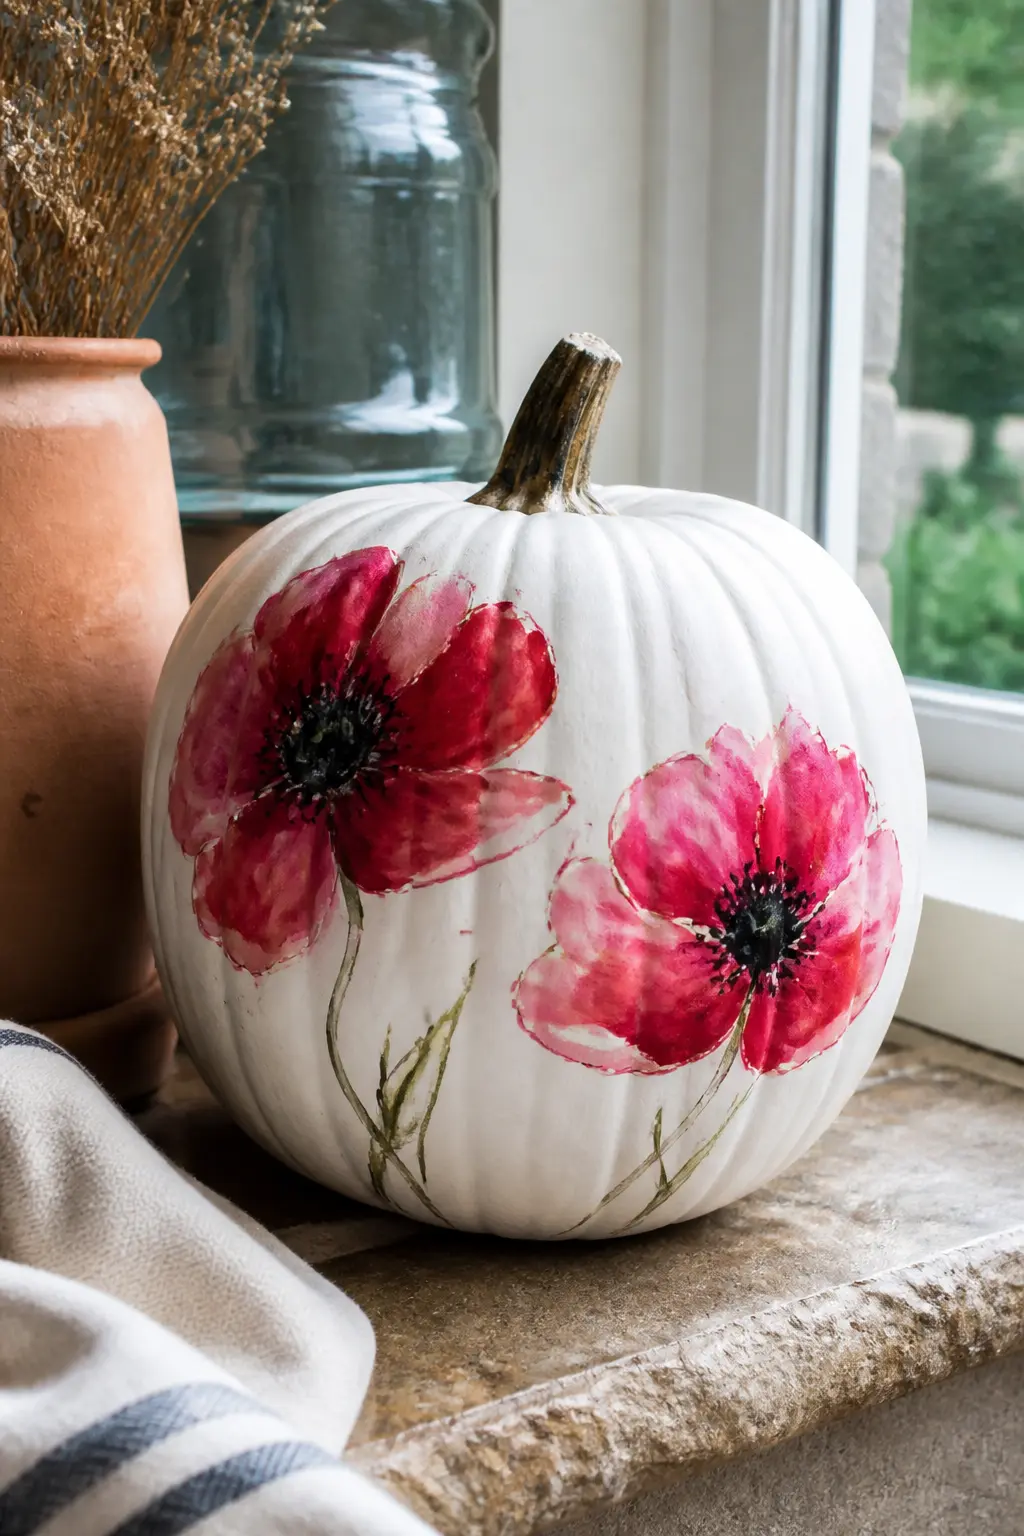
Poppies in Loose Wet-on-Wet Colour
Wet-on-wet painting means you apply a second colour before the first is dry, letting the two blend at the edges. For a poppy, load a large round brush with coral red, stroke on two or three broad petal shapes, then immediately touch the outer edges with a slightly darker crimson and the inner base with black. The colours bleed together in the wet paint, creating the translucent glow of a real poppy petal.
Add a black centre with radiating stamens in fine lines while the red is still slightly damp, so the black softens very slightly at its edges. Paint two to four poppies across the pumpkin at varying sizes, with thin green stems and narrow leaf marks in olive.
Poppies done this way look loose and botanical and nothing like a Halloween colour scheme, despite being red. The softness of the bleeding edges is what keeps them in the right register.
🛍 Shopping guide
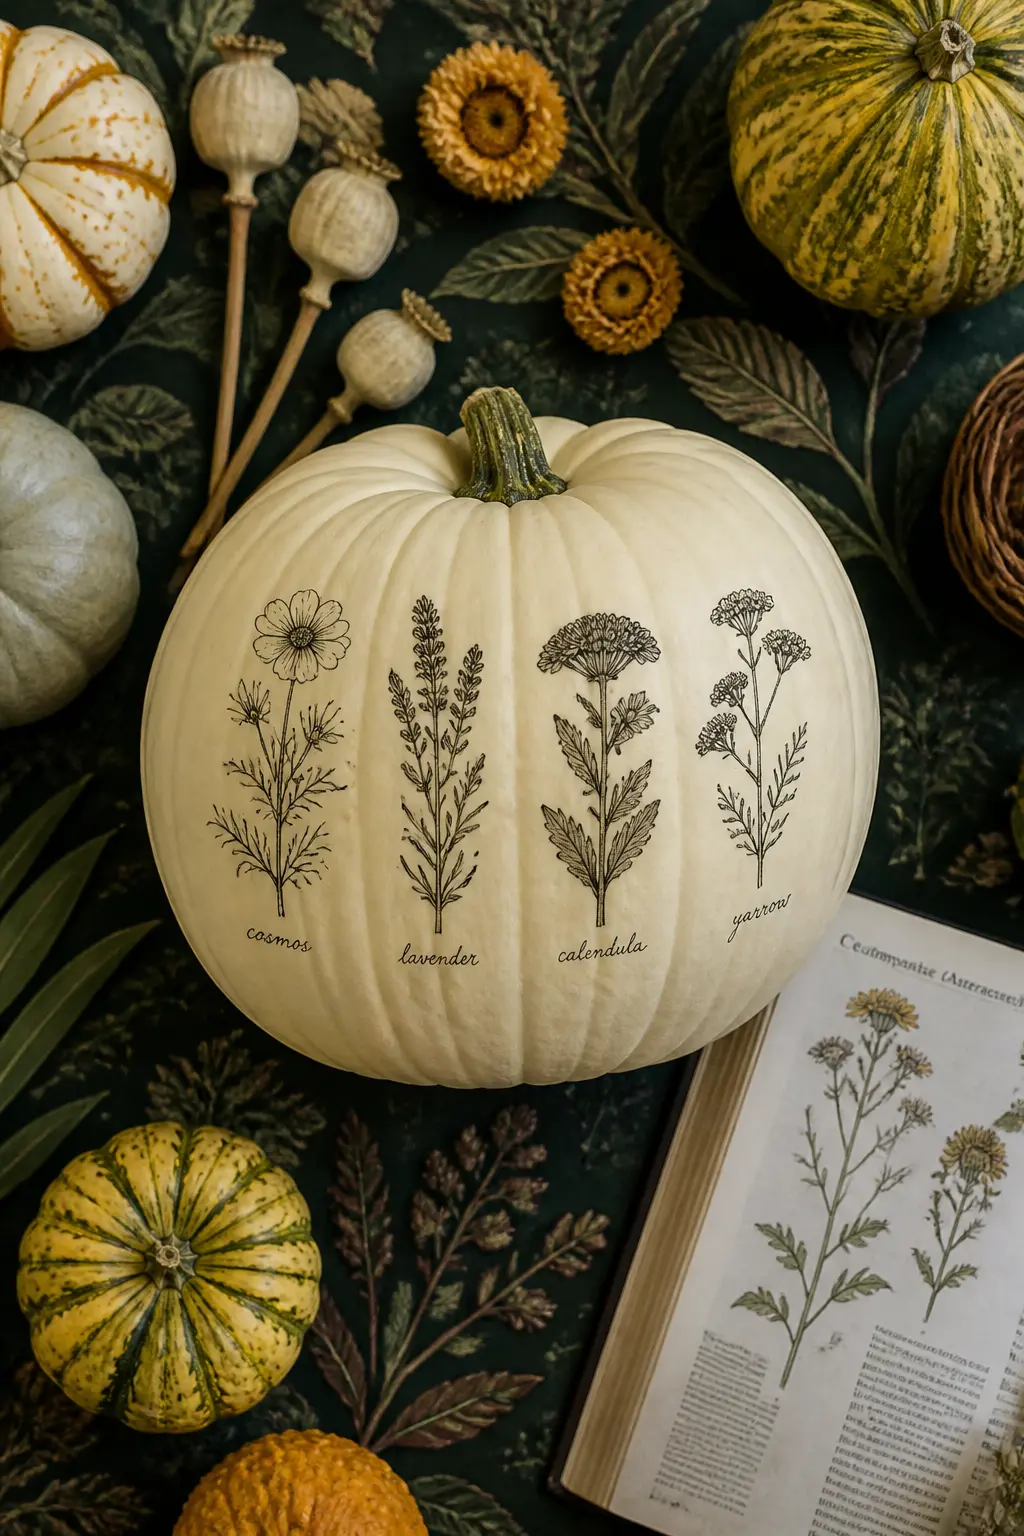
A Botanical Study with Labelled Names
A botanical study pumpkin treats the surface as a page from a Victorian herbarium. Paint three or four distinct botanical specimens across the pumpkin: a rose with its calyx, a sprig of rosemary, a seed head, a leaf with veins. Keep each one precise and slightly distanced from the others, as illustrations on a page are spaced.
Add the Latin or common name under each specimen in a fine liner or paint pen: Rosa canina, Rosmarinus officinalis. Use a ruler held against the curve to keep the lettering baseline consistent.
The combination of detailed illustration and handwritten labels is what makes this the most ambitious entry in the list, and also the most singular. It looks like a piece of decorative art, not a craft project.
🛍 Shopping guide
Palette-Led Ideas
These seven ideas are defined by their colour combination more than their subject matter. The flowers are secondary; the palette is the statement. Pick the palette that fits the room the pumpkin will live in, then choose any flower shape from the simpler sections above to execute it.
A tonal palette (one colour on a close-matching ground) is the most forgiving: imperfect edges disappear. High-contrast palettes like navy and white or black and gold demand cleaner edges, so use a fine liner or a paint pen for the outlines.
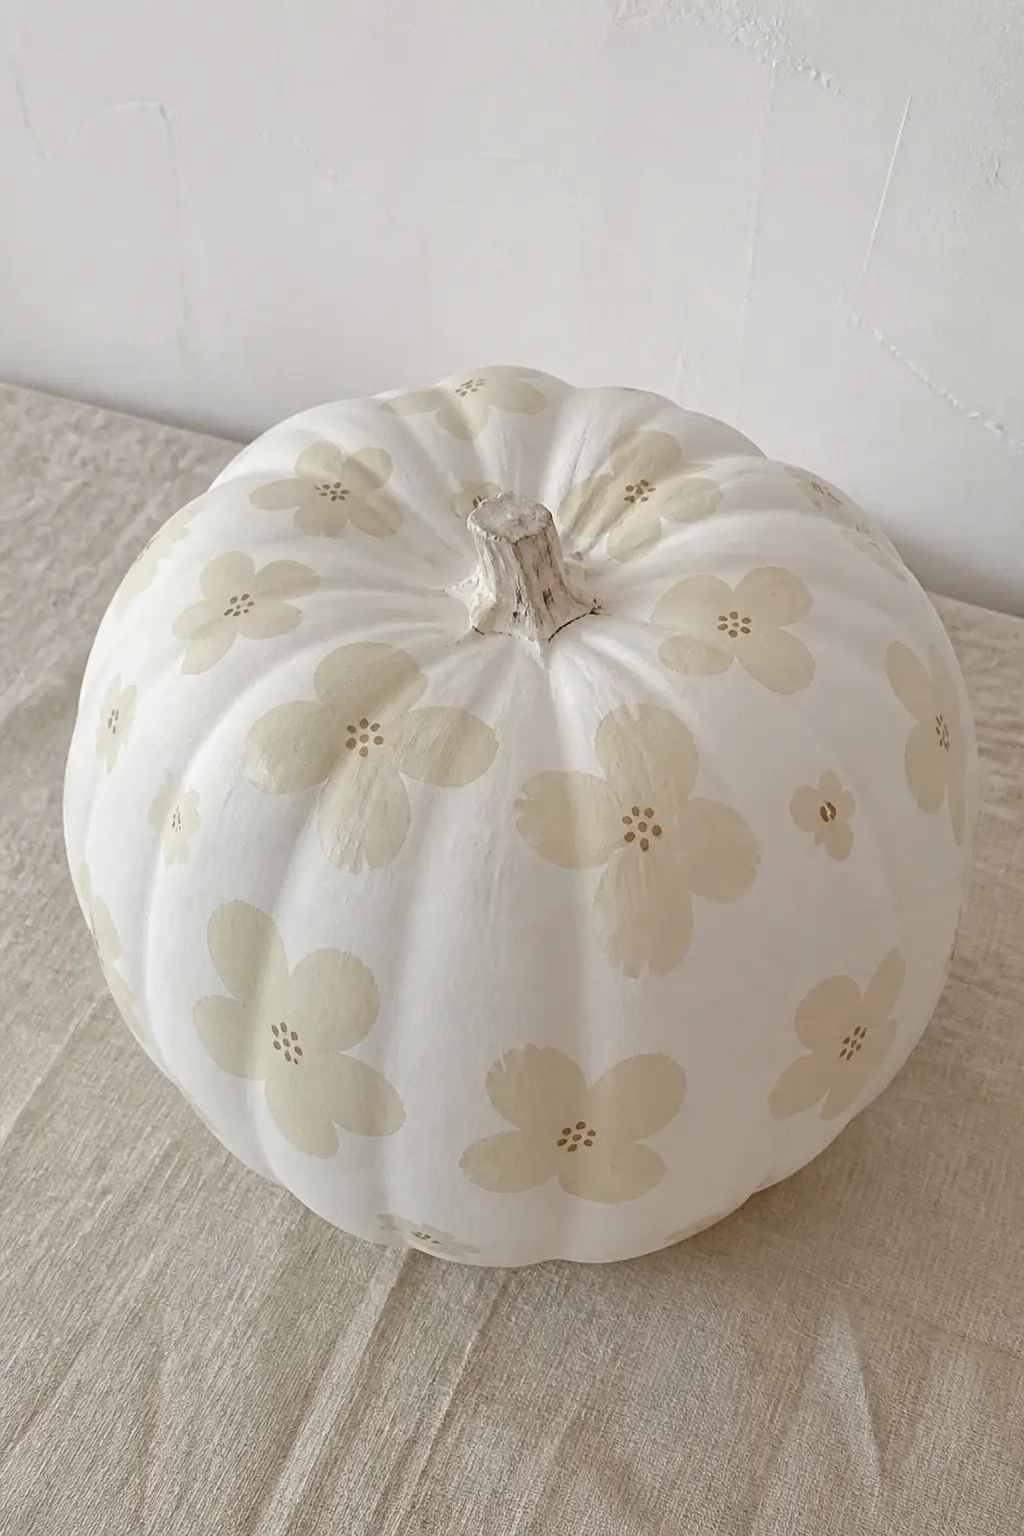
Cream Flowers on a White Pumpkin
Tonal palettes are the quietest and most sophisticated option in this list. A white pumpkin base with cream and off-white flowers in a slightly warmer tone creates a ghost of pattern rather than a statement: you see the flowers when you look, but the pumpkin reads as white from a distance.
Use any simple flower shape from the brush-technique sections: five-stroke daisies, hydrangea dots, or eucalyptus leaves all work. The difference in value between the base and the flowers is about twenty percent, which is subtle enough to look intentional rather than unfinished.
This pumpkin belongs on a white or pale grey surface where the tonal subtlety reads clearly. Against a dark or coloured background, it simply disappears.
🛍 Shopping guide
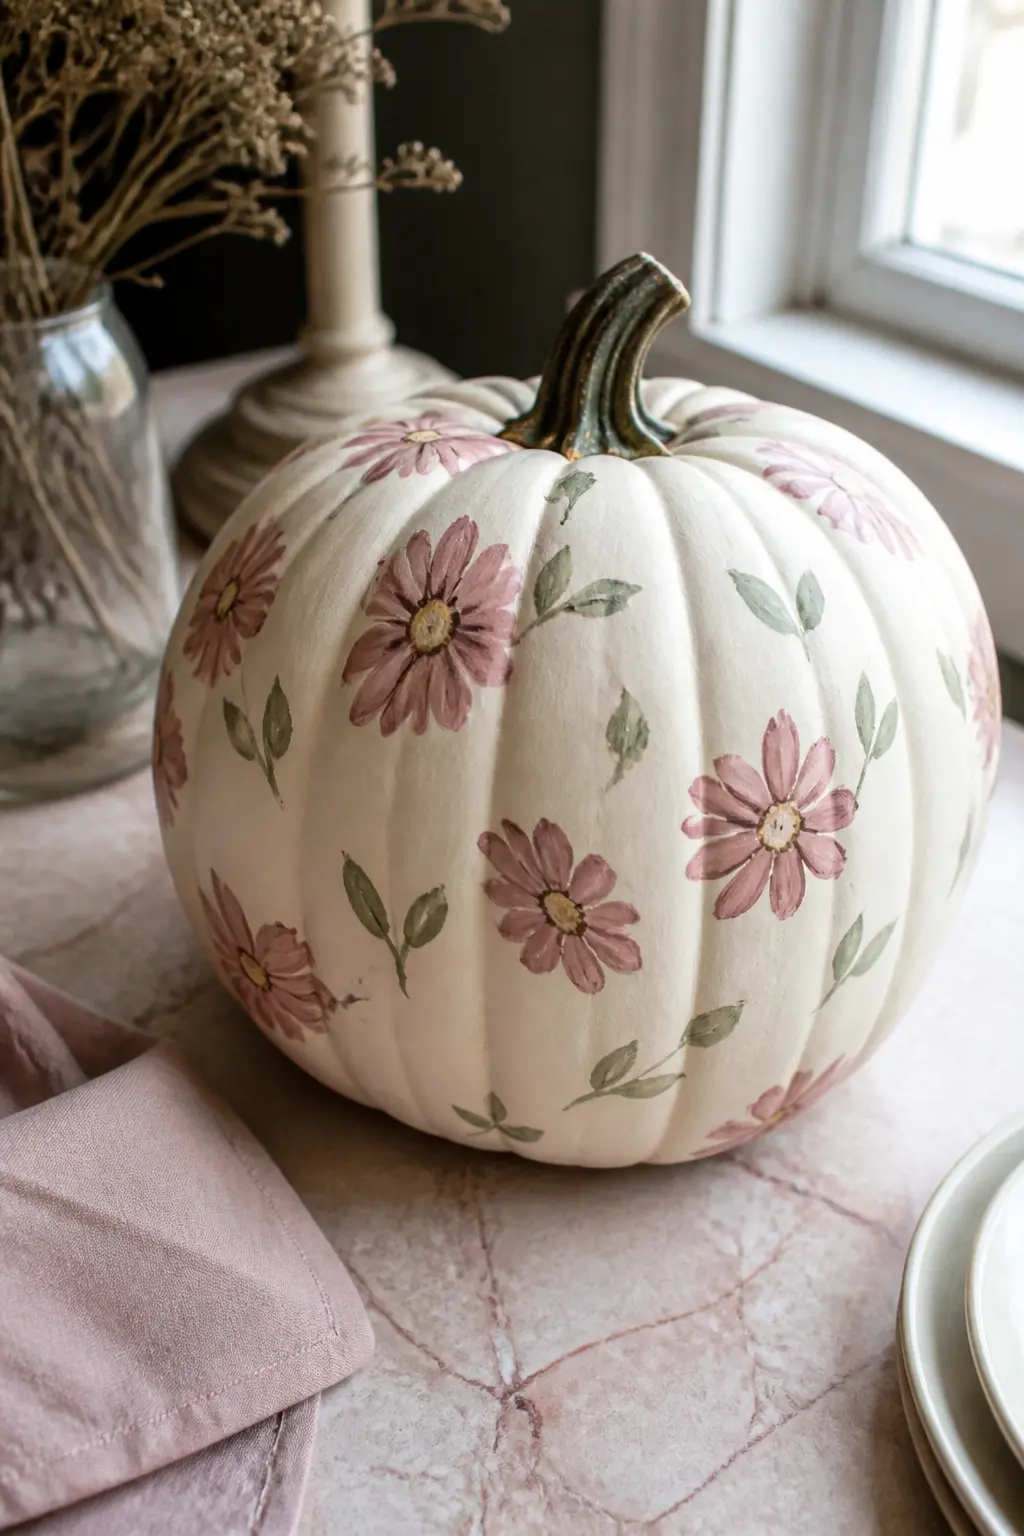
Dusty Pink and Sage on Cream
Dusty pink and sage on a cream ground is the palette of a faded French toile, and it works on a pumpkin for exactly the same reason it works on a lampshade or a tablecloth: the tones are close enough in value that nothing shouts, but the contrast between warm pink and cool sage creates gentle visual movement.
Use dusty rose for flower petals, sage green for leaves and stems. Keep both colours muted: add a tiny amount of raw umber to both mixes to grey them down if they look too bright out of the tube. A simple daisy or hydrangea shape is all you need.
This palette sits at the intersection of autumn and spring, which means the pumpkin earns its place earlier in the season than a straight harvest palette would.
🛍 Shopping guide
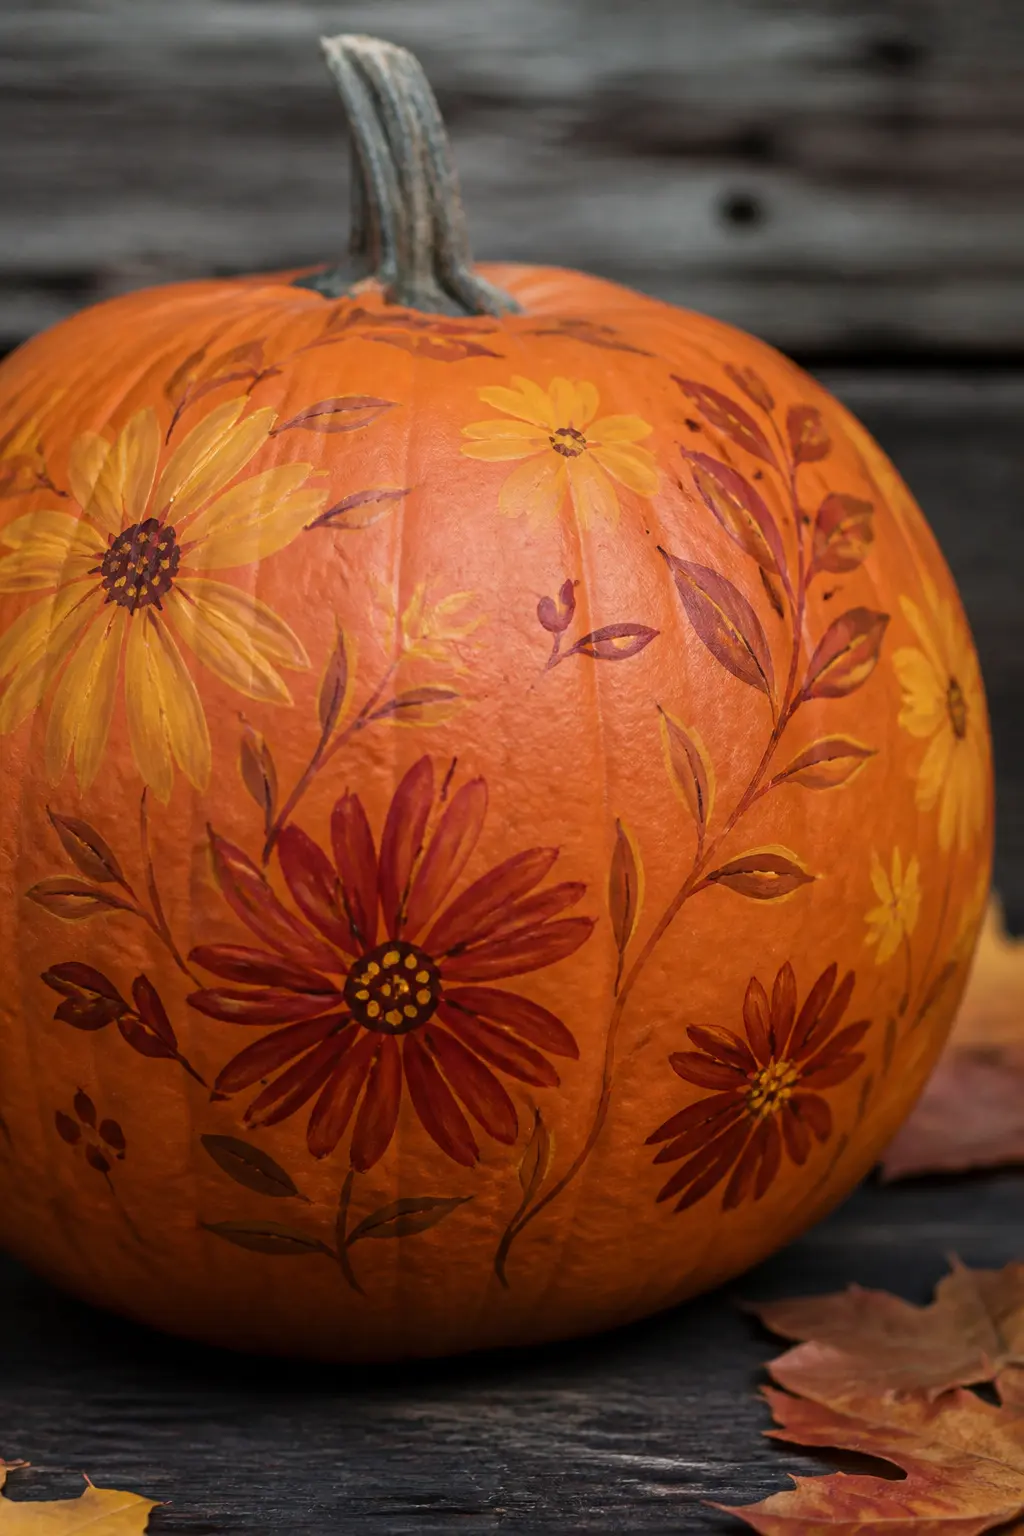
Mustard and Rust on a Natural Pumpkin
The orange skin of a natural pumpkin is a warm mid-tone that works as the ground itself: no base coat needed. Paint mustard yellow and rust red flowers directly on the unpainted surface, letting the orange show between the motifs. The three-tone combination of orange, mustard and rust is entirely autumnal without being cliched.
Use bold, simple marks: large leaf strokes, fat petals, chunky berry clusters. Fine detail would be lost against the natural skin texture of a real pumpkin, and tight precision is not the point here. The palette does all the work.
This is the fastest entry in the whole palette section. No base coat, simple marks, and the result looks like a piece of folk art pottery that you paid rather a lot for somewhere.
🛍 Shopping guide
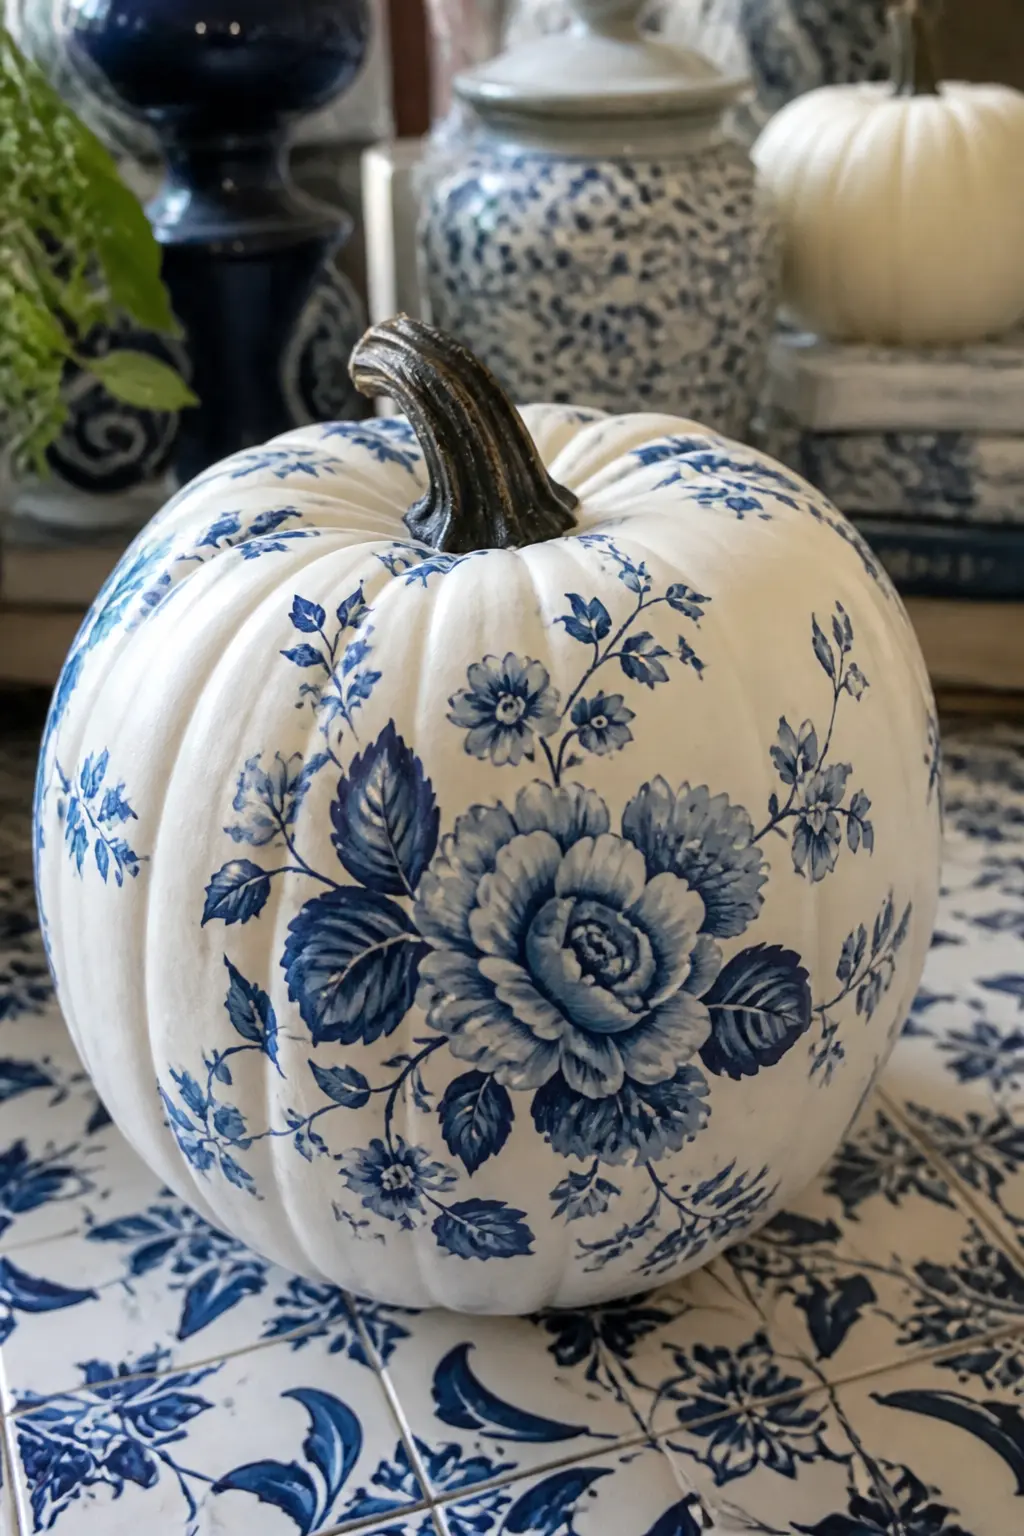
Navy and White in a China Pattern
Cobalt or navy on a bright white ground is the palette of transfer-printed china, and every household already has a reference point for it. The two-colour constraint actually makes the design decisions easier: you are choosing shapes and composition, not colours.
Paint the base white, let it cure, then use a fine round brush and navy craft paint to draw floral motifs: a central bouquet, scattered blossoms at the sides, a thin line border around the equator. Use a paint pen for border lines if your brush control is not consistent enough for even lines.
The result reads as valuable and deliberate. Navy and white has been an aspirational colour combination in domestic decorating for three hundred years, and it transfers to a pumpkin with no loss of that associations.
🛍 Shopping guide
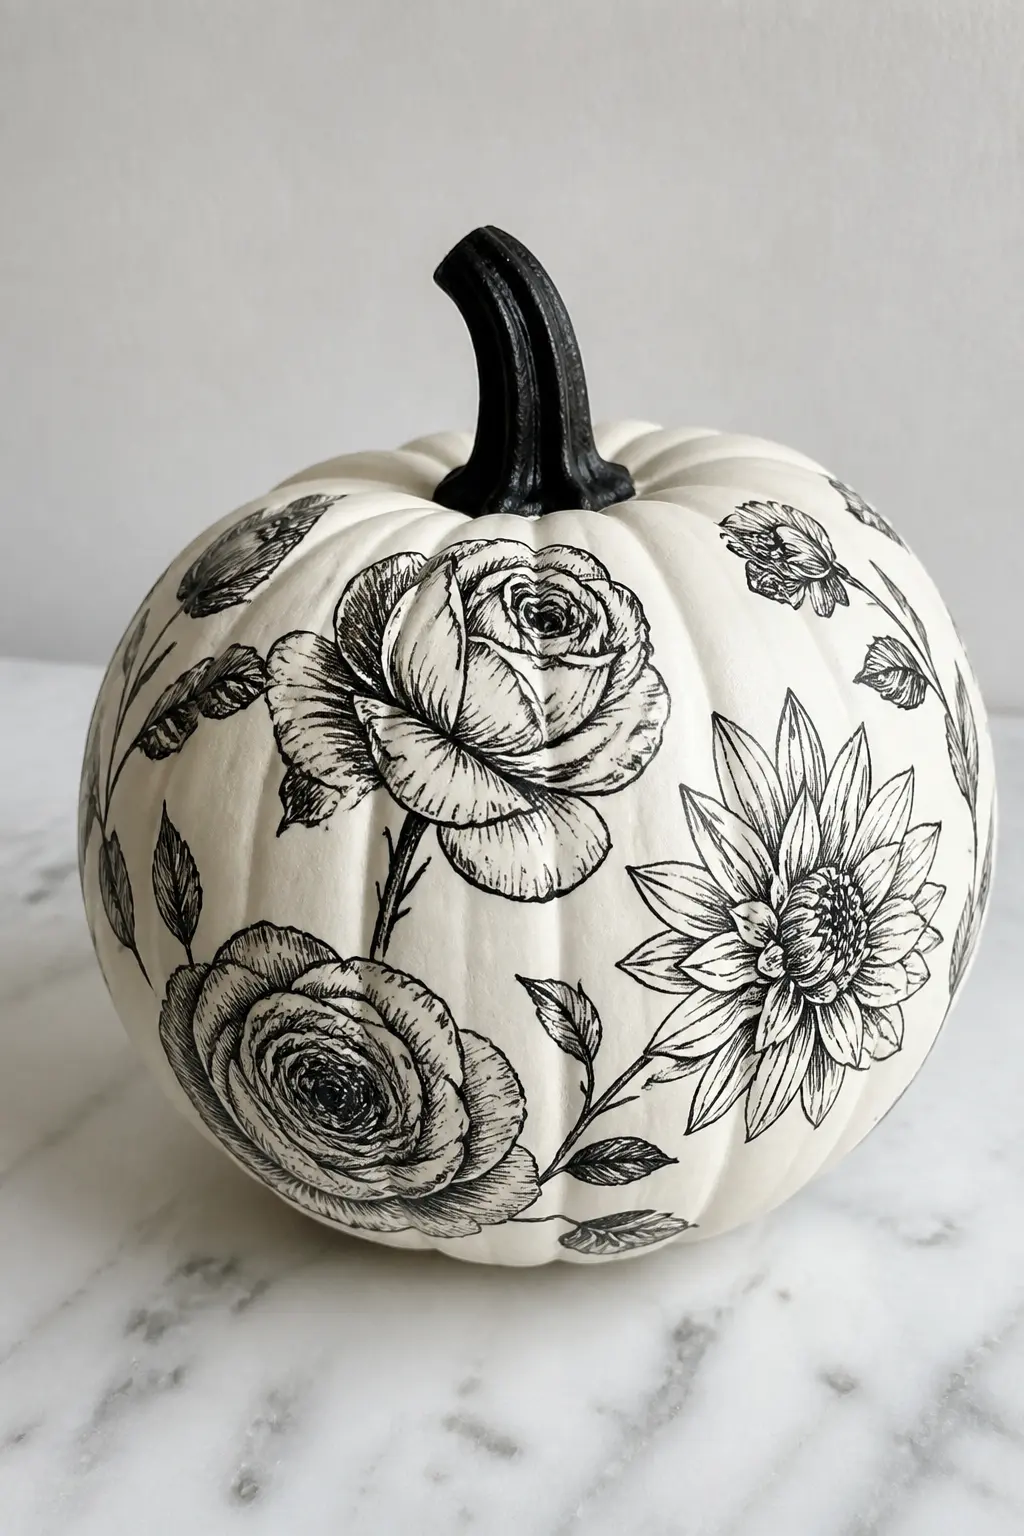
Black Flowers on a White Base
Black on white is the palette of an engraving, and painted flowers in black on a white pumpkin look like a page from a botanical print portfolio. The contrast is maximal and the effect is graphic and modern.
Use a fine brush or a black paint pen for the flower outlines and fill them with flat black, adding fine cross-hatching inside some petals for texture. A rose, a dahlia head and a few stems of leaves, in the style of a pen and ink illustration, works better here than loose gestural marks.
This is a pumpkin that reads as decor rather than craft, and it will not look out of place alongside black-framed prints or dark furniture.
🛍 Shopping guide
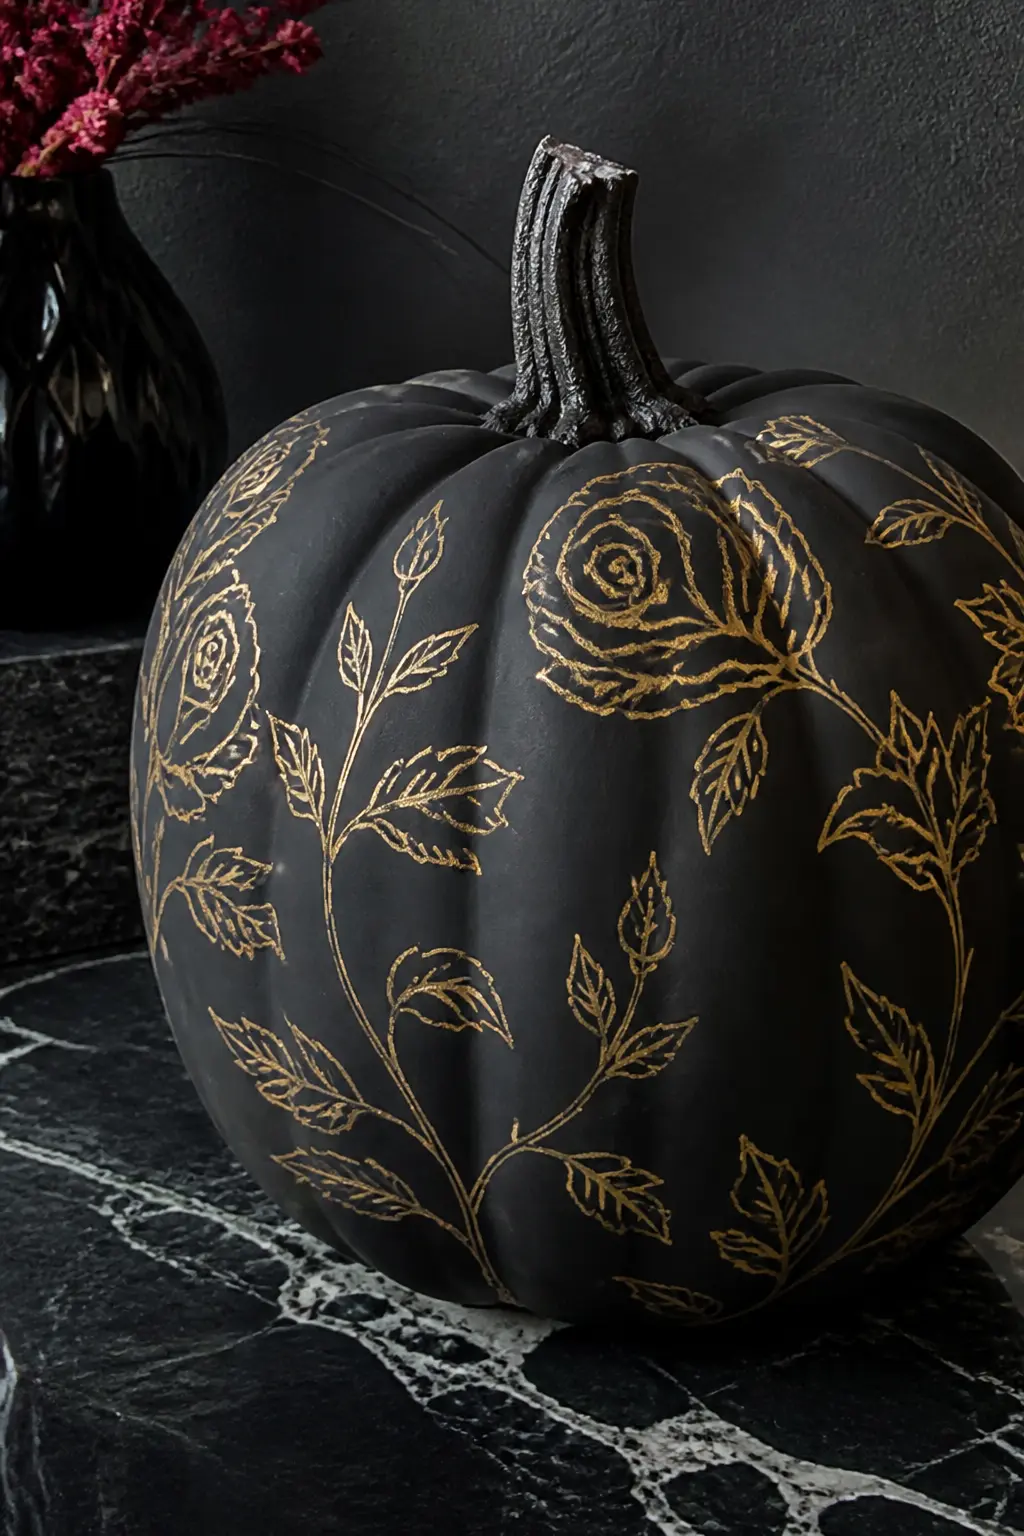
Gold Outlines on a Matte Black Pumpkin
A matte black base with gold floral outlines is the most dramatic palette in this list and requires the least actual painting: the gold lines are applied on top of the cured black ground with a gold paint pen or a fine brush loaded with metallic gold paint.
Draw flower outlines only, no filled areas: a trailing vine of open rose shapes, a sprig of leaves, a few star-shaped blooms. The black ground makes every gold line glow, and the matte finish of the base keeps the gold from tipping into garish.
This pumpkin belongs on a dark console table or a dark-painted shelf, where the gold seems to emerge from the background. In a pale room, place it on a dark tray so it does not float.
🛍 Shopping guide
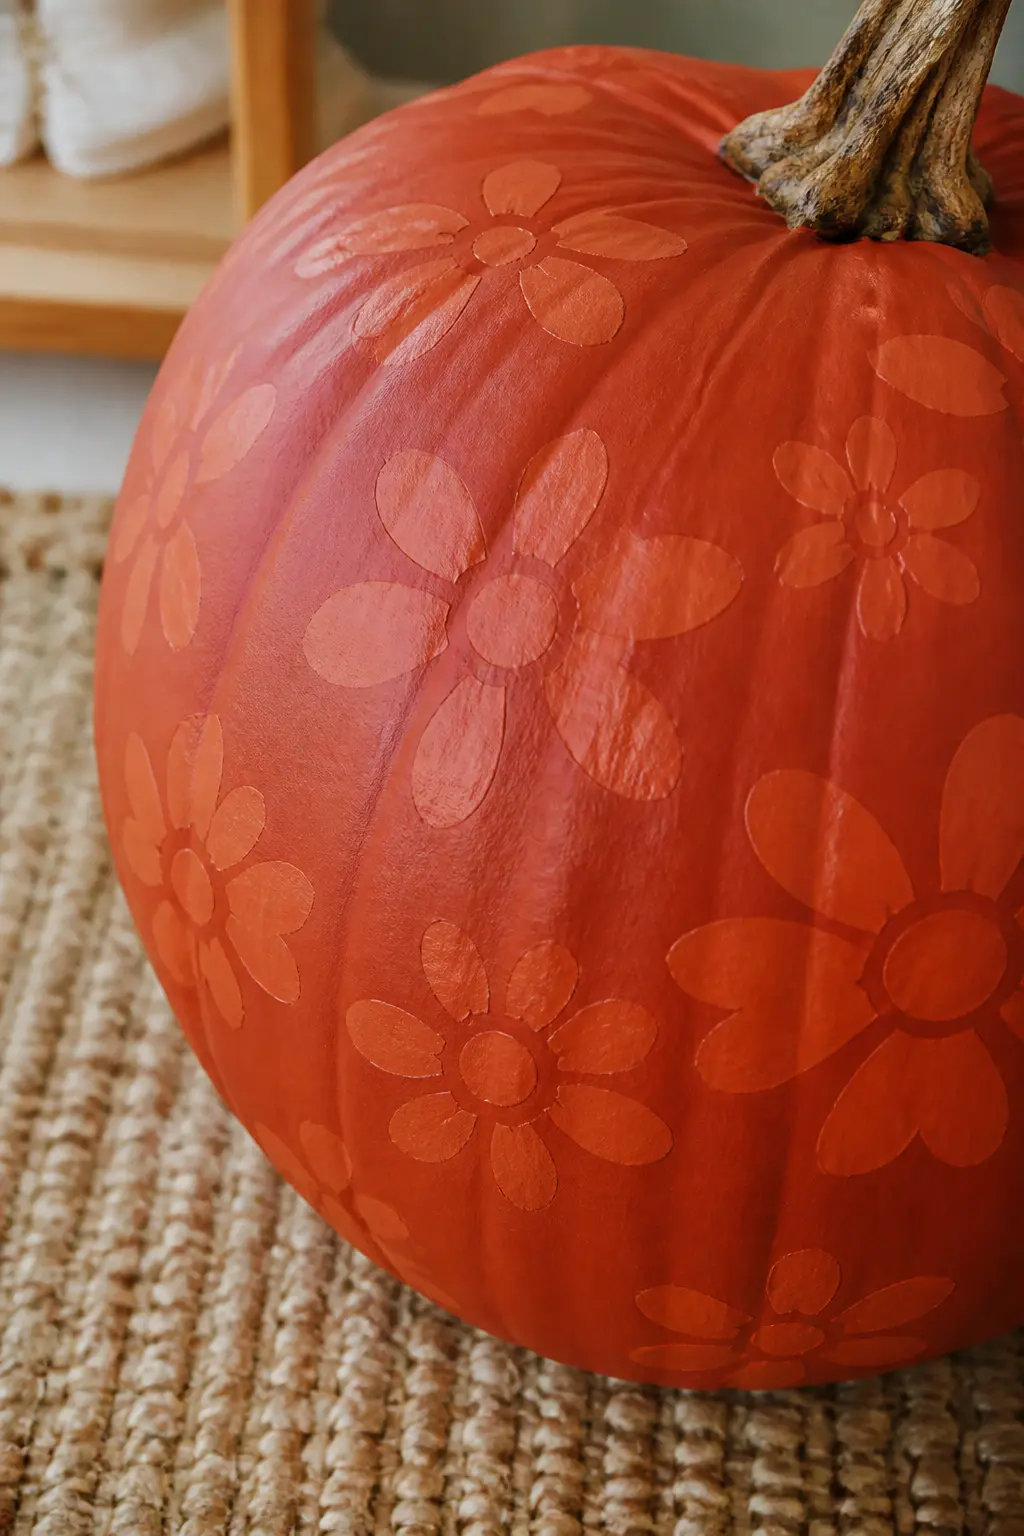
Single Colour Flowers on the Same Colour Ground
One colour, two tones: the ground is the darker value and the flowers are the lighter one, or the reverse. Terracotta flowers on a deep rust ground. Sage flowers on a darker forest green. The palette is essentially monochrome, and the flowers read as texture rather than decoration.
This is the most restrained option in the palette section and the one that will last stylistically the longest. It requires no colour-mixing decisions and almost no design decisions: pick your colour, mix a lighter and a darker version of it, and paint any simple flower shape.
The result is painterly and serious. It belongs in rooms with natural materials, unbleached linen and dark wood, where a more contrasting palette would compete.
🛍 Shopping guide
Style-Led Ideas
These seven ideas borrow from a recognisable decorative tradition: Delft pottery, chintz fabric, Art Nouveau illustration, folk painting, watercolour botanical art, the pressed herbarium, or the maximalist single bloom. The style is the brief, and the flowers just follow it.
Having one printed reference image open while you work makes an enormous difference. A Delft plate, a chintz curtain swatch, a page from an Art Nouveau poster book: the eye follows the source without you consciously copying it, and the result has a coherence that purely invented florals often lack.
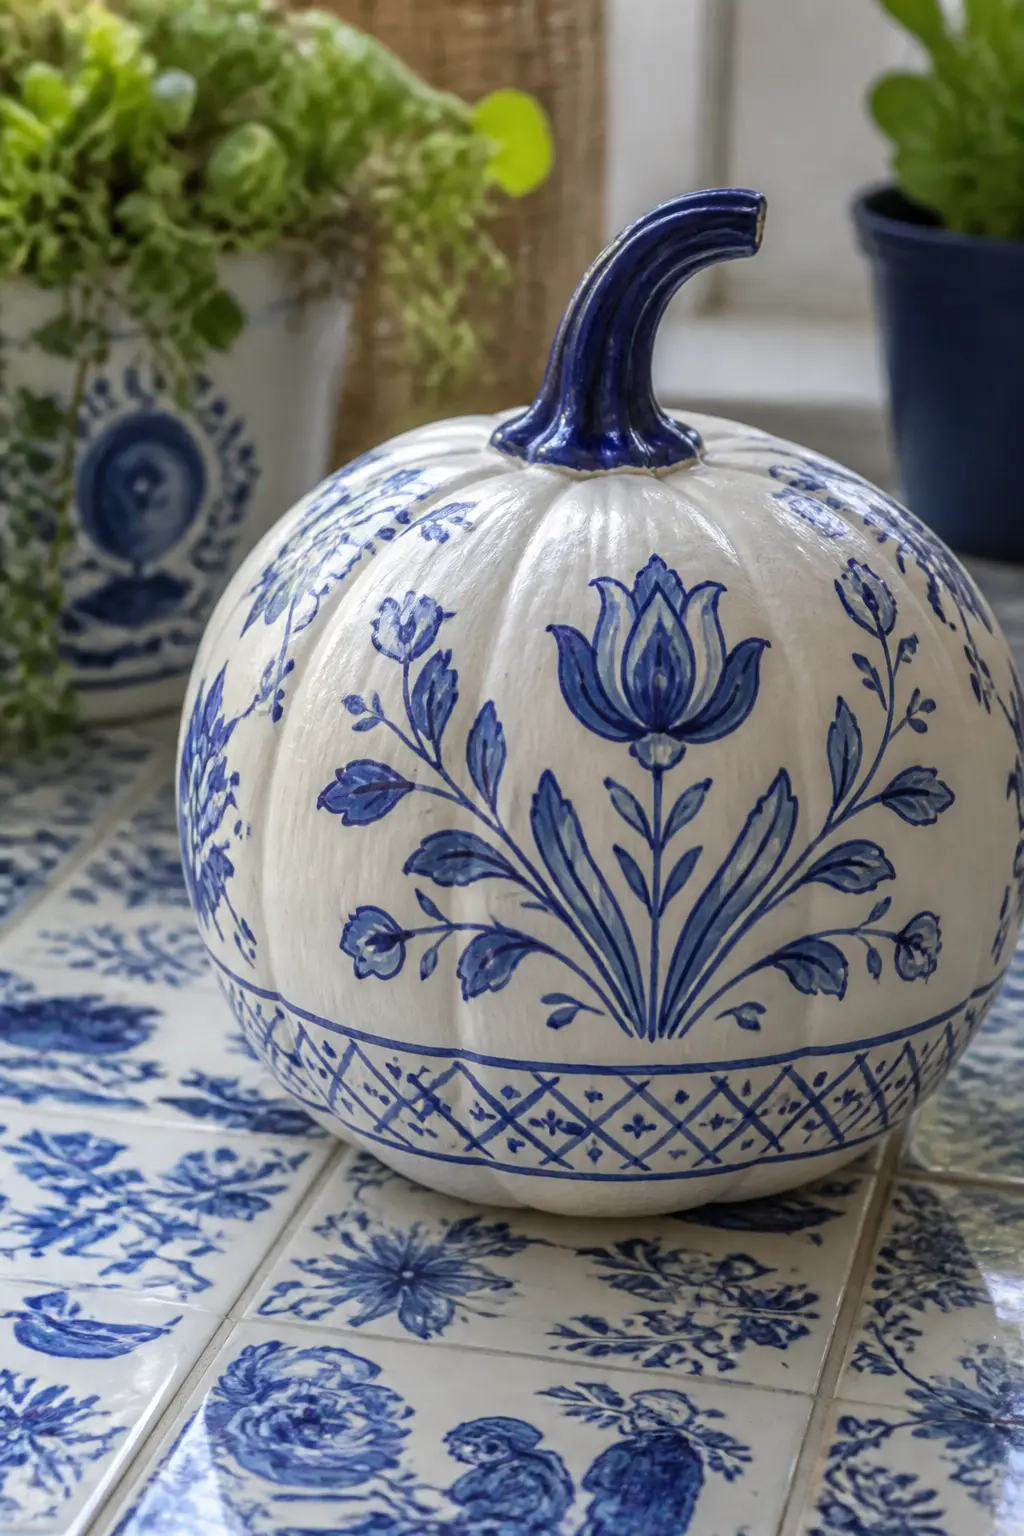
A Delft Blue and White Pattern
Delft pottery uses a very specific cobalt blue on a warm white ground, with particular motifs: tulip heads, formal leaf sprays, windmill-like geometric repeats and a border of hatching or dashes around the widest circumference. The flowers are always stylised and slightly flat, not naturalistic.
Sketch the layout lightly in pencil: a central motif on the front face, a repeat motif on each side, a thin hatched border band around the equator. Use a single blue (cobalt or cerulean mixed down with white to a medium value) for everything. Delft never uses dark navy or light sky: it lives in the middle of the blue range.
A Delft pumpkin is the one that non-crafters will assume you found on a market stall somewhere in Amsterdam, and that is an entirely satisfactory outcome.
🛍 Shopping guide
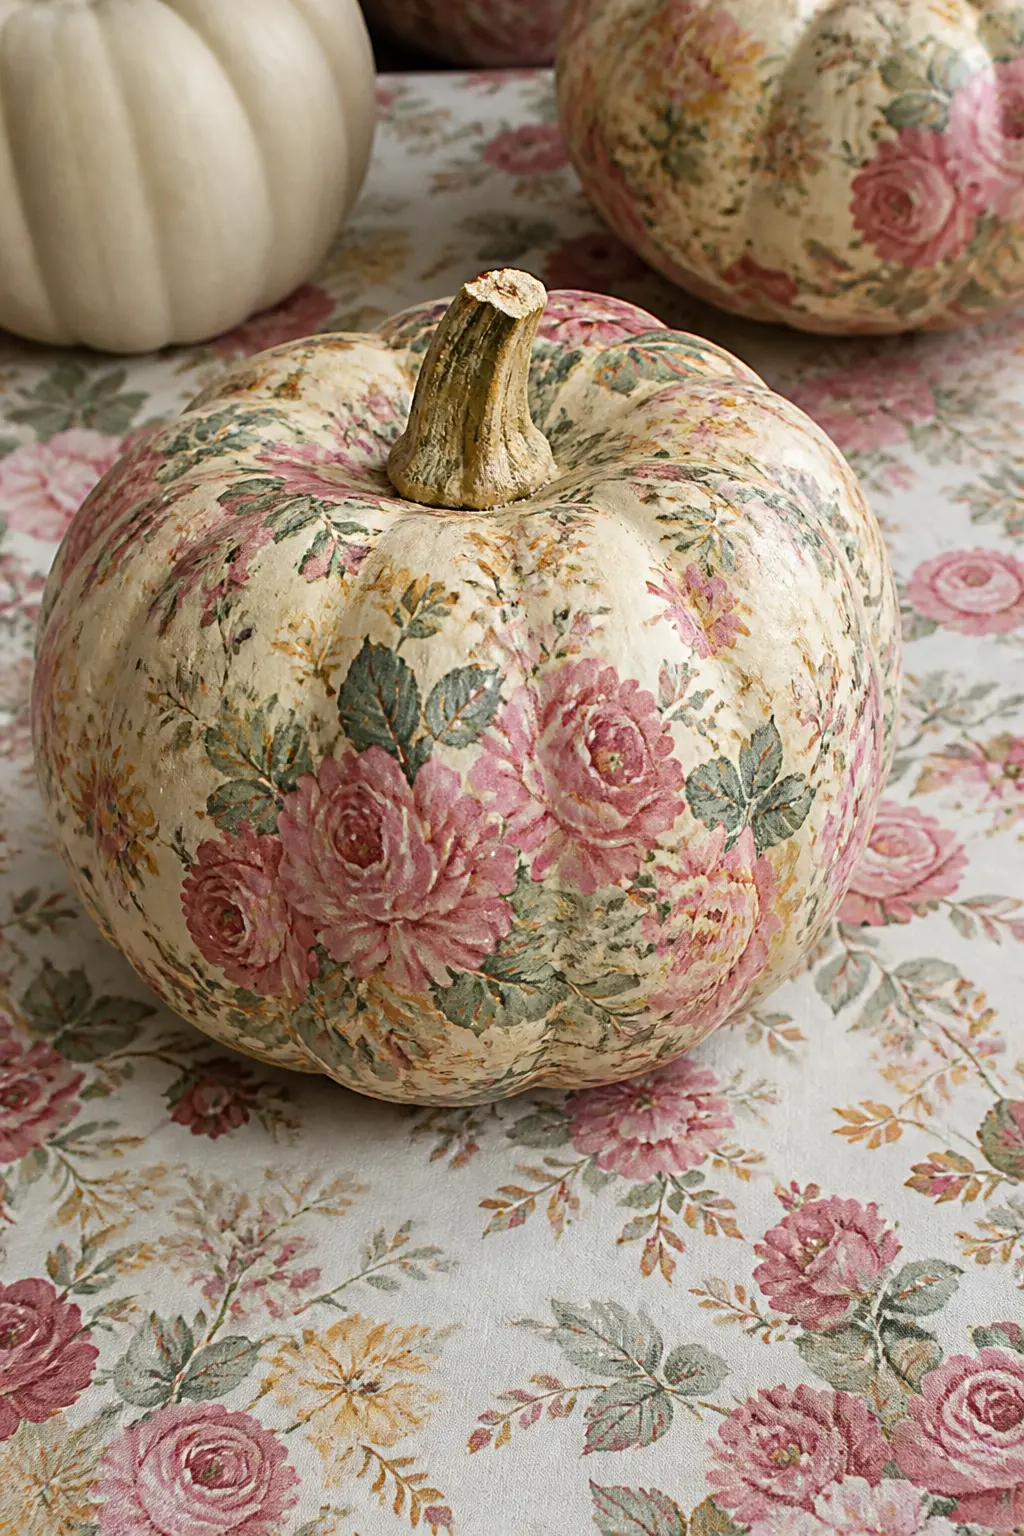
A Chintz All-Over Print
Chintz is characterised by an all-over floral pattern with no hierarchy of motifs: roses, leaves, smaller blossoms and stems fill every part of the surface at roughly equal visual weight. Nothing is a centrepiece, everything repeats. The colours are warm and slightly faded: rose, sage, old gold, cream and soft coral.
Start by covering the entire pumpkin with a fine network of stems in olive, then fill every section of stem with a different flower or leaf type. The density is what creates the chintz effect: sparse marks will not read as the style. Seal thoroughly, as the number of paint layers means the surface will be thicker than usual.
A chintz pumpkin belongs in a room with actual chintz in it: a cushion, a lampshade, a curtain. In that context, it reads as considered. Alone, it reads as very busy.
🛍 Shopping guide
Art Nouveau Outlines in Gold
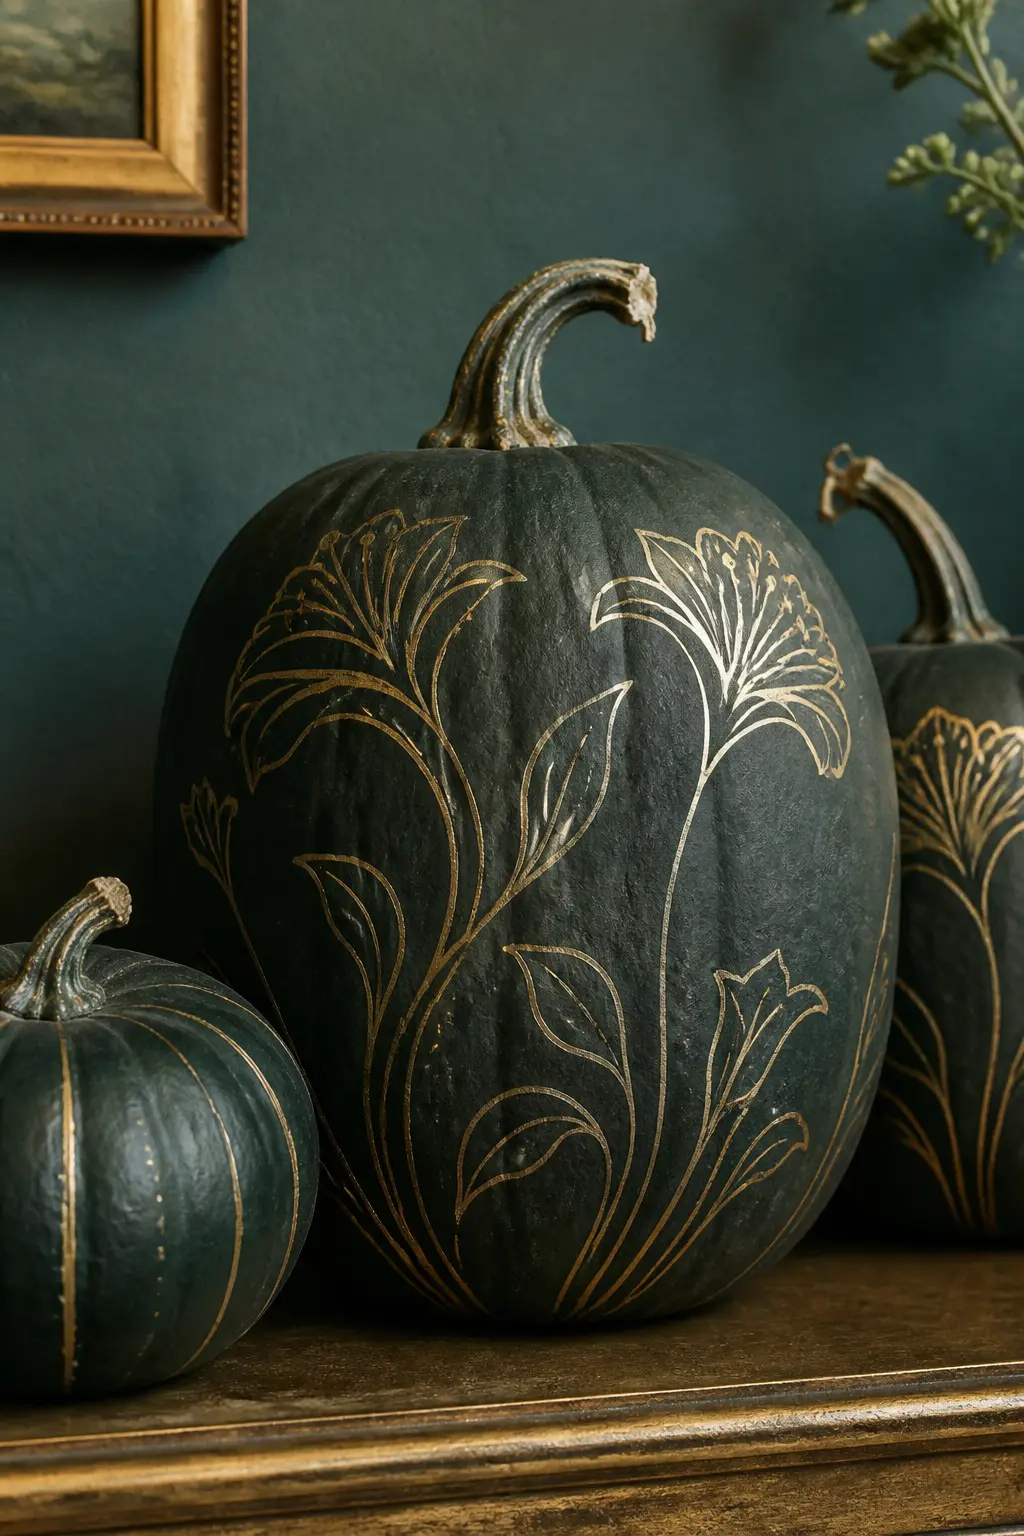
Art Nouveau uses flowing, sinuous lines rather than natural curves: stems bend at unexpected angles, petals elongate into near-abstract shapes, and the overall composition has a vertical rhythm. The outlines are the subject, not the colour fills.
Paint the pumpkin a deep jewel tone: forest green, midnight blue or deep plum. Let it cure. Then use a gold paint pen to draw long curving stem lines from the base upward, adding stylised lily, iris or peony shapes at the tops of the stems. The flowers are drawn in outline only, without fills, so the deep ground shows through.
Look at Alphonse Mucha posters or early William Morris textile designs before starting. The logic of the composition is highly specific to the style and worth understanding before you begin drawing.
🛍 Shopping guide
Folk Art with Bold Outlined Petals
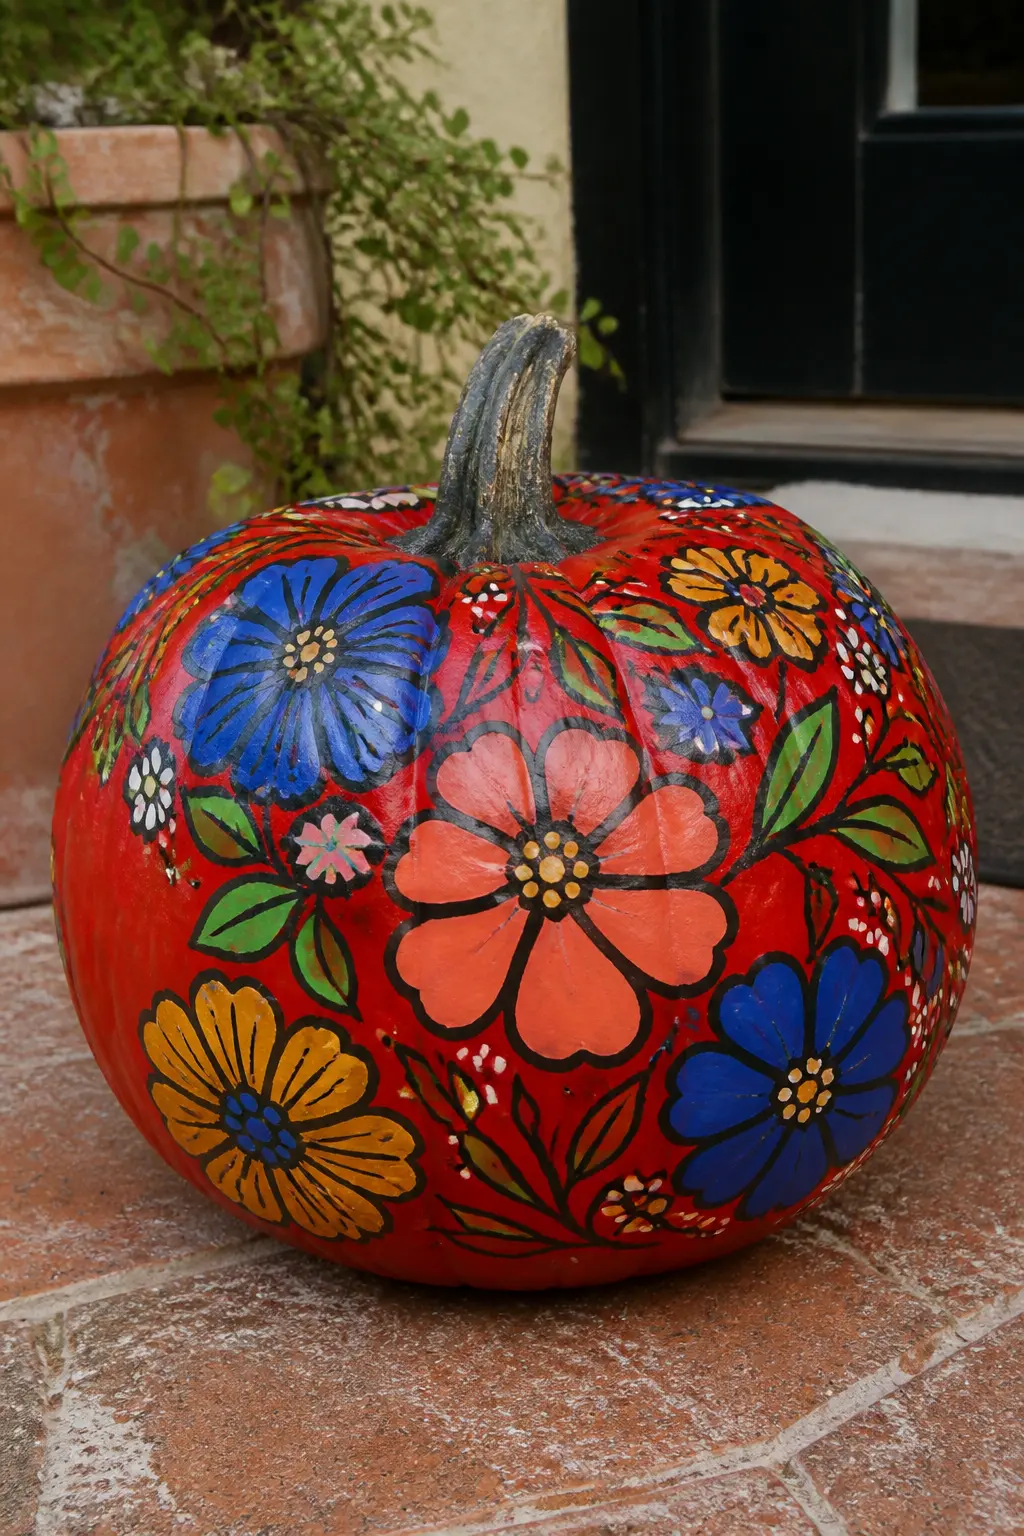
Folk art florals are built on a specific convention: solid colour fills with a dark contrasting outline around every petal and leaf, giving each shape a flat, graphic quality. Think Scandinavian Rosemaling, Eastern European embroidery patterns, or Mexican Talavera pottery. The proportions are bold and the colours are saturated but not neon.
Use a cream or red ground, paint flat flower shapes in coral, cobalt and mustard, then outline every shape with a dark brown or black liner brush or paint pen. Dots and comma strokes fill any remaining gaps. There is no shading and no blending.
The boldness of folk art means small imperfections disappear into the overall energy of the pattern. It is the most forgiving of the style-led entries, which makes it a reasonable first attempt at a defined decorative style.
🛍 Shopping guide
Watercolour with Soft Bleeding Edges
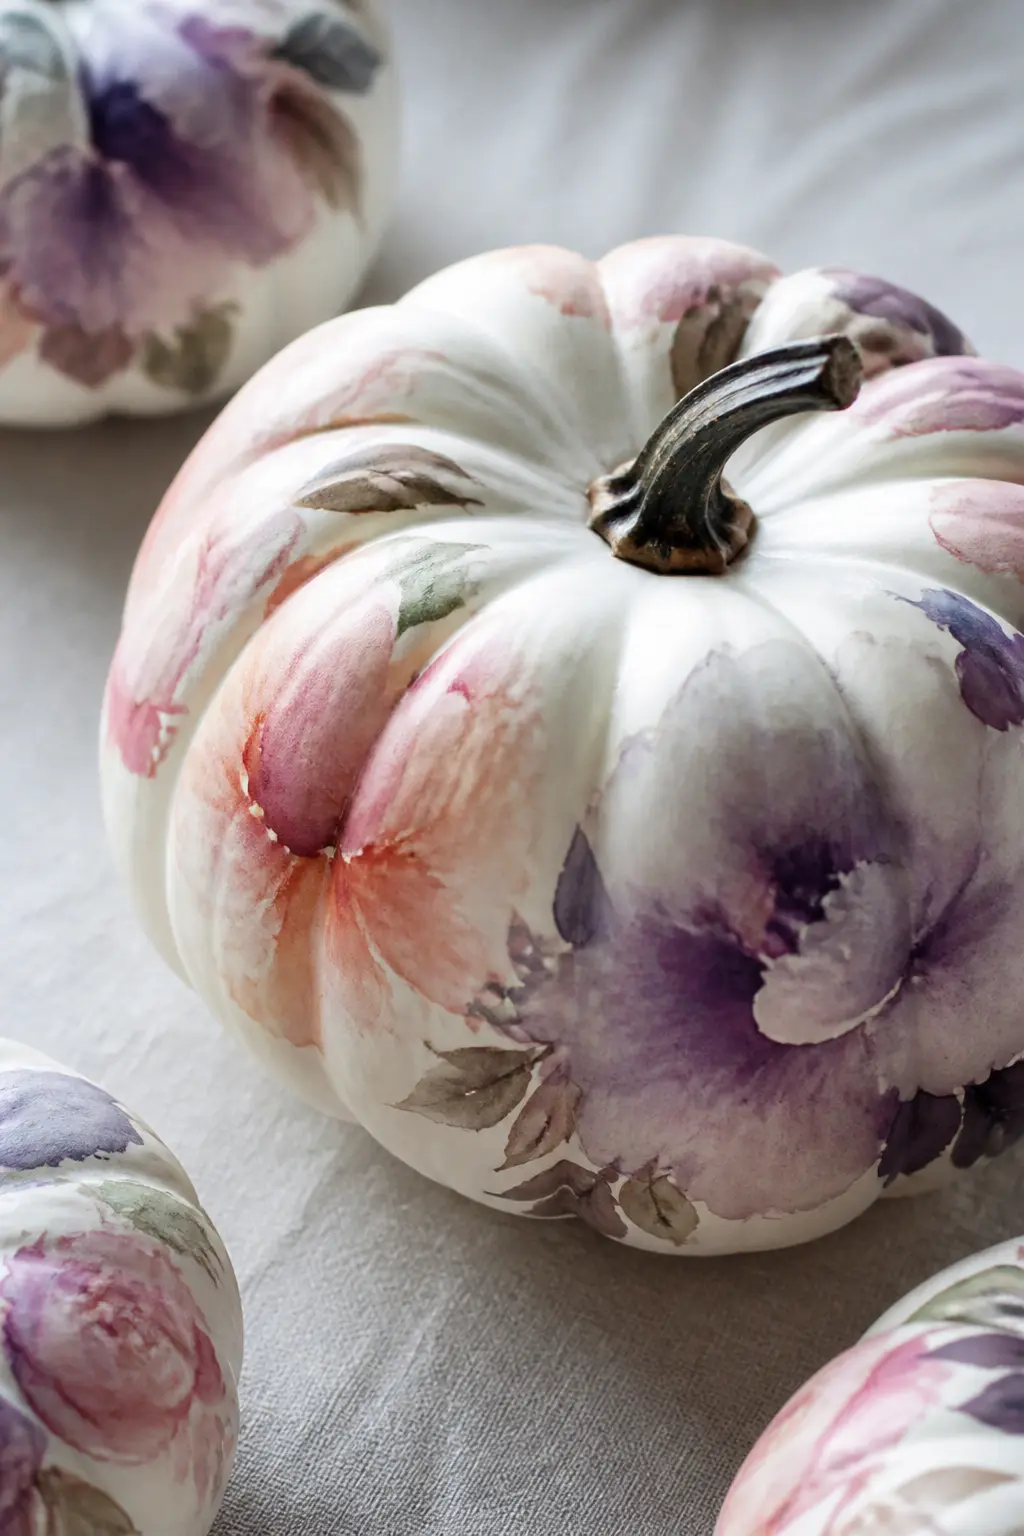
Watercolour on a pumpkin requires a specific product: watercolour effect craft paints, or heavily diluted acrylics applied over a wet base coat of clear medium. Standard acrylics behave like watercolours when diluted enough and applied to a damp surface.
Wet a small section of the pumpkin with clear matte medium. Drop diluted colour into the wet surface and let it spread and bleed. Add a second colour where it touches the first and let the two merge at the edge. The resulting soft-edged blooms with no hard outlines are the watercolour effect.
Work one bloom at a time so the surface does not dry before you have added the second colour. The final pumpkin has a translucent, layered quality that no other technique in this list produces.
🛍 Shopping guide
Pressed Herbarium Under Matte Varnish
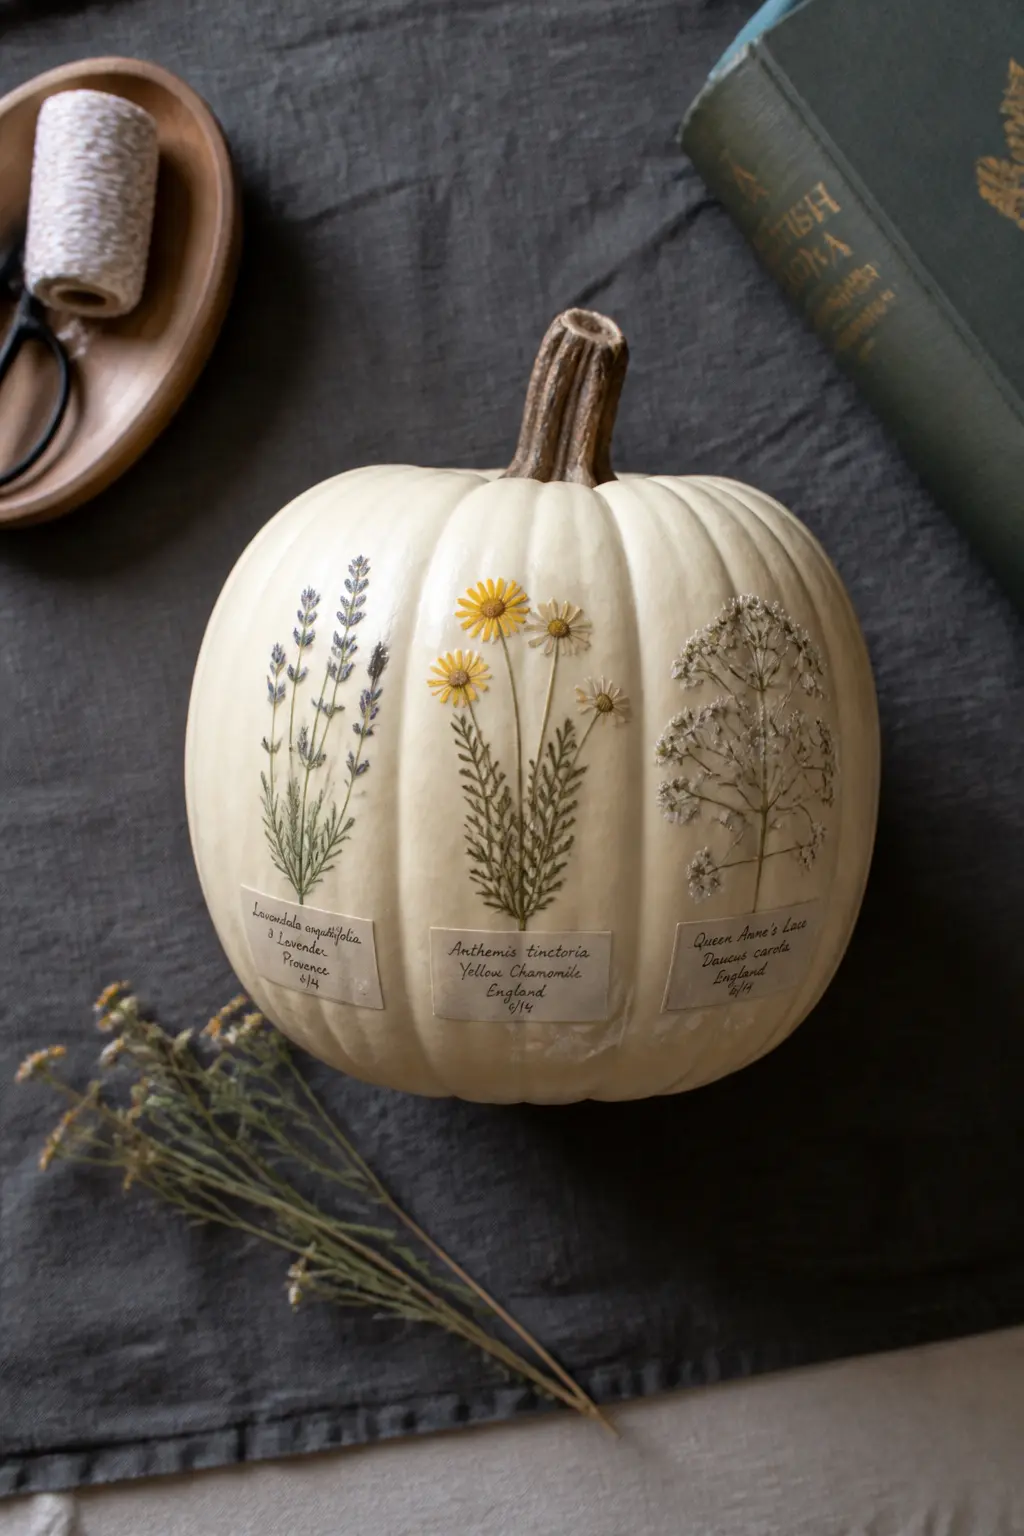
This entry borrows the aesthetic of a Victorian herbarium sheet: specimens laid flat, spaced with room to breathe, accompanied by small handwritten labels. It uses the real pressed flower technique from the first entry but arranges the flowers in the deliberate, scientific style of a specimen collection rather than a decorative scatter.
Glue three or four pressed specimens with space between each one, as though each is pinned to a board. Include a small handwritten label in pencil or fine pen under each specimen. Seal with two coats of matte varnish. The aesthetic is scholarly and botanical, with no hint of seasonal decoration in the conventional sense.
This pumpkin will live happily on a bookshelf alongside actual books, which is a very specific test of whether a seasonal decoration has genuinely earned its place.
🛍 Shopping guide
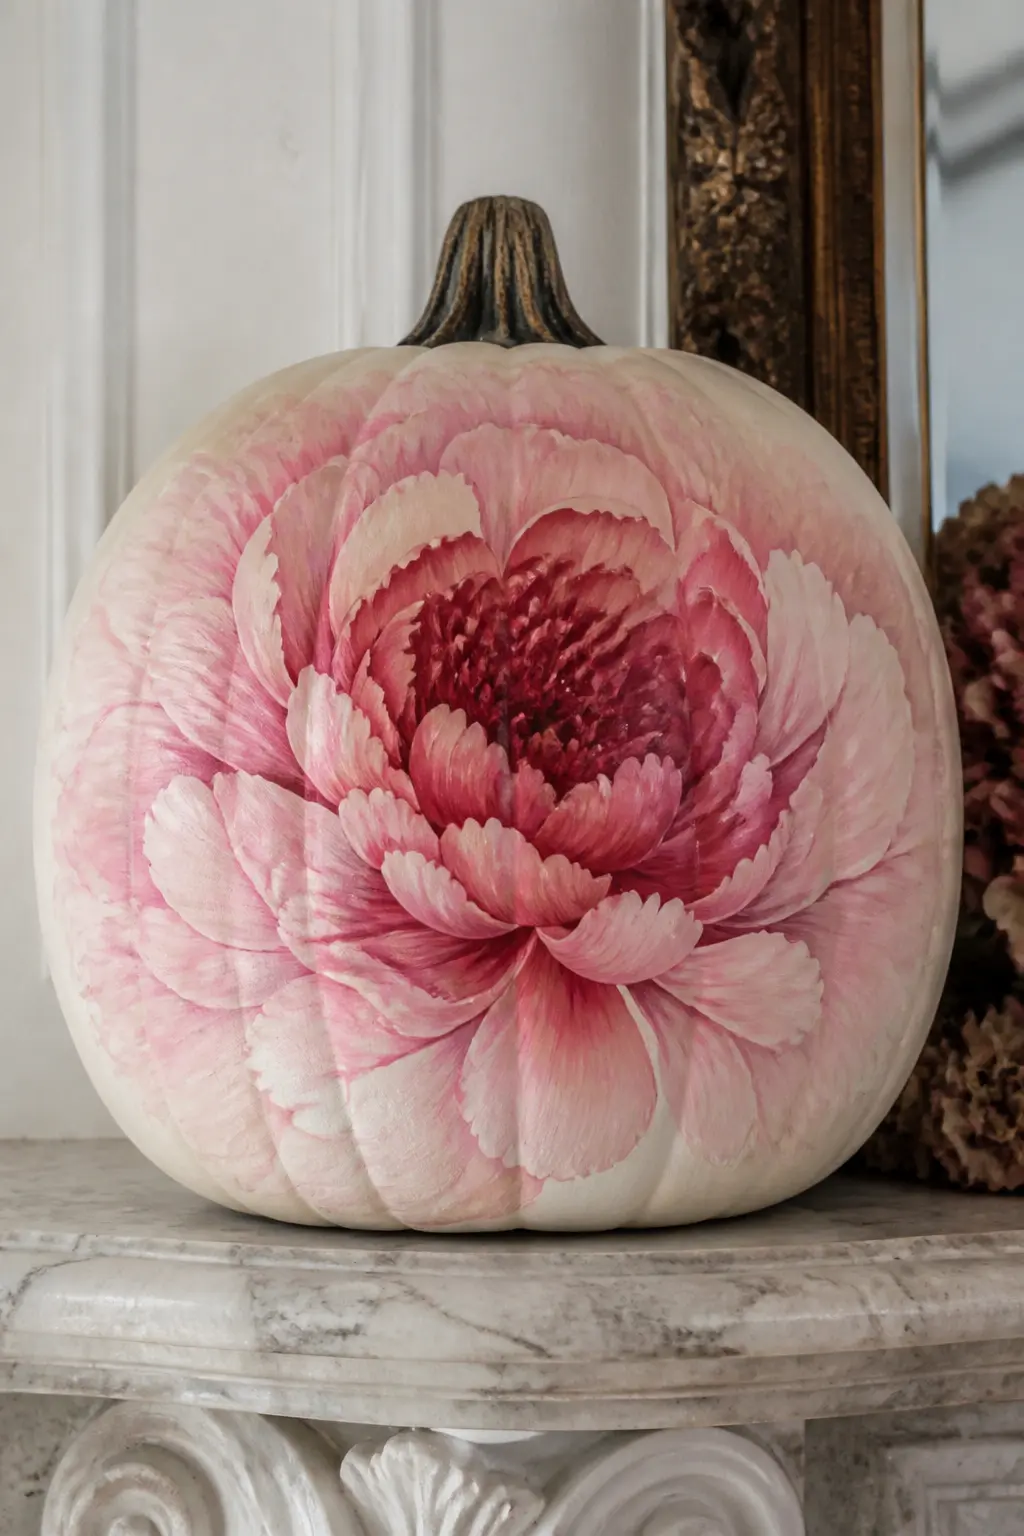
One Oversized Bloom Covering the Whole Front
Scale is the point here. One single flower, painted as large as the front face of the pumpkin will allow, with petals reaching the edges and a centre that dominates. The maximalist scale turns the pumpkin from a decorated object into a portrait of a flower.
A peony, a dahlia or an anemone all suit this treatment because their many-petalled structure gives you enough visual complexity to fill the surface. Use layered petals working from the centre outward, with the colours shifting from deep at the centre to lighter at the outer edges.
Leave the back of the pumpkin plain or painted in the darkest tone of the flower’s palette. The oversized single bloom has appeared in fine-art botanical painting for centuries, and at this scale on a pumpkin, it carries exactly that association.
🛍 Shopping guide
How to Make Any of These Last Two Months
Seal every finished pumpkin with at least two coats of matte spray varnish, letting each coat dry fully before the next. Outdoor-grade varnish buys you porch durability; indoor matte varnish is enough for a console table or mantelpiece. Keep the pumpkin out of standing water and direct rain.
Faux craft pumpkins cost more upfront but can be stored and reused for years. Real pumpkins, left unpainted on the inside, will last eight to twelve weeks in cool indoor conditions. If the stem softens, cut it off cleanly and replace it with a dried gourd stem secured with a cocktail stick and a dot of wood glue.
Chalk paint and chalk-finish acrylics adhere to both real and faux pumpkins without priming. Standard craft acrylics need a primer coat on the slick surface of a faux pumpkin, or they will peel. When in doubt, prime with white chalk paint, let it cure overnight, then proceed with any technique below.
Frequently Asked Questions
What type of paint works best on a pumpkin for long-term display?
Chalk-finish paint is the most reliable choice for both real and faux pumpkins. It adheres without priming, dries to a flat finish that makes simple marks look considered, and takes a matte varnish sealer well. Standard craft acrylics work too, but they need a primer coat on the slick surface of a faux pumpkin or they will peel over time.
How do you seal a painted pumpkin so it lasts the whole autumn?
Two coats of matte spray varnish, letting the first coat dry fully before applying the second. For a covered porch, use an outdoor-grade matte varnish. For indoor use, any craft matte spray sealer is sufficient. Keep the pumpkin away from standing water and direct rain regardless of the sealer used.
Can you paint a floral design on a real pumpkin, or does it have to be a faux one?
Real pumpkins work well for the whole of autumn in cool indoor conditions, lasting roughly eight to twelve weeks. For techniques that require a perfectly smooth surface, or for anything you want to keep beyond this season, a faux craft pumpkin is the better investment. The botanical study and the gold Art Nouveau outlines, in particular, deserve a surface that will store and return every year.
What is the easiest technique for someone who has never painted before?
The paper napkin decoupage, the washi tape bands, and the pressed flower technique require no brush skill at all. Of the three, washi tape is the most forgiving because it is fully repositionable before sealing. The napkin decoupage produces the most striking result for the effort involved.
How early in autumn can you put out a painted pumpkin?
A floral painted pumpkin reads as autumn botanical decor rather than Halloween, which means it suits a mantle, entry table or porch from the first of September onward. None of the ideas in this list have a Halloween association, so none of them will look out of place in September or November.
Halloween activities for kids classroom that print on plain paper, run at desks, and wrap up in thir

25 halloween party games for kids that are high-energy, not too scary, and totally unforgettable. Pr
Turn scattered props into 15 Halloween yard decorations that each tell a story from the street. Ever
Leave a Reply