

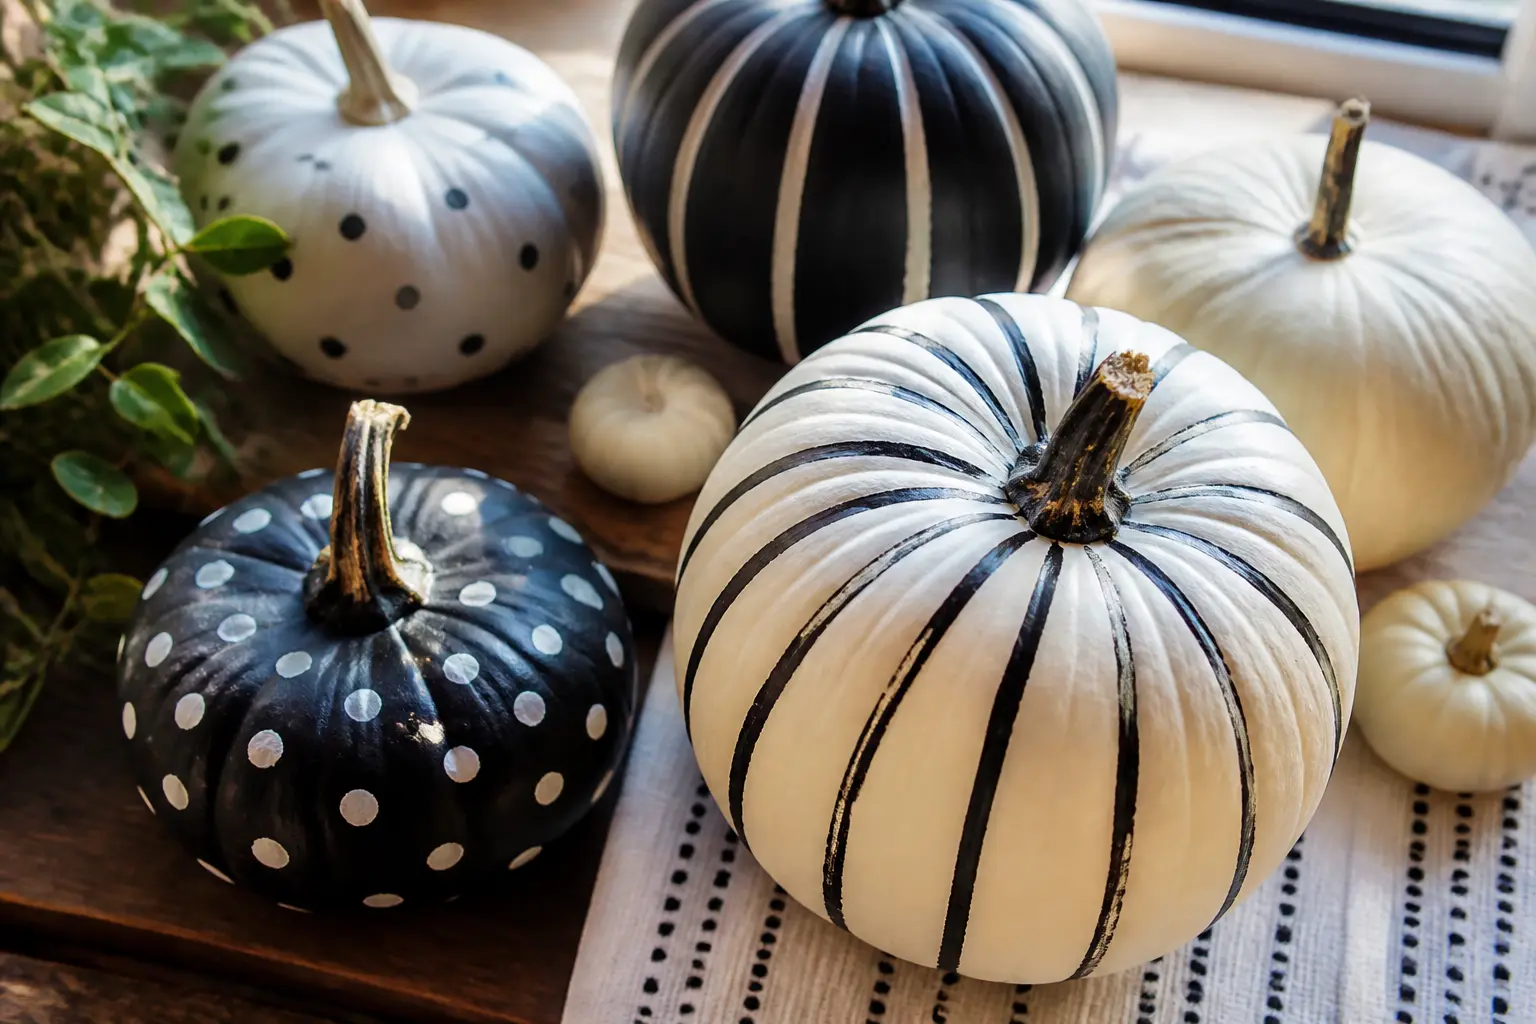
Two colours. Zero clutter. A black and white painted pumpkin sits quietly on a shelf in October and still looks right in November, when everything orange has been boxed away. Pattern does the whole job here, and that is exactly the point.
This list is sorted by pattern type, because with only two colours, pattern is every decision you make. Whether your home runs cool grey, warm cream or straight-up charcoal, one of these thirty will slot in without a second thought. No carving, no glitter, no orange anywhere.
Craft paint, a few brushes and some painter’s tape cover most of these. A few need a paint pen or a bag of air-dry clay dots. The fall living room decor ideas and fall room decor round-up on this site show you where pumpkins like these land best in a real room, if you need that wider picture.
This post contains affiliate links. If you buy through them, I may earn a small commission at no extra cost to you.
Stripes
Stripes on a pumpkin follow the natural ridges, which does half the drafting work for you. Use the ridge lines as guides and tape between them, or paint freehand along the curve for a softer, slightly imperfect line. Both approaches read as intentional from across the room.
Direction matters more than width. Vertical stripes lengthen a flat pumpkin. Horizontal ones make a tall pumpkin look rounder and more grounded. Decide which silhouette you want before you open any paint.
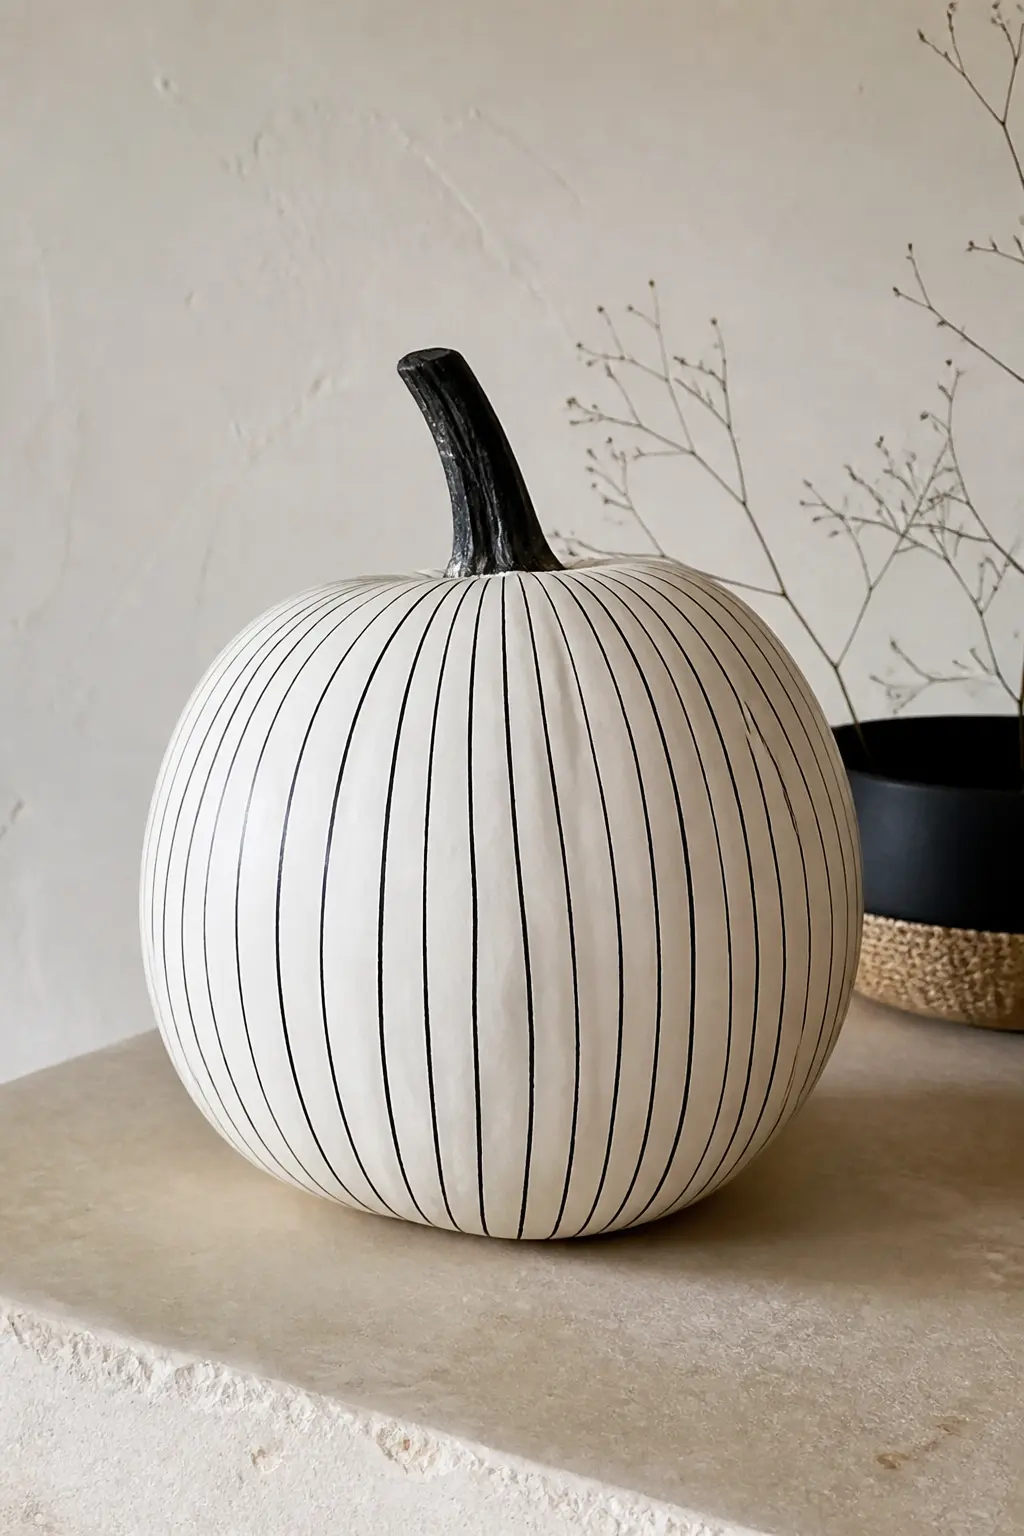
Fine Pinstripes on White
Start with two coats of white chalk paint on a natural pumpkin. Once dry, use a ruling pen or a very fine artist’s liner brush loaded with black acrylic to draw vertical lines roughly five millimetres apart. The ridges of the pumpkin guide the spacing naturally.
The result is quiet and graphic, closer to fine shirting fabric than anything seasonal. It suits a bookshelf or a bathroom vanity as comfortably as a front door.
🛍 Shopping guide
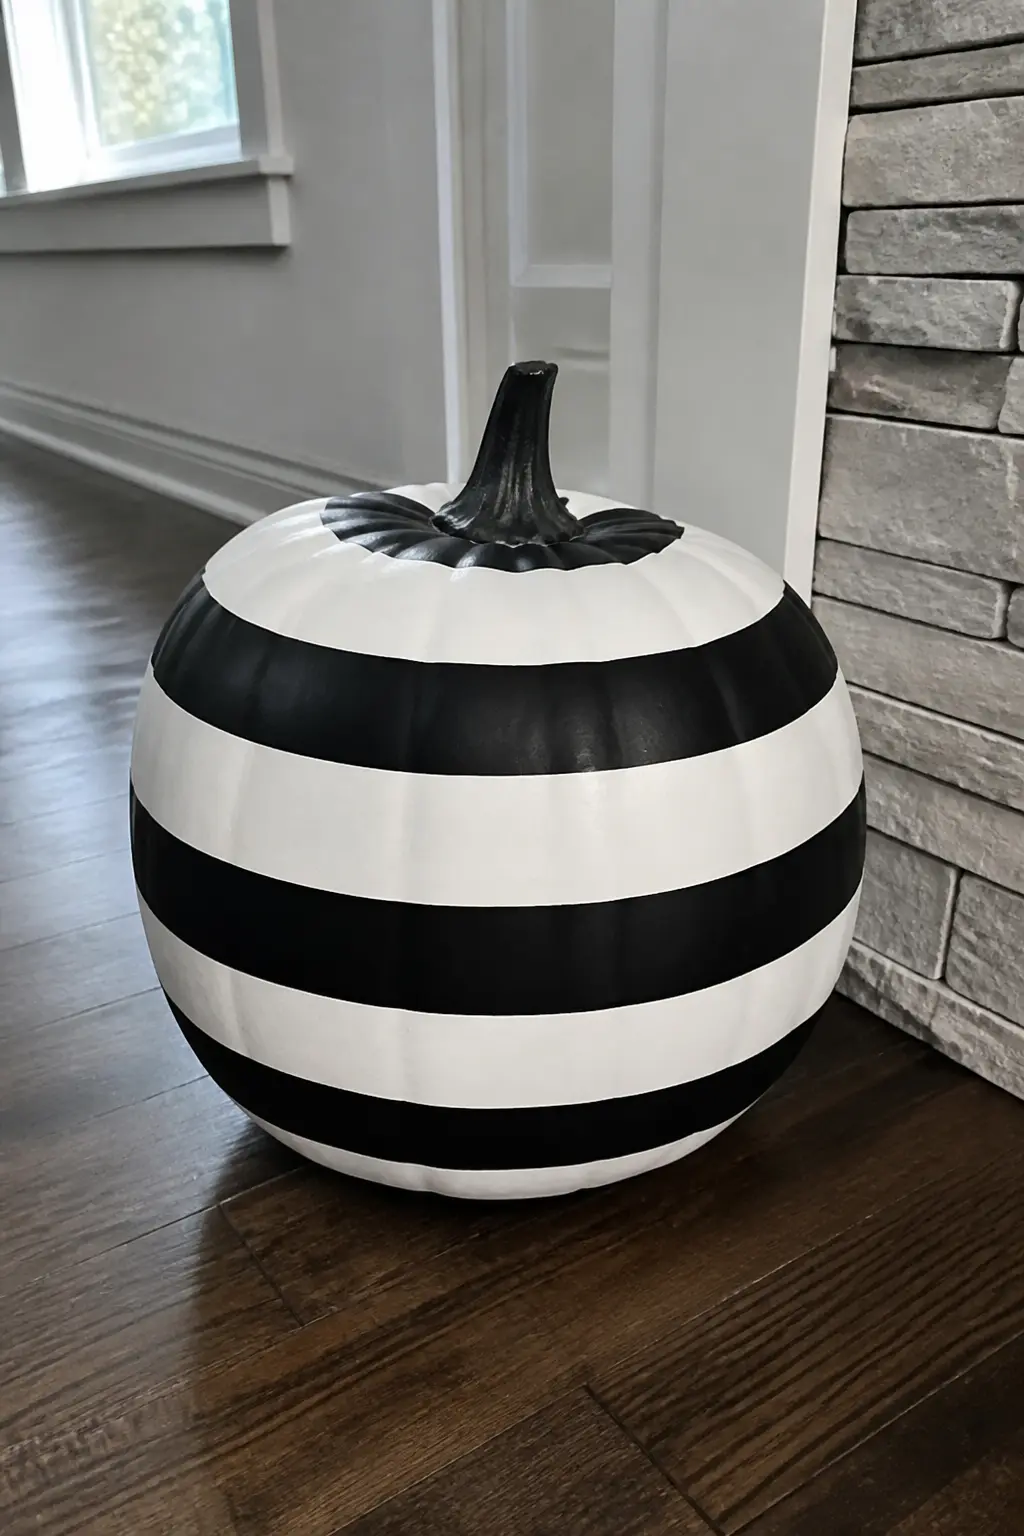
Thick Alternating Bands
Tape off bands roughly four centimetres wide using painter’s tape, alternating the sections you leave exposed. Paint every other band black, let dry fully, then remove tape and paint the remaining bands white for a clean edge on both sides.
Bold and graphic, this one reads from across a room. It works on a large pumpkin placed on the floor beside a fireplace or at the base of a staircase, where the scale can match.
🛍 Shopping guide
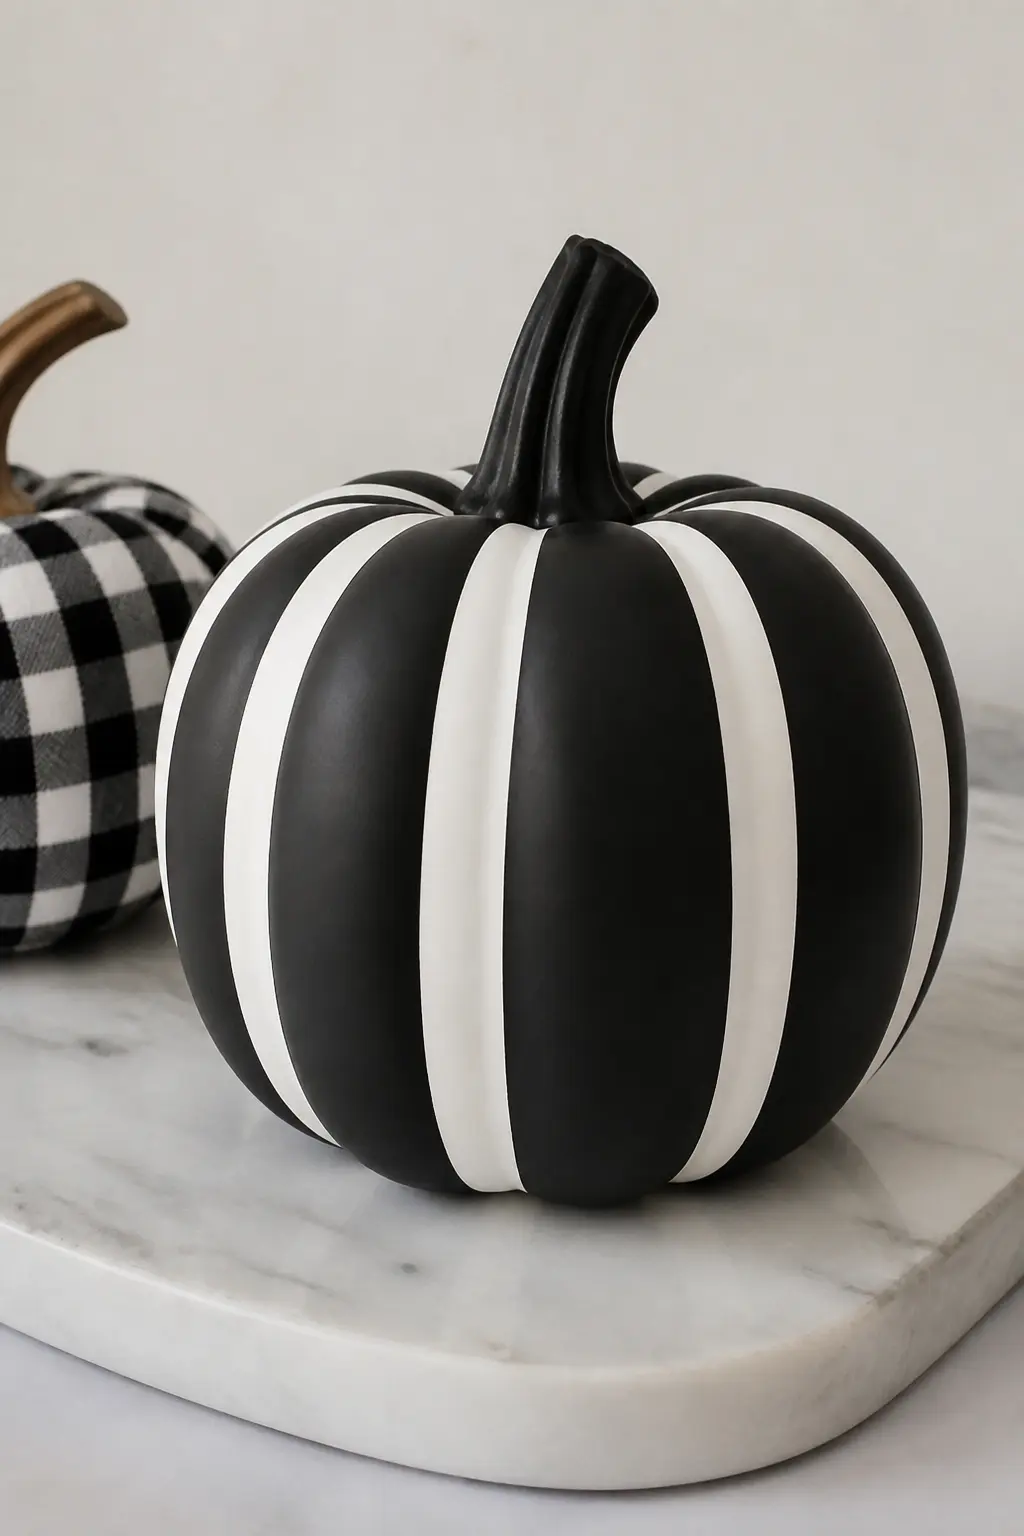
Black Base with White Stripes Reversed
Base coat the whole pumpkin in matte black, two coats minimum. Once fully cured, tape and paint white vertical stripes over the top. The reversal changes the entire mood: the same geometry reads as dramatic and night-sky dark rather than crisp and summery.
Place this one on a white or cream surface to let the dark body float. Against a dark shelf it disappears, which is the one placement to avoid.
🛍 Shopping guide
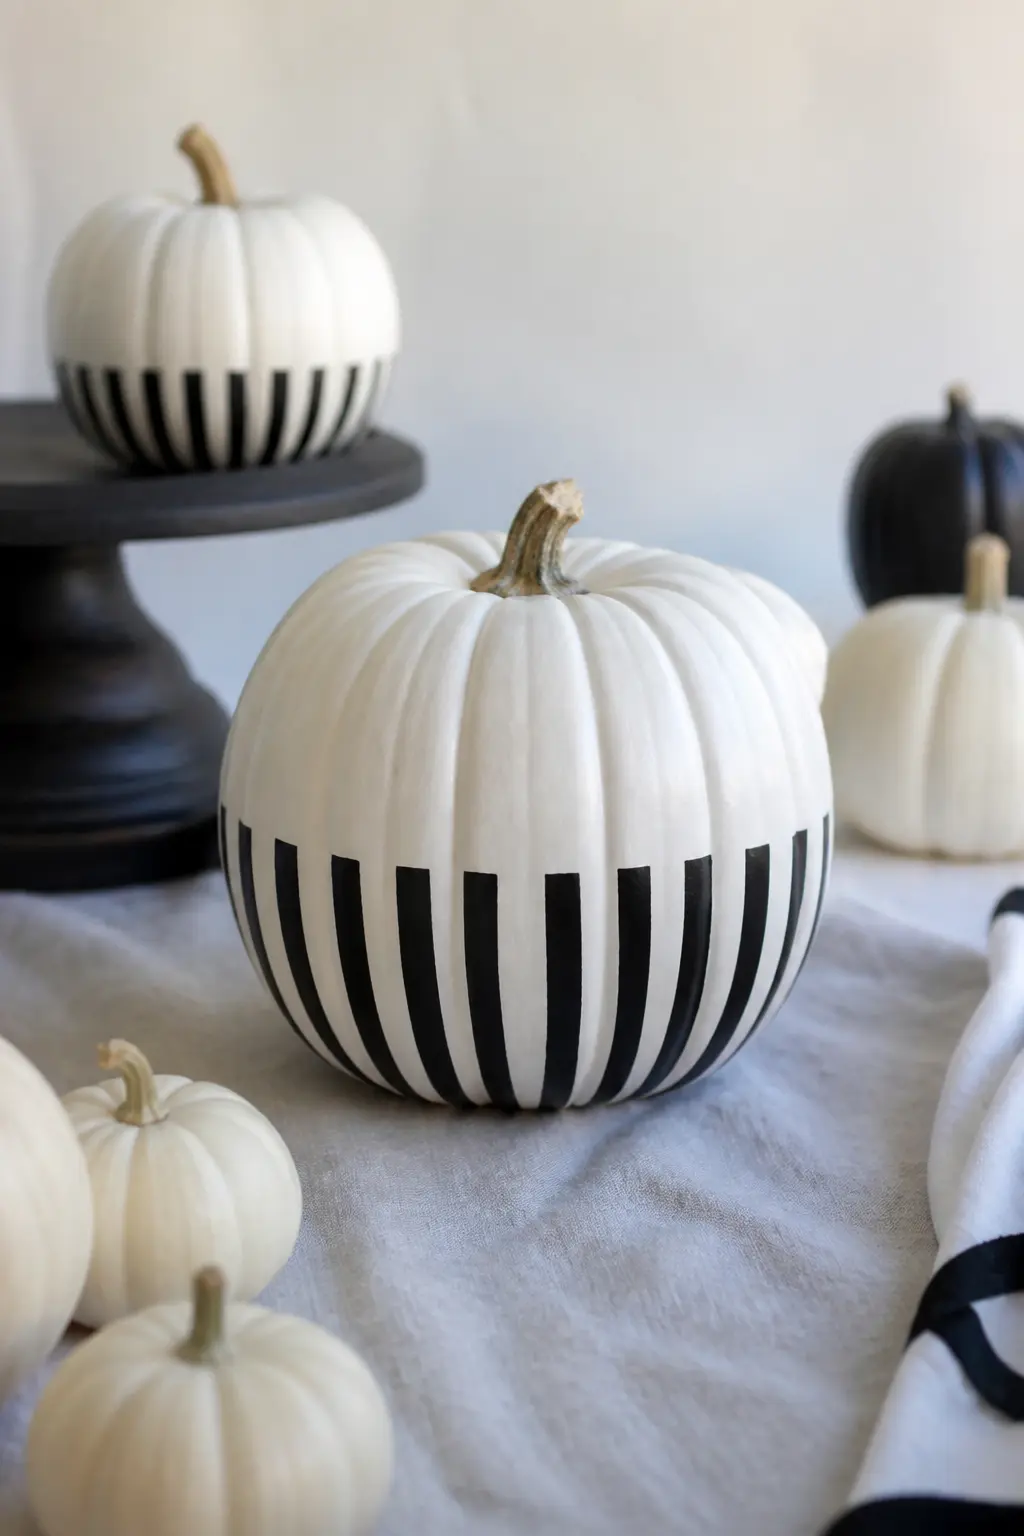
Stripes Only on the Lower Half
Keep the upper half plain white and run black stripes only across the bottom half of the pumpkin, finishing at the natural equator. Tape a clean horizontal line at the midpoint before painting the stripes below it.
The plain top half keeps the stem and the natural silhouette visible, so the pumpkin reads as a pumpkin first and a pattern second. It is the most restrained stripe option and the easiest to live with long-term.
Spots
Spots are the friendliest pattern on this list, because uneven spacing reads as charm rather than error. A round foam brush loaded lightly drops a consistent circle. A pencil eraser gives a smaller, tighter dot. A flicked brush gives you no control at all, and that is the whole point of speckle.
Scale your spot size to your pumpkin size. Tiny polka dots on a very large pumpkin disappear. Big scattered dots on a small pumpkin can feel crowded. Match them before you commit.
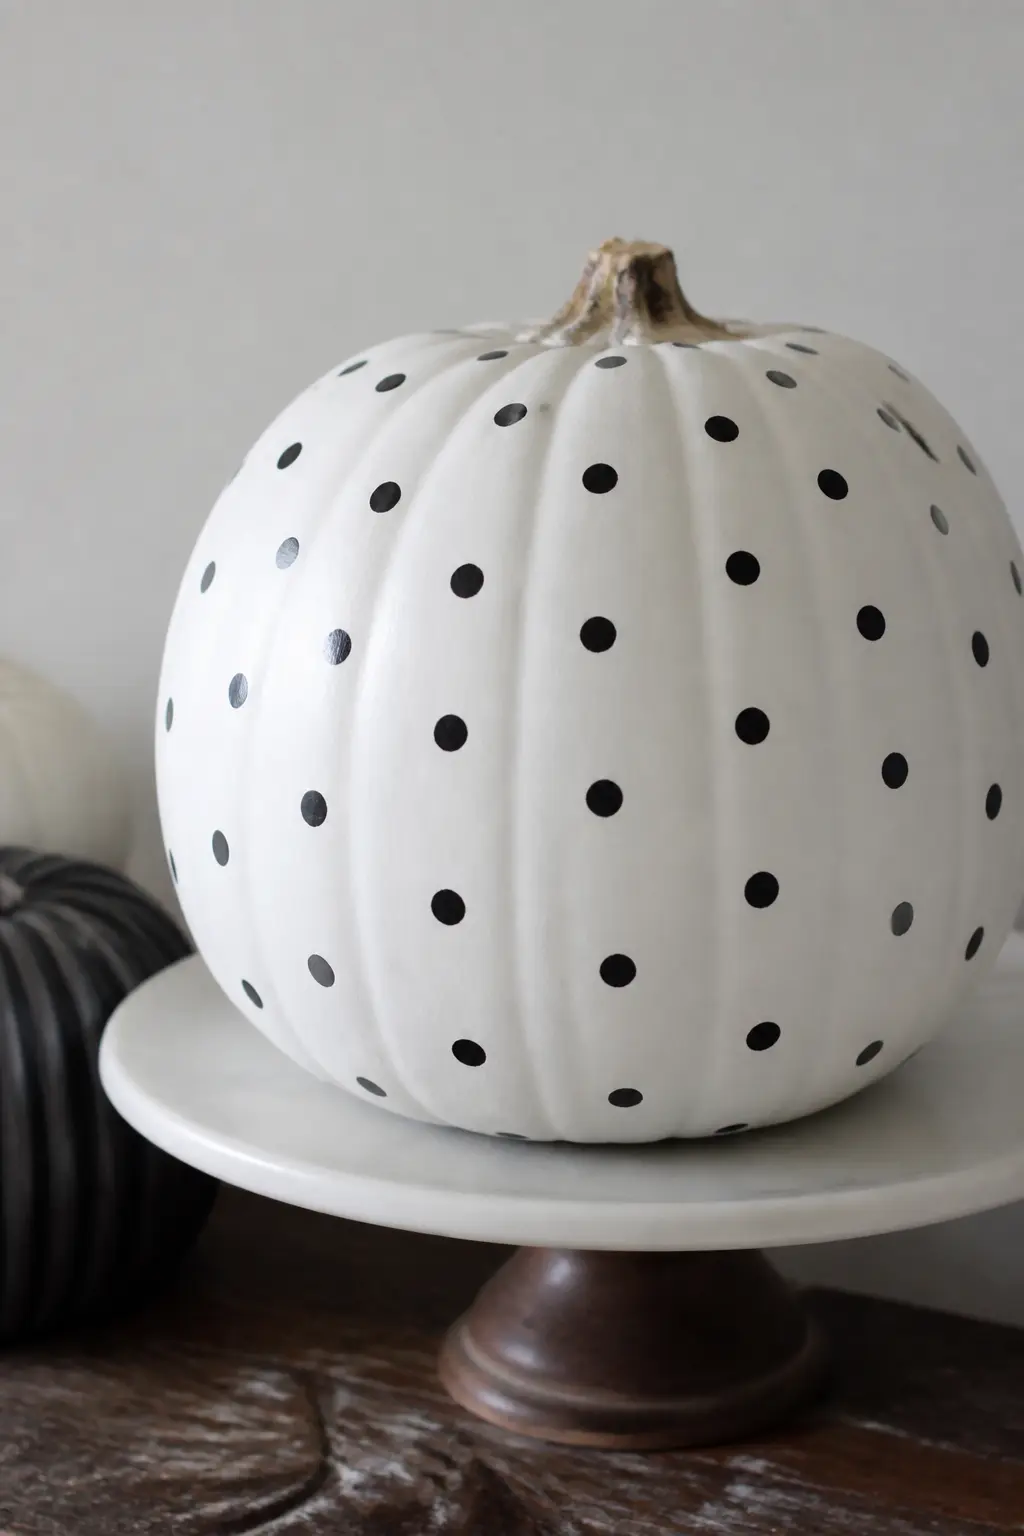
Even Polka Dots on White
Base coat in white, then use a round foam brush or a wine cork dipped in black paint to stamp evenly spaced circles across the entire surface. Measure a rough grid in pencil first if evenness matters to you. It is forgiving: a dot one centimetre off reads as deliberate from any normal distance.
The overall effect is cheerful without being childlike, especially when the dots are kept to one centimetre or smaller. A cluster of three of these in graduating sizes makes the most of the pattern.
🛍 Shopping guide
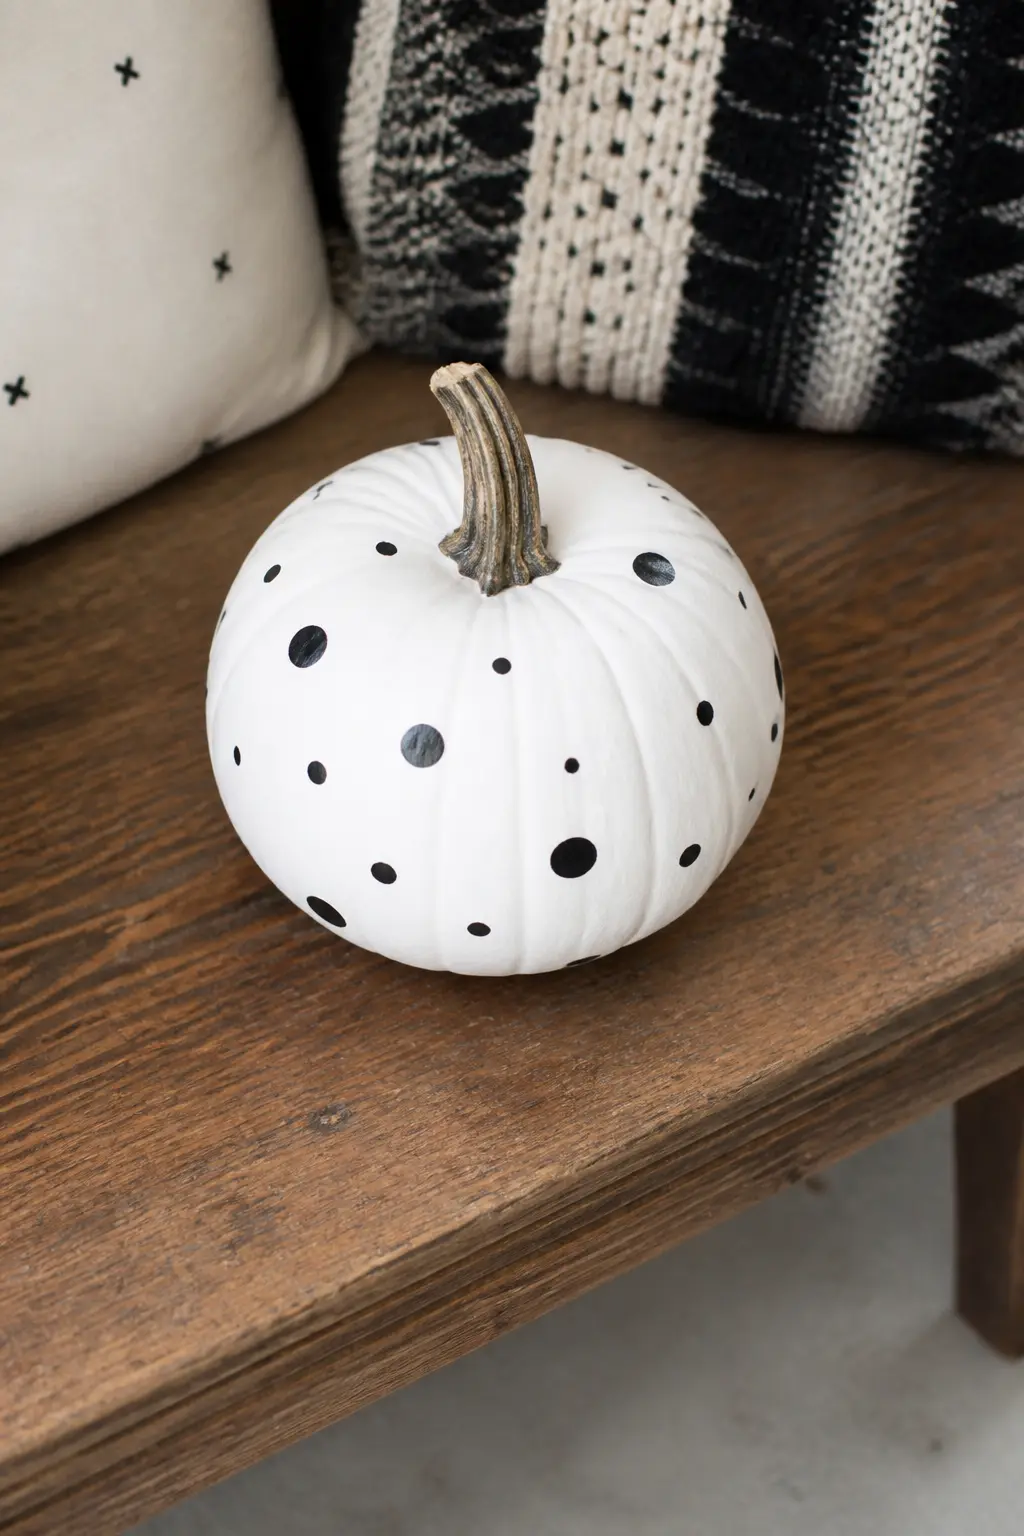
Scattered Dots in Three Sizes
Use three different applicators: a large foam brush, a standard brush tip and a pencil eraser, each loaded with black paint. Scatter the three sizes across a white base coat with no grid, varying the density so the surface breathes a little between clusters.
Organic and slightly playful, this pattern suits an entryway where things do not need to be too serious. The variation in dot size stops it reading as a child’s craft project.
🛍 Shopping guide
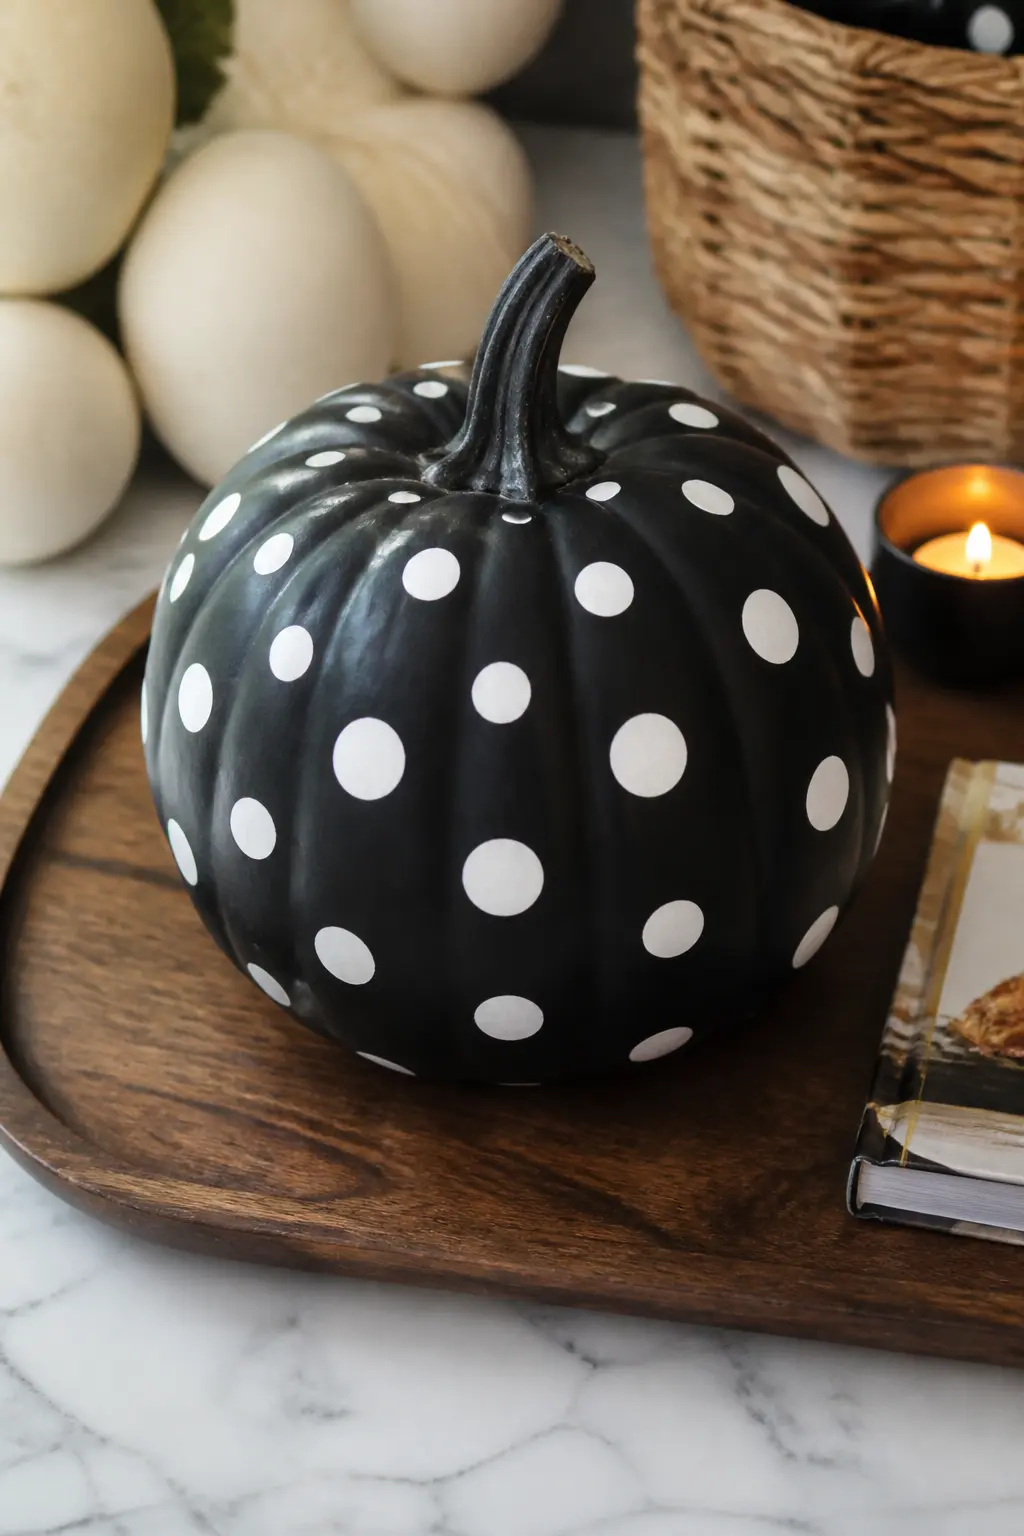
White Dots on a Matte Black Body
Base coat in matte black. Use a white paint pen or a dotting tool loaded with white acrylic to place even circles across the body. The dark ground makes the dots glow, almost like a field of stars. Let each dot dry before adding a neighbour to avoid smearing.
This is the most moody of the spot pumpkins and the best one for a Halloween night table. It also photographs beautifully against a dark background, so consider a dark tray or dark wood surface as the prop.
Speckled from a Flicked Brush
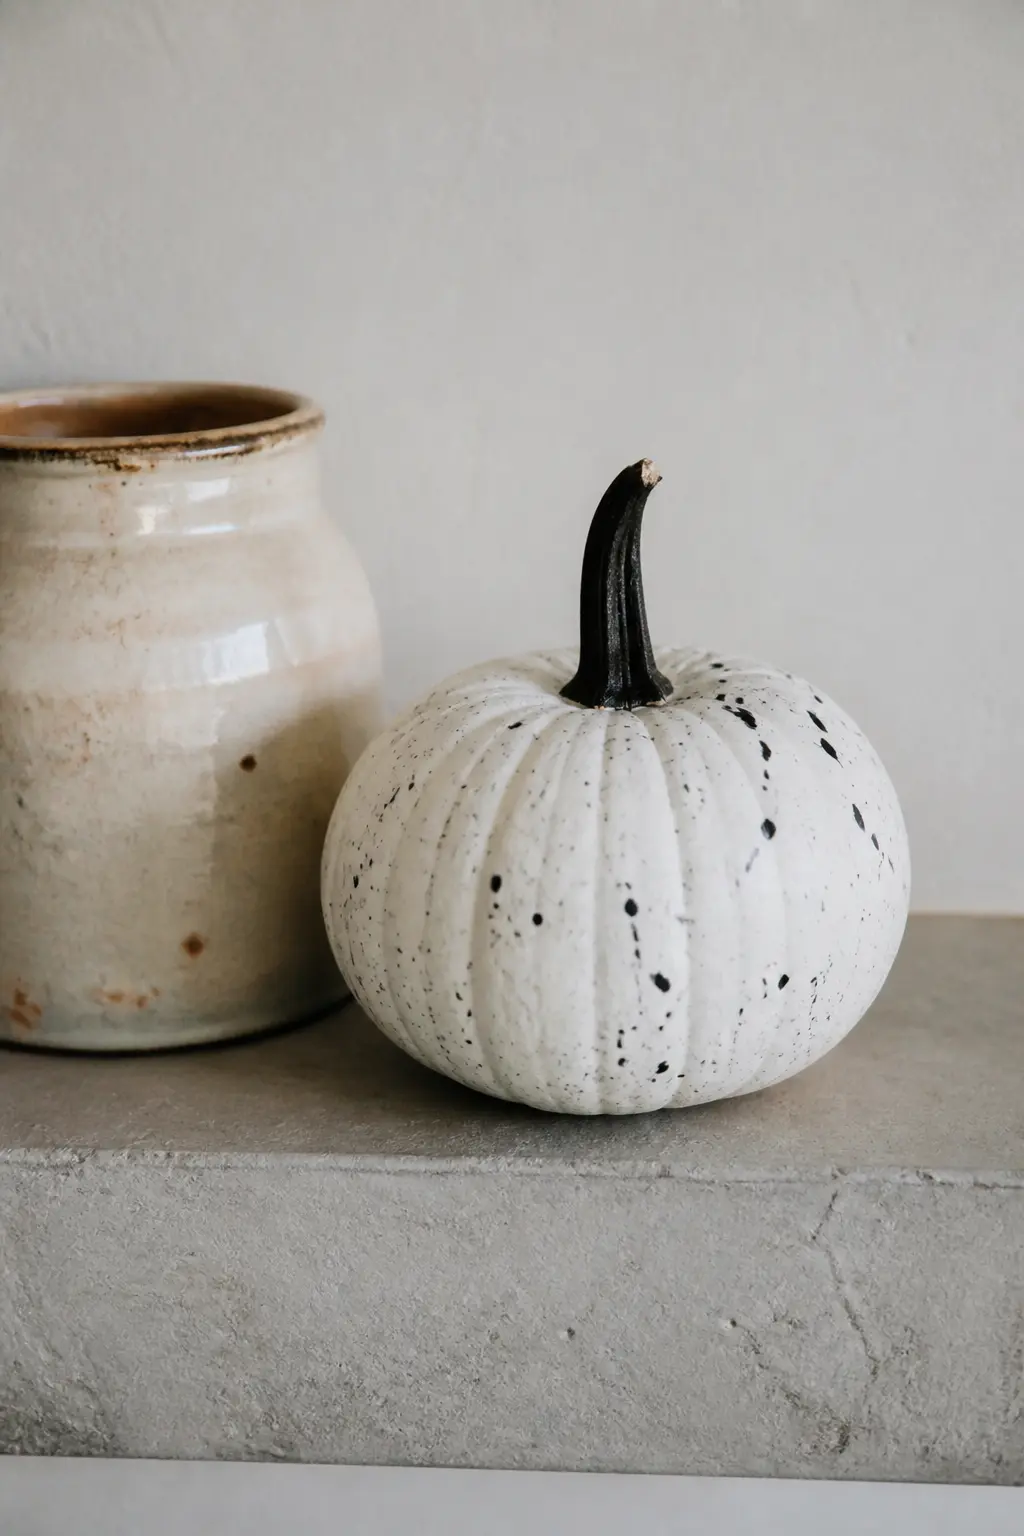
Base coat in white. Load a stiff-bristle brush with thinned black paint, hold it fifteen centimetres from the pumpkin and run your thumb across the bristles toward you, releasing a spray of tiny flecks. Work in layers rather than one heavy pass.
The effect mimics speckled ceramic, which is exactly the right reference for a neutral home. This pumpkin belongs beside pottery and woven textures, not beside orange-and-black cut-outs.
🛍 Shopping guide
Grids
Grids ask for tape and patience, but the payoff is a pumpkin that reads almost textile rather than seasonal. Wrap tape horizontally first, press every edge firmly so paint cannot bleed, then run the vertical strips. Two coats of the contrast colour and a steady peel while the paint is still slightly tacky give the cleanest edge.
Buffalo check and gingham are the same geometry at different scales. Checkerboard keeps its squares equal. Harlequin tips the grid forty-five degrees into diamonds. All four use the same taping logic.
Classic Checkerboard
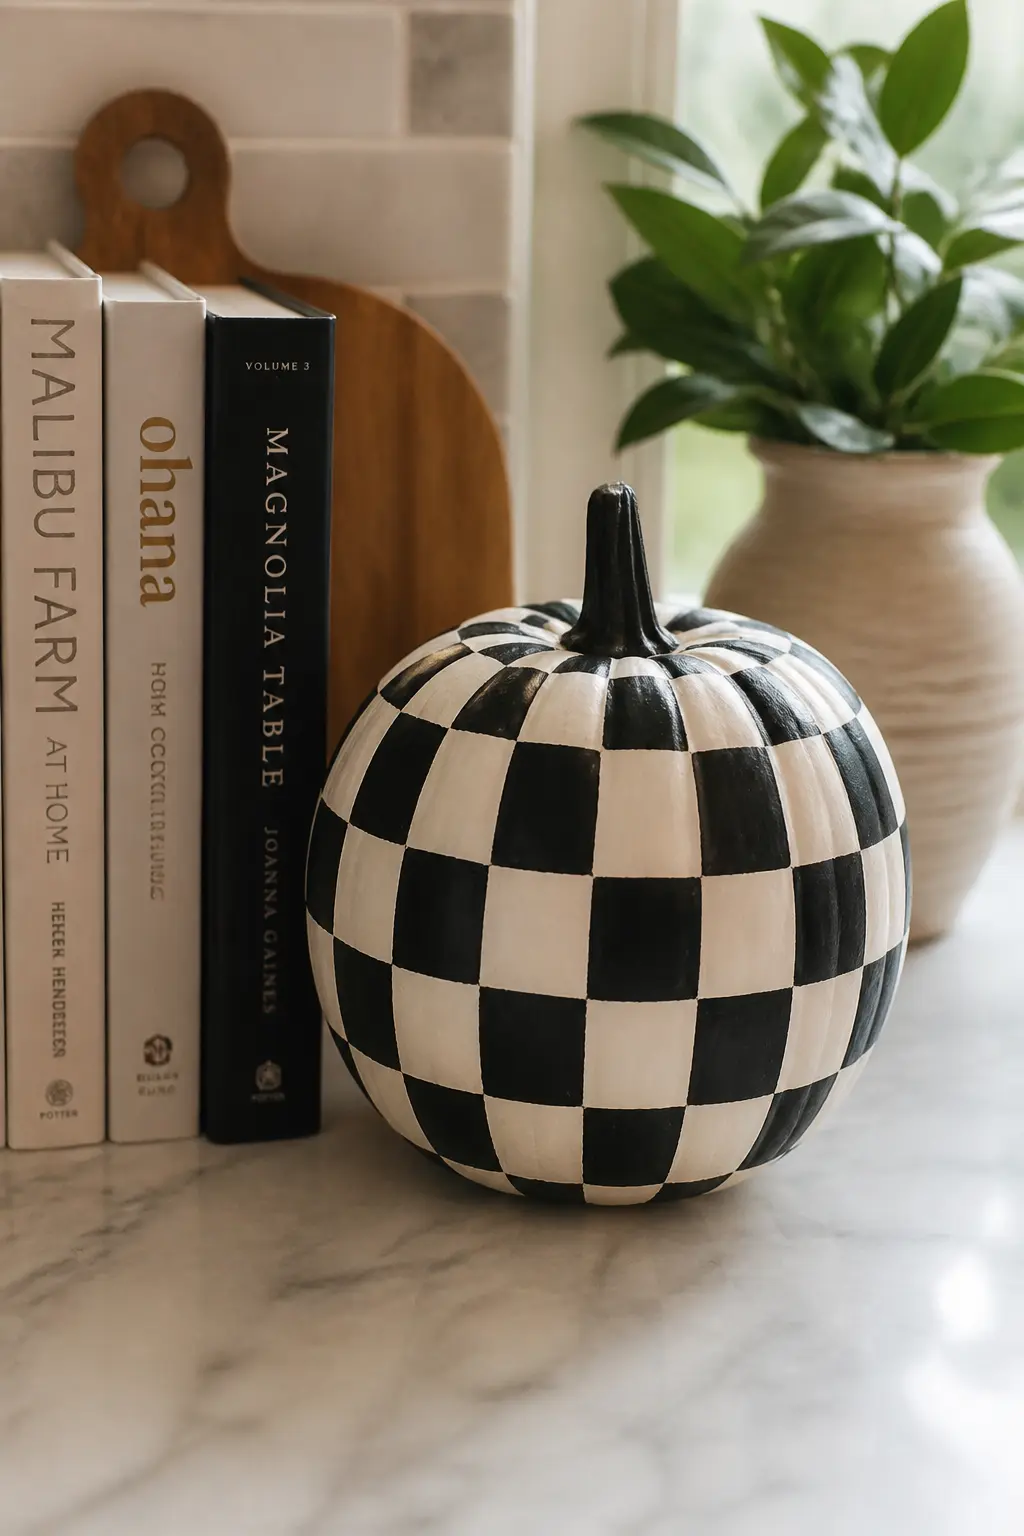
Base coat in white. Map a grid in pencil, keeping squares between one and two centimetres square for a standard-sized pumpkin. Tape alternate squares and paint them black. Remove the tape while the paint is still just tacky for the cleanest pull.
Checkerboard on a curved surface warps at the edges, and that warp is part of the charm. Do not try to correct it with extra tape. The slight distortion is what makes it look hand-applied rather than printed.
🛍 Shopping guide
Buffalo Check in Large Squares
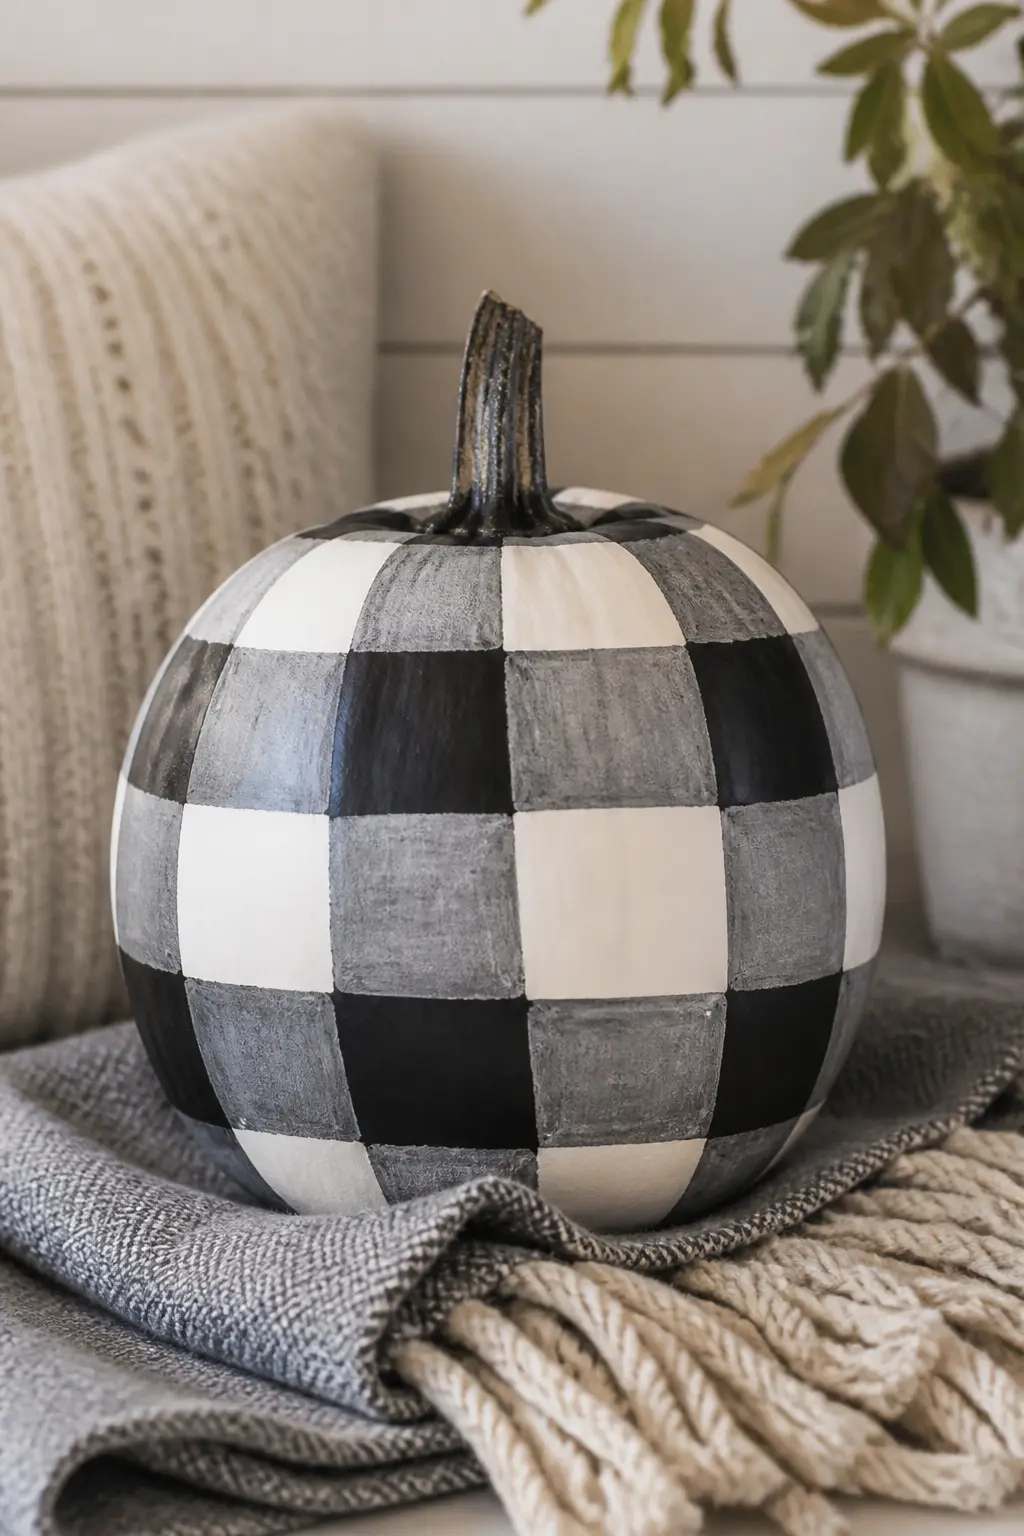
Buffalo check is a two-colour plaid built from large overlapping squares. Tape horizontal bands in black, let dry, then tape vertical bands, paint again, and the overlap creates the characteristic four-square block. The squares run approximately three to four centimetres each on a medium pumpkin.
This one has a cabin, cosy reading-corner energy. It suits autumn decor that needs to bridge Halloween and Thanksgiving without committing to either.
Fine Gingham on a Small Pumpkin
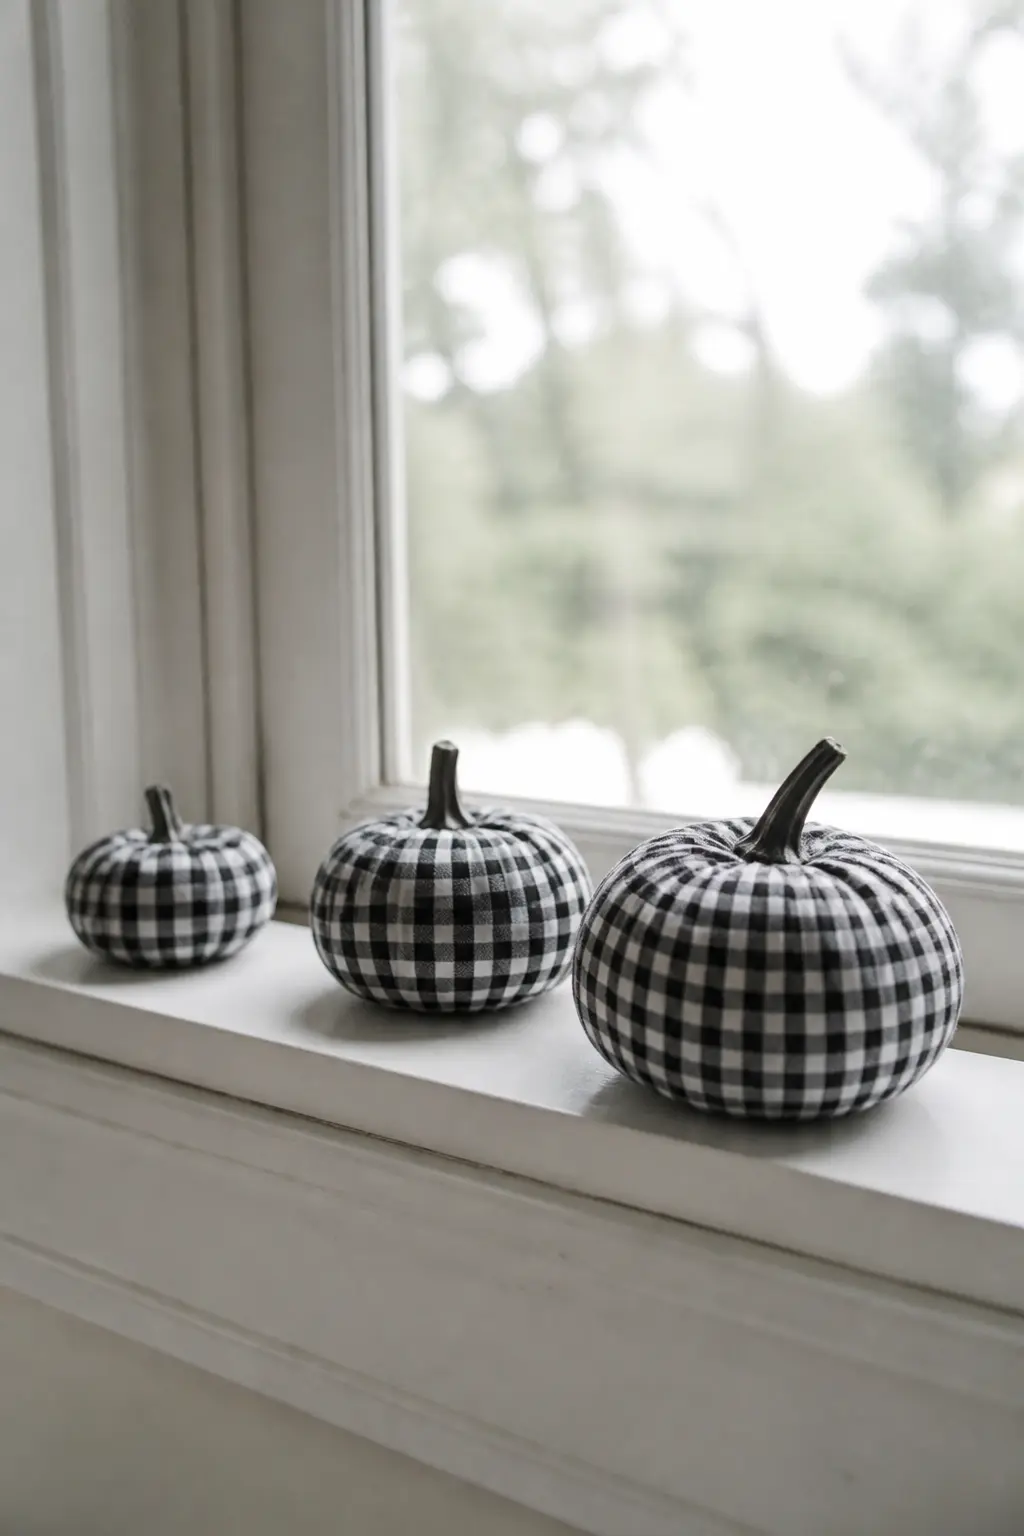
Gingham is the small-scale version of buffalo check, and it works best on a small pumpkin where the tight grid reads properly. Tape lines five millimetres apart in both directions. The overlap creates a slightly darker third tone, which is the defining feature of gingham.
A row of three small gingham pumpkins on a windowsill or shelf is understated and precise. This is the pattern for someone who loves linen tablecloths and thinks a grocery-store pumpkin is, on its own, not quite enough.
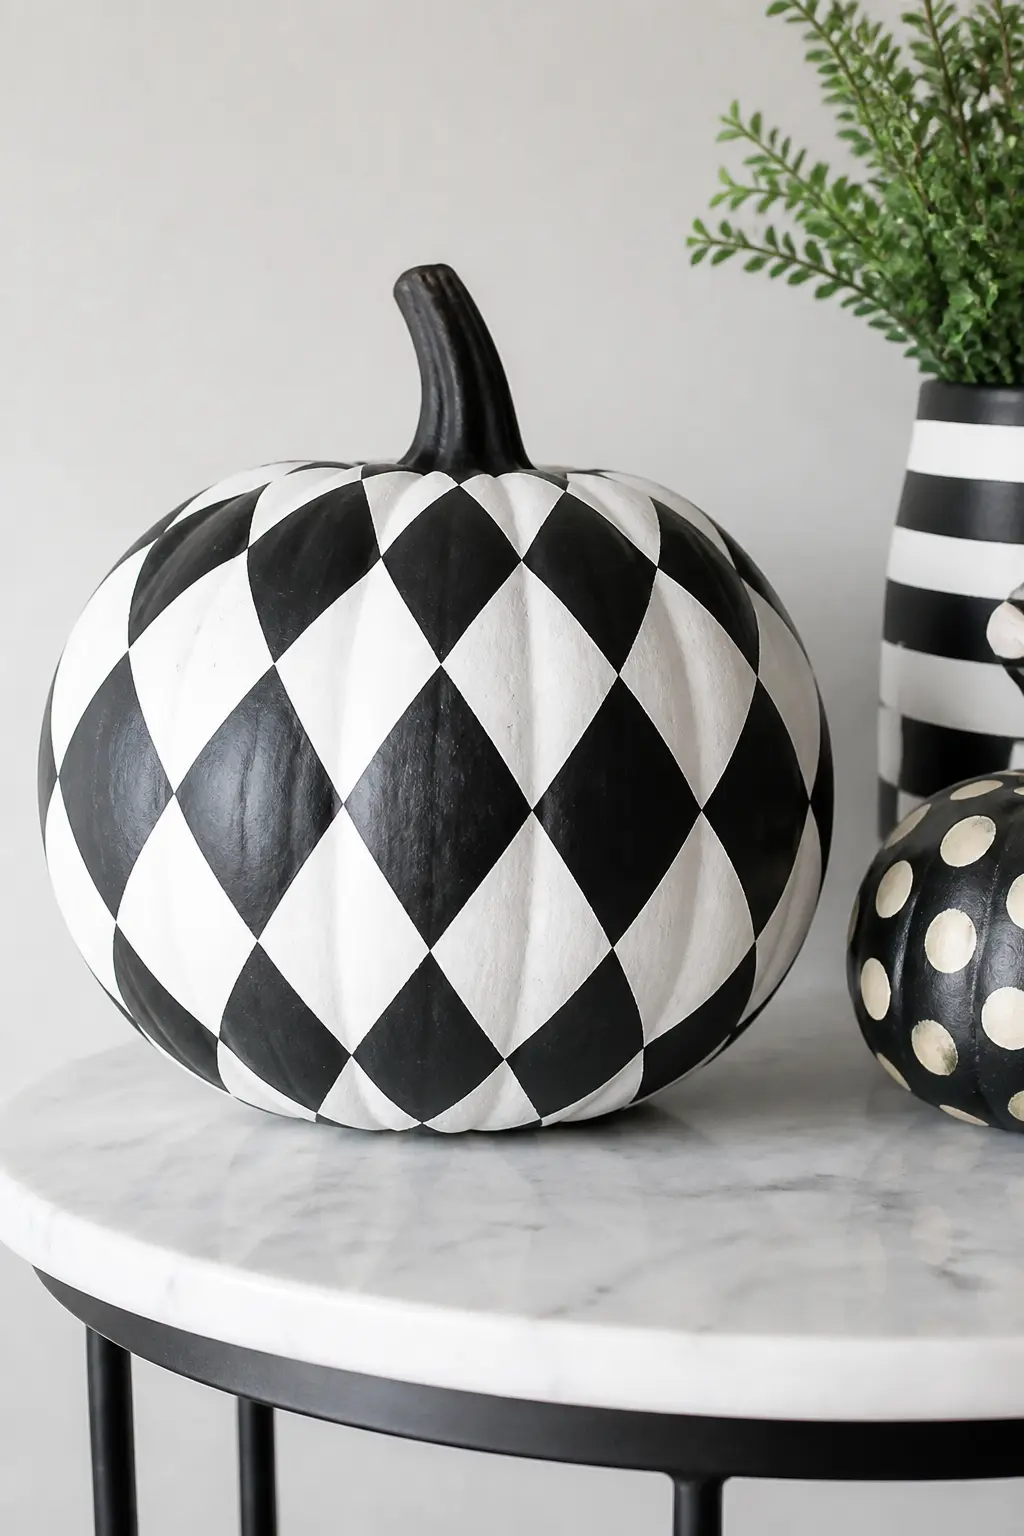
Harlequin Diamonds
Rotate the checkerboard grid forty-five degrees and you have a harlequin. Map a diamond grid in pencil, with each diamond roughly four centimetres tall on a medium pumpkin. Tape and paint alternate diamonds in black on a white base.
The diamond shape follows the pumpkin’s vertical curves more naturally than a square grid does, so the distortion is less noticeable. This is the most elegant of the four grid patterns and the one that photographs cleanest from straight on.
Geometry
Geometric designs treat the pumpkin as a three-dimensional canvas rather than a flat surface, and the results are the ones that photograph best. A chevron wraps around the equator like a belt. Triangles fan out from the stem like a compass rose. A diagonal split uses the whole silhouette as part of the composition.
Concentric rings painted from the top down look architectural, almost like a topographic map. None of these need artistic training, only a ruler, a pencil line and tape.
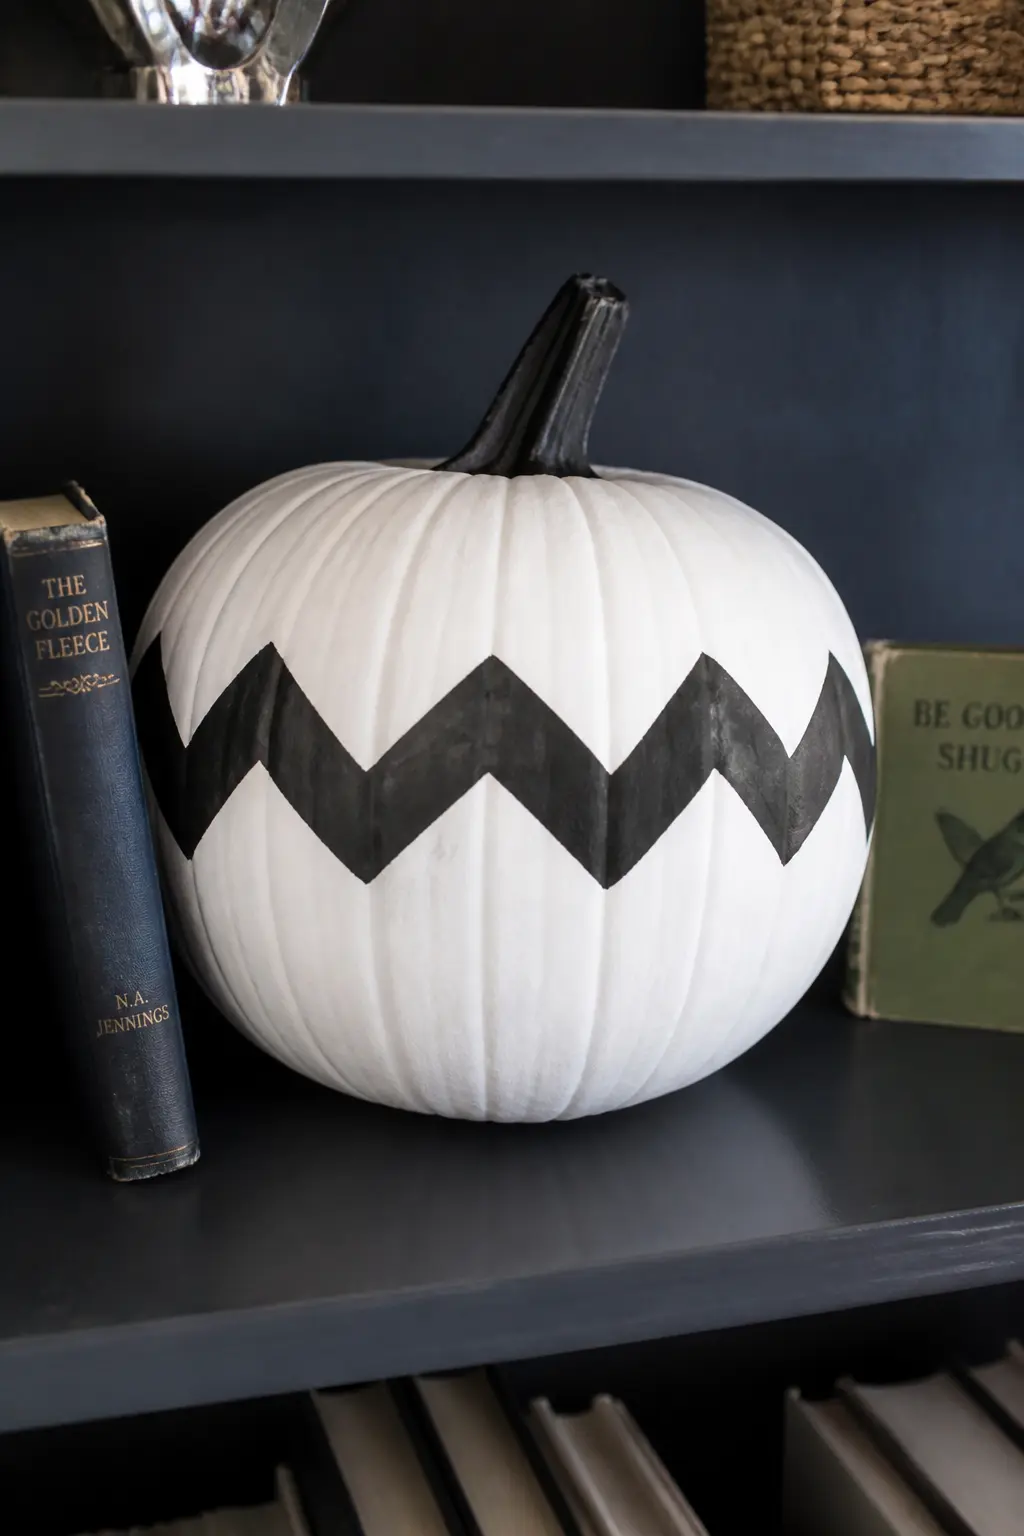
Chevron Around the Middle
Find the midpoint of the pumpkin and tape a zigzag band roughly five centimetres deep around its equator. The chevron peaks point upward. Paint the band black on a white base, or reverse it for a bolder look. The ridges of the pumpkin mean the tape will lift slightly: press firmly at every fold and touch up any bleeds with a fine brush.
The result looks like a wrapped parcel in graphic gift wrap, which suits a shelving display alongside books and candles rather than anything overtly seasonal.
Triangles Fanning from the Stem
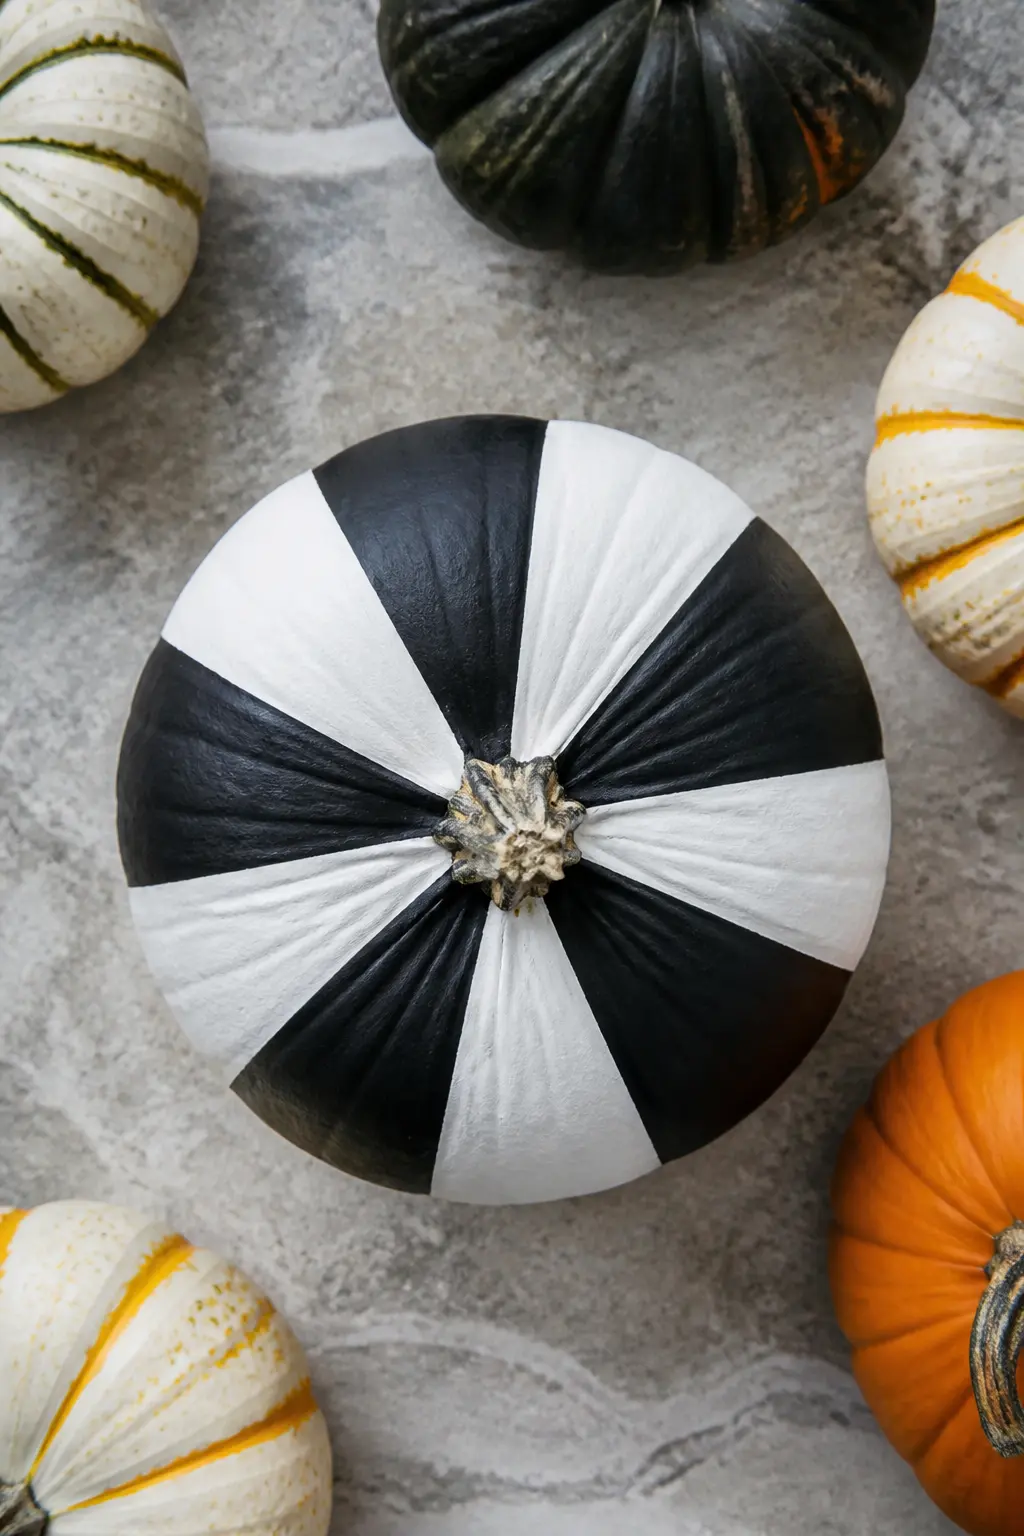
Draw light pencil lines radiating from the stem downward at equal intervals, dividing the pumpkin into wedge-shaped sections. Paint alternate wedges black, leaving the others white. The stem becomes the focal point, the apex from which every line originates.
Looked at from above, this is a graphic sunburst or compass rose. From the front it reads as a bold geometric pattern. Both views are worth staging: try it flat on a table where guests will look down at it.
A Single Diagonal Split
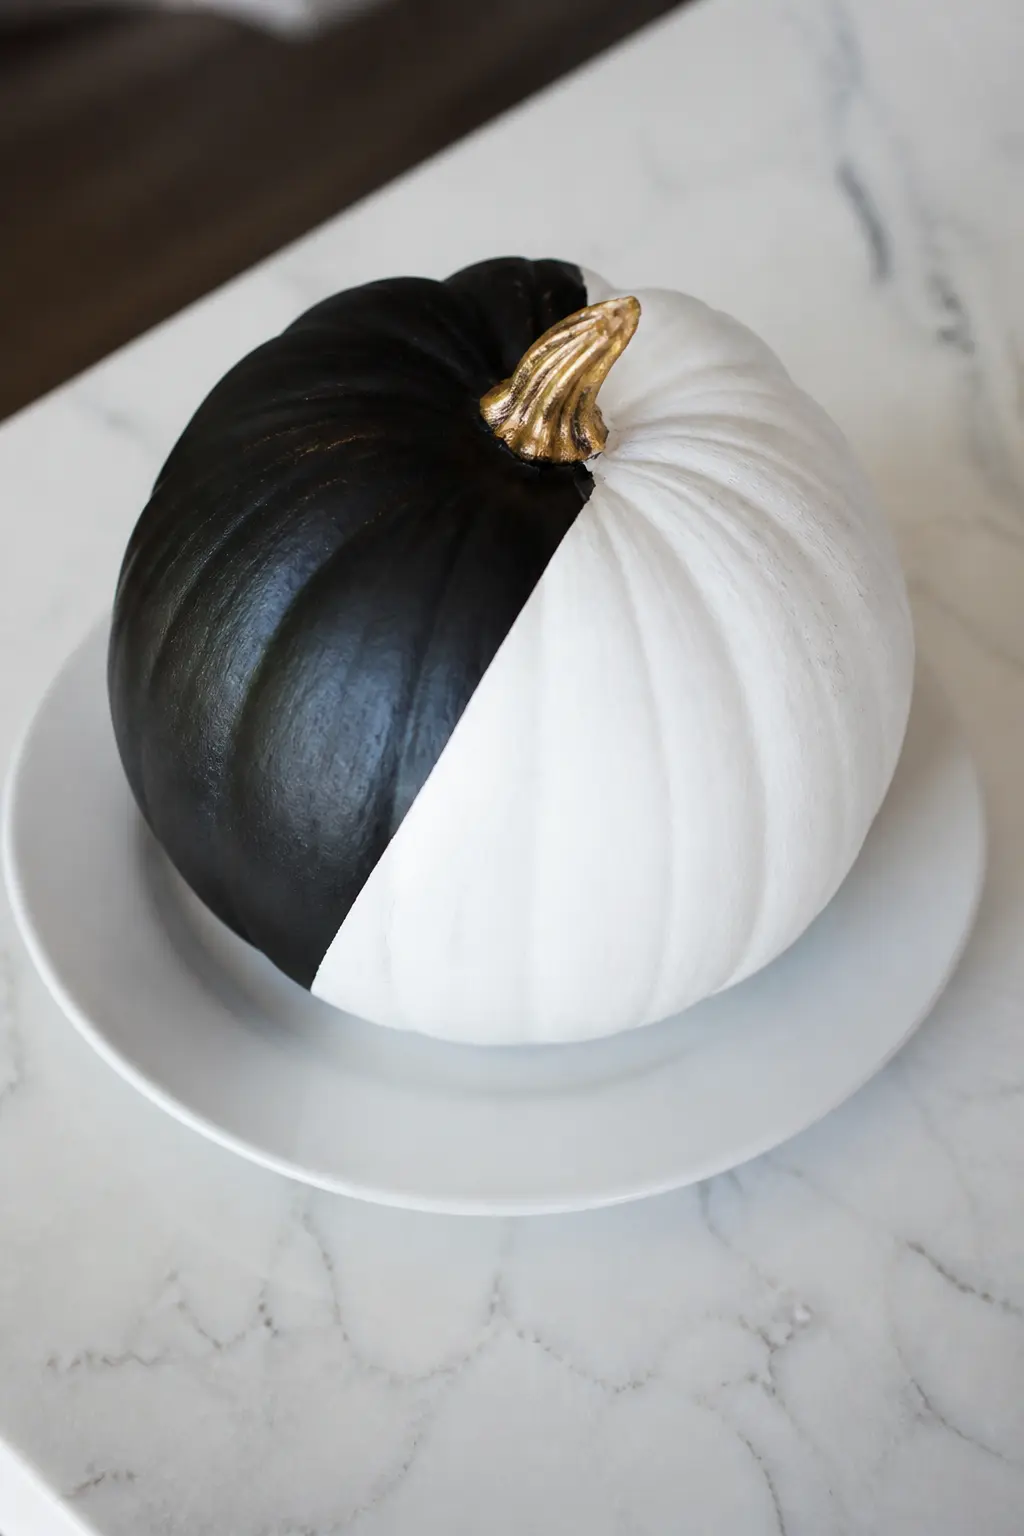
Tape a single diagonal line from top left to bottom right across the entire pumpkin. Paint one half black and one half white. The line can be perfectly straight or very slightly curved: either reads as intentional. The stem sits in the black or the white depending on which you find more balanced.
This is the design with the fewest moves and the biggest statement. It belongs in a room where other surfaces are already busy and you need a piece that stays still.
🛍 Shopping guide
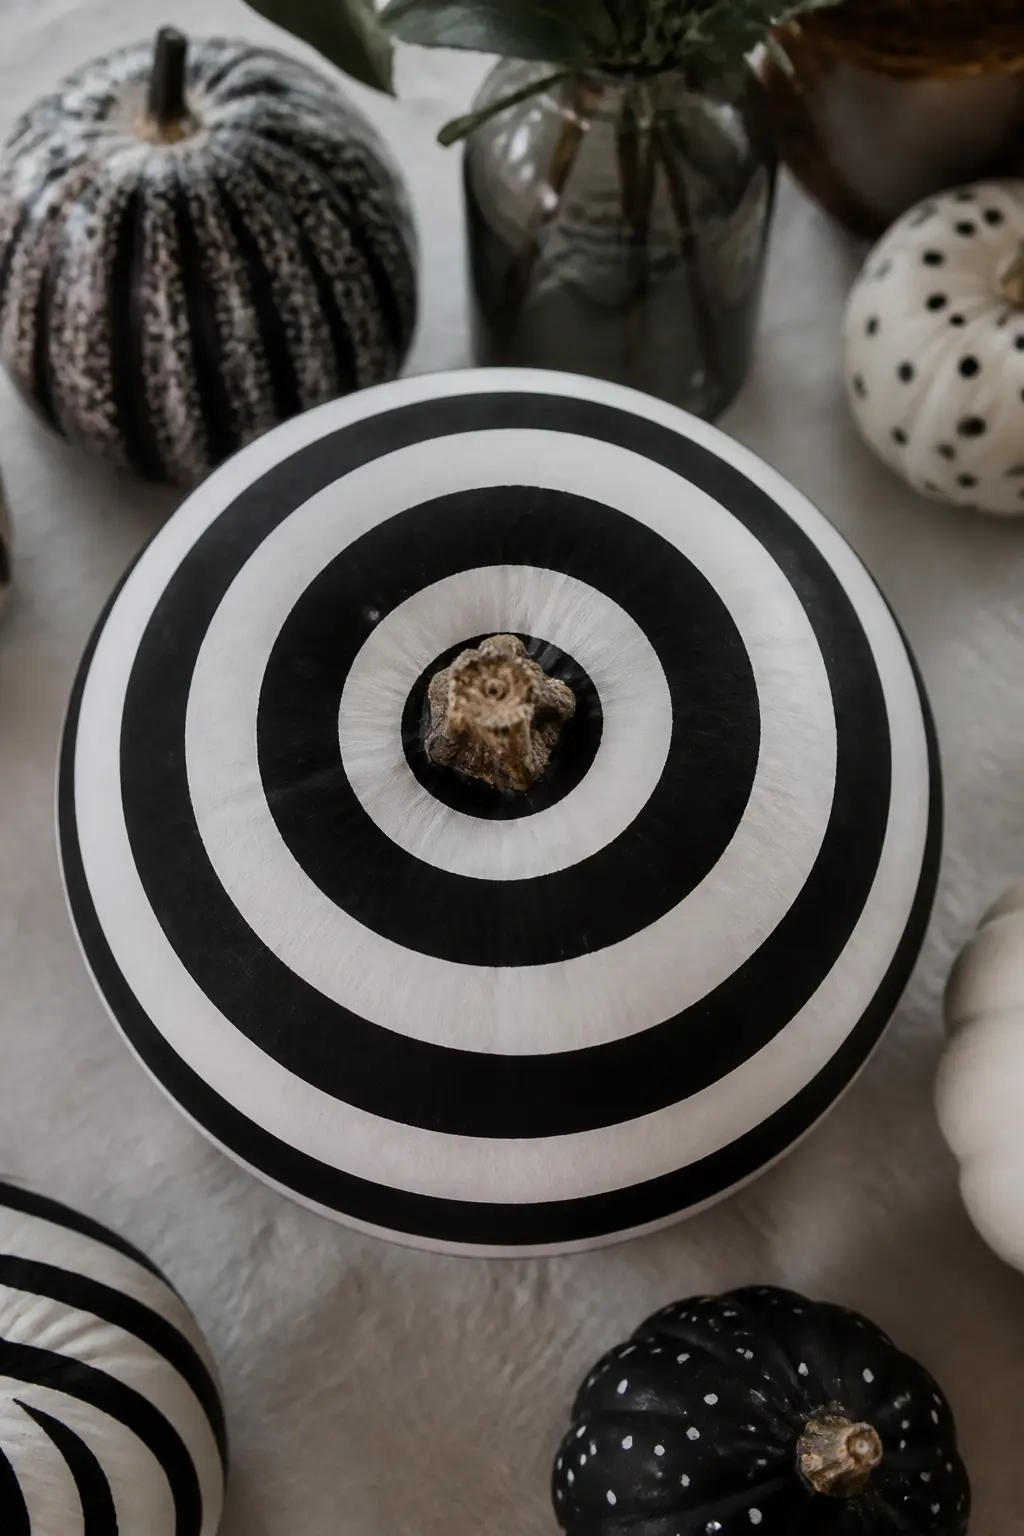
Concentric Rings from the Top
Starting at the stem, tape and paint concentric rings radiating outward and downward. Alternate black and white bands, keeping each ring roughly two centimetres wide. The rings follow the dome of the pumpkin the way a topographic map follows a hill.
From straight on, the effect is hypnotic and architectural. This pumpkin belongs on a coffee table or a shelf where people will look directly at it rather than past it. A single ring-patterned pumpkin in a vignette of plain white ones carries the whole arrangement.
Line Work
Line work is the category that rewards a steady hand and punishes impatience. Let every layer dry completely before adding detail on top. A fine-point oil-based paint pen outlasts acrylic applied with a brush in terms of precision, and it does not lift if you tape over it later.
Botanical drawings, hand-lettering and architectural scenes all belong here. So does a spider web, which looks far more elegant in fine black lines on white than it ever did carved. These pumpkins work as centrepieces that read from close range.
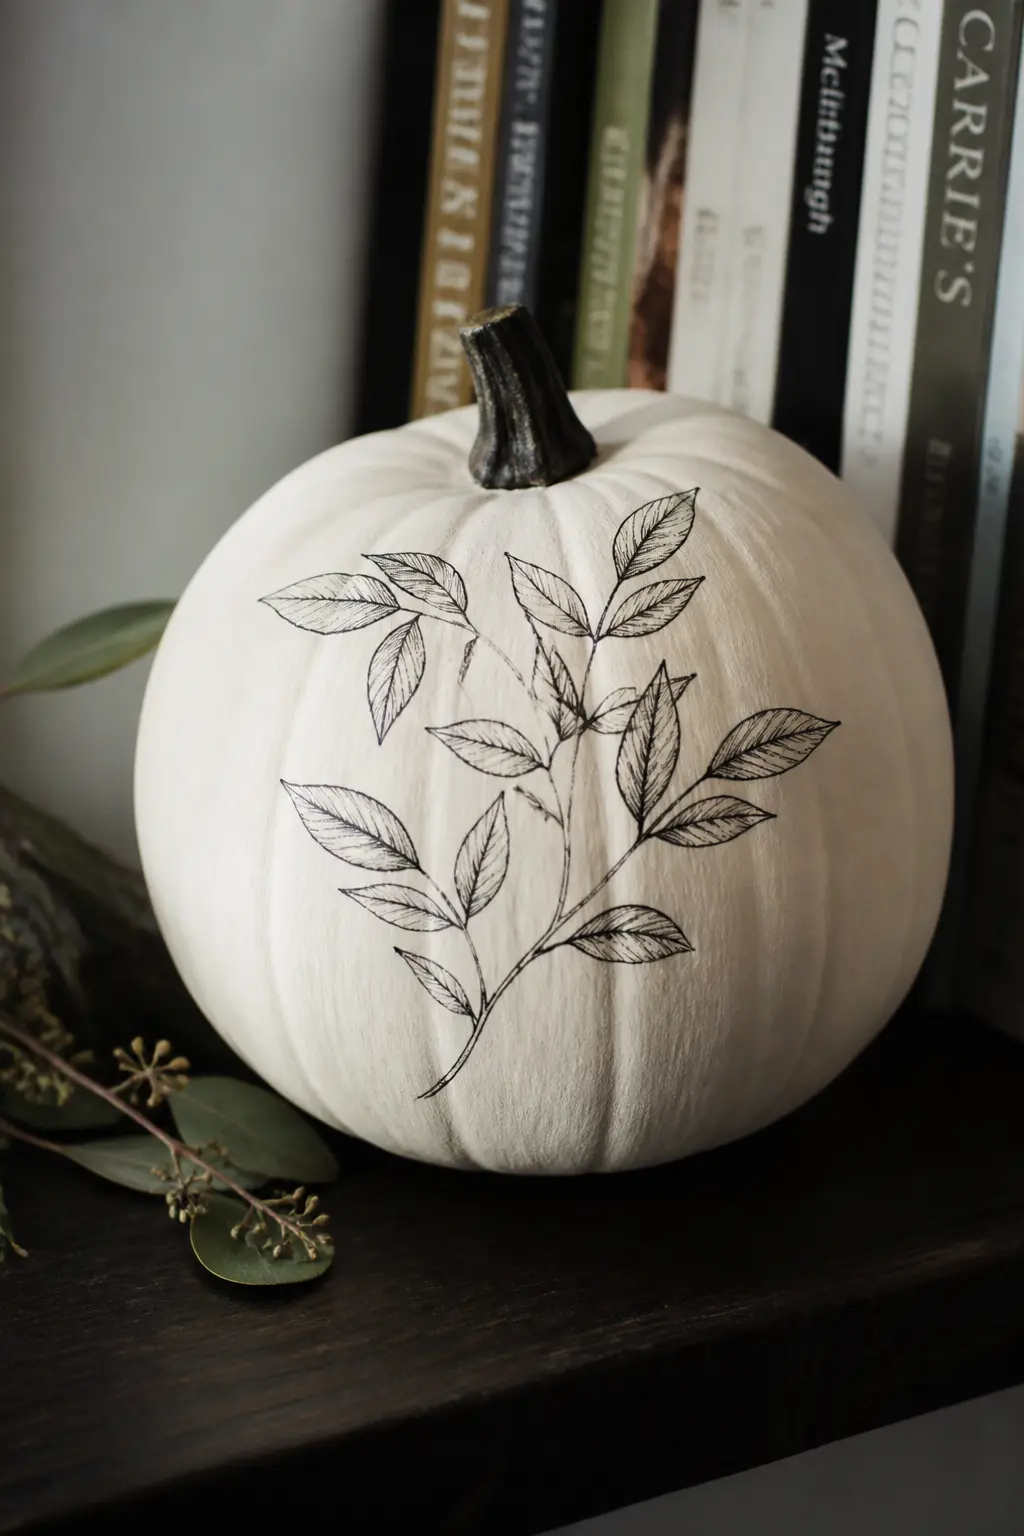
A Botanical Drawing in Fine Black Pen
Base coat in white, let cure for twenty-four hours, then draw directly onto the surface with a fine-point black oil-based paint pen. Sketch a botanical motif: a branch with berries, a sprig of eucalyptus, a cluster of dried seed heads. No colour, no fill, just clean black line.
The result looks like a ceramic piece from a Scandinavian design studio. It suits a dining table, a mantelpiece or a bathroom shelf and reads as autumn decor without announcing it. The drawing does not need to be technically perfect: botanical illustration has always had a hand-drawn quality that forgives minor wobbles.
Hand-Lettering Across the Front
Choose one word: gather, harvest, still, quiet, or simply the month name in small caps. Use a brush pen or paint pen to letter it across the widest part of the pumpkin in black on a white base. Keep the word lower-case for a modern look, upper-case for something more graphic.
Practice the word on paper first, several times, until the letterforms feel fluid. Then do it on the pumpkin in one committed pass. Hesitant strokes show more than confident ones that go slightly off.

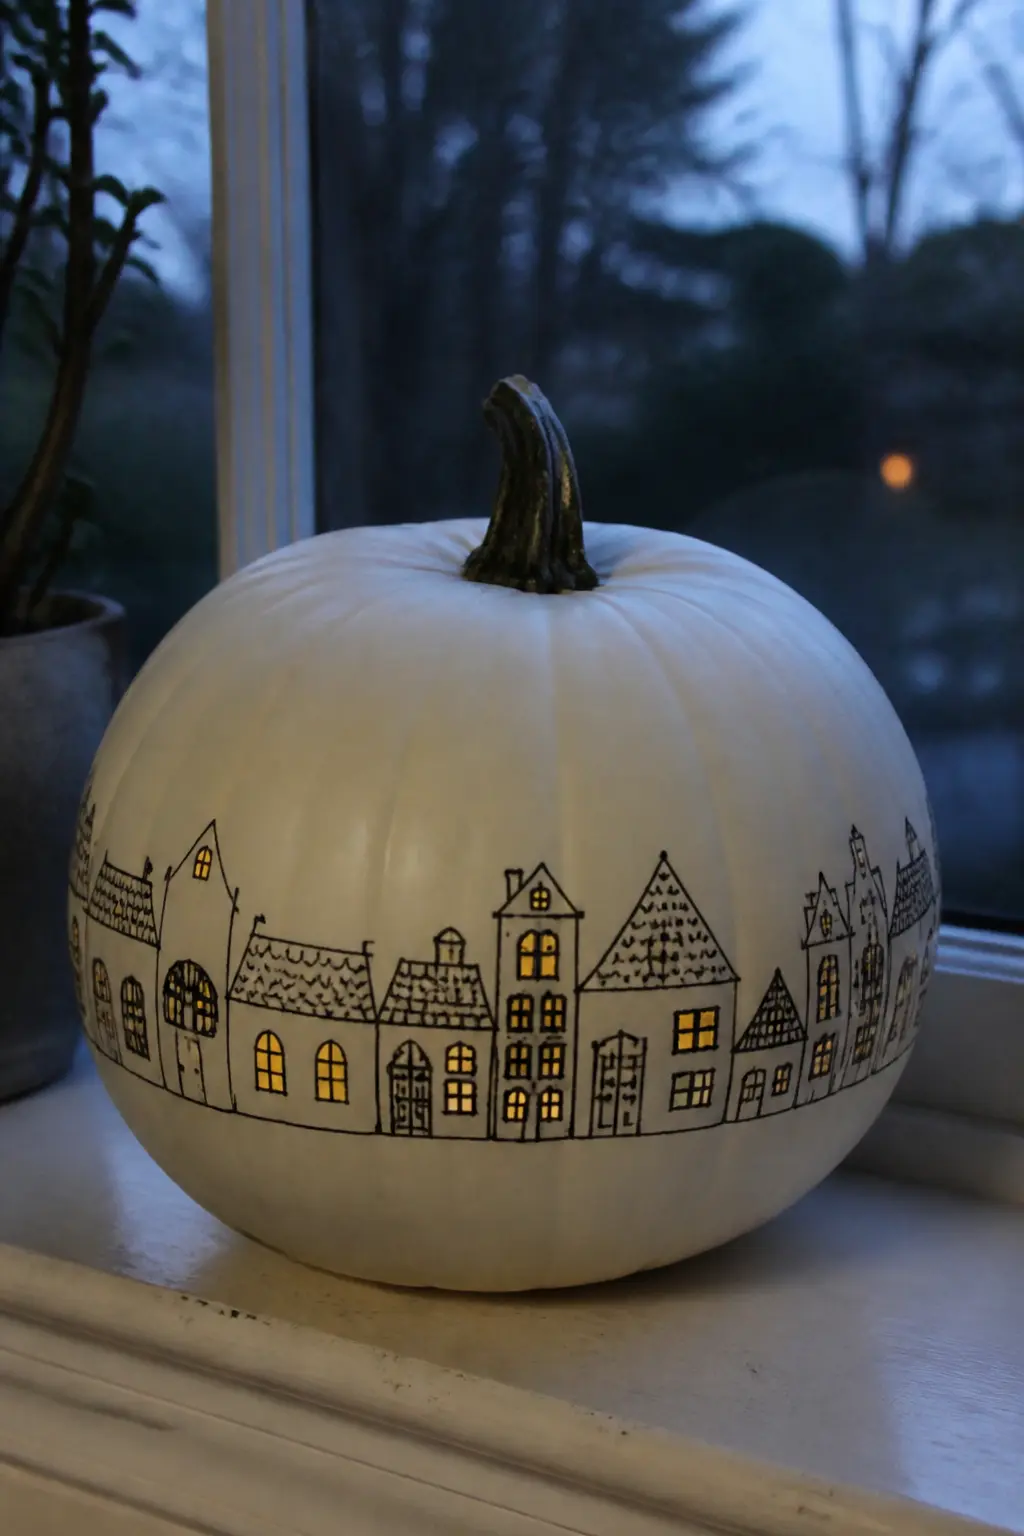
A Whole Village of Houses with Lit Windows
Base coat in white. Use a fine black paint pen to draw a continuous skyline of simple house shapes around the circumference of the pumpkin, varying the rooflines and heights. Add small square windows, and inside each window draw a tiny cross-hatched square in pale pencil to suggest light.
The village wraps around the entire pumpkin so there is no front or back, only a continuous street that the viewer circles to read. It is the most narrative of the line-work pumpkins and the most time-intensive, but it requires no artistic skill beyond a steady hand and a willingness to commit to a simple shape.
🛍 Shopping guide
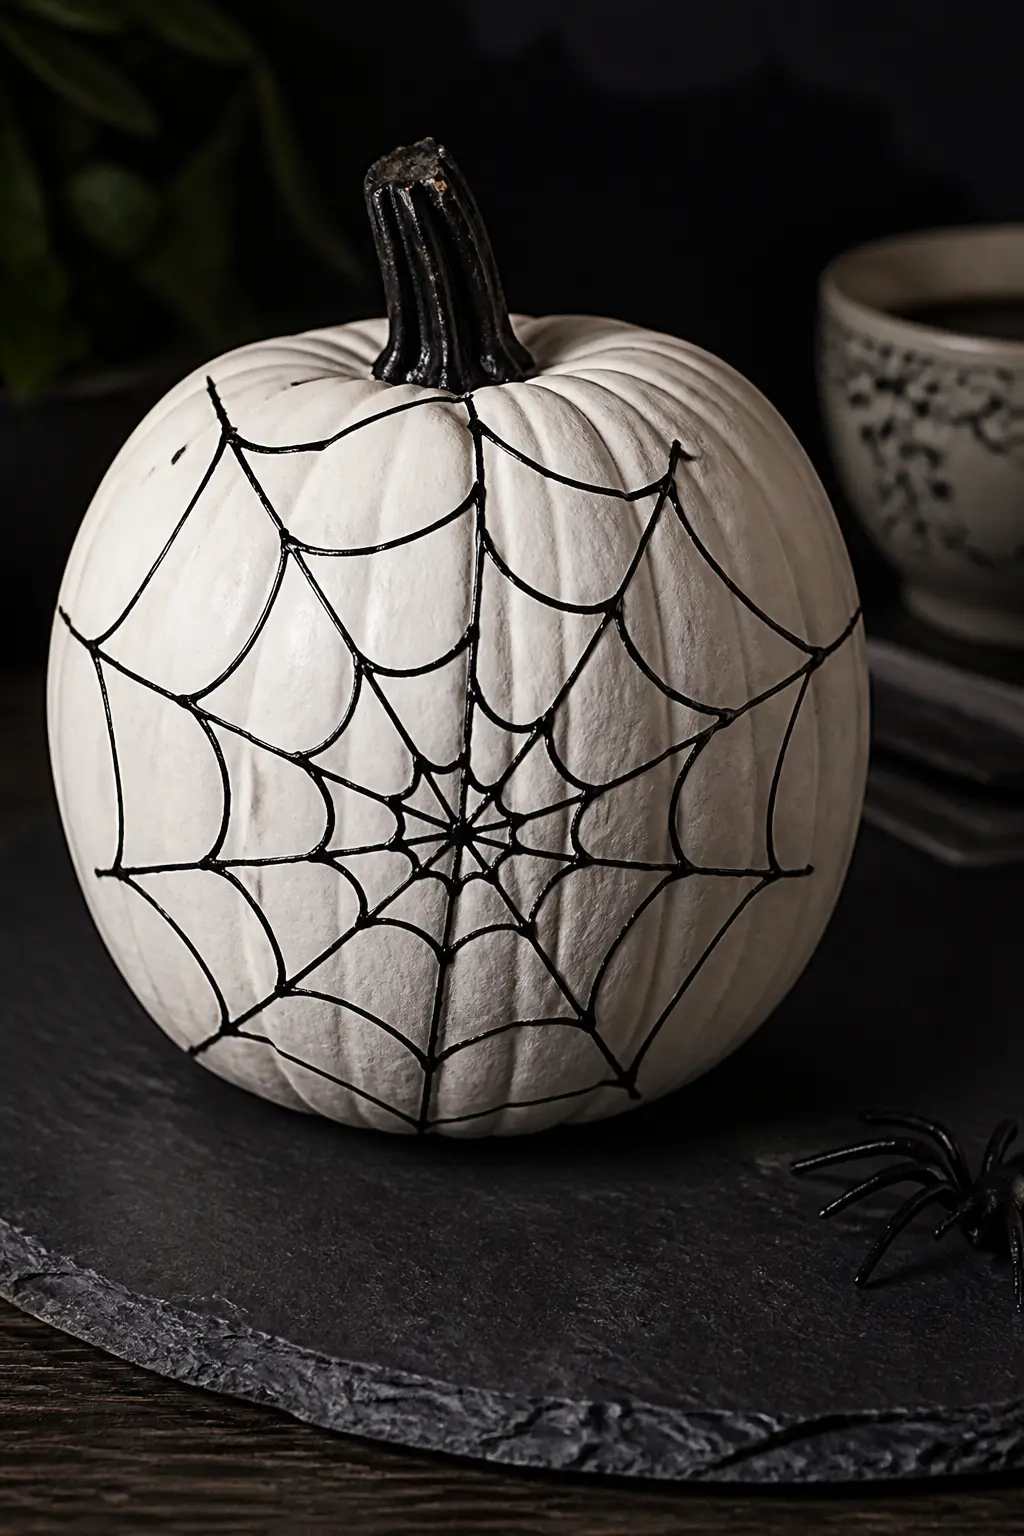
A Spider Web in Fine Lines
Mark the centre point of the web and draw six to eight radiating lines outward from it with a paint pen. Then connect them with arcing curves at regular intervals, moving from the centre outward. The geometry of a web is forgiving: irregular spacing reads as organic rather than inaccurate.
On a white base, a black web has all the Halloween association without the gore. On a matte black base, a white web disappears almost entirely until the light hits it at an angle, which is a more interesting effect for a room that needs atmosphere after dark.
Blocks
Block designs use solid fields of colour with a hard boundary between them. The boundary line is the entire design, so get it straight or get it deliberately curved, but commit. Tape gives a straight split. A painted arch or oval gives a softer division that follows the pumpkin’s own shape.
The sugar skull entry in this section is the most detailed: an outline face rather than a solid block, but it uses the same principle of two clean colour zones with high contrast at the edge.
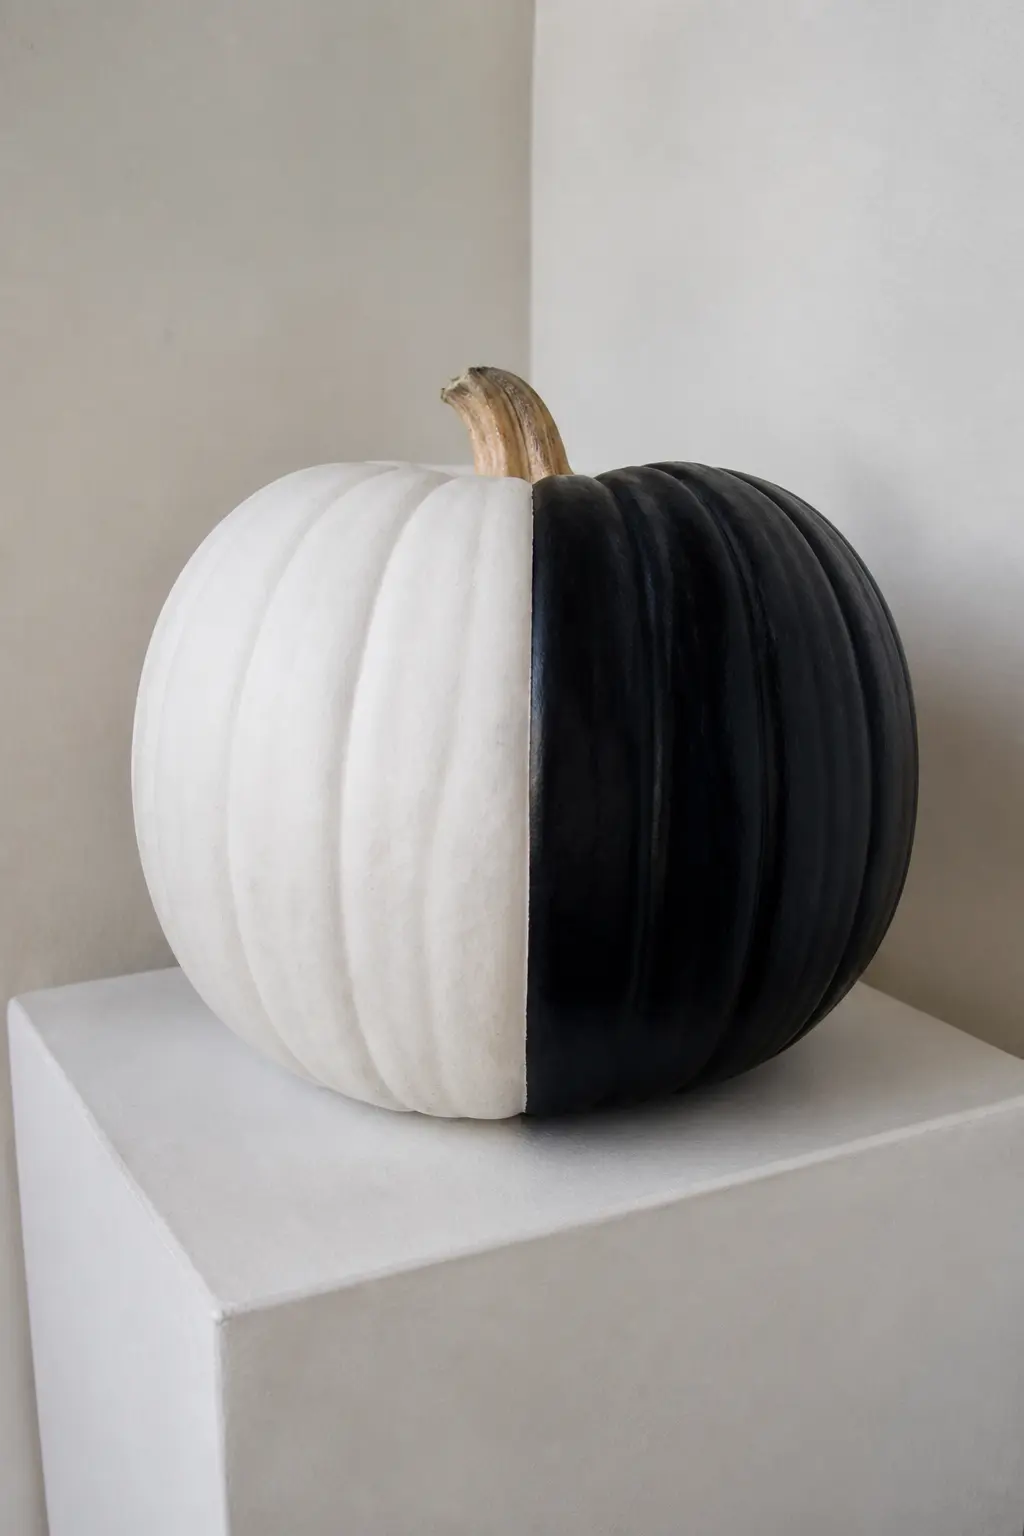
Half Black, Half White Down the Vertical
Tape a single vertical line from stem to base, dead centre. Paint the left half white and the right half black, or reverse it. The tape lifts cleanly to reveal a hard vertical seam that splits the pumpkin into two equal fields.
This is a deliberate, almost sculptural piece. It suits a pedestal or a shelf where it sits alone rather than in a group. The contrast is high enough that the pumpkin draws the eye without competing with anything around it.
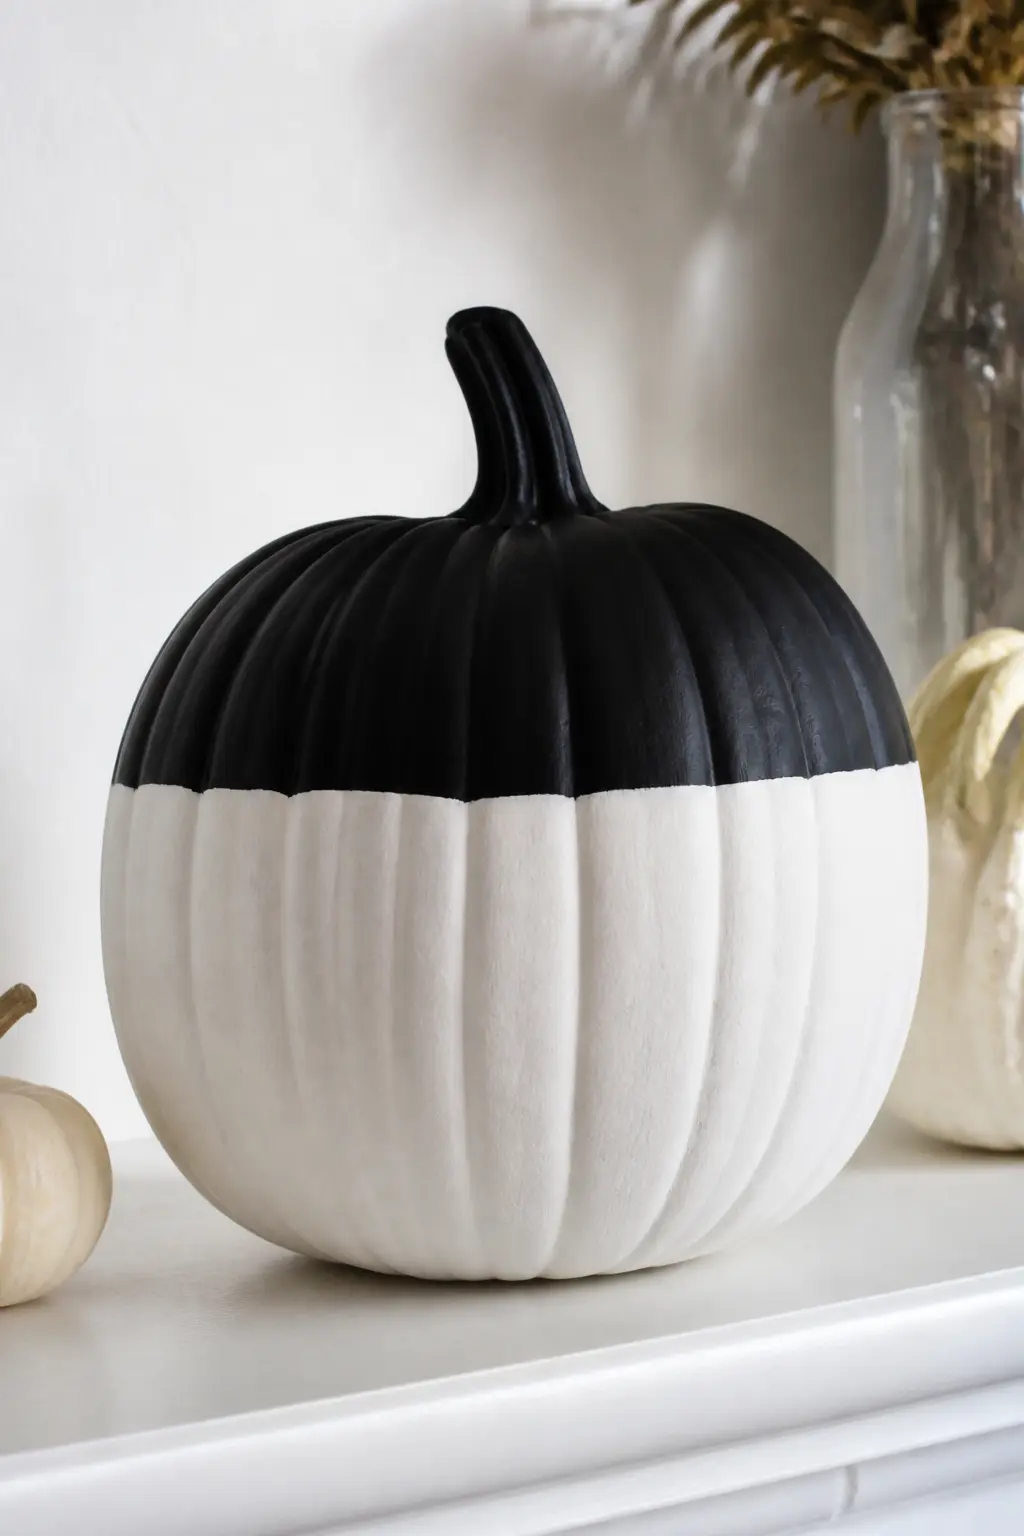
White Body with the Top Third Black
Base coat in white. Tape a horizontal line roughly one-third of the way down from the stem and paint everything above it, including the stem, in matte black. The natural cap of the pumpkin becomes a sharp, graphic lid.
This design borrows from Scandinavian ceramics, where a dark glaze dips to a clean line. It is one of the more sophisticated approaches and one of the fastest: one tape line, one colour, and the pumpkin reads finished. Choose a flat-top pumpkin variety for the cleanest lid effect.
🛍 Shopping guide
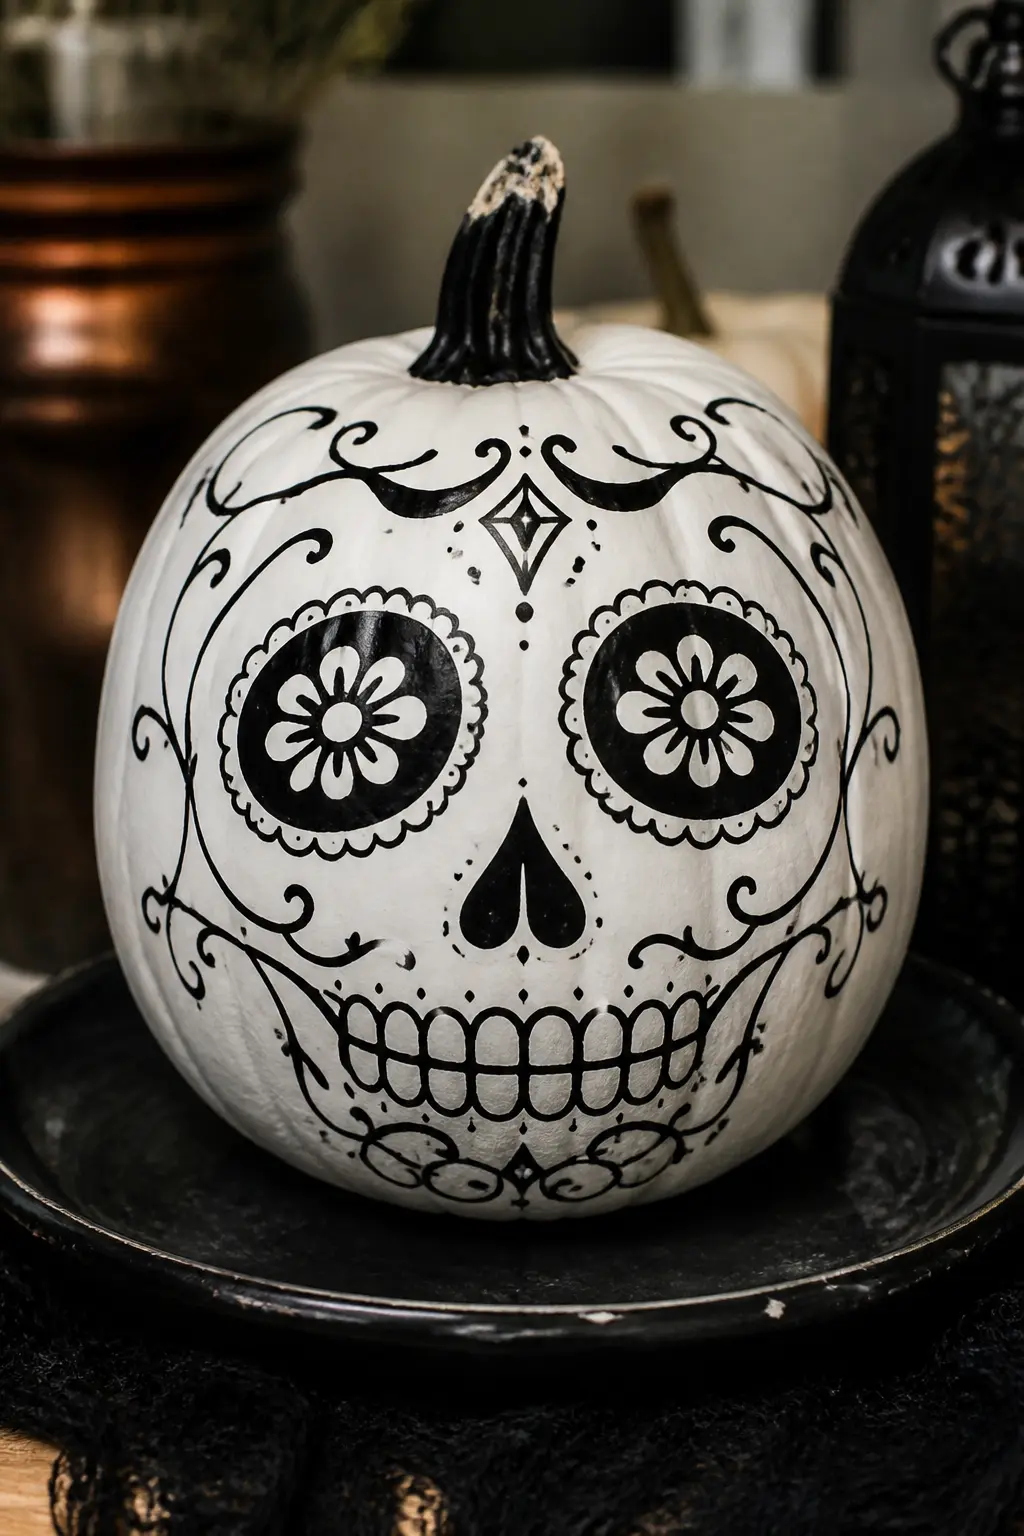
A Sugar Skull Face in Black Outline on White
Base coat in white. Use a fine black paint pen to draw the iconic sugar skull face: oval eye sockets filled with a flower or starburst motif, a stitched nose, and decorative teeth along the lower half. Keep everything in outline only, with no fill colour beyond black and white.
Without orange or pink or red, this reads as graphic pattern rather than costume prop. It is the only entry in this list with a face, and it earns a spot in a neutral home because the graphic restraint keeps it closer to Day of the Dead art than to a Halloween accessory.
Texture
Texture pumpkins are the ones guests touch before they think. Matte versus gloss finish creates visual contrast without any pattern at all. Pressed clay dots add actual physical relief. Both approaches read as art-object rather than craft project, which suits a neutral home perfectly.
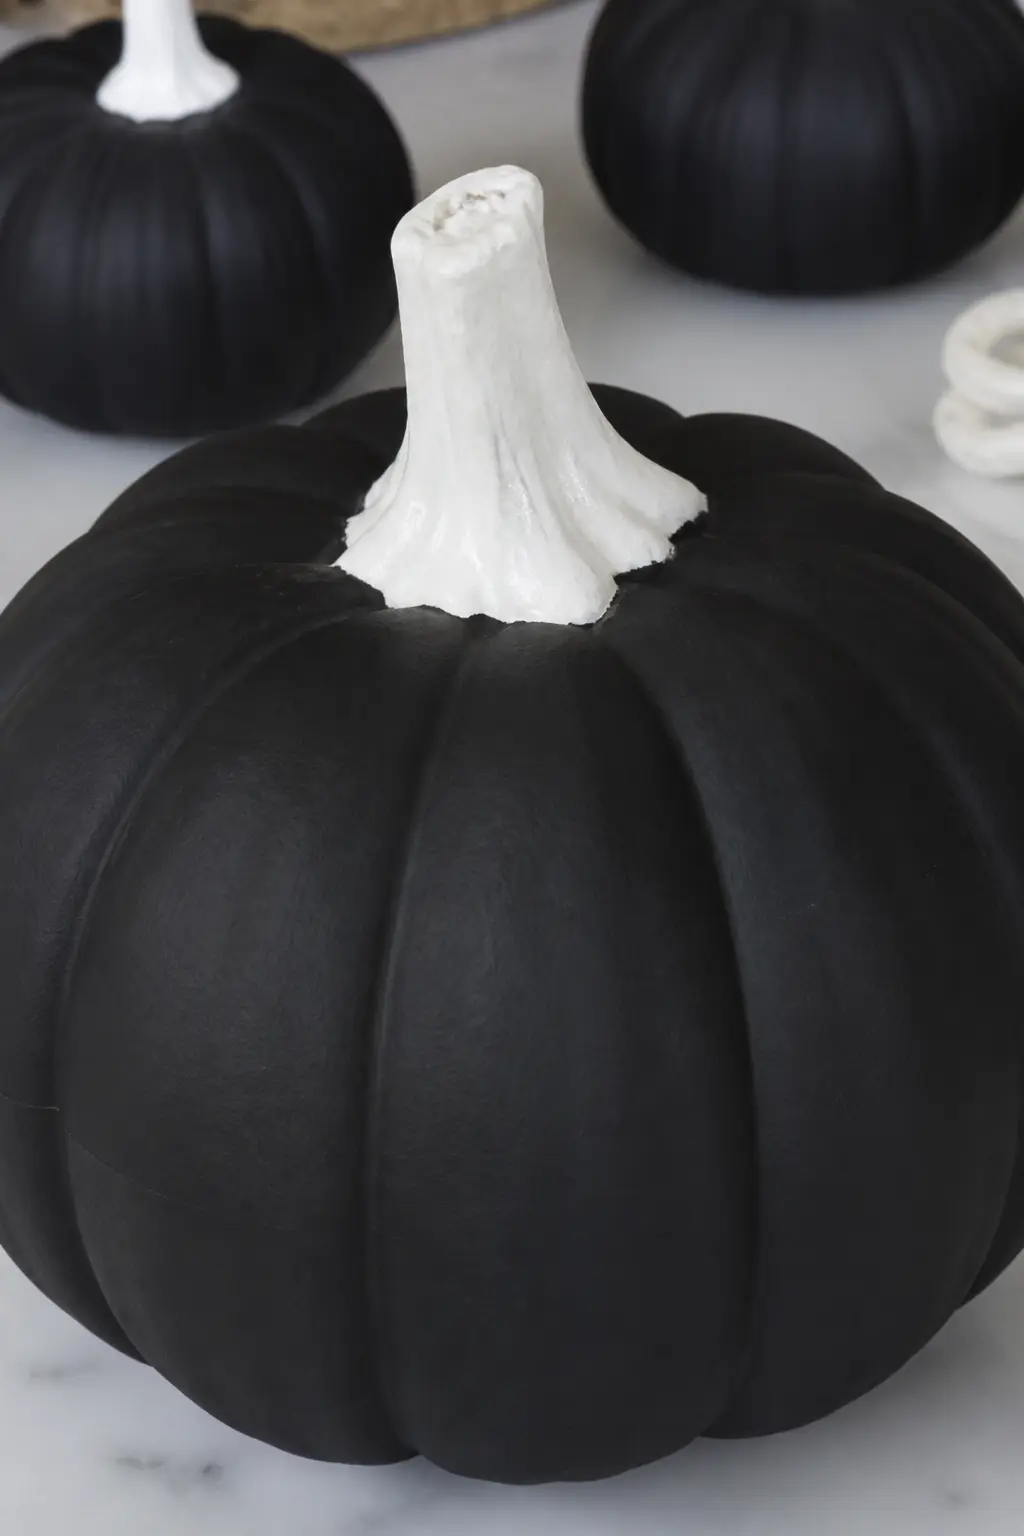
Matte Black with a Gloss White Stem
Paint the entire pumpkin body in two coats of matte black. Then brush the stem in gloss white paint, letting the shine contrast against the flat body below it. No pattern, no lines: the finish contrast does the entire design job.
This is the fastest pumpkin on the list and arguably the most sophisticated. It looks expensive because matte and gloss together read as considered. Ceramics and lighting fixtures use the same trick. The pumpkin form itself becomes the shape, and the finish tells you where to look.
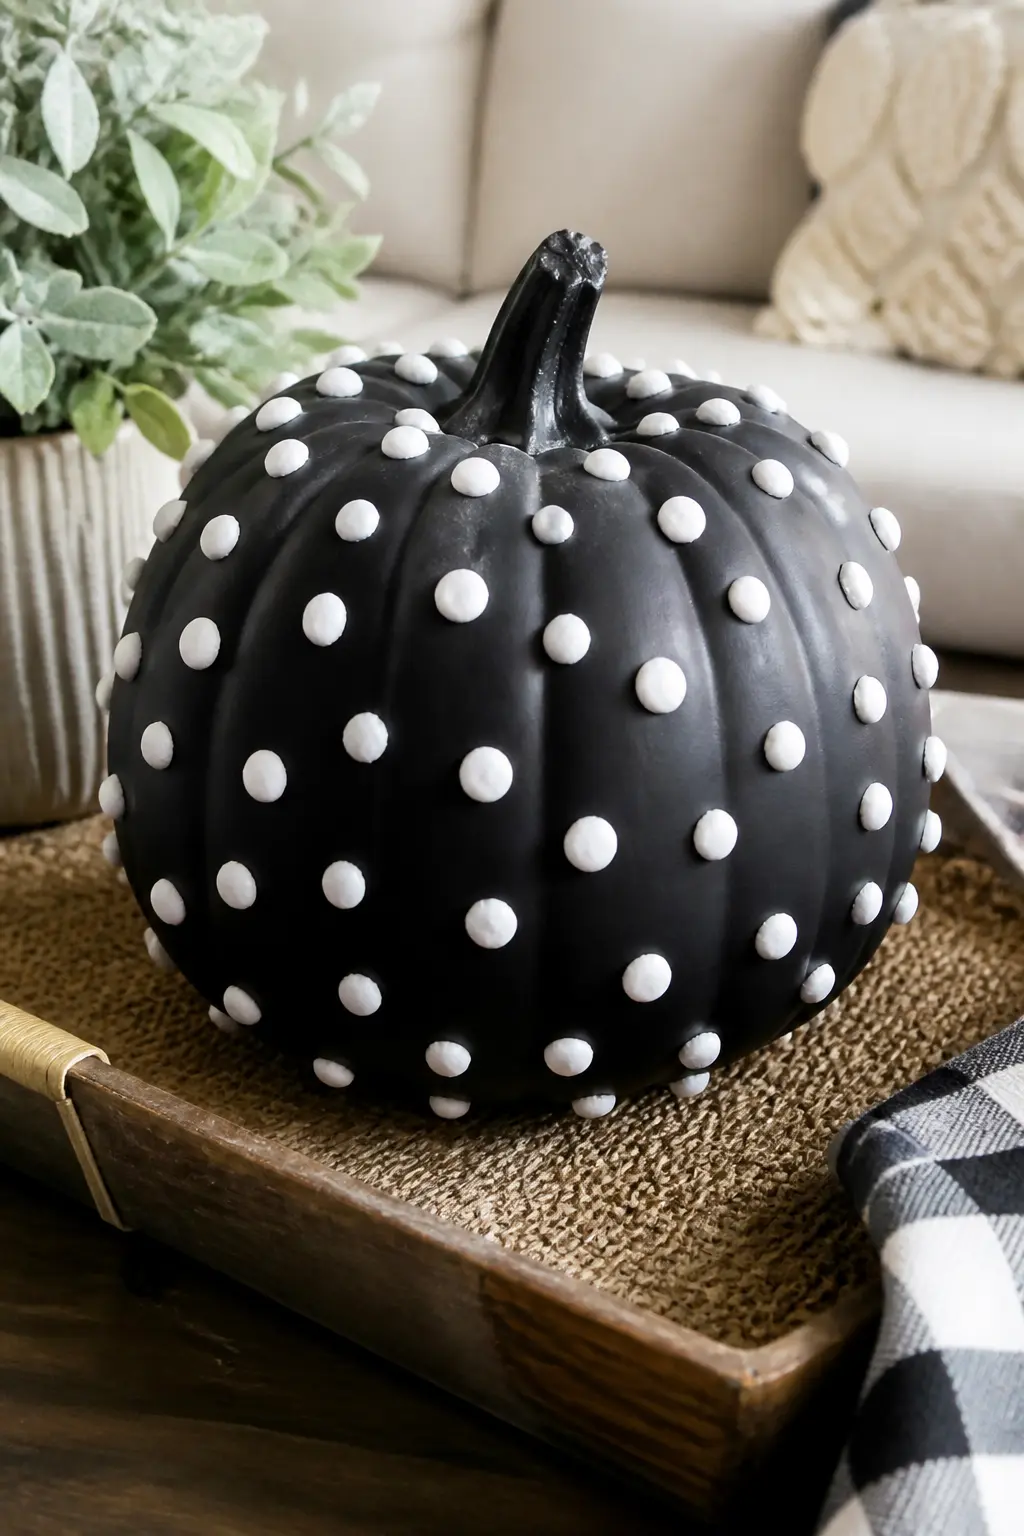
White Clay Dots Pressed onto a Black Pumpkin
Base coat in matte black. Roll small balls of white air-dry clay between your palms, each roughly the size of a pea, and press them evenly across the surface of the pumpkin. They will flatten slightly on contact and adhere without glue while still soft. Space them roughly two centimetres apart.
Once dry, the clay dots are permanent and add physical relief to the surface. This pumpkin is genuinely textural: guests will touch it. It suits a coffee table or an entry tray where people pass close enough to notice the surface rather than just the silhouette.
Sets and Details
A single painted pumpkin is a statement. A set is a collection, and it has completely different visual weight. Three sizes in the same pattern look like a designed range. One patterned pumpkin among plain white ones makes the pattern pop harder than if every pumpkin competed.
Details, the bow and the lace, are finishes rather than patterns. They suit someone who wants the effect without the painting, or wants to add a layer on top of a plain white pumpkin already in the house.
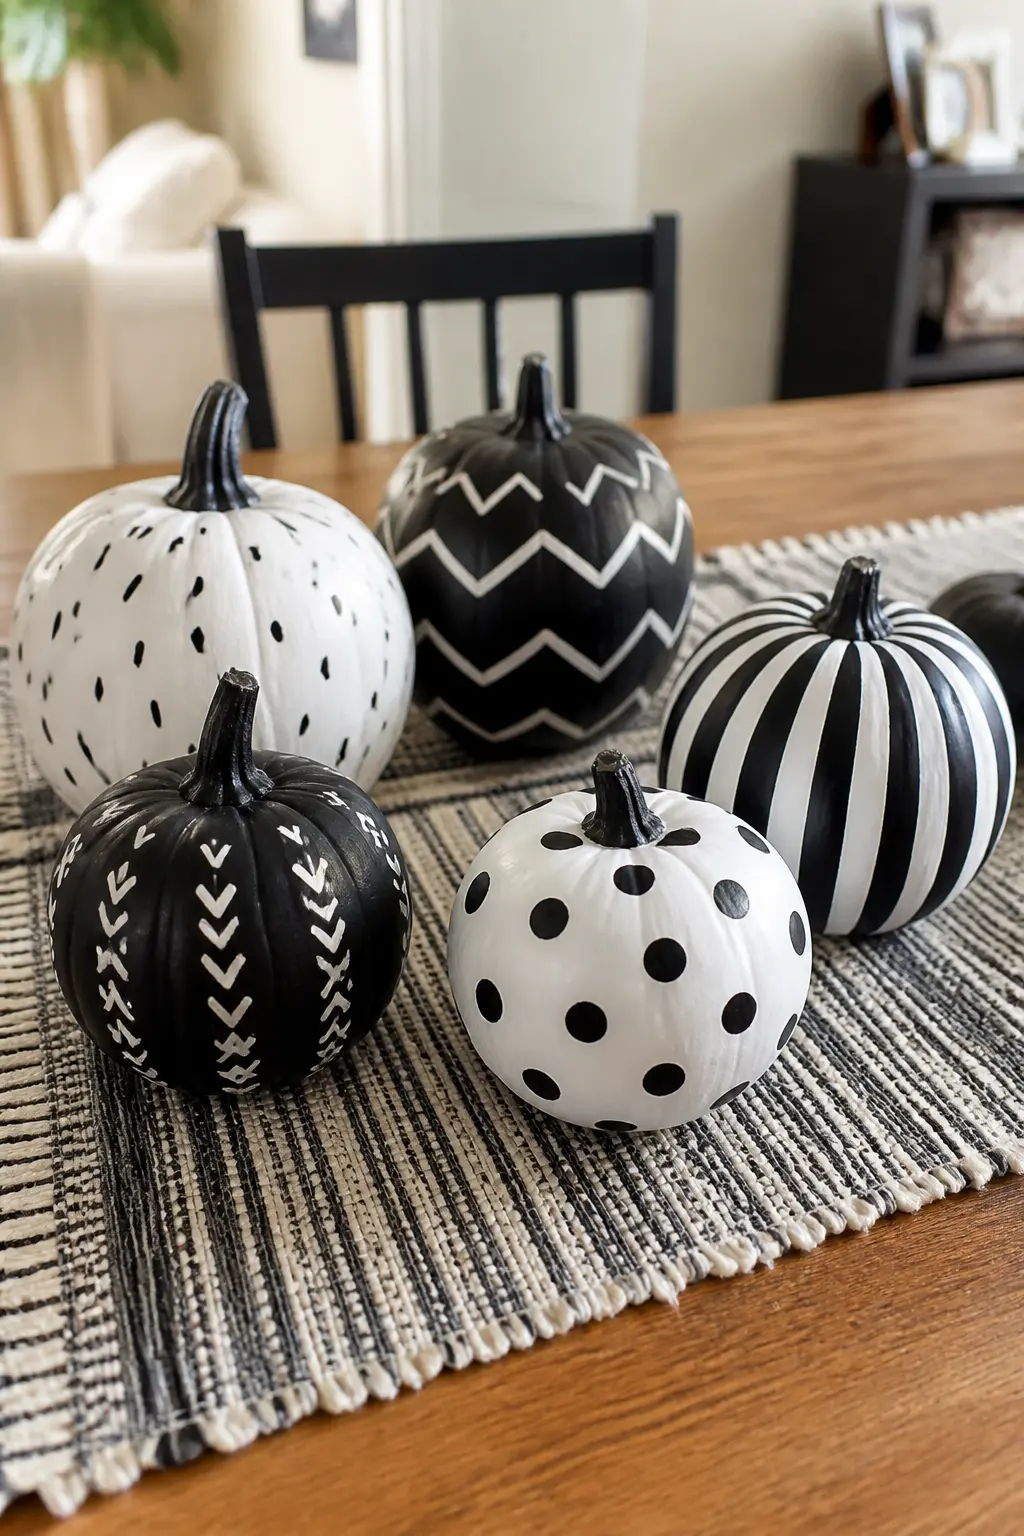
A Group Where Each Pumpkin Has a Different Pattern
Gather five to seven pumpkins in varying sizes and paint each one with a different pattern from this list: dots on one, stripes on another, checkerboard on a third. Limit the palette strictly to black and white on every pumpkin. The colour constraint is what holds the group together despite the variety of patterns.
Arrange them in an odd number, tallest at the back or one end, smallest at the front or centre. A group like this becomes the centrepiece of a hallway or dining table and replaces every other piece of seasonal decor you might otherwise need.
🛍 Shopping guide
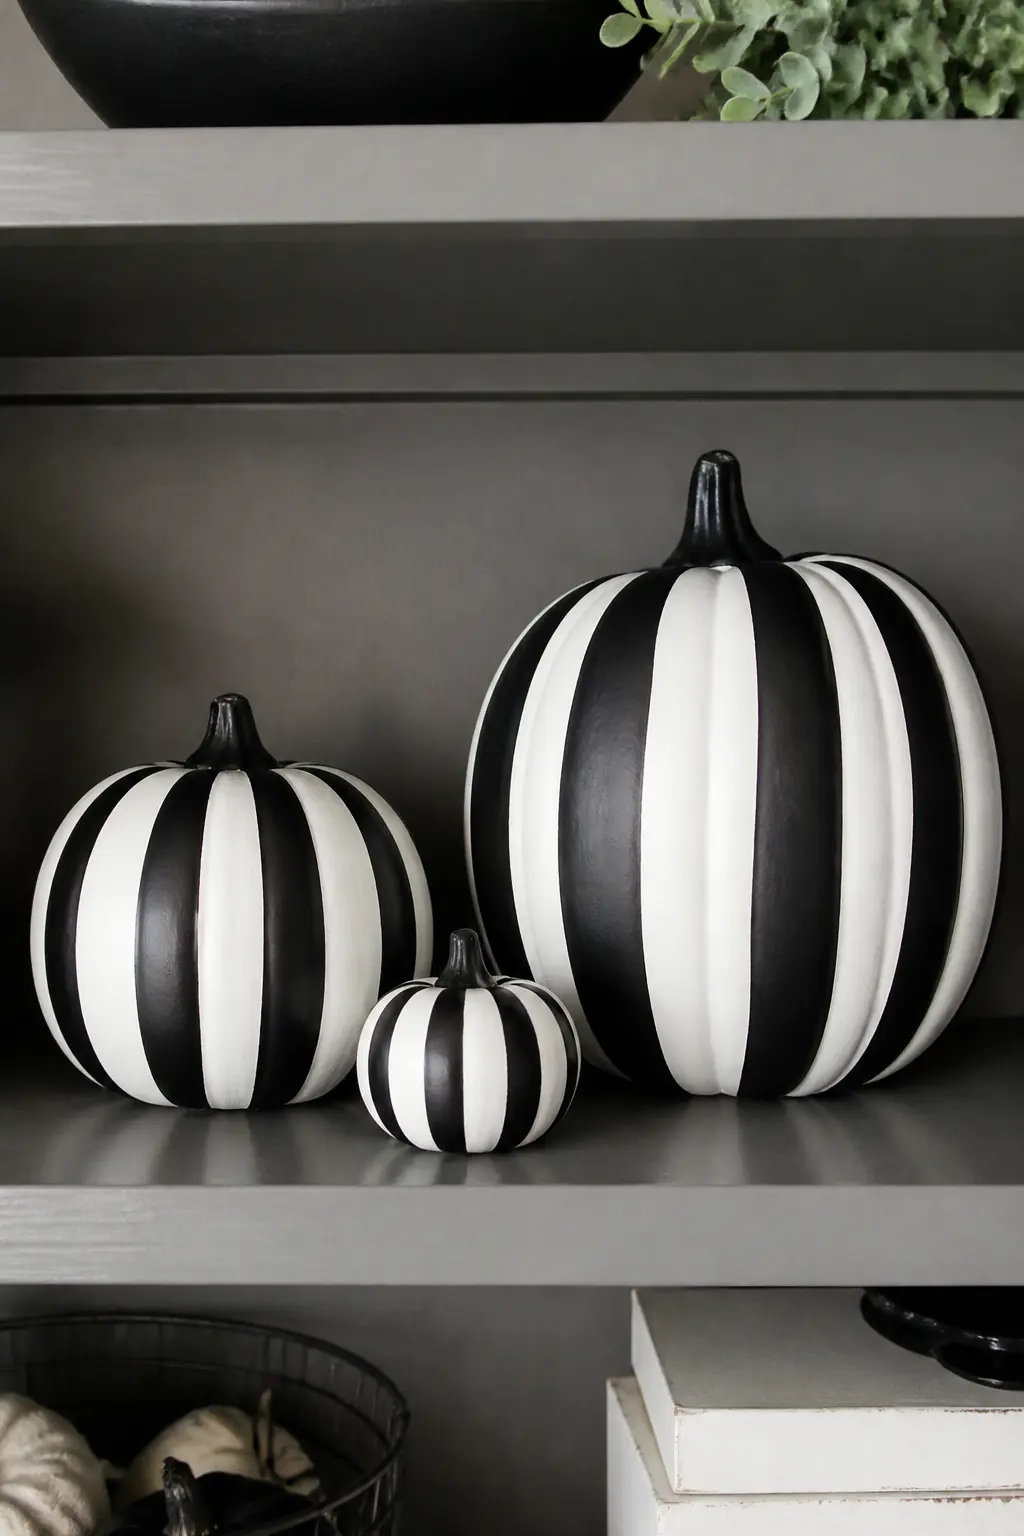
Three Sizes All in the Same Pattern
Choose one pattern, stripes, polka dots or checkerboard, and paint it onto three pumpkins in small, medium and large. Keep the scale of the pattern consistent across all three, which means the large pumpkin will show more repeats than the small one.
Line them up by size on a shelf or arrange them in a loose triangle. The cohesion of one repeated pattern across three sizes reads like a designed product range. This is the set for someone who wants to buy three pumpkins once and not think about it again until next year.
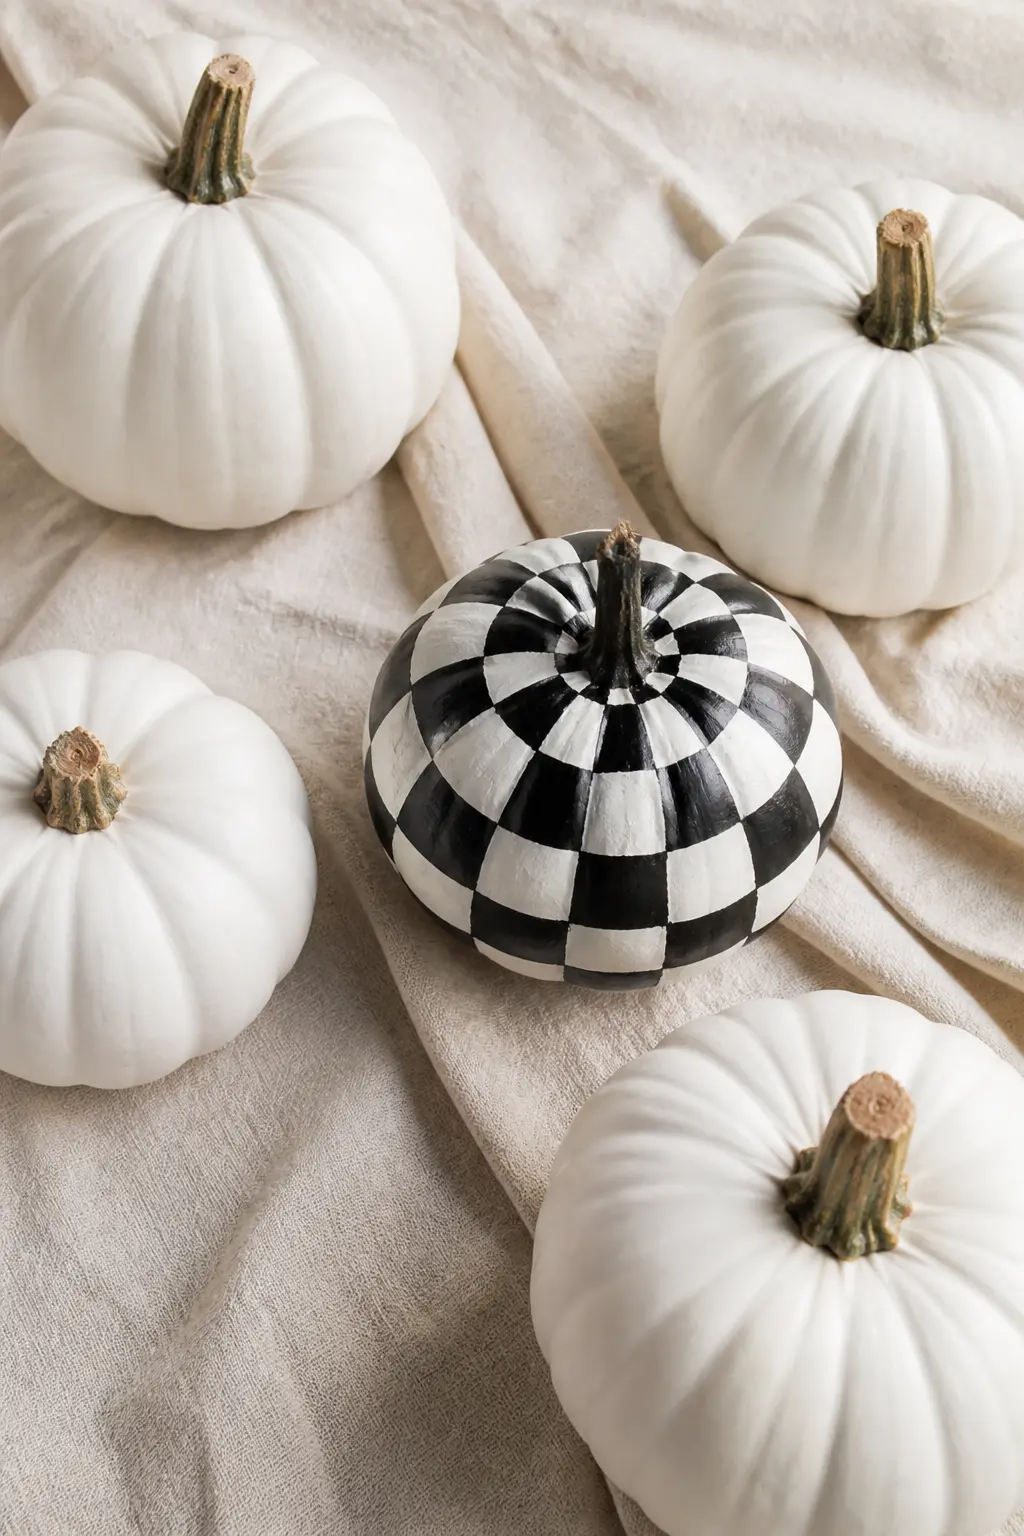
One Patterned Among Plain White Ones
Buy five plain white pumpkins and paint just one of them, whichever pattern you choose. Place the single patterned pumpkin slightly off-centre in the group. The plain pumpkins do not compete: they frame the patterned one and make its pattern read harder than it would among a group of competing designs.
This is also the approach for someone who runs out of time or patience. One good pumpkin in a group of plain ones always looks deliberate. It is the decor equivalent of one patterned cushion on a plain sofa: a single accent point that anchors the whole arrangement.
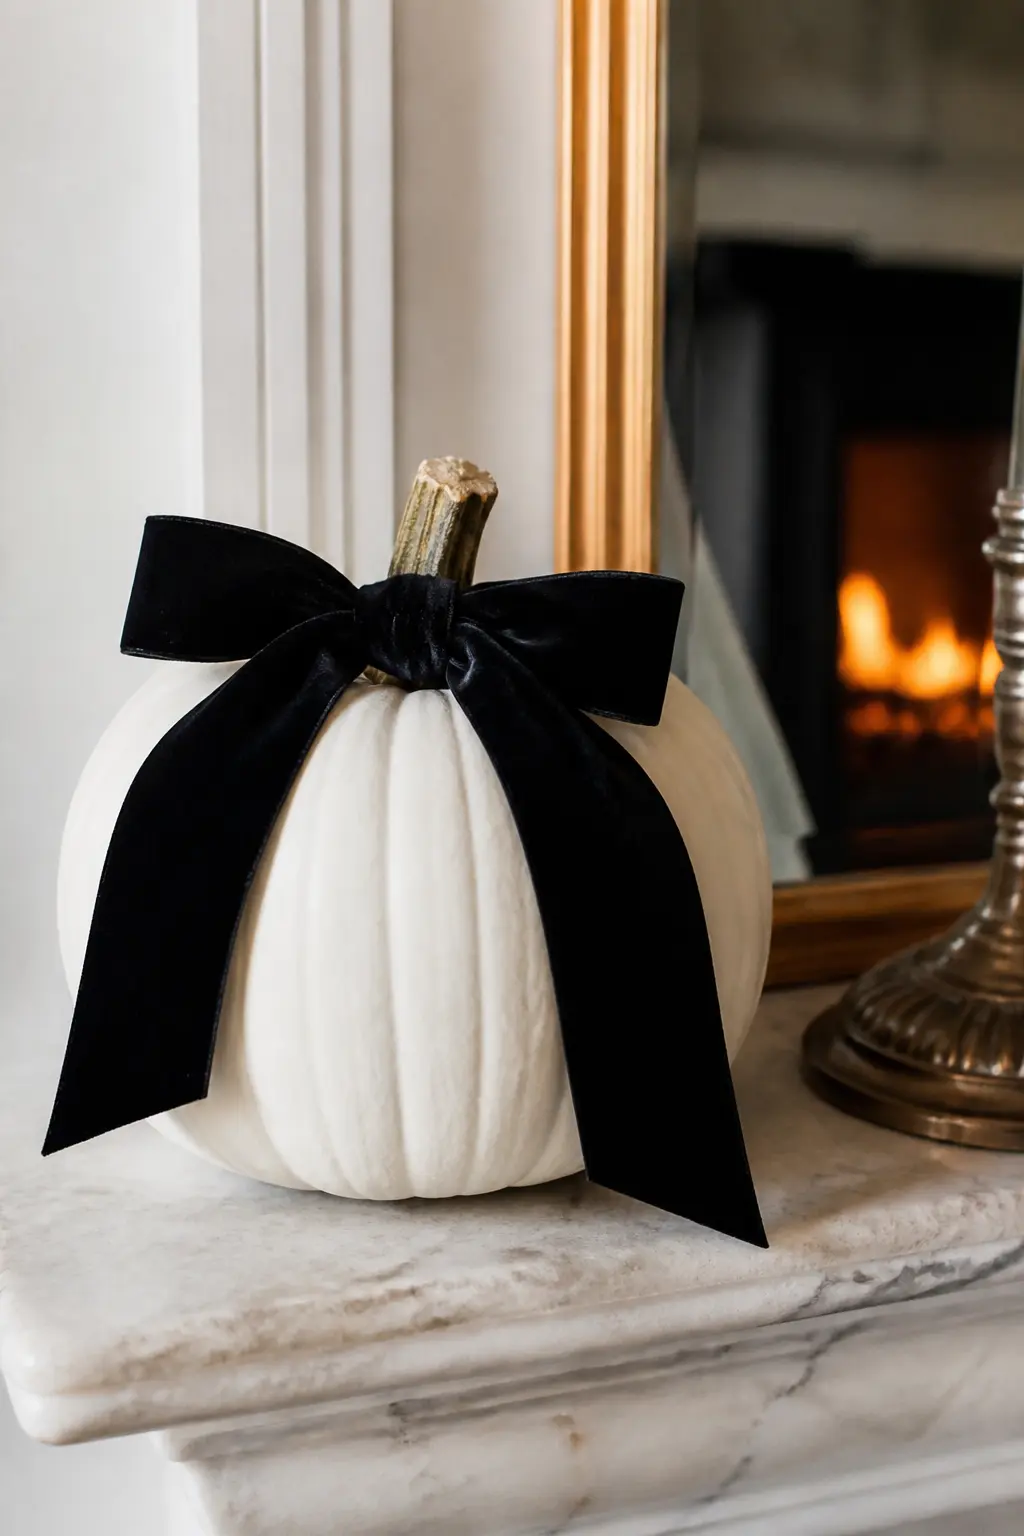
A Black Bow at the Stem of a White Pumpkin
Take a plain white pumpkin, painted or store-bought, and tie a wide black grosgrain or velvet ribbon into a bow at the base of the stem. Secure it with a dot of hot glue if needed. No painting required at all.
The bow changes the read of a plain pumpkin from farmhouse to formal. It suits a mantelpiece or a foyer table where other details are already present. The ribbon can be removed and reused after the season, which makes this the most reversible option on the list.
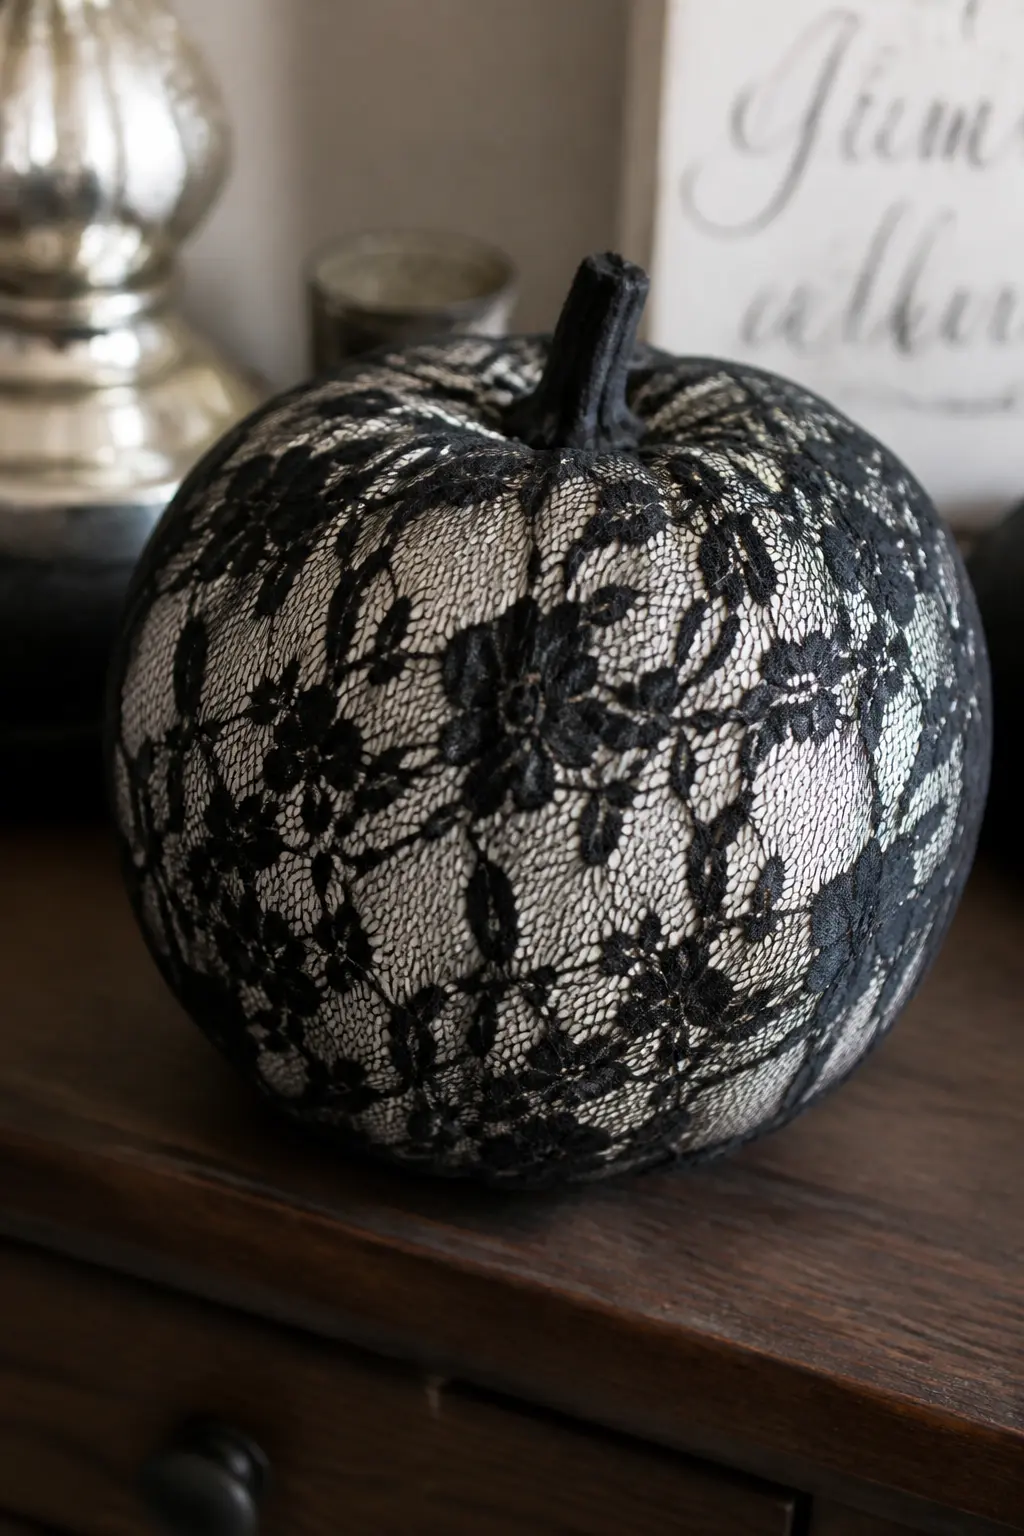
Black Lace Glued over a White Pumpkin
Cut a piece of black lace fabric large enough to drape over the top and sides of a white pumpkin, leaving the base exposed. Secure it with a thin line of craft glue or a few dots of hot glue at the back where the join will not show. The lace lies against the white surface and reads as a delicate pattern without any painting.
The effect is intricate and slightly gothic, closer to a French boudoir than a Halloween party. It suits a bedroom shelf or a bedside table where other fabrics and textures already appear. Use a lace with a tight repeat for a more pattern-like result and a loose repeat for something more veil-like.
🛍 Shopping guide
Frequently Asked Questions
What paint works best on a real pumpkin for a black and white painted pumpkin?
Multi-surface acrylic craft paint or chalk paint both adhere well to a real pumpkin rind without a primer. Apply a base coat, let it cure for several hours, then add your pattern. Seal with a matte or satin spray sealant to extend the life of the design. Oil-based paint pens work well for fine line detail on top of a cured acrylic base coat.
How do you keep painted lines sharp on a curved pumpkin surface?
Press painter’s tape firmly at every millimetre, especially along the curves of the ridges. Pull the tape while the paint is still slightly tacky rather than fully dry. Touch up any bleeds immediately with a fine brush and the base coat colour. Using a lower-tack tape on a cured base coat also helps.
Will a black and white painted pumpkin work as autumn decor past Halloween?
Yes, and that is the main advantage of this palette. Without orange or purple, none of these designs read as explicitly Halloween. Stripes, grids, botanical line work and block designs all work from early autumn through to late November in a neutral or monochrome home.
Can you paint a foam or artificial pumpkin instead of a real one?
Foam craft pumpkins take acrylic paint extremely well and give a smoother surface for fine line work. The surface is less porous than real rind, so one base coat is usually enough. Artificial pumpkins are also reusable from year to year, which makes the effort worthwhile for more detailed designs like the botanical drawing or the sugar skull.
How do you photograph a painted pumpkin to show the pattern clearly?
Shoot in natural light from the side rather than directly above or in front. A side-lit shot creates shadow that follows the ridges and makes the painted surface texture visible. Place the pumpkin on a plain surface that contrasts with its base colour: white pumpkins on dark wood, black pumpkins on marble or linen. Keep the background out of focus by moving close to the pumpkin.
My front yard used to look fine — barely. Scraggly grass that always needed mowing, a flower b
29 white painted pumpkin ideas that add colour, motifs, lettering and texture to a plain white base.
26 fall felt garland ideas in warm terracotta, caramel and sage: quick to make, storage-friendly, an
Leave a Reply