

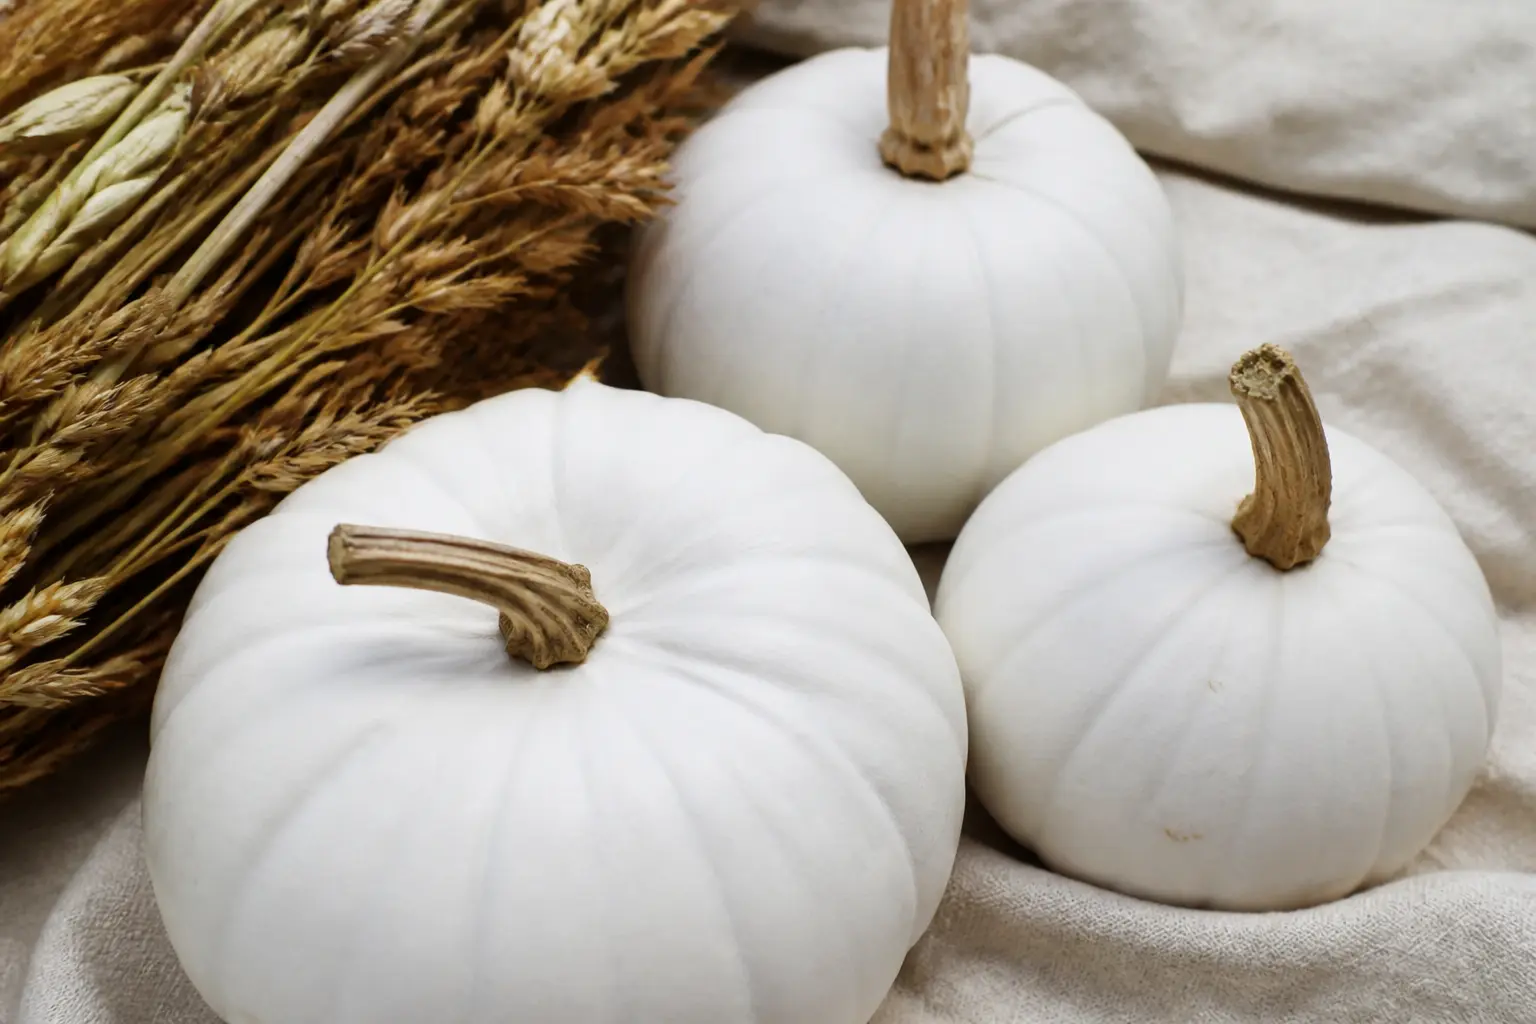
White is not a finished look. It is the best base coat you have ever worked with: it makes every colour sit brighter, every fine line read sharper, and every glued-on material look deliberate rather than desperate. A white pumpkin, real or faux, is already halfway to something good.
The 29 ideas below run the full range, from pale pink ghosts and lilac dots to high-contrast black stripes and gothic drips. Some take five minutes. Some take an afternoon. All of them earn a second look, which is the only thing that matters when the pumpkin is sitting on your porch or your mantel.
A few of the entries link naturally to broader autumn decorating, so if you want to see where else a white-and-black palette travels, 32 Fall Porch Decor Ideas That Hold Up Past the First Frost is worth a look. And if the pumpkin craft bug bites hard, 15 Pumpkin Crafts That Go Way Past a Basic Jack-o-Lantern has more to explore.
This post contains affiliate links. If you buy through them, I may earn a small commission at no extra cost to you.
Bold Black-on-White
Black on white is the sharpest combination in the palette, and it photographs beautifully. These five ideas work with paint, lace, glue and lettering, so pick the technique that matches the tools already in the house.
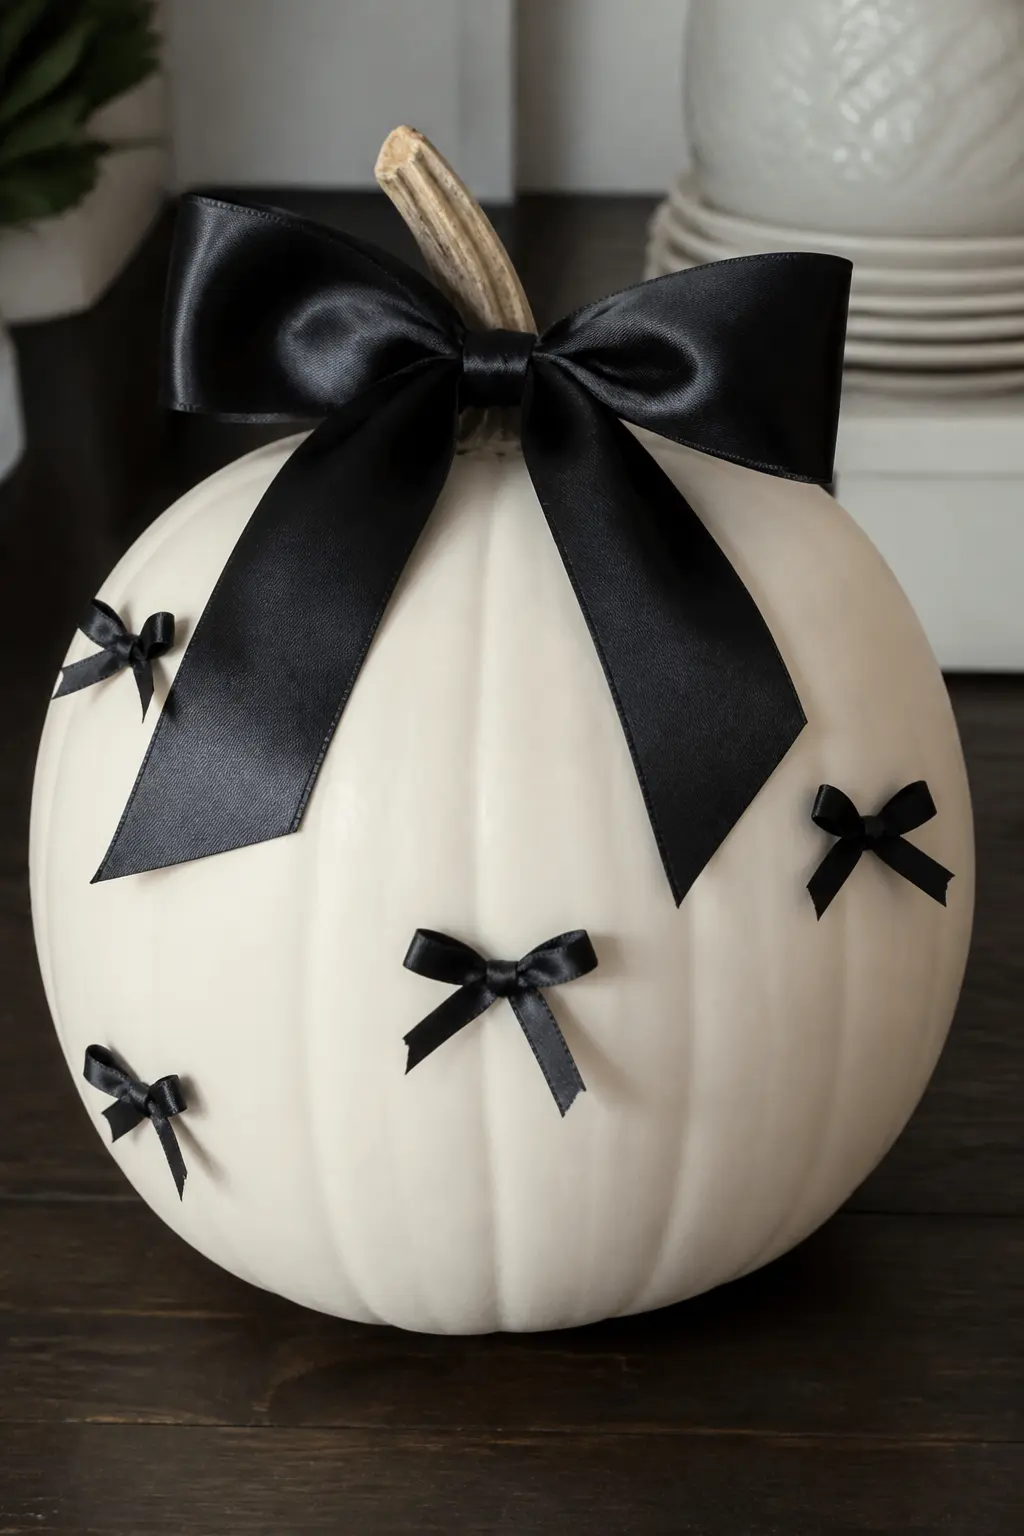
Black Satin Bow With Scattered Mini Bows
A large black satin bow wired around the stem is the centrepiece, and a handful of smaller pre-made bows glued at random over the body echo it without copying it exactly. The scale contrast between the oversized stem bow and the thumb-sized body bows is what makes the arrangement look styled rather than stuck on.
Use a low-temperature glue gun on the body bows. Satin scorches at high heat and puckers. Position three or four bows first before committing any of them, because the scatter needs to read as casual, not grid-like.
🛍 Shopping guide
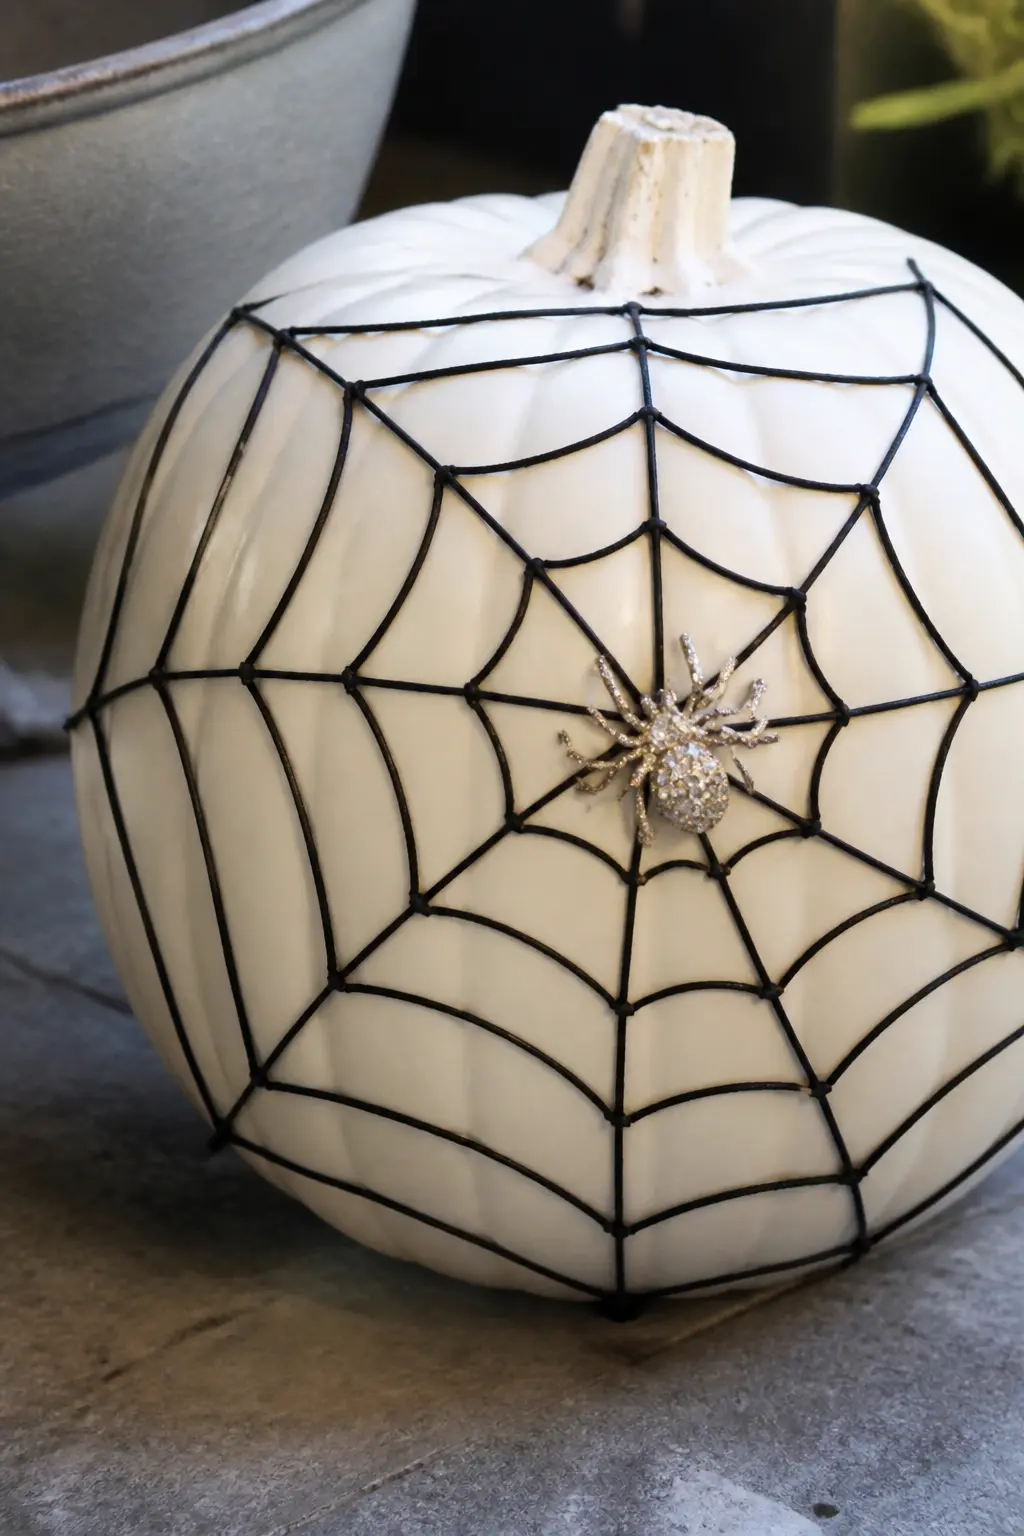
Black Spider Web With Rhinestone Spider
A spider web drawn with a fine black paint pen covers most of one side of the pumpkin, starting from a central point and fanning outward with curved connecting lines. At the centre sits a flat-back rhinestone spider charm, glued rather than painted, so it catches the light.
The trick is the contrast: the web is matte black, the spider glitters. Draw the web in pencil first so you can adjust the proportions before committing in paint pen. Wipe off any pencil that shows through with a barely damp cloth once the pen work is dry.
🛍 Shopping guide
Pearl Pin Lettering
Pearl-headed dressmaker pins pushed into a faux pumpkin spell out a word, a name or a short phrase. The letters sit proud of the surface and catch light from every angle. Sketch the letters lightly in pencil first, then follow the lines with pins spaced evenly, about a centimetre apart.
This only works on foam faux pumpkins, not on real ones and not on hard resin crafting pumpkins. Press each pin in at a slight inward angle so it grips and does not tilt under its own weight. The finished result looks like vintage millinery, not a craft project.

🛍 Shopping guide
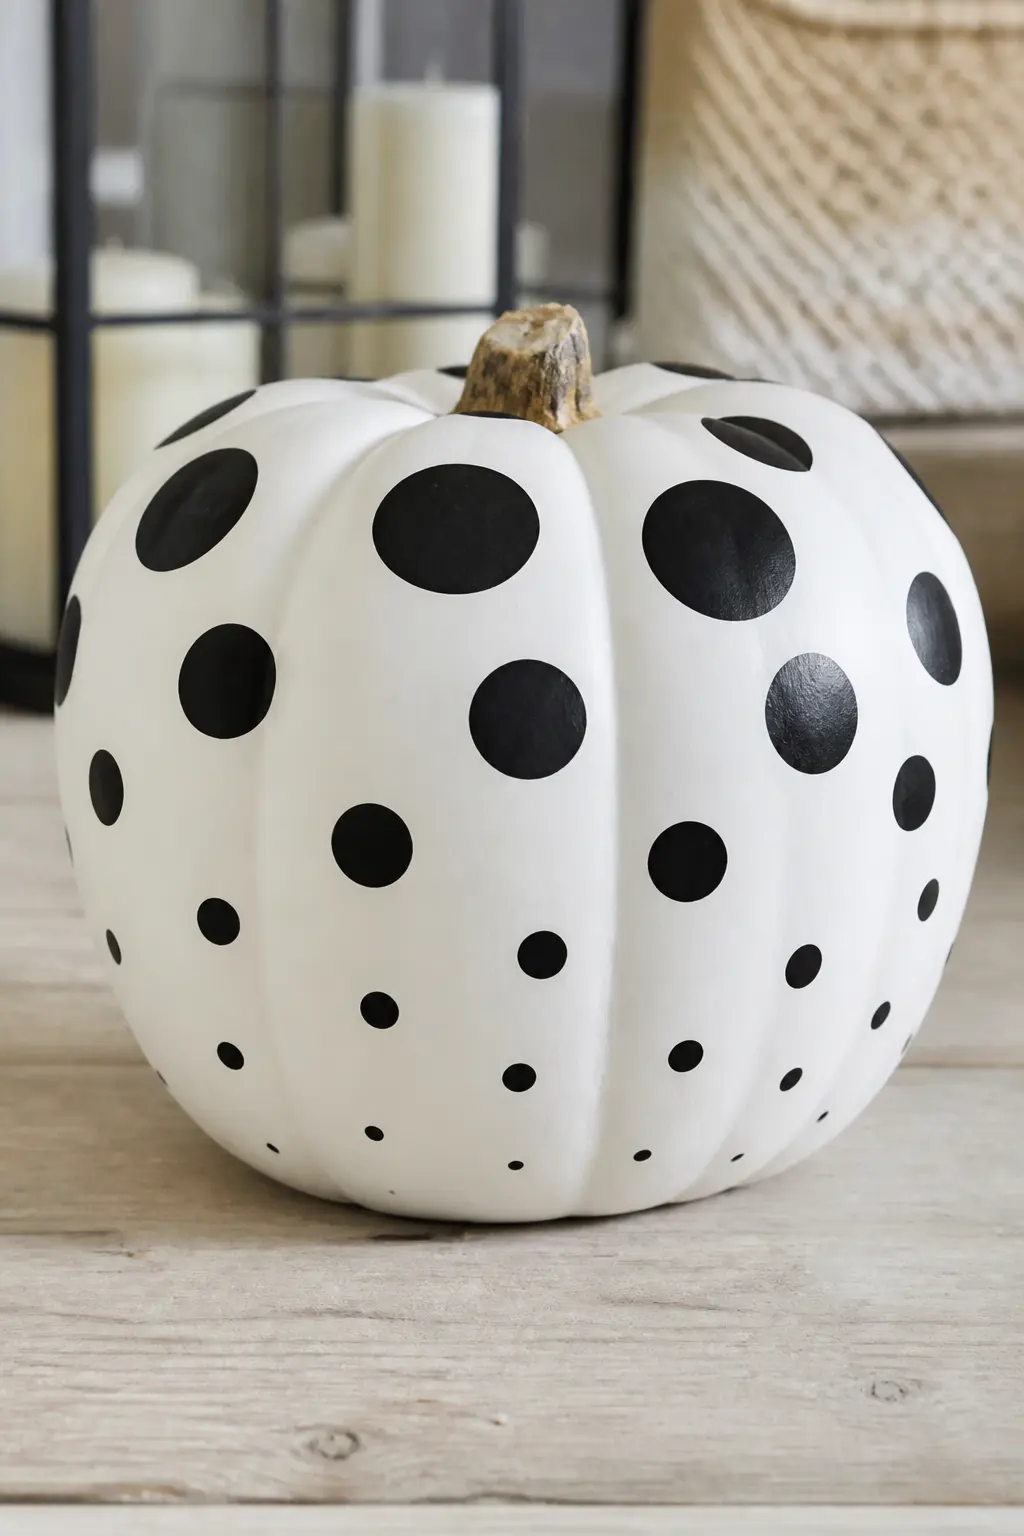
Black Polka Dots in Graduated Sizes
Polka dots in three graduating sizes, large near the top, medium in the middle band, small toward the base, give the pumpkin a graphic quality that looks designed rather than painted freehand. Use the back of a round brush, a pencil eraser and a toothpick for the three sizes so every dot is a clean circle.
Keep the spacing loose and slightly irregular. Perfect grid spacing reads as wallpaper. Loose spacing reads as art. Let each size dry before adding the next so the wet dots do not bleed into each other on a curved surface.
🛍 Shopping guide
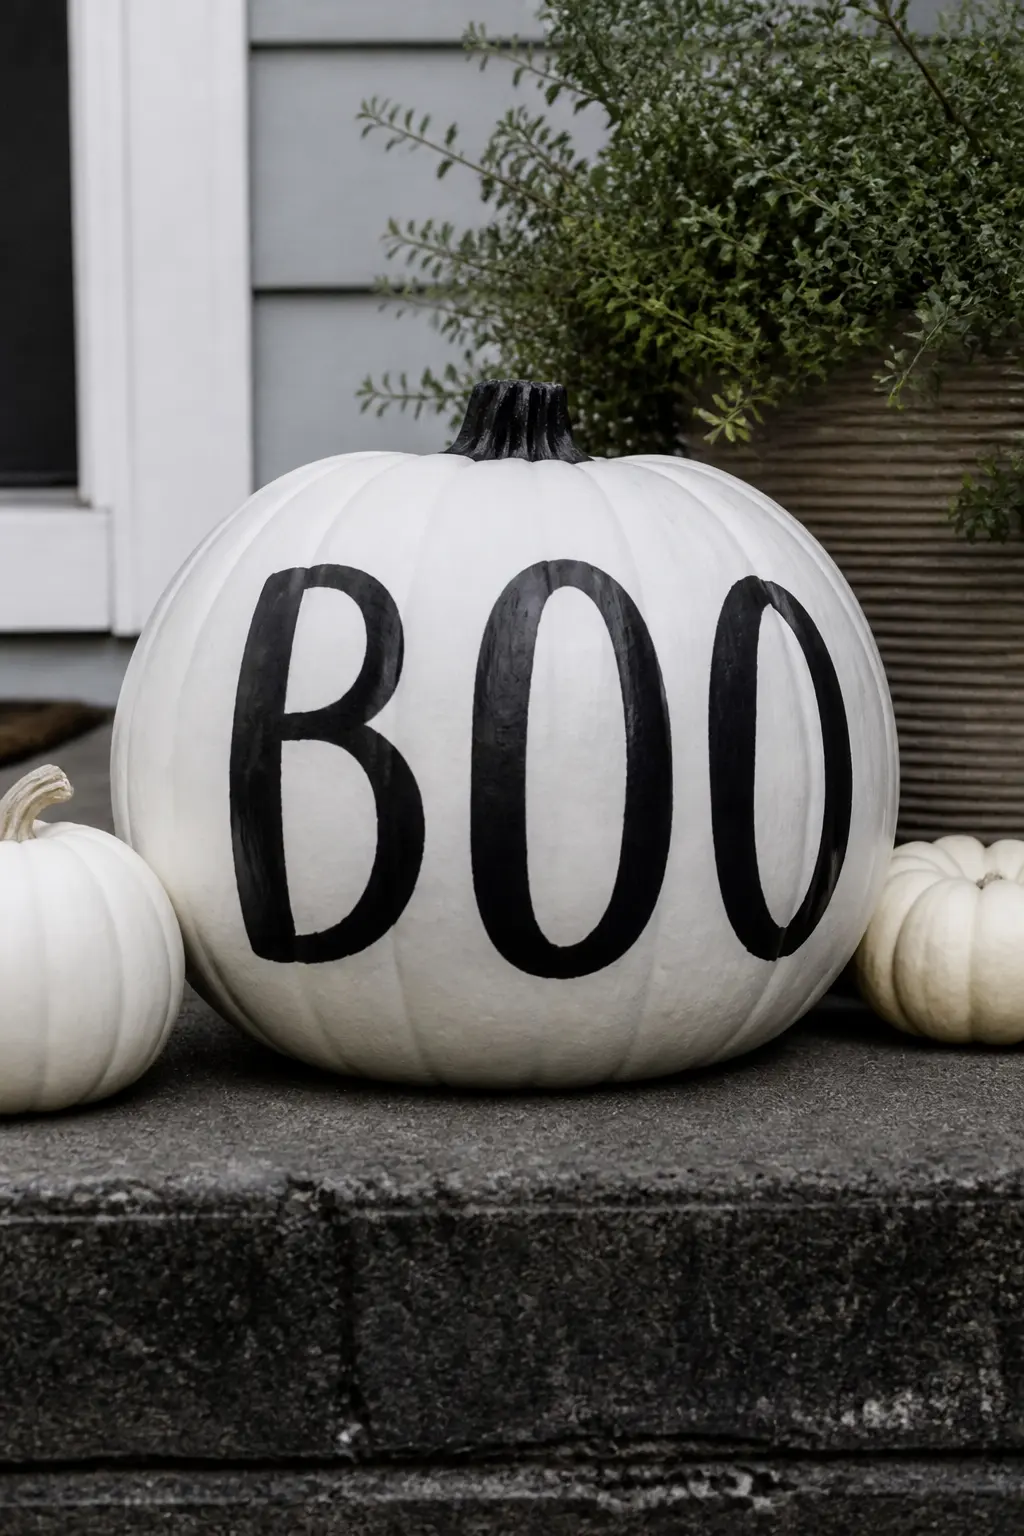
BOO Hand-Lettered in Black
Three large letters, B-O-O, hand-lettered in bold black across the widest part of the pumpkin. The impact is entirely in the scale: the letters should fill the space from roughly the first ridge to the last on the visible face. Use a broad-tip black paint marker for a confident, slightly brush-lettered look without needing calligraphy skills.
Sketch the letters in chalk pencil first and photograph them at arm’s length. What looks right up close often looks squeezed when you step back. Adjust spacing before you trace over in marker. A ghost-style wobbly baseline suits this better than a perfectly level row.
🛍 Shopping guide
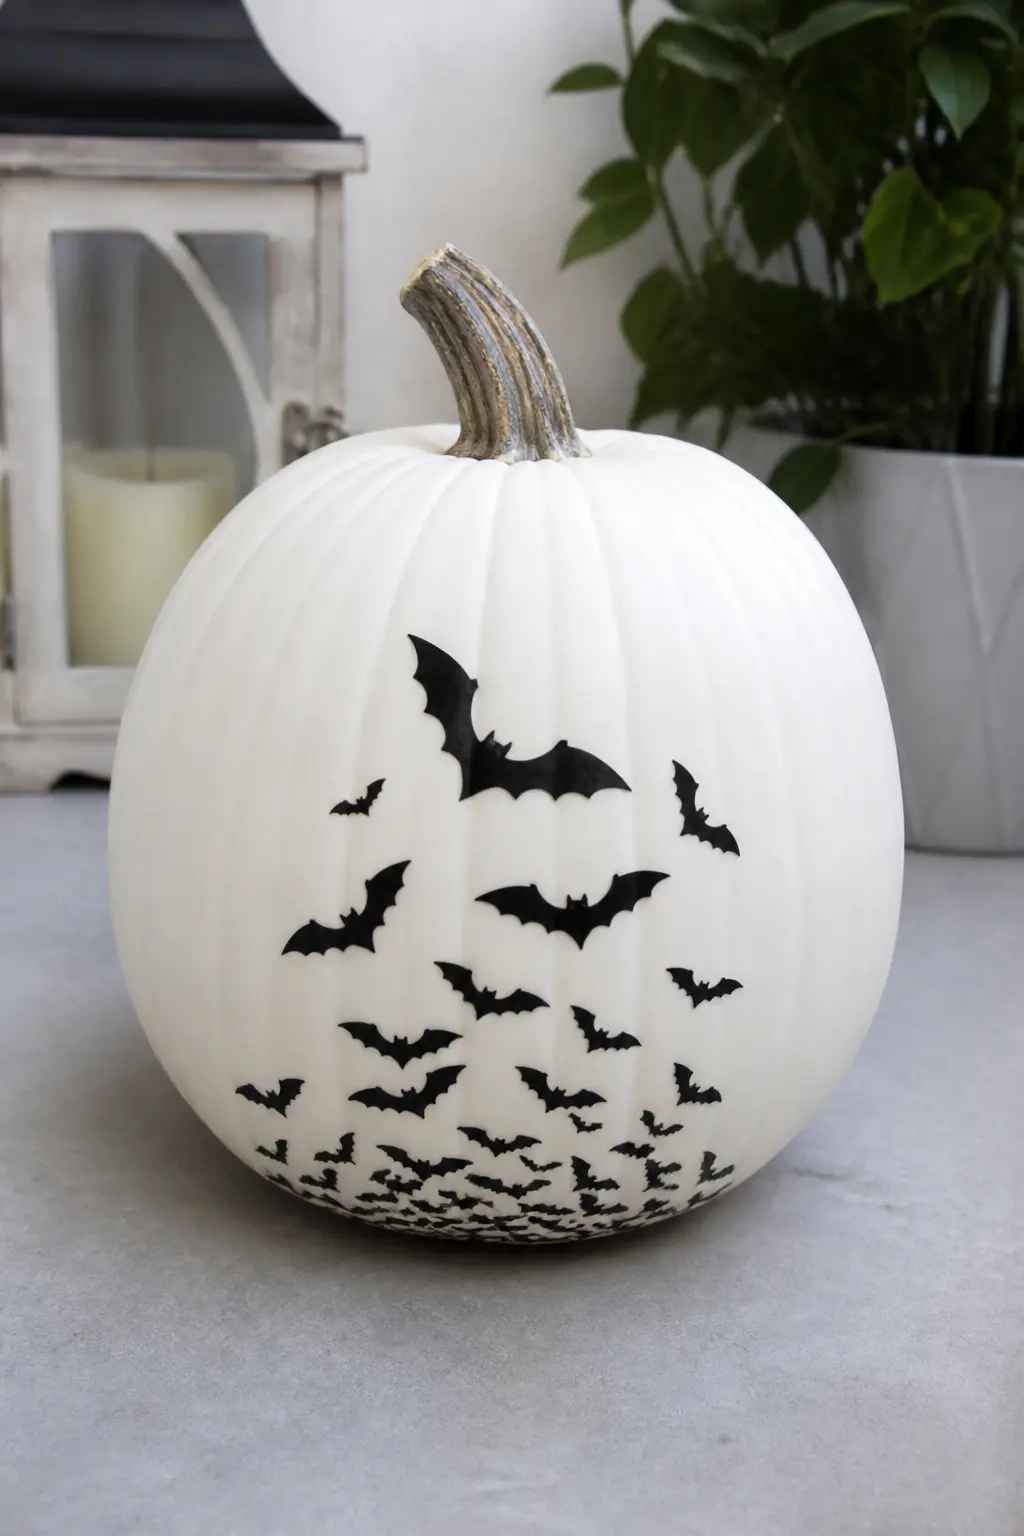
Swarm of Black Bats Climbing From the Base
Small black bat silhouettes painted in graduated sizes appear to swarm upward from the base of the pumpkin, the smallest near the bottom and the largest near the top, as though mid-flight. The motion implied by the size progression is what makes the design feel dynamic rather than static.
A bat stencil speeds this up considerably. Alternatively, cut bat shapes from black adhesive vinyl and stick them on: the edges stay crisper than hand-painted at this small scale, and vinyl peels cleanly from a sealed faux pumpkin if you change your mind. Painted or vinyl, the bats should never touch each other; keep a gap between each one so the swarm reads as movement.
🛍 Shopping guide
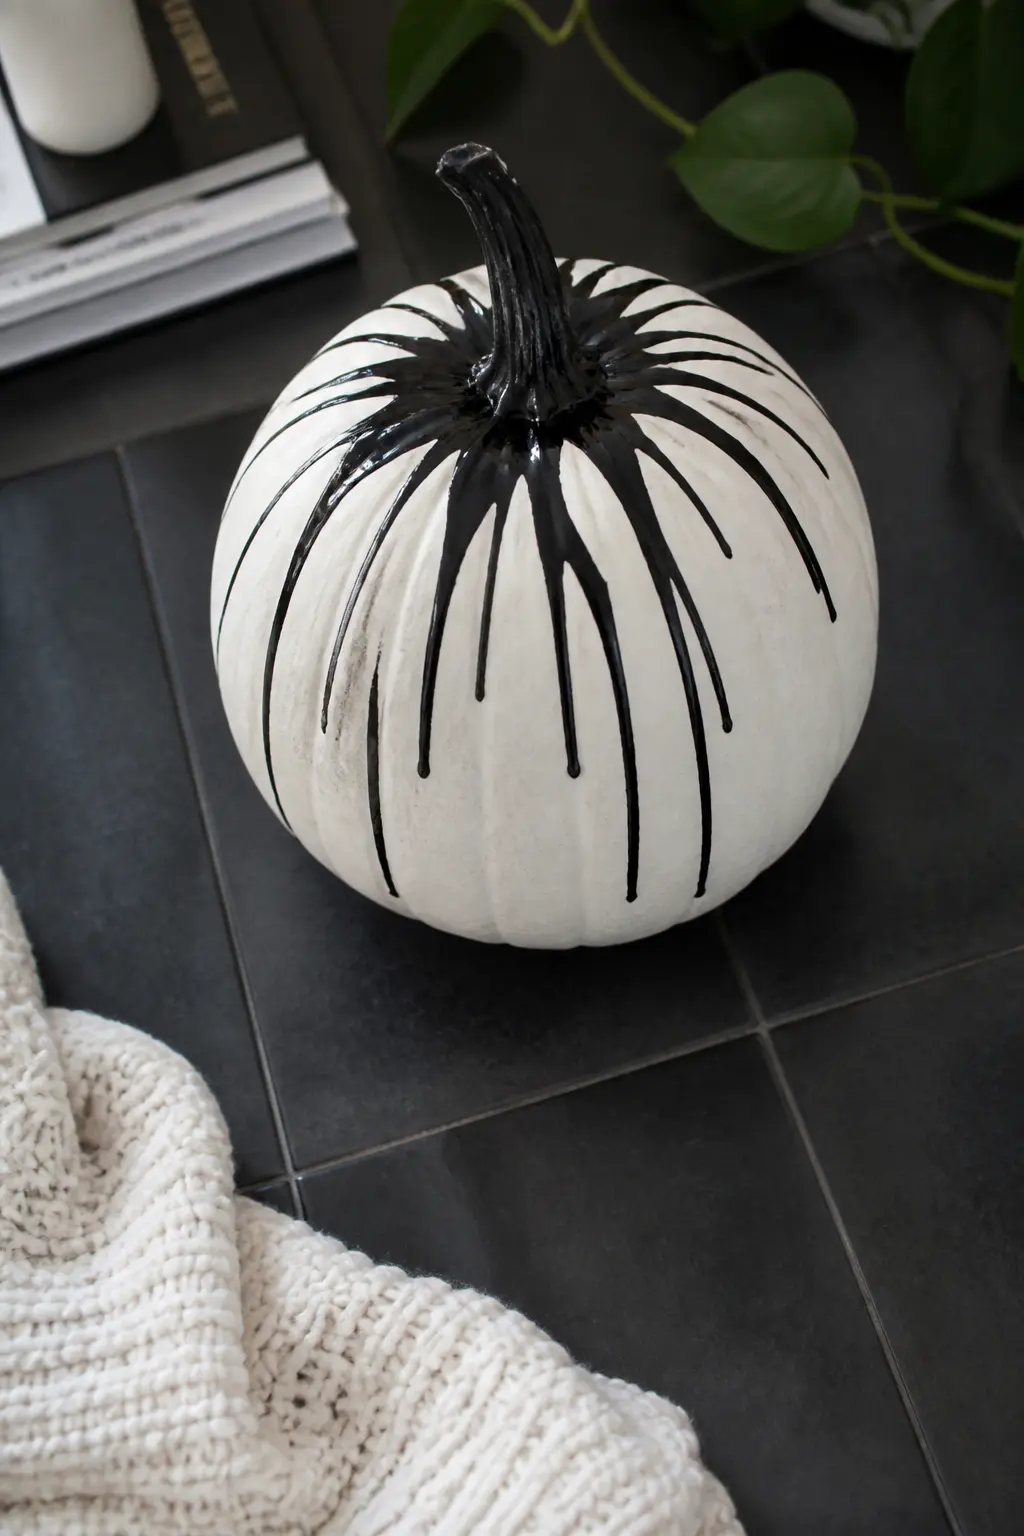
Black Drips From the Stem
Black paint runs in controlled drips downward from the stem, some short and some reaching halfway down the body, creating a graphic drippy effect that sits somewhere between haunted and editorial. The trick is controlling the drip length: thin the black paint with water, apply it around the rim of the crown in small pools, and tilt the pumpkin slowly to start the drips moving before they reach the right length and you set it flat again.
Practice the drip length on a piece of paper first so you know how fast the thinned paint travels. A thicker consistency makes shorter, fatter drips. A more watery consistency makes long, fine trails. This is one of those ideas where the imperfect version still works, because the drips are supposed to look uncontrolled.
🛍 Shopping guide
Gold and Glam
Gold lifts a white pumpkin from craft project to centrepiece. Whether you press on leaf flakes, glue rhinestones or pour a marbled top, the effect is rich enough to sit among candles and flowers without looking out of place.
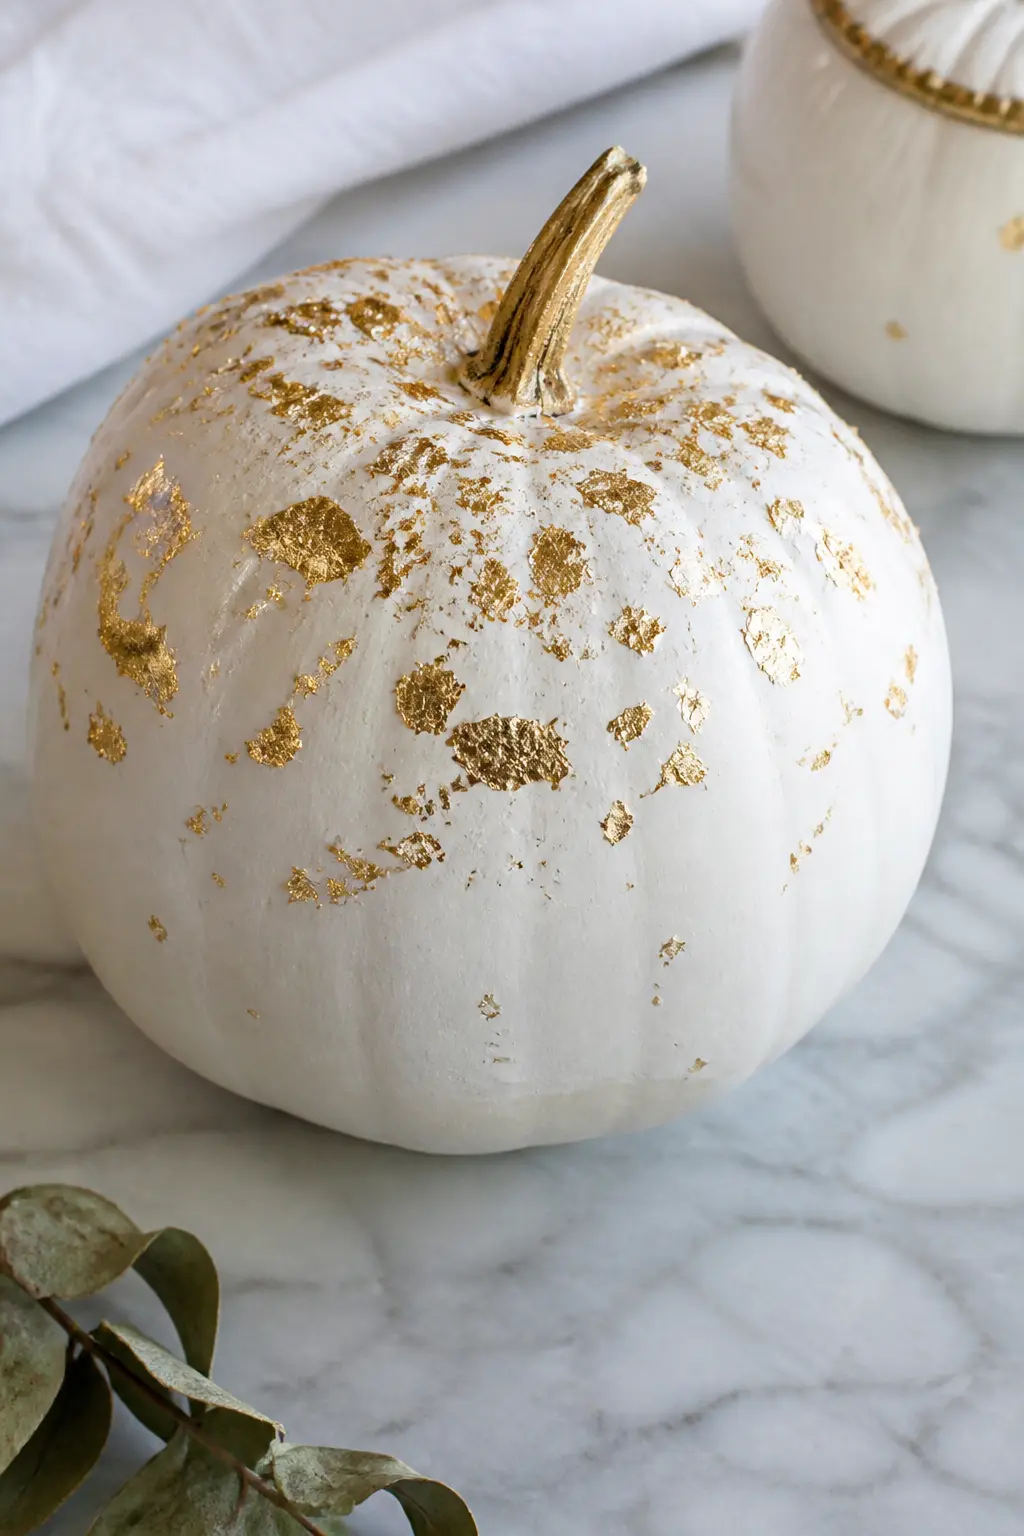
Gold Leaf Flake Scatter
Gold leaf flakes pressed onto a white pumpkin in a loose drift from the top down create something that looks genuinely expensive and takes about twenty minutes. Brush a thin coat of gilding size or craft glue over the area you want to gild, let it become tacky, then press the flakes on with a soft brush.
Do not aim for full coverage. Gaps and thin patches are part of the appeal, they read as deliberate texture rather than missed spots. A matte sealer over the top keeps the flakes fixed without killing the gleam.
🛍 Shopping guide
Rhinestone Curving Vine
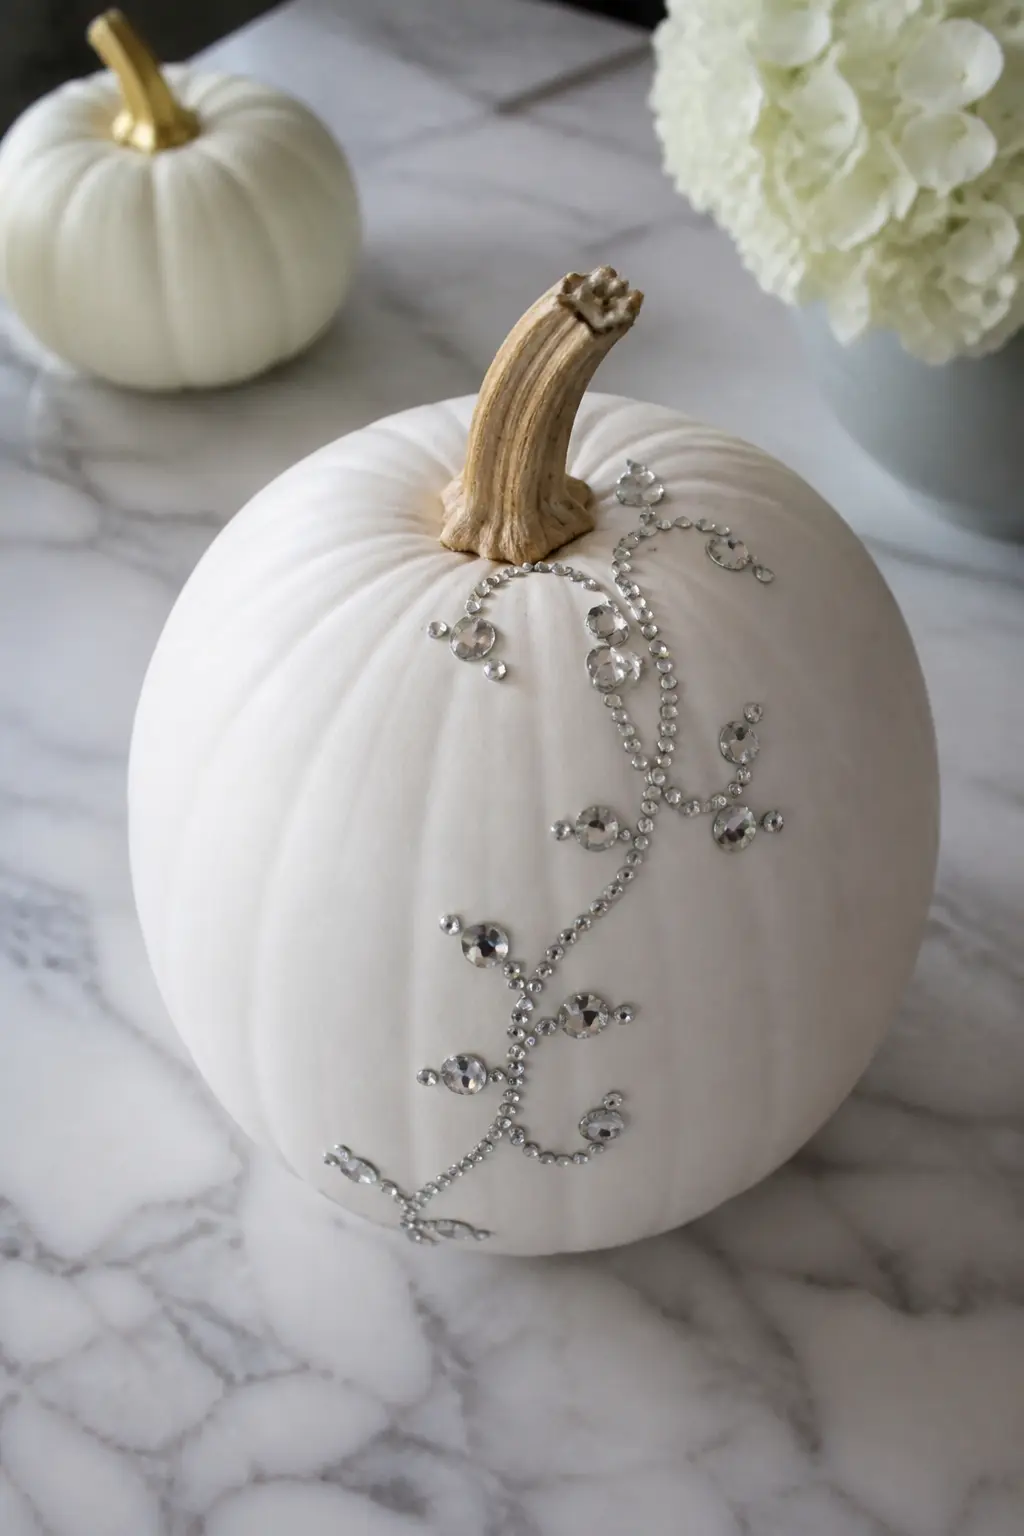
A vine of flat-back clear rhinestones curves from the stem down to the base of the pumpkin in a loose S-shape. Vary the stone sizes, larger at the stem and smallest at the tip, so the vine tapers naturally. A tweezers and a rhinestone picker tool make placement far easier than fingers.
Apply a small dot of jewel glue under each stone. Do not flood the surface. The rhinestones should sit flush, not float on a glue puddle. Work in sections of ten stones at a time so the glue does not dry before you place the next cluster.
🛍 Shopping guide
Blush and Gold Marbled Top
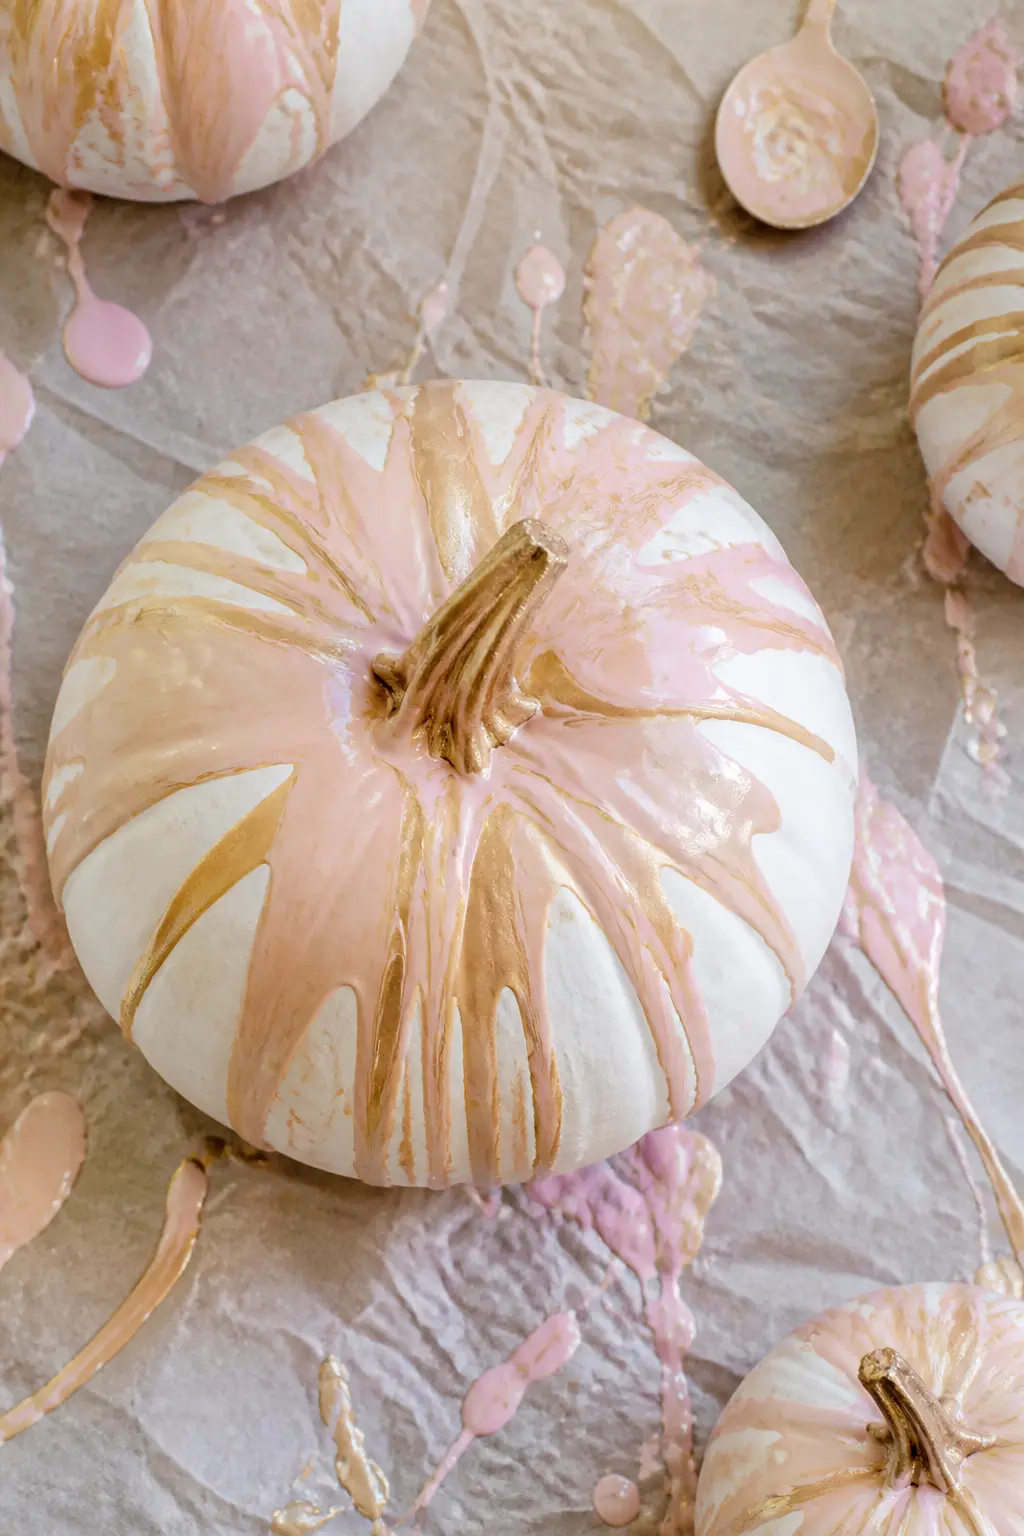
Diluted blush pink and gold metallic paint are poured together over the crown of the pumpkin and allowed to run down the ridges in soft, uncontrolled trails. The technique is exactly what it sounds like: mix each colour separately with a little water, pour slowly from the stem outward, and tilt the pumpkin to guide the direction of flow.
Work over a sheet of baking paper. The pour moves faster than expected and you want to catch the drips. The marbled top stops partway down the body and the white below it remains clean, which is the composition that makes it feel finished. Let it dry flat for at least two hours before handling.
🛍 Shopping guide
Cute and Pastel
Pastel on white stays soft and deliberately un-spooky. These ideas suit a child-friendly display, a coquette aesthetic or anyone who finds orange-and-black exhausting. The bows and dots and ghost faces belong here.
Pink Ghost Face With Rosy Cheeks
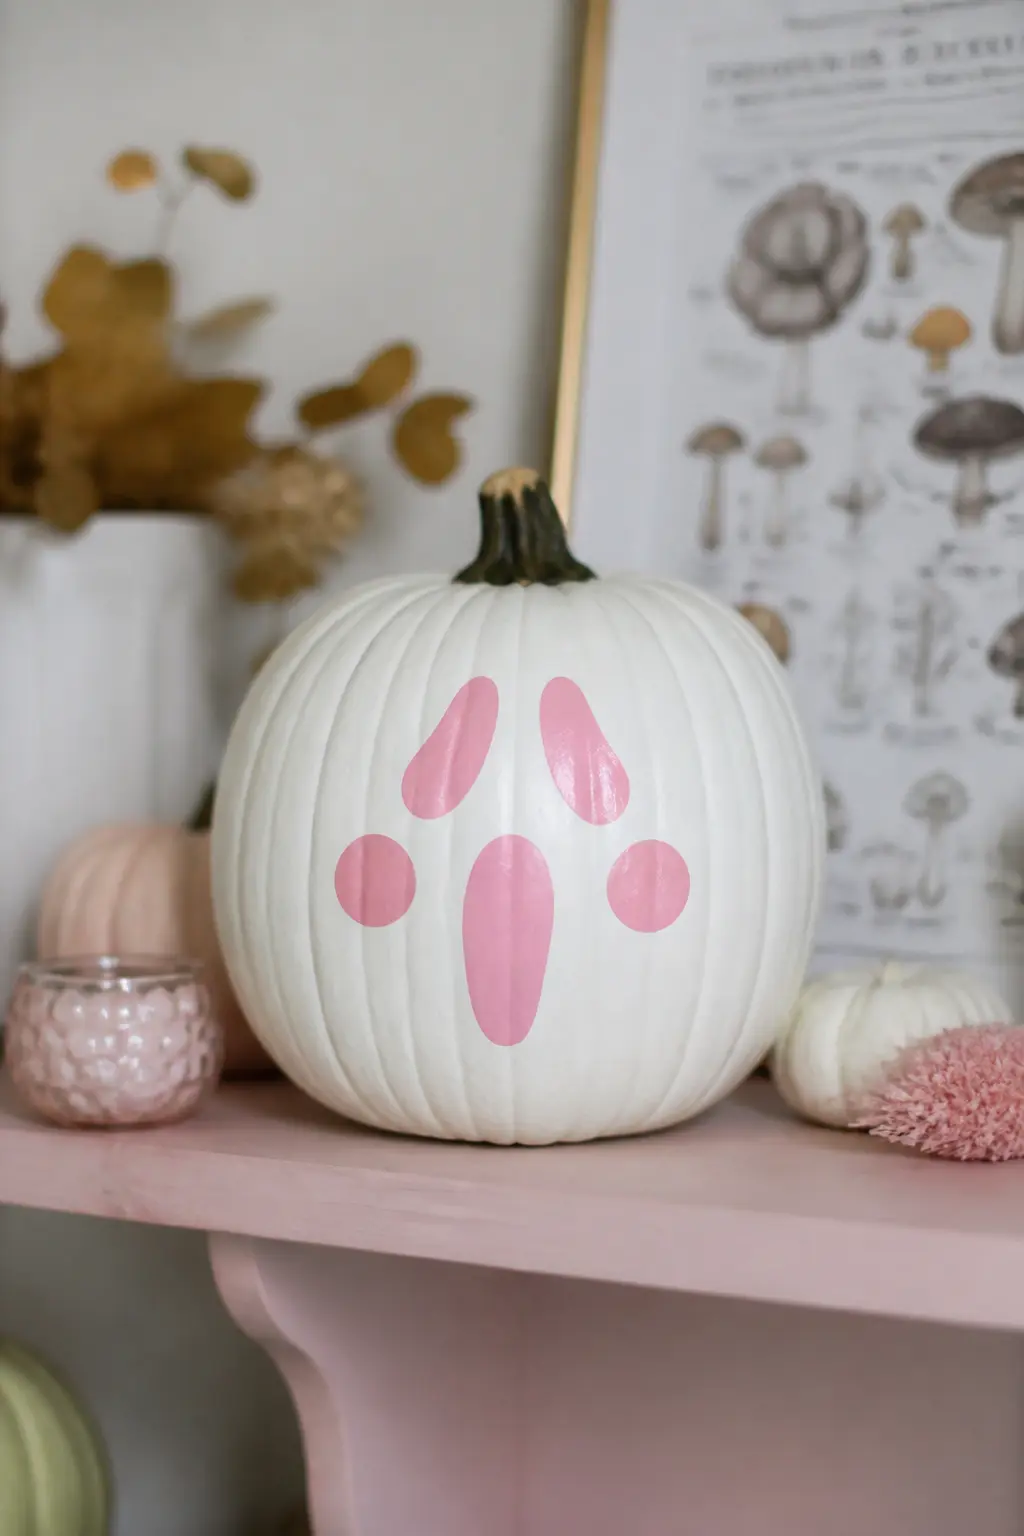
A simple ghost face painted in soft pink sits centred on the front of the pumpkin: two round eyes, a small open oval for a mouth, and two blush circles for cheeks. The palette stays entirely within pastels, so this reads as Halloween-adjacent without any darkness.
Use a small round brush and diluted pink acrylic for the cheeks so they blend softly at the edges. The eyes and mouth work better in a slightly deeper dusty rose than the face, giving just enough definition without reaching for black. This pumpkin belongs indoors, not on a porch in the rain.
🛍 Shopping guide
Black Cat on a Gold Crescent Moon
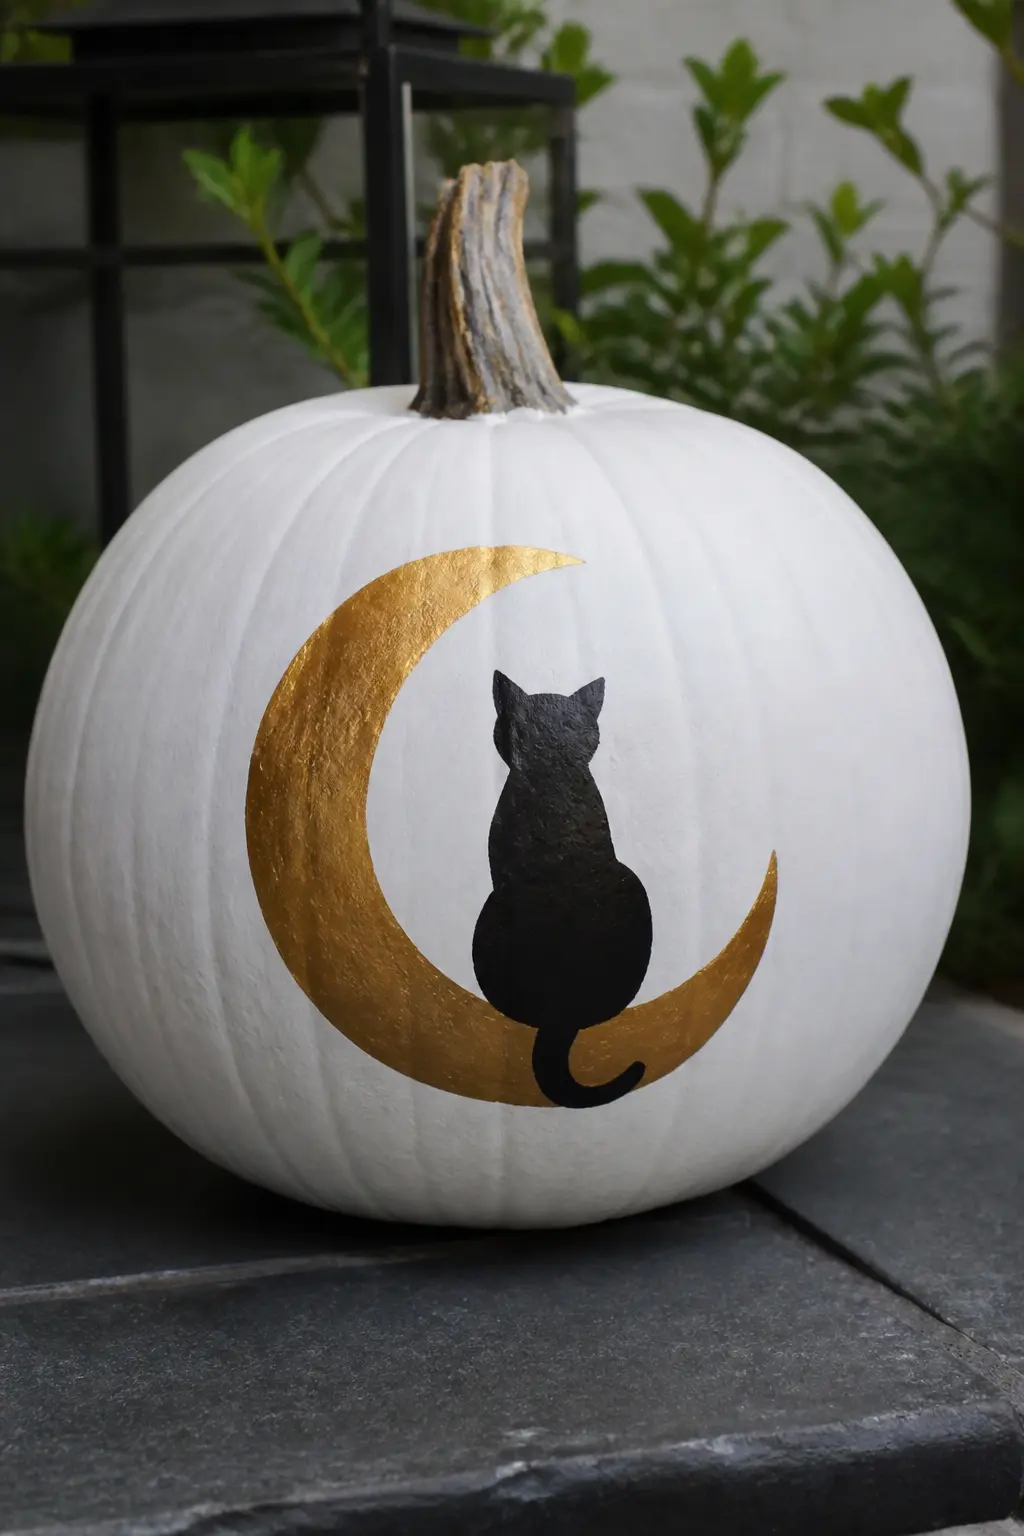
A silhouette of a sitting cat painted in solid black sits on a gold crescent moon painted in the lower half of the pumpkin face. The cat is all one piece, no detail lines, just the clean profile of ears, a curved back and a tail curling around the base of the moon. The gold crescent is the one warm note in an otherwise monochrome picture.
Trace both shapes in chalk pencil before you paint so the proportions look right on the curved surface. Fill the cat first in black, let it dry, then paint the moon behind it in gold so the edges overlap cleanly.
🛍 Shopping guide
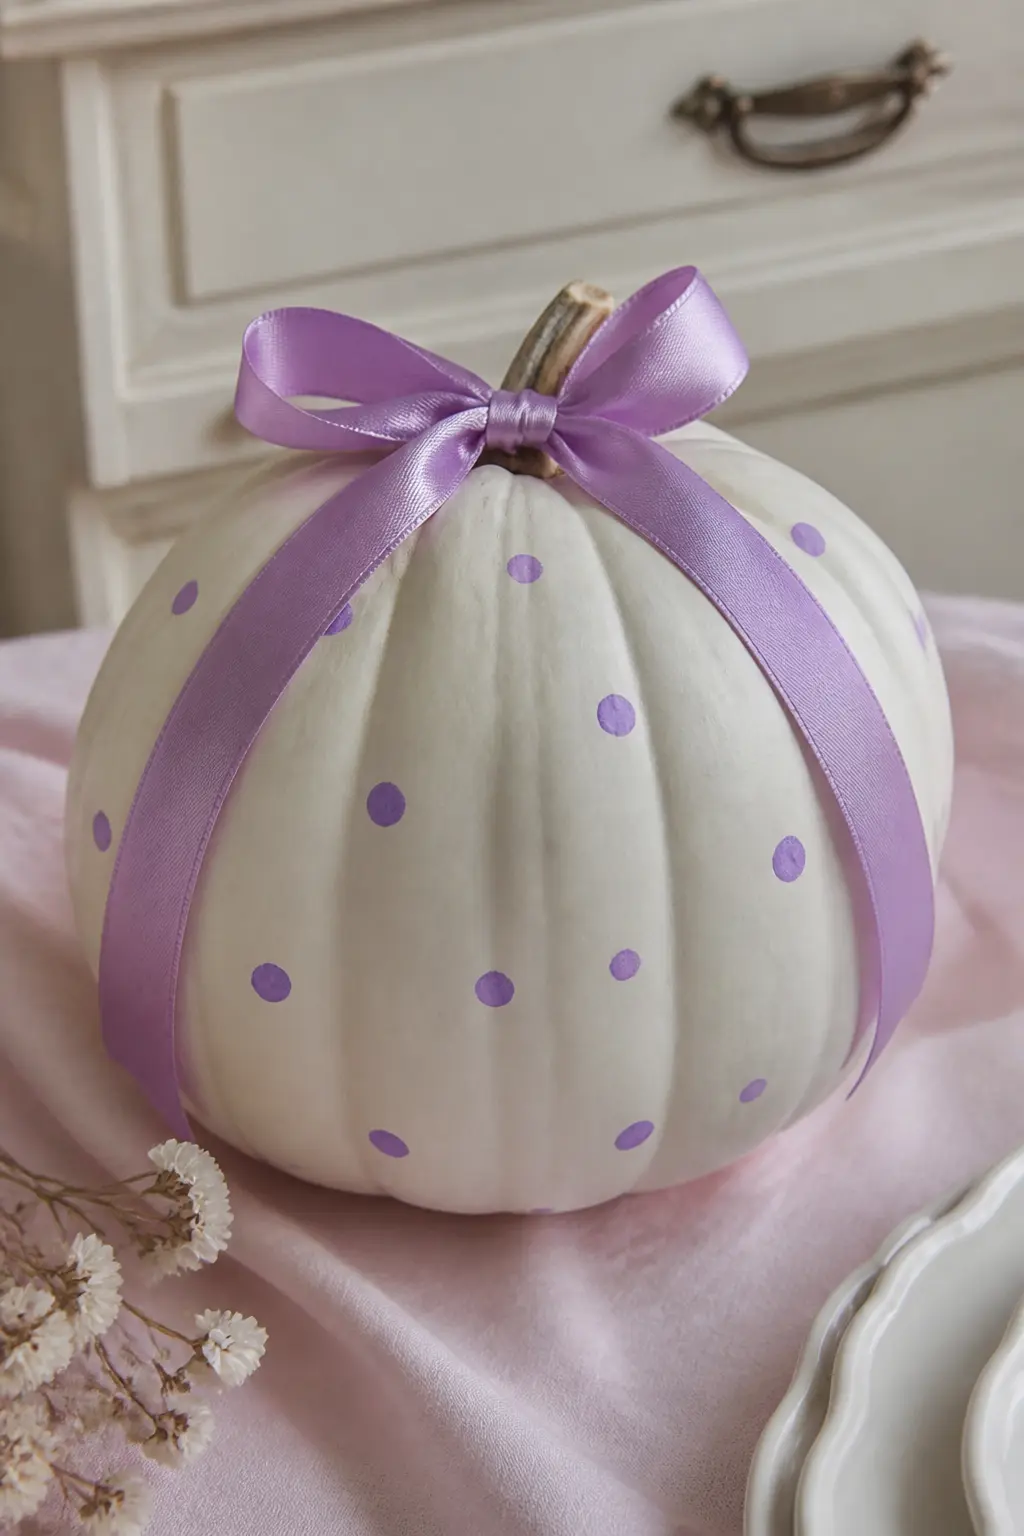
Lilac Bow and Lilac Dots
A lilac satin bow sits at the stem and small hand-painted lilac dots are scattered over the body in a loose, uneven pattern. The colour repeat between the bow and the dots is what makes the whole thing look considered. The dots do not need to be perfect circles, slightly wobbly reads as painterly rather than amateur at this scale.
Keep the dots the same size throughout, unlike the graduated dot entry. Uniformity here reinforces the dainty register of the bow. Seal with a matte varnish so the bow’s sheen is the only glossy element.
🛍 Shopping guide
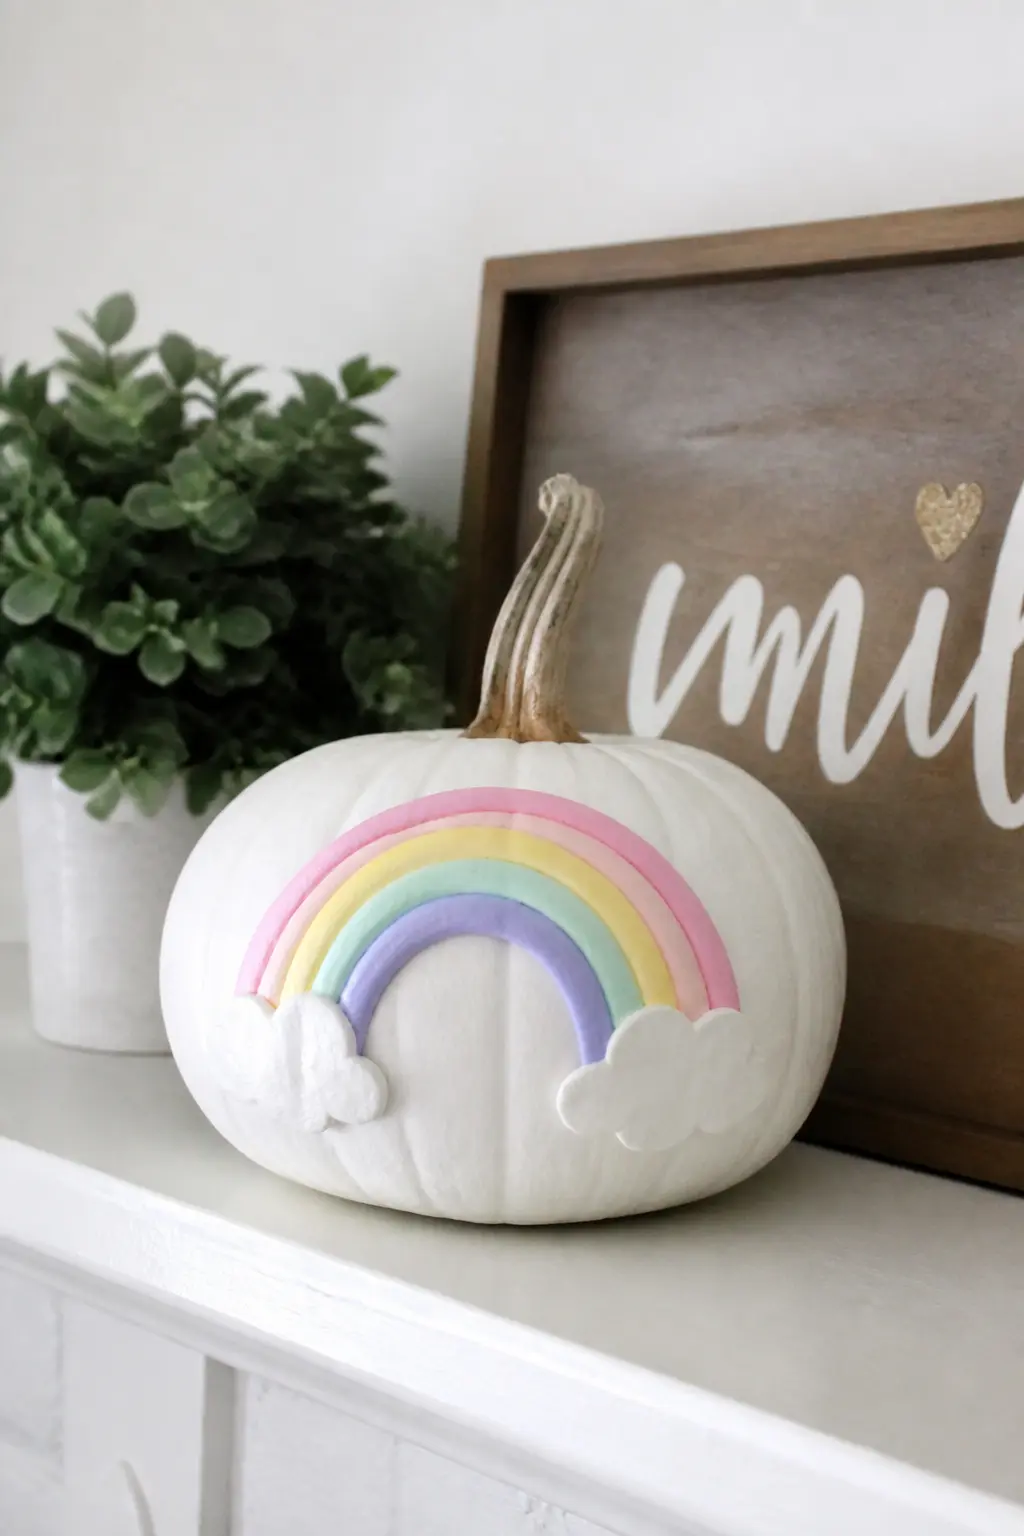
Pastel Rainbow Arc
A simple rainbow arc painted in pastel pink, yellow, mint and lilac sits in the lower half of the pumpkin face, with small white clouds at each end. The palette is deliberately soft rather than primary-bright. This sits in the same family as the ghost face and the lilac bow entries: cute, non-spooky, unambiguously cheerful.
Tape each stripe with thin painter’s tape if you want clean arcs, or paint freehand with a fine round brush for a softer edge. Freehand suits this idea better, because a slightly imprecise arc reads as hand-painted and considered, while a perfectly sharp arc can look like a nursery decal.
🛍 Shopping guide
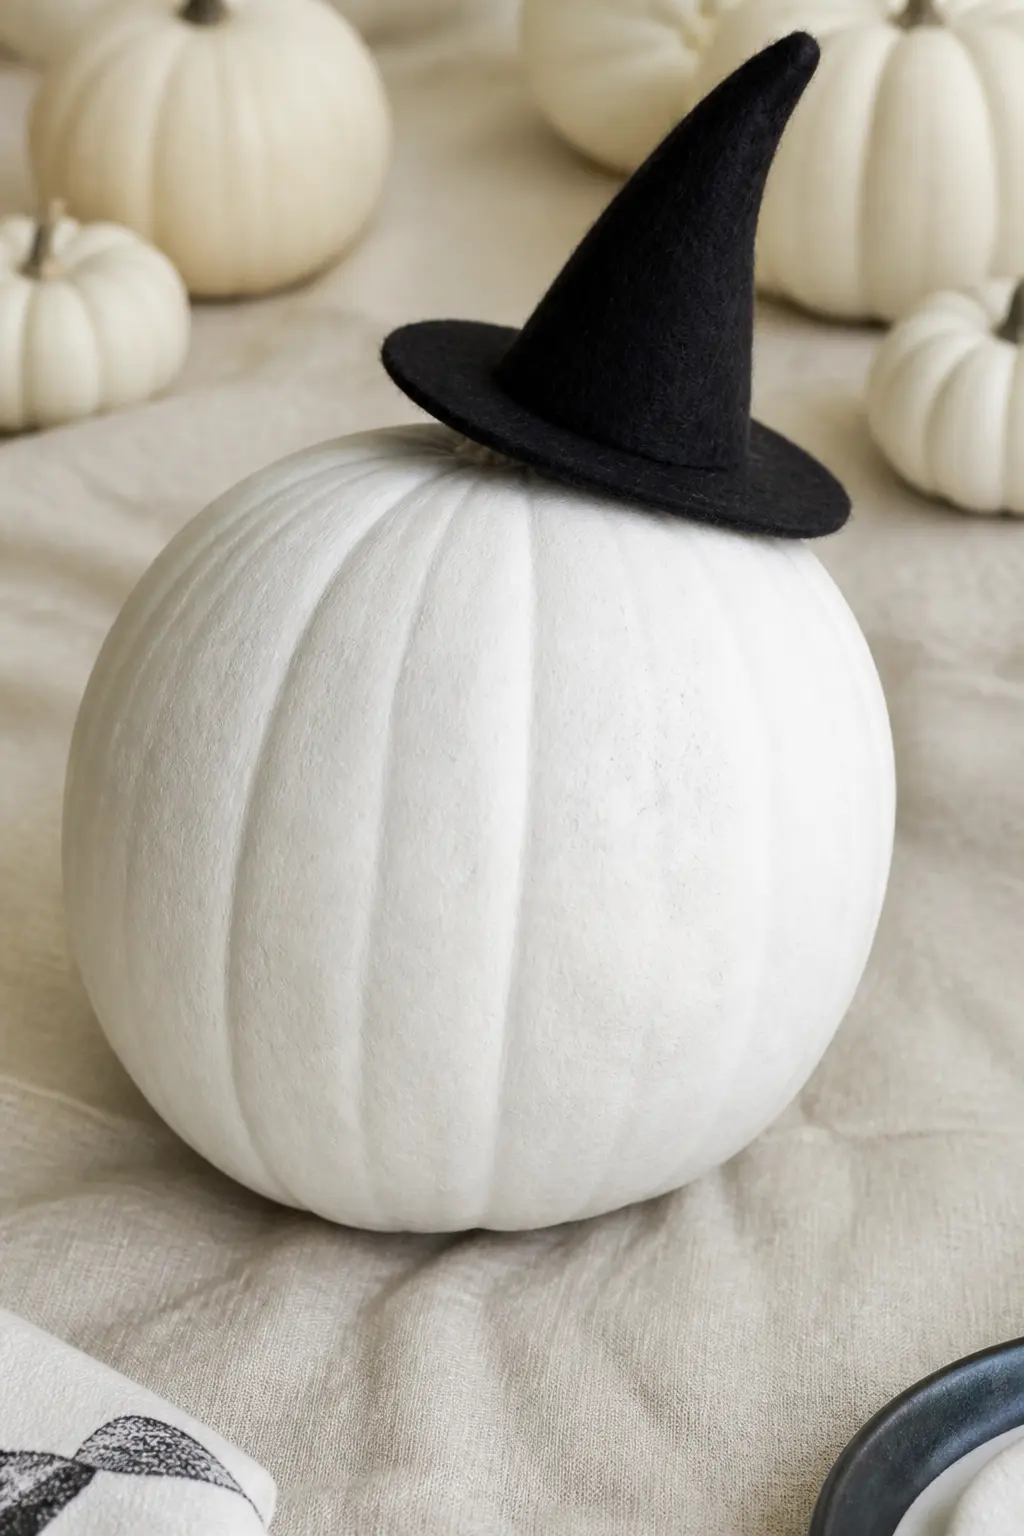
Felt Witch Hat Glued at an Angle
A miniature felt witch hat, tilted at an angle across the top of the pumpkin and fixed with strong glue or a thin wire pushed through its base, is the simplest character accessory on the list. The hat does all the Halloween signalling; the pumpkin itself stays plain white underneath.
Pre-made miniature witch hats are widely available in craft stores from September onward. Choose one with a brim wide enough to sit stably, or use a hot glue gun sparingly on the contact points. A small black ribbon around the hat brim, or a tiny orange bow, links it back to the pumpkin colour without painting anything.
🛍 Shopping guide
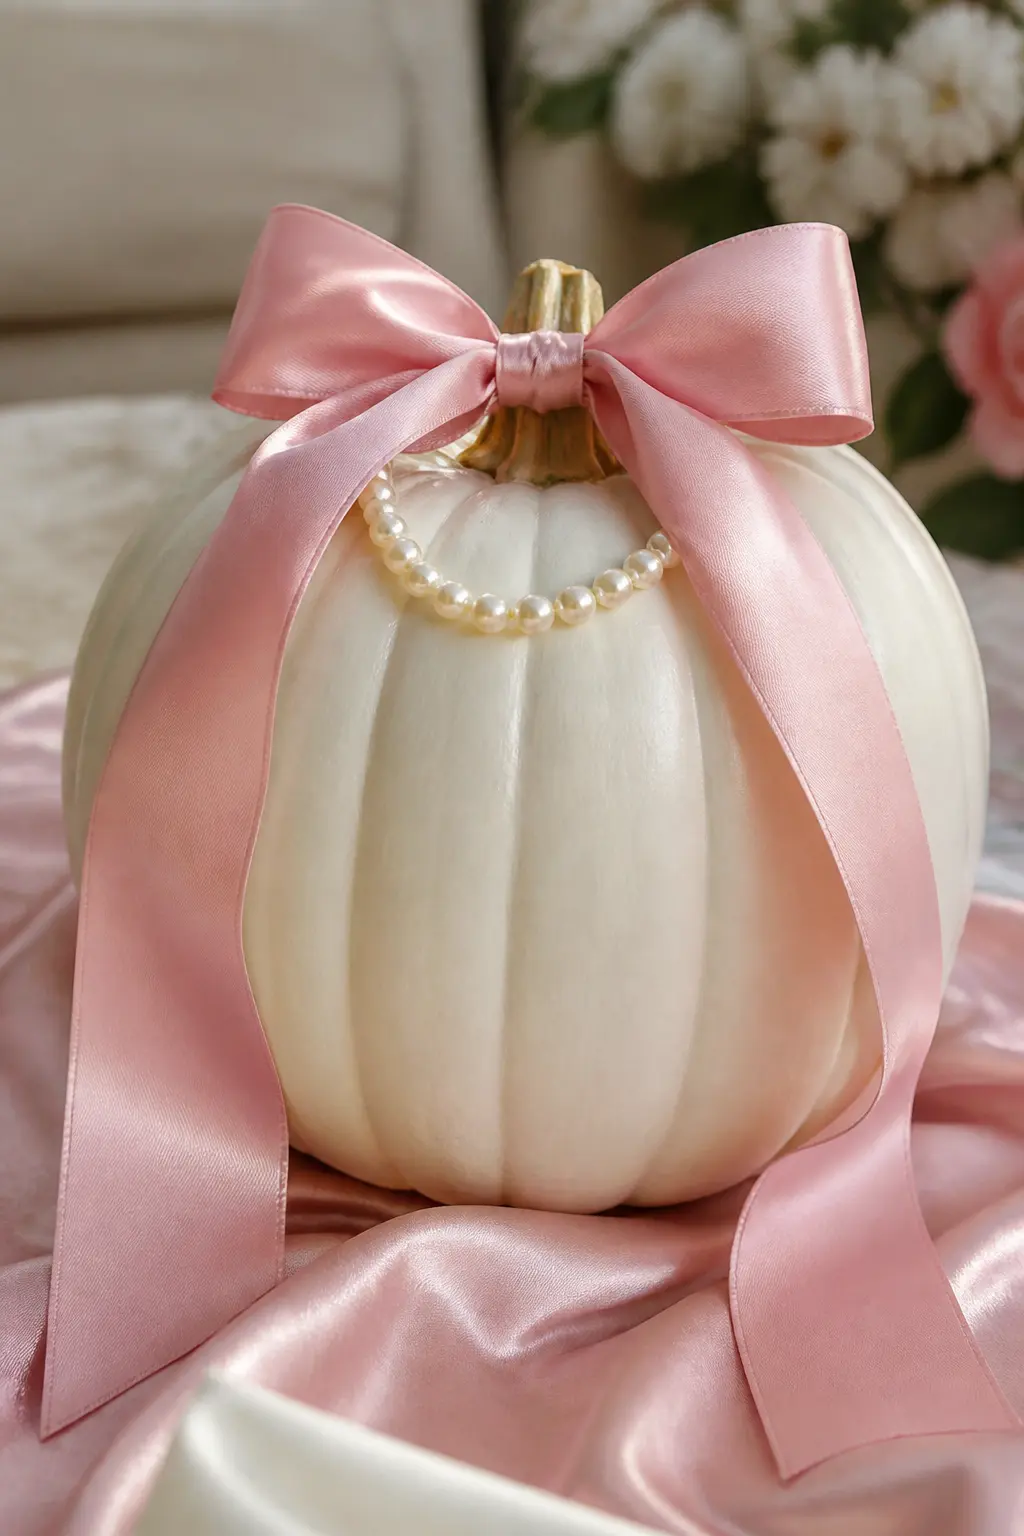
Coquette Pink Bow and Pearls at the Stem
A wide pink satin bow with long tails sits at the stem, and a string of pearl beads is looped twice around the base of the stem before the bow is tied over it. The result is overtly feminine and deliberately over-the-top in the best possible coquette tradition. The pumpkin below stays completely plain white.
Wire-edged ribbon holds its bow shape better than limp satin and does not droop. The pearl strand should be a cheap faux craft pearl, not a real bead that might be glued and wasted. A dot of hot glue under the knot of the bow keeps everything from sliding down the stem during display.
🛍 Shopping guide
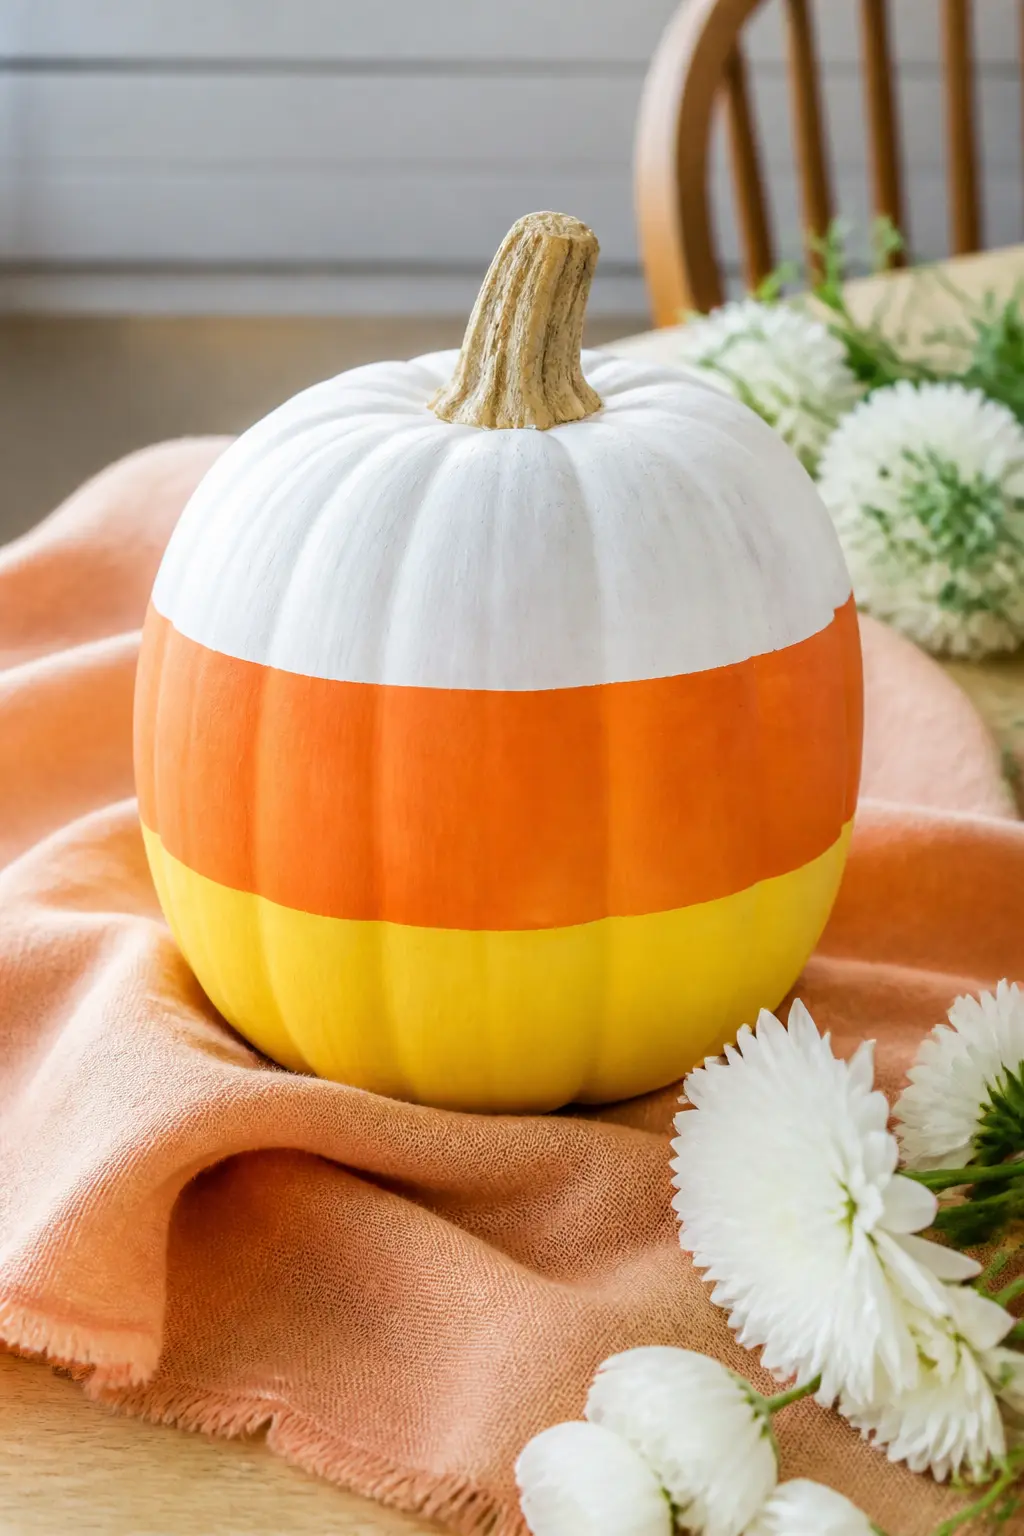
Candy Corn Stripe in Orange and Yellow
The lower half of the white pumpkin is painted in a wide orange band, and a yellow band below that covers the very base, so the pumpkin reads as a large candy corn from base to tip: white on top, orange in the middle, yellow at the bottom. The three-colour composition is immediately recognisable at a glance.
Tape the band edges for clean horizontal lines. Paint yellow first since it is the lighter colour, let dry, tape and paint the orange above it. The white of the painted pumpkin body above the orange band is the third tier of the candy corn and requires no additional paint at all.
🛍 Shopping guide
Nature and Woodland
Mushrooms, fox faces, dried flowers and constellation maps all read as autumn without reading as Halloween. Use these when the event runs from September through to Thanksgiving and you need the pumpkin to carry its weight the whole season.
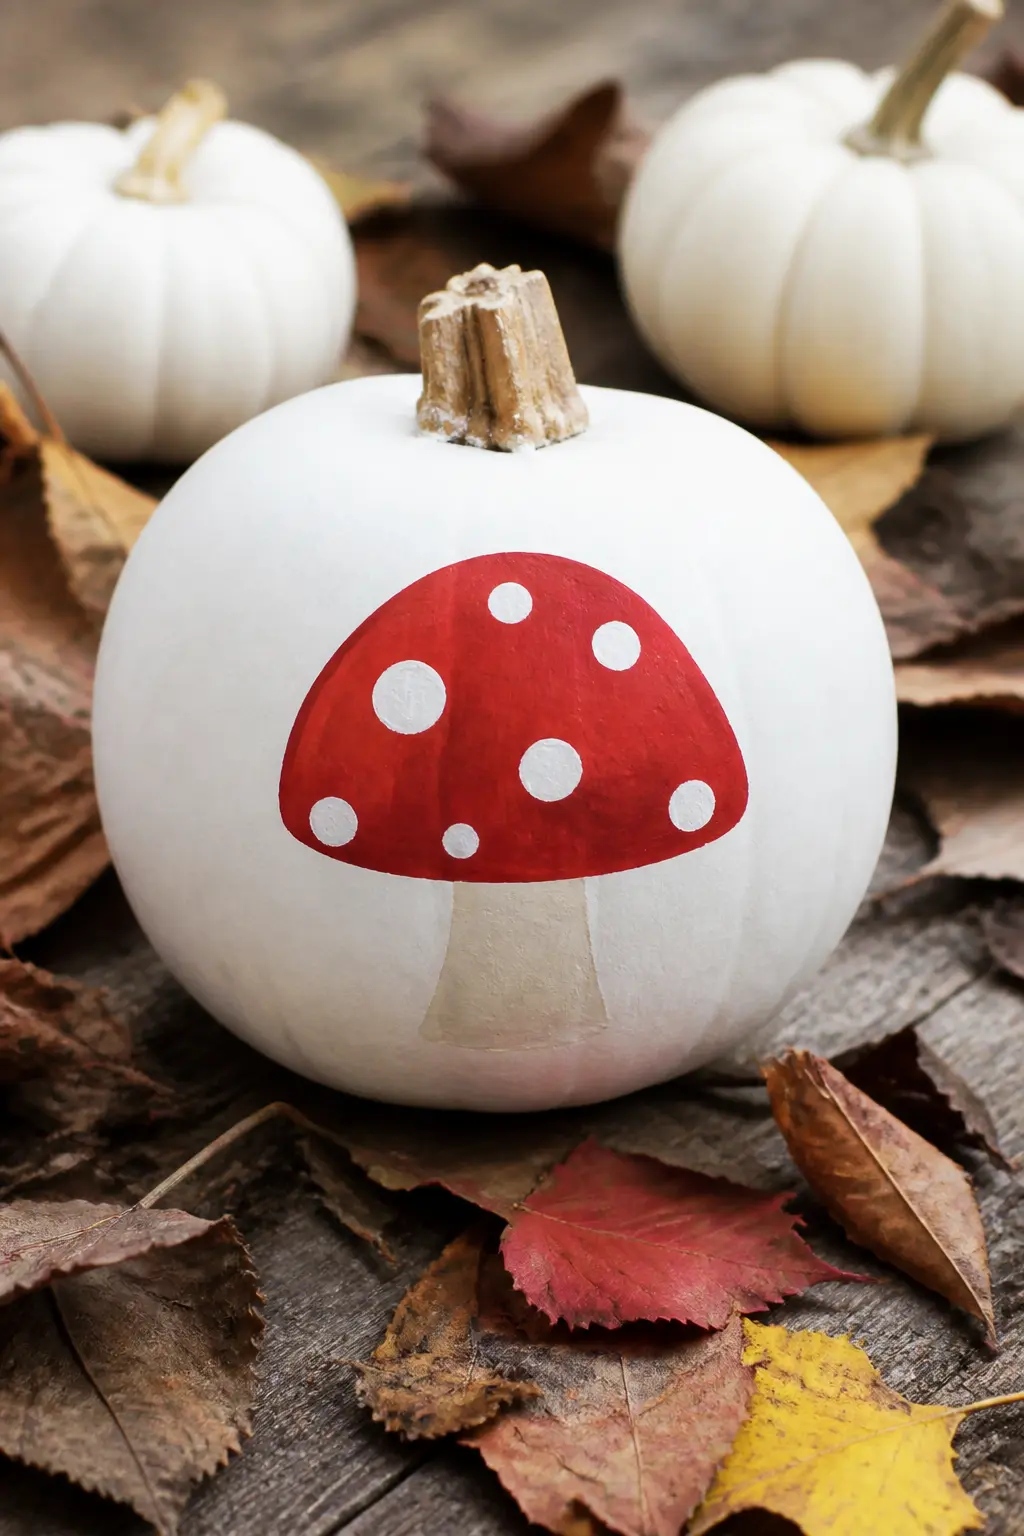
Red Mushroom With White Spots
A classic Amanita-style mushroom painted in red with white spots sits centred on the front of the pumpkin, cap upward. The cap curves to fill the upper half of the visible face, the stem is short and sits just above the base. The white spots are painted, not the reverse.
This one reads as woodland rather than Halloween, which is its whole appeal. Paint the red cap first and let it dry fully before adding the white spots on top with a round brush tip so they sit cleanly on the red rather than bleeding into wet paint. A fine black outline around the mushroom outline, added last, sharpens the whole image.
🛍 Shopping guide
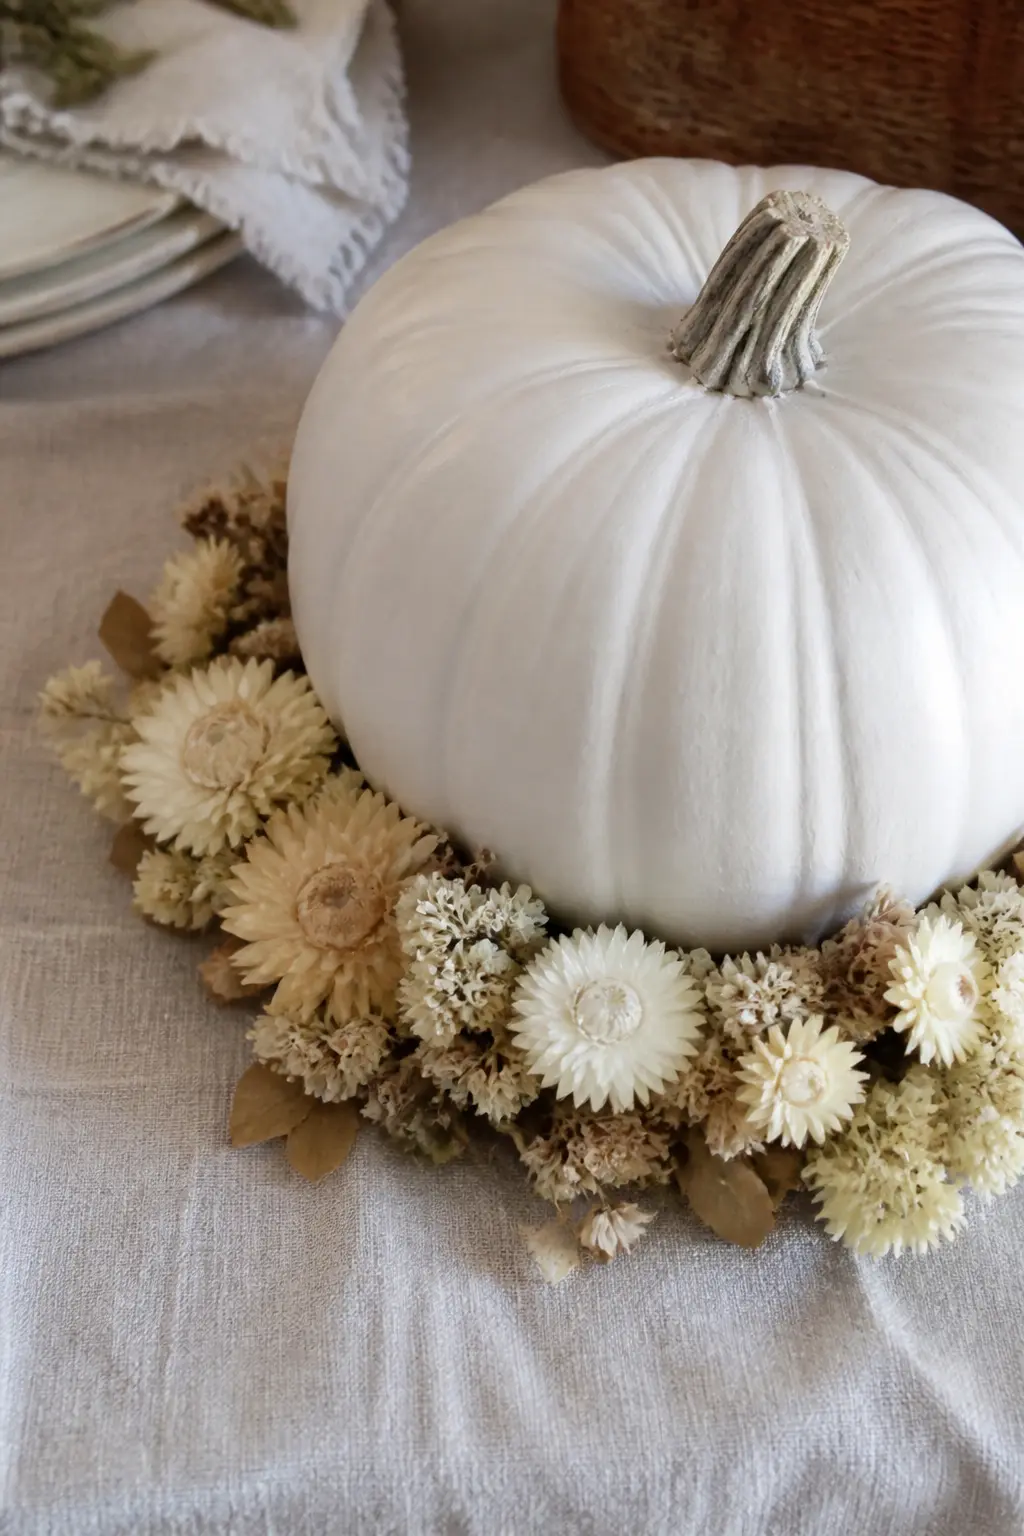
Ring of Dried Cream Flowers at the Base
A collar of dried cream flowers, such as statice, strawflowers and dried baby’s breath, is glued around the very base of the pumpkin so it sits in a wreath of botanicals rather than on a bare surface. The white-on-cream palette is quietly autumn, and the texture contrast between the smooth painted pumpkin and the papery dried flowers is the whole point.
Glue the largest blooms first to anchor the ring, then fill gaps with smaller stems. Work around the full circumference before going back to add a second layer. The ring should be full enough to look intentional, not sparse enough to look unfinished.
🛍 Shopping guide
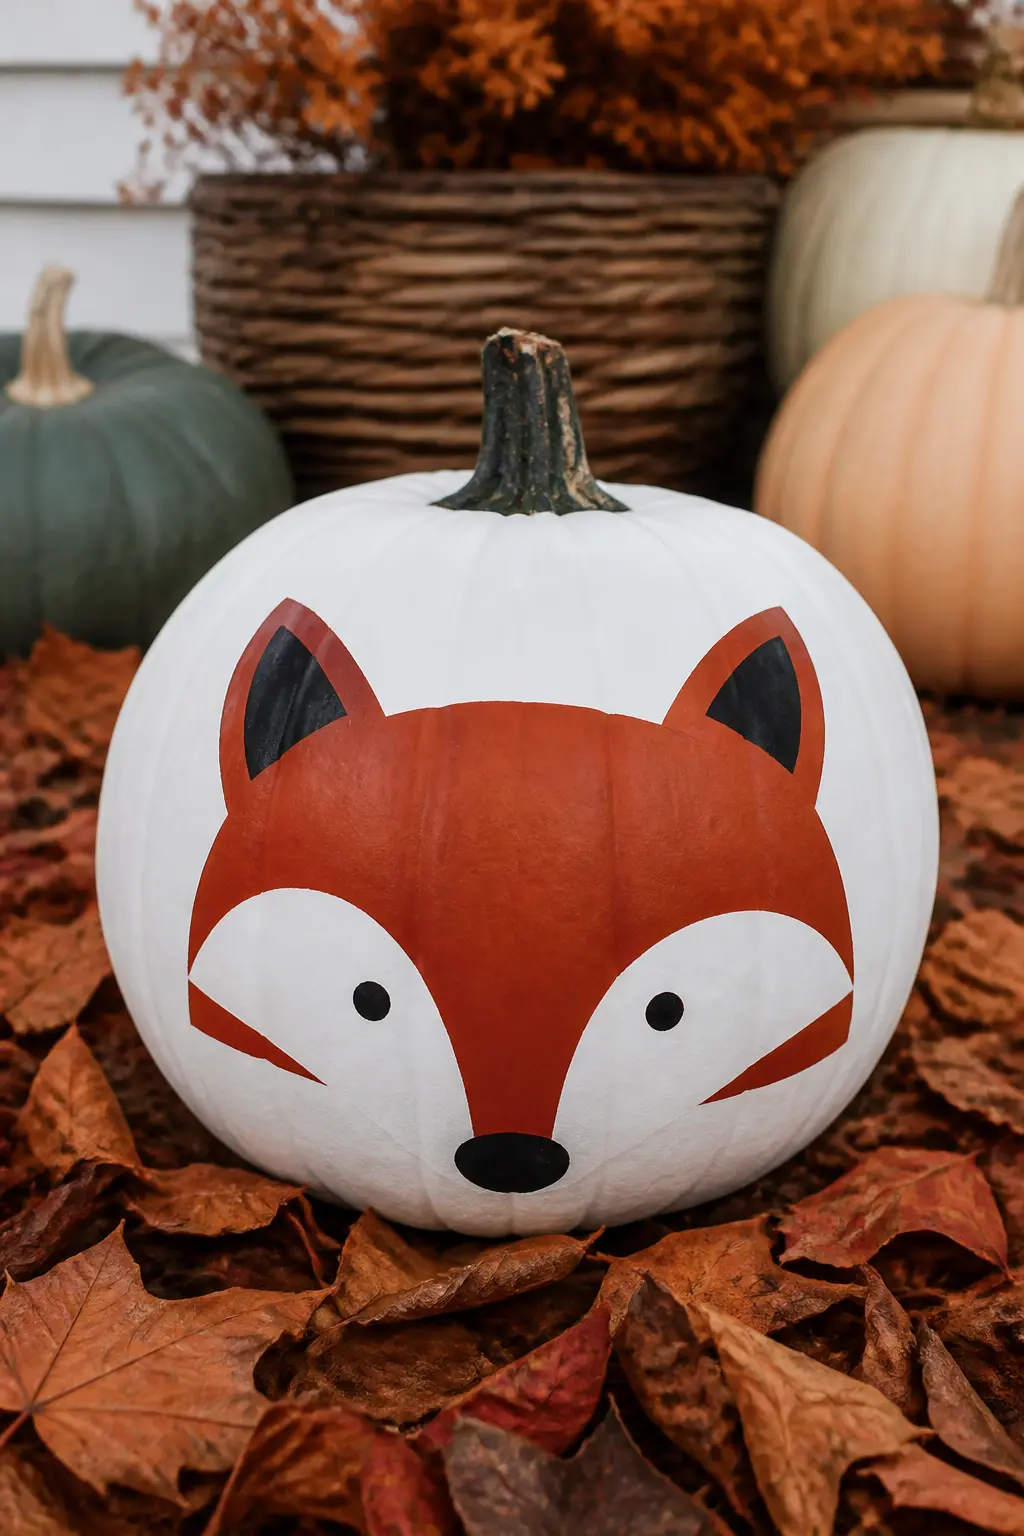
Fox Face in Rust and Black
A stylised fox face occupies the front of the pumpkin: a rust-orange triangular face, black ears outlined in white, white cheek patches and small black triangular features for the nose and eyes. It is graphic and flat rather than realistic, which suits a curved surface far better than detailed portraiture would.
Work in layers: the rust orange base first, white cheek patches second, black details last. Keep the ear shapes simple and the facial features small. Overworked details at this scale blur into each other once the pumpkin is at viewing distance. Autumn-coloured leaves or acorns next to this one reinforce the woodland feeling.
🛍 Shopping guide
Gold Constellation With Fine Lines
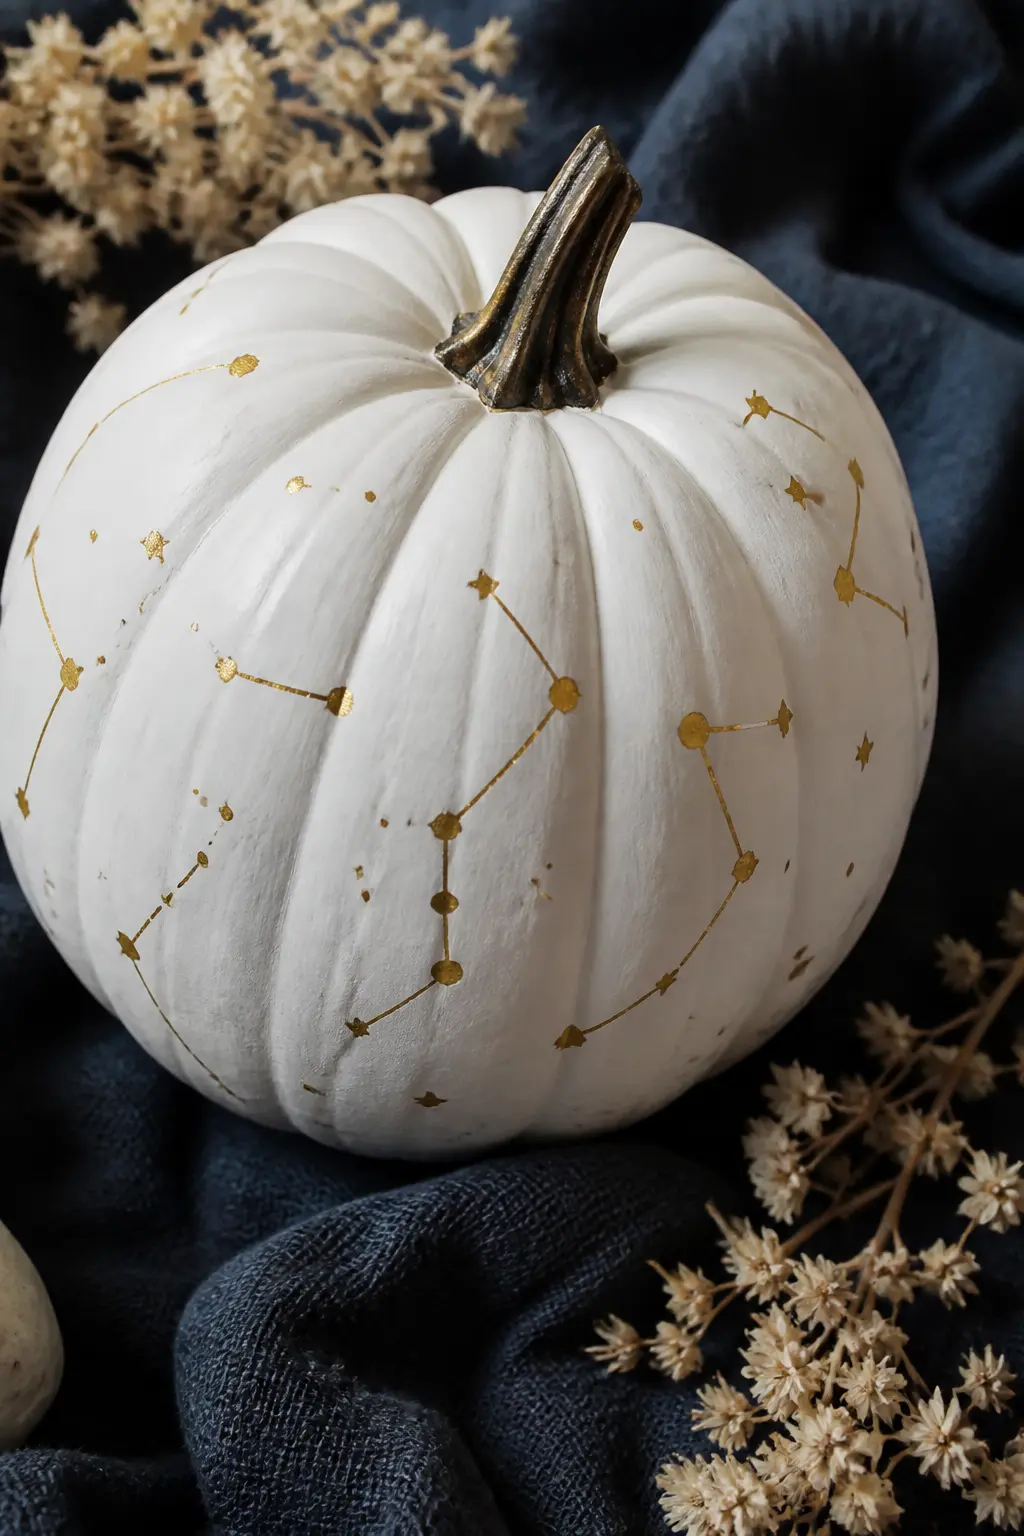
A constellation map drawn in gold on the white pumpkin body: small gold dots for stars, joined with fine straight lines to outline the shapes. Choose one or two recognisable patterns, Orion and the Big Dipper read well at this size, rather than cramming the whole sky onto one pumpkin.
A gold paint pen with a 0.5 mm tip gives the finest line without the bleed of a brush. Do the dots first, let them dry, then connect them with ruled lines if you want precision, or freehand if you trust your hand. This is the most quietly sophisticated idea on this list, and it suits autumn as much as Halloween.
🛍 Shopping guide
Pattern and Geometry
Tape is your best friend here. A clean plaid or a checkerboard band looks expensive and takes under an hour once the base coat is dry. These entries reward patience with masking more than any painting skill.
Black and Gold Checkerboard Band
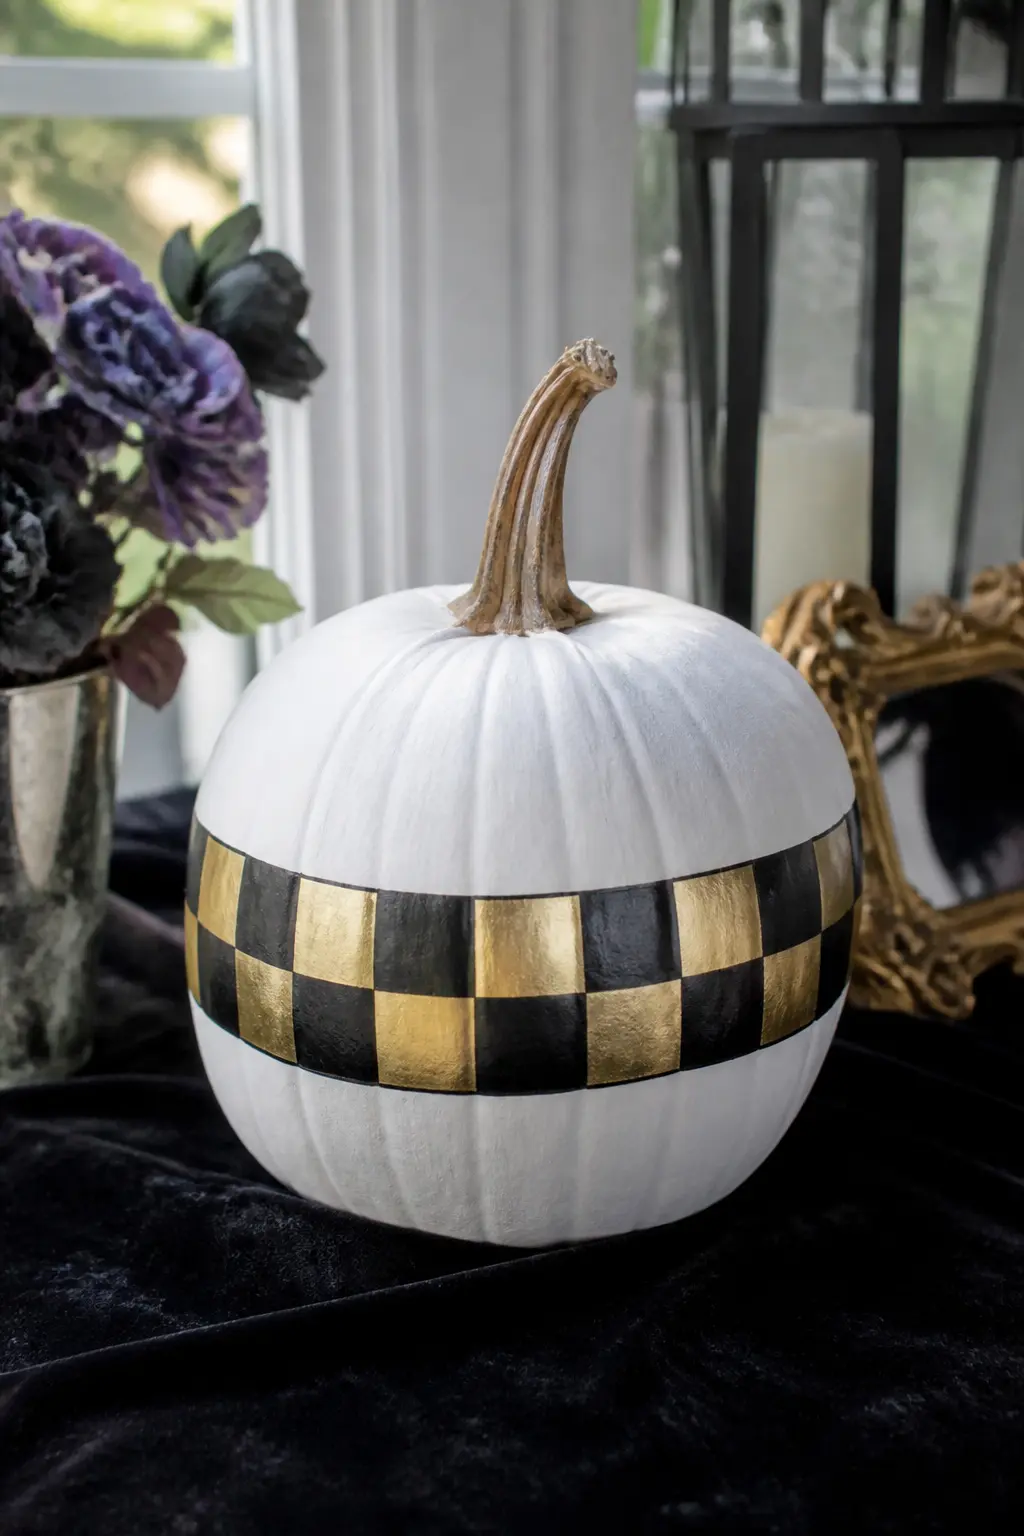
A band of checkerboard squares runs around the widest part of the pumpkin, alternating black and gold squares in equal sizes. Tape off the band with painter’s tape, mark the squares with a pencil, and paint alternate squares in black first, let dry, then fill in the rest in gold.
The band width looks best at roughly one third of the pumpkin’s total height. Too narrow and it reads as a stripe. Too wide and it swallows the white above and below it. Peel the tape while the paint is still slightly tacky for the cleanest edges.
🛍 Shopping guide
Black Stripes on Ridges With a Gold Stem
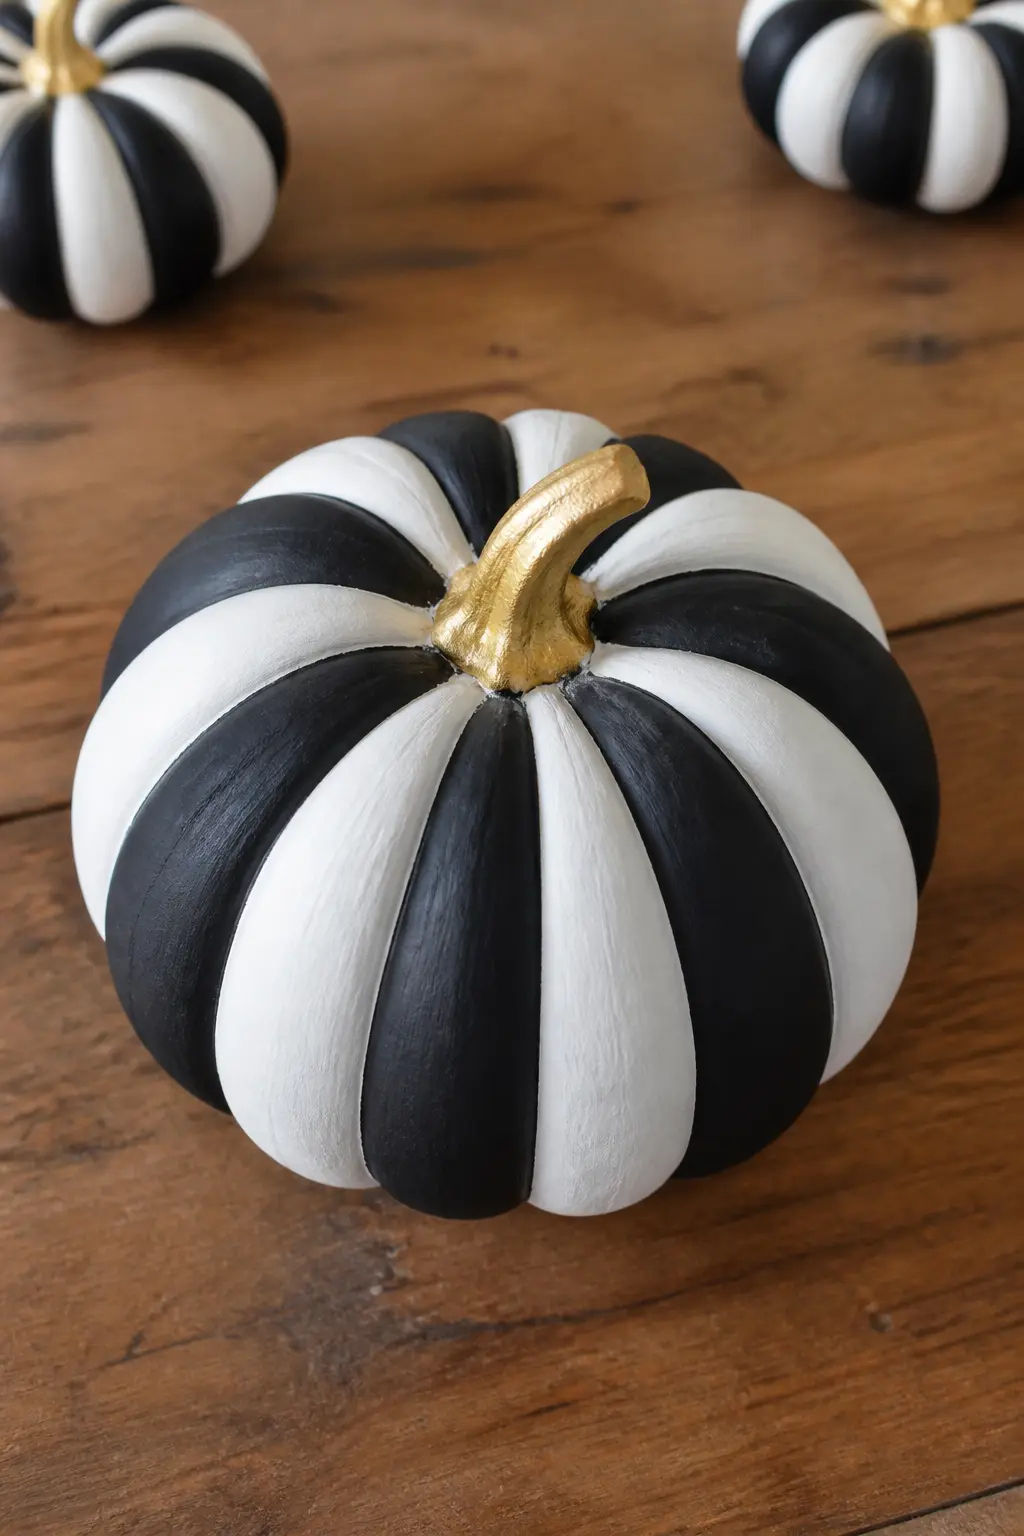
Black paint follows every other ridge of the pumpkin from top to bottom, creating natural vertical stripes that follow the pumpkin’s own geometry. The stem is painted in gold metallic paint as the single accent note. The combination is bold and architectural without requiring any tape or stencil work.
Use a flat brush slightly narrower than the ridge width and load it with paint rather than water. The goal is crisp edges, not bleed. A faux pumpkin with pronounced ridges reads better than a smooth one for this idea. Real ribbed pumpkins, like the Jarrahdale variety painted white, work beautifully if you can find them.
🛍 Shopping guide
Pink and Black Plaid Grid
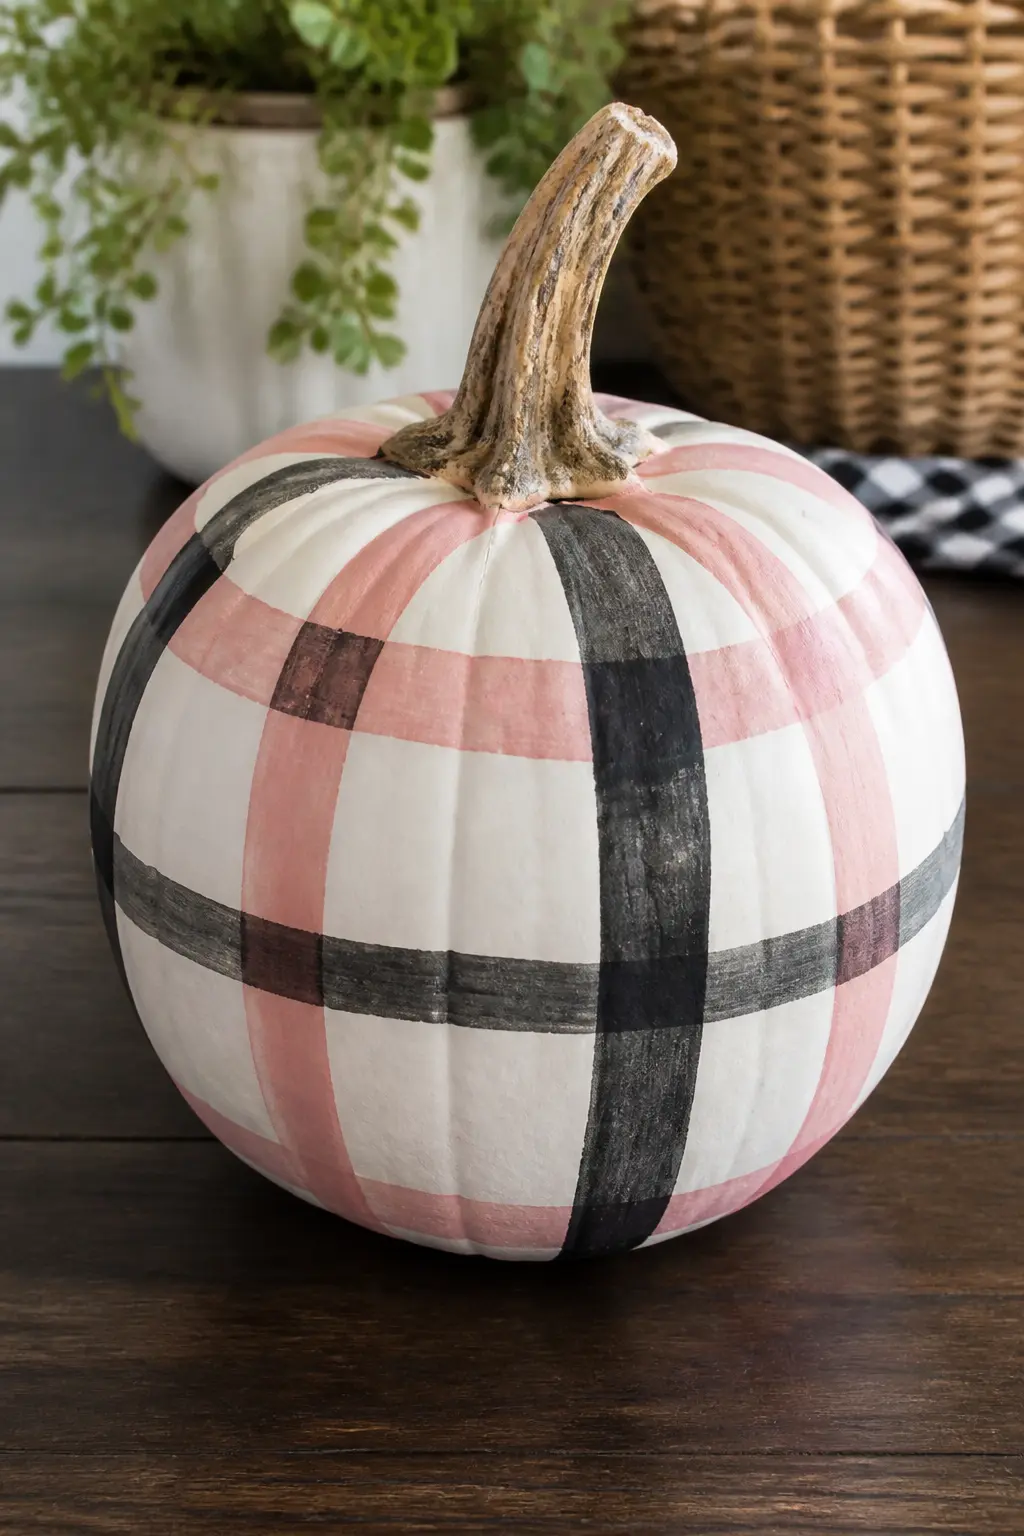
A pink and black plaid grid covers the pumpkin body, created by masking horizontal and vertical stripes with painter’s tape and painting the intersecting bands. The intersecting squares where pink and black overlap read as a third dark pink tone without any mixing. That layered quality is what separates this from a simple two-colour stripe.
Paint the pink bands first, let dry completely, then tape and paint the black. Work in thin coats and peel tape while still slightly tacky. A tartan reference image helps with stripe width ratios: equal widths look flat, varied widths look plaid.
🛍 Shopping guide
Monogram in Black With a Gold Circle
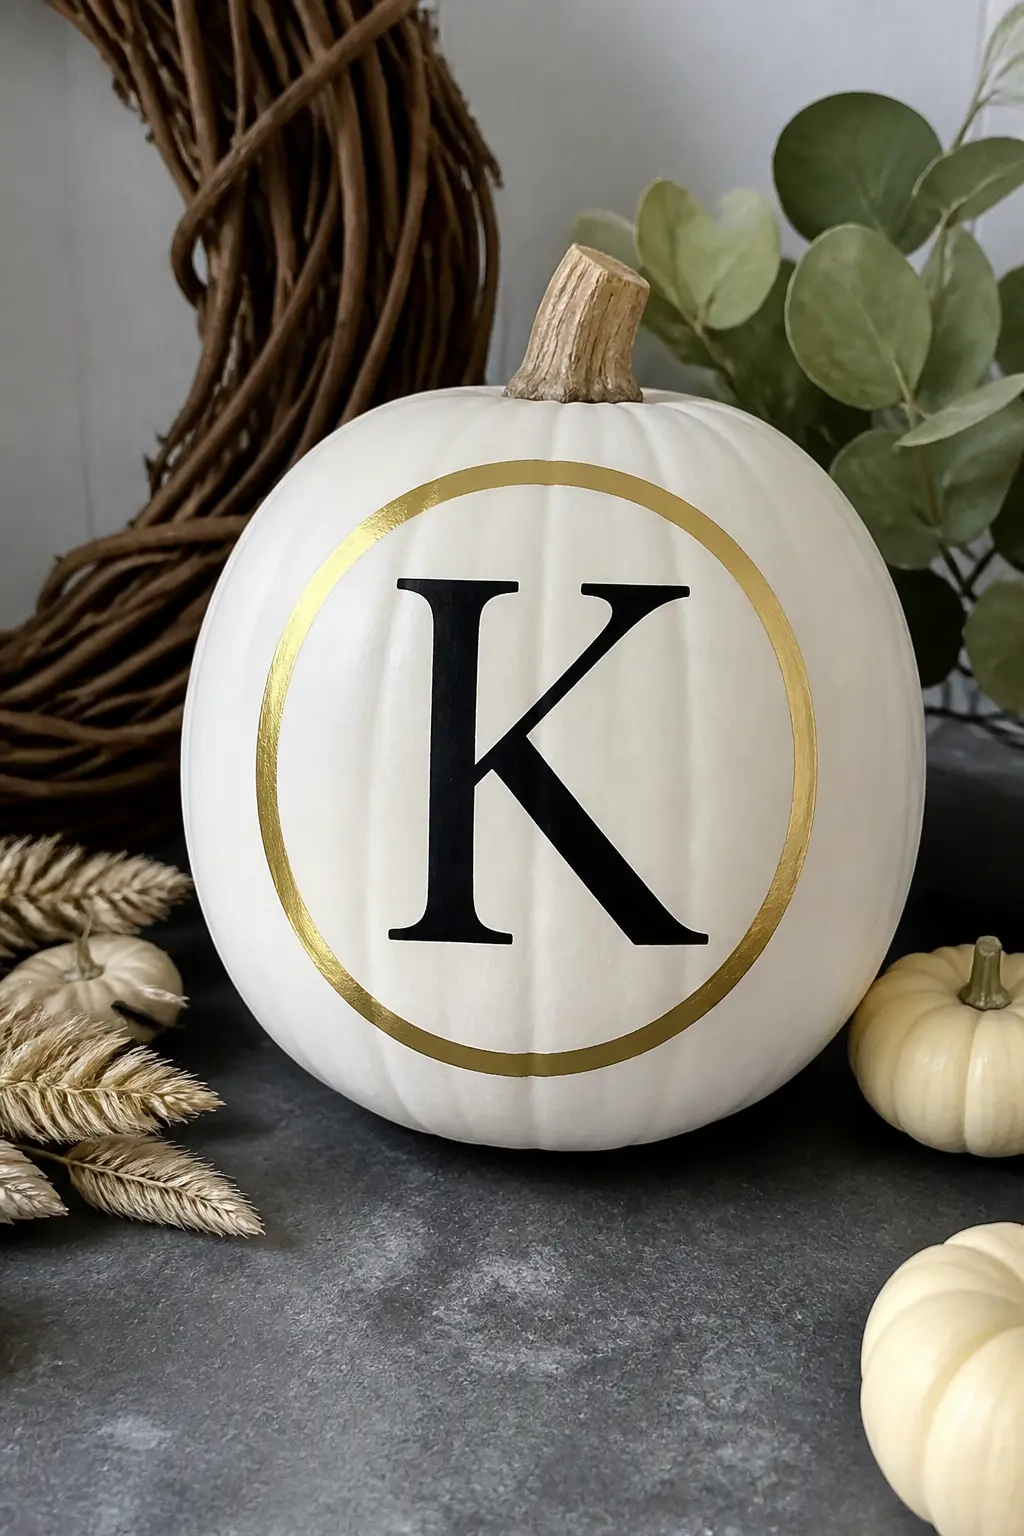
A single initial, large and bold, painted in black sits centred on the pumpkin front. A gold circle, painted with a round brush or a compass guide, frames the letter. The design is clean, personal and works for a front porch nameplate as much as a party decoration.
Use a projector or print the letter large and trace it through transfer paper if freehand lettering is not in the toolkit. A serif font reads as classic; a sans-serif reads as modern. The gold circle does not need to be perfectly round: slight variation in brushstroke width makes it look hand-done rather than mechanical, which is better here.
🛍 Shopping guide
Texture and Material
Some of the strongest pumpkins on this list add almost no paint at all. A crochet sleeve, a lace panel or a lace doily cap change the surface itself, and that material contrast is what earns the compliment.
Black Lace Panel
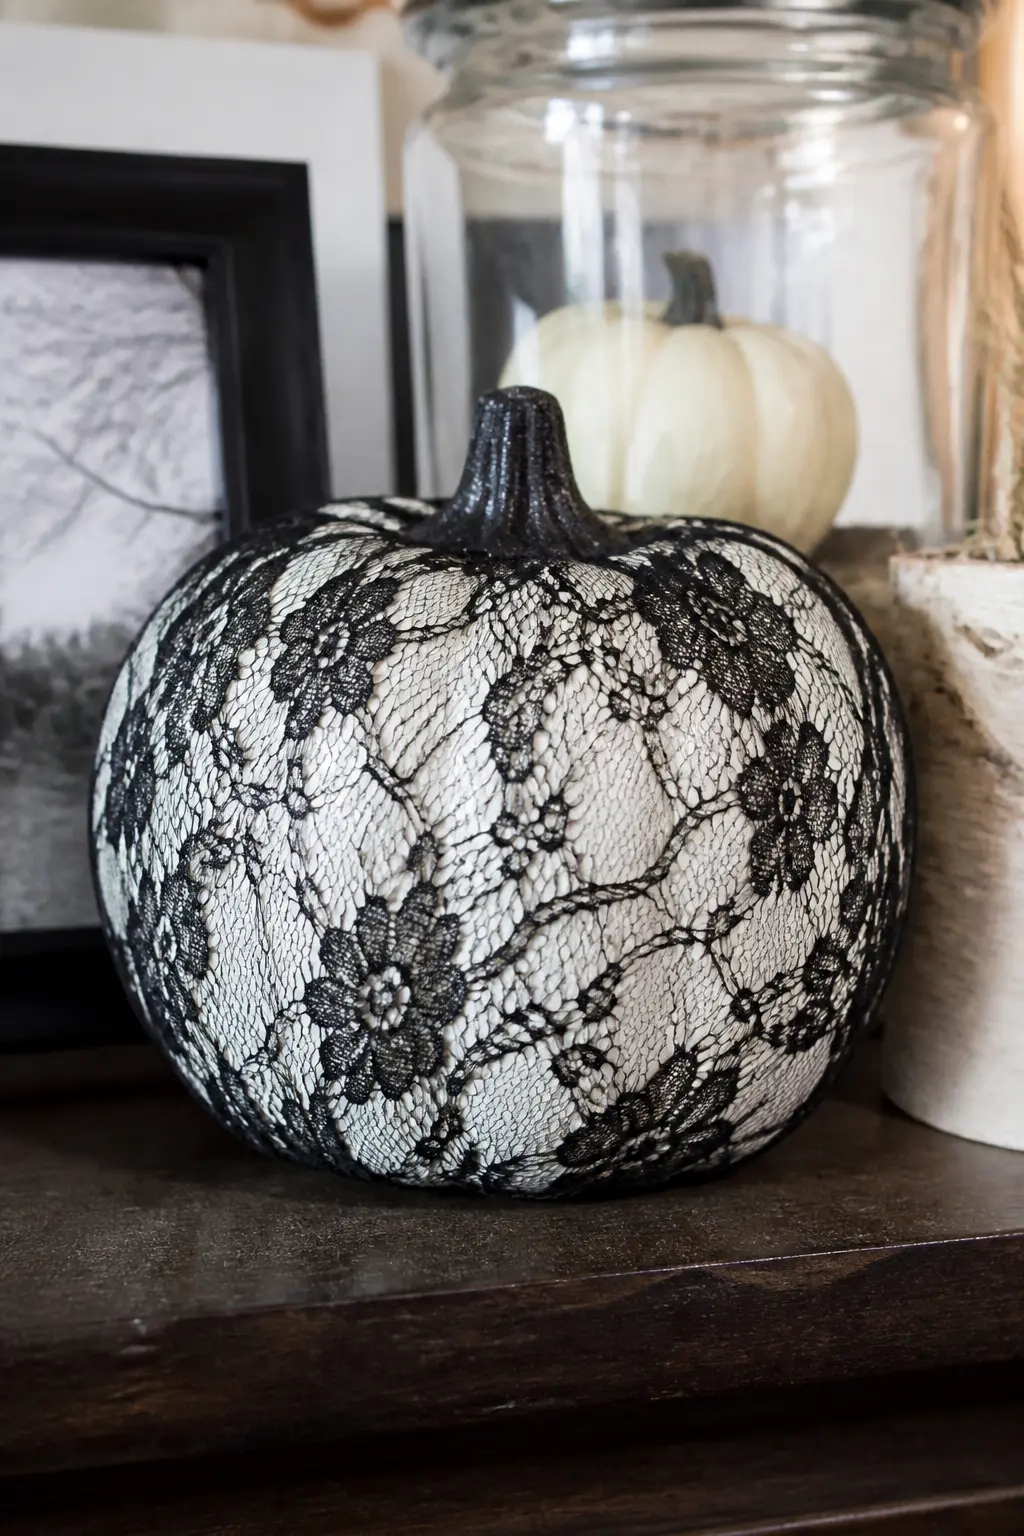
A rectangle of black lace fabric, cut to cover roughly one third of the pumpkin’s circumference, is glued flat against the front. The white pumpkin shows through the lace pattern underneath, creating a layered effect that paint alone cannot achieve. Decoupage medium works better than glue gun for this because it flexes as it dries and follows the curve of the pumpkin without puckering.
Choose a lace with a visible pattern rather than a fine net. Florals, scallops and spiderweb weaves all read well at arm’s length. Trim the top and bottom edge of the lace with small scissors once the decoupage is dry and slightly tacky.
🛍 Shopping guide
Crochet Sleeve in Cream With a Ribbon
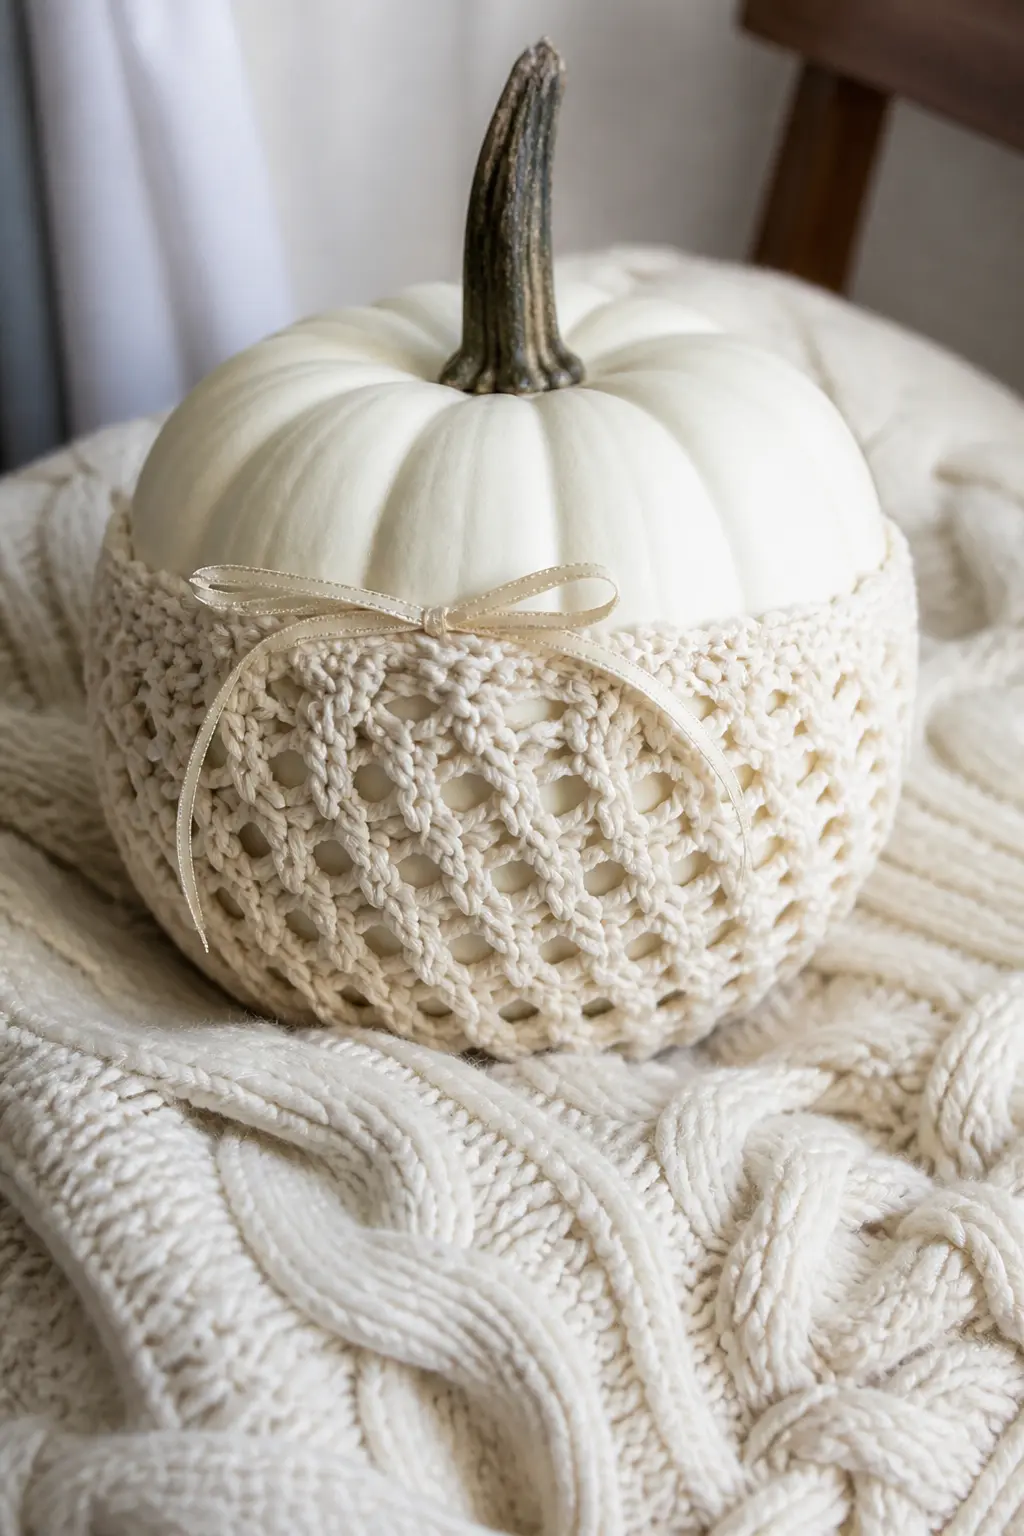
A crocheted sleeve in cream or off-white yarn is pulled over the pumpkin body, sitting like a cosy around the widest section, and a narrow ribbon is tied at the top of the sleeve where it meets the stem. The sleeve is knitted or crocheted to roughly the pumpkin’s circumference so it stretches slightly and grips without glue.
This idea works best on a faux pumpkin where the sleeve can be reused year after year. Patterns for simple pumpkin crochet cosies are easy to find and suitable for a beginner. The cream-on-white palette is deliberately understated, the material contrast doing the visual work that colour would do in another entry.
🛍 Shopping guide
Black Lace Doily Cap
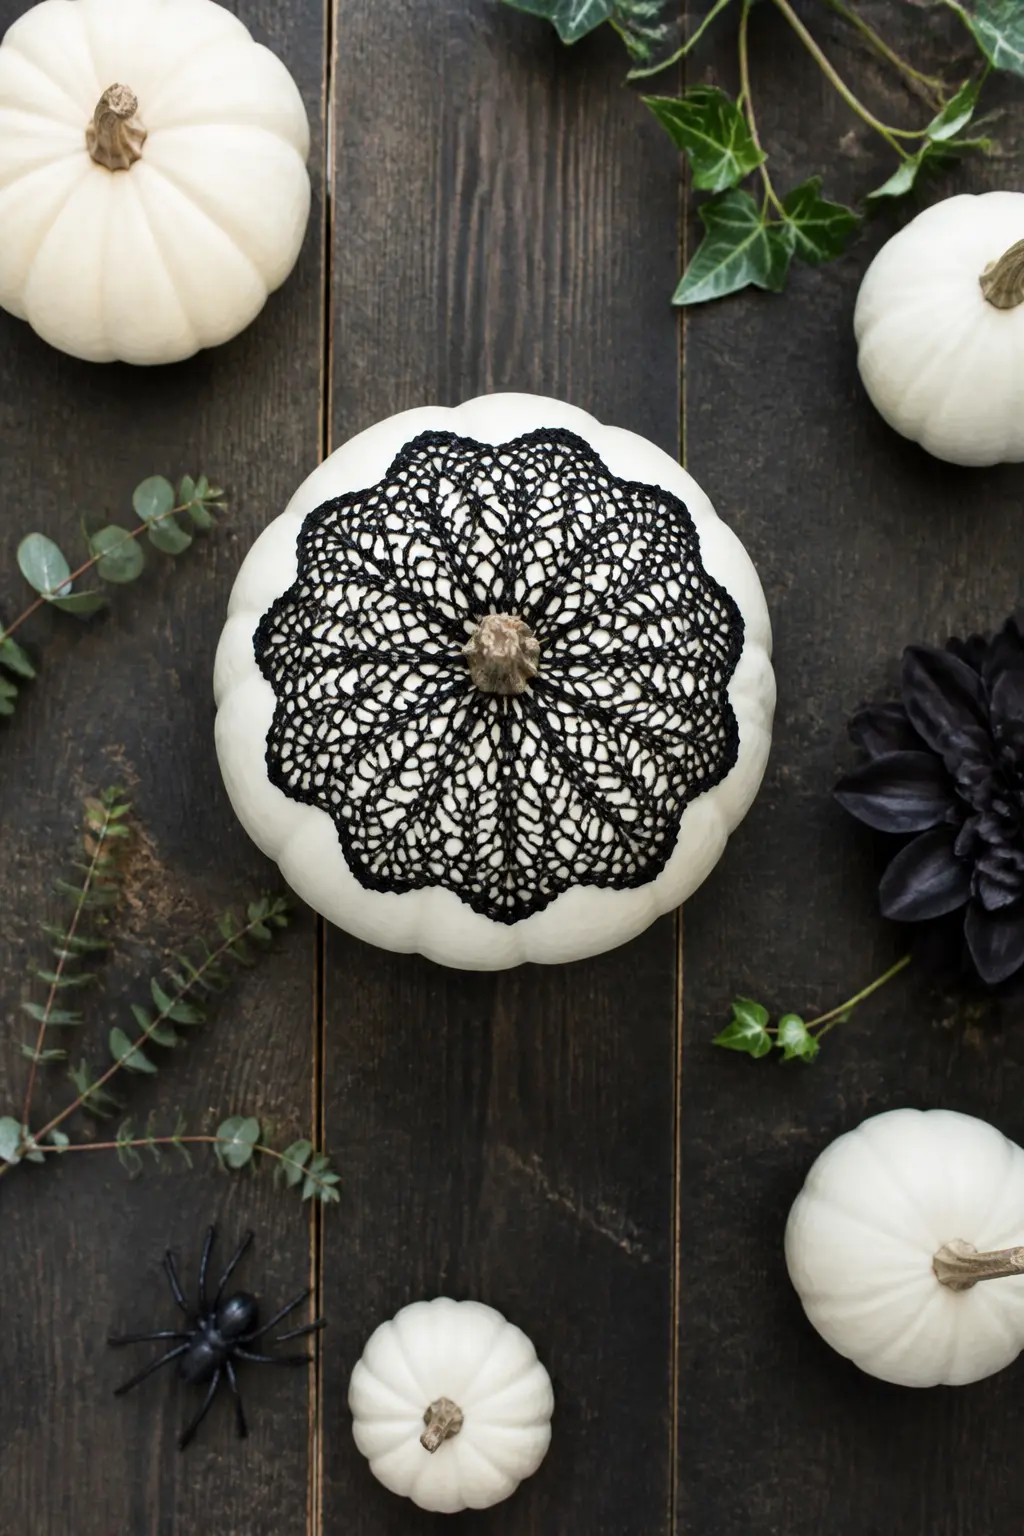
A black paper or fabric lace doily is laid flat on the very top of the pumpkin, centred over the stem, so it drapes slightly over the crown like a cap or a mantilla. A small dot of glue at the stem holds it in place. The doily’s pattern shows against the white pumpkin top and the effect is immediate: part Victorian, part gothic, entirely easy.
Paper doilies are one-season and cost almost nothing. Fabric lace doilies last indefinitely and can be washed and stored. Either works. Choose a doily slightly wider than the pumpkin’s shoulder so the edge softens over the curve rather than sitting like a flat disc.
🛍 Shopping guide
Quick Wins
These three ideas take ten minutes or fewer, use supplies from a craft shop, and still look considered. Keep them in mind when October arrives faster than expected.
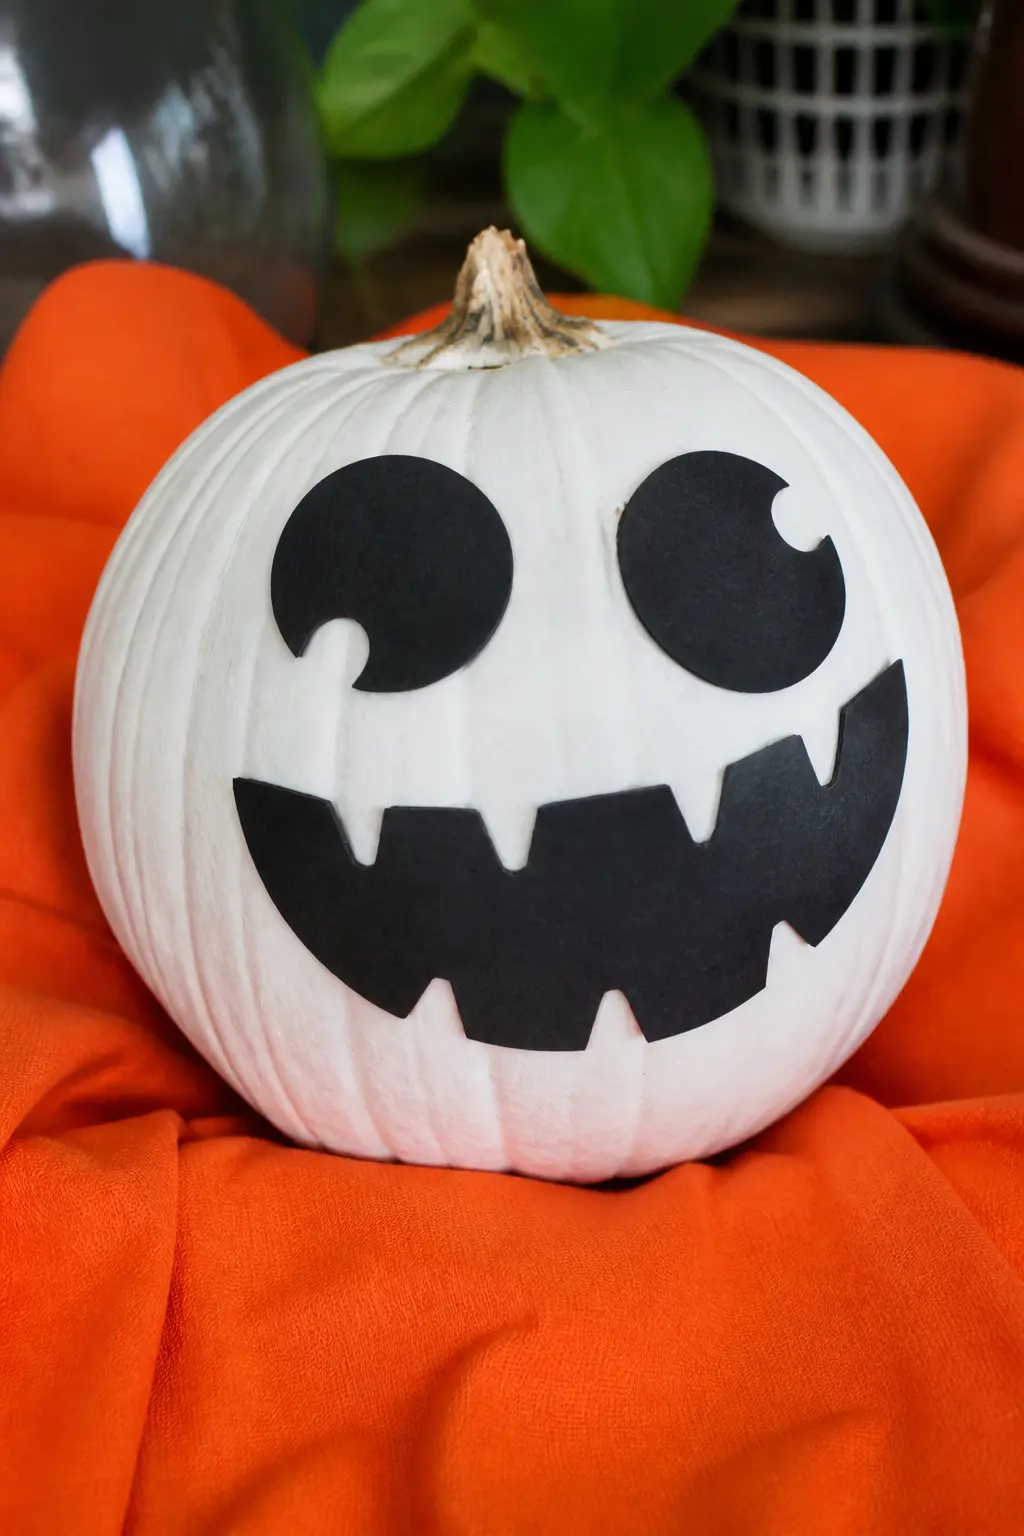
Foam Sticker Eyes and Mouth
Foam self-adhesive eyes and a foam mouth sticker in black, the kind sold in bulk craft packs, are pressed onto the front of a white pumpkin to make an instant monster face. The foam texture against the painted surface reads as intentional contrast at close range. No painting required.
This is the fastest idea on the list, under five minutes, and it suits a pumpkin destined for a child’s room or a party table where the priority is quick and cheerful over refined. Choose foam shapes that are large enough to read from across the room: small stickers disappear on a pumpkin body.
🛍 Shopping guide
How to Choose and Display Your Finished Pumpkin
One strong pumpkin beats a cluster of mediocre ones every time. Pick an idea that matches the palette already in the room, so the pumpkin fits rather than competes. If you are grouping several, vary the sizes and keep the decoration style consistent, whether that is all-black-on-white or all-pastel, so the group reads as intentional.
Faux pumpkins are worth the upfront cost if you plan to use the same design next year. Real pumpkins hold paint well but last around four weeks before they soften, so time the more elaborate treatments for mid-October rather than September. A coat of matte sealer over any painted or glued design protects the finish and is never optional on a real pumpkin sitting outdoors.
For more on building a whole front-door moment around a white-and-neutral palette, 32 Fall Porch Decor Ideas That Hold Up Past the First Frost lays out the full picture without requiring a single orange gourd.
Frequently Asked Questions
What kind of paint do you use on a white pumpkin?
Acrylic craft paint is the standard choice for both real and faux pumpkins. It adheres without priming on a sealed or painted surface, dries quickly and takes a sealer coat well. Chalk paint works on faux pumpkins and gives a matte finish without brushmarks. Avoid watercolour and oil paint: watercolour washes off and oil paint stays tacky for days on a non-absorbent surface.
How do you get a smooth white base on a real pumpkin?
Clean the pumpkin with a damp cloth and let it dry fully. Apply two coats of matte white spray paint, letting each coat dry for at least an hour before the next. Spray paint gives a smoother base than brush-on paint on a real pumpkin because it does not catch on the natural ridges and texture. A brush-on base coat is fine for a faux pumpkin with a smooth moulded surface.
Do you need to seal a painted pumpkin?
Yes, if it will be displayed outdoors or if anything is glued to the surface. A matte sealer spray over any painted or glued decoration prevents peeling, protects against moisture and locks rhinestones, lace and other attachments in place. Skip the sealer only on a faux pumpkin kept indoors in a dry space.
Can you decorate a faux craft pumpkin the same way as a real one?
Mostly, yes. Faux pumpkins accept paint, glue, pins and decoupage well. The differences: foam faux pumpkins take pins and are the only type suitable for the pearl pin lettering idea, resin faux pumpkins need a light sanding before paint adheres, and real pumpkins eventually soften, so anything elaborate is better invested in a faux pumpkin you can reuse.
How long does a painted real pumpkin last?
A real pumpkin kept outdoors lasts roughly three to four weeks after painting before it begins to soften. Indoors and away from heat, it can last six weeks. Painting a real pumpkin rather than carving it extends its life because the skin remains intact. A sealer coat also slows moisture loss slightly.
What is the easiest white pumpkin decoration idea on this list?
The foam sticker face takes under five minutes and requires no painting at all. The felt witch hat and the black lace doily cap are also five-minute ideas. The pearl pin lettering is fast once you have the pins, but requires a foam pumpkin specifically. For a painted idea with minimal skill, the BOO lettering with a broad paint marker is the most forgiving: the letters are large, bold and look intentional even if the line is not perfectly straight.
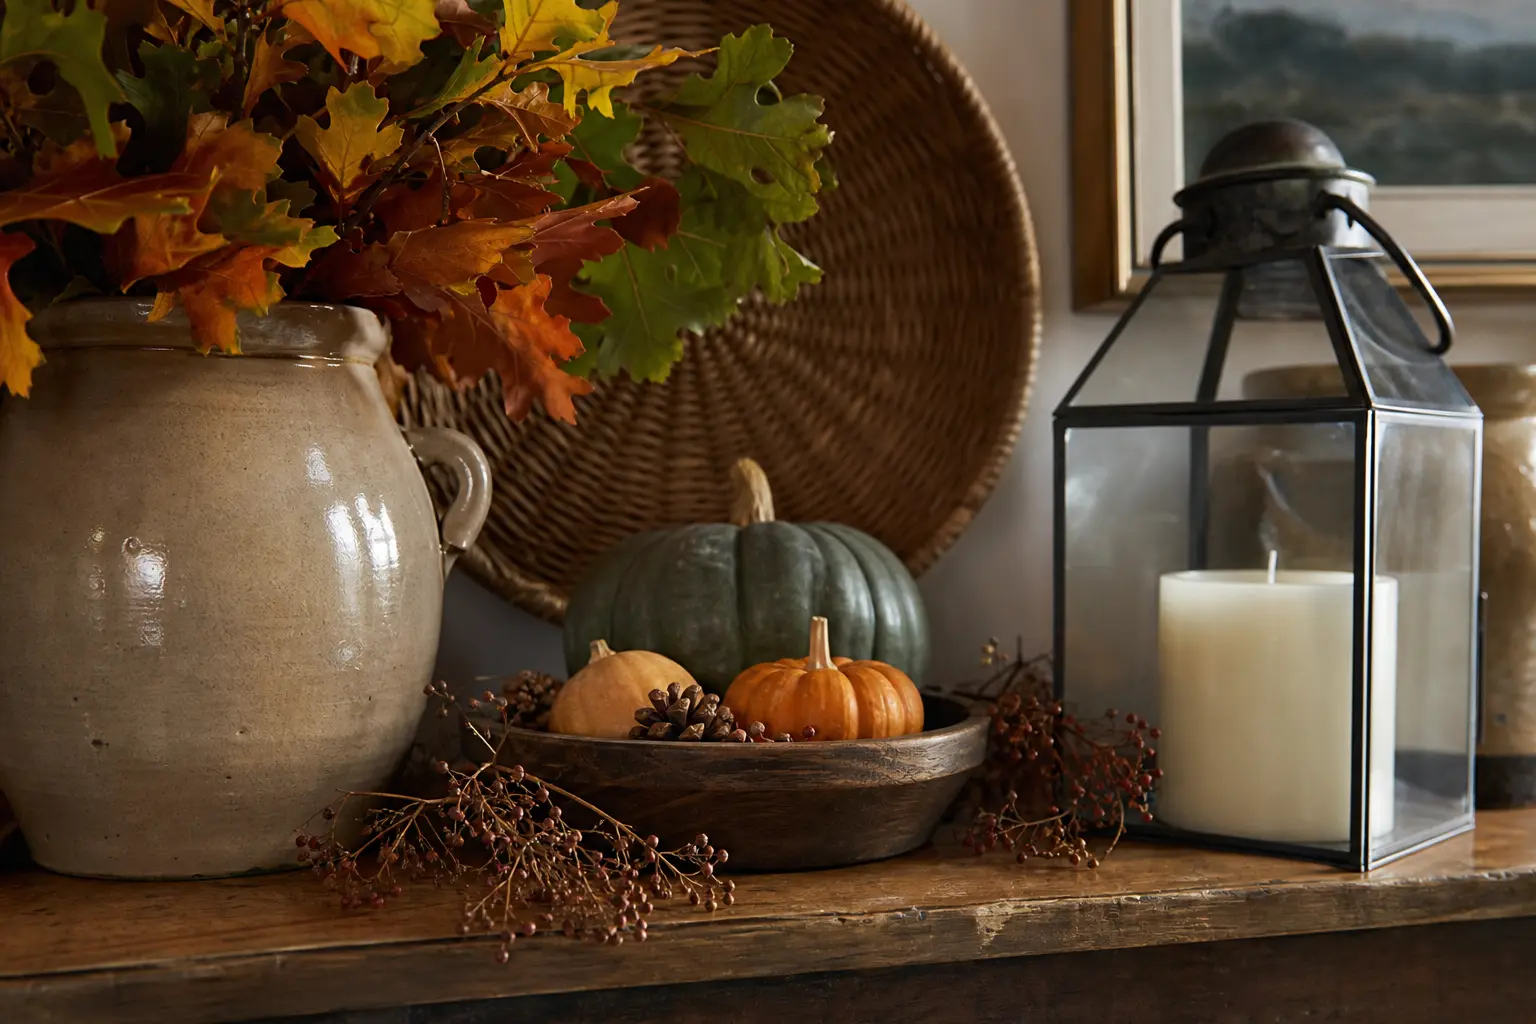
17 fall decor collections for every room, budget and skill level, from porch to mantle, so you can p
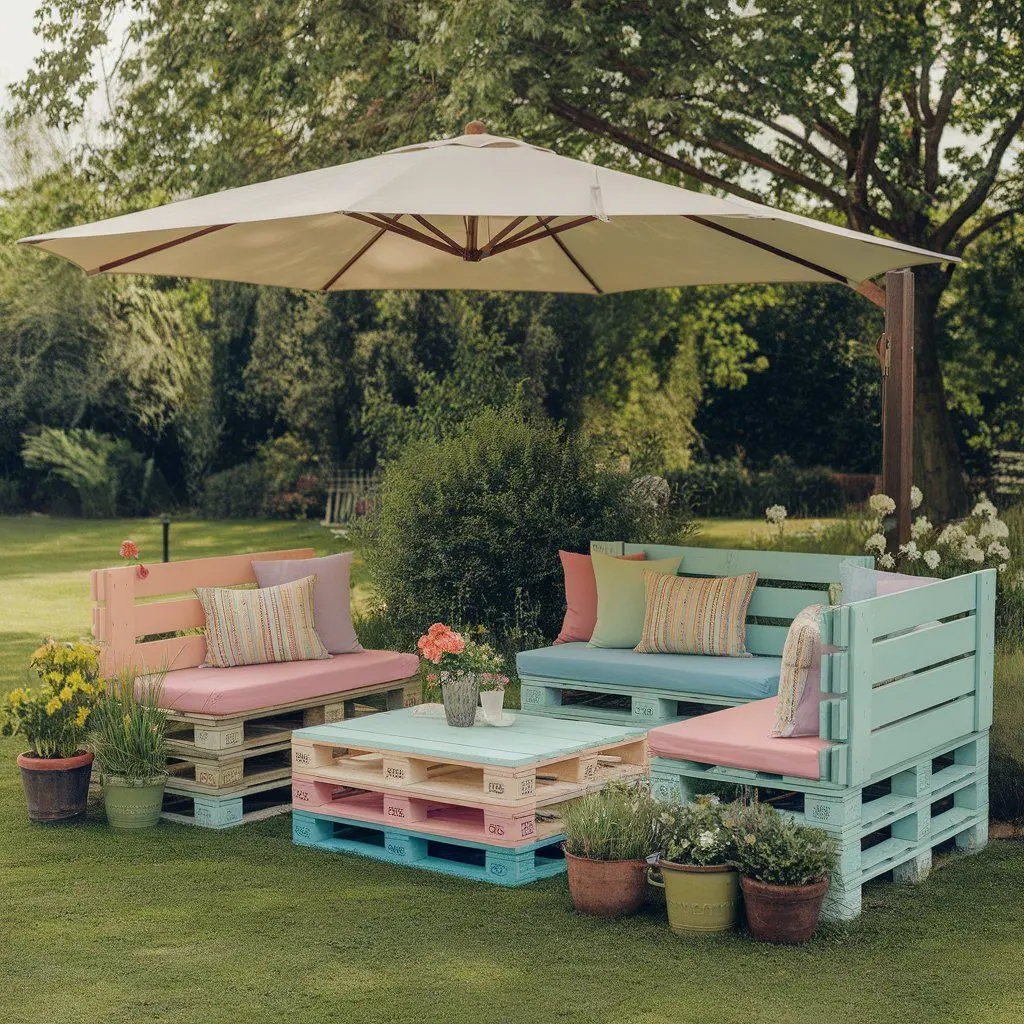
My backyard used to be the place I walked through to get to the garbage cans. Not a place I actually
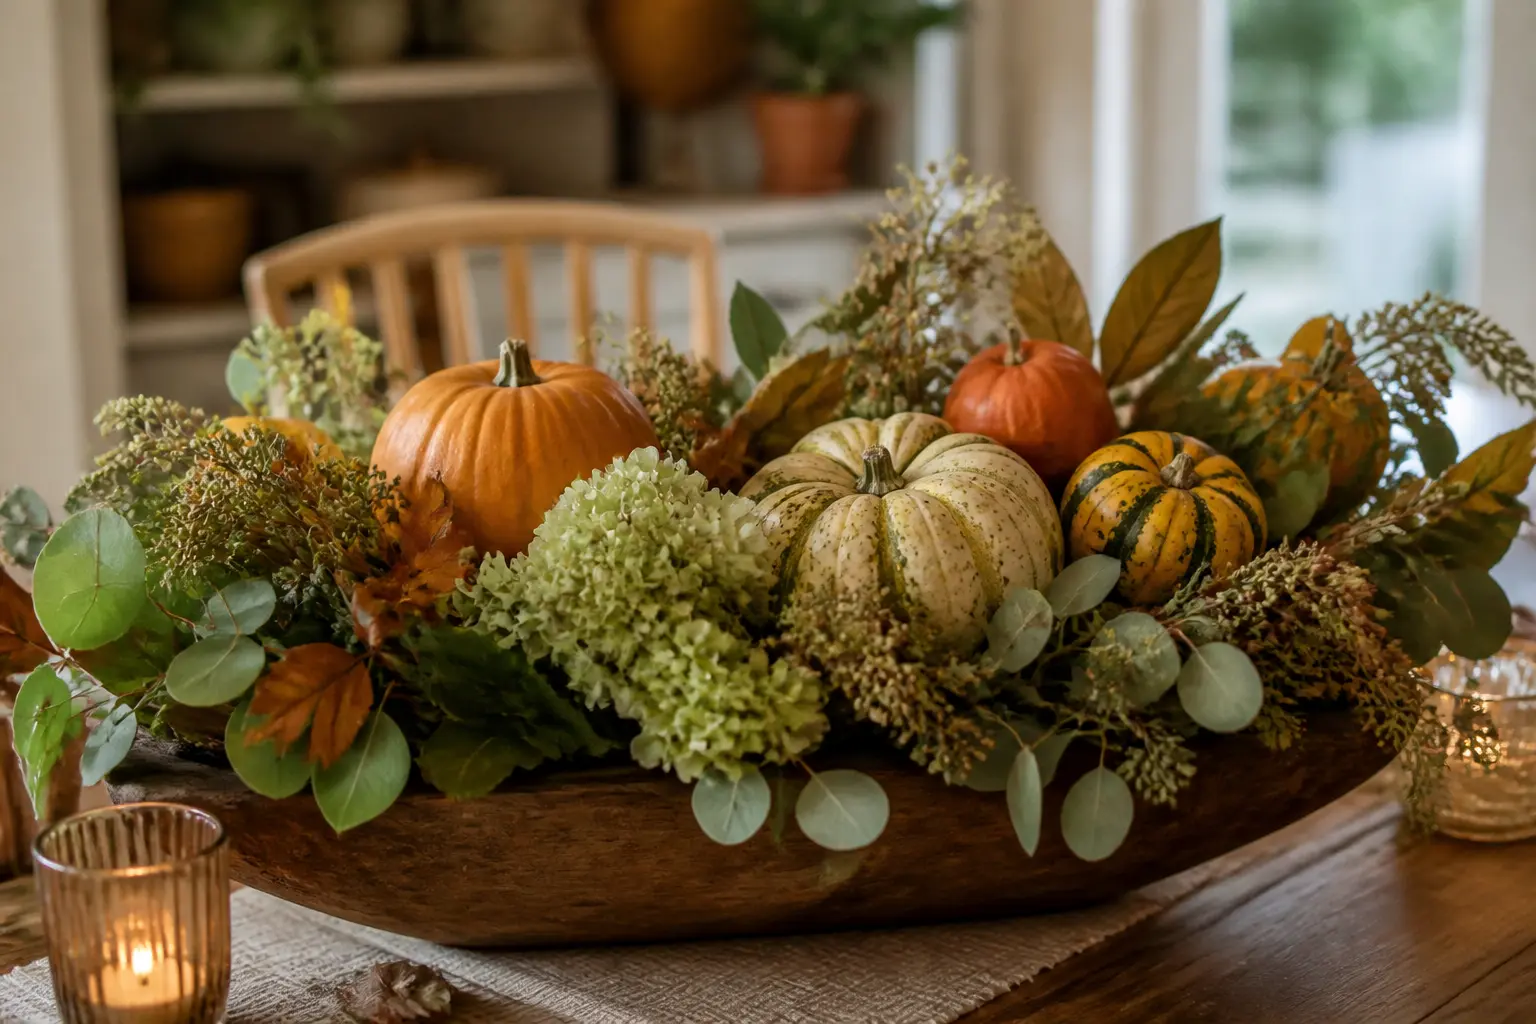
32 fall centerpiece ideas that actually look expensive, work on any table, and take under an hour to
Leave a Reply