

25 Bedazzled Halloween Crafts Ideas for Anyone Who Bedazzles Stuff All Year
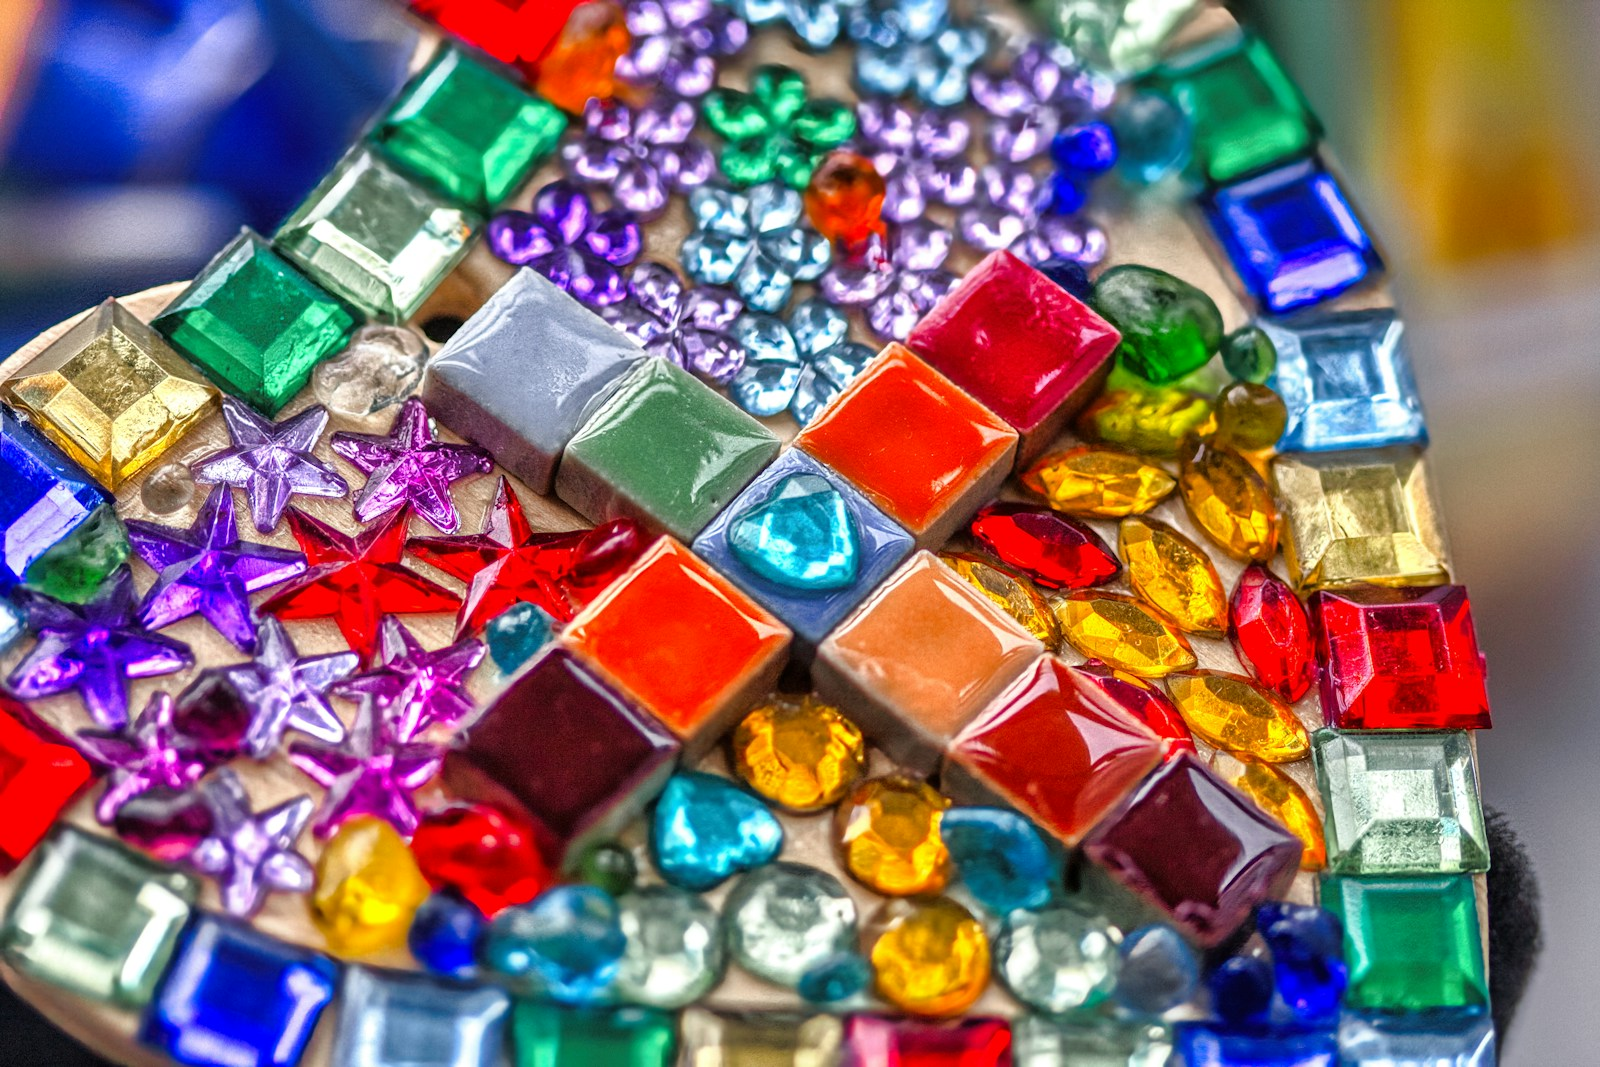
Rhinestones are not a Halloween-only supply, which is exactly why this list exists. If your craft drawer already holds flat-backs in four sizes and a gem applicator wand, October is simply the season when everyone else finally understands you.
Every idea here skips the orange-and-black default and lives instead in dusty purples, chalky whites, soft pinks and silver. The gore stays out. The AB crystals stay in. Some of these take twenty minutes; a few take an evening.
All of them look like you spent more than you did, which is the whole point.
For more no-carve pumpkin directions and adult-friendly Halloween projects, see 16 Halloween DIY Crafts That Look Like You Bought Them and 18 Halloween Crafts for Adults That Are Not Kid Projects in Disguise.
Twenty-five ideas follow, grouped by what they are so you can go straight to the section that fits your afternoon.
This post contains affiliate links. If you buy through them, I may earn a small commission at no extra cost to you.
Bedazzled Pumpkins
A pumpkin with a matte chalk-paint base and a handful of gems pressed into it reads entirely differently from a carved jack-o-lantern.
The surface stays smooth, the gems catch whatever light hits them, and the whole thing lasts well past November 1 if you use a faux pumpkin.
These five pumpkin ideas each take a different approach to placement so they do not look like the same project in five sizes.
Lilac Pumpkin Scattered with Pastel Gems
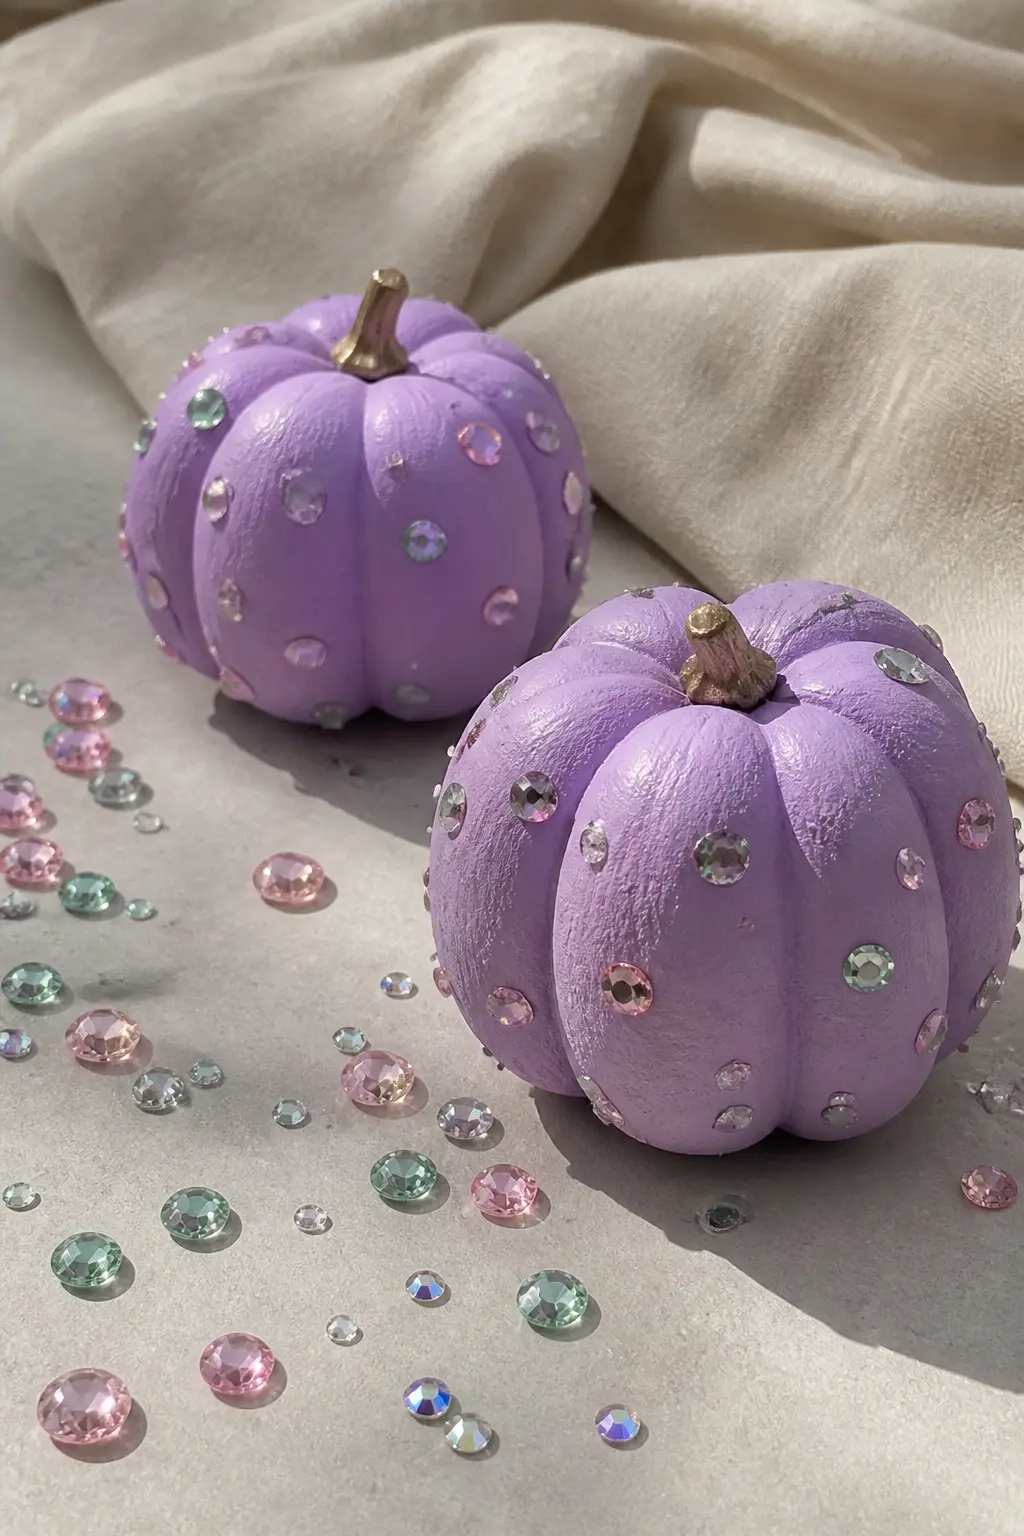
Paint a small faux pumpkin in matte lilac. Let it dry completely, then press pastel flat-back rhinestones directly into the surface at irregular intervals, using gem glue for permanence. The key is spacing: leave more bare surface than you cover.
The scattered placement reads as deliberate rather than accidental when every gem is at least a thumb-width from its neighbour. Use the same adhesive on the stem, then dust it lightly with pearl pigment powder while the glue is still tacky.
🛍 Shopping guide
White Pumpkin with a Crystal Constellation
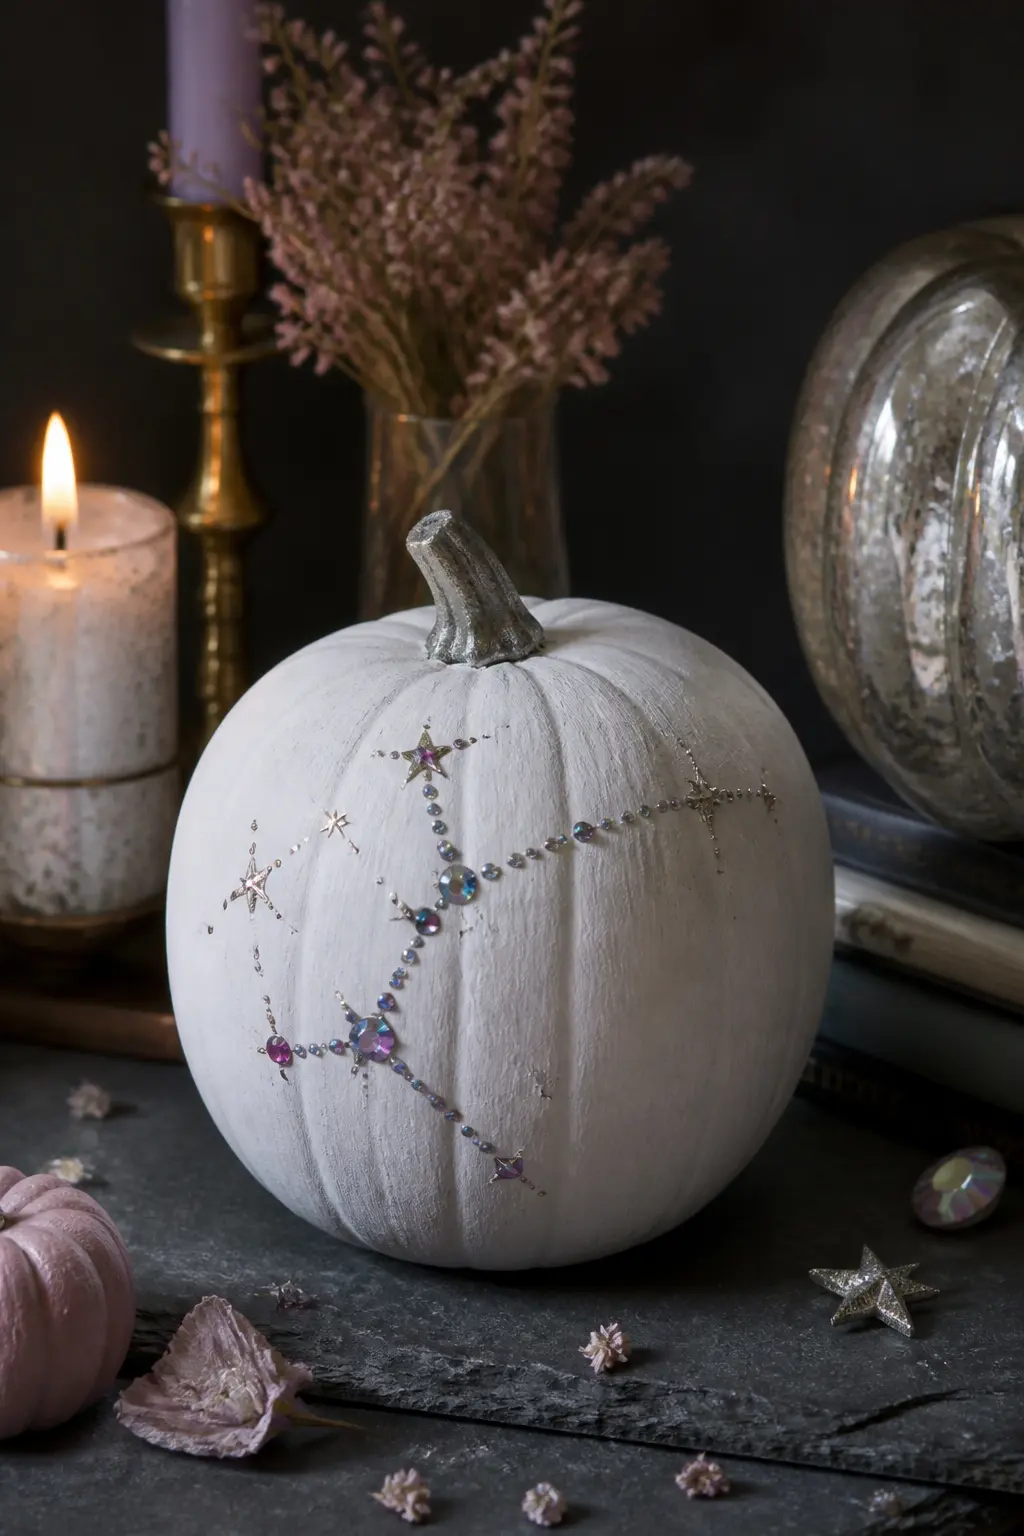
A chalky white pumpkin becomes a night-sky piece when you map out a constellation shape in silver and AB crystal rhinestones. Sketch the pattern lightly in pencil first: Orion and Cassiopeia both have simple enough shapes to translate well onto a curved surface.
Use tiny 3ss gems for stars and a single large 20ss stone at the focal point. Add a fine dusting of silver chunky glitter around the gems while the glue is still open. The result looks considered rather than covered.
🛍 Shopping guide
Blush Pumpkin with a Jewelled Stripe
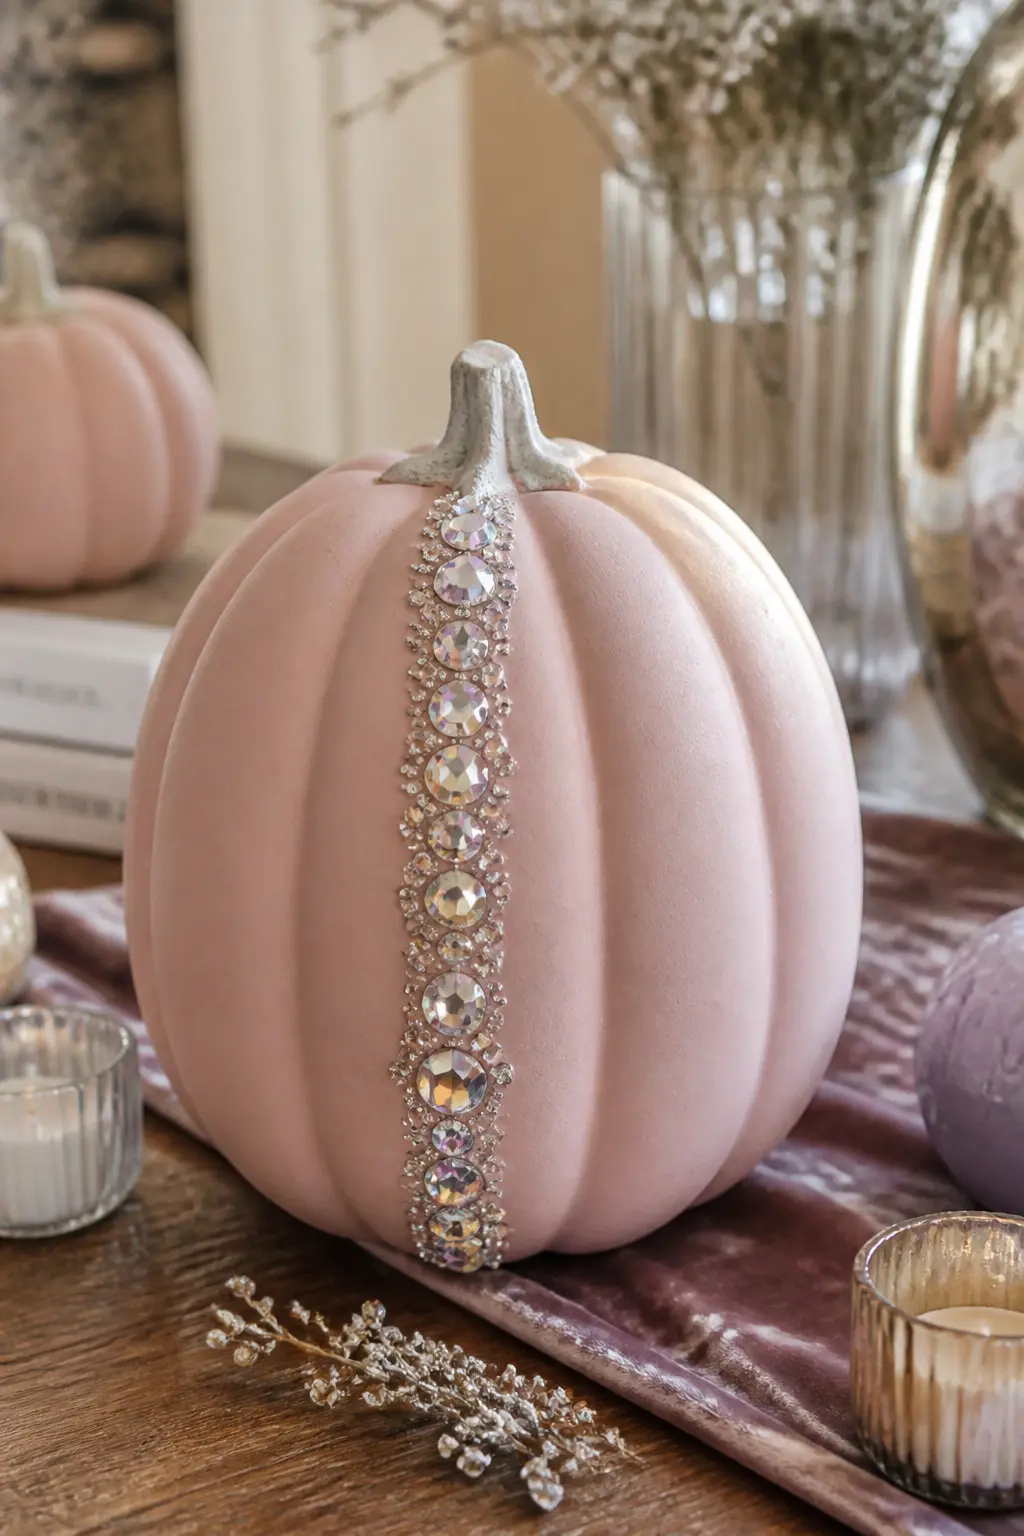
A single vertical stripe of mixed gems runs from the base of the stem to the bottom of a blush-painted pumpkin, following the natural ridge of the gourd. The stripe graduates: start with tiny clear gems at the base, increase to medium pink stones in the middle, and finish with a large statement jewel at the widest point.
This graduated placement turns a pumpkin into something that looks almost like a piece of costume jewellery at scale. Lean it slightly forward so the stripe faces the room.
🛍 Shopping guide
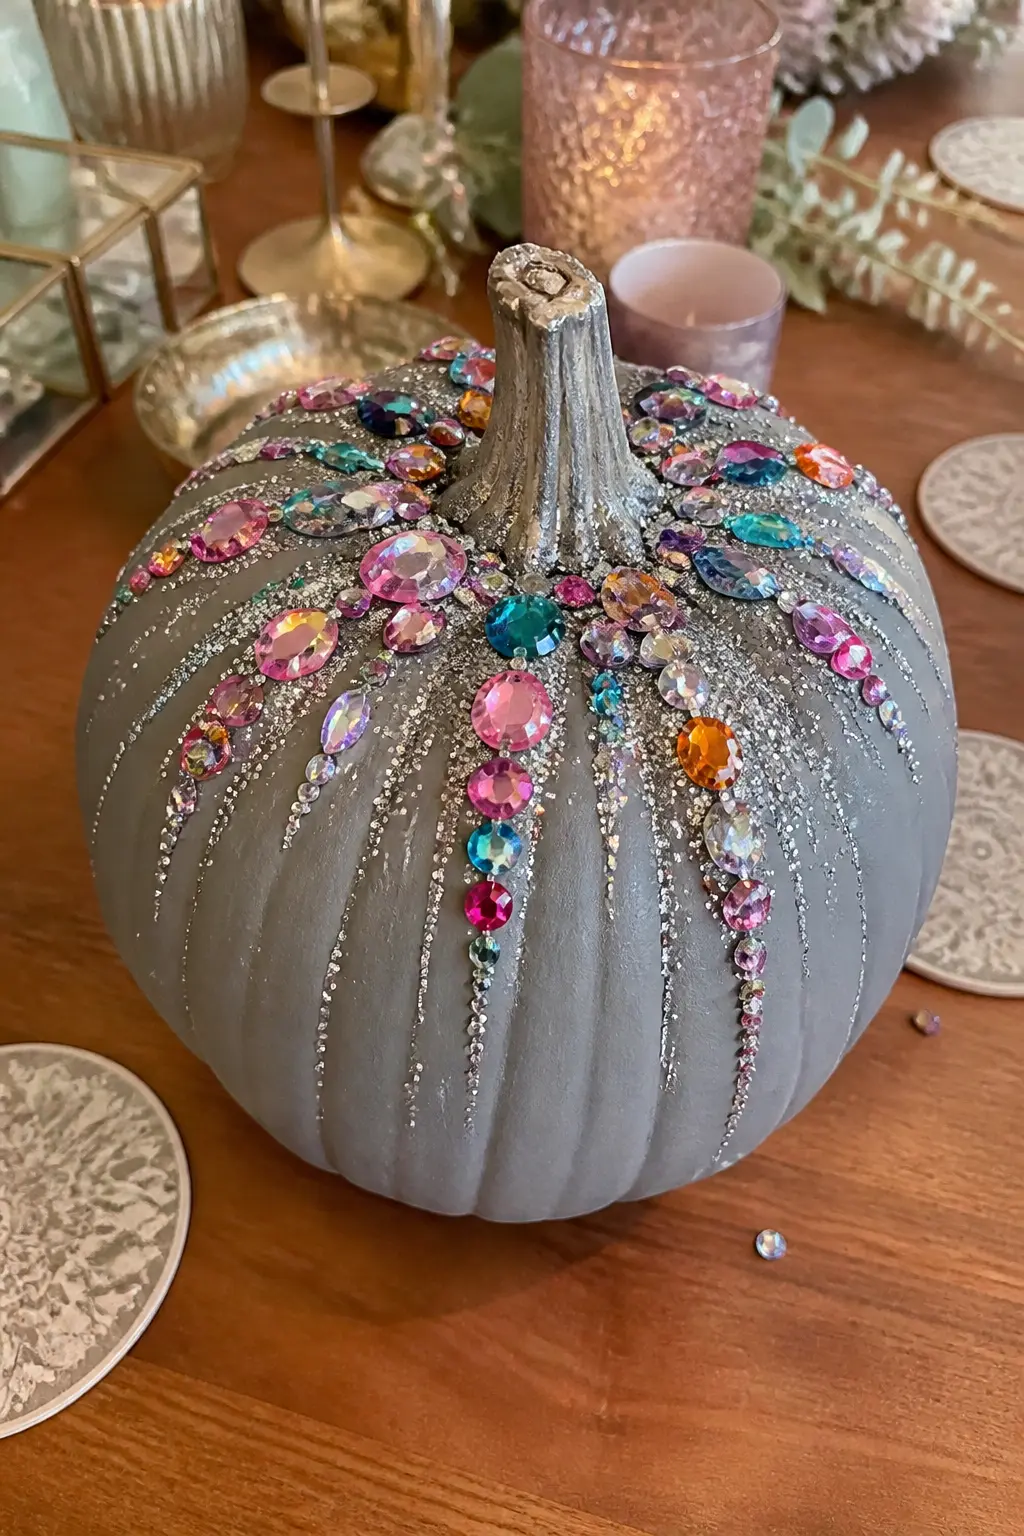
Glitter-and-Gem Pumpkin with a Color Burst
Paint the pumpkin in flat warm grey or pale blue-grey. Then apply a burst of multicolour large acrylic gems radiating out from the stem, surrounded by loose holographic glitter pressed into wet glue. The gems here are the bold, oversize kind, 20mm to 30mm, so the piece reads from across the room.
This one works best on a medium to large pumpkin where the surface area justifies the drama. Keep the rest of your table decor very simple so the pumpkin holds the stage.
🛍 Shopping guide
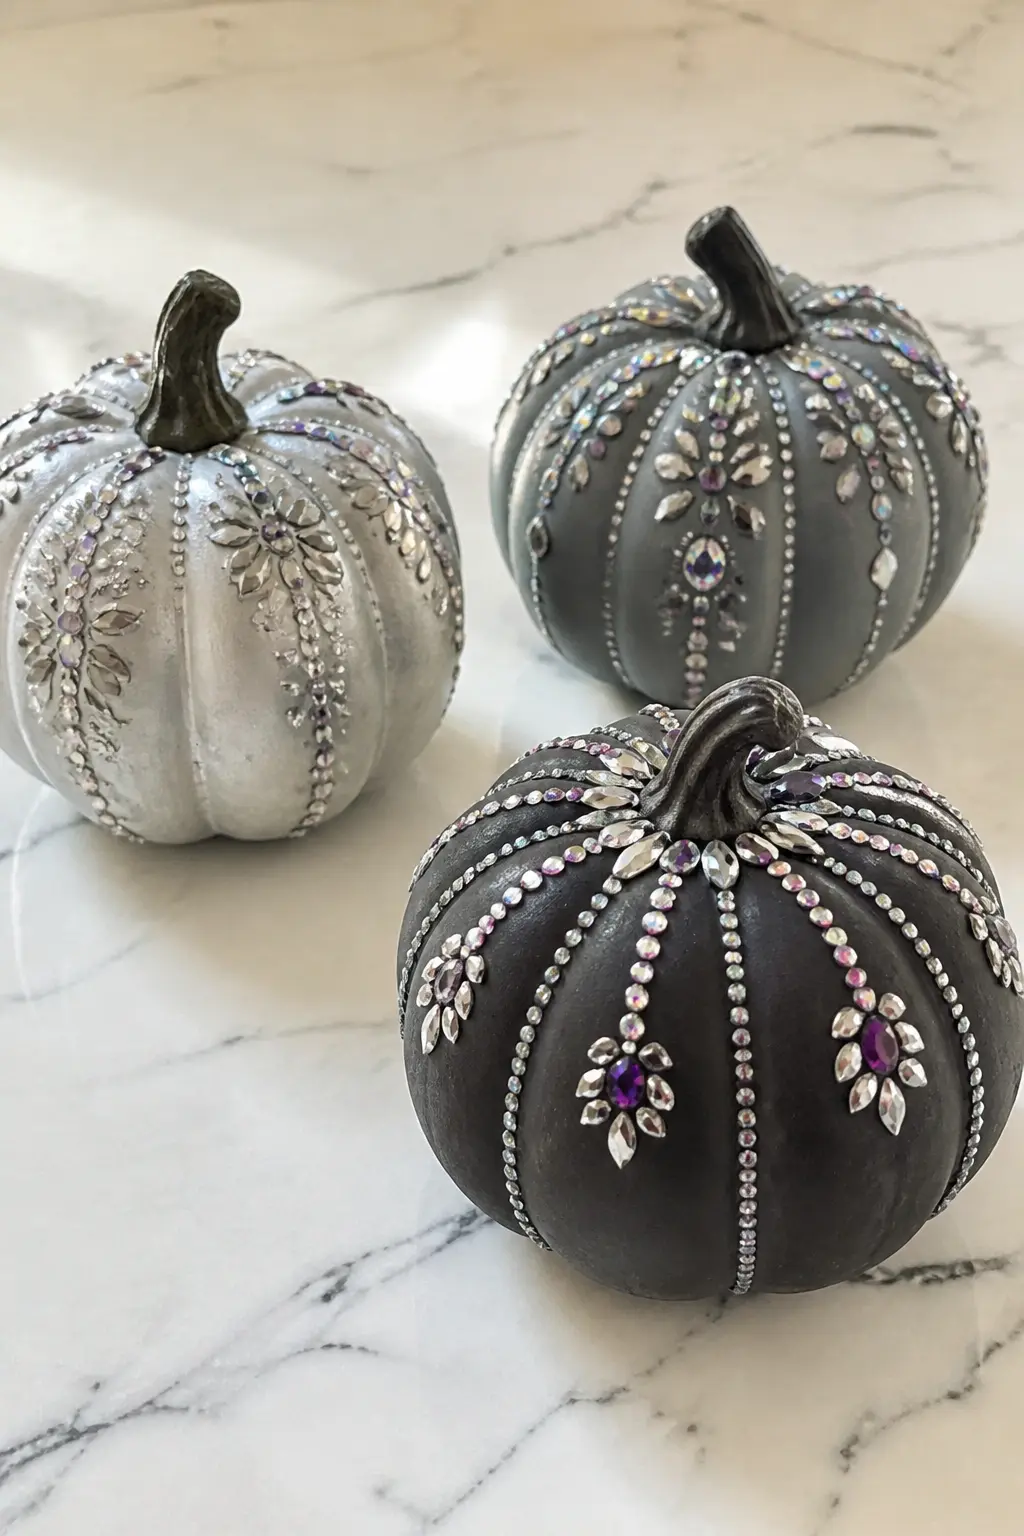
Mini Pumpkin Trio in Silver and Smoke
Three mini faux pumpkins painted in slightly different tones, pale silver, warm stone and deep charcoal, sit together as a group. Each carries a different gem treatment: one has a ring of clear crystals around its equator, one wears a cap of gem clusters near the stem, and one has tiny gunmetal stones in a grid pattern.
Grouping three gives you variety without committing to three separate large projects. The palette holds them together even though each surface treatment is different.
🛍 Shopping guide
Bedazzled Candles and Votives
A plain pillar candle or a glass votive costs almost nothing and takes gems beautifully once you know the trick: use a dedicated gem glue, not hot glue, so the bond holds near heat.
Work in columns or rings rather than scattering randomly, and the result looks architectural. Cluster three finished candles at different heights for an instant centrepiece that requires zero floral skill.
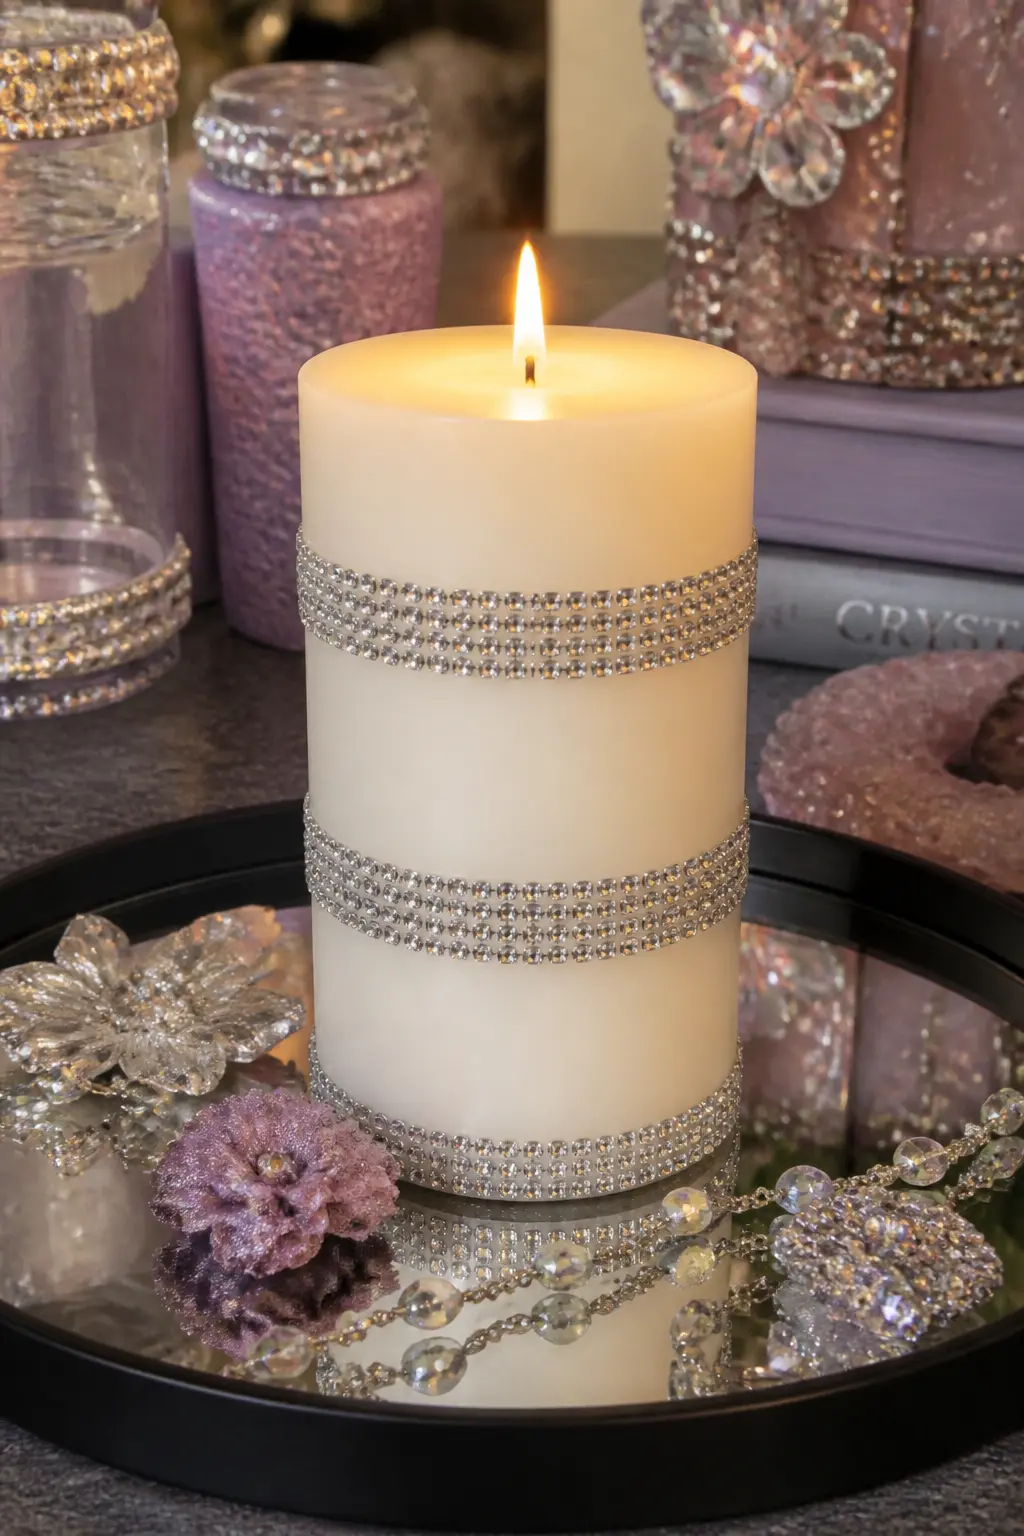
Banded Crystal Pillar Candle
A white or ivory pillar candle gets three horizontal bands of clear and silver rhinestones, spaced evenly from base to top. Each band is a single row of the same size stone, so the geometry is crisp rather than busy.
Use a gem glue rated for proximity to heat, and keep the top band at least two inches below the wick.
Displayed on a mirrored tray with two plain candles for height contrast, this costs almost nothing and looks like a luxury prop. Replace the candle insert after each season but keep the finished look for years.
🛍 Shopping guide
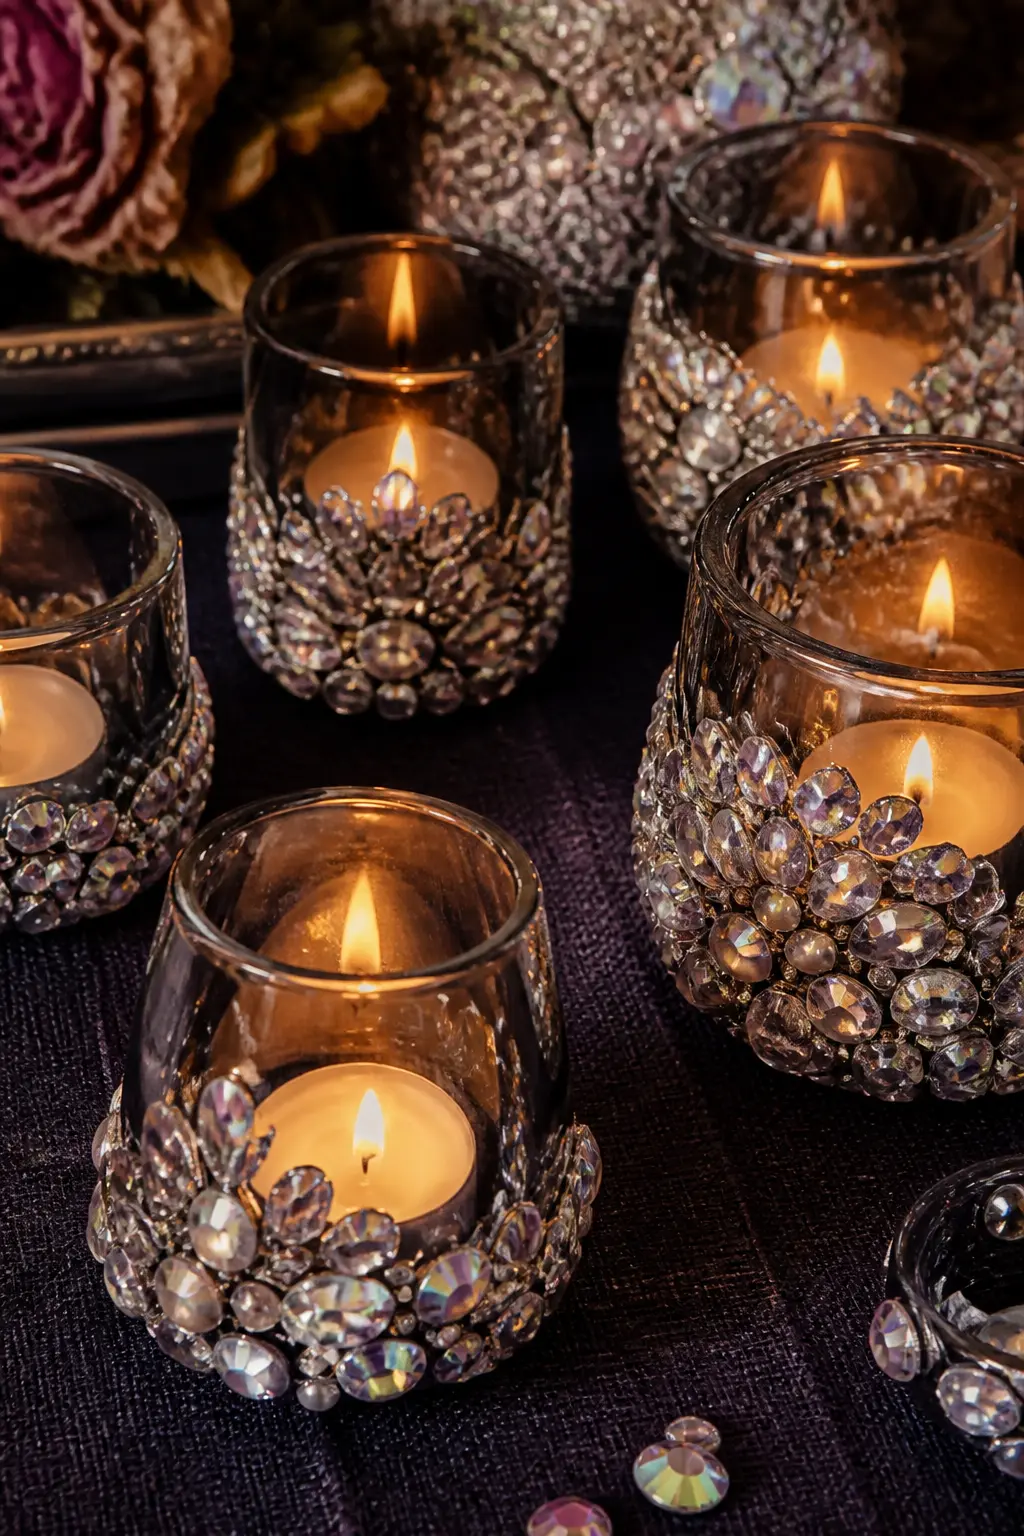
Smoky Glass Votive with AB Crystal Clusters
Take a squat smoky glass votive and cluster AB flat-back rhinestones across the lower half, densely packed so the glass beneath barely shows. Leave the top half bare: when the tea light inside burns, the clear upper glass glows and the bedazzled lower half throws prismatic flecks across the tablecloth.
The contrast between dense crystals and clean glass is what makes this interesting. Four of these in a cluster at different heights, using hurricane holders as risers, fill a table centrepiece spot without a single flower.
🛍 Shopping guide
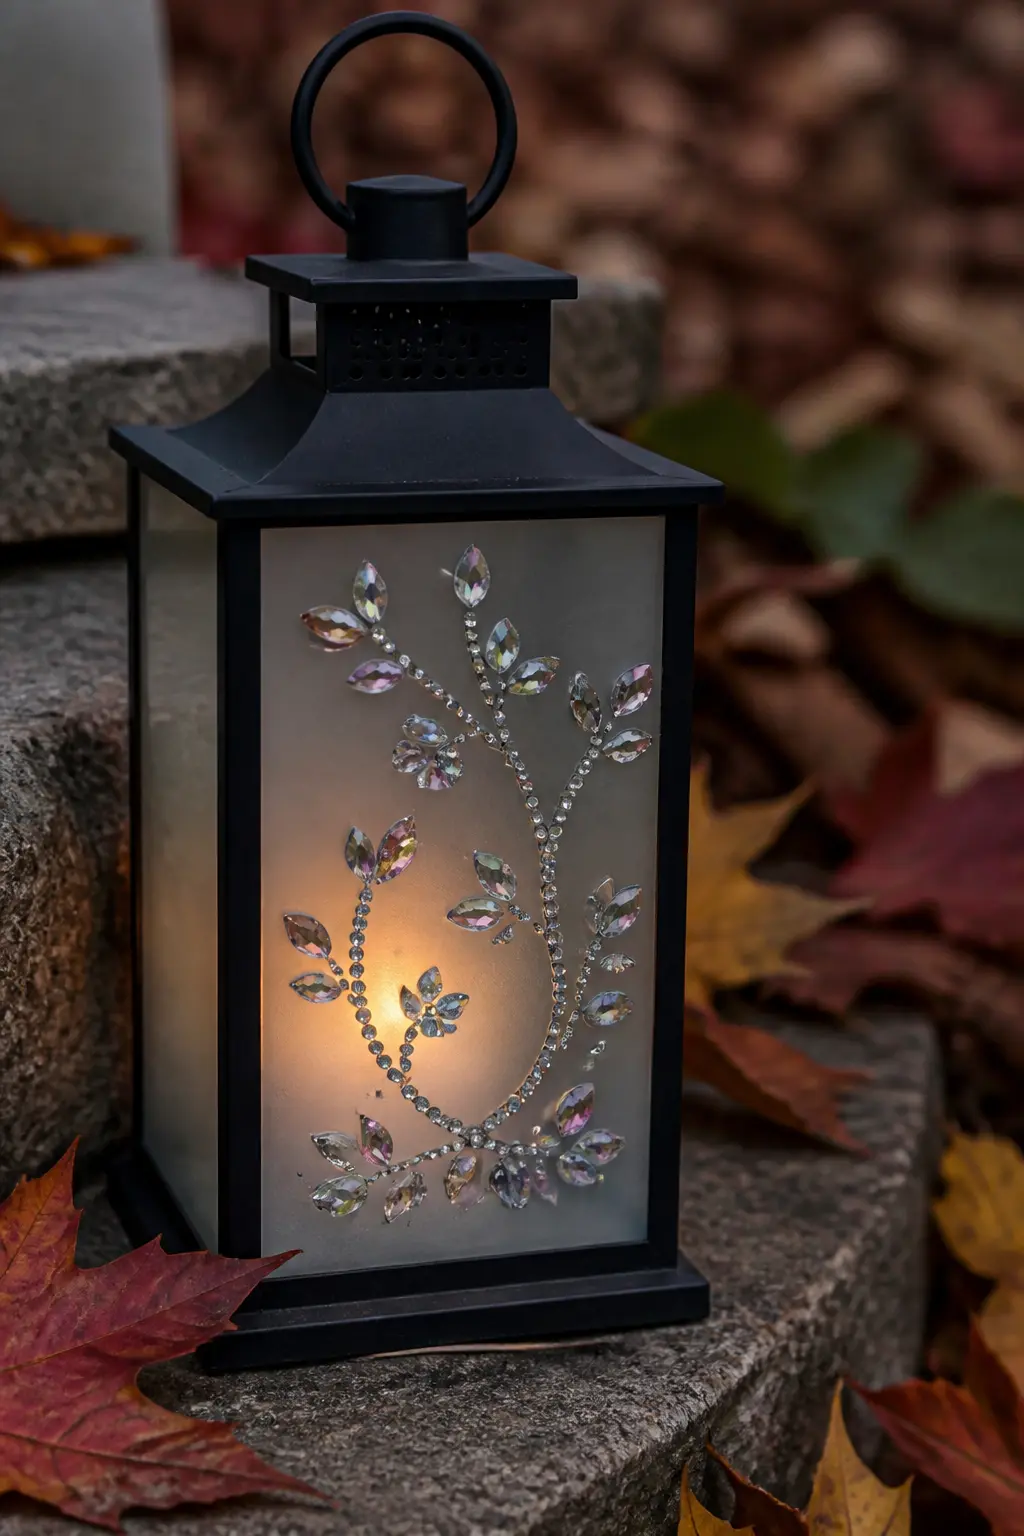
Frosted Lantern with Gem Vine
A metal or black wire lantern gets a trailing vine drawn across one panel in gem glue, then covered immediately in a mix of tiny clear and pale amethyst rhinestones. The vine shape gives the random-sized gems a structure to follow so the result looks intentional.
Frost the glass panels with a light coat of frosting spray before you begin, so the interior light diffuses softly rather than shining a hard beam through the gems. This works beautifully on a front step or a console table near the door.
🛍 Shopping guide
Bedazzled Witch and Ghost Decor
Witches and ghosts are the shapes that suit this aesthetic best: both are already associated with silver and white, so covering them in crystals feels logical rather than kitschy.
The five ideas here range from a standalone decorative piece to something wearable for a low-effort costume. All stay firmly in the pale, sparkly end of Halloween rather than the spooky end.
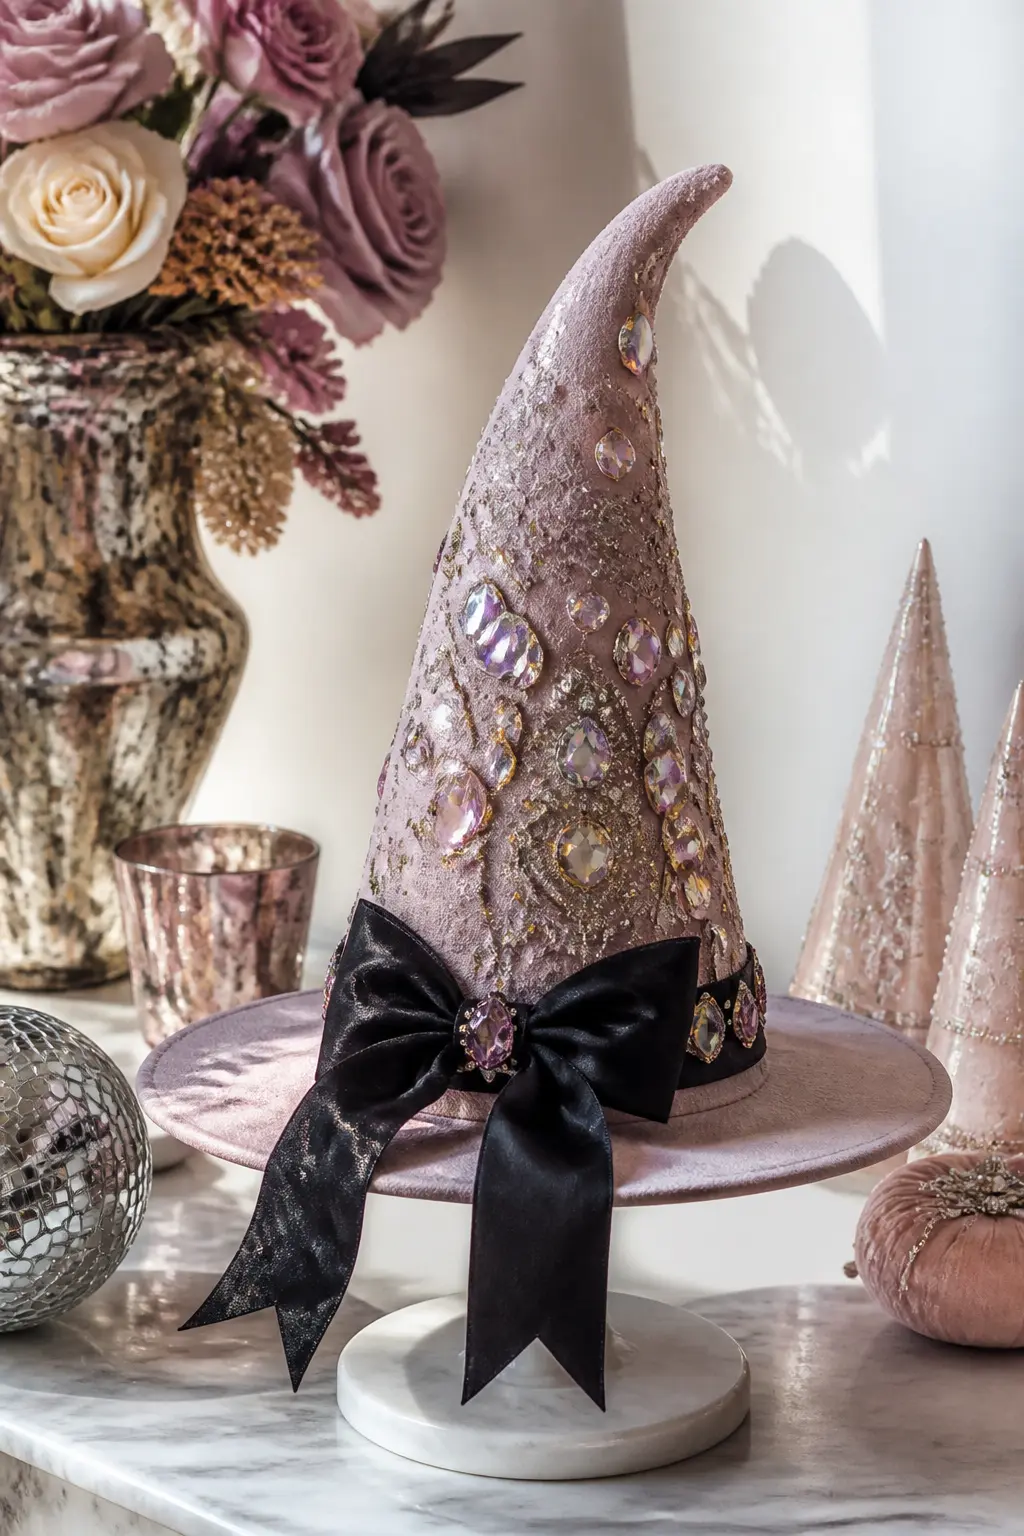
Jewelled Crystal Witch Hat Centerpiece
A foam or cardboard witch hat form, painted in dusty blush or pale lilac, becomes a statement centrepiece when the brim edge and the hat band area are covered in rhinestones and a black ribbon bow.
Use oversize statement gems, 15mm to 20mm teardrops and rounds, clustered at the front of the band. Fill the spaces with smaller AB stones and tiny silver star charms.
Stand it on a short pedestal or a cake stand so it commands the table. This is the piece guests photograph first, and it took you one evening to make. Inspired by the current trend for jewel-encrusted witch hats that are more glamour than fright.
🛍 Shopping guide
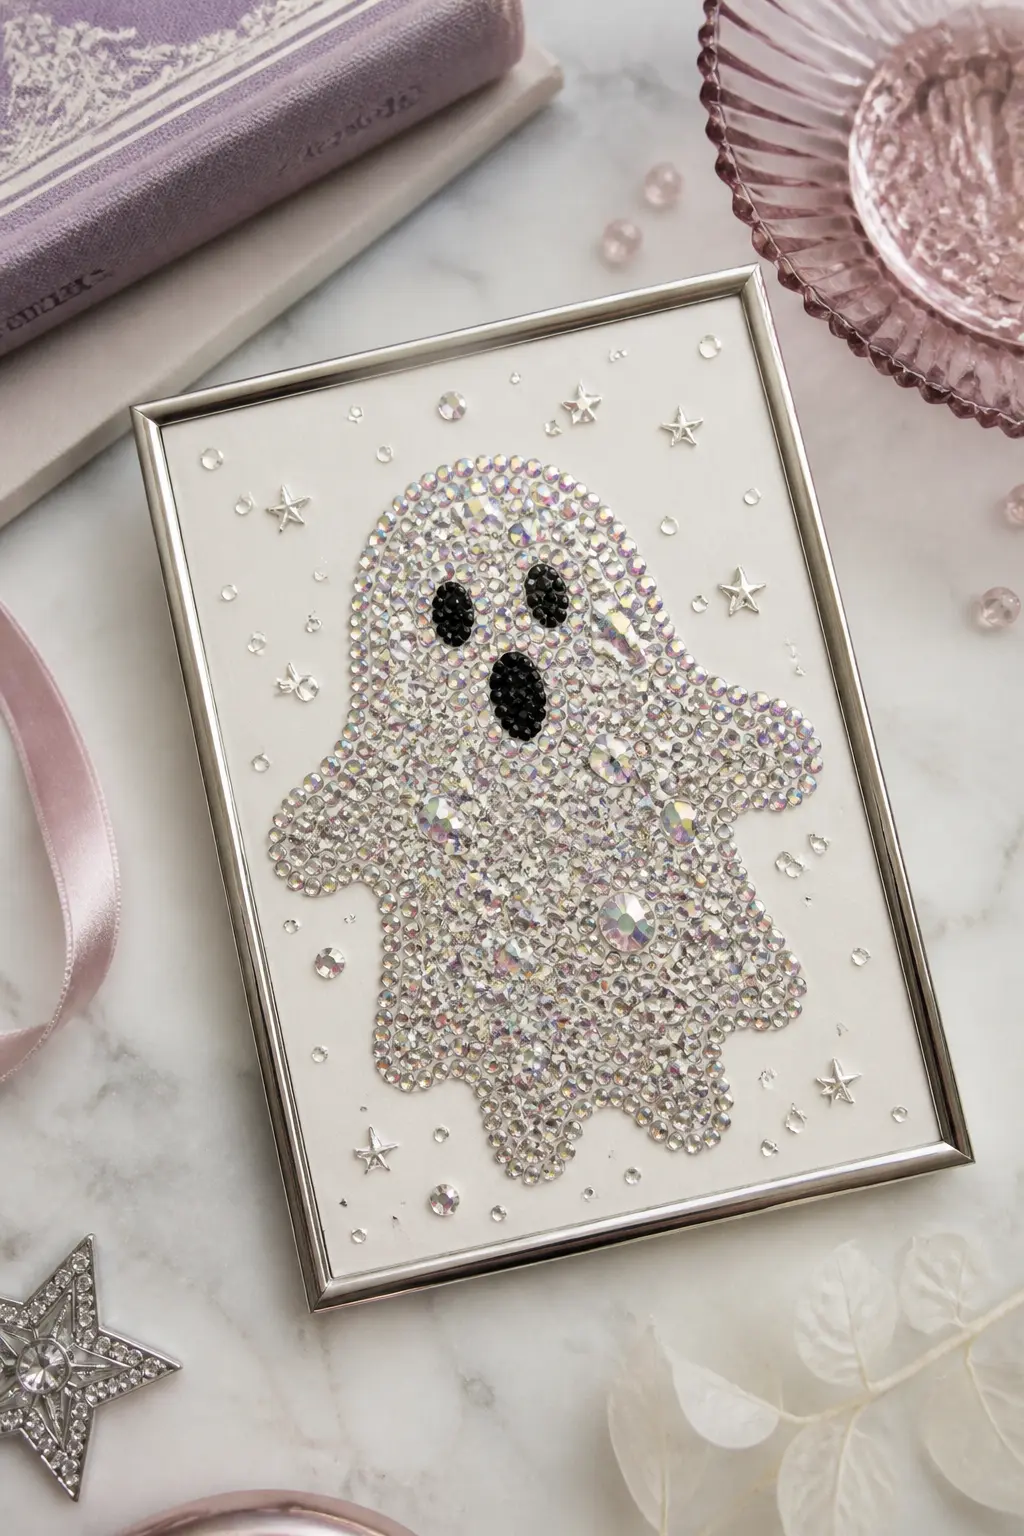
Rhinestone Ghost Wall Art
On a piece of thick watercolour card or cotton rag paper, draw a simple ghost silhouette in pencil.
Fill the shape entirely with flat-back rhinestones in AB white and clear, using the larger gems toward the centre and graduating to tiny 3ss stones at the edges so the shape dissolves softly. Add two small black onyx or jet rhinestones for eyes.
Frame it in a simple silver or white frame and hang it as you would any art print. This is the project that confuses people most pleasantly: they cannot immediately tell what the surface material is from across the room. See also 20 Halloween Arts and Crafts to Fill a Whole October for more wall-worthy project ideas.
🛍 Shopping guide
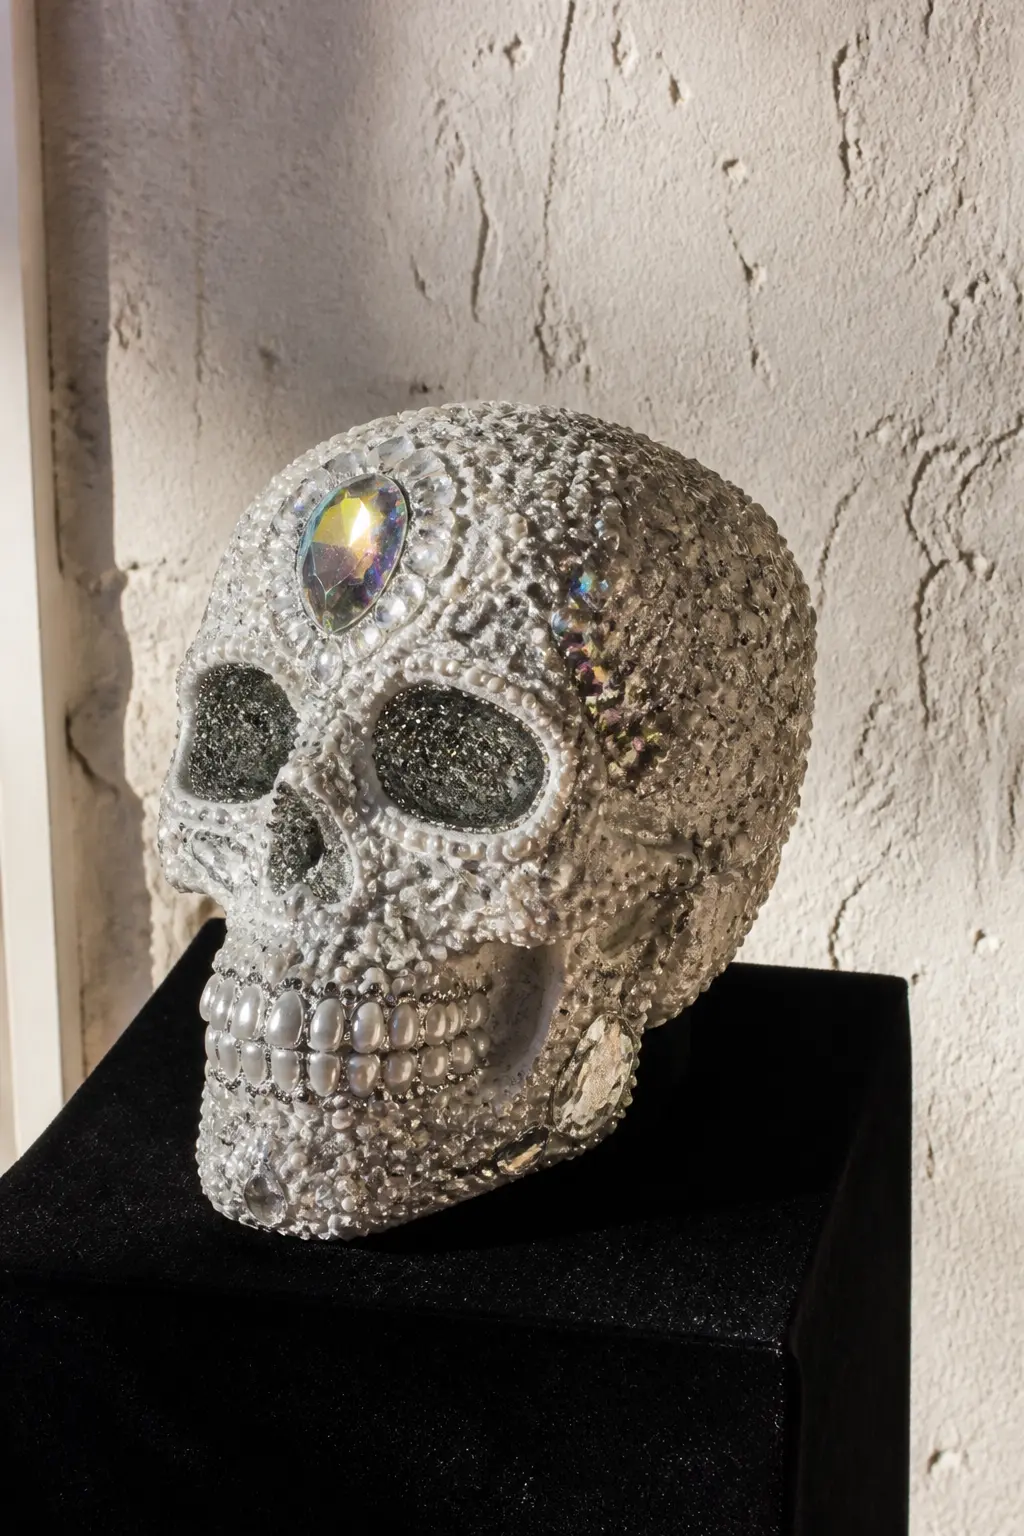
Crystal Skull Decorative Object
A resin or ceramic decorative skull, the kind sold in home decor shops rather than costume shops, gets an entirely new life when fully covered in white and pale grey rhinestones. Work section by section using strong gel glue, and press gems firmly into any recessed areas around the eye sockets last, using tweezers for control.
The finished piece reads as a sculptural object rather than a prop. Set it on a small acrylic riser or a velvet-covered box to lift it to eye level on a shelf. This one earns its place all of October without looking like it belongs at a child’s party.
🛍 Shopping guide
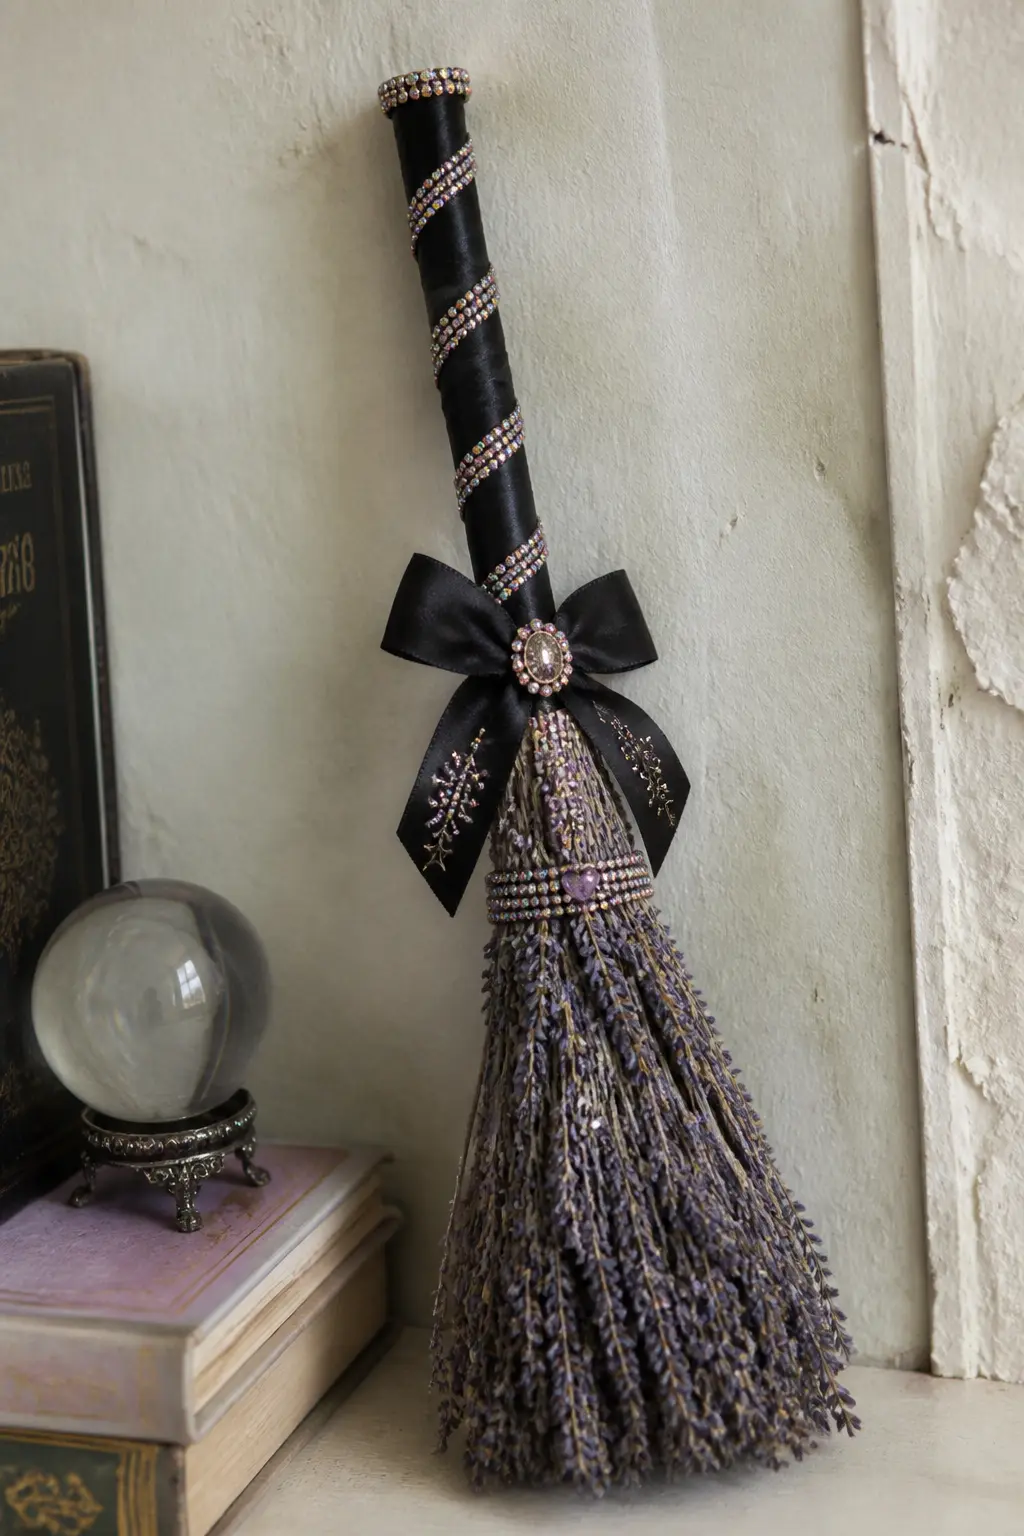
Bedazzled Witch’s Broom
A decorative mini broom, the kind sold in autumn craft sections, gets a rhinestone treatment along its handle. Wrap the handle first in narrow black velvet ribbon, then glue alternating bands of clear and smoky topaz rhinestones directly over the ribbon at even intervals.
Tie a cluster of dried lavender and a black silk ribbon bow at the base of the handle where it meets the bristles. Leaned against a wall or hung on a hook, this reads more apothecary than Halloween aisle, which is exactly the right register.
🛍 Shopping guide
Bedazzled Table and Party Decor
The table is where gems earn their keep, because candlelight hits them from below and the whole surface shimmers. These ideas work whether you are hosting ten people or setting a single dessert table for a small gathering.
None of them require a full table linen overhaul: the gem work sits on top of whatever you already own. For more Halloween party entertainment ideas, see 25 Seriously Fun Halloween Party Games.
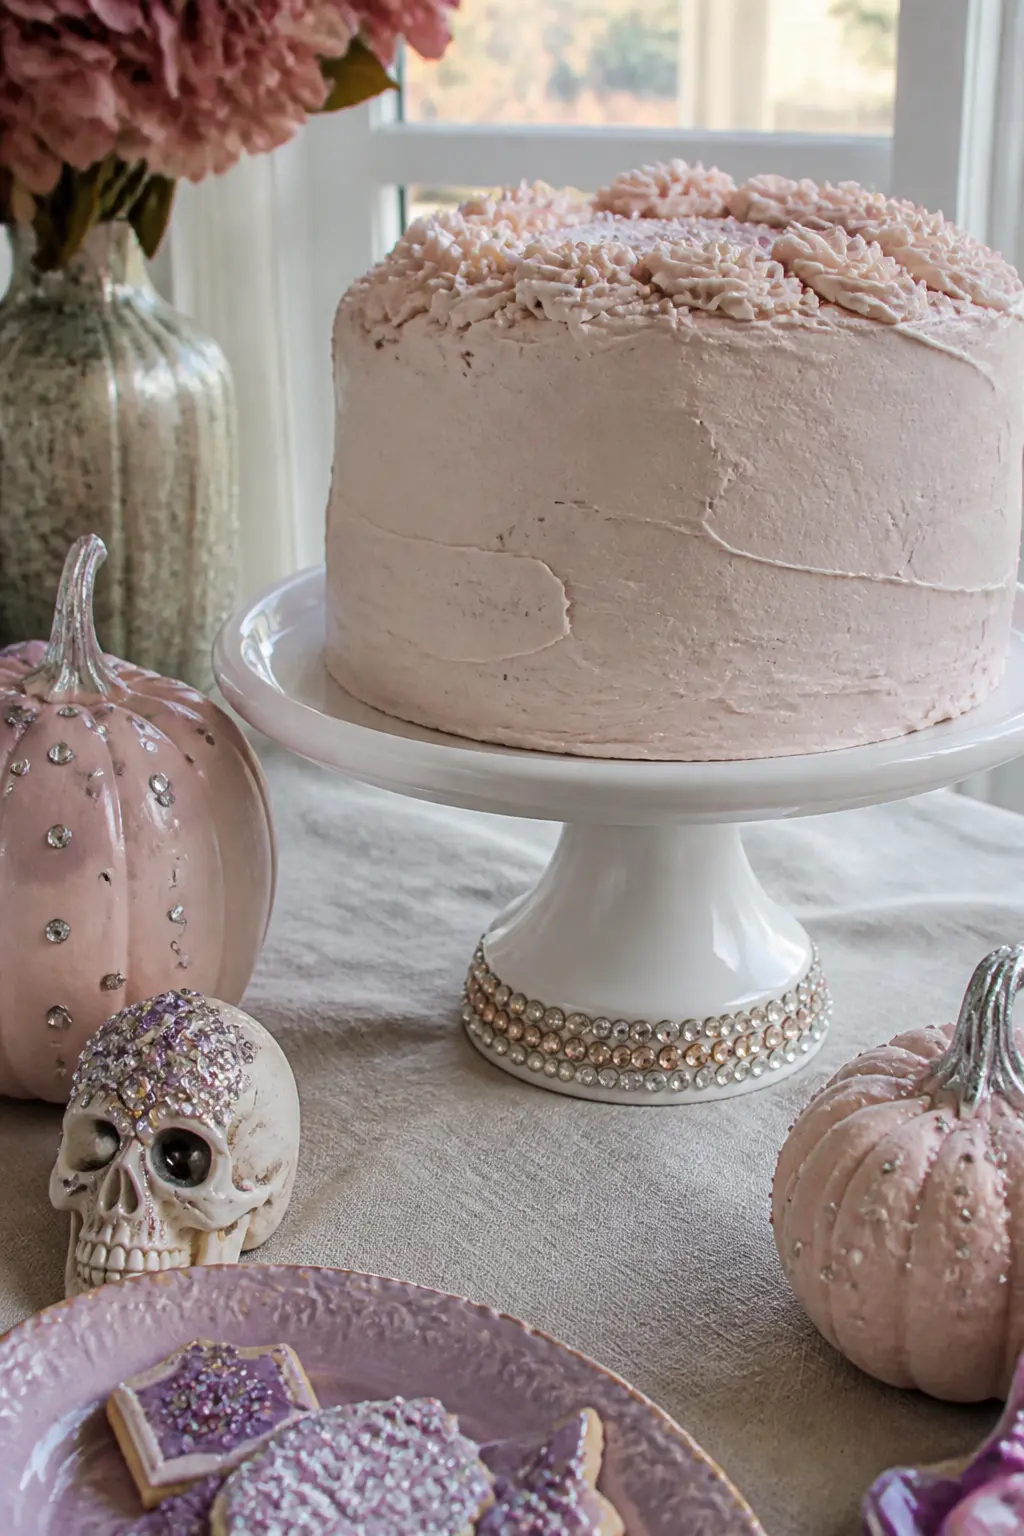
Rhinestone Halloween Cake Stand
A plain white ceramic or glass cake stand becomes permanent party infrastructure when you ring the base with a single row of large clear and blush rhinestones. Use E6000 or a comparable permanent adhesive: these stones will survive washing as long as they stay away from the dishwasher.
The stand works for a Halloween party centrepiece and then moves seamlessly to every other occasion. Stack a tiered effect using two stands of different heights, the upper one plain and the lower one jewelled, for maximum drama with minimum effort.
See 31 Easy Halloween Decorations You Can Put Up in an Afternoon for more table ideas that set up fast.
🛍 Shopping guide
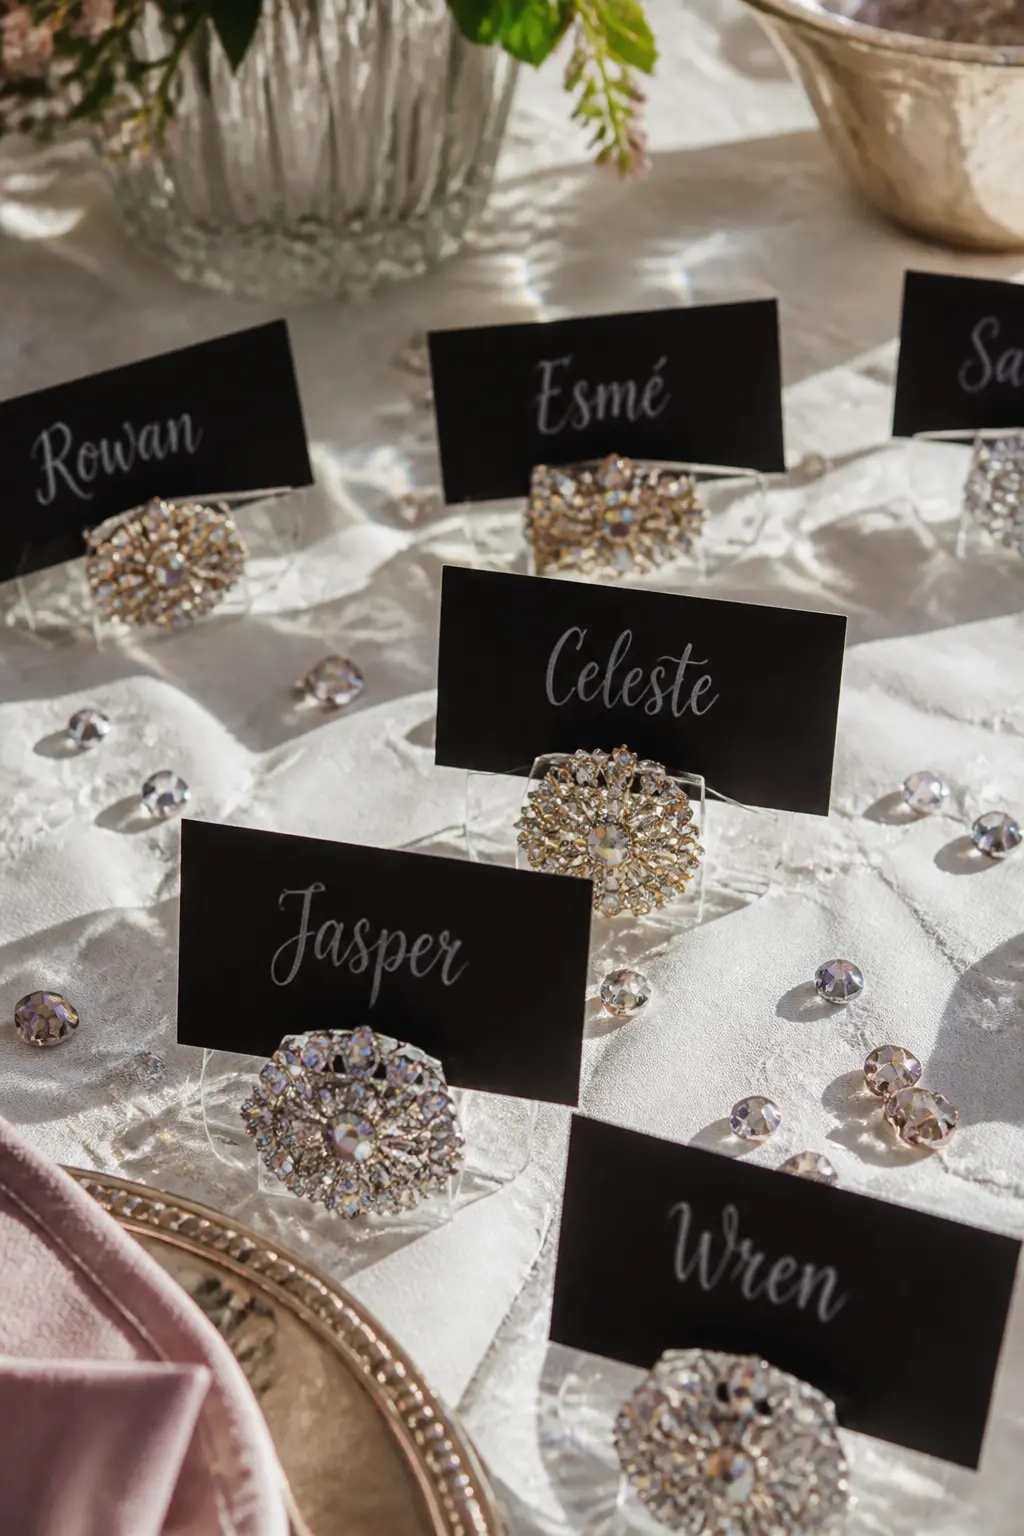
Crystal Place Card Holders
Buy plain acrylic or metal place card holders, then glue a cluster of three to five rhinestones onto the front face of each one. The cluster takes two minutes per holder, and twelve holders can be finished in an evening.
Use a consistent gem colour across all of them, perhaps all AB or all blush, so the table setting reads as intentional rather than mismatched.
Write the names in white or gold ink on black card stock cut to size. The gem cluster elevates even plain handwriting into something that looks designed. Guests tend to pocket these, which is a compliment.
🛍 Shopping guide
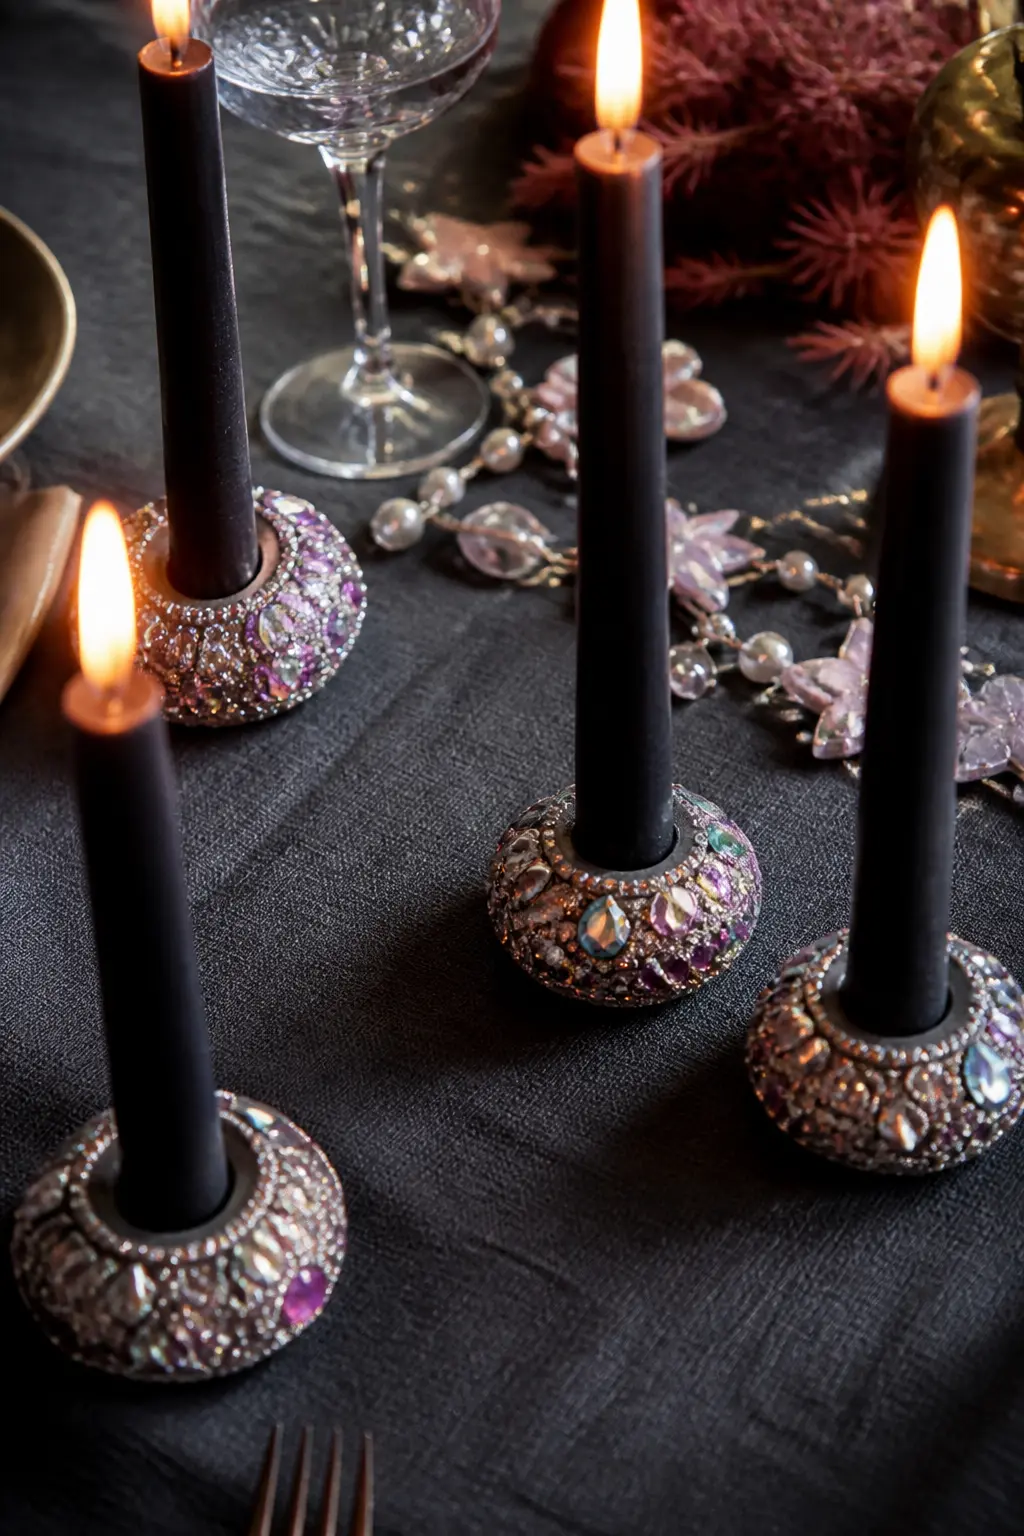
Jewelled Black Taper Candle Ring
A small foam ring designed to sit at the base of a taper candle gets densely covered in black, gunmetal and clear rhinestones. Press gems tightly together with no gaps, working in rows around the circumference. The finished ring lifts a plain black taper candle into something that belongs on a very good table.
Make four identical rings for a formal dinner setting, or mix three colour schemes, all black, all silver, all pale lavender, for a less matched look. These store flat in a zip bag and reappear every year without any maintenance.
🛍 Shopping guide
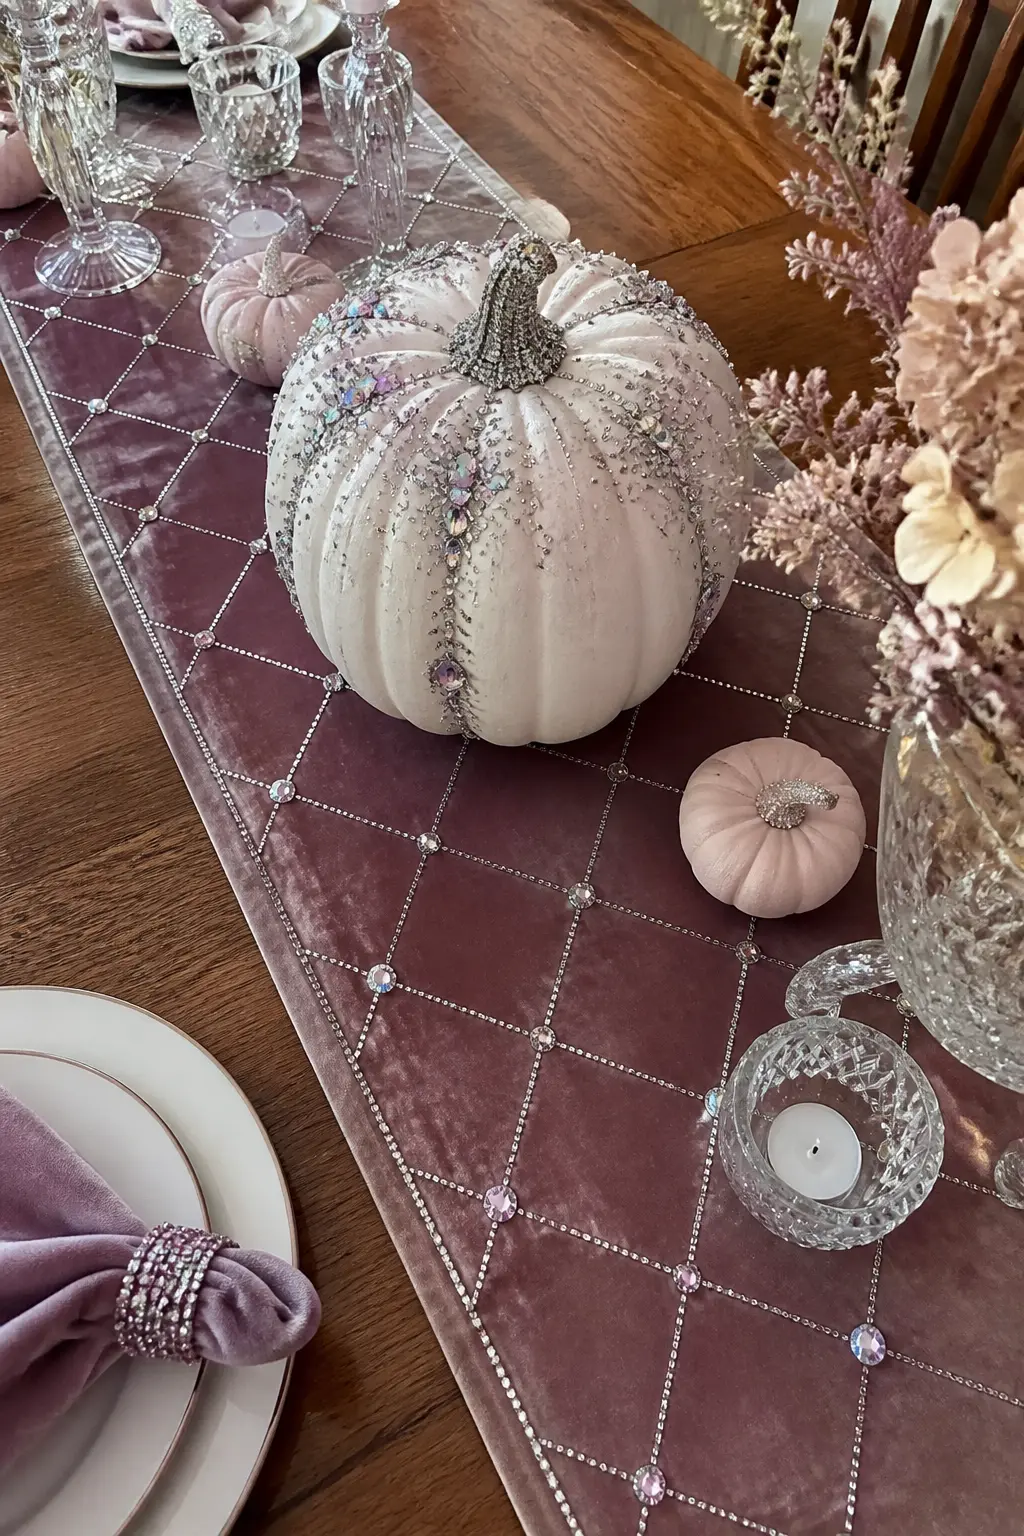
Bedazzled Velvet Pumpkin Table Runner Accent
Velvet fabric takes rhinestones better than almost any other textile because the pile grips the adhesive backing and the gems nestle in rather than sliding. Cut a short length of dusty purple or deep teal velvet and arrange a geometric diamond grid of rhinestones down its centre before placing it as a table runner accent under your centrepiece.
The result feels upholstered, almost like a jewelled textile from a costume drama set, and it costs a fraction of any purchased runner with this level of detail. Back the velvet with iron-on interfacing first so it stays flat under the weight of the gems.
🛍 Shopping guide
Bedazzled Wreaths and Door Decor
A wreath covered in gems takes a hot-glue gun and an afternoon, and it outlasts any paper decoration by years.
The trick is to start with a base that already has some texture, such as a grapevine or a foam form wrapped in ribbon, so the gems have something to nestle into rather than lying flat on a smooth surface.
These three ideas each use a different base so the results look distinct.
For more front-door options that do the heavy lifting before guests even ring the bell, see 35 Halloween Door Decorations That Do the Work Before Anyone Knocks.
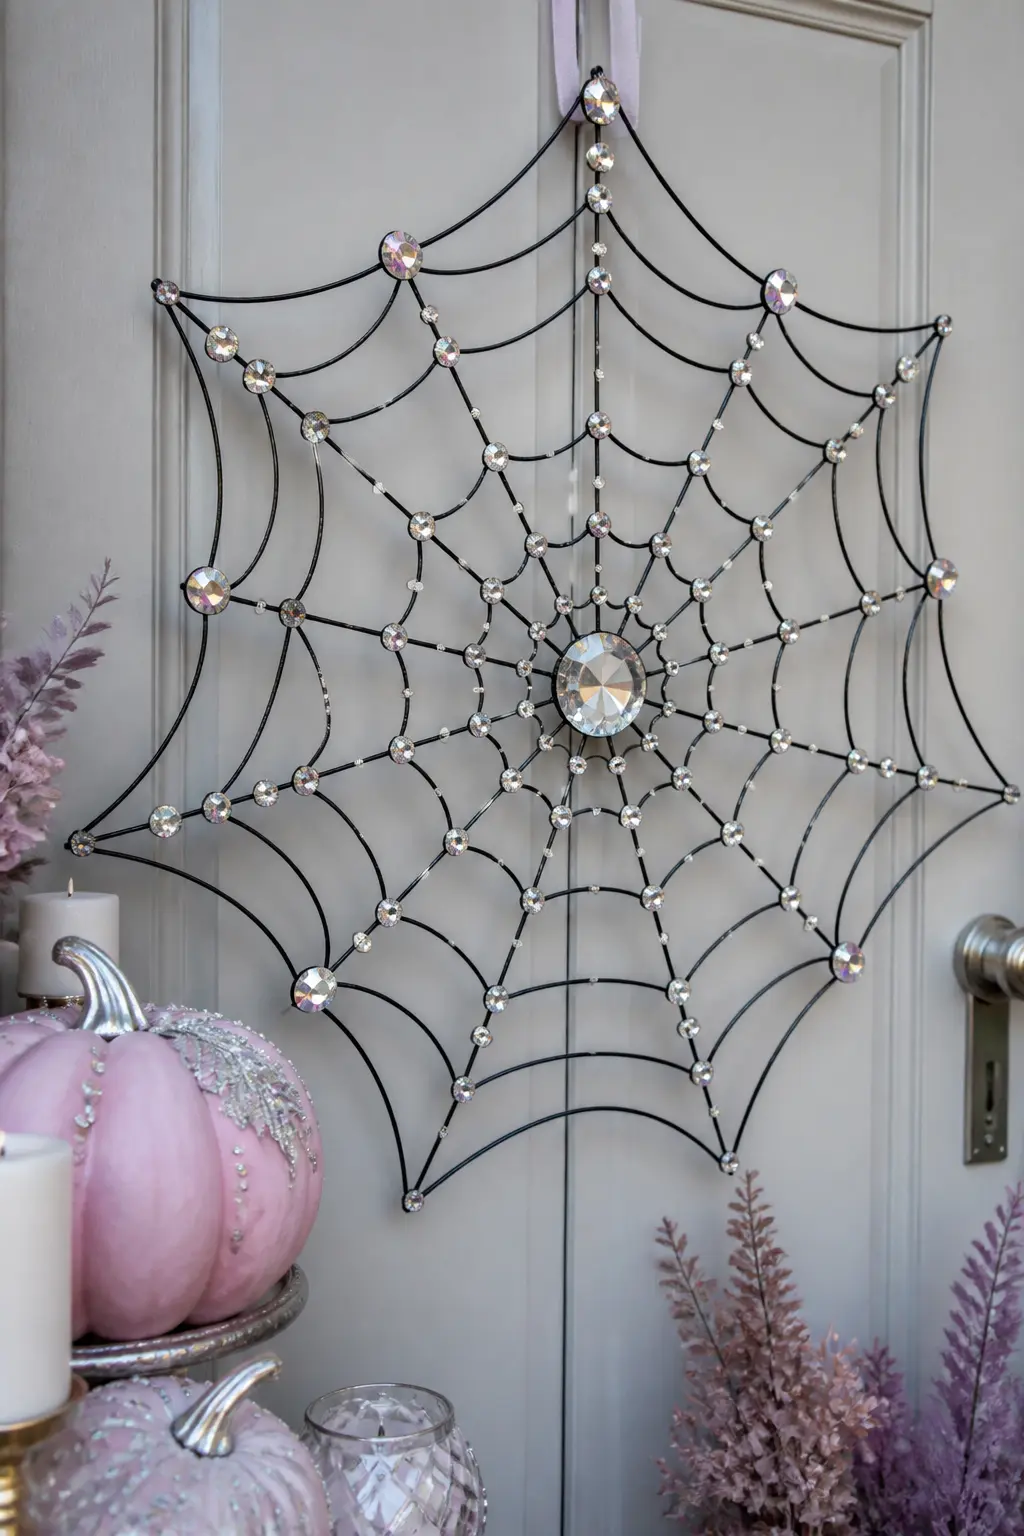
Crystal Spiderweb Wreath
A black wire wreath form, the open kind with visible spokes, becomes a spiderweb when you stretch thin black craft wire between the spokes in a web pattern, then glue small clear rhinestones at every intersection. A single large domed crystal gem sits at the centre.
The finished piece is graphic, minimal and elegant rather than spooky. It hangs beautifully against a pale door or a white wall and is light enough for a standard wreath hook. This is the project for anyone who wants to acknowledge the season without committing to full Halloween decor.
🛍 Shopping guide
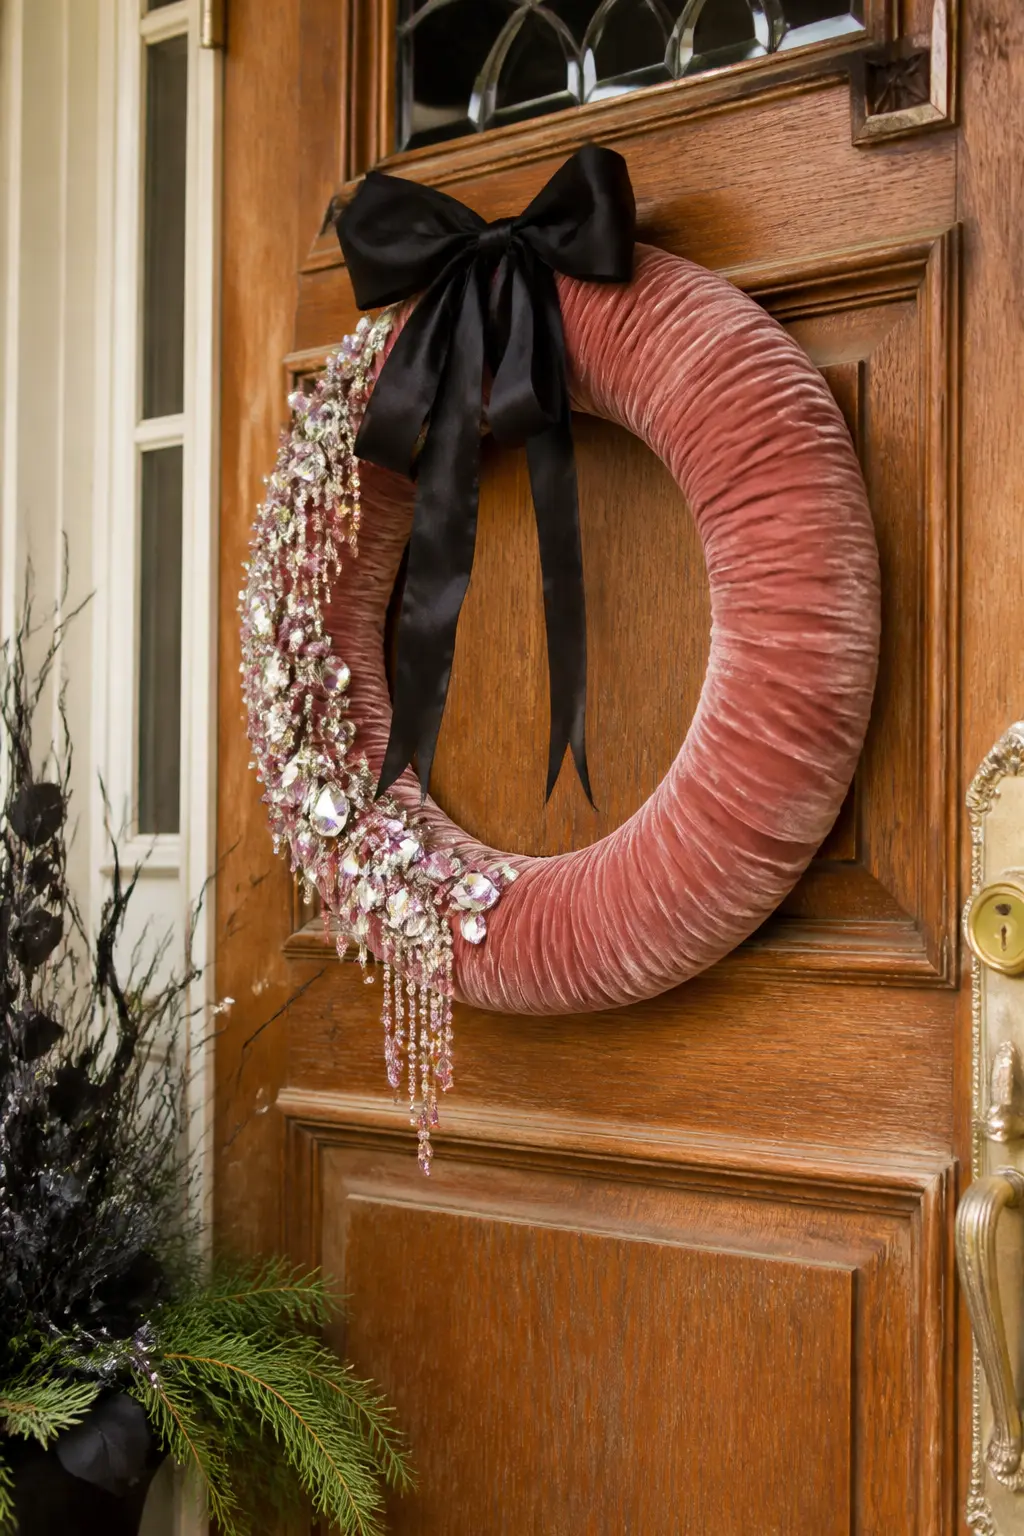
Velvet Ribbon and Gem Wreath
Wrap a grapevine wreath completely in narrow dusty rose velvet ribbon before adding a single waterfall of rhinestones down one side, clustered most densely at the top and trailing off toward the bottom in diminishing density. The velvet base gives the gems a luxurious surface to sit against and muffles the rustic texture of the vine beneath.
Finish with a large silk bow in a complementary tone, either black or deep burgundy, at the top. This wreath reads at home on a front door in October and, with a swap of the bow colour, carries through to winter without a full rebuild.
🛍 Shopping guide
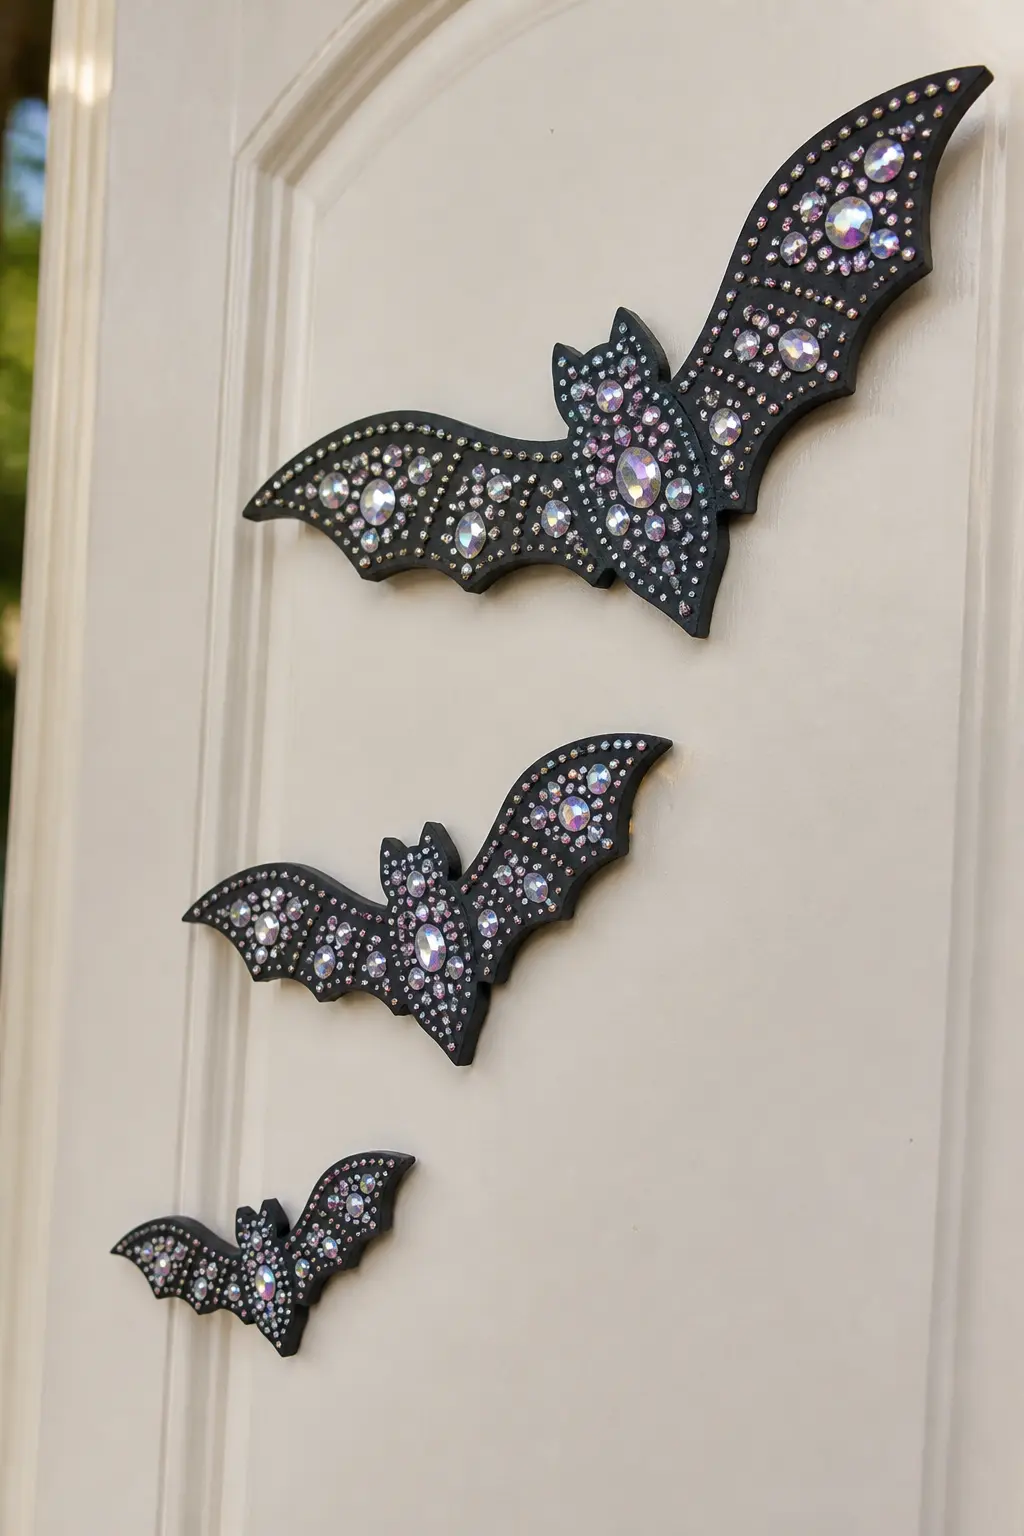
Jewelled Foam Bat Door Cluster
Cut bat shapes from black craft foam in three sizes, then cover each one in black and gunmetal rhinestones, pressing gems into the foam directly without adhesive at first to check placement, then securing with gem glue. Attach a small rhinestone eye to each bat.
Arrange seven to twelve finished bats in a loose ascending cluster on the door using removable adhesive strips. They read as a colony taking flight, and the gem surfaces catch porch light beautifully after dark. Store them flat in a folder between seasons.
🛍 Shopping guide
Bedazzled Wearables and Accessories
A rhinestone-heavy accessory is a complete costume on a budget and a half. These four ideas sit at the intersection of craft project and something you might actually wear to a party without feeling dressed up in the theatrical sense.
Each one starts with a plain base you can buy for under ten dollars, then transforms with gems into something that photographs extremely well.
Gem-Encrusted Party Fascinator
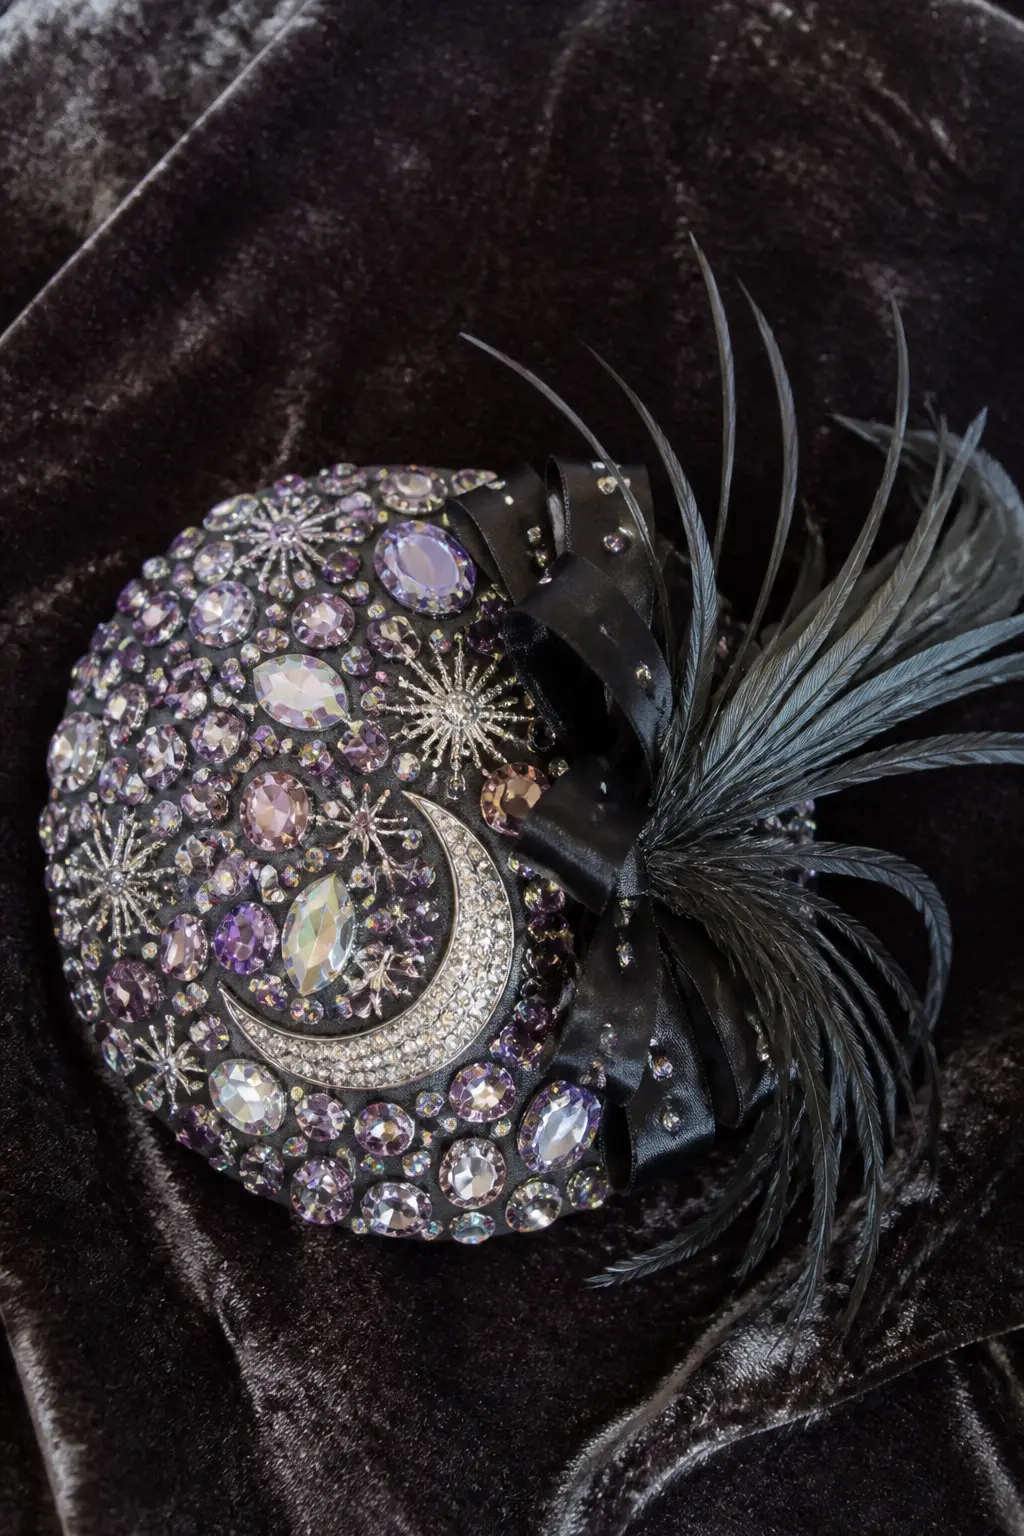
A plain black felt or satin fascinator base, the kind with a small comb or clip, transforms into a full Halloween accessory when covered in AB crystals and small moon and star flatback charms. Work from the centre outward, placing the largest statement gems first and filling in with smaller sizes around them.
Wear it with a simple black outfit and nothing else sparkles. The fascinator does all the announcing. This is a complete Halloween look for a party where you want to participate without wearing a costume in the traditional sense.
🛍 Shopping guide
Rhinestone-Trimmed Velvet Headband
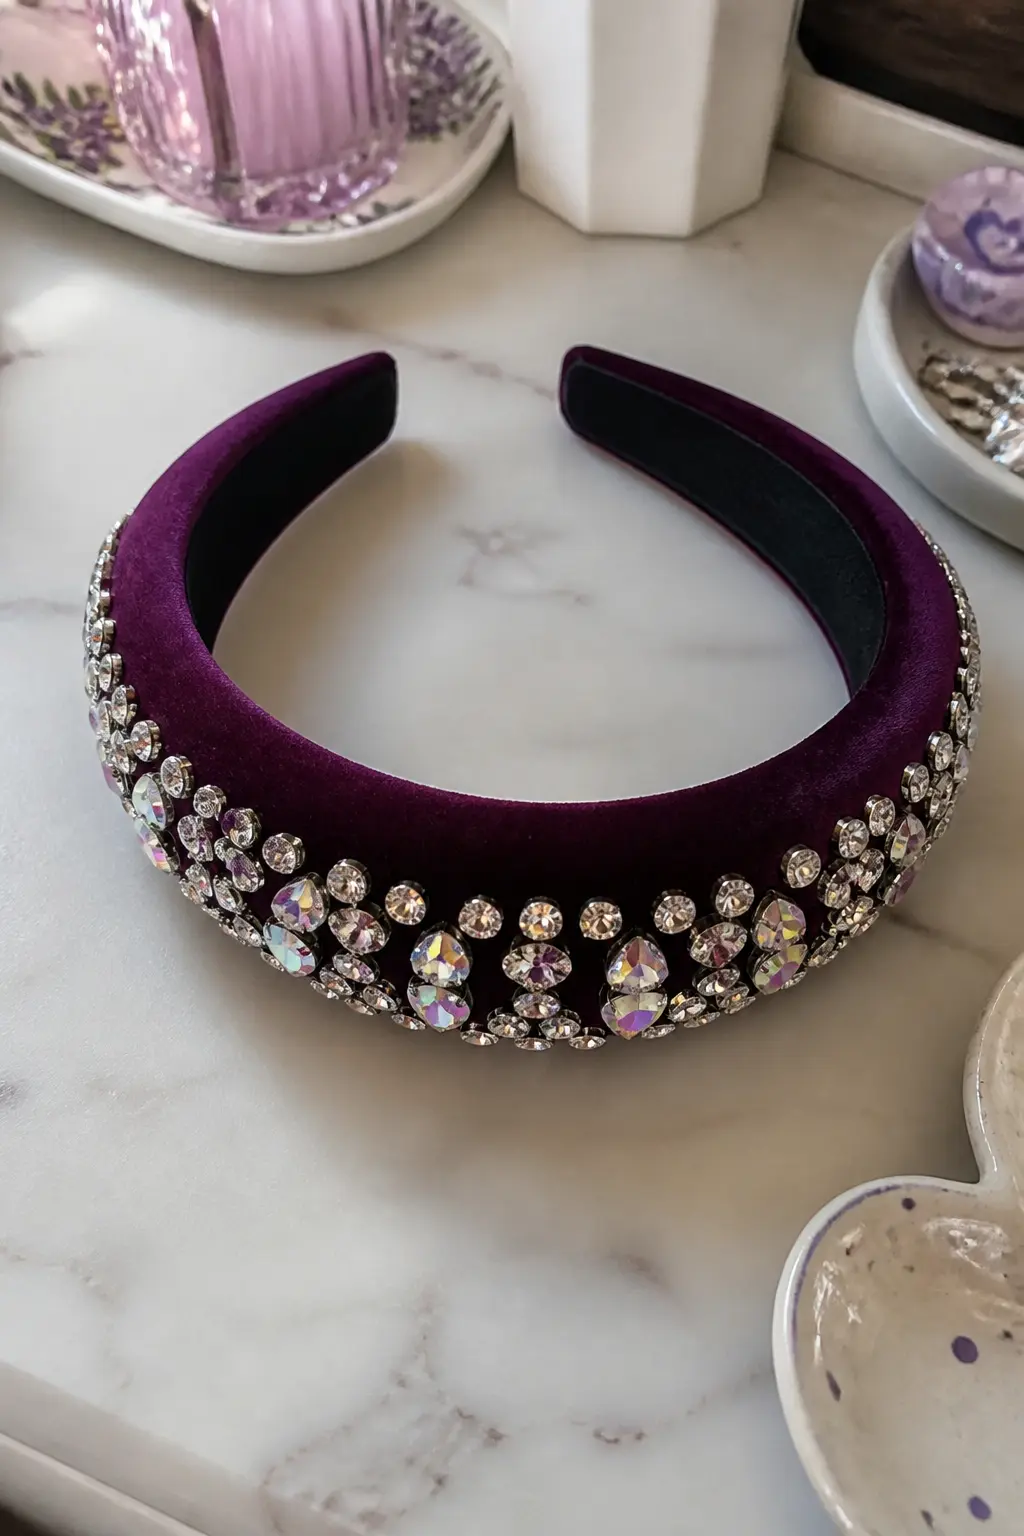
A wide velvet headband, preferably in deep plum or black, gets a band of rhinestones across its front face, running edge to edge in a slightly curved arc that follows the contour of the headband. Use a graduated mix: the largest stones at the centre, the smallest at the edges, all in the same colour family rather than mixed colours.
This takes under an hour including drying time and photographs as well as any accessory you could buy at four times the cost. It also works as an everyday accessory long after October ends, which makes the material spend very easy to justify.
🛍 Shopping guide
Crystal-Tipped Black Gloves
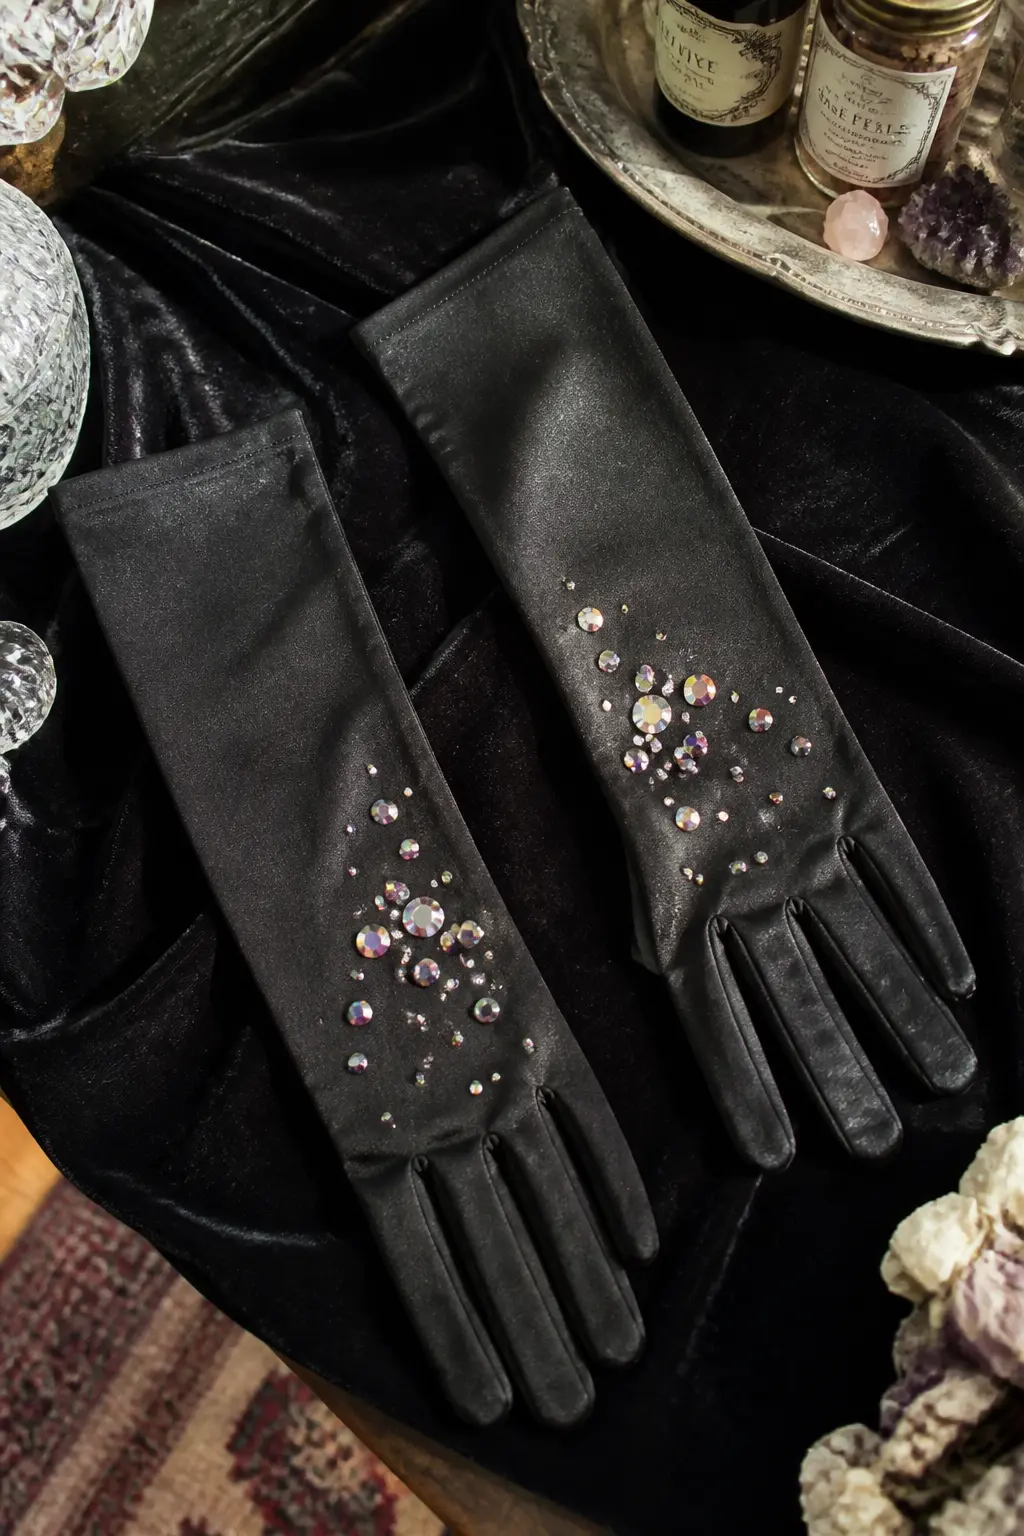
Long black satin or velvet opera gloves, the kind that reach the elbow, get a scattering of AB rhinestones on the back of the hand and across the knuckle area. Use fabric gem glue and allow a full twenty-four hours to cure before wearing so nothing slides under pressure.
The concentration of gems on the back of the hand means they show when your arm hangs naturally, which is exactly where you want the sparkle. This is the sort of detail that turns a plain black dress into a whole look without any other accessory needed.
🛍 Shopping guide
Jewelled Masquerade Mask
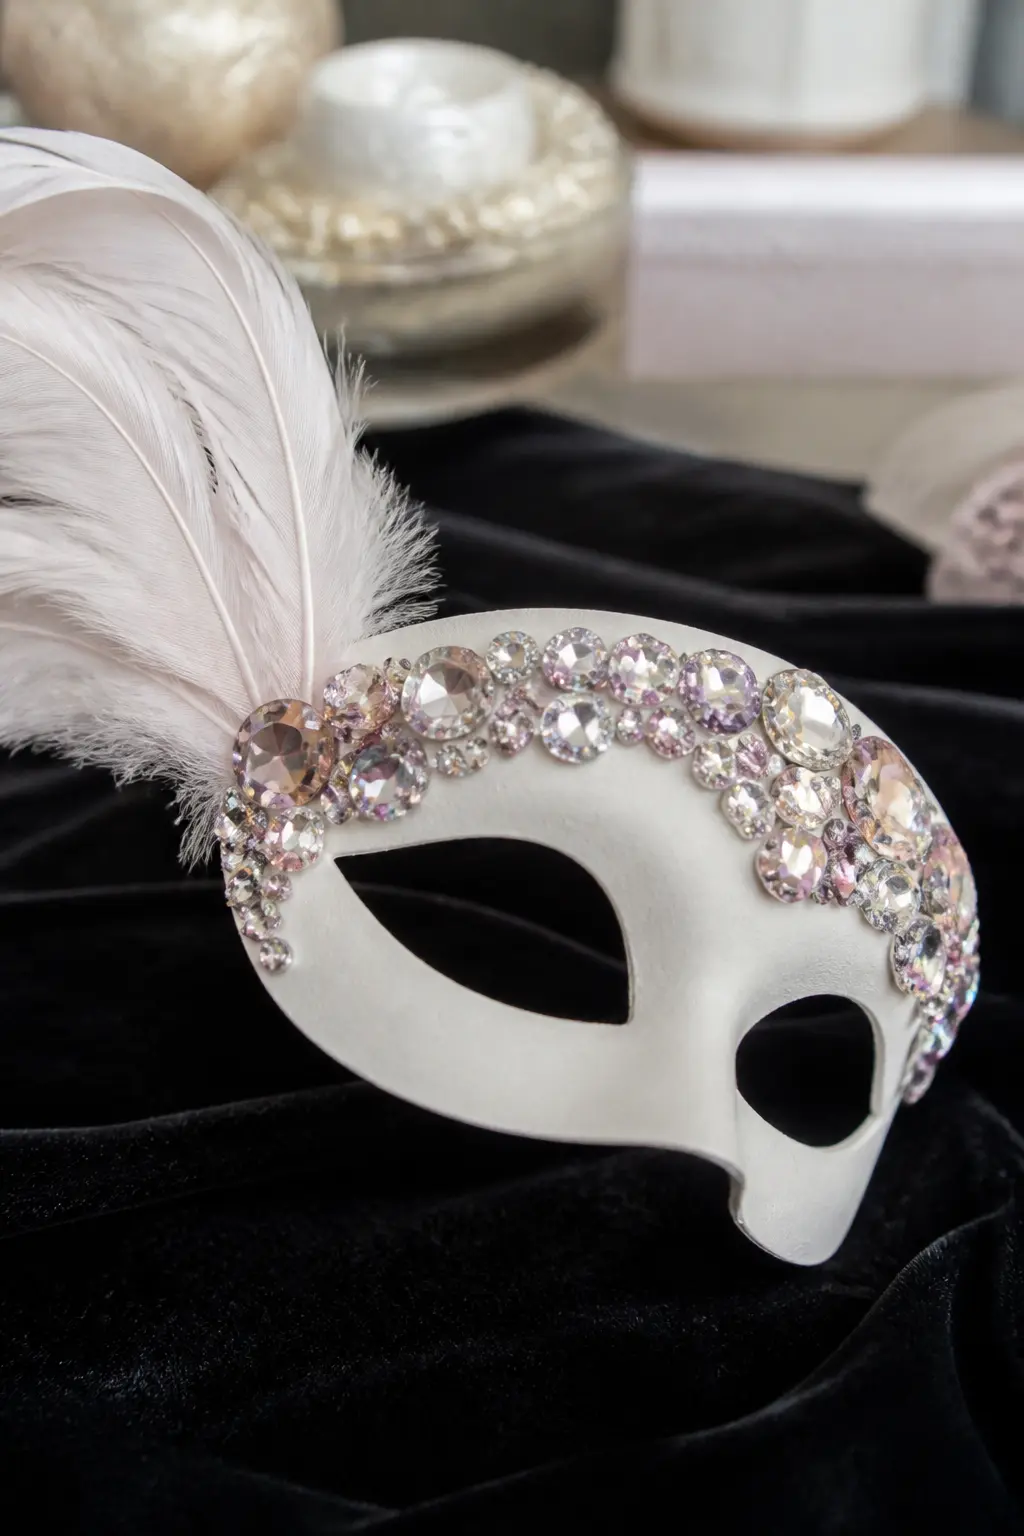
A plain white or black masquerade mask, the flat Venetian kind rather than a moulded full-face version, becomes a serious piece of work when the entire upper edge is encrusted with rhinestones in a sweeping arch. Use the largest gems at the peak of each eye cut-out and graduate down toward the nose bridge and the outer edges.
Leave the lower portion of the mask plain so the gem work reads as a defined architectural border. A single feather in matching tone attached at one outer edge keeps it in masquerade territory without overwhelming the crystal work. This is essentially the adult version of dress-up, done properly.
🛍 Shopping guide
Bedazzled Paper and Card Crafts
Paper is the underrated base for gem work: it is lightweight, cheap and flat enough that even mixed sizes of rhinestone create a clean, readable image rather than a lumpy pile.
These four ideas include framed pieces and cards, all of which work as gifts or as party decor. None of them need special equipment beyond a fine-tip gem glue and steady hands.
For more paper-based Halloween projects, see 17 Halloween Paper Crafts That Only Need Scissors and Glue.
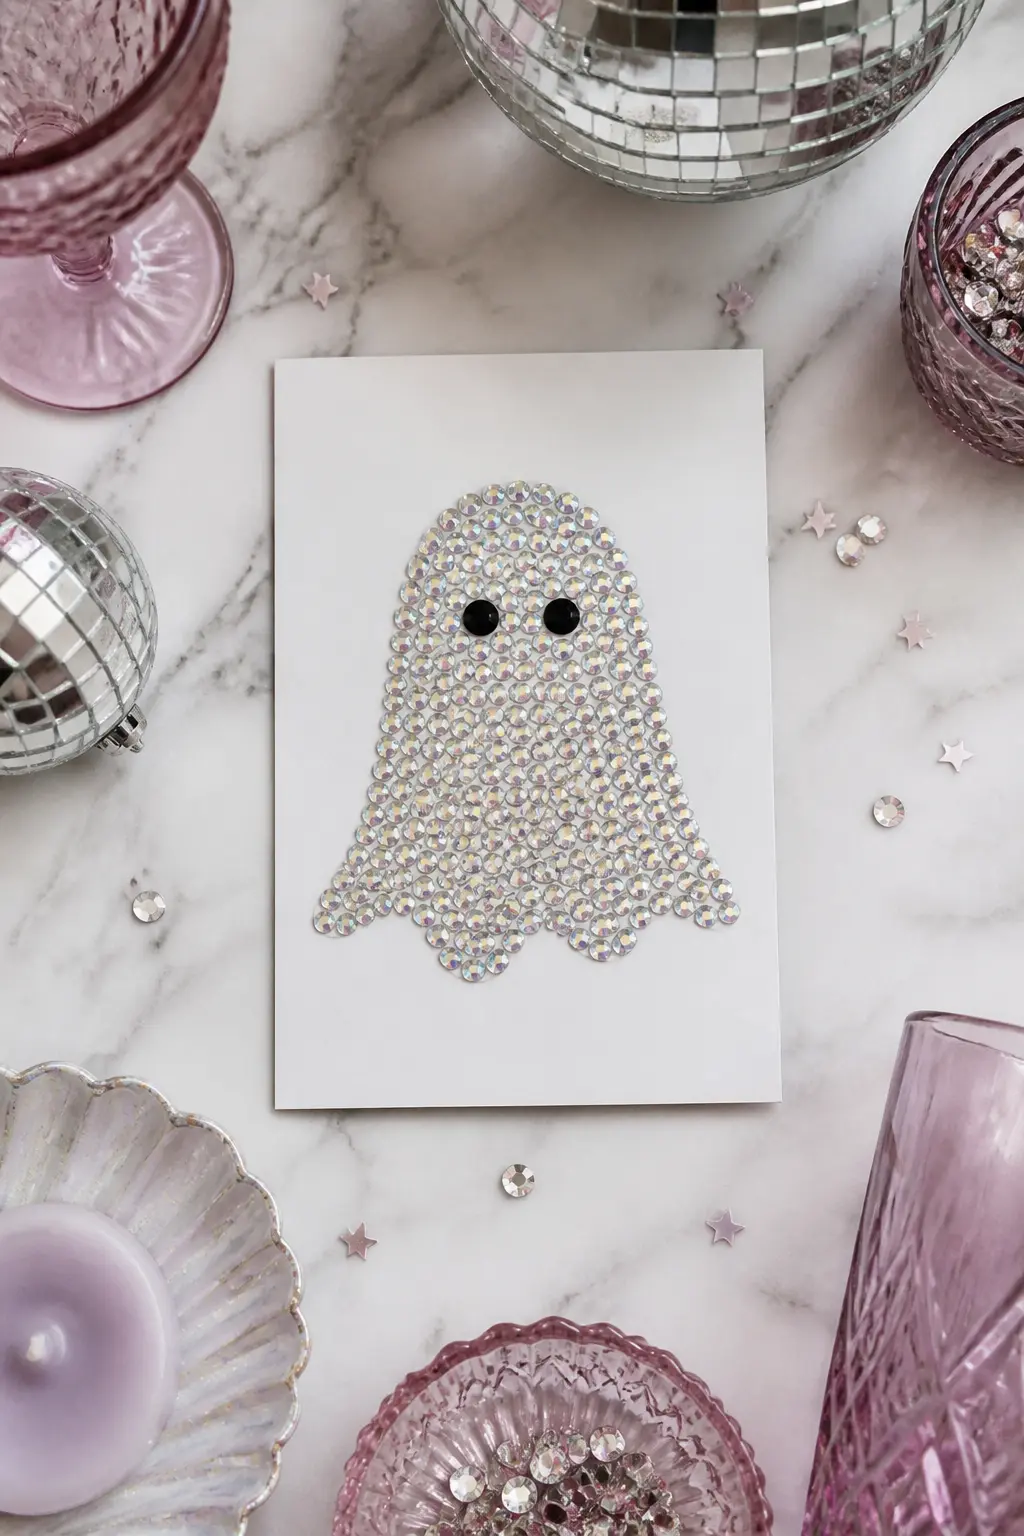
AB Crystal Mosaic Ghost Card
On a blank A6 white card, build a ghost shape from AB and clear rhinestones of mixed sizes, placing them in a mosaic arrangement so the iridescent faces catch light at different angles. Use two small jet rhinestones for eyes.
This is the same technique as the framed wall art ghost but kept to card size so it doubles as a party invitation or a keepsake gift.
The card looks expensive enough that recipients tend to frame it rather than recycle it. Make a run of eight on a quiet Sunday and your party invitations are done. A tip on gem order: fill the eye sockets last, after the body is fully set, so they stay sharp and centred.
🛍 Shopping guide
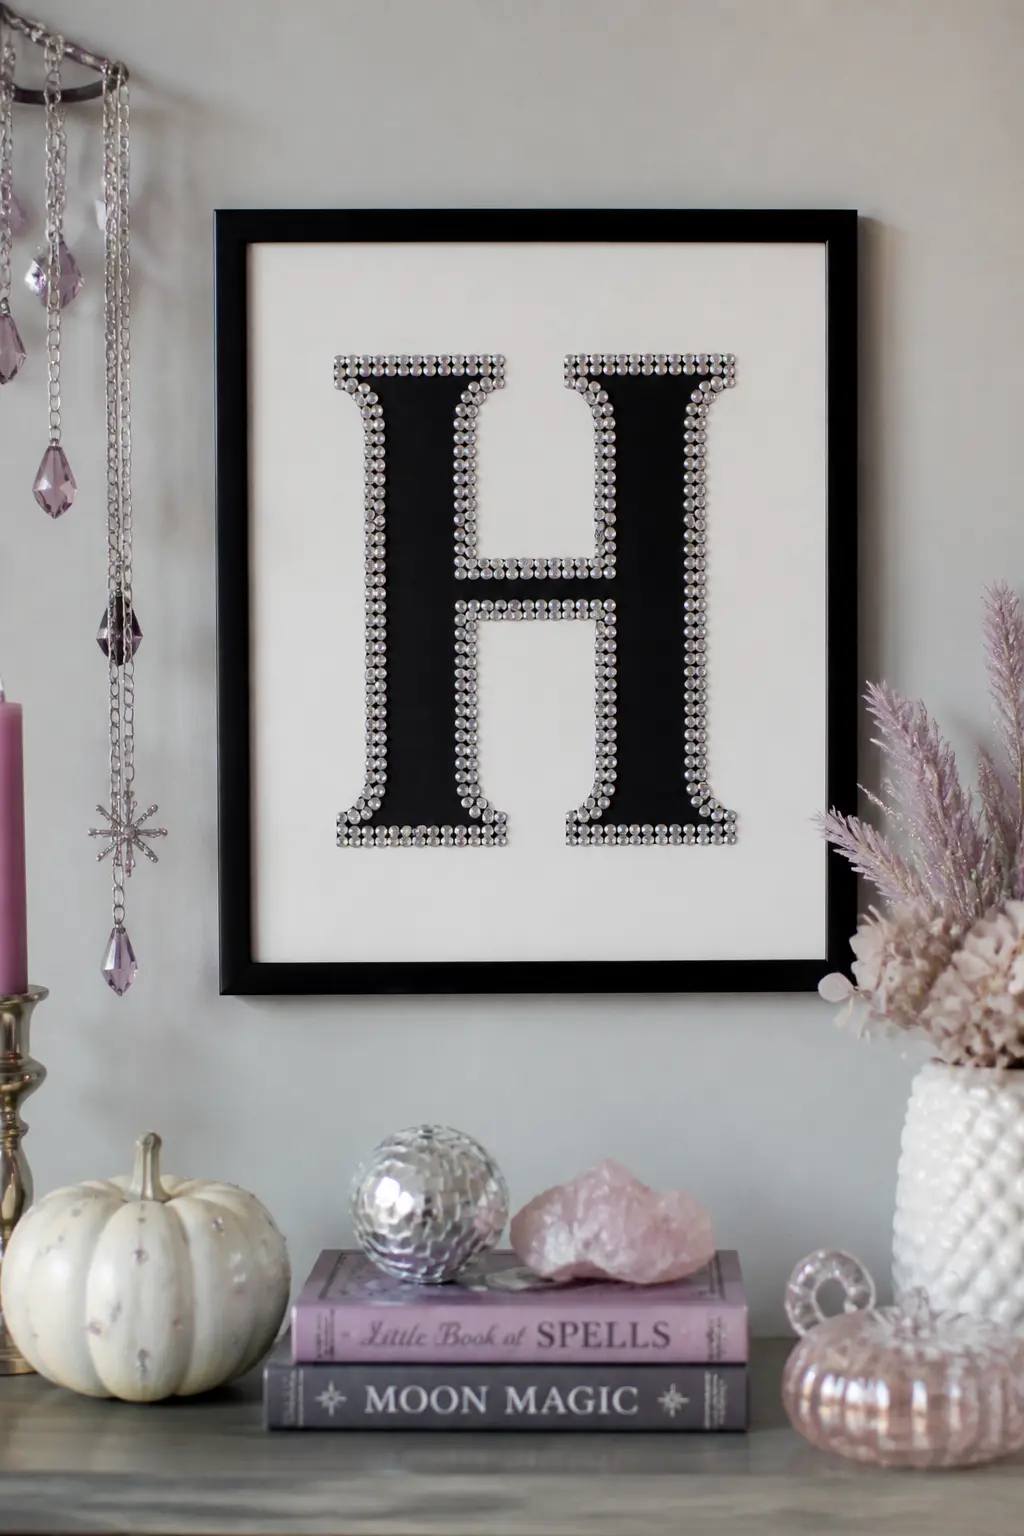
Rhinestone Halloween Monogram Print
Print or hand-letter a large single letter or Halloween word, such as BOO or your own initial, in heavy black ink on thick white card. Then outline the entire letterform in rhinestones, using a consistent size throughout so the gem border looks like a defined line rather than a scatter.
Frame the finished piece in a simple black frame. Three matching frames in a row on a hallway console, each spelling a different letter, create a gallery wall moment that costs almost nothing. This trick works best with bold sans-serif letterforms where the gem outline has a clean edge to follow.
🛍 Shopping guide
Frequently Asked Questions
What glue works best for rhinestones on pumpkins?
A clear-drying gem glue or E6000 adhesive holds flat-back rhinestones well on both real and faux pumpkin surfaces. Hot glue works in a pinch but tends to leave white strings and releases in cold weather, so gel-formula gem glue is the more reliable choice for anything you want to display outdoors or keep for multiple seasons.
How do you stop rhinestones from falling off fabric?
Use a fabric-specific gem adhesive rather than general craft glue, and allow a full twenty-four to forty-eight hours to cure flat before wearing or handling the piece. Avoid washing the item for at least seventy-two hours after application, and turn it inside out when you do launder it to protect the gem surface.
Can you bedazzle a real pumpkin instead of a faux one?
Yes, but the timeline is short. A real pumpkin begins to degrade within two to three weeks, and the moisture from the rind can soften certain adhesives. Use a strong gel craft glue and display the pumpkin indoors in a cool spot. For a piece you want to keep, a faux pumpkin is the sensible base.
What size rhinestones work best for beginners?
SS16 to SS20 flat-back rhinestones, roughly 4mm to 5mm across, are the easiest size to handle without precision tweezers and large enough to make visible impact quickly. Very small stones (SS6 and below) require a wax picker or applicator pen to place accurately and are better suited to fill-in work once you are comfortable with the larger sizes.
How do you store finished rhinestone crafts between seasons?
Wrap each piece individually in tissue paper or a microfibre cloth before boxing, so gems do not catch on each other and pull free. Store flat where possible, and avoid plastic bags that trap moisture. A shallow lidded box lined with a layer of foam or felt keeps delicate pieces safe year after year without any fuss.
21 no-bake halloween treats ideas sorted by where they live on the party table. Ghost strawberries,

17 DIY newborn Halloween costumes that are soft, fast to make, and genuinely cute. No hot glue burns
35 Halloween staircase decorations that actually look good: black, bone, and candlelight ideas sorte
Leave a Reply