

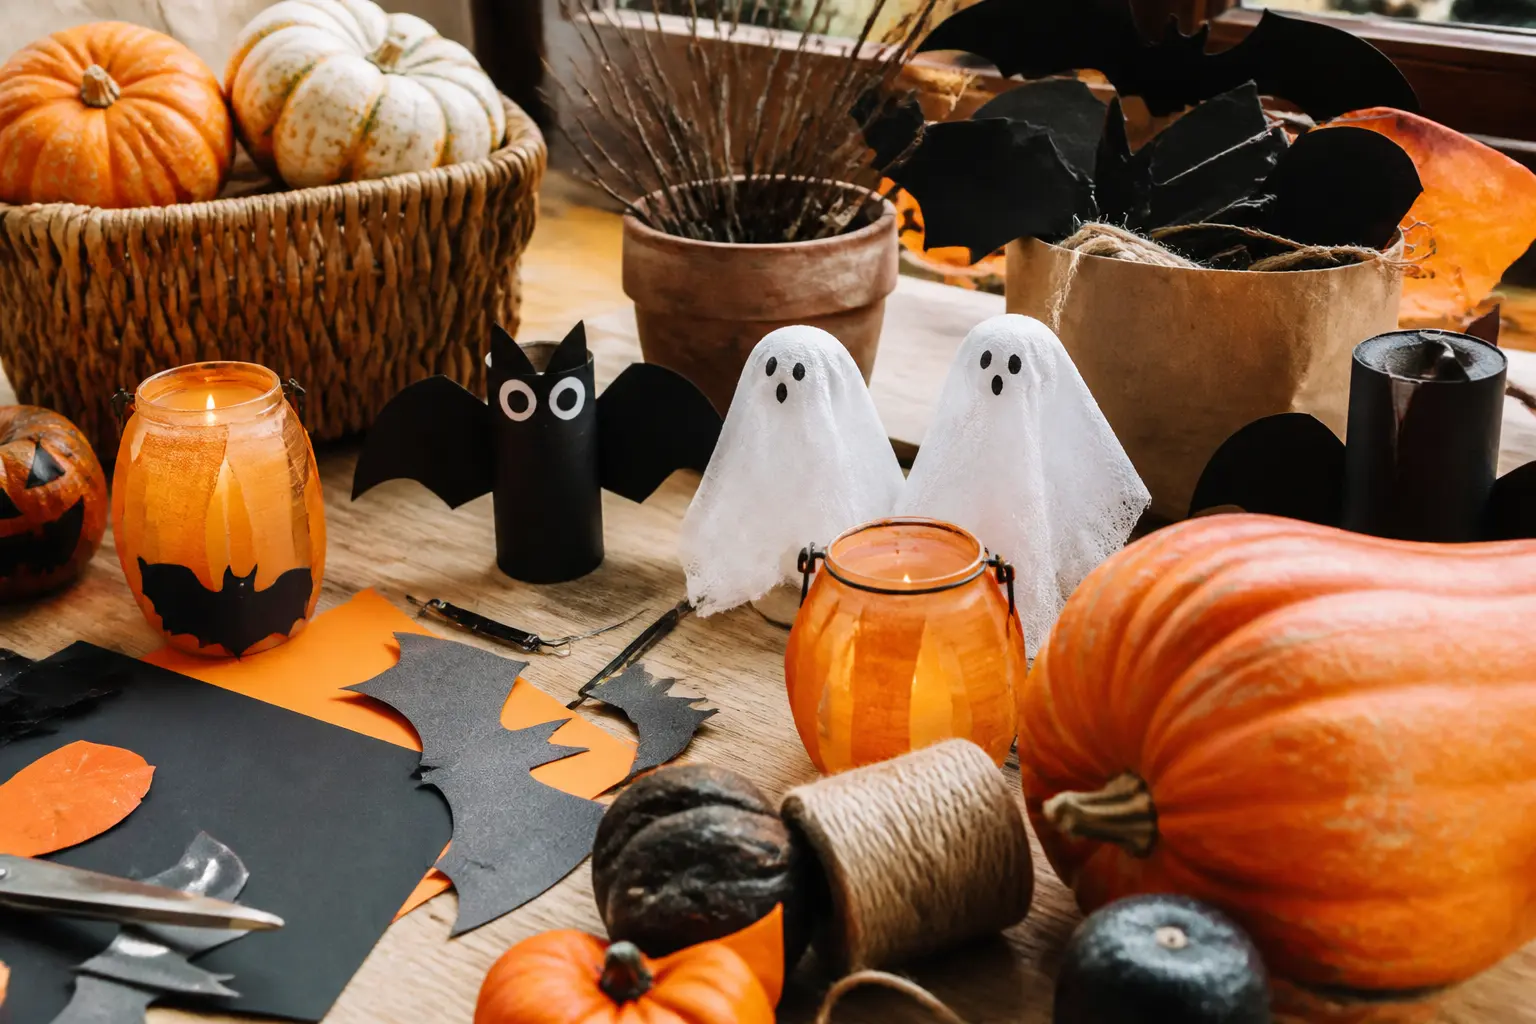
Halloween decor has a look problem. Most handmade pieces announce themselves the moment they land next to anything from a proper homeware shop, and not in a good way.
These 16 halloween diy crafts are built specifically to close that gap: each one uses a single technique, done carefully, that pushes the finish past “homemade” and into something guests will pick up and inspect. The materials are unglamorous. The results are not.
A note before you start: spray painting and etching cream both need ventilation and gloves, and those notes are inside each relevant step. Read the whole method once before you begin any craft.
Nothing here is difficult, but several pieces need time more than skill, and skipping the cure or dry time is the one mistake that ruins the finish every time.
If you need ideas for the night itself, the team at 30 Unforgettable Halloween Party Ideas and Games has the table covered. And if your guests want something to do with their hands, 20 Effortless Easy Halloween Party Games slots in without any extra planning.
This post contains affiliate links. If you buy through them, I may earn a small commission at no extra cost to you.
- Matte Black Bottle Set
- Wax-Dipped Skull
- Corduroy Pumpkin
- Aged Portrait
- Smoked Glass Votives
- Bone White Branches
- Black Feather Garland
- Painted Owl Silhouette
- Corked Bottle Set
- Blackened Candlesticks
- Stiffened Muslin Ghost Sculpture
- Etched Glass Cloche
- Dark Dried Floral Arrangement
- Antique Key Display
- Charcoal Canvas Bunting
- Stained Wood Sign
- Frequently Asked Questions
Matte Black Bottle Set
A cluster of matte black bottles does what no single statement piece can: it fills a tablescape with cohesion. Use three to five bottles of different heights and silhouettes, and the group reads as curated rather than collected.
Finished pieces sit on a console, a mantel, or a bar cart; store them wrapped in newspaper in the original box after the season.
The finish quality here lives entirely in the curing step. Spray paint that has not cured fully will fingerprint, and fingerprints on matte black are permanent. Give it the full time the can specifies, usually 24 to 48 hours, and do not touch the bottles until then.
What You Need
- 3 to 5 clean, dry glass bottles in varied heights and silhouettes
- 1 can matte black spray paint (look for one rated for glass)
- 6 kraft labels, approximately 6 x 4 cm
- 1 m natural twine
- A fine-tip black marker or calligraphy pen for lettering
How to Make It
- Set the bottles on a drop cloth in a well-ventilated area, spacing them so you can walk around them. Hold the can 30 cm from the surface and apply the first coat in slow, sweeping passes. The goal is a light, even veil of colour, not full coverage. Thin coats prevent drips and give you the flat matte finish that looks expensive; one thick coat gives you a shiny, uneven mess. Let the first coat dry for the time stated on the can (usually 20 to 30 minutes) before applying a second.
- Once the bottles are fully covered and completely dry, leave them undisturbed on the drop cloth for the full cure time on the can. Resist moving them. When the surface no longer feels faintly tacky and the sheen is uniform and flat, they are ready.
- Letter each kraft label with a single word: “Hemlock”, “Nightshade”, “Wormwood”, or any apothecary-style name in block capitals. Cut a 20 cm length of twine per bottle, thread it through the label hole or tie it around the label, and knot it firmly to the bottle neck. Trim any excess twine close to the knot so the label sits flush.

Wax-Dipped Skull
A resin or ceramic skull looks fine on its own. Dipped once in pale candle wax and allowed to drip, it looks like something from a film set.
The wax pools in the eye sockets, traces the cheekbones, and drips down the jaw in a way that no paint could replicate. Place it on a plinth or a short stack of dark books for maximum effect.
Temperature is everything here. Wax that is too hot runs off the skull so fast it leaves almost nothing. Wax that is too cool grabs and clumps unevenly. Aim for the point where the wax is fully liquid but not steaming, around 65 to 70 degrees Celsius, and you will get the slow, elegant drip that makes this look intentional.
What You Need
- 1 plain resin or ceramic skull, any size
- 500 g white or ivory pillar candle wax (paraffin or soy both work)
- 1 dipping pot or deep saucepan reserved for craft use
- A cooking thermometer
- A sheet of baking parchment to catch drips
How to Make It
- Melt the wax in the dipping pot over a low heat, checking the temperature with a thermometer. Remove from the heat the moment it reaches 70 degrees Celsius. The wax should be clear and fully liquid with no visible solid pieces. This is an adult-only step: molten wax causes serious burns.
- Hold the skull by the jaw and dip just the crown and forehead into the wax, submerging it about a third of the way down. Pull it out slowly and hold it level over the parchment, letting the wax run naturally down toward the jaw. Do not tip or shake it; let gravity do the work. The drips should be deliberate-looking, not chaotic. Set it on the parchment to cool for 20 minutes until the wax is opaque and hard.
- Repeat the dip once more, using the same technique. The second coat adds depth and a slight layering effect where the wax thickens at the drip tips. Let it cool and harden completely before moving it. If any drips look too heavy, you can snap them off cleanly once the wax is fully cold.

Corduroy Pumpkin
Fabric pumpkins have saturated every autumn feed, but most look flat and pillowy. Using wide-wale corduroy changes that: the ridges of the fabric read as natural pumpkin segments, and a real dried stem on top convinces the eye completely. This sits beautifully with actual pumpkins, vintage pottery, or on its own on a stack of linen.
The cinching step is where most people go wrong. Wrap the twine tightly enough to pull the stuffed pouch into clear, distinct lobes, and the corduroy ribs will line up inside each one. Too loose and it looks like a full bin bag.
Too tight and the fabric puckers at the gathers rather than rounding out. Pull, then check, then pull a little more.
What You Need
- A 40 x 40 cm square of wide-wale corduroy in burnt orange, deep olive, or charcoal
- 200 g polyester toy fill (polyfill)
- 1 m natural twine
- 1 real dried pumpkin or gourd stem (or a thick twig cut to 5 cm)
- A hand sewing needle and thread in a matching colour
- A hot glue gun
How to Make It
- Fold the corduroy square in half with the right sides facing, and sew a simple running stitch around the two raw open sides, leaving a 1 cm seam allowance. Leave a 5 cm gap on one side for turning. Turn the resulting pouch right side out through the gap: the corduroy ridges should now face outward. Stuff firmly with polyfill until the pouch is round and taut with no flat areas, then slip-stitch the gap closed.
- Cut a 60 cm length of twine. Find the centre of the stuffed pouch and push the twine down through the centre from top to bottom using the needle, then bring both ends back up through the same central point from underneath. Pull the twine firmly across the surface, dividing the pouch into two halves. Repeat, crossing at 90 degrees, to make four segments, then again diagonally to create six to eight. Knot the twine firmly at the top. Each segment should bulge outward with a clear ridge between them.
- Apply a small blob of hot glue (adult step) to the top knot and press the dried stem firmly into it. Hold for 30 seconds. The stem should stand upright. Tie a small loop of remaining twine around the base of the stem if you want a finishing detail.

🛍 Shopping guide
Aged Portrait
A thrifted framed print that looks genuinely old costs nothing and reads as a prop from a Victorian haunted house.
The technique is a gray wash wiped back unevenly: shadows gather in the detail of the image and the edges look like decades of light damage.
Lean it against a wall rather than hanging it; a slight lean adds to the atmosphere and makes it easier to store flat afterwards.
The key word in this whole method is “unevenly”. A wash wiped back uniformly looks like a filter. Wiped back in some places and left heavier in others, it looks like age, which is exactly what you want. Work quickly before the wash dries, and do not overthink it.
What You Need
- 1 thrifted framed print with a pale or mid-tone image (portraits work best)
- 120-grit sandpaper
- Gray craft paint thinned 3:1 with water (the wash)
- A wide, flat paintbrush
- A clean cotton cloth or old tea towel
How to Make It
- Lay the print face-up on a protected surface. Sand the surface lightly with the 120-grit sandpaper using circular strokes. The goal is to break the surface sheen of the print so the wash will grip; you are not trying to remove ink or damage the image. Wipe away the dust with a dry cloth. The surface should look slightly dull.
- Brush the diluted gray wash across the entire print in one direction, working quickly so it does not begin to dry before you wipe it back. Load the brush generously and keep the strokes loose.
- While the wash is still wet, use the cotton cloth to wipe it back. Press firmly in the centre of the image and more lightly toward the edges, leaving more wash in the corners and in any recessed detail. The result should look uneven and slightly murky, not uniformly gray. Let dry completely, at least 90 minutes, before handling.

🛍 Shopping guide
Smoked Glass Votives
Clear glass votives with a smoked interior hold a lit tea light beautifully: the flame glows through the dark patches and the clear ones in a way that looks genuinely atmospheric.
A set of three or five grouped together on a tray is more effective than a single piece. Store them nested in tissue paper once the season is over; the paint is durable but not indestructible.
The single move that makes this look right rather than amateurish is the wipe-back. Applied paint that sits on glass too uniformly looks painted. Wiped back in some places before it dries, it looks smoked from within. Work on one votive at a time so the paint stays workable.
What You Need
- 3 to 5 clear glass votives (any size, clean and dry)
- Black glass paint (not regular craft paint, which will peel)
- A small cosmetic sponge or sea sponge piece
- Paper towels for wiping back
How to Make It
- Dab the sponge into the glass paint and blot it once on a paper towel to remove the excess. Sponge the paint onto the outside of the votive in a patchy, irregular pattern, concentrating it toward the base and leaving the rim area lighter. Work around the whole votive before moving on. The coverage should be uneven from the start.
- Before the paint dries (work within two to three minutes), tear a small piece of paper towel and press and lift it against some of the painted areas to remove paint in irregular patches. This is the step that creates the smoke effect: the contrast between denser and lighter areas is what the eye reads as depth. If the paint has dried before you wipe back, simply sponge another thin coat over it and wipe that one back instead.
- Let the votives dry fully, then cure them according to the instructions on the paint bottle. Most glass paints either air-cure over 21 days or oven-cure at a low temperature for 30 minutes. Oven curing is the adult step if you choose it; follow the paint manufacturer’s temperature exactly.

🛍 Shopping guide
Bone White Branches
Bare branches sprayed white and arranged in a heavy vase look architectural and quietly unsettling, which is exactly the register good Halloween decor should occupy.
The trick is restraint: three to five branches in a well-weighted vase, with the tallest at least twice the height of the vase. Use them in a corner, flanking a fireplace, or at either end of a console table.
The branches need to be genuinely dry and bark-stable before you spray them, or the paint will flake. Collect them well in advance and let them sit indoors for a few days. Spray outdoors or in a very well ventilated space and allow each coat to dry completely before adding another.
What You Need
- 3 to 5 bare branches, at least 60 cm tall, bark intact and dry
- 1 can matte or satin white spray paint
- A heavy ceramic or stone vase, at least 25 cm tall and wide enough to hold the branches steady
- Gravel, sand, or florist foam to weight the vase base
- A drop cloth
How to Make It
- Lay the branches on the drop cloth and spray in thin, even coats, turning each branch to coat all sides. Let each coat dry for 30 minutes before adding another. Two coats give a dense, bone-like finish; one coat leaves the bark texture showing more, which also works well. The surface is ready when it looks uniformly pale with no dark patches of bark showing through.
- While the branches dry, pack the base of the vase with gravel, sand, or tightly wedged florist foam. This step is essential: tall branches in a lightweight vase tip immediately. The vase should not move when you press the rim with one hand.
- Arrange the branches by height, with the tallest at the back and the shortest at the front. Angle them slightly outward rather than straight up for a more natural silhouette. Tuck shorter branches or twigs between them to fill any gaps. The arrangement should look found rather than constructed.

Black Feather Garland
Black feathers on twine look far more considered than any paper garland. The secret is overlapping: each group of feathers covers the stem of the one before it, and alternating the direction every few groups gives the finished garland a fullness that reads as deliberate. Hang it along a mantel, across a doorway, or looped over a mirror frame.
This is a hot glue project, which means working fairly quickly, and the glue strings can be a nuisance. Let the garland cool completely, then run a finger along it to pull away any stray strings before you hang it.
What You Need
- 1 bag (approximately 100 pieces) black craft feathers in mixed sizes
- 2 m natural twine
- A hot glue gun and glue sticks
- Scissors
How to Make It
- Lay the twine along a flat surface. Start at one end and apply a small dot of hot glue (adult step) to the quill of three or four feathers, pressing them onto the twine with quills pointing toward the centre and plumes fanning outward. Hold each one for ten seconds until the glue sets. Overlap the next group so the quills are hidden under the plumes of the previous one.
- After every three or four groups, rotate the feathers so they point in the opposite direction, left to right or right to left. This alternation creates a symmetrical fullness along the garland rather than everything pointing the same way. Keep the groups tight enough that no bare twine shows through.
- Leave 15 cm of bare twine at each end for hanging loops. Knot each end securely. Once the glue is cool, pull away any stray glue strings by hand. The finished garland should be full enough to hold its shape when lifted.

🛍 Shopping guide
Painted Owl Silhouette
A flat owl silhouette in matte black, propped against a wall or mounted on a fence post, has a graphic quality that printed decor cannot match.
Cut from thin plywood, it is solid enough to hold up outdoors for a single evening and sturdy enough to store and reuse for years. The shape does all the work; the painting is straightforward.
Printing an owl outline at the size you want, taping it to the plywood, and tracing around it with a pencil gives you a clean template without freehand drawing. The jigsaw step is for adults only, and sanding the edges before painting is what separates a finished-looking piece from a rough one.
What You Need
- 1 sheet of 4 mm birch plywood, at least 30 x 40 cm
- A printed owl silhouette template, sized to fit the plywood
- A jigsaw (adult use only)
- 80-grit and 120-grit sandpaper
- Matte black exterior paint or spray paint
- A foam roller or wide brush
How to Make It
- Tape the printed template to the plywood and trace the owl outline firmly with a pencil, pressing hard enough to leave a visible line on the wood. Remove the paper. An adult should cut along the traced line with the jigsaw, using slow, steady passes and supporting the plywood so it does not flex. Sand the edges first with 80-grit to remove any splinters, then with 120-grit until the edges feel smooth to the touch.
- Apply the matte black paint to both sides of the silhouette using a foam roller for the flat surfaces and a brush for the edges. Two coats give a solid, flat finish; let the first dry completely (at least one hour) before flipping and painting the second side. When both sides are fully dry, check the edges under good light: any pale wood showing at the edges needs a touch-up with a small brush.
- To mount the silhouette, drill a small hole at the top and thread with wire or a picture hook. To prop it, cut a short length of plywood scrap, glue and nail it to the back as a stand, or simply lean the piece against a wall or post.

🛍 Shopping guide
Corked Bottle Set
This is the apothecary aesthetic done properly: glass jars filled with single natural materials, hand-lettered kraft labels, and cork stoppers. Each jar holds one thing only, which is what gives the set its visual logic.
Line them up on a wooden board or tray, and the group looks like it belongs to a collection that took years to assemble. Tip the contents out and nest the empty jars at the end of the season.
Variety within the set matters. Aim for at least three different textures: something fibrous (dried moss), something angular (seed pods), and something fine (dried botanicals or peppercorns). The labels unify what would otherwise be just a collection of jars.
What You Need
- 4 to 6 clear glass jars with cork stoppers, in varied sizes
- Dried moss, seed pods, whole spices, or dried botanicals (one type per jar)
- 6 kraft labels, approximately 5 x 3 cm
- 1 m natural twine
- A fine-tip pen for lettering
How to Make It
- Fill each jar with a single material, packed loosely enough to see through the glass but densely enough to look intentional. Cork each jar. The materials should sit just below the shoulder of the jar, not crammed to the brim.
- Letter each label with the contents in block capitals: “DRIED MOSS”, “STAR ANISE”, “NIGELLA SEED”. Keep the lettering centred and the words on a single baseline. If your lettering is uncertain, use a light pencil guideline first, then ink over it and erase the pencil once dry.
- Cut a 15 cm length of twine per jar. Tie the label to the twine and then tie the twine around the neck of the jar with a simple knot, trimming any excess. The label should hang at the front and sit flat, not spin around the neck.

🛍 Shopping guide
Blackened Candlesticks
Wooden candlesticks in raw or honey-toned wood look decorative enough at any other time of year. Painted flat black and sanded at the edges to show the wood grain through, they look like antiques.
The distressing is light and specific: it catches the high points of the turning, which is exactly where decades of handling would wear a painted piece. Set taper candles in them and they are complete.
Black paint on turned wood sometimes looks too flat and dense. The answer is to sand back, not to thin the paint. Use the sandpaper on the raised ridges only, where the wood’s profile is highest, and leave the recesses fully black. The contrast does the work.
What You Need
- 2 wooden candlesticks in different heights (unfinished or already painted)
- Black chalk paint or matte black craft paint
- A foam brush or small paintbrush
- 220-grit sandpaper
- Taper candles to fit the holders
How to Make It
- Apply black paint to the entire candlestick, working the brush into the turned recesses so no wood shows. Two coats give full coverage; let the first dry for at least one hour before applying the second. The surface should be completely, evenly black with no streaks or missed areas before you move to the next step.
- Once fully dry (allow two hours after the final coat), wrap a small piece of 220-grit sandpaper around your finger and sand lightly across the raised ridges of the turning. The sanding should reveal small patches of bare wood at the highest points. Work slowly: you can always sand more, but you cannot unsand. Stop when the piece looks gently worn rather than stripped.
- Fit the taper candles and check they stand straight. If the candle hole is too wide, a small piece of florist tape wrapped around the base of the candle will grip the wood and hold it upright.

Stiffened Muslin Ghost Sculpture
This is the one ghost decoration that does not look sad when daylight hits it. Stiffened over a form and left to dry hard, the muslin holds a draped shape that looks sculptural rather than floppy.
Three of different sizes grouped together on a windowsill or mantel look like a considered still life. The form comes out, the ghost stores flat, and the whole project costs very little.
The fiddliest part is the draping: the muslin needs to be arranged before the stiffener sets, which gives you about ten to fifteen minutes of working time. Arrange the folds quickly, pulling the fabric down to create a tapered hem and lifting the top slightly to form a rounded head shape, then leave it completely undisturbed until dry.
What You Need
- A 50 x 50 cm piece of plain white or cream muslin (loosely woven cotton)
- Liquid fabric stiffener (sold at craft shops as “fabric stiffener” or “stiffy”)
- 1 foam ball, 7 cm diameter
- 1 tall glass bottle or tin can to use as a form
- Cling film to cover the form
- A shallow bowl for soaking
How to Make It
- Cover the foam ball and the top of the bottle with cling film, pressing it smooth so it does not create lumps under the fabric. Balance the foam ball on top of the bottle neck; this is your ghost form. Pour the fabric stiffener into the shallow bowl. Submerge the muslin in the stiffener, working it in with your hands until fully saturated. Lift it out and squeeze gently (do not wring) to remove excess, so it is wet and limp but not dripping.
- Drape the saturated muslin over the foam ball and bottle form, centring it so the ball is under the highest point of the fabric. Arrange the lower edges into soft, uneven folds, pulling downward to taper the hem. Lift one corner slightly on each side if you want the suggestion of raised arms. Work quickly: you have about ten minutes before the stiffener begins to set. Once you are satisfied with the shape, do not touch it again.
- Leave the ghost to dry completely in a warm place, at least six to eight hours or overnight. When fully dry, the muslin will be rigid and hold its shape without support. Slide the bottle out from below and peel the cling film away carefully; the foam ball will stay inside the head and that is fine. The ghost should stand on its own.

🛍 Shopping guide
Etched Glass Cloche
A glass cloche with a spider web or botanical motif etched directly into the surface looks like a specialist shop piece. Etching cream works on any smooth glass and the result is permanent, so the cloche can be cleaned and reused indefinitely.
Use it over a single candle, a skull, or a small arrangement of dried flowers; the frosted motif catches the light differently from every angle.
The one step that separates a clean etch from a smeared one is stencil adhesion. The stencil must be completely flat against the glass with no lifted edges before the cream goes on.
Press every edge with a fingernail and roll over the surface with a brayer or the back of a spoon before you open the etching cream. Gloves on before it does.
What You Need
- 1 glass cloche with a smooth, flat or curved surface
- 1 self-adhesive vinyl stencil in a spider web, moon, or botanical motif (sized to fit the cloche)
- Etching cream (available at craft shops)
- A soft brush or foam applicator
- Rubber or nitrile gloves
- Running water for rinsing
How to Make It
- Clean the glass with rubbing alcohol or window cleaner and let it dry completely; any oil or fingerprint will prevent the stencil from adhering properly and cause the etching cream to bleed. Peel the backing from the stencil and press it firmly onto the cloche, working from the centre outward to push out any air bubbles. Run your fingernail around every edge of the stencil, then press again with the back of a spoon. The stencil must be completely flat with zero lifted edges.
- Put on the gloves. This is an adult-only step and the gloves stay on until the cream is fully rinsed away. Using the soft brush, apply the etching cream in a thick, even layer over the open areas of the stencil. Do not brush back and forth repeatedly: apply and leave. Set a timer for the time stated on your cream bottle, usually three to five minutes. Do not exceed it, and do not peek by lifting the stencil.
- At the timer, carry the cloche to the sink and rinse under running water thoroughly for at least one minute, keeping the gloves on. Once rinsed, peel away the stencil from one corner. The etched motif will be visible immediately as a soft frosted area. Wash the glass with dish soap, rinse, and dry. The etch is permanent and dishwasher-safe.

Dark Dried Floral Arrangement
Dried flowers sprayed matte black and arranged in a dark vase look like something out of a florist specializing in funereal aesthetics, which is exactly the right reference for October.
The spray paint does not damage the dried material if applied in light coats, and the arrangement keeps indefinitely if kept away from moisture. Store it under a cloche or in a box with tissue.
The height variation in the arrangement is the detail that makes it look considered rather than bunched. Work from the tallest stem down, and add shorter pieces to fill the gaps rather than building outward from a flat base. Odd numbers of stems almost always look better than even ones.
What You Need
- A mixed bunch of dried flowers and seed heads (thistles, poppies, lunaria, grasses all work well)
- Matte black floral spray paint
- A block of dry floral foam cut to fit the vase
- A dark or matte ceramic vase, at least 15 cm tall
- A drop cloth
How to Make It
- Lay the dried flowers on the drop cloth and spray in thin, light coats, turning the stems to reach all sides. Dried material is fragile, so hold the can at least 40 cm away and use less pressure than you would on a solid surface. Let each coat dry for 20 minutes before adding another. The stems and petals should look fully black with the original texture still visible, not crushed or matted with paint.
- Cut the floral foam block to fit snugly inside the vase opening and press it in firmly. It should sit about 2 cm below the vase rim so it does not show. If the foam is visible, press it down further or trim the top with scissors.
- Begin arranging with the three tallest stems, placing them toward the back and at varying angles. Add medium stems to fill the mid-section, then shorter pieces at the front to cover the foam. The arrangement is done when no foam is visible and the stems sit at three or more distinct height levels.

Antique Key Display
Old keys in a shadow box look like a Victorian curiosity cabinet, and they cost almost nothing to source at antique fairs or flea markets.
Dark wax gives each one the same depth of tone and protects the metal from further rust without losing the patina. The shadow box unifies the collection; the ribbons stop them rattling and add the one textile note that keeps it from looking industrial.
Waxing old metal feels counterintuitive but it works: dark furniture wax fills the surface and darkens the highlights, and a quick buff brings up a low sheen. Apply sparingly because wax builds fast on metal.
What You Need
- 6 to 10 old skeleton keys in varied sizes (antique fairs, flea markets, or online)
- Dark brown or black furniture wax (a small tin)
- A soft cloth for waxing and a separate cloth for buffing
- 60 cm narrow black or dark red ribbon per key (3 to 4 mm wide)
- 1 shadow box frame, at least 25 x 35 cm, with a depth of at least 3 cm
- Small nails or picture pins for mounting
How to Make It
- Wipe each key clean with a dry cloth. Dip a corner of the wax cloth into the dark wax and work it into the surface of the key, getting into any engraved detail or joints. A little goes a long way: use less than you think you need. Leave for two minutes, then buff with the clean cloth using brisk, circular strokes until the key has a low, even sheen. The metal should look darkened but not lacquered.
- Cut a 60 cm length of ribbon per key. Thread one end through the bow of the key and fold it in half, aligning the ends, so the key hangs at the midpoint. Tie the two ribbon ends together in a simple knot about 5 cm from the top, leaving a loop for hanging. Repeat for each key.
- Lay the shadow box flat and arrange the keys inside it before fixing anything: vary the heights and angles until the grouping looks balanced. When you are happy with the arrangement, press a small nail or picture pin through the back of the box at the hanging loop of each key, bending the pin slightly to hold the ribbon in place. Close the back of the shadow box and hang it level.

Charcoal Canvas Bunting
Bunting made from charcoal cotton canvas sits in a completely different register from paper or felt versions.
The pinking shear edge does not fray and does not need hemming, the fabric drapes rather than curling, and the finished piece looks architectural pinned across a doorway or strung from a mantel. Store it folded in a zip bag; it will last indefinitely.
The fold-and-stitch at the top is the step most people skip, and it is the one that matters: a triangle simply knotted to twine flaps and rotates. A folded-and-stitched top sits flat and faces forward. Keep the stitches close to the fold and consistent, and the bunting will hang straight the first time.
What You Need
- 50 cm of charcoal cotton canvas (at least 130 cm wide), or equivalent in pieces
- Pinking shears
- 2 m natural twine
- A hand sewing needle and thread in a matching dark colour
- A ruler and chalk or fabric pencil for marking
How to Make It
- Mark out equilateral triangles on the canvas using the ruler and chalk: each triangle should be approximately 20 cm wide at the base and 25 cm tall. Cut each one out with the pinking shears, which gives a zigzag edge that will not fray. For a 2 m length of bunting, cut ten to twelve triangles. Lay them out in a row, points facing down, to check they are consistent in size before moving on.
- Fold the top 2 cm of each triangle over the twine, enclosing the twine inside the fold so it runs along the top edge of the triangle. The triangle should hang from the twine rather than being knotted to it. Pin the fold in place with a dressmaking pin.
- Stitch the fold closed with a running stitch, sewing through both layers of canvas with the twine inside. Keep the stitches close together (about 4 mm apart) and in a straight line along the fold. Space the triangles evenly along the twine as you go, leaving 10 cm between each one. Leave at least 20 cm of bare twine at each end for tying.

🛍 Shopping guide
Stained Wood Sign
A dark-stained wood board with a single phrase lettered in cream paint pen looks like a specialist print shop product. Choose a short phrase: five words or fewer sits best on a board of this size and is easier to letter evenly.
“Something wicked”, “Beware”, or simply a date in Roman numerals all work. The sign leans against a wall or rests in a plate stand; no hanging hardware needed.
The cream paint pen on dark stain is the combination that makes this look deliberate rather than craft-fair. Let the stain dry absolutely fully before you letter it, because a pen nib that catches on tacky stain drags and blobs. If you are uncertain of your lettering, practice the layout on paper at full size first.
What You Need
- 1 pine or plywood board, approximately 30 x 15 cm and at least 18 mm thick
- 120-grit and 180-grit sandpaper
- Dark walnut or ebony wood stain
- A foam brush or lint-free cloth for applying stain
- A cream or off-white paint pen, medium tip (2 to 3 mm)
How to Make It
- Sand the board with 120-grit sandpaper in the direction of the grain until the surface is smooth and all mill marks are gone. Follow with 180-grit for a finer finish. Wipe away all dust with a barely damp cloth and let dry for ten minutes. Apply the wood stain with a foam brush or cloth, working in the direction of the grain and covering the front, edges, and back. Wipe back any excess with a clean cloth after two minutes. The board should look deeply coloured and even with no streaks. Allow to dry fully: most stains need two to four hours minimum, so check the tin.
- Once the stain is completely dry and does not feel the least bit tacky, lightly sketch the lettering in chalk or a light pencil on the surface to establish your spacing and baseline. Keep the letters centred on the board and leave equal margins on all sides.
- Shake the paint pen and prime the tip on scrap paper until the ink flows smoothly. Letter over your pencil sketch in confident, even strokes, keeping the pen at a consistent 45 to 60 degree angle to the surface. Do not go back over wet letters: wait two minutes between passes if a second stroke is needed. When the ink is fully dry, erase any visible pencil lines with a soft eraser.

Frequently Asked Questions
What is the single most important step in halloween diy crafts that need spray paint?
Full cure time. Spray paint that is dry to the touch is not cured, and on a matte finish especially, any contact before full cure leaves permanent fingerprints. Check the time stated on the can (usually 24 to 48 hours) and leave the piece undisturbed until then.
Can these halloween diy crafts be reused next year?
Most of them yes. The matte black bottles, bone white branches, owl silhouette, antique key display, charcoal bunting, stained sign, and blackened candlesticks are all designed to store and reuse. The dried floral arrangement and wax-dipped skull are also durable if kept dry. The corked bottle set simply needs the natural fillings refreshed.
Is etching cream safe to use at home?
Yes, with the right precautions. Wear nitrile or rubber gloves throughout, work near a sink, and follow the timing on the bottle exactly. Never let it contact skin and rinse immediately and thoroughly if it does. It is not a product to use with children present.
Where can you find old skeleton keys for the antique key display?
Antique fairs and flea markets are the best sources for genuine old keys at low cost. Online marketplaces (search ‘lot of old skeleton keys’) are reliable if local markets are limited. Charity shops occasionally carry them in boxes of miscellaneous hardware.
What is the best way to store fabric halloween diy crafts like the muslin ghost and canvas bunting?
The muslin ghost stores flat: lay it on tissue paper in a box and do not stack heavy items on top. The canvas bunting folds neatly and fits in a zip-seal bag. Both last indefinitely if kept dry.

14 Halloween sugar cookies decorated with a spoon, toothpick, and zip bag. Complete recipes with exa
25 bedazzled Halloween crafts for adults who treat rhinestones as a basic supply. Pumpkins, candles,
15 easy Halloween party appetizers that look spooky and taste amazing — from Mummy Pigs in Blanket
Leave a Reply