

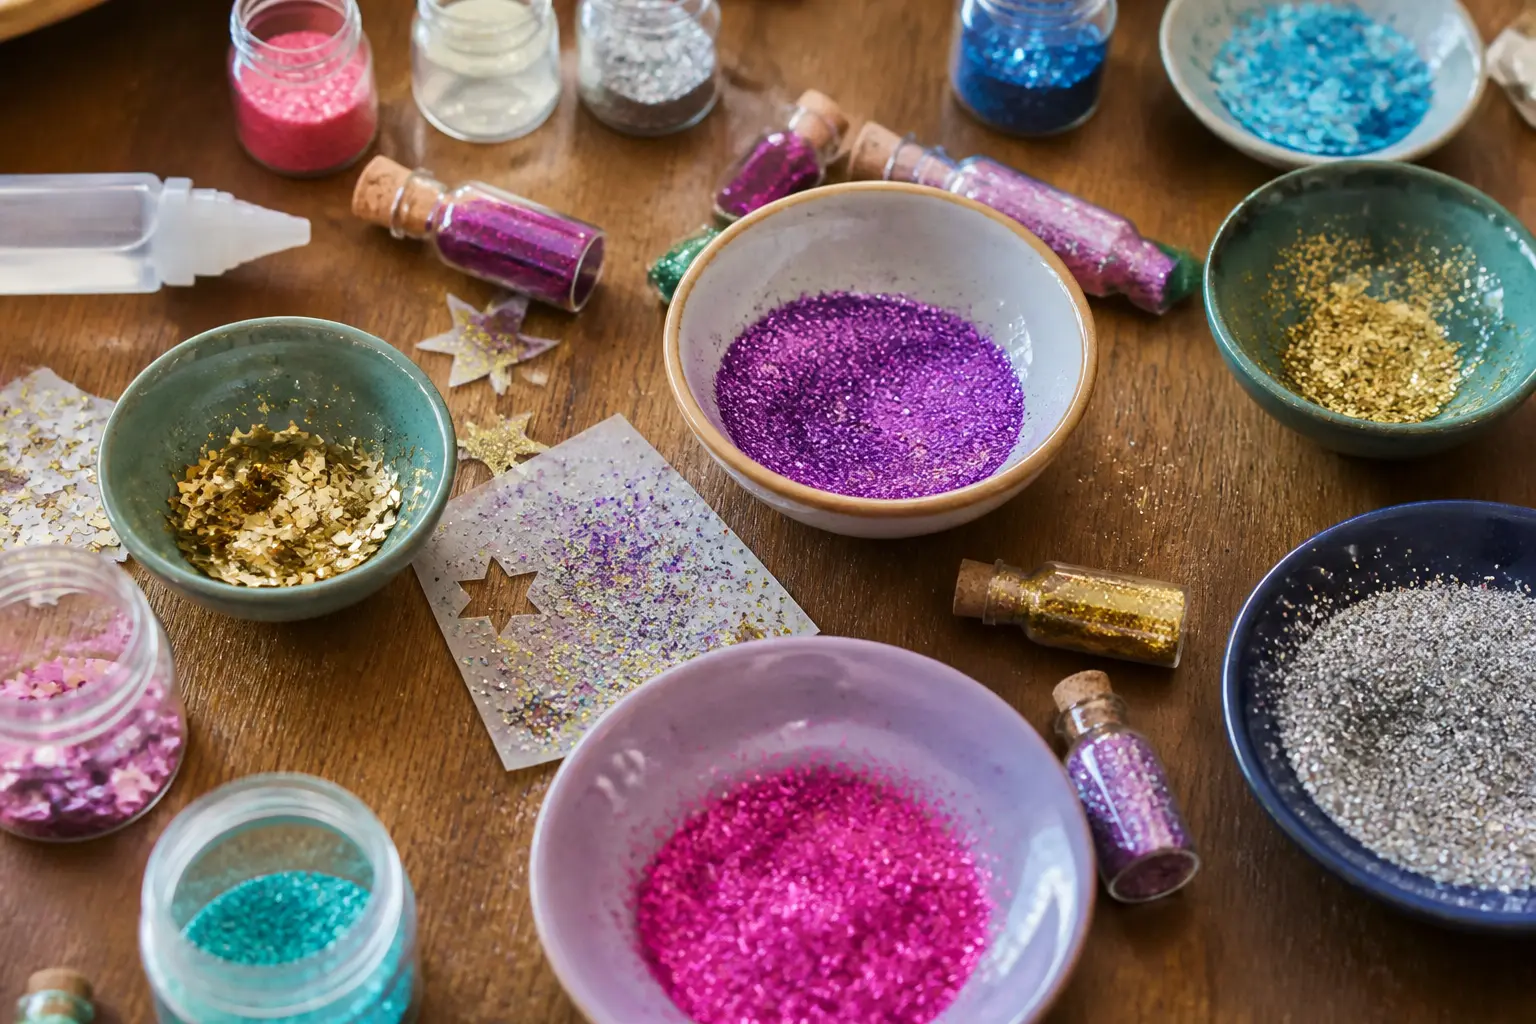
Glitter crafts have a reputation problem. The reputation is earned, mostly, but the answer is not to skip the sparkle. The answer is to seal it, contain it, and give it a surface worth landing on. Black card, painted wood rounds, stretched canvas and sealed resin all grip glitter properly, which means far less of it migrates to the sofa.
The 26 ideas below are written for adults who want Halloween decor that reads as considered rather than chaotic. Some take twenty minutes; a few take an afternoon. All of them look like something you chose on purpose.
If you want to pair any of these with a full party plan, 18 Halloween Crafts for Adults That Are Not Kid Projects in Disguise covers the broader picture, and 20 Halloween Arts and Crafts to Fill a Whole October gives you a week-by-week schedule.
Grab a silicone mat, a dedicated glitter brush, and a can of workable fixative. Everything else is in the shop links below each idea.
This post contains affiliate links. If you buy through them, I may earn a small commission at no extra cost to you.
Web and Spider Glitter Crafts
Spider webs are the easiest glitter format there is: the lines are thin, they separate the colours naturally, and the black background turns every gap into negative space that does half the design work for you. Squeeze the glue, pour the glitter, tap the excess into a tray and move on.
The ideas in this section all use black card or black painted board as the base. That single decision stops the craft from reading as childish and gives the glitter colours somewhere to really fire.
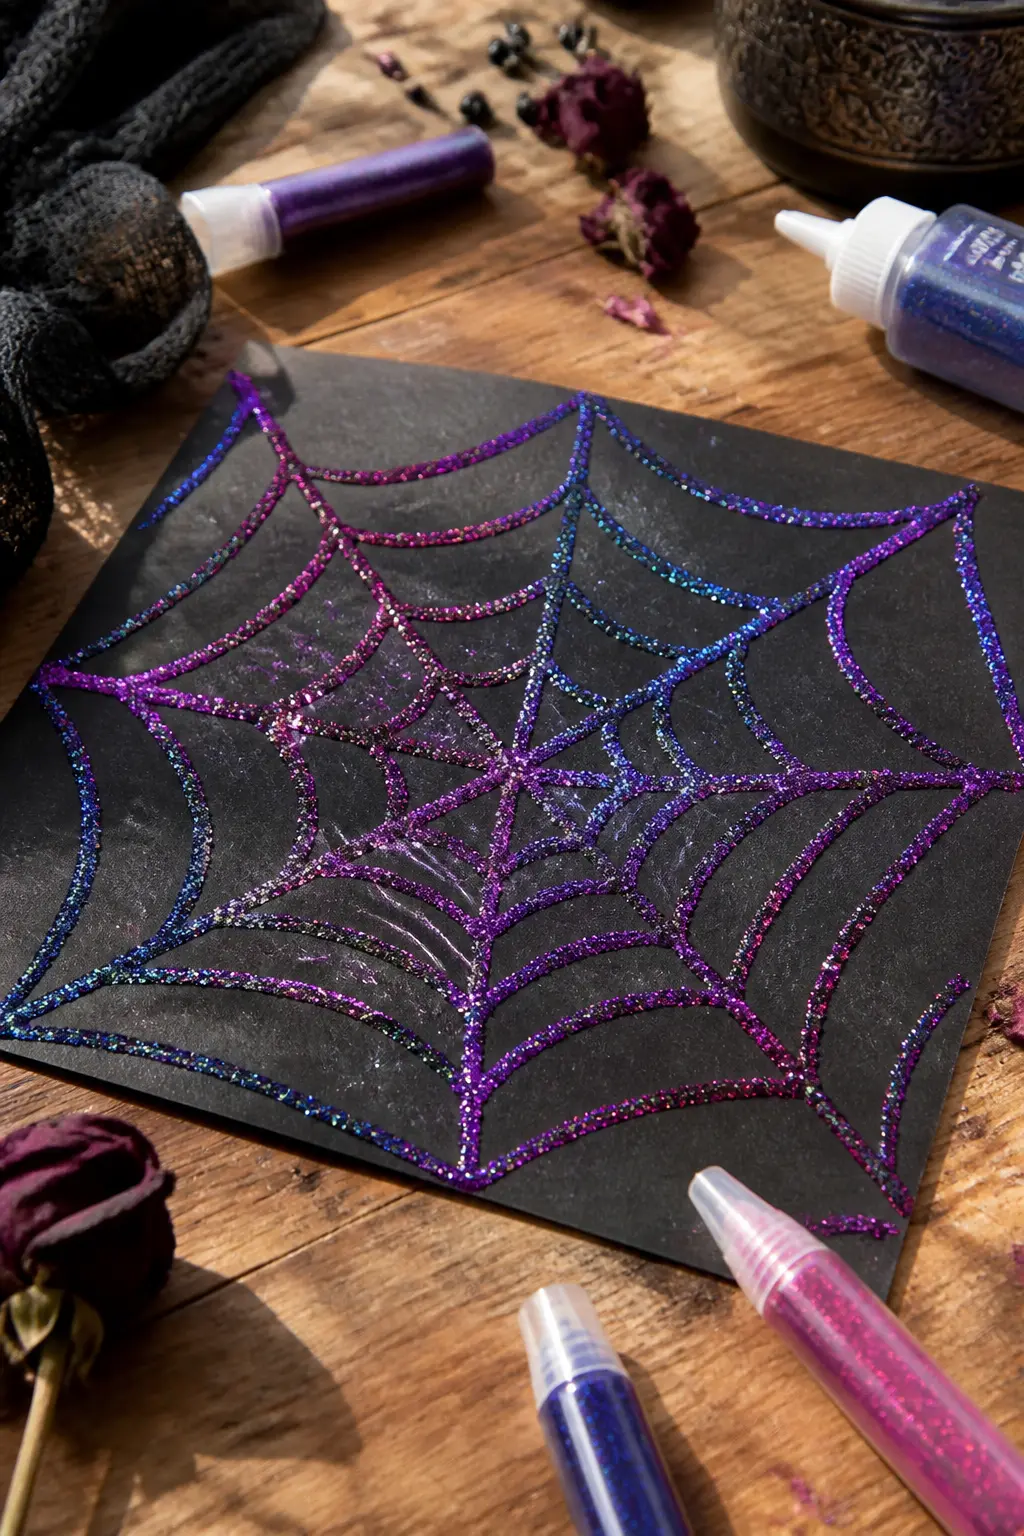
Rainbow Glitter Spider Web on Black Card
Squeeze white school glue in a classic web pattern on a square of black card: one central dot, straight lines radiating out, then curved arcs connecting them. Work in sections so the glue stays wet when the glitter lands.
Pour one glitter colour per arc section, starting from the centre and working outward. Deep cobalt, magenta and violet read as the most intentional combination; orange and gold read as more traditional. Tap the excess back into the tube and let the piece dry flat for two hours before displaying it.
Seal with a light mist of hairspray or matte fixative once the glue is fully dry. The glitter on this format stays put because the lines are thin and each one is essentially encased in dried glue.
🛍 Shopping guide
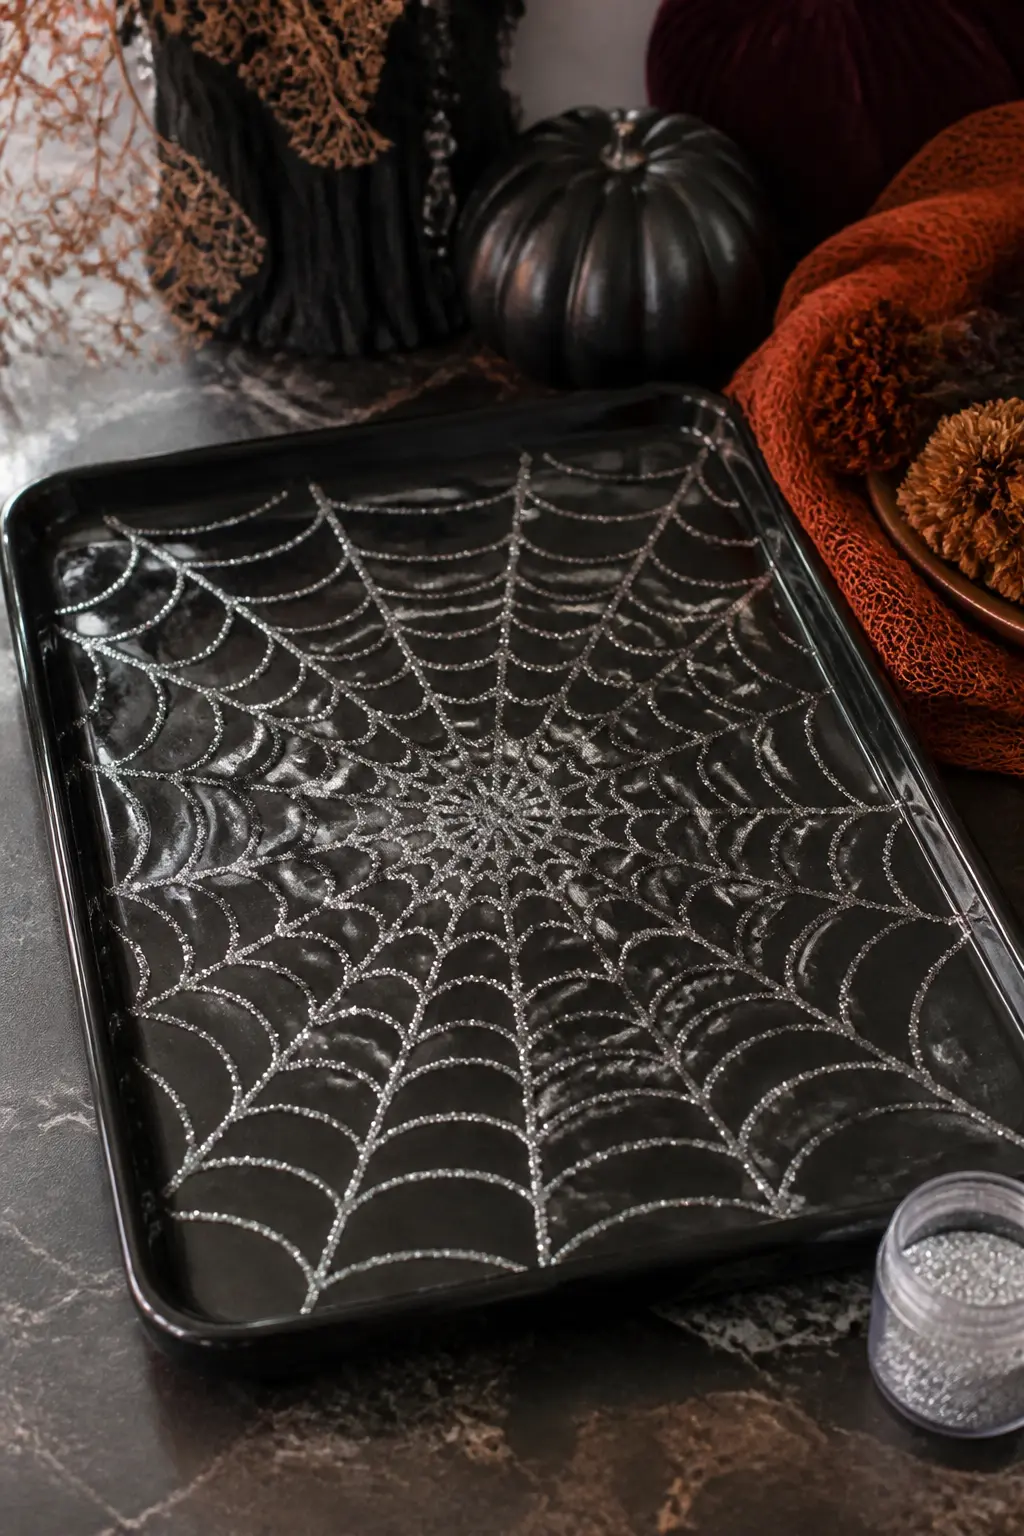
Monochrome Silver Web Tray
Take a plain black wooden or lacquered tray and draw a spider web across the entire surface in dimensional fabric paint, which has a slightly raised line and grips glitter even better than flat glue.
While the paint is wet, pour fine silver glitter over the whole web at once, covering every line. Shake the tray gently to distribute and tap the excess onto a sheet of paper to funnel back into the jar.
The result is a single-colour piece with real depth because the silver shifts between warm and cool as the light angle changes.
This tray works as a drinks station centrepiece or a surface for grouping candles. Seal it with two coats of Mod Podge once fully dry, because trays get handled.
🛍 Shopping guide
Glittered Acrylic Spiders on Wire
Cut simple spider body shapes from black craft foam, coat them in Mod Podge, and drop them into a bag of iridescent chunky glitter. Shake, remove and let dry on a silicone mat. The foam holds the shape without warping, and the chunky glitter gives a faceted, gemstone look rather than a flat sparkle.
Thread black floral wire through the body for legs, curl the ends slightly, and hang the finished spiders at different heights in a window or across a mantel shelf. Against daylight or candlelight, the iridescent glitter shifts between silver, lilac and pale green, which is far more interesting than plain black.

Pumpkin Glitter Crafts
A plain craft-store pumpkin, foam or real, becomes something else entirely once you add paint, glitter and dimensional embellishments. The trick is to treat the pumpkin the way a painter treats a canvas: build up layers, let each one dry, and add the heaviest texture last.
Gems and gold leaf sit on top of glitter beautifully because both materials catch light at different angles, which means the piece shifts as you walk past it. That is exactly the effect worth chasing for a mantel or a front-door arrangement.
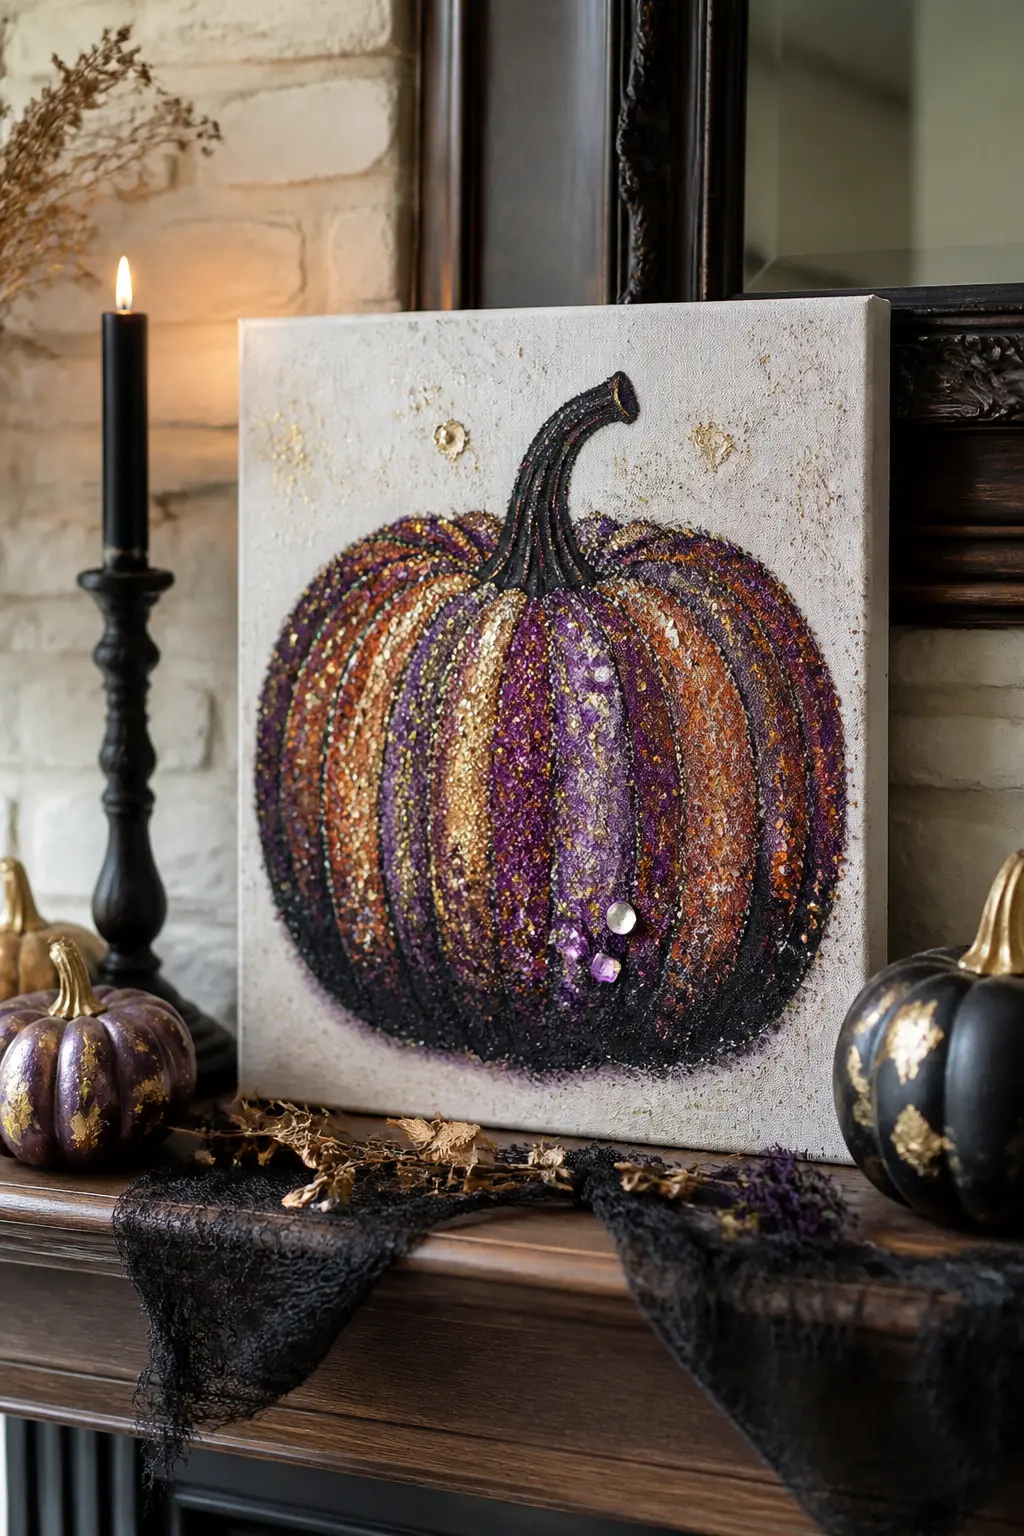
Jeweled Glitter Pumpkin on Canvas
Paint a pumpkin silhouette on a square canvas in broad, loose brushstrokes using acrylic in deep plum and black. Let it dry, then coat the ribbed sections individually with gel medium and press fine glitter into each one in a different colour: burnt orange, gold, silver and iridescent lavender all on the same pumpkin.
While the gel medium is still tacky, press flat-back rhinestones and small gold leaf flakes into the surface. The gems catch the light at angles the glitter cannot, which gives the piece a constantly shifting quality. Frame it or lean it on a mantel and it reads as a proper art piece rather than a holiday decoration.
This is the one entry in this section that genuinely improves with more time spent on it. The more deliberate the gem placement, the better the result.
🛍 Shopping guide
Glitter-Dipped Foam Pumpkin Stack
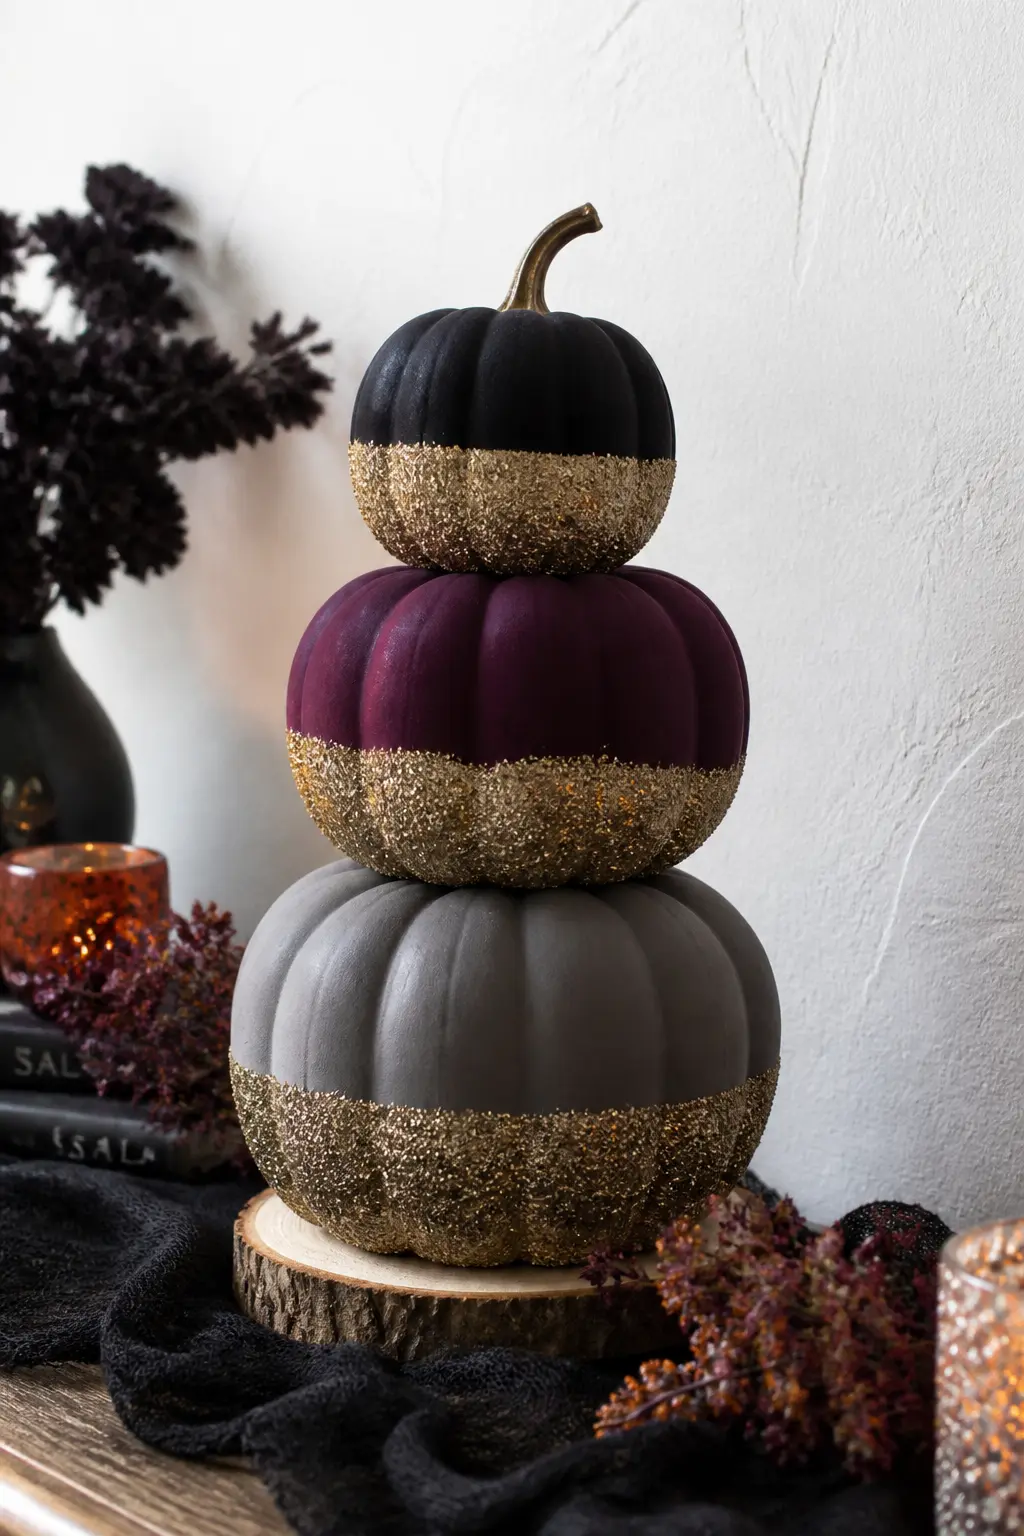
Stack three foam craft pumpkins in descending sizes on a wooden slice or a small cake stand. Paint each one in a different matte base colour: black, deep plum and slate grey. Then dip the bottom third of each pumpkin into a tray of glitter, pressing gently so the glitter adheres to the still-tacky paint.
The dipped effect, half matte and half sparkling, is the detail that makes this look intentional. Use a single glitter colour across all three pumpkins for cohesion, or graduate from fine silver at the bottom of the smallest to chunky gold at the bottom of the largest.
🛍 Shopping guide
Geode-Style Glitter Pumpkin
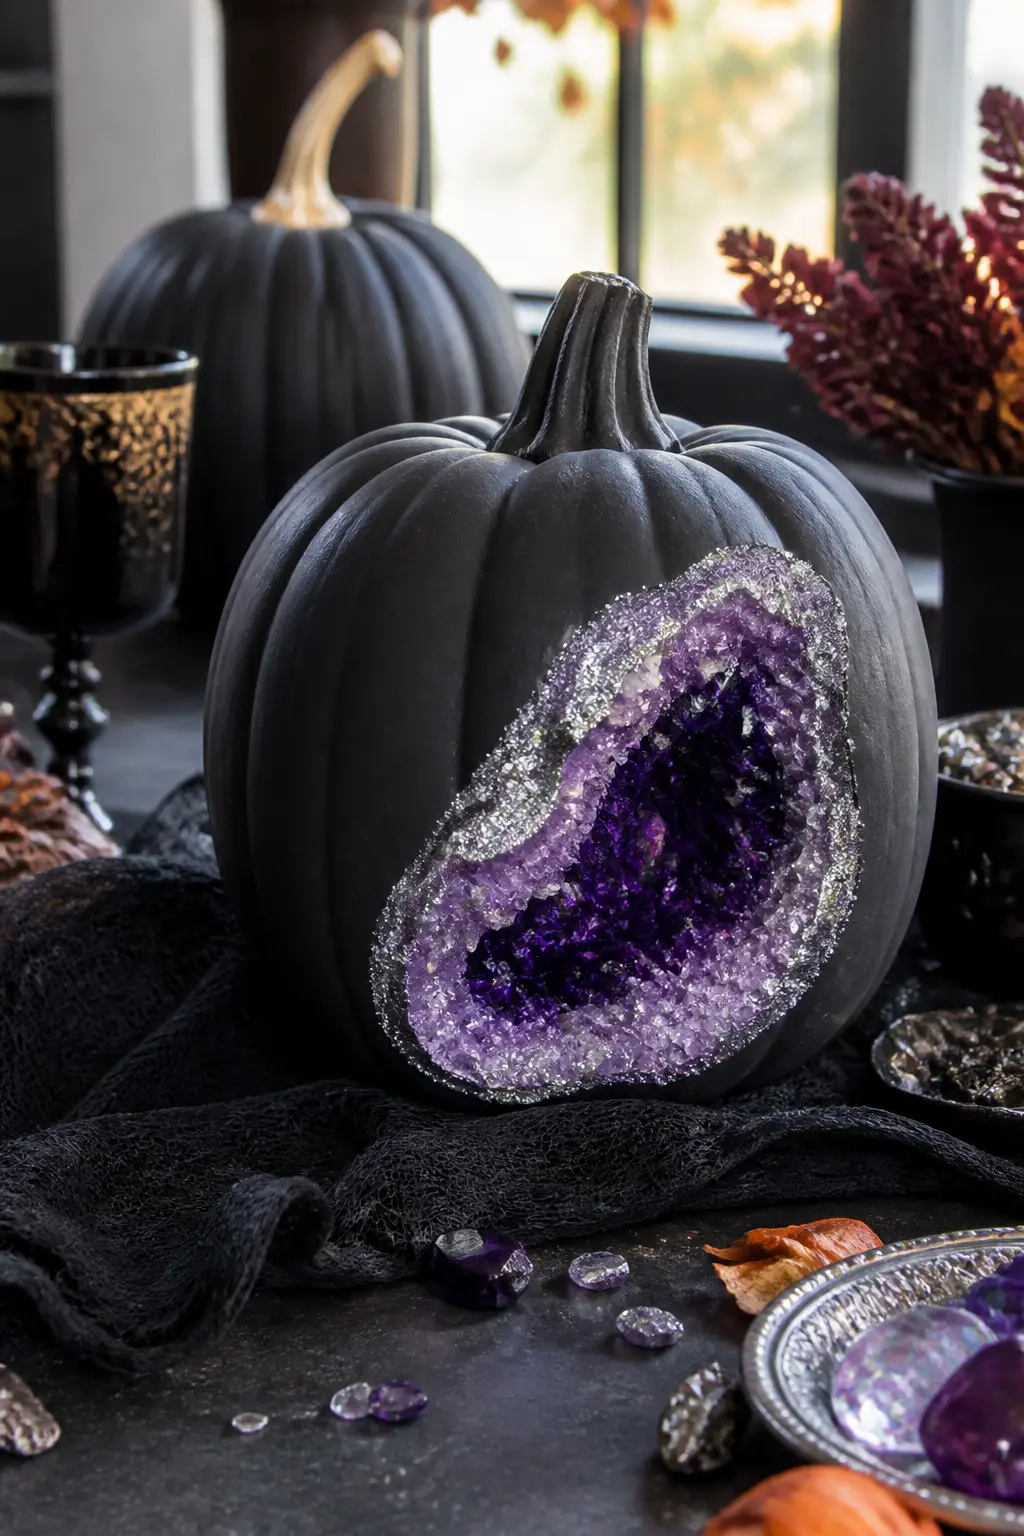
Cut or hollow a rough irregular oval from one side of a large foam pumpkin to suggest a geode cavity.
Paint the cavity walls with a base of black acrylic, then layer glitter and crushed glass beads working from the outer edge inward: deep amethyst glitter at the rim, iridescent crystal glitter toward the centre, white coarse glitter at the deepest point.
Seal the whole interior with gloss Mod Podge, which makes it look wet and mineral. The outside of the pumpkin can stay matte black or be given a single coat of fine silver glitter for contrast.
This sits flat on a surface as a centrepiece, and the interior catches candlelight or fairy lights dropped inside the cavity in a way that is genuinely difficult to describe and very easy to admire.
🛍 Shopping guide
Glitter-Stem Velvet Pumpkin
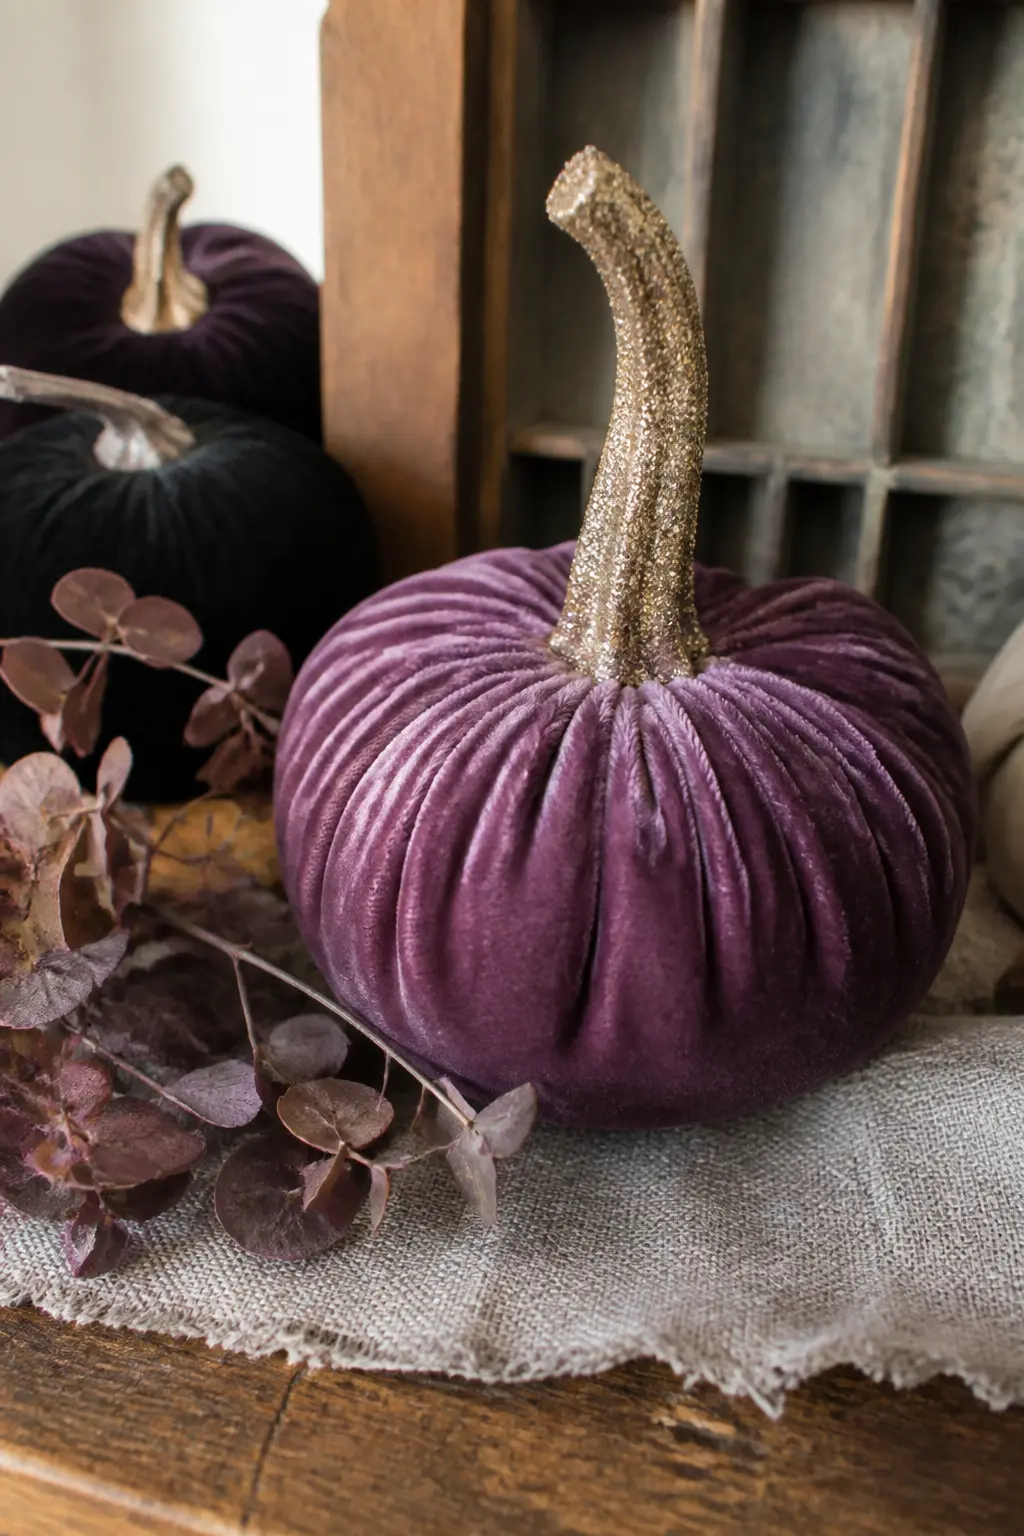
Buy or make a plain velvet pumpkin, which has a textile body that completely solves the glitter-shedding problem because nothing is going to shake loose from velvet.
The stem is where the glitter lives here: wrap it with a thin coat of Mod Podge and press it into fine bronze or antique gold glitter, then repeat once dried for full coverage.
The contrast between the soft matte velvet body and the hard glittering stem is the whole aesthetic. A deep dusty plum or forest green velvet paired with bronze glitter is the most grown-up version of this and works on a bookshelf well after Halloween has passed.
🛍 Shopping guide
Ghost and Figure Glitter Crafts
The cottagecore ghost, soft and slightly sorrowful, holding dried flowers on a blush-painted background, has replaced the cartoon sheet-ghost almost entirely in adult Halloween craft right now. The silhouette is simple to build from cheesecloth and a polystyrene ball, and the glitter comes in on the background rather than on the figure itself.
That reversal, glitter as sky and the figure as matte foreground, is what makes these pieces look like small paintings rather than children’s projects. Keep the palette dusty rather than neon and the result works well into November.
Cheesecloth Ghost on a Painted Wood Round
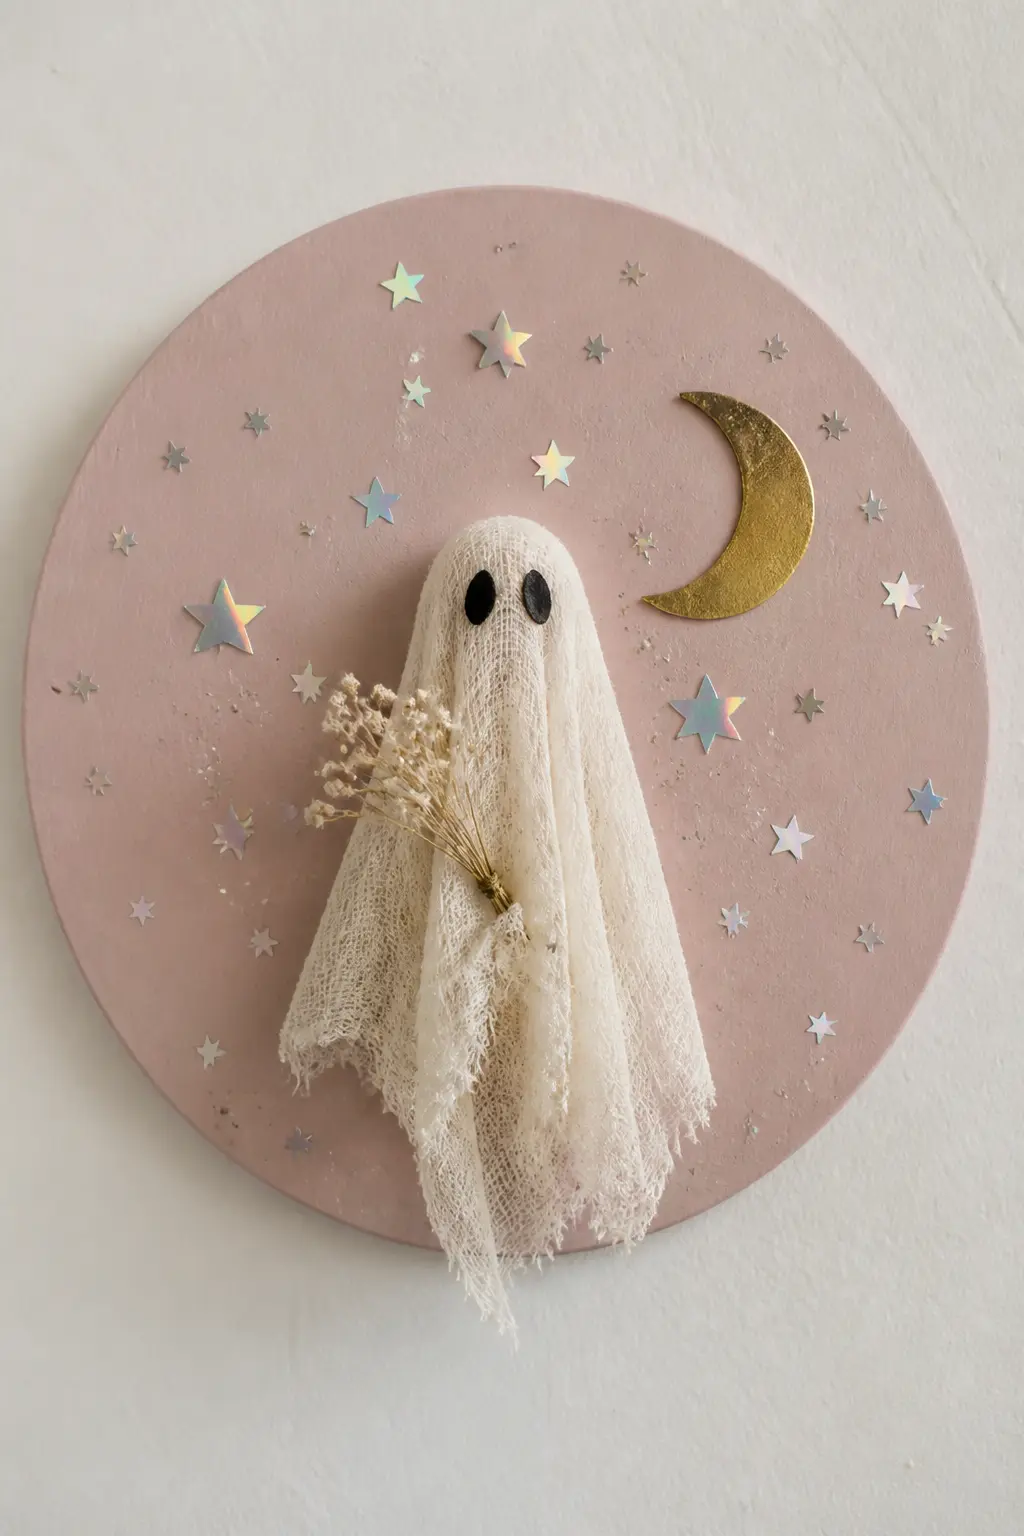
Paint a 10-inch wood round in dusty blush or warm terracotta. While it dries, scatter chunky iridescent star confetti and holographic hex glitter across the wet paint so it embeds naturally rather than sitting on top. Add a tiny crescent moon shape in gold paint once the base is dry.
Make the ghost figure from a small polystyrene ball wrapped in cheesecloth, gathered and tied at the neck. Press two small black gem stickers for eyes. Glue the figure to the lower centre of the painted round, then tuck a tiny bundle of dried baby’s breath or gypsophila into the gathered cloth at the front.
The result is small, wall-hangable and genuinely charming. A picture hook or a loop of velvet ribbon at the back finishes it.
🛍 Shopping guide
Glitter Constellation Ghost Silhouette
Cut a ghost silhouette from black card. Coat the entire surface with Mod Podge and press it face-down onto a sheet of fine iridescent silver glitter, so every part of the ghost catches light. Let it dry and shake off the excess.
On a piece of deep navy or black card slightly larger than the ghost, use a white paint pen to draw connecting constellation lines between small dots.
Glue the glitter ghost over the constellation background, slightly offset so the star lines peek out around its edges. The glitter ghost against the hand-drawn constellation gives the piece the look of a small art print.
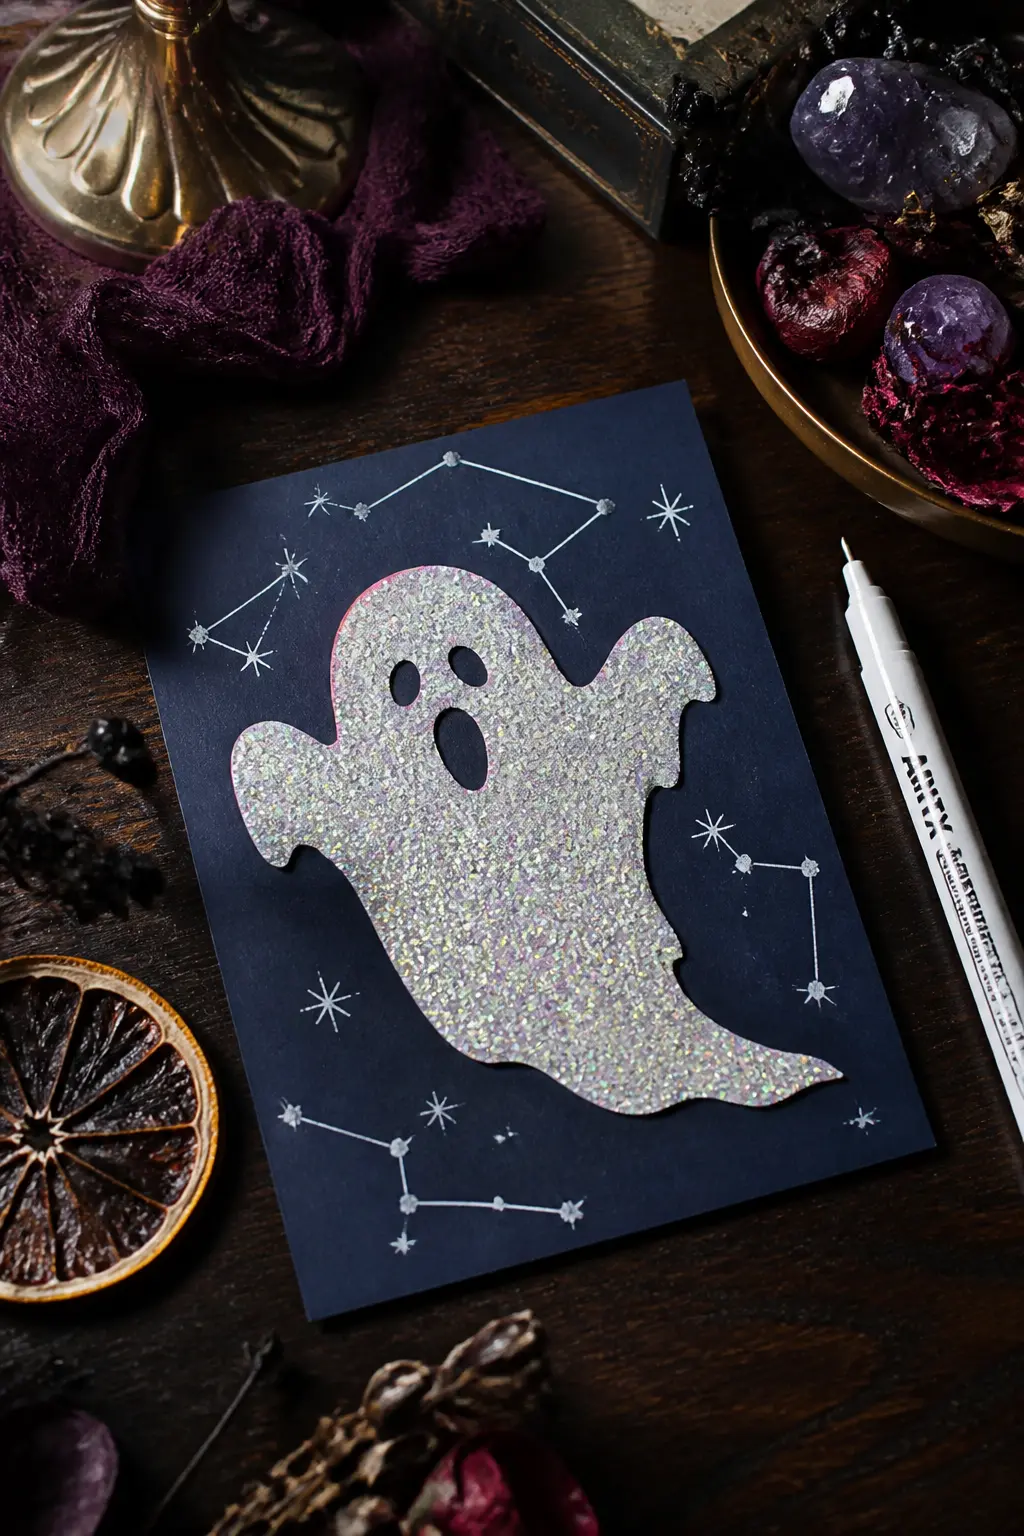
🛍 Shopping guide
Glitter Witch Hat Wall Art
Draw or trace a tall witch hat silhouette on black mountboard and cut it out. Paint the brim in matte black and coat the cone in Mod Podge, pressing it into deep violet fine glitter for full coverage.
Add a band of wide black satin ribbon at the base of the cone, then glue a cluster of small dried black roses or preserved eucalyptus to the ribbon band.
Punch a hole at the top and thread velvet ribbon for hanging. Leaned against a wall or hung from a nail, this reads as intentional art rather than a seasonal novelty, especially with the dried botanicals grounding the glitter.
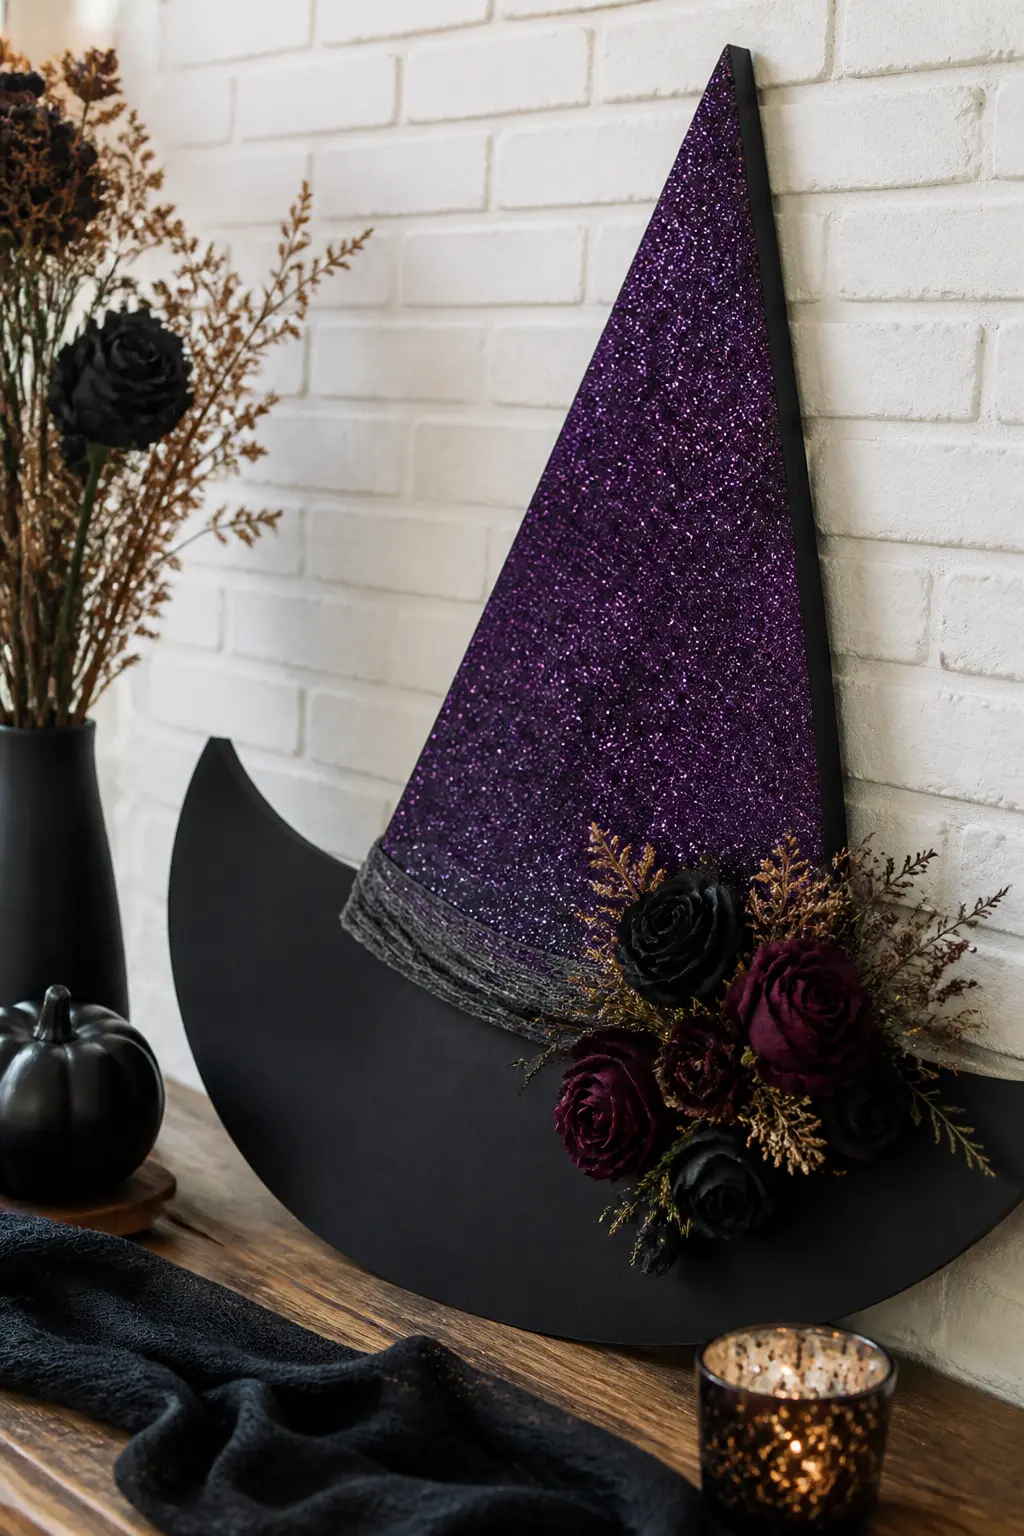
🛍 Shopping guide
Candle and Glass Glitter Crafts
Glass and glitter are natural partners because the light moves through both. A plain votive, a wine glass or an apothecary jar becomes a moody centrepiece when glitter is sealed on the outside and a candle burns inside.
Use Mod Podge as the adhesive, let it cure for a full 24 hours, and the glitter will not flake into a flame or a drink.
Stick to chunky hex glitter or fine cosmetic-grade glitter on vessels rather than craft glitter, which tends to have sharp edges and sheds more aggressively.
Glitter and Resin Skull Votives
Coat the outside of small glass skull votives in a thin layer of Mod Podge using a foam brush, working one section at a time. Press iridescent or holographic fine glitter into each section while it is still wet, then let the whole piece cure for 24 hours before sealing with a second coat of Mod Podge.
Place a battery tea light inside rather than a real flame, because even sealed glitter and open flame are not a combination worth testing. The battery light bouncing around inside a glitter-coated glass skull is more atmospheric than it sounds, and far safer for an unattended party table.
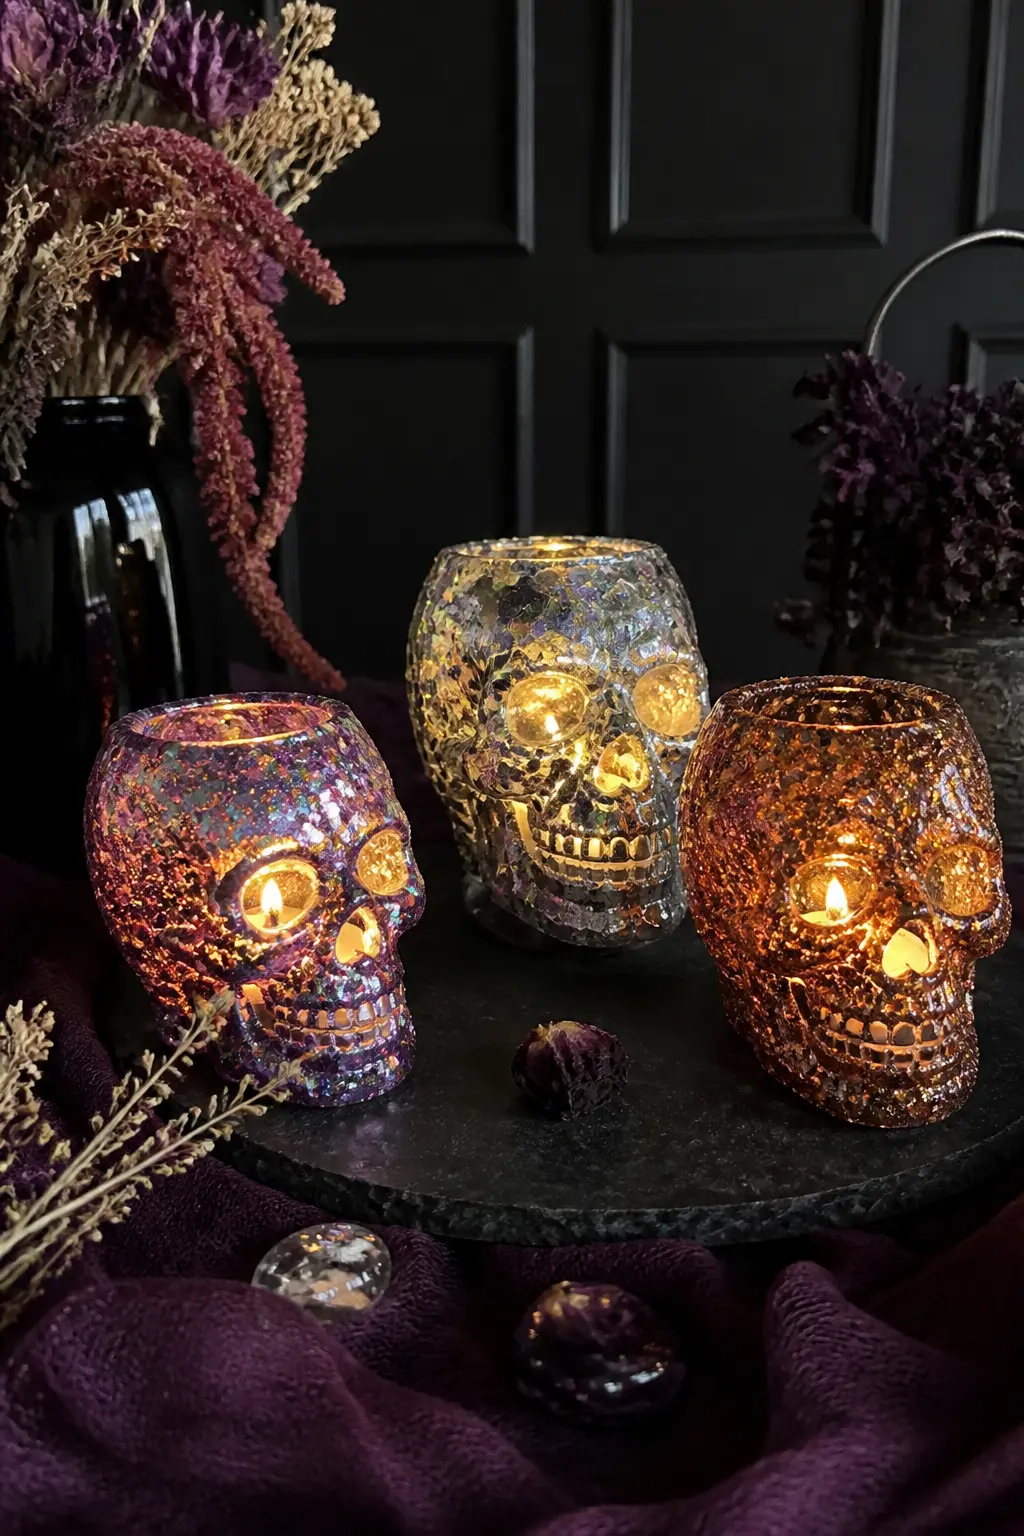
🛍 Shopping guide
Glitter-Dipped Wine Glasses
Dip the outside of the stem and the base of plain wine glasses into Mod Podge, then immediately into a tray of fine glitter. Hold upside down over the tray until the dripping stops, then rest upside down on a silicone mat to dry.
The glitter naturally fades as it moves up the bowl, creating an ombre effect without any extra work.
Once fully dry, seal with a dishwasher-safe Mod Podge formula and let cure for 28 days before washing, or hand-wash only if you want to use them sooner. These are the party favour that costs almost nothing and looks like it came from a boutique gift shop.
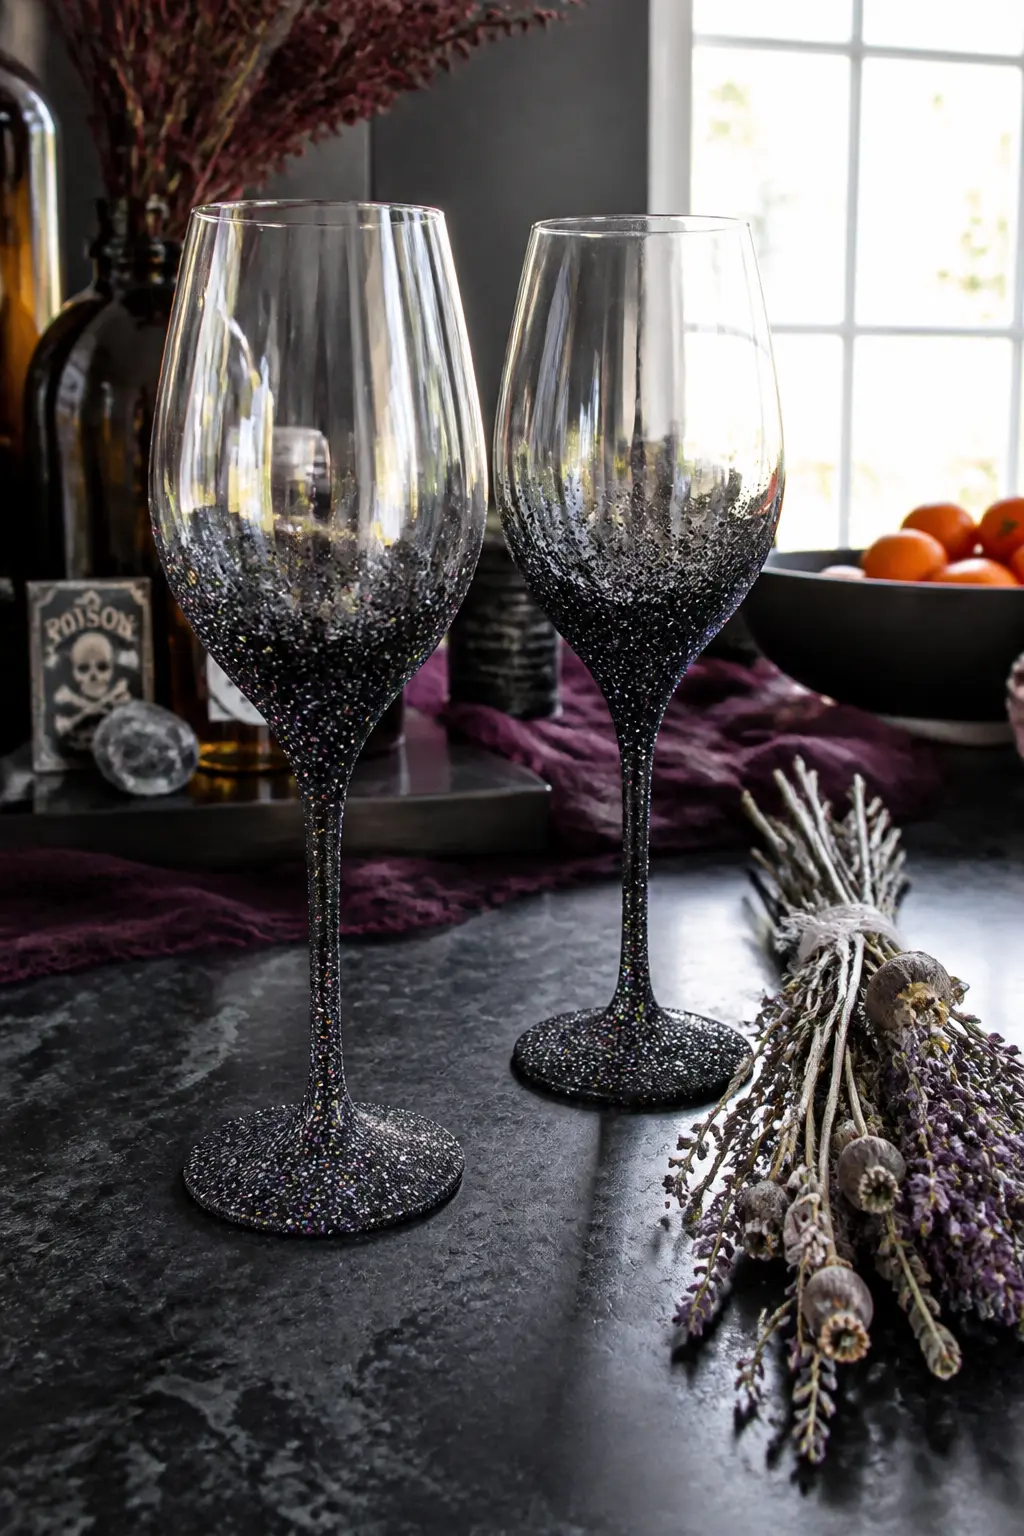
🛍 Shopping guide
Glitter Apothecary Jar Centrepiece
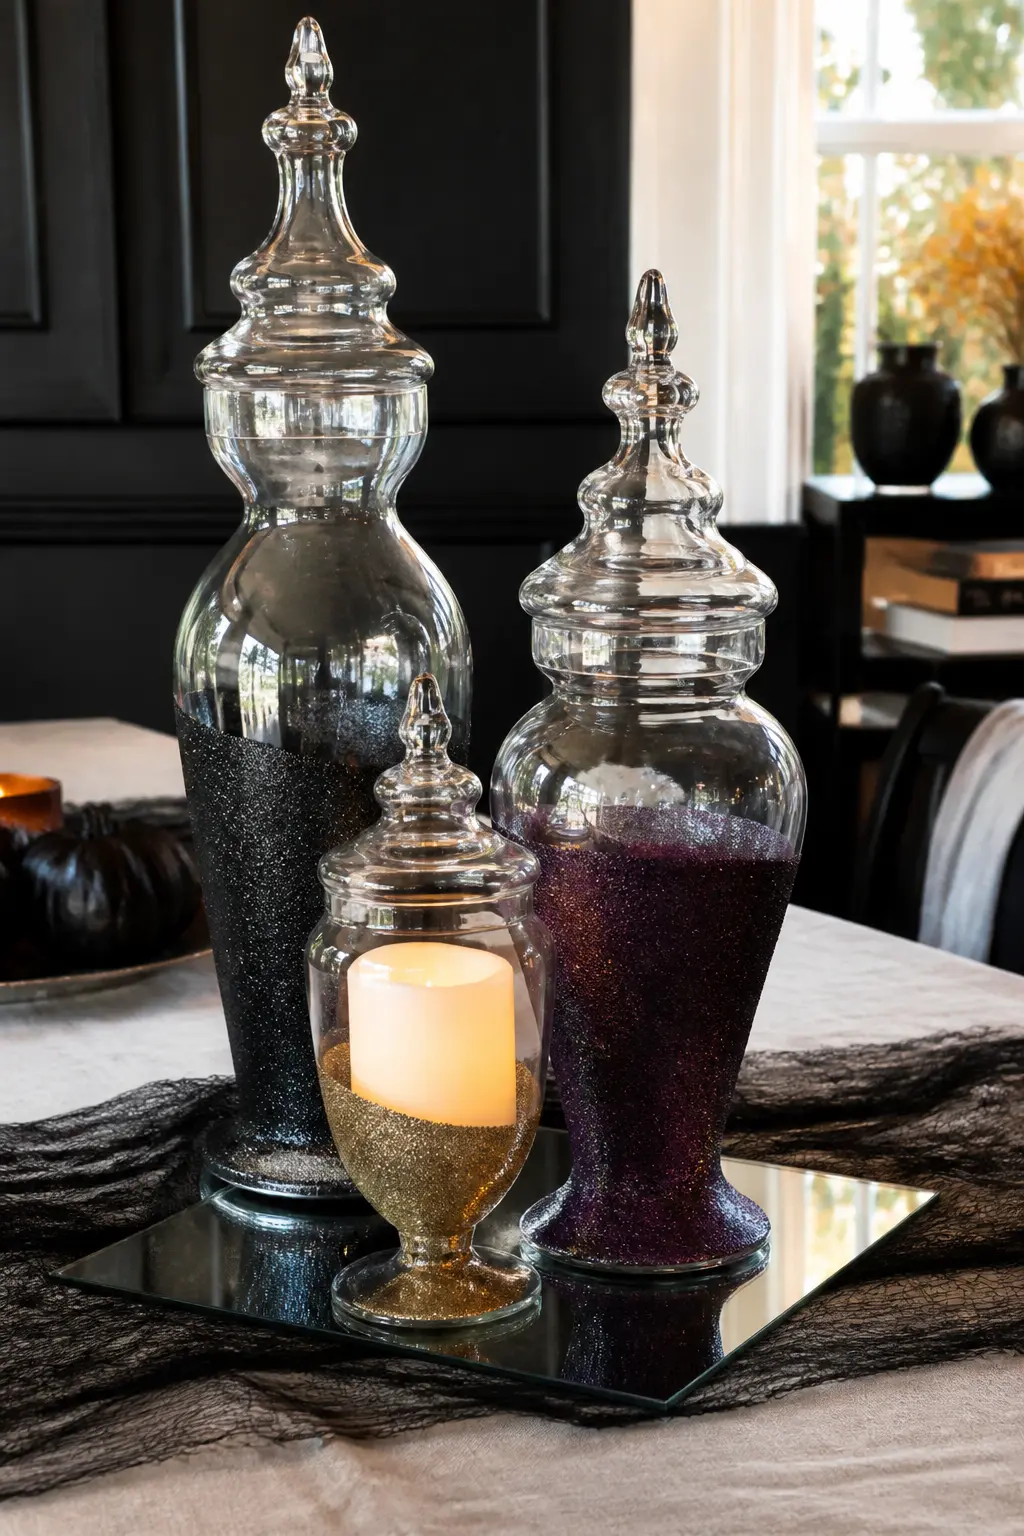
Take three apothecary jars in different heights and coat the lower half of each in Mod Podge. Roll each one through a tray of glitter: deep black on the tallest, dark plum on the middle and antique gold on the shortest. Let them dry and seal.
Fill each jar with a different material: black sand in the tall one, dried black beans in the middle, and a battery pillar candle in the shortest so the gold glitter base glows. Cluster all three on a mirrored tile or a piece of black slate for a centrepiece that reflects light in two directions at once.
🛍 Shopping guide
Glitter Lantern with Vellum Web
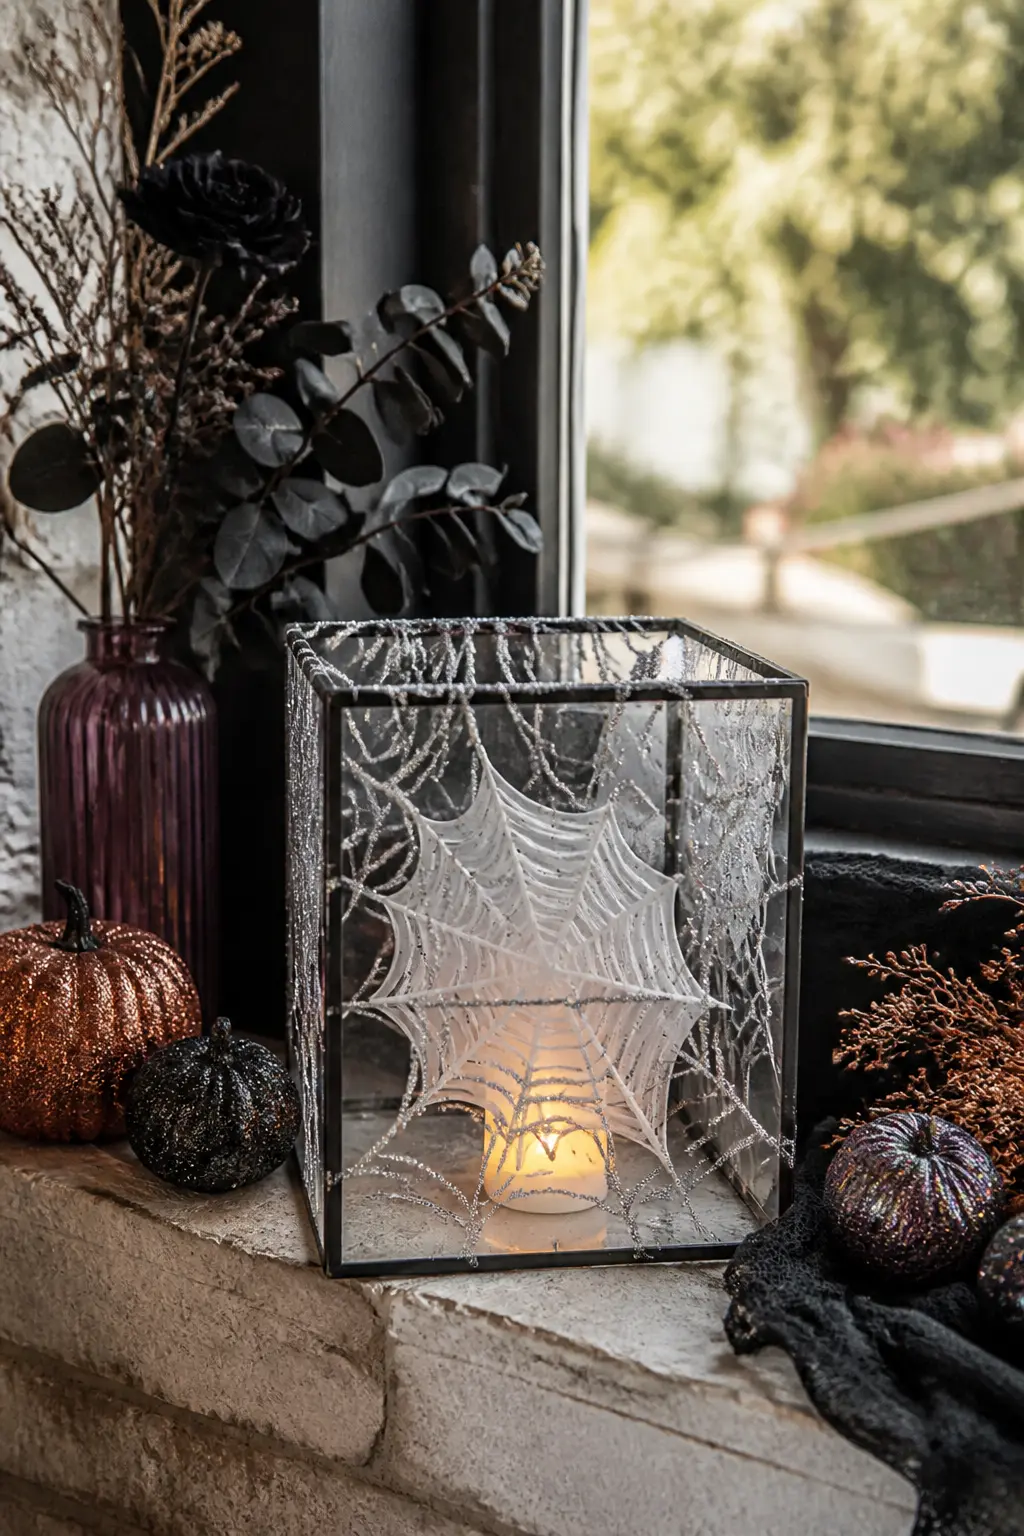
Cut a spider web from white vellum and glue it to the inside of a square glass lantern before inserting a battery candle. The vellum diffuses the light slightly while the web casts a faint shadow on the lantern walls.
On the outside of the glass, paint thin web lines with Mod Podge and dust with fine silver glitter while wet.
The interior vellum shadow and the exterior glitter work at different distances: the glitter catches from across the room, the web shadow becomes visible up close. That layered visual is what makes this more interesting than a simple glitter lantern.
🛍 Shopping guide
Wreath and Door Glitter Crafts
A glitter wreath does not need to be foam rings wrapped in glittered picks from a craft store. The interesting version starts with a wire or grapevine base, adds dried or faux botanicals, and uses glitter only on specific elements: tips of branches, the undersides of leaves, the edges of ribbon. Restraint is the whole technique.
For door pieces specifically, seal everything twice with a matte fixative spray, because temperature changes and brief rain exposure will lift unprotected glitter fast.
Glitter Dipped Faux Foliage Wreath
Start with a grapevine wreath base and wire in stems of faux eucalyptus, dark magnolia leaves and a few dried lunaria (honesty) pods. Leave the base foliage completely matte. Paint the tips of every third leaf and the edges of the honesty pods with a thin coat of gel medium and dust immediately with ultra-fine iridescent silver glitter.
The matte-to-glitter ratio should sit around 80:20: just enough sparkle to catch light as the door opens, not enough to read as a craft-store product. A velvet ribbon bow in deep plum at the base ties it together without overwhelming the botanical quality.

🛍 Shopping guide
Black Feather and Glitter Wreath
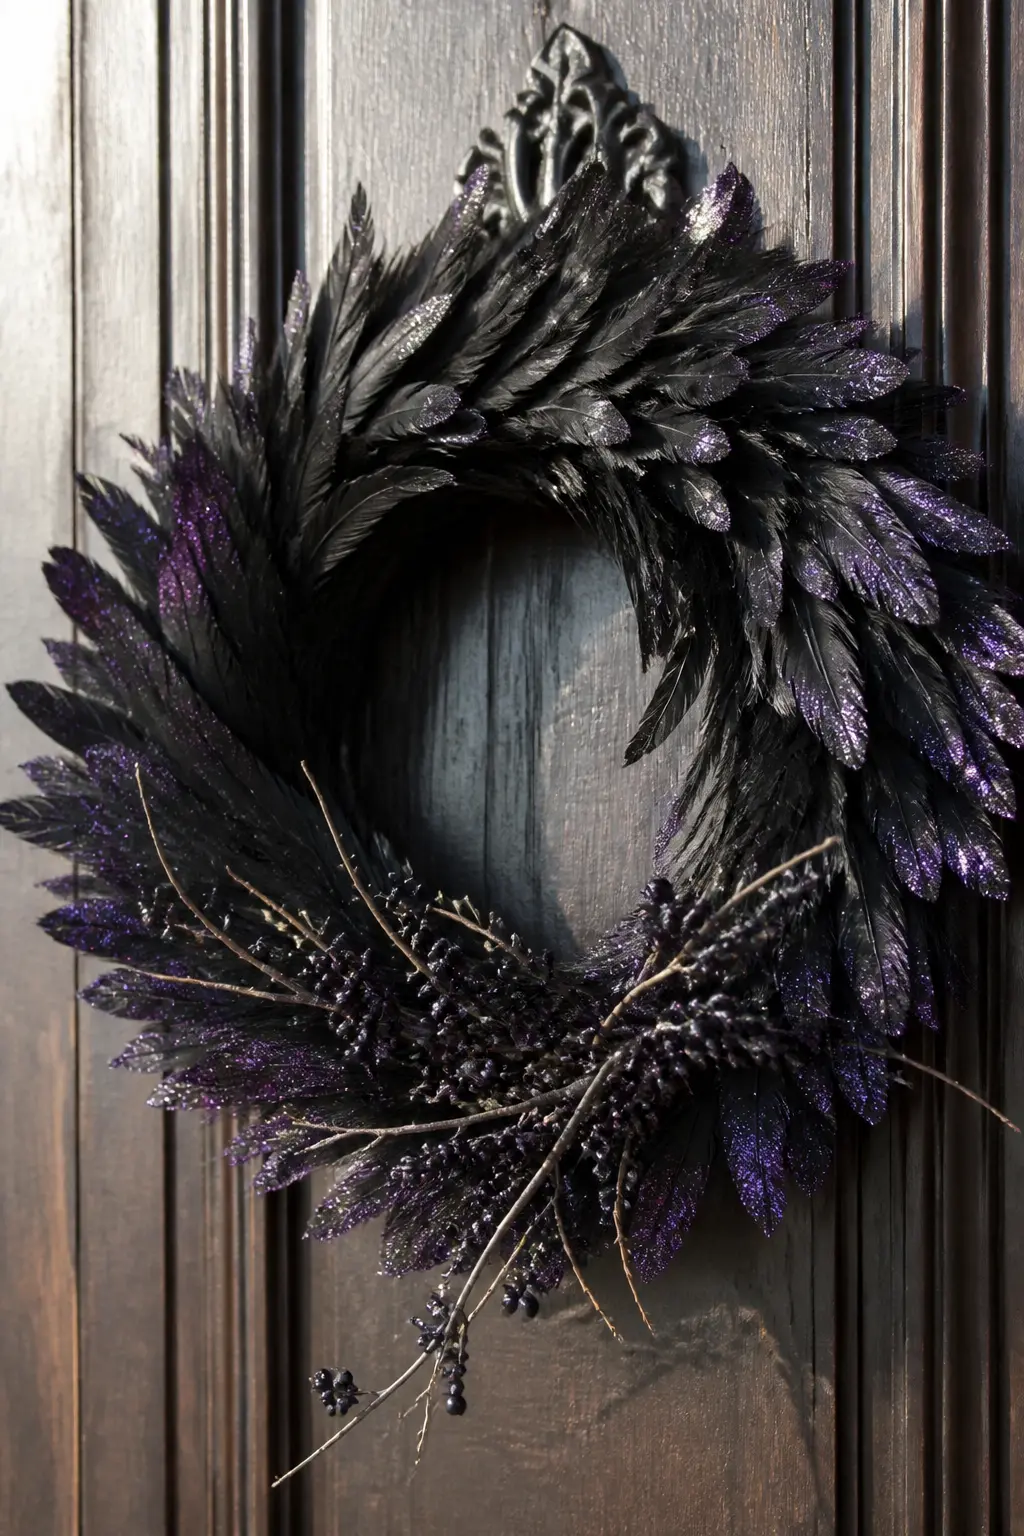
Wire or hot-glue black feathers around a foam wreath ring, overlapping them like shingles so the base disappears completely. Spray the entire wreath with hairspray while it is still moving, then immediately dust fine jet-black and deep violet glitter over the tips of the outermost feathers only.
The glitter on black feathers is almost invisible in ambient light but lights up dramatically under a porch lamp or a candle nearby. That shift, from matte to suddenly brilliant, is what makes this worth doing. Add a few dried black berry picks or small crow feathers in contrasting sizes to break the uniformity.
🛍 Shopping guide
Glitter Bat Mobile Wreath
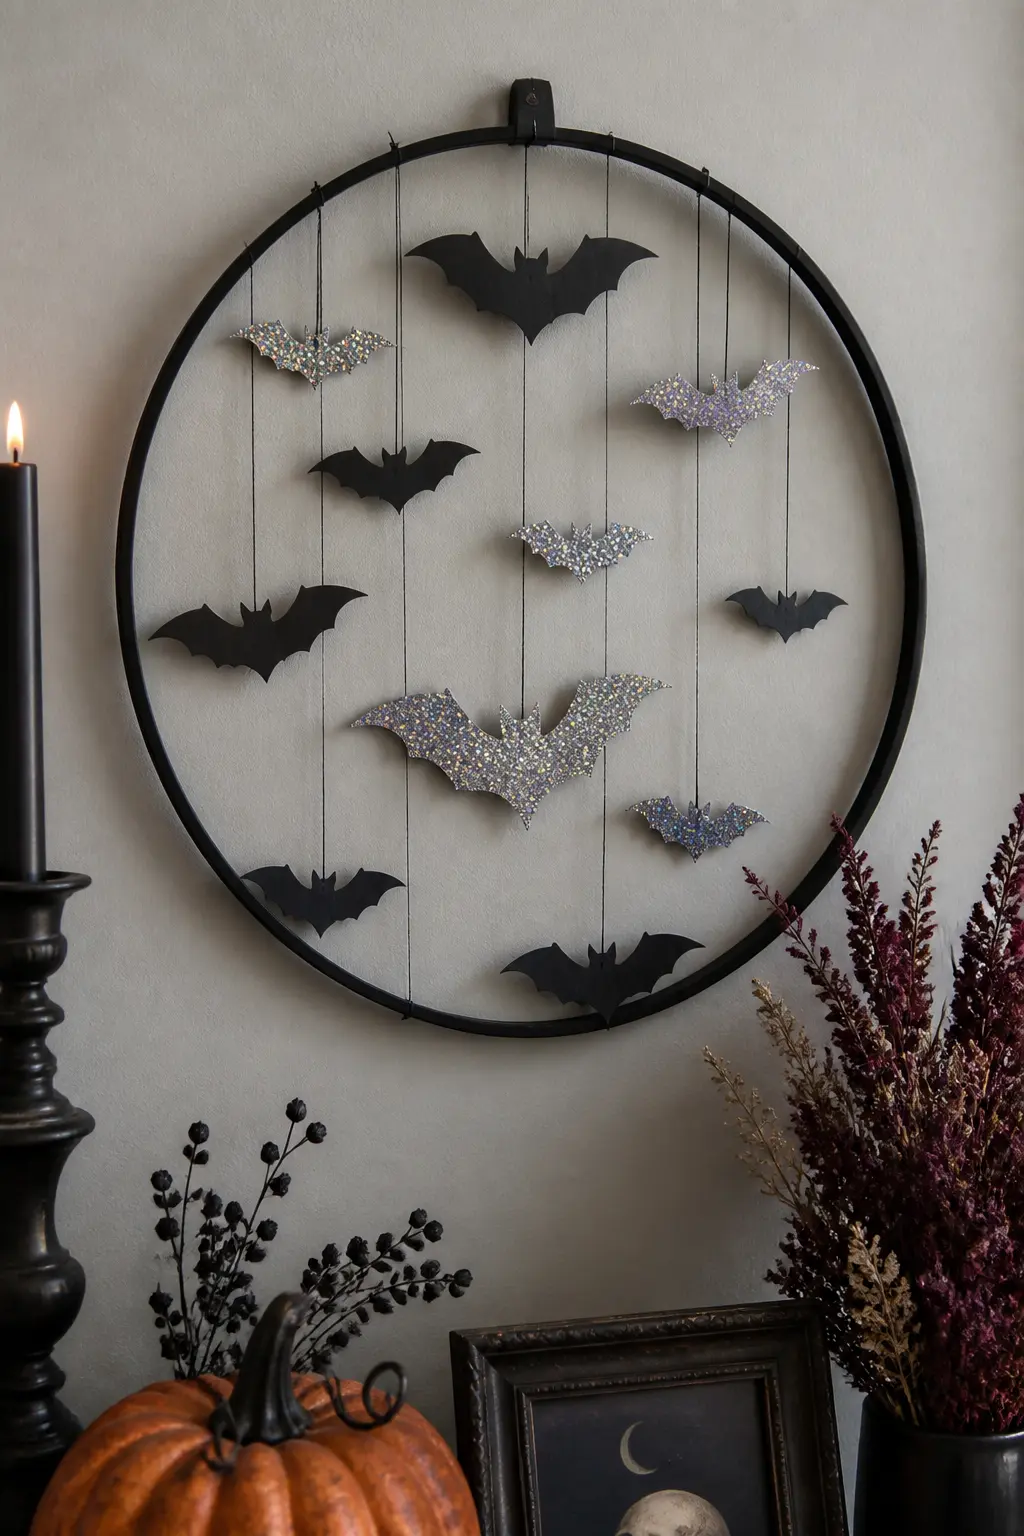
Cut bat silhouettes from black card in three sizes. Coat alternating bats entirely in fine holographic glitter and leave the others flat matte black. Punch a small hole in each and hang them at different lengths from a simple embroidery hoop painted matte black, using black thread.
The hoop hangs flat against the door or wall like a modern wreath, and the hanging bats move in any air movement, turning the holographic glitter ones into little flashes of light. It is visually very different from a traditional ring wreath and much faster to make than it looks.
🛍 Shopping guide
Paper and Card Glitter Crafts
Paper is the most forgiving glitter surface because the texture grips the adhesive well and the whole piece is flat, which means you can press it under a heavy book while it dries and get a clean finish. Black card is the default base, but deep plum and forest green also work beautifully with iridescent and silver glitter.
These make the most practical party favour and place-card format: easy to batch-produce, light to transport and straightforward to display. A few of them double as wall art once the party is over, which justifies the time spent making them.
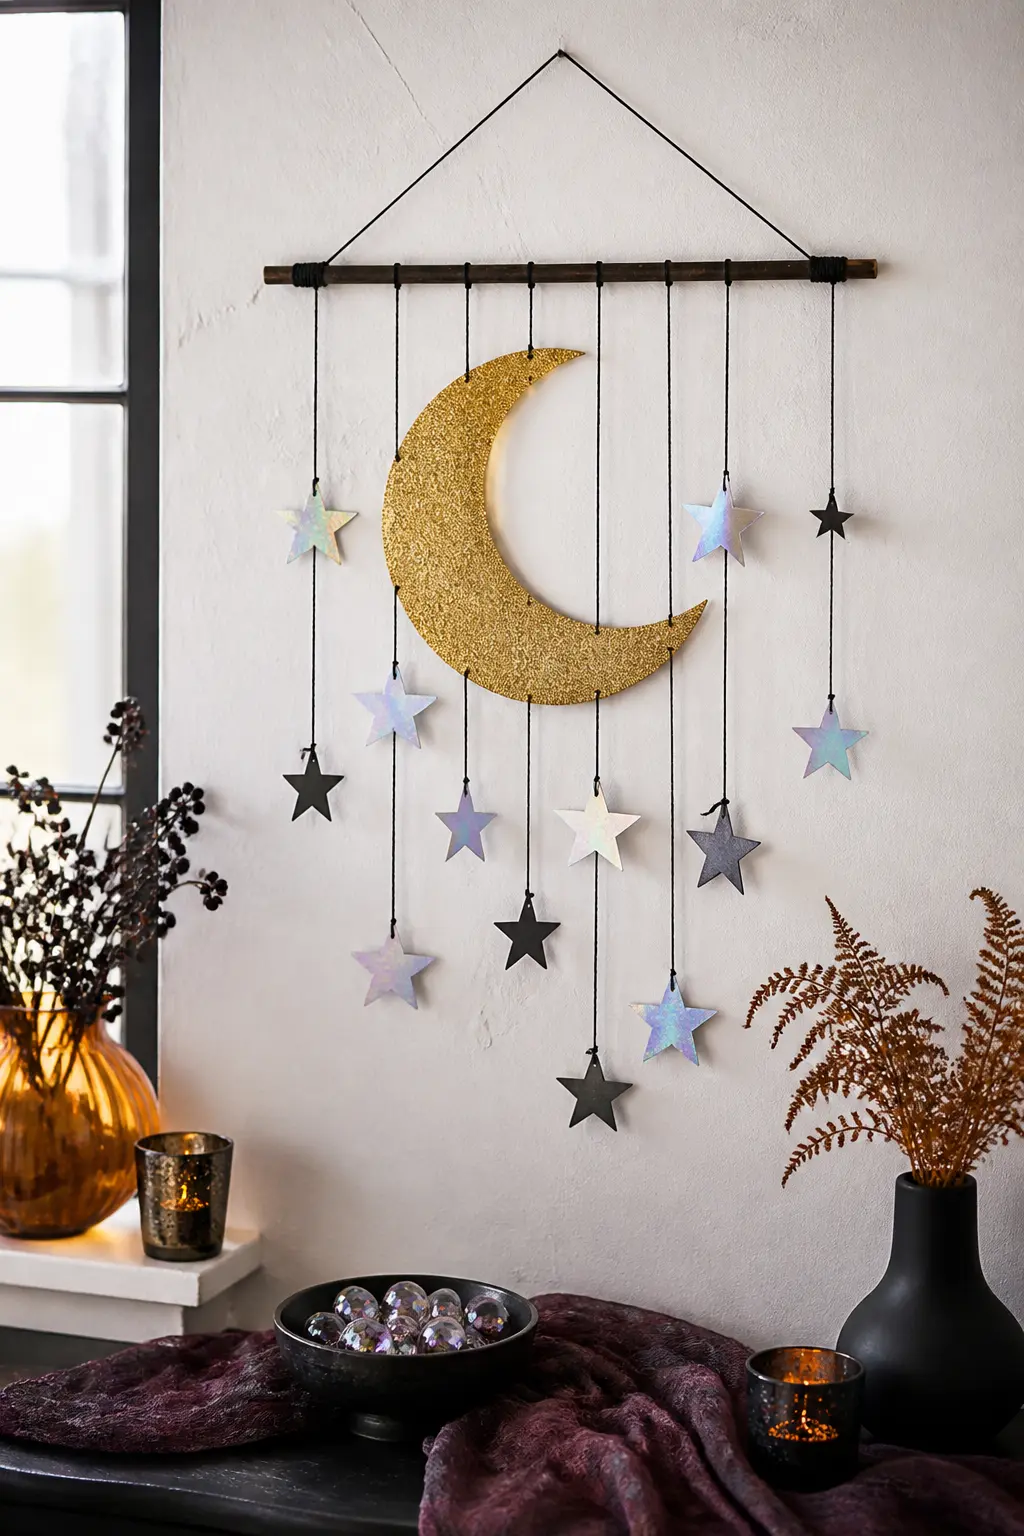
Glitter Moon and Stars Wall Hanging
Cut a large crescent moon from black card and a scatter of stars in three sizes. Coat the moon in Mod Podge and press into deep gold chunky glitter. Coat half the stars in iridescent fine glitter and leave the rest matte black.
Punch holes and hang everything from a length of driftwood or a simple dowel using black thread at varying heights.
The layered heights and the mix of glittered and matte elements give this the same visual logic as a mobile but the wall footprint of a garland. It works as a mantel drop or a window hanging and stays appropriate well past October.
🛍 Shopping guide
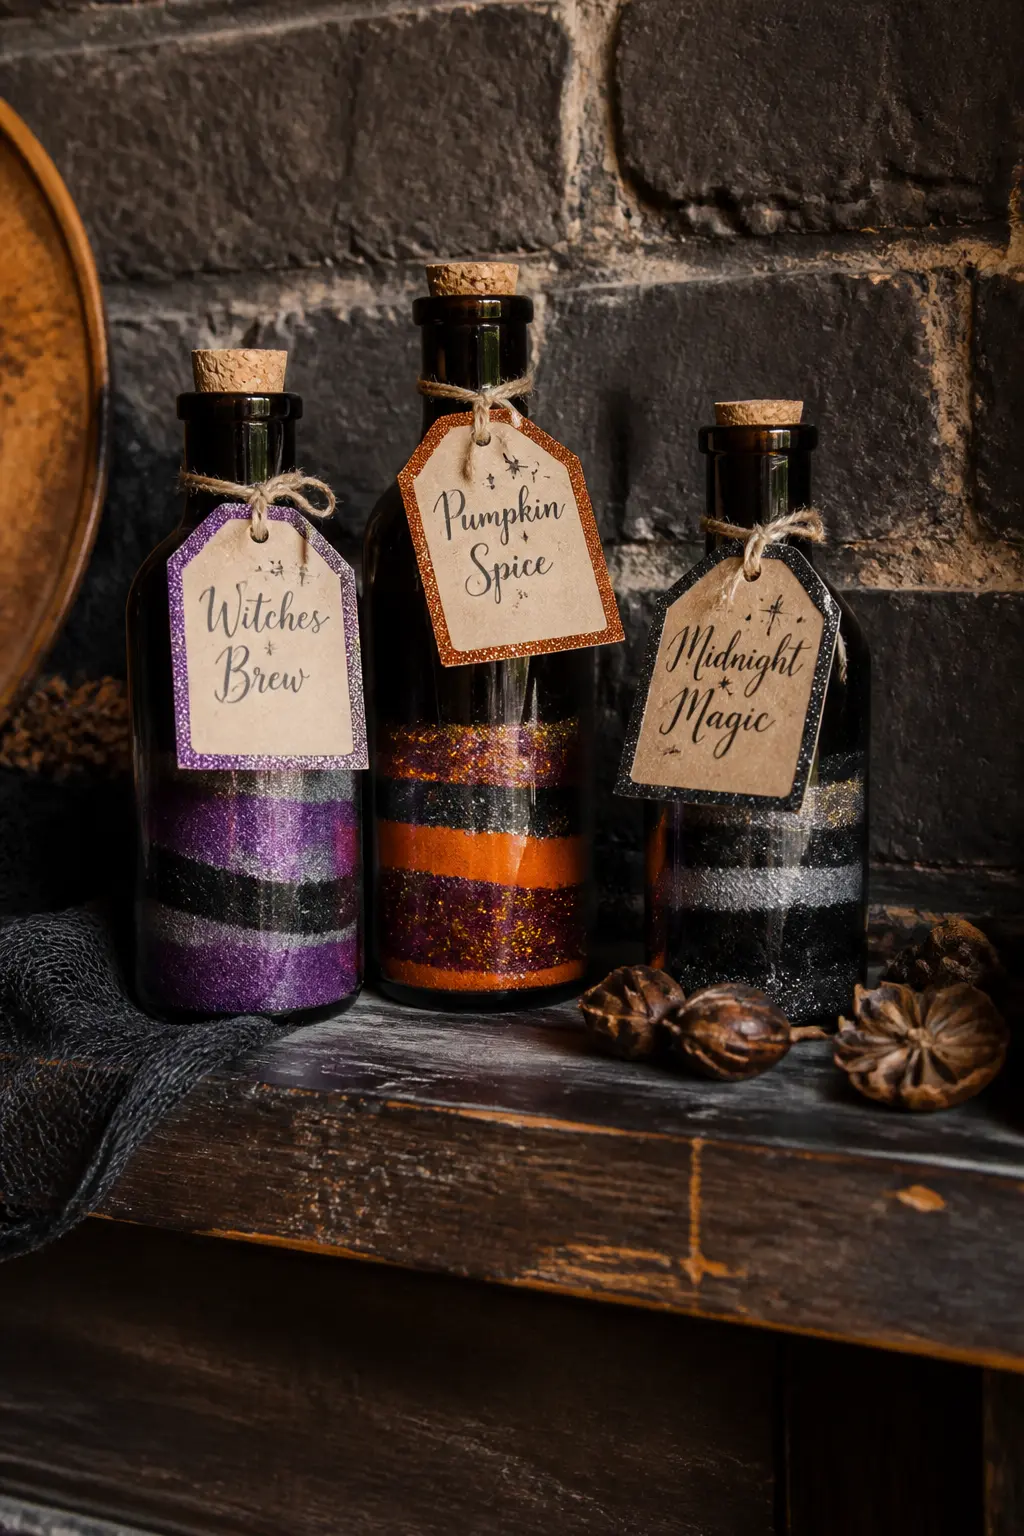
Glitter Potions Labels and Bottles
Print or hand-letter potion labels on aged kraft or cream card. Border each label with a thin line of Mod Podge applied with a fine brush, then press fine glitter along the border only so the text remains legible.
Use deep teal, antique gold and burgundy glitters on different labels so a set of three bottles reads as a collection rather than identical multiples.
Tie the labels to dark glass bottles or apothecary vials with black twine. Fill the bottles with coloured water, black sand, or layered fine glitter in different colours for a display that catches light and reads as genuinely witchy rather than kitschy.
🛍 Shopping guide
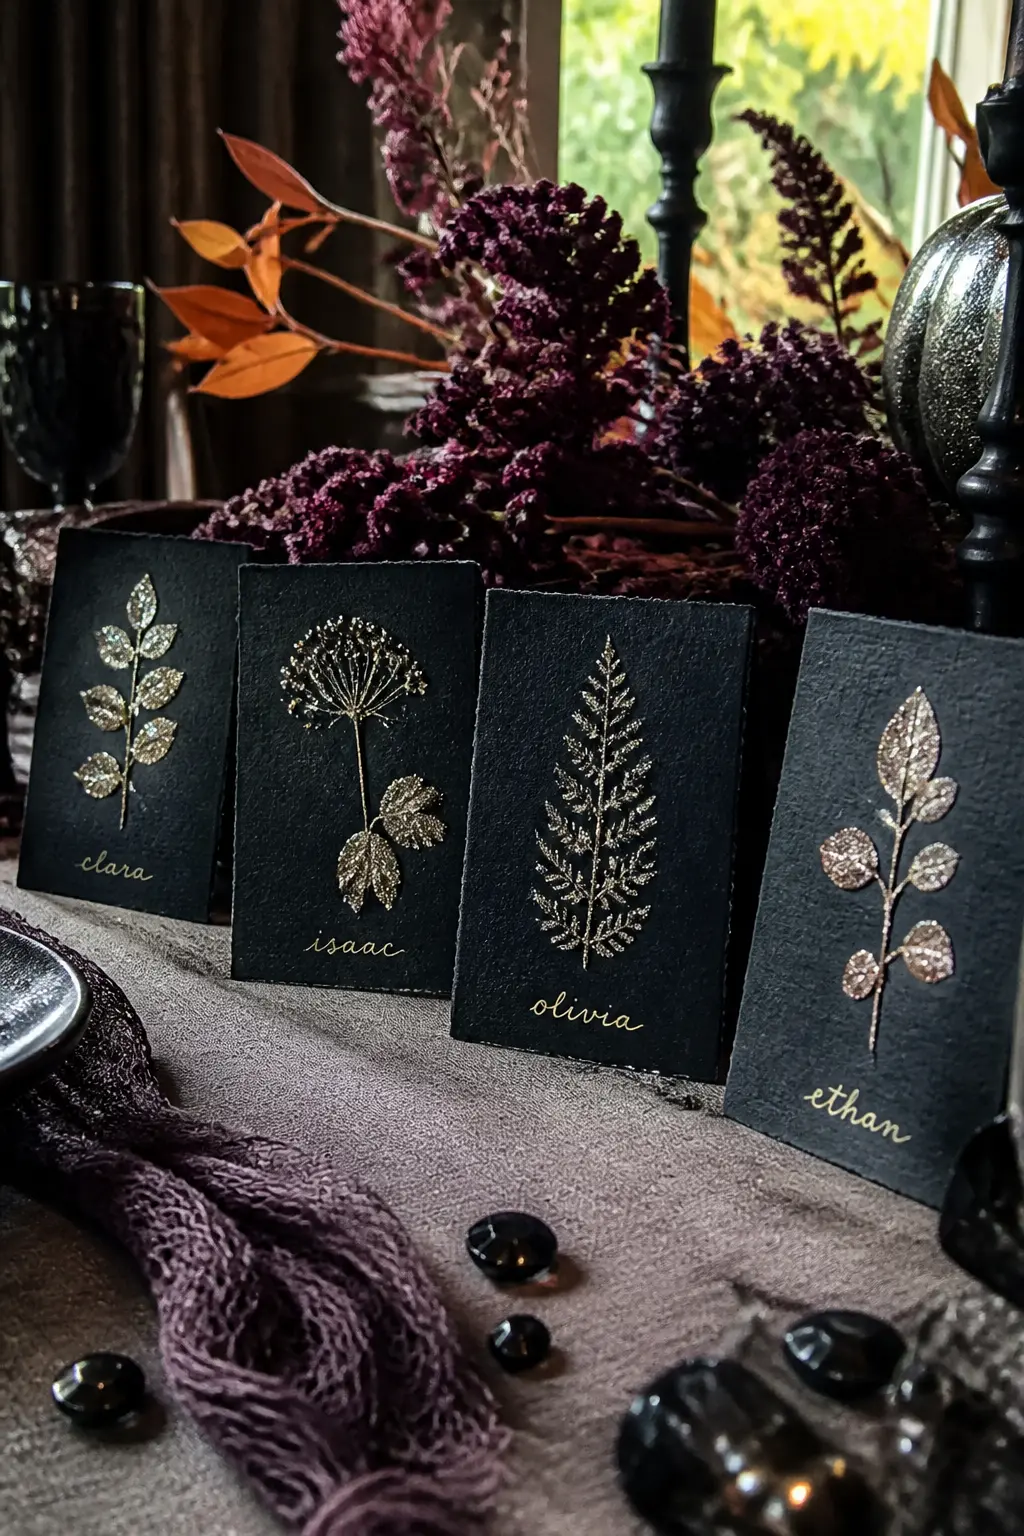
Glitter Pressed Botanical Cards
Press dried leaves, ferns or flower petals flat between heavy books for two weeks before this project. Brush each dried piece lightly with Mod Podge and dust with ultra-fine glitter that matches or contrasts its natural colour: skeleton leaves in gold, ferns in iridescent green, small petals in violet.
Arrange the glittered botanicals on heavy black or deep navy card, pressing them flat and sealing with a full coat of Mod Podge over the top. These work as place cards with a name written below each botanical in gold ink, as art prints framed on a gallery wall, or as gift enclosures.
🛍 Shopping guide
Resin and Mixed-Media Glitter Crafts
Resin locks glitter permanently, which solves the shedding problem completely. The tradeoff is cure time: most two-part resins need at least 24 hours before demoulding and another 24 before the piece is fully hard. Plan for that and the results are genuinely impressive, with a glass-like surface that magnifies the glitter underneath.
If resin feels like a stretch, UV resin in small moulds gives a similar effect in about two minutes under a UV lamp and involves far less mixing. Either way, silicone moulds in moon, bat and skull shapes are the most useful thing to own for this section.
Glitter Skull Resin Paperweight
Mix a two-part clear resin according to manufacturer instructions and add a small amount of black alcohol ink for a smoky base tone. Pour halfway into a silicone skull mould, then sprinkle in a layer of iridescent and gold chunky glitter. Fill to the top with clear resin and let cure for 48 hours before demoulding.
The glitter suspends throughout the skull rather than sitting on the surface, which gives a depth effect that is hard to achieve any other way. Polish the flat base on fine sandpaper so it sits steady, then buff the whole piece with a resin polishing compound for a glass-like finish.

🛍 Shopping guide
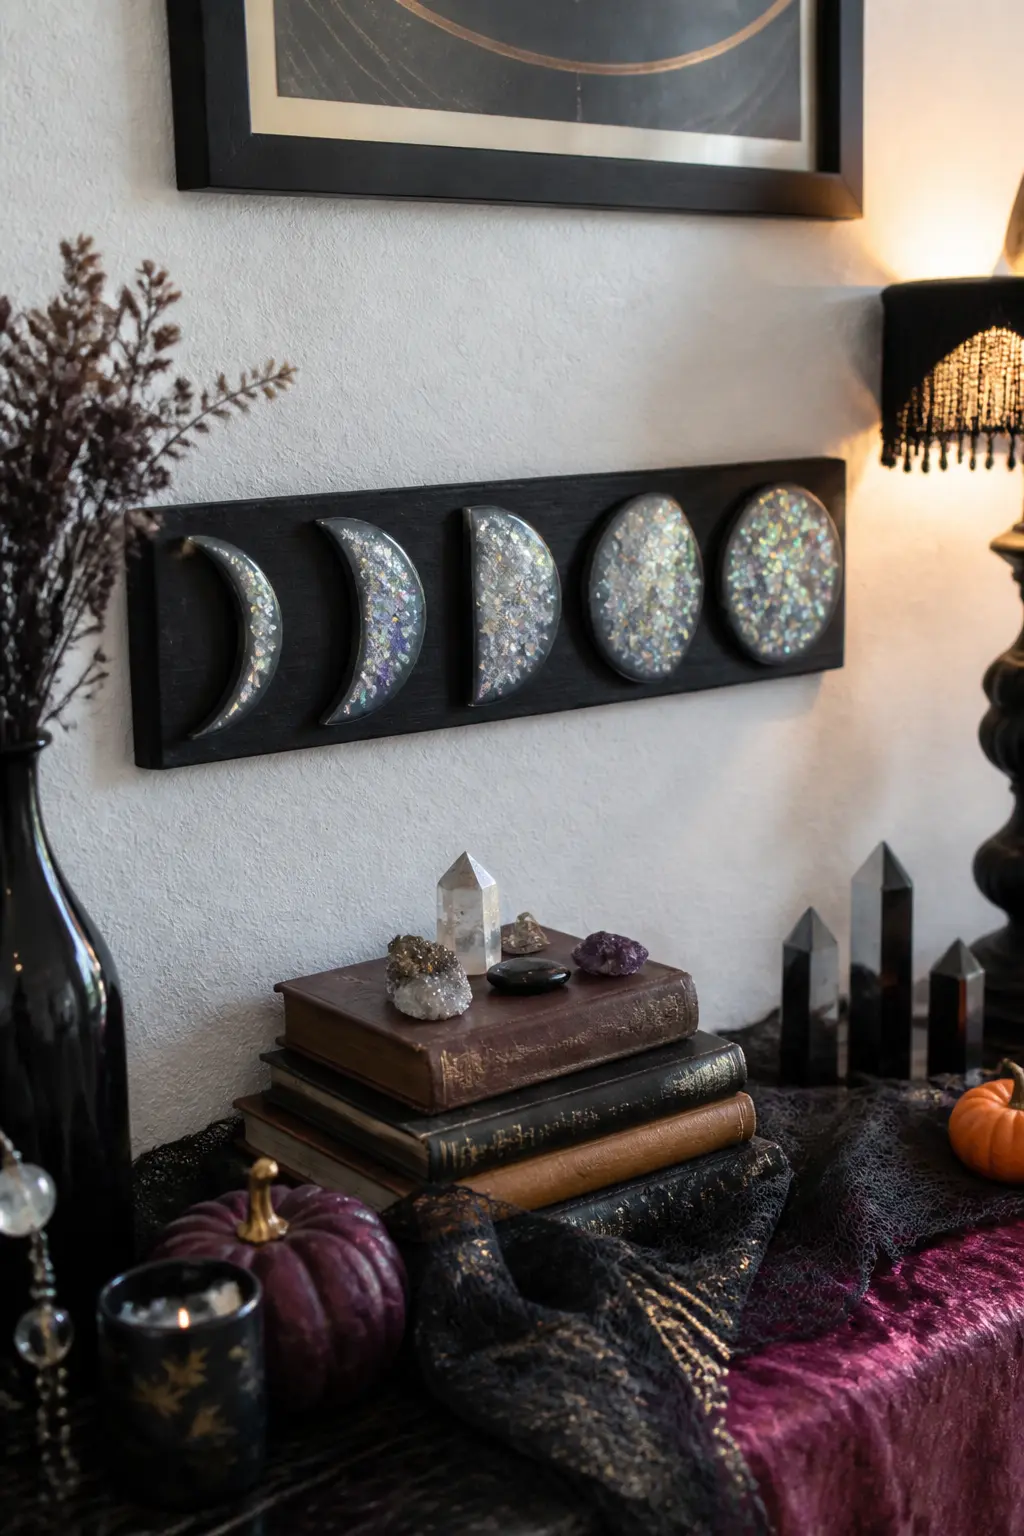
Glitter Resin Moon Phase Set
Pour clear resin into five moon-phase silicone moulds: new moon, crescent, half, gibbous and full. Add a different amount of iridescent glitter to each pour so the pieces graduate from barely-there sparkle in the new moon to densely glittered in the full moon. Let cure fully before demoulding.
Mount all five on a strip of black painted wood in order, using a small dab of E6000 adhesive. Hang the strip on a wall as an art installation or lean it on a mantel between candles. The effect is a proper decorative object that earns its space on the wall year-round.
🛍 Shopping guide
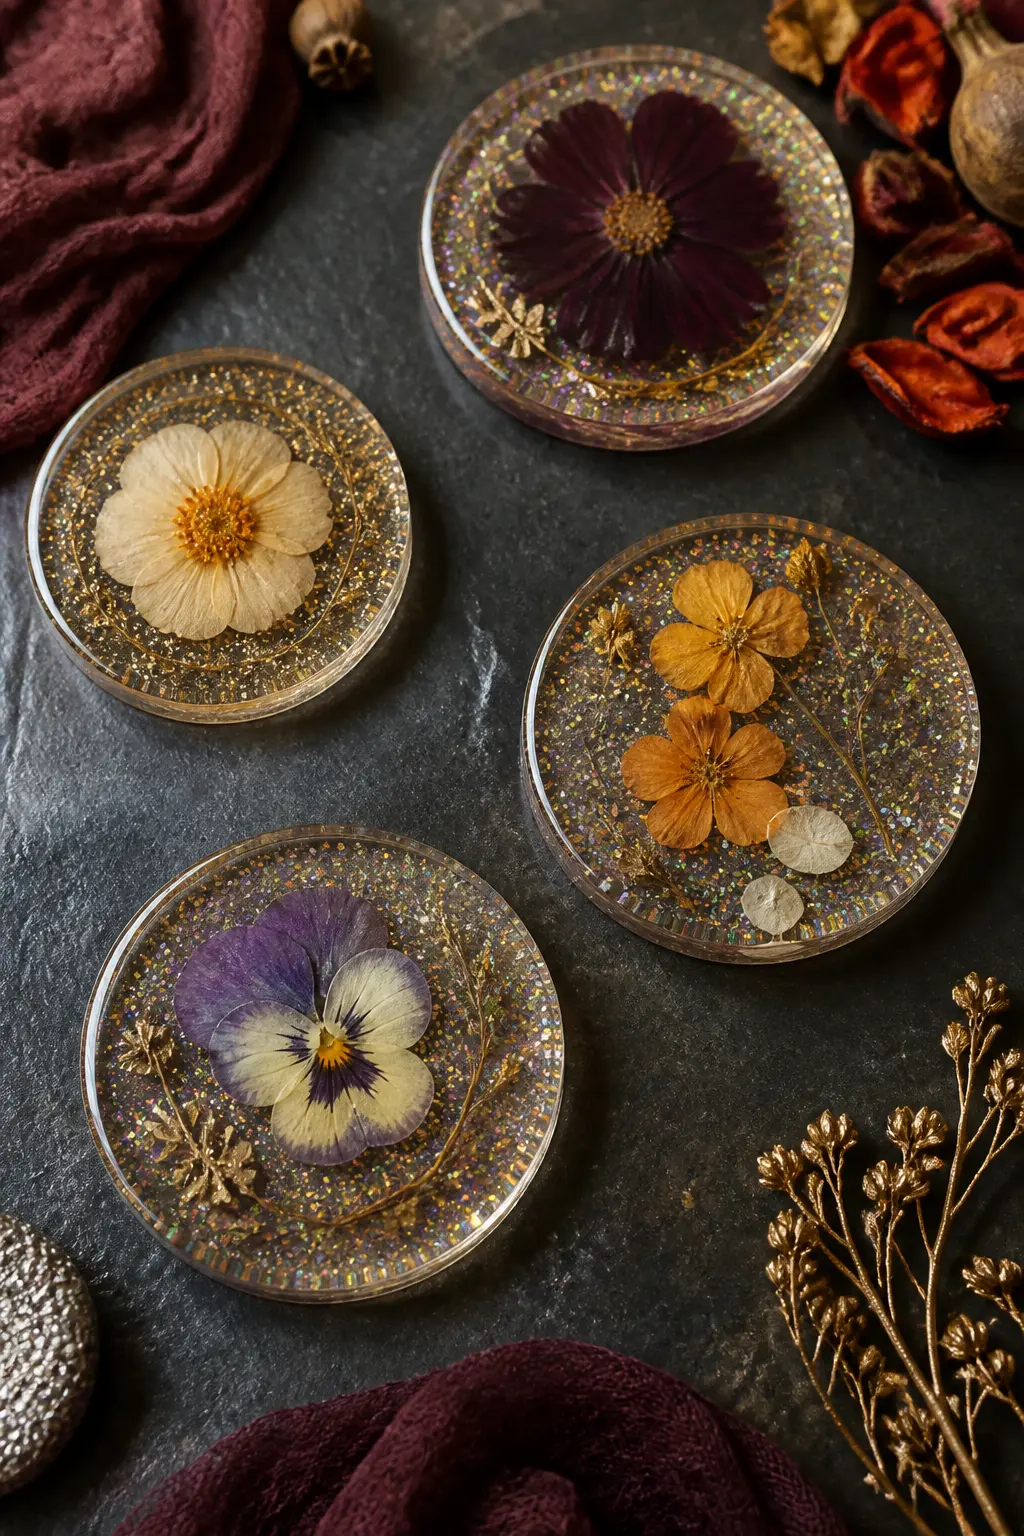
Glitter and Pressed Flower Resin Coasters
Pour a thin base layer of resin into round silicone coaster moulds and let it reach a gel state, about two hours. Press a dried flower or leaf onto the gel surface, add a pinch of iridescent or gold glitter around it, then pour the final clear layer over the top and let cure for 48 hours.
The sandwiched botanical and glitter sit at different depths inside the coaster, which makes it look dimensional rather than flat. A set of four in slightly different botanical combinations makes a cohesive but not identical series, which is always more interesting than matching copies.
🛍 Shopping guide
Ornament and Keepsake Glitter Crafts
Clear plastic or glass ornament balls are the quickest win in this whole list. Pour glitter inside, shake, add a drop of glue at the top to fix the glitter in place, and cap it.
Done in under five minutes, and the result looks like a luxury gift-shop find. Mixing two or three glitter colours inside one ball is the move that separates the good versions from the obvious ones.
These double as tree ornaments, place settings and favour packaging, which makes the batch worthwhile. A tag with a name and a loop of velvet ribbon is all the finishing they need.
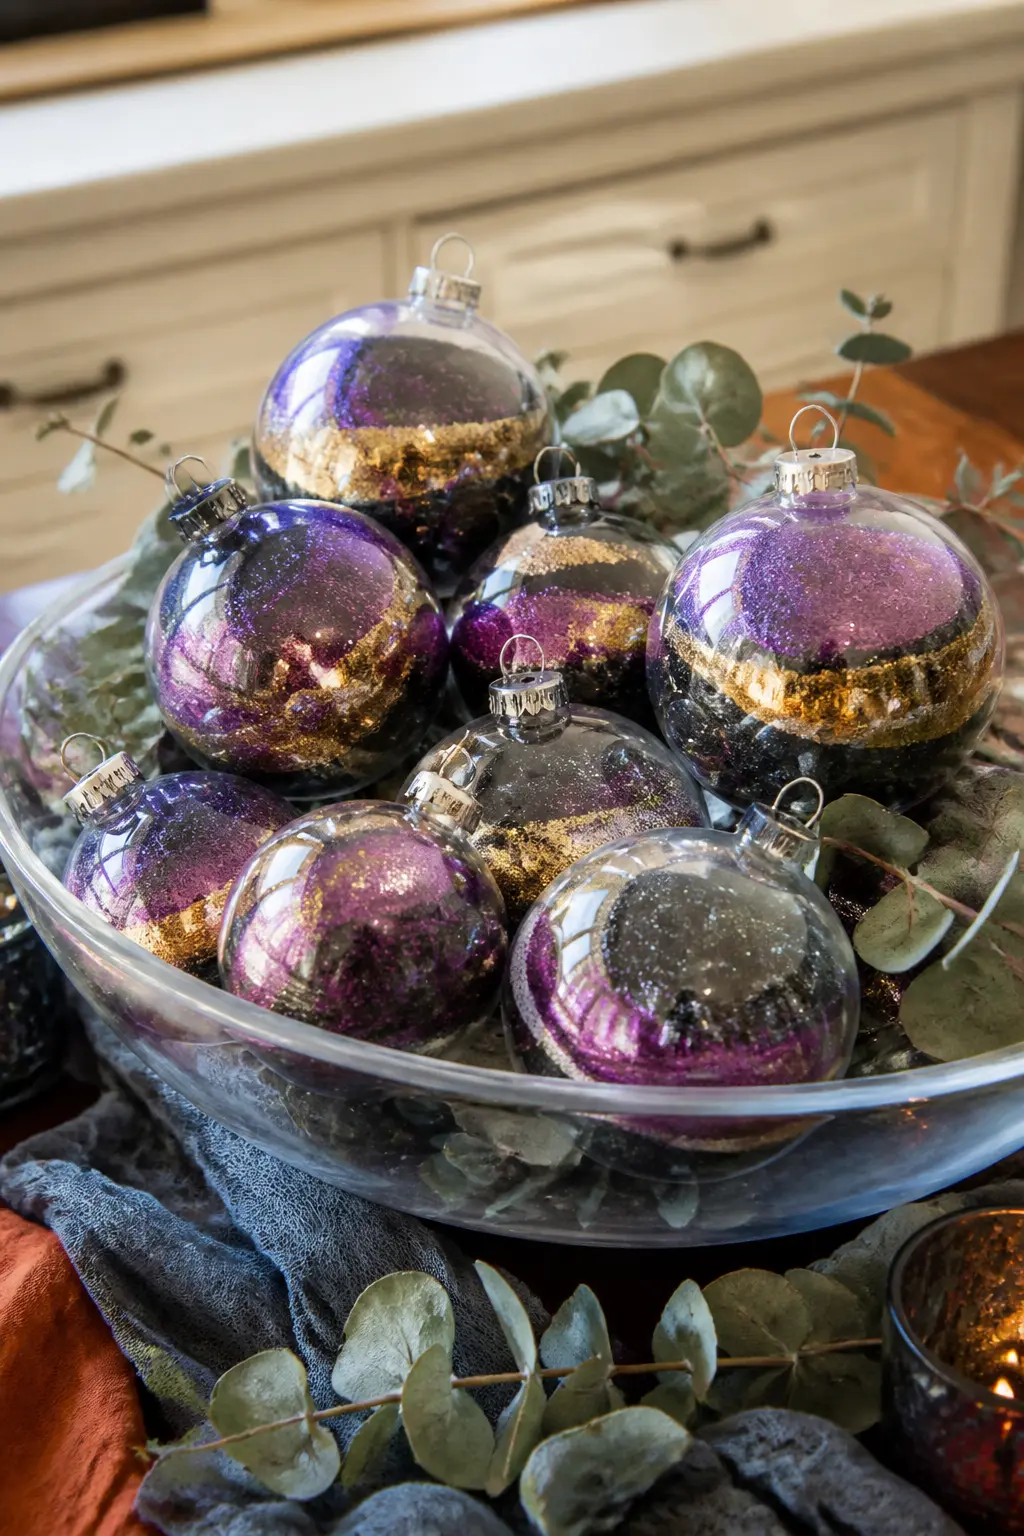
Glitter Fill Ornament Balls
Remove the cap from a clear plastic or glass ornament ball. Pour in a teaspoon of fine glitter in one colour, then a second contrasting colour, then a third if the ball is large enough. Replace the cap and shake once gently.
The glitters do not fully mix: they layer and shift as the ball moves, which is the effect worth preserving by keeping the shaking minimal.
Hang these from bare branches in a tall vase, from a mantel garland, or cluster them in a glass bowl as a centrepiece fill. Black and deep violet with a streak of gold is the colour combination that reads as most intentional and least like a Christmas decoration.
🛍 Shopping guide
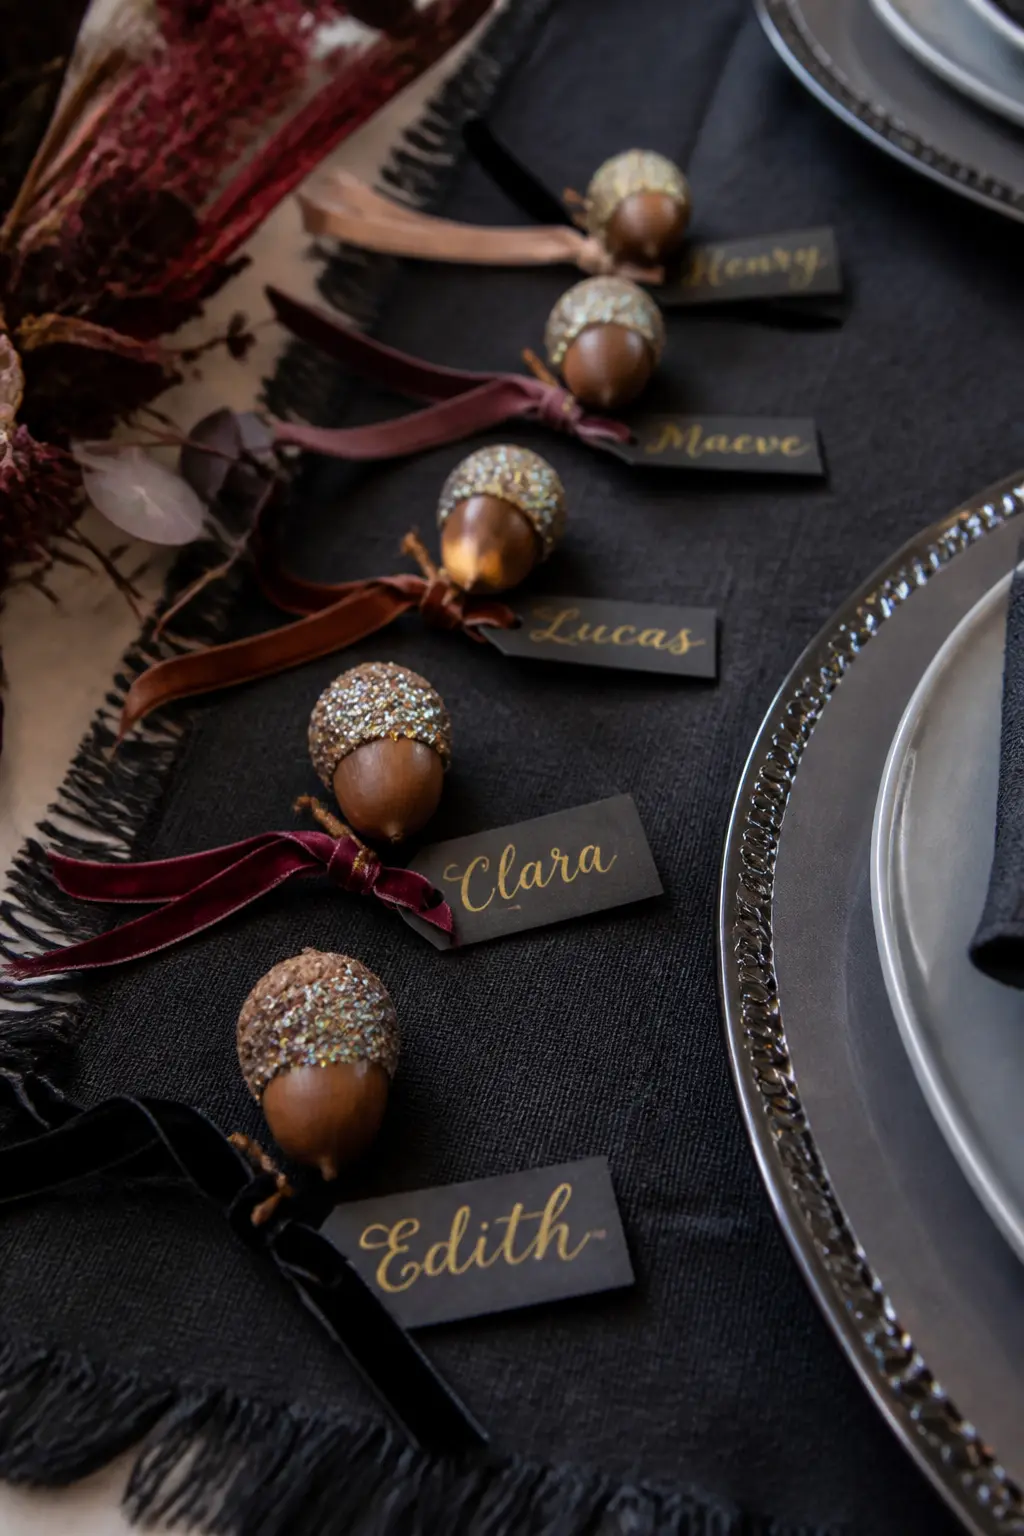
Glitter Dipped Acorn Place Settings
Collect real acorns or buy faux ones from a craft store. Separate the caps from the nuts. Coat just the caps in Mod Podge and dip into fine glitter, then reattach to the nut with a dab of hot glue.
The contrast between the matte acorn body and the glittered cap is sharper and more elegant than coating the whole acorn.
Write each guest’s name on a small oval tag in gold ink, punch a hole, and loop thin velvet ribbon through both the tag and the acorn cap. These sit beside each plate as a place card and go home as a favour. It is the kind of detail people notice and remember.
🛍 Shopping guide
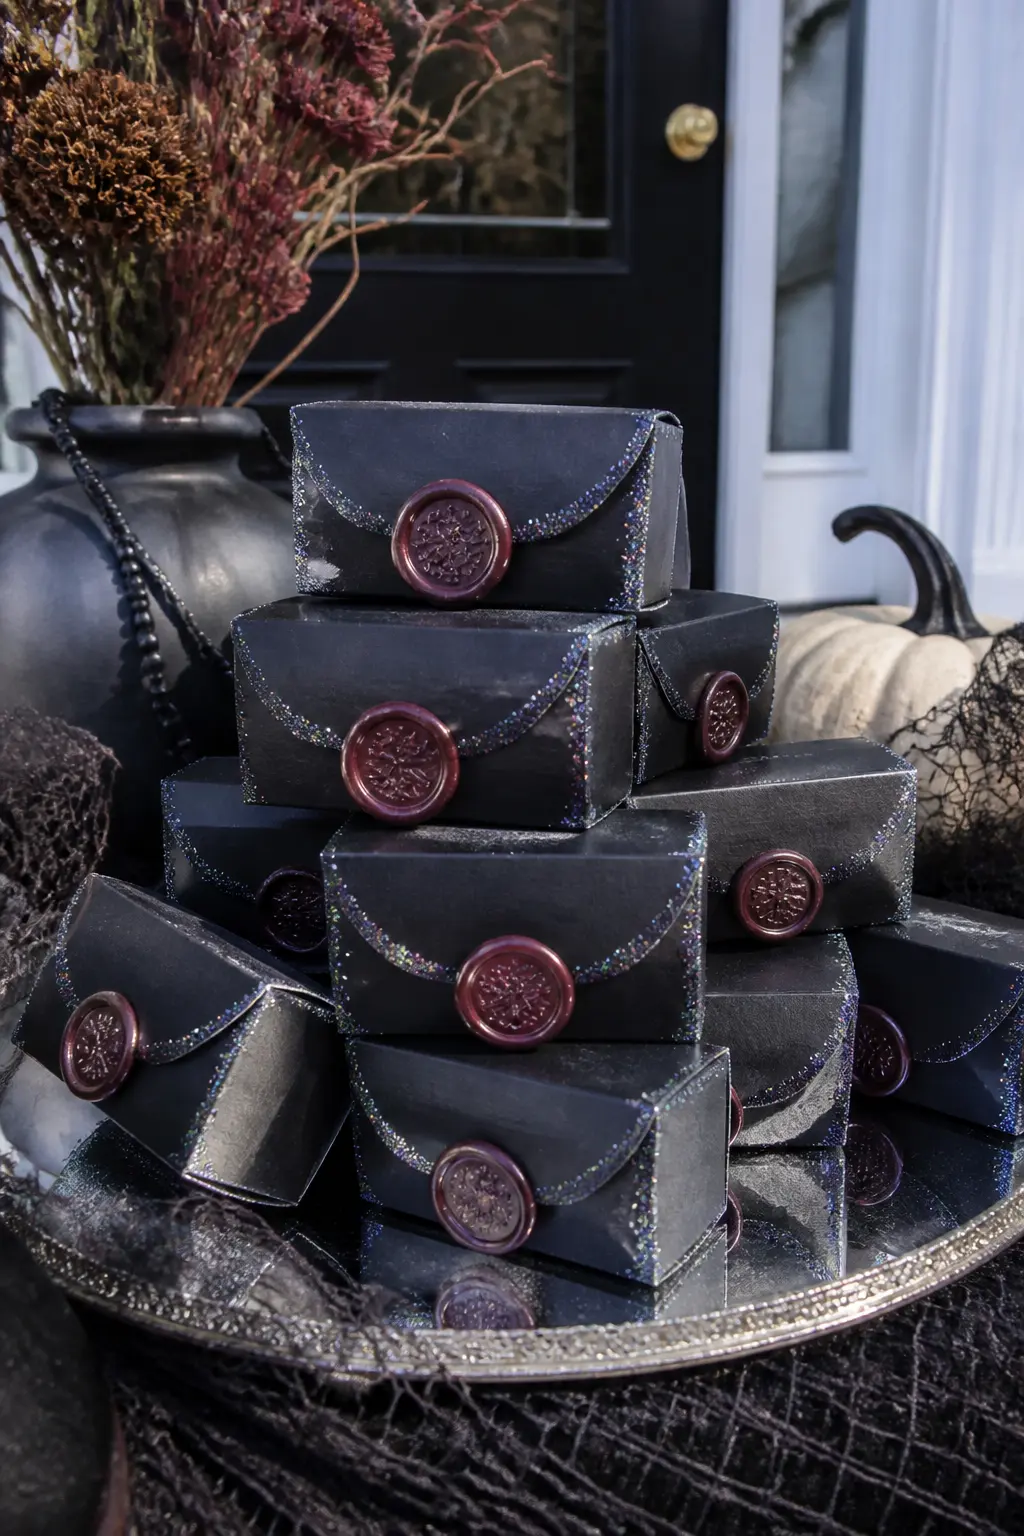
Glitter Wax Seal Favour Boxes
Fold small black card boxes from a template and fill with a single chocolate truffle, a packet of salted caramel, or a small candle. Before closing, brush the outside of each box with a dry brush dipped in iridescent glitter, working lightly so the glitter catches on the raised edges and texture of the card rather than coating it completely.
Press a wax seal in black or deep burgundy wax onto the closing flap. The wax seal and the brushed glitter together move the box from basic craft-store packaging into something that reads as bespoke. Stack them on a mirrored tray near the door so guests take one on the way out.
🛍 Shopping guide
Frequently Asked Questions
How do you stop glitter from spreading everywhere when you craft with it?
Work on a silicone mat or a dedicated tray with raised edges. Pour glitter directly from its container rather than scooping it, tap the excess onto a sheet of paper folded into a funnel, and pour the loose glitter back into the tube immediately. Seal every finished piece with a fixative spray before moving it.
What is the best glue to use for glitter crafts on glass?
Mod Podge is the most forgiving option for glass: it dries clear, grips well and is available in a dishwasher-safe formula for drinkware. For resin pieces, skip glue entirely and suspend the glitter inside the pour. Avoid standard PVA on glass, as it tends to peel once the piece is handled repeatedly.
Which type of glitter works best for adult Halloween crafts?
Fine grain glitter gives the most refined, jewellery-like finish on small or detailed pieces. Chunky or hex glitter reads better from a distance and suits larger objects like wreaths and centrepieces. Iridescent and holographic glitters in dark palettes, plum, gunmetal, deep teal, sit in adult decor more naturally than bright primary colours.
Can glitter crafts be made ahead of time?
Yes, and most of them actually improve for it. Mod Podge and resin both continue to harden for 24 to 72 hours after they appear dry, so a piece made three days before a party is more robust than one made the morning of.
Store finished pieces flat or upright in a box with tissue paper between them to prevent scratching.
Are these glitter craft ideas suitable for a party activity?
The glitter web on black card, the ghost portrait on a wood round and the glitter-fill ornament balls all work well as party-table crafts because they are fast, low-mess and require no special equipment. For a full activity lineup, 30 Unforgettable Halloween Party Ideas and Games covers how to structure a craft station alongside games.
What Halloween glitter crafts can guests take home as favours?
The glitter-dipped wine glasses, the pressed botanical place cards, the glitter acorn settings and the wax-sealed favour boxes all work as take-home pieces without any extra packaging work. The ghost portrait wood rounds double as wall art, which makes them a favour people are genuinely pleased to receive.
30 Halloween party ideas and games for every crowd — trending, active, printable, and quiet. Your

33 halloween wreath ideas from quietly elegant to full-on creepy, every one made by hand, for the on

18 halloween birthday party games that are actually fun — active, printable & spooky quiet games f
Leave a Reply