

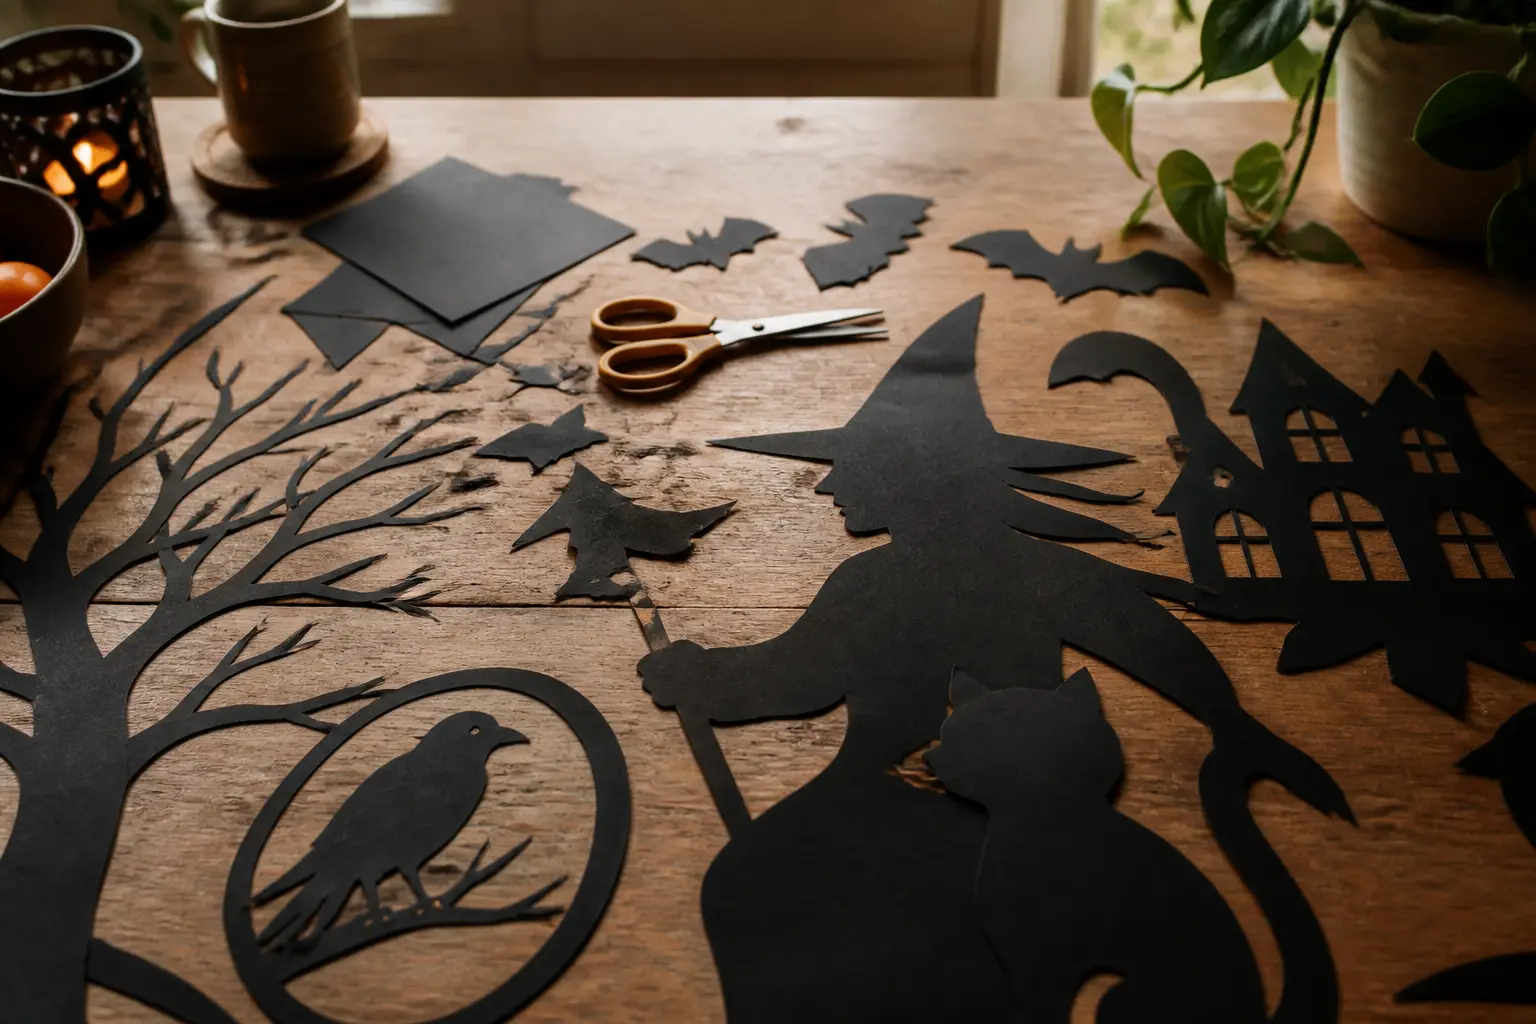
Black cardstock and a warm lamp behind it cost almost nothing. What they produce, from the pavement at dusk, looks like a professional display that took a weekend. That gap between effort and effect is exactly why silhouette windows have taken over every street worth photographing right now.
These 29 ideas cover every window size, every skill level, and every corner of the Halloween mood board, from quietly creepy to full-on horror. Each one uses the same principle: cut a shape, backlight it, collect compliments. The only tools you genuinely need are scissors, a craft knife, and a lamp you already own. For links to games and activities that go with the party inside, see 30 Unforgettable Halloween Party Ideas and Games and 16 Halloween DIY Crafts That Look Like You Bought Them.
The ideas below are grouped by the kind of scene they create, so you can pick one statement window or run a whole theme across every pane in the house. Start where you like. Stop when the street looks good enough.
This post contains affiliate links. If you buy through them, I may earn a small commission at no extra cost to you.
Classic Creature Silhouettes
These are the shapes everyone recognises in under a second: the bat, the raven, the spider. Recognition is the point. When a passer-by clocks the shape before they even read the scene, the effect lands harder. Cut clean, hang high, backlight with a warm-toned bulb.
Jack-o’-Lantern Row at the Sill
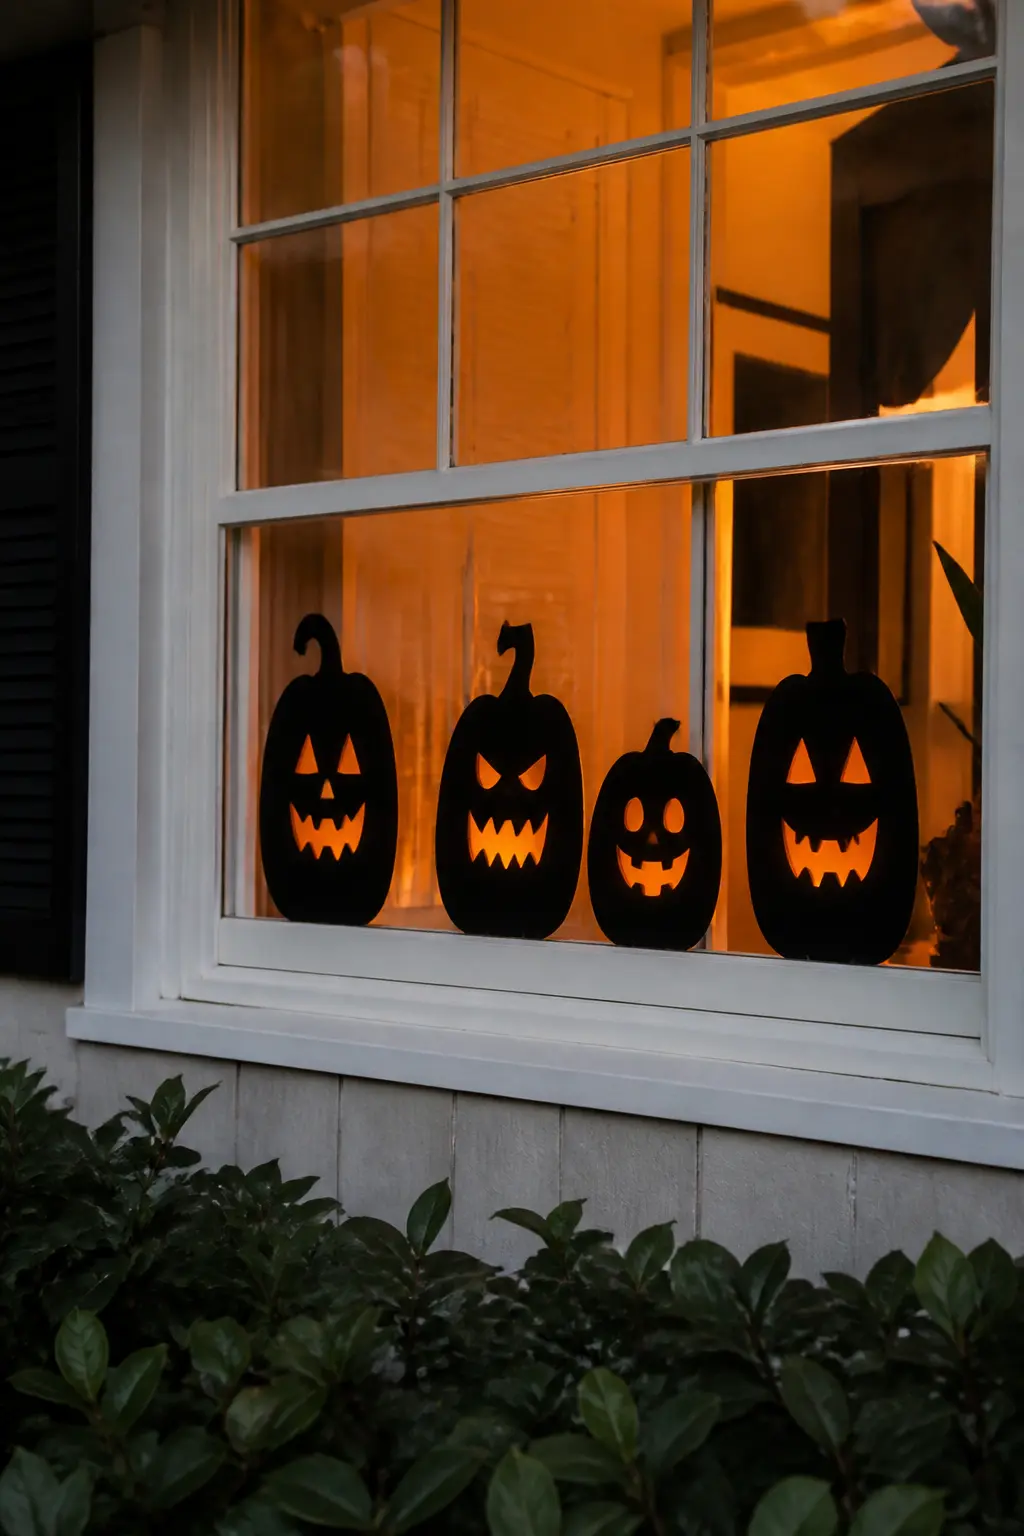
Cut four pumpkin faces from black foam board, each one a different expression, and stand them in a line along the inside windowsill. Tuck a string of warm orange fairy lights behind them so the glow bleeds through the cut eyes and mouths.
The sill acts as the ground line, so the pumpkins read as sitting outside even though they are in. Vary the heights by propping the shorter ones on a folded piece of card, hidden behind the shape.
🛍 Shopping guide
Bat Scatter Across the Panes
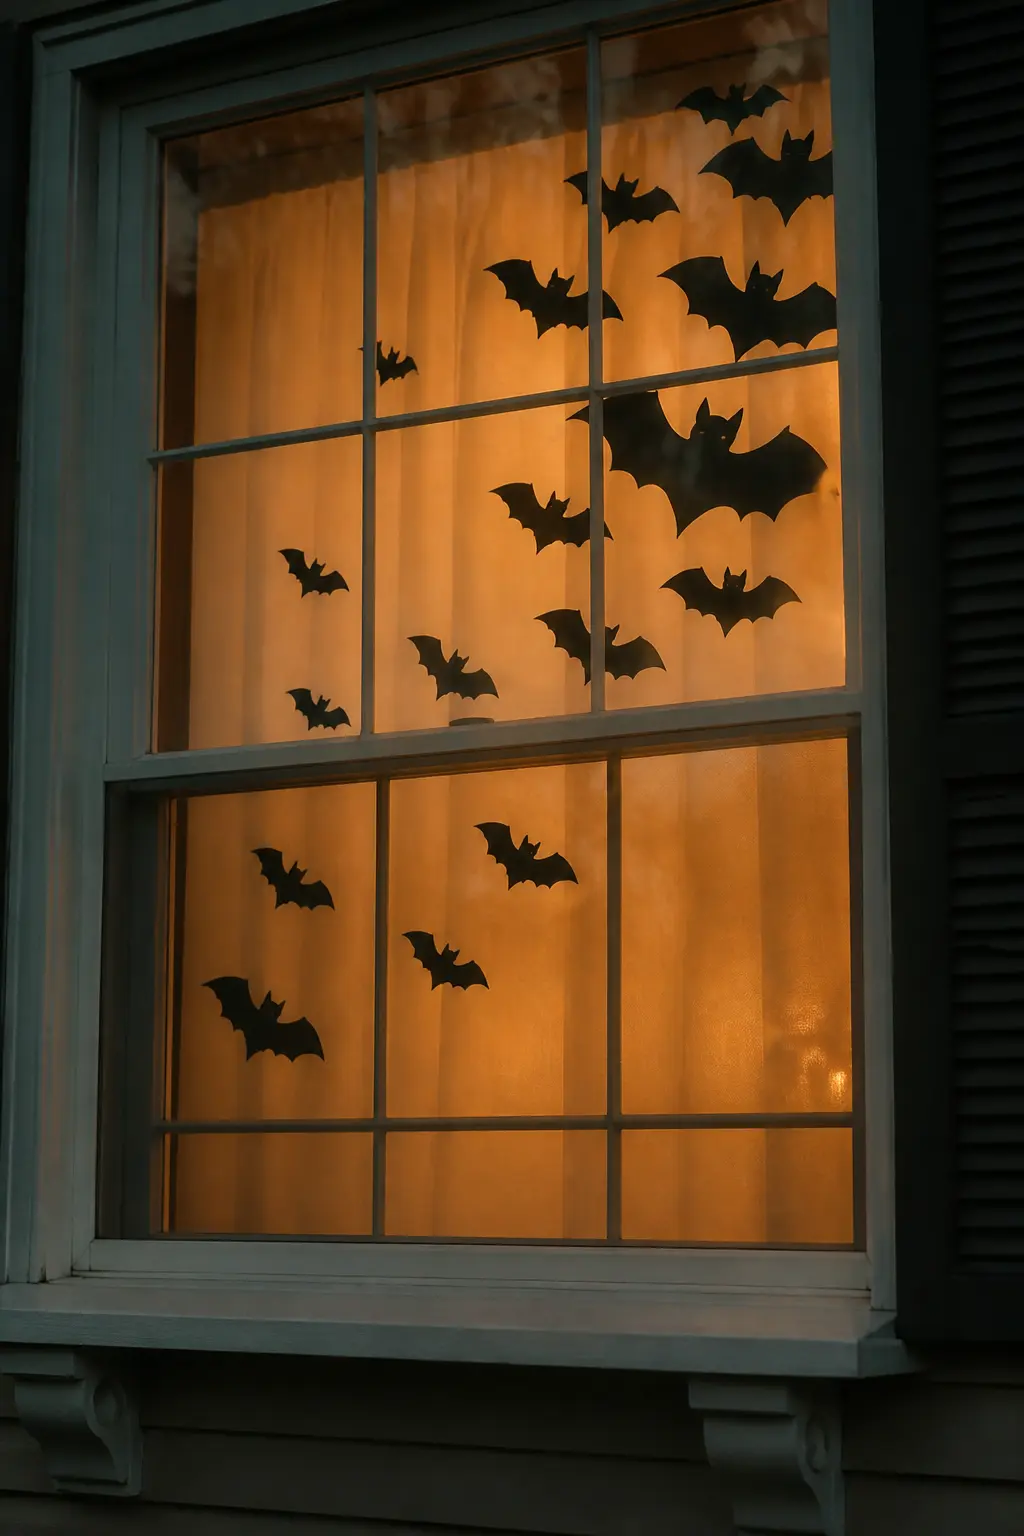
Cut twelve to sixteen bats in two sizes from black card and stick them directly to the glass with removable window cling adhesive. Cluster them in one corner, then let a few stray toward the opposite edge as if mid-flight.
The asymmetry matters more than the number. A perfectly centred flock looks staged. Bats escaping the frame look real.
🛍 Shopping guide
Owl on a Branch
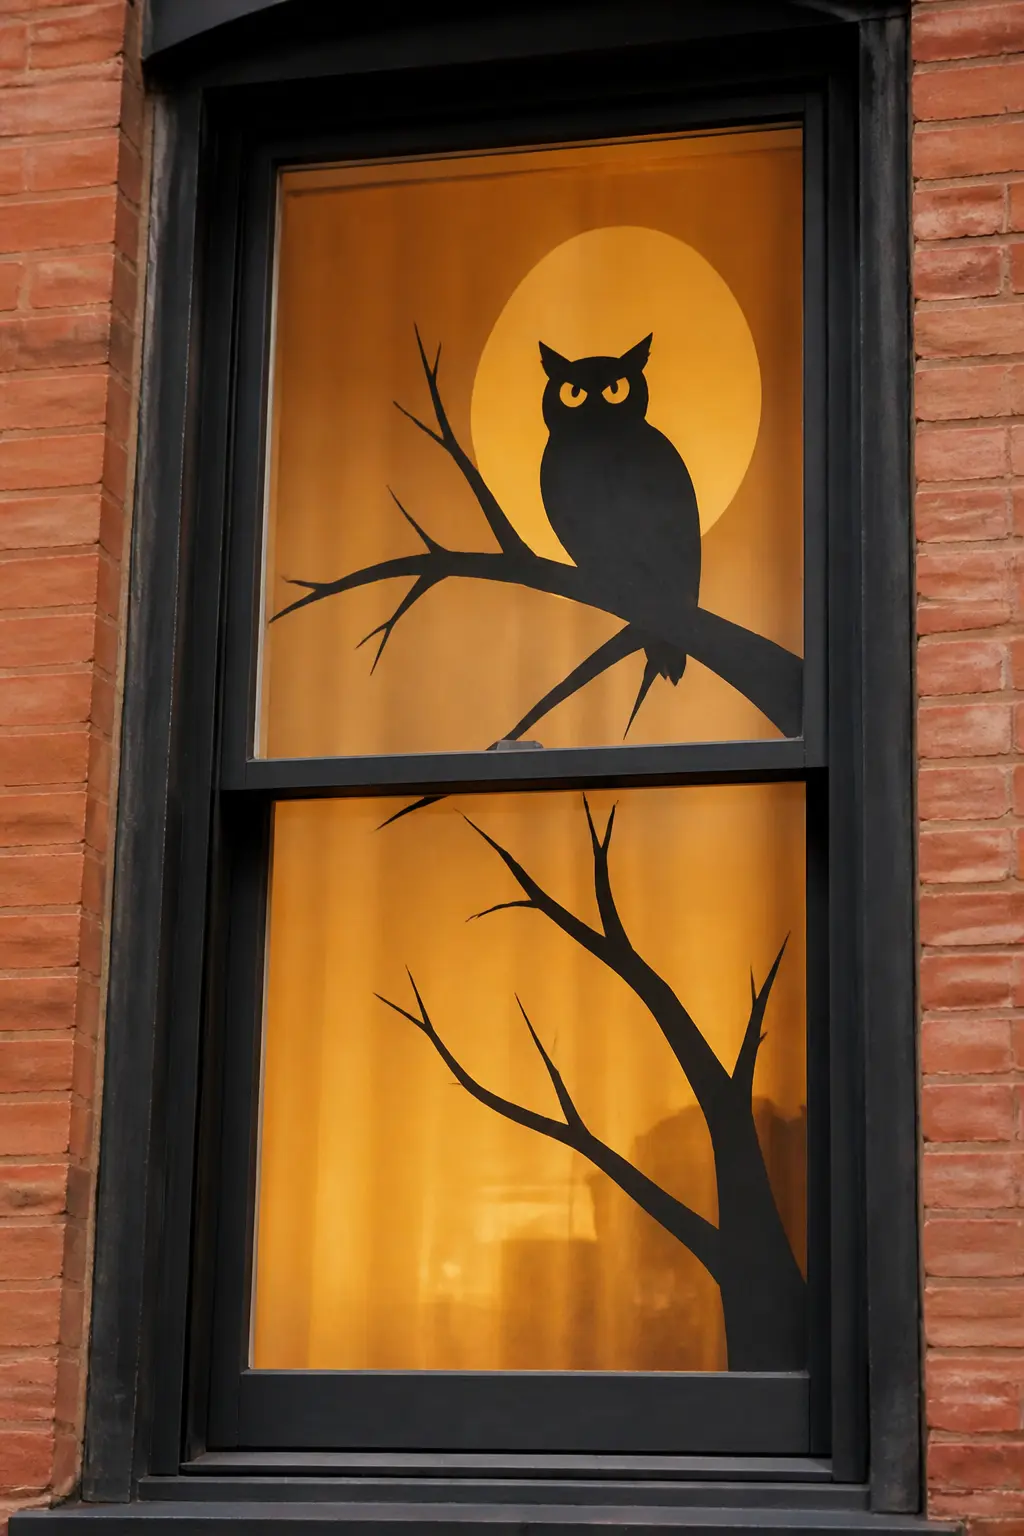
Cut a bare tree branch stretching across the lower third of the window, and perch a large owl silhouette on the thickest limb. The branch should touch both side edges of the glass so it reads as a real tree outside.
Add a full moon circle in pale yellow tracing paper behind the owl, taped to the glass before the black layer goes on. The colour difference between the moon and the curtain behind it is what sells the depth.
🛍 Shopping guide
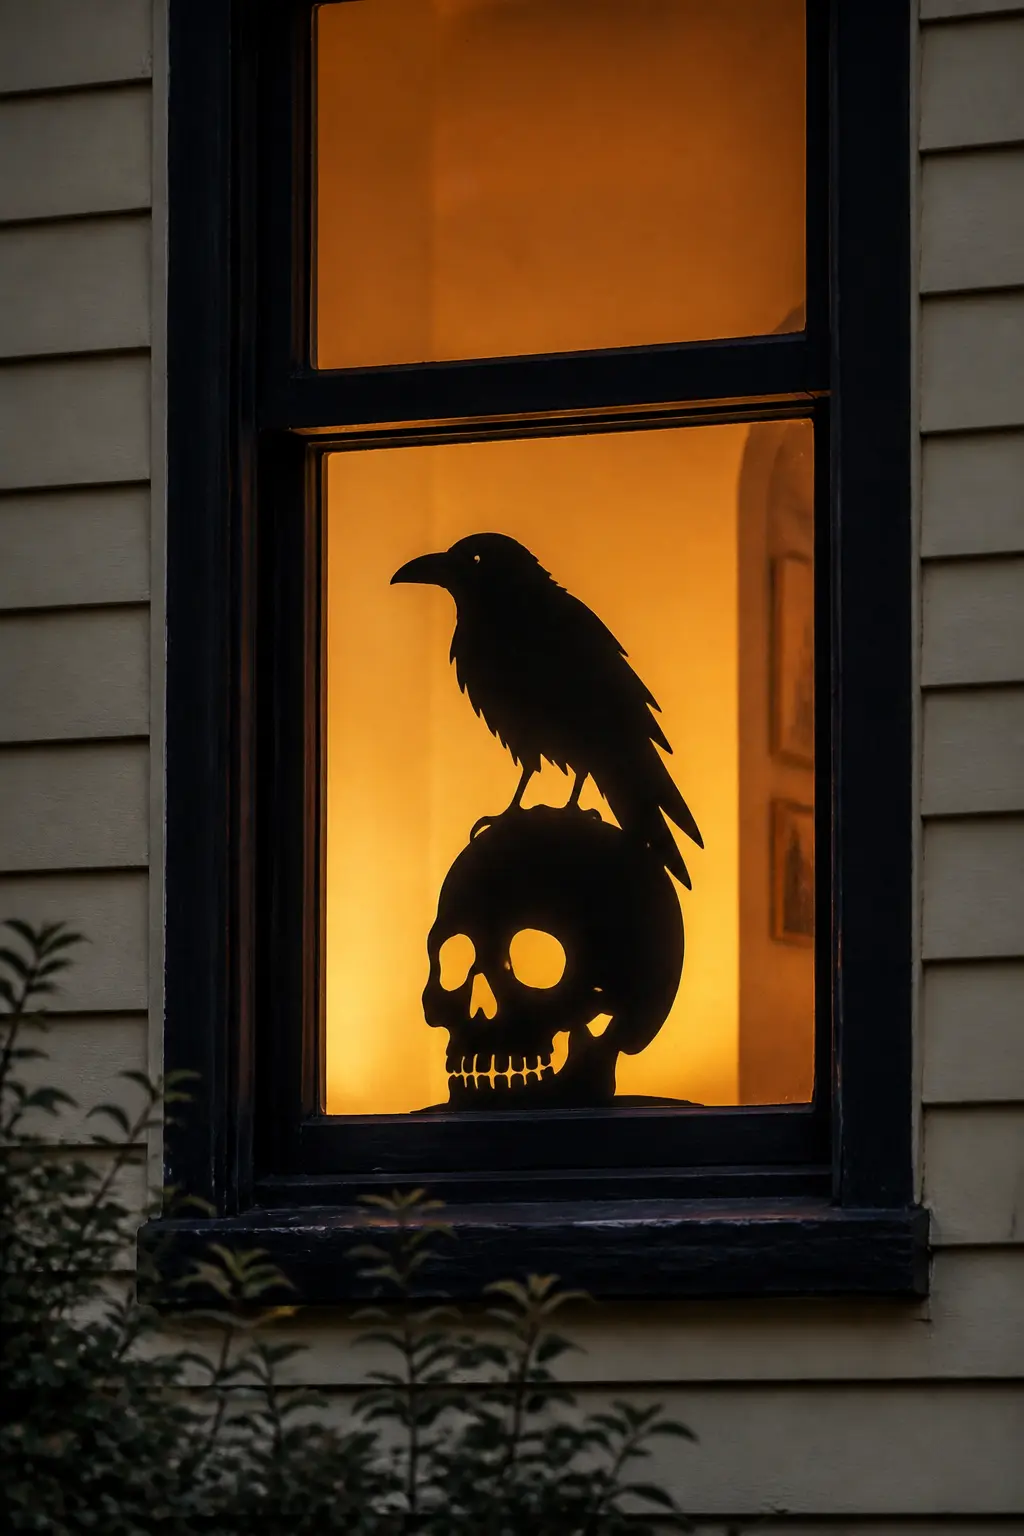
Raven on a Skull
Cut a large raven in profile, wings folded, standing on top of a human skull. Make the skull wide enough that the raven looks proportionally heavy on it. Both shapes come from one sheet of black foam board cut in one piece, which keeps them perfectly aligned.
Stand the whole thing on the windowsill against a lamp positioned directly behind it. The silhouette reads clean at ten metres.
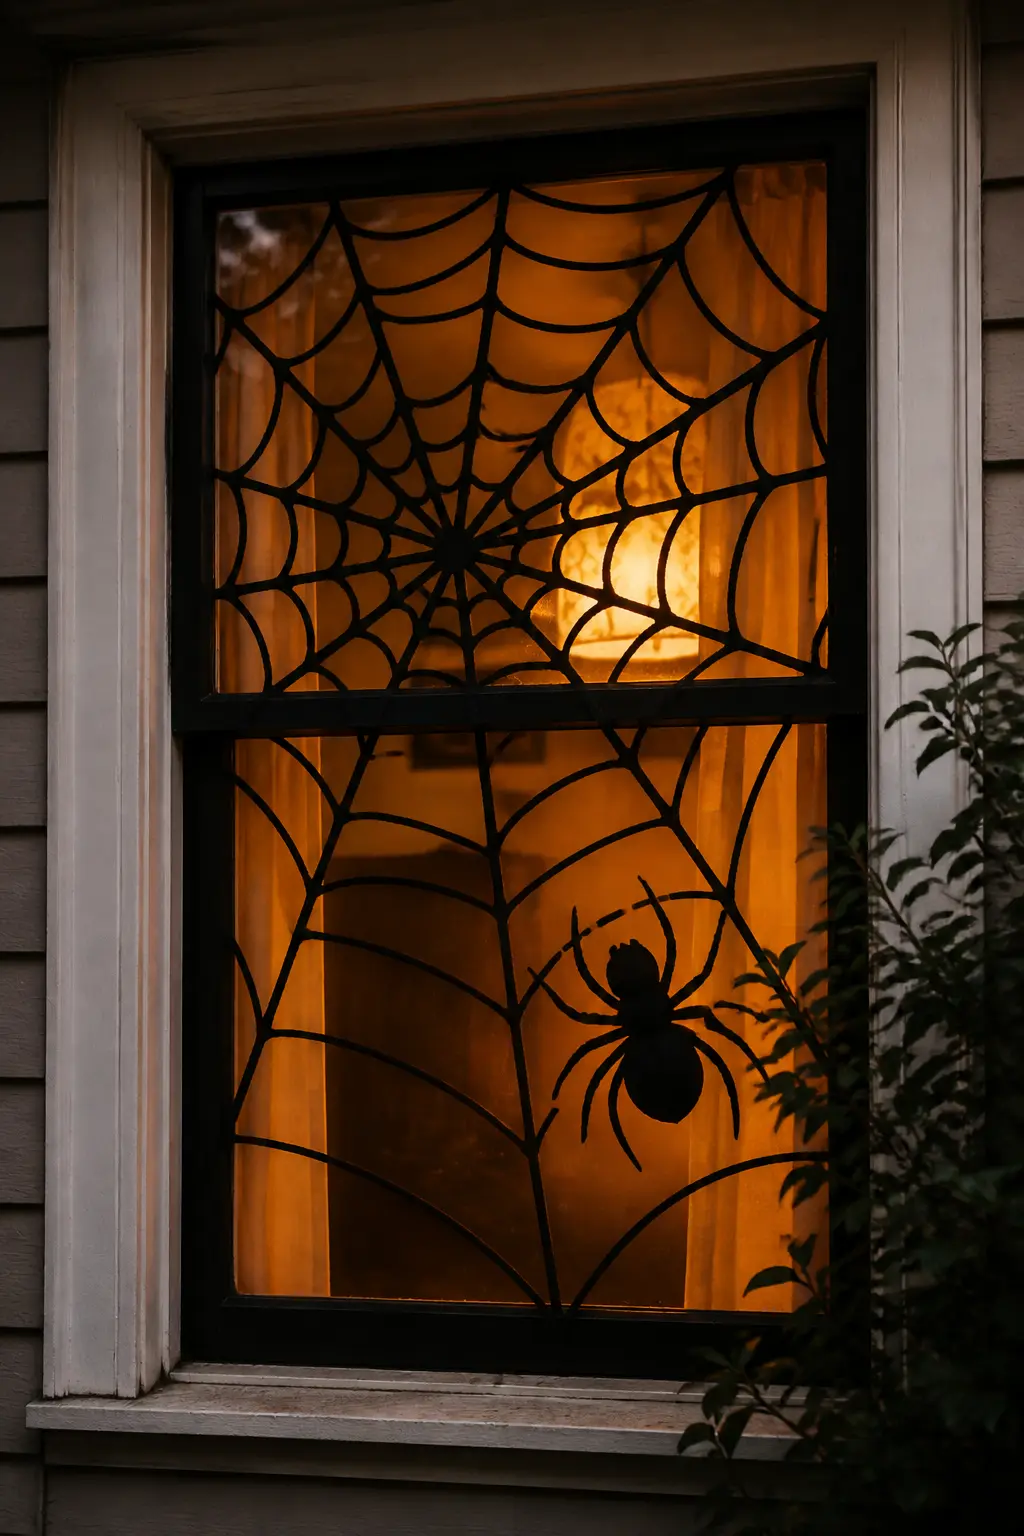
Spider in a Web
Cut a spider body and legs as one piece, then cut the web separately as a large circle with radiating and spiral lines removed. Tape the web to the glass first, then layer the spider over the centre of it, slightly off-centre, as if it just moved.
A web with clean geometry looks printed. Go slightly wobbly on the spiral rings to make it look hand-spun and organic.
🛍 Shopping guide
Graveyard and Gothic Landscape
A panoramic strip of black cardstock running the full width of a ground-floor window turns flat glass into a cemetery at midnight. These ideas use layering: a far row of headstones, a middle row of bare trees, a foreground of creeping fog (white tissue paper works). Depth on a flat plane is the whole trick.
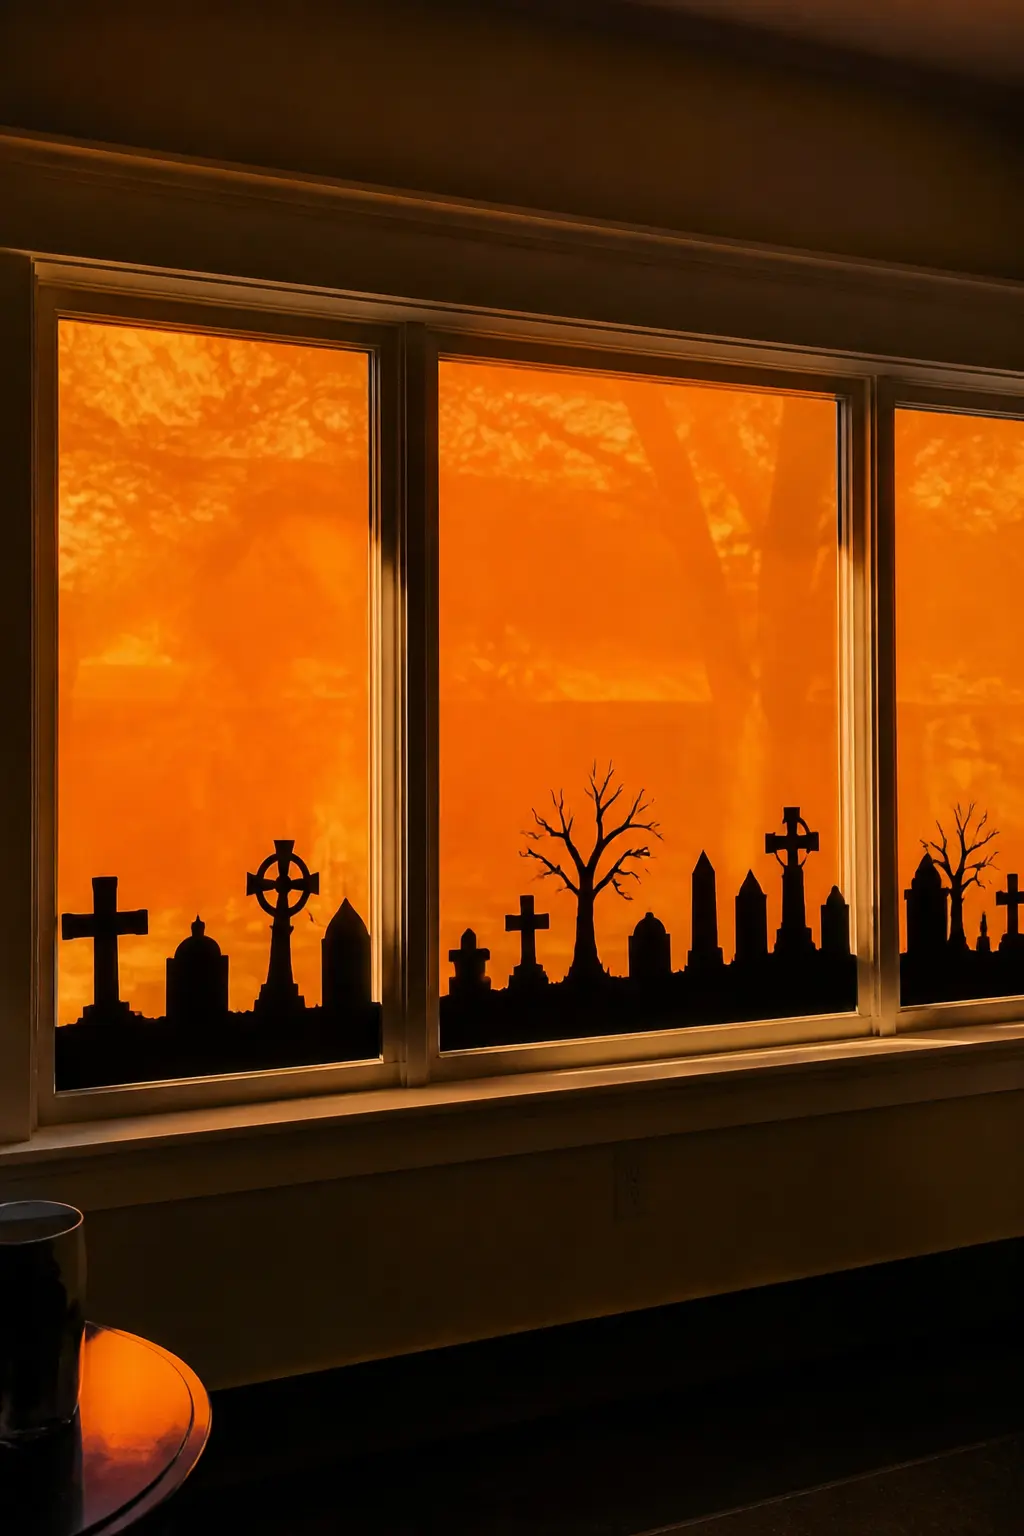
Cemetery Horizon Strip
Cut a single long strip of black cardstock as tall as about a quarter of the window and as wide as the full pane. Along the top edge, cut the profile of a graveyard: headstones in different shapes, a leaning cross, a broken obelisk, two bare trees at the ends.
Tape this strip to the inside bottom of the glass. The window above becomes the sky. Back the whole thing with a sheet of deep orange cellophane taped to the glass behind the cardstock for an amber-dusk sky at any hour.
🛍 Shopping guide
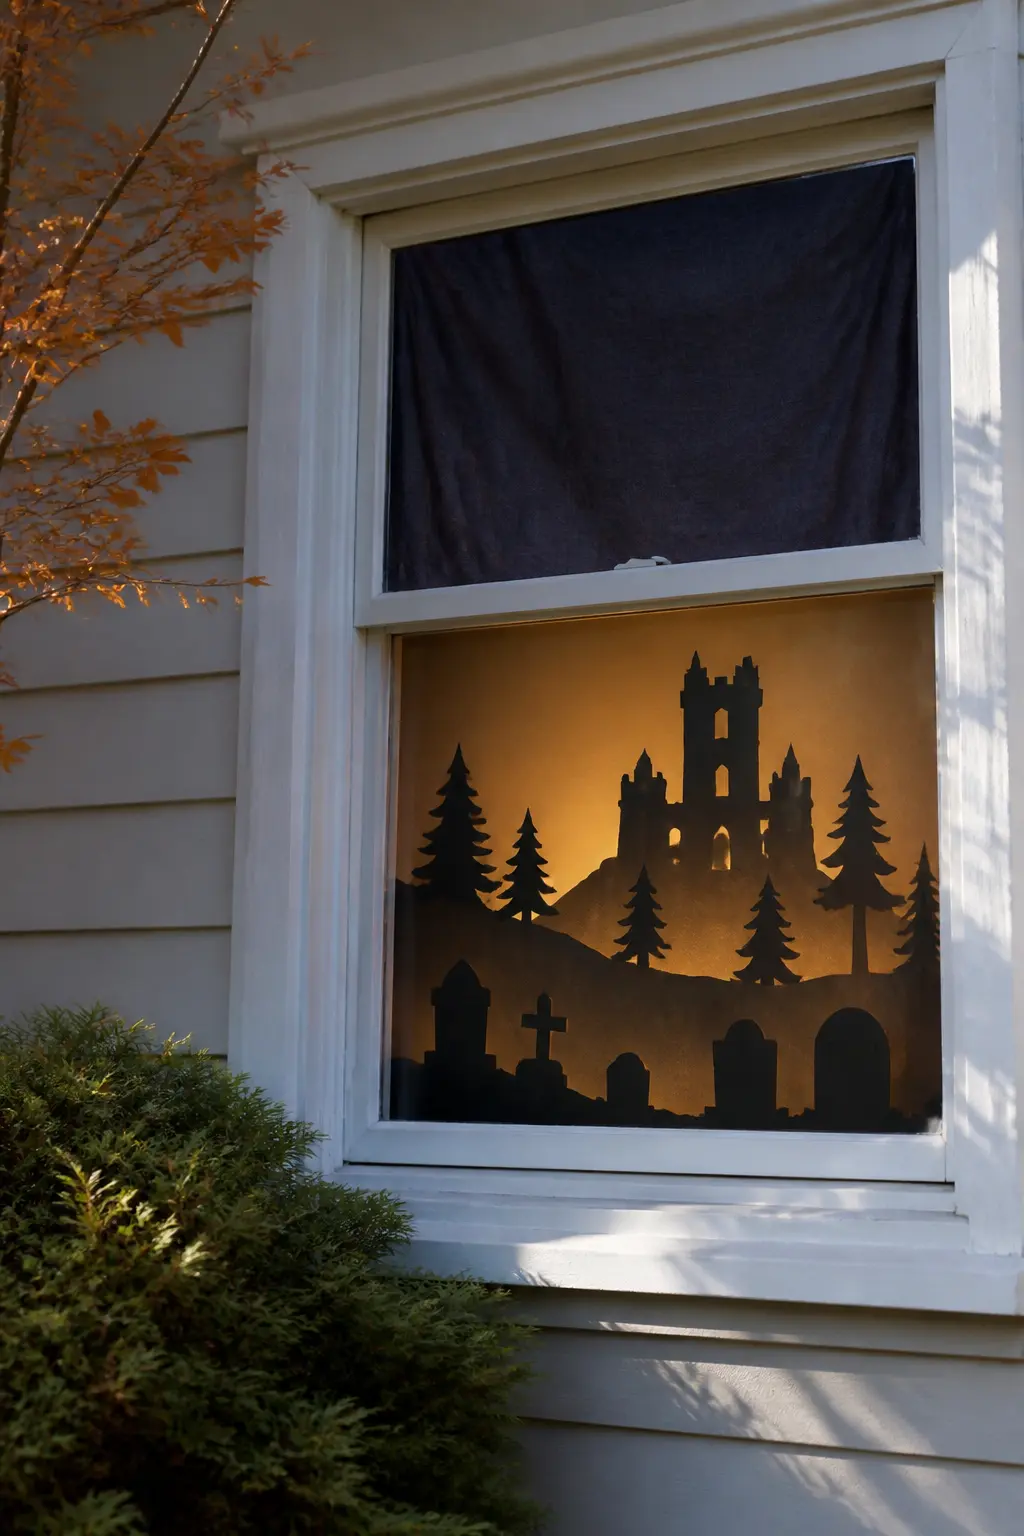
Layered Haunted Hill
Make three layers: a far hill with a ruined castle outline, a middle layer of pine trees, and a foreground of more headstones. Each layer is a separate strip of black cardstock, and each one sits a few centimetres in front of the last, propped on small card folds.
The tiny gaps between layers catch the backlight and create actual shadow depth. The window stops looking flat. Tape a piece of dark navy blue fabric to the glass itself as the sky layer.
Lone Mausoleum with Iron Gate
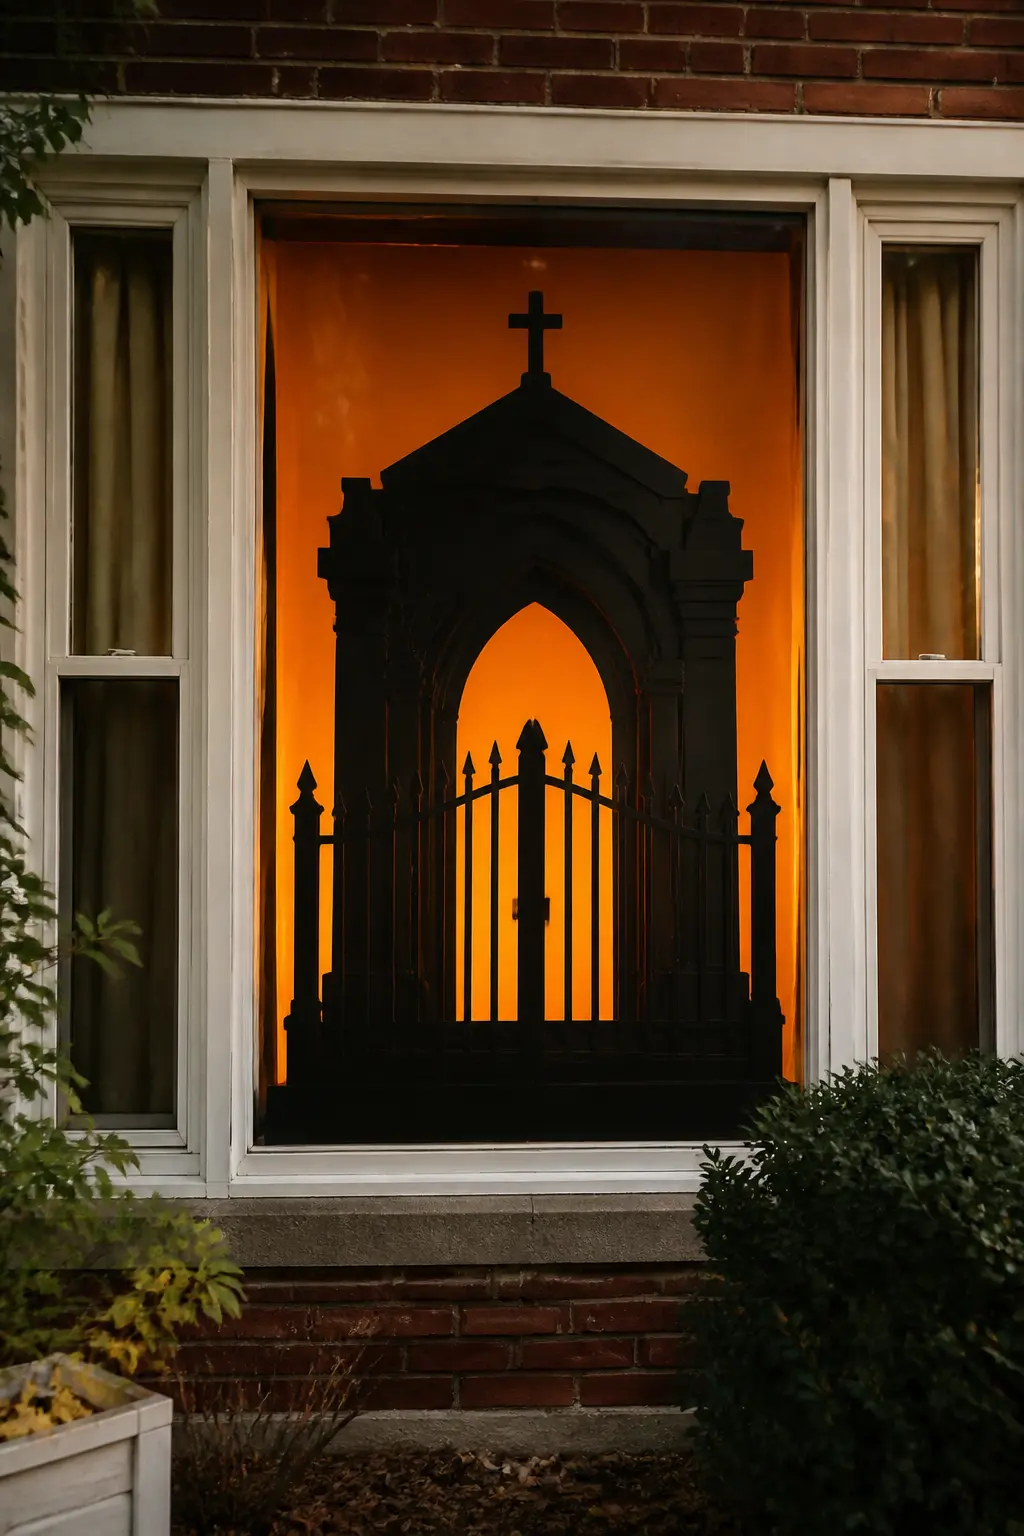
Cut a mausoleum shape as the centrepiece of a wide window: the flat front with columns, a triangular pediment, and a small step. In front of it, cut a detailed iron gate from a separate strip, with vertical bars and a scrolled arch at the top.
The gate overlaps the base of the mausoleum. Cut away every bar in the gate so the light comes through the gaps. That grid of thin light lines is the detail that makes it look expensive.
Dead Forest Panorama
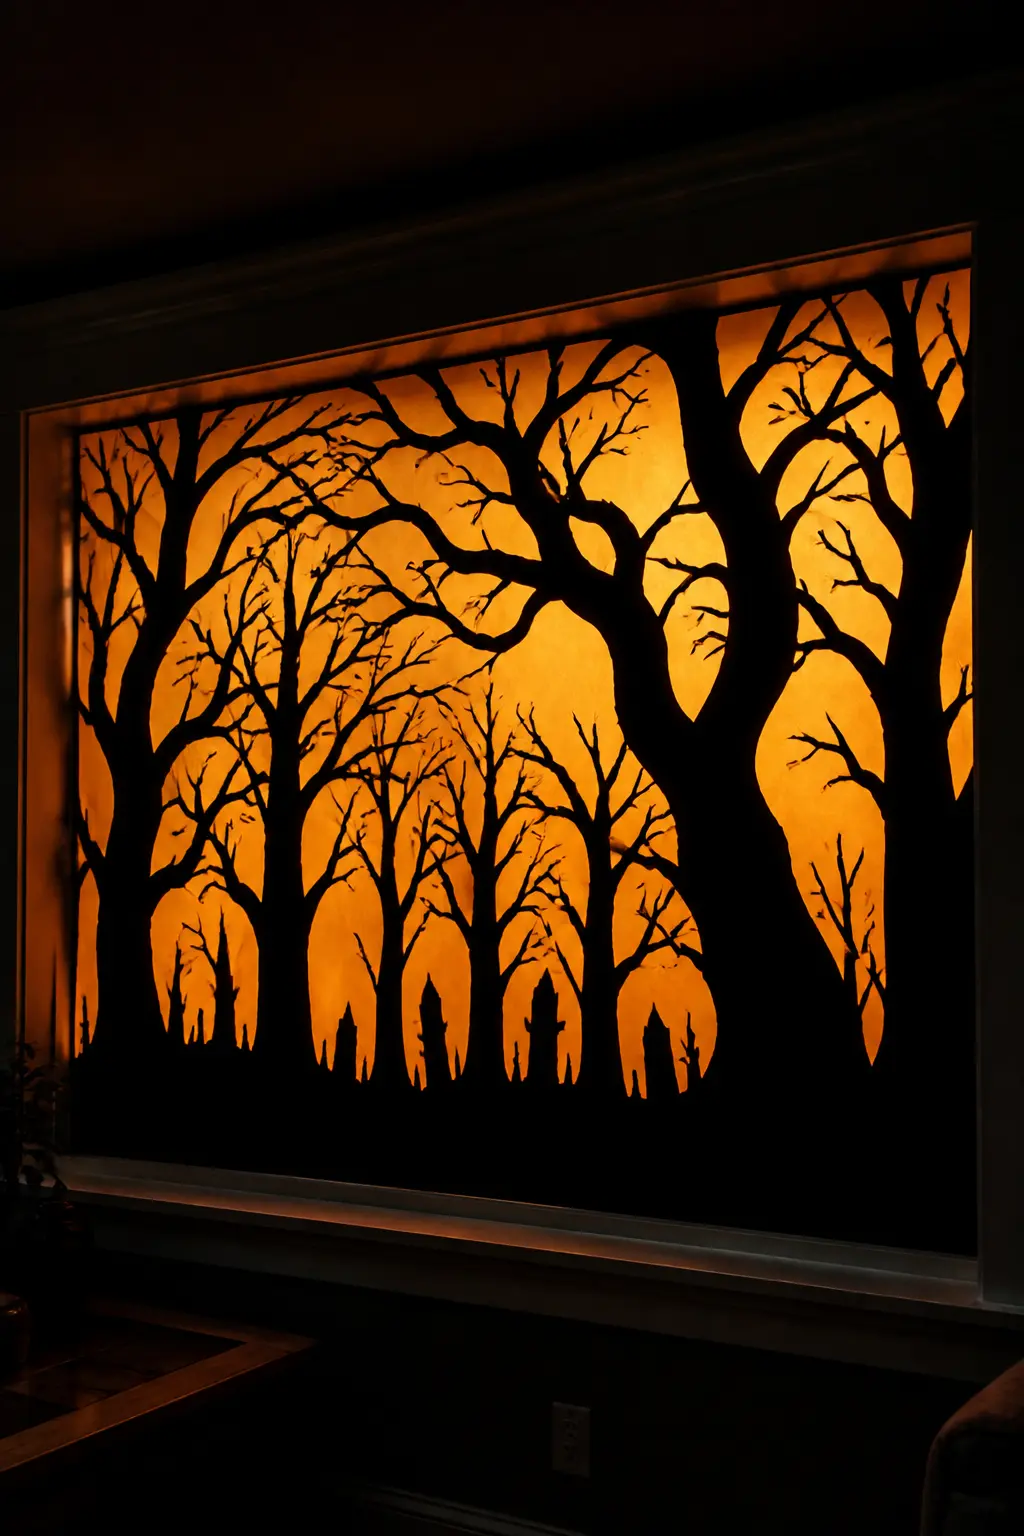
Cover the entire window with a single large sheet of black card or joined strips, then cut away everything that is sky: the irregular gaps between bare branches, between trunks, any open sky above the tree line. Leave the trees and ground solid.
The light comes through every gap you cut, making the window look like moonlight through a winter forest. The more branches you cut, the more light, the more drama.
Rising Figures and Reaching Hands
Silhouettes that seem to climb out of somewhere read as movement, which is far more unsettling than a static shape. Position these low in the window so the arms or heads are just cresting the sill. The sill itself becomes the ground they are rising from.
Zombie Hands at the Sill
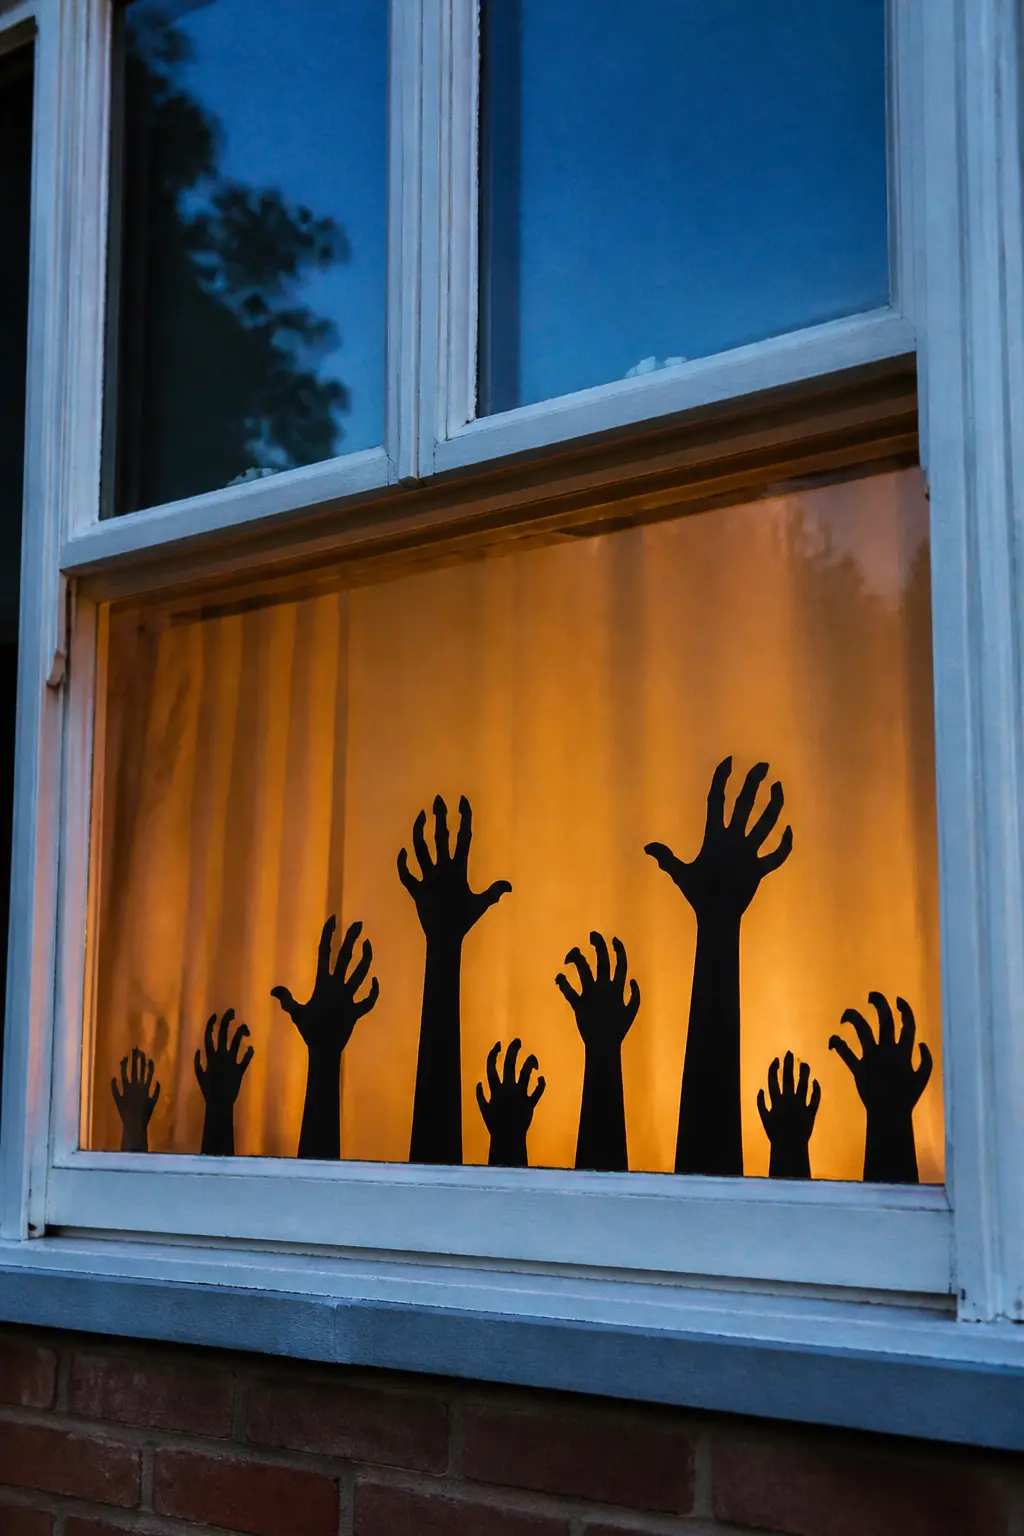
Cut ten to twelve hand-and-arm shapes in varying lengths and poses from black cardstock, all reaching upward. Stand them in a row along the inside of the sill using folded card bases, so only the arms and hands are visible above the sill line from outside.
Stagger the heights and tilt a few at angles so they look frantic rather than orderly. The sill reads as the earth. The hands are the thing beneath it.
Emerging Skeleton Torso
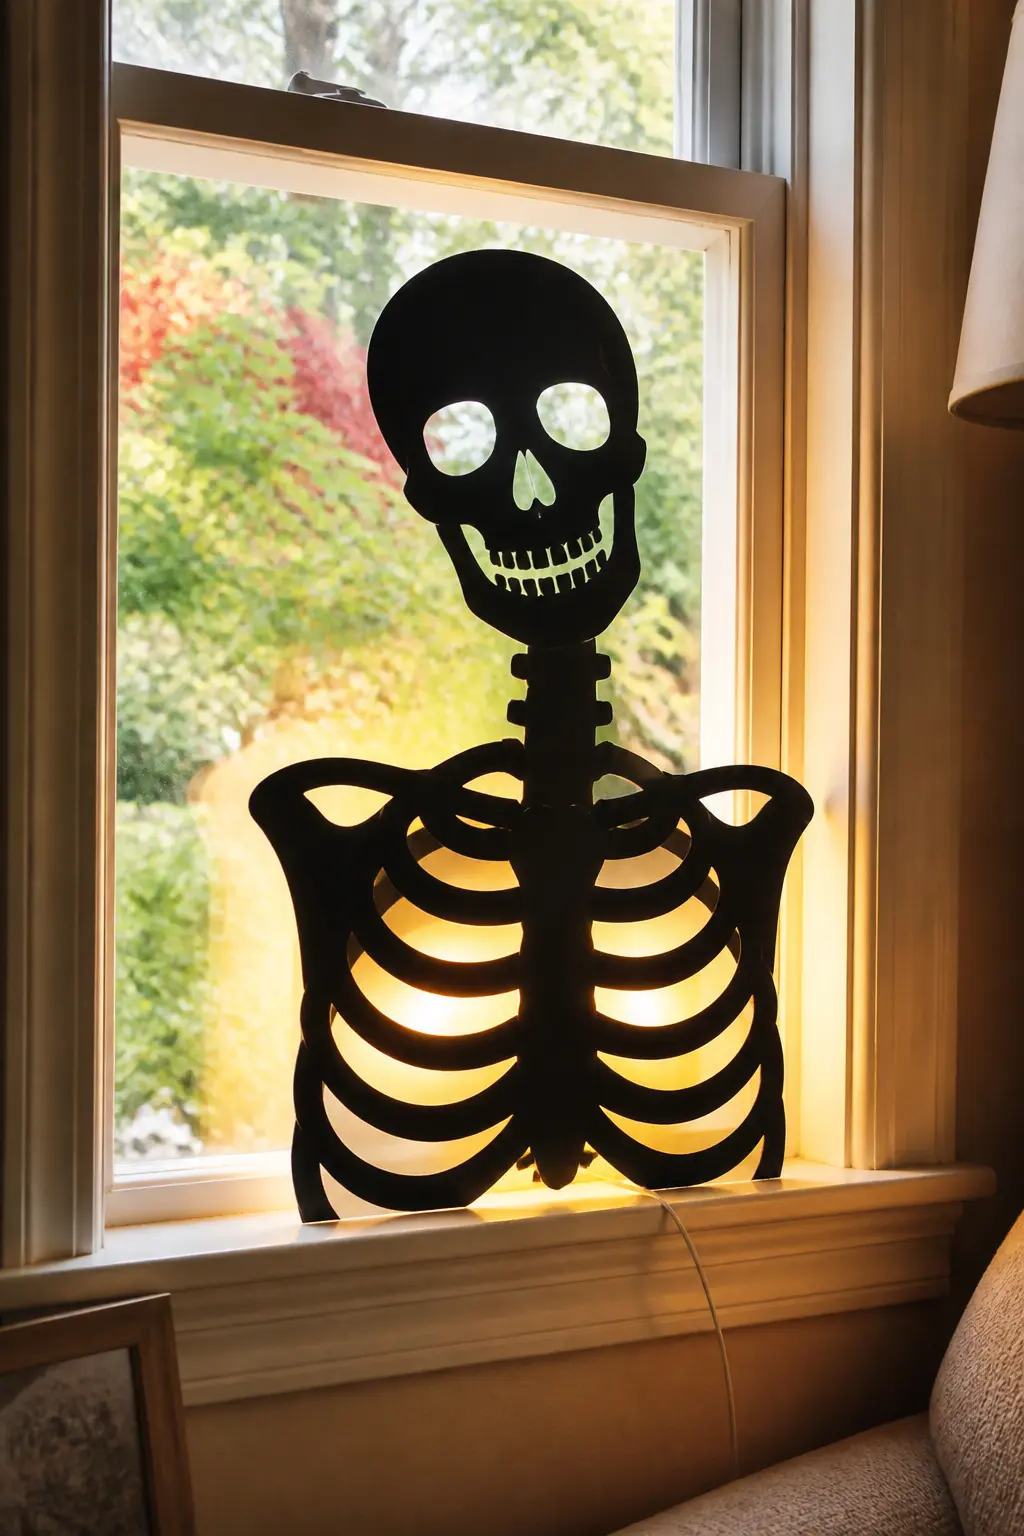
Cut a skeleton from the ribcage up: ribcage, shoulders, neck, skull. Position it so the bottom of the ribcage aligns with the sill, as if the skeleton is pushing itself up from below. Make the skull slightly tilted, as if it is looking toward whoever is walking past.
Backlight from a lamp placed on the floor, angled up. The light catches the ribcage cutouts and creates internal glow in the bones.
🛍 Shopping guide
Crawling Figure from the Corner
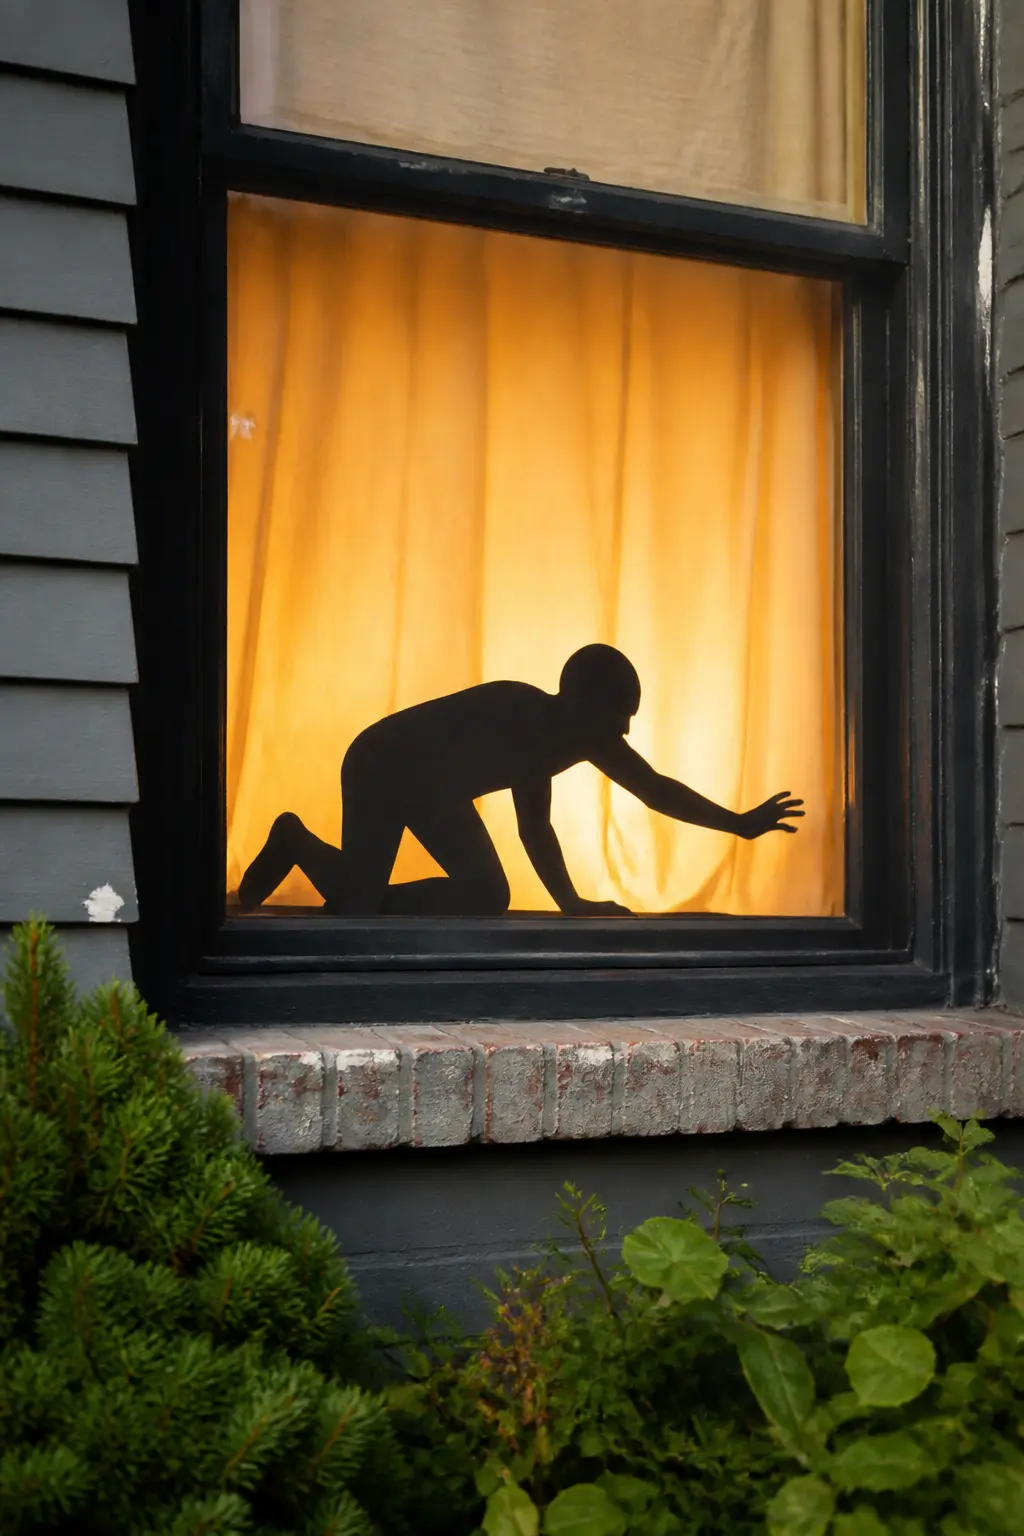
A figure on all fours, silhouetted, crawling from the lower corner toward the centre of the window. Cut the shape so one hand is forward and one knee is raised, mid-crawl. Place it at the very bottom edge of the glass, as low as possible.
This one is disturbing in proportion to how normal the window looks otherwise. No graveyard context needed. The shape alone does the work.
🛍 Shopping guide
Hand Pushing Through the Glass
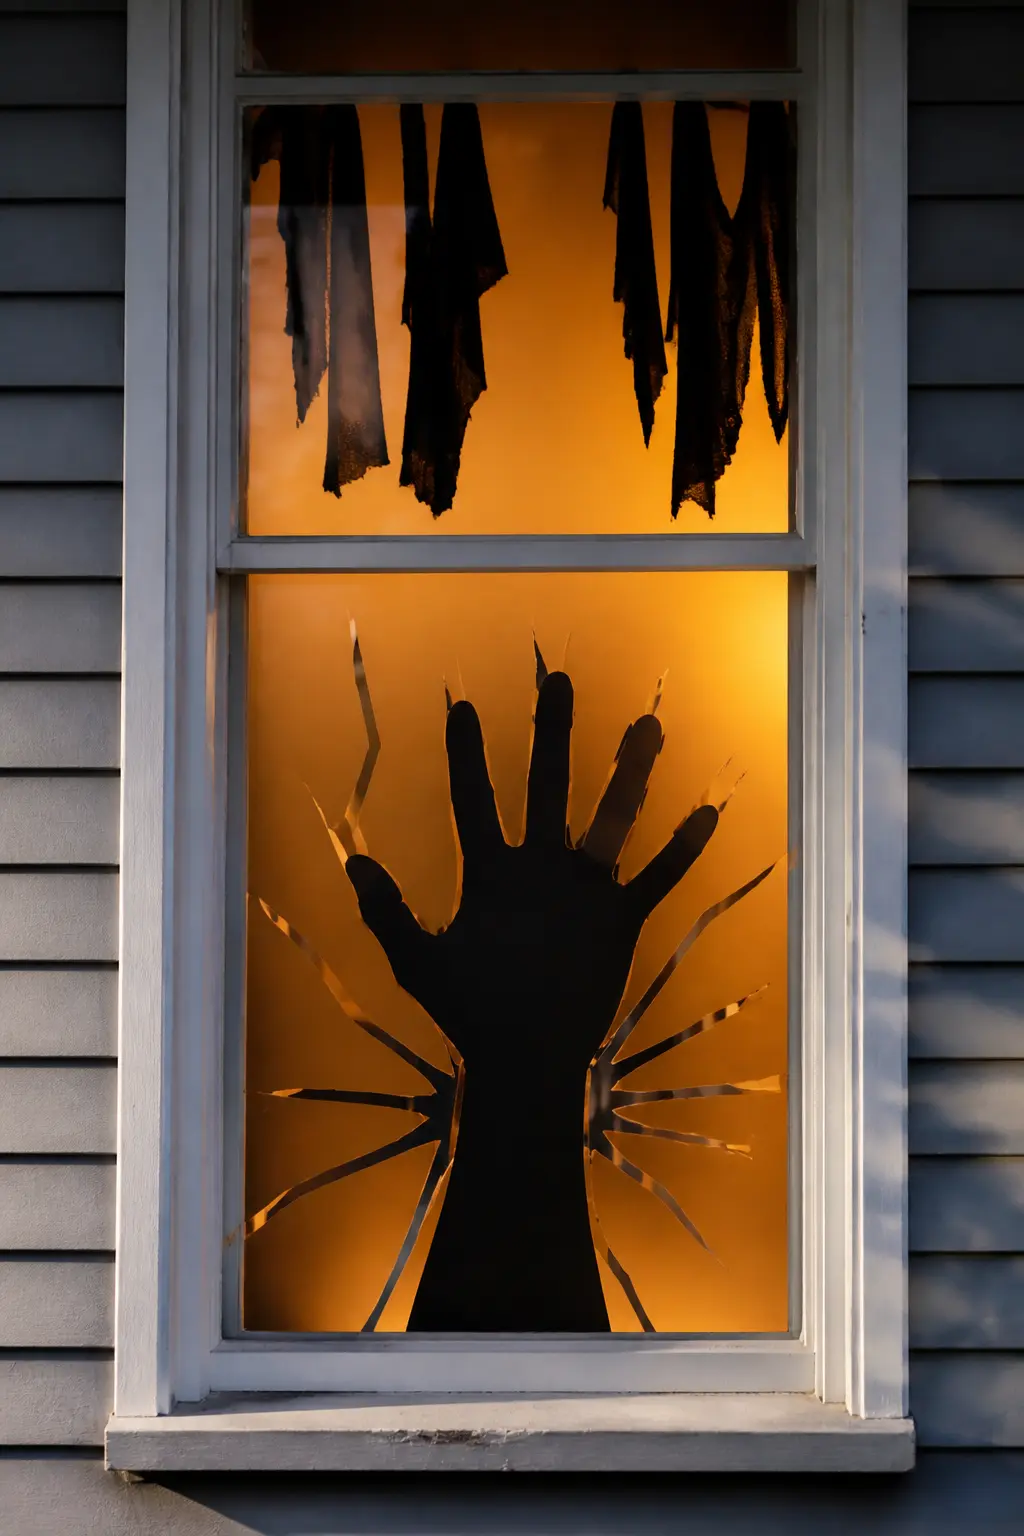
Cut one oversized hand at about twice the size of a real adult hand. Add a cracked glass starburst pattern around it in a separate piece of white or silver card, taped behind the black hand so the cracks radiate from where the wrist would enter the glass.
The crack pattern is what sells it. Without that detail it is just a hand. With it, the window appears to be breaking inward.
Witches, Warlocks and Familiars
The witch silhouette is a century old and still works because the shape is so specific: the hat, the broom, the crooked profile. Update it by putting the figure mid-flight across a full moon cut from white or yellow cardstock, or hunched over a cauldron at the lower pane.
Witch on a Broomstick Mid-Flight
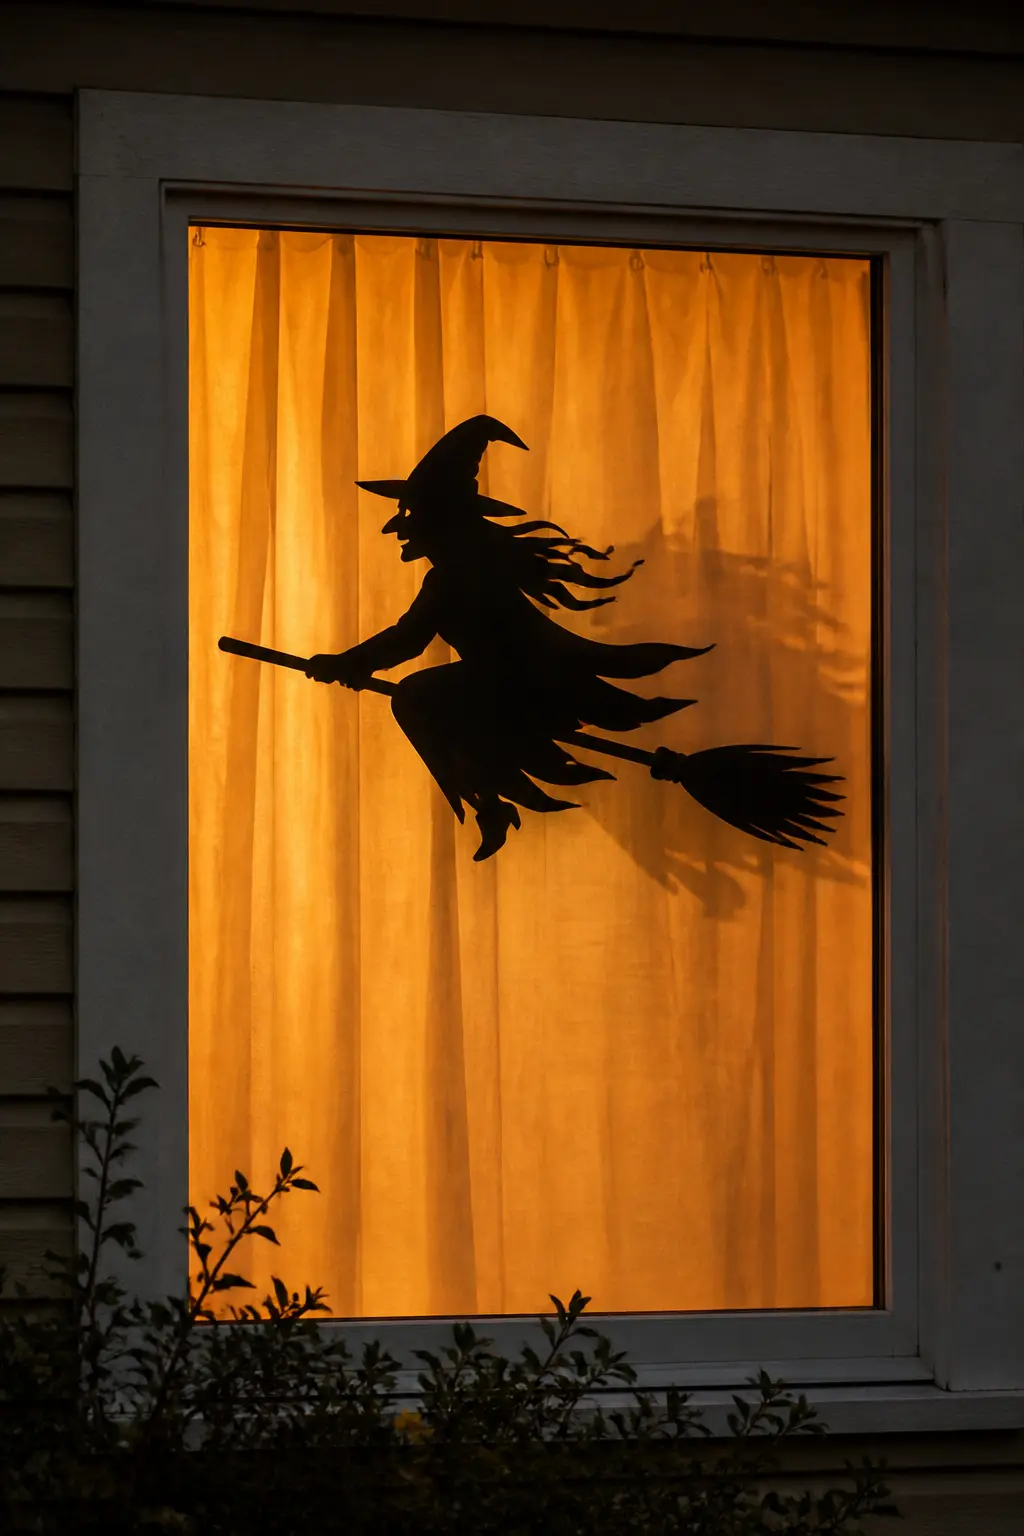
Cut the classic profile: pointed hat, hunched body, broomstick at a forty-five degree angle, a small cat on the tail of the broom. The entire shape comes from one connected piece of black card, which means nothing can shift out of alignment.
Hang it on two small clear hooks suctioned to the glass rather than taping it flat, so it floats a centimetre away from the glass and casts its own shadow on the curtain behind it.
🛍 Shopping guide
Full Moon Behind the Witch
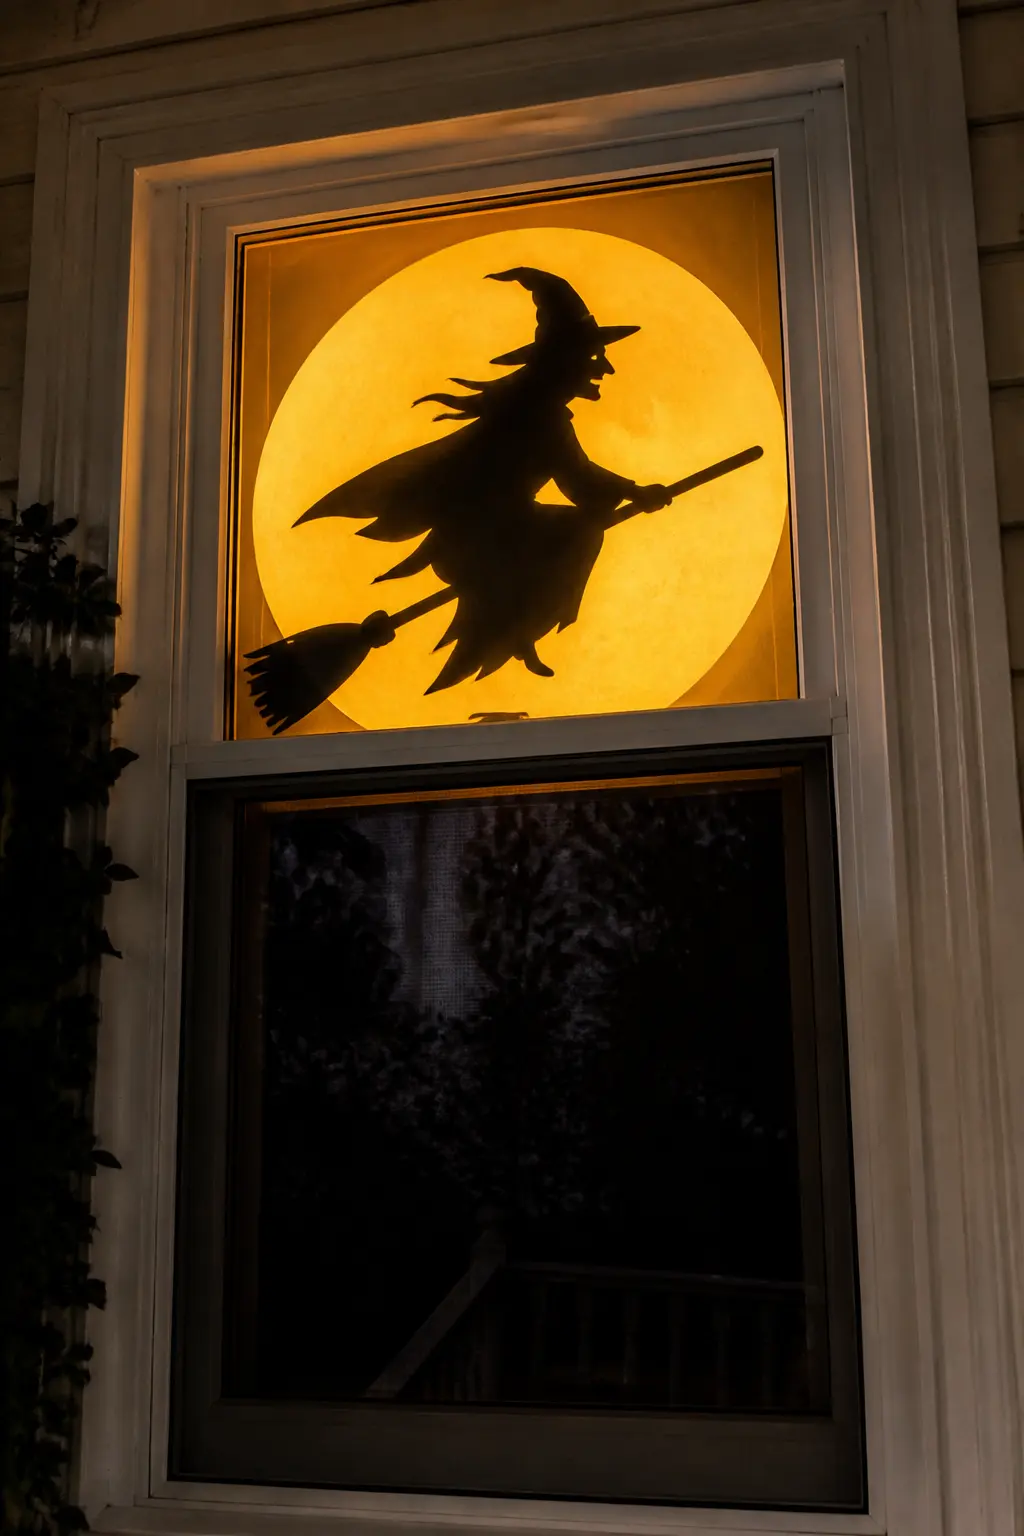
Cut a large circle of pale yellow tracing paper or frosted contact paper and tape it to the glass as the moon. In front of it, stick a black witch silhouette centred on the circle. The moon glows from the room light behind it, the witch is solid black in front.
Size the moon so it fills the whole upper pane of a two-pane sash window. The witch should be just smaller than the moon diameter, so a ring of yellow glows around her.
🛍 Shopping guide
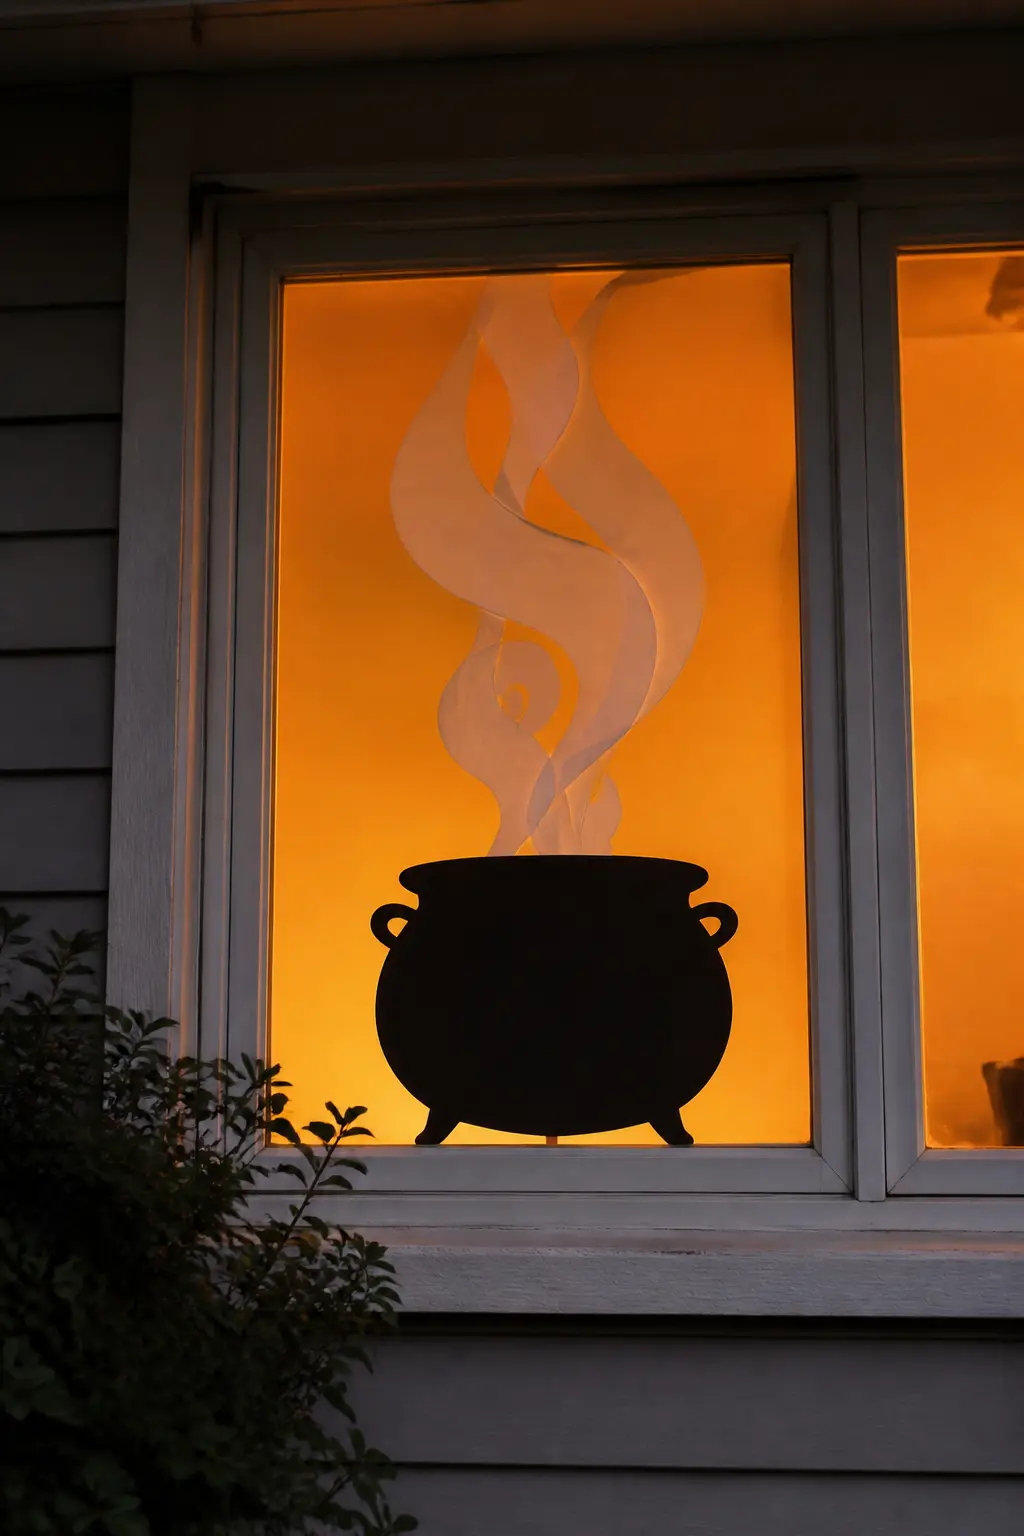
Cauldron Scene with Rising Smoke
Cut a wide cauldron shape and position it at the sill. Above it, cut wisps of smoke from white or pale grey translucent paper: loose, curling shapes that rise from the cauldron rim toward the top of the window.
The smoke is the detail that gets comments. White translucent paper over an amber light gives it a sickly greenish cast. Nobody will know why it looks slightly wrong, only that it does.
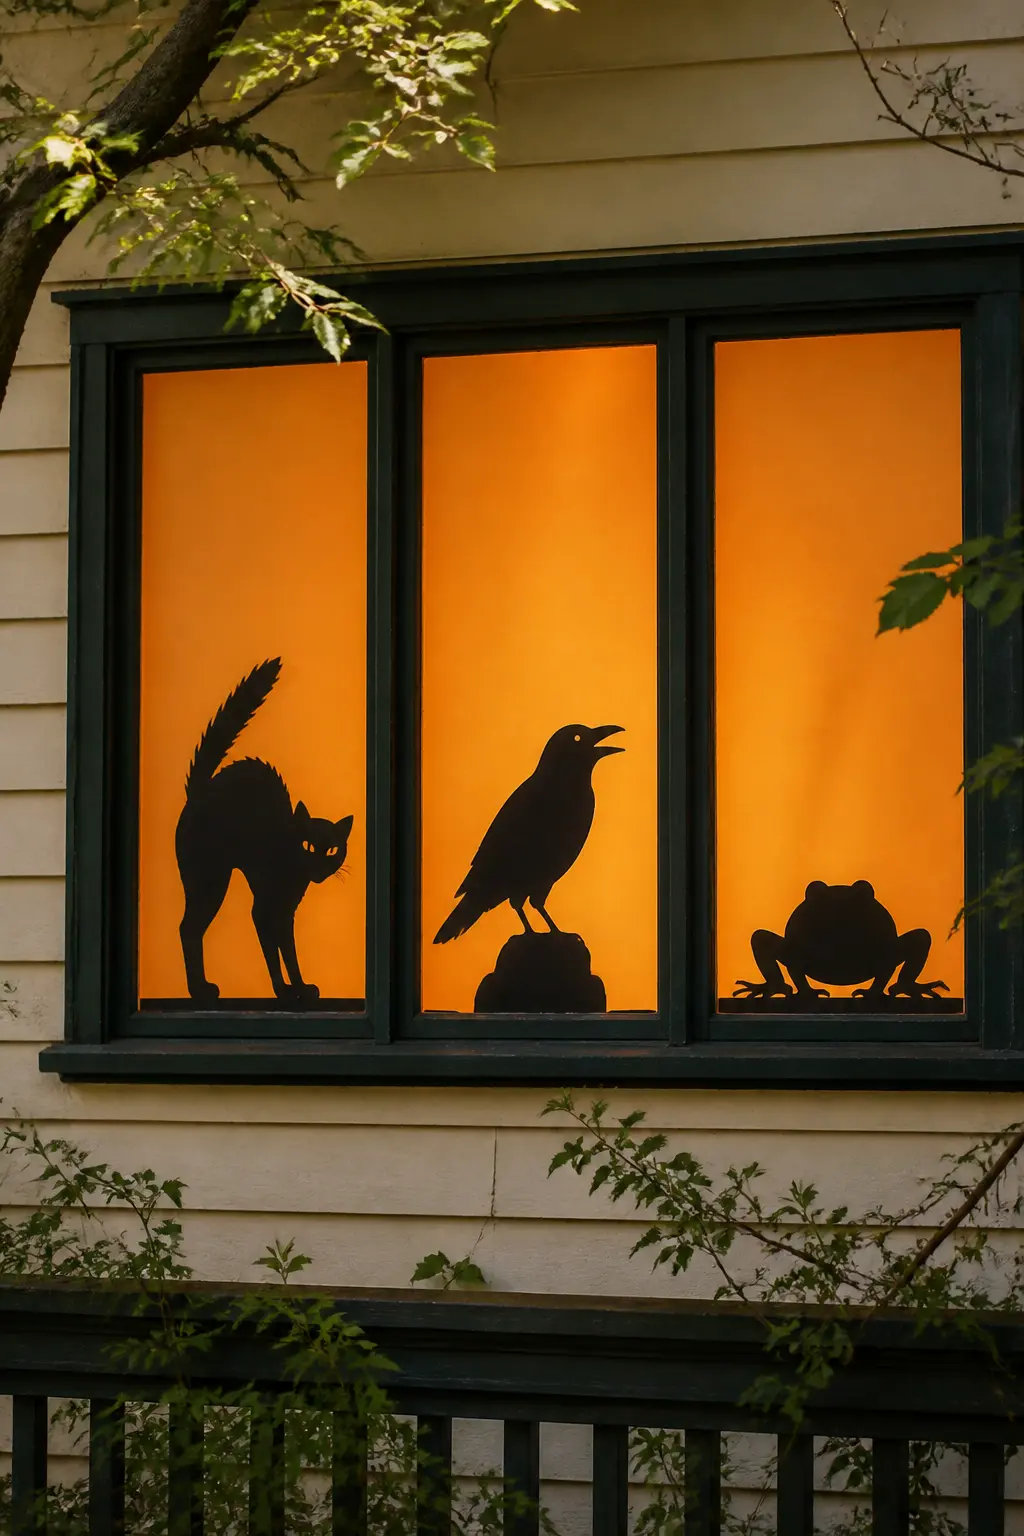
Familiar Silhouettes: Cat, Crow, Toad
Three small animals, each on its own square of glass, each in a different window pane in a multi-pane window. The cat sits with its back arched. The crow stands with its beak open. The toad crouches low and wide.
Keep each shape simple enough to read at a distance. Three small perfect silhouettes in three panes read better than one complicated scene squeezed into one pane.
🛍 Shopping guide
Monster Close-Ups
Scale changes everything. A monster face cut to fill an entire window pane, edge to edge, stops being decoration and starts being architecture. These ideas lean into that: oversized skulls, enormous spider eyes, a werewolf snout pressed to the glass. The bigger the shape, the less detail you need.
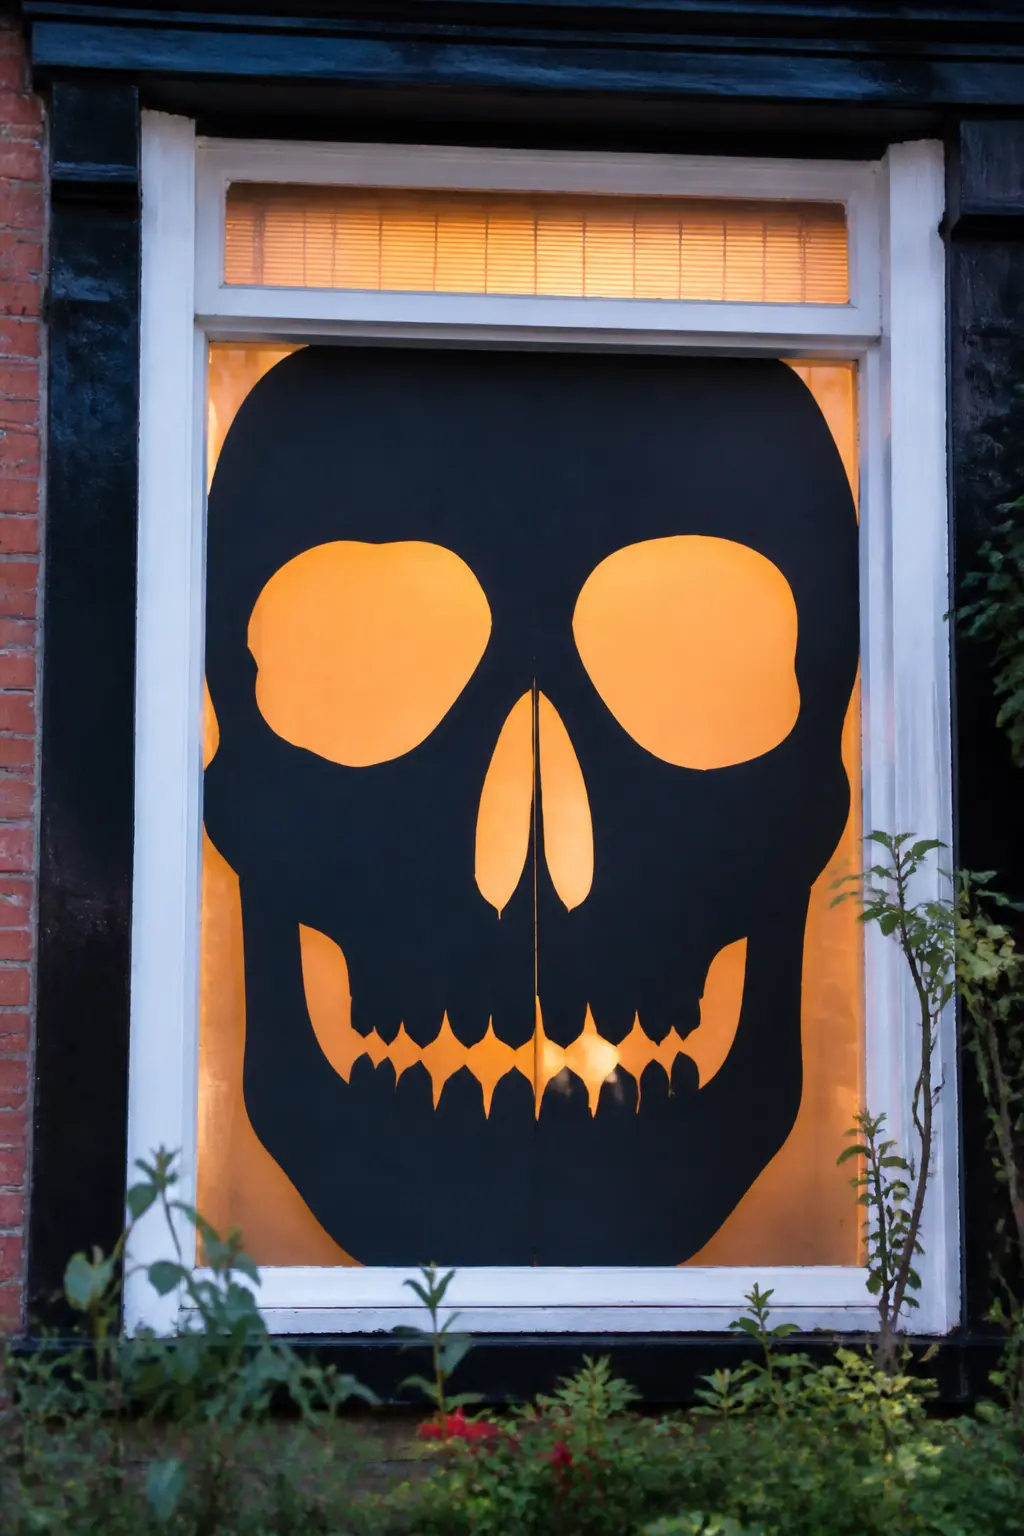
Giant Skull Centred in a Pane
Cut a skull face to fill one full window pane, edge to edge. The eye sockets and nasal cavity are cut away completely so light passes through them. Keep the rest solid black.
This works best in a large single-pane window where the scale is maximum. The head appears to be behind the glass, too large to be inside the room, which is the exact wrongness you want.
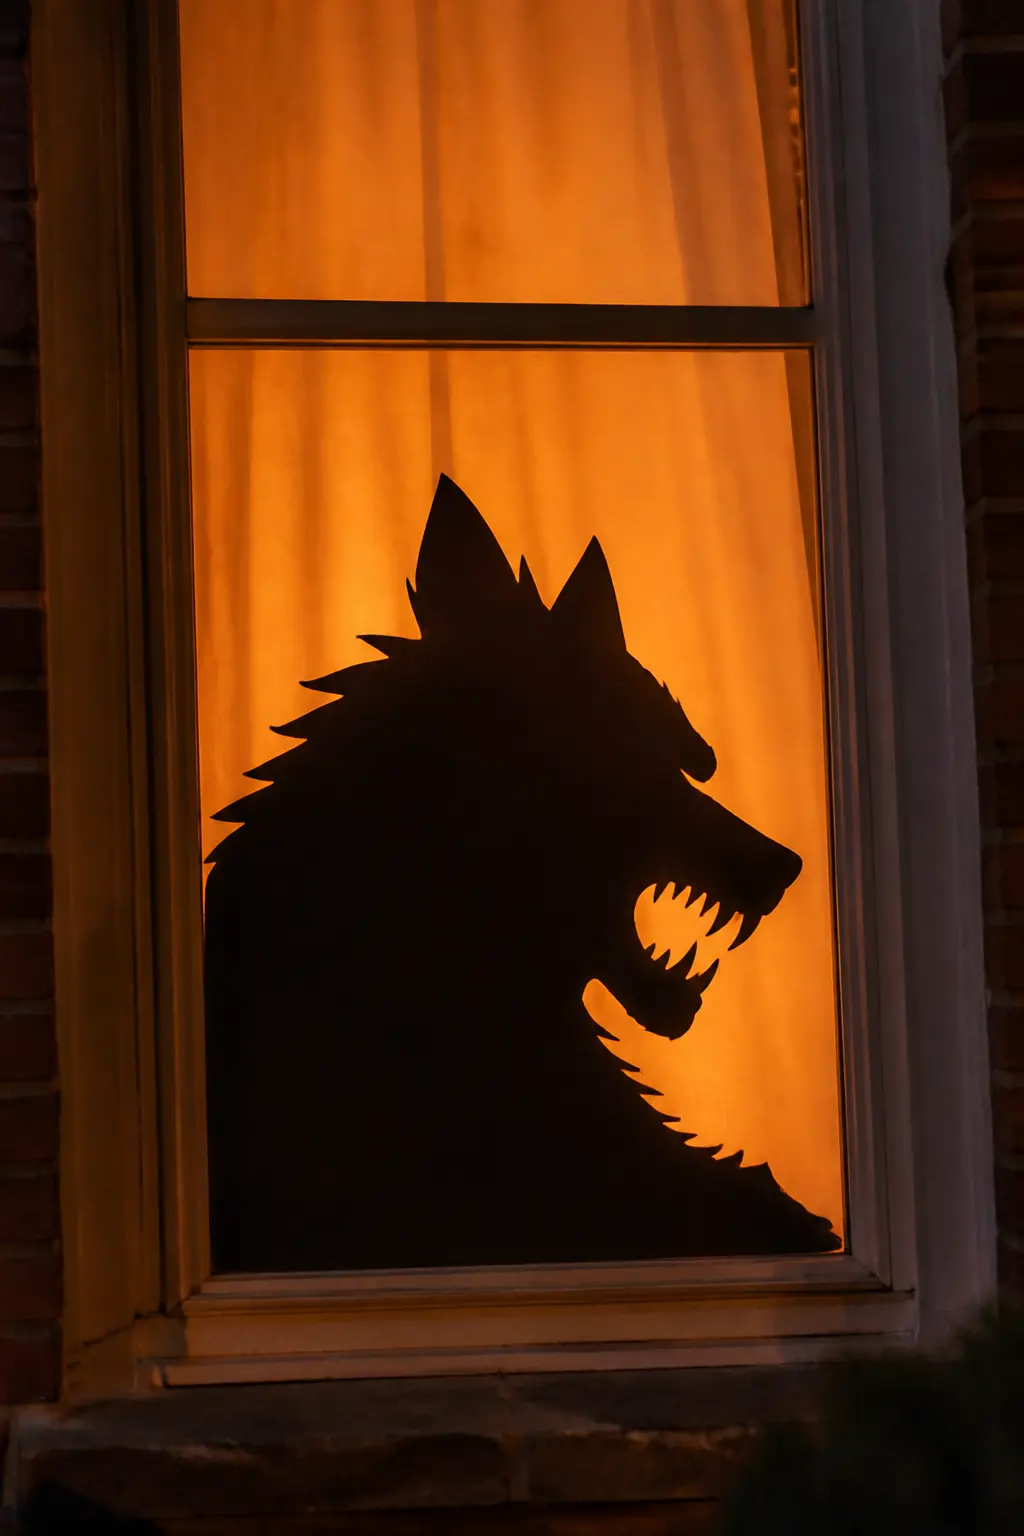
Werewolf Head Profile
A werewolf in profile, head and shoulders only, filling the lower two-thirds of the window. The snout is forward, the ears are erect, fur texture is suggested by a ragged cut edge along the shoulder line rather than any interior detail.
Profile shapes are easier to cut cleanly than front-facing ones and they read from further away. The fur edge takes ten minutes with small scissors and makes the whole thing look professional.
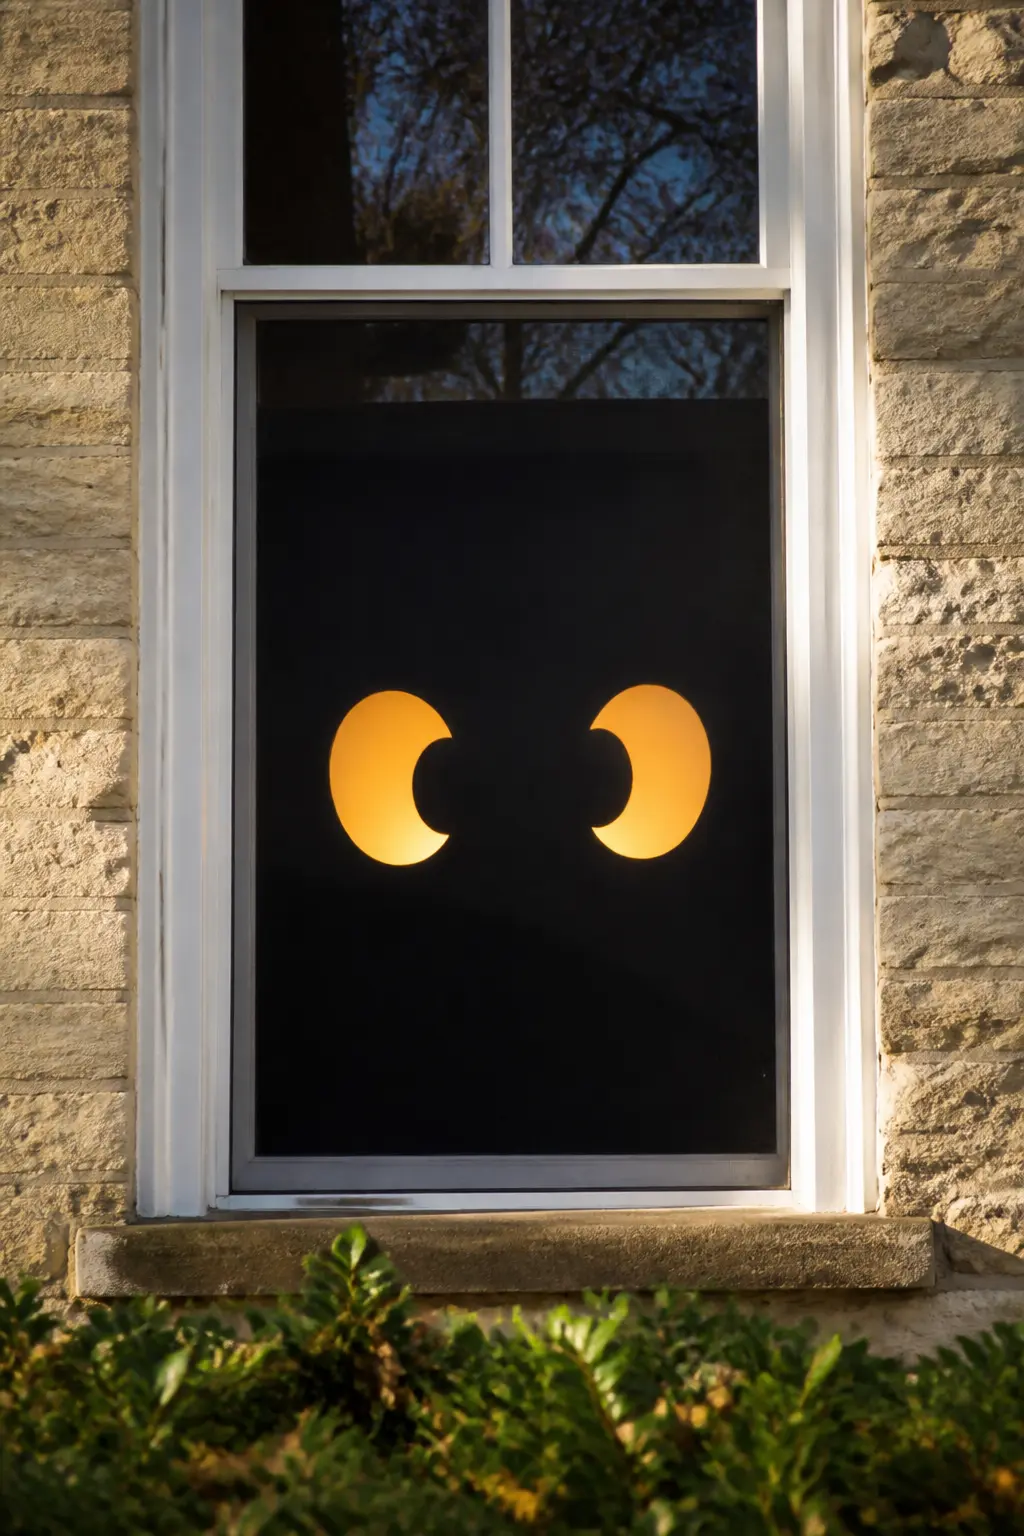
Monster Eyes Only
Cut two large oval or slit-pupil eyes from black card, leaving the irises open so light shows through. No other facial features. Just the eyes, level with a standing adult, visible from the street.
The absence of a face is what makes it work. Two glowing eyes in an otherwise dark window trigger something instinctive. Keep the rest of the room dark so there is nothing else visible through the glass.
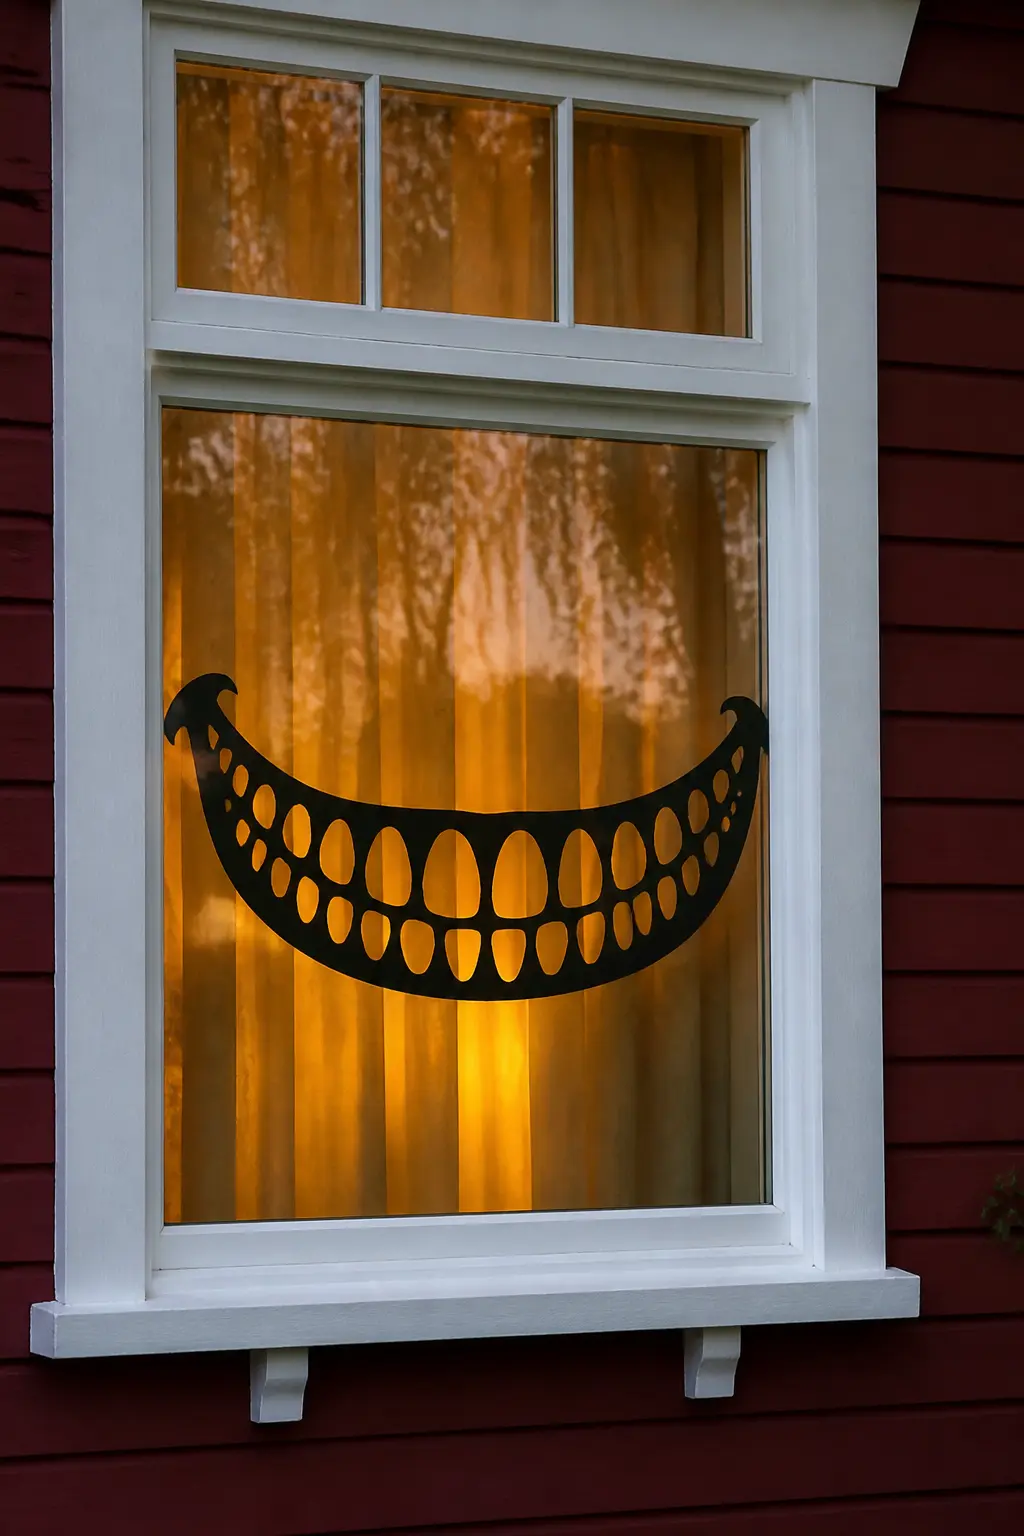
Cheshire Grin Across the Pane
One enormous grinning mouth, cut from black card, spanning the full width of the window. Teeth are cut away so light shows through each one individually. No eyes, no nose, just the grin. Position it at the vertical midpoint of the window.
The teeth do the work. Cut them narrow and slightly uneven. Wide blunt teeth look cartoony. Narrow, slightly misaligned teeth look threatening.
Haunted Interior Scenes
Instead of creatures, these silhouettes suggest the life inside a haunted house: a rocking chair moving on its own, a long dining table set for guests who never arrived, a staircase with a shape at the top. Interior scenes need a second layer of context cut into the same sheet, like a frame of curtains or a window-within-the-window.
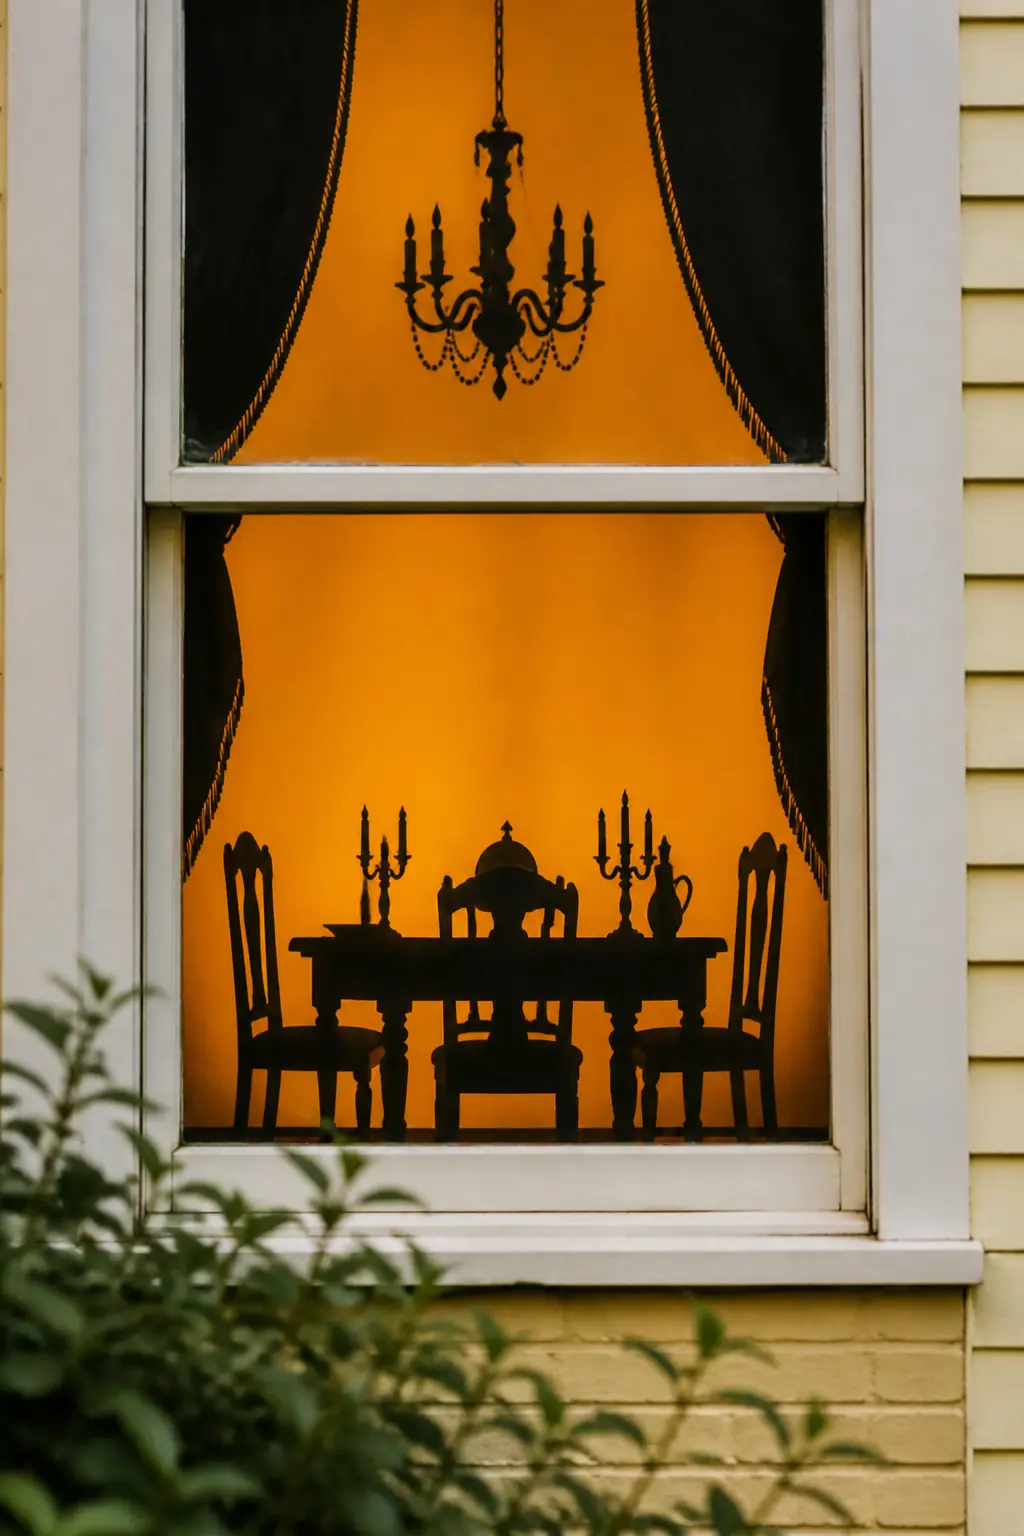
Ghost Table in the Parlour
Cut the silhouette of a long dining table in profile, with two chairs at each side. On the table, cut the outlines of candlesticks and a centrepiece. Leave the chairs empty. No figures sit in them.
The emptiness is the whole point. A set table with no one at it is unsettling in a way that creatures are not. Frame the scene with two silhouette curtains, one at each side, to suggest you are looking through a window into the room.
🛍 Shopping guide
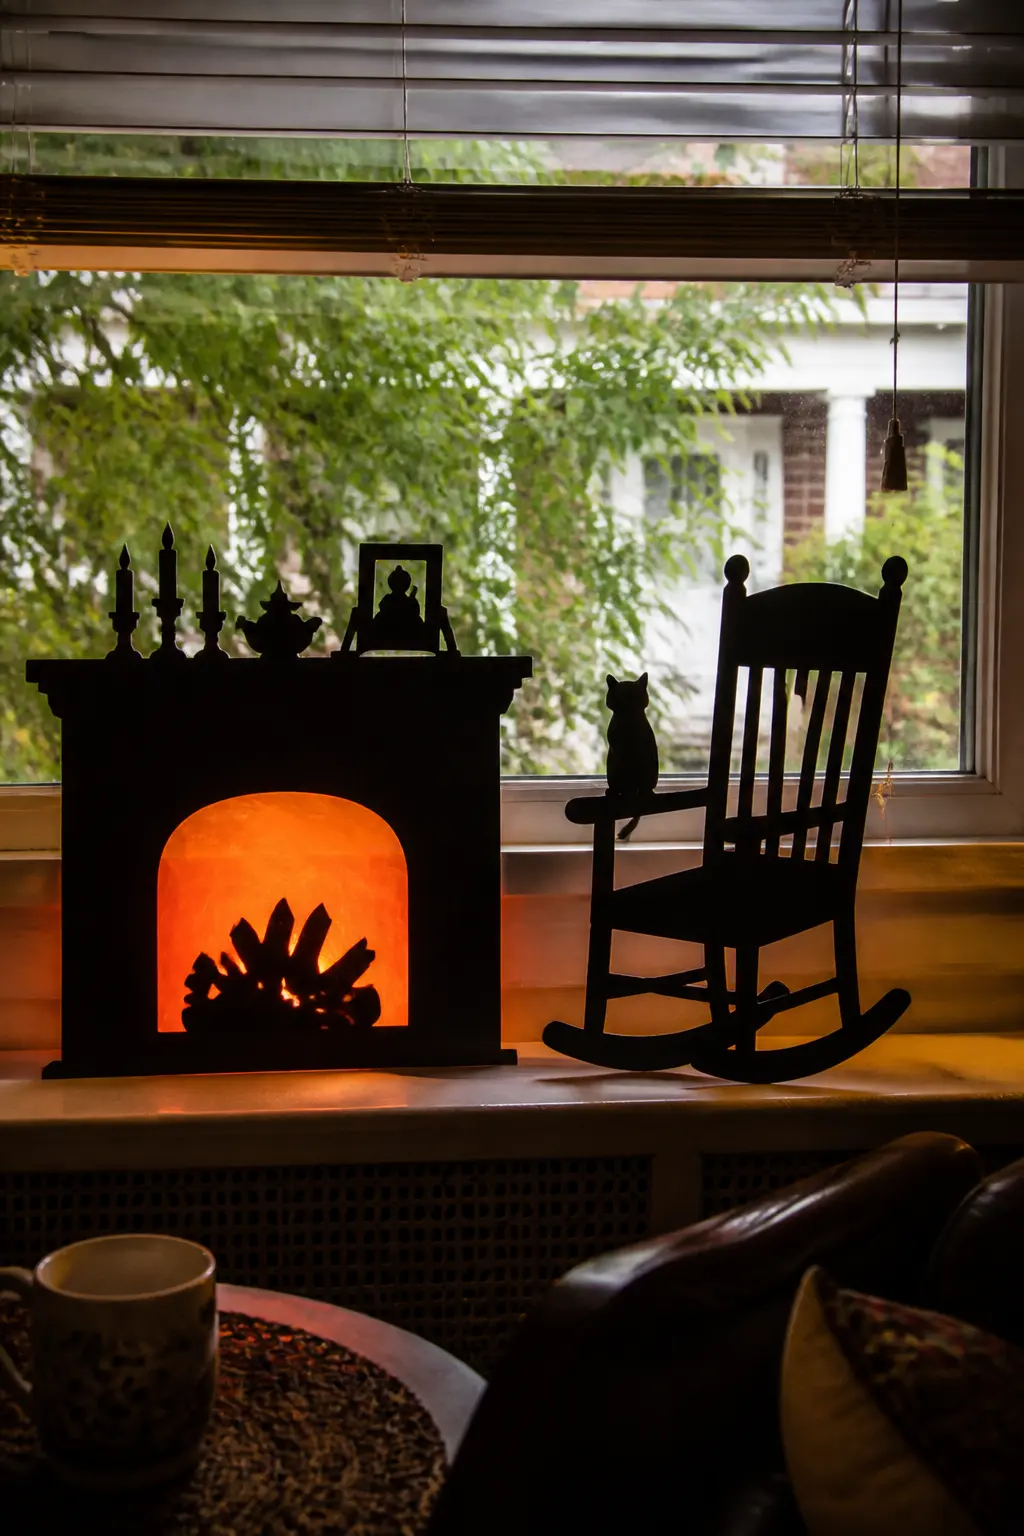
Rocking Chair by the Fire
Cut a rocking chair with an exaggerated curved rocker and a high pointed back. Add a fireplace shape in the same scene, to the chair’s side, with an open firebox cut out and backed with orange tissue paper.
The chair sits empty. A small black cat shape on the arm of the chair, looking back at the window, is the only other element needed. Three shapes, total. Simple, and quietly horrible.
🛍 Shopping guide
The Staircase with a Shape at the Top
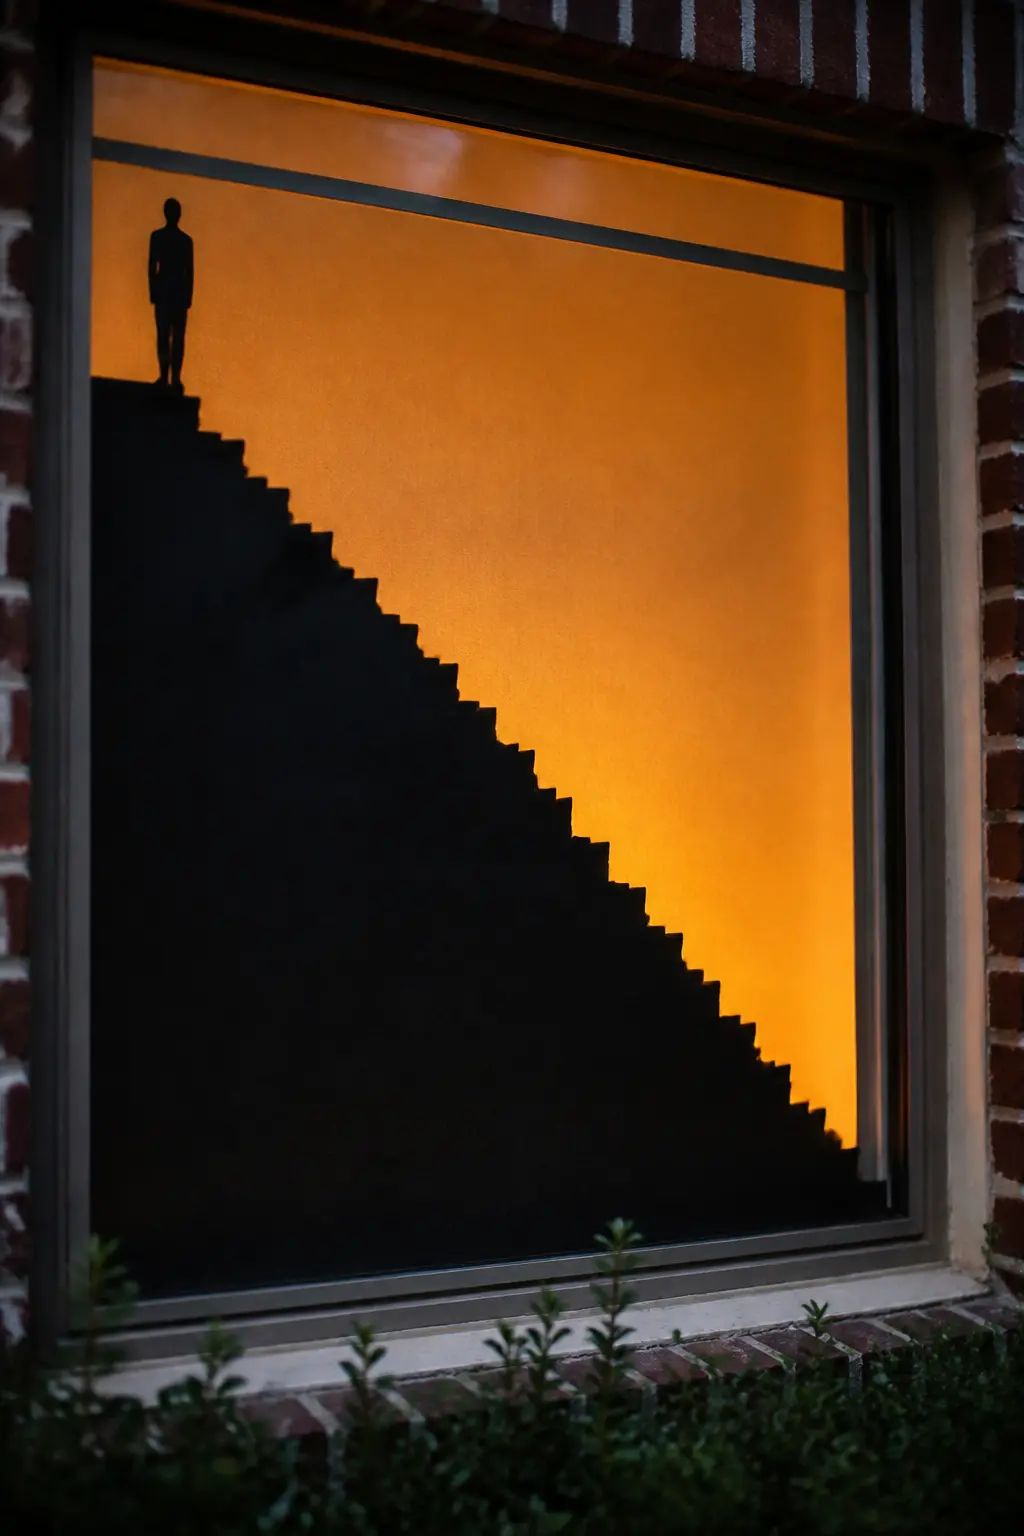
Cut a staircase in perspective, rising from the lower right corner to the upper left of the window. At the top, a small featureless figure stands. No face detail, no definition. Just the outline of someone standing still at the top of the stairs.
Perspective on a staircase is the hard part. Print a reference image and trace the basic lines. The figure at the top should be no taller than a fifth of the full scene height, which makes the forced perspective read as real depth.
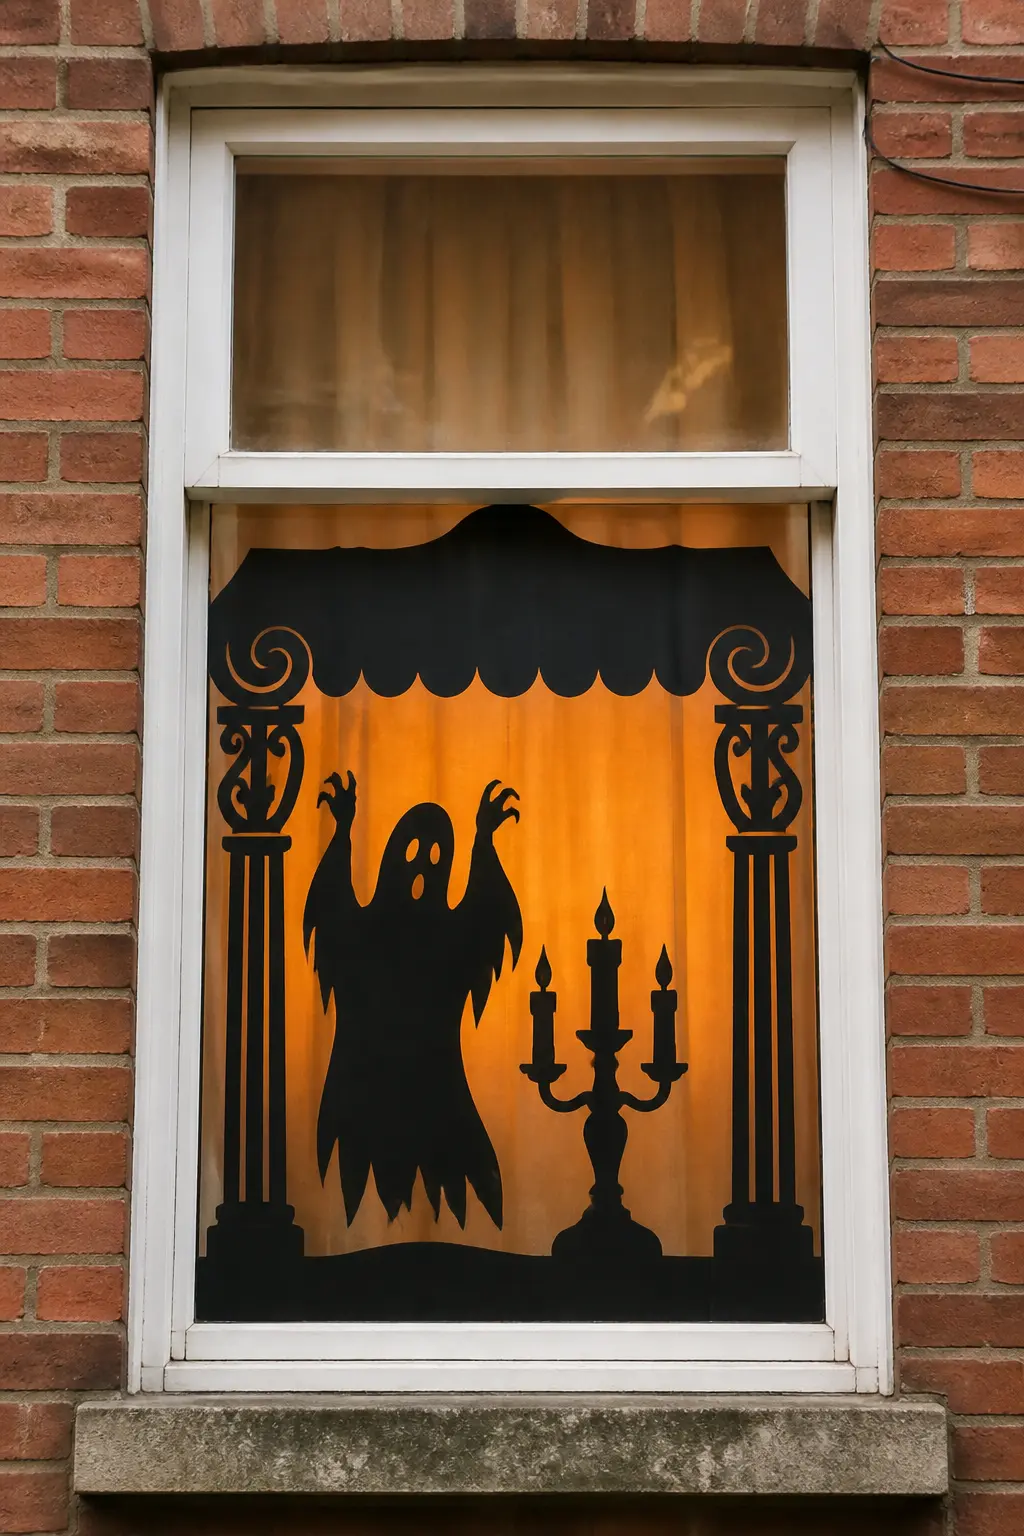
Shadow Puppet Theatre Frame
Cut an ornate theatre proscenium arch shape to frame the inside of the window, with scrolled columns on each side and a scalloped arch at the top. Inside this frame, place a simple silhouette scene: a ghost floating, a candelabra, a figure in a long coat.
The theatre frame turns the window into a stage. Everything inside it, however basic, looks deliberate and designed. It is the easiest upgrade for someone with limited cutting confidence.
Small-Window and Bathroom Fixes
Not every window is a wide picture frame. A narrow bathroom window, a porthole of a landing pane, a tiny sidelight by the front door: these all work better with a single tight subject. The constraint is actually useful. One perfect shape, correctly scaled, reads better than a crowded scene crammed into a small opening.
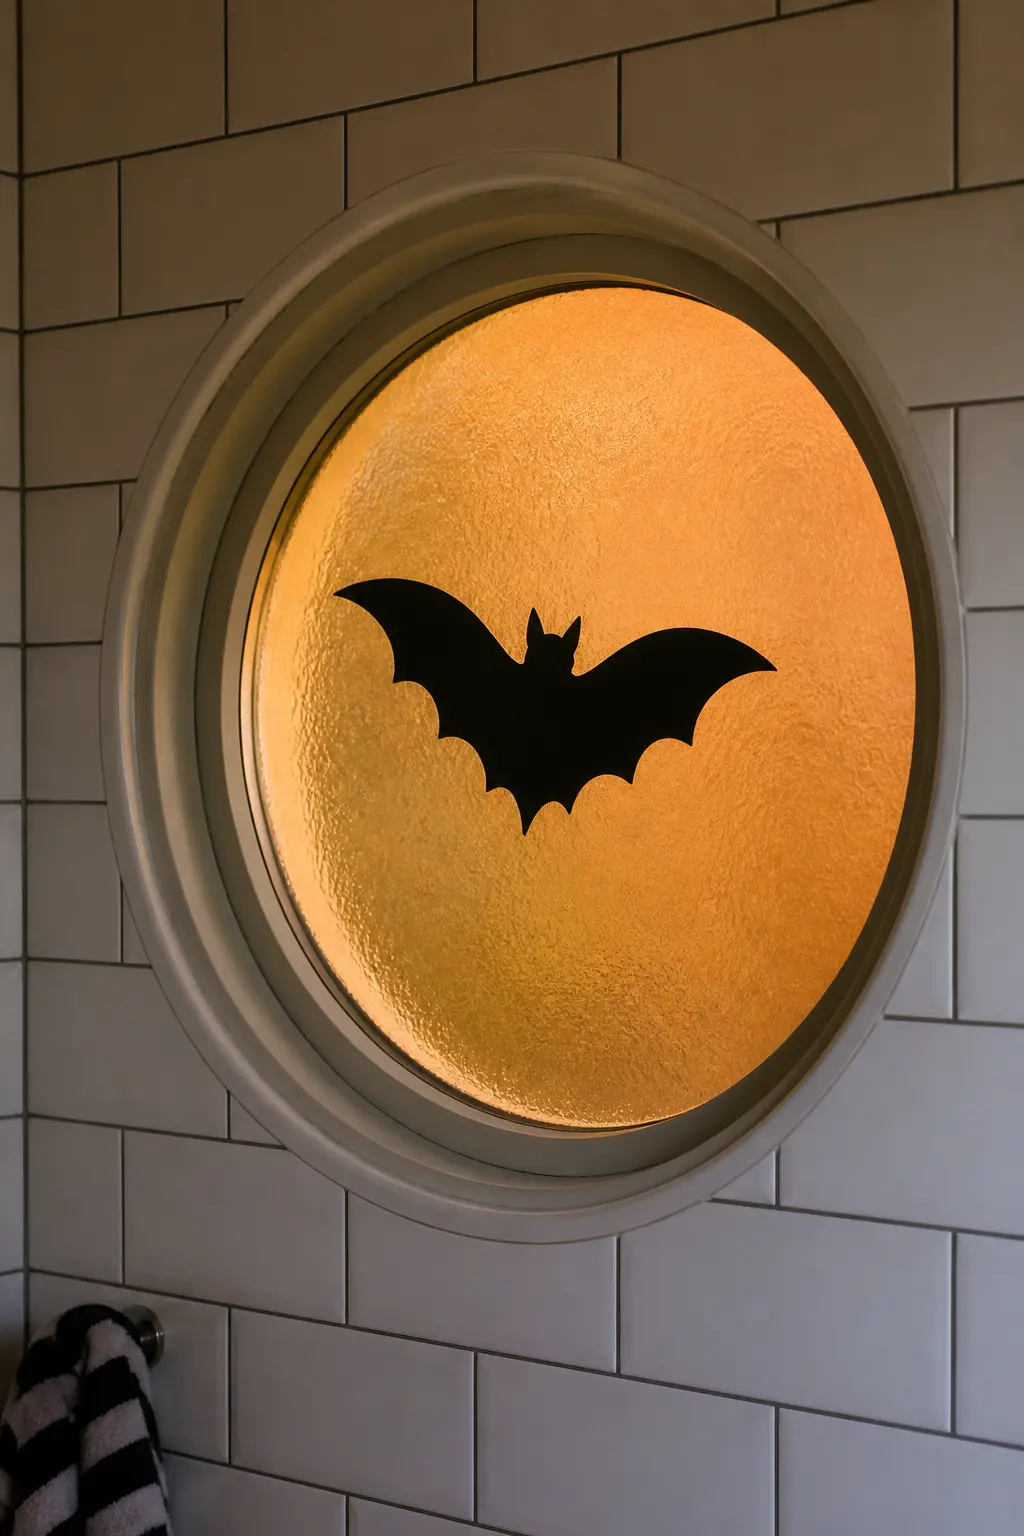
Single Bat on a Porthole Window
One bat, wings spread, cut to fit the width of a small circular or square bathroom window. Tape it to the inside of the frosted glass. The frosted glass diffuses the backlight into a soft, even glow, making the bat look printed rather than cut.
Frosted glass is better than clear for this. The texture softens everything and hides the cardstock edges. No other decoration needed at this window size.
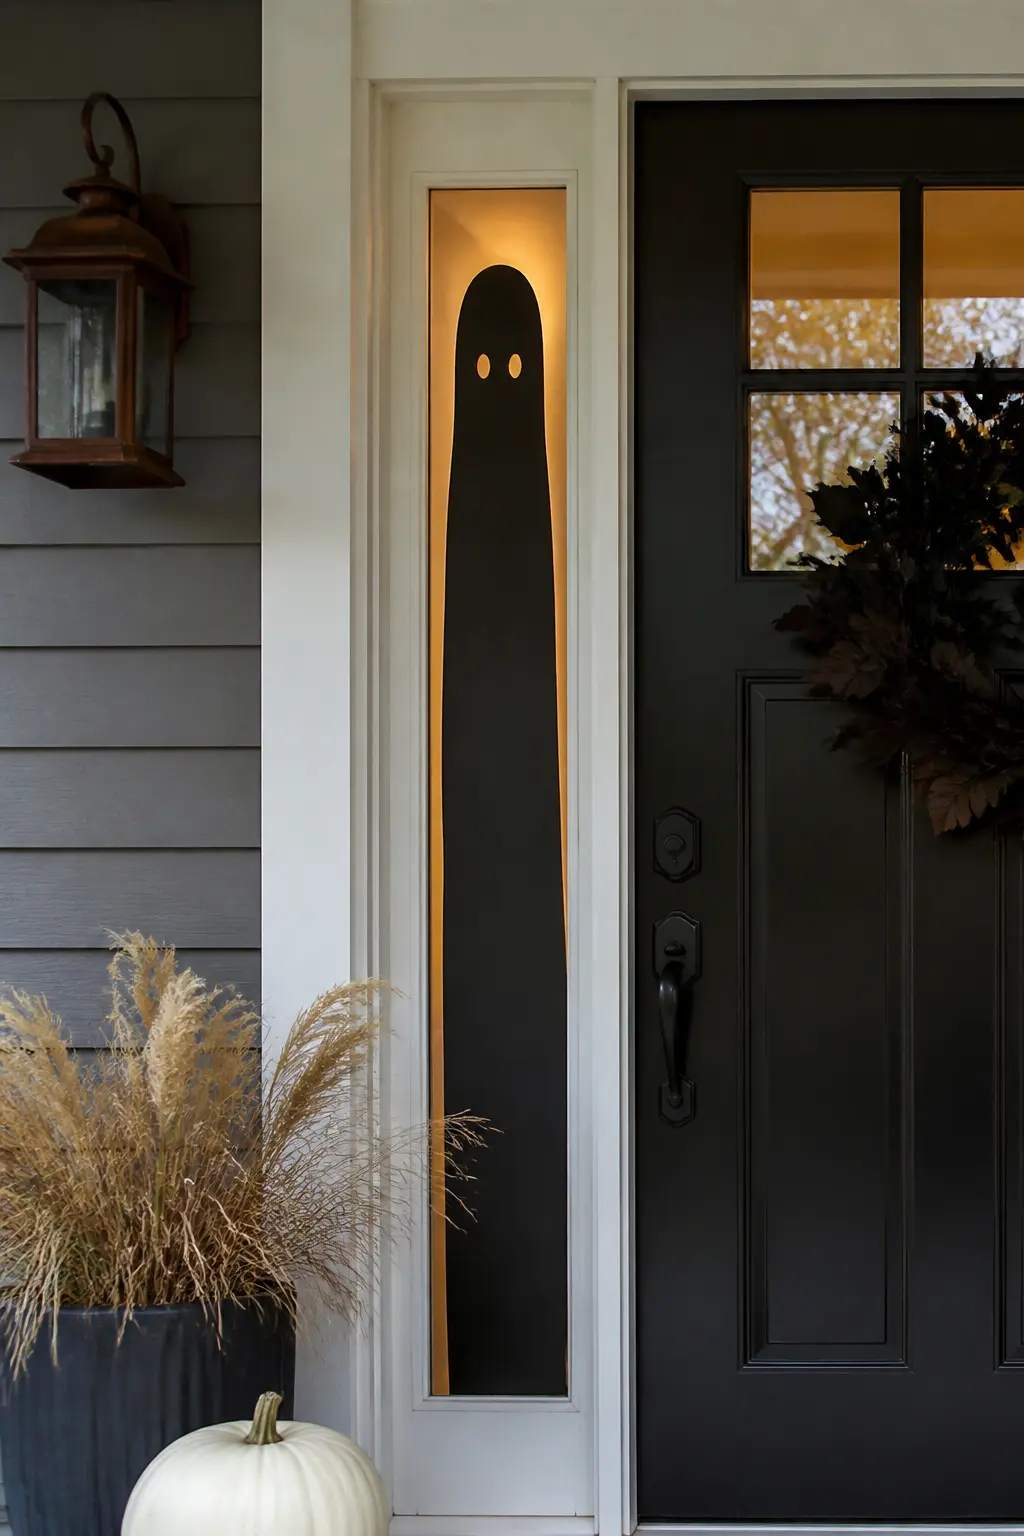
Tall Narrow Ghost in a Sidelight
A classic ghost shape, the rounded head with trailing hem, cut tall and thin to fit a narrow sidelight window beside a front door. The ghost should nearly touch the top and bottom of the pane.
Two small black dot eyes, punched with a hole punch, are all the detail needed. The shape at full pane height in a narrow window looks weirdly lifelike in scale, because the proportions match a standing figure.
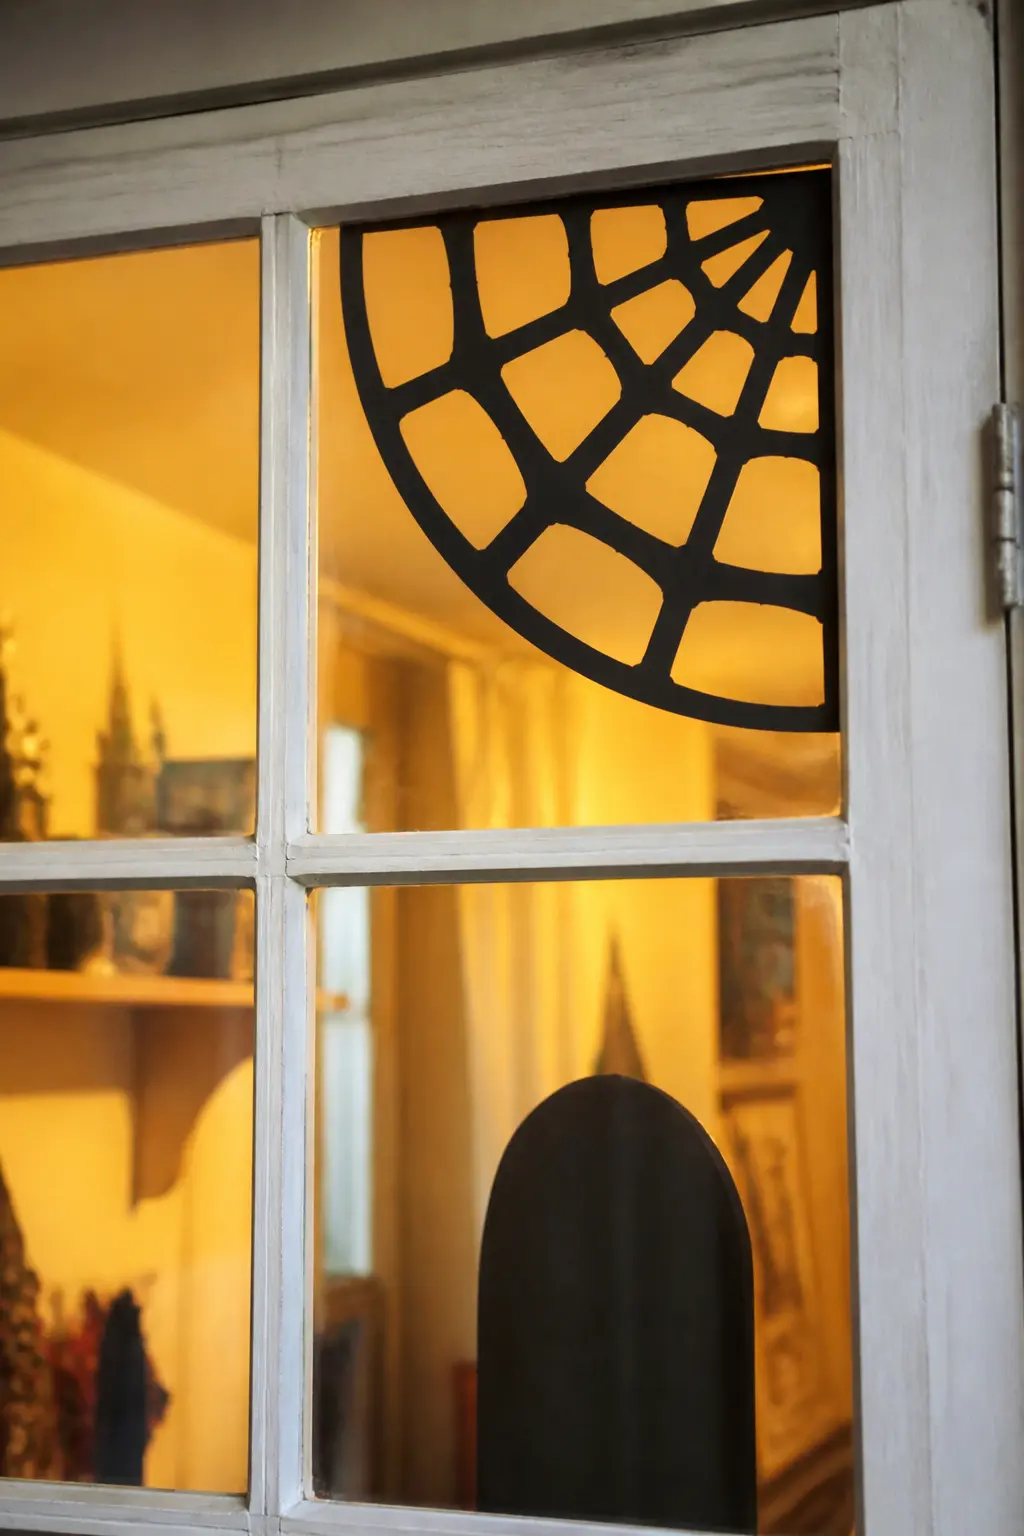
Spider Web in a Corner Pane
Cut a quarter-circle web shape to fit exactly into one corner pane of a multi-pane window. The web radiates from the corner, with concentric arcs cut away so light comes through. The web stays in one pane only and leaves the rest of the window clear.
This works in a period house with many small panes. One decorated corner pane surrounded by clear glass looks more deliberate than a window covered entirely in black.
🛍 Shopping guide
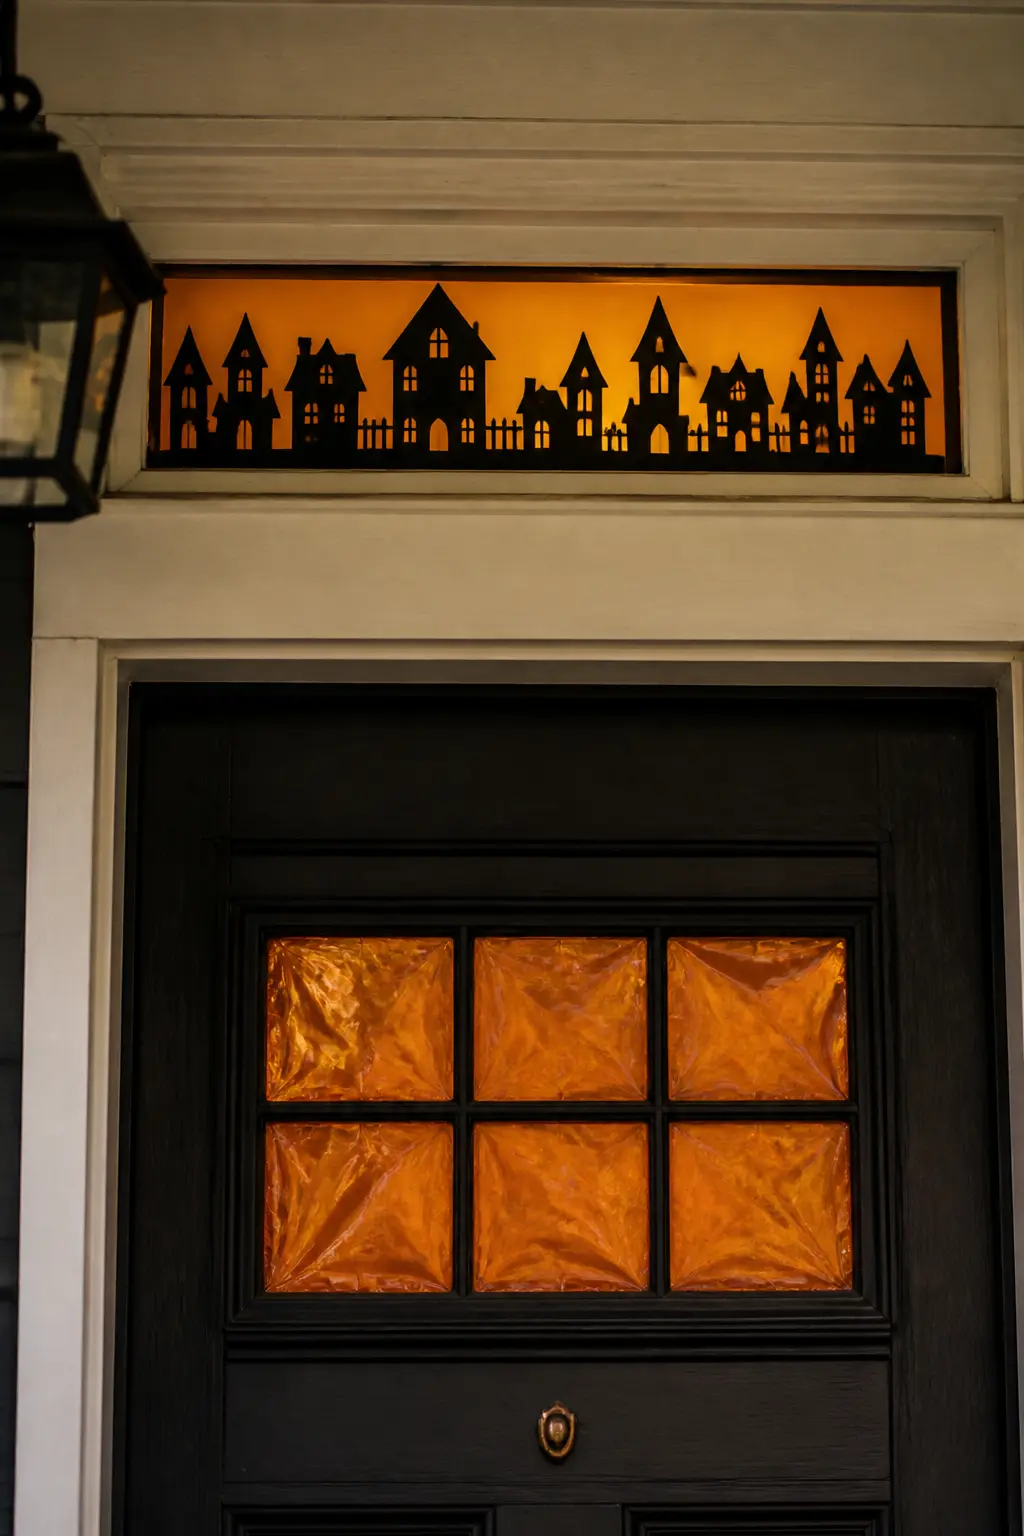
Haunted House Profile on a Transom
A transom window above a door is the perfect width for a full haunted house profile: peaked roof, attic window, widow’s walk, tall chimneys. Cut the skyline of the house to fit the transom width exactly, leaving only the upper silhouette edge detailed.
Back it with orange cellophane so the amber glow reads from outside even when the hall light is on. The transom frame acts as the ground line. The house rises up into the dark above the door.
🛍 Shopping guide
Frequently Asked Questions
What is the best material for DIY Halloween window silhouettes?
Black foam board (3mm to 5mm) is the most forgiving: it cuts cleanly, stands on its own, and holds its shape overnight. Black cardstock at 270gsm to 300gsm works for flat taped designs. Black adhesive vinyl is best if you want the shape to stick directly to the glass and peel off without residue.
How do you keep silhouettes from falling off the window?
Use removable adhesive putty or clear suction cup hooks for shapes hung on glass. For shapes taped to the frame rather than the glass, repositionable tape works well. Avoid permanent tape on painted frames: it strips paint when you remove it.
What light source works best behind window silhouettes?
A warm amber or orange bulb placed close to the glass gives the most dramatic result. Fairy lights work for small scenes along the sill. Avoid cool white LEDs: they make the backlight look clinical rather than atmospheric. A flickering LED bulb adds movement without any additional effort.
Can you use a Cricut or cutting machine for these silhouettes?
A cutting machine handles any design in cardstock or adhesive vinyl and removes the need for a craft knife entirely. Scale the design to match your window pane before cutting. For foam board over 3mm, a craft knife is still necessary: cutting machines do not handle thick foam board well.
How far in advance can you put up window silhouettes?
Cardstock and foam board silhouettes can go up a week before Halloween without any damage, provided the room behind them does not get very damp or hot. Adhesive vinyl can stay on clean glass for several weeks and peels off without residue when you are ready to take it down.
Do window silhouettes work in a well-lit room?
They work best when the light is concentrated behind the silhouette rather than spread across the whole room. A lamp placed close to the glass, pointed at the black shape, gives a strong glow through the cutouts even if the rest of the room is lit normally. For designs that rely on darkness, a blackout curtain behind the shape and a single lamp in front of the glass is the most reliable setup.
15 outdoor Halloween party games for your backyard bash — active, printable, and spooky. Print the
Halloween activities for kids that keep hands busy: 16 free printables to cut, colour and count, plu
31 wickedly fun Halloween party games for every age — from trending 2026 formats to beloved classi
Leave a Reply