

Halloween paper crafts are the one category of holiday decorating that genuinely costs almost nothing. Black and orange cardstock, a pair of scissors, a glue stick: that is the entire supply list for most of what follows. No Cricut, no paint, no hot-glue gun warming up on your counter.
Every idea here works with paper you can buy at any supermarket or office-supply store. The techniques are cutting, folding, layering, and weaving, and nothing requires more than thirty minutes of focused attention. The results look deliberate rather than desperate, which is the whole point.
The 17 crafts below are grouped by where they live in the room: on walls, in windows, at the table, and hanging from above. Pick one section or raid all four. Either way, the house looks done before the first guest rings the bell. If you want games to run alongside the decor, 30 Unforgettable Halloween Party Ideas and Games and 20 No-Cringe Adult Halloween Party Games are worth a look.
This post contains affiliate links. If you buy through them, I may earn a small commission at no extra cost to you.
Wall and Door Displays
Walls are the easiest win in any room. Nothing needs a nail, nothing needs a frame, and removable adhesive strips take the whole arrangement down in sixty seconds after the party. These four projects treat the wall as a canvas rather than a surface to avoid touching.
Work in odd numbers when you cluster shapes. Three sizes of bat or three cat poses read as a composition rather than a random scatter, and that difference is visible from across the room.
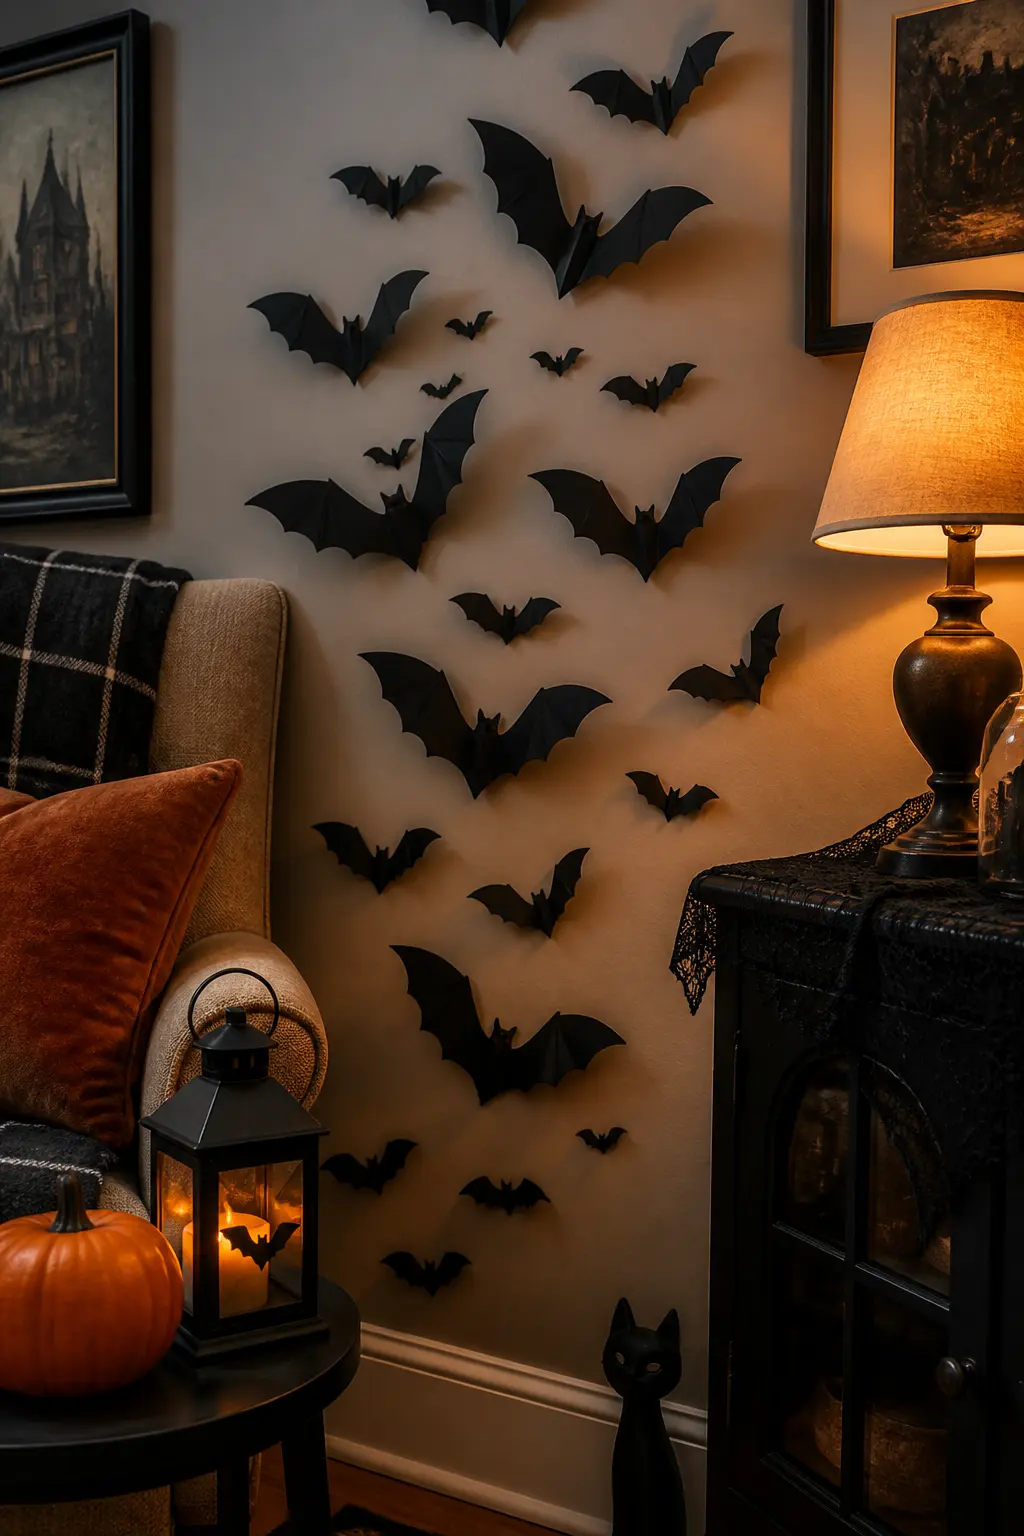
Layered Bat Wall Cluster
Cut bats in three sizes from black cardstock, using a simple template traced and repeated. The template can be a freehand sketch: bats are forgiving shapes. Vary the wingspan from roughly three inches to eight inches so the cluster has visual rhythm rather than a repetitive grid.
Curve each wing slightly by bending it backward over a finger before mounting. That single step lifts the bats away from flat-cut silhouettes and into something that casts a small shadow on the wall behind them.
Arrange them climbing upward from a corner or along a staircase wall, largest at the bottom and smallest near the ceiling. Removable adhesive strips hold each bat securely and release without tearing paint.
🛍 Shopping guide
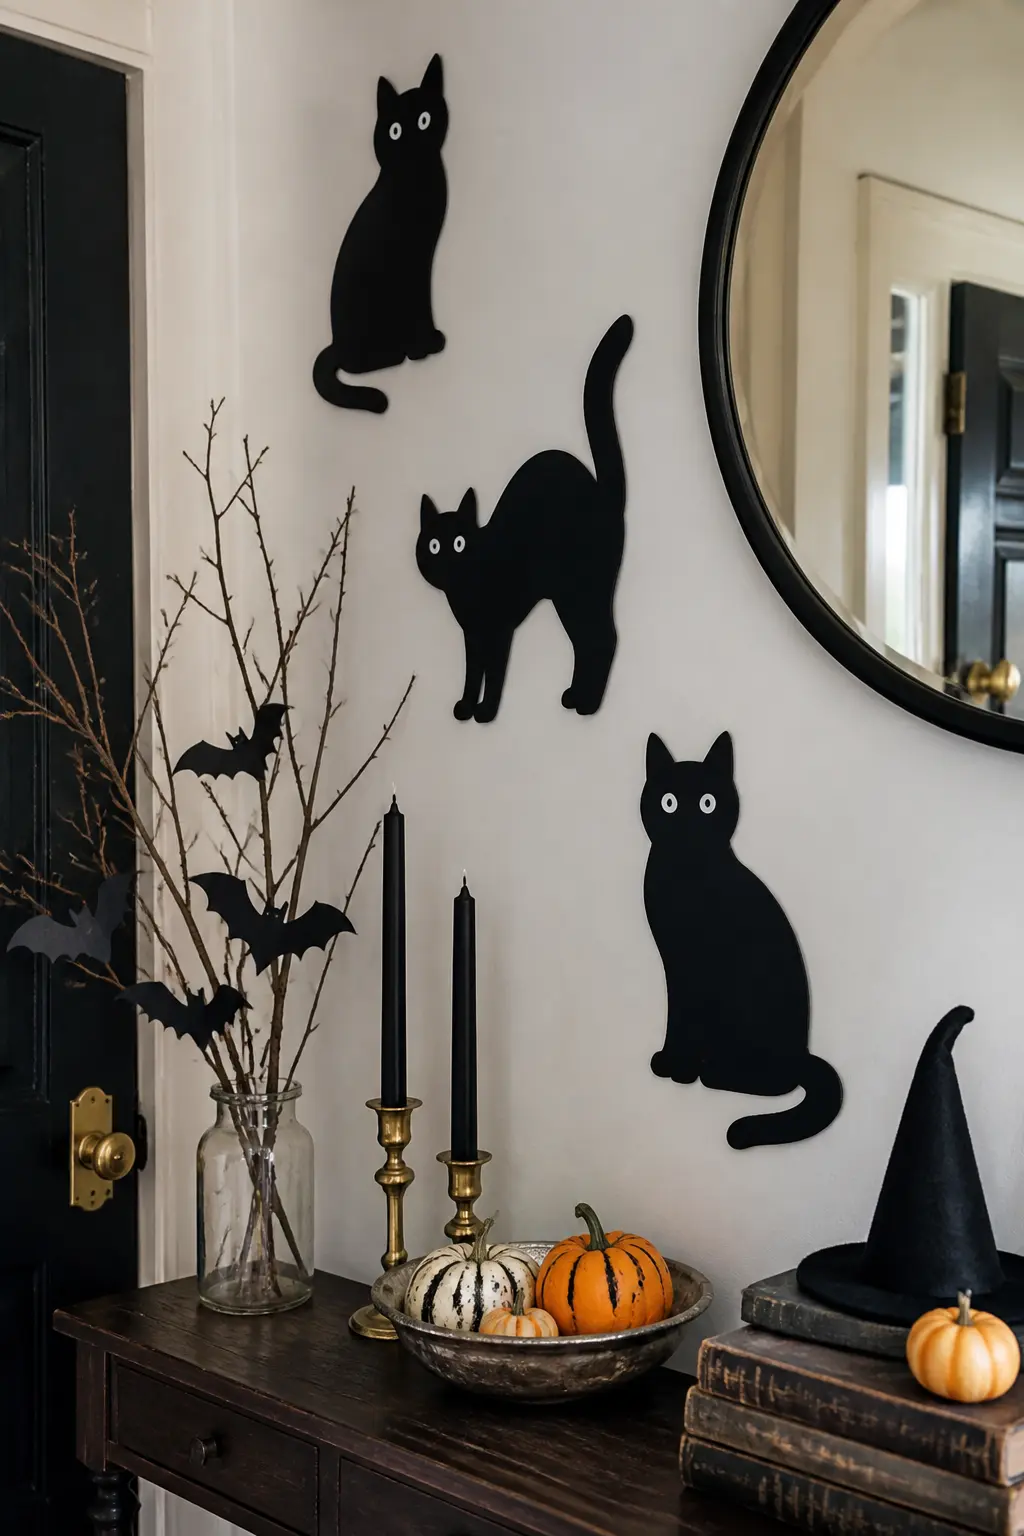
Cat Silhouette Wall Set
Cut three cat silhouettes from black cardstock, each in a different pose: seated, arched back, and mid-stride. A printed template helps with the arched-back pose, which has the most interior detail. The other two are simple enough to cut freehand after one practice shape.
Cut tiny oval eyes from white paper and glue them onto each cat. That one addition catches the eye immediately and keeps the set from reading as a flat graphic repeat.
Mount the three cats at staggered heights across a wall or along a baseboard so they appear to be moving through the room. Removable adhesive holds them flat and leaves no mark when the season ends.
🛍 Shopping guide
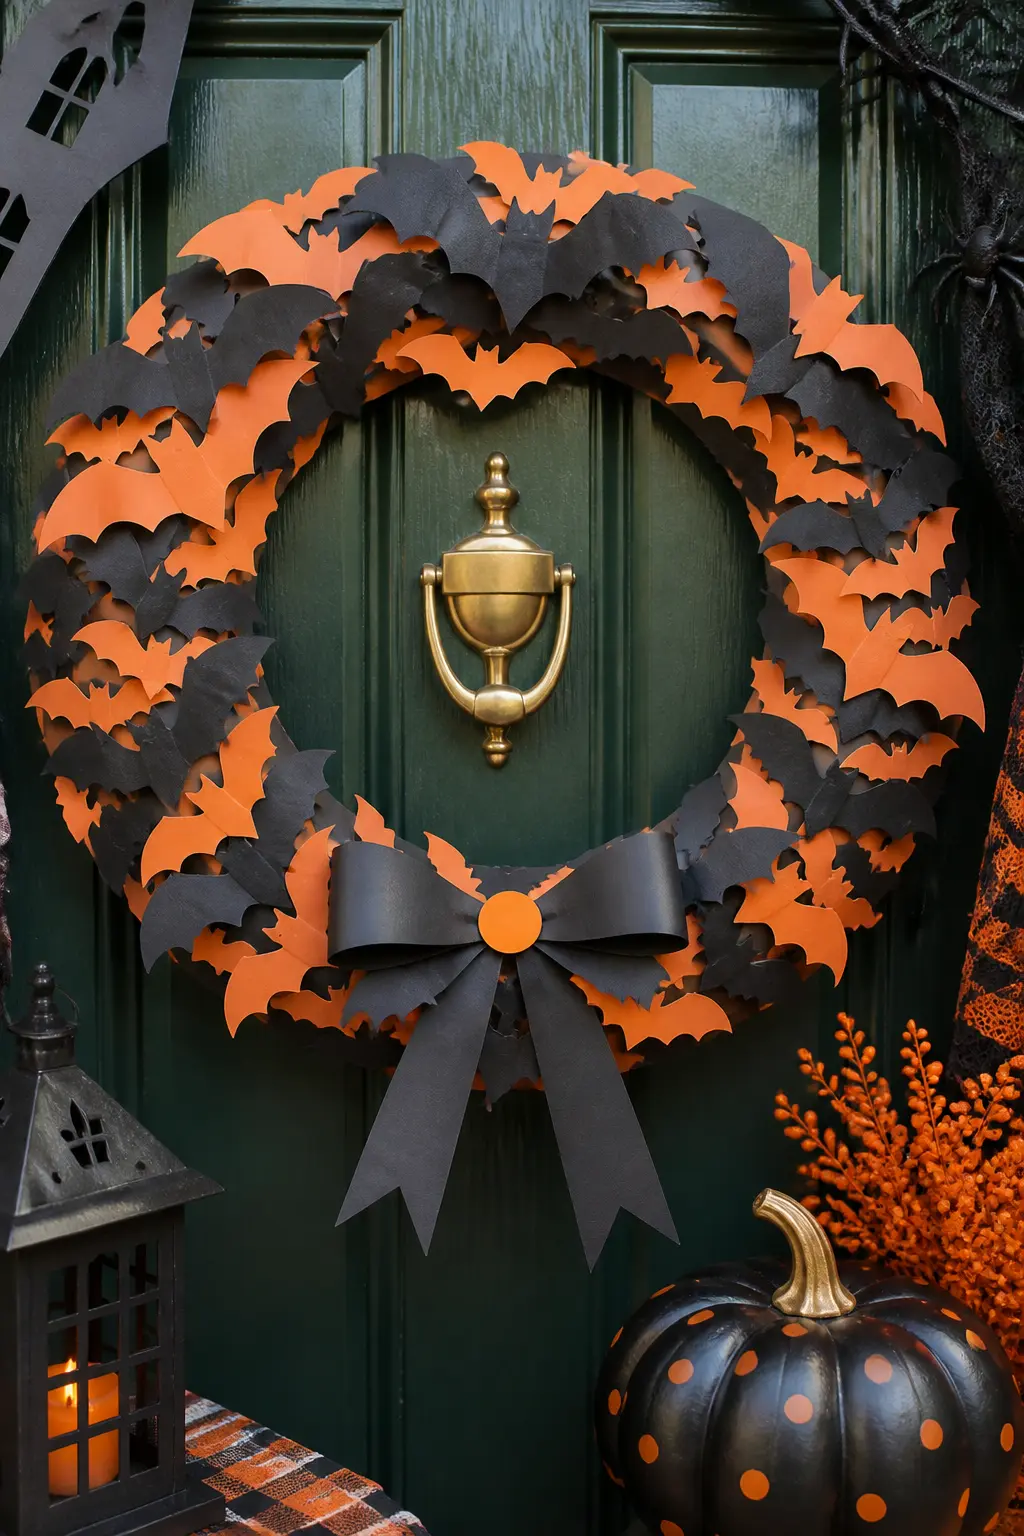
Paper Wreath Ring
Start with a cardboard ring cut from a cereal box or bought as a plain wreath form. Cut bat or simple leaf shapes from orange and black cardstock, keeping them roughly the same size so they layer evenly. Irregular cutting is fine: the overlap hides the edges.
Glue the shapes overlapping around the ring, alternating colors and turning each piece at a slightly different angle. Work around the whole ring before going back to fill gaps. That approach avoids the patchy look that comes from finishing one section at a time.
Finish with a folded paper bow in black or orange. A paper bow holds its shape better than ribbon on a flat wreath and costs nothing extra.
Window Projects
Windows are free light boxes. Anything translucent or cut through will glow when backlit by daylight or a streetlamp, and tape peels off glass without a trace. These projects are built specifically to use that light rather than fight it.
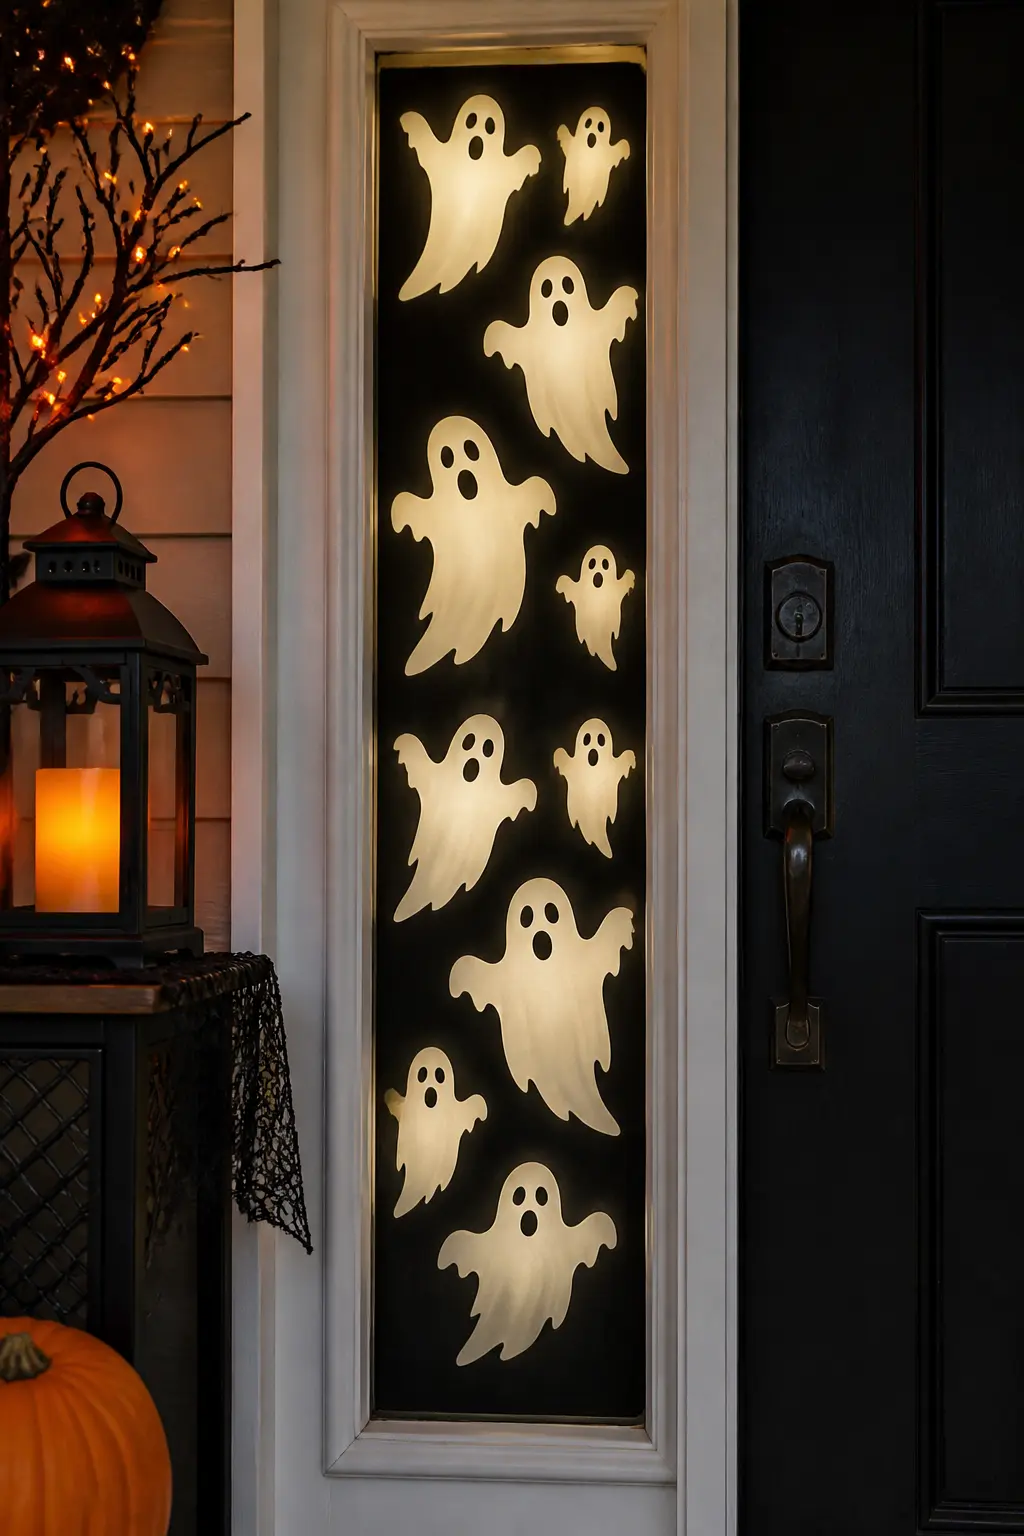
Ghost Silhouette Window Panel
Cut five or six ghost shapes from white cardstock, varying the size from about four inches tall to eight inches. The ghost outline is a rounded dome with a wavy hem: no internal detail needed. Cut them all before you start assembling so you can arrange them across the backing sheet first.
Glue the ghosts onto a sheet of black paper sized to fit your window pane. Space them unevenly rather than in a row. The black backing blocks the view through that pane entirely, so choose a window where privacy is welcome, or use a smaller pane such as a front-door sidelight.
Tape the panel to the glass with painter’s tape. Daylight behind it will silhouette the ghosts from outside, and interior light will show them clearly from inside at night. One panel does two jobs at once.
🛍 Shopping guide
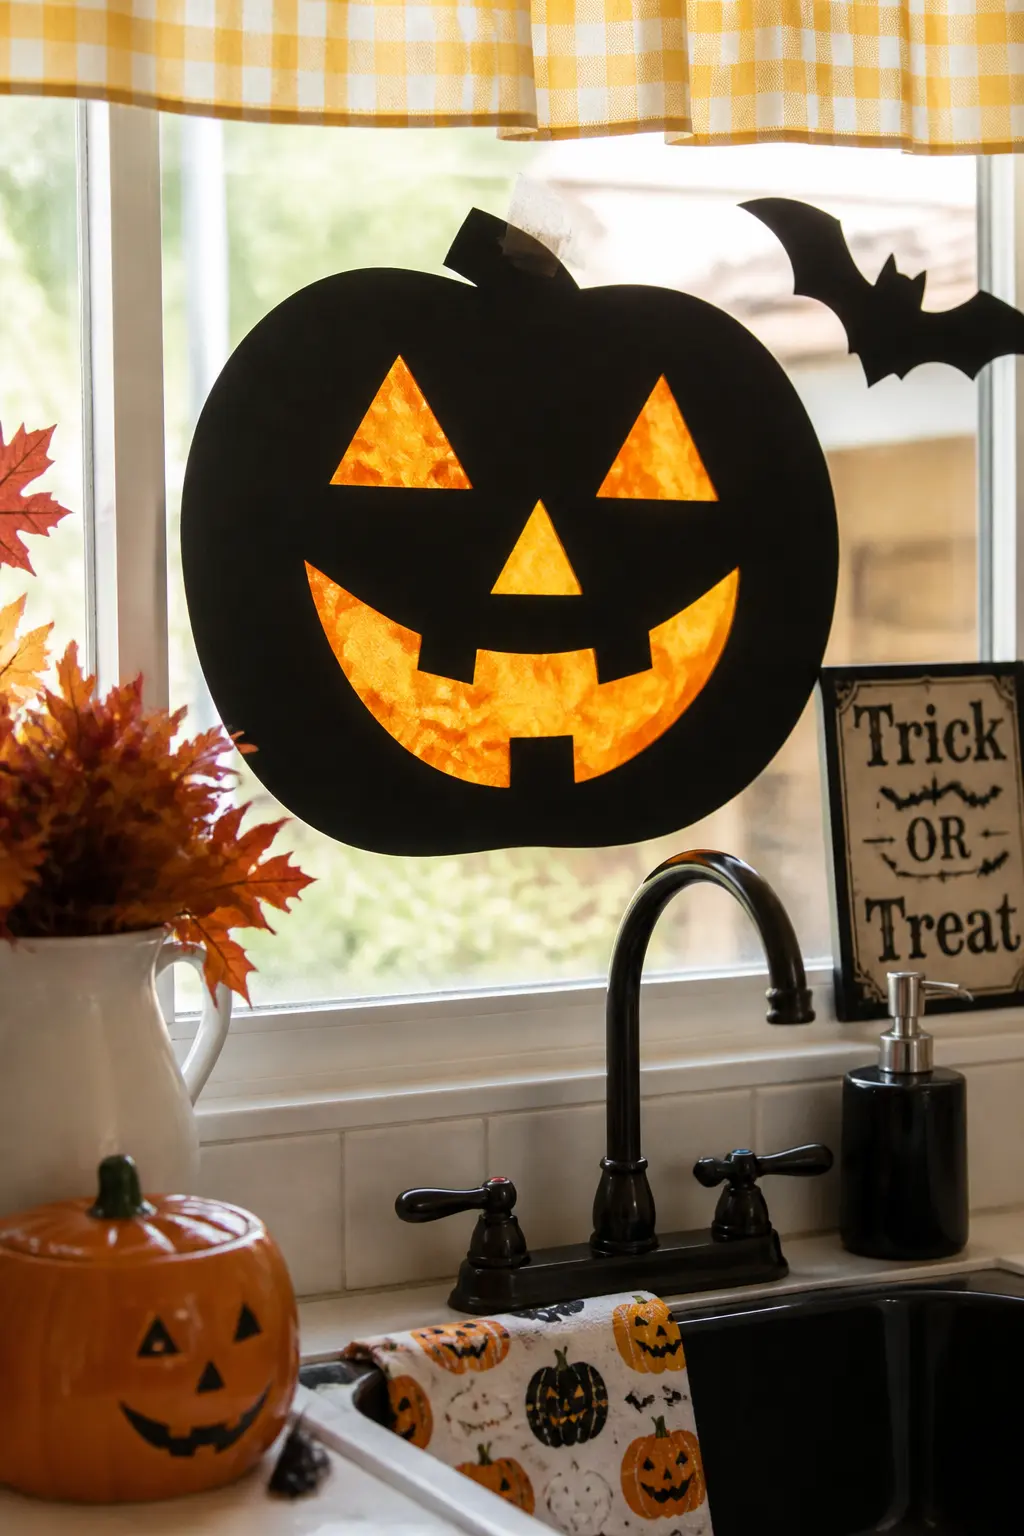
Tissue Stained Glass Pumpkin
Draw a pumpkin outline on black cardstock, then draw the jack-o-lantern face inside it: triangular eyes, a nose, and a jagged mouth. Cut the face openings out with a craft knife, leaving the black cardstock as a frame. The outer pumpkin shape does not need to be perfectly symmetrical: slight irregularity reads as handmade rather than sloppy.
Cut pieces of orange tissue paper slightly larger than each opening and glue them flat against the back of the cardstock frame with a glue stick. Hold each piece up to the light before gluing to check the coverage. Two layers of tissue deepen the color noticeably if you want more saturation.
Tape the finished pumpkin to a window with painter’s tape. At night with the room light on, the tissue glows amber from outside. During the day, sunlight does the same from inside.
🛍 Shopping guide
Spider Web Paper Cutout
Fold a square of black cardstock in half, then in half again, then diagonally into a triangle. The more folds, the more intricate the web, but four folds is the practical limit for cardstock without a heavy crease tool. Sketch the web pattern lightly in pencil along the folded edges: curved arcs for the rings, small notches for the spoke lines.
Cut along the pencil lines with small sharp scissors, keeping the tip angled toward the fold so the cuts stay clean. Unfold carefully and flatten under a heavy book for ten minutes. The result is a symmetrical web with a lacy open pattern.
Tape it to a window or mount it flat on a wall. Backlit in a window, the cut areas glow through and the web reads as a negative space. On a wall, the shadow it casts adds a second layer of pattern.
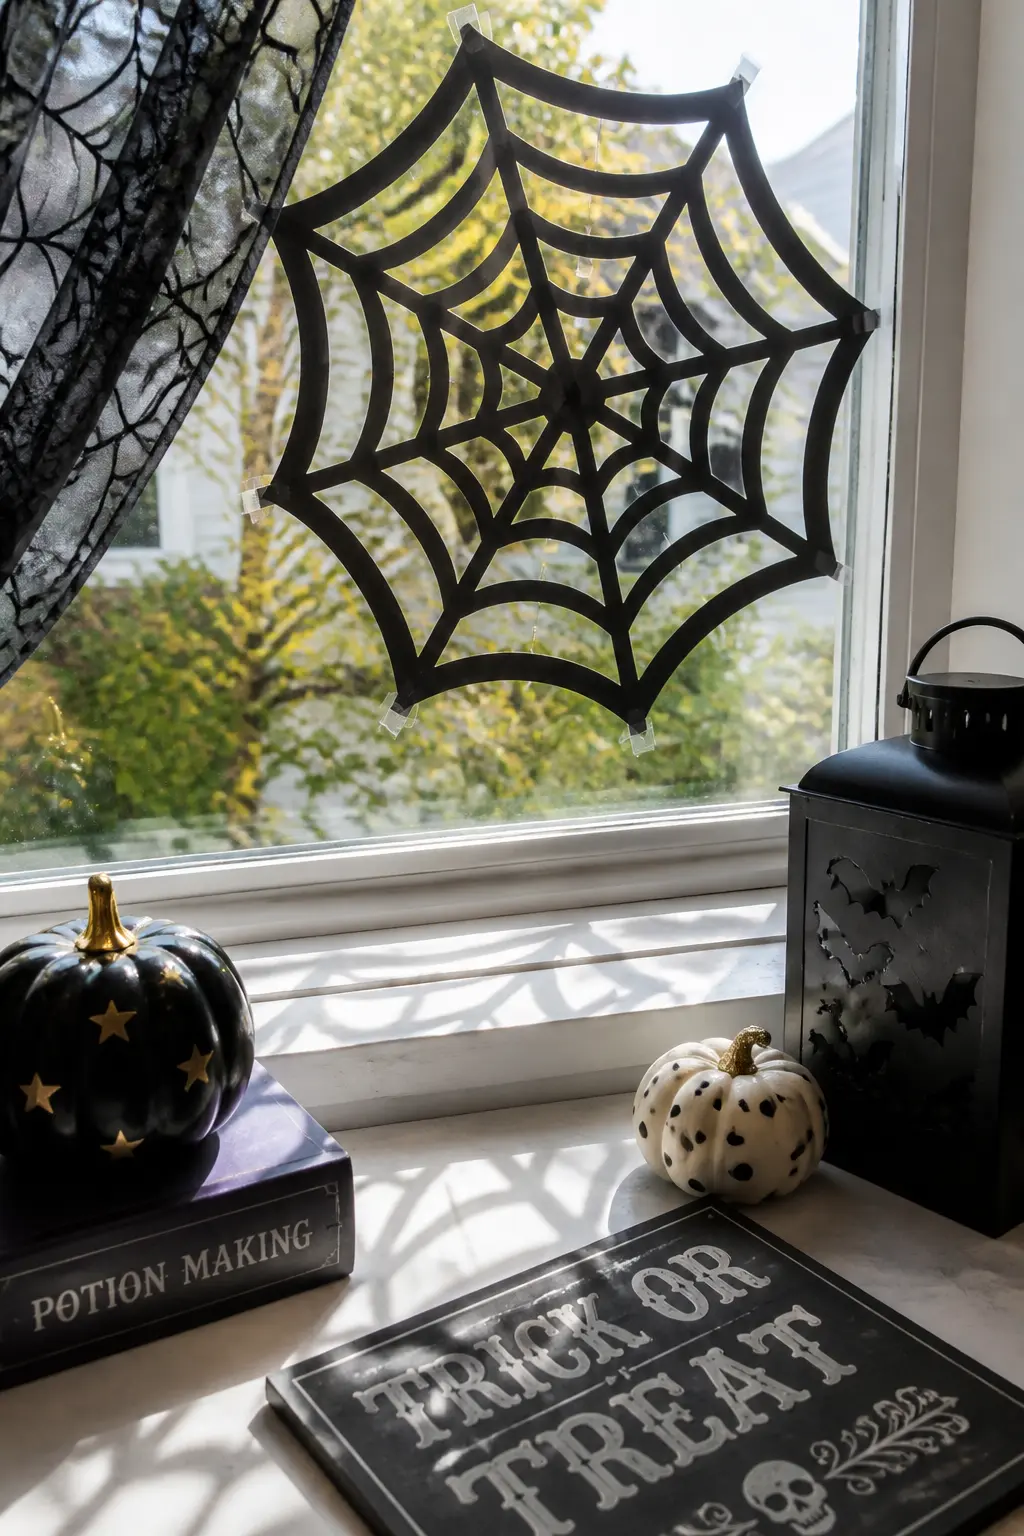
Table and Surface Crafts
The table is where guests actually sit, so it earns a few extra minutes of effort. Both projects here are flat, which means they store in a folder and come out again next year without any reconstruction. That is a feature, not an afterthought.
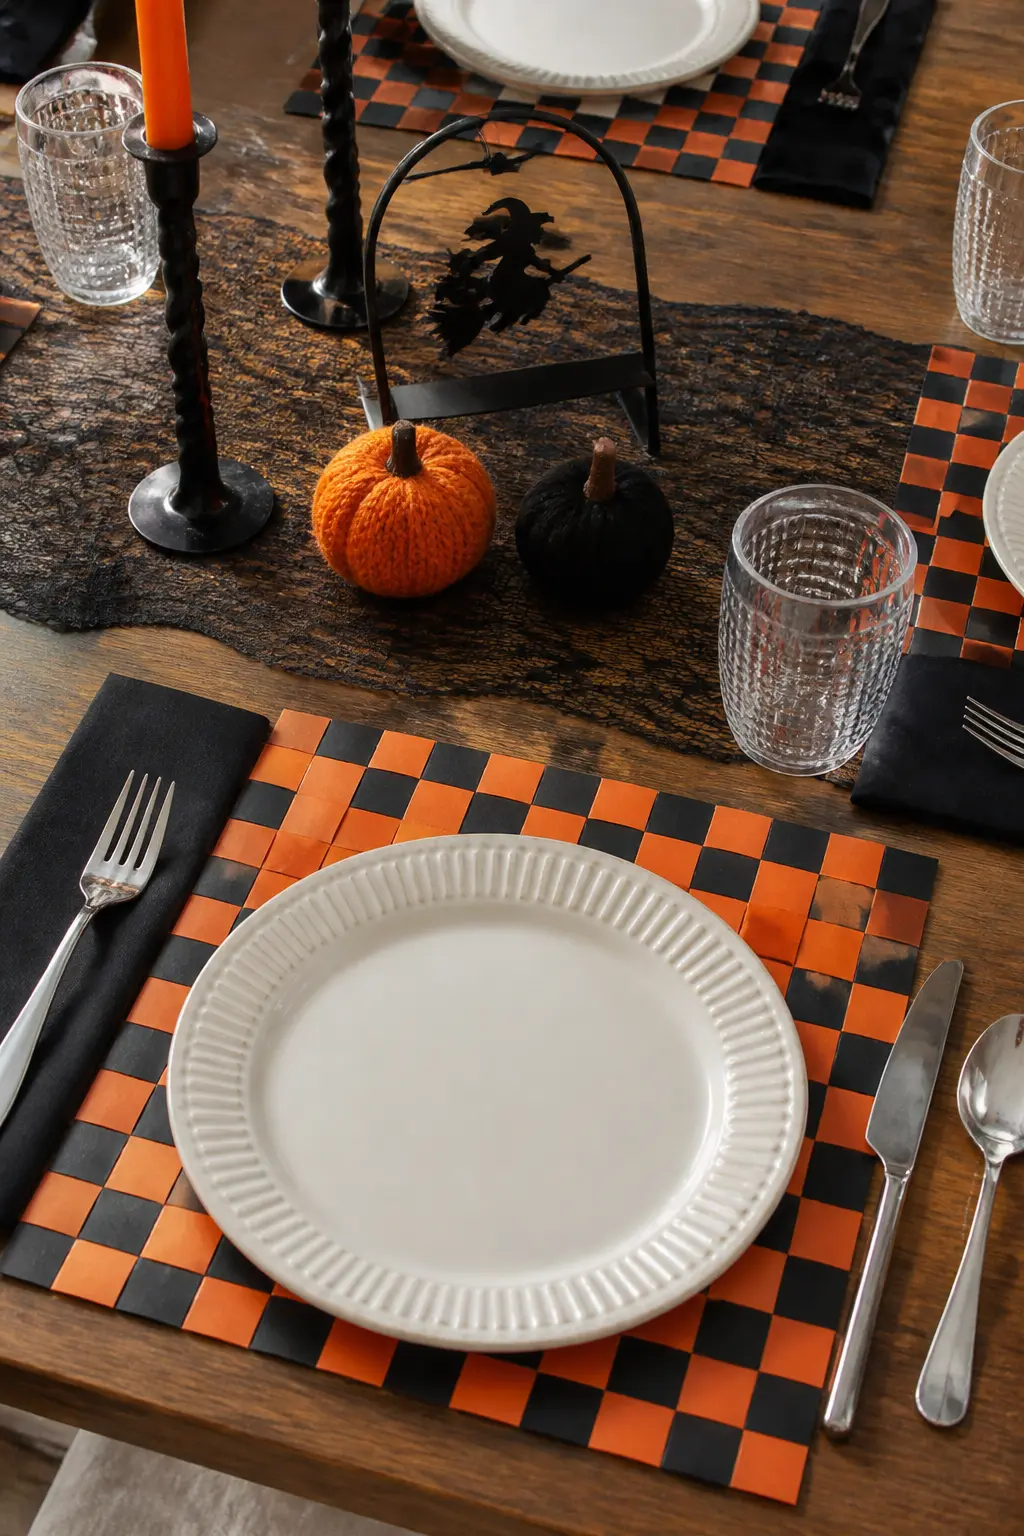
Woven Paper Placemats
Cut parallel slits lengthwise across an orange cardstock sheet, leaving about an inch uncut at each end so the sheet holds together as a loom. The slits should be roughly half an inch apart: close enough to weave firmly, wide enough that the strips do not tear under tension.
Cut black cardstock into strips of the same width and weave them through the slits, alternating over and under on each pass and shifting the pattern one slot for each new strip. The checkerboard that emerges is tight and flat with no glue until the very end.
Fold the short ends of the woven strips over the edge of the orange sheet and glue them down. That neat edge finish is what separates this from a classroom project. Each mat takes about fifteen minutes and lasts the whole season stored flat in a folder.
🛍 Shopping guide
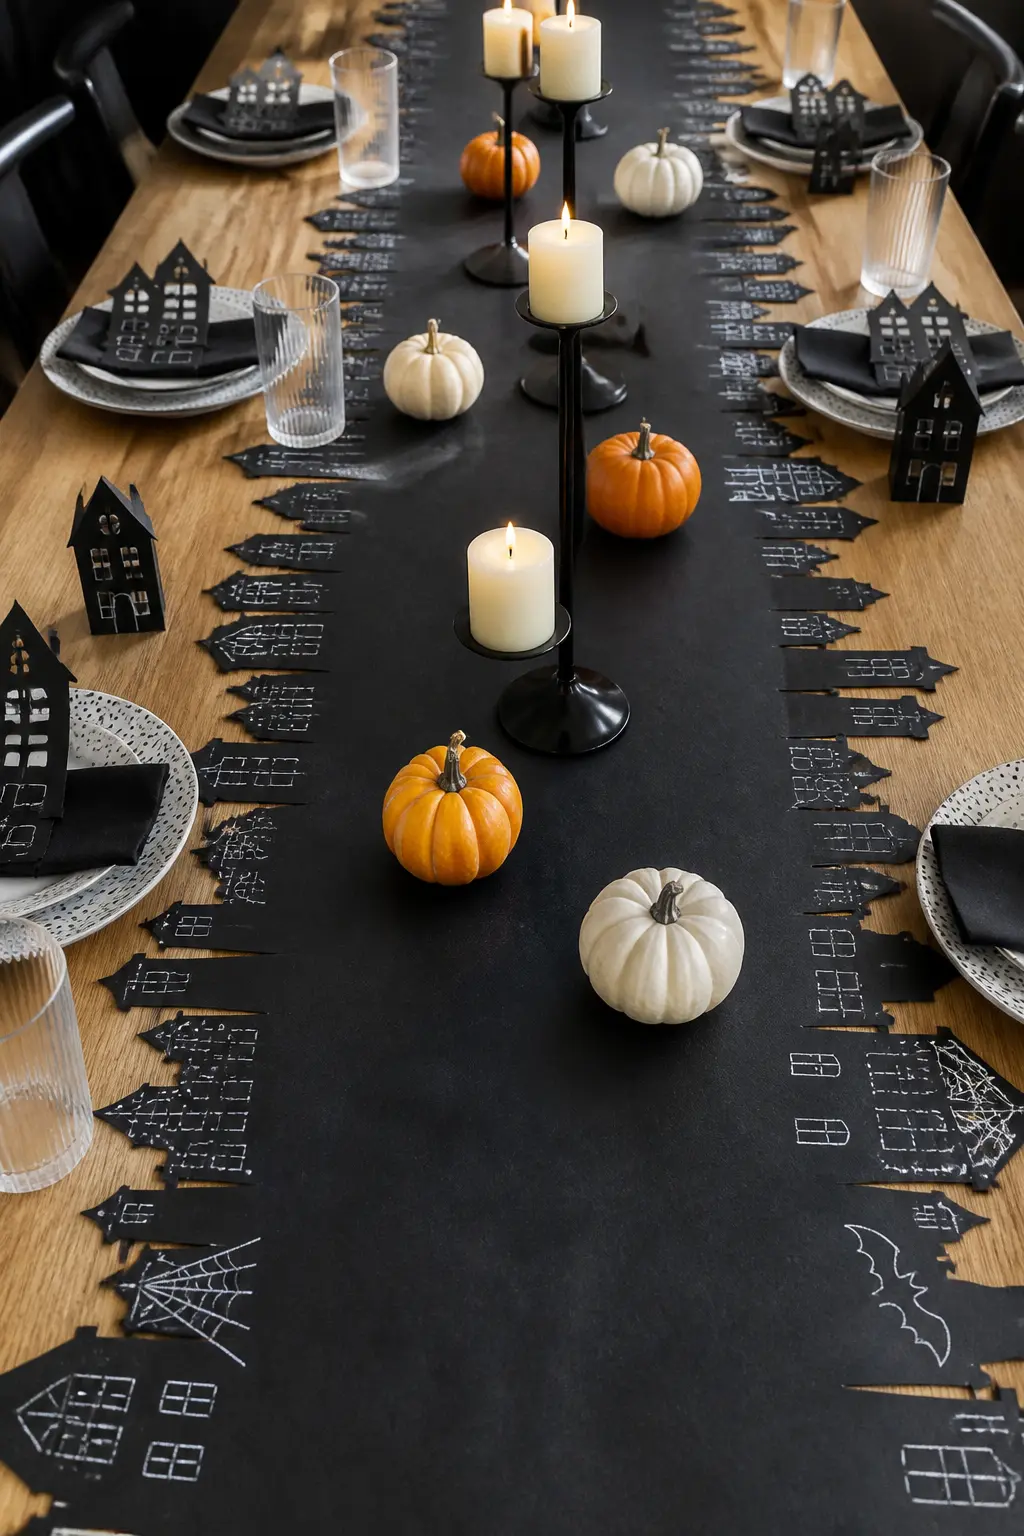
Silhouette Table Runner
Cut a length of black paper roll to match your table, adding two inches at each end to allow for overhang. Fold the paper in half lengthwise so you cut the silhouette skyline through both layers at once and get a mirrored edge. Sketch a skyline freehand: haunted house, bare trees, a fence, a few tombstones. The shapes do not need to be exact.
Cut along the sketch with scissors, then unfold the paper flat. The mirrored cut gives a finished bottom edge on both sides without any extra work. Lay it down the center of the table with the cut edge facing the guests.
Draw details directly on the runner with a white chalk marker: window frames, cracks in gravestones, branch texture on the trees. The chalk marker lifts off the black paper cleanly and gives a hand-drawn quality that printed runners cannot replicate.
Garlands and Hanging Decor
Garlands and mobiles do something walls cannot: they move. Even a small current of air from an open door sets paper shapes swaying, and that subtle motion reads as atmosphere rather than decoration. String, twine, or an embroidery hoop are the only hardware any of these need.
For a party, anchor garlands at both ends so they do not swing into candles or food. For everyday display, let them drape loosely and move freely.
Paper Chain Garland
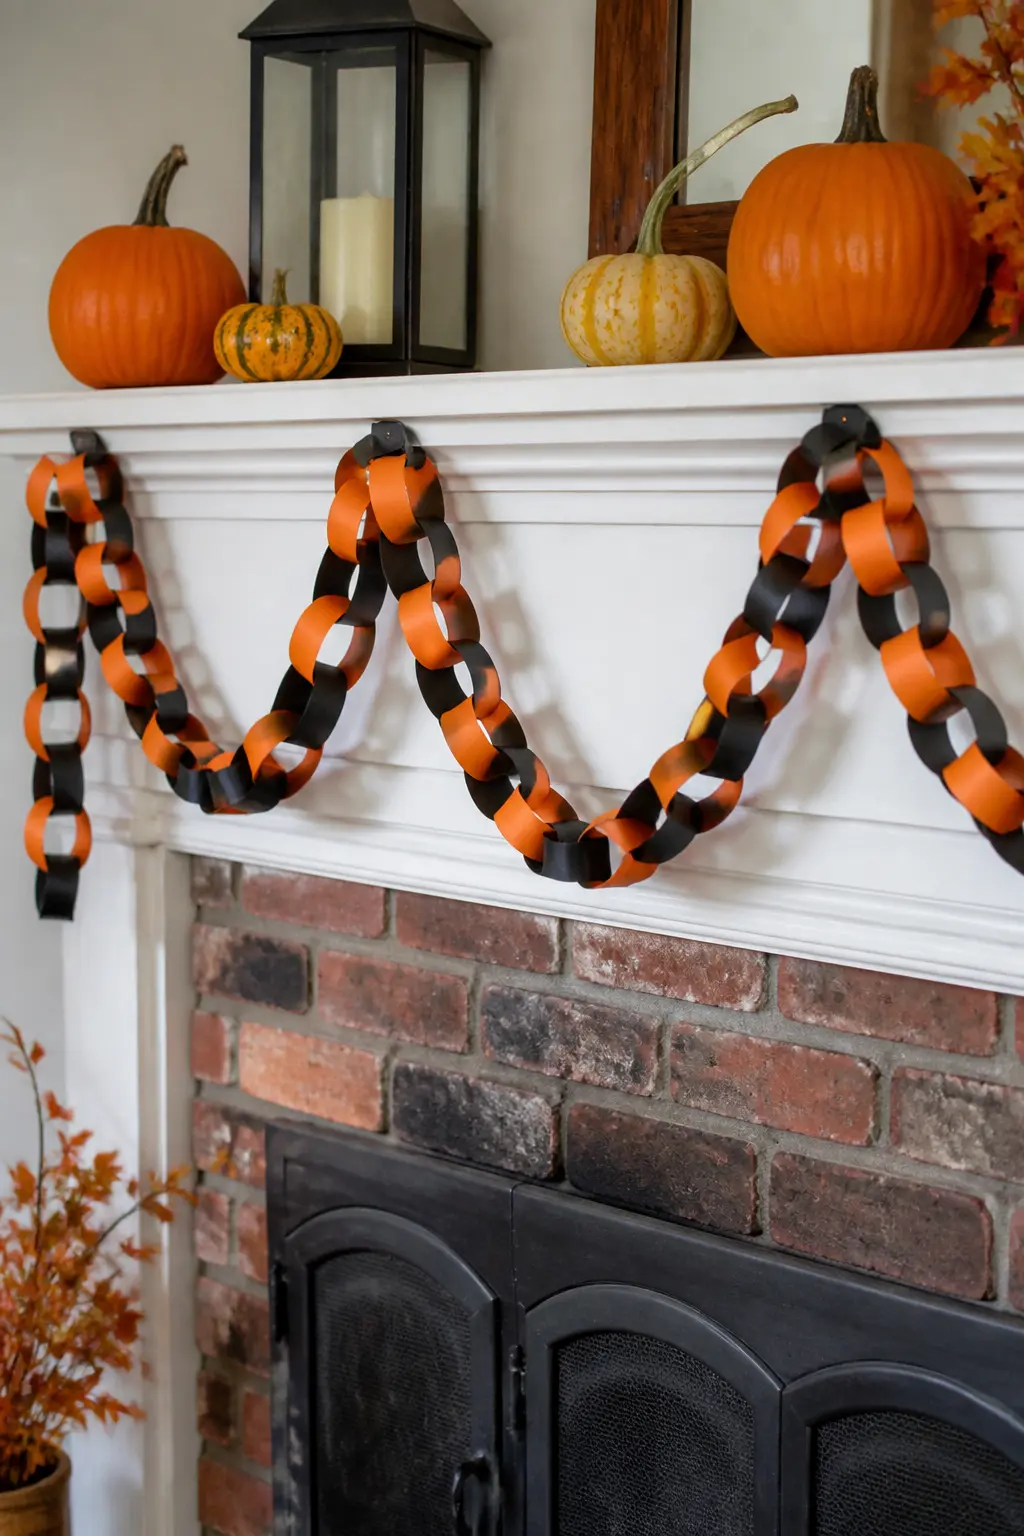
Cut orange and black paper into strips roughly an inch wide and six inches long. The strip width determines how chunky the chain reads: narrower strips make a delicate garland, wider ones make a bold one. Cut all the strips first so the linking goes quickly.
Loop the first strip into a ring and glue the ends. Thread the second strip through the ring before closing it the same way, alternating colors as you go. A finished chain of sixty rings takes about twenty minutes and spans roughly five feet.
Hang the garland along a mantle, across a doorway, or draped in overlapping swags between two hooks. The weight of the paper gives it a natural drape that feels more considered than a flat taut line.
Paper Skull Garland
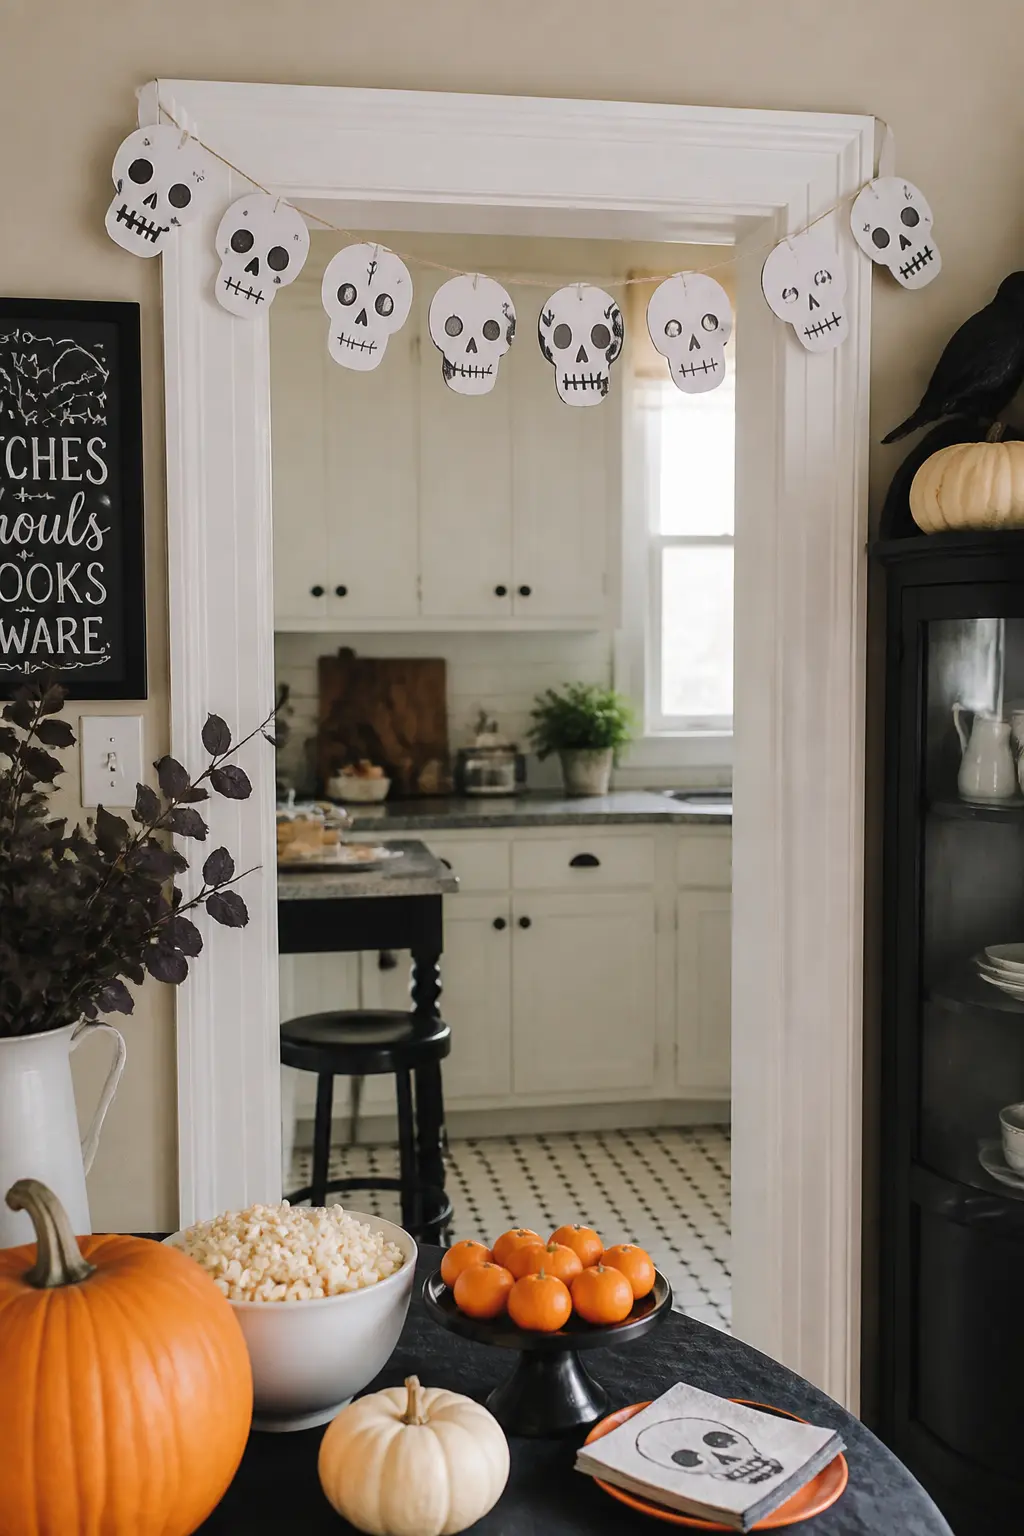
Fold several sheets of white cardstock and cut skull shapes through both layers at once so each cut produces two matching skulls. A basic skull outline is a rounded rectangle with a slightly narrowed jaw. Cut ten to fourteen skulls total so the finished garland has enough weight to drape without looking sparse.
Draw faces on each skull with a black marker: two dark oval eyes, a small triangle nose, and a wide rectangular tooth grid. Varying the expression slightly from skull to skull keeps the garland lively. Punch a small hole at the top of each skull with a hole punch.
Thread natural twine through the holes, spacing the skulls evenly. Tie a knot on each side of every skull to hold its position rather than letting them slide together. Hang the garland wherever it will catch the light.
Fringed Paper Garland
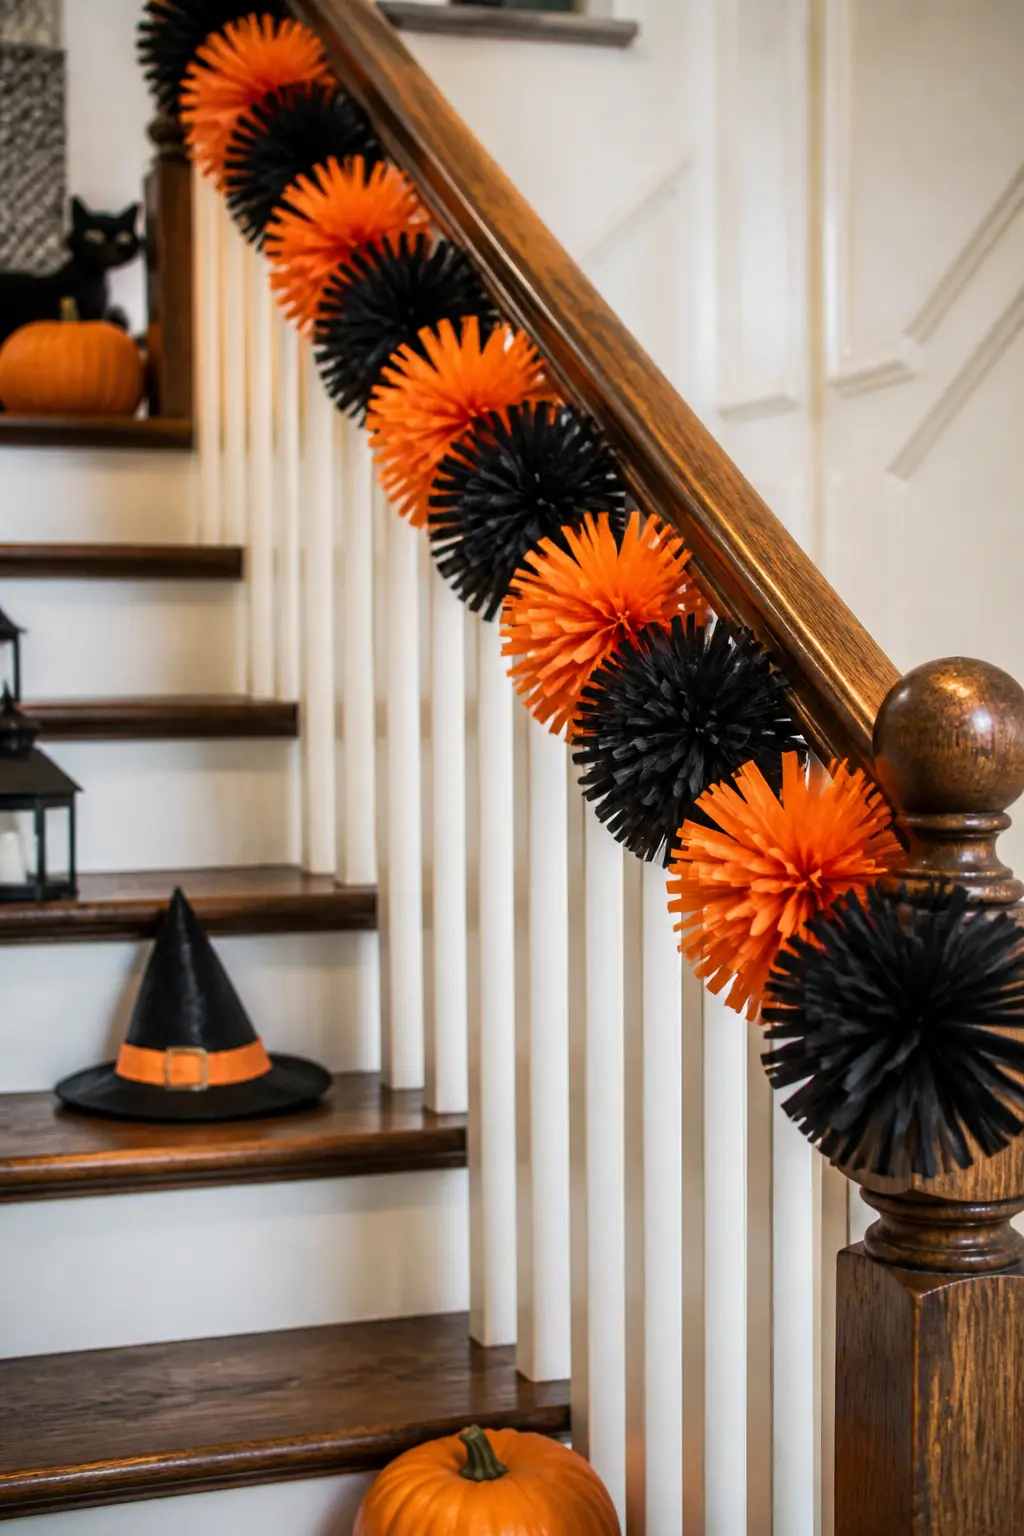
Cut paper strips about three inches wide and ten inches long from black and orange paper. Cut fringe along one long edge of each strip, stopping about an inch from the other edge so the fringe stays attached. The fringe cuts can be straight or slightly angled: angled fringe fans out more when fluffed.
Roll each strip tightly from the uncut edge and glue the outer end flat. Fluff the fringe outward with your fingers so it radiates around the roll. Each finished pom should look full, not compressed.
Attach the poms to a length of twine by tying the rolled base directly to the cord, alternating black and orange. Tie them close enough that the fringe touches. Hung above a table or along a staircase, the garland has a texture that flat-cut shapes cannot match.
Paper Ghost Mobile
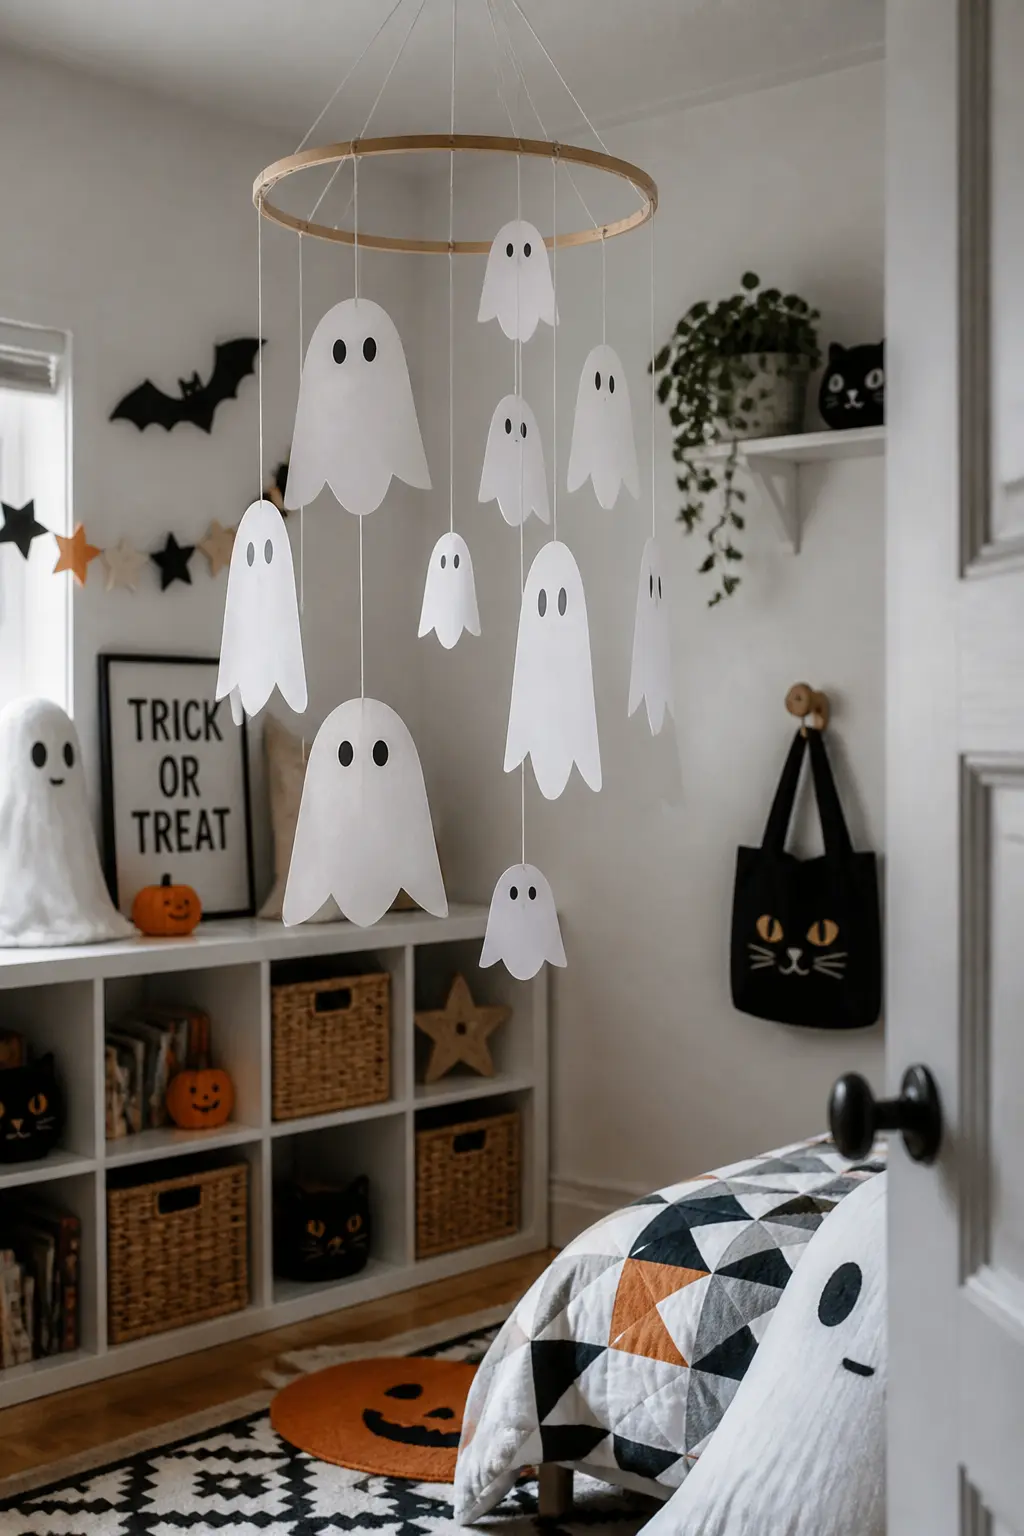
Cut eight to twelve ghost shapes from white cardstock, ranging from two inches to six inches tall. Draw a simple face on each one with a black marker: two round eyes and a small open mouth are enough. The variation in size is what makes the mobile read as a composition rather than a set of duplicates.
Tie each ghost to a length of string, knotting through a small hole punched at the top of each shape. Vary the string lengths between six and eighteen inches so the ghosts hang at different levels and create depth when viewed from the side.
Tie all the strings to an embroidery hoop at irregular intervals around the circumference. Hang the hoop from a ceiling hook with three strings tied equidistant around it so it hangs level. Any air movement sets the ghosts turning gently.
Sculptural Paper Accents
These are the pieces that sit on a shelf, a mantle, or a side table and hold their shape on their own. Rosettes, lanterns, and a curled spider all use the same basic principle: paper that has been persuaded into a three-dimensional form stays there without any armature. Cardstock is stiff enough to do that on its own.
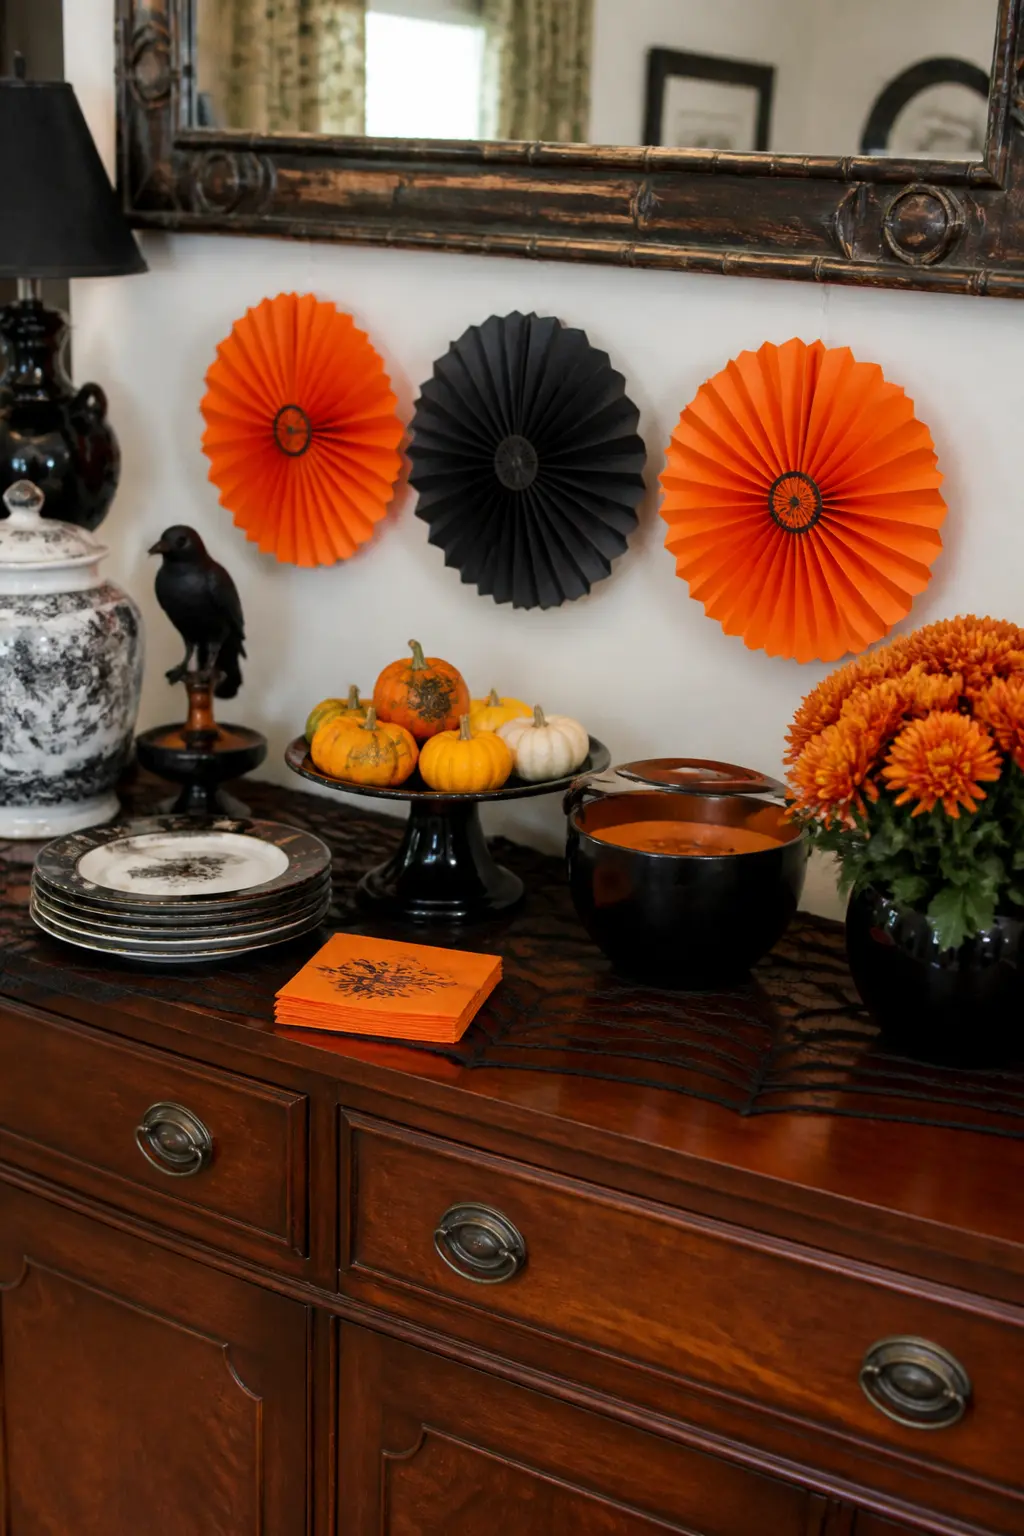
Paper Rosette Medallions
Cut a strip of cardstock roughly two inches wide and the full length of the sheet. Fold it accordion-style in half-inch pleats, keeping the folds as even as possible. Cardstock holds a crease sharply, so the pleats stay put without any tape or clips while you work.
Pinch the folded strip at its center and fan the two halves outward into a semicircle. Glue the two end pleats together to close the circle into a full rosette. Press it flat under a book for five minutes while the glue sets, then release.
Make two or three rosettes in alternating black and orange and mount them in a cluster on a wall or door. They read as graphic and intentional from across a room, and a cluster of three takes less than thirty minutes total to make.
🛍 Shopping guide
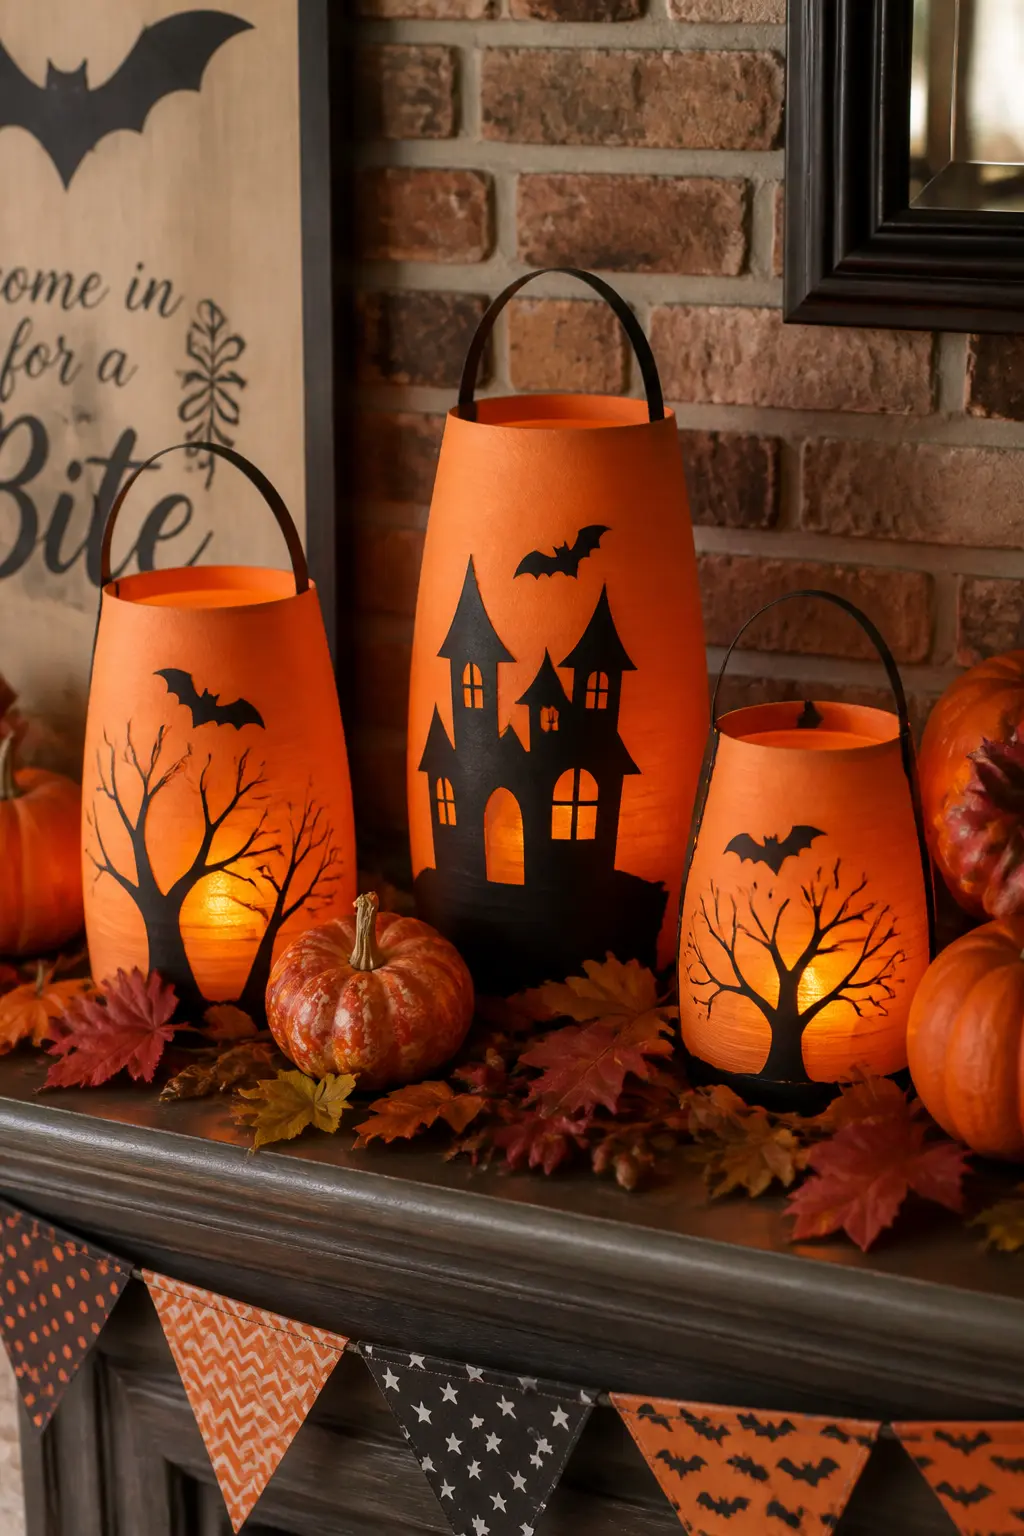
Paper Lantern Set
Fold a sheet of orange cardstock in half lengthwise. Cut slits from the folded edge toward the open edge, stopping about an inch from the open edge. Space the slits roughly three-quarters of an inch apart. The number of slits determines how much the lantern bows outward when opened.
Unfold the sheet and roll it into a cylinder with the slits running horizontally. Glue or tape the short edges together. The slits will bow outward slightly as the cylinder curves, creating the classic lantern silhouette. Add a narrow paper strip handle across the top if you plan to hang it.
Set a battery tea light inside each lantern. The orange paper gives the light a warm amber glow. Make three or five lanterns and group them at different heights on a mantle, shelf, or table surface. Never use a real candle inside paper.
🛍 Shopping guide
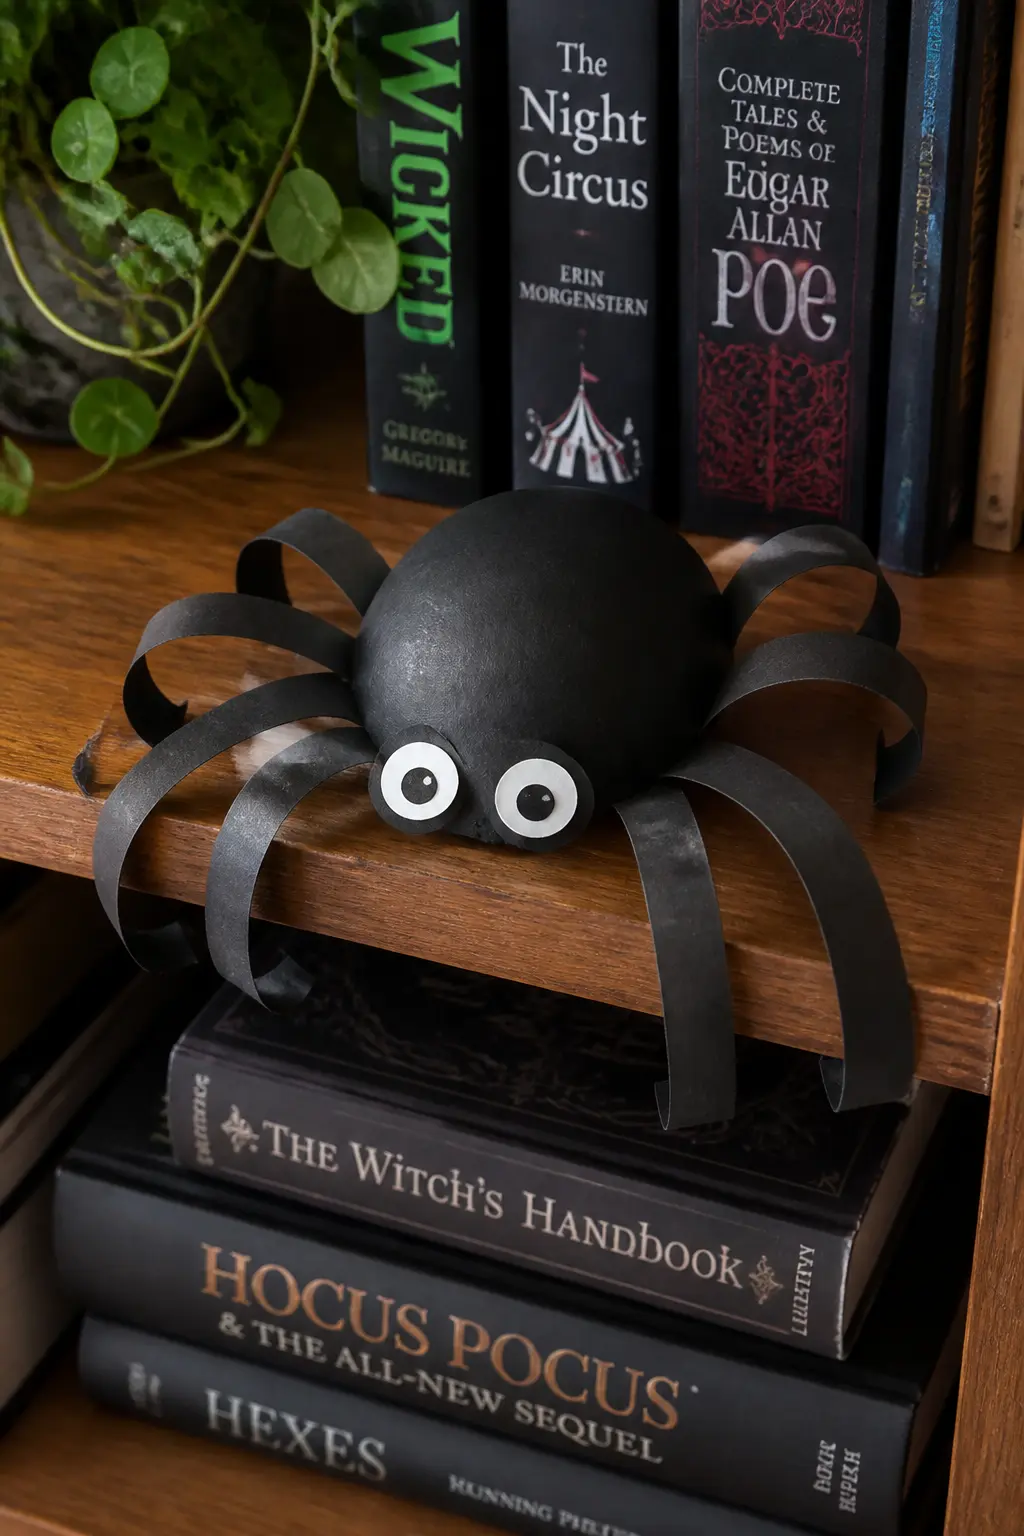
Curled Paper Spider
Cut a circle about three inches across from black cardstock for the body, and a slightly larger oval for the abdomen. Glue the oval behind the circle so it peeks out at the back. The two-piece body reads as convincingly three-dimensional without any shaping.
Cut eight long thin strips from black cardstock, about a quarter inch wide and eight inches long. Curl each strip by holding one end and drawing it firmly along the edge of a pencil or scissors blade. The curl sets immediately in cardstock and stays without any glue.
Glue four curled legs to each side of the body, bending the end of each strip flat as an anchor point. Adjust the curl direction so some legs point forward and some back, which stops the spider from looking like a symmetrical diagram. Set it on a shelf edge, a bookcase, or a mantle so the legs hang over the side.
Scene-Building Layers
Layered paper scenes are the closest thing to framed art on this list. Stack two or three sheets with cutout shapes in between and you get depth, shadow, and a finished look that is genuinely hard to distinguish from something purchased. These two projects go on a wall or prop against a surface equally well.
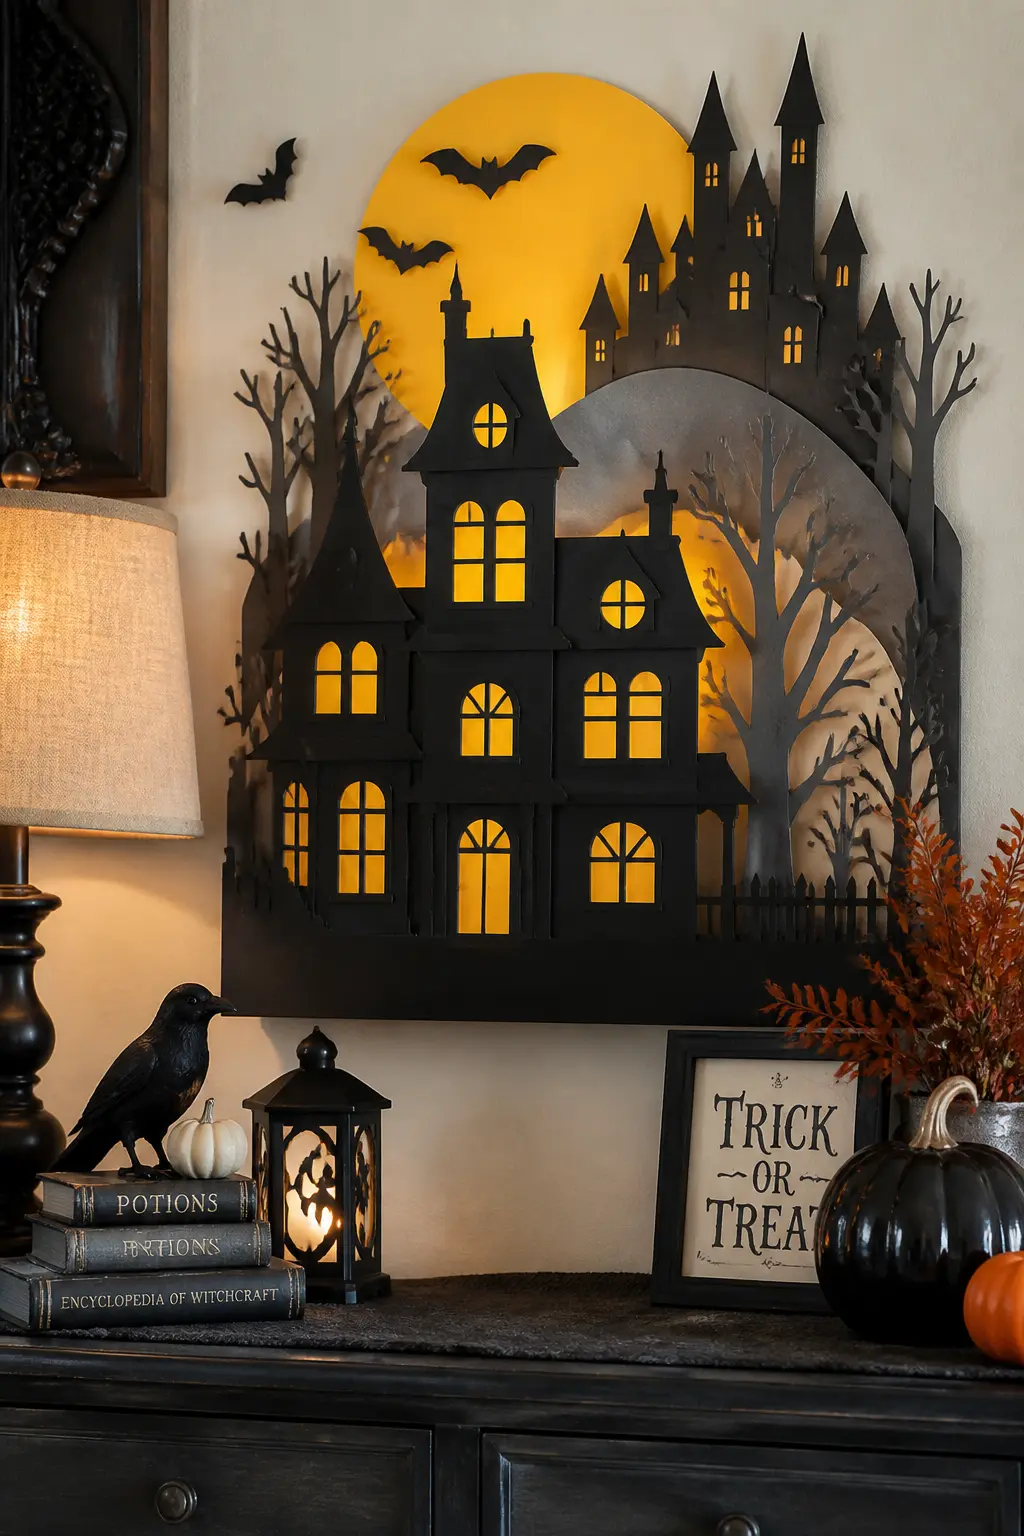
Layered Haunted House
Cut three house silhouettes from black, gray, and yellow cardstock, each slightly smaller than the last. The largest layer in black forms the background and sets the outer shape. The gray layer sits in front of it, cut slightly smaller with a different roofline. The yellow layer, smallest of the three, goes at the back as a glow behind the windows.
Cut small rectangular windows into the front black layer using a craft knife. When the yellow layer sits behind, the light appears to come from inside. Cut the windows before assembling the layers so the cardstock lies flat on the cutting mat.
Glue the layers together with the yellow at the back, gray in the middle, and black at the front, offsetting each layer slightly so all three colors show at the edges. Mount the finished scene on a wall or prop it against a surface with a folded paper stand glued to the back.
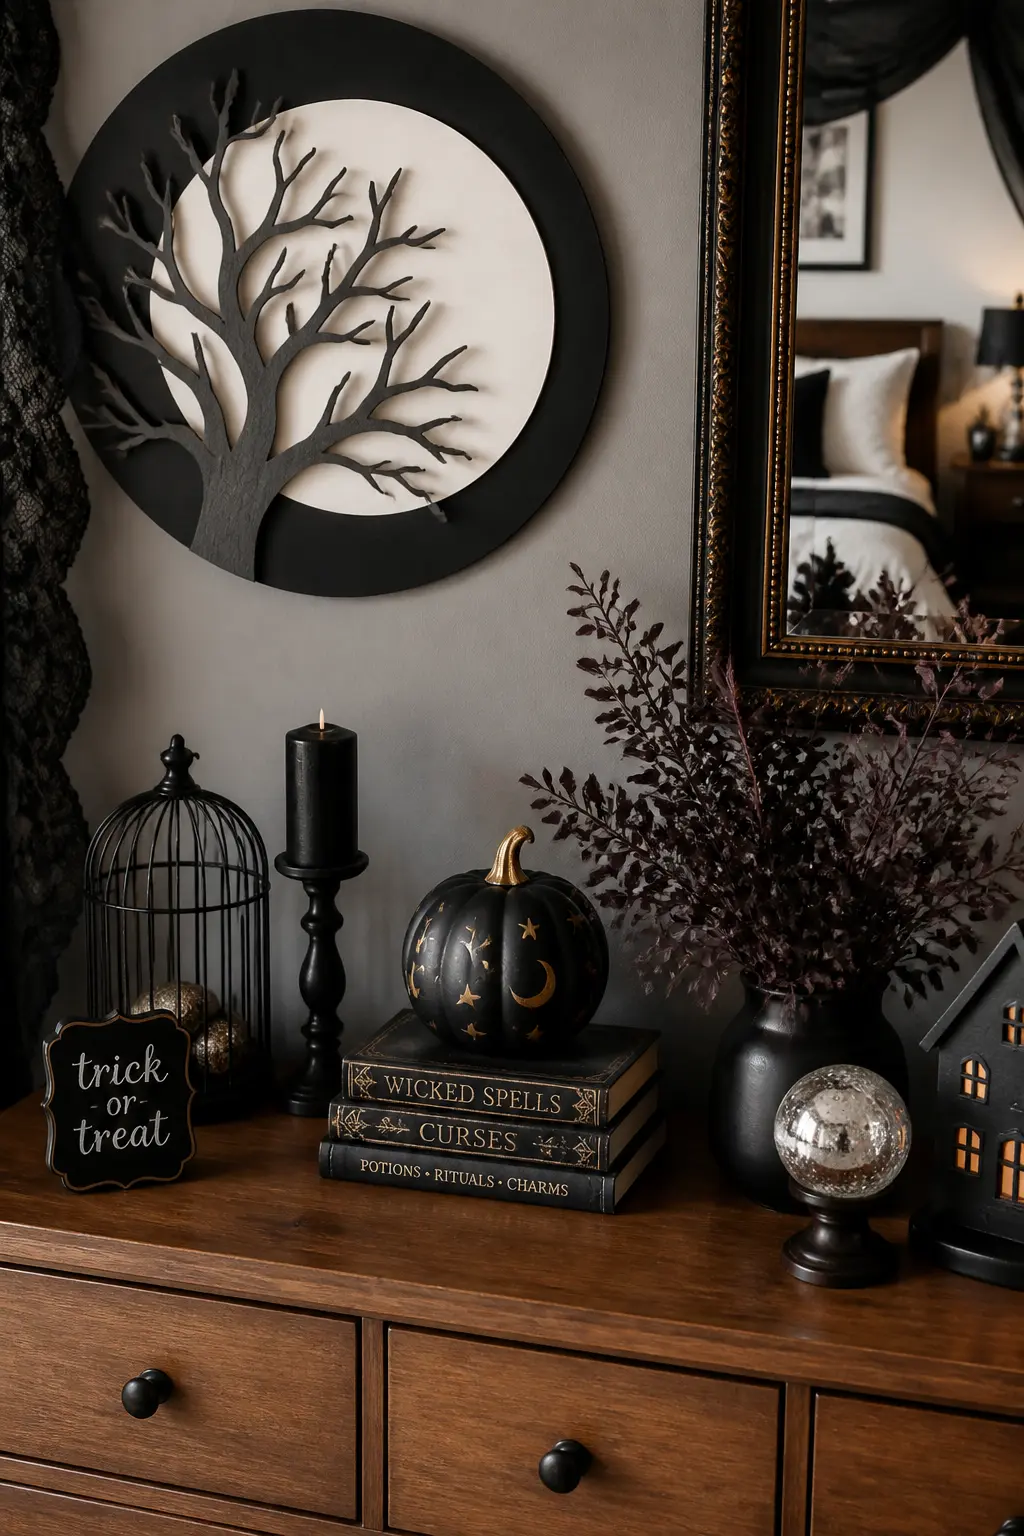
Layered Moon Scene
Cut a circle about six inches across from white cardstock and glue it near the upper center of a black cardstock sheet. The black background frames the moon and does all the atmospheric work without any additional cutting.
Cut a bare tree silhouette from gray cardstock: a trunk, three or four main branches, and a few smaller offshoots. Keep the silhouette narrow enough that the moon shows clearly behind it. Glue the tree over the moon so the branches cross the white circle, creating the classic Halloween skyline in one simple step.
Cut a thin crescent of gray paper and glue it over one edge of the white circle to suggest a shadow on the moon’s surface. That final layer adds depth and stops the scene from reading as a two-tone cutout. Mount the finished piece in a frame or tape it directly to a wall.
Frequently Asked Questions
What weight of cardstock works best for Halloween paper crafts?
65 lb cardstock is the practical sweet spot. It holds a fold and takes a crease, cuts cleanly without tearing, and is stiff enough for three-dimensional shapes like lanterns and spiders. Standard 20 lb printer paper is too thin for anything structural, and 110 lb cardstock is hard to fold without cracking.
Can regular copy paper substitute for cardstock in these projects?
For flat projects like the skull garland or ghost window panel, copy paper works fine. For anything that needs to hold a curve, stand upright, or weave without tearing, cardstock is worth the small extra cost. A pack of 50 sheets covers most of these projects.
How do you hang paper decorations without damaging the walls?
Removable adhesive strips, the kind sold for mounting lightweight frames, hold cardstock flat and release without tearing paint. For garlands, a single removable hook at each end is enough. Avoid double-sided tape directly on painted walls: it bonds more aggressively than it claims.
How far in advance can these crafts be made?
Flat pieces like the table runner, placemats, and window panels can be made two to three weeks ahead and stored flat in a large folder or between sheets of tissue. Three-dimensional pieces like the lanterns and spider store well in a shoebox with tissue paper between them. Avoid humid storage areas, which can soften the paper and cause pieces to lose their shape.
Are these crafts safe to use near candles?
Paper and open flames are never a safe combination. Every lit element in these projects should use a battery-powered tea light or LED candle, not a real flame. That applies especially to the paper lanterns, which enclose the light source entirely.
What games go well alongside a paper-decorated Halloween party?
A well-decorated space deserves games to match the atmosphere. The roundup at 30 Unforgettable Halloween Party Ideas and Games covers both activities and decor angles, and 20 No-Cringe Adult Halloween Party Games focuses specifically on games that work for grown-up crowds.
15 classic Halloween party games done right — each with a modern twist so they never feel dated. P

23 hilarious Halloween games for adults — trending 2026 picks, classics, printables & a DIY Tourna

Halloween activities for kids that keep hands busy: 16 free printables to cut, colour and count, plu
Leave a Reply