

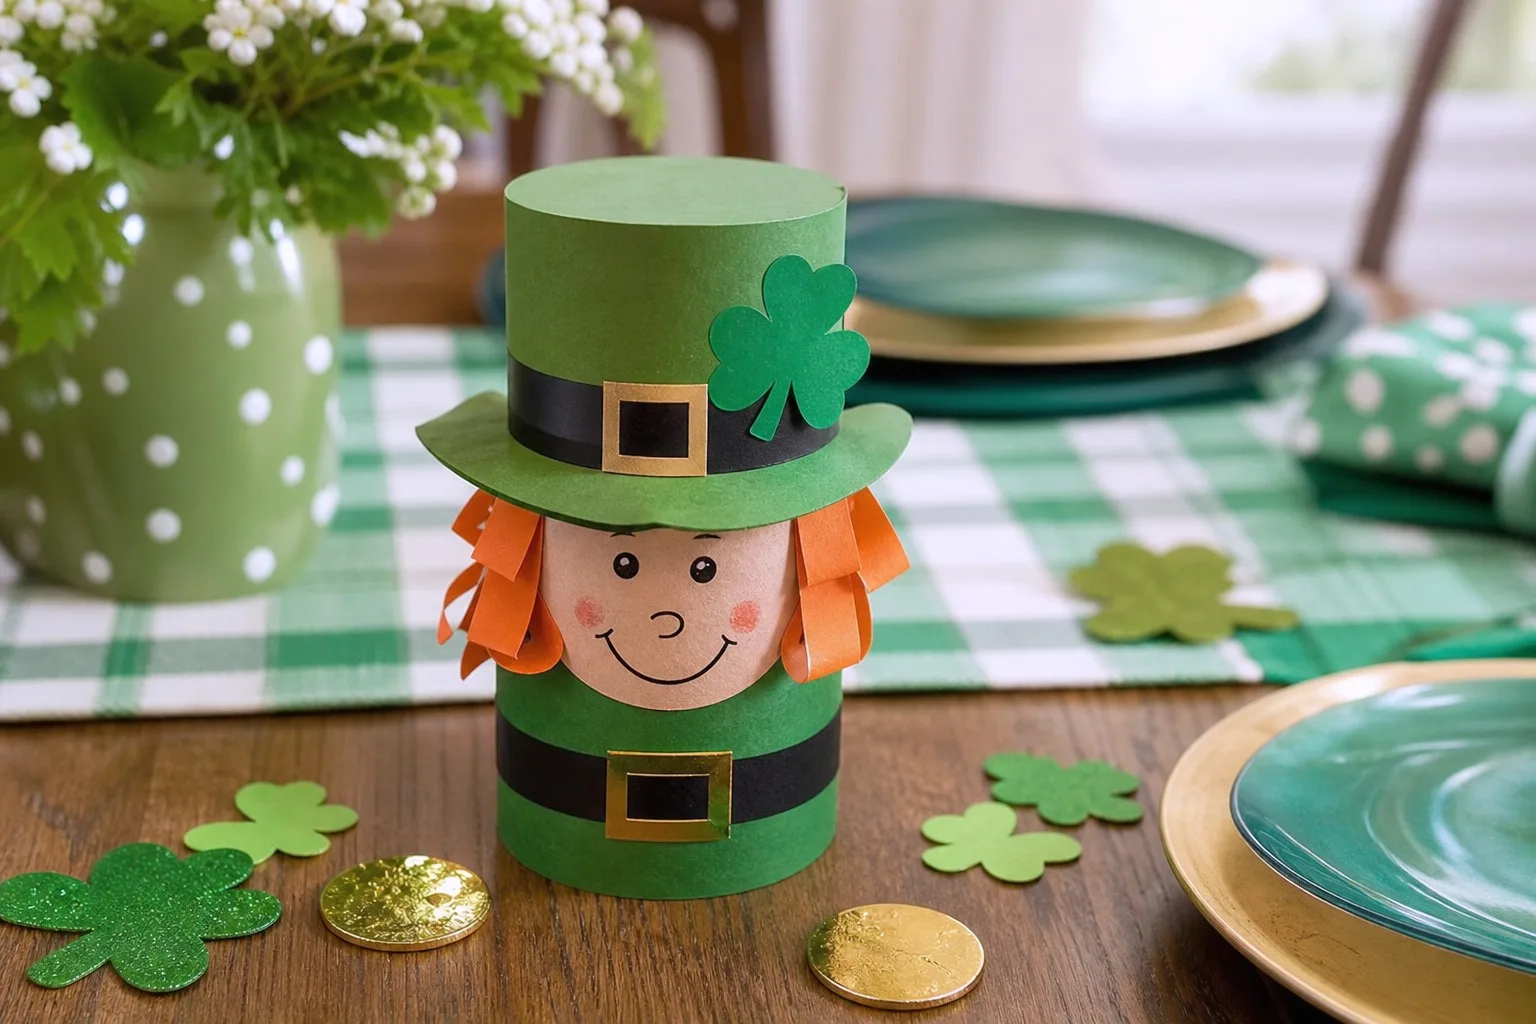
By March the good holiday glitter is long gone and the kids are bored of coloring the same printable shamrock.
You do not need a theme party or a trip to the craft store to fix that: a stack of green and gold paper, some tissue scraps and a glue stick on the kitchen table will hold a four year old and an eight year old for a whole rainy afternoon.
Every idea below comes together with things already in the house: paper plates, cotton balls, yarn, buttons, a shoebox pulled from recycling. Nothing needs paint to dry overnight and nothing needs a parent with steady hands, just scissors, glue and a little patience for glitter on the floor.
Group them by what is already on your table: rainbow pieces for the window, shamrocks for the wall, leprechaun gear for the door, and a small pile of gold for the middle of it all. Finish with the short shopping list at the end so nobody is mid-project when you realize the cotton balls ran out.
This post contains affiliate links. If you buy through them, I may earn a small commission at no extra cost to you.
Table of Contents
Rainbow Wall and Window Crafts
Rainbows are the easy win: every kid already knows the color order and loves an excuse to use the whole marker box at once. These six hang in a window or on a wall and do most of the decorating work for you.
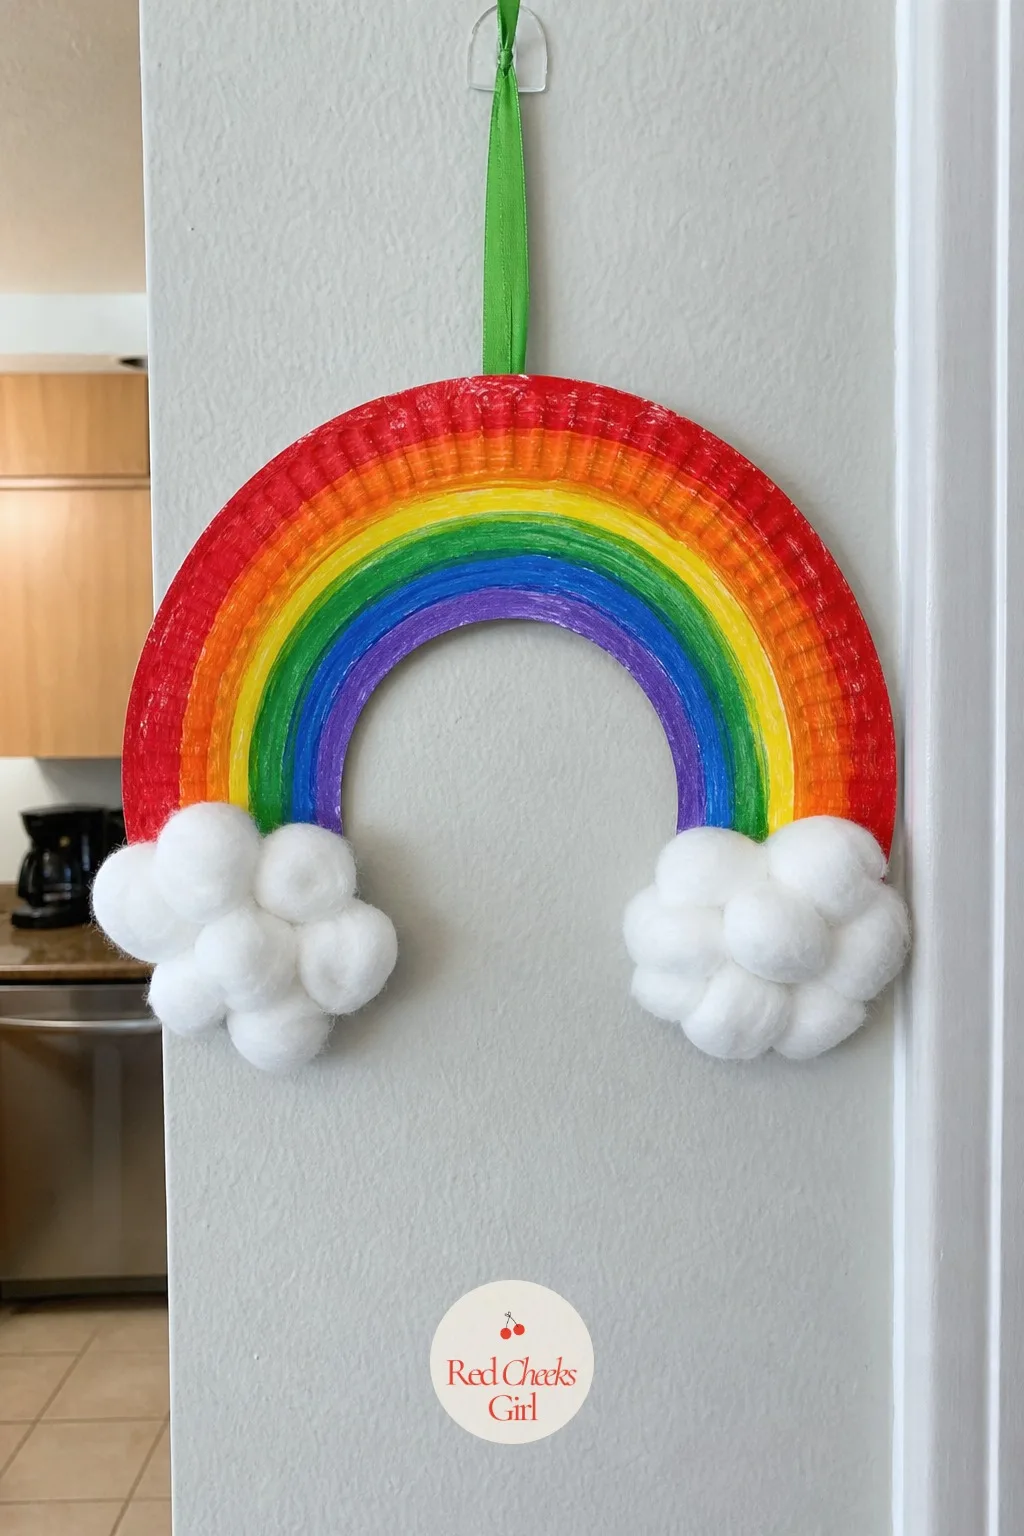
Fold a Paper Plate Rainbow Wreath with Cotton Ball Clouds
The front door has looked bare since the heart garland came down, and this fills it without buying a single new thing. Cut the center out of a paper plate, leaving the rim as your arch, then let the kids paint or marker in arched stripes of red, orange, yellow, green, blue and purple.
Glue a cluster of cotton balls at each end of the arch for clouds, punch a hole at the top and loop green ribbon through to hang it. It works just as well taped flat to a window if you would rather not put a nail in the door.
Swap the cotton balls for white pom poms if the craft drawer is short, and once the plate technique clicks, the same shape carries straight through to 26 Christmas Wreath Crafts for Kids With Paper Plates, Handprints and Glittery Chaos come winter.
🛍 Shopping guide
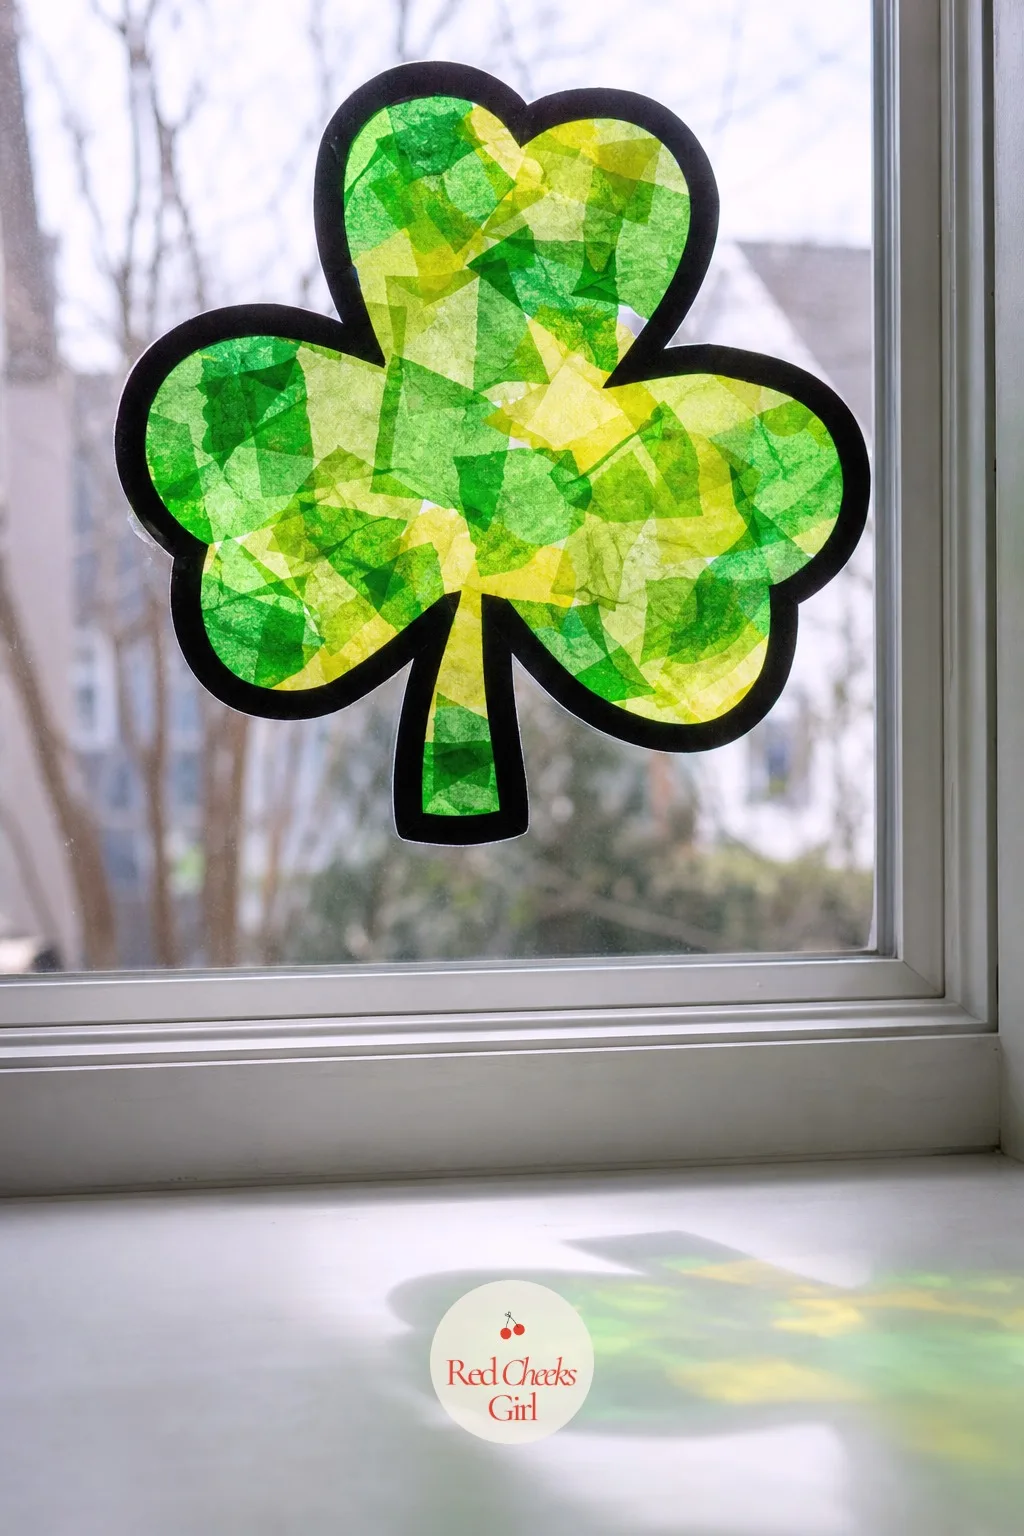
Press a Shamrock Suncatcher from Contact Paper and Tissue Paper
No glue, no paint, nothing that needs to dry: this is the one you set up when you need twenty quiet minutes and zero mess. Tape a sheet of contact paper sticky side up to the table, let the kids press torn squares of green and yellow tissue paper onto it until it is full.
Cap it with a second sheet of contact paper, trim around a shamrock outline cut from black paper laid on top, and tape the finished piece to a sunny window.
If the contact paper roll ran out on last year’s suncatcher, window cling gel paint works the same trick with even less cutting.
🛍 Shopping guide
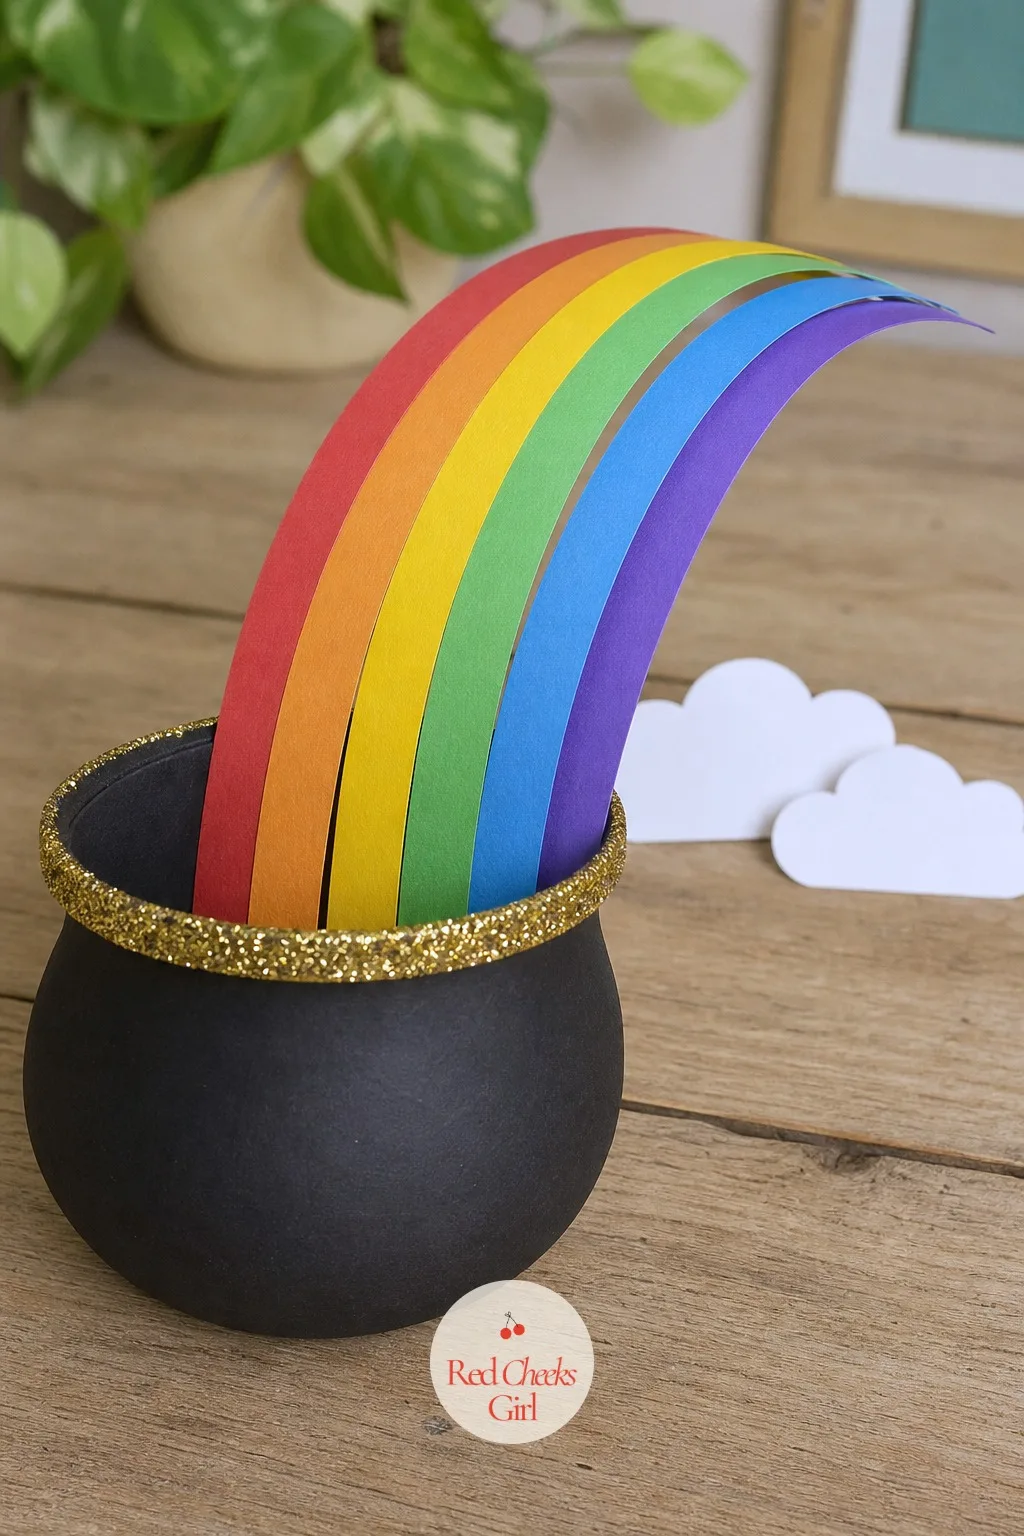
Curl a Pot of Gold Rainbow from Paper Strips
Start with the pot: a black paper half circle, its rim brushed with glitter glue or dipped in loose gold glitter. Cut six paper strips in rainbow order, curl each one tightly around a pencil or the scissor blade, then glue the ends into the mouth of the pot so they arch up and over.
Add two cotton ball or paper clouds at the far end if there is room on the page, and it is ready to tape to the fridge the same afternoon.
Swap the paper strips for narrow ribbon if you want arcs that hold their curl without flattening by dinner.
🛍 Shopping guide
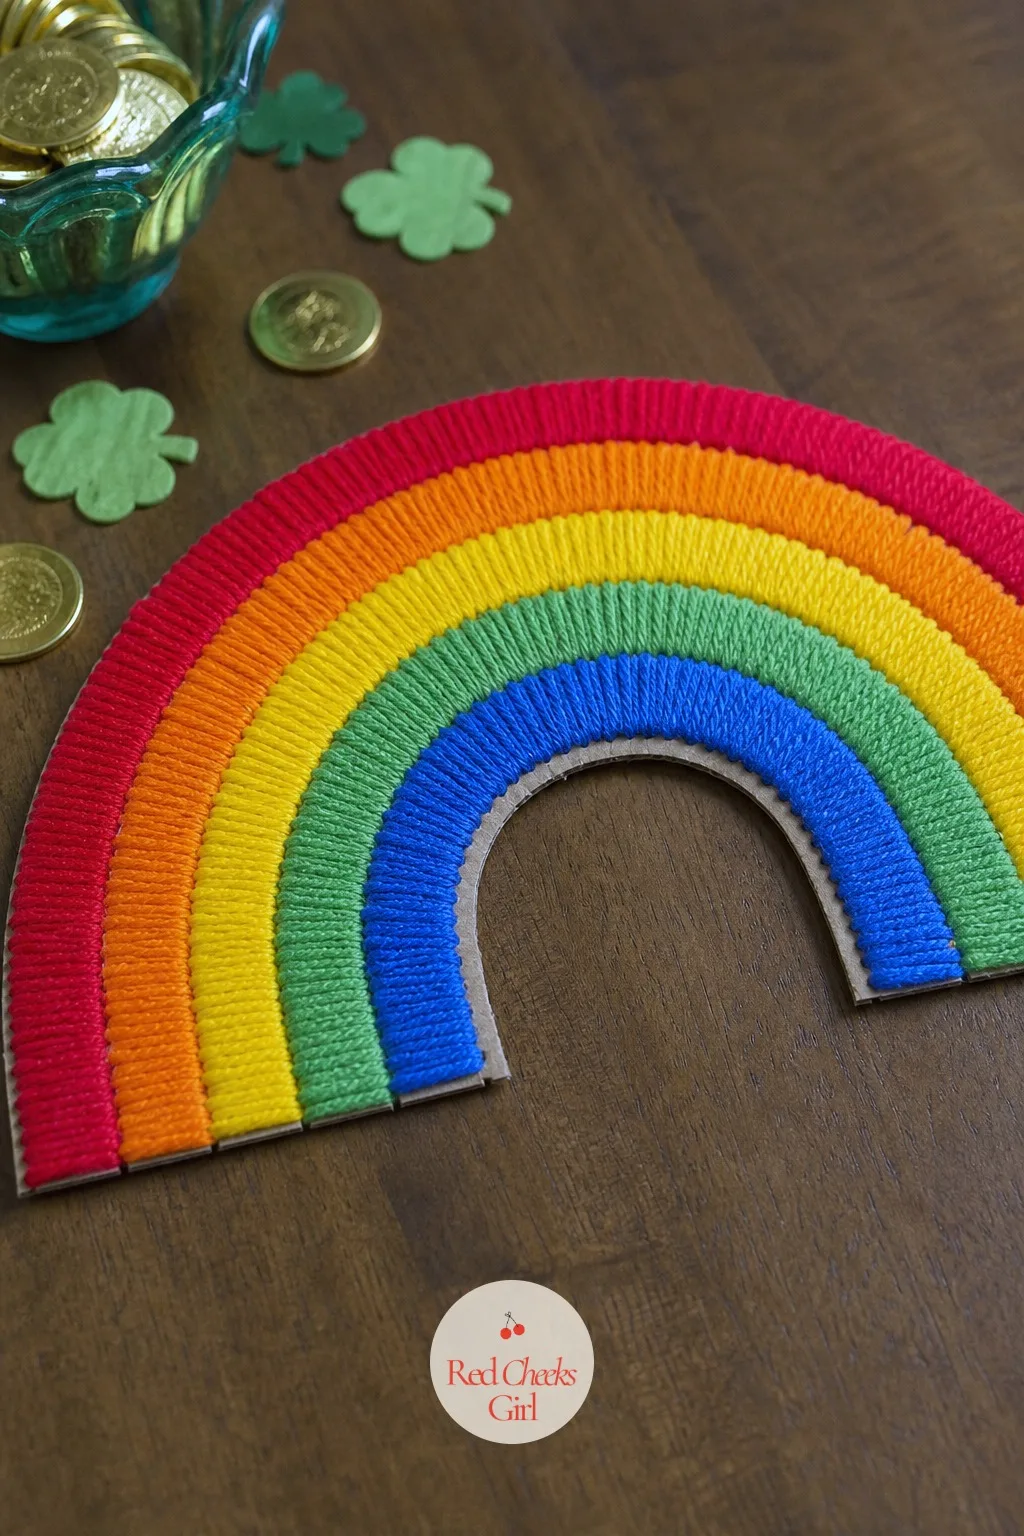
Wrap a Rainbow Across a Cardboard Loom with Yarn
For the kid who still finds scissors frustrating, this one skips cutting almost entirely. Cut a rainbow arch shape from a flattened cardboard box, notch the edges every half inch, then let little hands wrap yarn around and through the notches in solid bands of color.
Tie off each color at the back before starting the next, working from the outer red band in toward purple at the center.
Embroidery floss gives thinner, crisper stripes if you want a more detailed look once the basic wrap is mastered.
🛍 Shopping guide
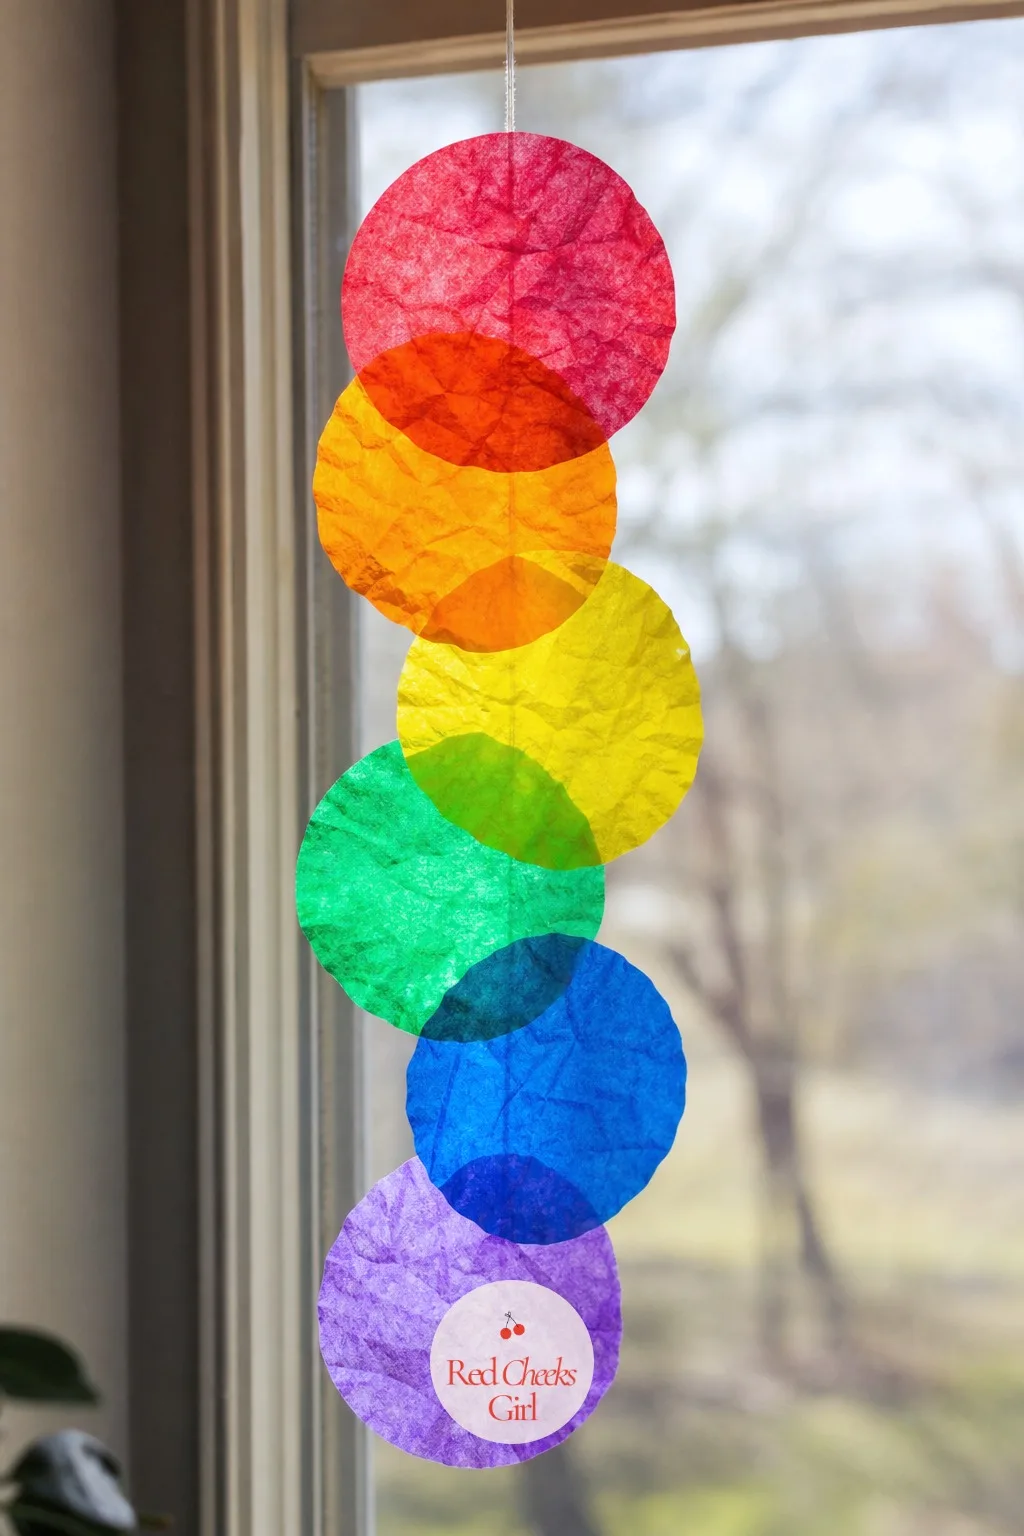
Layer a Coffee Filter Rainbow Suncatcher
Coffee filters take color like nothing else in the drawer, soaking it up in soft watercolor bands instead of hard lines. Dye each filter a different rainbow shade with a few drops of food coloring and water, let them dry flat, then overlap and glue them onto a string in rainbow order.
Hang the finished strand across a window where the afternoon light will pass straight through the ruffled layers.
Skip the liquid dye entirely and blot a wet filter against a washable marker instead, it bleeds the same way with far less chance of a stained tablecloth.
🛍 Shopping guide
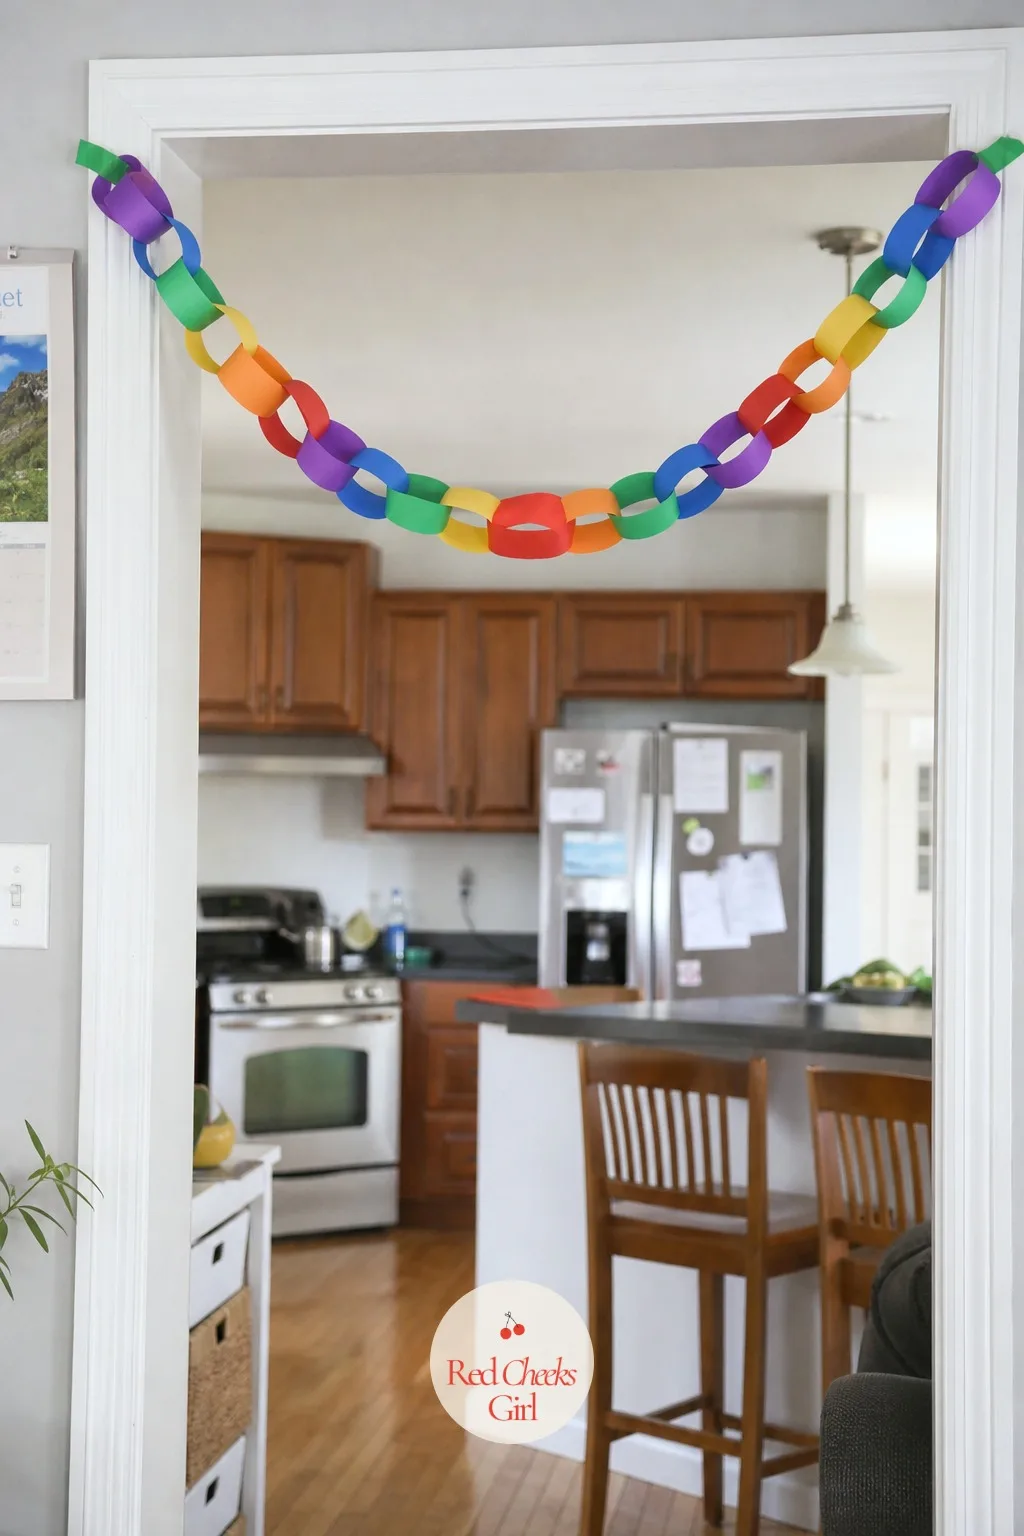
String a Rainbow Paper Chain Garland
This is the one to hand a bored kid with nothing but a stapler and scrap paper, and somehow it still ends up on the wall. Cut strips of paper in rainbow order, loop the first through the last and glue or staple closed, then thread the next strip through before closing it too.
Keep looping until the chain reaches doorway to doorway, then tape both ends up and let it sag gently in the middle.
Leftover scrapbook paper or old wrapping paper scraps work just as well as a fresh pack if you are using up the bin first.
🛍 Shopping guide
Shamrock Crafts for the Table
Shamrocks are where the little hands get to be the materials: handprints, buttons, loops of paper, all pressed into the same three-leaf shape. These five work from toddler age right through early elementary.
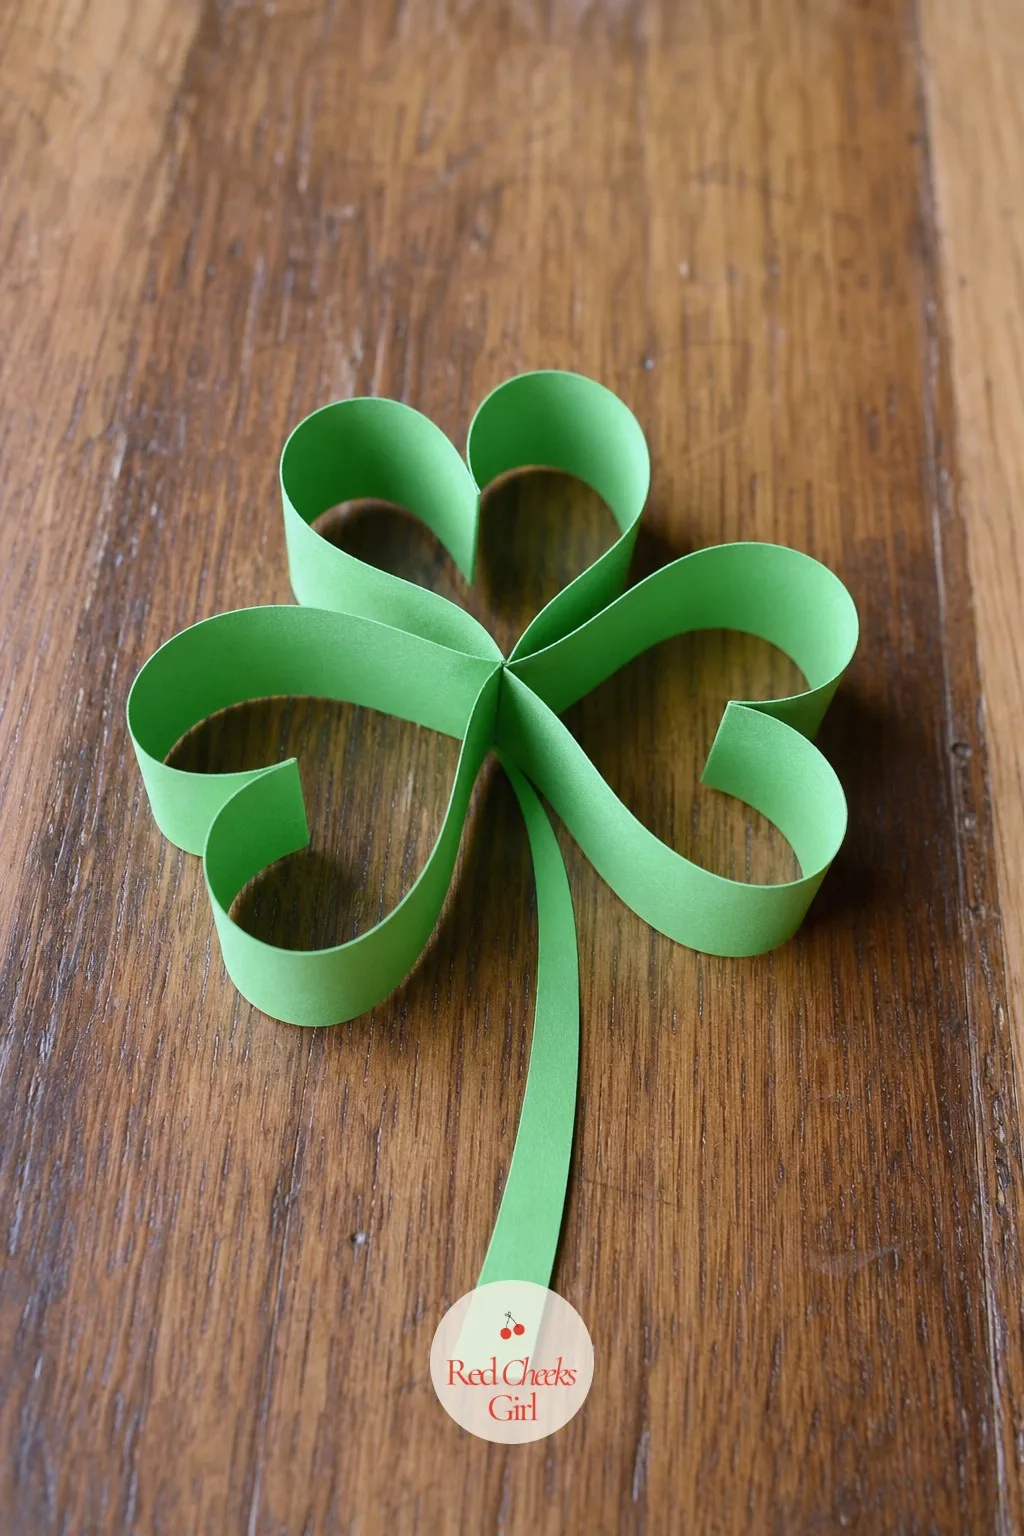
Loop Heart Shamrocks from Paper Strips
Three paper hearts, looped from strips and twisted together at the base, make a fuller shamrock than anything cut flat from a template. Curl one end of a paper strip into a heart shape, pinch the center and repeat twice more, then glue all three centers together with a thin strip trailing below as the stem.
Cluster four or five on a sheet of cardstock for a wall piece, or hang single ones as window ornaments.
Mix two shades of green across the loops, a light leaf and a deep emerald, so the cluster has some depth instead of flattening into one color.
🛍 Shopping guide
Stamp a Handprint Shamrock Keepsake Card
This is the one that still gets pulled out of a drawer years later, mostly because the hand it belongs to does not stay this small for long. Paint a kid’s palm and fingers green, press three times onto folded cardstock so the prints meet at the center like clover leaves, and paint in a stem below once it dries.
Write the date on the back before it goes anywhere, that detail is the whole point later.
For a baby too young to press a flat palm, three footprints arranged the same way work just as well.
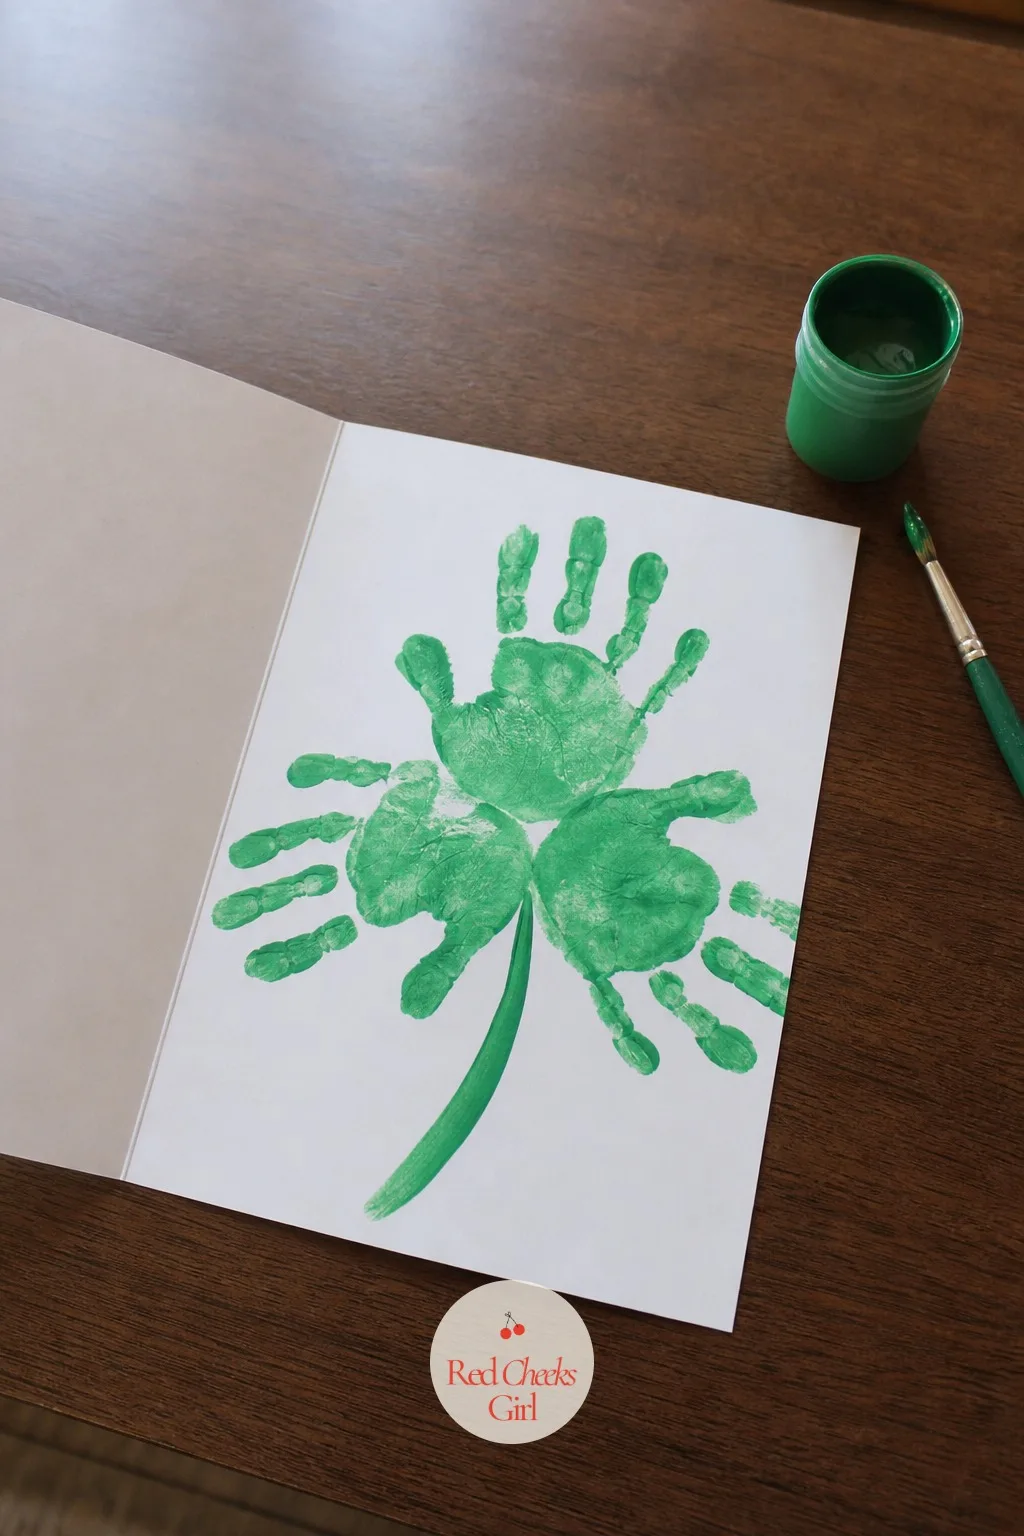
🛍 Shopping guide
Build a Pom Pom Shamrock Topiary
Glue a few dozen green pom poms over a cardboard shamrock cutout and it stops looking flat, it starts looking like something you would actually set out for the holiday. Cover the shape edge to edge, working leaf by leaf so the glue has time to grip, then push the finished shamrock onto a thin dowel.
Set the dowel into a small pot filled with dried beans or florist foam so it stands upright on the table.
No pom poms in the drawer? Cotton balls dipped in diluted green paint and dried give almost the same texture.
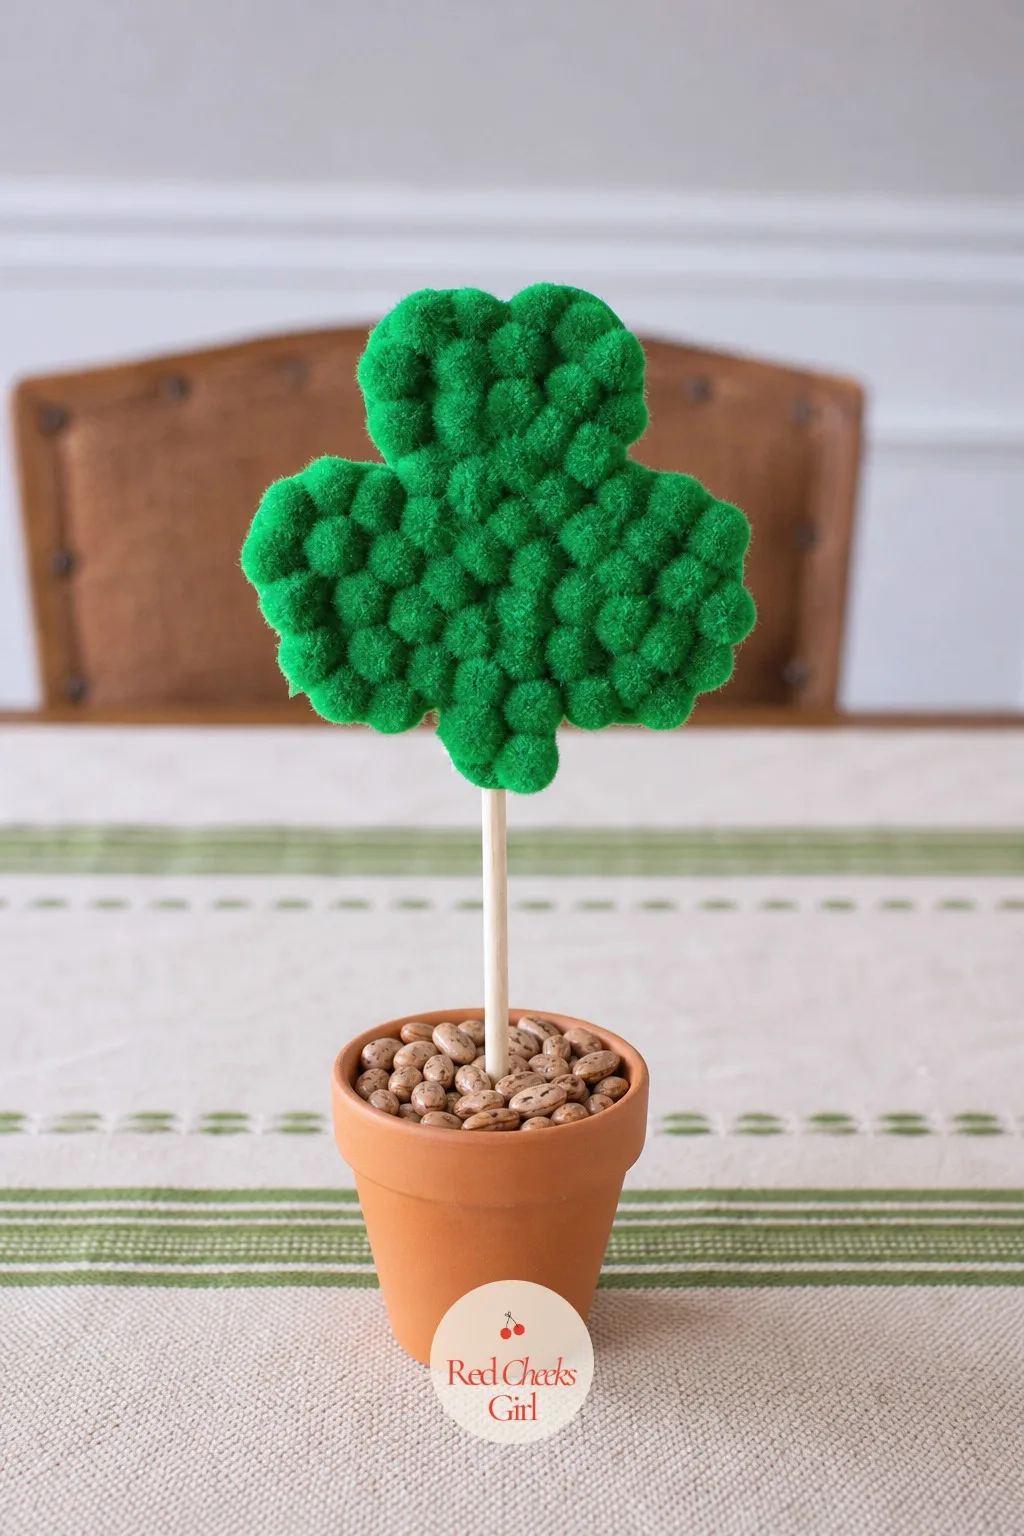
🛍 Shopping guide
Thread a Button Shamrock Garland
Button sorting is half the fun for a kid who likes small, fiddly things, and this gives all that sorting somewhere to go. Thread three green buttons onto twine so they sit close together in a loose clover shape, knot the twine, then leave a short gap before threading the next cluster.
Keep going until the garland is long enough for a mantel or window frame, then tie off both ends.
Out of buttons? Large dried pasta shapes, painted green and left to dry overnight, thread the same way.
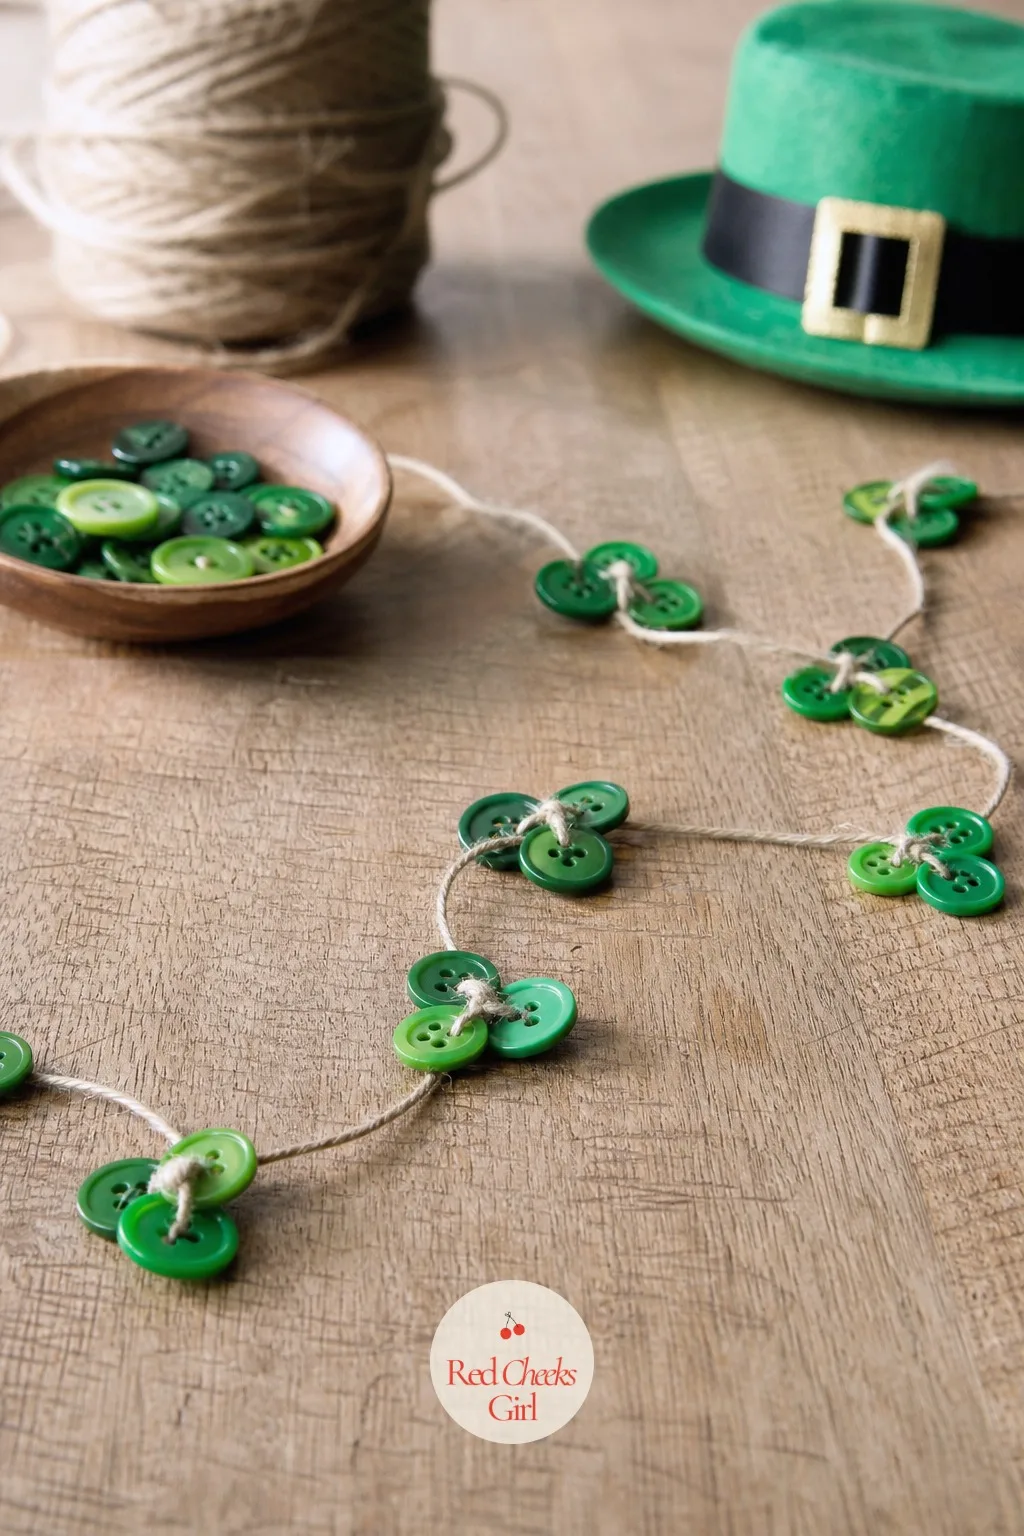
🛍 Shopping guide
Collage a Tissue Paper Shamrock Window Decoration
Draw and cut a large shamrock outline from cardstock, then let the kids scrunch squares of tissue paper into loose balls and glue them inside the outline until no cardstock shows through. The scrunching keeps small hands busy far longer than flat squares ever would.
Tape the finished shamrock to a window so the tissue glows when the light hits it from outside.
Mix two or three shades of green tissue in the same piece, it reads far richer than one flat color ever does.
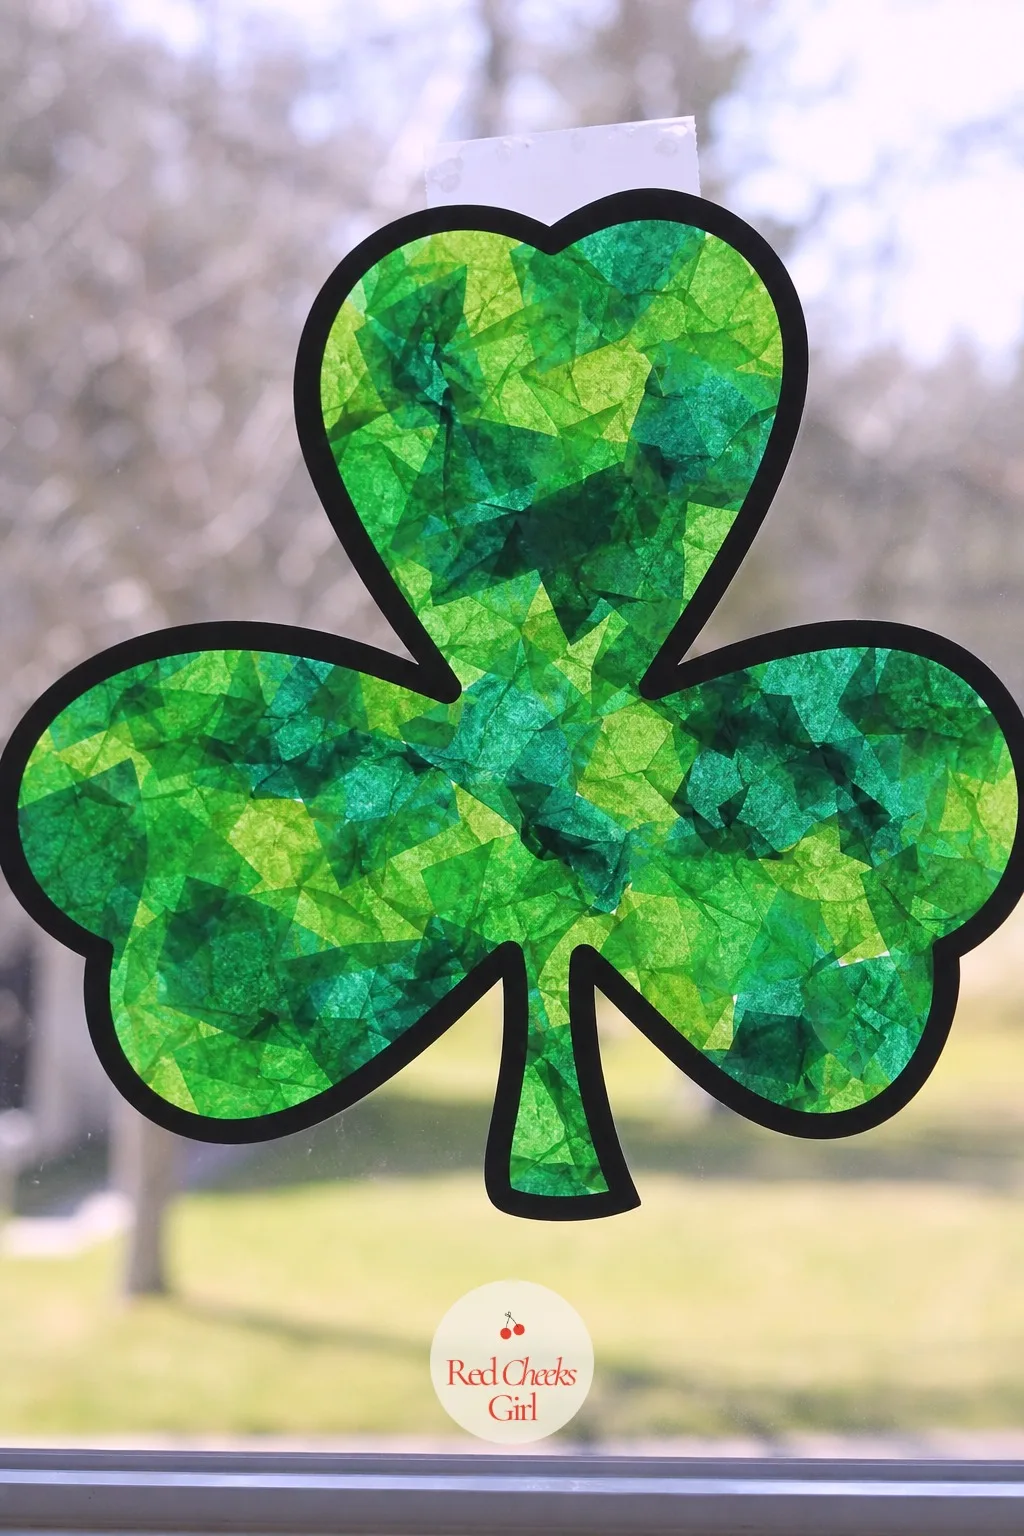
🛍 Shopping guide
Leprechaun Crafts
The leprechaun is the one character of the day, so give him a hat, a trap and a trail across the kitchen floor. These four crafts turn into the morning-of surprise that makes the whole holiday feel like a prank.
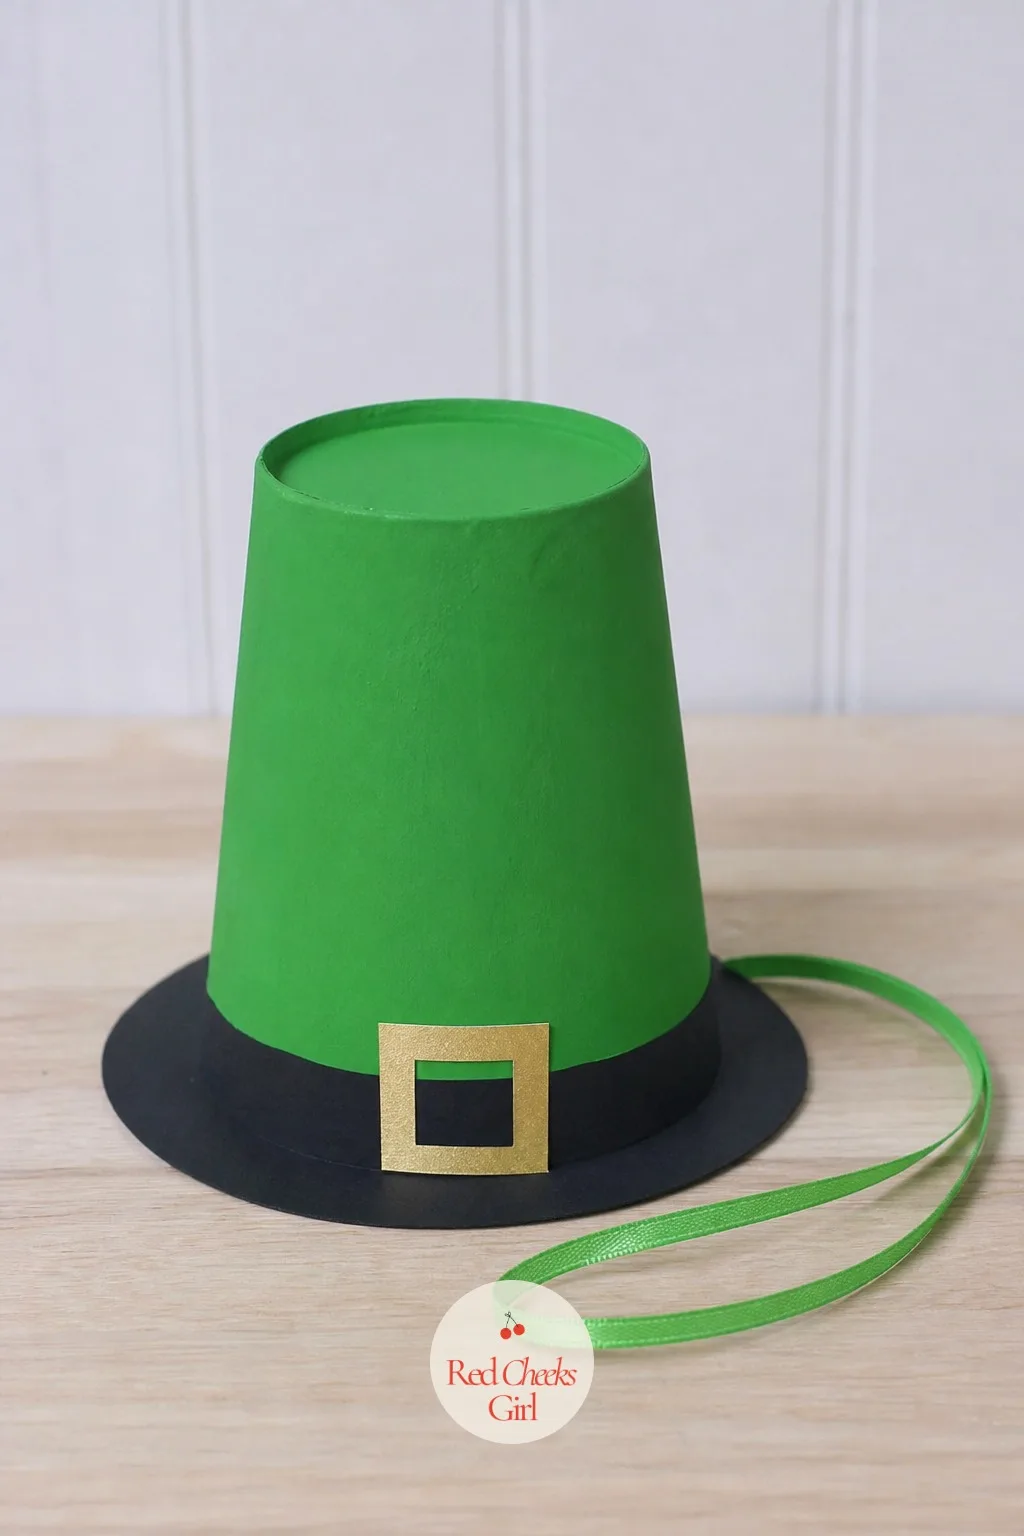
Shape a Leprechaun Hat from a Paper Cup
Flip a paper cup upside down and it is already most of the way to a tall leprechaun hat, it just needs the rest of the costume glued on. Paint the cup green and let it dry, then glue a black paper ring around the open base as the brim.
Cut a small gold paper rectangle and glue it to the front of the brim as the buckle, and punch a hole on either side for ribbon so it ties under the chin.
A foam cup holds its shape better than paper if the hat needs to survive more than one wearing.
🛍 Shopping guide
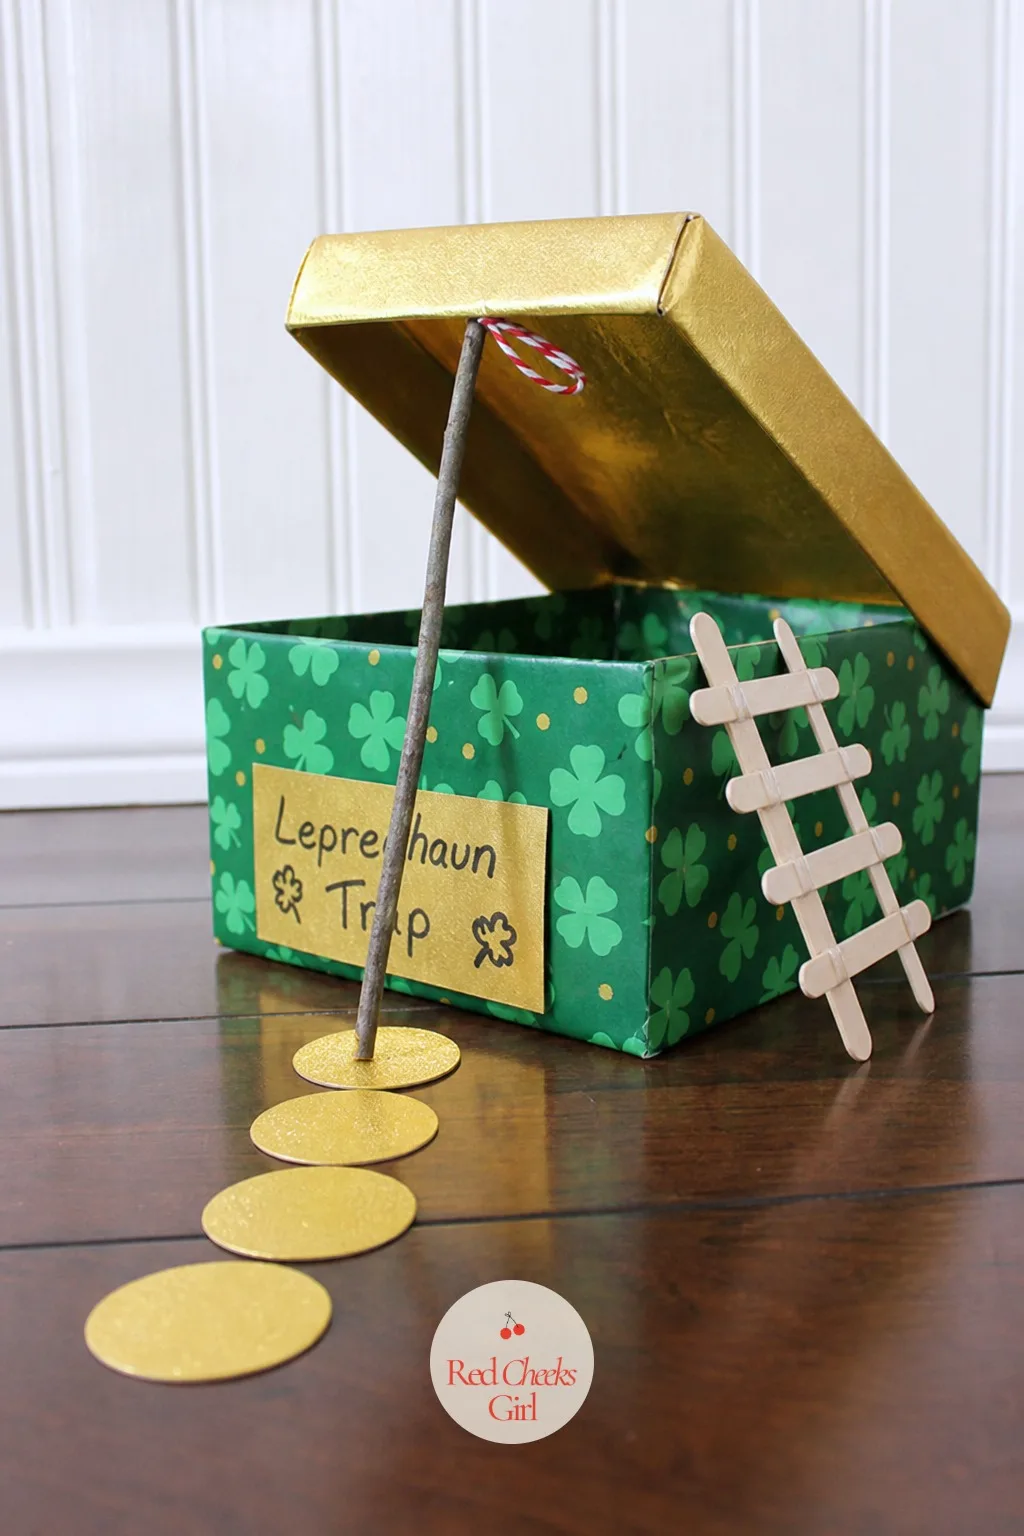
Set a Leprechaun Trap from a Shoebox
Start with a shoebox, the base covered in green and gold paper so none of the cardboard shows. Glue a popsicle stick ladder up one side leading to the lid, cut a small trapdoor into the lid itself, and prop it open with a stick tied to a long string.
Scatter a trail of gold coin cutouts up the ladder and across the lid as bait, then set the whole thing by the front door the night before.
If you would rather the trap come out every year, a sturdy wooden box from the craft store holds up far better than cardboard over time, and the same trick shows up among the 18 St Patrick’s Day Games for Kids to Catch a Leprechaun.
🛍 Shopping guide
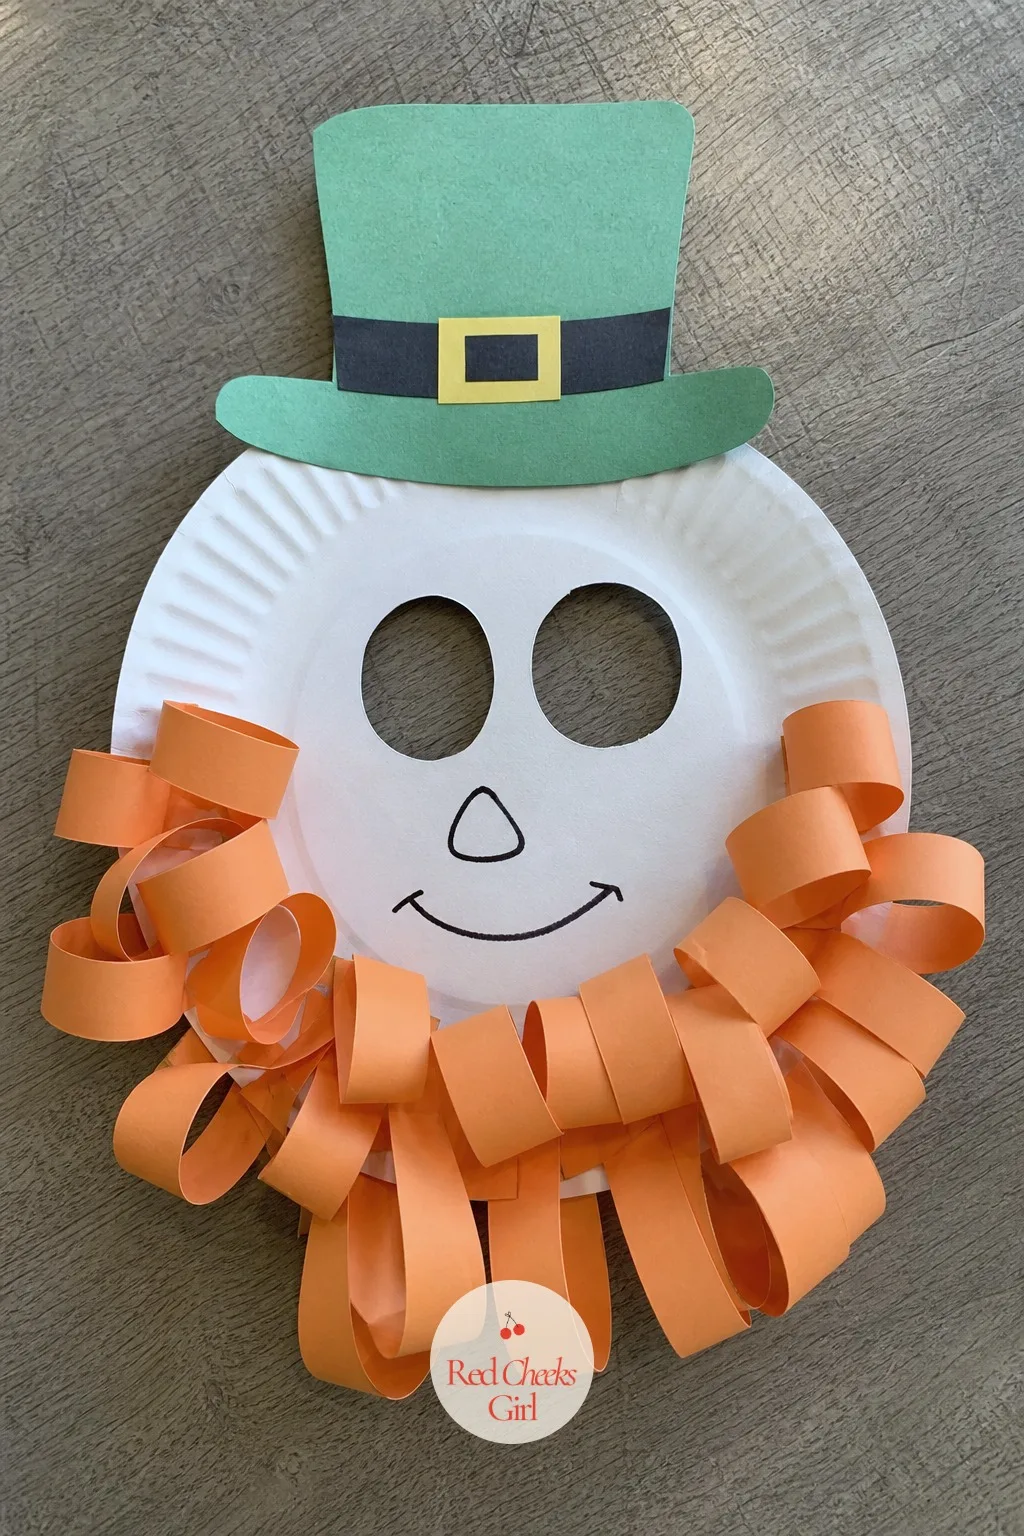
Snip a Leprechaun Beard Mask from a Paper Plate
Cut the center out of a paper plate into a wide oval, leaving the rim intact as the frame. Glue curled strips of orange paper thick around the lower edge for a beard, add a small green triangle hat glued above, then cut two eye holes through the center of the plate.
Staple an elastic cord to each side so it slips on like a mask for a quick photo before dinner.
Cotton balls dyed orange with food coloring give a softer, fluffier beard if curling strips of paper is too fiddly for small hands.
🛍 Shopping guide
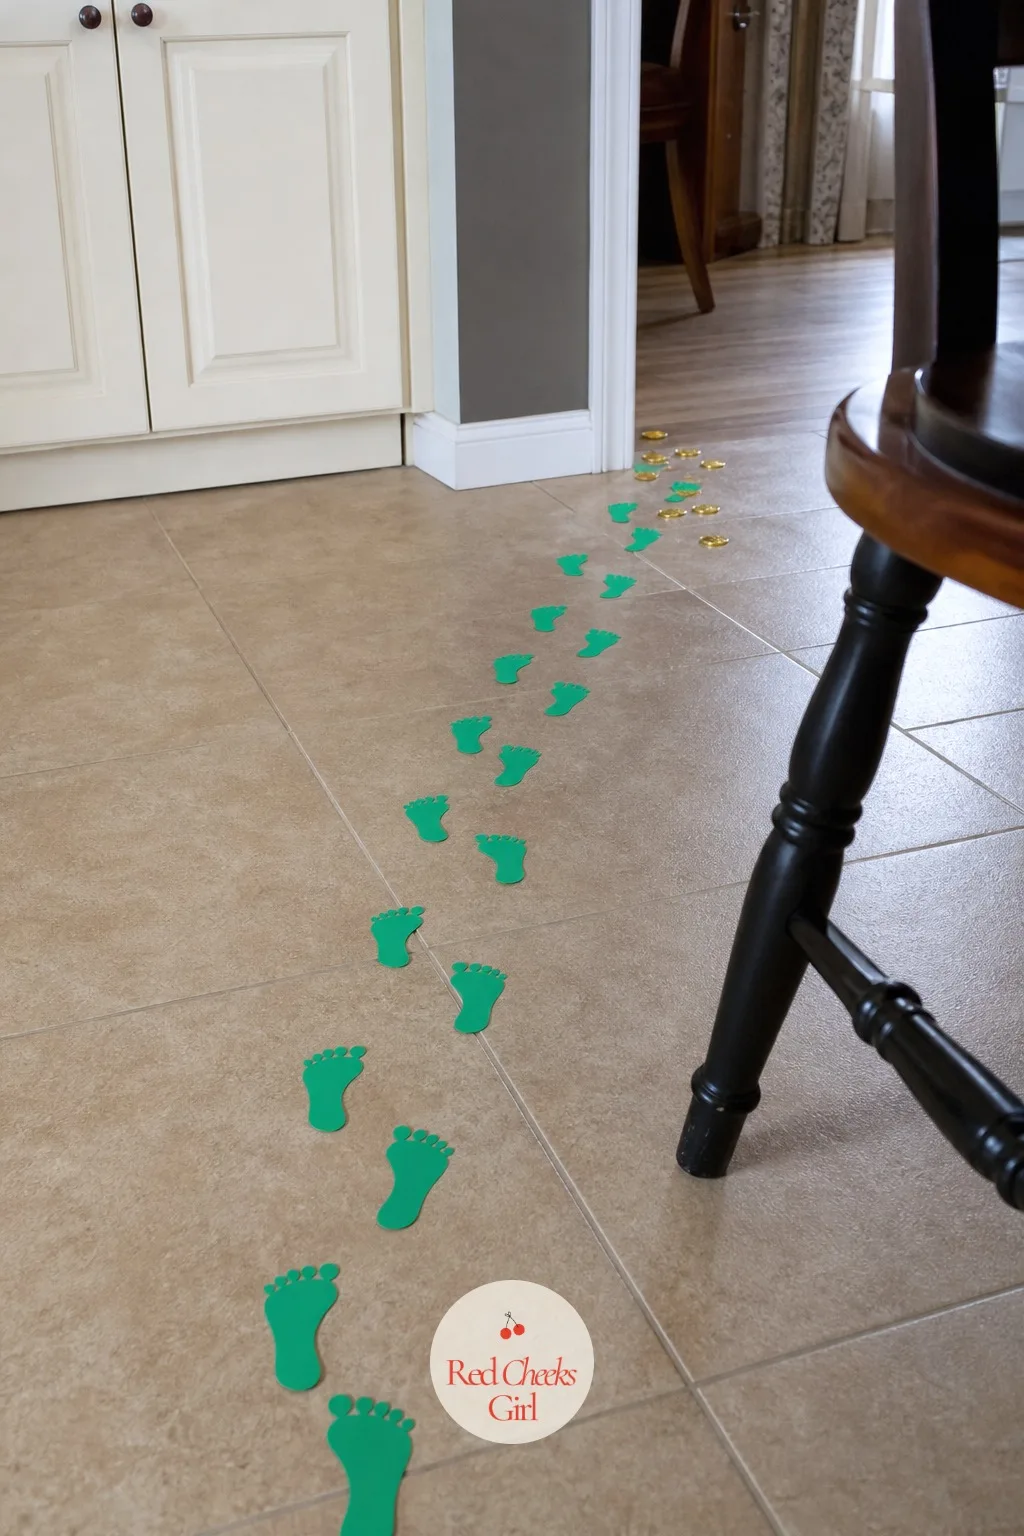
Track a Leprechaun Footprint Trail Across the Floor
Cut a dozen small footprints from green cardstock, each one slightly offset from the last, and tape them across the kitchen floor the night before heading toward a pile of gold coins. The kids wake up to the trail already there, which does most of the storytelling for you.
Curve the trail past a chair leg or around the table instead of a straight line, it reads far more like someone actually ran through in a hurry.
If the floor is tile and you do not mind washable paint, small painted footprints work the same way without any cutting at all.
🛍 Shopping guide
Pot of Gold and Treasure Crafts
Gold is the payoff color, the one that makes green and rainbow look richer next to it. These three crafts give the kids something to count, fill or rub, which buys you a good fifteen quiet minutes.
Fill a Jar with Gold Coins to Count
Fill a clean glass jar to the brim with gold foil chocolate coins, tie a length of green ribbon in a bow around the neck, and set it on the table as the centerpiece for the day. Kids guess how many coins are inside before anyone is allowed to open the lid.
Write the actual count on a small tag tied to the ribbon so the guess can be checked at the end.
Dried corn kernels or chickpeas, spray painted gold the day before, work the same way if the coins keep disappearing into pockets.

🛍 Shopping guide
Weave a Pot of Gold Basket from a Paper Bowl
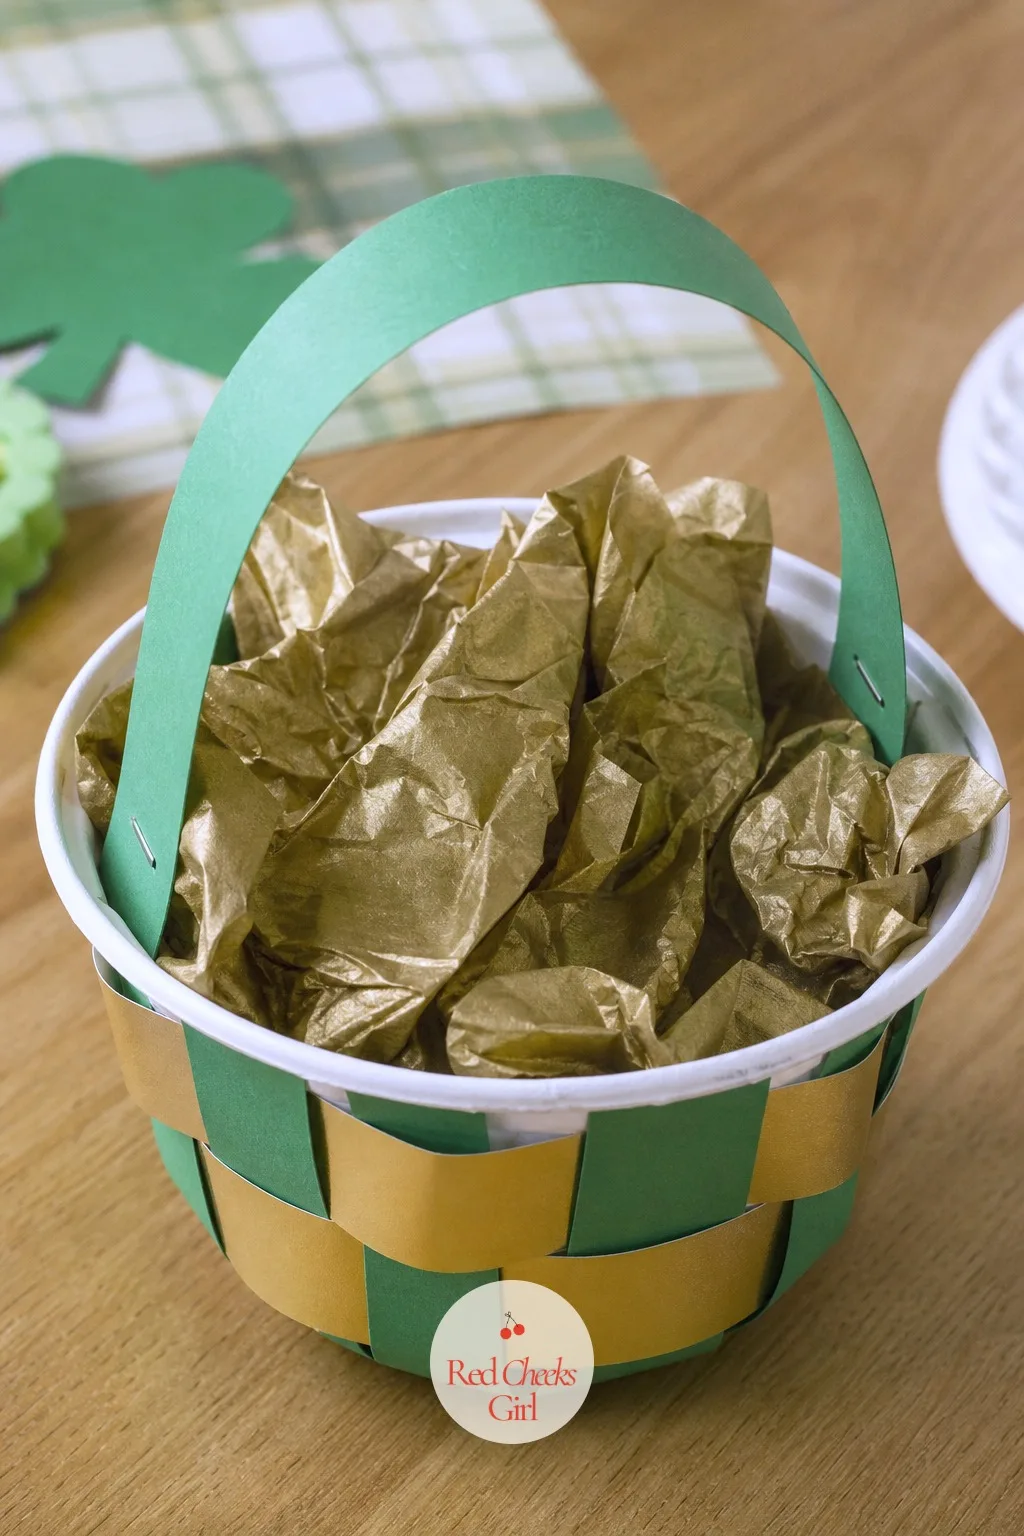
Cut even slits around the rim of a paper bowl, then weave strips of green and gold paper in and out through the slits the way you would weave a basket. Staple a wide paper strip across the top as a handle once the weaving reaches all the way around.
Fill the inside with crumpled gold tissue paper and a few coin cutouts peeking over the rim.
Skip the weaving entirely and just fill any small basket already in the house with the same gold tissue and coins if you are short on time.
🛍 Shopping guide
Rub a Gold Coin Texture Picture
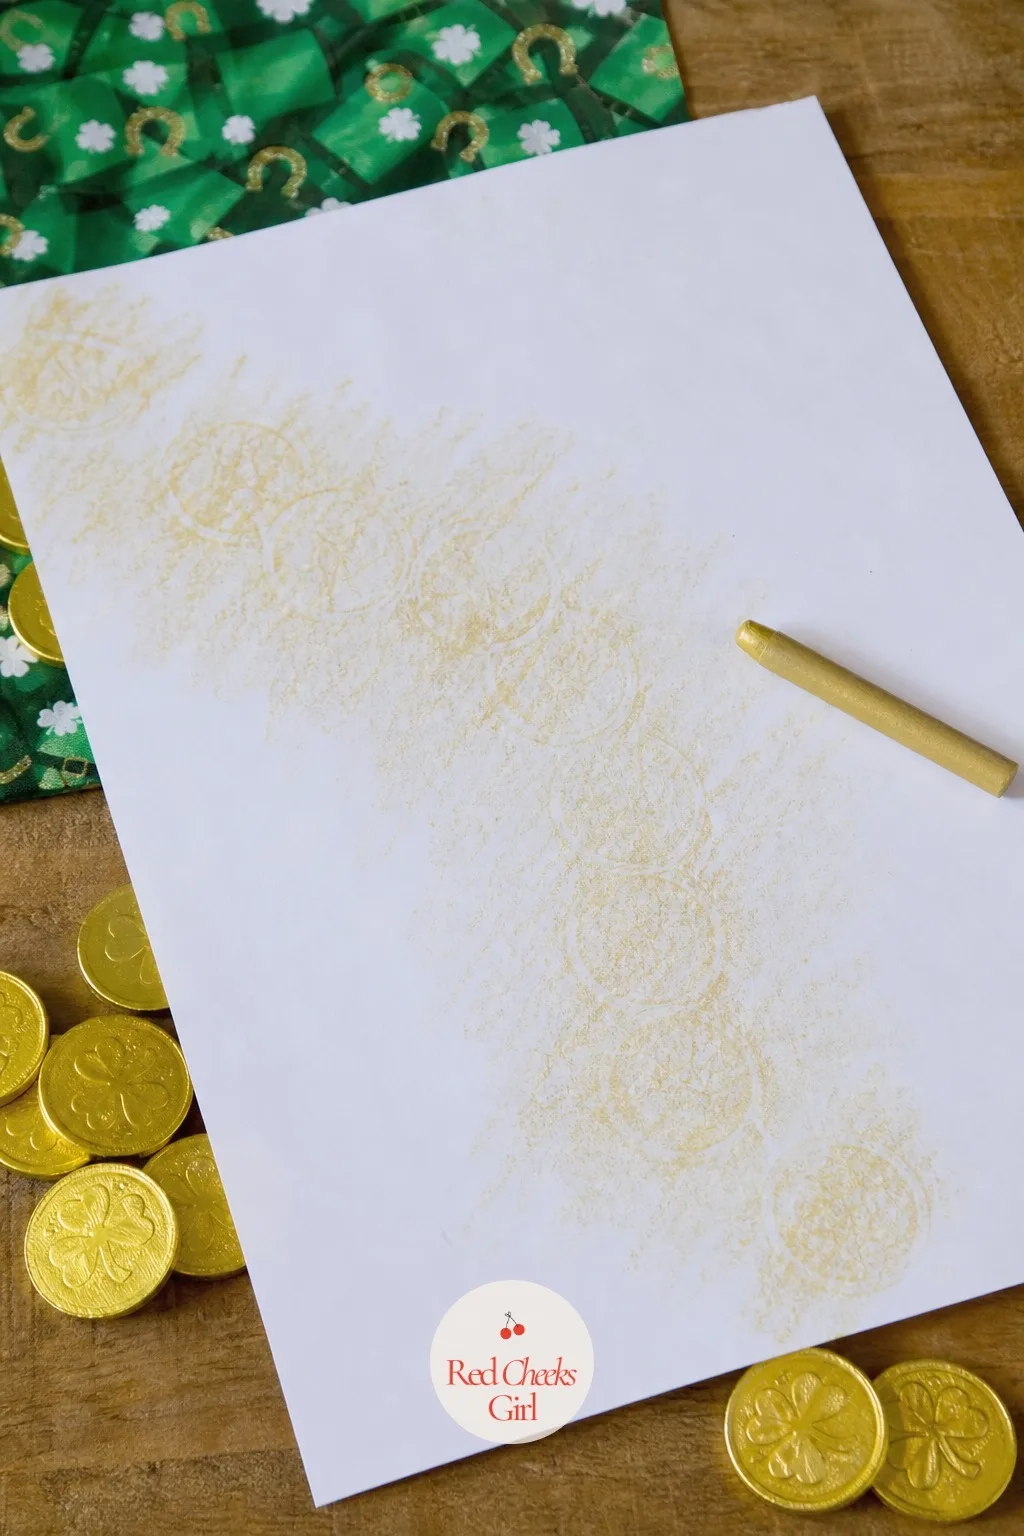
Lay real coins or coin shaped craft foam pieces under a sheet of paper, then rub a gold crayon flat across the surface so the circular pattern appears underneath in gold. Move the coins and rub again, scattering the pattern loosely across the page like spilled treasure.
It takes almost no setup and keeps restless hands busy without any glue or scissors.
Craft foam coin shapes work better than real coins for younger kids who tend to lose small change under the table.
🛍 Shopping guide
Wearable and Keepsake Crafts
Some of this she wears out the door, some of it goes straight onto the fridge or into a drawer for grandma. These last three are the ones that outlast the day itself.
Cut a Four Leaf Clover Headband
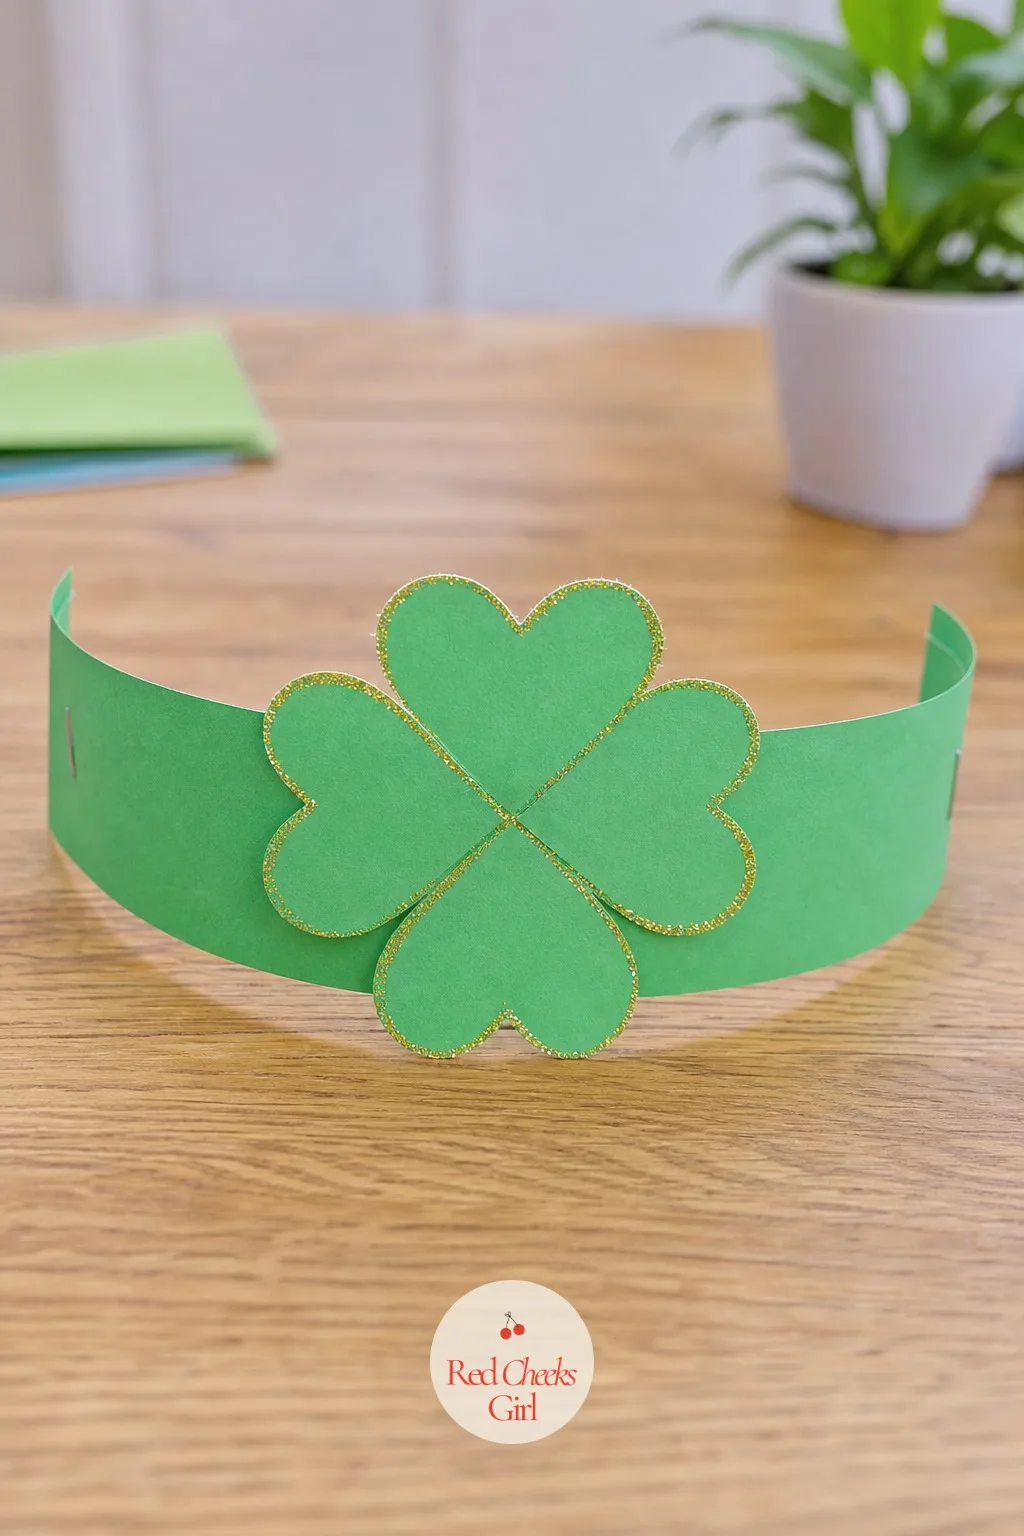
Measure a strip of green paper around a kid’s head, staple the ends, then glue four small paper hearts together point to point at the front so they form a four leaf clover instead of the usual three. A light dusting of gold glitter along the leaf edges finishes it.
This one leaves the house on the way out the door, which makes it the easiest favor of the whole day.
Felt clover shapes, hot glued instead of paper, hold up far better if more than one kid wants a turn wearing it.
🛍 Shopping guide
Press a Rainbow Handprint onto a Keepsake Canvas
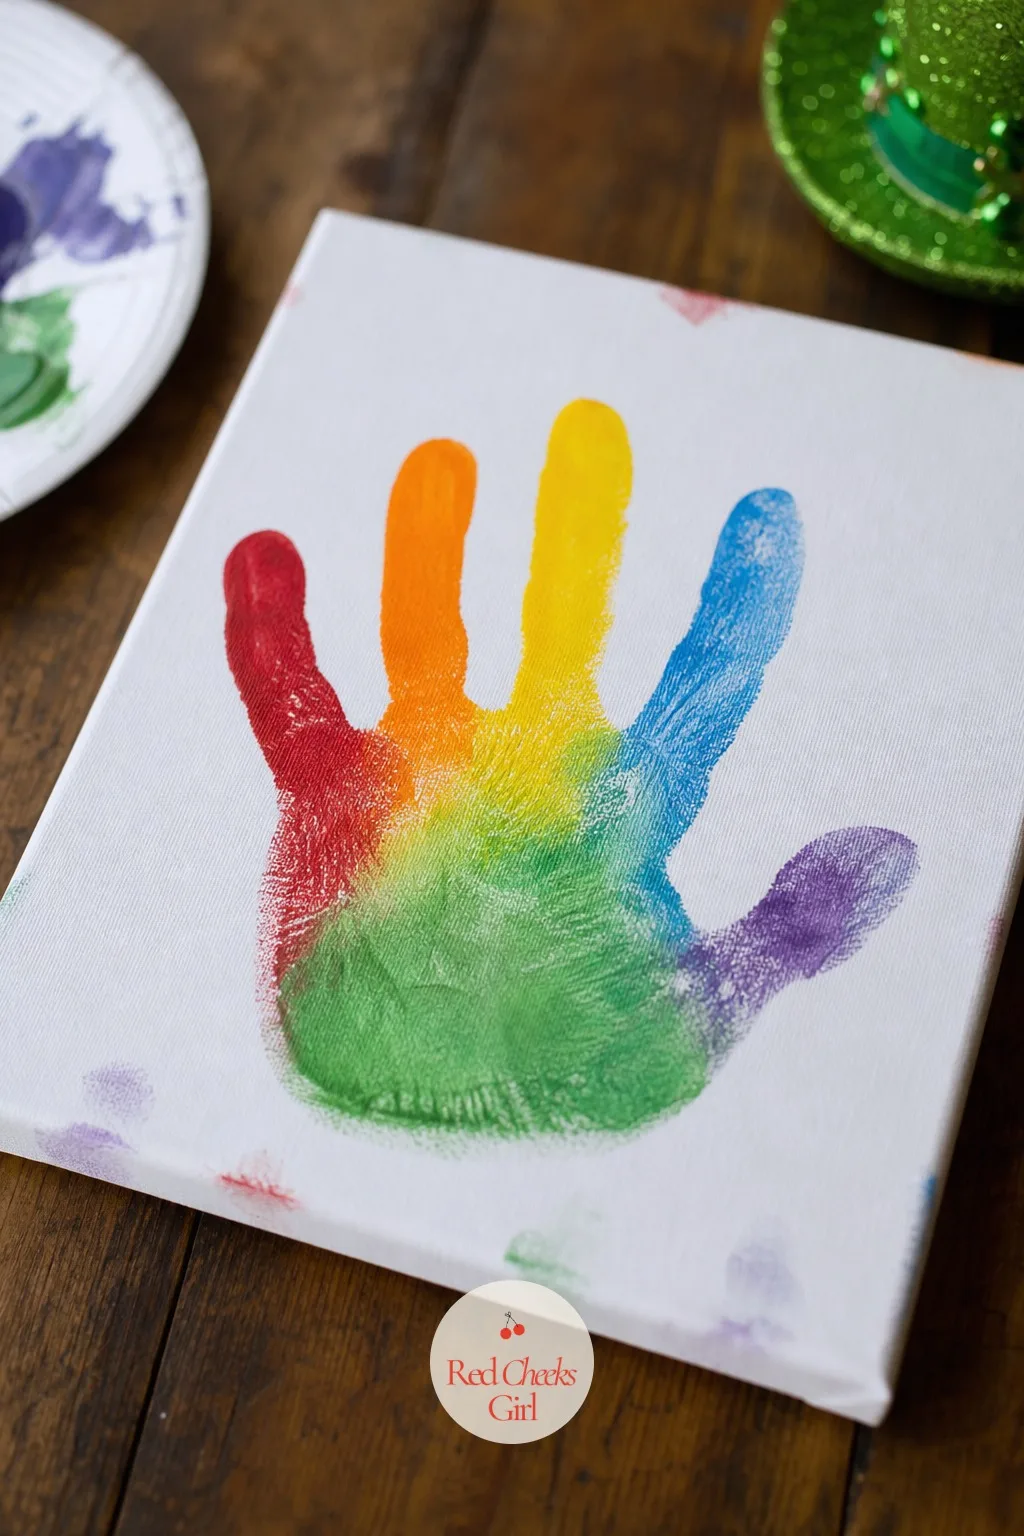
Paint each finger a different rainbow color, keeping the palm itself green, then press the whole hand down onto a small canvas in one firm motion. The stripes blend slightly at the fingertips where the colors meet, which is exactly what makes it look hand done rather than printed.
Let it dry flat for at least an hour before anyone picks it up, then date the back once it is set.
A plain paper plate works as the canvas if a mini art canvas is not already in the house.
🛍 Shopping guide
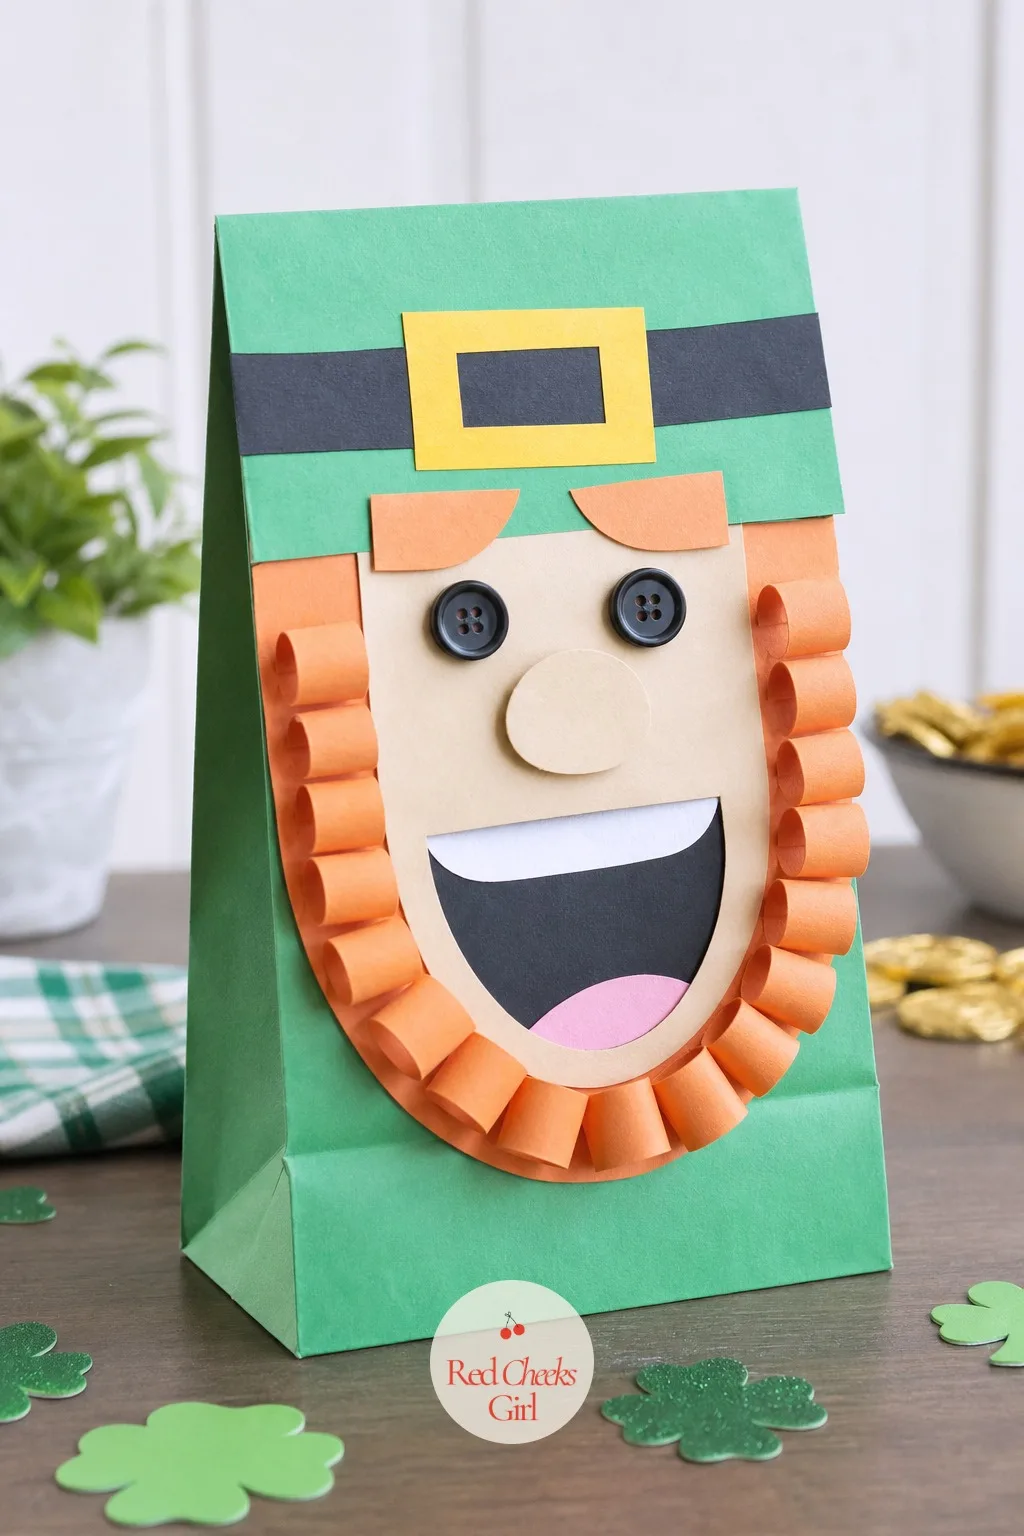
Make a Leprechaun Puppet from a Paper Bag
A folded paper lunch bag already has a built in mouth, the flat bottom flap, so start there. Paint the flap as an open mouth, glue a construction paper face above it, then add curled orange paper or yarn as a beard trailing below the chin.
Two button eyes and a small triangle hat finish the face, and a hand slipped inside the bag works the mouth open and shut.
A full size grocery bag makes a floor sized puppet if little hands want something bigger to perform with, and the same craft keeps a few more rainy afternoons covered alongside the 20 St Patrick’s Day Party Games for a Green and Noisy Night for later in the day.
🛍 Shopping guide
Frequently Asked Questions
What age are St Patrick’s Day crafts suitable for?
Most of these crafts work from toddler age through early elementary, with handprint shamrocks and the pom pom topiary suited to the youngest hands and the woven pot of gold basket better for kids who can already manage scissors well.
What are the best mess-free St Patrick’s Day crafts for toddlers?
The contact paper suncatcher is the cleanest option, since tissue paper presses onto the sticky sheet with no glue at all; the button garland and coin rubbing are nearly as tidy.
How do I make a leprechaun trap kids will actually want to build?
Cover a shoebox in green and gold paper, glue a popsicle stick ladder up one side, cut a trapdoor into the lid propped open with a string tied stick, then scatter gold coin cutouts as bait leading up to it.
What can kids make with paper plates for St Patrick’s Day?
Paper plates work well as a rainbow wreath base, a leprechaun beard mask frame, or a simple shamrock cutout once the center is trimmed into the right shape.
How far in advance should we start St Patrick’s Day crafts?
Most of these finish in under thirty minutes and can be made the same afternoon; only the leprechaun trap and footprint trail need to be set up the night before so they are ready as a surprise in the morning.
How do I keep gold glitter from going everywhere?
Work over a tray or baking sheet so loose glitter stays contained, and swap loose glitter for glitter glue on crafts like the clover headband where only a light edge of sparkle is needed.
22 bright, countable 100th day of school ideas: showpieces, snacks sorted into tens, games and small

There’s a particular kind of panic that sets in around the second week of April, when you sudd

150 clean truth or dare questions for any age — perfect for parties, sleepovers & game night. Grab
Leave a Reply