

26 Christmas Wreath Crafts for Kids With Paper Plates, Handprints and Glittery Chaos
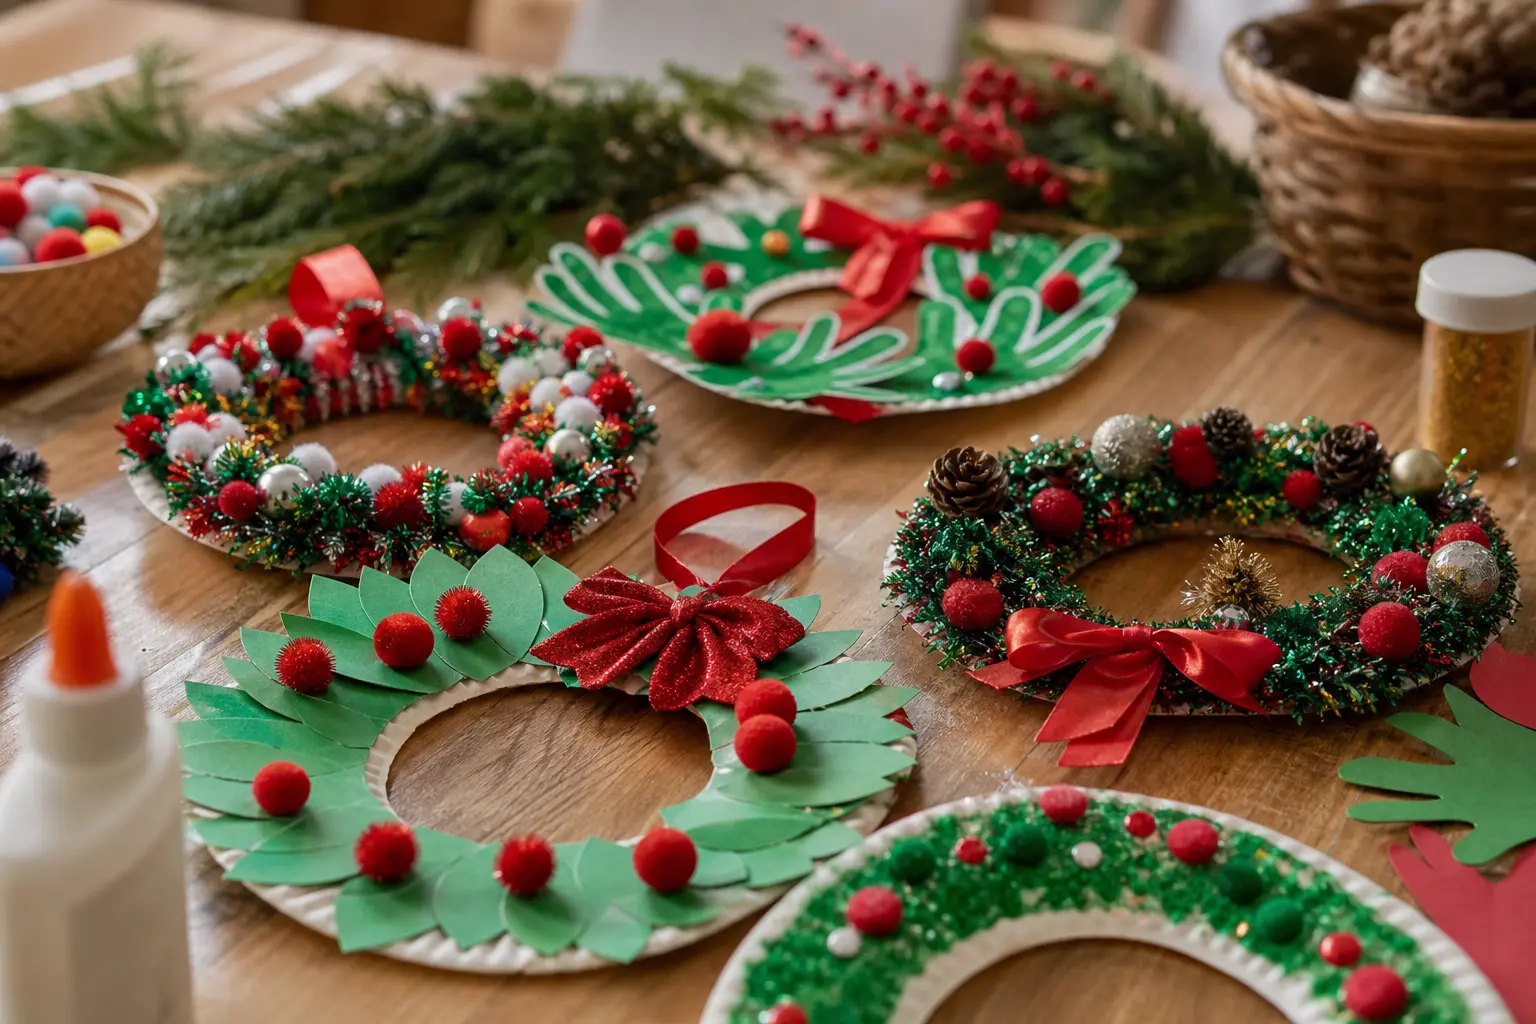
Forget the wreath that belongs on a front door. These are the wreaths that belong on a fridge, a bedroom door or a classroom window, made by hands that are four, six or nine years old and proud of every crooked edge. A paper plate, a handful of paint and twenty quiet minutes is the whole ask.
None of these need a hot glue gun unsupervised or a trip to a specialty craft shop. Most start with a paper plate, a stack of construction paper, or whatever is already rattling around the pantry. If the grown-up version of a wreath is more your speed, 15 Christmas Wreath Crafts for Kids Built From Something Other Than a Paper Plate covers that ground instead.
Sorted into five groups by base material, so you can match the craft to the kid, the mess tolerance and the ten minutes you actually have before dinner.
This post contains affiliate links. If you buy through them, I may earn a small commission at no extra cost to you.
Paper Plate Wreaths
A paper plate is the cheapest, fastest wreath base there is: cut out the middle and the rim does all the work. These six turn that plain ring into a character, which gives smaller hands a clear job instead of an open-ended one.
They all suit preschool through early elementary, and every one of them survives being carried home on a school bus.
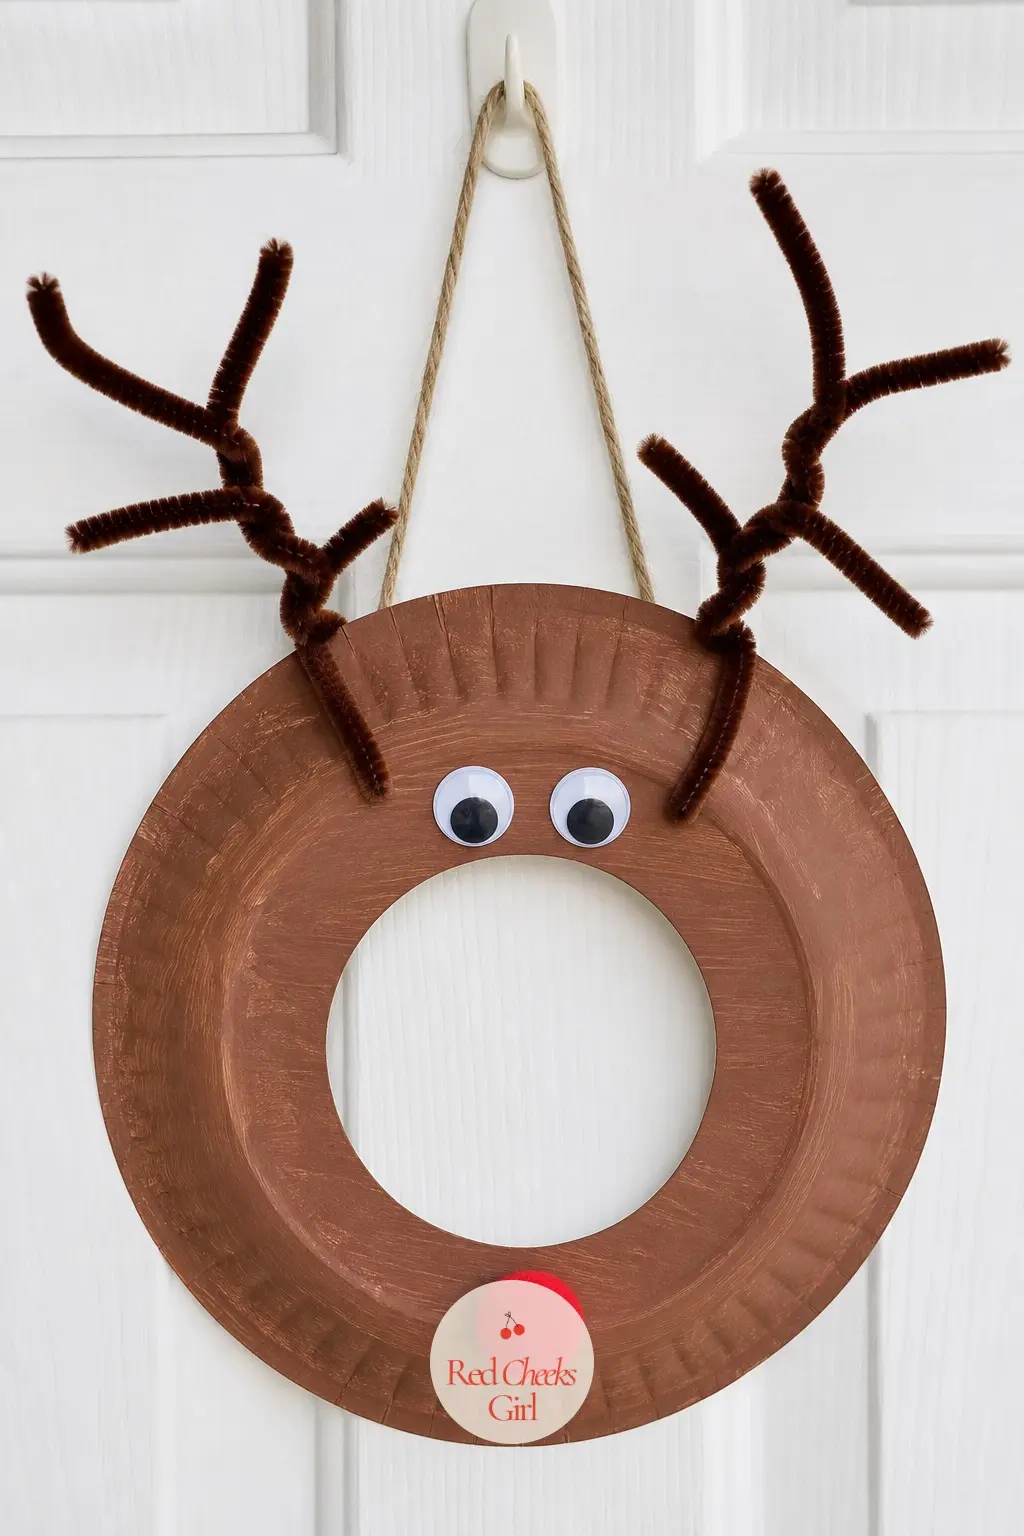
Rudolph Paper Plate Wreath
A brown-painted paper plate ring becomes Rudolph with two googly eyes, a round red pom nose glued dead center at the bottom, and a pair of twisted brown pipe cleaners bent into antlers and taped to the back.
This is the easiest entry on the whole list for a first-time crafter: four pieces, no cutting beyond the center hole, and the nose placement is the only decision that matters.
🛍 Shopping guide
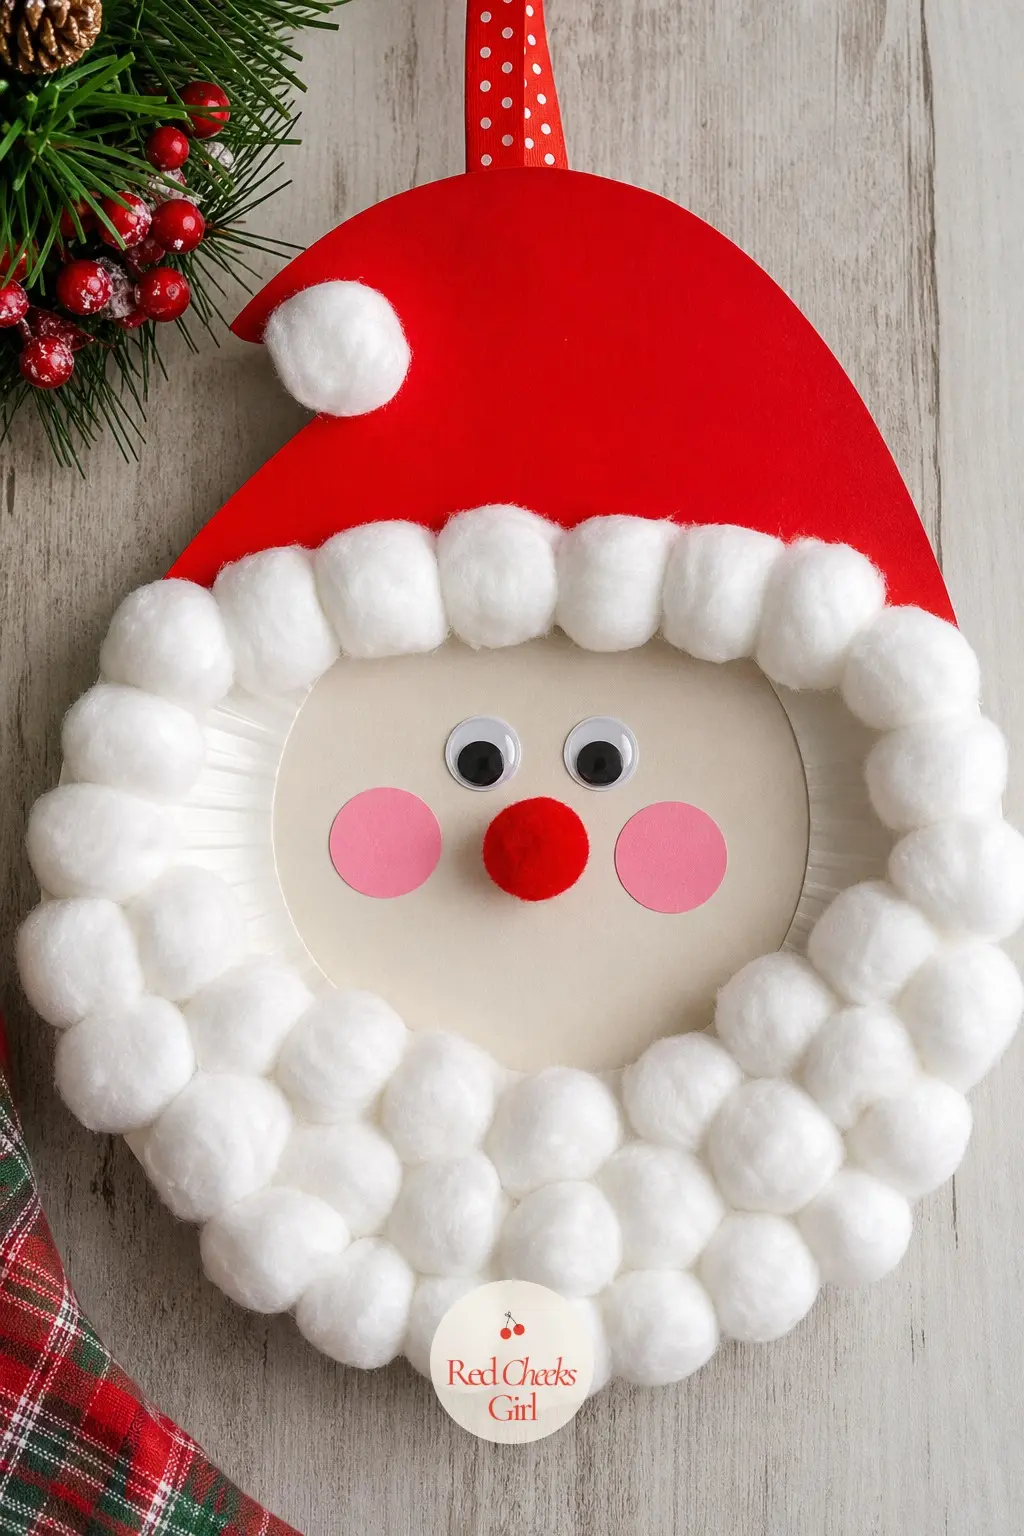
Santa Face Paper Plate Wreath
A white paper plate ring gets a border of stretched cotton balls for the beard, a red felt triangle folded into a hat at the top, and two circles of pink paper glued on as cheeks.
Stretching the cotton balls thin before gluing is the only technique to teach, and it keeps little fingers busy for a solid ten minutes before the hat goes on.
🛍 Shopping guide
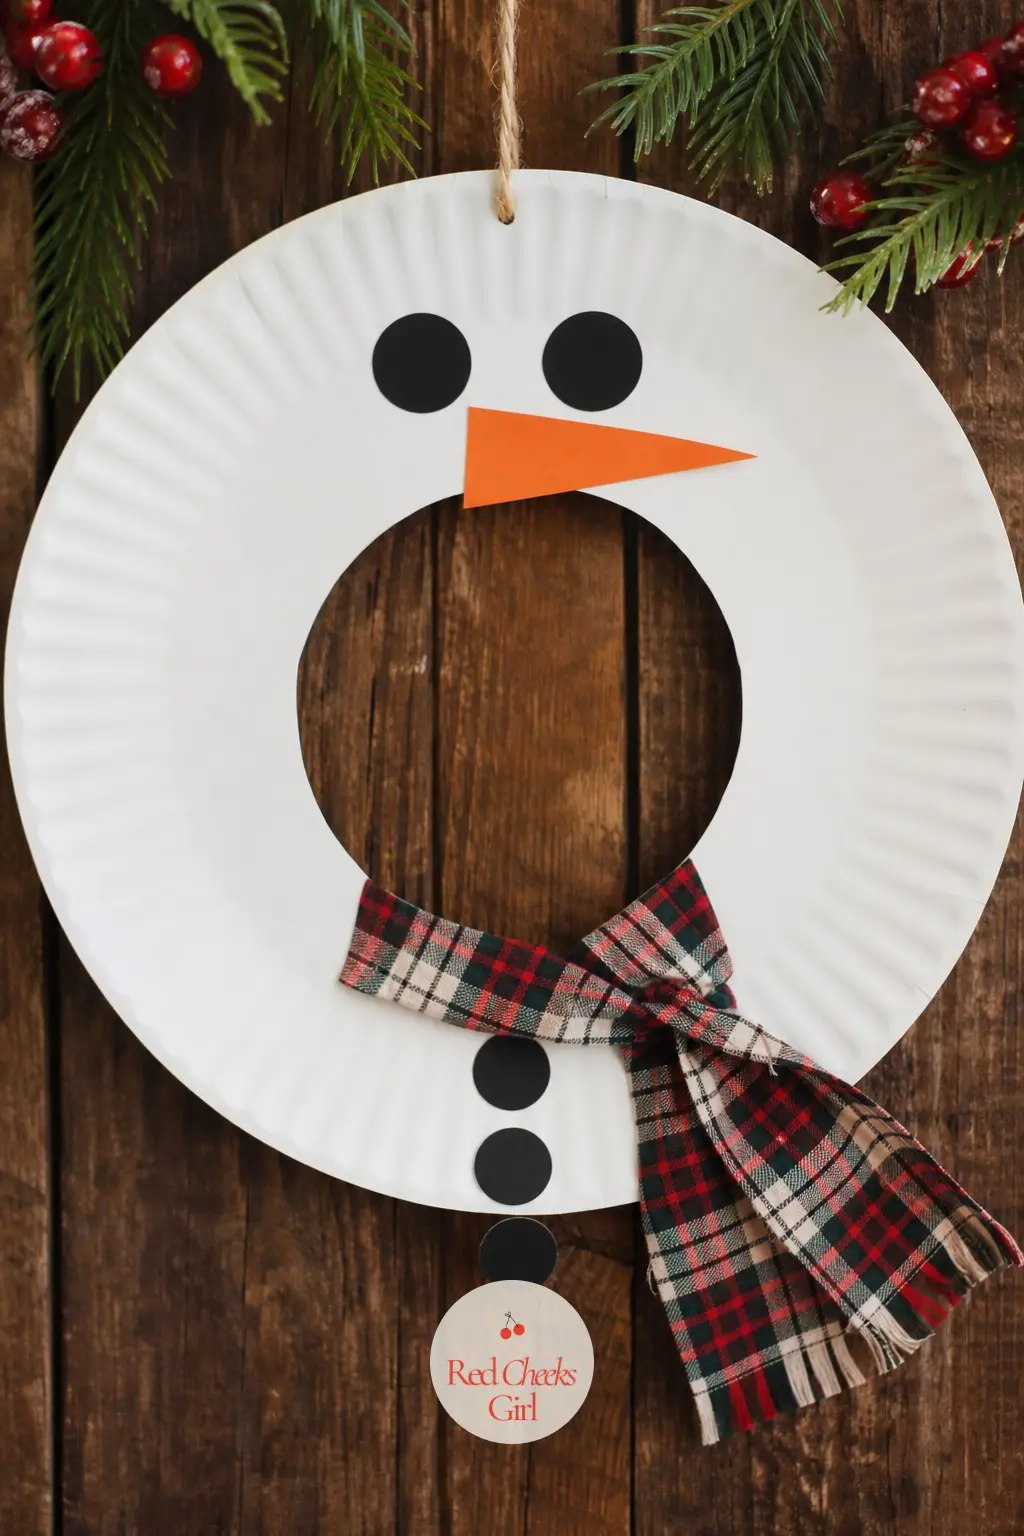
Snowman Paper Plate Wreath
Leave the paper plate ring white for this one. Three black paper buttons run down the front, an orange paper triangle becomes the carrot nose, and a scrap of plaid paper gets snipped into a tiny scarf around the bottom.
It skips paint entirely, which makes it a good pick for a classroom table where wet paint would slow everyone down.
🛍 Shopping guide
Holly Leaf Paper Plate Wreath
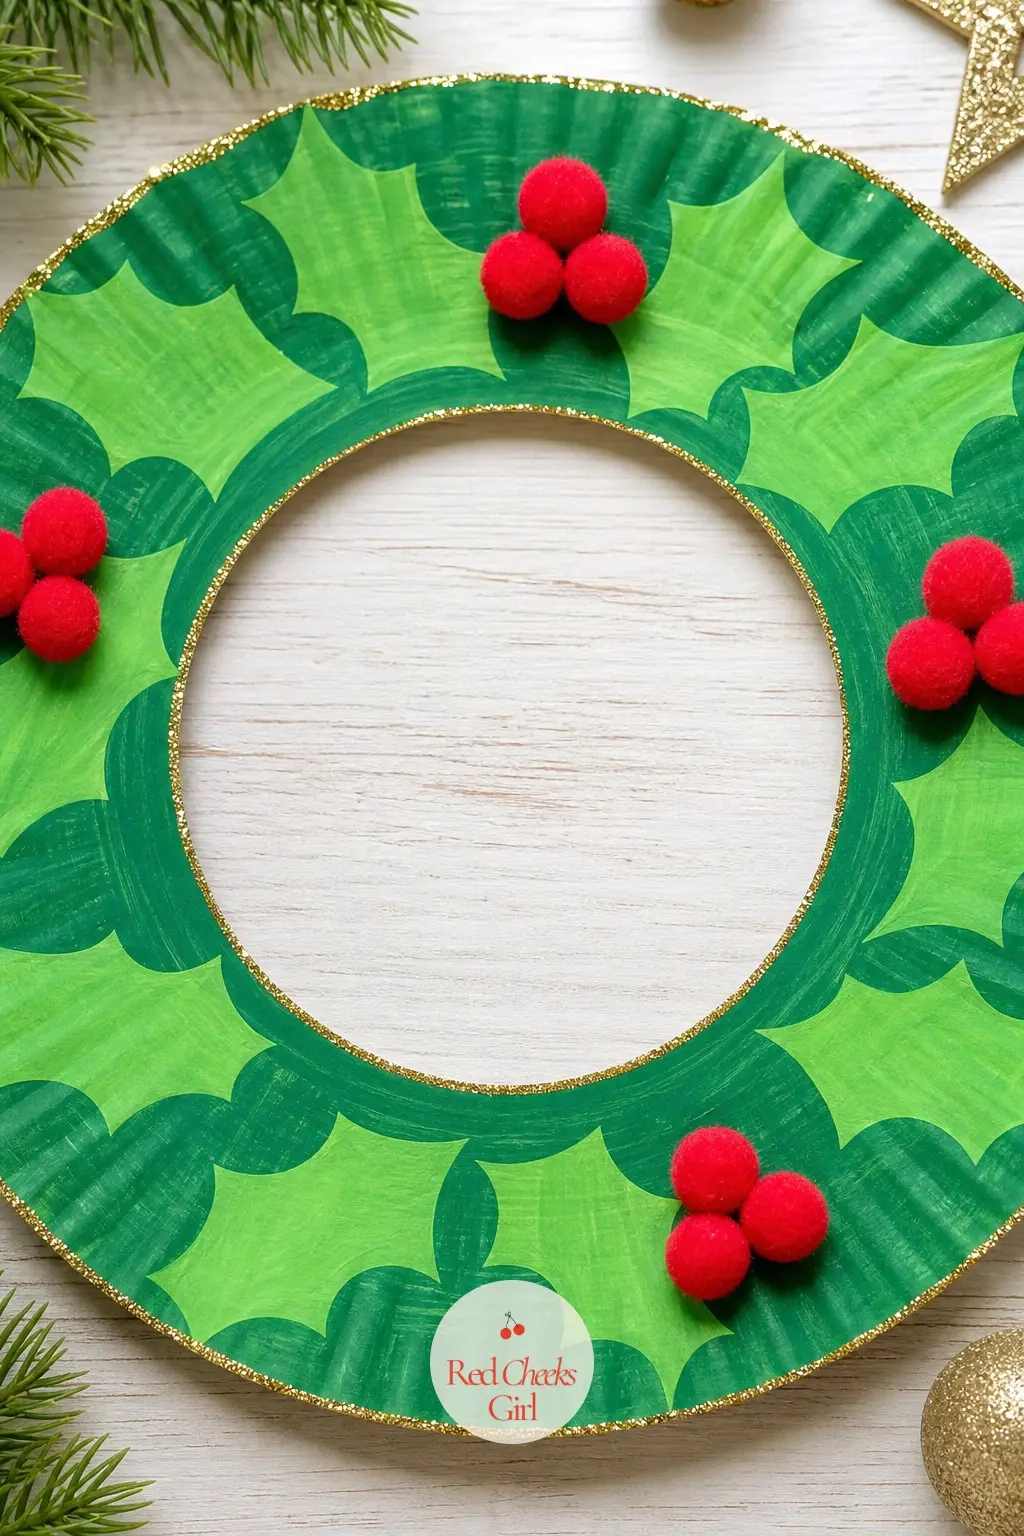
Paint the ring in two shades of green, let it dry, then dab on clusters of red pom pom berries in threes along the rim. A thin gold glitter line brushed along the outer edge, while the paint is still tacky, finishes it without a second drying step.
Younger siblings can help with the pom poms while an older kid handles the brush.
🛍 Shopping guide
Gingerbread Paper Plate Wreath
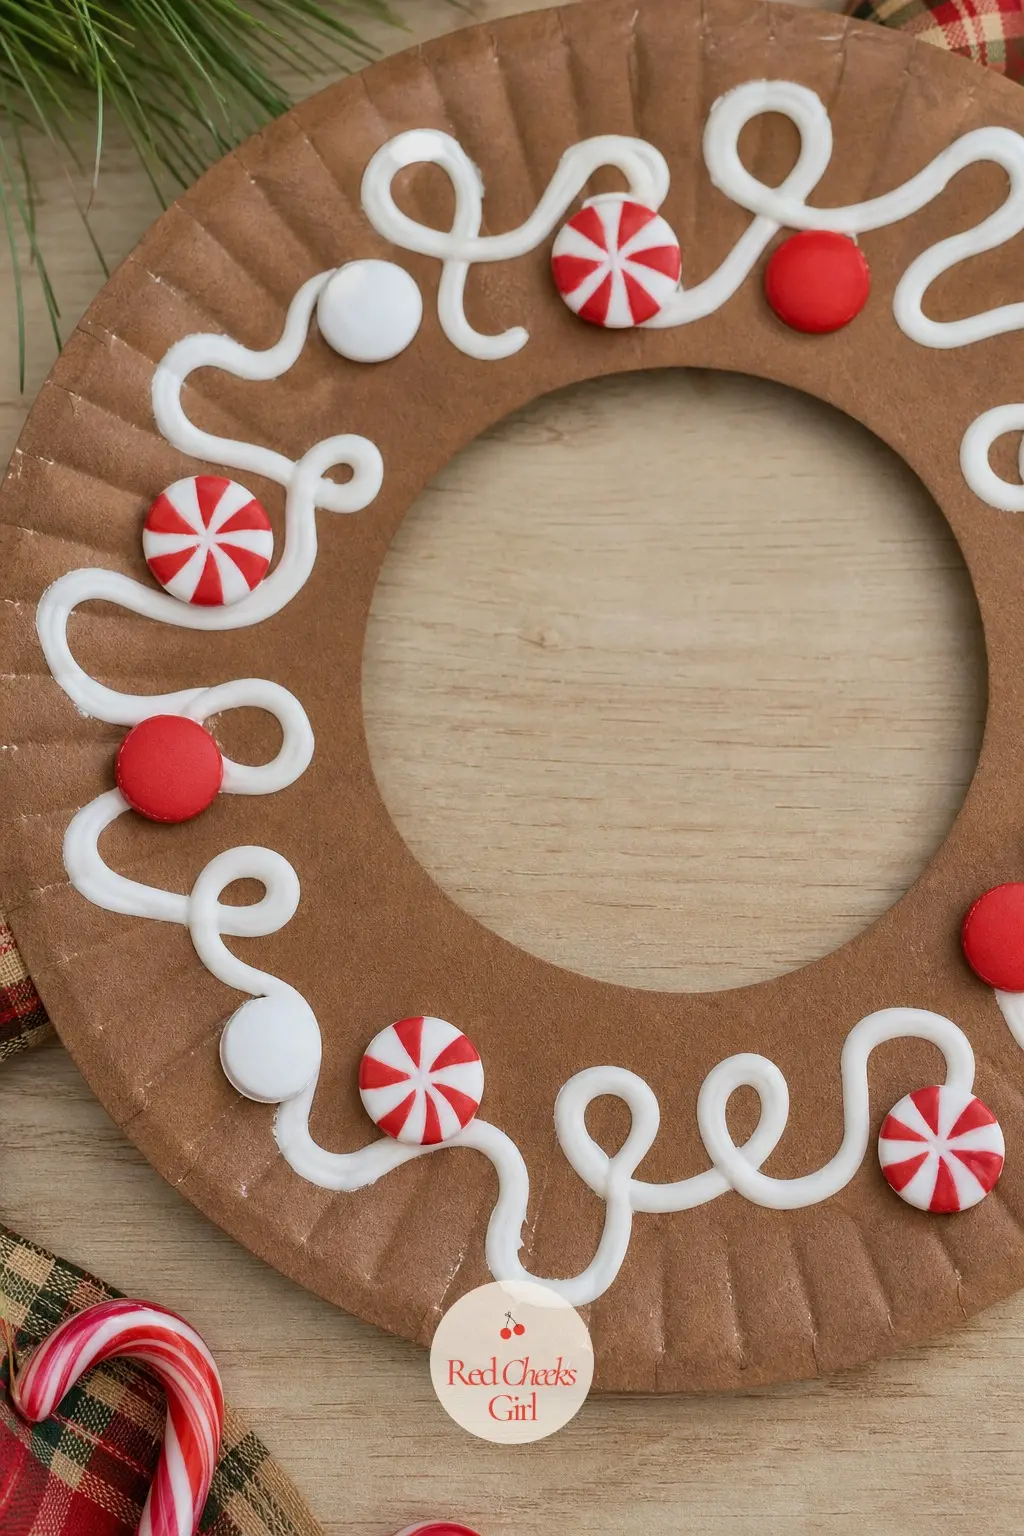
A brown paper plate ring gets squeezed lines of white puffy paint in swirls and dots, meant to look like icing. While the paint is still wet, press on a few flat red and white candy-style paper buttons for a gumdrop effect.
Let it cure flat for a few hours before hanging, the puffy paint stays soft until then.
🛍 Shopping guide
Elf Paper Plate Wreath
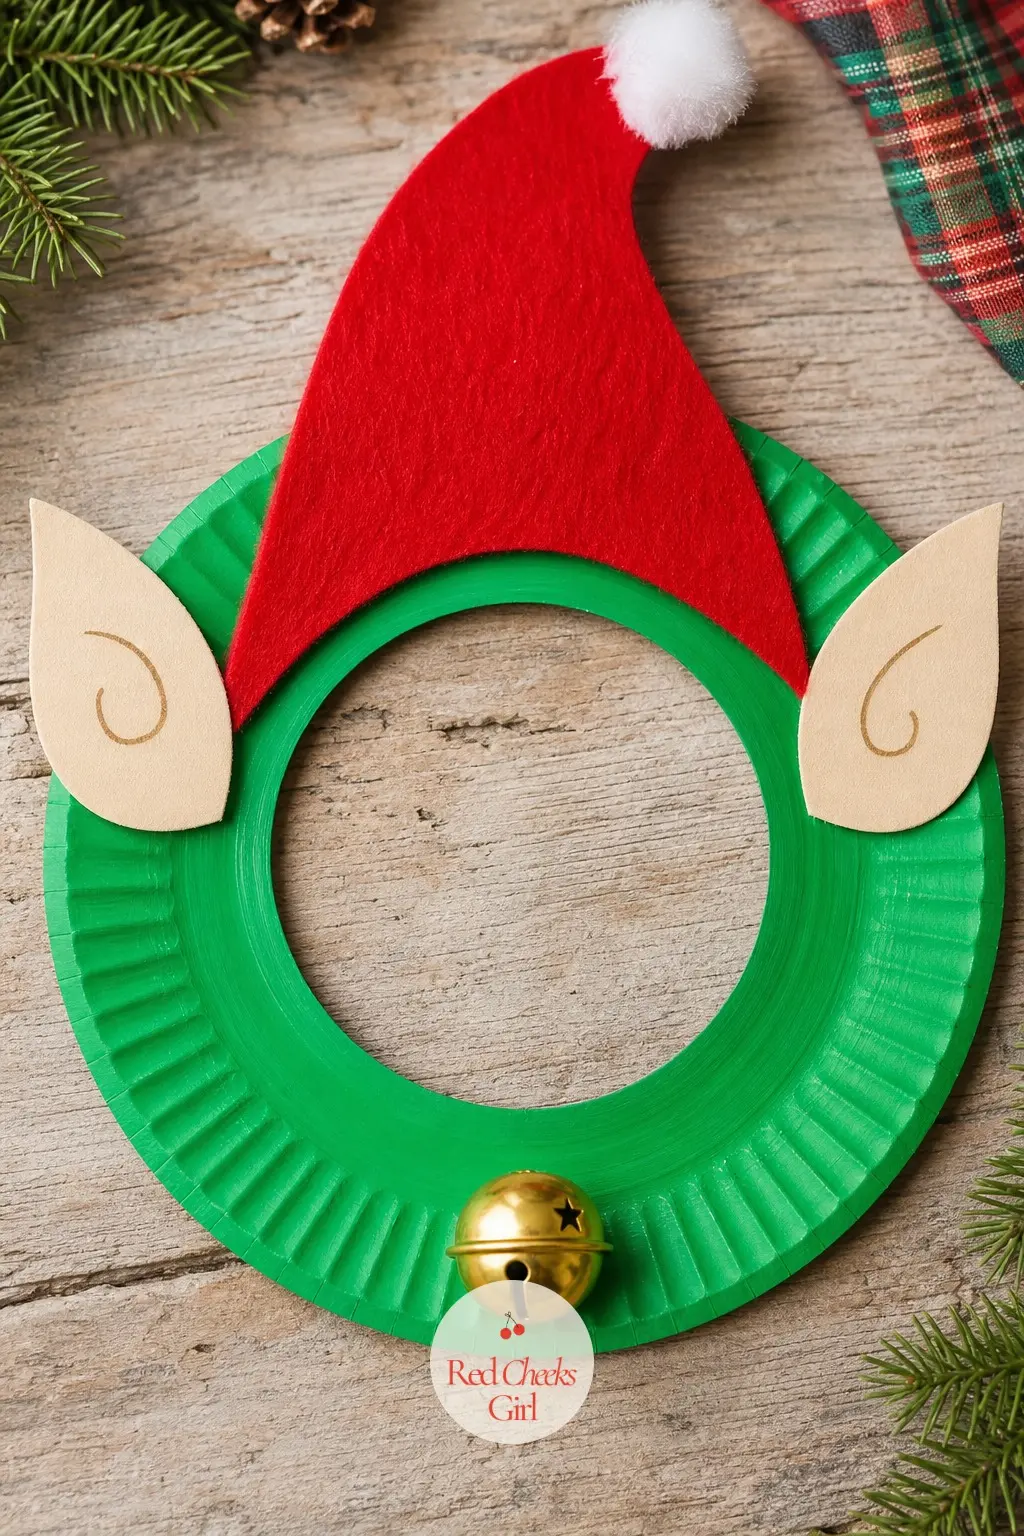
Paint the ring bright green, add a red felt triangle hat at the top with a cotton ball pom on its tip, then glue two cream paper ovals folded to a point for elf ears on either side. A single gold jingle bell at the bottom edge rattles every time the door opens.
Stitching the bell on with thread holds better than glue if it will get handled often.
🛍 Shopping guide
Handprint and Fingerprint Wreaths
A handprint wreath is the one craft a parent actually keeps. Tracing and cutting takes the most adult help in this whole list, so have the scissors ready and expect to do some of the cutting for anyone under five.
Each of these six turns a traced hand or a stamped finger into part of the design instead of just decoration glued onto someone else’s shape.
Handprint Holly Wreath
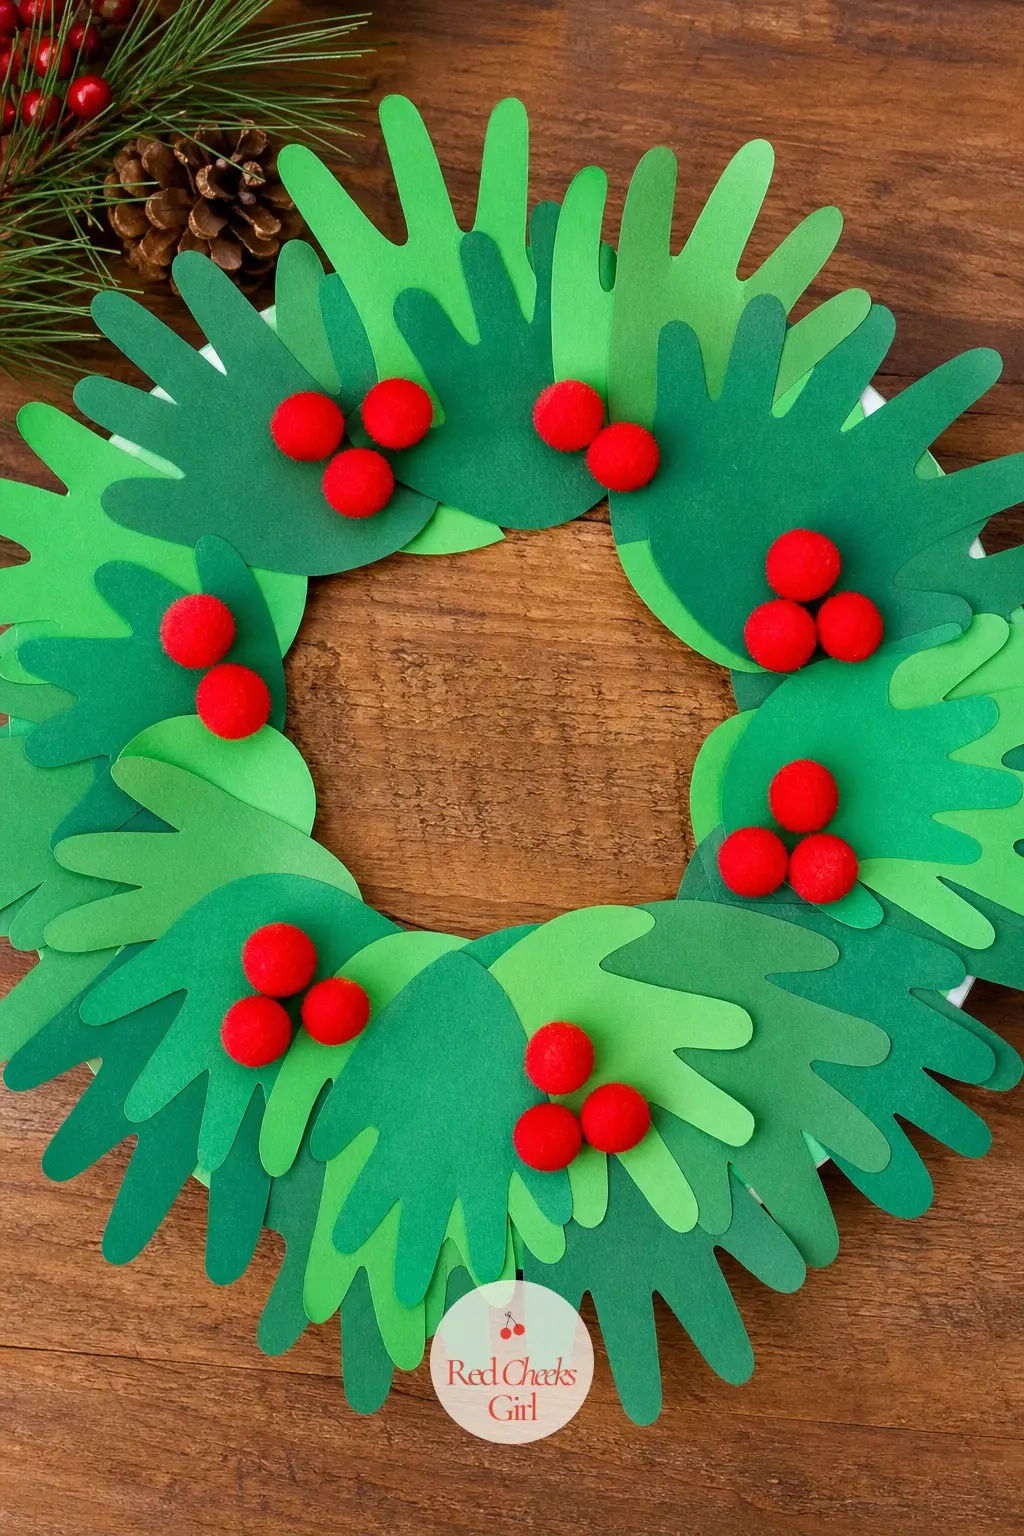
Trace ten or twelve small hands on green paper, cut them out, then overlap them in pairs around a plain paper plate ring so each pair reads as a holly leaf. Red pom poms glued in the gaps finish it as berries.
Two shades of green paper, instead of one, keeps the overlapping hands from blurring into a single flat shape.
🛍 Shopping guide
Fingerprint Reindeer Antler Wreath
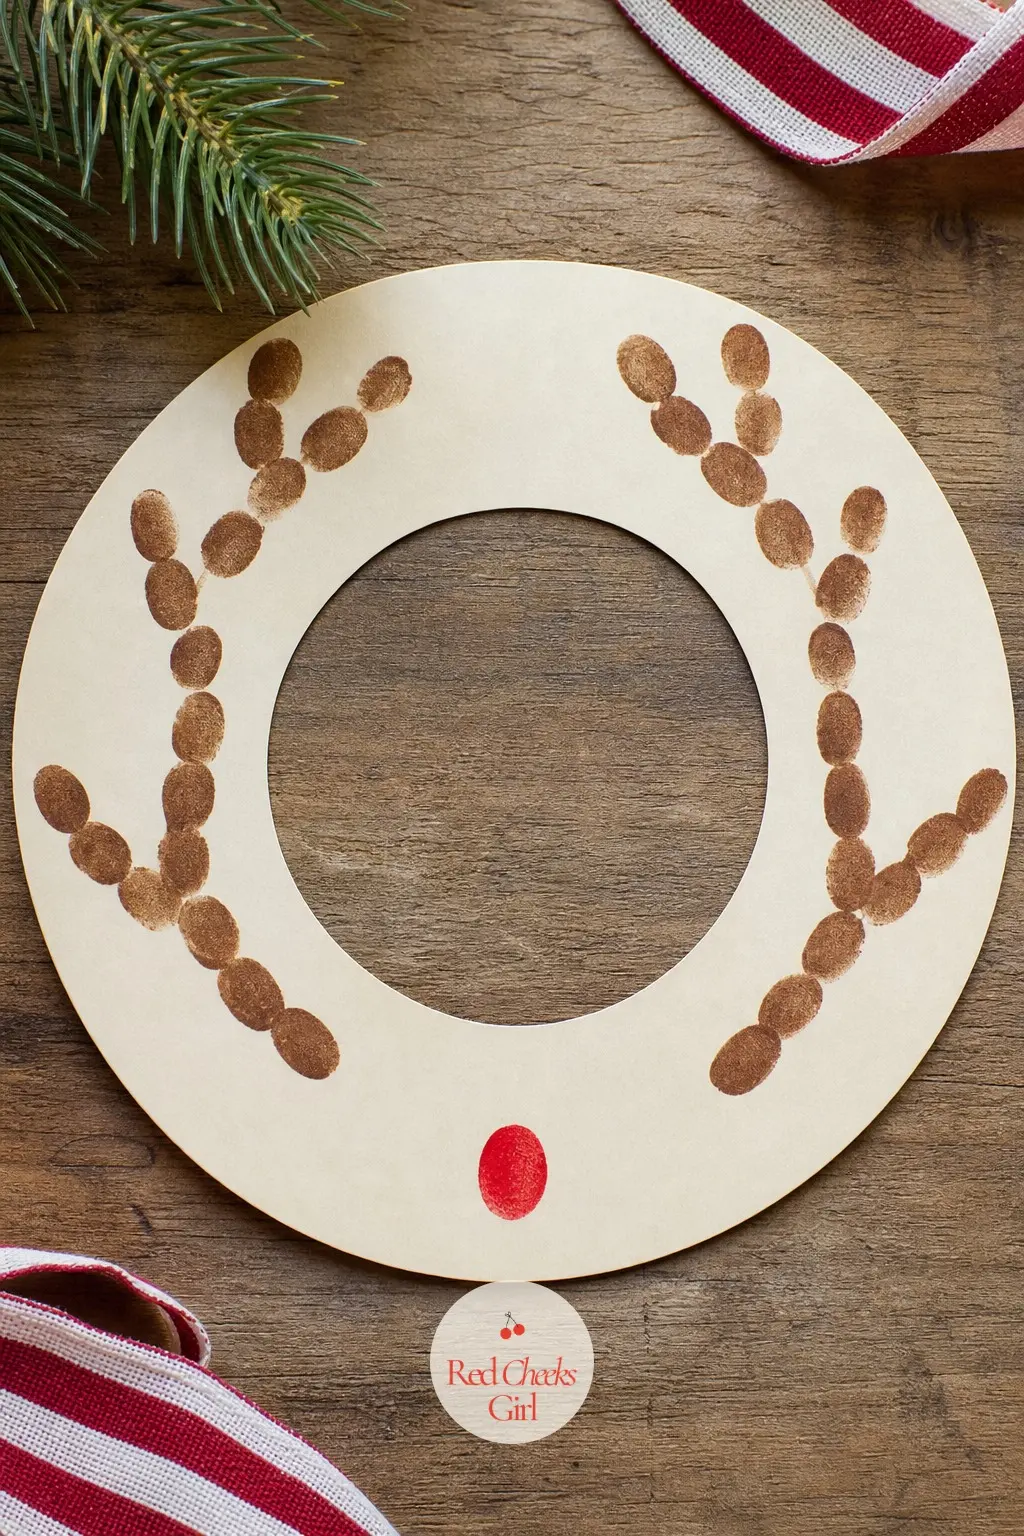
On a cream paper ring, use a brown stamp pad to press fingerprints in branching lines that fan out like antlers at six or eight points around the circle. One red thumbprint at the bottom becomes Rudolph’s nose, tying the whole ring together.
This one is almost entirely stamp pad work, so it suits a toddler who cannot manage scissors yet.
🛍 Shopping guide
Rainbow Handprint Wreath
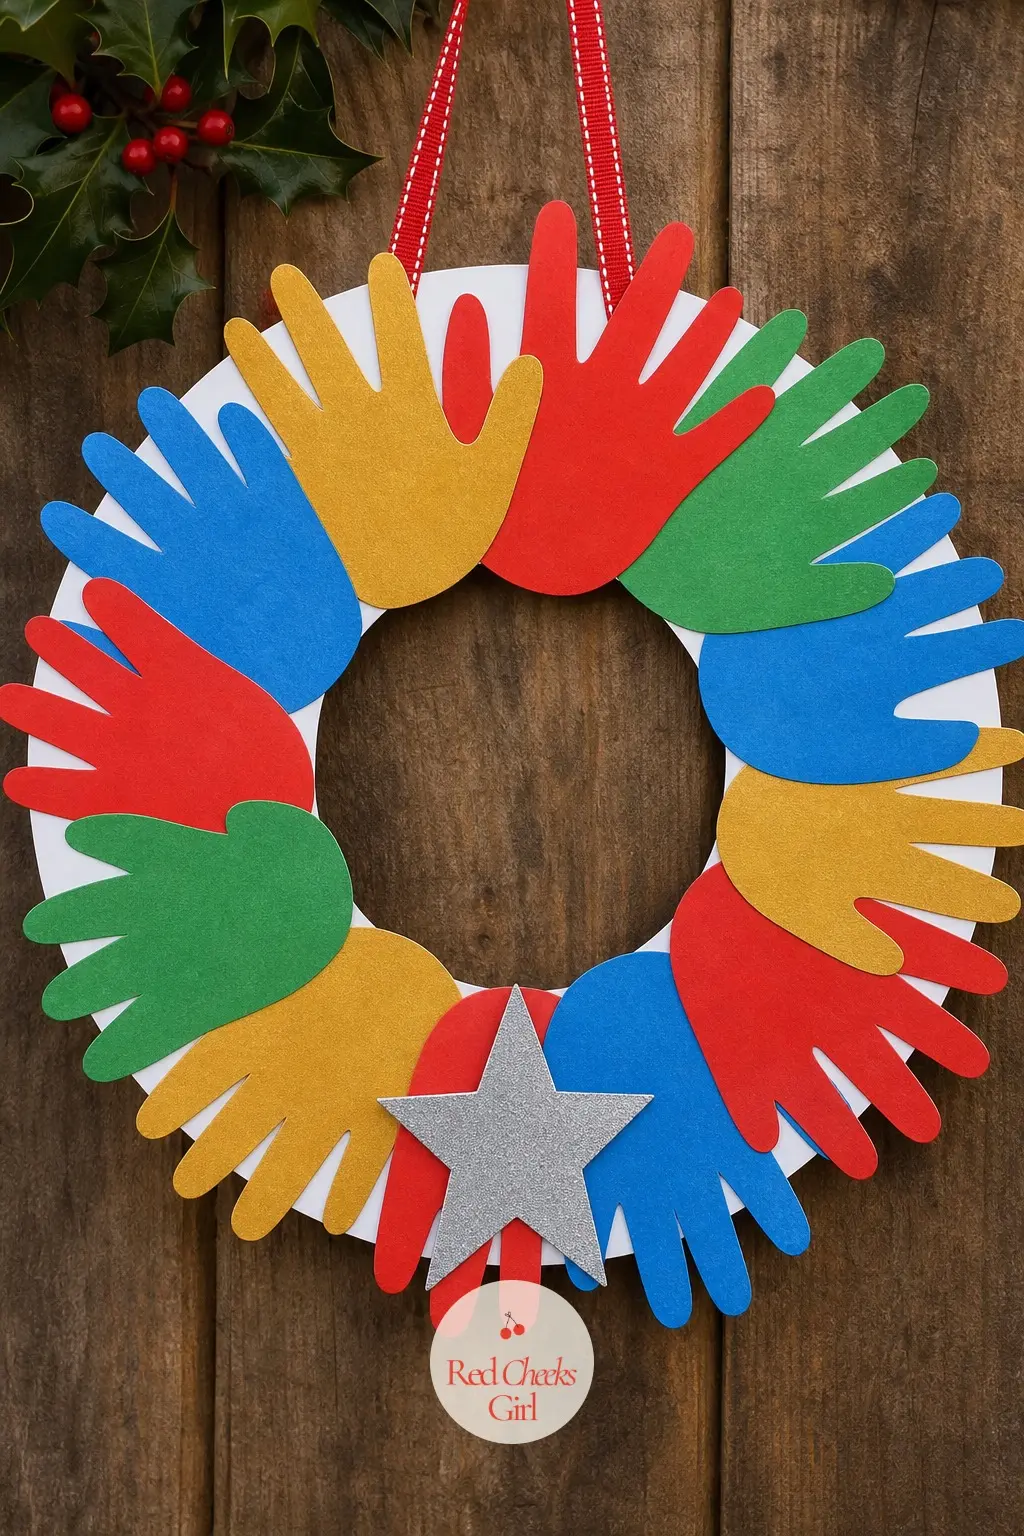
Instead of all-green, this wreath uses a different color for every handprint, red, green, gold and blue, fanned shingle-style around a white paper ring. A single silver paper star glued at the bottom center stands in for a bow.
It works especially well as a group project, one handprint per child, with everyone’s color going somewhere on the same ring.
🛍 Shopping guide
Thumbprint Snowflake Wreath
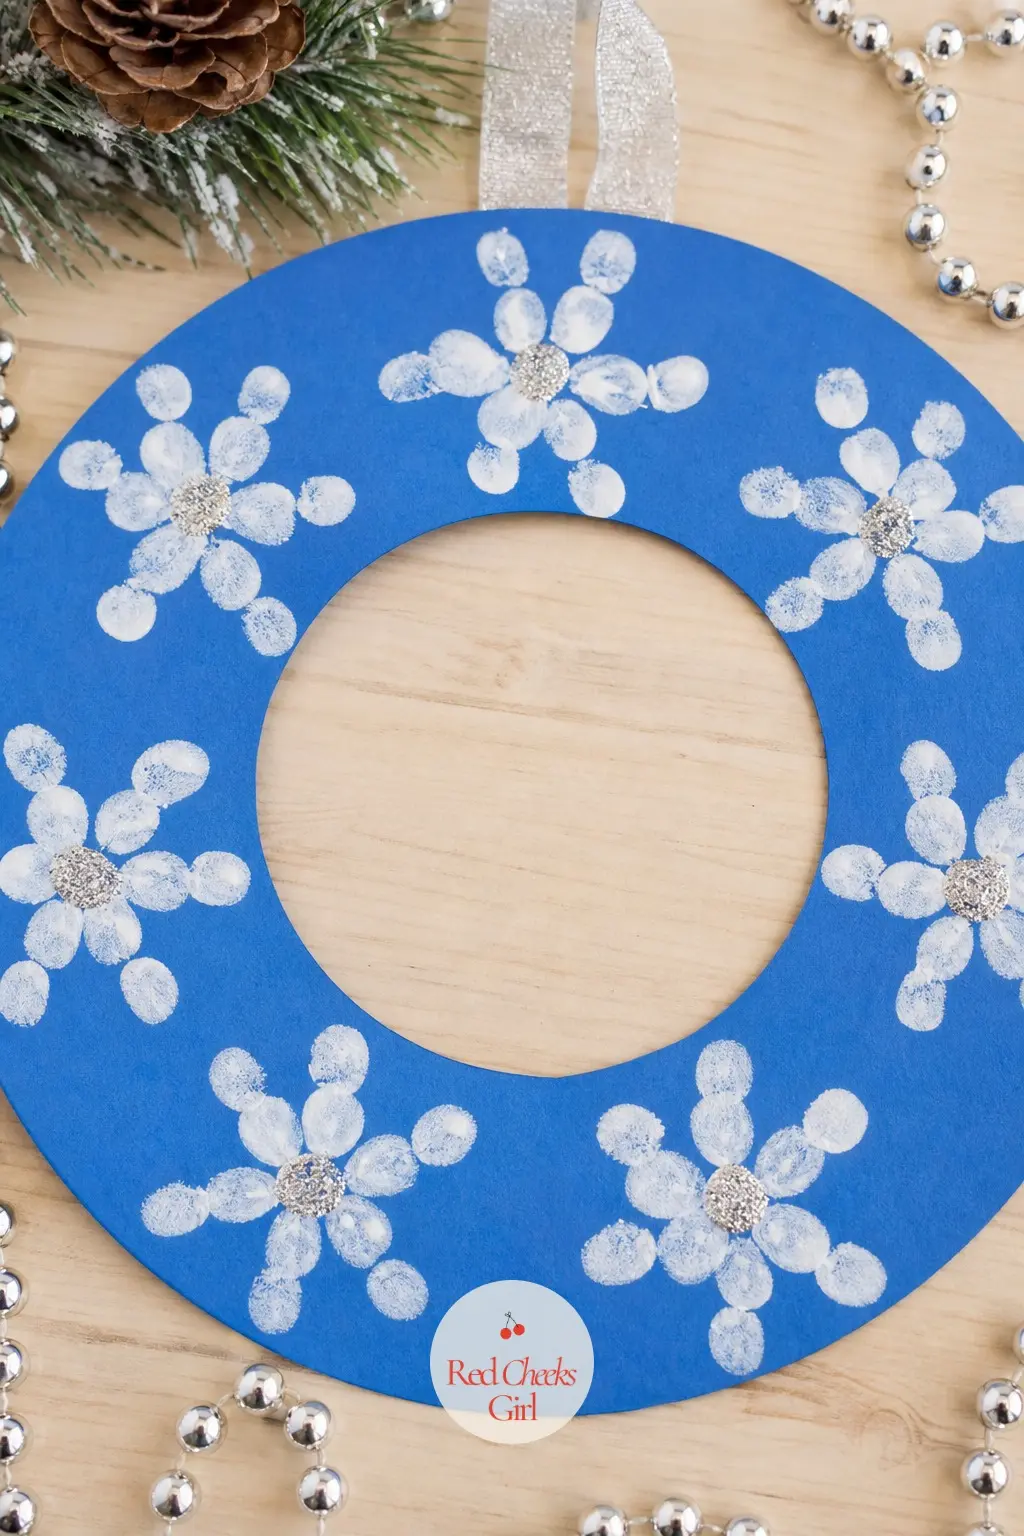
On a blue cardstock ring, cluster white paint thumbprints into six-point snowflake shapes spaced evenly around the circle. Once dry, a dab of craft glue and a pinch of silver glitter on each snowflake center adds the only sparkle this one needs.
Keep the paint on a small plate rather than in a jar, it dries out less between prints.
🛍 Shopping guide
Handprint Poinsettia Wreath
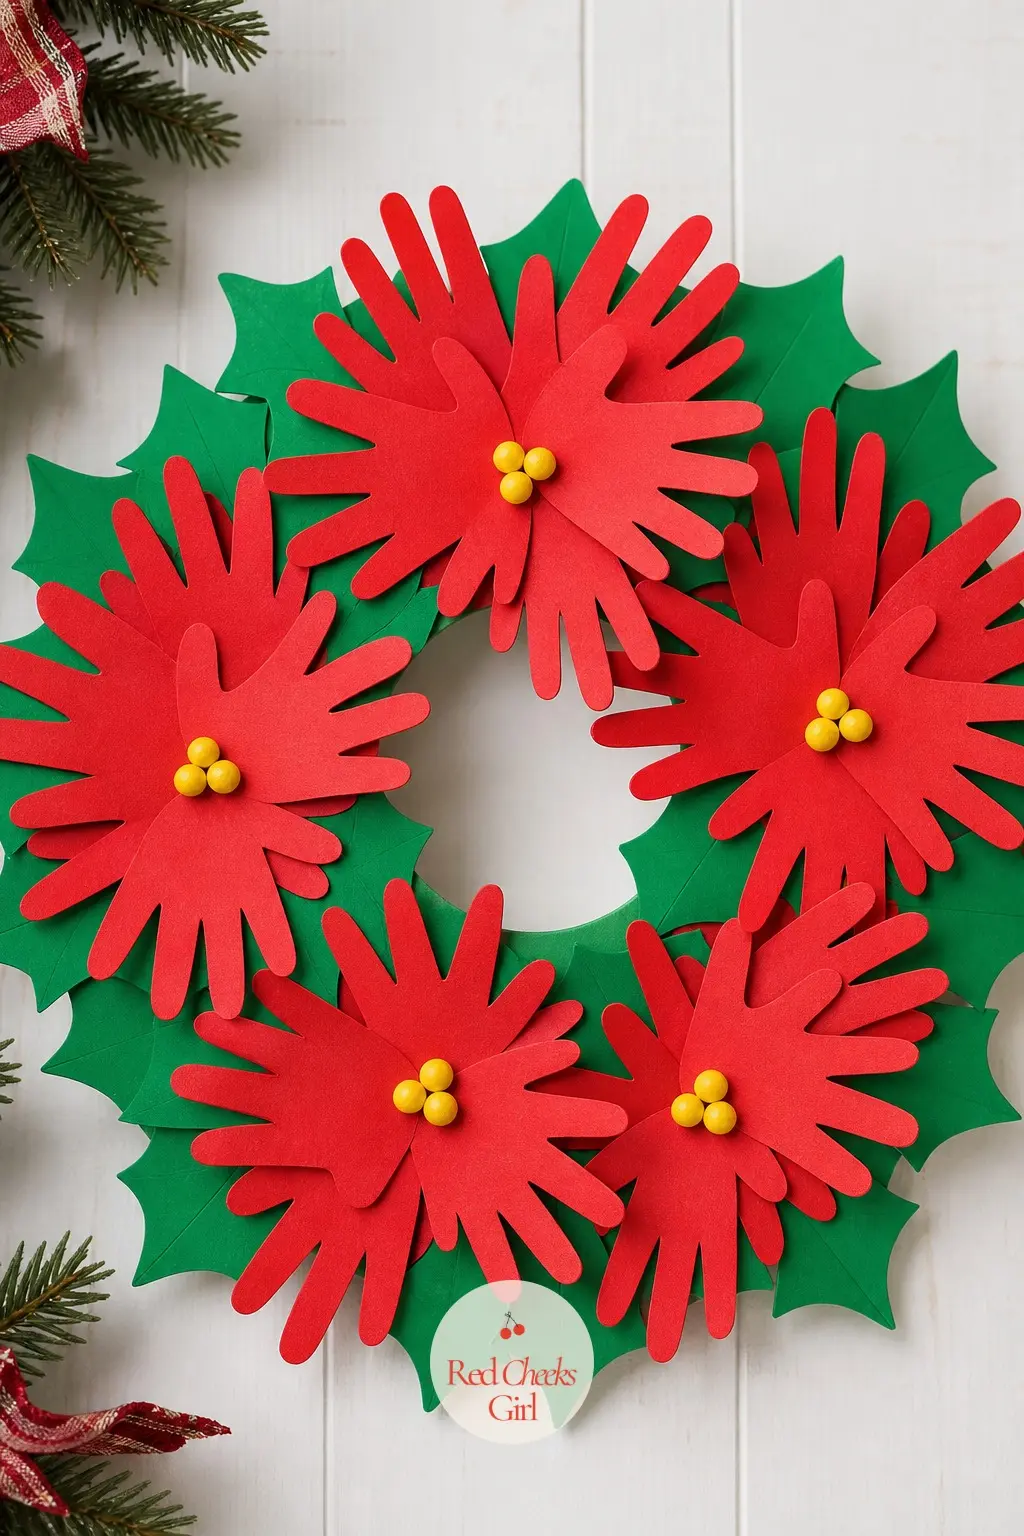
Layer red paper handprints in twos and threes around a ring so they read as poinsettia petals, then glue a small yellow paper bead or button at the center of each cluster. Green paper leaves cut freehand fill the remaining gaps.
This is the most paper-heavy entry here, plan on twenty or more handprints for a full-looking ring.
🛍 Shopping guide
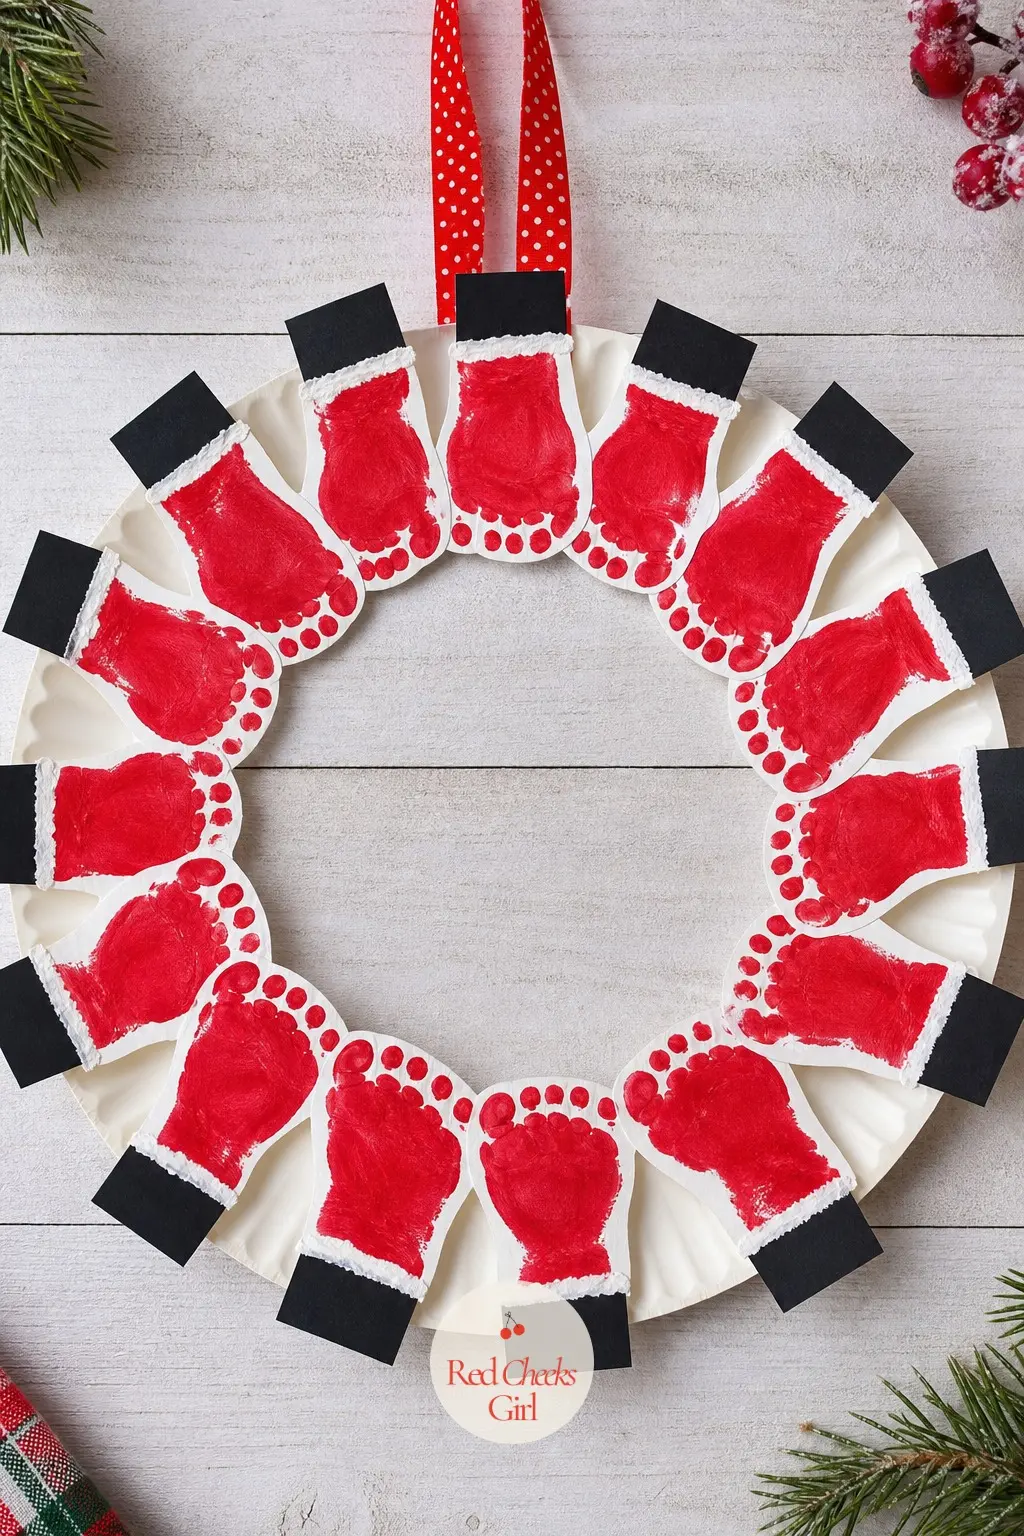
Footprint Santa Boot Wreath
For a baby or toddler too small for a tidy handprint, red and white paint footprints along the outer edge of a paper plate ring stand in for a string of Santa boots. Small black paper cuffs glued at the top of each print finish the look.
Wipe tiny feet with a damp cloth immediately after, this one is messier in practice than it sounds.
🛍 Shopping guide
Glitter and Sparkle Wreaths
Glitter is the material that makes every kid craft look finished, and the one that ends up in the car carpet for a year afterward. Work over a tray, a baking sheet or an old towel folded in half, and let these dry somewhere nobody needs to walk past.
These five lean into the sparkle on purpose rather than apologizing for it.
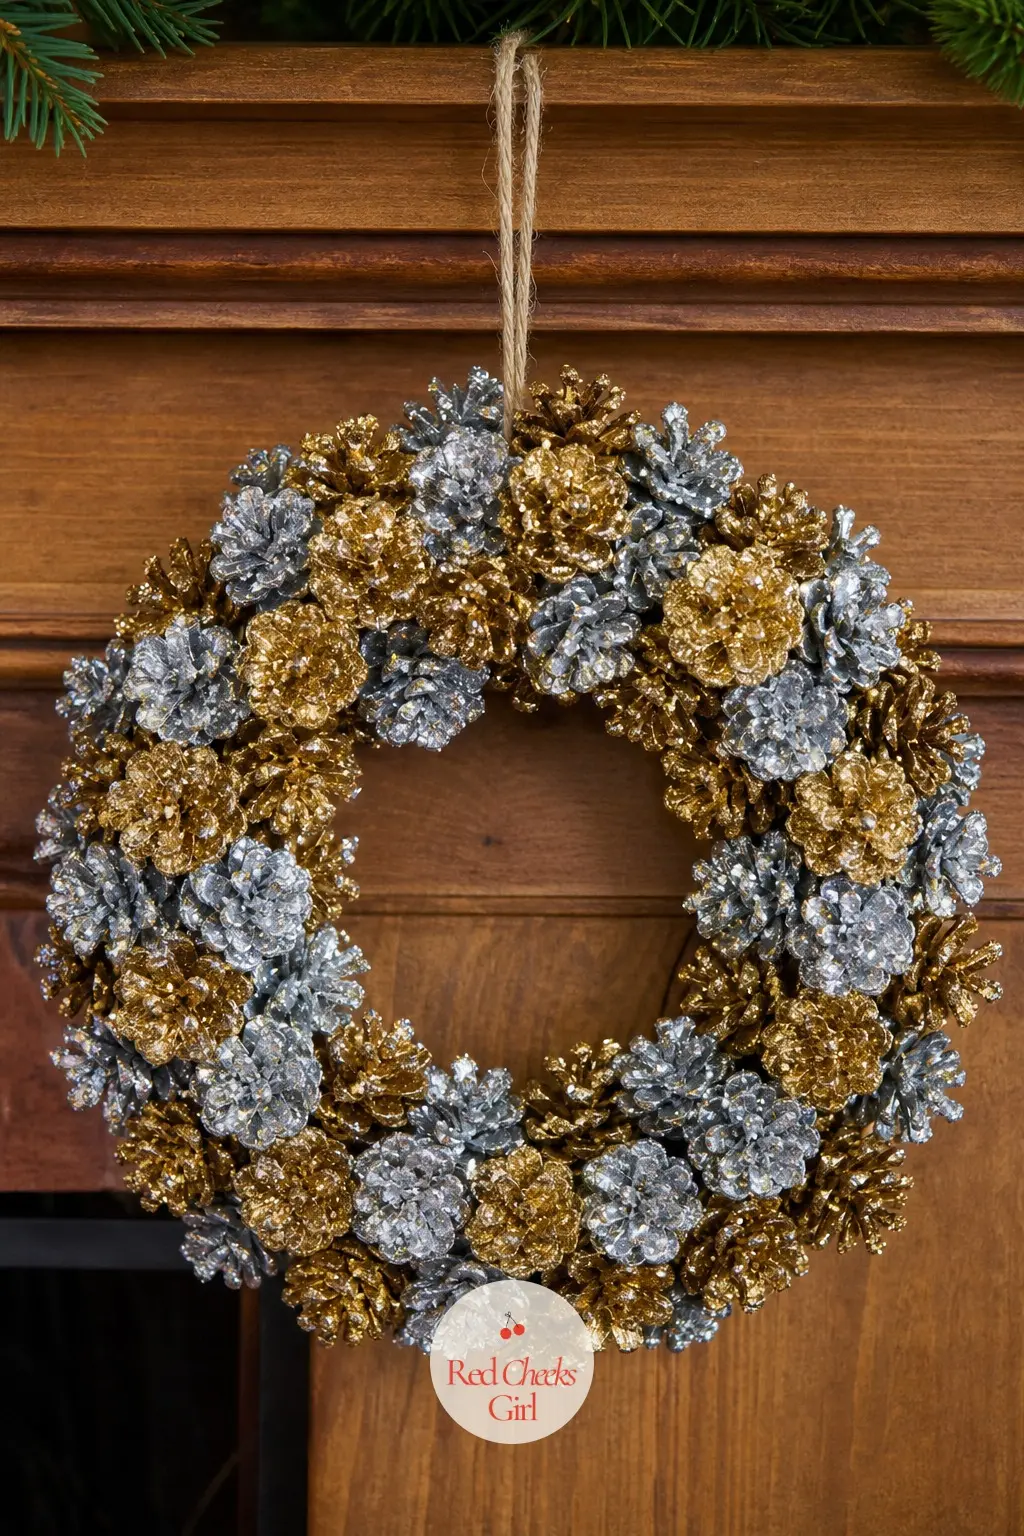
Glitter Pinecone Wreath
Dip small pinecones in craft glue, roll them in a mix of gold and silver glitter, and let them dry upright on wax paper before wiring them to a plain foam ring. A cord loop at the top hangs it without any ribbon needed.
Collecting the pinecones is half the fun, a short walk outside turns into the first step of the craft.
🛍 Shopping guide
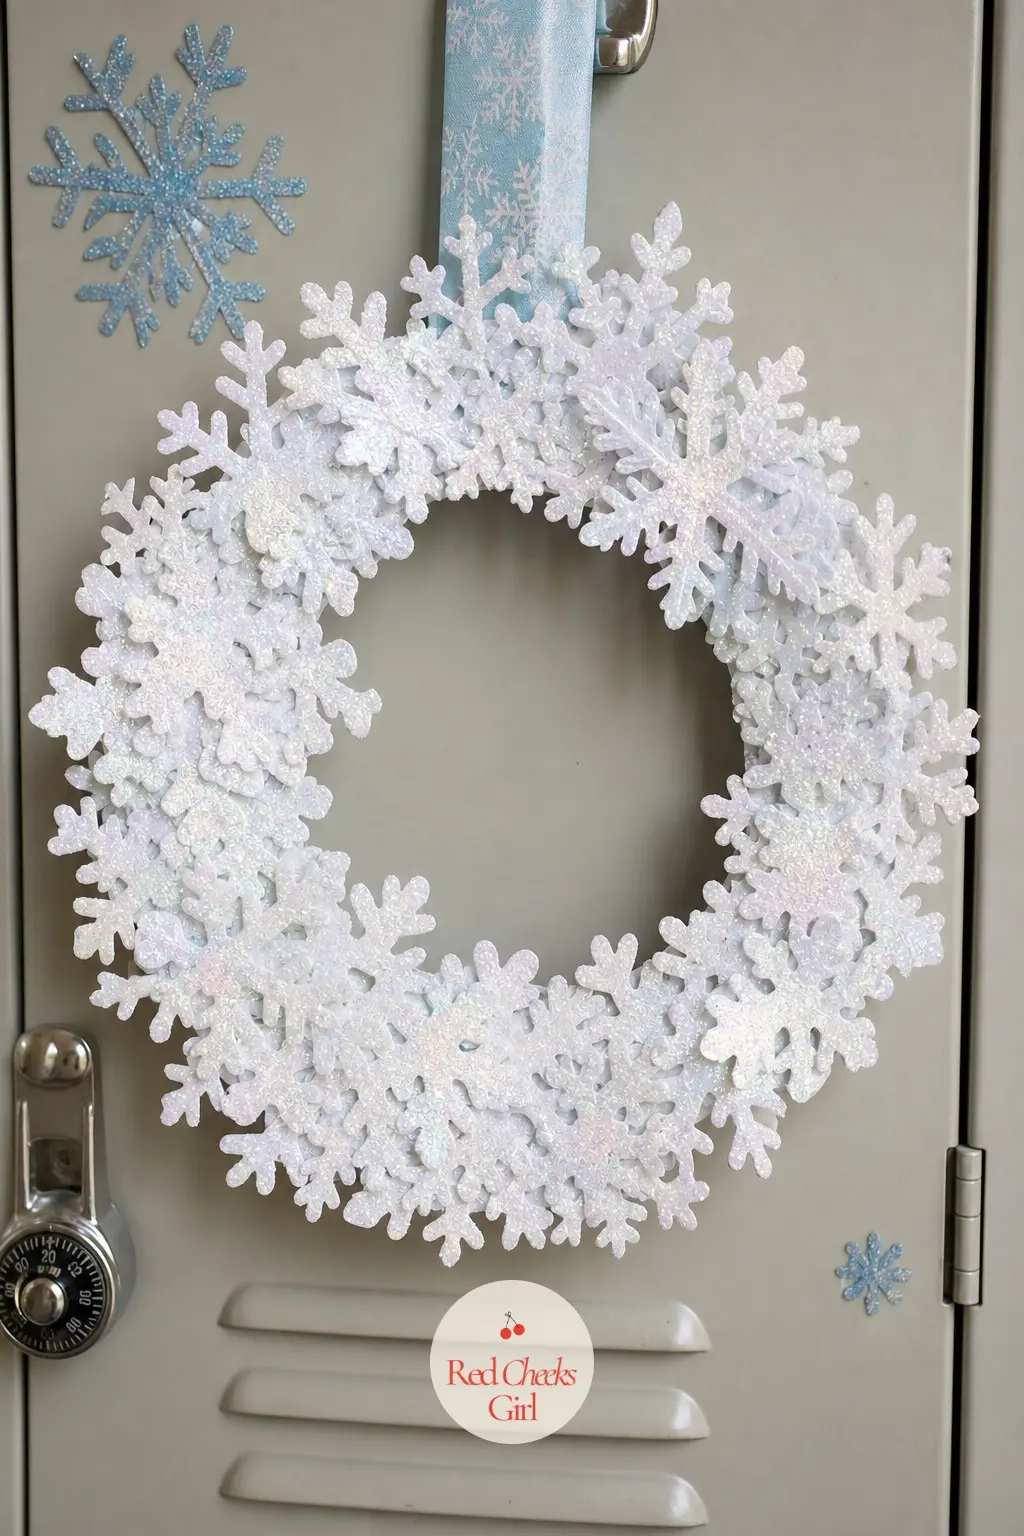
Glitter Snowflake Paper Wreath
Cut a dozen snowflakes from white cardstock, brush each one with glue, and coat them in iridescent glitter before they overlap edge to edge around a paper ring. The overlap is what keeps the ring looking full rather than spotty.
Let every snowflake dry separately on wax paper before gluing it down, wet glitter glue transfers everywhere otherwise.
🛍 Shopping guide
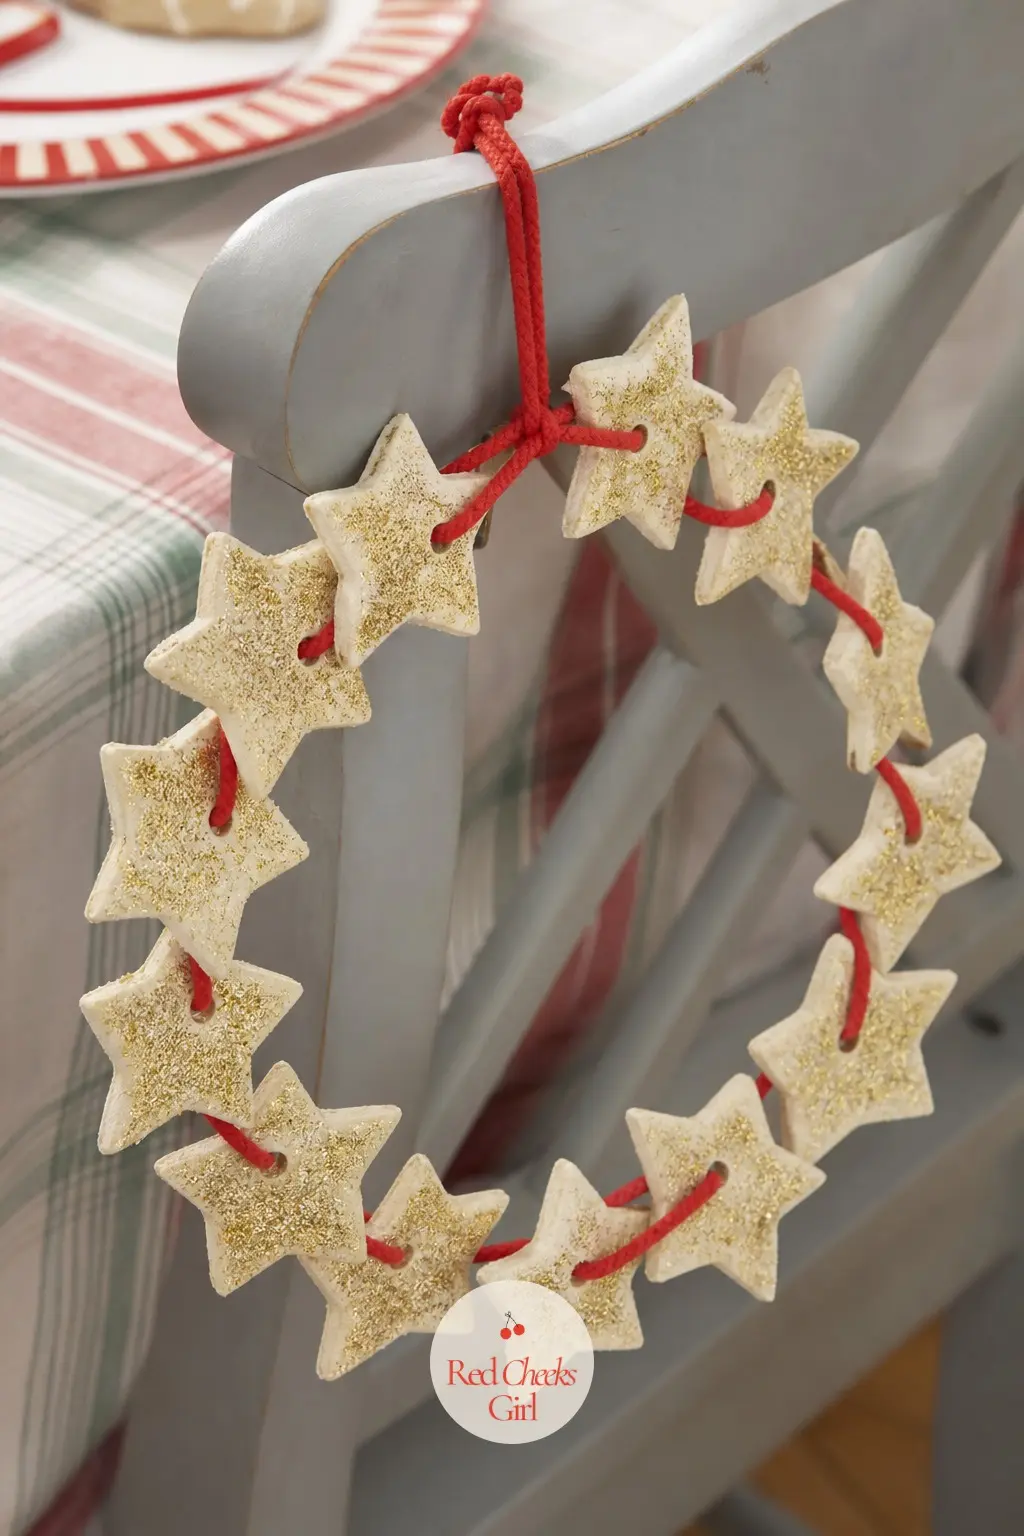
Glittered Salt Dough Star Wreath
Roll out simple salt dough, cut stars with a cookie cutter, and air-dry or bake them low until firm. Paint each one ivory, dust with fine gold glitter while the paint is tacky, then thread six or seven onto a red cord looped into a ring.
These keep for years if they are fully dried before painting, unlike paper crafts.
🛍 Shopping guide
Glitter Glue Puffy Paint Wreath
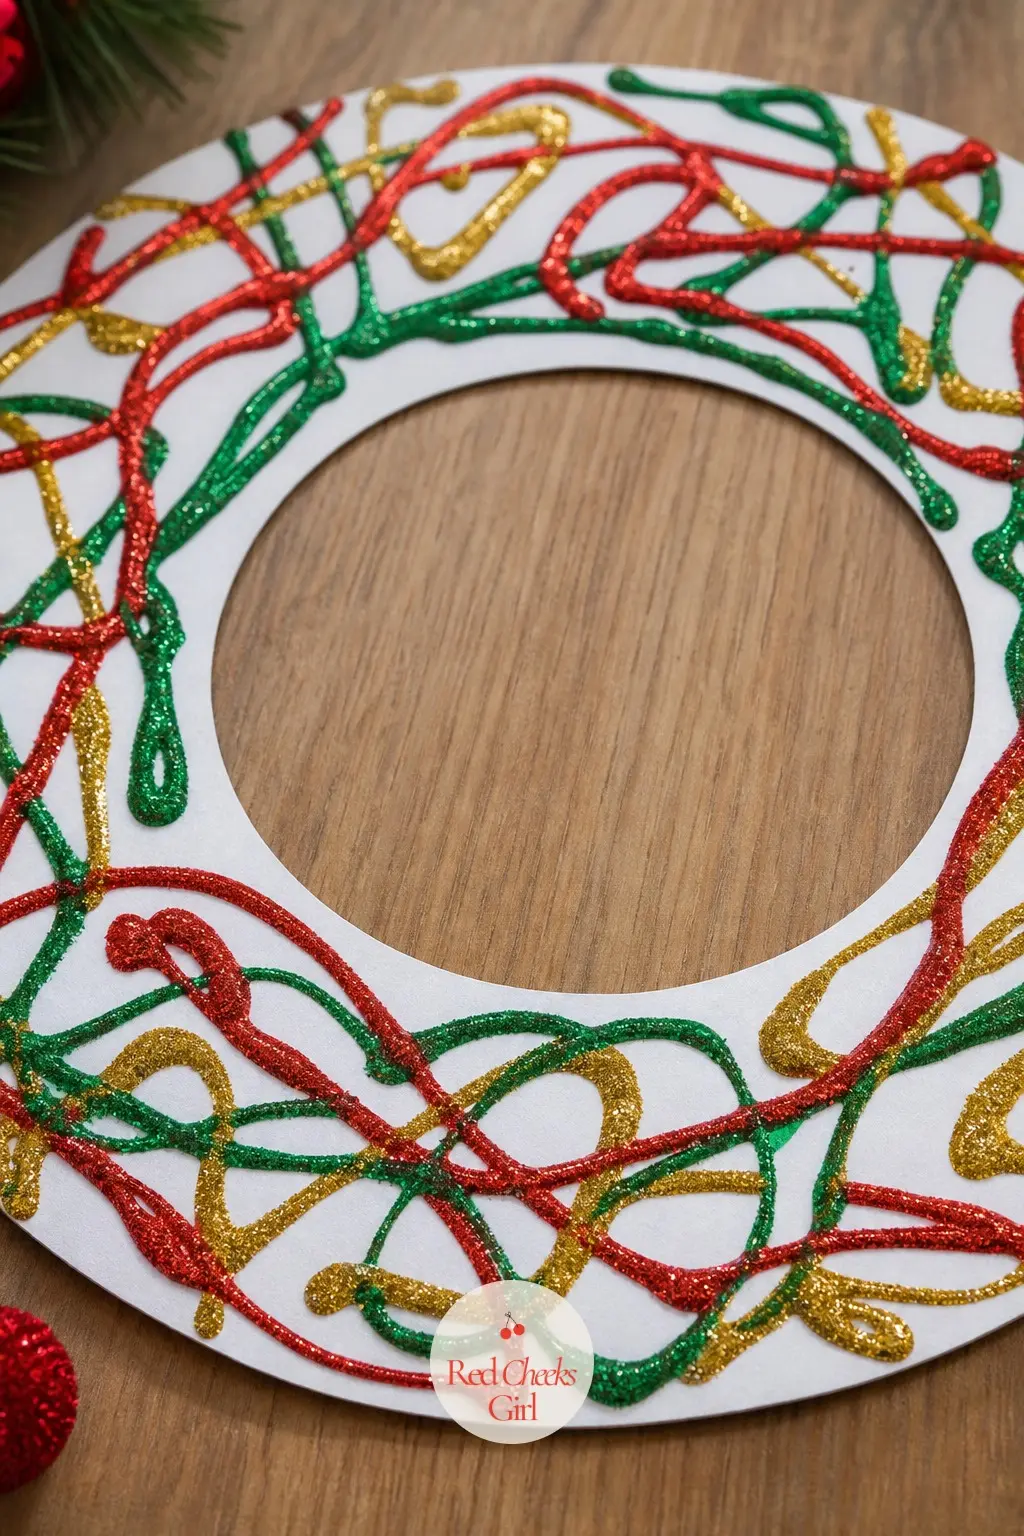
Skip loose glitter altogether and let kids squeeze lines of red, green and gold glitter glue straight onto a plain paper ring in swirls, dots or zigzags. No two will look alike, and nothing shakes loose later because the glitter is sealed inside the glue.
This is the glitter craft to hand a child who cannot yet be trusted with loose glitter and a glue stick.
🛍 Shopping guide
Sequin and Glitter Jar Lid Wreath
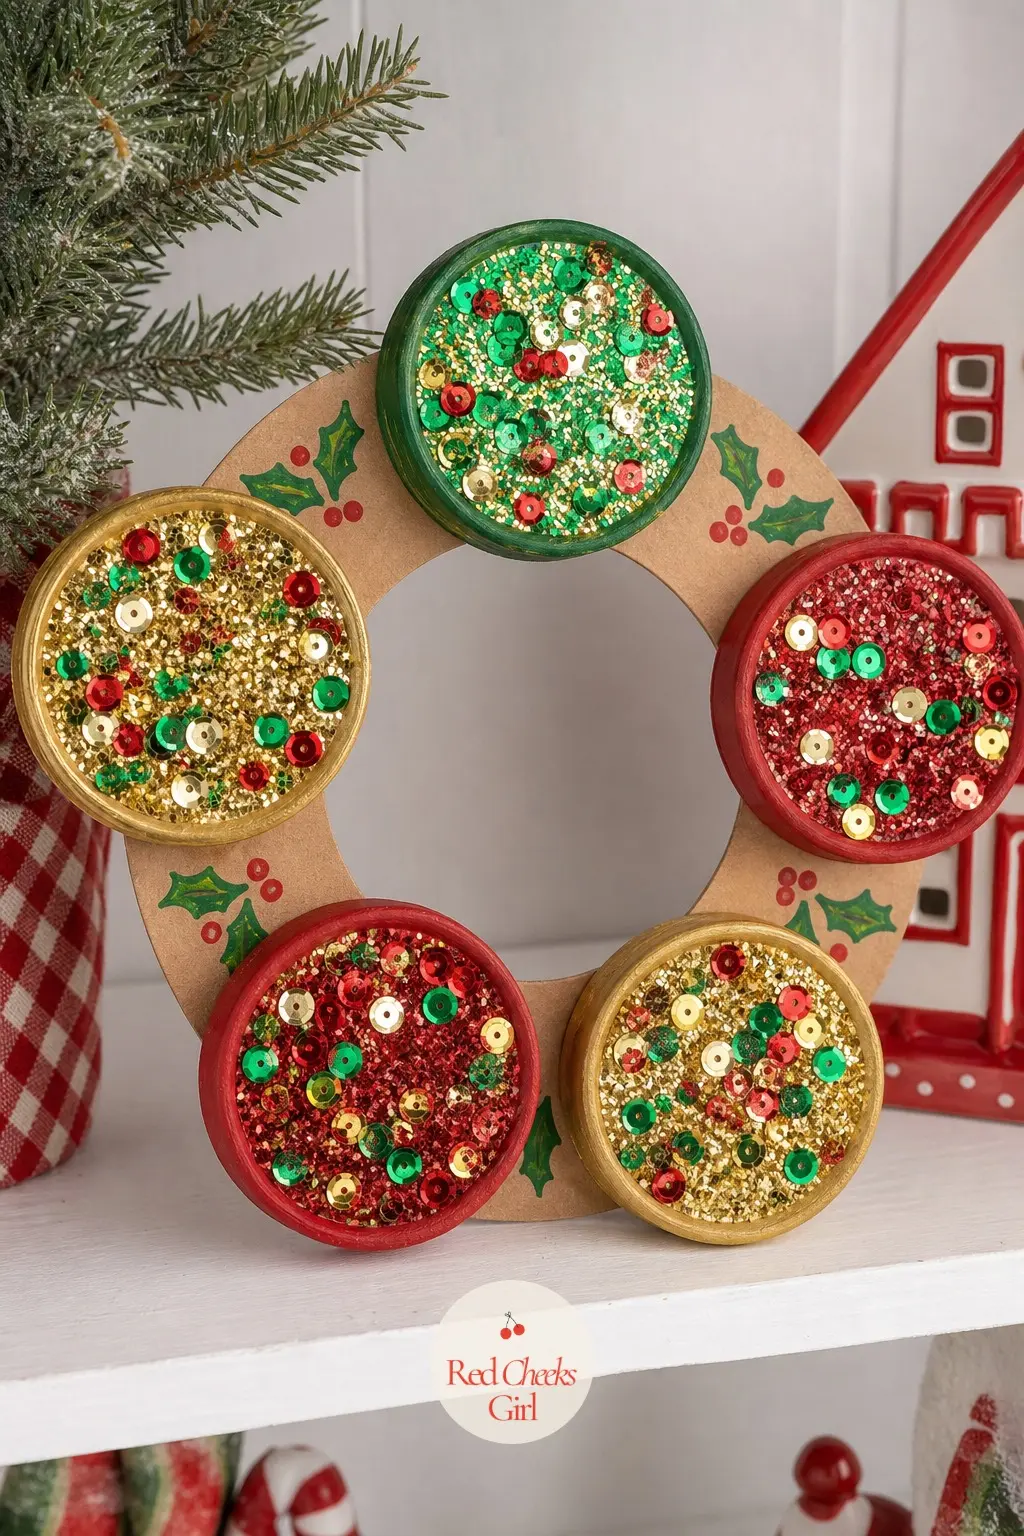
Save five or six mason jar lids, paint them in red, green and gold, then coat the wet paint in sequins and fine glitter before gluing them in a cluster ring on a circle of cardboard. Each lid becomes its own tiny ornament.
This one needs the most adult glue-gun help of the group, so plan on handing over the squeezing and letting kids do the sequin pressing.
🛍 Shopping guide
Pantry and Recycled Material Wreaths
No special trip required for this group: cereal, pasta, egg cartons and bottle caps already live in most kitchens. They also give a different kind of fine motor practice than paper and glue, since most of these involve stringing, snapping or gluing small rigid pieces.
If the household has been saving bottle caps or egg cartons out of habit, this is where that habit pays off. For more ways to turn pantry odds and ends into decor, 31 Christmas Crafts for Kids That Turn Into Something Else Halfway Through is worth a look.
Cereal Loop Wreath
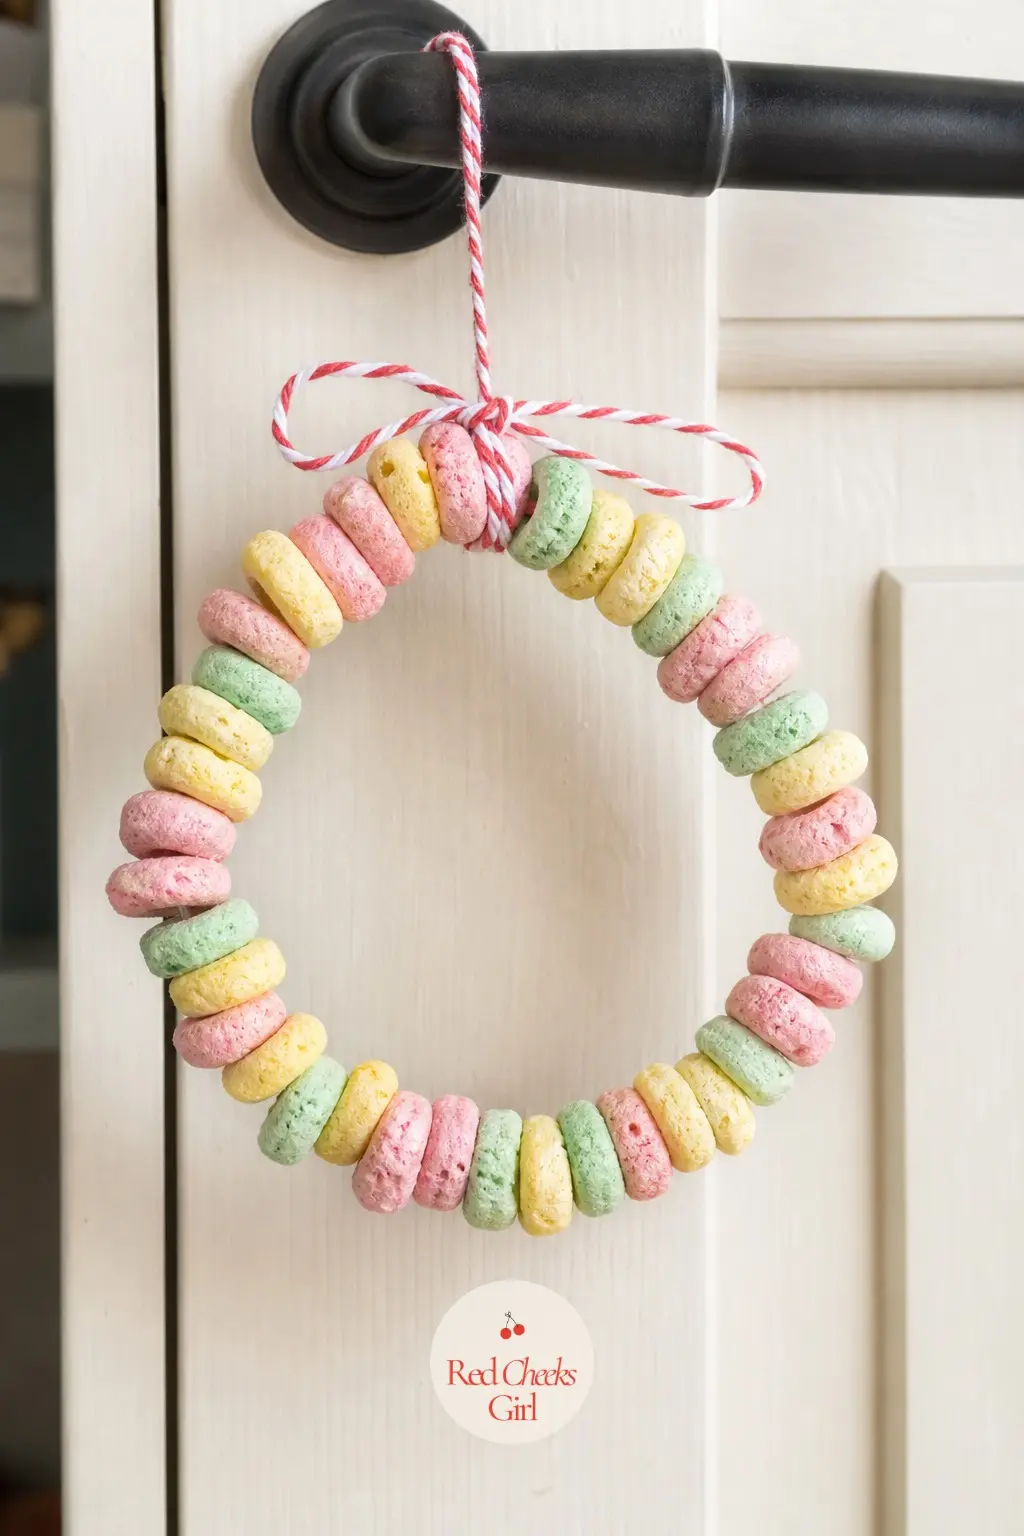
Soak toasted O cereal briefly in food coloring and let it dry on paper towels until it turns pastel pink, mint and lemon, then string it onto a pipe cleaner bent into a ring. Twist the ends together and it is done, no glue needed at all.
Little ones who are past the mouthing stage love the stringing part, it keeps hands busy for a surprisingly long stretch.
🛍 Shopping guide
Pasta Noodle Wreath
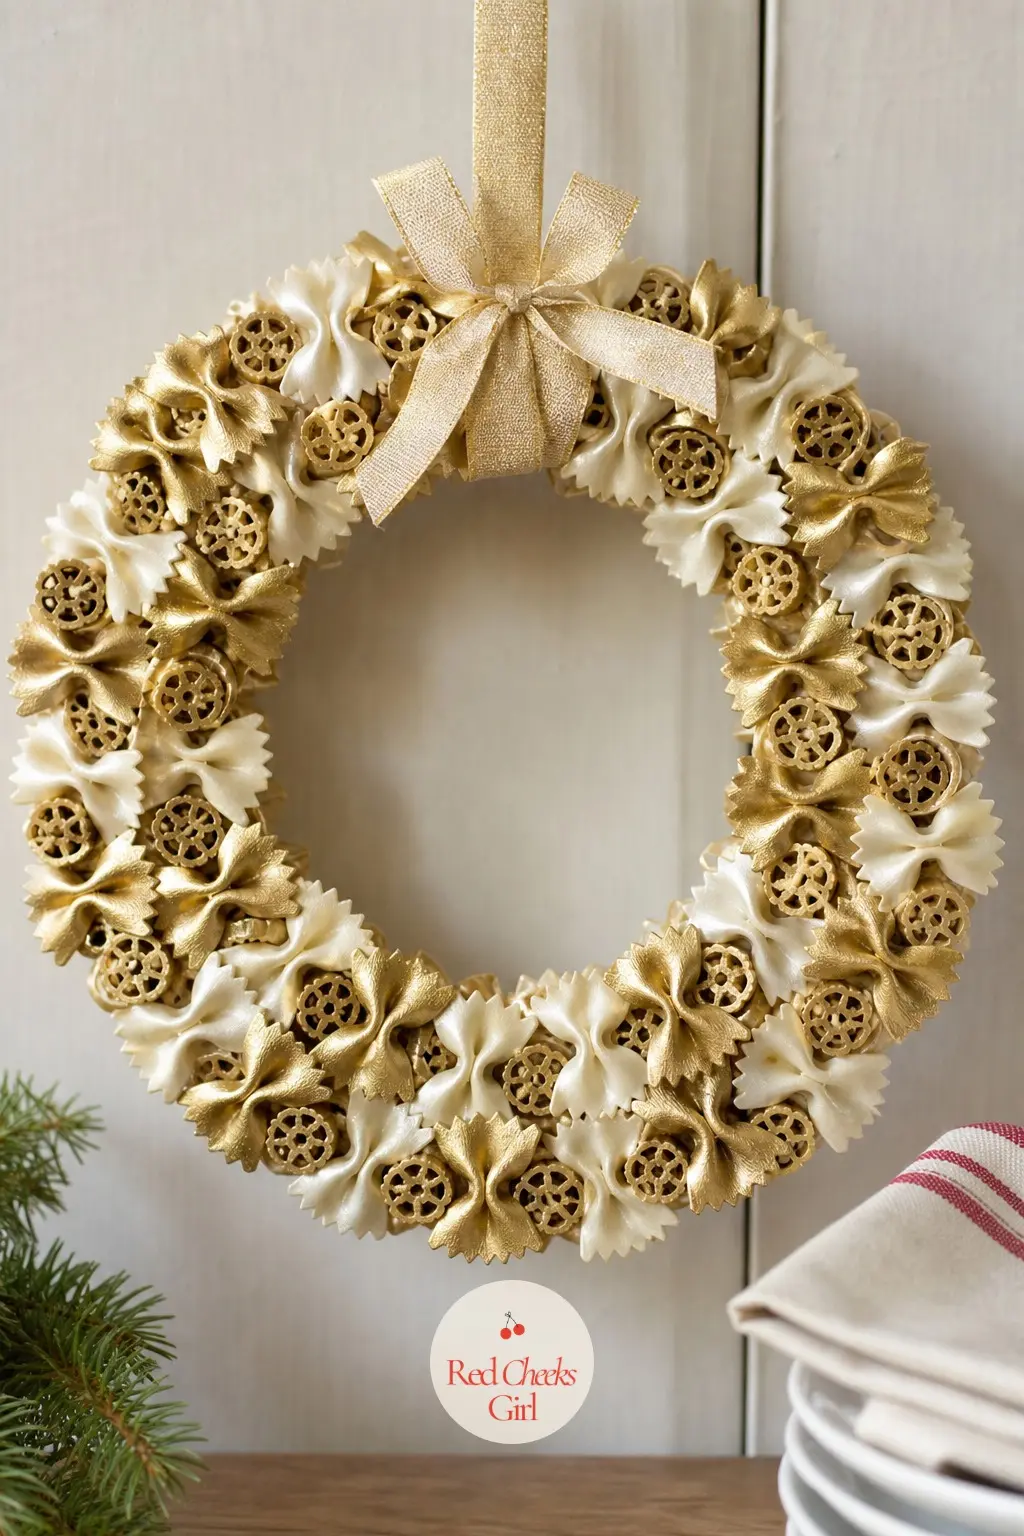
Spray-paint a mix of bow-tie and wagon-wheel pasta in gold and ivory, let it dry completely outside or in a well-aired garage, then glue the pieces in overlapping rows around a cardboard ring. The different pasta shapes give it real texture once the paint unifies the color.
Do the spray-painting step yourself outdoors, the gluing is the part for small hands.
🛍 Shopping guide
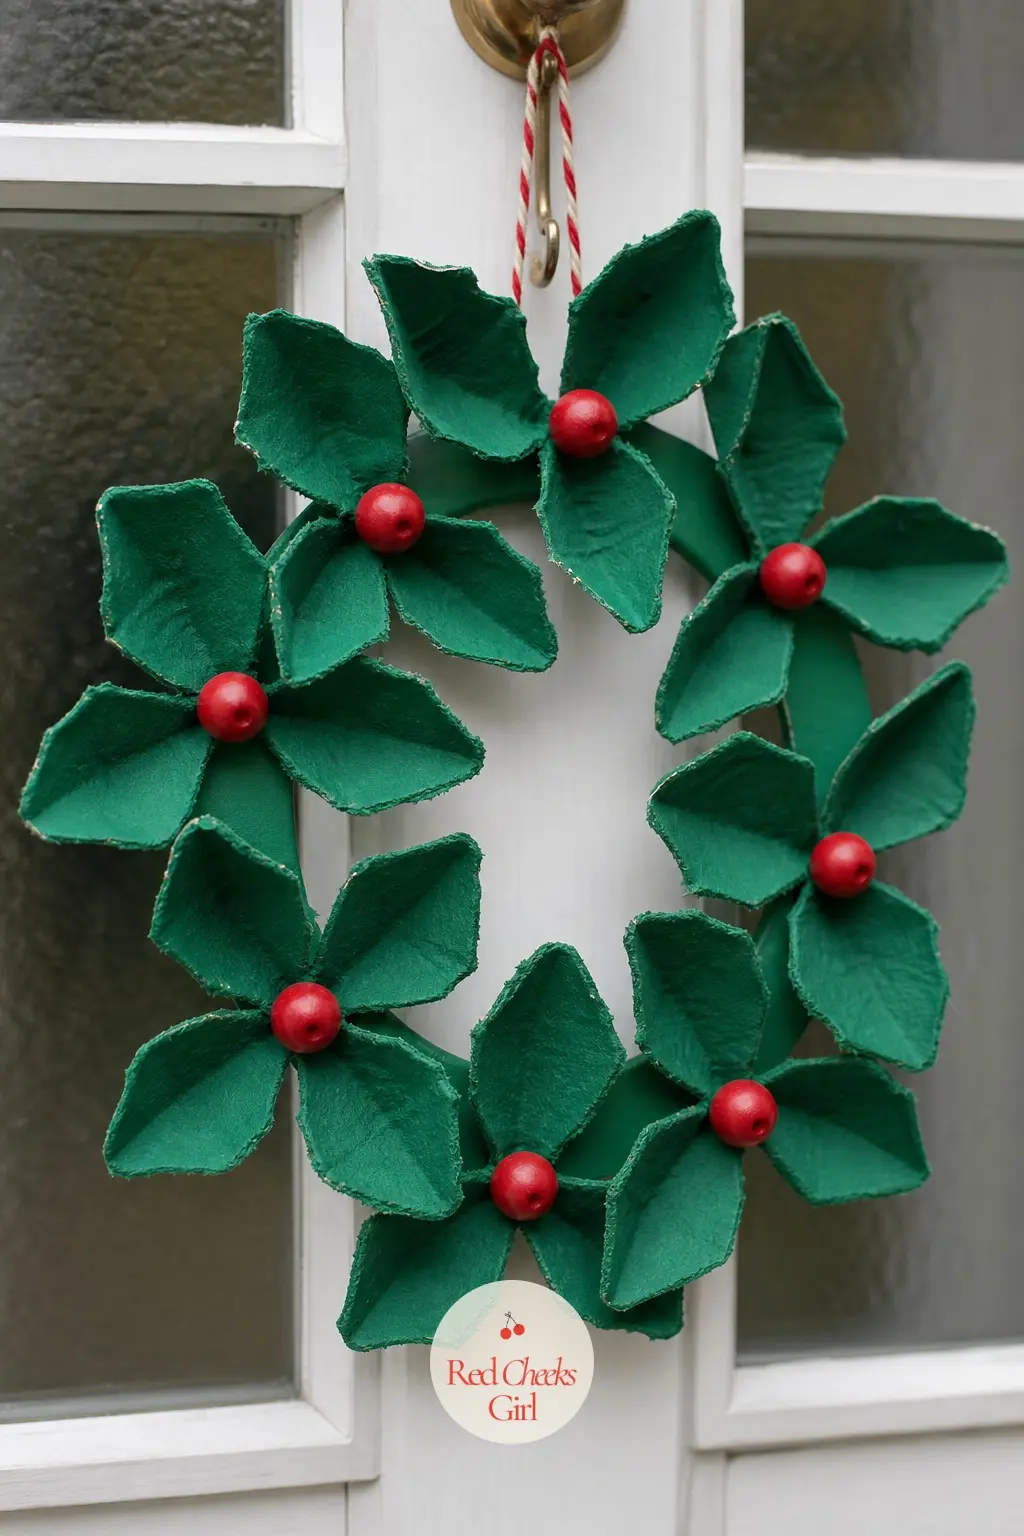
Egg Carton Holly Wreath
Cut the cups from a cardboard egg carton, trim each one into a leaf point, and paint them deep green. Glue three leaf cups in a cluster around a paper ring, then press a red bead or button into the center of each cluster as a berry.
Egg cartons take paint better after a light coat of white primer first, skip it and the cardboard shows through.
🛍 Shopping guide
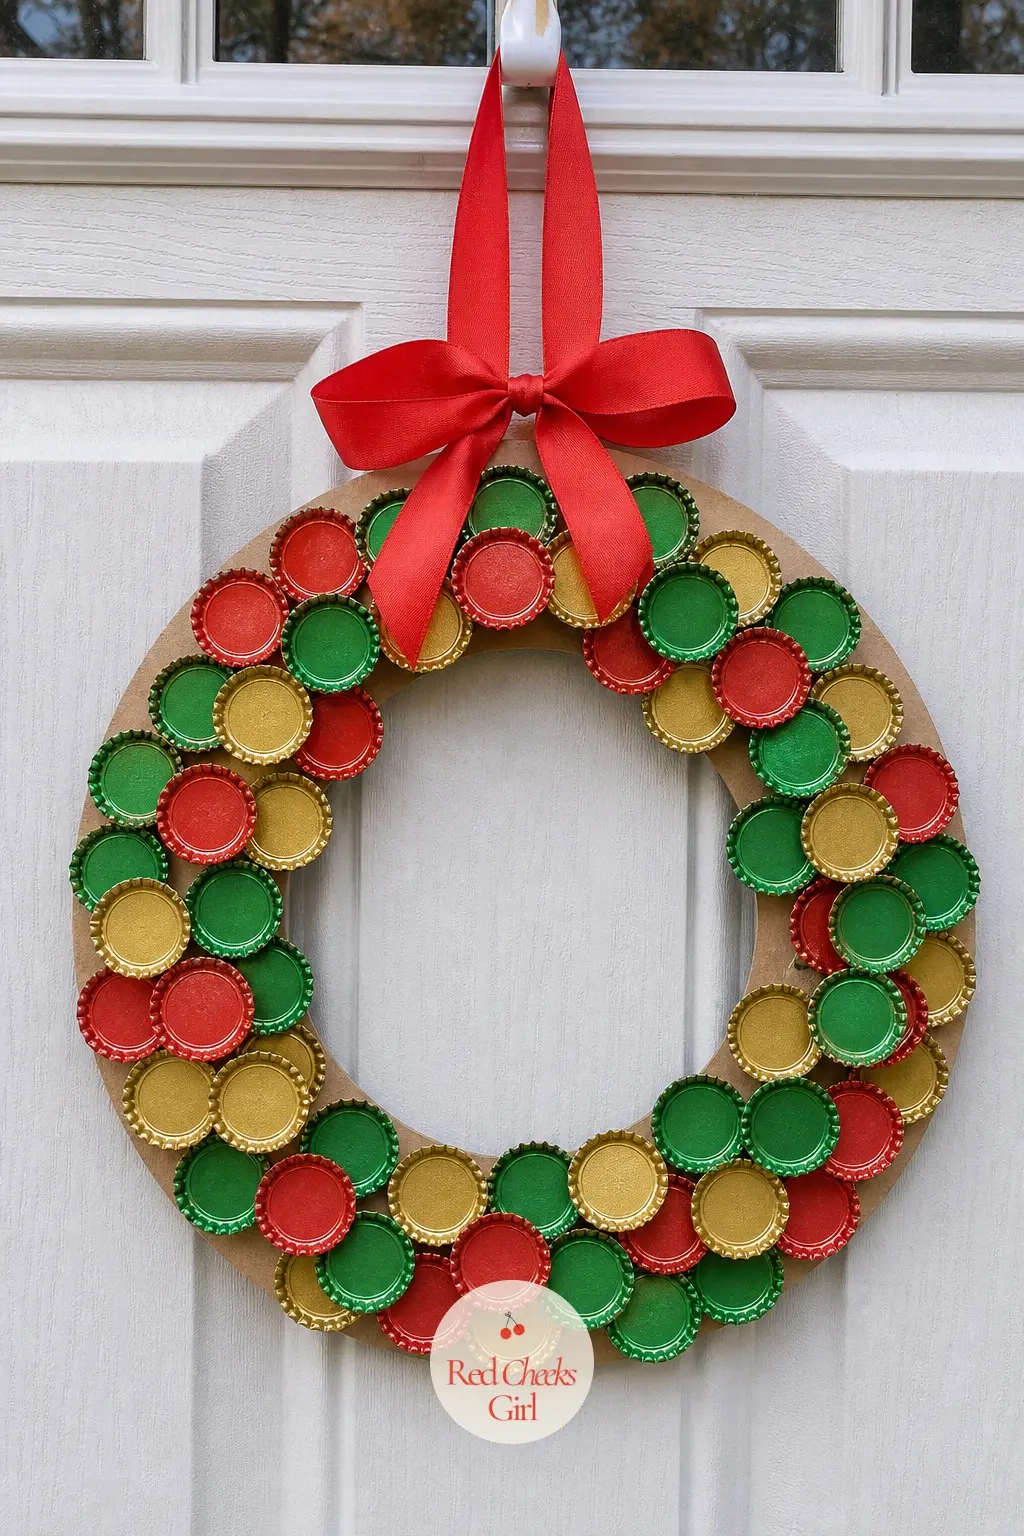
Bottle Cap Ornament Wreath
Collect a few weeks’ worth of bottle caps, paint them red, green and gold, and glue them in small clusters around a cardboard ring so each cluster reads as a tiny bauble grouping. A dot of white paint on each cap mimics a highlight.
Wash and dry caps thoroughly before painting, any sticky residue keeps the paint from setting properly.
🛍 Shopping guide
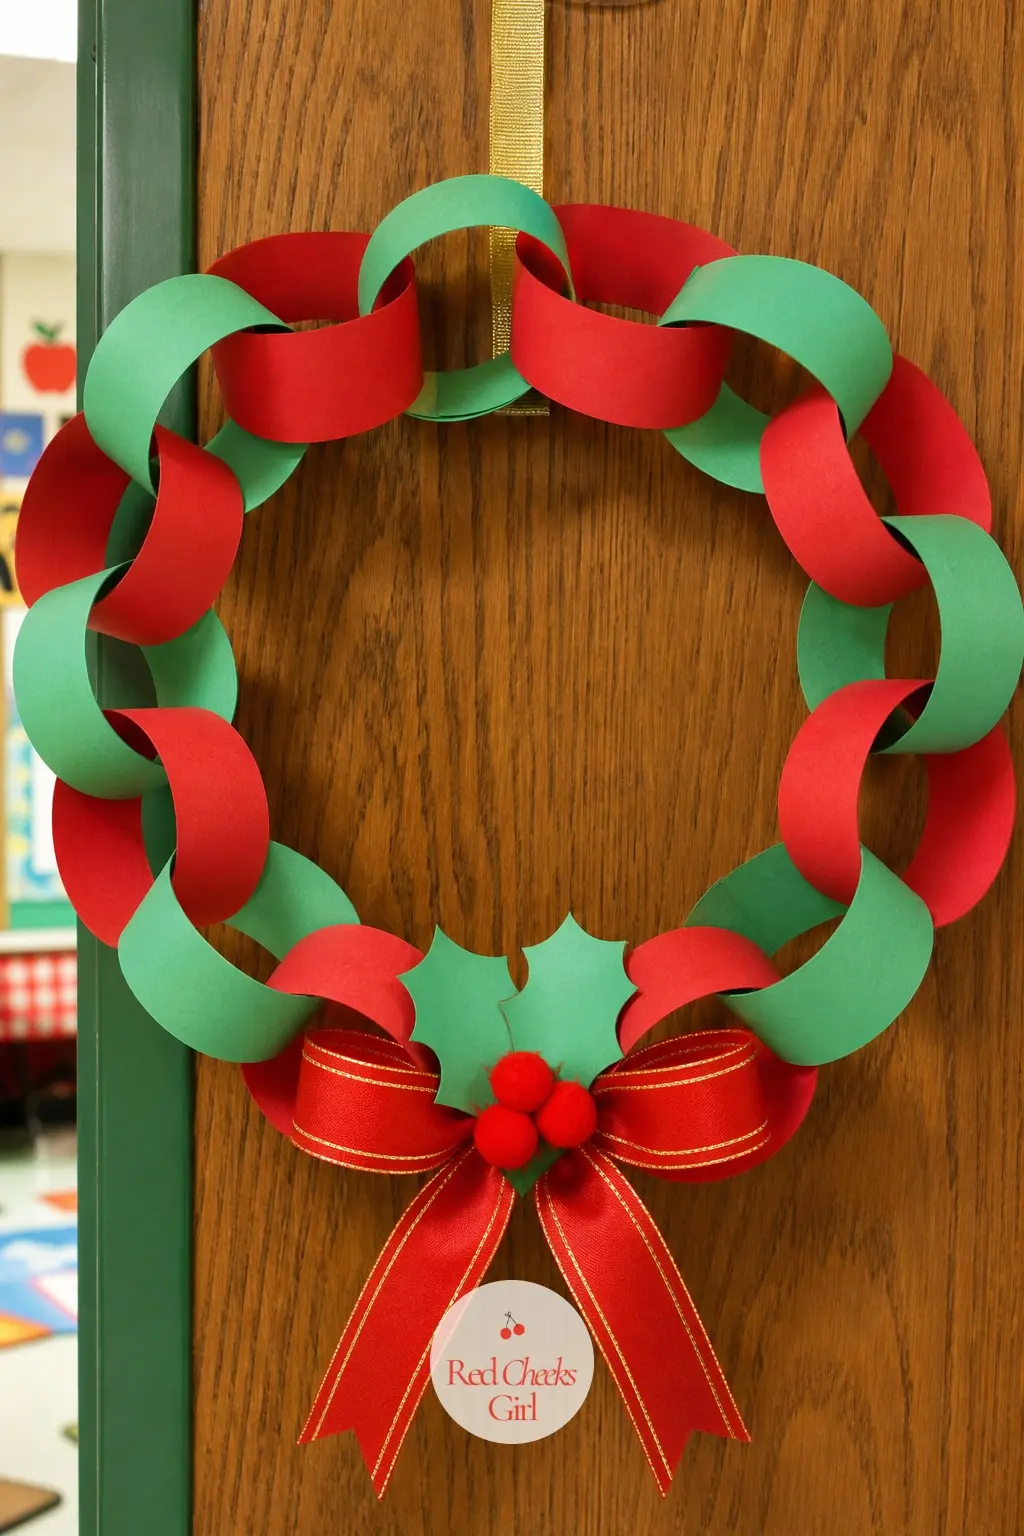
Paper Chain Loop Wreath
Cut strips of red and green construction paper and loop them into a classic paper chain, long enough that the chain itself curls into a ring with no separate base needed. Staple or tape the two ends together to close the circle.
This is the fastest group craft here, since every child can add links at the same time around one shared chain.
🛍 Shopping guide
No-Mess and Small-Space Wreaths
Some days call for a craft with no drying time, no glue and no glitter trail, especially in a small apartment, a dorm room or a car on a long drive. These four use stickers, tape, cotton and spare puzzle pieces instead of paint or paste.
They are also the fastest group here, most finished start to finish in under fifteen minutes.
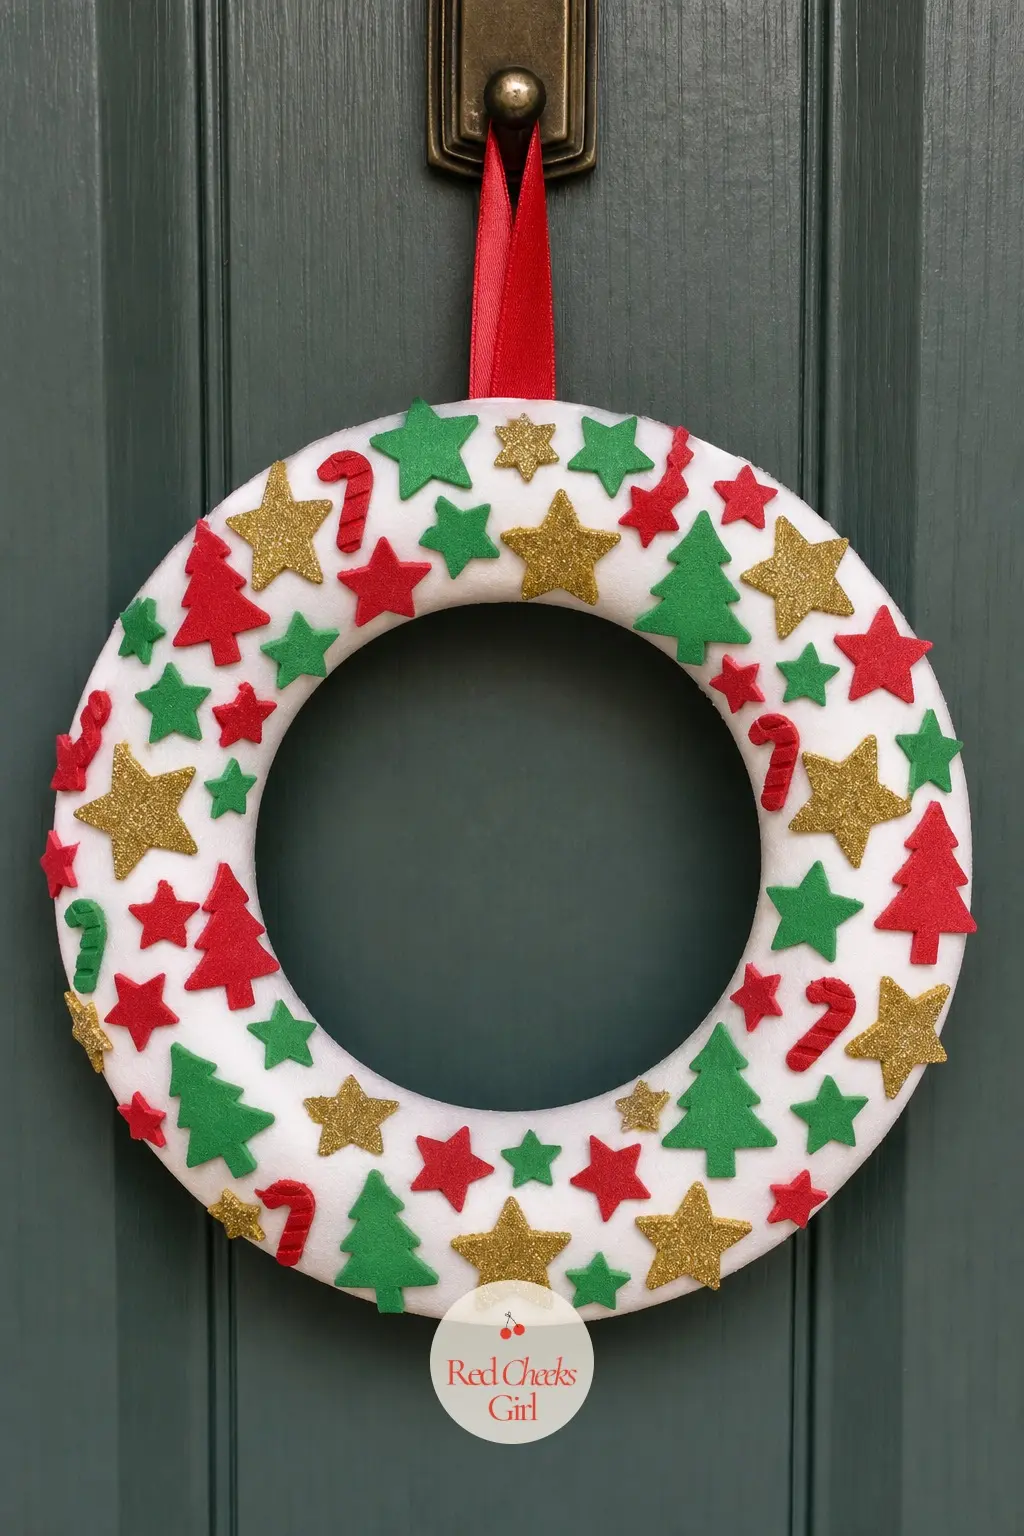
Foam Sticker Wreath
Peel-and-stick foam shapes, stars, little trees and candy canes, go straight onto a plain white paper ring with no glue or paint involved at all. Pressing the backing off the stickers is good fine motor practice on its own.
It is the cleanest craft on this whole list, nothing wet, nothing that needs drying time.
🛍 Shopping guide
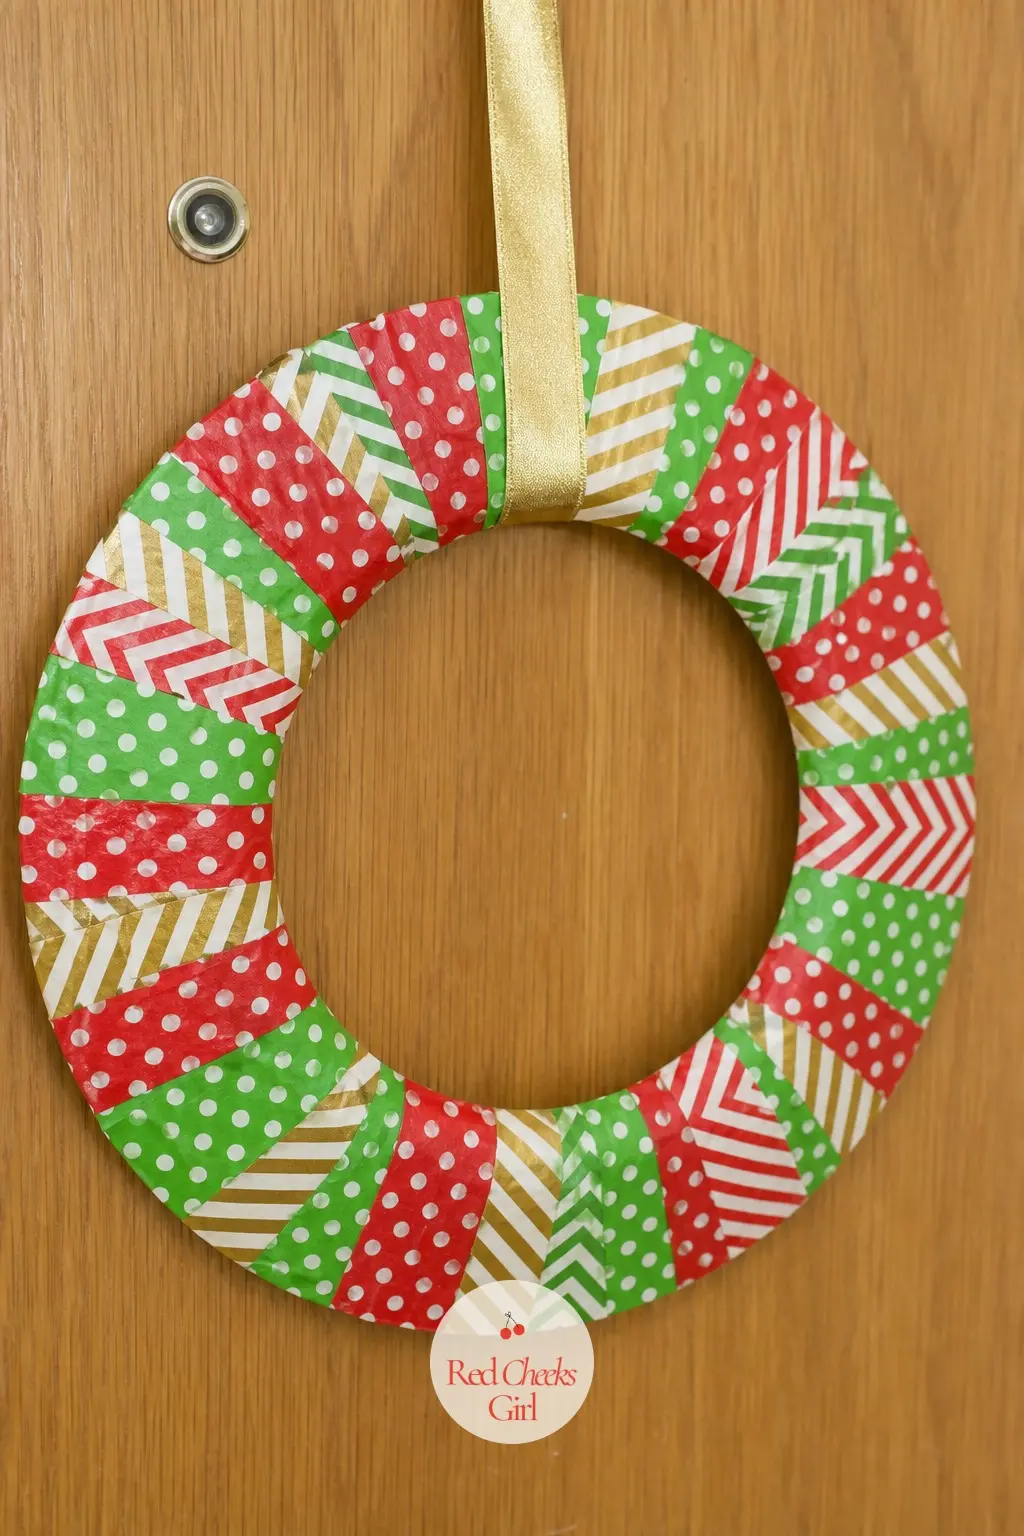
Washi Tape Stripe Wreath
Tear or snip strips of patterned red, green and gold washi tape and layer them across a paper plate ring at slightly different angles so the patterns overlap. Scissors are the only tool needed, there is no glue to wait on.
This one travels well, pack the tape rolls and a plate in a bag for a car trip craft.
🛍 Shopping guide
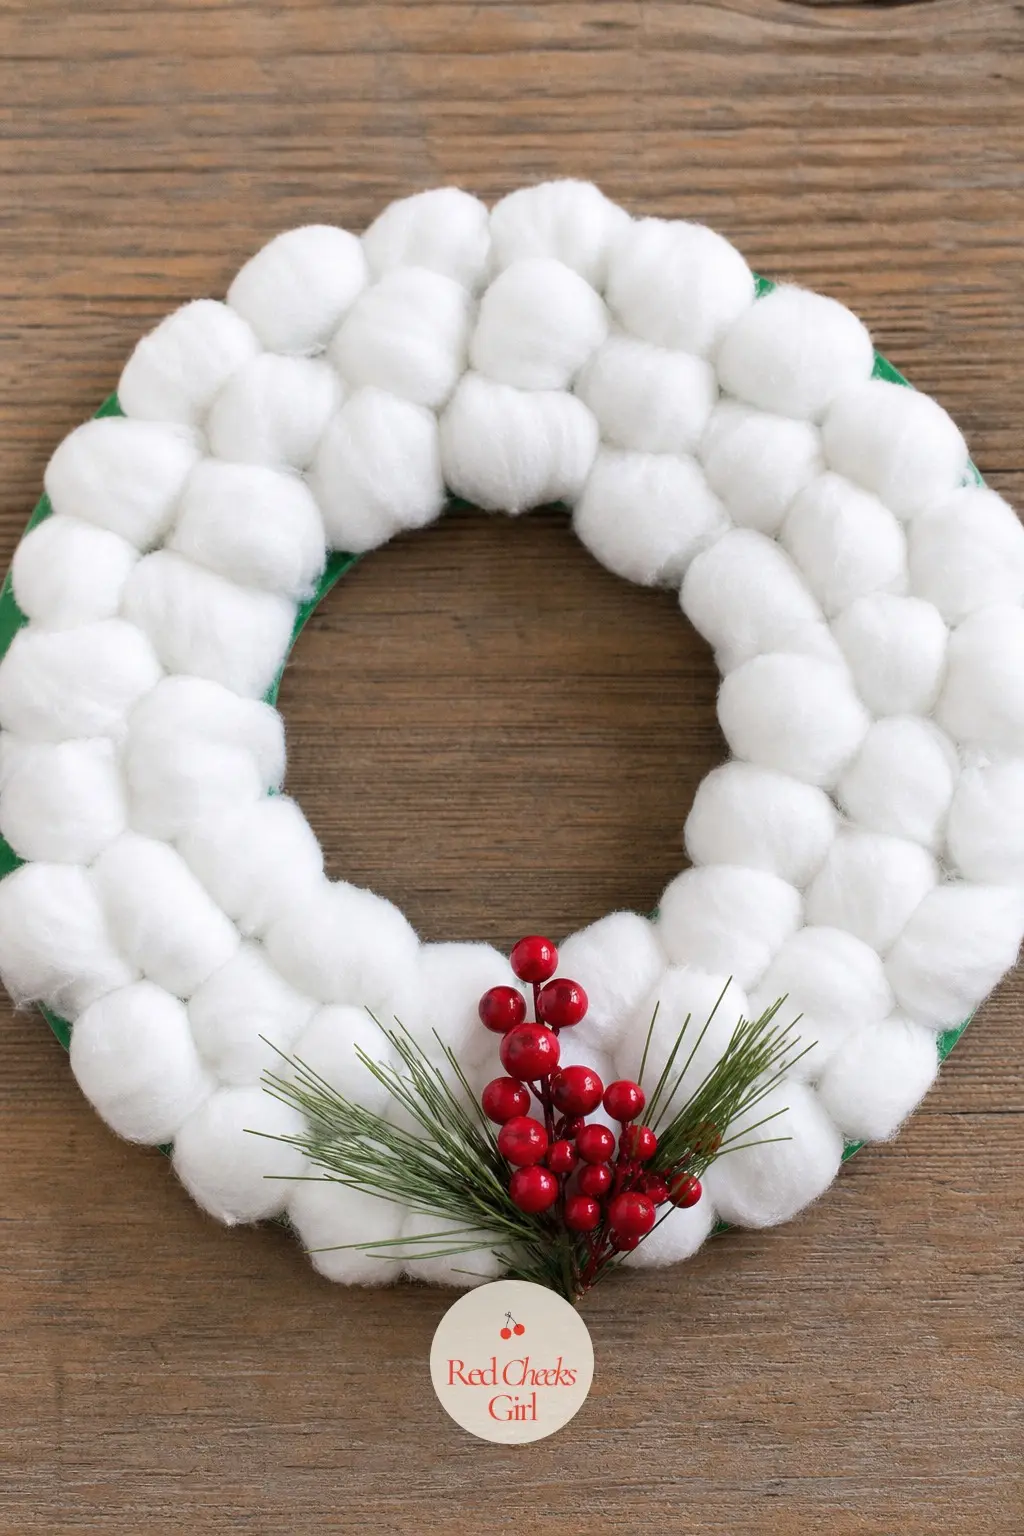
Cotton Ball Snow Wreath
Stretch cotton balls thin and glue them densely around a green-painted ring until the texture looks like packed snow. A single red berry pick tucked in at the bottom is the only color accent it needs.
Stretching the cotton first, rather than gluing it on whole and round, is what keeps the finished texture looking like snow instead of lumps.
🛍 Shopping guide
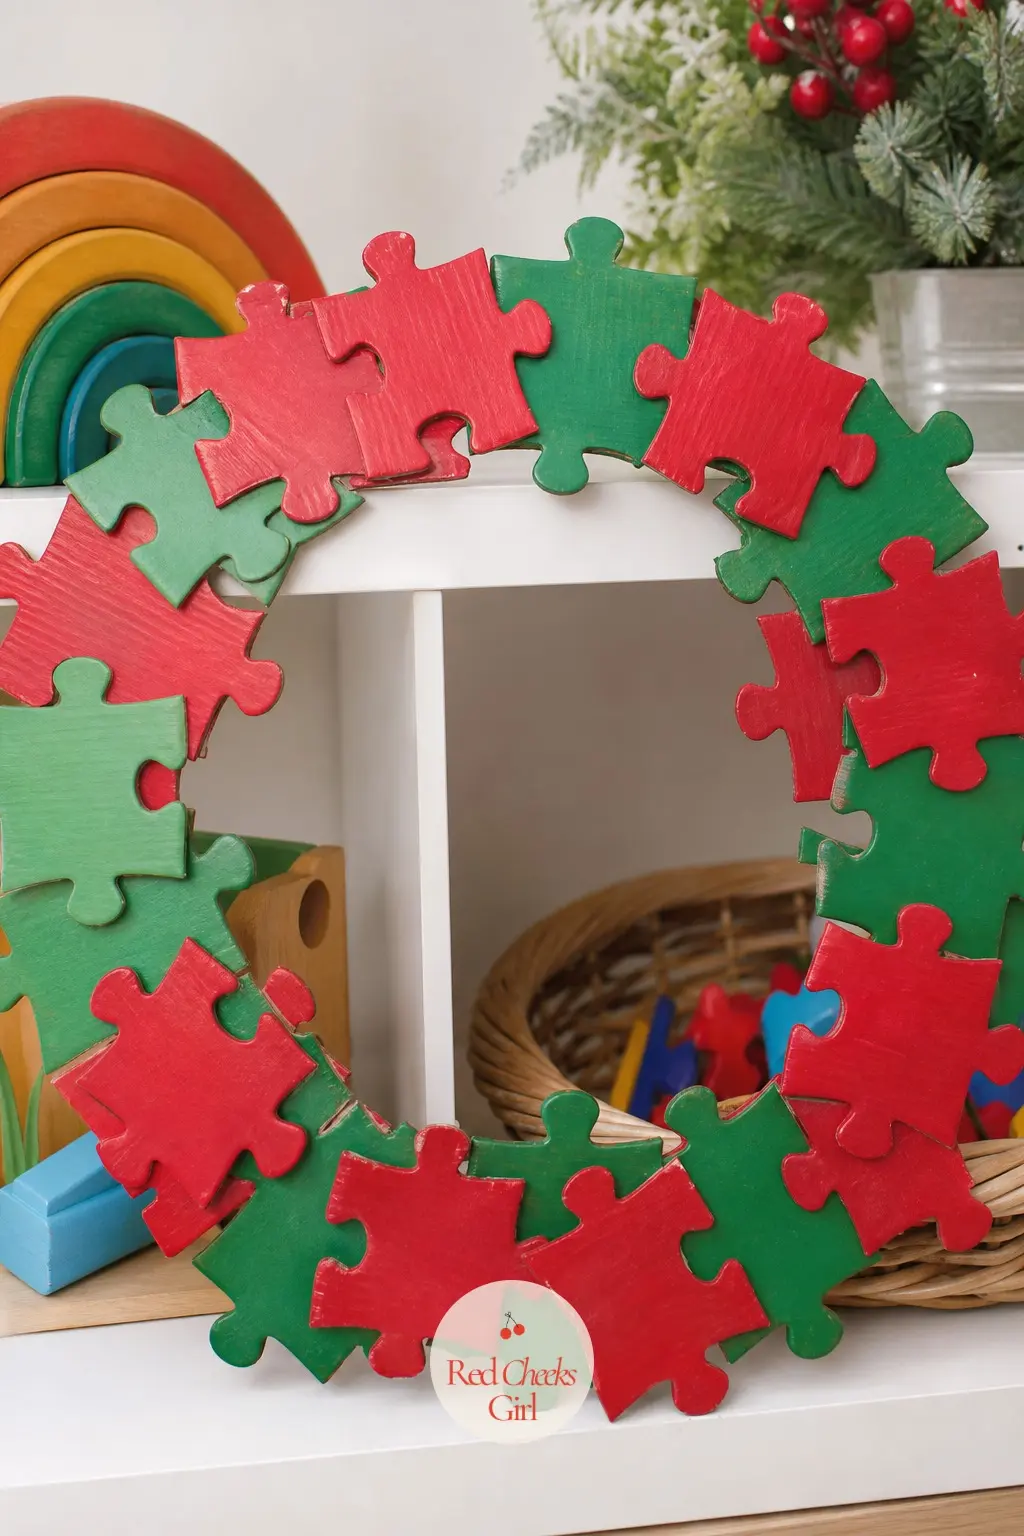
Puzzle Piece Wreath
Raid the box of puzzles missing pieces, paint the orphaned pieces red and green, and glue them in overlapping rows around a cardboard ring once they are dry. The interlocking shapes naturally tuck against each other with very little gap-filling needed.
It is a good use for puzzles that already lost a piece or two and were headed for the donation pile anyway.
🛍 Shopping guide
Frequently Asked Questions
What is the easiest Christmas wreath for a toddler to make?
A paper plate base with stickers, pom poms or footprints needs no cutting and no waiting, which makes it the easiest option for anyone under three. Foam stickers and the footprint boot wreath are the two in this list with the lowest skill requirement.
What can I use instead of a paper plate for a wreath base?
Cardboard cut into a ring, a foam wreath form, or paper strips looped into a chain all work as a base when paper plates are out of stock. The pasta, bottle cap and puzzle piece wreaths here all use a cut cardboard circle instead.
How do you keep a handprint wreath from falling apart?
Let the glue fully dry flat before hanging, and use a glue stick or craft glue rather than a runny liquid glue that softens paper. A hole punched at the top with string threaded through is sturdier than tape for hanging.
How do you stop glitter crafts from making such a mess?
Work over a tray or an upside-down box lid so stray glitter stays contained, and switch to glitter glue instead of loose glitter for younger kids. Letting each glittered piece dry separately before assembly also cuts down on transfer.
What age is a handprint wreath craft good for?
Most versions suit ages two through eight, with younger kids needing an adult to trace and cut the hand shapes first. Children around six and up can usually trace and cut their own with practice.
How do you preserve a kids paper plate wreath as a keepsake?
Press it flat between heavy books for a few days once the glue is fully dry, then store it in a flat box rather than hanging it year after year. Taking a photo of it in use is a lower-effort backup for anything too delicate to keep.

21 red and green Christmas tree looks for every room, real and artificial, from a panelled fireplace

Christmas eve party games that wind down, not up: 8 free printables plus 5 no-prep ideas to carry ki

22 christmas crafts for adults where finish is everything: marbled baubles, wax-dipped amaryllis, ha
Leave a Reply