

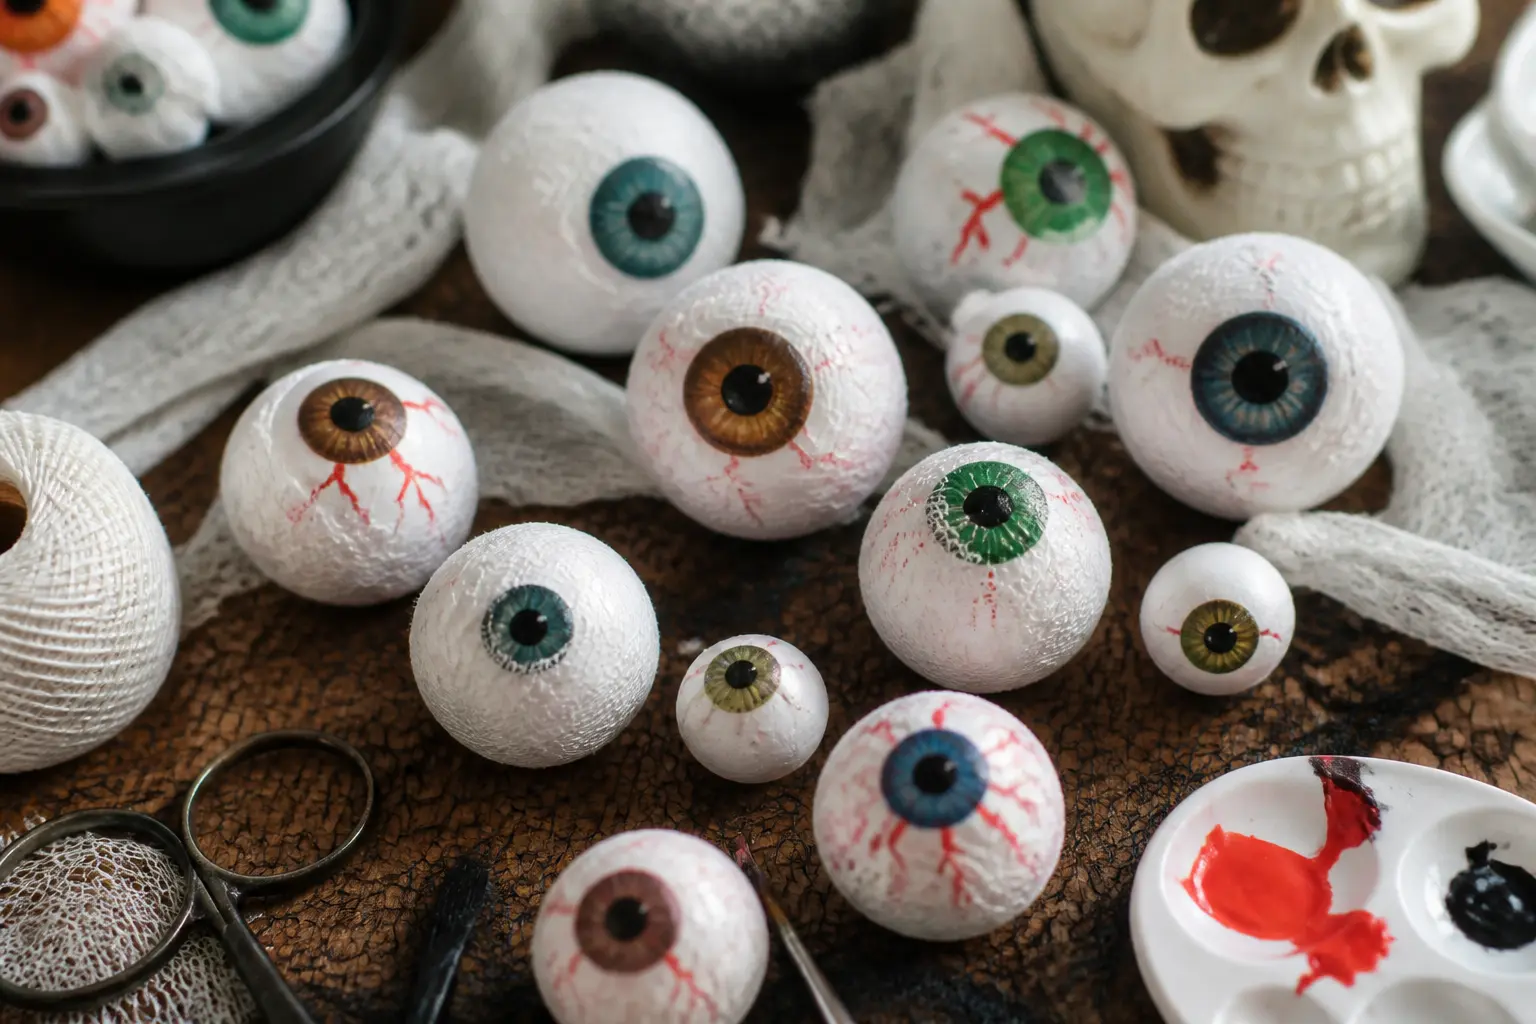
Eyeballs are the one Halloween motif that works at every scale, from a single jar on a shelf to a ceiling full of balloons, and the DIY version always reads better than anything mass-produced. The bloodshot detail, the iris colour, the slight wrongness of a pupil that seems to follow you: those things come from a steady hand and a Sharpie, not a factory.
Everything here uses materials that cost almost nothing or are already in the house. Googly eyes, ping-pong balls, empty jam jars, white balloons, paper plates, and a tube of red paint cover the majority of the list. The rest use styrofoam balls, jute twine, or leftover ribbon, all things that survive being bought in a multipack and stored for next year.
The 27 ideas below are grouped by where they live: overhead, on a table, at the door, in a window, and on the food. Pick one section or raid all five. Either way, the effect is a house that feels watched, which is exactly the point.
This post contains affiliate links. If you buy through them, I may earn a small commission at no extra cost to you.
Overhead and Hanging
Anything that hangs from a ceiling or a doorframe stops guests in their tracks. Eyeball balloons and bead garlands do the heaviest lifting here because they fill vertical space without touching a surface you need for food or drinks.
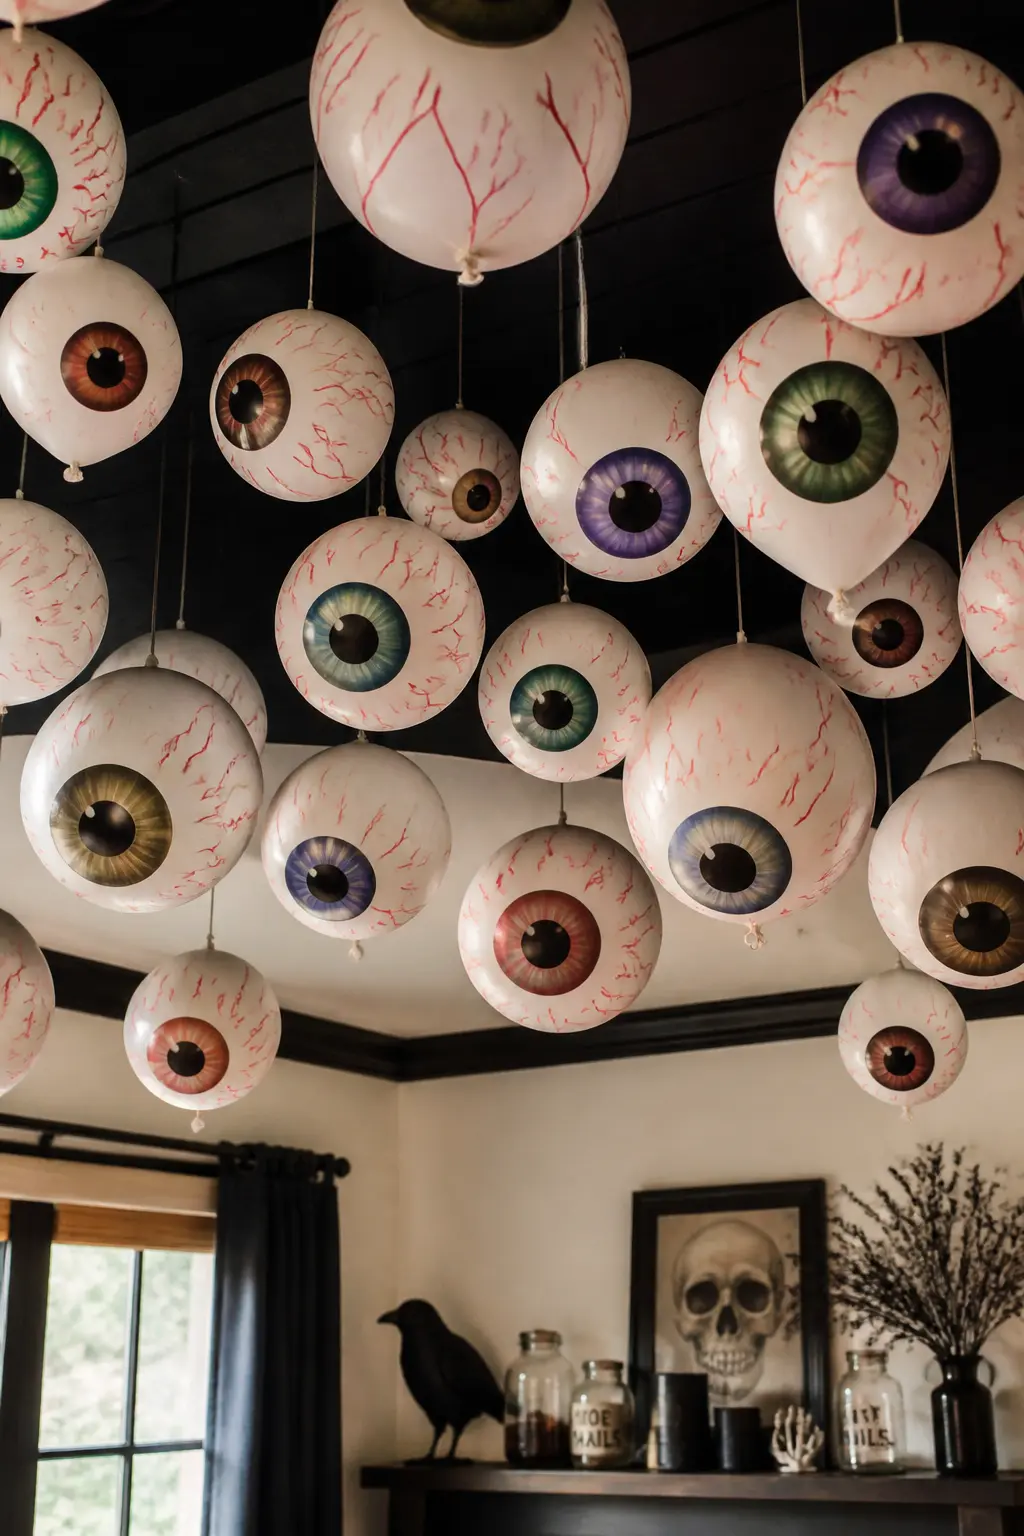
Bloodshot Balloon Ceiling Cloud
Inflate white balloons to varying sizes and draw red veins outward from a coloured iris painted or drawn near the knot end. Cluster thirty or forty of them at different heights using clear fishing line tied to a ceiling hook, so the whole mass floats at just above head height.
The iris colours should differ from balloon to balloon: one orange, one green, one milky blue. That variation stops the cloud from reading as a single prop and makes the whole thing feel genuinely alive. Pull the balloons apart slightly so guests walk through them rather than under them.
🛍 Shopping guide
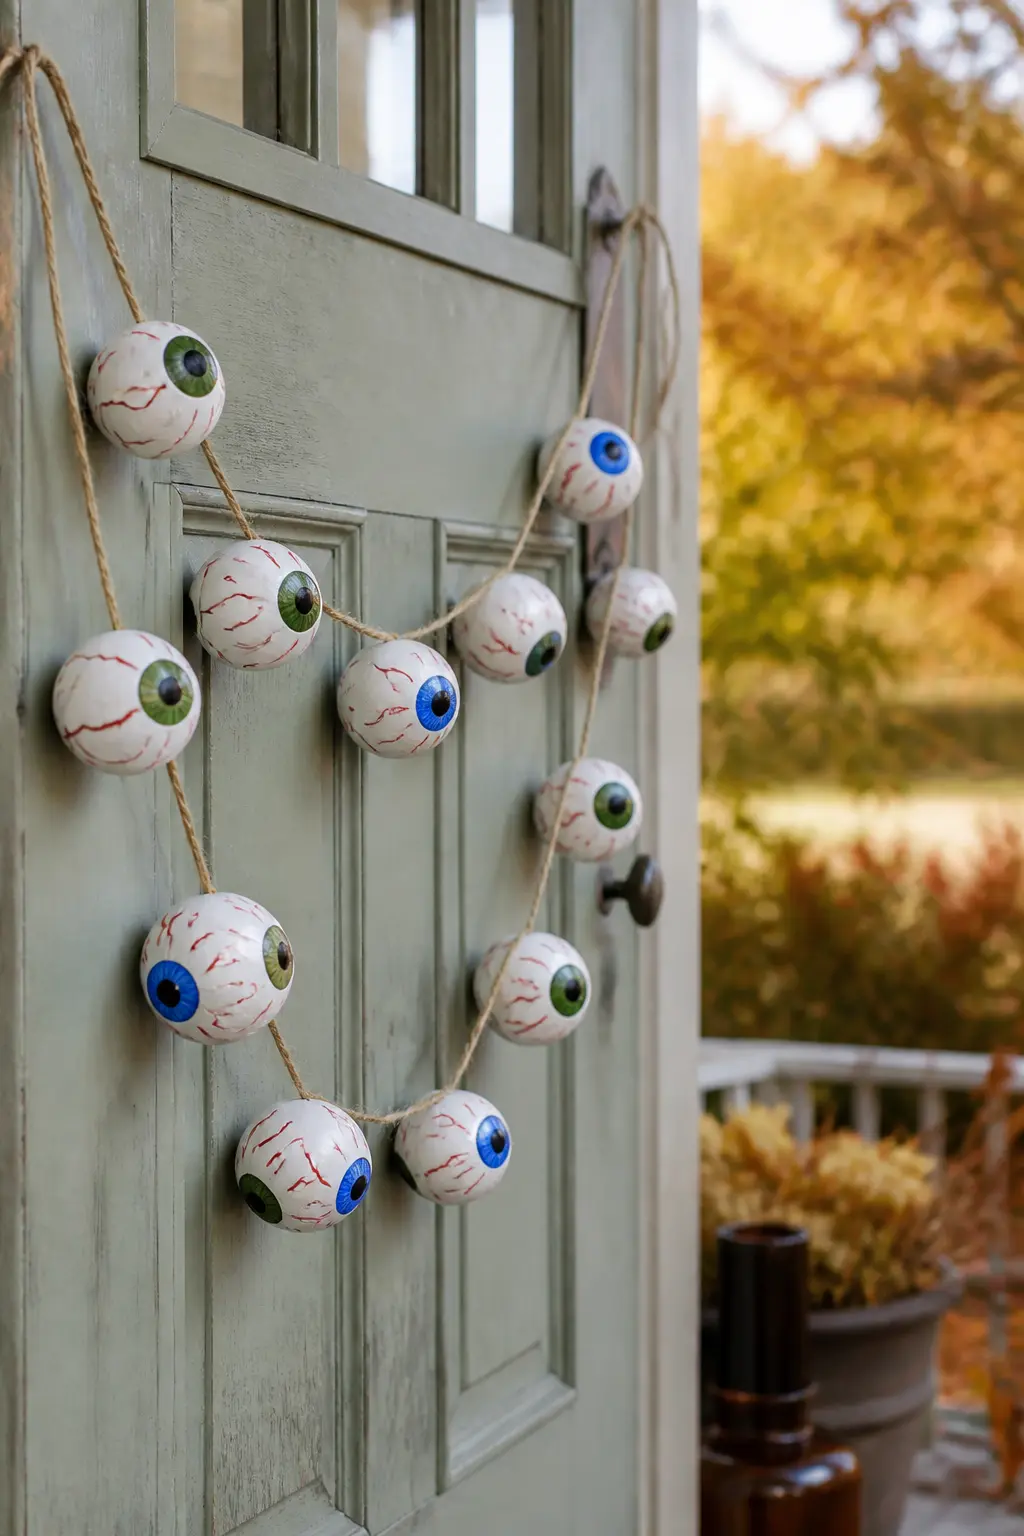
Jute-Strung Eyeball Garland
Thread ping-pong balls or small styrofoam balls onto jute twine, knotting between each one so they stay evenly spaced. Paint each ball white, let it dry, then add a ring of colour for the iris and a black circle for the pupil. Red veins come last, drawn with a fine red marker.
Drape the finished garland in swooping loops across a mantel, a doorframe, or a porch railing. Three loops at different heights give the layered effect seen in the trending pins without doubling the effort. Jute reads as deliberately crafted rather than cheap, which matters when guests are standing close.
🛍 Shopping guide
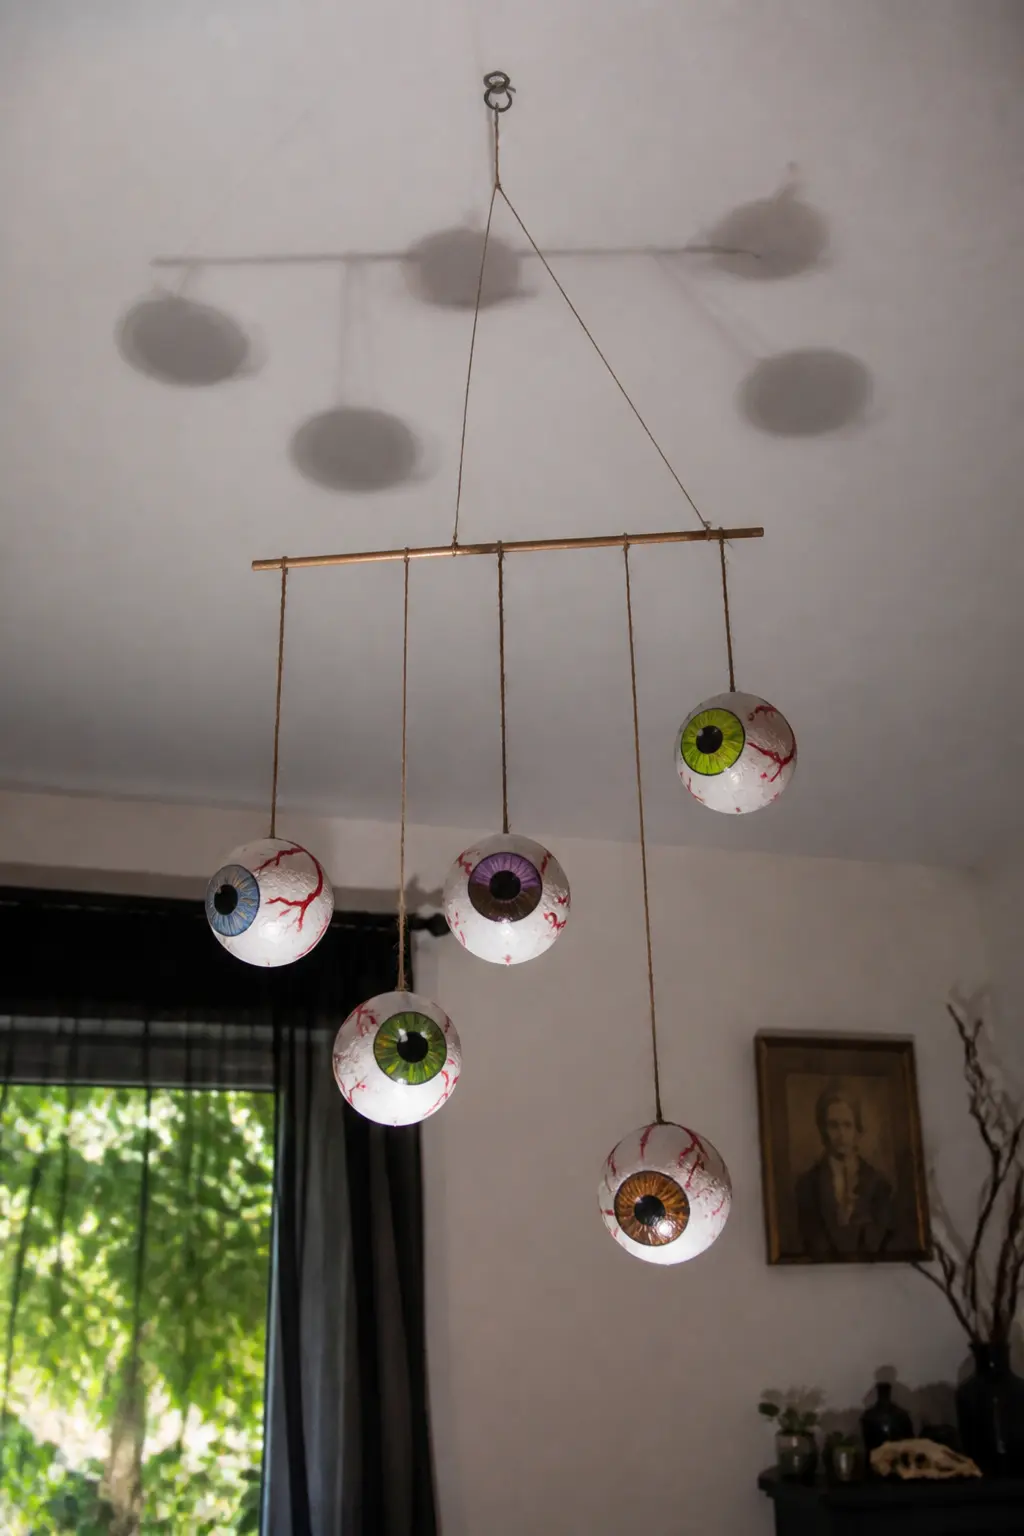
Fishbowl Eyeball Mobile
Cut a wooden dowel to about 40 cm and hang four or five painted styrofoam eyeballs from it at different lengths using invisible thread. Suspend the dowel itself from the ceiling with a single hook. The balls rotate slowly in any air current, which is the unsettling part.
Keep the iris colours in an analogous range, all greens or all ambers, for a more editorial finish. A small LED uplighter on the floor beneath it casts the shadows upward onto the ceiling, doubling the effect for almost no extra cost.
🛍 Shopping guide
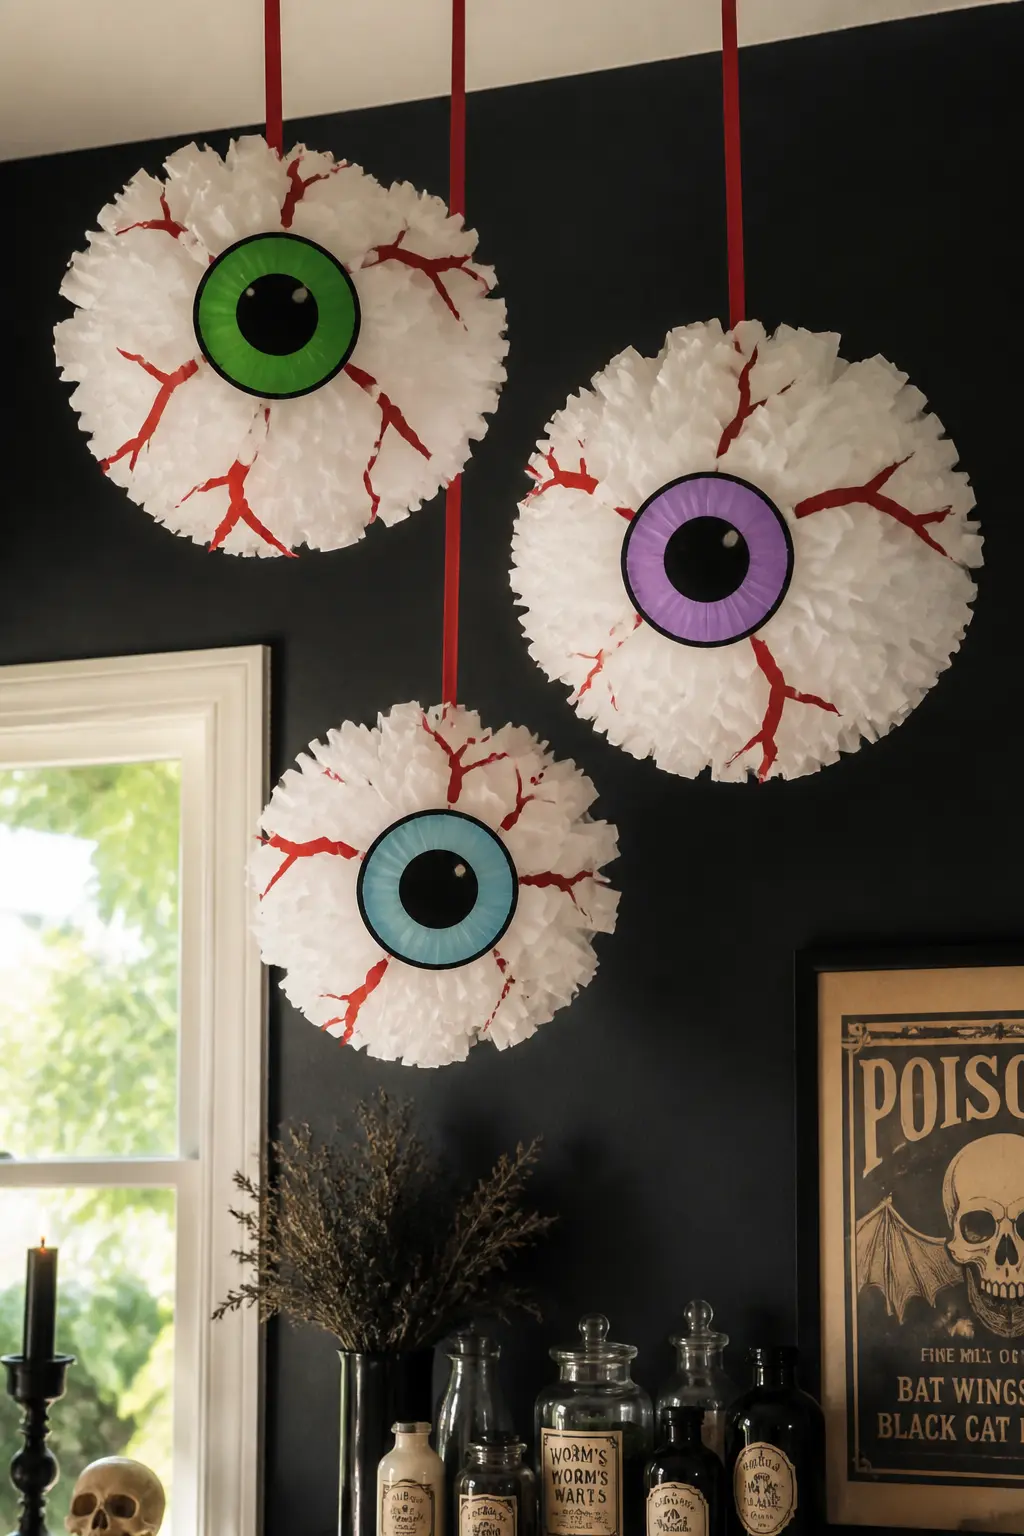
Crepe Paper Eyeball Pom
Make a standard tissue-paper pom in white, then paint or glue a large iris disc to the centre once it is opened and fluffed. The iris is a circle of coloured card stock, the pupil a black circle on top of that. Red ribbon strips radiate from the iris outward into the white tissue layers, mimicking veins.
Hang three poms of different sizes together as a cluster. The largest reads as the main eyeball, the smaller ones as satellites. Because tissue poms are already a known party item, the eyeball transformation lands as a visual joke that lands harder than a bought prop.
🛍 Shopping guide
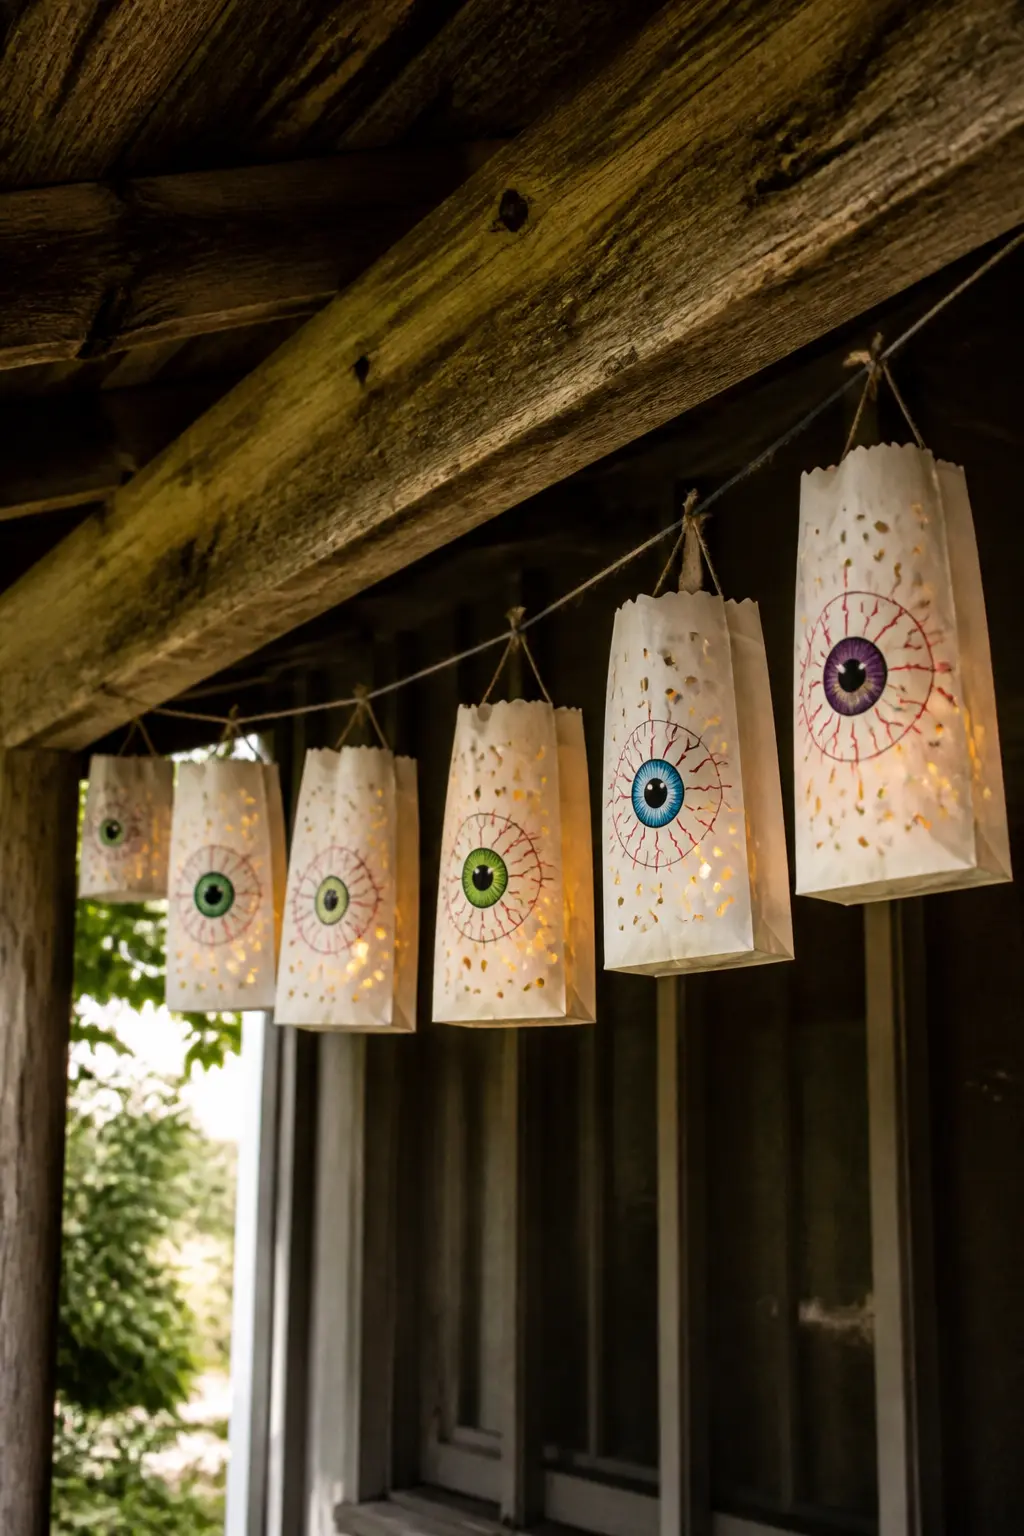
Eyeball Luminaria Bags
Punch a ring of small holes in the sides of white paper lunch bags to suggest veins, then draw or stamp an iris on the front. Drop a battery tea light inside each bag, fold the top down once, and hang from a length of jute using binder clips.
A line of six across a porch ceiling glows amber and cream and casts stippled shadows through the punched holes. The effect is considerably more sophisticated than the materials suggest, which is the best possible outcome for a craft that takes about eight minutes per bag.
🛍 Shopping guide
Table and Shelf
A table covered in eyeball jars, bowls, and trays earns the most comments per square foot of any surface in the room. These ideas scale from a single centrepiece to a full tablescape without requiring a lot of storage space afterwards.
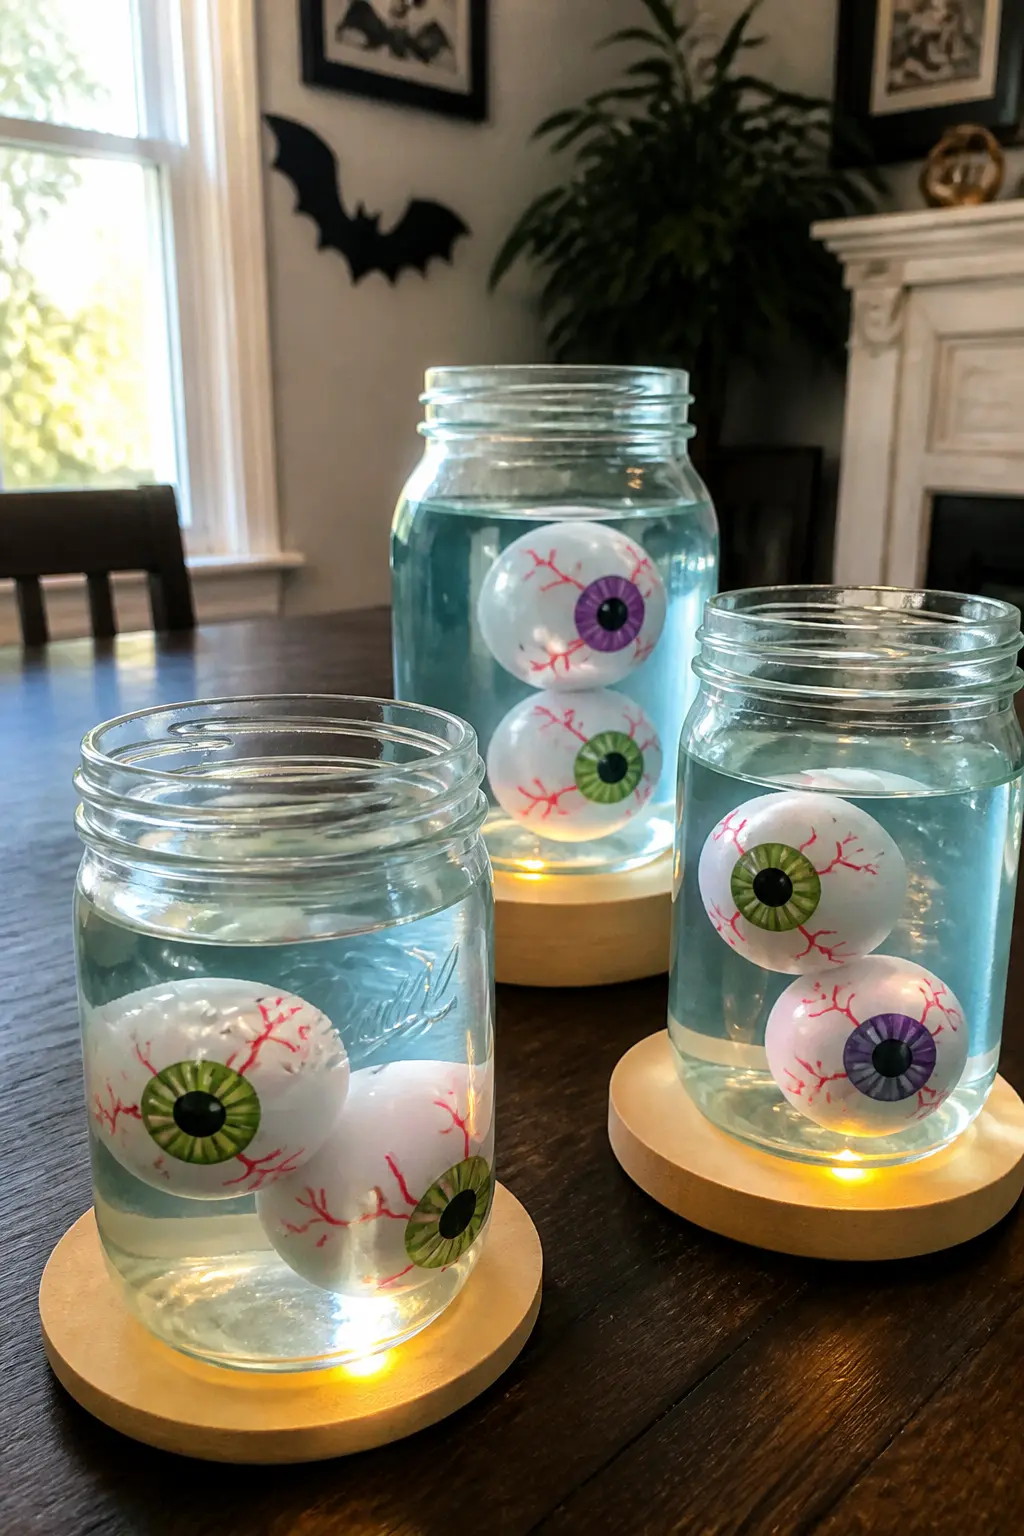
Eyeball Mason Jar Centrepiece
Fill wide-mouth mason jars with water tinted a very pale green or blue using a drop of food colouring, then drop in two or three ping-pong balls painted as eyeballs so they float at the surface. A battery tea light under the jar tints the whole thing from below.
Group three jars of different heights at the centre of a table. The floating balls turn slowly in the water, which makes them feel alive in a way a static prop never does. Change the iris colours across the three jars so the cluster reads as a collection rather than a repeated unit.
🛍 Shopping guide
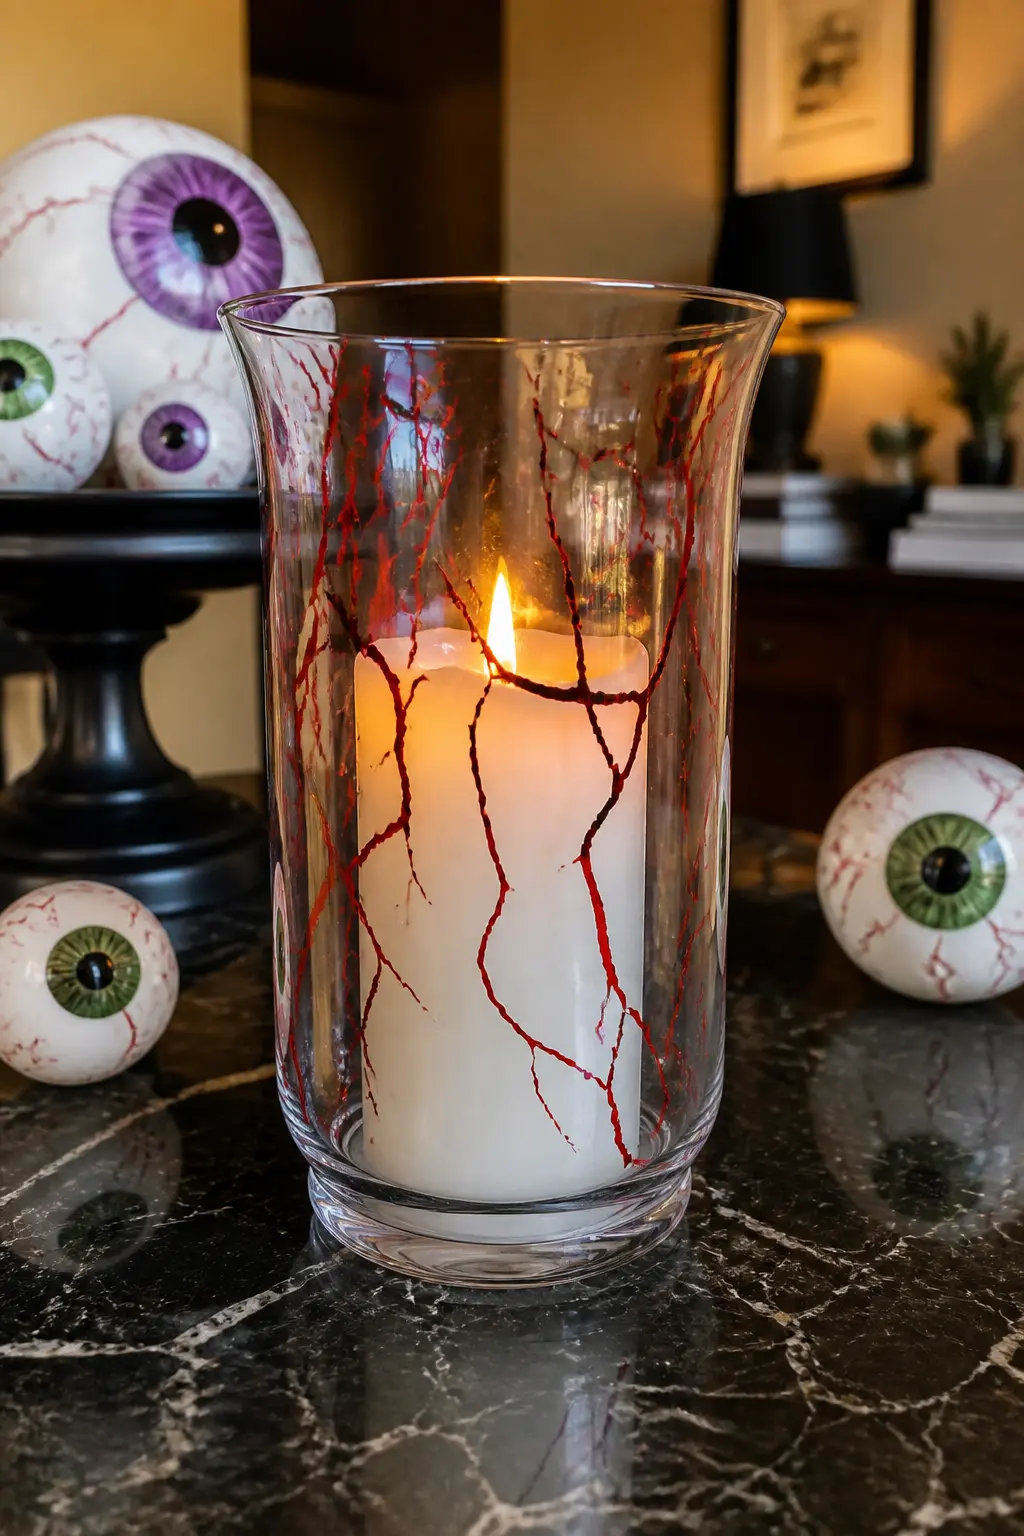
Bloodshot Candle Hurricane
Take a clear glass hurricane vase and use red glass paint to draw branching veins from the base upward, stopping before they reach the rim. Set a thick white pillar candle inside. When the candle is lit, the red lines glow against the glass from the inside.
Add a ring of black craft foam cut as a pupil circle around the candle base, just visible inside the vase. The iris effect comes from a ring of green or amber tissue paper crumpled around the foam. The vase becomes an eyeball and the candle becomes the pupil, which is a very good return on about twenty minutes of work.
🛍 Shopping guide
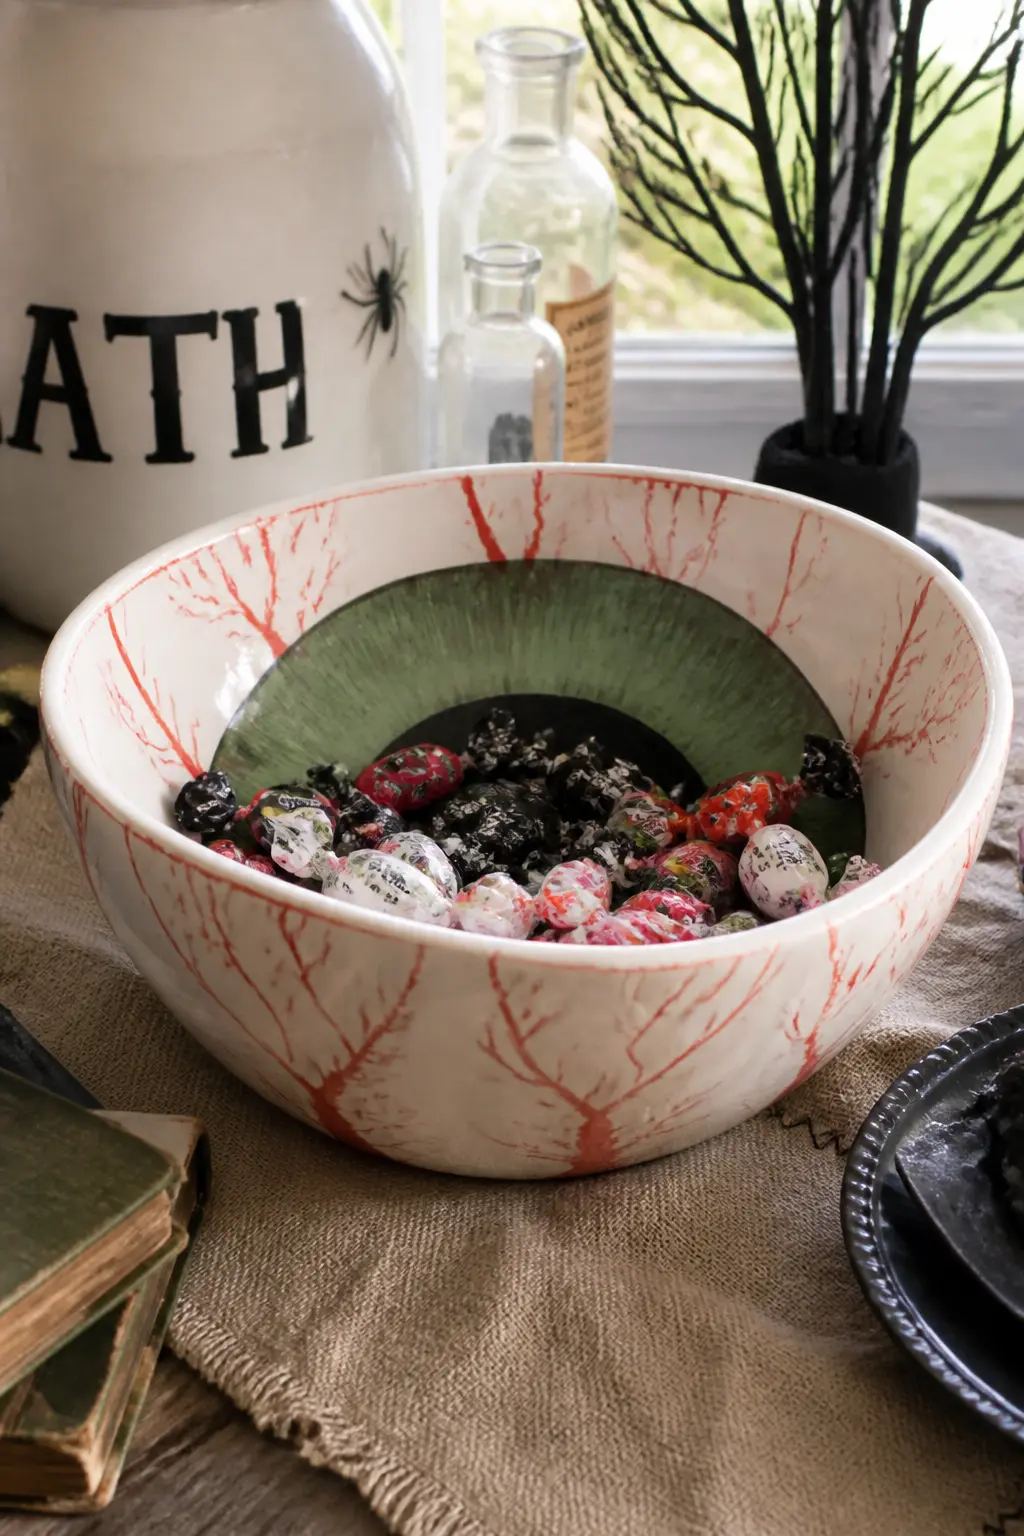
Giant Eyeball Serving Bowl
Paint a large white mixing bowl as an eyeball, treating the interior as the iris. A ring of colour inside the bowl, a black circle at the centre base as the pupil, and red veins painted on the outside of the bowl complete the look. Seal with food-safe varnish once fully dry.
Fill it with wrapped candy, popcorn, or plastic toy spiders on the night. The bowl does double duty as decoration and as the actual candy bowl, which removes one item from the table clutter. Choose a bowl with a slight curve outward at the rim so the veins on the outside show even when the bowl is full.
🛍 Shopping guide
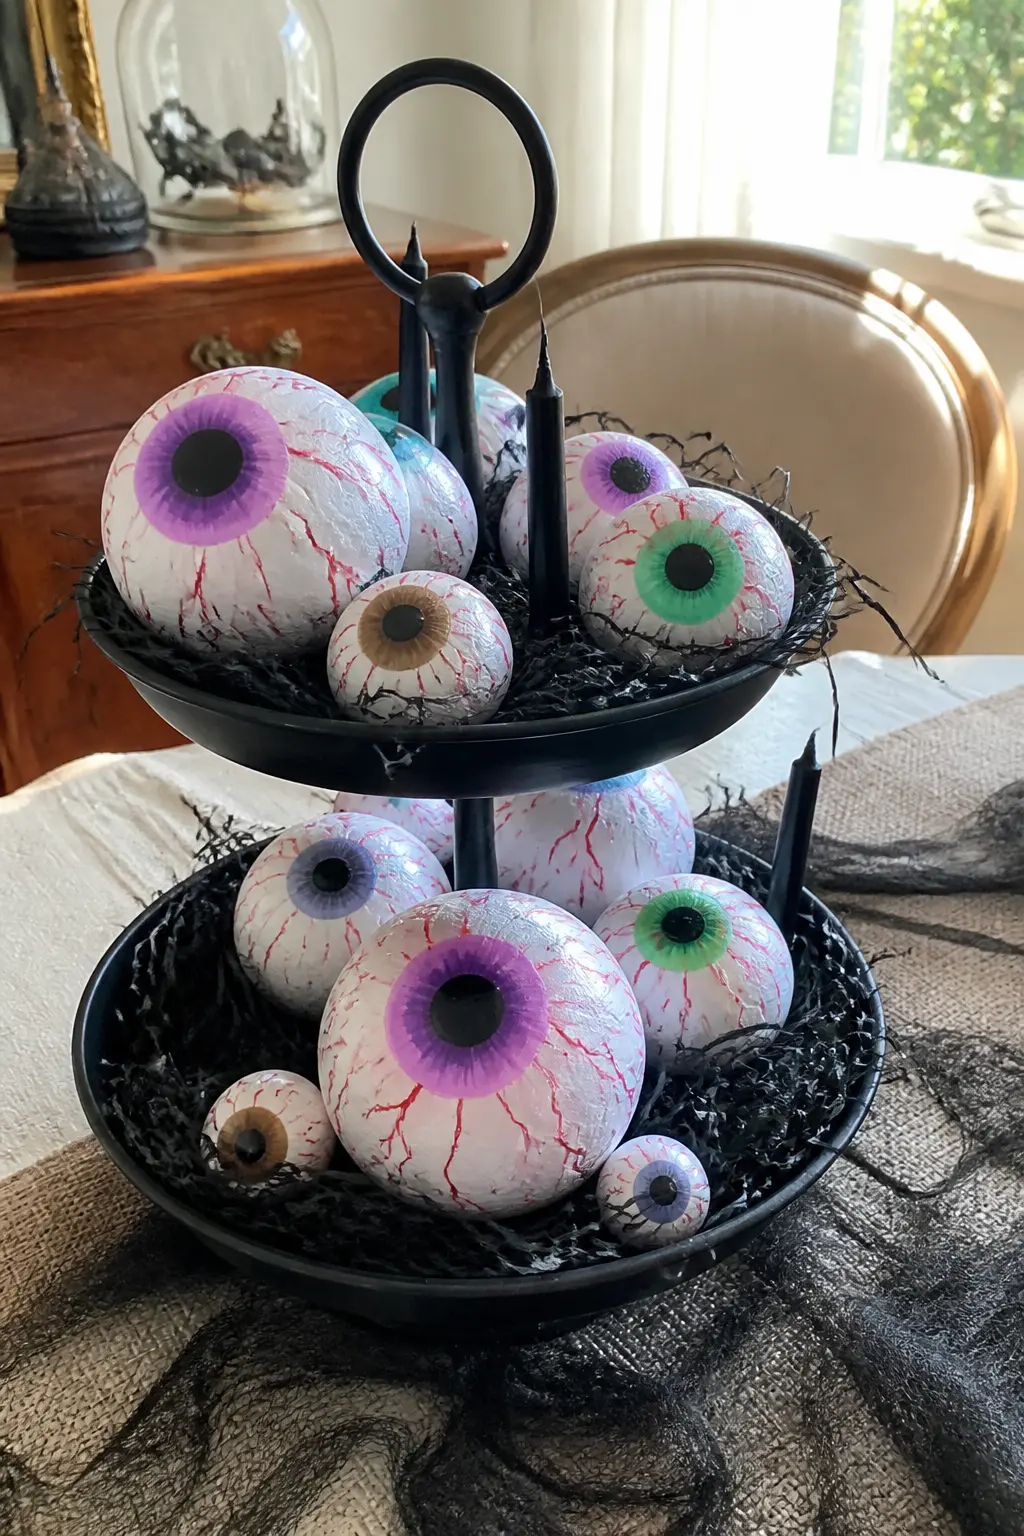
Styrofoam Eyeball Tiered Tray
Paint a set of styrofoam balls as eyeballs in different sizes and scatter them across the tiers of a two-tier or three-tier serving tray, filling the gaps with black raffia or Spanish moss. The eyeballs do not need to be secured: their weight keeps them in place and guests can pick them up to examine them.
Mix in a few actual props, a small plastic skull or a couple of black taper candles, so the tray reads as a styled vignette rather than a single-note eyeball display. The contrast between the gruesome and the elegant is what makes a tiered tray feel curated rather than chaotic.
🛍 Shopping guide
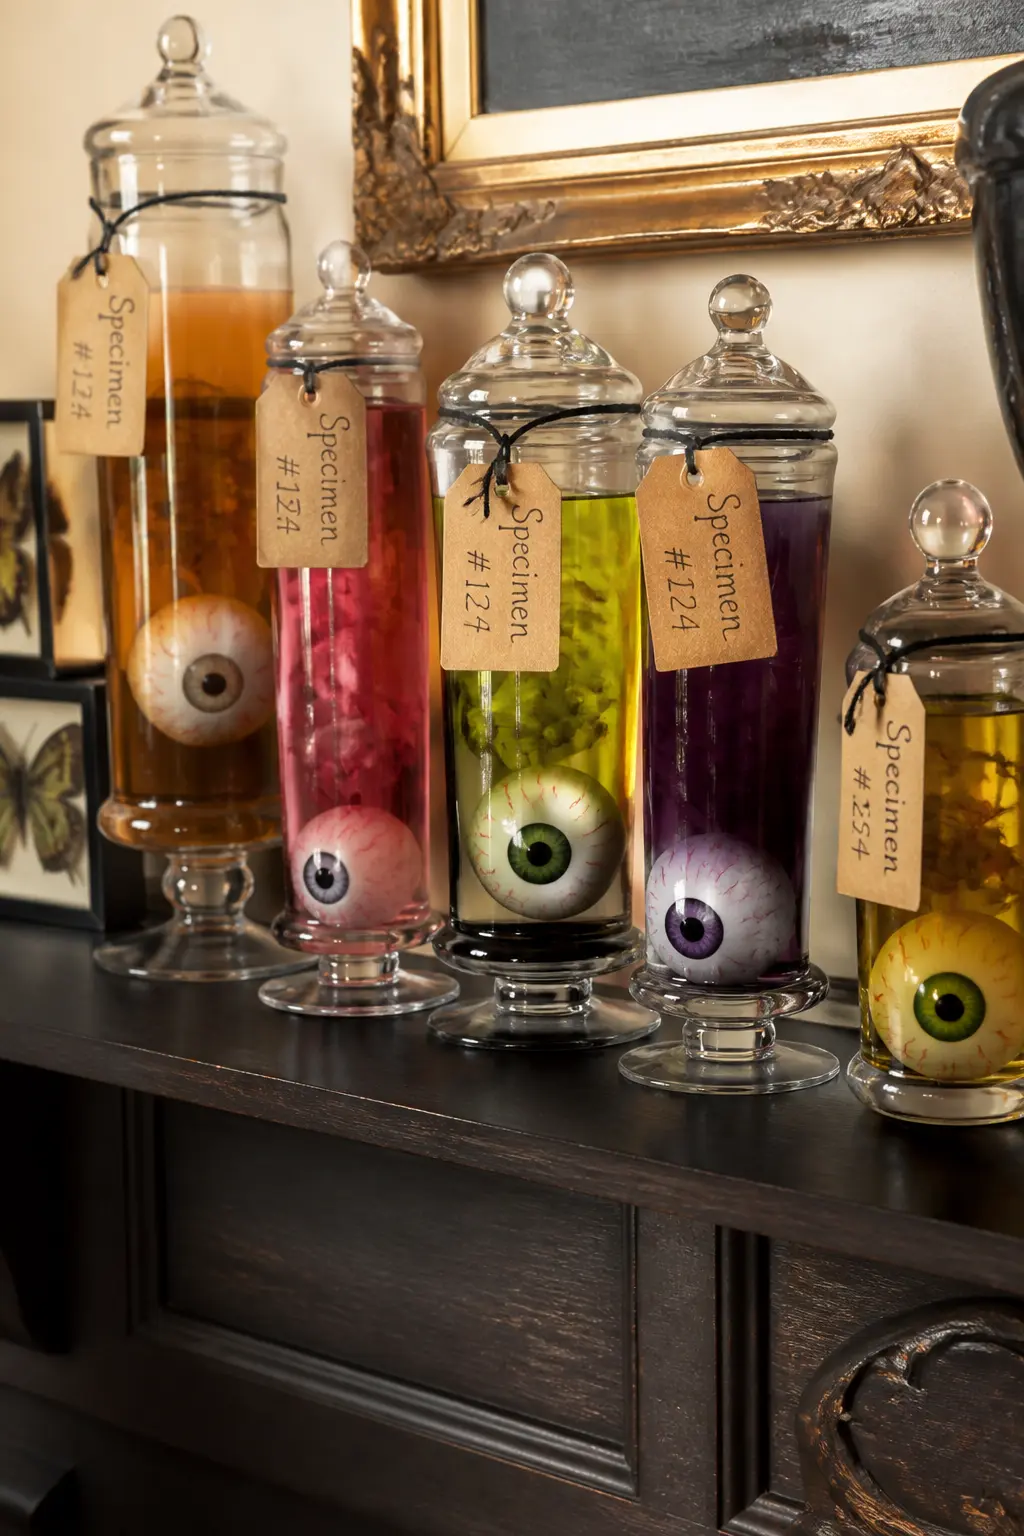
Eyeball Apothecary Jar Shelf
Line a shelf with tall apothecary jars or clip-top glass bottles, each filled with a different liquid colour and a small ping-pong eyeball inside. One jar holds pale green water, one holds murky amber tea, one holds clear water with a swirl of black food colouring. The variation across jars reads as a mad scientist’s collection.
Label each jar with a torn strip of brown kraft paper tied with black twine. Write the labels in ordinary handwriting rather than trying to simulate gothic script: plain handwriting reads as more unsettling because it looks domestic. Print nothing.
🛍 Shopping guide
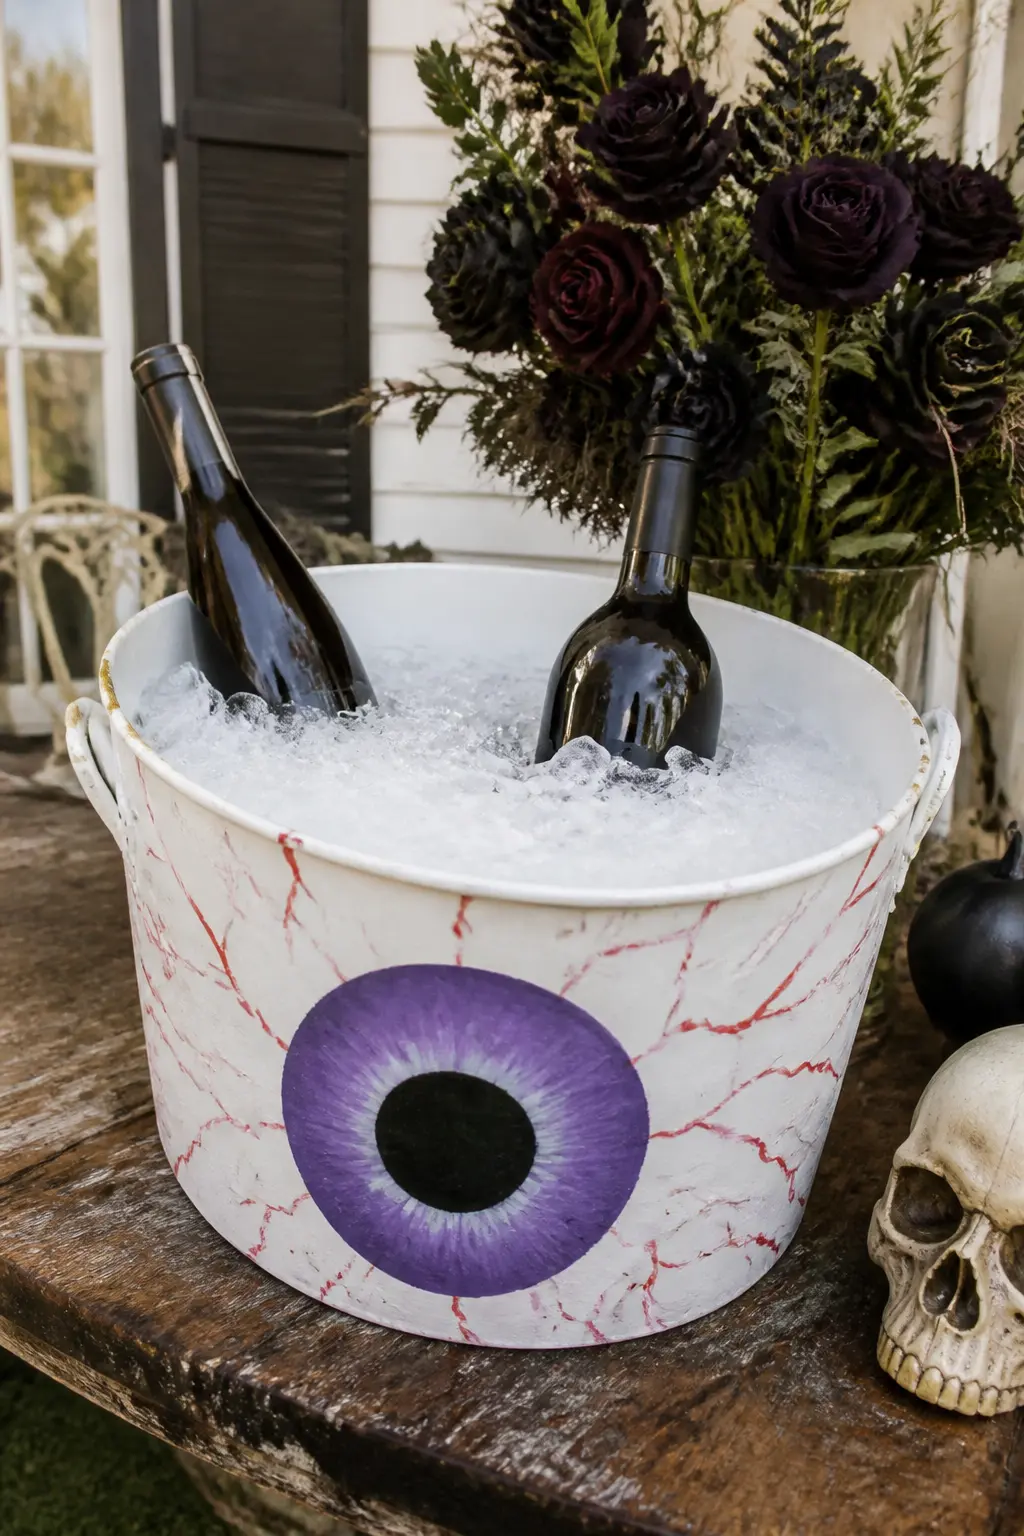
Eyeball Ice Bucket
Paint a plain white bucket or use a white enamel ice bucket as the base. Draw a single large iris on the front, veins radiating outward to the rim, and fill with crushed ice on the night. Bottles of wine or soda stick out of the ice looking as if they are being clutched by an eyeball, which is deeply wrong in exactly the right way.
Keep the iris colour deep violet or red so it reads from across the room. A ring of white glow-in-the-dark paint around the iris catches blacklight if you have one running. The bucket costs nothing extra if you already own one in white or pale grey.
🛍 Shopping guide
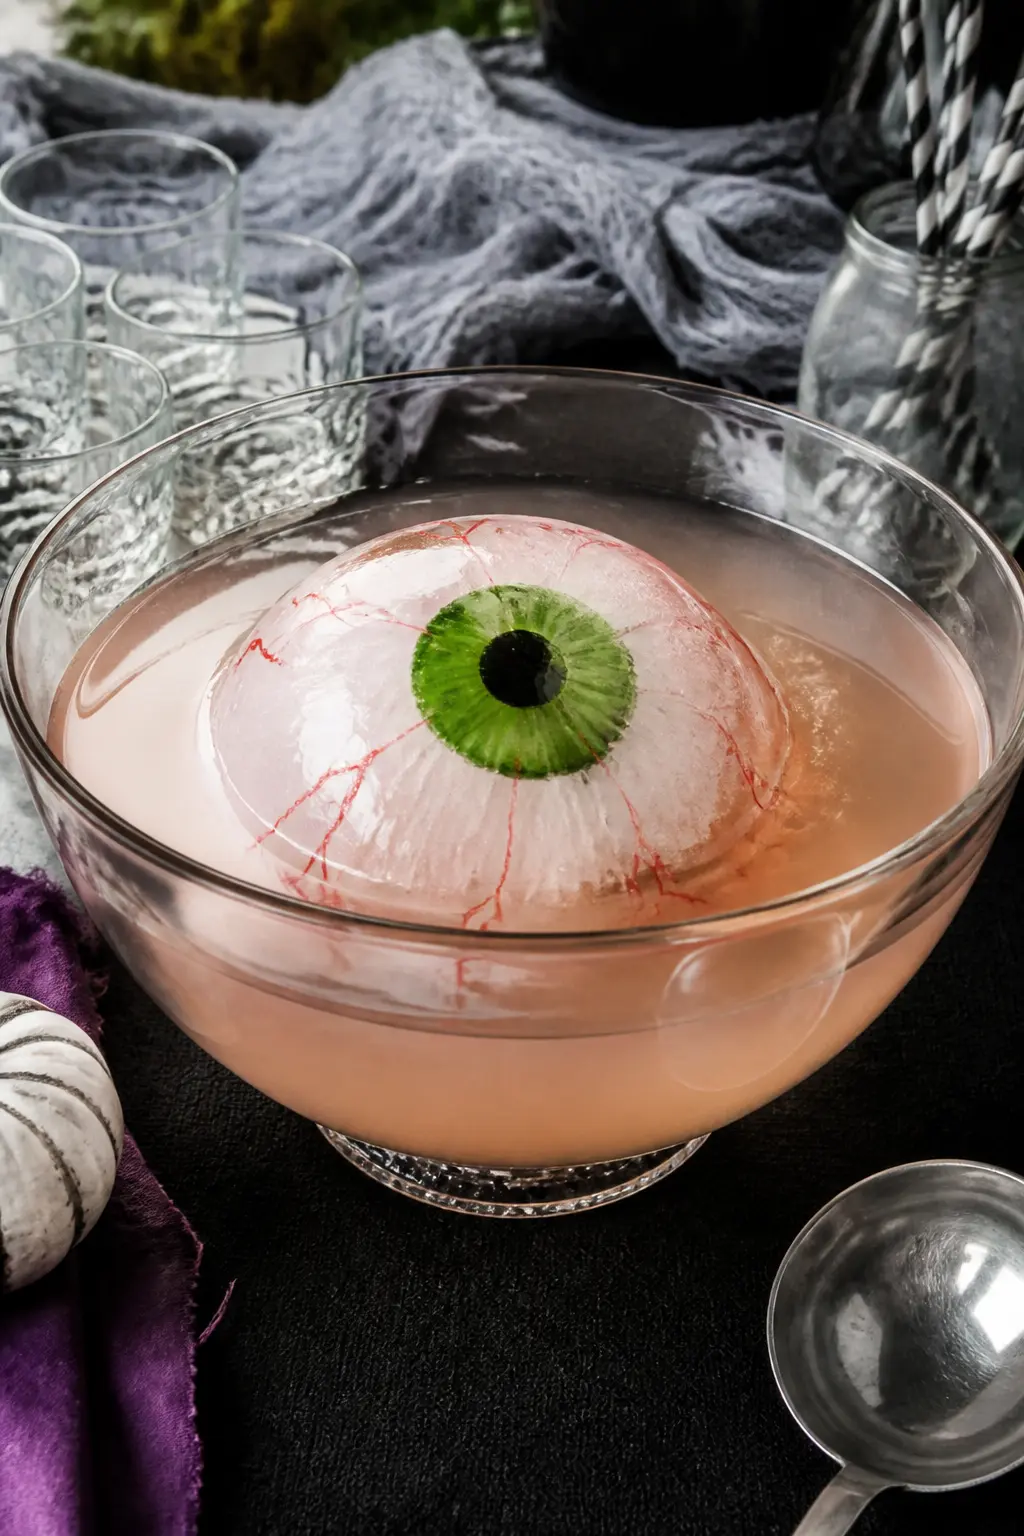
Floating Eyeball Punch Bowl
Freeze water tinted red with food colouring into a round silicone mould, then paint a simple iris and pupil on the flat top surface once frozen. Lower the ice orb into a clear punch bowl of lemonade or a pale cocktail, flat side up so the iris faces guests.
As the orb melts it colours the punch faintly red, which is a very good effect for minimal effort. Make two orbs so one stays in the freezer as a replacement. The silicone moulds used for bath bombs or cake pops are the right size and cost almost nothing.
🛍 Shopping guide
Door and Entry
The door is the first thing trick-or-treaters see and the last thing guests notice on their way out. Paper plates, foam circles, and peel-and-stick vinyl turn a flat door into something that genuinely alarms people, without leaving marks on the paint.
If the door idea catches your eye, this classroom door decoration article has more techniques that translate easily to a home front door.
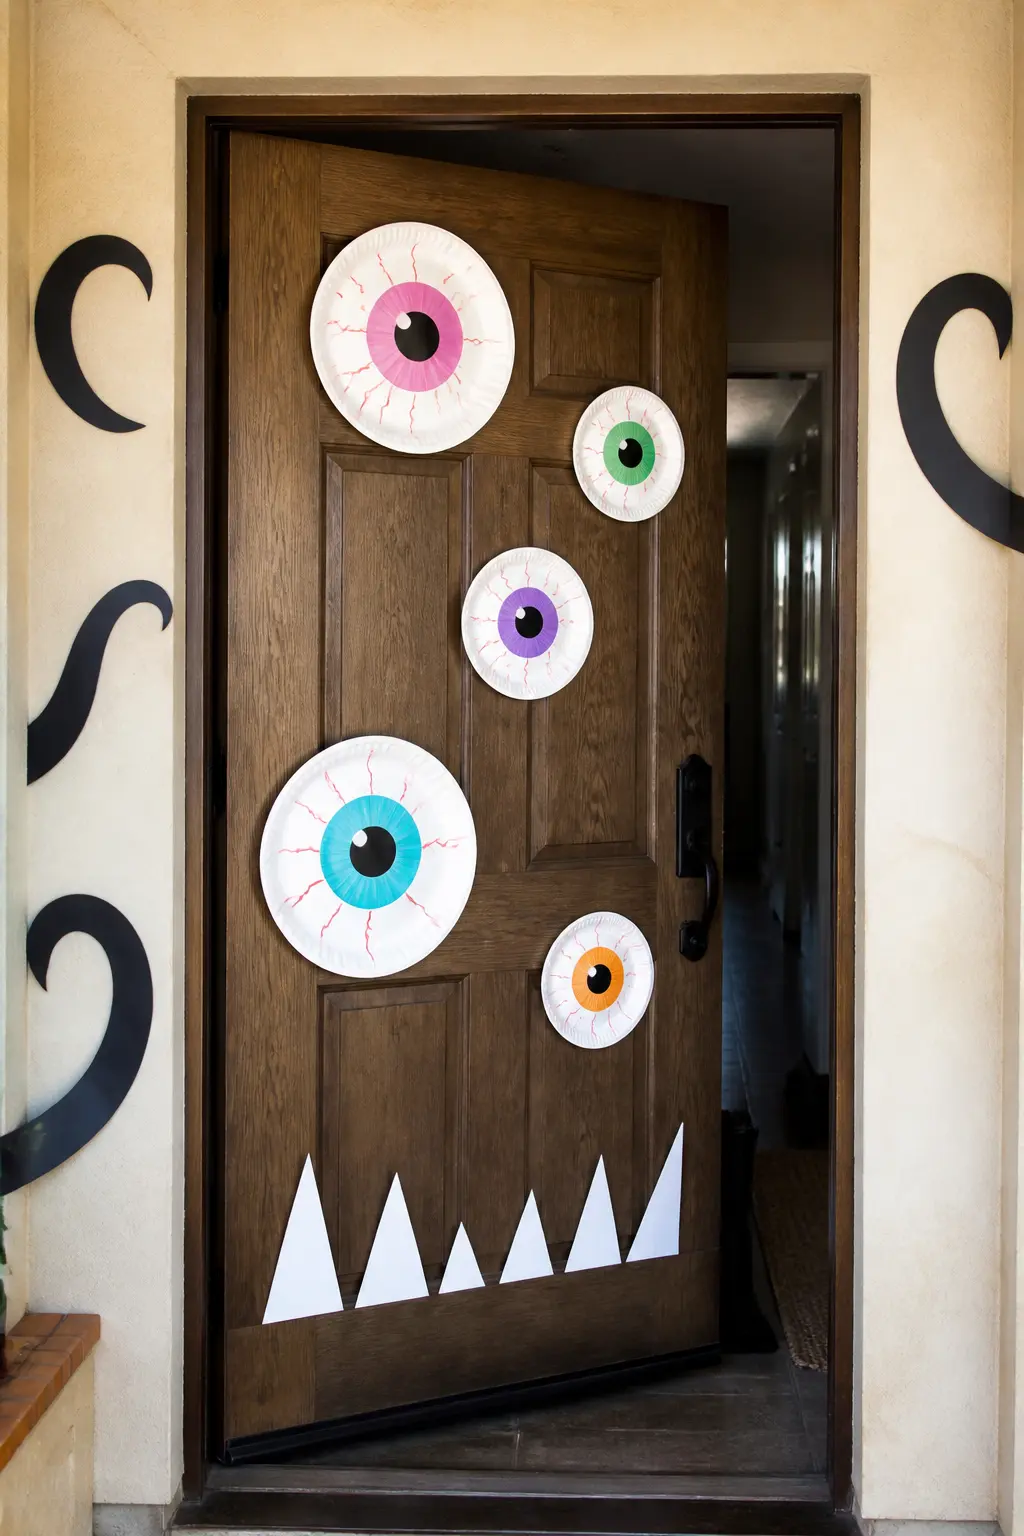
Monster Face Front Door
Cover a front door in paper-plate eyeballs, each made from two nested plates (one larger white plate as the white of the eye, one smaller plate painted with an iris), and secure them with removable adhesive strips. Add paper triangles at the bottom as teeth and simple curved black paper shapes at the sides as eyebrows or horns.
The door becomes a creature, not just a decorated surface. Use five or six eyeballs at different heights and angles rather than a neat grid: uneven placement reads as alive. The iris colours should vary, one for each plate, so the creature looks chaotic rather than coordinated.
🛍 Shopping guide
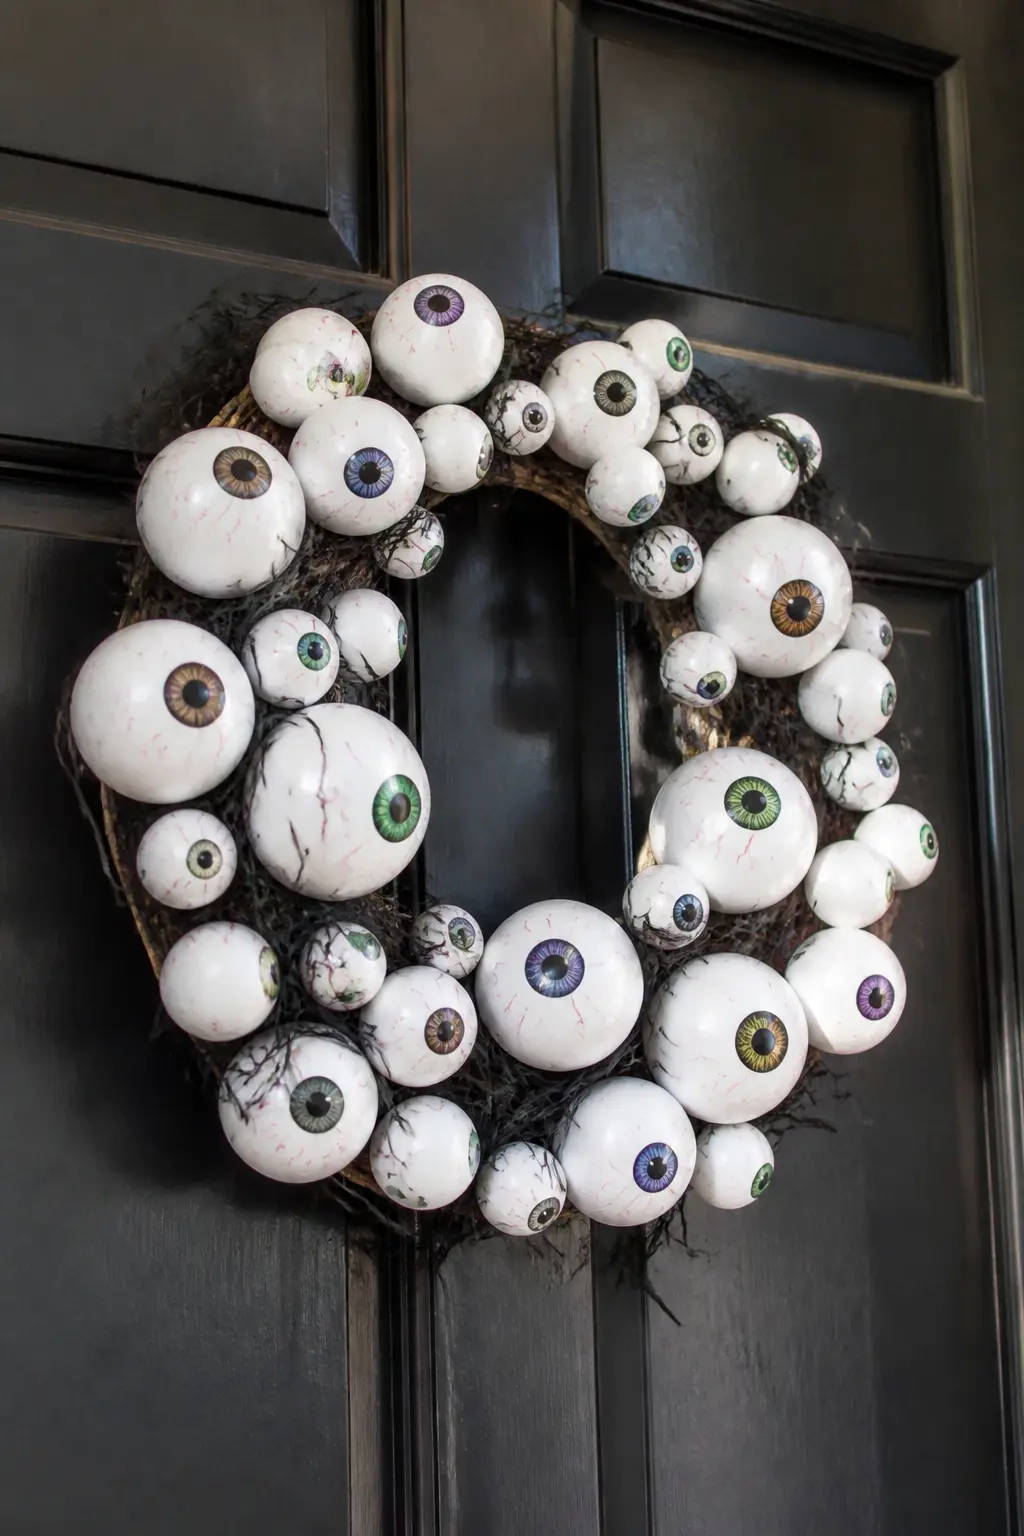
Wreath of Watching Eyes
Start with a plain grapevine or foam wreath base and hot-glue styrofoam balls painted as eyeballs across the front surface, covering it completely. Tuck Spanish moss or black raffia between the balls to fill gaps and give the impression the eyes are growing from something organic and wrong.
Face the pupils in different directions so the wreath does not read as a manufactured product. Roughly half should face forward, the others tilted or averted. The wreath hangs on a door hook like any other and takes the nail or hook you already have.
🛍 Shopping guide
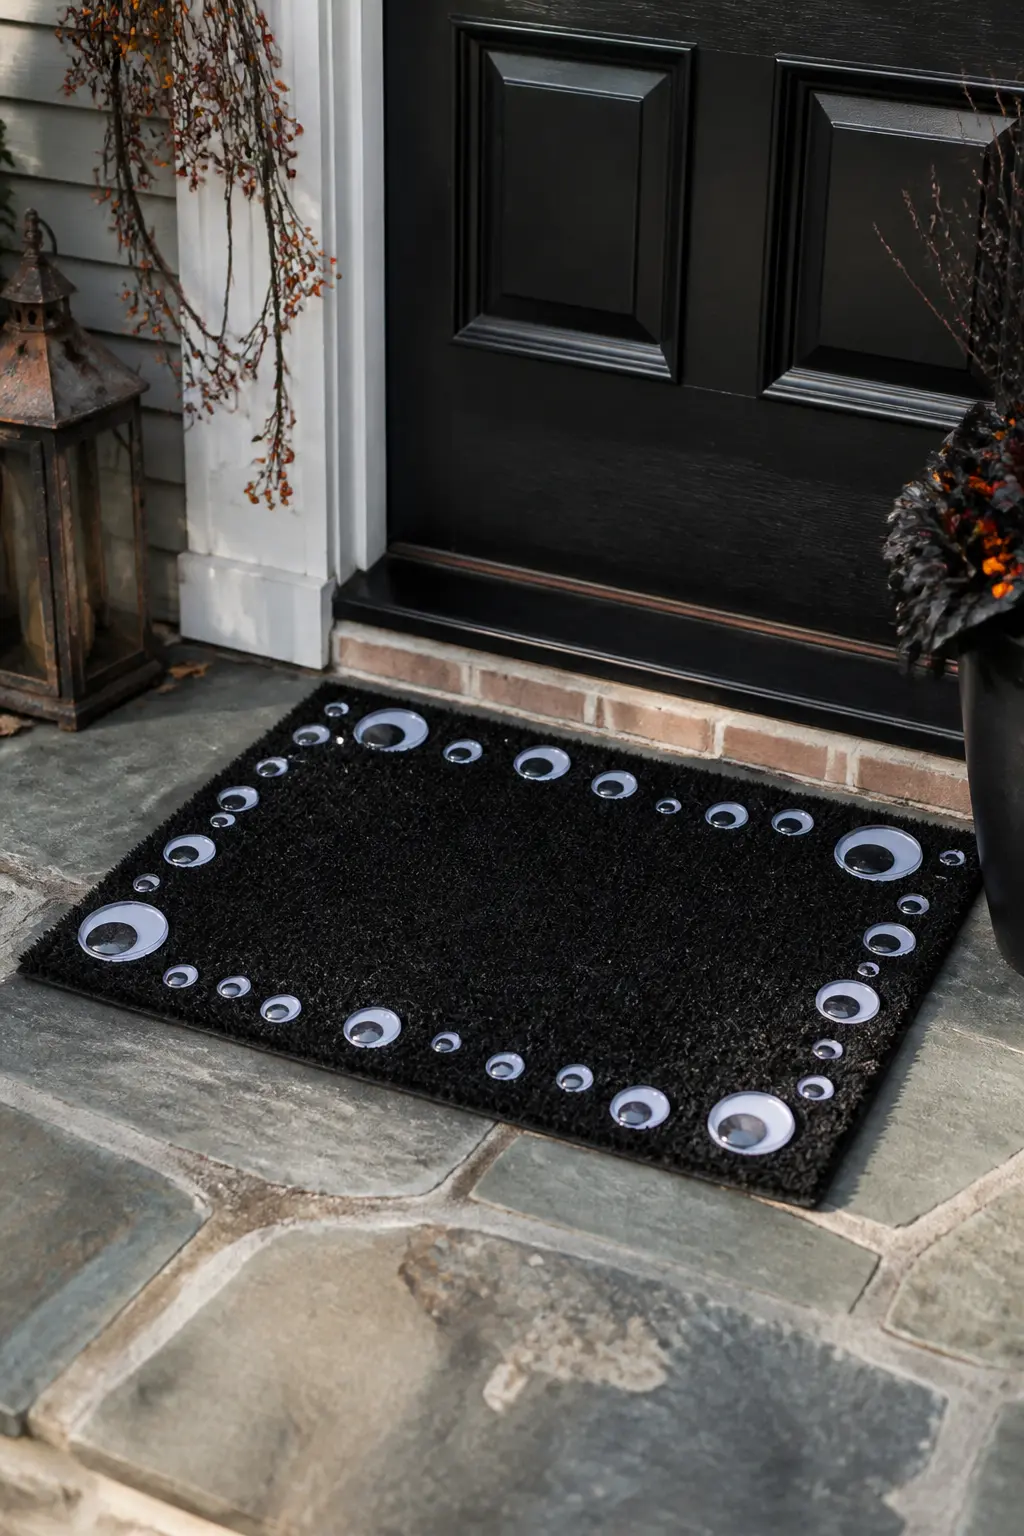
Googly Eye Doormat Border
Glue large googly eyes (40mm or bigger) around the border of a plain black coir doormat using waterproof outdoor adhesive. The eyes look upward at whoever is about to knock, which is the simplest possible version of the watching-eyes theme and takes about fifteen minutes.
Seal the eyes with outdoor-rated clear varnish spray once the adhesive dries, so they survive a week of foot traffic and autumn drizzle. Replace any that fall off with the spares from the same bag: googly eyes in that size come in packs of fifty or more.
🛍 Shopping guide
Eyeball Balloon Arch Entry
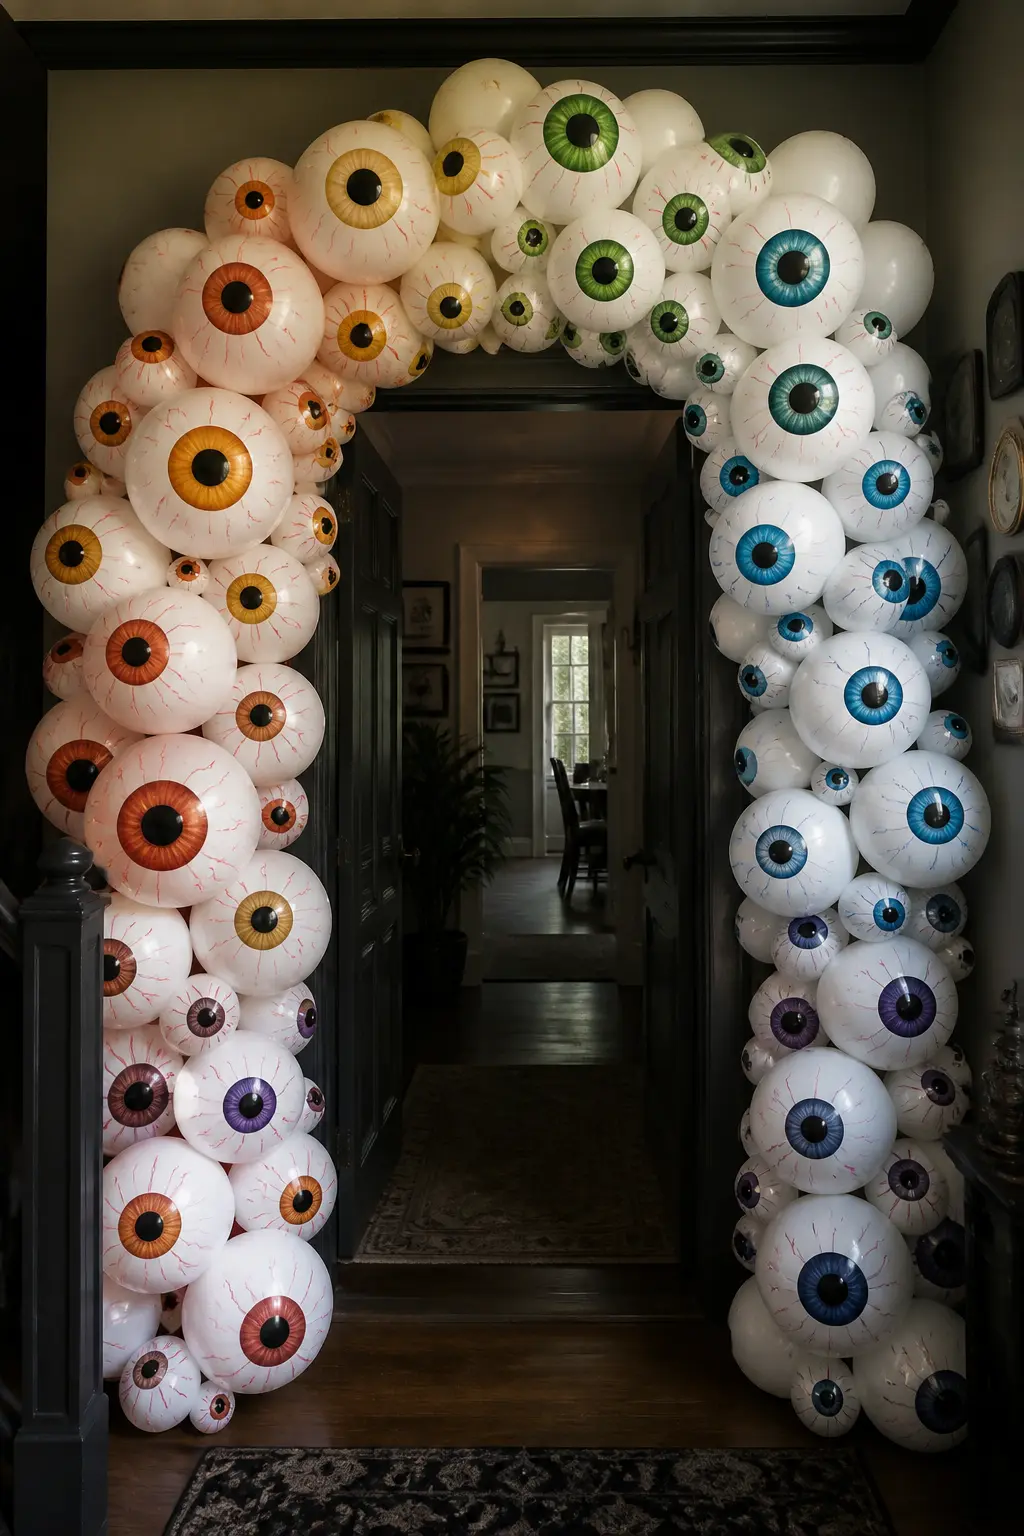
Build a simple balloon arch over a doorframe using a balloon decorating strip and white balloons, every one of which you have drawn as an eyeball before inflating. Vary the iris colour across the arch so it graduates from red to orange on one side and green to blue on the other, meeting in the middle with a deep violet.
You do not need a helium tank: the arch strip holds the balloons in place against the frame and a standard hand pump does the inflating. The whole arch goes up in under an hour and comes down in under ten minutes, which is the correct ratio for a party decoration.
🛍 Shopping guide
Porch Column Eyeball Wrap
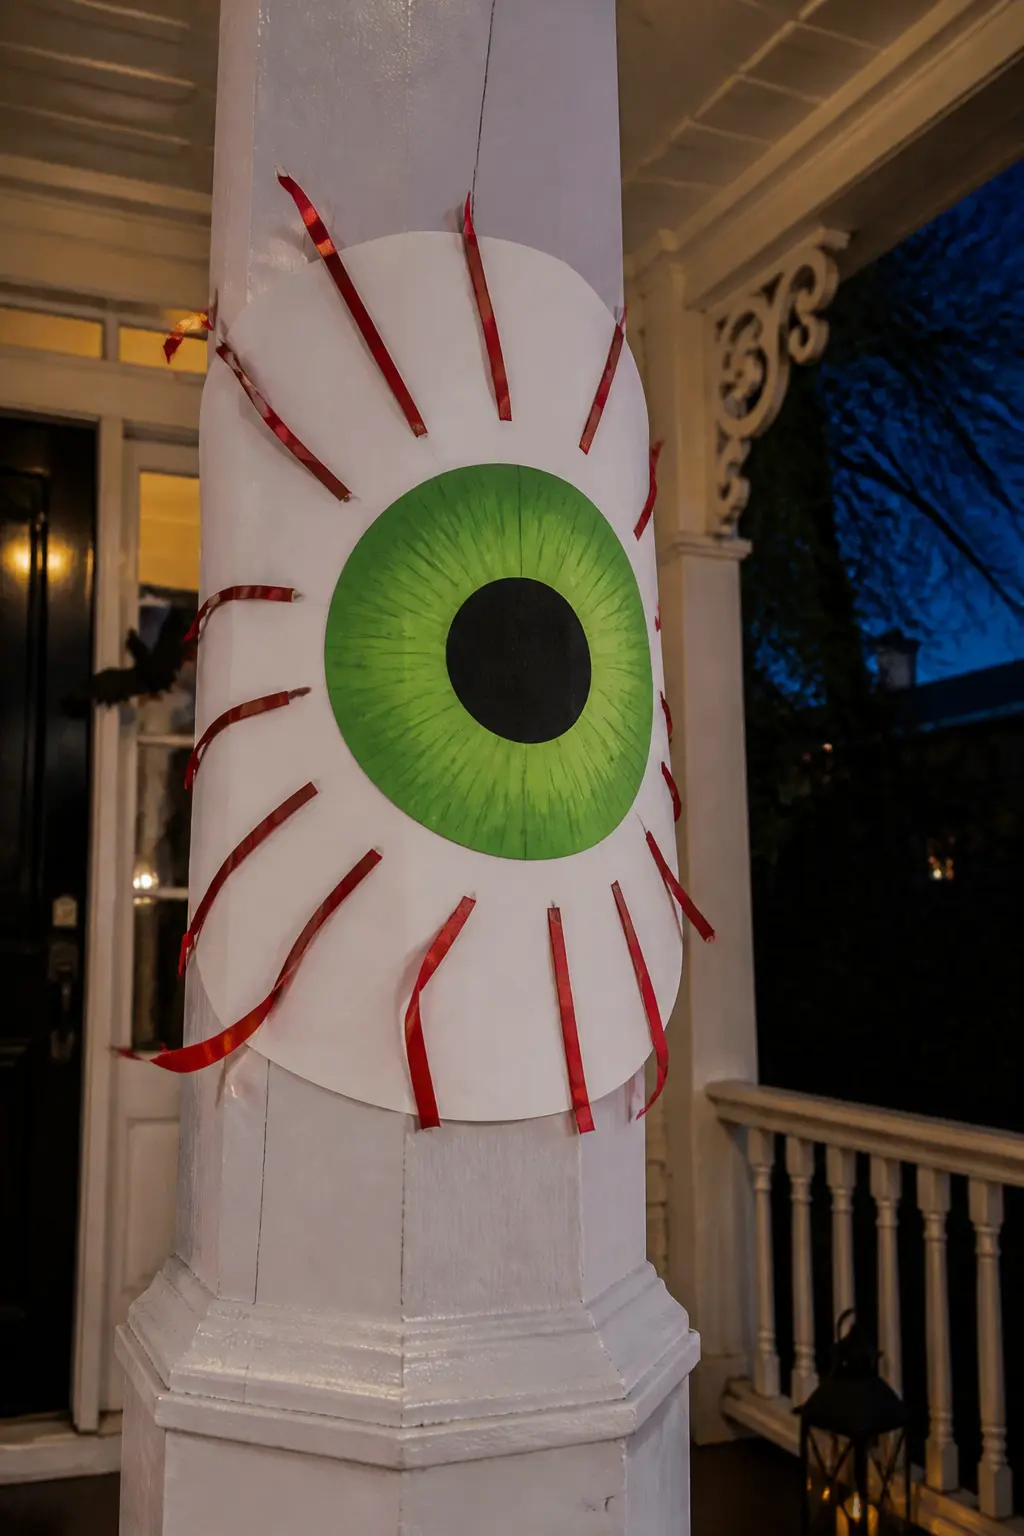
Cut a large iris disc from coloured card stock and a larger white circle from poster board. Layer them together with a black pupil at the centre and a few strips of red ribbon as veins, then wrap the whole assembly around a porch column with gaffer tape on the back. From the street, the column appears to have a single giant watching eye.
Scale matters: make the white circle at least 60 cm across for a standard column. Smaller and it reads as a sticker rather than a presence. One eye per column is enough; two columns with matching eyes bracket the entry like a face.
🛍 Shopping guide
Googly Eye Balloon Photo Wall
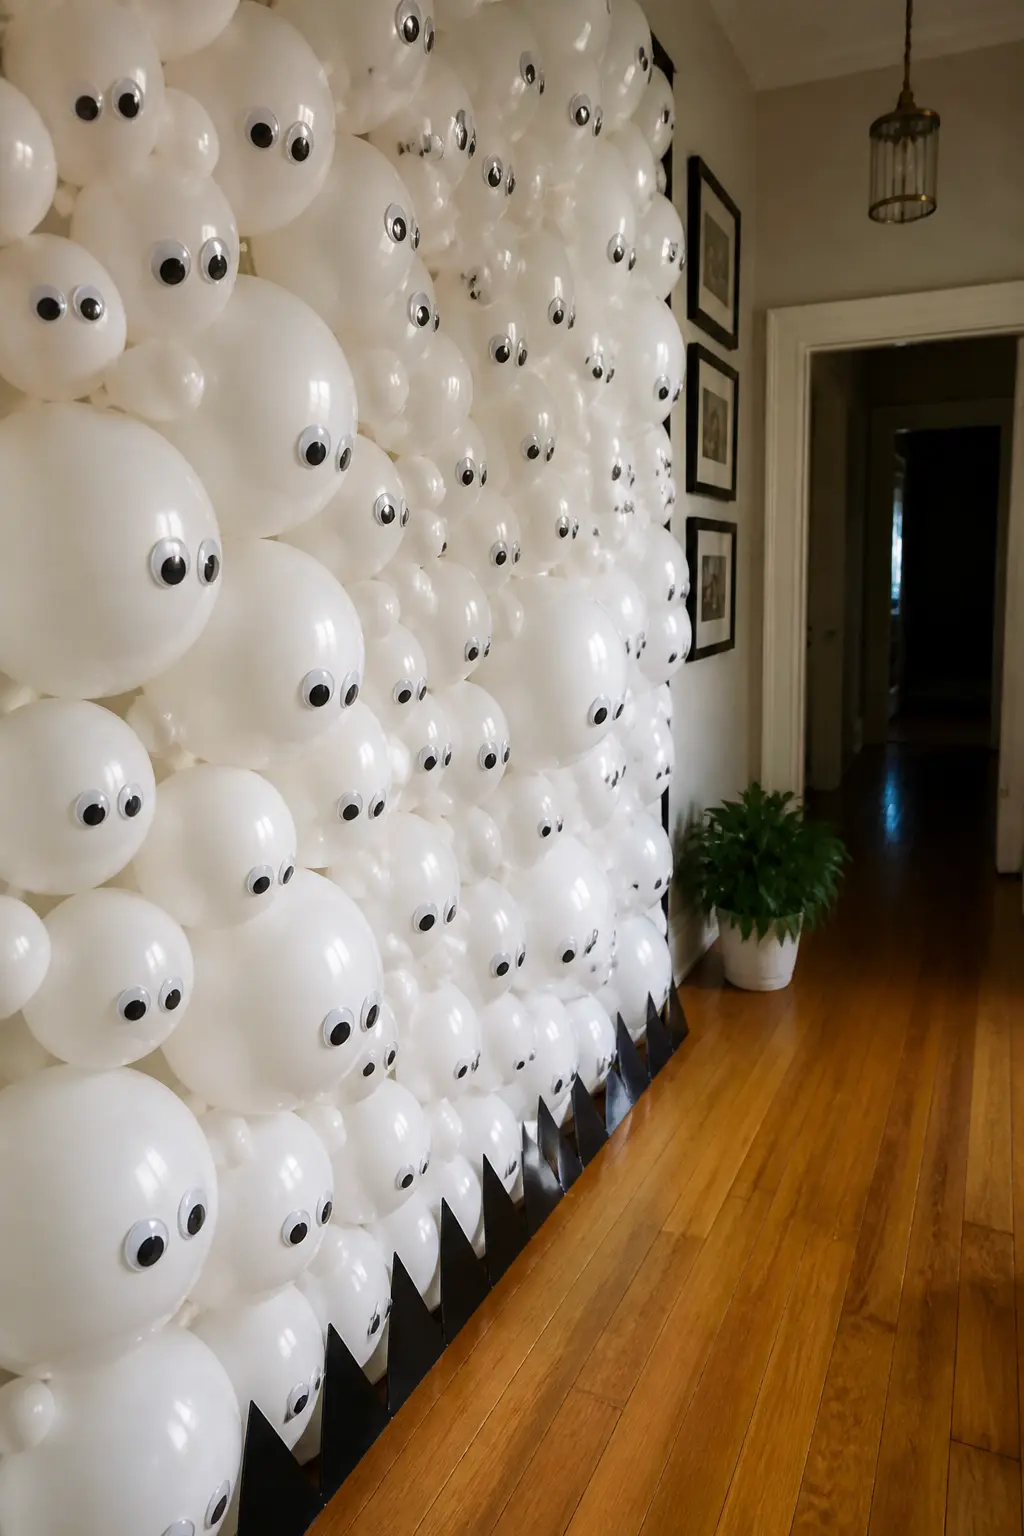
Cover a flat wall section with white balloons pinned or taped in a tight grid, then stick two large self-adhesive googly eyes onto each balloon. The grid does not need to be perfect: off-kilter balloons add to the creature-wall effect. Back this with a strip of black card at the base cut as a row of teeth, and the wall becomes a mouth with a hundred eyes above it.
This is the highest-impact single craft on the list in terms of square footage covered per hour of effort. The balloons do not need to be inflated to the same size: variation in inflation makes the wall feel organic rather than manufactured. For more door and wall ideas that work in public spaces, this classroom door decoration article has scale-up techniques.
🛍 Shopping guide
Window and Sill
A window lit from behind turns any eyeball prop into a glowing spectacle visible from the street. The key is backlighting: a cheap LED strip or a battery tea light inside a jar does the work.
Backlit Eyeball Window Cling
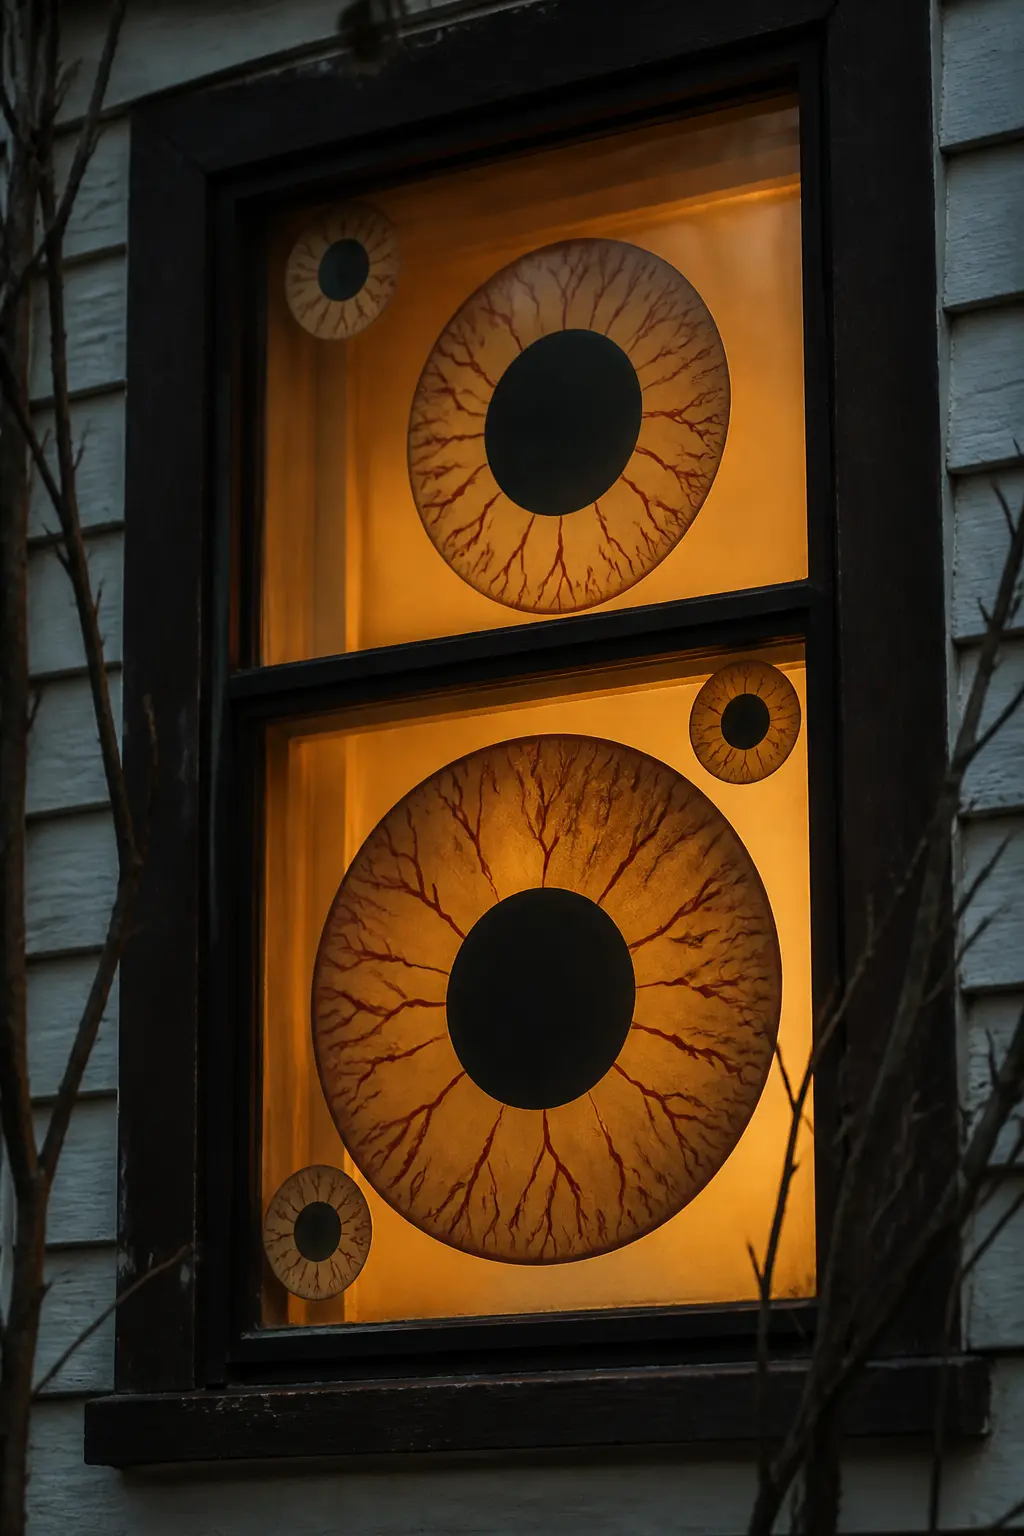
Cut an iris and pupil shape from black and coloured card stock and tape them to the inside of a window so they are visible as a silhouette from outside at night. Backlight the window with a string of warm LED lights inside the room and the whole thing reads as a glowing eyeball from the street.
The card does not need to be perfect: torn edges and slight asymmetry make it look more organic and more unsettling than a computer-cut circle. Tape it with painter’s tape so it lifts off the glass cleanly in November without residue.
🛍 Shopping guide
Eyeball Jar Window Sill Row
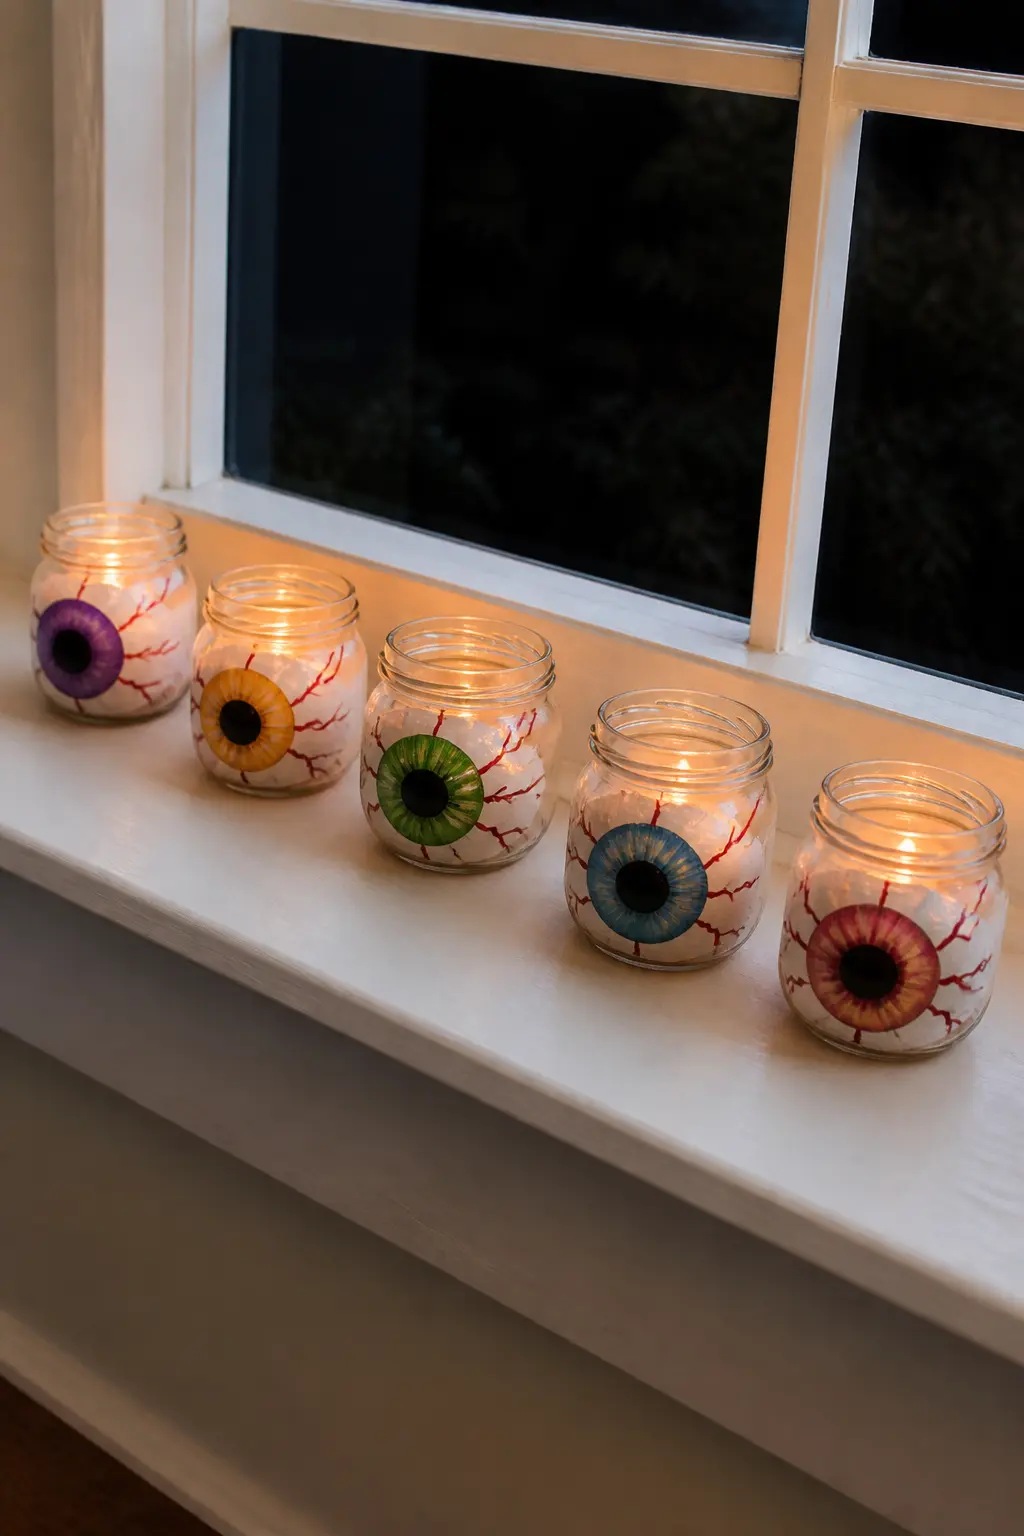
Line a window sill with small glass jars, each holding a glowing battery tea light. Paint an iris on the front of each jar using glass paint or a paint marker: one green, one amber, one red, one blue. The jars glow from within and the iris colours tint the light that falls forward.
From outside the house at night, the window sill reads as a row of watching eyes, which rewards the neighbours. From inside, they cast coloured pools of light onto the sill surface that shift as the tea lights flicker. No two jars need to look identical.
🛍 Shopping guide
Sheer Curtain Eyeball Shadow Play
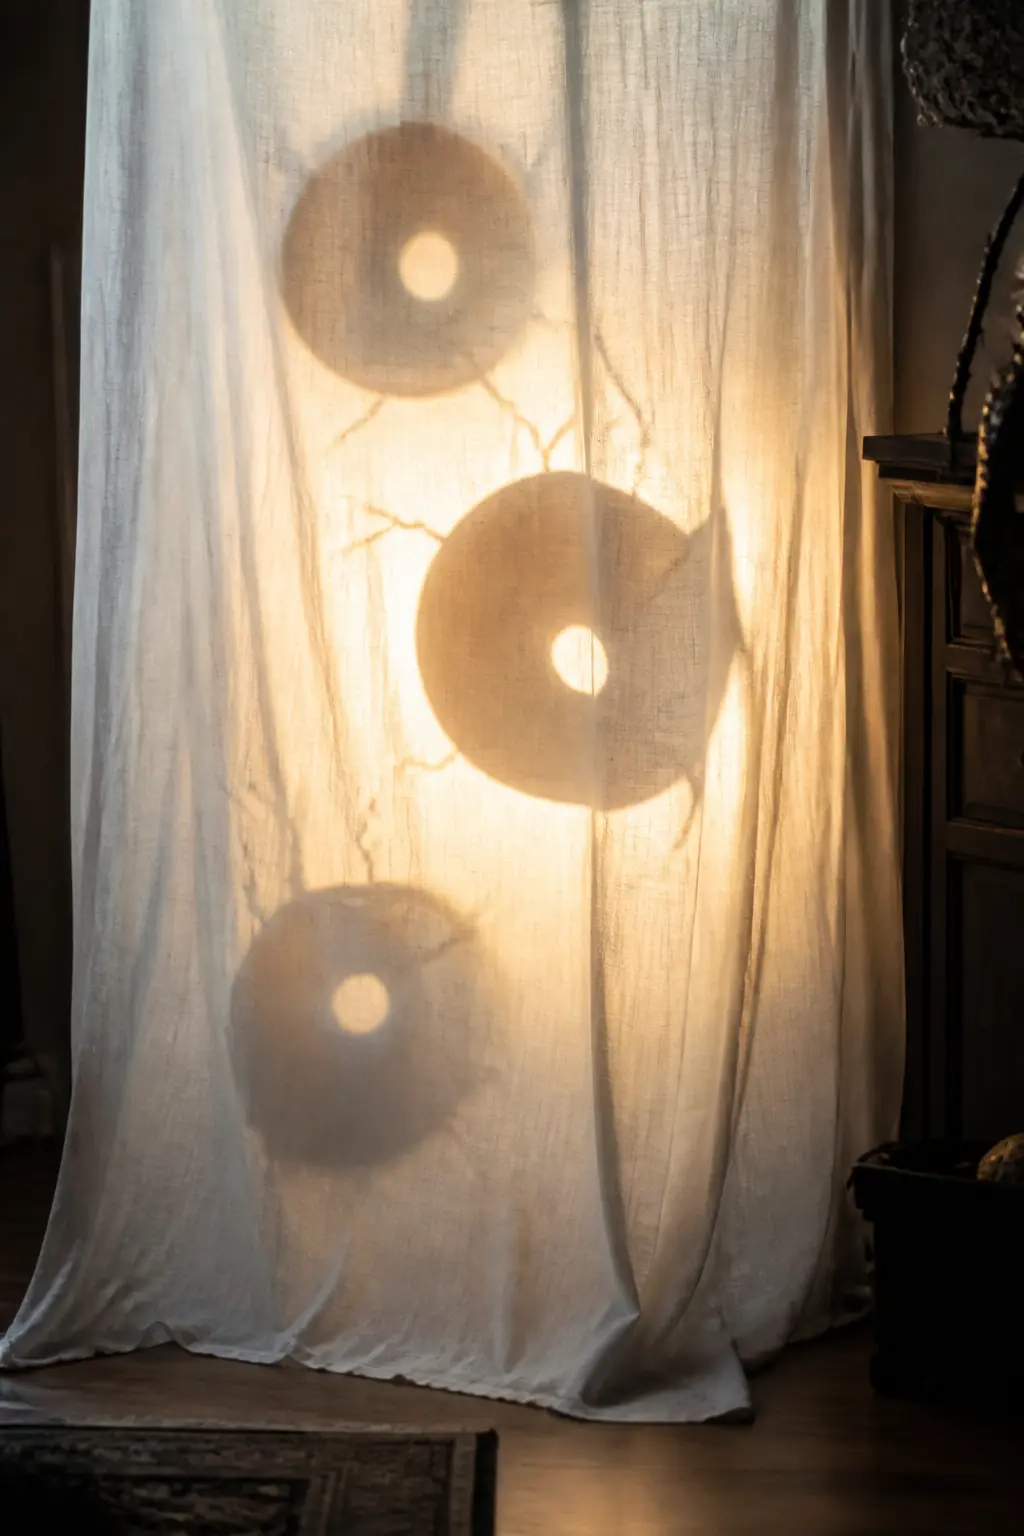
Cut large iris and pupil shapes from black card stock and tape them to a sheer white curtain using fabric glue dots. When backlit by a lamp behind the curtain, the shapes cast soft shadows forward, and from outside the curtain itself glows with the eye shapes visible as dark patches on a luminous ground.
Three eyes at different heights along a single curtain panel look deliberate and theatrical. The iris shapes can stay abstract: a ring shape is enough. Fabric glue dots hold through the season and release without tearing the fabric in November.
🛍 Shopping guide
Eyeball Terrarium
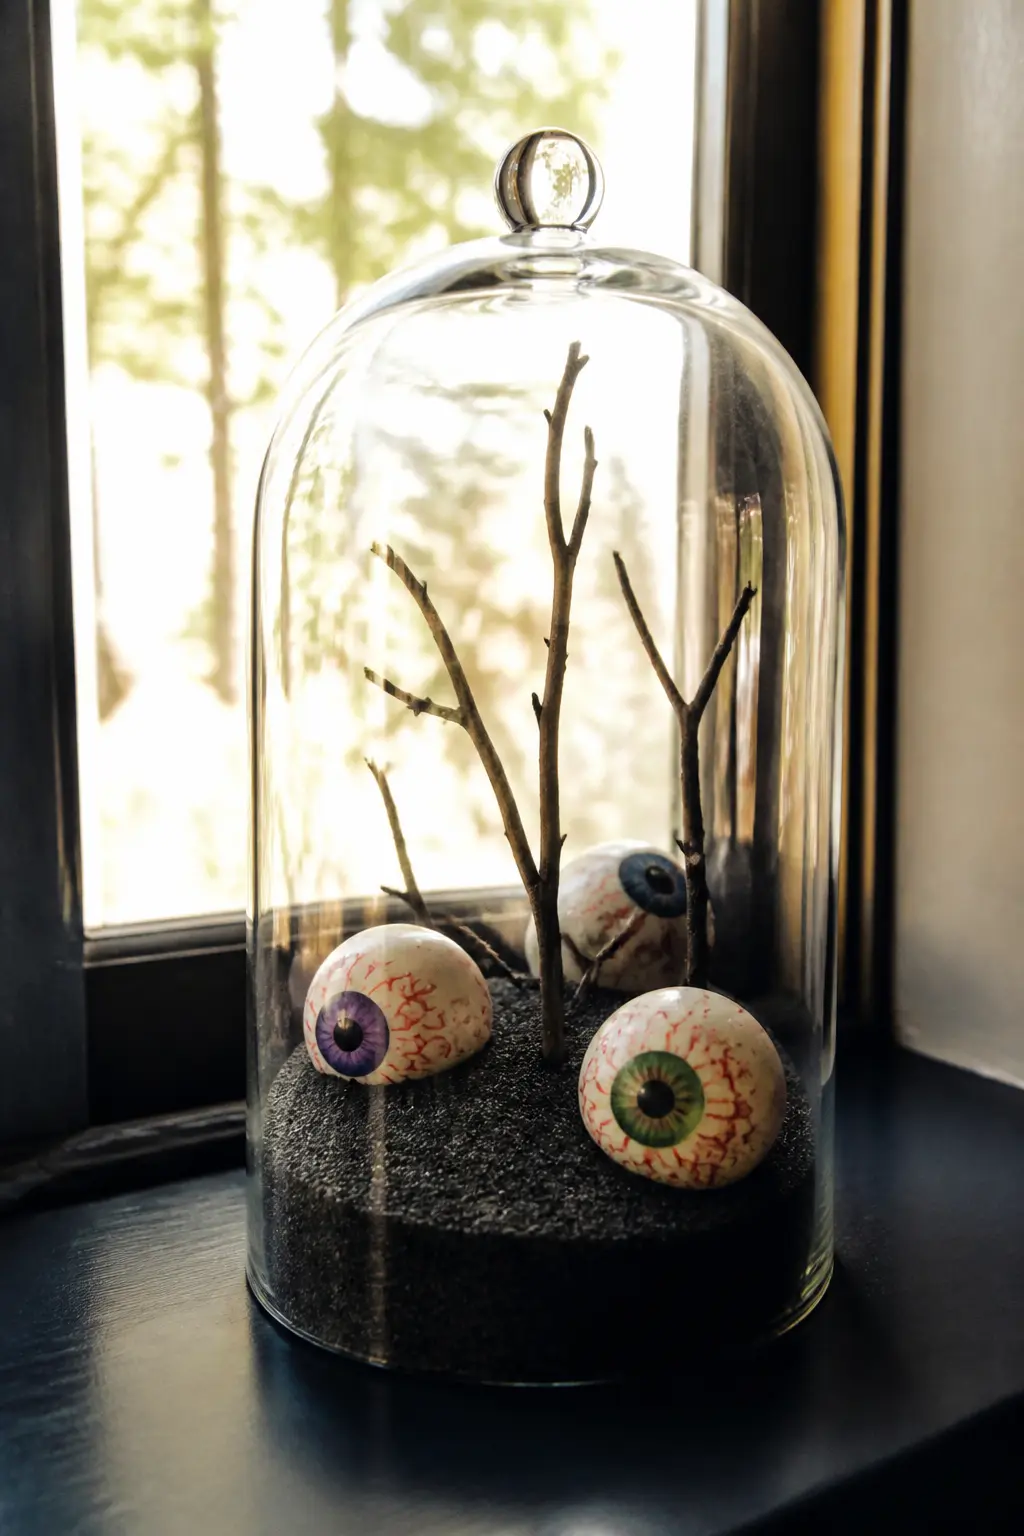
Fill a glass cloche or a large glass bowl with a layer of dark potting soil or black sand, then press three or four painted ping-pong eyeballs partway into the soil so they appear to be buried up to their equators. Add a few dried black twigs and a dusting of fine silver glitter as frost.
The terrarium reads as a specimen jar from a horror film prop department and costs almost nothing to assemble if you already have a cloche. Place it on a window sill so daylight illuminates it from behind: the iris colours appear to glow without any additional lighting.
🛍 Shopping guide
Food and Drink
Edible eyeballs on a buffet table double as decoration until someone eats them, which is the best possible outcome. These ideas stay simple: no piping bags, no sugar thermometers, no special equipment.
Bloody Eyeball Cake Pops
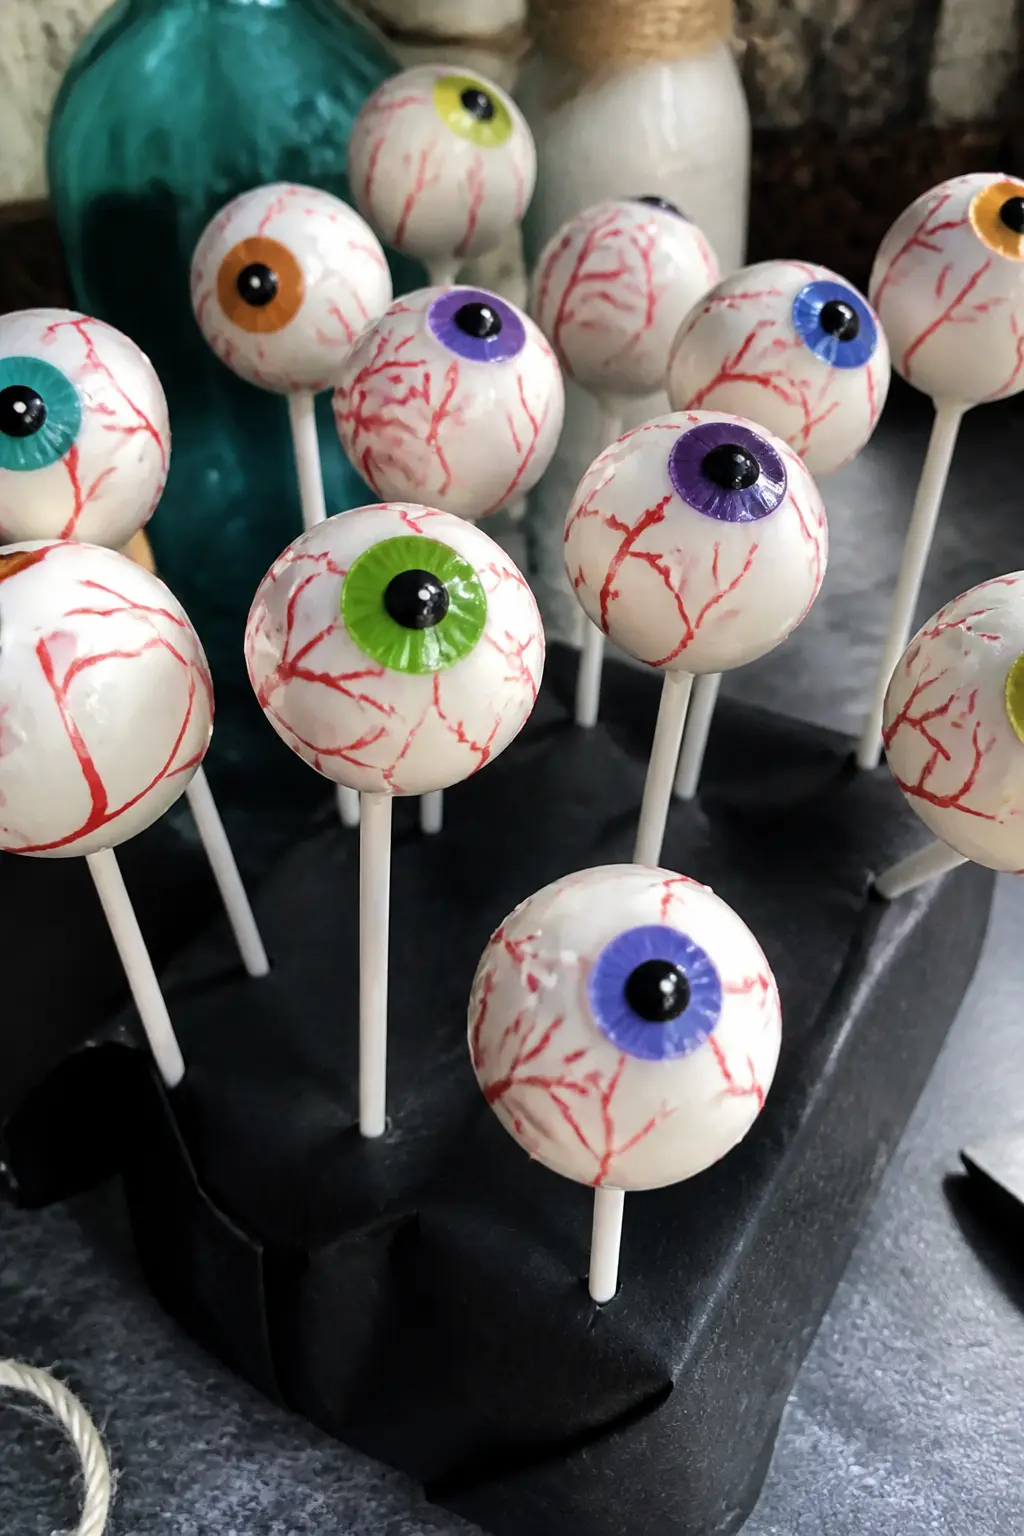
Dip cake pop rounds in white candy melt coating, let them set, then paint a coloured iris circle and black pupil on each one using food-safe paint markers. Use a fine brush and red food colouring to draw vein lines from the edges of the iris outward to the rim of the pop.
Stand them in a block of floral foam wrapped in black crepe paper so they point upward on their sticks like a cluster of eyes emerging from the dark. The effect is visceral in the best possible way, and they disappear faster than any other item on the table. For more on making cake pops without baking a cake from scratch, this Christmas cake pop guide covers the base technique that works year-round.
🛍 Shopping guide
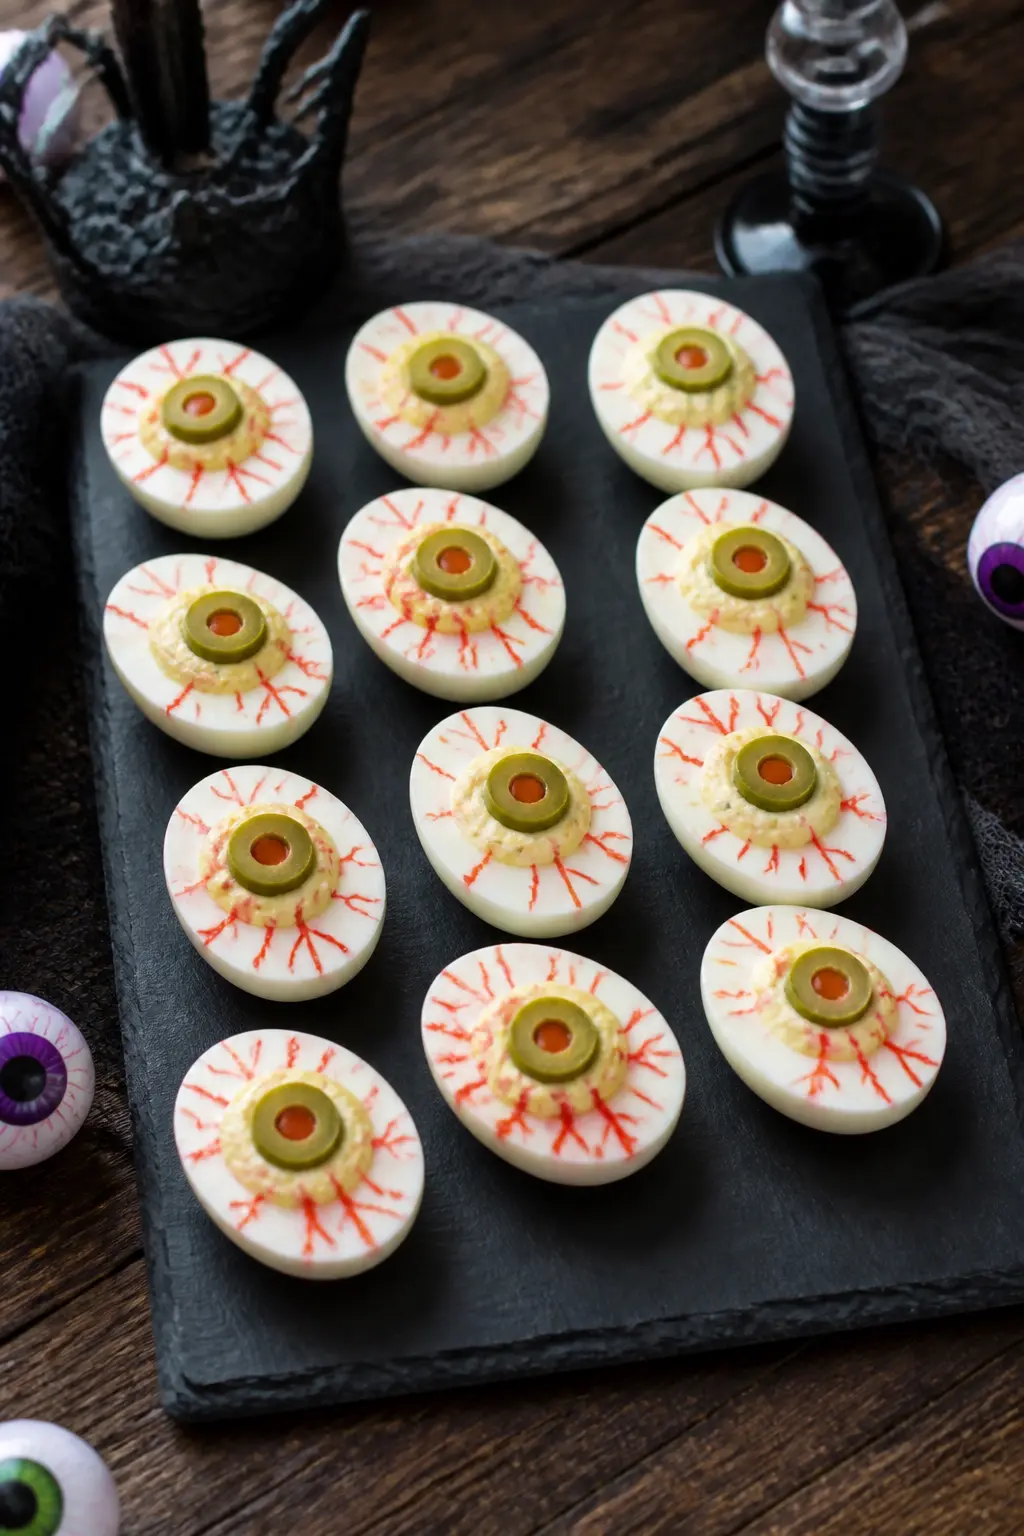
Eyeball Devilled Eggs
Make devilled eggs in the usual way, then pipe the yolk filling into a smooth dome rather than the standard piped swirl. Press a green or black olive slice into the filling as the iris and a small caper or black sesame seed at its centre as the pupil. Use a thin skewer dipped in red food colouring gel to draw veins from the iris outward across the white of the egg.
Serve them on a plain black slate board or a white platter so the egg whites read clearly against the surface. Twelve eggs on a board look like a compound eye, which is the correct level of unsettling for a Halloween party spread.
🛍 Shopping guide
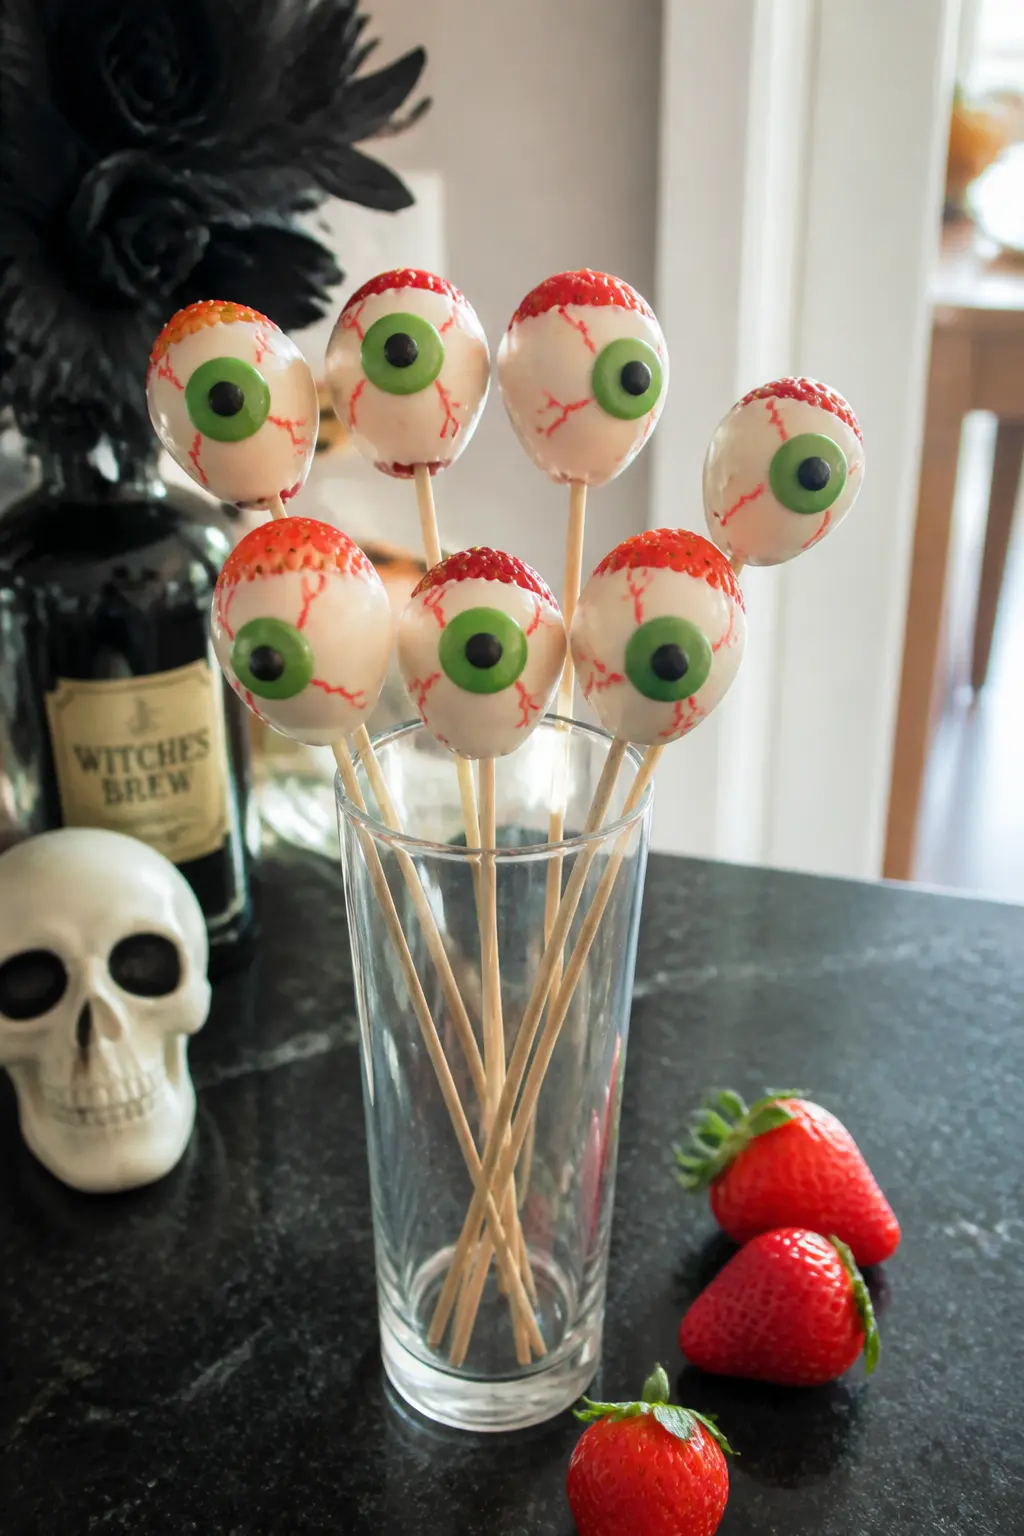
Strawberry Eyeball Skewers
Dip the tip of each strawberry in white chocolate and let it set on a tray. Once firm, add a ring of melted coloured chocolate as the iris (green or brown candy melt), a dot of black writing icing as the pupil, and two or three thin red lines as veins drawn with a cocktail stick dipped in red gel colouring. Thread three skewered strawberries per stick.
Stand the skewers upright in a tall glass or in the same black-wrapped foam block as the cake pops. The red of the strawberry reads as the bloodshot part of the eye and the white chocolate as the sclera, meaning the fruit itself does half the design work before you touch it.
🛍 Shopping guide
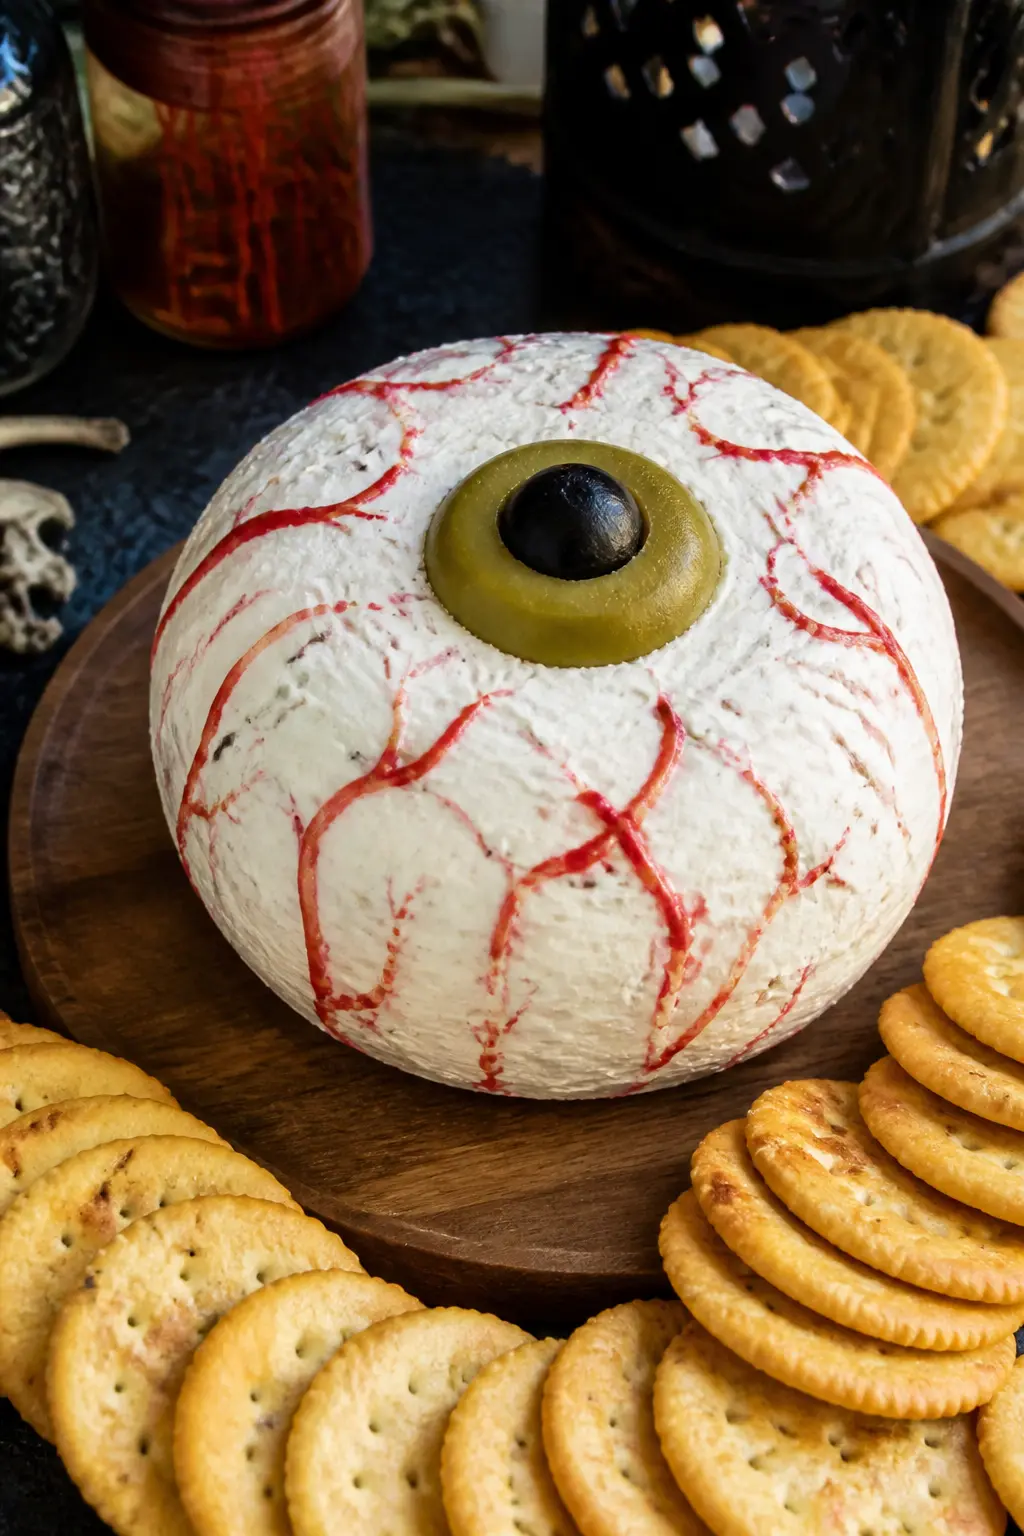
Eyeball Cheese Ball
Shape a cream cheese and cheddar mixture into a smooth round ball and chill until firm. Press a large green olive into one side as the iris, a black olive slice at its centre as the pupil, and use thin strips of sun-dried tomato or red pepper to draw veins radiating outward across the surface of the ball.
Serve it on a wooden board surrounded by crackers. The cheese ball sits at the centre of the board the way a prop from a horror set would, and it costs about the same as a regular cheese ball to make. Nothing on this table needs to be explained: it reads immediately.
🛍 Shopping guide
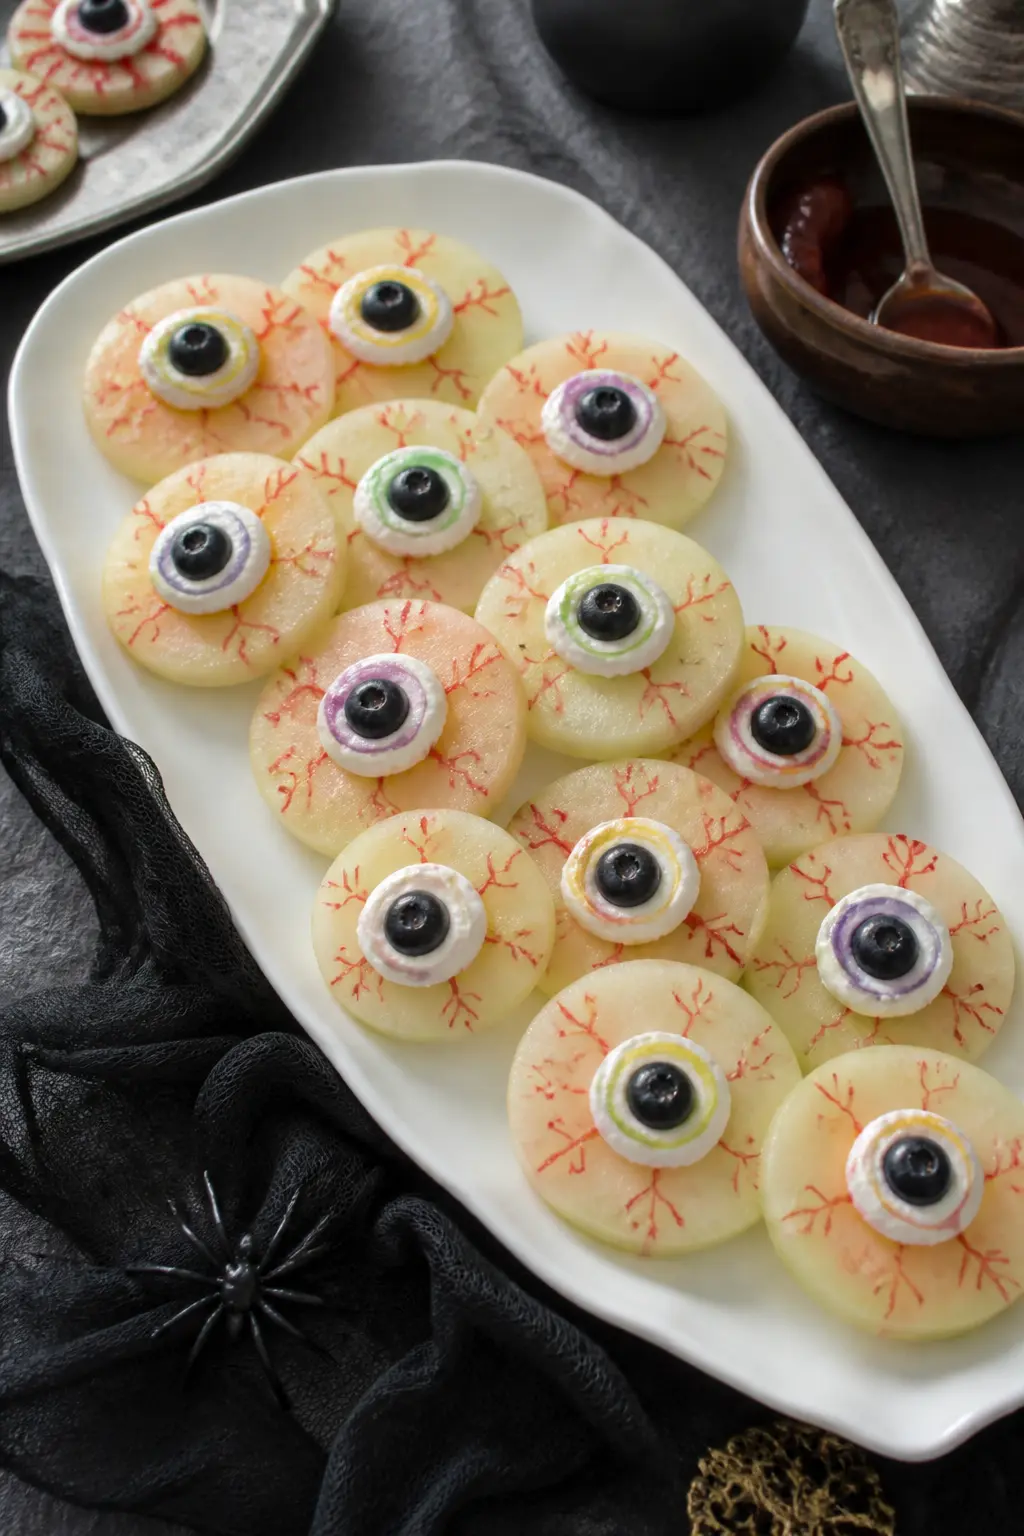
Melon Eyeball Fruit Platter
Cut a watermelon or honeydew into rounds and use a small melon baller or a circular cutter to cut a well in the centre of each round. Place a blueberry or a dark grape in the well as the pupil and pipe a ring of cream cheese or yoghurt around it as the iris. Use a cocktail stick and red coulis to draw veins across the white rind or the pale fruit flesh.
Arrange the rounds on a long white platter in an overlapping row. The platter travels to a table already assembled. Each round feeds one person and takes about forty seconds to prepare once the melon is sliced, making this the most efficient eyeball craft in the entire article.
🛍 Shopping guide
Frequently Asked Questions
What is the easiest DIY Halloween eyeball decoration to make in under 20 minutes?
The googly eye doormat is the fastest: glue large self-adhesive googly eyes around a plain black coir mat, spray with clear varnish, and it is done. The eyeball jar window sill row is a close second: paint an iris on each jar, drop in a battery tea light, and line them up.
What paint works on balloons for DIY eyeball decorations?
Acrylic paint adheres to latex balloons when applied thinly with a soft brush, but it can crack if the balloon flexes. Paint markers labelled for use on latex or rubber stay flexible much longer. Sharpie oil-based paint markers in medium tip are the most reliable option for red veins and iris details.
How do you make bloodshot veins on a styrofoam eyeball?
Use a fine red permanent marker or a red oil paint marker. Start at the iris edge and draw thin branching lines outward toward the edge of the ball, lifting the pen at the end of each line so it tapers. Do not try to draw one continuous line: multiple short strokes with slightly different angles look more organic.
Can Halloween eyeball decorations work outdoors?
Yes, with the right materials. Seal any painted props with outdoor-rated clear varnish spray. The jute eyeball garland, porch column eyeball wrap, and googly eye doormat all survive light rain if sealed. Avoid tissue paper and uncoated card stock outdoors: they dissolve in any moisture.
What can googly eyes be glued to for Halloween decorations?
Googly eyes with a flat back adhere to most surfaces using a glue dot, hot glue, or waterproof craft adhesive. Coir matting, glass jars, balloon surfaces (with latex-safe glue), foam board, painted wood, and fabric all hold them well. Self-adhesive versions stick to smooth surfaces like glass, plastic, and painted walls without added glue.
How do you make an eyeball garland with ping-pong balls?
Use a large needle or a heated skewer to pierce each ping-pong ball through the centre. Thread jute twine through each ball, knotting on both sides to keep it in position. Paint the balls white first, let them dry, then add the iris and vein details. The whole garland takes about an hour including drying time.

20 halloween games for adults and kids that scale from toddlers to grandparents — active, printabl
33 Halloween paper crafts for kids that actually work: glitter webs, ghost cards, witch hats, handpr
22 Halloween crafts for elementary kids that use real techniques and materials you can grab in one s
Leave a Reply