

24 Colourful Fun to Be One First Birthday Party Ideas That Still Read as One Theme in Photos
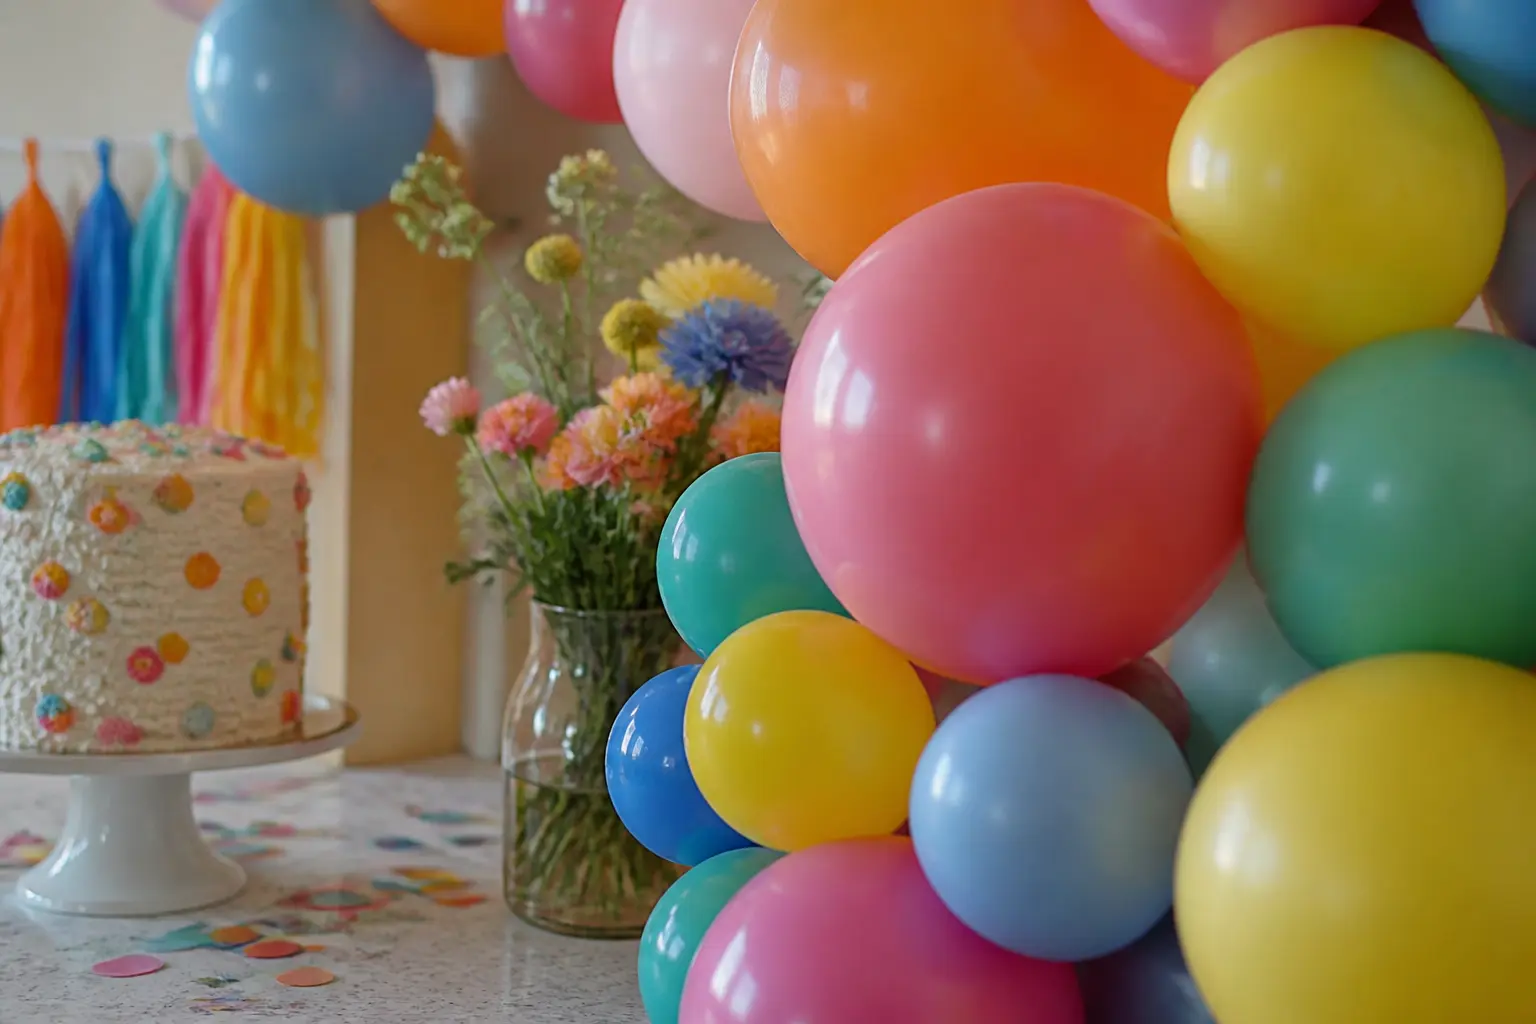
A colourful first birthday is one of the easiest themes to pull off on a tight timeline, because the palette does the heavy lifting. Commit to four or five colours and repeat them everywhere: the table, the ceiling, the cake board, even the goodie bags. Consistency is what turns a cheerful mess into something that looks designed.
The ideas below are grouped by zone so you can tackle one section of the party at a time without losing the thread. Some are ten-minute projects. Others are worth ordering early. All of them photograph well, which matters when the birthday guest of honour cannot yet hold a conversation about it. For more first birthday direction, the colourful first birthday party ideas roundup and the boys first birthday party ideas guide are worth bookmarking alongside this one.
One more thing before you start: pick your colour order and stick to it. If the paper chain goes blue, green, yellow, orange, pink, repeat that exact sequence on the balloon garland, the napkin stack, and the sprinkle border on the cake. That single decision is what makes everything in the photos look like it belongs together.
This post contains affiliate links. If you buy through them, I may earn a small commission at no extra cost to you.
The Entrance and Backdrop
Guests form their first impression before they even sit down. A strong entrance sets the colour story and gives parents somewhere to stand for the smash-cake photo that does not involve a blank wall.
Scallop-Edge Backdrop Panel
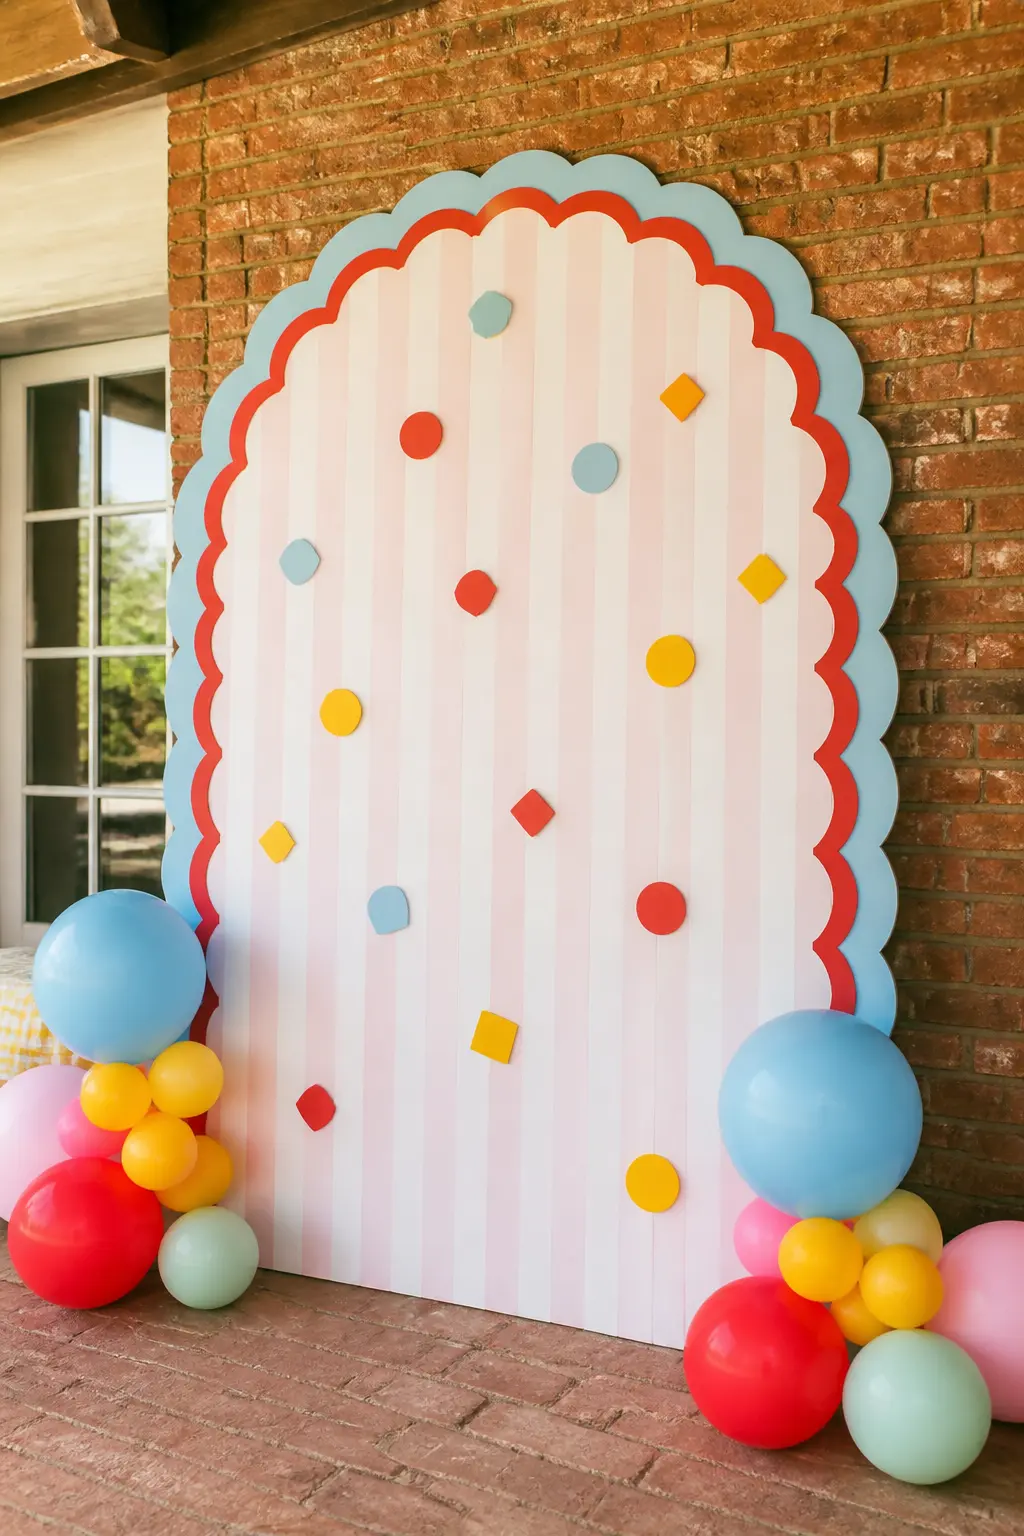
Cut a large arch panel from foam board or foamcore and finish the edges in a deep scallop, alternating two colours so every curve changes. Mount it flat against a brick or painted wall and scatter hand-cut confetti shapes across the surface: stars, circles, short dashes, all in the party palette.
The scalloped border is the detail that keeps the backdrop from looking like a plain poster. Pair it with two small balloon clusters at the base corners, no garland needed, and the whole thing takes under two hours to assemble on the morning of the party.
🛍 Shopping guide
Rainbow Streamer Curtain Entrance
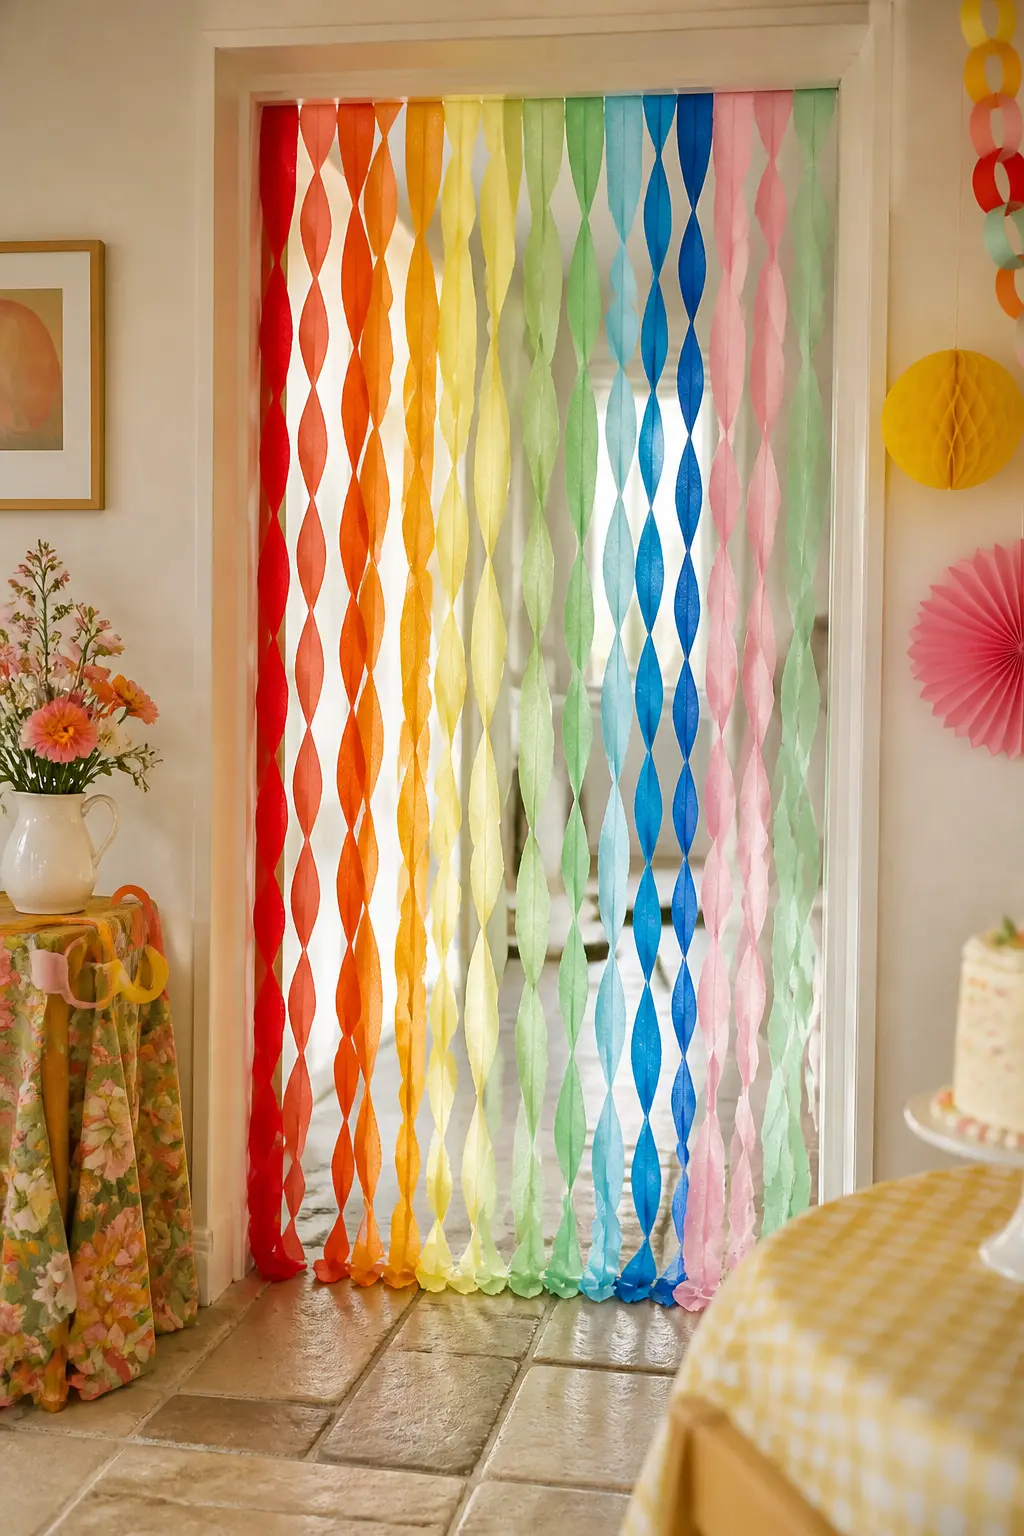
Hang lengths of crepe streamer from a tension rod or a length of ribbon stretched across a doorframe, grouping them in colour order: red, orange, yellow, green, blue, violet, then repeat. Twist each strand twice before hanging so it catches movement.
Keep the strands long enough to brush the floor. Guests walk through it to enter the party space, which creates a genuine moment even for babies being carried. The curtain photographs as a solid wall of colour from the front and as individual twisted ribbons from the side, giving you two completely different looks from the same setup.
🛍 Shopping guide
Oversized Number One Balloon Column
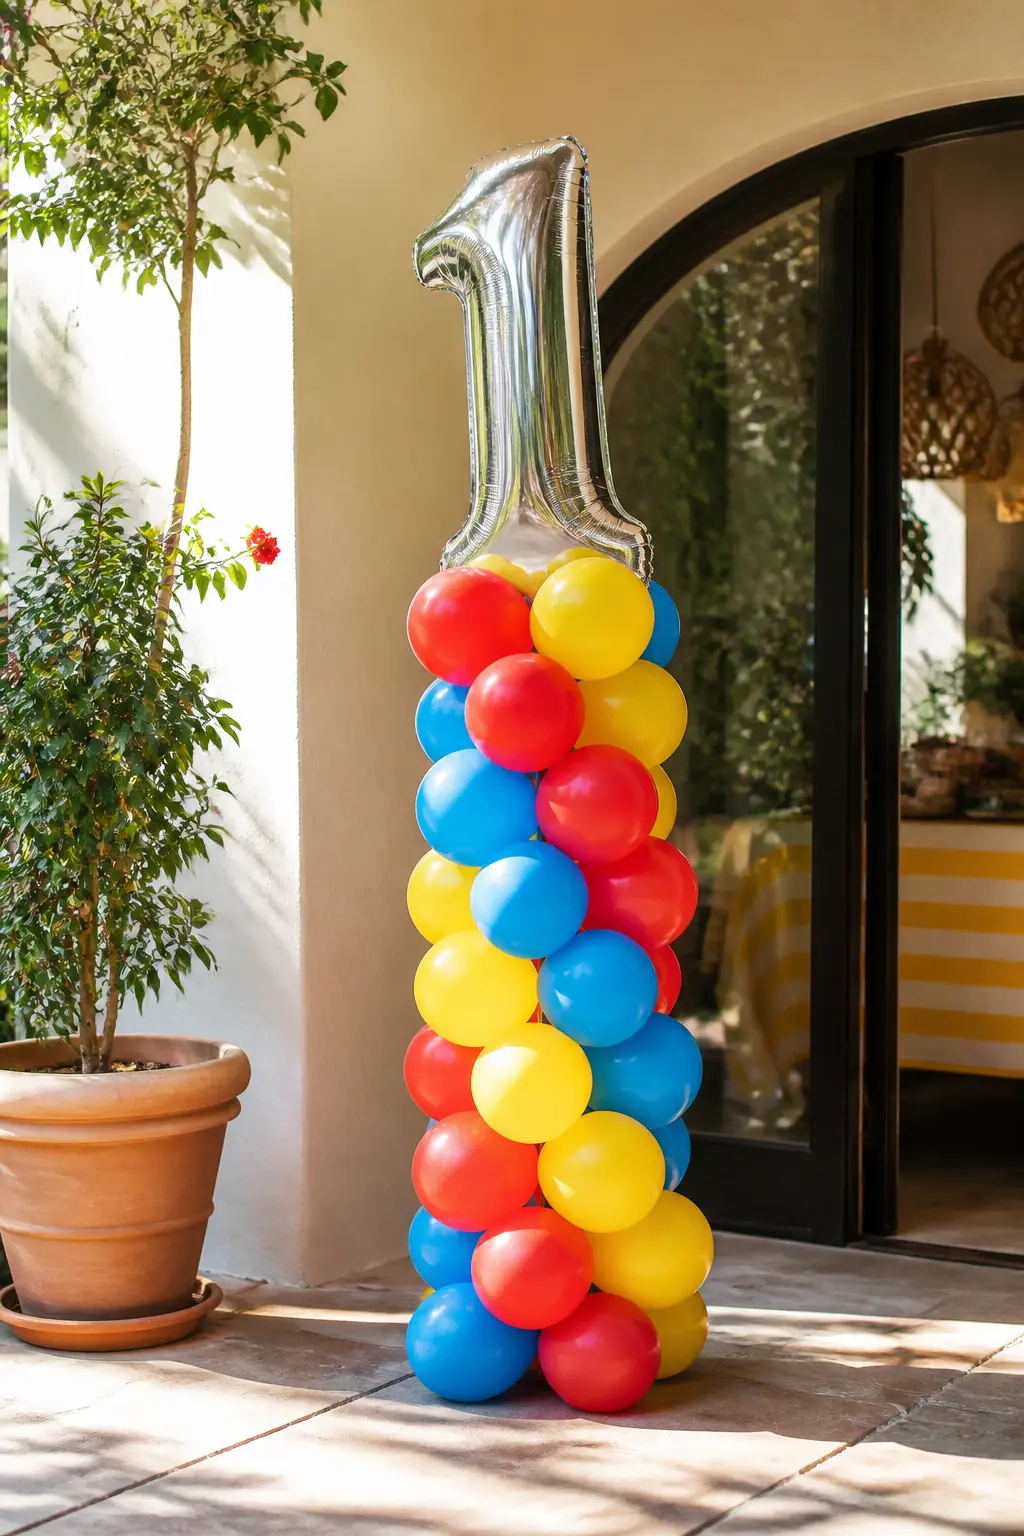
Build a freestanding column of balloons in the party palette and top it with a large foil number one. Use a balloon column stand kit so the column stays upright without helium, which also means you can build it the night before.
Place it just inside the entrance so it appears in every arrival photo. Alternate matte and glossy balloons in the column for texture. The foil number anchors the theme immediately, before anyone reads a single sign.
🛍 Shopping guide
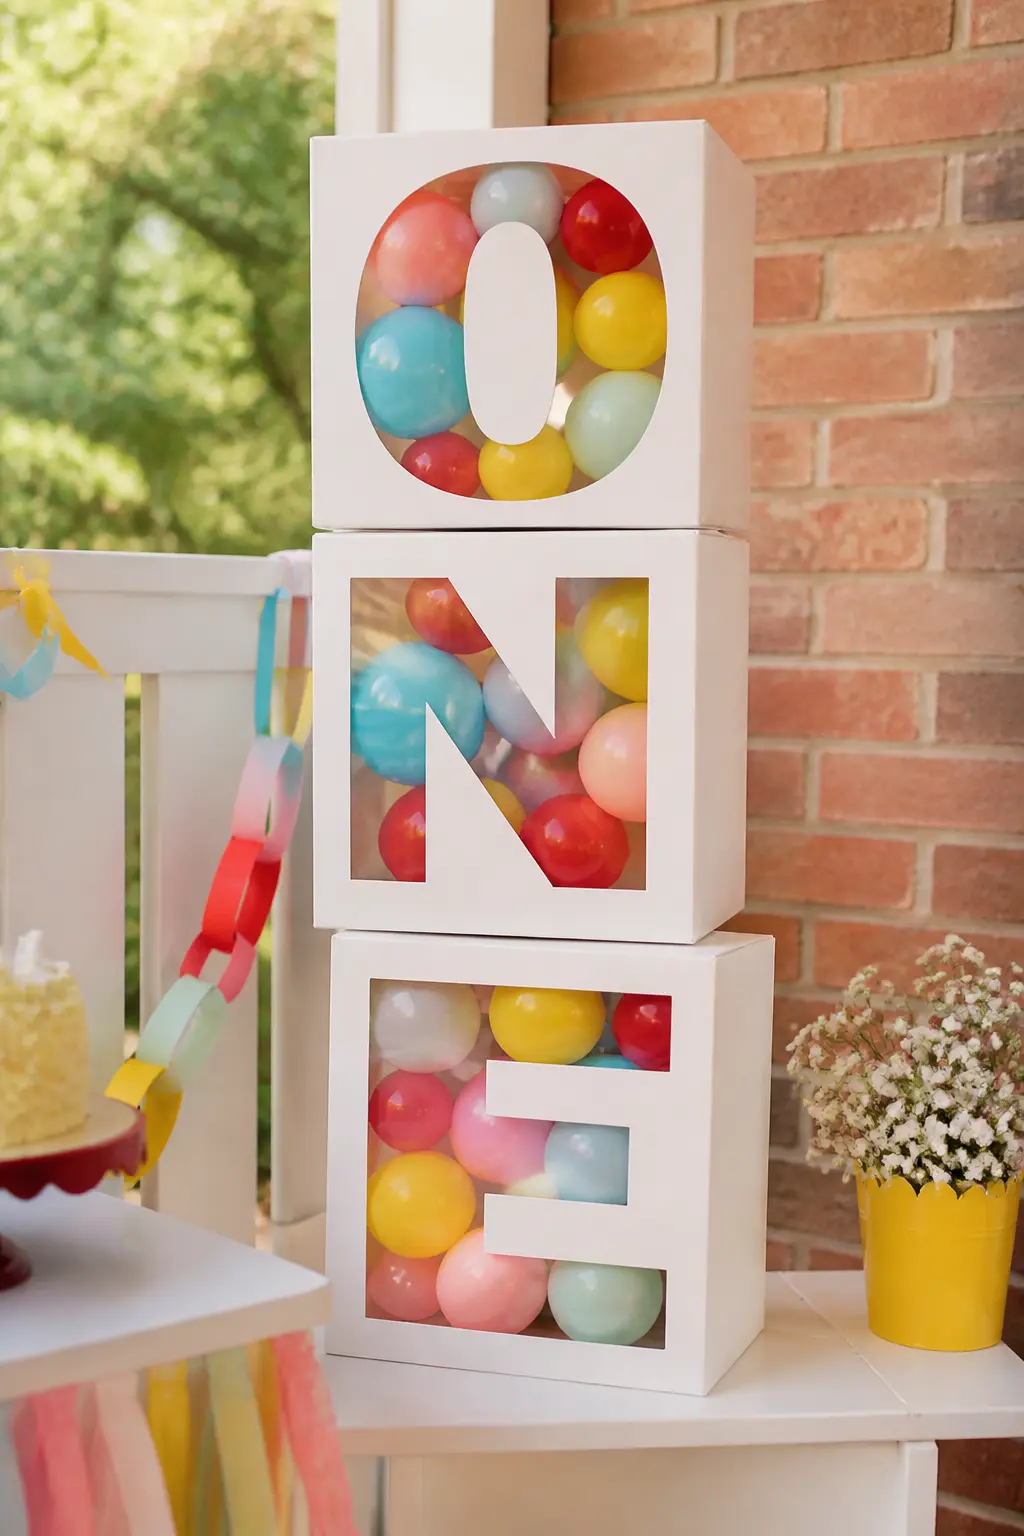
Balloon Letter Boxes O-N-E Display
Stack three clear acrylic or white cardboard boxes spelling O, N, E and fill each with small balloons in two or three colours before sealing the front panel. Place the stack on a small table or a low shelf near the entrance so guests walk past it as they arrive.
The clear-box version lets every balloon colour show through. The cardboard version is cheaper and just as effective if you cut a large window in the front panel and cover it with cellophane. Either way, the letters read immediately from across the room and the scale of the stacked boxes makes the setup feel substantial without taking up floor space.
The Party Table
The table is the room’s anchor. Get it right and everything around it can be simpler than you think. Layered plates, a paper-chain runner and colour-matched napkins carry enormous weight here.
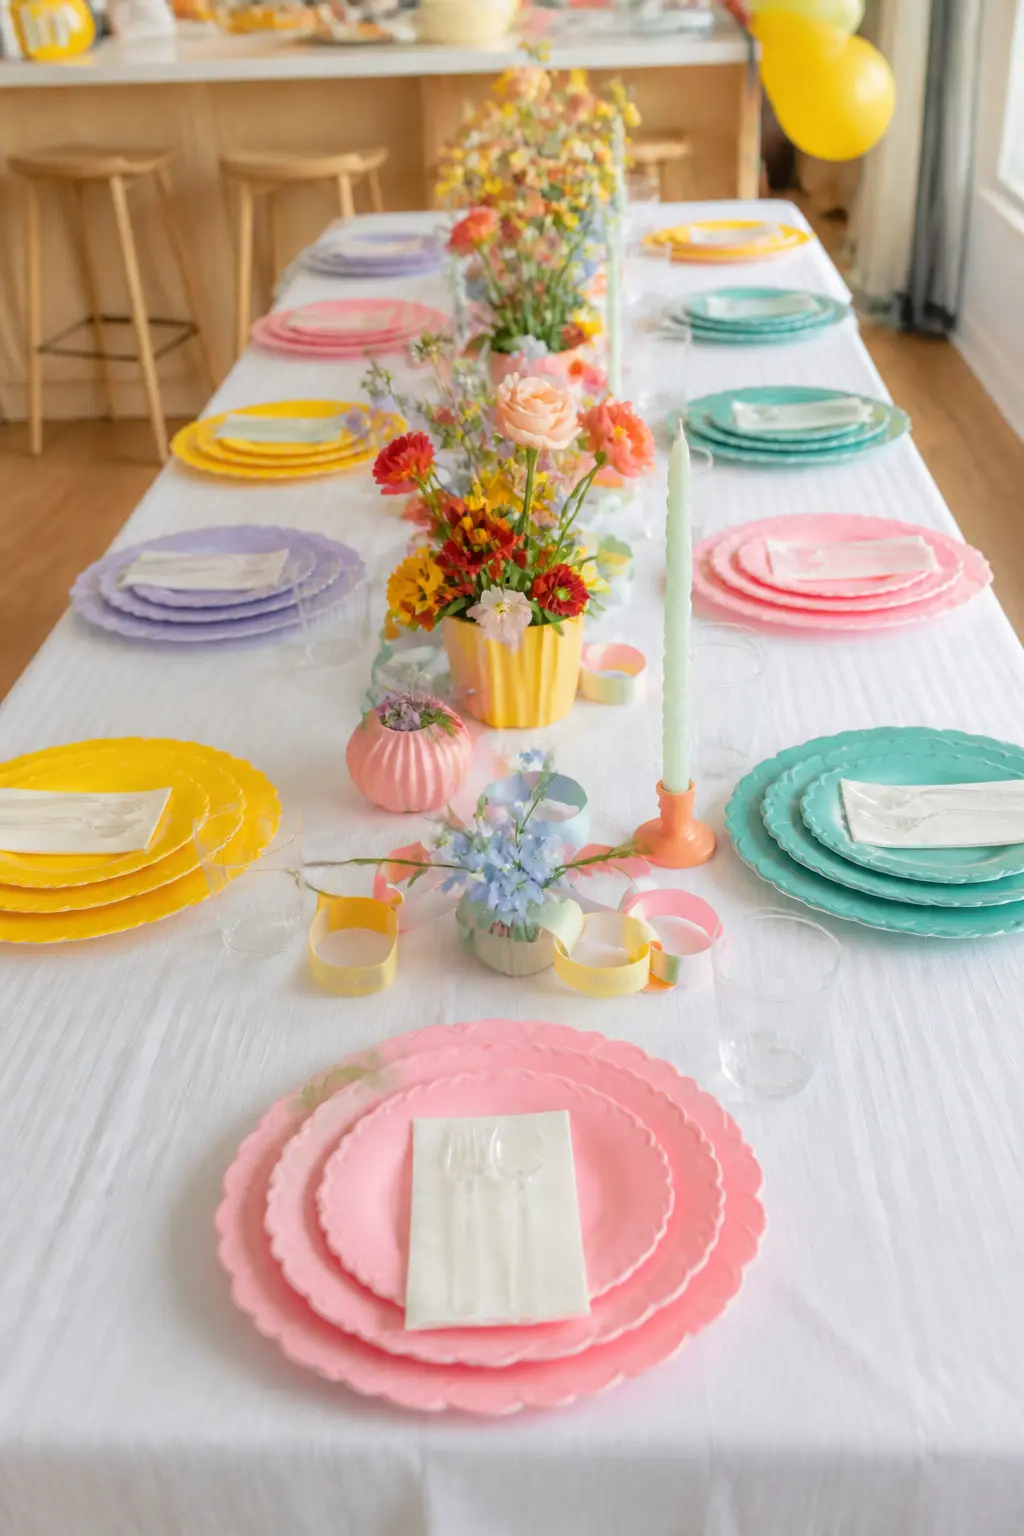
Layered Scallop Plate Place Setting
Stack three plates at each seat: a large scalloped dinner plate in one colour, a smaller scalloped salad plate in a second colour, and a standard white paper plate printed with a birthday motif on top. Each seat gets a different base colour so the table reads as a full rainbow when photographed from the end.
Tuck a colour-matched napkin under each stack with just the scalloped edge visible. Add clear acrylic cutlery rather than white plastic: it photographs as almost invisible, which keeps the colour story clean.
🛍 Shopping guide
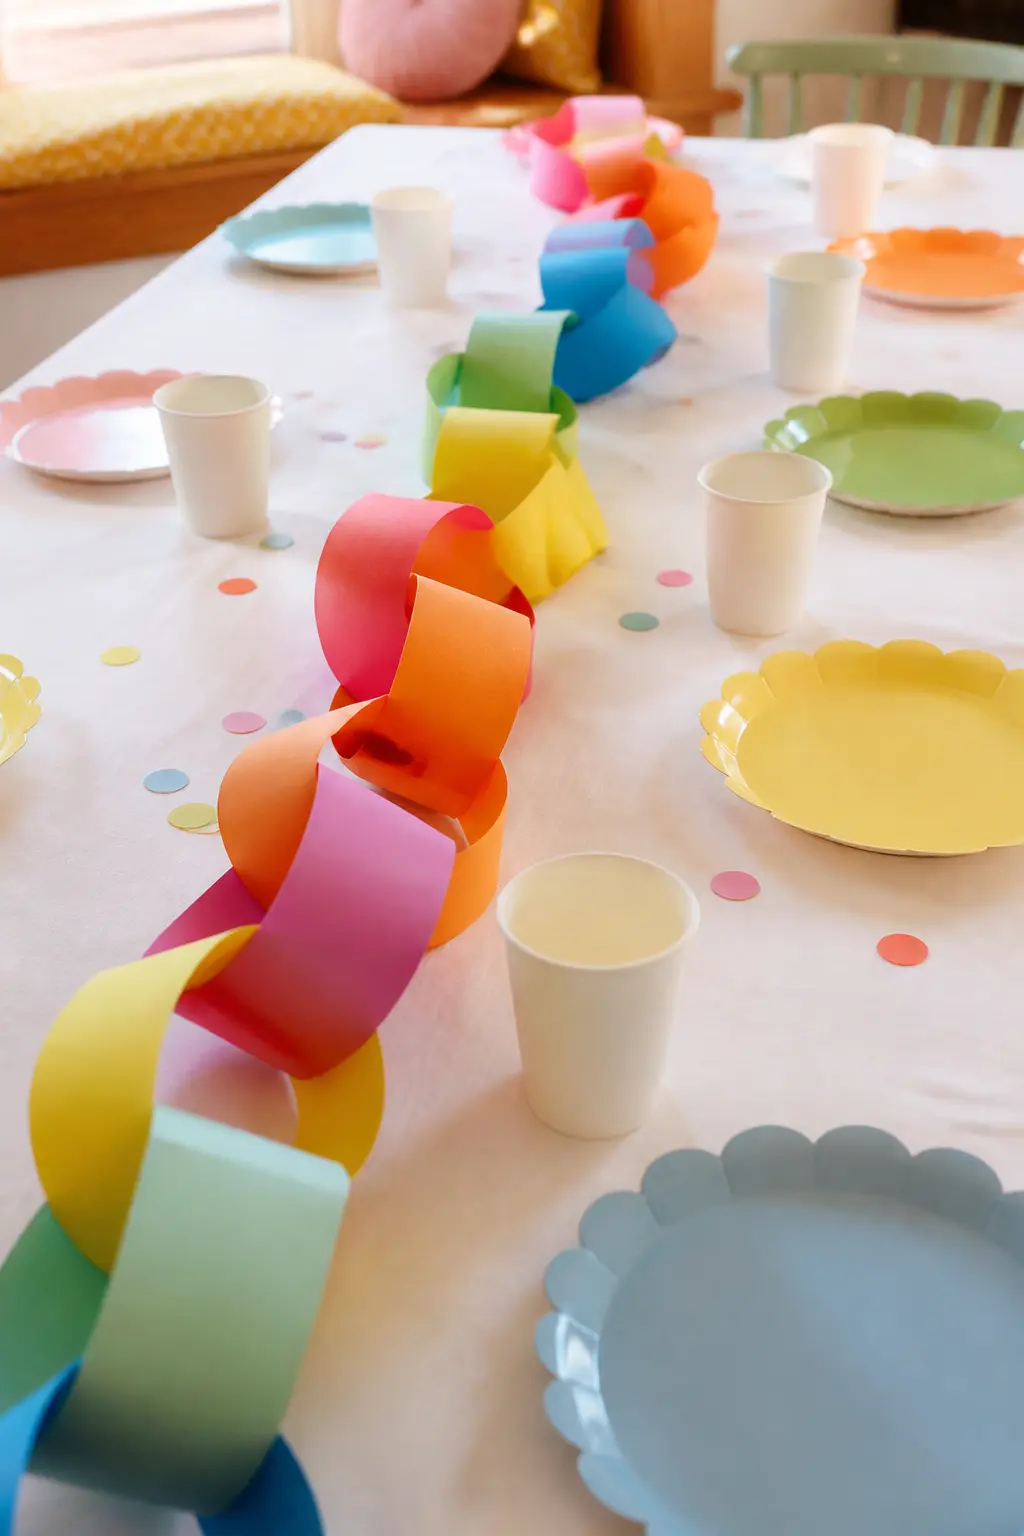
Paper Chain Table Runner
A paper chain made from strips of cardstock in a fixed colour sequence runs down the centre of the table instead of a fabric runner. The links are larger than the Christmas-craft version: cut strips about 5 cm wide and 30 cm long so each ring is palm-sized. The result looks intentional, not childish.
Lay it in a loose S-curve rather than dead straight. It takes up almost no budget and photographs as a bold graphic element in every overhead shot. Make extra and loop some from the ceiling above the table for continuity.
🛍 Shopping guide
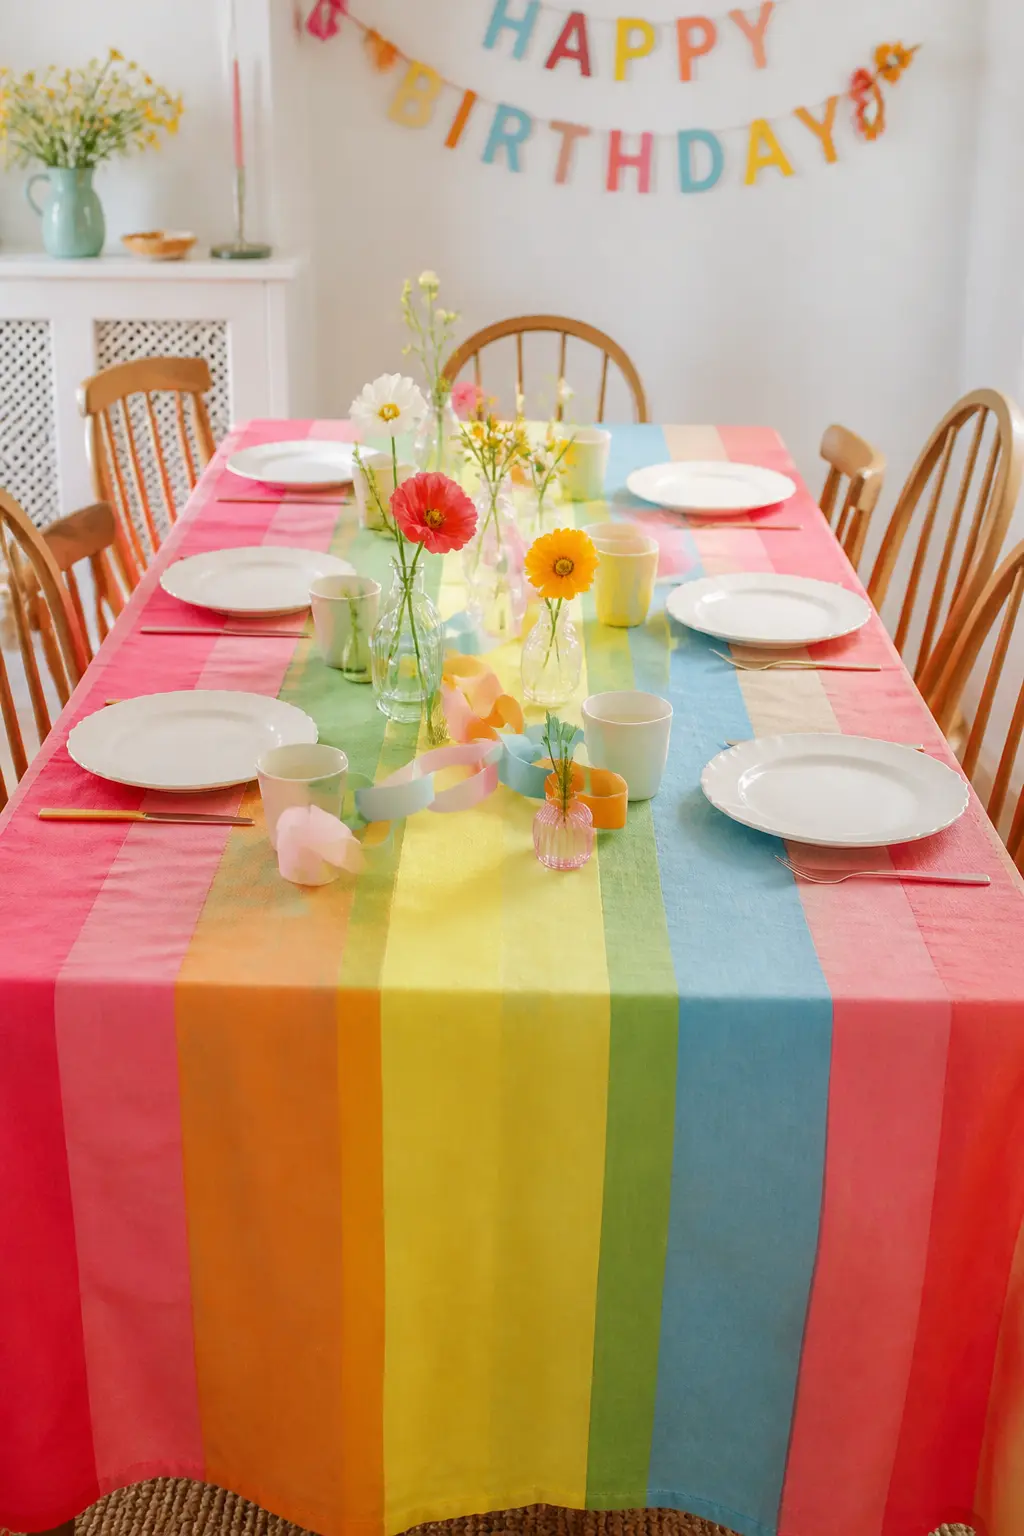
Rainbow Stripe Tablecloth Base
Use a wide rainbow stripe tablecloth as the base layer, then set white plates directly on top so the stripes frame each place setting. The cloth provides all the colour the table needs without a single additional centrepiece.
Choose stripes that run lengthwise so they radiate outward from the centre of the table. A vinyl or laminated version wipes clean in seconds, which matters when the birthday guest knocks over a cup of water mid-party.
🛍 Shopping guide
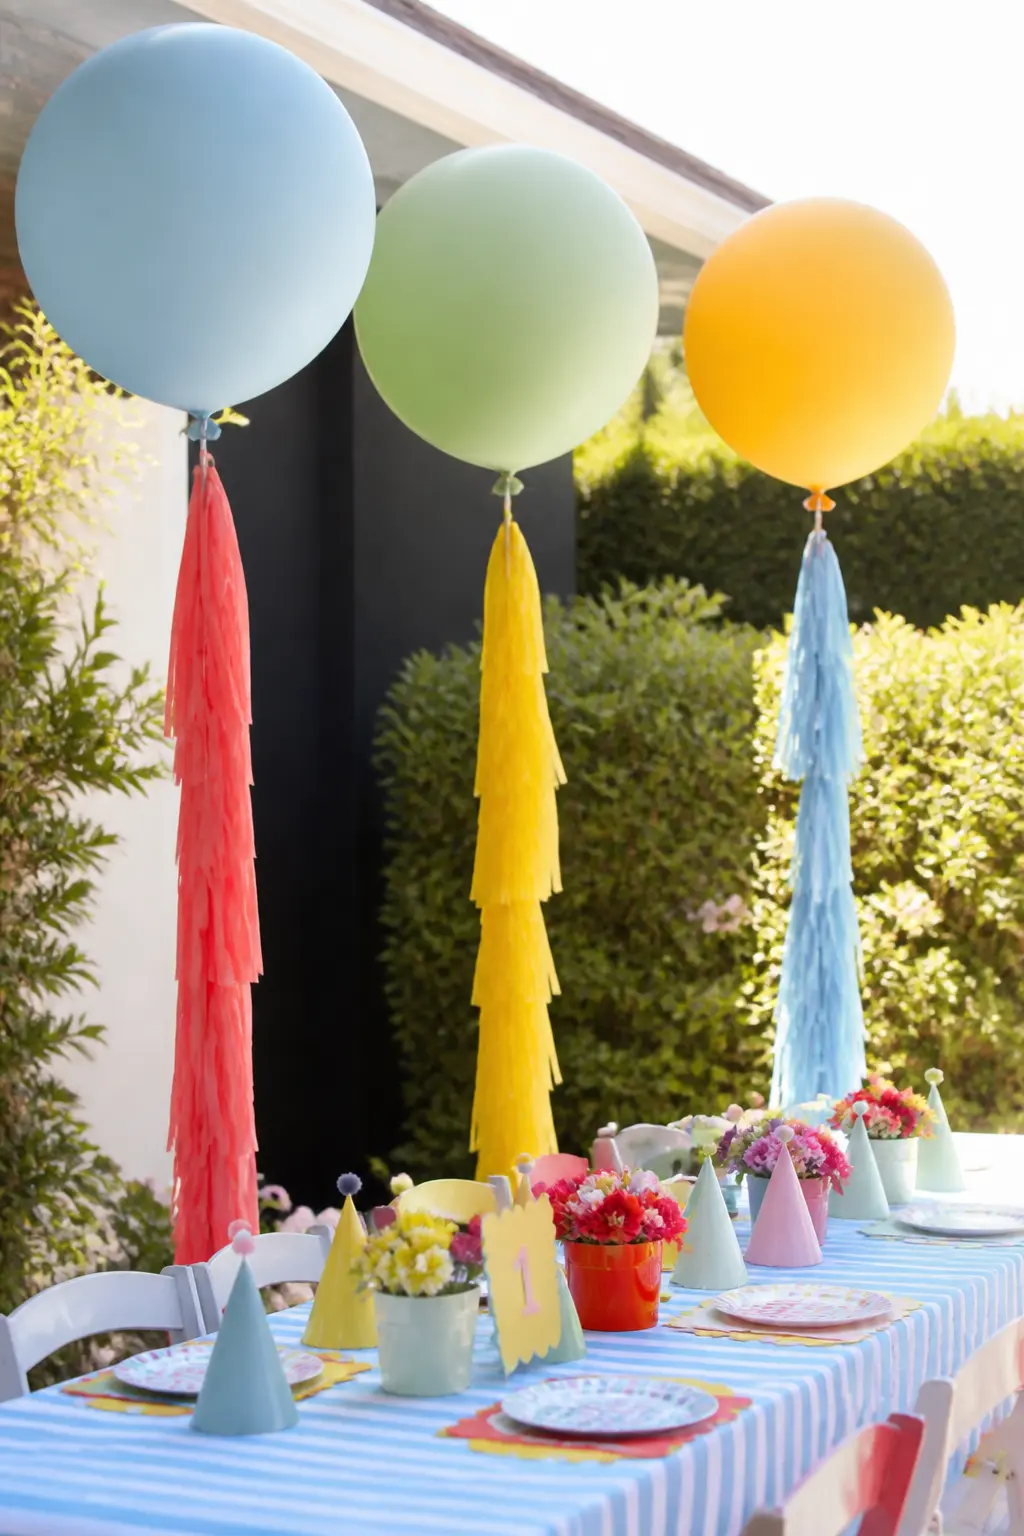
Giant Round Balloon Centrepieces with Tissue Tassels
Fill 36-inch latex balloons with helium and tie a long tissue-paper tassel to each one in a contrasting colour: a blue balloon with a yellow tassel, a yellow balloon with a green tassel. Place one at each end of the table and one or two along the centre, weighted by a small sandbag hidden under the tablecloth.
The balloons float just above seated adults’ eyelines, so they do not block conversation, and they are visible in every wide shot of the room. Vary the balloon colours so the table reads like a moving rainbow when photographed from any angle.
🛍 Shopping guide
Ceiling and Overhead Decor
Overhead decor photographs in every single shot taken at the party, including the ones where nobody planned to photograph it. Treat the ceiling as a fifth wall.
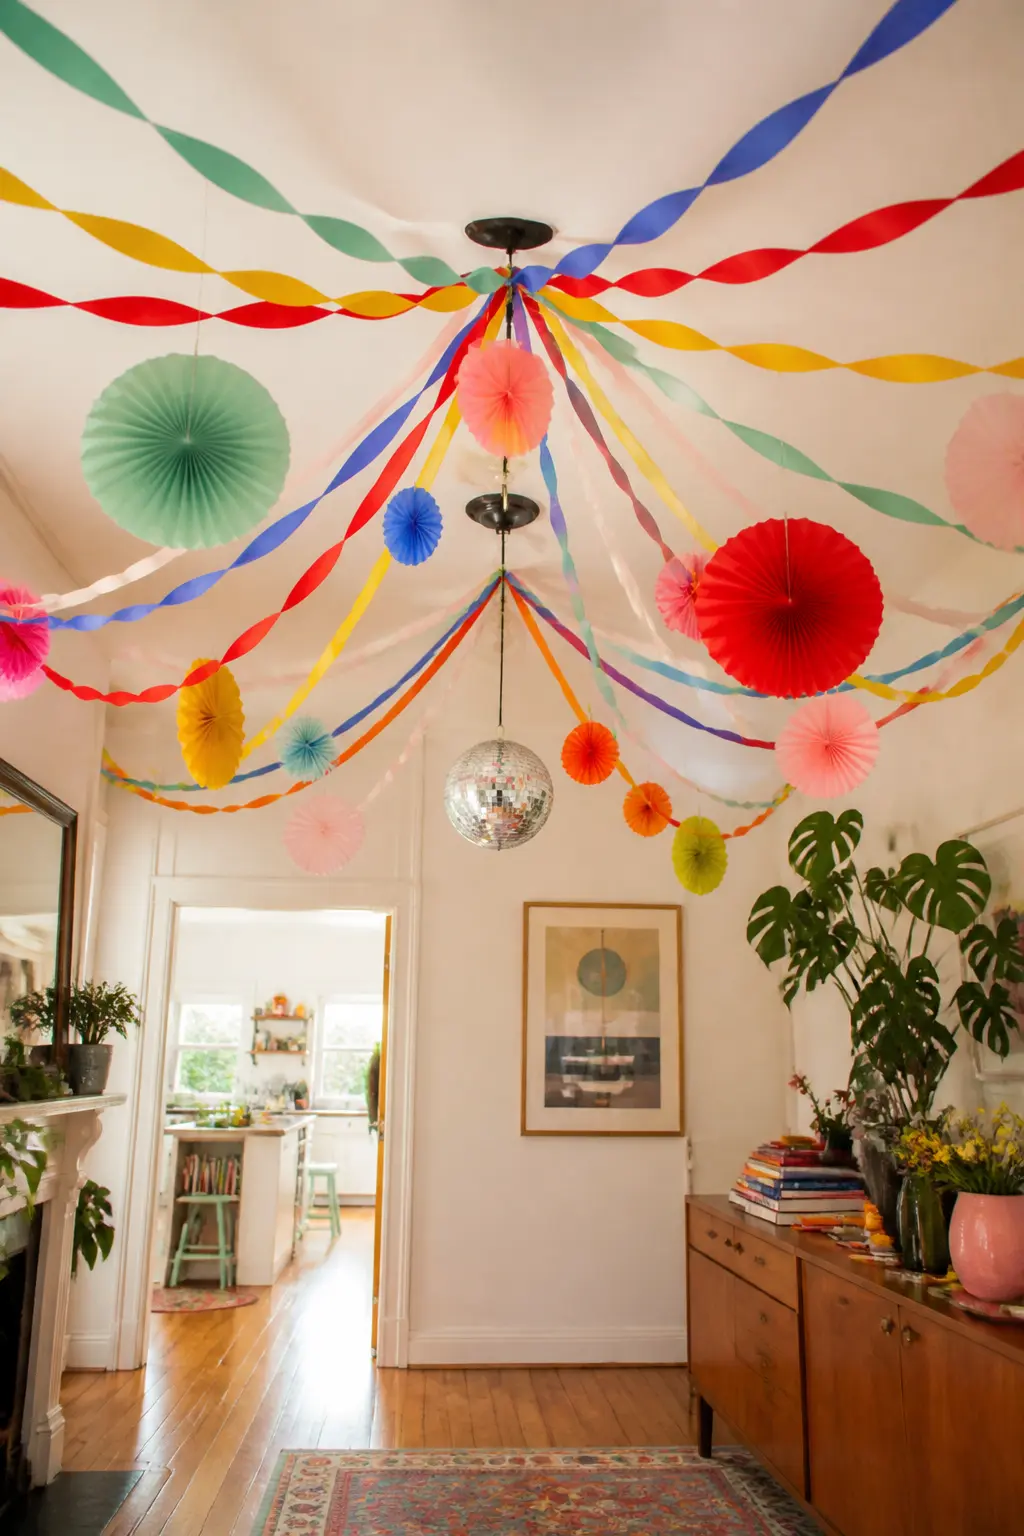
Ceiling Streamer Swag with Paper Fans
Twist lengths of crepe streamers and swag them from one side of the room to the other in wide arcs, fastening them to the ceiling with removable hooks. Hang honeycomb paper fans in the gaps between swags, alternating sizes: one large, two small, one large.
The combination of twisted streamers and flat fans gives the ceiling two different textures that read beautifully in photos. Use the same colour sequence as the table chain so the ceiling and the table feel like one cohesive design.
🛍 Shopping guide
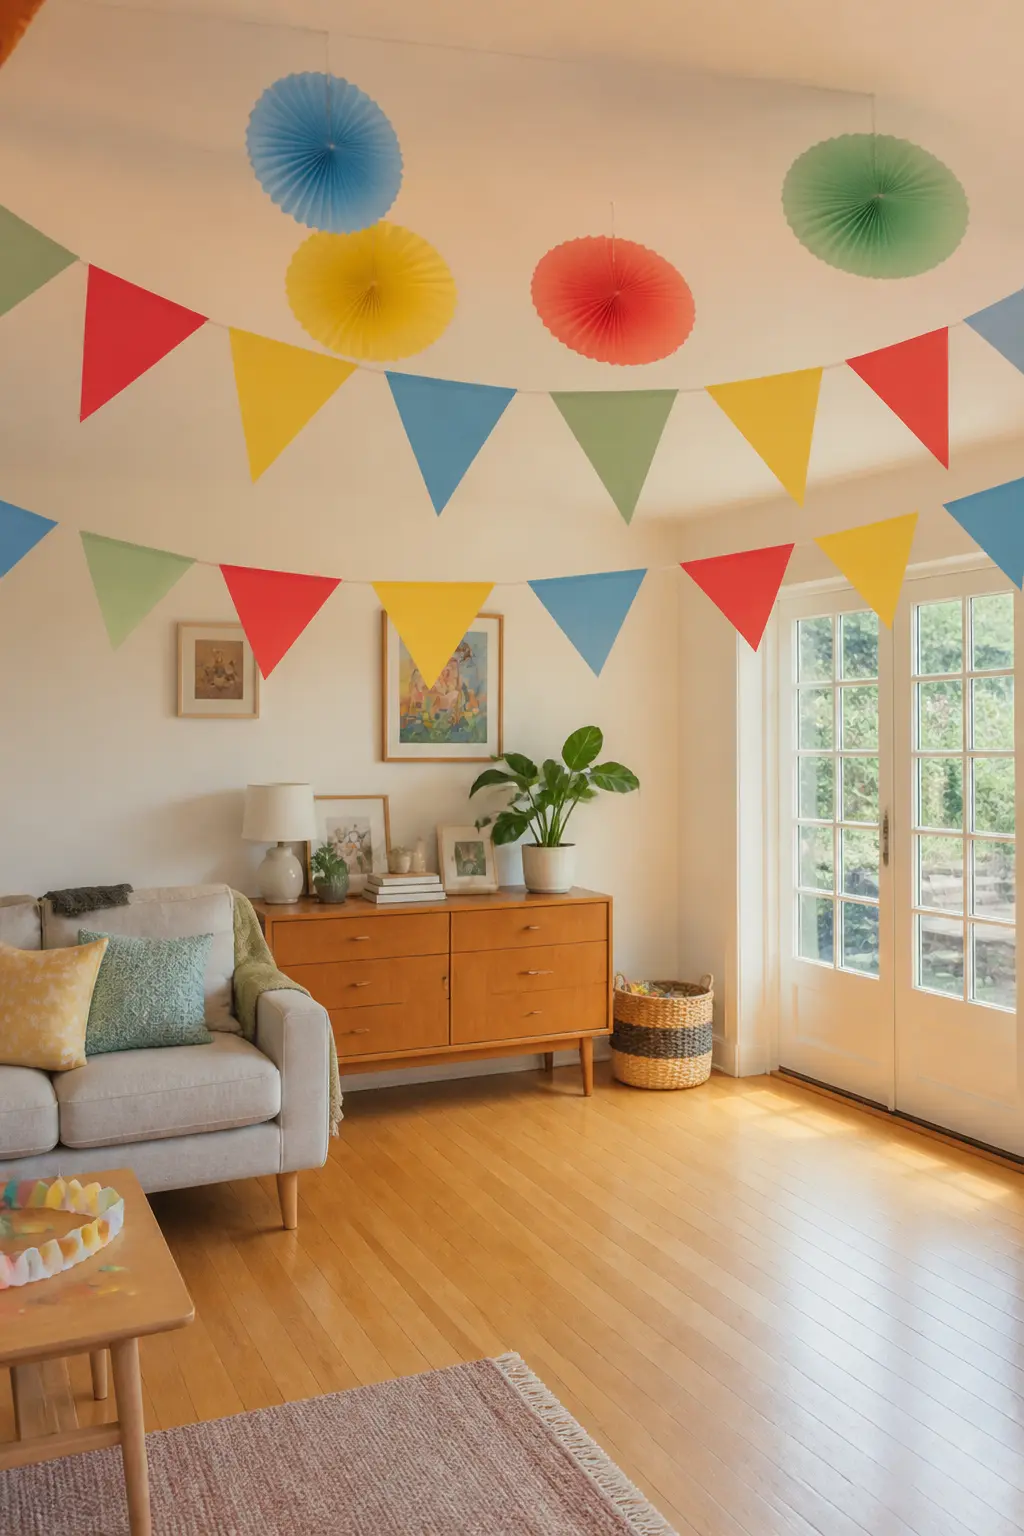
Triangle Flag Bunting Across the Room
String triangle flag bunting in solid primary colours across the full length of the room, from one wall to the opposite, using a zigzag rather than a straight line so it drops and rises in a wave. Solid flags rather than printed ones keep the look graphic and timeless.
Layer two strings at slightly different heights for depth. The bunting costs very little and ships flat, so it is one of the easiest items to order well in advance without worrying about storage.
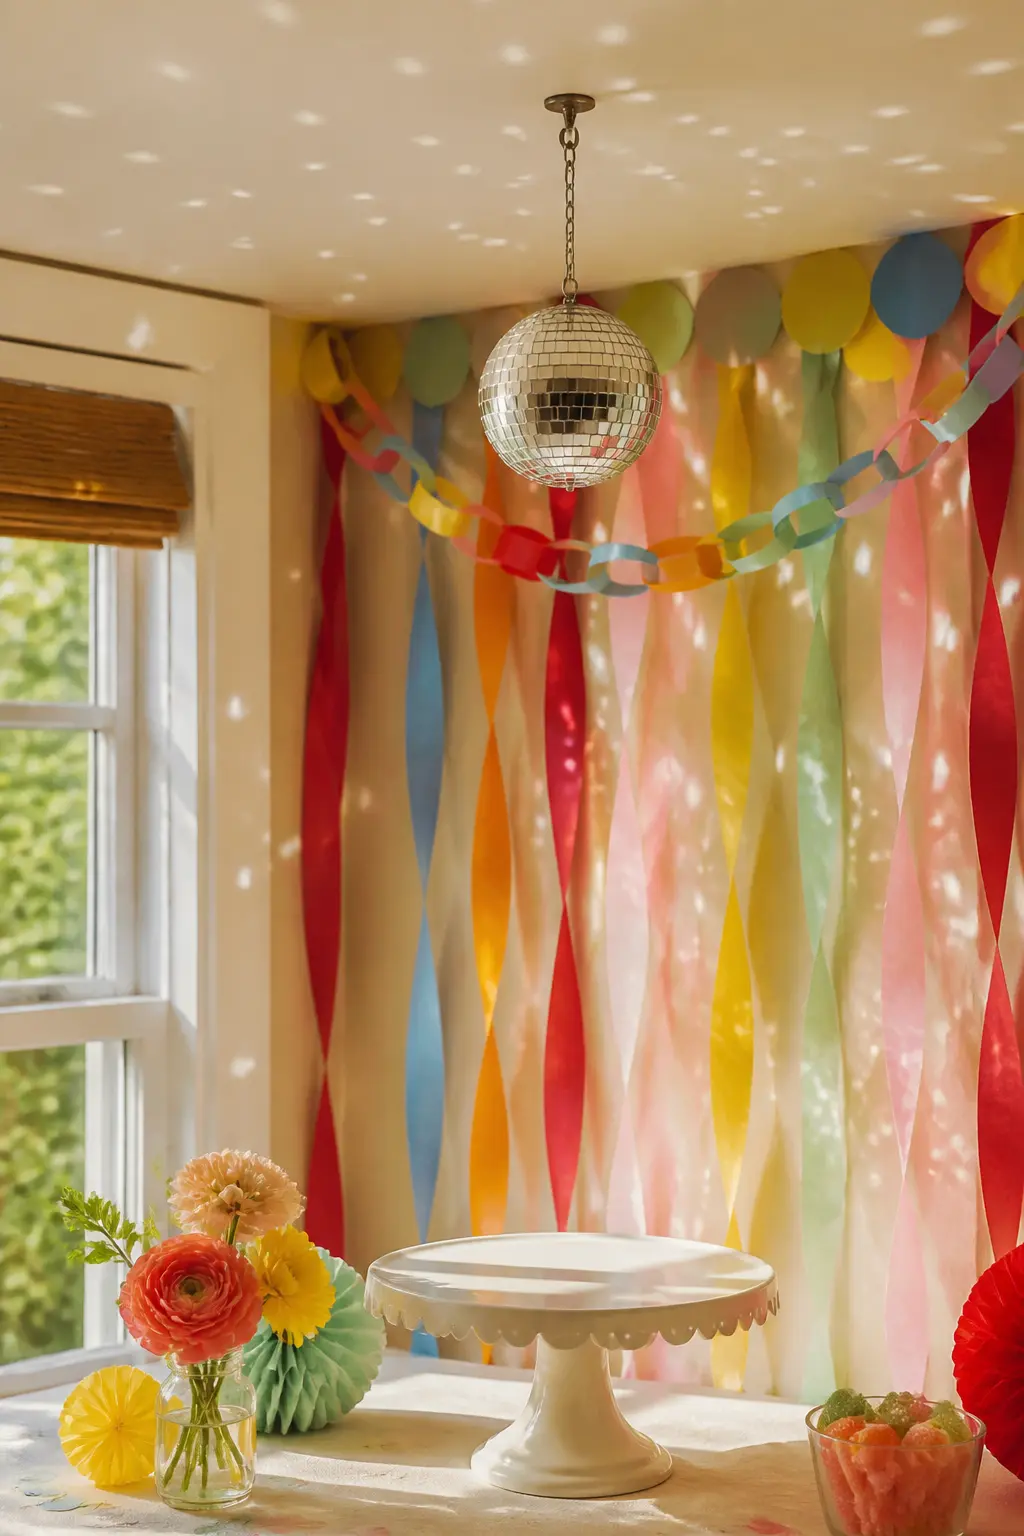
Mini Disco Ball Above the Cake Table
Hang a single 20 cm mirror disco ball directly above the cake table from a removable ceiling hook. Position it so any window light hits it in the afternoon. The moving light spots appear in every photo taken at the table and cost nothing in electricity.
The disco ball adds a texture none of the other decor elements provide: it is the only shiny thing in a room full of matte paper, which makes it a natural focal point. Keep everything else around it slightly simpler so it reads clearly in photos.
🛍 Shopping guide
The Smash Cake and Dessert
Two cakes, one for photos and one for eating, is the move most stylists use but rarely say out loud. A decorated six-inch cake costs less than a full-size one and photographs three times better.
Rainbow Buttercream Stripe Smash Cake
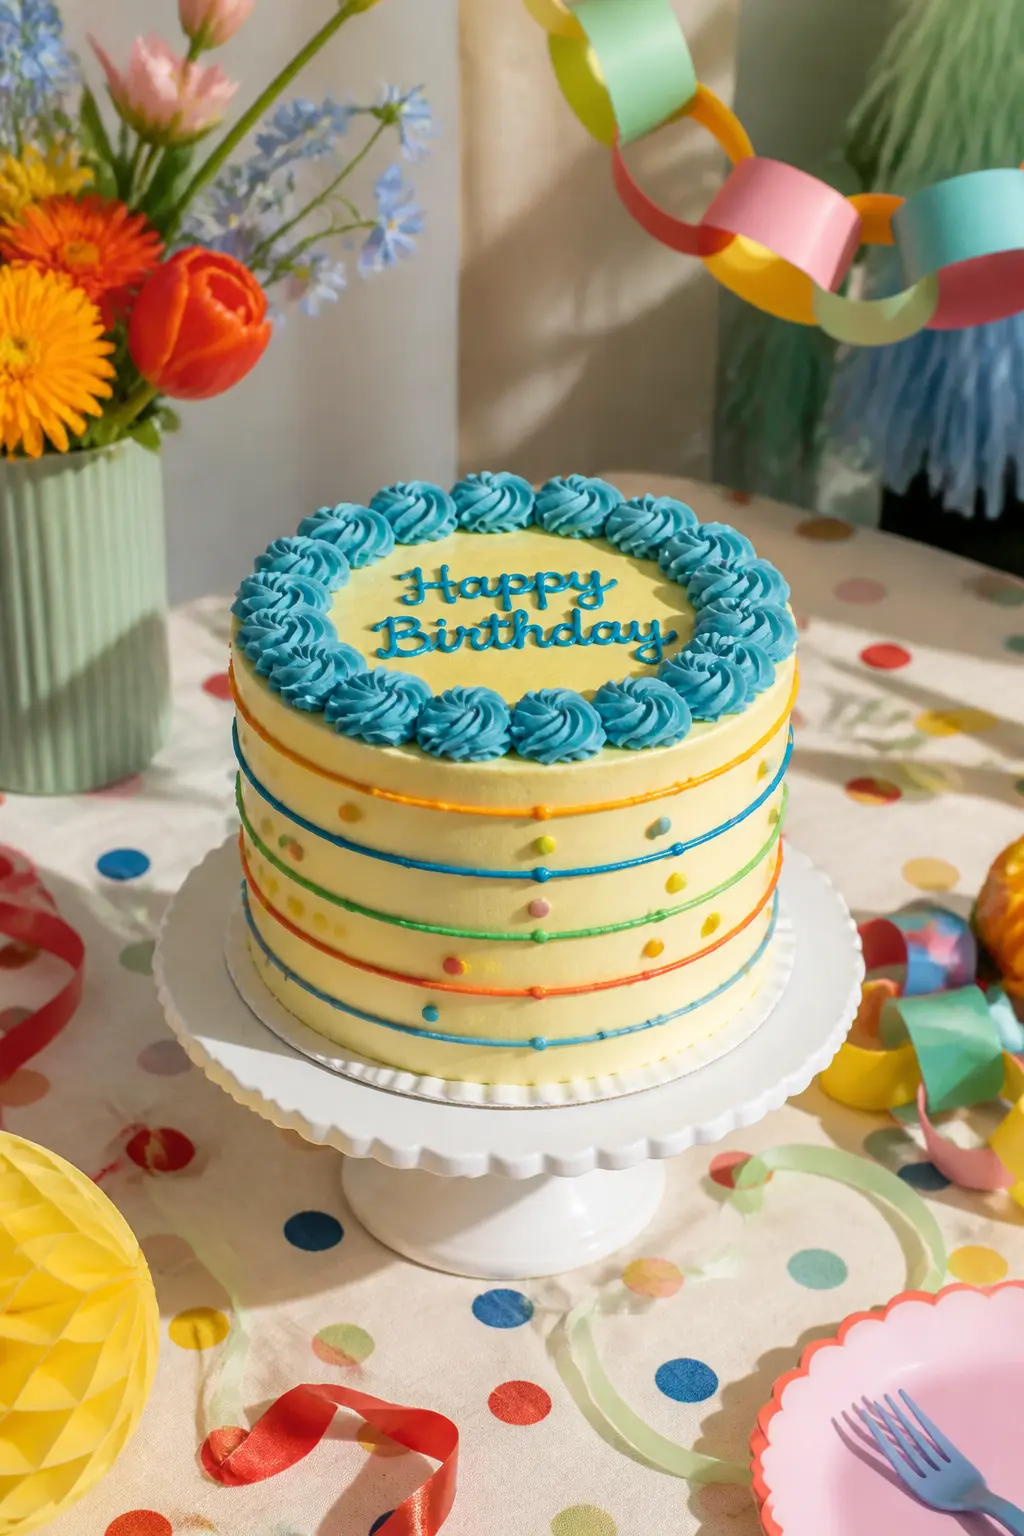
A six-inch double-layer cake frosted in pale yellow or cream buttercream, decorated with horizontal piped stripes in blue, red and green and scattered dot sprinkles in the party palette. The top carries a central circle of piped rosettes with the age written in the centre in a contrasting colour.
The combination of a neutral base with bold piped stripes keeps the cake looking bakery-level without requiring advanced skills. Order it from a local bakery with a reference image, or use a box mix and a basic piping bag at home: the stripes cover any uneven frosting underneath.
🛍 Shopping guide
Confetti Sprinkle Sheet Cake for Guests
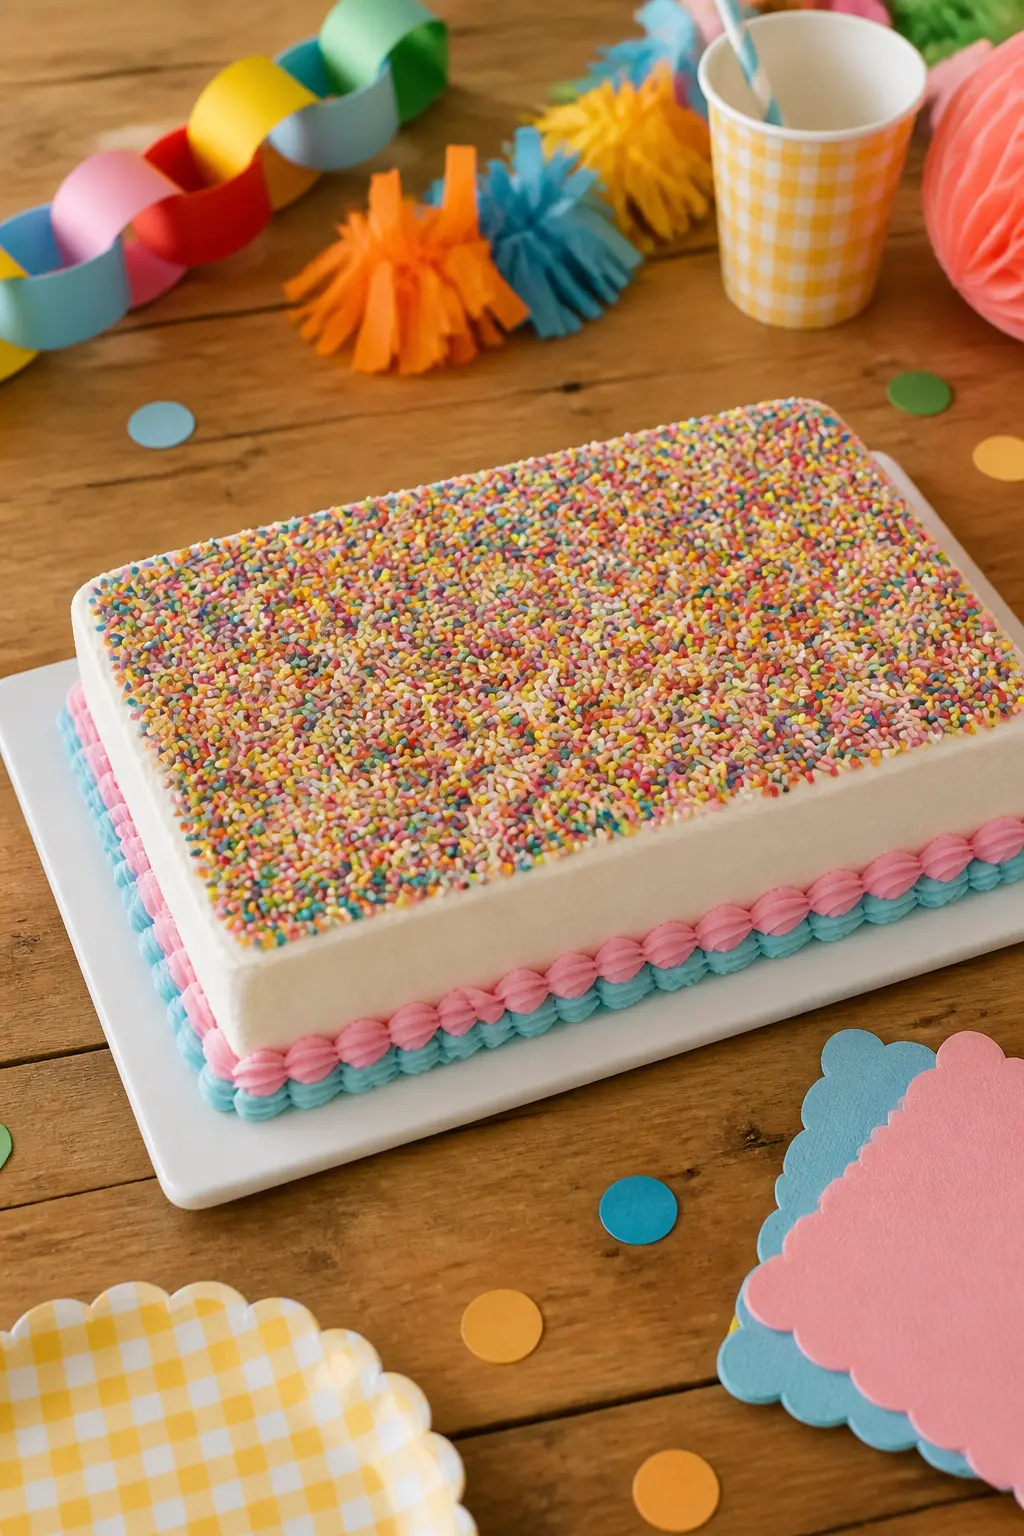
A quarter-sheet cake frosted in white and covered in rainbow jimmie sprinkles before the frosting sets, so the sprinkles press flush into the surface. Pipe a simple scalloped border in two colours around the base and write nothing on the top: the sprinkle surface is decoration enough.
A sheet cake feeds more people for far less money than a tiered cake. Guests rarely mind that the writing is missing when the surface looks this deliberate. Cut it in the kitchen so slices arrive at the table already plated.
🛍 Shopping guide
Vintage-Style Piped Cupcake Tower
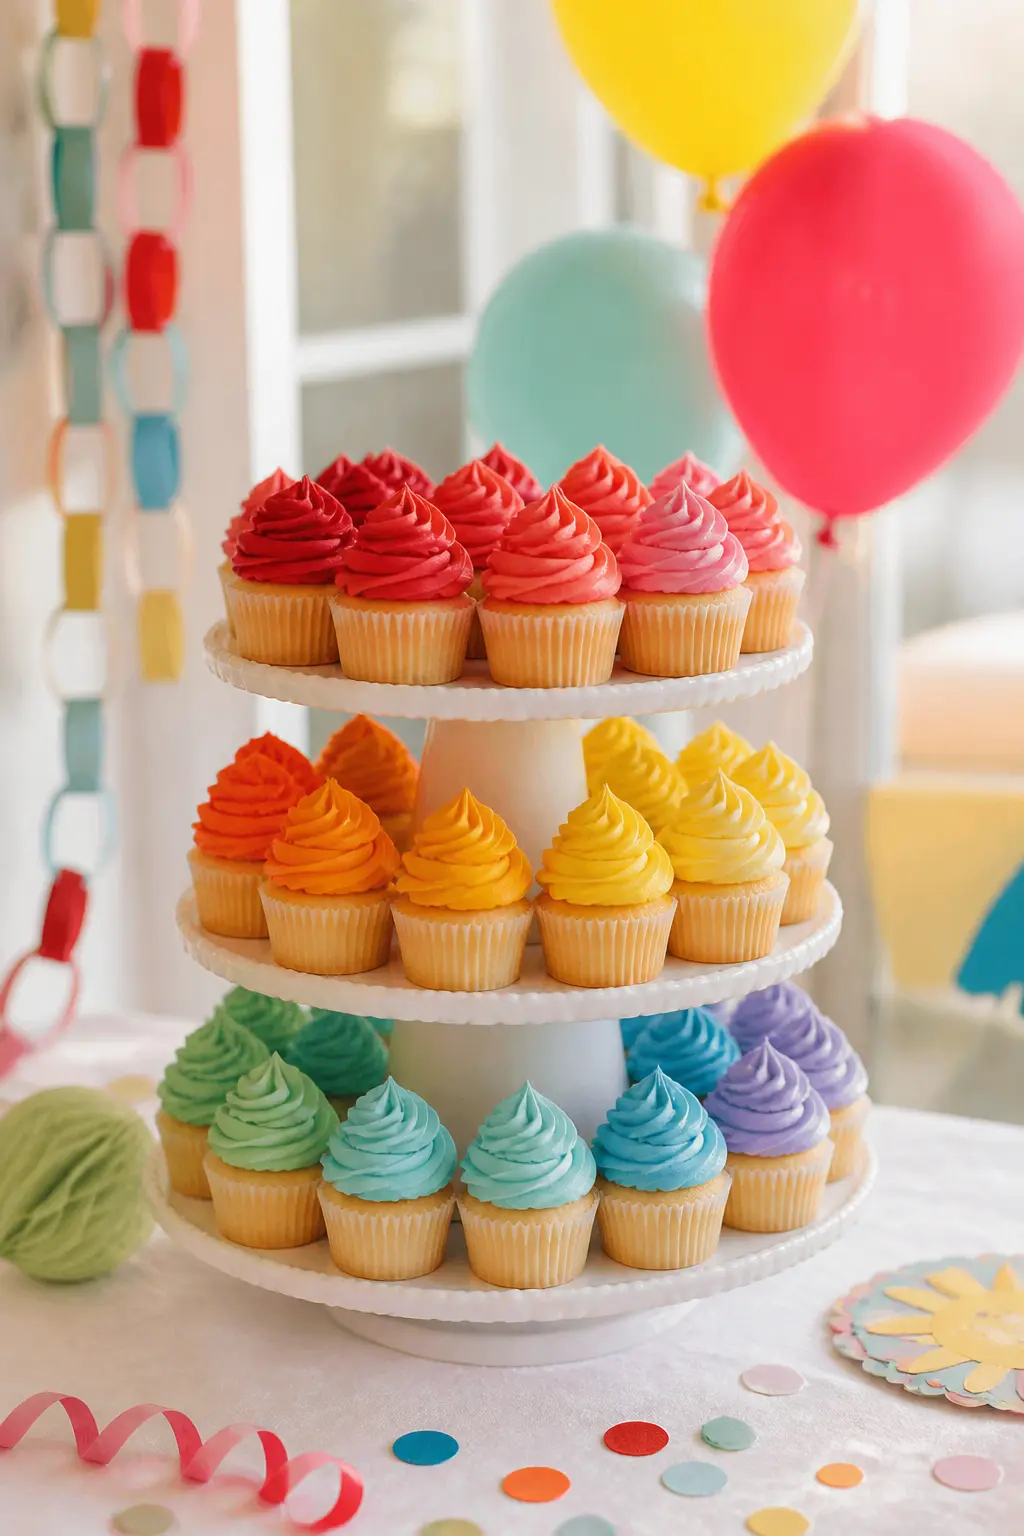
Bake standard cupcakes and top each one with a tall swirl of coloured buttercream, one colour per cupcake so the tower cycles through the full palette. Use a 1M star tip for the classic swirl. No fondant toppers, no printed flags: the piping is the decoration.
Display them on a tiered cupcake tower stand, arranging colours in gradient order rather than randomly. The tower reads as a full rainbow from across the room and serves as a secondary dessert display so the smash cake stays intact for longer.
🛍 Shopping guide
Balloon Moments
Balloons are the fastest way to move colour from the floor to the ceiling. Giant rounds above the table, a garland flanking the backdrop, or a single oversized number at the entrance: each one pulls a different visual job.
Balloon Garland Arch Kit in Primary and Pastel Mix
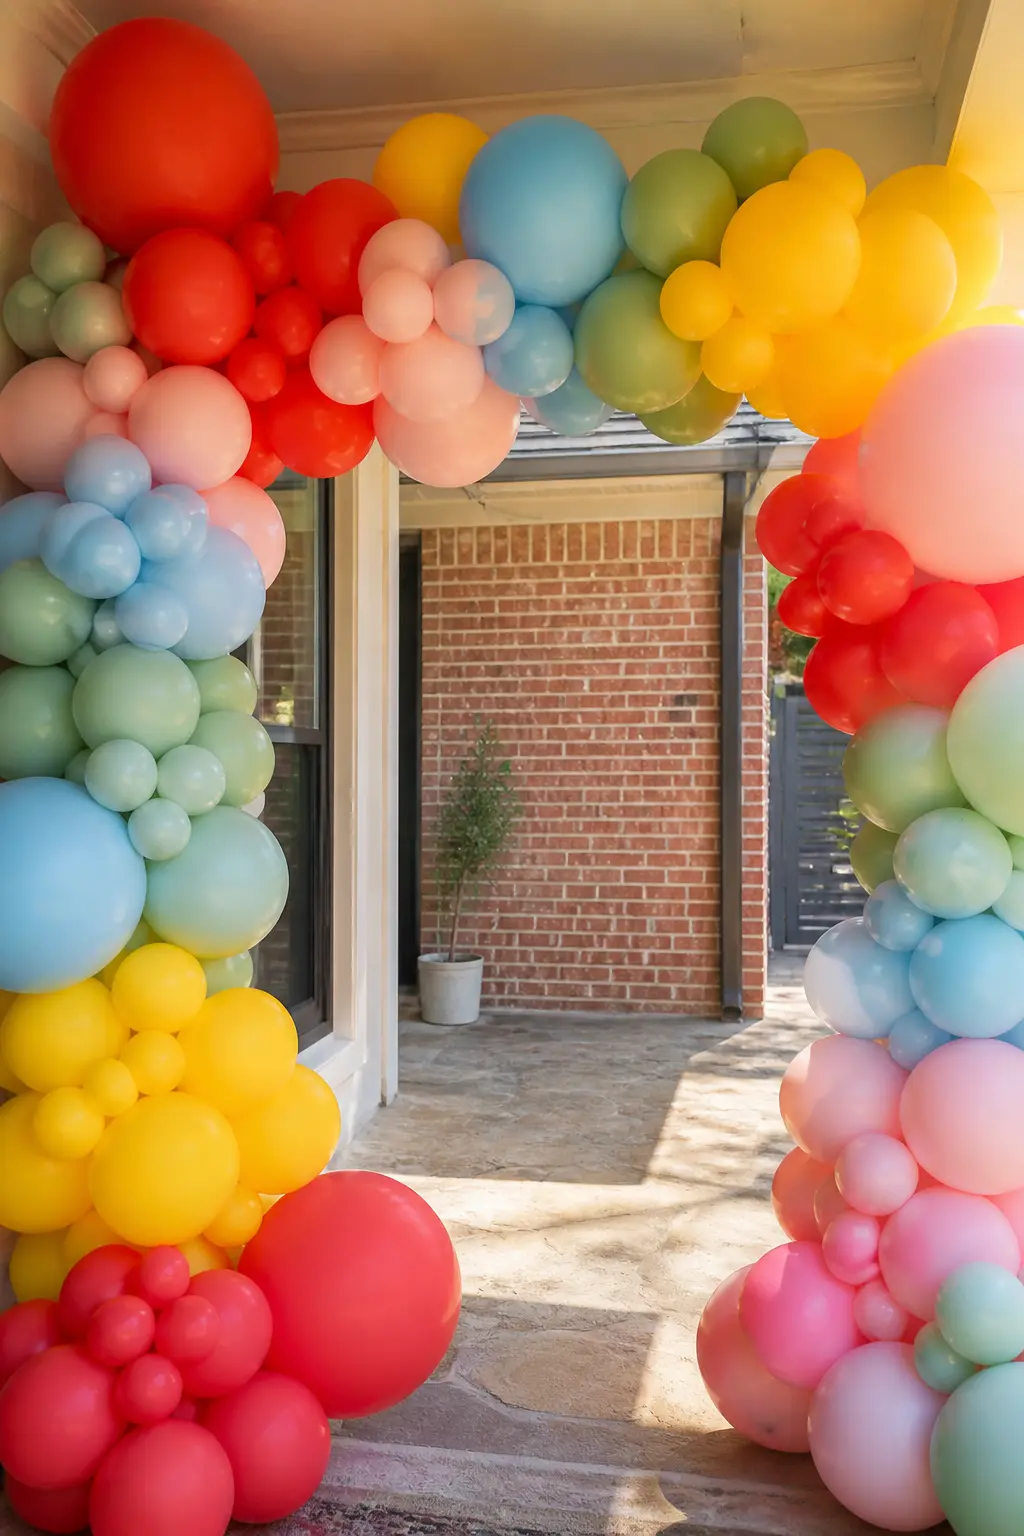
Build a classic organic balloon garland using a mix of 5-inch and 11-inch balloons in primary red, yellow and blue alongside their pastel counterparts: blush, butter and powder blue. The size variation is what makes a garland look organic rather than uniform. Thread them onto a balloon decorating strip and mount the strip on a freestanding frame.
Weave in a handful of sage green balloons to tone the whole arrangement down just enough that it does not feel like a primary-school craft room. That one neutral shade is the detail that separates a garland that looks designed from one that looks inflated.
🛍 Shopping guide
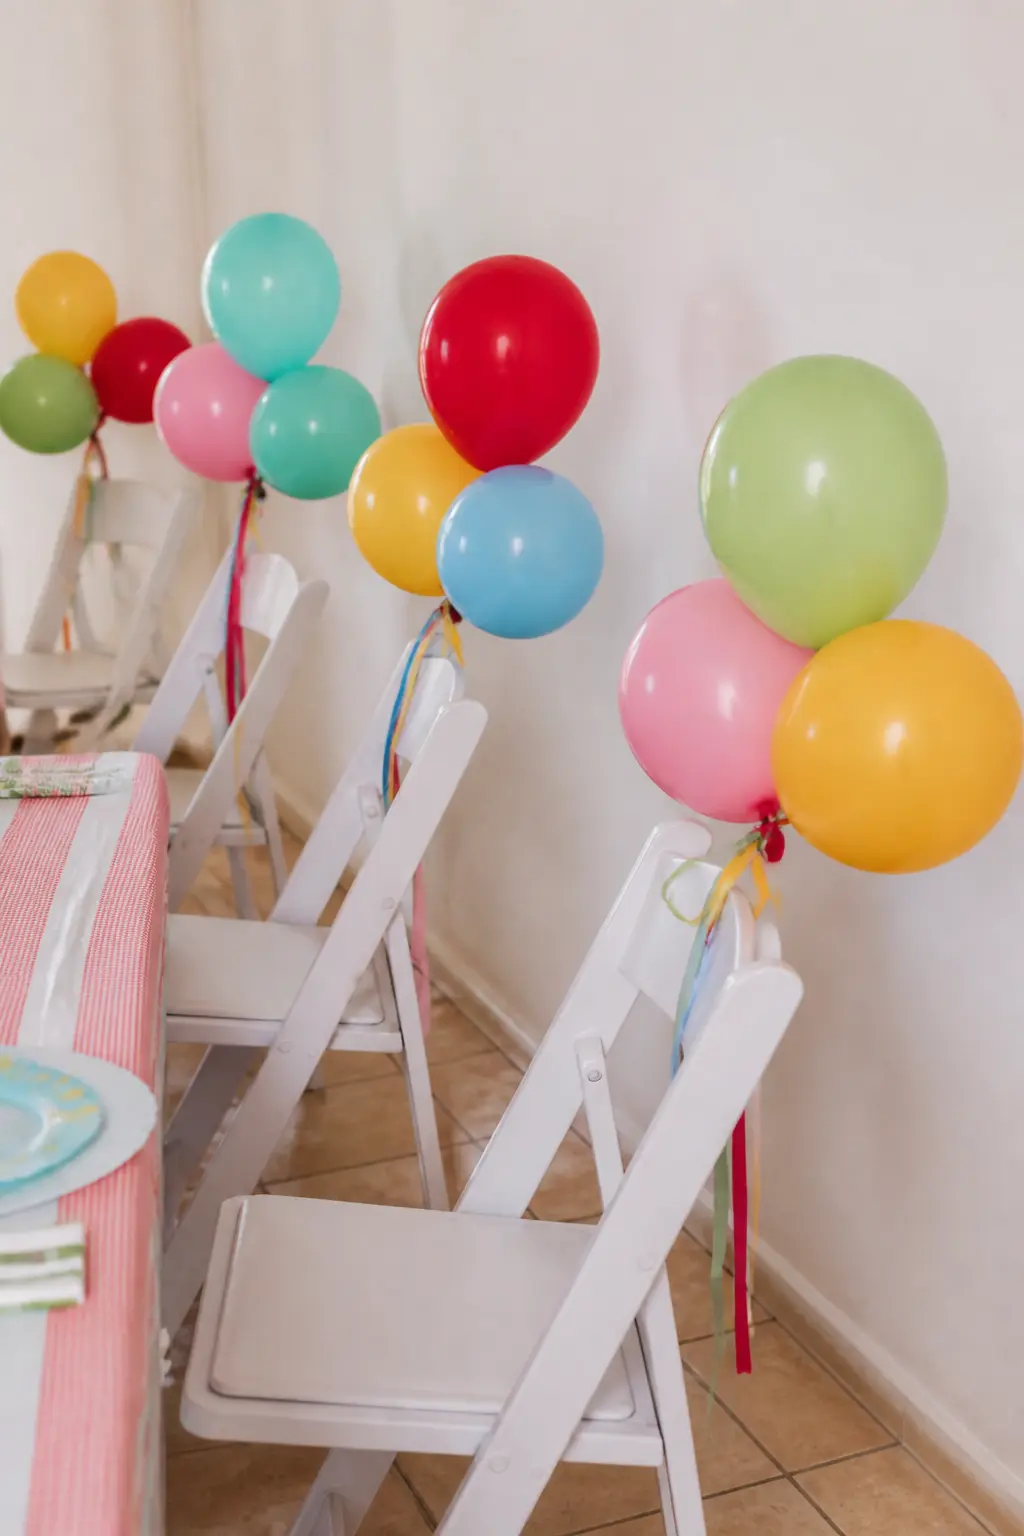
Cluster of Balloons Tied to Each Chair
Tie a cluster of three 11-inch balloons, one primary and two pastels, to the back of each dining chair. Vary the primary colour from chair to chair so the full table cycles through the palette when photographed from either end.
This costs a fraction of a garland and creates a similar visual impact because the colour appears at standing height throughout the room. Weight each cluster with a small ribbon loop tied to the chair rail rather than a balloon weight, so nothing sits on the ground to be kicked.
🛍 Shopping guide
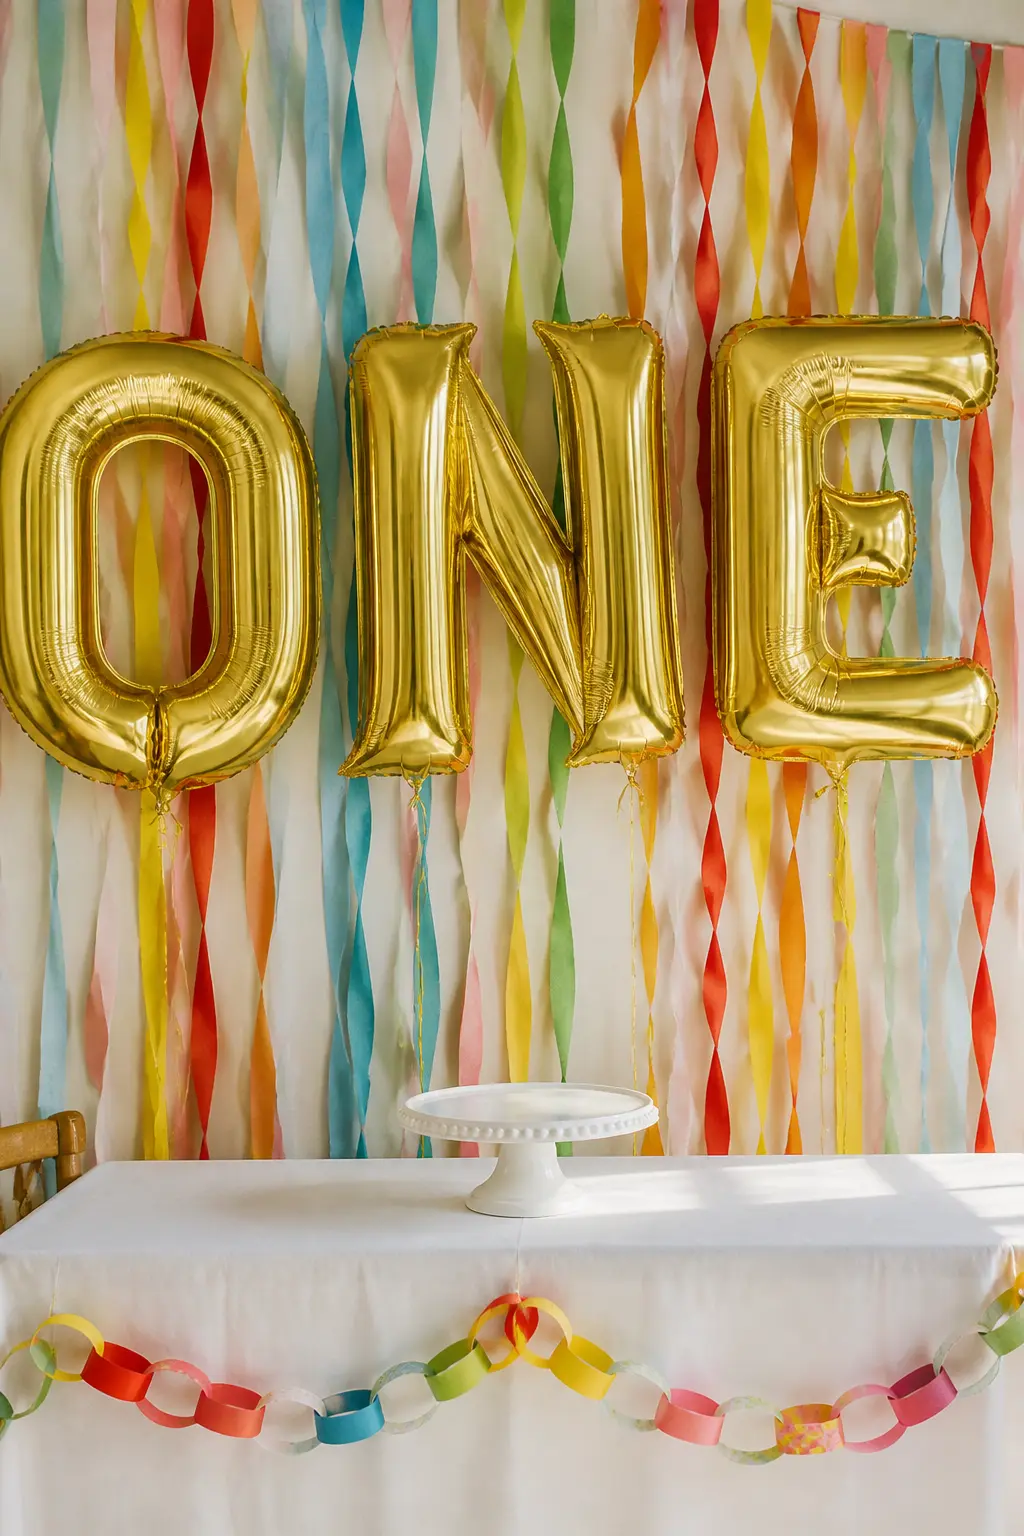
Foil Letter O-N-E Balloon Set
Float three large gold or rose-gold foil letter balloons spelling ONE behind the smash cake table, tethered to small weights so they sit at just above head height for a seated adult. Position the letters with a small gap between each one so they read as three separate graphic elements rather than one run-on word.
Foil balloons hold their shape for several days, so you can inflate them the morning before the party. Use helium for the float effect, or fill with air and attach each balloon to a thin clear rod in a weighted base for a no-helium version.
🛍 Shopping guide
The High Chair and Smash Setup
The high chair is the one spot every photographer points at. Dress it the way you would dress a prop table: a few intentional details read better than a pile of decorations.
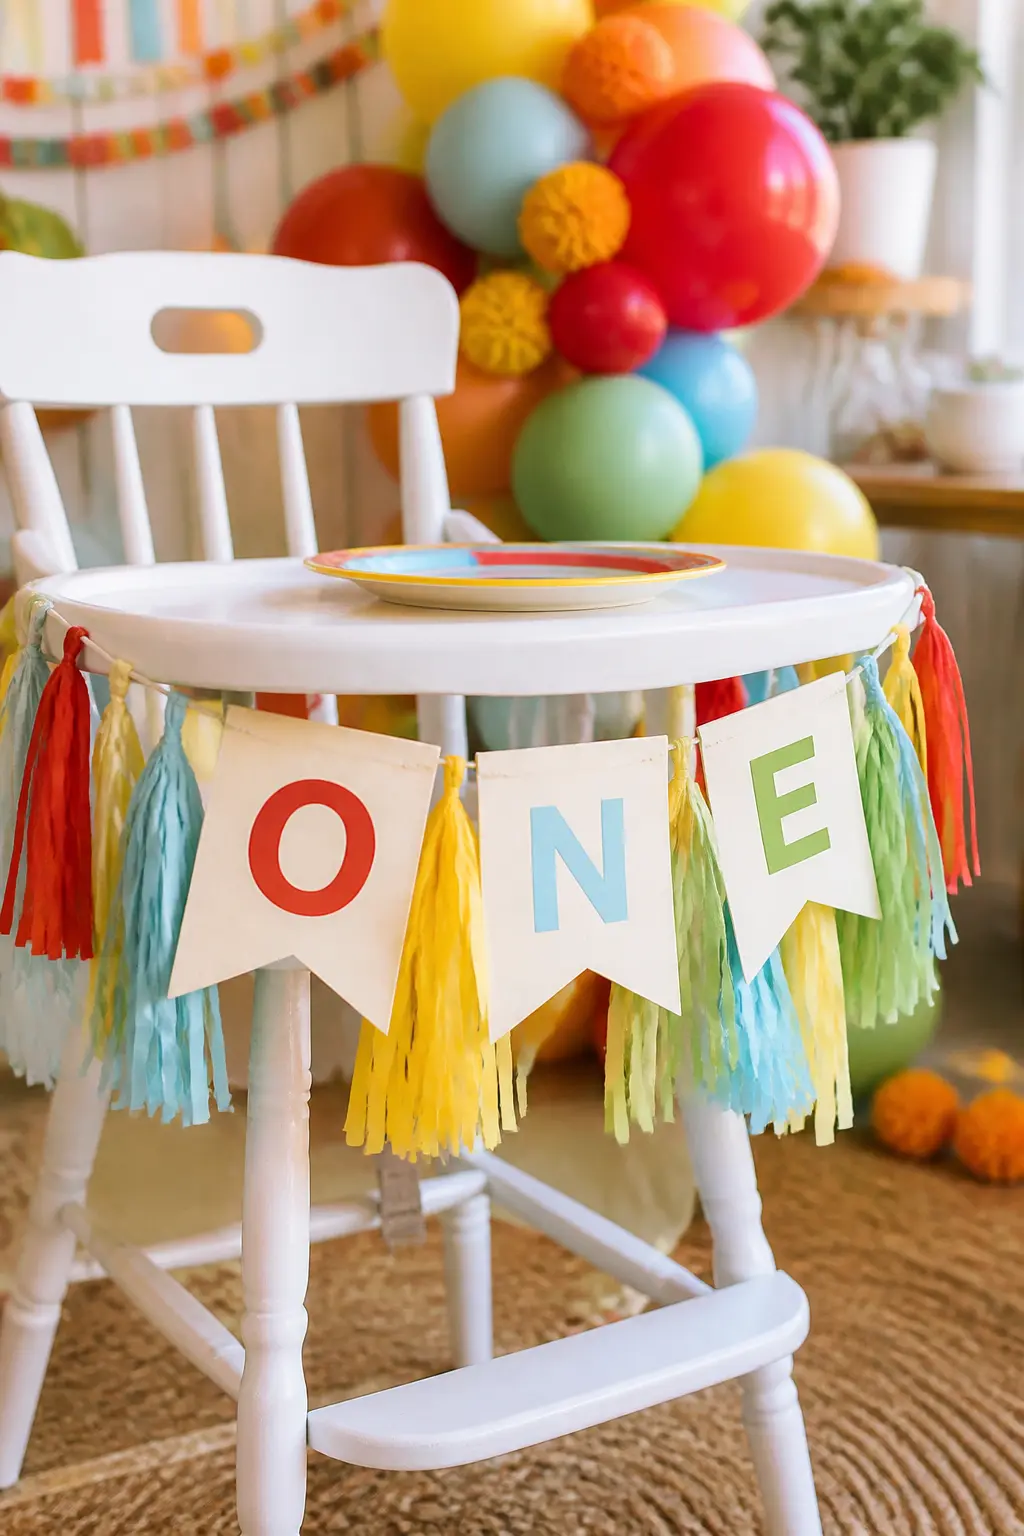
Tassel-Trim High Chair Banner
Cut a length of ribbon long enough to wrap across the front of the high chair tray and down both sides. Glue a fringe of short tissue-paper tassels along the bottom edge in alternating colours. Tie it onto the chair with two bows at the tray corners.
The tassel trim catches every camera angle and takes fifteen minutes to make. It also works on a standard kitchen chair or a vintage wooden high chair: the tassel fringe is what reads clearly in the photo, not the chair underneath it.
🛍 Shopping guide
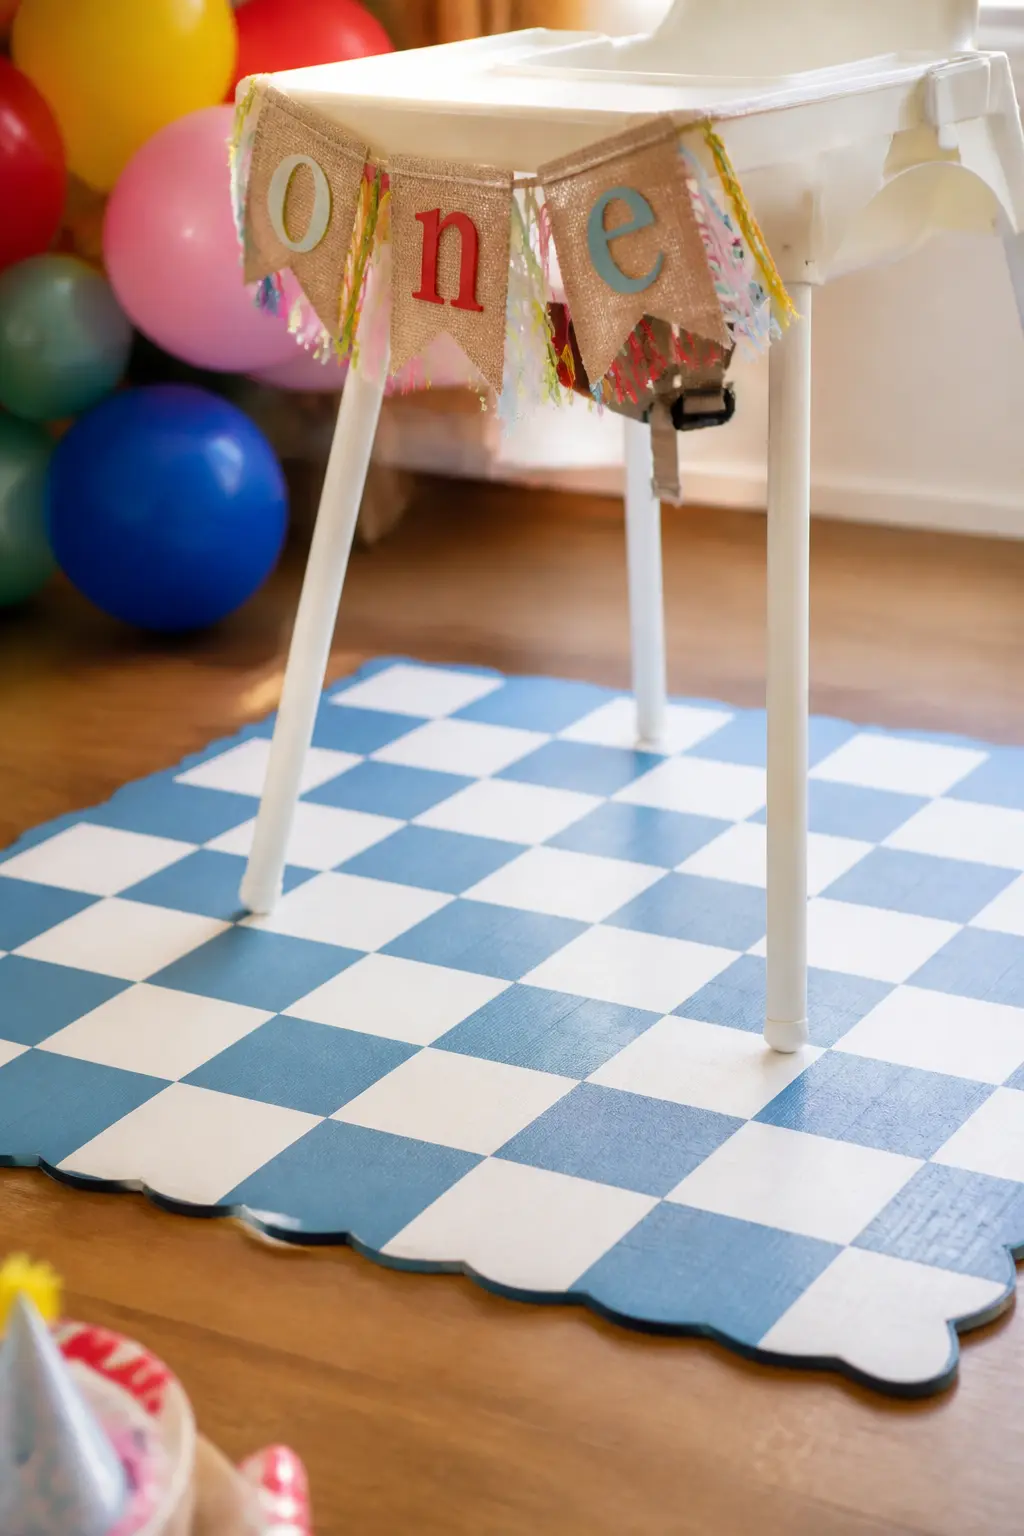
Chequered Floor Mat Under the High Chair
Place a vinyl chequered mat, in white and one accent colour such as blue or pale yellow, directly under the high chair before the smash cake arrives. It protects the floor and provides a graphic base layer that reads immediately in overhead photos.
The chequered pattern is distinct from every other element on the table and backdrop, so it adds visual interest without competing with the colour story. Wipe it clean after the smash, roll it up, and reuse it for the next party season.
🛍 Shopping guide
Photo Garland First Year Memory Banner
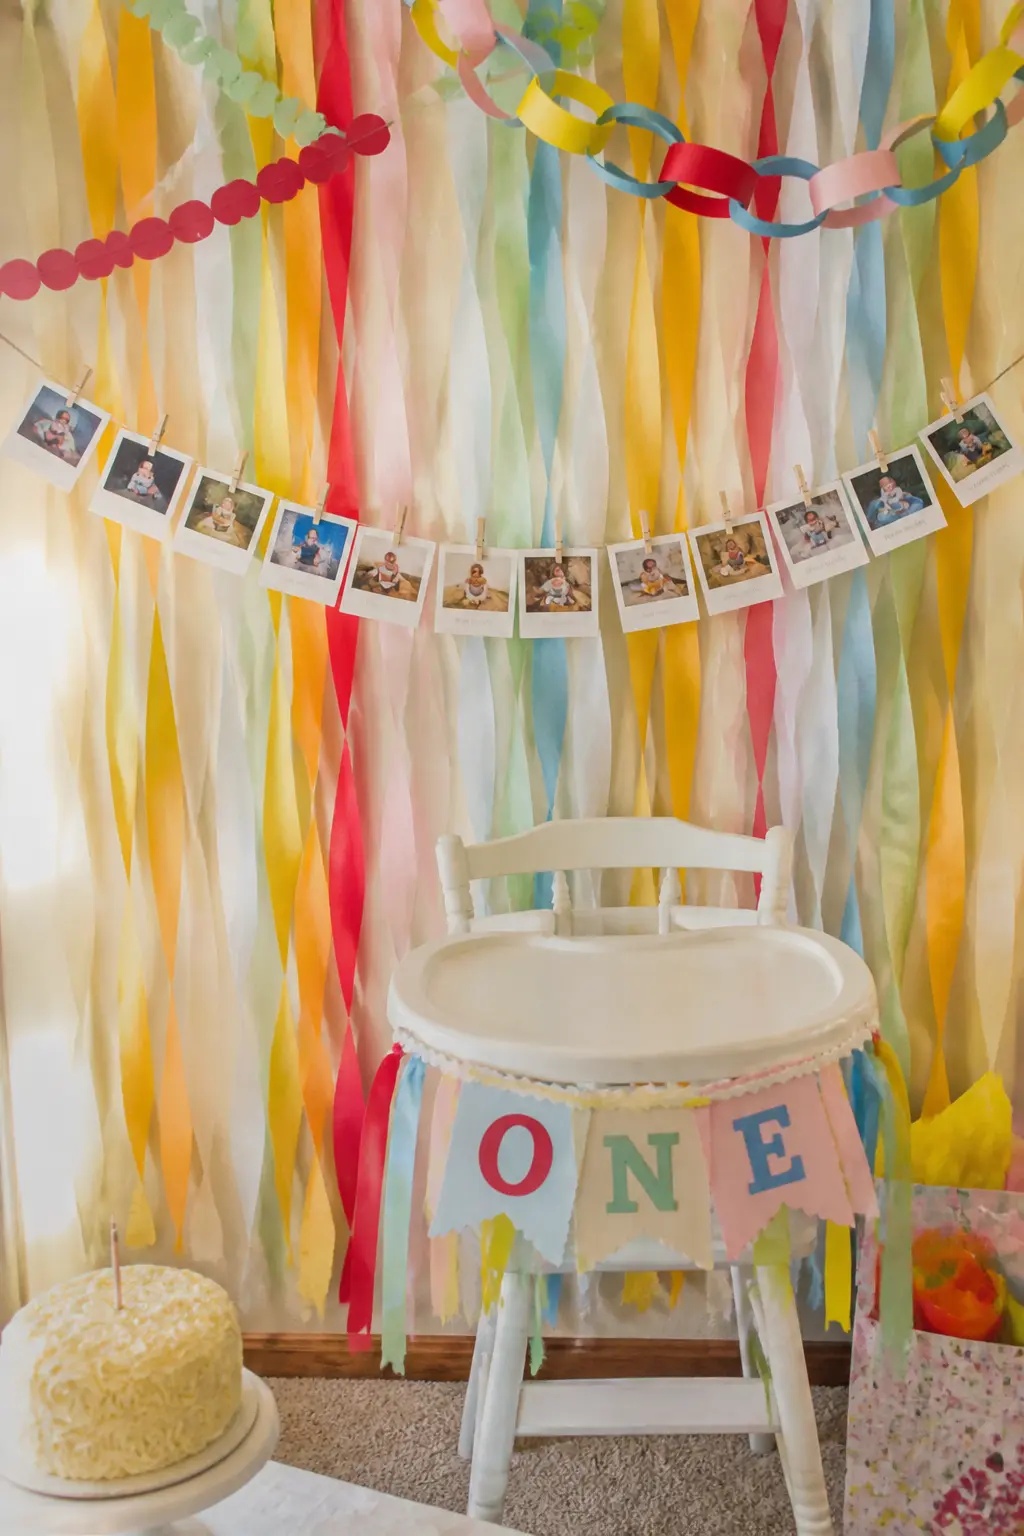
Print twelve small square photos, one from each month of the first year, and clip them to a length of twine with mini wooden pegs. Hang the garland in a shallow arc above or beside the high chair so it is in every photo taken at the smash setup.
Print the photos at a drugstore or home printer at 4×4 inches. The total cost is under five dollars for the printing. Add a small flag at each end cut from the same cardstock as the party chain, so the garland matches the rest of the decor.
🛍 Shopping guide
Favours and Finishing Touches
Favours do not need to be expensive. They need to be consistent with the palette and finished enough that they look like part of the party, not an afterthought sitting in a basket by the door.
Colour-Blocked Favour Bags with Tissue Plumes
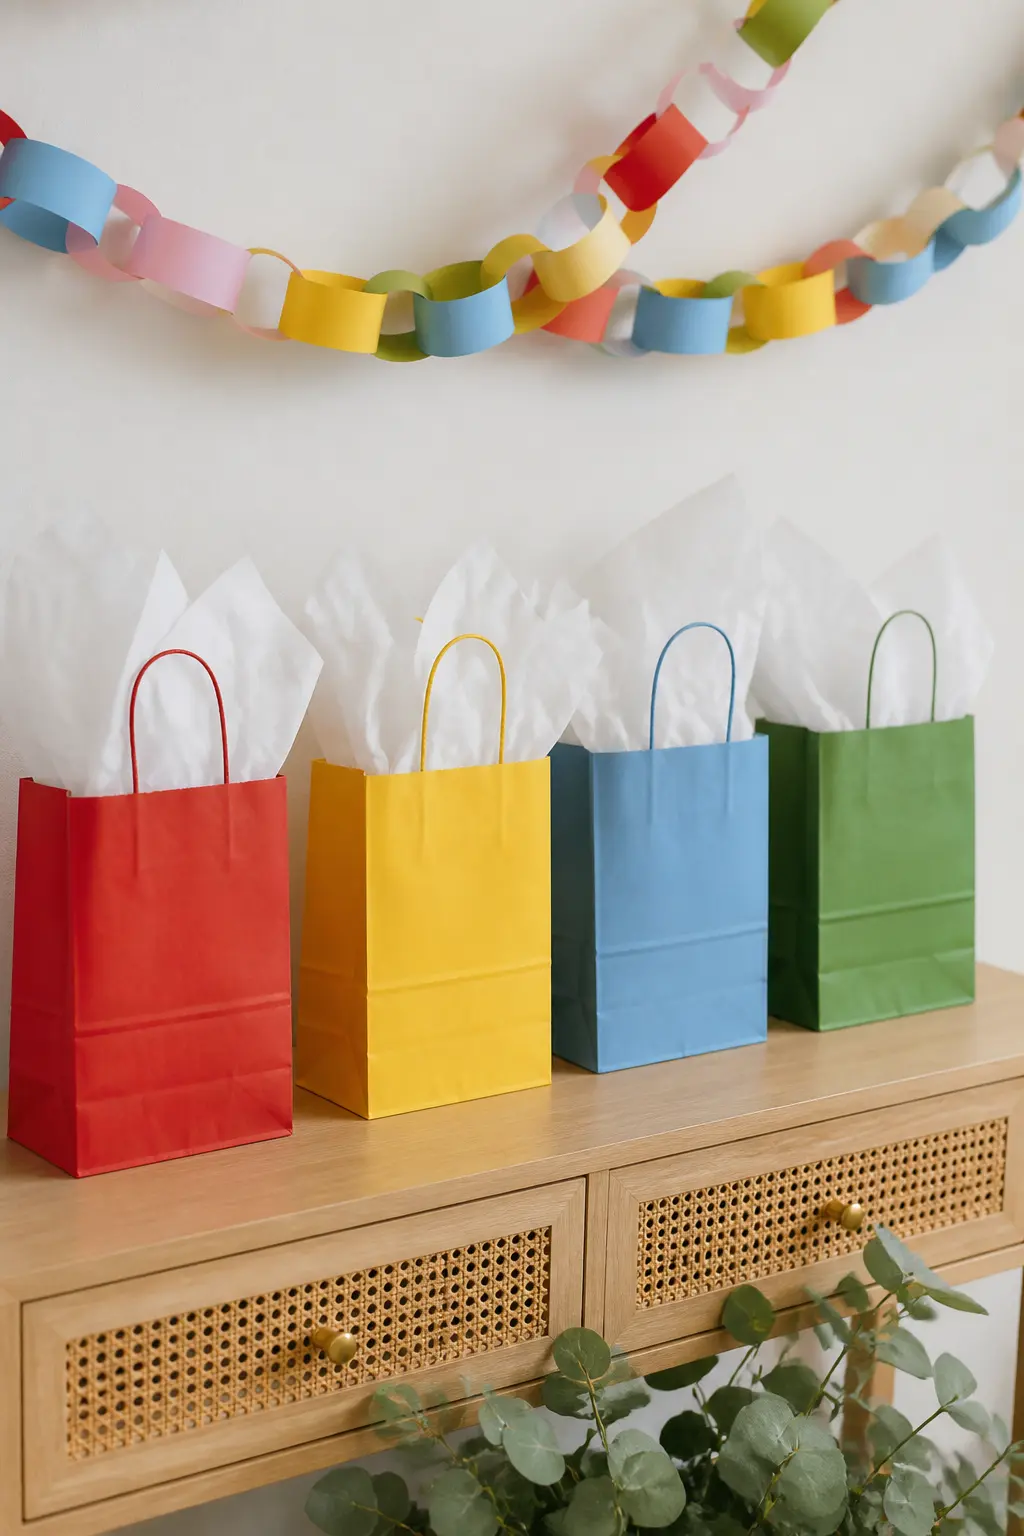
Use solid kraft paper bags in four colours: one red, one yellow, one blue, one green, distributed evenly among guests. Stuff each bag with white tissue paper and pull two or three sheets into a plume above the bag opening. Line all the bags up on a side table in colour order before guests arrive.
The lined-up bags photograph as a colour installation in their own right. Fill them with a handful of wrapped sweets, a small playdough pot and a crayon set: nothing breakable, nothing that requires explanation, nothing that costs more than three dollars per bag.
🛍 Shopping guide
Rainbow Popcorn Box Station
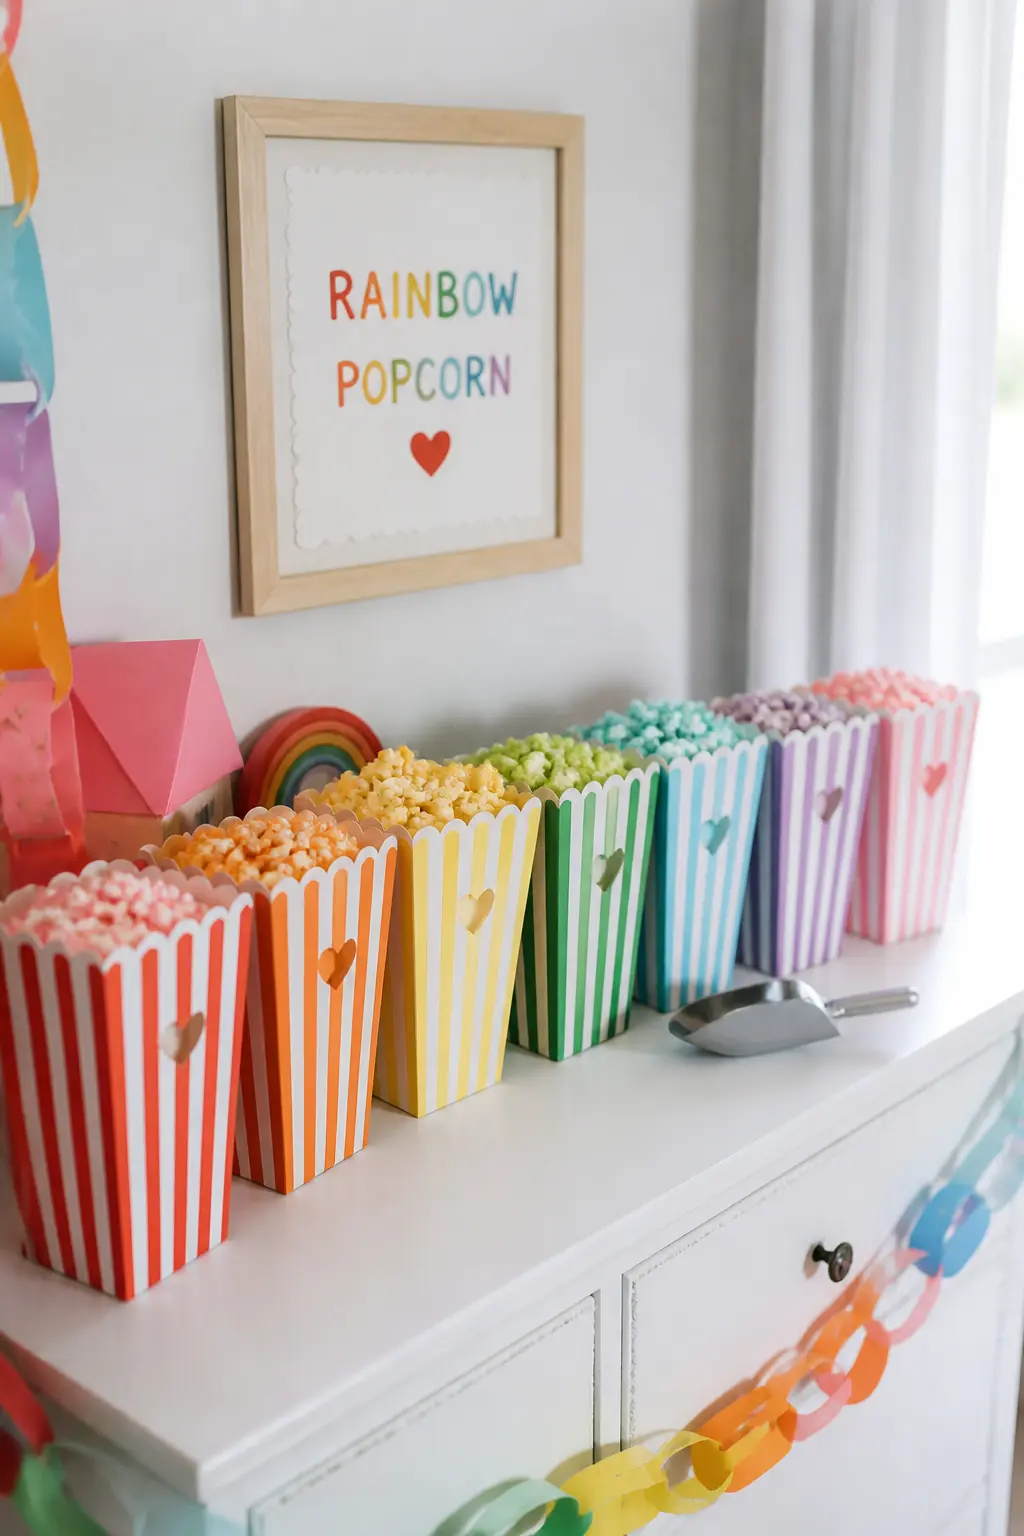
Set out a row of printed popcorn boxes in the party colours on a side table and fill each one with plain or lightly salted popcorn. A handwritten label on the table reading ‘help yourself’ is the only signage needed. Add a scoop so guests can top up their boxes during the party.
Popcorn boxes are inexpensive and come in pre-printed rainbow versions. They read as part of the decor while they are full and part of the favour when guests take them home. Keep a second bag of popcorn in the kitchen for refills.
🛍 Shopping guide
Invitation Suite in the Party Palette
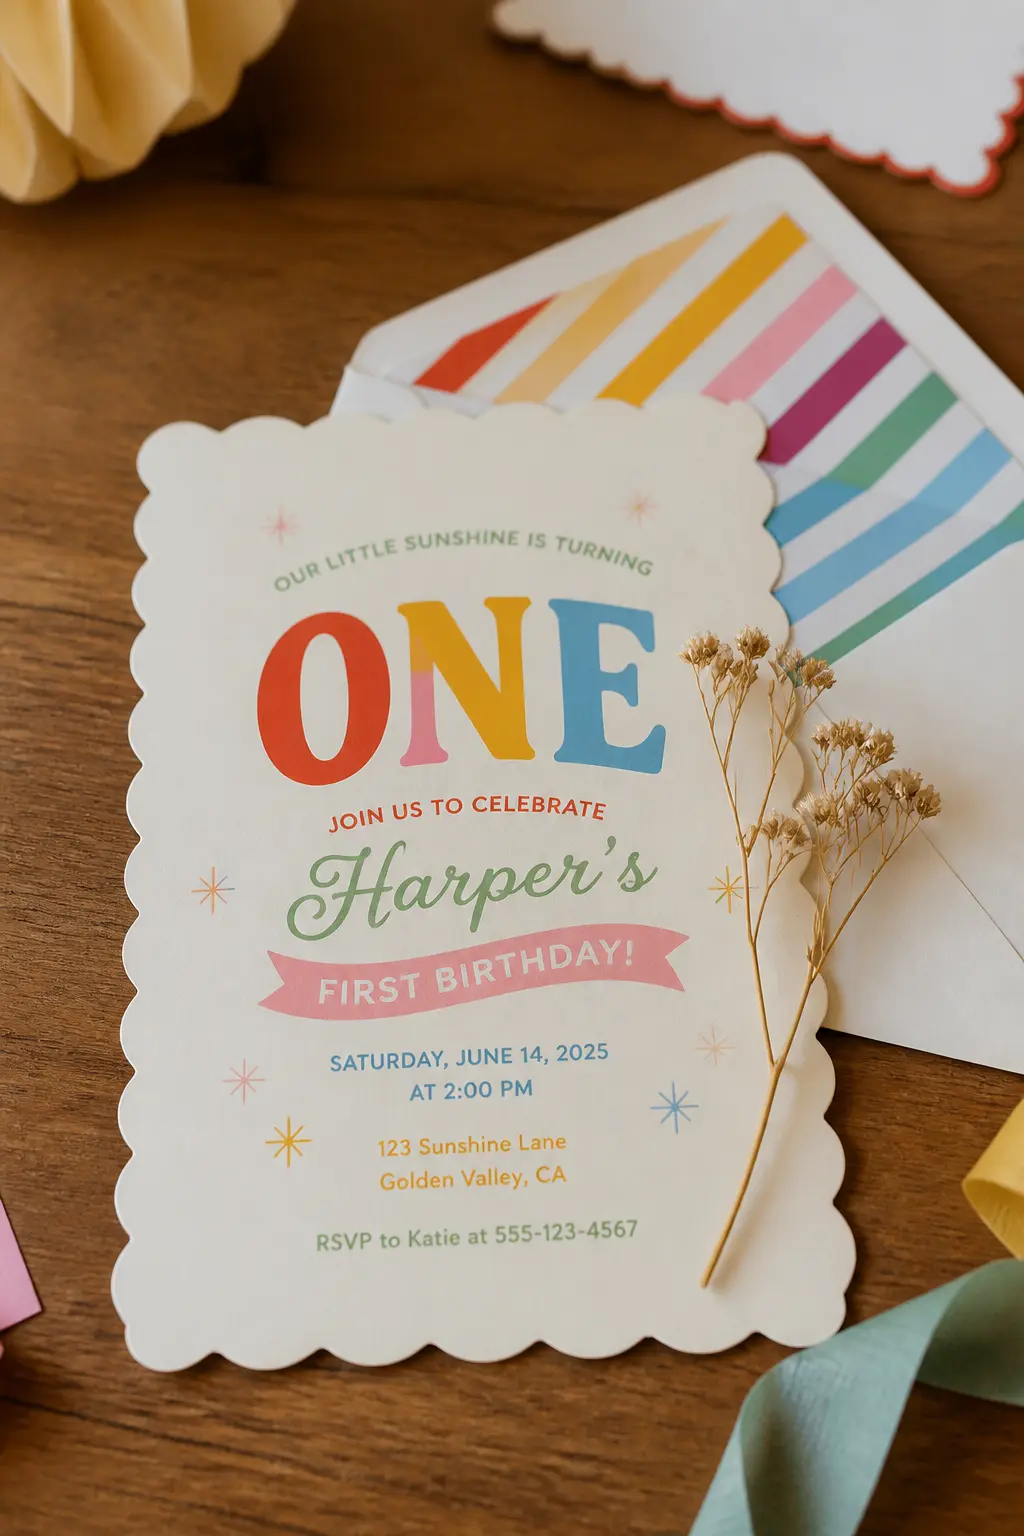
A digital invitation printed at home on cream cardstock, using the same four or five colours that appear throughout the party decor, sets guest expectations before they arrive. Use a retro bouncy font for ‘ONE’ and a clean sans-serif for the details. Print at 5×7 and trim by hand or with a paper cutter.
For gender-neutral first birthday invitations, this palette works without adjustment: primary colours belong to no particular gender and the rainbow framing reads as universal. A matching envelope liner cut from the same paper as the party chain ties the whole suite together.
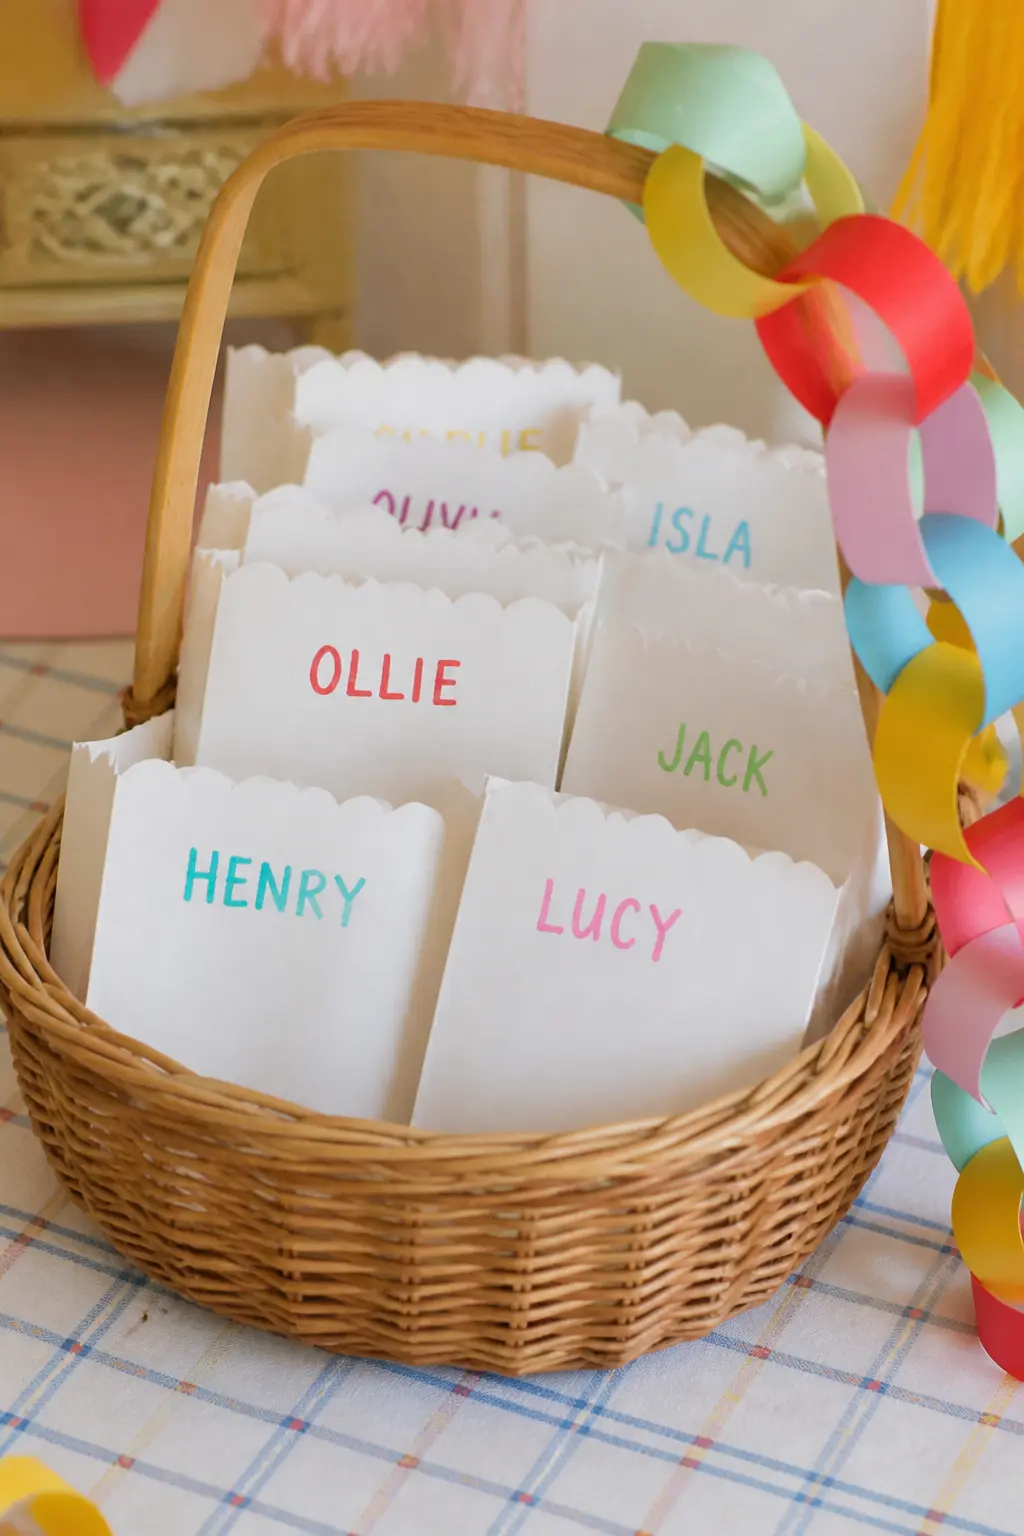
Scalloped Paper Goodie Bags with Name Tags
Cut a scalloped edge along the top of plain white paper bags using a decorative scissors or a punch, then stamp or write each guest’s name on the front in a bold marker in one of the party colours. The scalloped edge echoes the plates and backdrop without any additional purchase.
Stack them on arrival in a basket by the door so guests can find their own. A name on the bag encourages children to take the right one and gives parents one less logistical moment to manage at the end of the party.
🛍 Shopping guide
Frequently Asked Questions
What colours work best for a fun to be one colourful first birthday party?
A base of primary red, yellow and blue, softened with sage green, blush and mint, gives you a palette that is bright without being harsh. Repeat the same five or six colours in every element and the photos will look cohesive even if the individual details are simple.
How far ahead should decorations be prepared?
Order any printed or shipped items three to four weeks out. Make paper chains and cut cardstock elements the week before. Inflate balloons and hang ceiling decor the evening before the party. Leave the table setting for the morning of, since plates and napkins take less than thirty minutes to arrange.
Do you need a separate smash cake and a guest cake?
Two cakes is the practical choice rather than an indulgent one. A decorated six-inch smash cake stays intact for photos, while a plain sheet cake covers all the guests. The combined cost is usually less than one large tiered cake, and the smash cake photographs better because of its scale.
How do you keep a rainbow party from looking chaotic?
Fix a colour sequence and repeat it in every repeating element: the paper chain, the balloon garland, the cupcake tower, the favour bags. Use a neutral, such as sage green or cream, in at least twenty percent of the decor to give the eye somewhere to rest. Consistency in saturation level matters more than matching exact shades.
What is the easiest DIY decor for a fun to be one party?
A paper chain table runner is the highest-impact, lowest-cost project at this kind of party. Pre-cut the strips in a fixed colour order, then link them together in front of the television the week before. The chain doubles as a ceiling swag if you make extra, so one session of cutting covers two decor elements.
Do helium balloons work for an indoor first birthday?
Helium works well for giant round centrepiece balloons and foil letter balloons. For garlands and chair clusters, air-filled balloons on balloon strip tape are more stable, hold shape longer, and require no tank. A helium-free garland can go up the night before, which removes one task from the morning of the party.
Fourteen warm, practical setups for an 80th birthday party for grandma, built around getting the who
12 printable gender-neutral first birthday invitation ideas for every theme — from Wild One safari
20 birthday party themes for adults built for adult tastes from the start: speakeasy nights, supper
Leave a Reply