

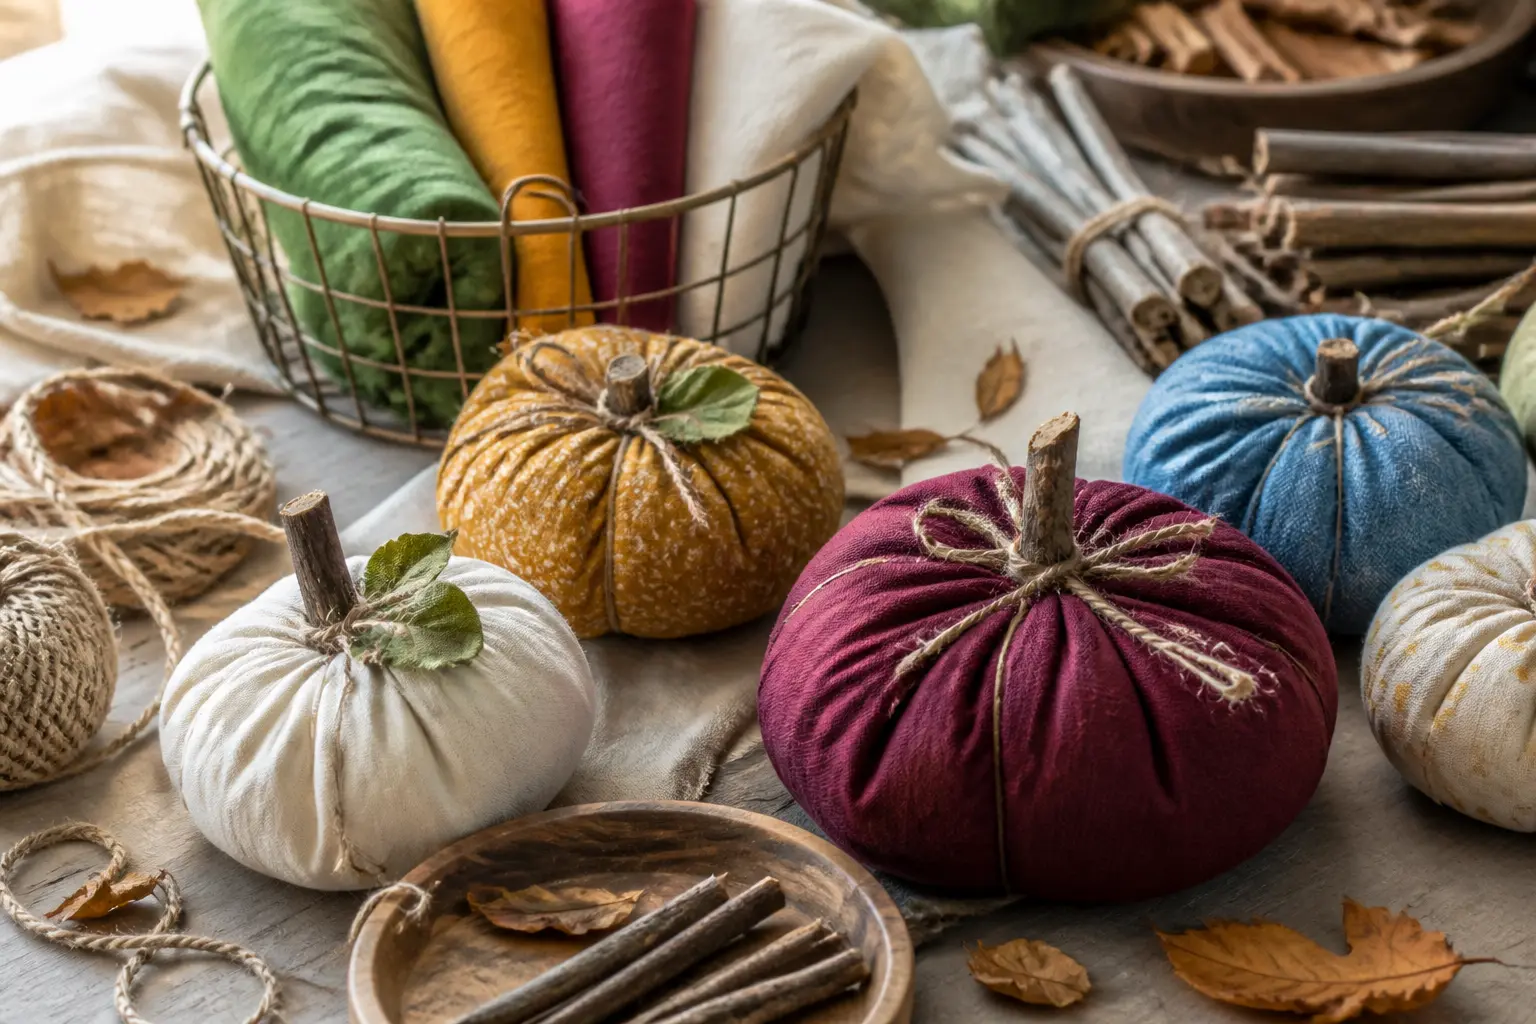
Fabric pumpkins are the autumn decoration that actually earns its shelf space. They do not rot, they pack flat at the end of the season, and the right one looks like something from a boutique gift shop rather than a craft table.
The sixteen makes below cover the full range: no-sew sock versions that take twenty minutes, hand-sewn velvet rounds that take an afternoon, and a few in between that ask only for scissors, a needle and whatever textured fabric catches your eye.
All of them share the same easy-living palette of burnt orange, warm cream, dusty sage and cinnamon brown, because that is what photographs well and what sits happily on a mantel, a dining table or a front step.
For more autumn decorating ideas that work beyond the dining room, the round-up at Thanksgiving Decor Ideas That Work in Every Room is worth a look alongside this one.
And if you want to turn these pumpkins into a Halloween project with a crowd, 20 Budget-Friendly DIY Halloween Party Games has the games to run while everyone crafts.
This post contains affiliate links. If you buy through them, I may earn a small commission at no extra cost to you.
- Gathered Velvet Circle Pumpkin
- No-Sew Boucle Sock Pumpkin
- Linen Drawstring Pumpkin with Dried Stem
- Sherpa Fleece Pumpkin with Twine Stem
- Felt Panel Pumpkin with Embroidered Vine
- Stuffed Velvet Ribbon Pumpkin
- Fabric Scrap Patchwork Pumpkin
- Wire-Frame Fabric Lantern Pumpkin
- Painted Hessian Pumpkin with Botanical Print
- Knotted Macrame Cotton Pumpkin
- Felted Wool Ball Pumpkin
- Quilted Cotton Pumpkin with Batting Layer
- Tied Bandana Pumpkin
- Fabric-Covered Cardboard Box Pumpkin
- Rust Linen Pillow Pumpkin for a Sofa
- Scented Lavender-Filled Muslin Pumpkin
- Frequently Asked Questions
Gathered Velvet Circle Pumpkin
This is the one in the photo everyone assumes was bought. Cut a circle of velvet, run a gathering stitch around the edge, stuff it, pull it tight and divide the ball into segments with strong thread.
The result is a plump, ribbed pumpkin that sits between 12 and 24 cm wide depending on how large you cut your circle. It suits a mantel, a centrepiece or a stack of three in graduating sizes on a console table.
At the end of the season, slip it into a cotton bag and it stores without a crease.
What You Need
- Burnt orange velvet fabric, 50 cm x 50 cm minimum (for a large pumpkin; use 35 cm x 35 cm for small)
- Polyester toy stuffing, approx 80 g per large pumpkin
- Strong button thread or upholstery thread, 2 m
- Hand-sewing needle, large eye
- A short dried stick or cinnamon stick, 6-8 cm, for the stem
- Low-temp glue gun and glue sticks
- A compass or dinner plate to draw the circle
- Scissors
How to Make It
- Use a dinner plate (for large) or a side plate (for small) as a template and draw a circle on the wrong side of the velvet. Cut it out cleanly. The circle does not need to be perfect; slight irregularities disappear once the fabric gathers.
- Thread the needle with a double length of button thread and knot the end. Work a running stitch around the entire edge of the circle, staying about 1 cm from the raw edge. Use long stitches, roughly 1 cm each, so the thread gathers easily.
- Once you reach the start, pull both thread ends gently to begin gathering the fabric into a pouch. Pack the stuffing in as you tighten: add enough that the pouch feels firmly full but not stretched. Pull the thread until the opening is about 3 cm across.
- Continue pulling and adjusting the stuffing until the opening closes to roughly 1-2 cm. Secure the thread with several firm stitches across the opening, then knot tightly. The pumpkin should now be a plump, even ball with the gathered side at the top.
- Cut a length of button thread about 1.5 m. Knot one end and push the needle down through the very centre of the gathered top, through the stuffing and out through the bottom centre. Pull firmly so the thread bites slightly into the ball, then bring it back up beside the first entry point. This anchors your dividing thread. Work it around the outside in 6 or 8 equal sections, looping from top to bottom and pulling each loop taut before moving to the next. Each pull creates one rib. Knot off at the top when all sections are done.
- An adult should use the glue gun here: apply a small dot of hot glue to the gathered top centre and press the dried stick or cinnamon stick into it. Hold for 30 seconds. A tiny felt leaf tucked in beside the stem finishes it, secured with a second dot of glue.

🛍 Shopping guide
No-Sew Boucle Sock Pumpkin
A fluffy boucle or bouclette sock becomes a rounded, textured pumpkin in under twenty minutes with no sewing at all. The sock’s ribbed ankle gives you a ready-made stem.
This is a legitimate adult craft that happens to be achievable without a needle, and the boucle texture reads as expensive whether the sock came from a pound shop or a department store.
Cluster three or five on a tray for a centrepiece, or tuck one into a wreath. Store them in a box at season end: the soft fabric bounces back perfectly.
What You Need
- 1 fluffy or boucle ankle sock per pumpkin (cream, sage or terracotta coloured)
- Approx 3 tablespoons of plastic poly pellets or dried lentils (for weight at the base)
- Polyester stuffing, a small handful per pumpkin
- Natural jute twine, 80 cm per pumpkin
- Scissors
How to Make It
- Cut off the ribbed ankle section of the sock just above where the foot widens. Set the ankle piece aside: that becomes the stem. Keep the foot section as the body of the pumpkin.
- Turn the foot section so the cut end faces upward. Pour the poly pellets or lentils into the toe first: this adds a satisfying weight and stops the pumpkin from tipping. Pack the stuffing on top until the body feels plump and round, filling it to within 3 cm of the cut top.
- Gather the open top together and twist it tightly so no stuffing escapes. Roll the ribbed ankle piece into a tight tube and push it down over the twisted top, tucking the excess fabric inside so only 2-3 cm of the tube shows above the body. This is your stem.
- Cut the jute twine into one 80 cm length. Hold the pumpkin so the stem is at the top and the seam at the bottom. Wrap the twine vertically around the pumpkin, pulling it gently so it sinks slightly into the fabric and creates a rib. Bring it back up and cross it at the top, then repeat in two more positions evenly spaced around the pumpkin. You will have 6 ribs total. Tie a knot or a small bow at the top, beside the stem, and trim the ends.

🛍 Shopping guide
Linen Drawstring Pumpkin with Dried Stem
Undyed natural linen has a quieter, more grown-up look than orange velvet, and this drawstring version needs only a rectangle of fabric and one length of cord.
The finished pumpkin sits in the 15-18 cm range and has a slightly flattened, heirloom shape that suits a bookshelf or a windowsill among other autumn objects. Tuck a cinnamon stick through the cord loop for a stem that smells as good as it looks.
Pack it flat between seasons without any special care.
What You Need
- Natural or undyed linen fabric, one rectangle 40 cm x 30 cm
- Linen thread or strong sewing thread to match
- Hand-sewing needle
- Waxed cotton cord or thin rope, 60 cm
- Polyester stuffing, approx 50 g
- 1 cinnamon stick, 8-10 cm
- A large safety pin (to thread the cord)
- Scissors
How to Make It
- Fold the linen rectangle in half with the right sides facing, so you have a piece 20 cm x 30 cm. Sew down one short side and along the long side, leaving the remaining short side open at the top. Use a 1 cm seam allowance. Turn the pouch right side out.
- Fold the top raw edge down by 1 cm, then fold again by another 1.5 cm to create a channel for the cord. Pin in place. Sew around the fold leaving a 1.5 cm gap unsewn: this is where the cord enters. Sew a second line of stitching 1 cm below the first to create a proper casing channel.
- Attach the safety pin to one end of the cord and thread it all the way around through the channel, exiting through the same gap. Knot both cord ends together so the cord cannot pull through.
- Pack the linen pouch firmly with stuffing until it feels solid and round. Pull the cord to gather the top closed. Adjust the stuffing so the sides are even and the base is relatively flat. Tie the cord in a firm double knot close to the gathered top.
- Thread the cinnamon stick through the cord loop that sits above the knot so it stands upright as a stem. Adjust the folds of the gathered top around it so the gathering looks even from all sides.
- To create ribs, thread a needle with a long doubled length of linen thread and push it through the centre bottom, up through the stuffing and out the centre top. Pull the thread around the outside in 5 or 7 equal vertical sections, looping back through the centre bottom each time, pulling each loop snug. Knot firmly and bury the thread end inside the stuffing.

🛍 Shopping guide
Sherpa Fleece Pumpkin with Twine Stem
Sherpa or teddy fleece makes the softest, chunkiest pumpkin in this collection: the kind a child genuinely wants to pick up and hold, but one that also looks considered on an adult mantel.
The cream-on-cream palette, as in the moodboard inspiration, photographs beautifully and works in modern, minimal rooms that would reject anything orange. Because fleece does not fray, there is no hemming: cut, stuff, divide and you are done. Store it anywhere soft; it survives compression well.
What You Need
- Cream or oatmeal sherpa or teddy fleece, 45 cm circle (draw around a dinner plate and a side plate for two sizes)
- Polyester stuffing, 60-80 g
- Button thread or strong thread, 2 m
- Hand-sewing needle
- Chunky jute rope or tightly rolled hessian, 8-10 cm for the stem
- Low-temp glue gun and glue sticks
How to Make It
- Cut a circle of sherpa fleece. The nap (fluffy side) should face outward when finished. Because fleece does not fray, raw edges need no finishing at all.
- Thread the needle with double button thread and knot the end. Sew a running stitch all the way around the circle, staying 1.5 cm from the edge. Fleece is thick, so use a slightly longer stitch, about 1.5 cm each, to keep the gathering manageable.
- Pull the thread to gather the circle into a pouch, filling with stuffing as the opening closes. Sherpa fleece conceals uneven stuffing well, but aim for a round, even ball. Pull the opening to about 2 cm, adjust the stuffing, then close and knot firmly.
- Thread a fresh 1.5 m length of button thread and knot the end. Push the needle through the gathered top centre, through the ball and out the bottom centre, then pull it back up alongside and knot at the top to anchor the dividing thread. Work the thread in 6 vertical sections around the outside, pulling each one firmly until it bites into the fleece and creates a visible rib. Knot at the top when all 6 ribs are done.
- An adult should use the glue gun: apply a generous dot of hot glue to the gathered centre top and press the jute rope or rolled hessian stem in firmly. Hold for 45 seconds. The glue needs to grip both the thread knot and the stem base. Once cool, the stem is secure.

🛍 Shopping guide
Felt Panel Pumpkin with Embroidered Vine
Six identical felt panels, whip-stitched together and stuffed, give a pumpkin with clean, graphic seams and the option to mix two shades: think terracotta panels alternating with dusty sage for a more contemporary effect.
A simple chain-stitch vine embroidered onto one or two panels before assembly is the detail that lifts this from craft-fair to keepsake.
This one takes longer than the gathered versions but rewards patience with a firmer, more structured shape that holds its form year after year. It suits a side table or a shelf where shape matters more than softness.
What You Need
- Wool felt or stiff craft felt, 30 cm x 45 cm in terracotta and 20 cm x 45 cm in dusty sage
- Pumpkin panel template (a rounded rectangle with pointed top and bottom, approx 8 cm wide x 14 cm tall at its fullest)
- Sharp fabric scissors
- Embroidery needle and embroidery floss in olive green and cream
- Strong thread or embroidery floss for whip-stitch joins, in terracotta or matching colour
- Polyester stuffing, approx 60 g
- A short twig or dried stem, 5-6 cm
- Low-temp glue gun and glue sticks
How to Make It
- Draw or print a panel template: a shape like a leaf with rounded sides, 8 cm at its widest and 14 cm tall. Cut 4 panels in terracotta and 2 in dusty sage. Stack them alternately when planning the join order: terracotta, sage, terracotta, terracotta, sage, terracotta, so the two sage panels face each other on opposite sides of the finished pumpkin.
- On two of the terracotta panels, embroider a simple curling vine in chain stitch using olive green floss before joining. Work from the pointed top downward, letting the vine curve naturally. Add one or two tiny leaf shapes in satin stitch. This step is optional but takes only 10-15 minutes and makes the finished piece look considered.
- Pin two panels together along one long curved edge, right sides out (felt is the same on both sides). Whip-stitch along the edge using matching thread, keeping stitches 3-4 mm apart and 3 mm from the edge. Add a third panel to the free edge of the second, then a fourth, fifth and sixth. After the fifth panel is attached, begin stuffing the pumpkin from the top before closing the last seam: felt panels are stiff and allow less give than other methods.
- Once the stuffing feels firm and even, join the last seam from bottom to top, stopping 3 cm from the top point. Add any remaining stuffing with a pencil or chopstick to fill the upper portion, then finish closing the seam. The top and bottom pointed tips should meet cleanly and hold their shape without gaps.
- At the top, pinch the six panel tips together and bind them with a short length of floss to keep them neat. An adult should use the glue gun to attach a small twig stem, pressing it into the bound tips and holding for 30 seconds.

🛍 Shopping guide
Stuffed Velvet Ribbon Pumpkin
Long velvet ribbons, folded and layered over a polystyrene ball, create a pumpkin with deeply defined ribs and a rich, jewel-like surface. No sewing at all.
The technique works on any ball size from 8 cm to 20 cm, which means one pack of ribbon makes a whole family of pumpkins.
Choose ribbons in complementary tones: a burnt orange wired velvet ribbon alongside a copper satin makes the finished piece look layered and deliberate. A tall dried grass stem pushed through the centre top finishes it.
Display on a mirror tray or nest in a bowl of acorns.
What You Need
- 1 polystyrene or foam ball, 12 cm diameter
- Wired velvet ribbon, 38 mm wide, 2 m in burnt orange
- Plain or satin ribbon, 25 mm wide, 1 m in copper or deep amber
- Low-temp glue gun and glue sticks
- Straight pins, 20
- Dried grass stem or small twig, 8-10 cm
- Scissors
How to Make It
- Find the top and bottom centres of the foam ball: push a pin into each to mark them. These become the anchoring points for all the ribbon runs.
- Cut the velvet ribbon into 8 equal lengths, each long enough to run from the top pin, over the widest part of the ball, to the bottom pin, with 1 cm extra at each end. For a 12 cm ball this is approximately 22 cm per strip. An adult should use the glue gun for all the following steps.
- Apply a thin line of hot glue from the top pin down one side of the ball to the bottom pin. Press the first ribbon strip over this glue line, centring it so equal fabric covers each side of the glue line. Pin both ends at the top and bottom pins. Work quickly as hot glue sets fast.
- Repeat with the remaining 7 strips, spacing them evenly around the ball so they all meet at the two poles. Each strip should overlap slightly at the edges but sit flat: the ball should be completely covered when all 8 are in place. If gaps show, tuck the wired ribbon edges inward with a pin.
- Cut the copper ribbon into 8 shorter strips, 12 cm each. Weave each one vertically between the velvet strips at the equator of the ball, folding each end under and pinning flat. This creates a contrasting band around the middle that also hides any raw edges.
- Push the dried grass stem or twig into the top centre, through all the ribbon ends, into the foam. If it feels loose, add a small dot of glue around the base of the stem before inserting.

🛍 Shopping guide
Fabric Scrap Patchwork Pumpkin
A satisfying use for the pile of autumn-coloured fabric scraps that never quite found a project.
Eight fabric wedges, each in a different warm print or texture, are sewn together into a ball and stuffed: the result is a pumpkin that feels bespoke and slightly artisan, like something from a market stall.
Limit the palette to the burnt orange and cream end of the spectrum so the patchwork reads as intentional rather than random. This is a good project for a sewing beginner since all the seams are straight or gently curved.
What You Need
- Fabric scraps in 4-8 different textures or prints, each at least 12 cm x 18 cm, in autumn tones
- Pumpkin wedge template: a pointed oval shape, 10 cm wide x 16 cm tall
- Sewing machine or hand-sewing needle and strong thread
- Polyester stuffing, 70 g
- Matching or toning thread
- A short cinnamon stick or twig, 6 cm
- Low-temp glue gun and glue sticks
- Scissors and pins
How to Make It
- Cut 8 wedge shapes from your fabric scraps, mixing textures freely. The template is a pointed oval: widest at the middle, tapering to a gentle point at top and bottom. Press each piece flat with an iron before cutting for cleaner edges.
- Pin two wedges right sides together along one long curved edge. Sew with a 1 cm seam allowance, easing the fabric around the curve with your fingers as you go. If you are hand-sewing, use small, even running stitches about 4-5 mm long. Press the seam open or to one side.
- Add the remaining wedges one by one in the same way until you have joined all 8 into a ring. The ring will begin to curve into a ball shape naturally. Before sewing the final seam that closes the ring, check that the top and bottom points of all wedges align reasonably well.
- Sew the last seam from the bottom point upward, leaving a 6 cm gap unsewn near the top. Turn the pumpkin right side out through this gap: the seams will be inside. Stuff firmly through the gap until the pumpkin holds its shape.
- Close the gap with a ladder stitch (bring the needle through one side of the gap, across to the other, repeat, and pull the thread to close the fabric together invisibly). Knot firmly when closed.
- An adult should use the glue gun to attach the stem. Apply a dot of glue to one end of the cinnamon stick or twig and push it firmly into the top point of the pumpkin. Hold for 30 seconds.

🛍 Shopping guide
Wire-Frame Fabric Lantern Pumpkin
This one is genuinely different from everything else in the list: a wire ring frame wrapped with torn fabric strips produces an open, airy pumpkin silhouette rather than a solid stuffed shape. Drop a battery tea light inside and it glows.
The fabric strips catch the light and the wire frame gives it a graphic outline that looks sculptural on a dark shelf or in a window at dusk.
Choose wide-cut strips of velvet, linen or cotton in warm tones and wrap them loosely so the wire shows through in places. This craft needs adult hands for the wire bending, but the fabric-wrapping step suits children 8 and up.
What You Need
- Galvanised wire or florist wire, 1.5 mm gauge, 5 m
- Wire cutters and round-nose pliers
- Fabric strips torn from cotton or linen, 2-3 cm wide, in burnt orange and cream, totalling approx 3 m of strips
- 1 battery-operated tea light (the flickering type)
- 1 short dried stick, 6-8 cm, for the stem
- A small piece of florist tape or masking tape to bind the top of the frame
How to Make It
- An adult must handle all wire work. Cut four lengths of wire, each 60 cm. Hold all four together at their midpoints and twist them around each other 3-4 times at the centre to form a tight hub. Splay the eight wire ends outward like spokes.
- Bend each spoke into a gentle outward arc: hold the wire about 15 cm from the hub and curve it upward and out, then downward. The shape should resemble the ribs of a round lantern. Bring all eight ends together and twist them at the top, forming a second hub. Bind the top hub firmly with florist tape. The frame should be roughly 14 cm tall and 16 cm wide at its widest.
- Tear the fabric into strips 2-3 cm wide and 30-40 cm long. Begin wrapping a strip around one wire rib from the bottom hub to the top hub, stretching it slightly as you wrap so it clings. Knot or tuck the end into a previous wrap. There is no right or wrong way to wrap: overlapping and leaving gaps both look good.
- Continue wrapping ribs until the frame has a mix of densely wrapped and lightly wrapped sections. Leave at least two ribs only lightly covered so light passes through when the tea light is inside.
- Set the tea light inside the bottom of the frame. It will sit between the wire ribs. Tuck the dried stick into the top hub binding for a stem. The lantern pumpkin is not glued; everything is held by the wire frame, so it disassembles easily for storage.

🛍 Shopping guide
Painted Hessian Pumpkin with Botanical Print
Hessian has a rough, honest texture that most decorators overlook, and a gathered hessian pumpkin painted with a simple leaf or botanical print in cream or sage is the kind of thing that looks expensive and handmade at the same time.
The paint is applied before the fabric is cut, which is far less fiddly than painting a three-dimensional object. This suits a front door display, a harvest table or a large bookcase: hessian is sturdy enough for outdoor use if kept under a porch roof.
Store flat between seasons since hessian creases back out with a steam iron.
What You Need
- Natural hessian fabric, 50 cm x 50 cm
- Fabric paint in cream and sage green, 30 ml each
- A flat paintbrush, 1 cm wide
- Leaves or botanical stamps (or use a real leaf as a stamp)
- Sponge brush or cosmetic sponge
- Button thread, 2 m
- Large-eye needle
- Polyester stuffing, 80 g
- A thick twig, 6-8 cm, for the stem
- Low-temp glue gun and glue sticks
How to Make It
- Lay the hessian flat. Brush a thick, slightly uneven wash of cream fabric paint across one half of the fabric using the sponge brush. Let it dry to the touch, about 20 minutes. The texture of hessian will trap the paint unevenly, which adds rather than detracts.
- Apply sage green fabric paint to a real leaf (a bay leaf, eucalyptus or ivy works well) and press it firmly onto the cream-painted hessian. Lift cleanly. Repeat 3-5 times in a loose cluster pattern. Leave the whole piece to dry fully, at least 40 minutes, before cutting.
- Cut a 45 cm circle from the painted hessian, centring the botanical print roughly in the middle. Thread the needle with double button thread and knot the end. Sew a running stitch 1.5 cm from the raw edge all the way around. Hessian frays, so work quickly and keep the stitches close to the edge rather than straying inward.
- Gather the thread until the circle begins to form a pouch and fill with stuffing as you tighten. Pull the gathering closed to within 2-3 cm of the opening. Stuff any remaining gaps then close the opening and knot firmly. The botanical print should be visible on the front face of the finished pumpkin.
- Divide into 6-8 ribs using a separate length of thread as described in the Gathered Velvet Circle Pumpkin method. An adult should use the glue gun to attach the twig stem into the gathered top centre. Leave for 1 minute before moving.

🛍 Shopping guide
Knotted Macrame Cotton Pumpkin
Chunky cotton macrame cord, shaped into a ball by knotting and compressing rather than sewing, gives a pumpkin with an entirely different character: cream, textural, slightly sculptural, sitting halfway between boho and understated. There is no fabric to cut and no needle.
Square knots hold the shape; stuffing holds the form. The finished size depends on how much cord you use, and the method scales from a 10 cm table accent to a 22 cm statement piece.
Sit it in a ceramic bowl or on a slice of wood.
What You Need
- Natural cotton macrame cord, 5 mm single strand, 15 m
- Scissors
- Polyester stuffing, 60 g
- Jute twine, 1 m
- A cinnamon stick or thick twig, 6-8 cm
- Low-temp glue gun and glue sticks
How to Make It
- Cut 8 lengths of cord, each 150 cm. Fold all 8 in half and tie an overhand knot at the fold: this becomes the bottom centre of the pumpkin. You now have 16 working strands hanging from one central knot.
- Divide the strands into 4 groups of 4. Work a row of square knots: take the two outer strands of each group, cross the left strand over the two middle strands and under the right, then pull the right strand under the middle and up through the loop on the left side. Pull snug. This is one square knot. Work one square knot per group, so 4 knots in the first row.
- Move down 3 cm and work an alternating row: pick up 2 strands from adjacent groups so the knots fall between the first-row knots. Work 4 more square knots in this second row. Repeat for 2 more alternating rows. You will have 4 rows total and a flat, knotted panel that already cups slightly.
- Cup the panel into a ball shape with your hands. Push a generous ball of stuffing into the centre and draw all the strands up over the top, gathering them to close the pumpkin. When the shape looks round and full, tie all the strands together in a firm overhand knot at the top.
- Trim the cord ends to about 4 cm above the knot. These form the stem area. Wrap them tightly with a 30 cm piece of jute twine, winding from the knot upward, to make a neat stem shape. Tie off and trim.
- Divide the pumpkin into ribs by cutting 6 lengths of jute, each 40 cm, and threading each one from the top knot down over the side and under the bottom knot, pulling it taut. Tie the top and bottom ends of each jute length together and hide the knots against the base. An adult can use a hot glue dot to secure any loose jute ends.

Felted Wool Ball Pumpkin
Wet felting transforms a ball of raw wool roving into a solid, seamless pumpkin shape in about an hour, and the result has a matte, almost stone-like surface that is completely different from anything sewn or stuffed.
The colour possibilities are vast since roving comes in every autumn shade imaginable: rust, ochre, warm taupe, dusty rose. A few thin layers of sage roving felted over the base colour add depth without obscuring it.
This is one of the messier crafts in this collection since it uses hot water, but the mess stays at the sink. Finished pumpkins need 24 hours to dry fully.
What You Need
- Wool roving in burnt orange, approx 50 g per medium pumpkin
- Wool roving in sage green, 10 g (for detail layers)
- A round balloon, inflated to 10-12 cm diameter
- Hot water and a small bowl
- Washing-up liquid, 1 teaspoon
- A towel
- Strong thread or rubber bands for the stem area
- A short dried twig, 5 cm
- Low-temp glue gun and glue sticks
How to Make It
- Inflate the balloon to 10-12 cm diameter and knot it. This is your shaping mould. Mix the hot water with a teaspoon of washing-up liquid in the bowl: the water should be as hot as your hands can comfortably tolerate.
- Pull the orange wool roving into thin strips and begin wrapping it around the balloon in all directions, building up a roughly even layer about 1 cm thick. The fibres do not need to look perfect at this stage: they will compact as you felt them.
- Dip your hands in the hot soapy water and begin rubbing the wool layer on the balloon firmly with circular motions. Work all over the surface. After 5 minutes the fibres will start to mat and tighten. Add thin wisps of sage roving and felt them into the surface at this point: they will sink into the base colour rather than sitting on top.
- Continue rubbing and compressing for 20-30 minutes, adding more hot water as needed to keep the surface slick. The ball is ready when the wool feels firm, holds its shape when you press it, and the balloon moves freely inside the wool shell.
- Pierce the balloon with a pin and let it deflate. The wool shell will be a hollow sphere. Stuff it with polyester filling pressed in through the balloon knot hole, which leaves a small natural opening. When firmly stuffed, close the opening with a few hand stitches or bind it tightly with strong thread.
- Bind the top area of the sphere tightly with a rubber band or thread to create a slight neck: this is where the stem attaches and gives the pumpkin its characteristic top indent. Leave to dry completely on a towel, 24 hours at minimum. Do not rush this with a hairdryer as the shape may distort.
- Once dry, divide the sphere into 5 or 6 ribs by running strong thread from the bound top, down over the outside, and under the base: tie each one just firmly enough to indent the felt without cutting through it. An adult should use the glue gun to push a short twig into the bound top for a stem.

🛍 Shopping guide
Quilted Cotton Pumpkin with Batting Layer
A quilted pumpkin has a subtle raised diamond or square pattern pressed into its surface that catches low autumn light beautifully.
The method layers quilting cotton with a thin batting layer, quilts them together with simple parallel stitching on a machine, then cuts and assembles the pumpkin as a six-panel shape.
The finished piece has a slightly flattened, wide profile rather than a tall round one, which suits a table centrepiece or a window seat. This one takes the longest of any in the collection but produces the most polished result.
What You Need
- Quilting cotton, 50 cm x 60 cm in warm amber or rust
- Thin cotton batting or wadding, 50 cm x 60 cm
- Backing fabric (any plain cotton), 50 cm x 60 cm
- Sewing machine with quilting foot or walking foot
- Matching thread
- Pumpkin panel template: 6 panels, each 9 cm wide x 16 cm tall
- Polyester stuffing, 80 g
- A short thick twig, 6-8 cm
- Low-temp glue gun and glue sticks
How to Make It
- Layer the three fabrics: backing fabric right side down, then batting, then quilting cotton right side up. Pin or baste all three layers together across the whole piece before cutting. Machine-stitch parallel diagonal lines across the layered fabric, spacing them 3 cm apart, then stitch a second set of parallel lines at 90 degrees to the first to create a diamond grid. This is the quilting step and takes 15-20 minutes on a machine.
- Place the quilted fabric cotton-side up and cut 6 panel shapes using the template, arranging them so the quilted diamond grid is visible and runs consistently across all panels. Press each panel lightly with an iron on a low setting.
- With right sides facing, pin two panels together along one long curved edge. Machine-stitch with a 1 cm seam. Add a third panel, a fourth, fifth and sixth in the same way. After the fifth panel, leave a 7 cm gap near the top of the last seam for stuffing.
- Join the sixth panel to the first to close the ring: sew from the bottom point upward stopping at the stuffing gap. Turn the pumpkin right side out through the gap. The quilted surface should now be the outside.
- Stuff firmly through the gap. The quilted layers are stiffer than plain fabric, so the pumpkin will want to hold a good round shape once fully stuffed. Close the gap with a ladder stitch as described in the Fabric Scrap Patchwork Pumpkin method.
- An adult should use the glue gun to attach the twig stem to the top point, pressing firmly for 30 seconds. A wrapped loop of jute twine around the base of the stem adds a finishing detail.

🛍 Shopping guide
Tied Bandana Pumpkin
A cotton or linen bandana, or a 50 cm fabric square hemmed to a similar size, wraps around a ball of stuffing and ties at the top into a stem. No sewing is required: the whole thing holds by the tension of the knot.
The finished pumpkin has a casual, farmhouse feel that suits a basket of apples on a kitchen worktop or a front porch display.
Pick bandanas in warm terracotta, dusty plum or cream with a simple printed border, and cluster three together for a grouping that takes about ten minutes to assemble.
What You Need
- 1 cotton or linen square, 50 cm x 50 cm (a bandana or cut fabric square)
- Polyester stuffing or a scrunched plastic bag, approx a large double handful
- Jute twine, 60 cm
- A small sprig of dried eucalyptus or dried herb, optional
How to Make It
- Lay the fabric square flat. Place the stuffing in the centre, shaping it roughly into a ball as you pile it up. The mound of stuffing should be about 12-14 cm across.
- Gather all four corners of the fabric upward over the stuffing and hold them together above the mound. Twist the gathered fabric tightly so the stuffing is compressed into a firm ball below the twist.
- Tie the jute twine around the twisted fabric just above the stuffing ball, pulling firmly. Knot twice. The fabric above the knot becomes the stem: trim or tuck it as you like. If you trim, cut across at an angle for a more stem-like shape.
- Adjust the stuffing ball below the knot by pressing and shaping through the fabric until it looks evenly round. The fabric will fall in folds that suggest the ribs of a pumpkin: pulling the fabric taut in four or six places around the equator and tucking it gently inward at each point makes the ribs more pronounced.
- Tuck a sprig of dried eucalyptus under the twine knot against the stem for a botanical finish.

🛍 Shopping guide
Fabric-Covered Cardboard Box Pumpkin
A cardboard cylinder or a round box base becomes the inner structure of this pumpkin, giving it a perfectly flat bottom so it stands without wobbling on any surface.
Velvet or boucle fabric is stretched and glued over the outside, then cinched with thread to create ribs. This approach is ideal for anyone who finds stuffed fabric shapes hard to control: the cardboard holds the form and the fabric covers it.
Finished pumpkins work well as gift boxes, with a small treasure hidden inside.
What You Need
- A round cardboard box or cylinder, 10-15 cm diameter and 8-12 cm tall
- Velvet or boucle fabric, enough to wrap around the box with 5 cm extra on all sides
- Low-temp glue gun and glue sticks
- Button thread, 1 m
- A large needle
- A cinnamon stick or thick twig, 6-8 cm, for the stem
- Scissors
How to Make It
- Place the box in the centre of the fabric, wrong side up. Cut the fabric so it extends 5 cm beyond the box edges on all sides. An adult should use the glue gun for all gluing steps.
- Apply hot glue to the side of the box and smooth the fabric around it, pulling it taut as you work around the circumference. Overlap any excess and glue it flat. The fabric should sit smoothly on the side with no bubbles or puckers.
- Fold the excess fabric neatly over the top and bottom edges of the box, mitreing the fabric at regular intervals as you would wrap a gift, and glue all flaps down. The inside of the box does not need to be covered unless you plan to use it as a gift box.
- Once the glue is set (5-10 minutes), thread the needle with double button thread and push it through the fabric and cardboard at the very centre of the top, then back out through the centre bottom. Pull the thread tight so it bites into the top and bottom of the cylinder. Work 5 or 7 vertical thread loops from top to bottom around the outside, pulling each one firmly so it presses into the fabric and creates a rib. Knot all threads together at the top.
- An adult should glue the cinnamon stick or twig over the thread knot at the top centre for a stem. Wrap the stem base with a short piece of jute twine and glue to neaten.

🛍 Shopping guide
Rust Linen Pillow Pumpkin for a Sofa
Scale up the pumpkin concept and it becomes a throw pillow: a 35 cm gathered linen disc that sits comfortably on a sofa or an armchair and reads as a decorative cushion from across the room.
The construction is the same gathered-circle method used for the velvet pumpkin, but the scale changes everything. The ribs are worked with upholstery thread and pulled firmly so they are visible but do not distort the pillow’s comfort.
This one stays out all season because it earns its place as furniture, not just decoration. Check the Halloween crafts at 16 Halloween DIY Crafts That Look Like You Bought Them if you want a companion piece.
What You Need
- Rust or terracotta medium-weight linen, 80 cm x 80 cm
- Upholstery thread or strong linen thread, 3 m
- Large upholstery needle
- Polyester cushion filling or foam chips, 200 g
- A thick short twig or wrapped cord bundle, 10-12 cm, for the stem
- Low-temp glue gun and glue sticks
- A compass or a large bowl (35 cm) to draw the circle
How to Make It
- Draw a 70 cm diameter circle on the wrong side of the linen (use a piece of string tied to a pencil, fixed to the centre point with a pin, to draw a true circle). Cut out the circle. A circle this size will finish at approximately 35 cm diameter as a pillow.
- Thread the upholstery needle with a long double length of upholstery thread and knot the end firmly. Work a running stitch 2 cm from the raw edge of the entire circle, using 1.5 cm stitches. Work slowly and keep the distance from the edge consistent: at this scale, irregular gathering shows more than it does on a small pumpkin.
- Begin pulling the thread to gather the circle into a large pouch. Feed the cushion filling in as the opening narrows: this is a two-handed job and slightly fiddly because the linen is stiff. Aim for a very firm fill: the pillow should resist your palm when pressed. Pull the gathering closed to about 3 cm and knot twice to secure.
- Thread a fresh 2 m length of upholstery thread and knot it at the gathered top. Push the needle through the gathered centre, through the pillow, and out the centre bottom. Work 6 rib sections around the outside, pulling each one firmly enough to create a visible groove without cutting through the linen. Knot all the thread ends at the bottom centre and bury the knot inside the pillow with the needle.
- An adult should use the glue gun to attach the stem to the gathered top. A thick twig, a rolled piece of hessian or a cinnamon bundle tied with jute all work at this scale. Hold the stem in place for a full minute given the larger surface area of the glue joint.

🛍 Shopping guide
Scented Lavender-Filled Muslin Pumpkin
A small gathered muslin pumpkin filled with dried lavender and a handful of polyester stuffing for shape is the autumn equivalent of a drawer sachet: it smells wonderful, it looks like a proper decoration and it costs almost nothing.
Set it on a bedside table, tuck it inside a wardrobe or nestle it among candles on a bathroom shelf. Muslin is thin and the lavender fragrance passes through it easily.
This is the first pumpkin in this collection that has a genuinely practical afterlife beyond decoration.
What You Need
- Undyed muslin, 35 cm circle per pumpkin
- Dried lavender, 3 tablespoons per pumpkin
- Polyester stuffing, small handful
- Cotton sewing thread and needle
- Ribbon in sage or cream, 40 cm, 10-15 mm wide
- A short cinnamon stick, 4-5 cm
How to Make It
- Cut a 35 cm circle of muslin: this is the one craft in the collection where a slightly irregular circle genuinely does not matter since the gathering will conceal it. Thread the needle with a double length of thread and knot the end.
- Work a running stitch 1 cm from the raw edge all the way round. Mix the lavender and stuffing together in a small bowl: the stuffing holds the lavender in suspension and prevents the finished pumpkin from feeling flat.
- Gather the thread slightly, enough to cup the fabric, then spoon the lavender and stuffing mixture into the cup. Aim for about two-thirds full: too much stuffing makes the gathering hard to close. Pull the gathering closed and knot firmly.
- Divide into 5 ribs using a separate thread length looped top to bottom, pulled just firmly enough to indent the soft muslin. Knot at the top.
- Tie the ribbon into a small bow and stitch or knot it around the cinnamon stick. Tuck the cinnamon stick into the top ribs of the pumpkin so it sits upright: the ribbon will cover the gathering knot and the cinnamon adds its own warm scent to the lavender.

🛍 Shopping guide
Frequently Asked Questions
What is the best fabric for a fabric pumpkin DIY?
Velvet, boucle and sherpa fleece give the most polished results because their texture hides uneven gathering and reads well from across a room. Hessian and linen suit a more rustic look and are easier to source by the metre. Avoid very stretchy fabrics such as jersey since they distort unevenly when pulled into a gathered shape.
Do fabric pumpkins need to be sewn?
No. Several methods in this collection use no sewing at all: the sock pumpkin uses only twine, the bandana pumpkin needs only a knot, and the velvet ribbon pumpkin over a foam ball relies on pins and hot glue. Even the gathered velvet pumpkin needs only a basic running stitch that most beginners can manage.
How do you store fabric pumpkins between seasons?
Most fabric pumpkins store well in a lidded box or a cotton bag. Velvet and boucle versions do not need to be stored flat: they hold their shape well under light compression.
The pillow pumpkin can be used as a regular cushion year-round or stored in a linen bag. Avoid plastic bags for storage since they trap moisture and can cause muslin and hessian to smell musty.
Can children make fabric pumpkins?
Yes, with the right project. The sock pumpkin suits ages 8 and up with no adult steps. The bandana pumpkin works from age 7. Any project using a hot glue gun or wire needs an adult to handle those specific steps, though children can do the fabric-wrapping and stuffing independently.
How do you make fabric pumpkin ribs?
The most reliable method is to thread a long needle with strong button thread or upholstery thread, push it through the centre of the gathered top, through the stuffing and out through the centre bottom, then bring it back up alongside the entry point to anchor it.
Work the thread in equal sections around the outside of the pumpkin, pulling each loop from top to bottom and pulling firmly so it bites into the fabric. Five to eight sections give the best pumpkin shape.
What can I use as a fabric pumpkin stem?
Cinnamon sticks are the most popular choice because they add scent as well as texture. Short dried twigs, a bundle of dried grass stems tied with twine, a piece of thick jute rope, or a tightly rolled piece of hessian all work well.
For the sock pumpkin, the ribbed ankle of the sock itself becomes the stem with no additional materials needed.
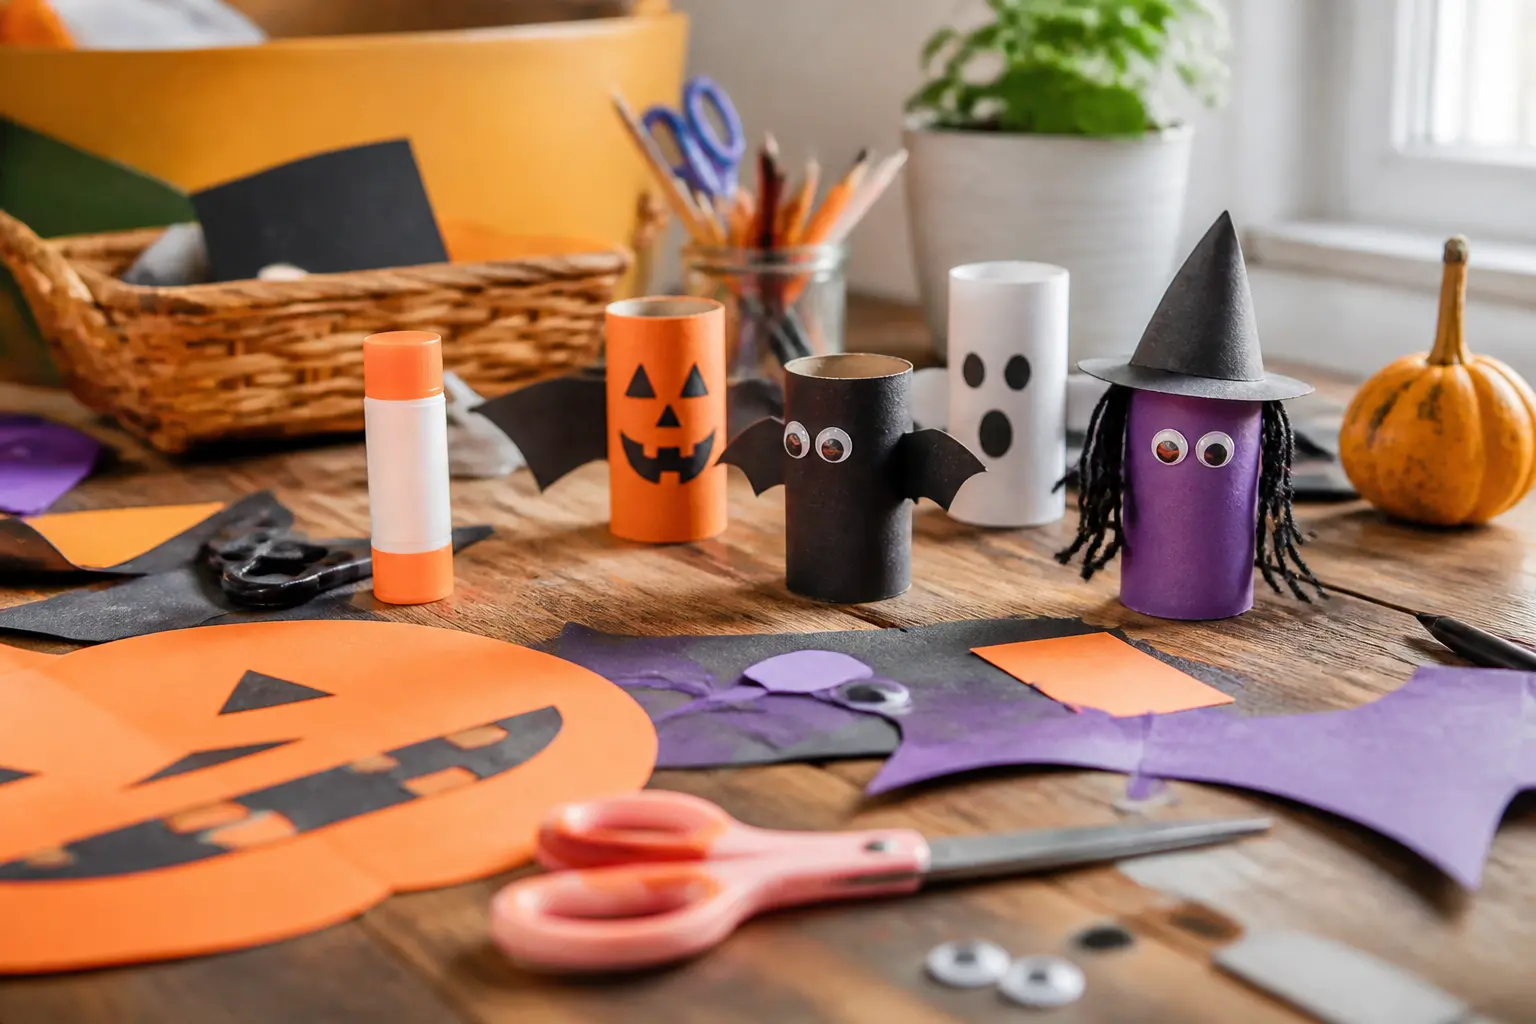
22 Halloween crafts for elementary kids that use real techniques and materials you can grab in one s

15 gentle toddler Halloween party games with zero scares — just big giggles, easy setup, and free
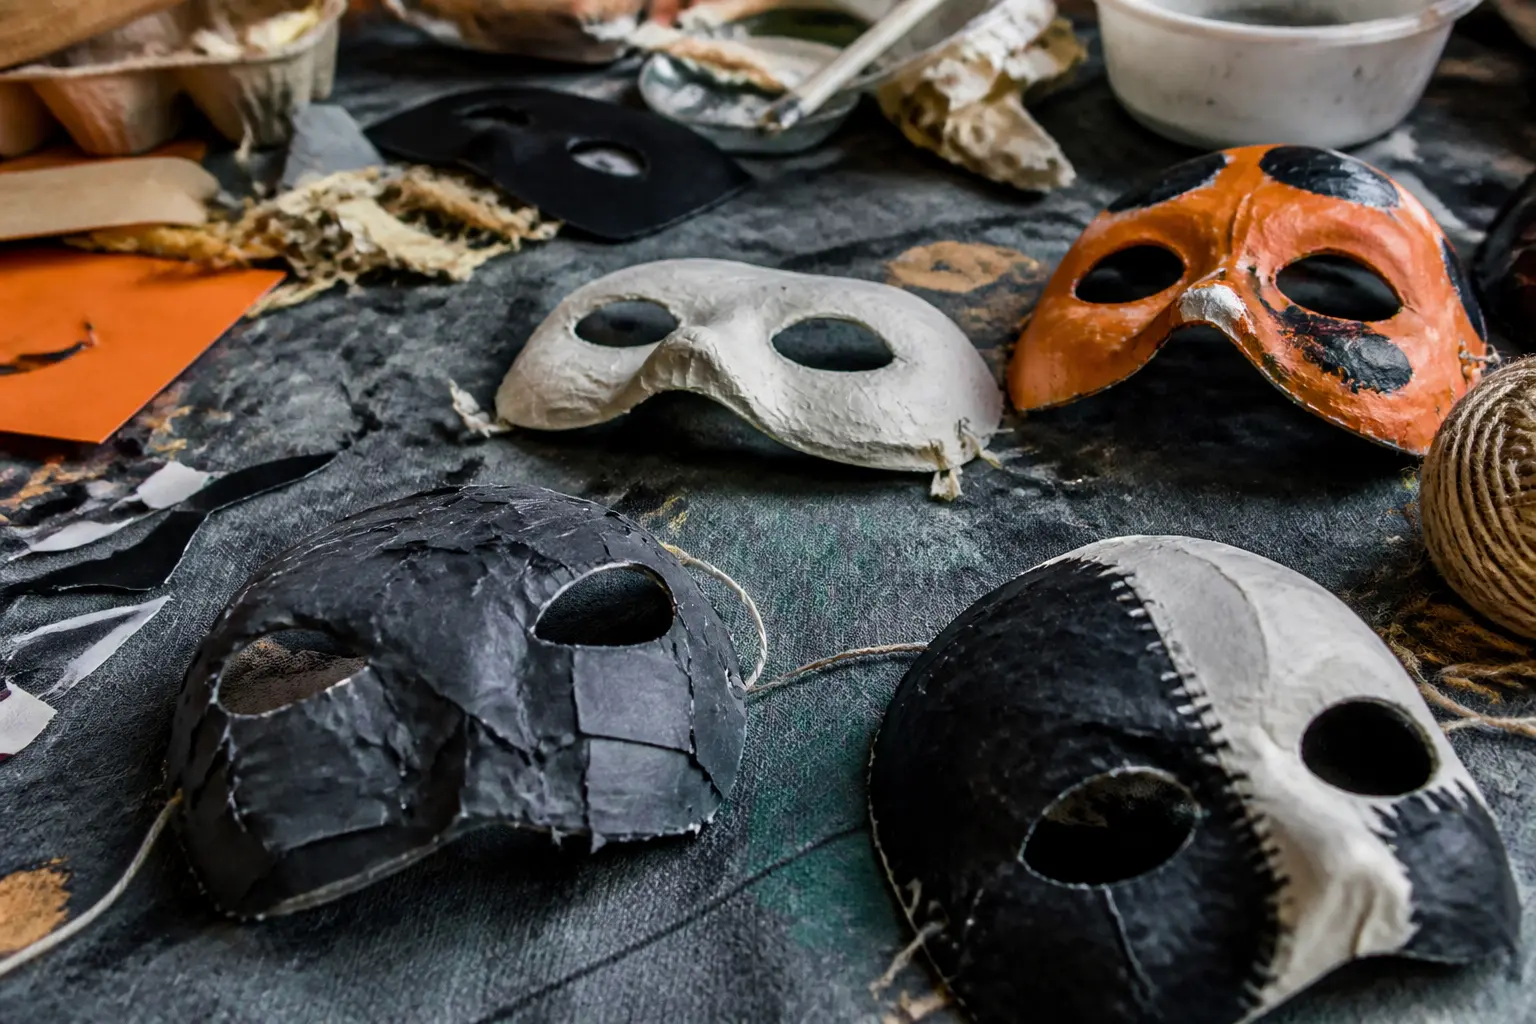
18 DIY Halloween masks to make for kids and adults, from papier-mache celestial forms to layered lea
Leave a Reply