

18 DIY Halloween Masks for Kids and Grown-Ups That Stay On Past the First Photo
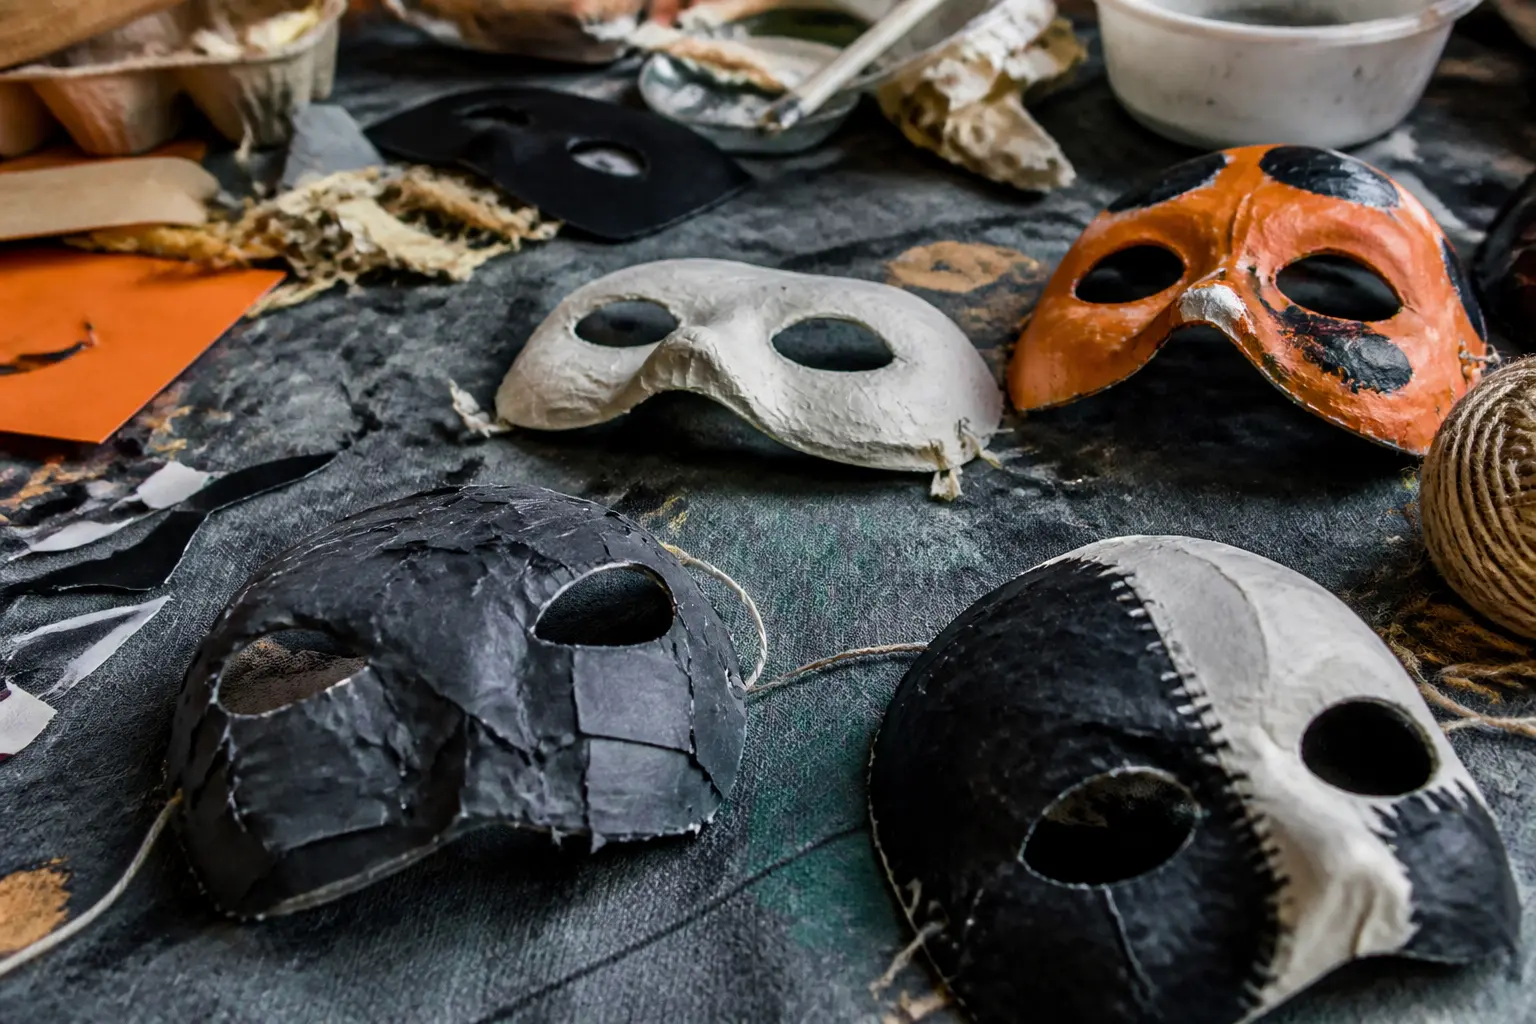
Halloween masks diy searches spike every autumn, but most of the results are the same five tutorials recycled with a new thumbnail. These eighteen are not that. They are drawn from the corner of Halloween craft that cares about texture, finish and wearability, where a mask is closer to a small sculpture than a face-paint job.
The techniques here range from a twenty-minute foam-and-paint half-mask to a multi-session papier-mache full face that could hang on the wall afterwards. Some suit a six-year-old with scissors and a parent nearby. Others reward an adult who wants something genuinely impressive. All of them stay on, because an elastic band or a ribbon tie is built into each method from the start, not glued on as an afterthought.
If you are also planning the party around the costumes, these all-ages Halloween games and these budget-friendly DIY party games make a natural companion read once you have settled the masks.
This post contains affiliate links. If you buy through them, I may earn a small commission at no extra cost to you.
Papier-Mache Full Masks
Papier-mache is the foundation of the most sculptural masks here. The process takes a weekend, but the result is rigid, lightweight and completely personalised to the wearer’s face. Balloon moulds work for rounder forms; a plastic mask blank from a craft store works for anything that needs accurate eye placement from the start.
The finish is what sets these apart from school-project territory. Sand between layers, prime with gesso and the surface takes paint, metallic powder or crinkled tissue exactly as you intend it to.
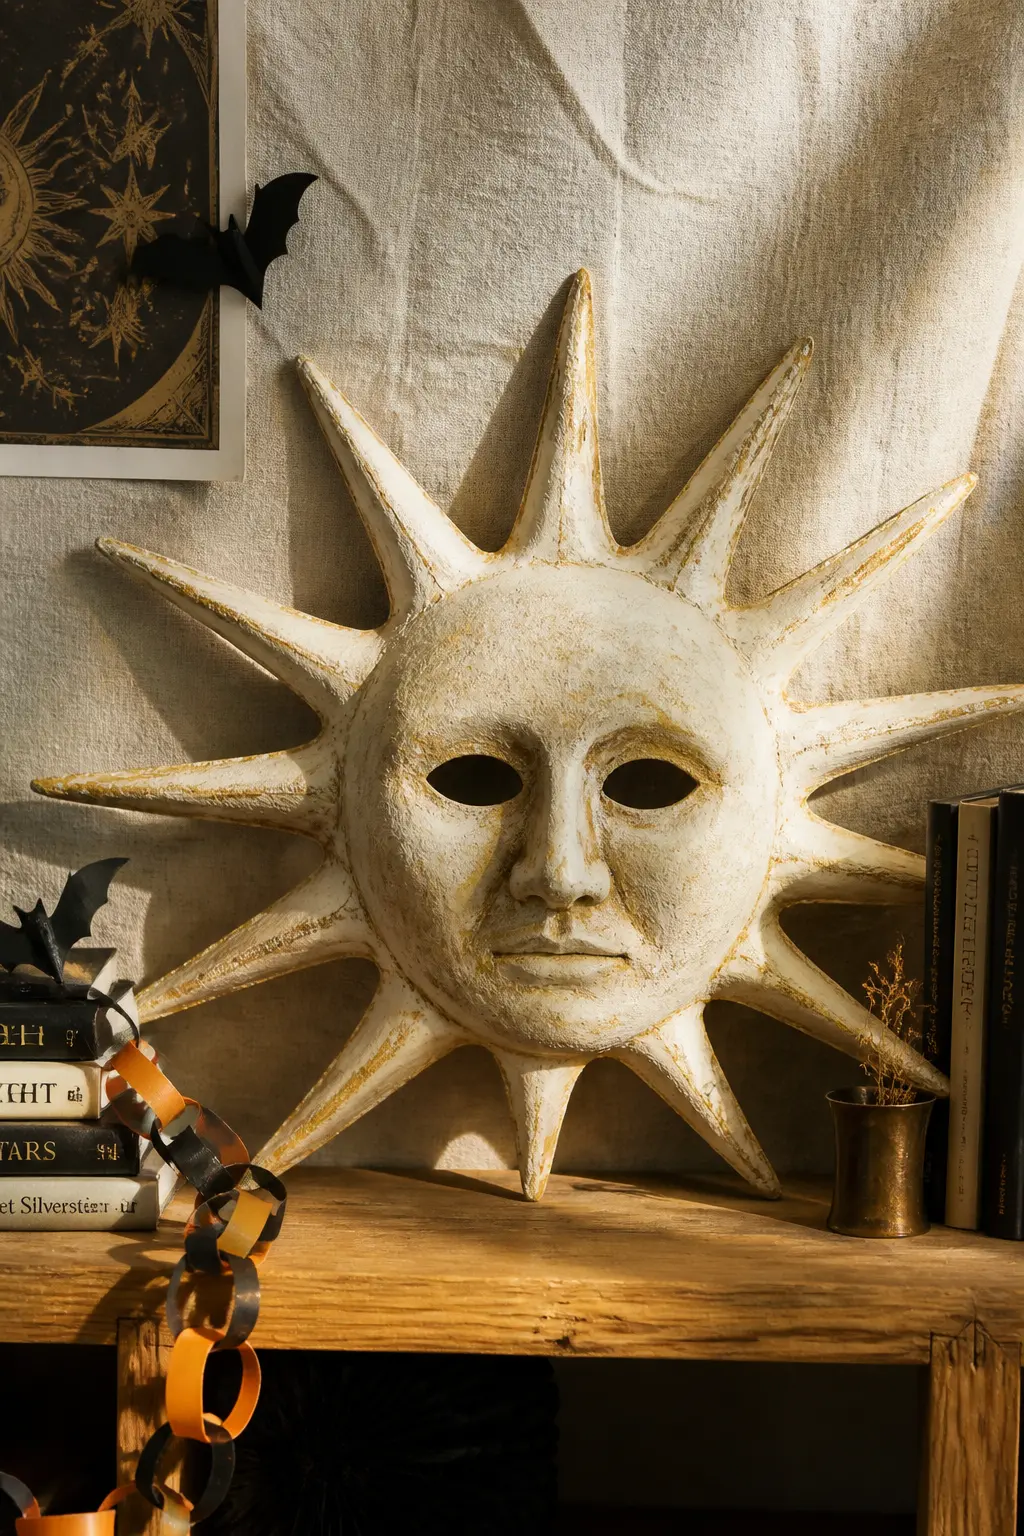
Papier-Mache Sun God Mask
Build the base face over a balloon inflated to roughly head size, taping a cardboard nose cone in place before the first layer of paste goes on. Use flour-and-water paste rather than PVA for the first two layers: it dries more slowly, which means fewer bubbles. Four layers total, each one dried completely before the next.
The rays are the sculptural moment. Cut long tapered triangles from thick cardboard, score the bases and tape them radially around the top and sides of the cured face. Cover the joins with two more paste layers and sand the whole surface once dry. Prime with white gesso, then paint in bone and raw umber, building up the wrinkled texture with crinkled tissue pressed into the final paste layer before it sets.
Attach a wide elastic band through two small holes at the temples, knotted on the inside. The mask will hold its own weight without pressing on the nose.
🛍 Shopping guide
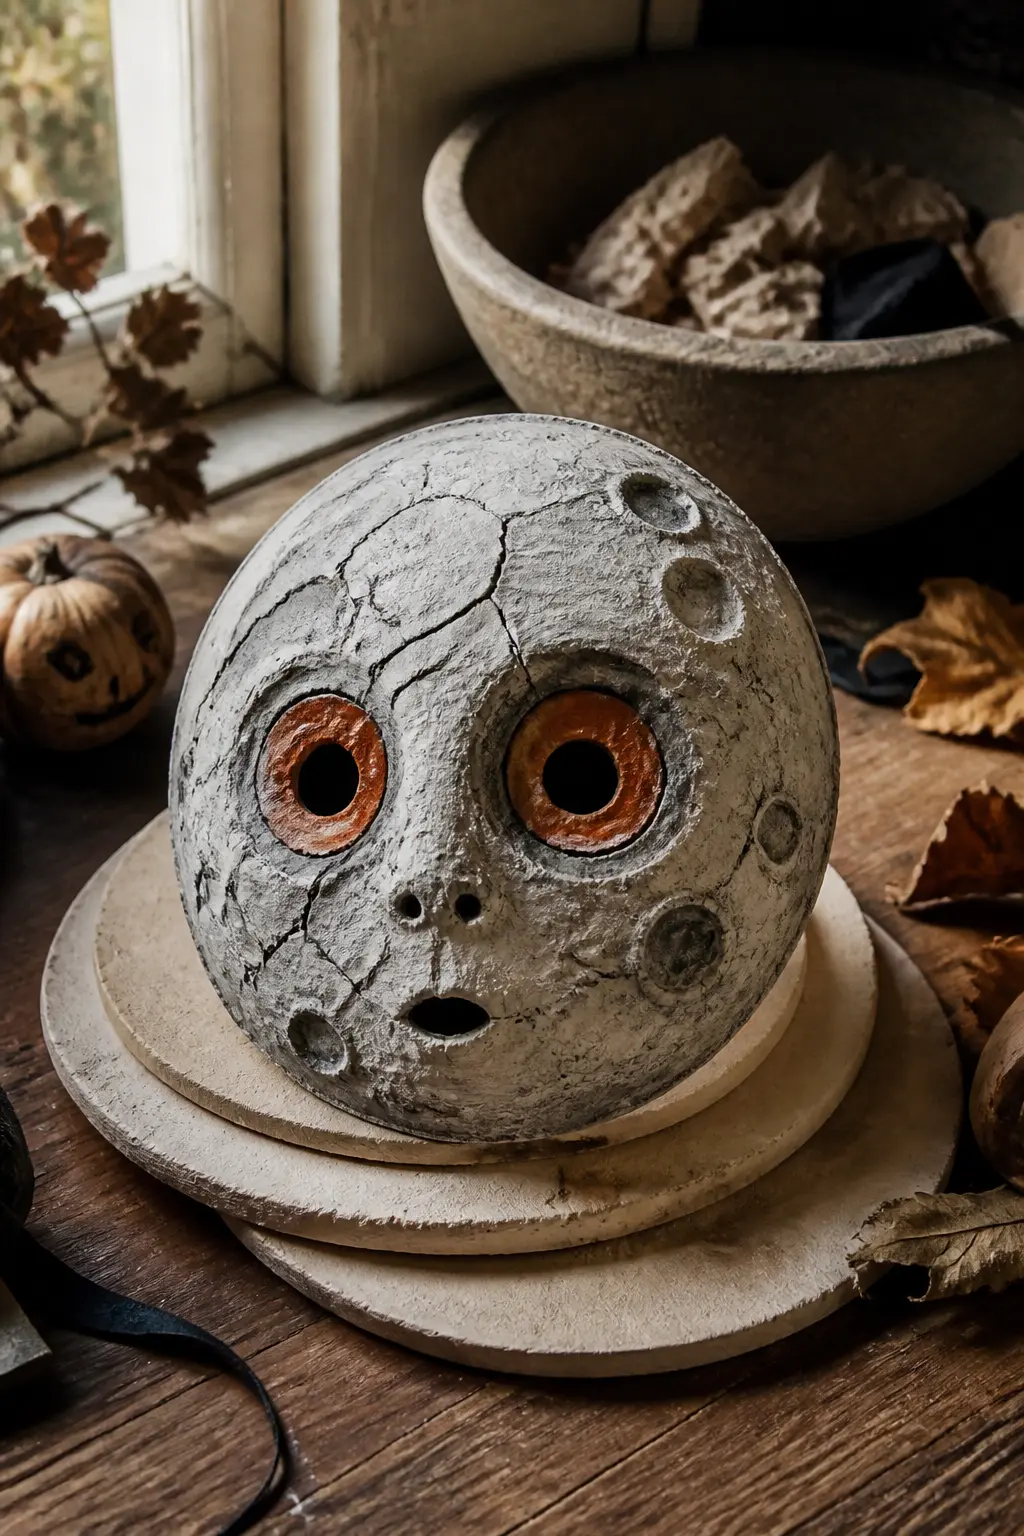
Cracked Moon Face Mask
Start with a plastic mask blank as the armature so the eye holes land correctly. Build up the rounded forehead and cheeks with crumpled newspaper balls taped in place, then cover the whole surface with five layers of papier-mache strips, smoothing with a wet brush between each one.
The crater texture comes from pressing the back of a round measuring spoon lightly into the penultimate paste layer before it sets fully. Sand lightly once dry. Paint with grey and white acrylics, blending wet-into-wet, then add a fine cracked-porcelain effect by painting veins of dark grey with a detail brush. A coat of matte varnish keeps the finish from looking plastic.
Large round eyes painted with orange-gold pupils, a small stitched mouth line and two rosy cheek circles give it the folk-art character that separates it from a plain grey oval.
🛍 Shopping guide
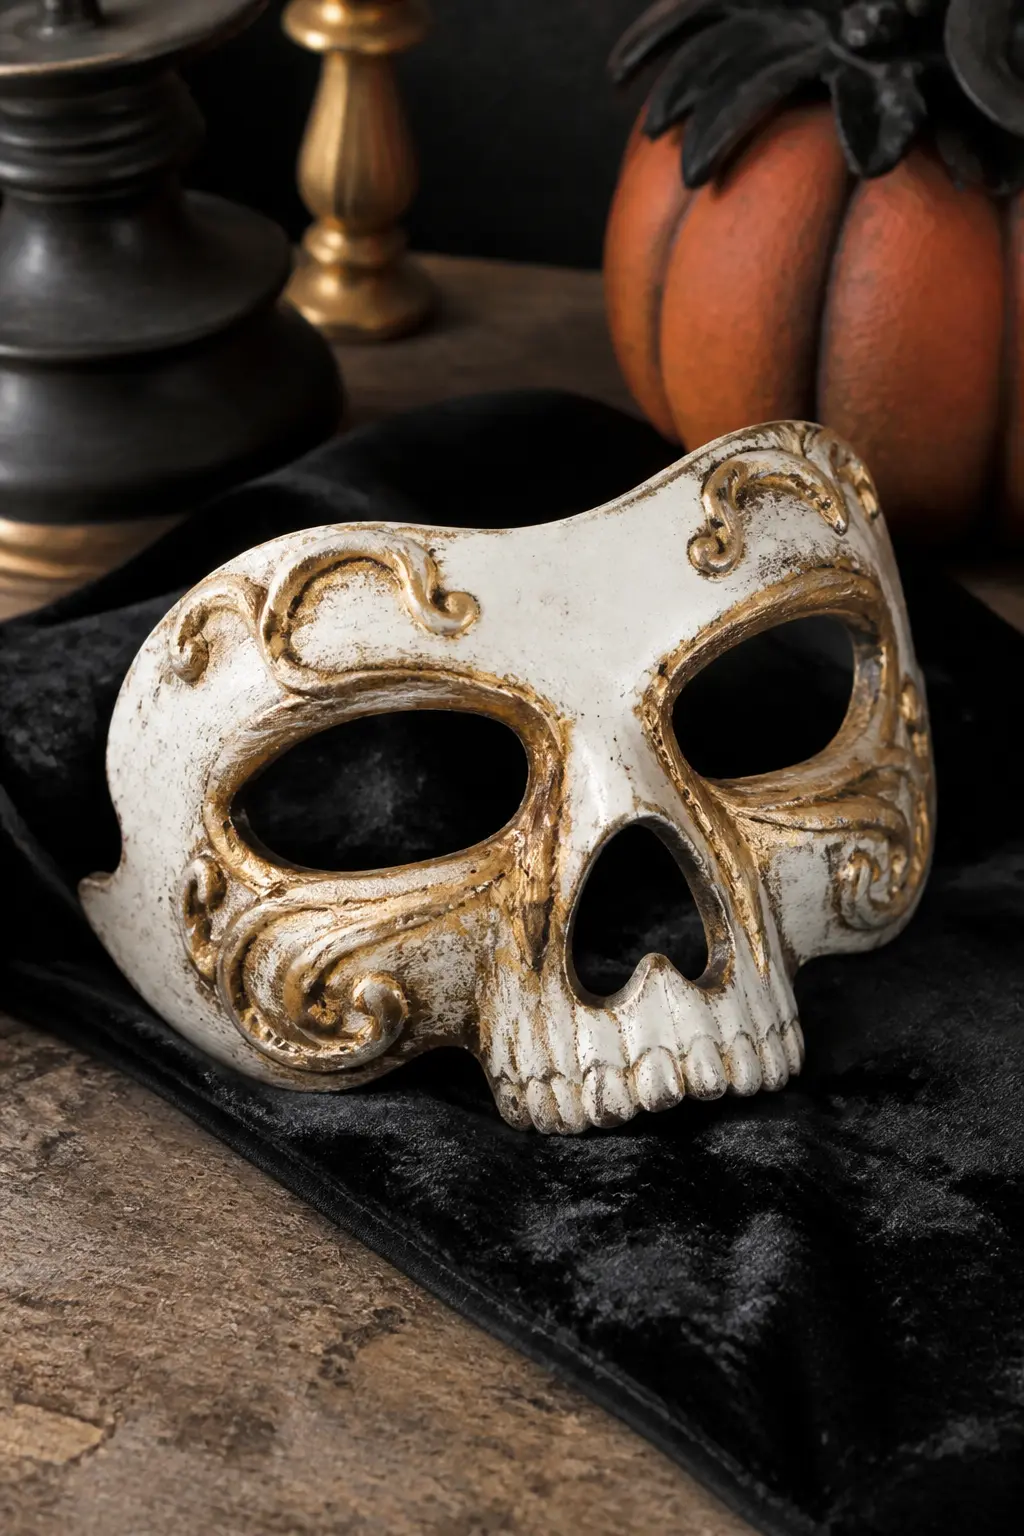
Baroque Skull Half-Mask
A half-mask blank carries papier-mache cheekbones and a sculpted brow ridge built from crumpled tape-covered foil before the paste layers go on. The foil holds any shape you press it into and adds almost no weight. Five paste layers, sanded to a smooth finish.
Paint the base in flat white, then shade the orbital cavities with raw umber and the cheekbones with a pale gold. Thin black veins painted with a liner brush add the baroque detail without requiring any specialist skill. Seal with gloss varnish for a bone-china finish. Tie with a wide black satin ribbon rather than elastic: the bow at the back reads as a deliberate style choice.
🛍 Shopping guide
Craft Foam Half-Masks
Craft foam is the fastest route to a mask that actually fits, because you cut it to the wearer’s measurements before any decorating begins. A heat gun curves it to the bridge of the nose in under a minute. The surface takes acrylic paint well, and a topcoat of Mod Podge or varnish keeps it from scuffing.
Half-masks are also the practical choice for kids who need to eat, drink and run. The mouth stays free, the elastic sits at a comfortable tension and nothing slides down the nose by eight o’clock.
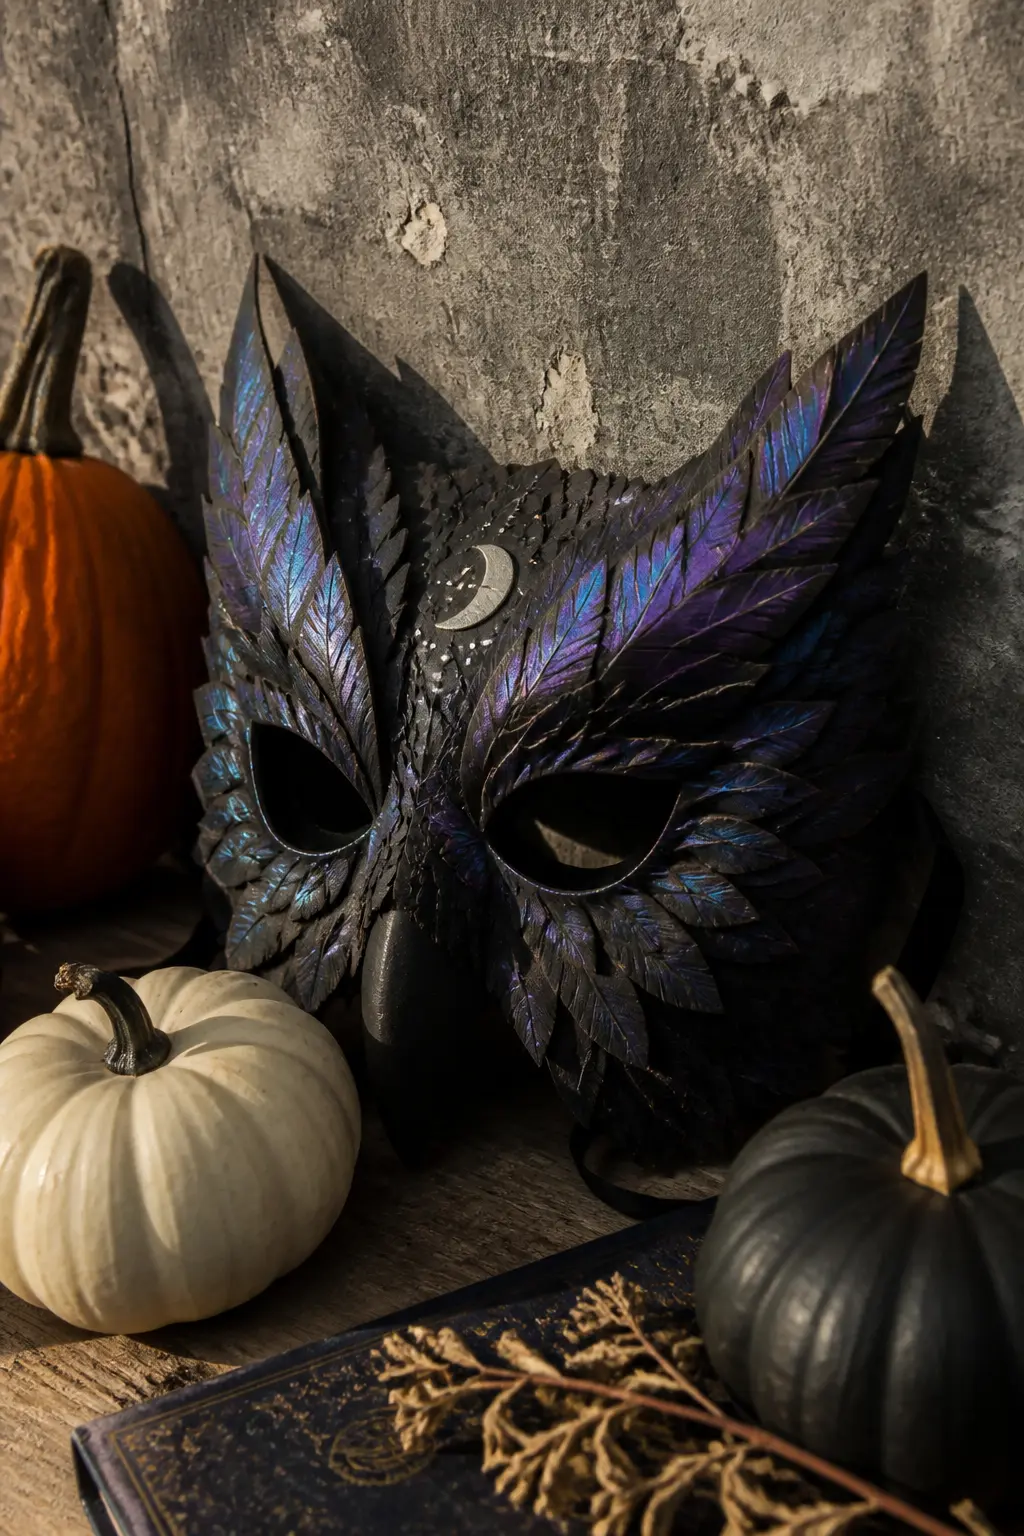
Raven Feather Half-Mask
Trace a half-mask template onto 6mm craft foam and cut with sharp scissors. Heat the bridge with a heat gun and press it gently over a curved surface (a large orange works) until it conforms to the nose shape. Let it cool in place.
Cut feather shapes from thinner 2mm black craft foam: no two exactly alike, some narrow, some broad, with the quill line scored with a ballpoint pen. Layer them from the outer edge inward, each piece glued with contact cement and slightly overlapping the one before it. Dry-brush iridescent purple and teal over the top surface of the finished feather layer.
Seal with Plasti-dip diluted slightly with naphtha for a leather-like finish. Two small holes at the temples, black round elastic, and the mask is complete. It holds its shape through a full evening.
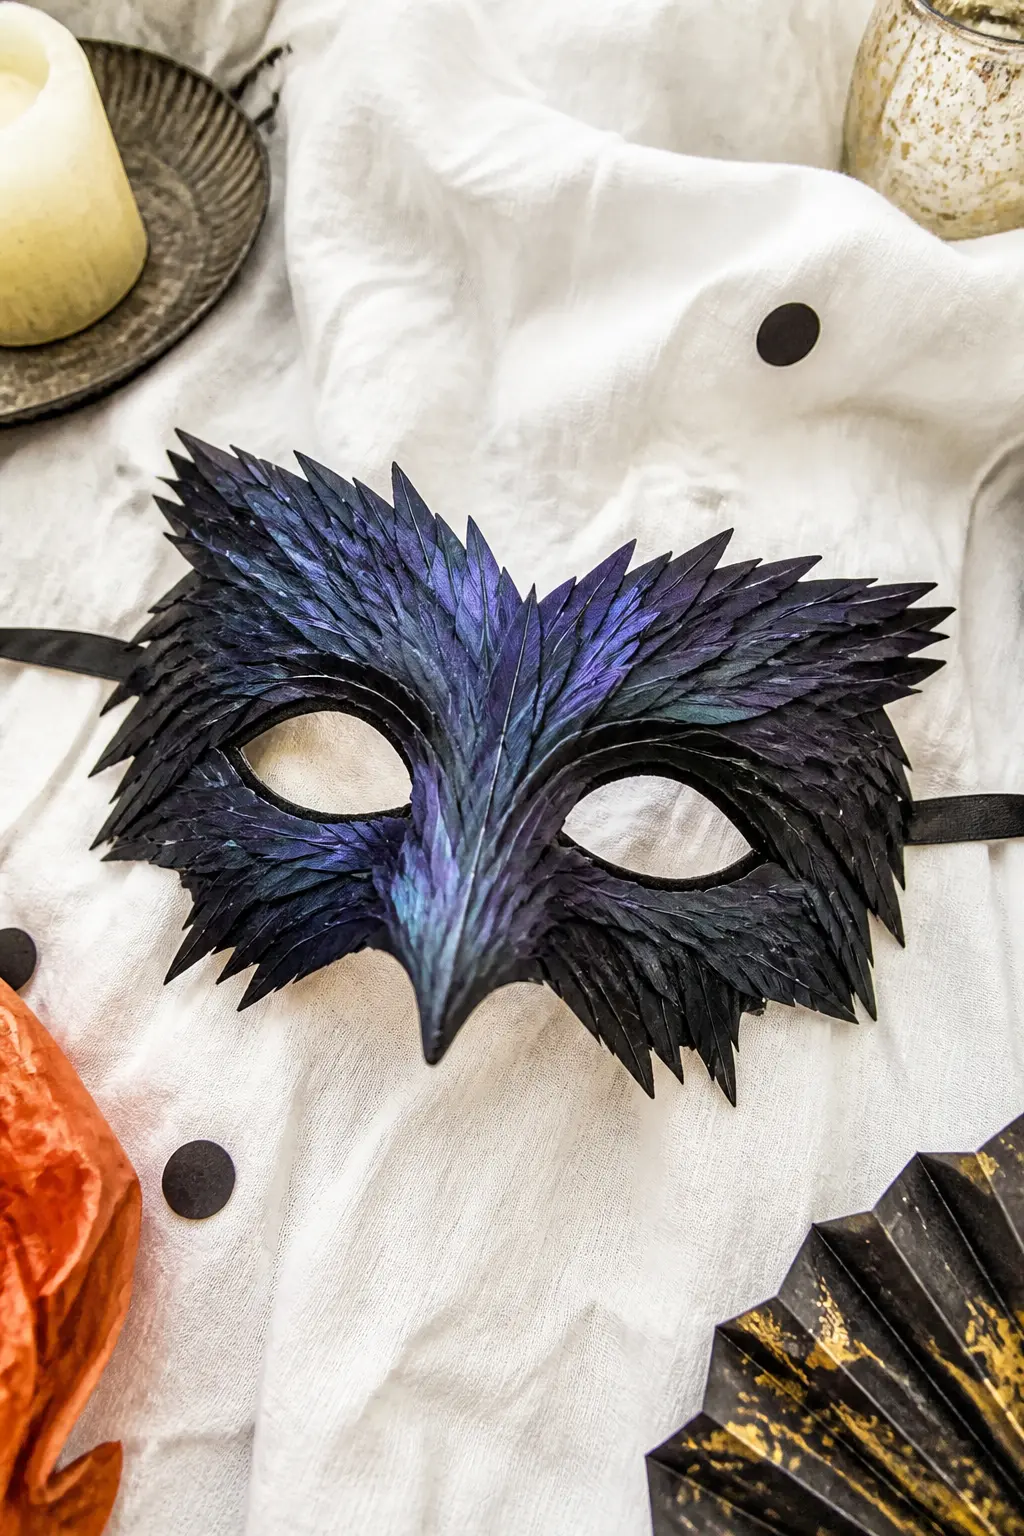
🛍 Shopping guide
Harvest Fox Half-Mask
Cut the basic half-mask shape from 4mm orange craft foam, then cut two pointed ear extensions from the same sheet and heat-bend them upright before gluing at the top of the mask. The ears hold their angle once cooled.
Score fur-direction lines all over the surface with a ballpoint pen, pressing firmly so the channels are visible. Paint the muzzle area in cream, the outer ears and eye surrounds in dark brown. Dry-brush burnt orange over the rest. A coat of matte sealant stops the foam from looking synthetic.
Add a small black painted nose in the centre and thin black whisker lines. This takes under two hours from cut to finished, and it reads as a costume rather than a novelty item because the texturing does real work.
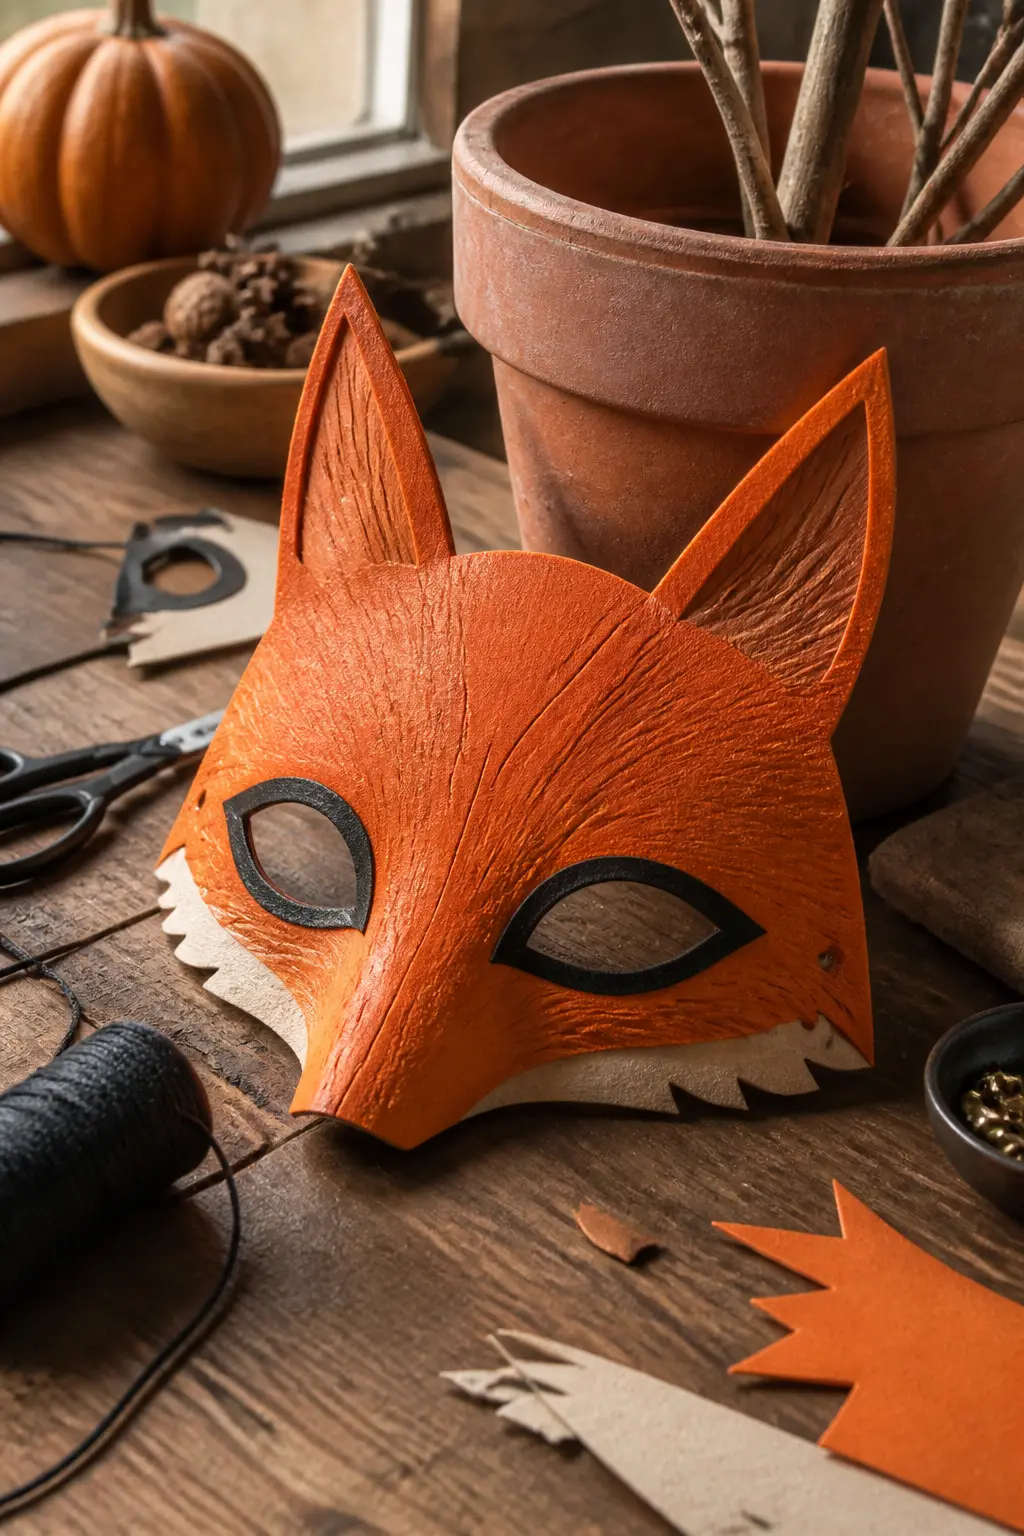
🛍 Shopping guide
Leather-Look and EVA Foam Sculpted Masks
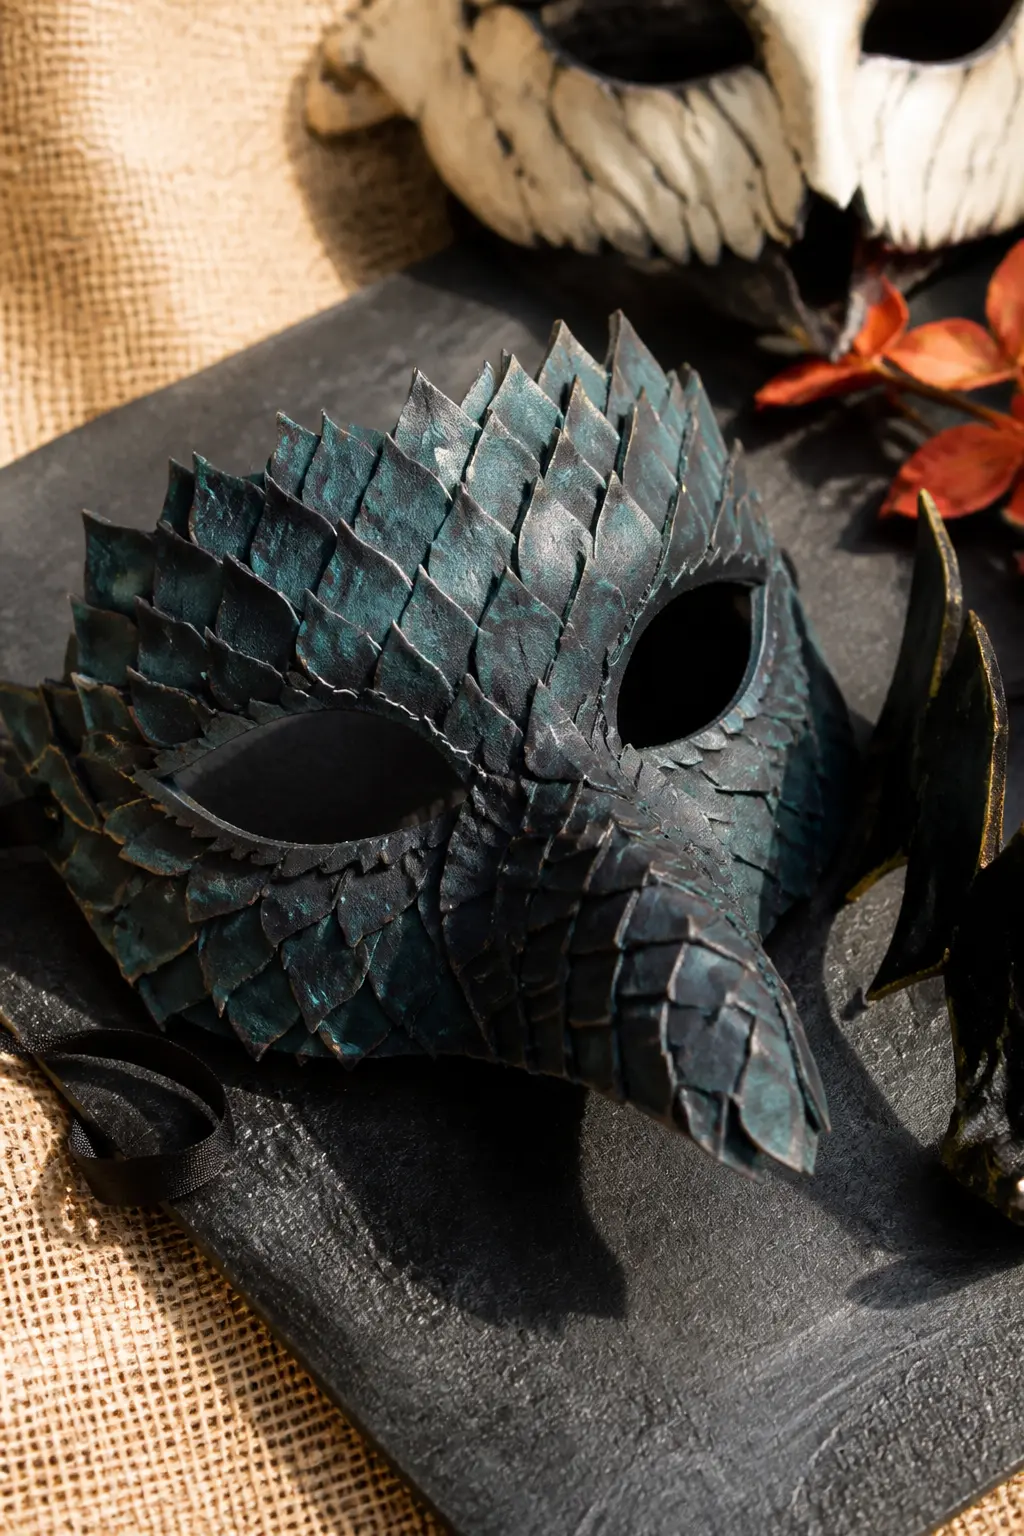
EVA foam (the kind sold as floor puzzle mats or cosplay foam) behaves like leather once you seal it with Plasti-dip or a flexible paint. It cuts cleanly, heat-forms into three-dimensional shapes and adds almost no weight. Layering thin pieces on top of each other, the way real leather masks are built, produces the same feathered or scaled texture without the specialist tools.
The colour palette that makes these look expensive is narrow: charcoal base, iridescent purple or teal dry-brushed over the top, and a matte sealant to kill any plastic shine.
Crepe Paper and Folk-Art Masks
Crepe paper is criminally underused in mask-making. Stretched over a base and sealed, it produces the wrinkled, almost bark-like texture that makes a mask look decades old. It is also the cheapest material in any of these projects, and the one most forgiving of mistakes: you simply add another layer.
Folk-art finishing, meaning painted features with bold outlines and flat colour rather than realistic shading, suits children’s masks perfectly. The style is confident, not naive, and it photographs beautifully.
Crepe Paper Witch Mask
Glue stretched black crepe paper over a papier-mache half-mask base while the surface is still slightly damp with diluted PVA. Press and stretch the paper into the facial contours, letting it wrinkle along the brow and chin naturally. The wrinkling is the texture: do not smooth it out. Seal with two coats of diluted PVA once dry.
Paint the surface in flat black, then dry-brush with dark green to pick out the wrinkle ridges. Nose and brow accents in forest green, outlined in black with a fine brush. The eye surrounds are the only area left crisp: outline them in gold paint with a fine liner.
The result has the same aged, almost bark-like surface as the best folk-art Halloween pieces, and it costs almost nothing in materials. Attach a wide hat made from black card over the top of the mask, fixed with a hidden wire loop, and the whole costume is one piece.
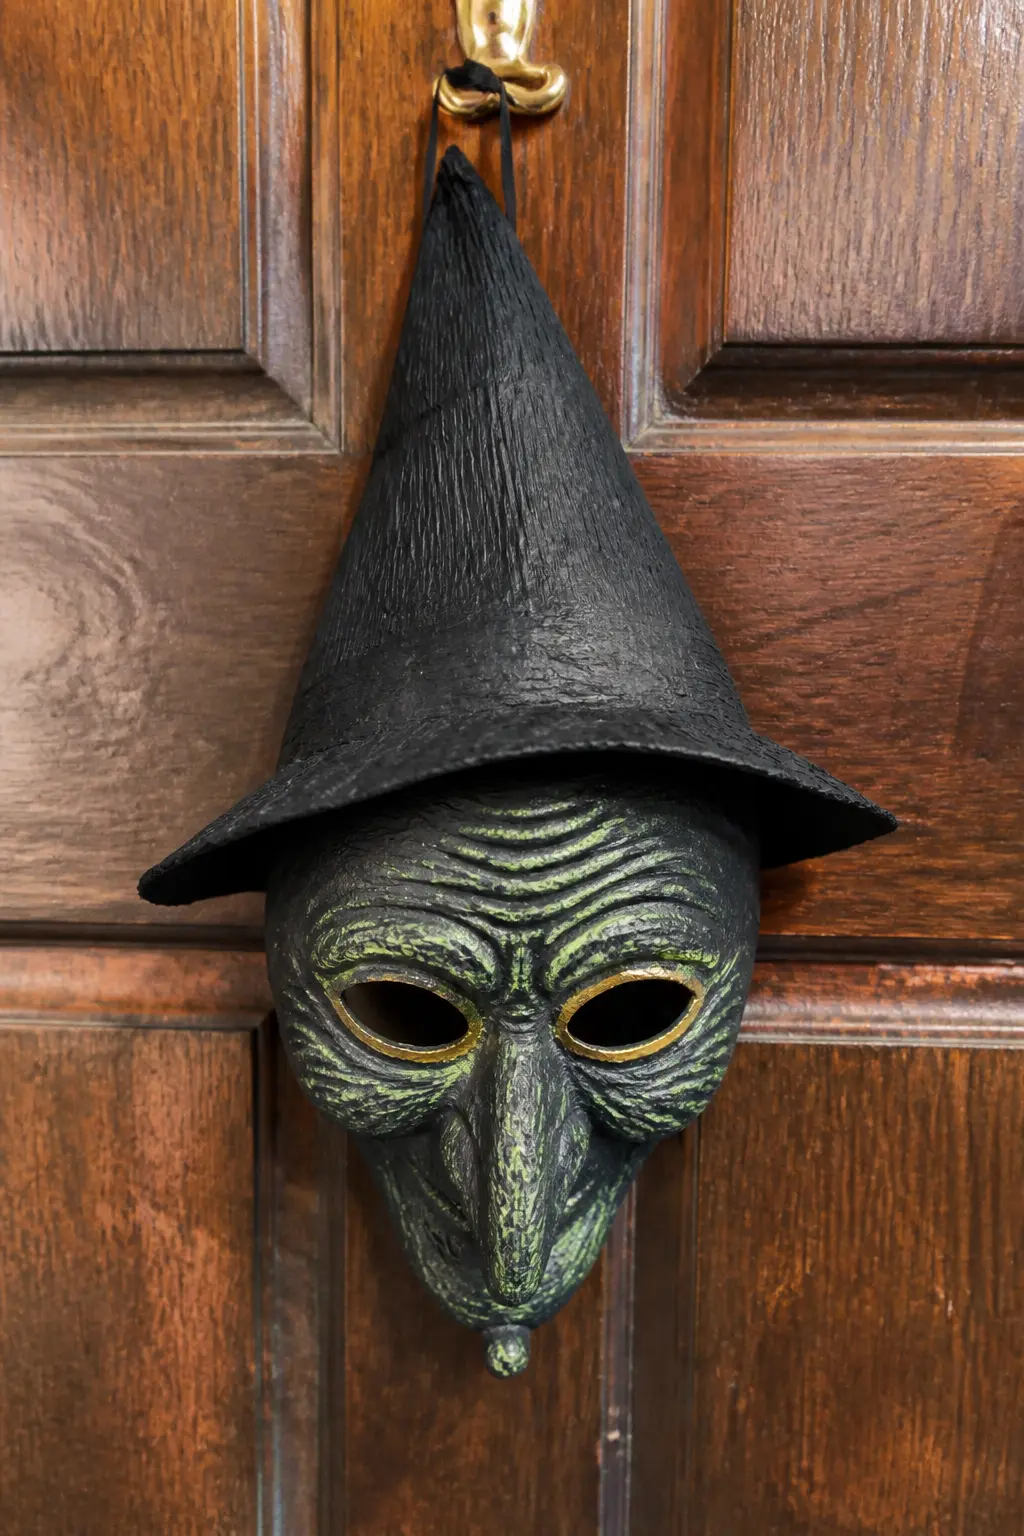
🛍 Shopping guide
Folk-Art Moon and Stars Full Mask
Build a full oval face in papier-mache over a balloon. Before the final layer of paste dries, press thin strips of crepe paper all over the surface and smooth them down with a brush: this gives the bark-like texture across the whole face. Let dry fully.
The folk-art painting style is flat, graphic and confident: a crescent eyebrow above each eye hole, cheeks painted in a flat dusty rose circle, a small bow-shaped mouth in red. Star shapes stamped around the temples with a piece of cut foam sponge dipped in gold paint. No blending, no gradients: the flatness is the style.
Cut small cardboard crescent moons and stars, cover them in the same crepe-and-paste method, paint in gold, and attach them around the edge of the face. They extend the silhouette without adding structural complexity. Tie with a wide velvet ribbon in black or deep burgundy.
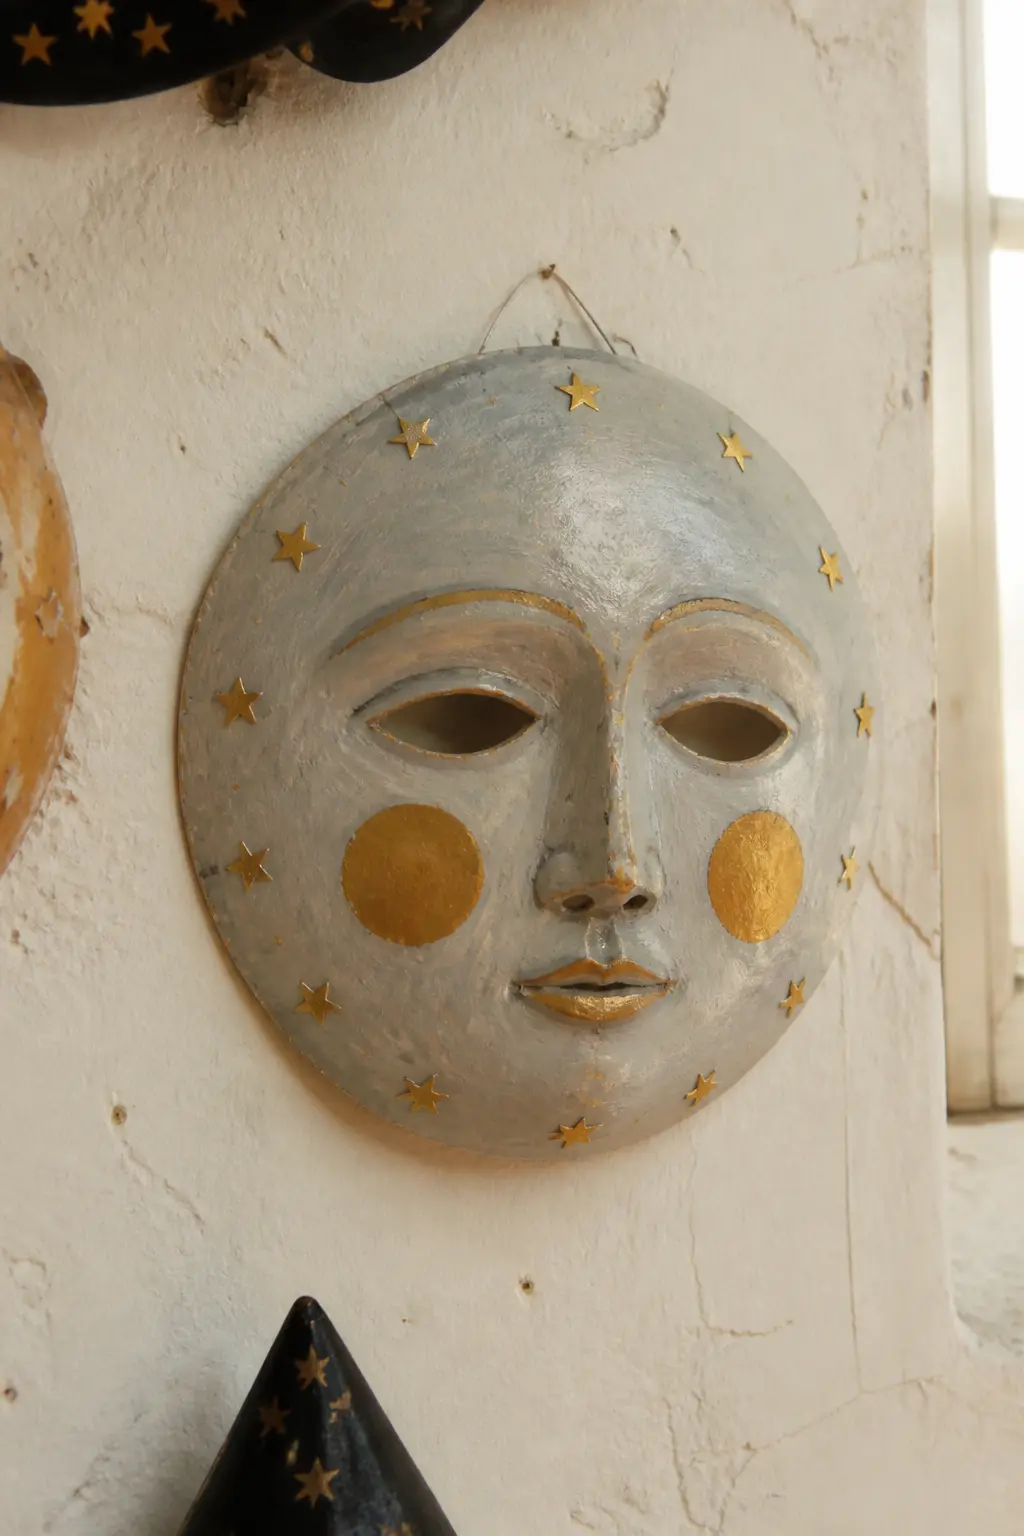
🛍 Shopping guide
Clay-Accented and Mixed-Media Masks
Air-dry clay pressed onto a foam or papier-mache base adds dimension that paint alone cannot fake. A rolled coil becomes a serpent’s scales. A flattened disc becomes a moon-crater. The clay dries in twenty-four hours, sands smooth and takes the same acrylic-and-gesso finish as any other surface.
Mixed-media masks combine two or three materials deliberately: foam for the structural base, clay for the raised details, fabric or ribbon for trim. Each material does what it does best, and the result reads as genuinely handcrafted rather than assembled from a kit.
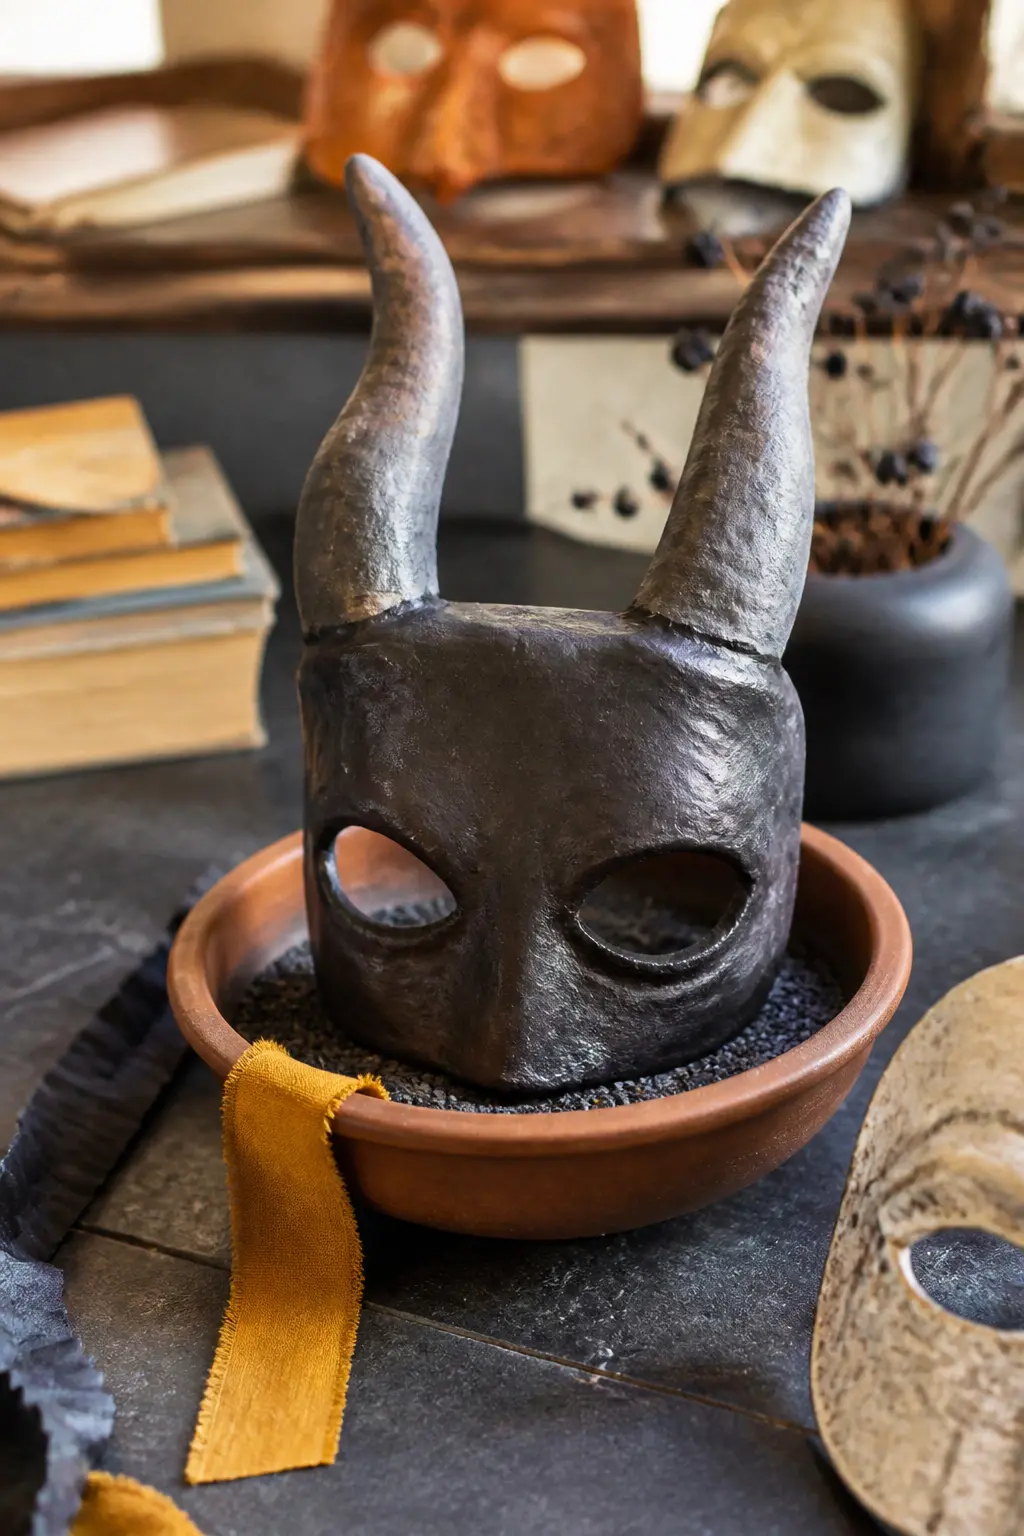
Air-Dry Clay Horned Mask
The base is a papier-mache half-mask blank, fully cured and sanded. Roll two tapered clay horns, roughly 8 cm long, and press their flat bases firmly onto the top of the mask, working the clay down around the edge for adhesion. Score the mask surface first with sandpaper and apply a layer of PVA to help the clay grip. Let dry for a full forty-eight hours before moving the mask.
Once dry, prime the entire surface (mask and horns together) with gesso, sand lightly and paint in charcoal with raw umber shadows worked into the base of the horns. The horns pick up a dry-brushed pale gold at their tips. Seal with matte varnish.
This is the mask that looks expensive rather than handmade: the unified gesso-and-paint finish makes the join between materials invisible. Tie with black ribbon or use a wide elastic band hidden under the horns at the back.
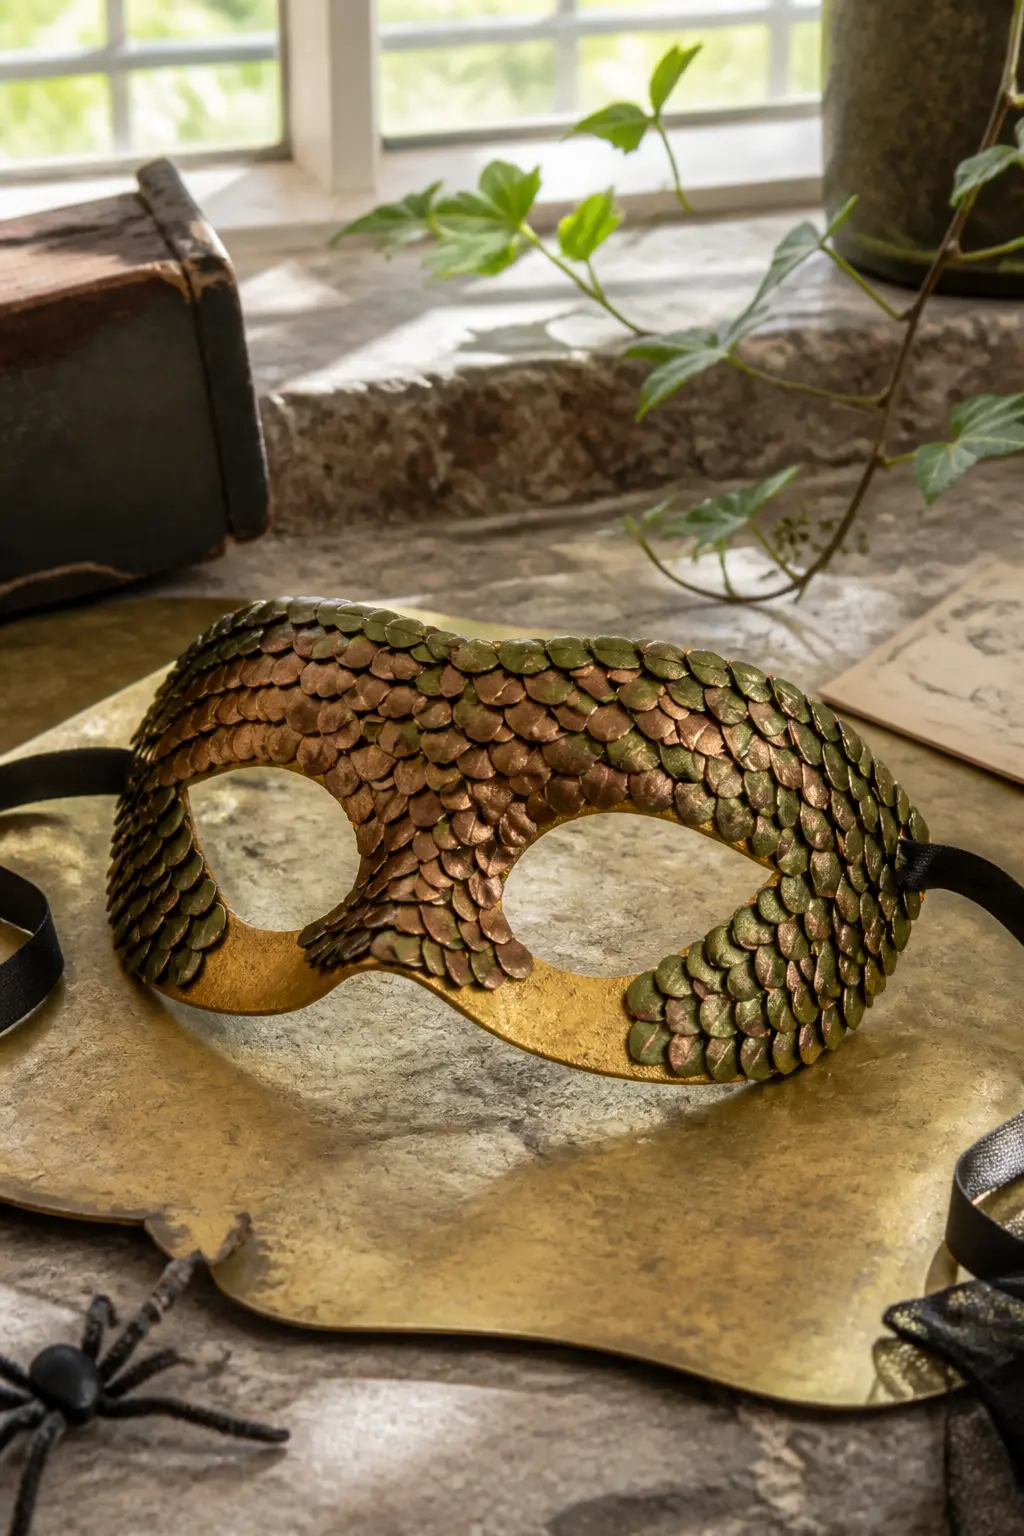
Snake Scale Cheek Mask
A minimal half-mask that covers only the eyes and cheeks, cut from 4mm gold craft foam. The structural piece is simple. The detail is all clay: small lozenge-shaped scales pressed from air-dry clay and applied in overlapping rows down both cheeks, leaving the eye holes and brow area clean.
Paint the foam base in deep gold, the scales in alternating bronze and deep green. Once sealed, the colour shift between scales catches light differently at every angle. A thin line of gold paint along the eye surrounds pulls the look together.
This mask suits a face that does not want full coverage: it is decorative rather than concealing, and comfortable for several hours of wear because so little of the face is covered. The clay scales are heavy enough to need a firm elastic, not ribbon, to keep the mask level.
🛍 Shopping guide
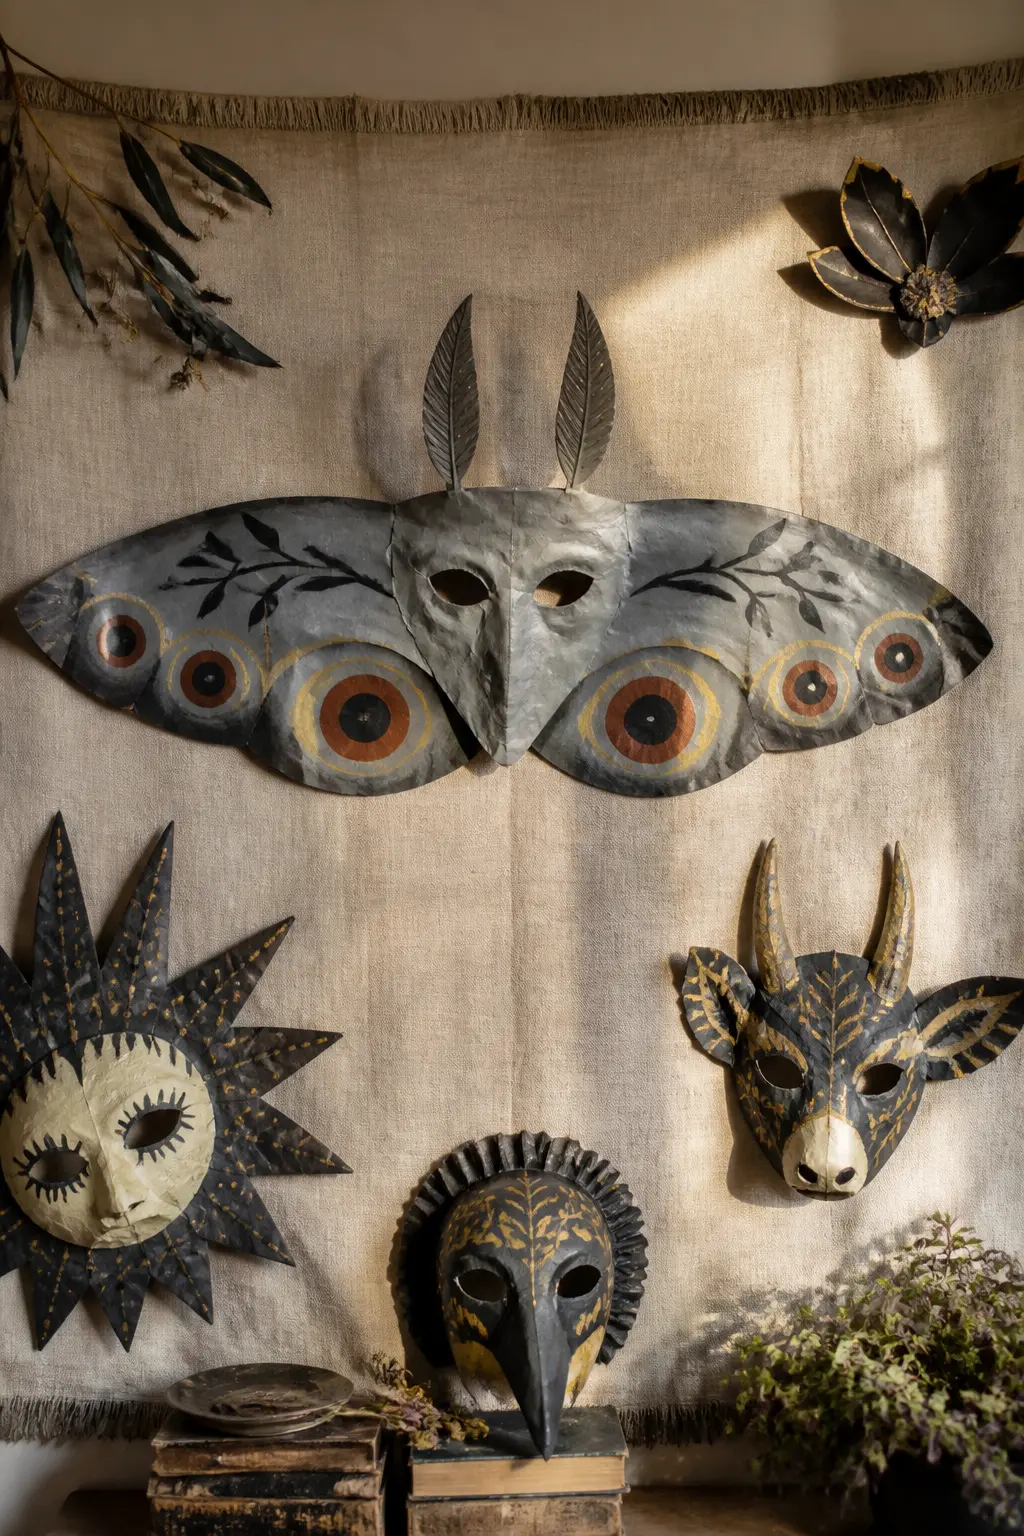
Botanical Moth Mask
Cut oversized moth wing extensions from 2mm grey foam and attach them to the sides of a papier-mache half-mask blank with contact cement and a reinforcing strip of packing tape on the inside. The wings extend about 15 cm each side and give the whole mask a wingspan of nearly 50 cm, which is the visual drama of the piece.
Press tiny clay circles (use a straw as a cutter) onto the wing surface in the pattern of a real moth’s eyespots: rings of graduated size from the outer edge inward. Paint the base in warm grey, the eyespots in concentric rings of cream, amber and dark brown. Dry-brush pale gold over the entire wing surface last.
The mask body itself is painted in the same grey with a fine black vein pattern suggesting wing membrane. Wear it with a wide black elastic band at the back: the wings distribute the weight evenly and it sits level without adjusting.
🛍 Shopping guide
No-Sew Fabric and Ribbon Masks
Stiffened fabric, buckram or heavy interfacing cuts and holds a shape without any rigid base underneath. It suits simpler silhouettes: a cat ear half-mask, a butterfly, a vintage domino. Starch the fabric, pin it over a shaped mould, let it dry and the structure holds through an evening of wear.
This is the category where a child who wants to participate in the making actually can, start to finish, with minimal adult intervention beyond the ironing step.
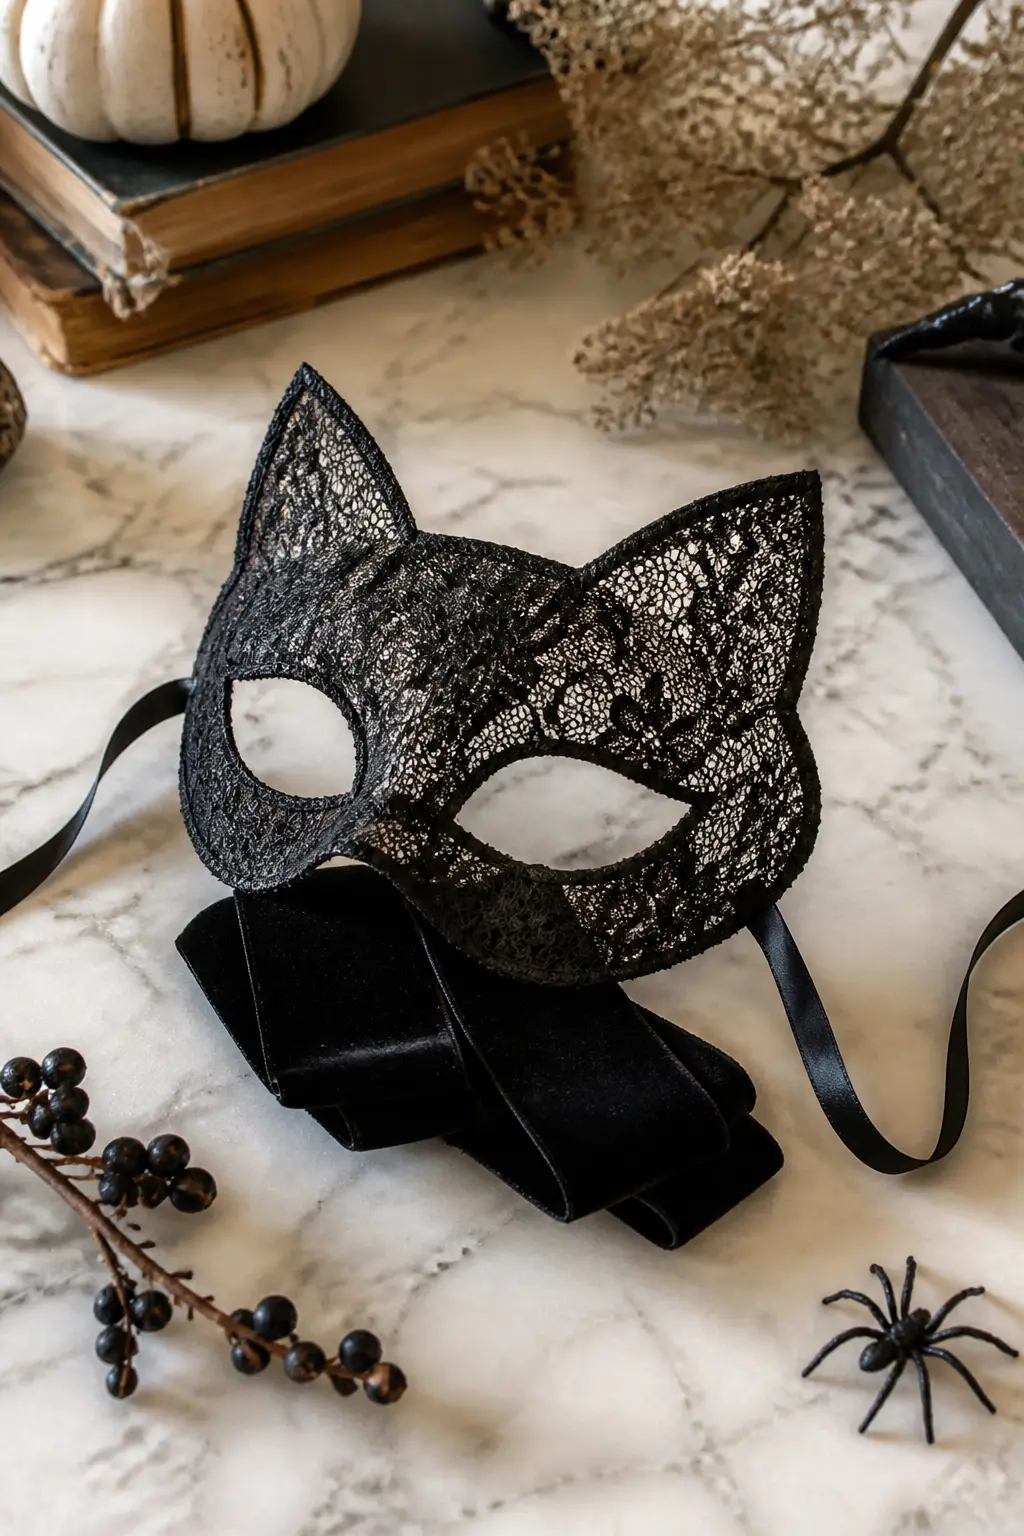
Stiffened Lace Cat Mask
Cut a cat half-mask shape, including pointed ears, from a single piece of heavy black lace fabric. Dip the whole piece in liquid starch, pin it over a mask-shaped mould made from crumpled foil covered in cling film, and leave it to dry overnight. The starch holds the three-dimensional curve of the brow and the upright ears permanently.
No painting required: the lace pattern is the decoration. Apply a line of black satin ribbon around the perimeter with fabric glue for a clean edge, and attach a second length of ribbon (80 cm each side) at the temples for tying. The ribbons do the structural work that elastic would normally do, and they add to the costume rather than just enabling it.
This is the fastest good-looking mask in the article. From cutting to dry, it is entirely hands-off, and the ten minutes of actual work are beginner-level.
🛍 Shopping guide
Velvet and Buckram Domino Mask
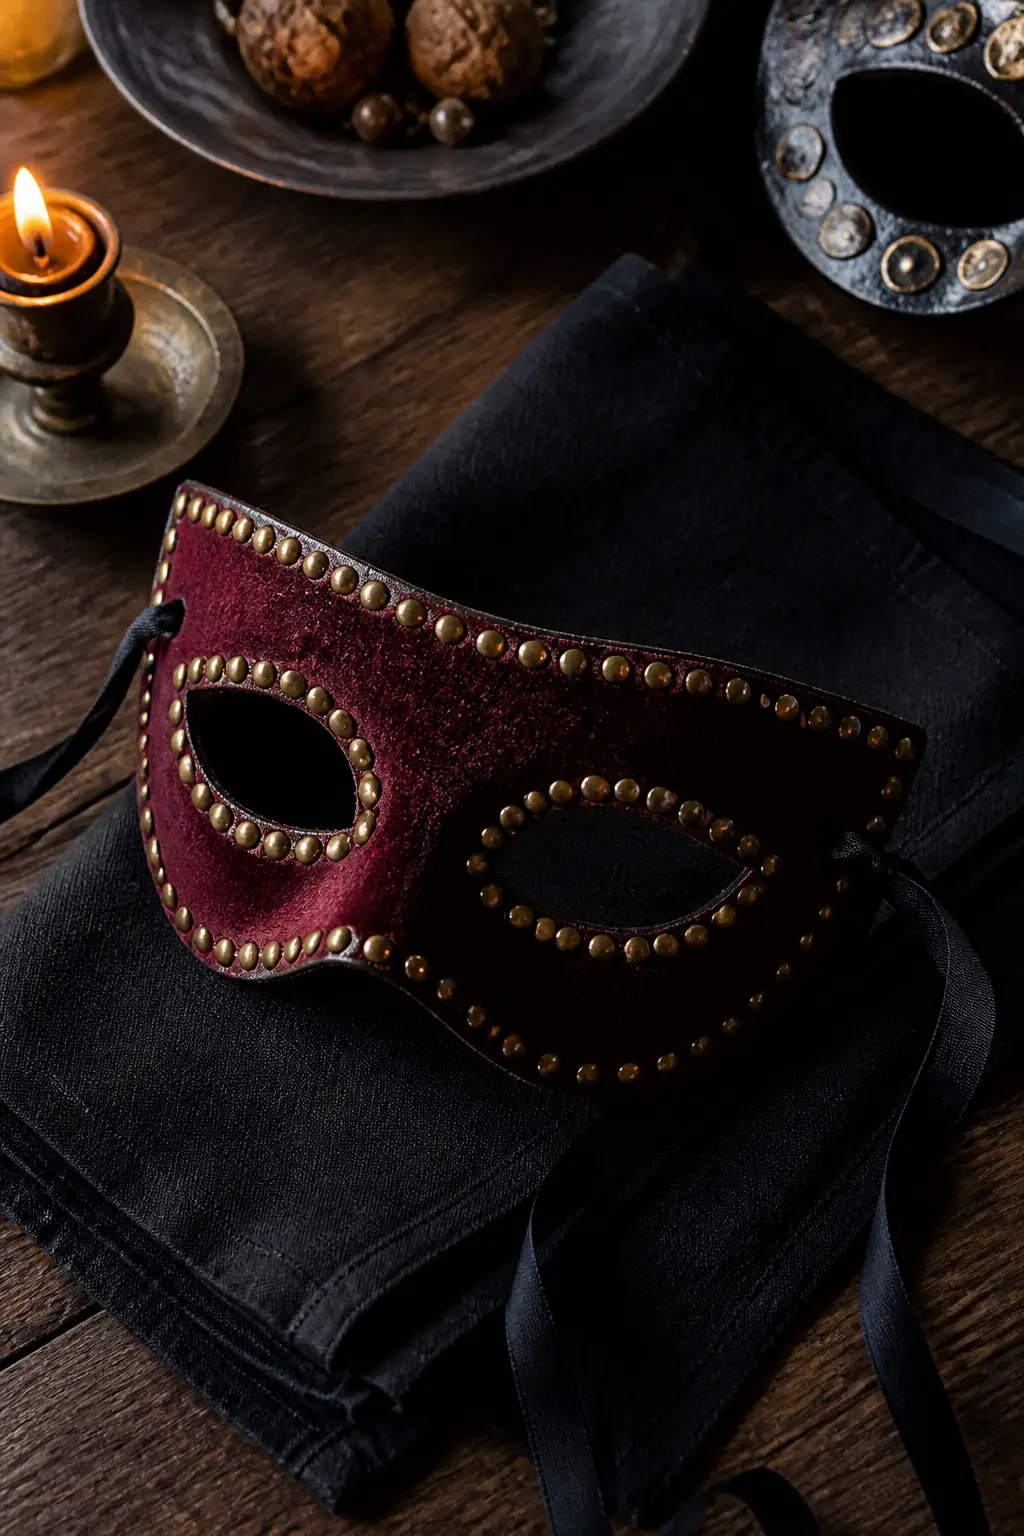
A classic domino mask in heavy interfacing (buckram weight) gives the shape. Cut two identical pieces, sandwich them with a thin layer of batting pressed flat with an iron, then cover the front with a piece of deep burgundy velvet glued down and wrapped around the edges like a picture frame.
The velvet does not need to be cut precisely: fold and glue it to the back, trimming the corners on a diagonal to reduce bulk. A line of tiny brass nail-head studs around the perimeter, applied individually with the flat end of a pen, adds the decorative detail without any sewing. Ribbon ties in black grosgrain, glued and then reinforced with a single stitch through the buckram for security.
This mask suits adults who want something genuinely elegant. Burgundy and brass reads as deliberate rather than Halloween-specific, which extends its wearable life well past October.
🛍 Shopping guide
Printable-Base Masks with a Handmade Finish
A printed template gives the eyeholes in exactly the right place and the silhouette cleanly cut. After that, every decorating choice is handmade: painted, glittered, feathered or clay-embellished. The template is a starting point, not the finished object, and these masks do not look like something that came off a printer.
This approach suits a party craft station where multiple children work simultaneously: everyone starts from the same cut shape and ends up with something completely different.
Printed Template Celestial Half-Mask
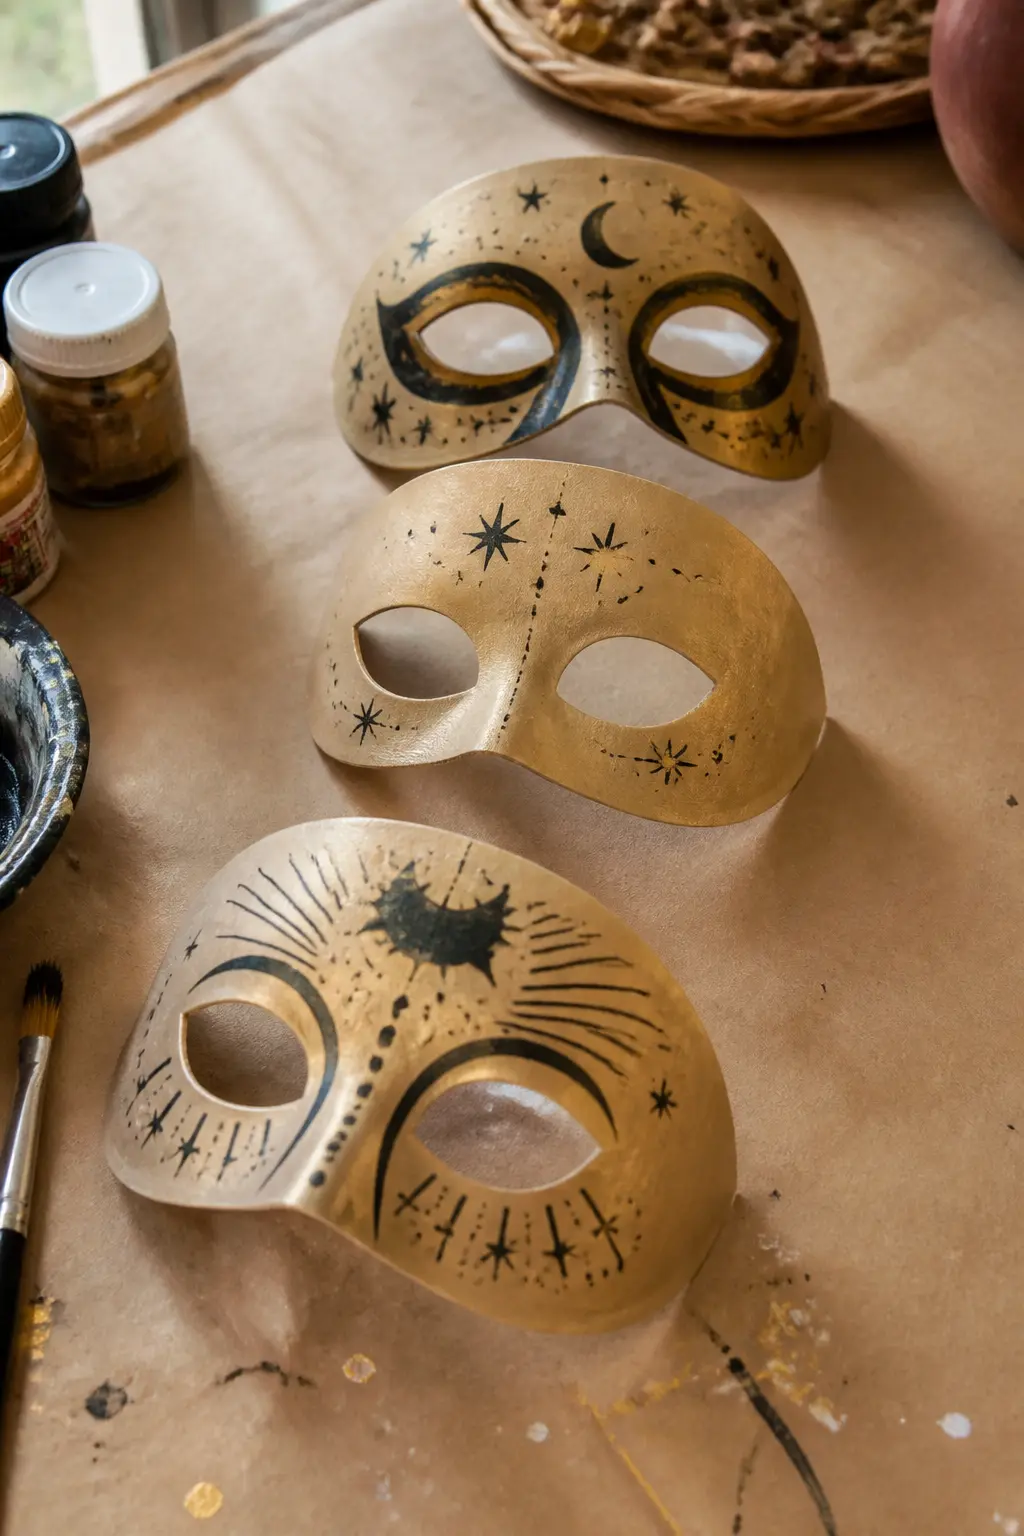
Print a simple half-mask template on card stock, cut out the eye holes and trim the silhouette. The template is only structural: what goes on top of it is where the making happens. Paint the base with two coats of dusty gold acrylic before adding any embellishment.
While the paint is still slightly tacky, press a sheet of crinkled tissue paper over the surface and smooth it down. Peel the tissue away gently once the paint is dry: it leaves a fine cracked texture across the gold surface. Add painted moon and sun symbols with a fine liner brush, then seal.
A party craft station using pre-cut printed templates, a pot of gold paint, tissue paper and a few colours of liner paint produces individualised masks in thirty minutes per child. Every one looks different; none looks like a printout.
Printed Animal Base with Clay Ears
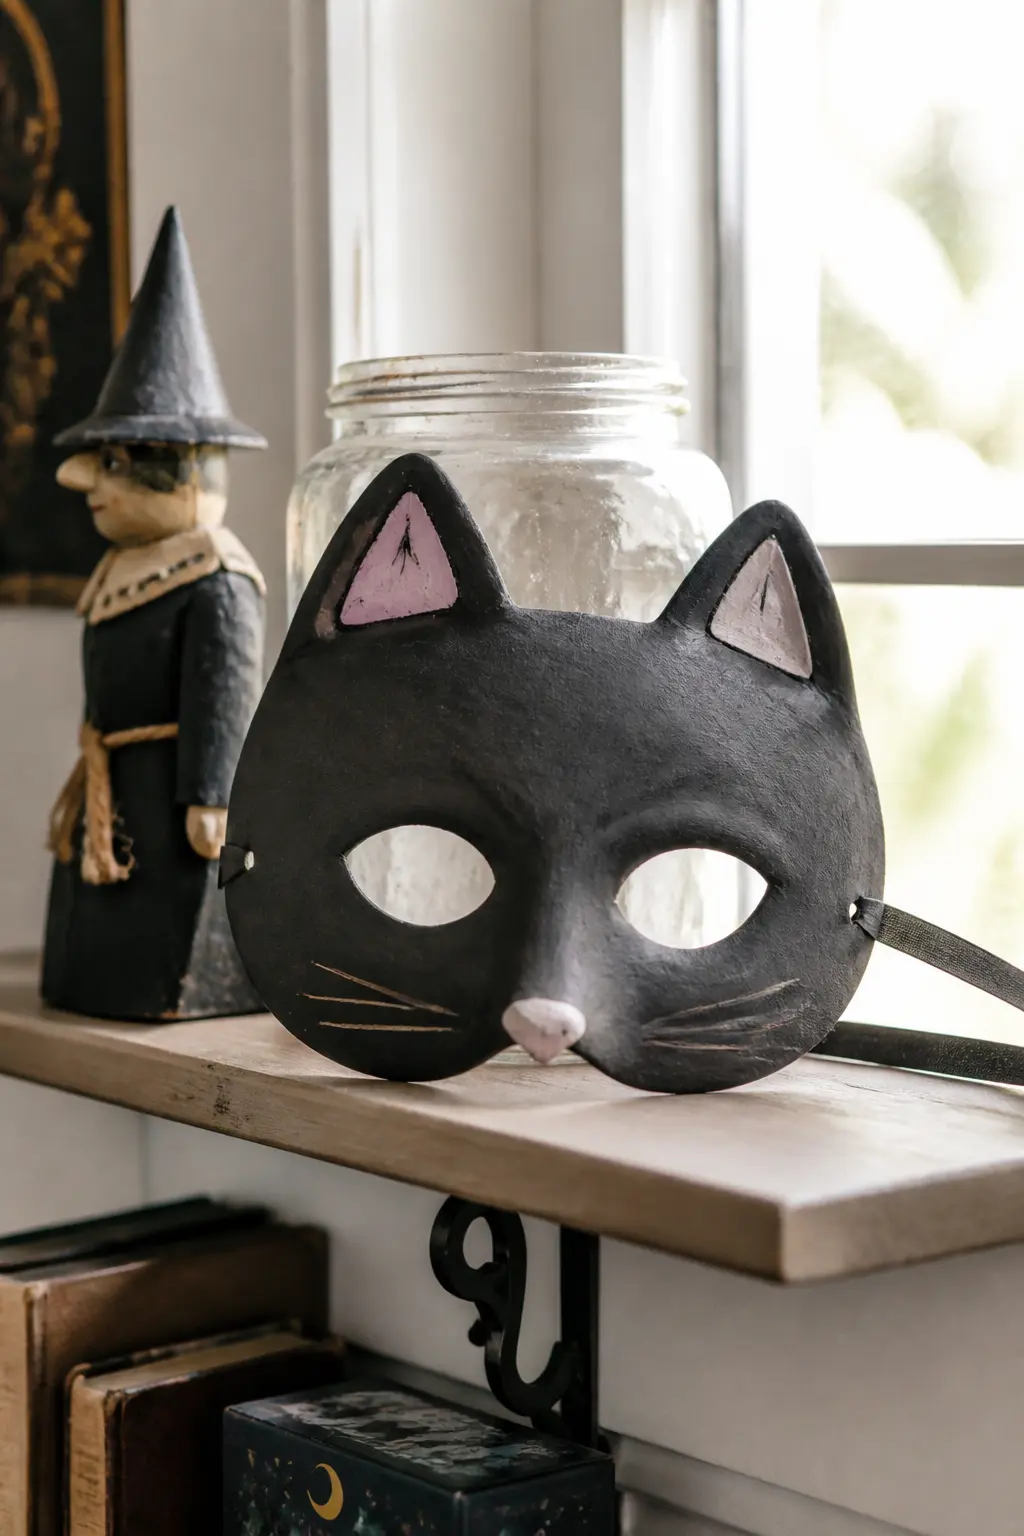
Print and cut a basic animal half-mask in the chosen shape, reinforce the back with a second layer of card glued flat, and let dry under a heavy book. Then attach sculpted air-dry clay ears pressed onto wire armatures that push through two pre-cut slots at the top of the mask.
The clay ears hold any shape, dry solid and can be painted to match or contrast the card base. Cat ears in black with pink inner detail, wolf ears in grey with white tipping, fox ears in burnt orange: the base template is the same for all three.
This approach makes a genuinely good mask from a starting point that requires no sculpting skill at all for the main face. The clay ears are the one step that teaches a child what handmade actually means, without demanding a finished result that looks professional before it is even dry.
🛍 Shopping guide
Sculptural Statement Masks for Adults
These are the masks that earn a second look across a crowded room. They take more time, more layers and more patience, but none of them require specialist tools or materials you cannot order online. What they do require is willingness to let something dry fully before moving to the next step, which is the step most tutorials skip.
Each of these works equally as a wearable costume piece and as a wall installation afterwards, which makes the time investment easier to justify.
Celestial Empress Full Mask
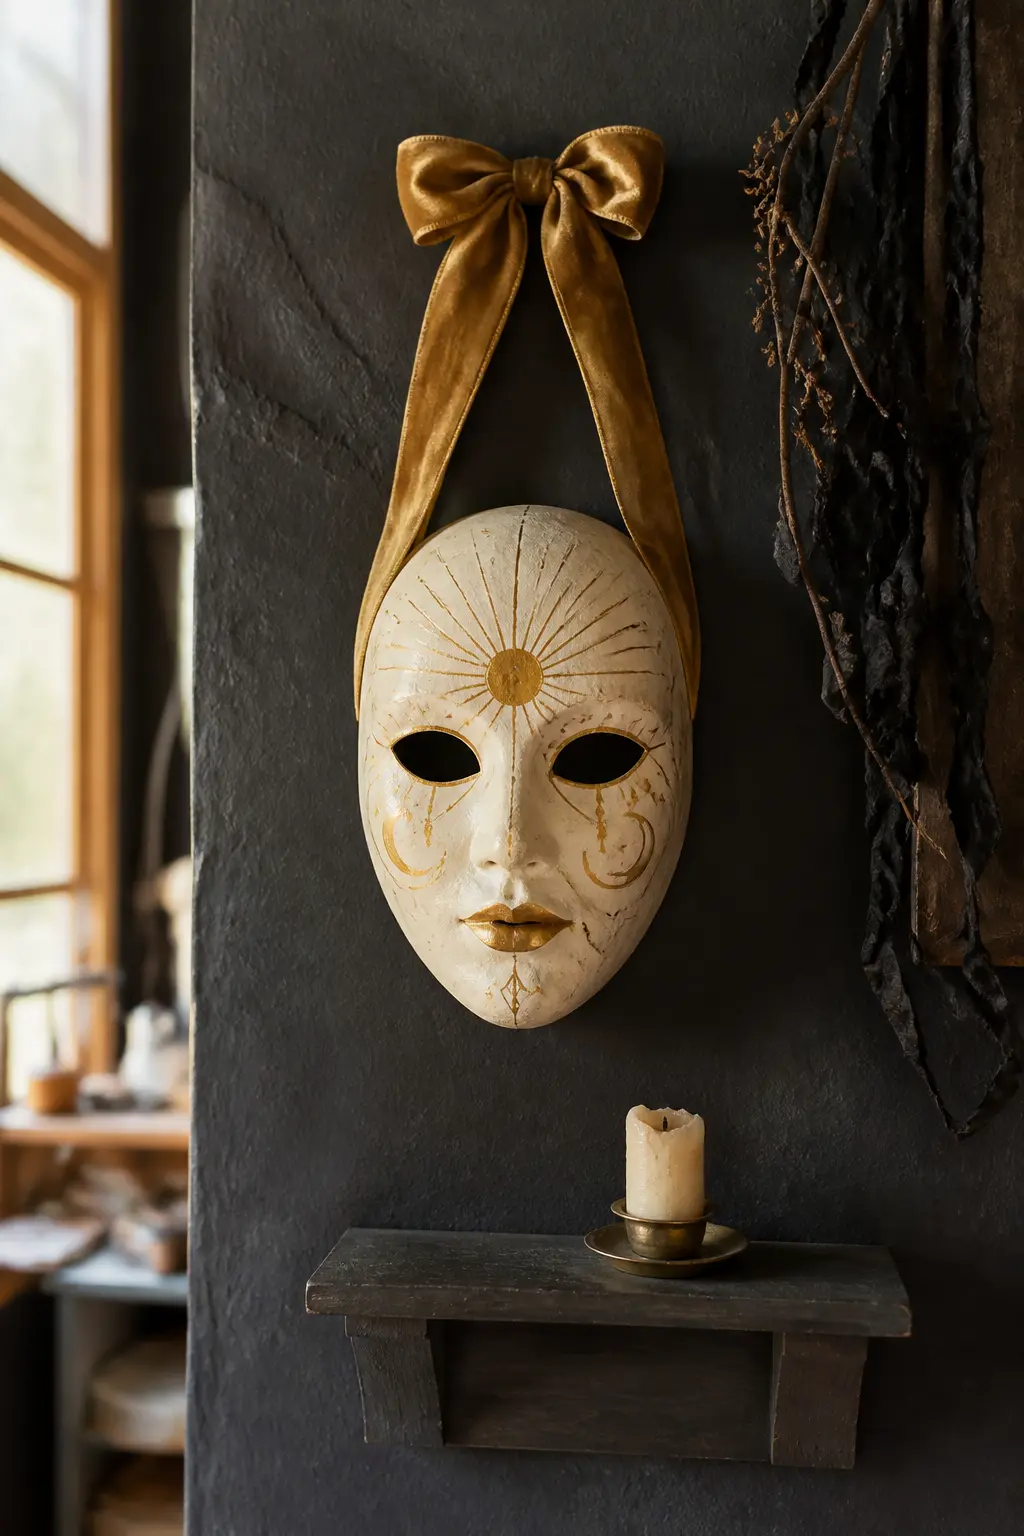
This is the mask that takes a full weekend and earns every minute of it. Build a full face in papier-mache over a balloon armature, adding a domed forehead built up with balled foil under the final paste layers. Sand to a smooth, even surface: every bump will show through the finish, so patience here changes the outcome entirely.
Gesso three times, sanding between each coat. Paint the face in an ivory base, then shade the temples with very diluted raw umber, the inner eye corners with gold and the brow with a deeper ochre. The celestial detail is added with a fine brush: sun rays rising from the brow line, crescent moons at the temples, tiny stars along the chin line. All in gold, all flat, all outlined in thin raw umber.
String with a wide velvet ribbon in deep gold. This mask hangs on the wall from November to the following October without looking out of place, which is the real measure of whether a handmade object has succeeded.
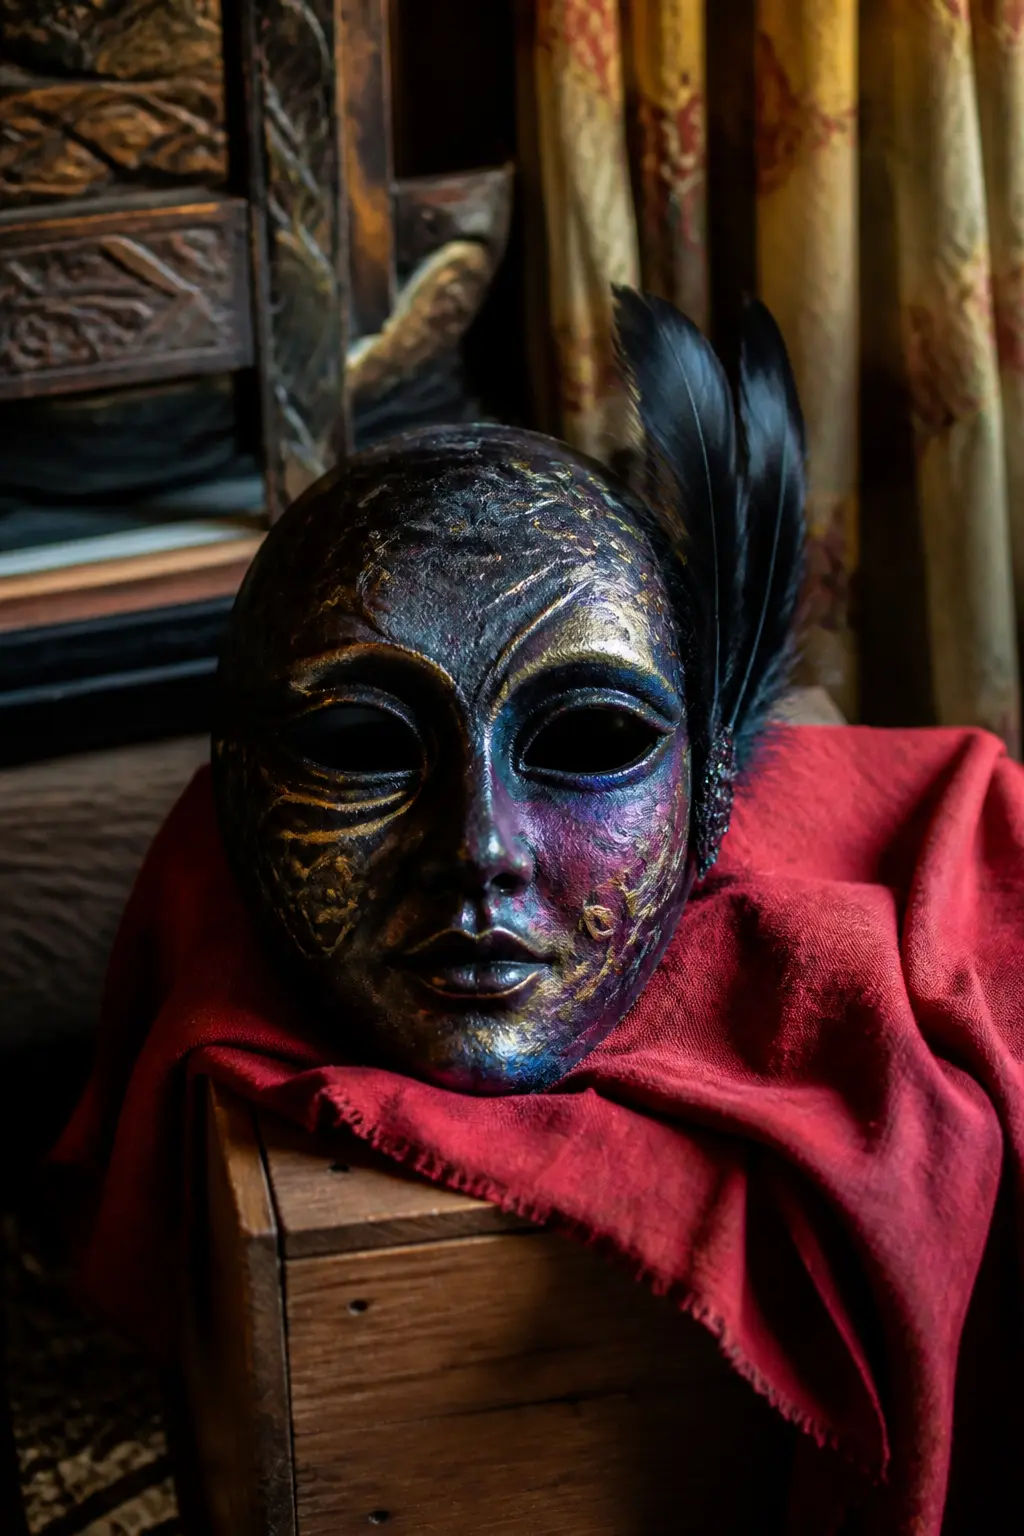
Dark Carnival Full Mask
The base is a full papier-mache face, built smooth and primed with gesso. The palette is the departure point: deep black as the base, then layers of dark jewel tones, burgundy and midnight blue dry-brushed in sequence over the surface. The face reads as black from a distance and shifts colour in direct light.
Carved foam details glued to the face before priming: a diamond shape between the brows, scroll shapes at the cheekbones, a slightly pointed chin extension. These break the oval flatness and give the mask the architectural quality of a real carnival piece.
Paint the carved details in contrasting gold or deep red. A fine crackle medium applied over the coloured areas before the final sealant coat gives the appearance of aged, gilded paint. Attach wide black grosgrain ribbon ties and a small black feather arrangement at one temple, glued with craft cement. This mask takes four sessions and justifies framing after Halloween.
🛍 Shopping guide
Frequently Asked Questions
What is the best material for a DIY Halloween mask that actually stays on all evening?
Craft foam (EVA foam) is the most reliable base for a wearable mask. It is lightweight, curves to the face with a heat gun and takes paint well. Pair it with flat elastic at 25mm width rather than round cord: flat elastic distributes pressure evenly and does not dig in at the temples after an hour.
How do you make a papier-mache mask without it taking a week to dry?
Use thin newspaper strips and a flour-and-water paste for the first layers, which dries faster than PVA paste. Between sessions, put the mask in a low oven (60 degrees C) for thirty minutes with the door slightly open. Four thin layers dried this way are ready to paint within two days.
Can you make these DIY Halloween masks with kids in the room?
The craft foam masks are genuinely child-safe and child-led. Cutting, heat-shaping (adult-supervised) and painting are all accessible from about age seven upward. The papier-mache projects suit older children who can manage the paste-and-wait rhythm. The sculptural adult masks work best as solo evening projects once the kids are asleep.
How do you stop a painted mask from scuffing in a bag on the way to a party?
A coat of matte or satin acrylic varnish (spray is faster and more even) before the mask leaves the house is the only reliable protection. Two thin coats beat one thick one. Let the second coat cure for at least two hours before the mask touches anything, and carry it face-up in an open bag rather than wrapped.
What adhesive works for attaching clay or foam details to a papier-mache base?
Score the papier-mache surface with coarse sandpaper, apply a coat of undiluted PVA and let it become tacky before pressing the clay or foam piece on. For foam-to-foam joins, contact cement is faster and stronger. Let contact cement become touch-dry on both surfaces before pressing them together: it bonds on contact and repositioning is not possible.
40 Halloween embroidery ideas sized for one evening: black cats, floral pumpkins, ghosts, woodland c
Boo basket ideas for boyfriends that feel personal and intentional: gourmet snacks, grooming picks,
Twelve pumpkin painting ideas guides sorted by colour, pattern, mood and skill level, so you can pic
Leave a Reply