

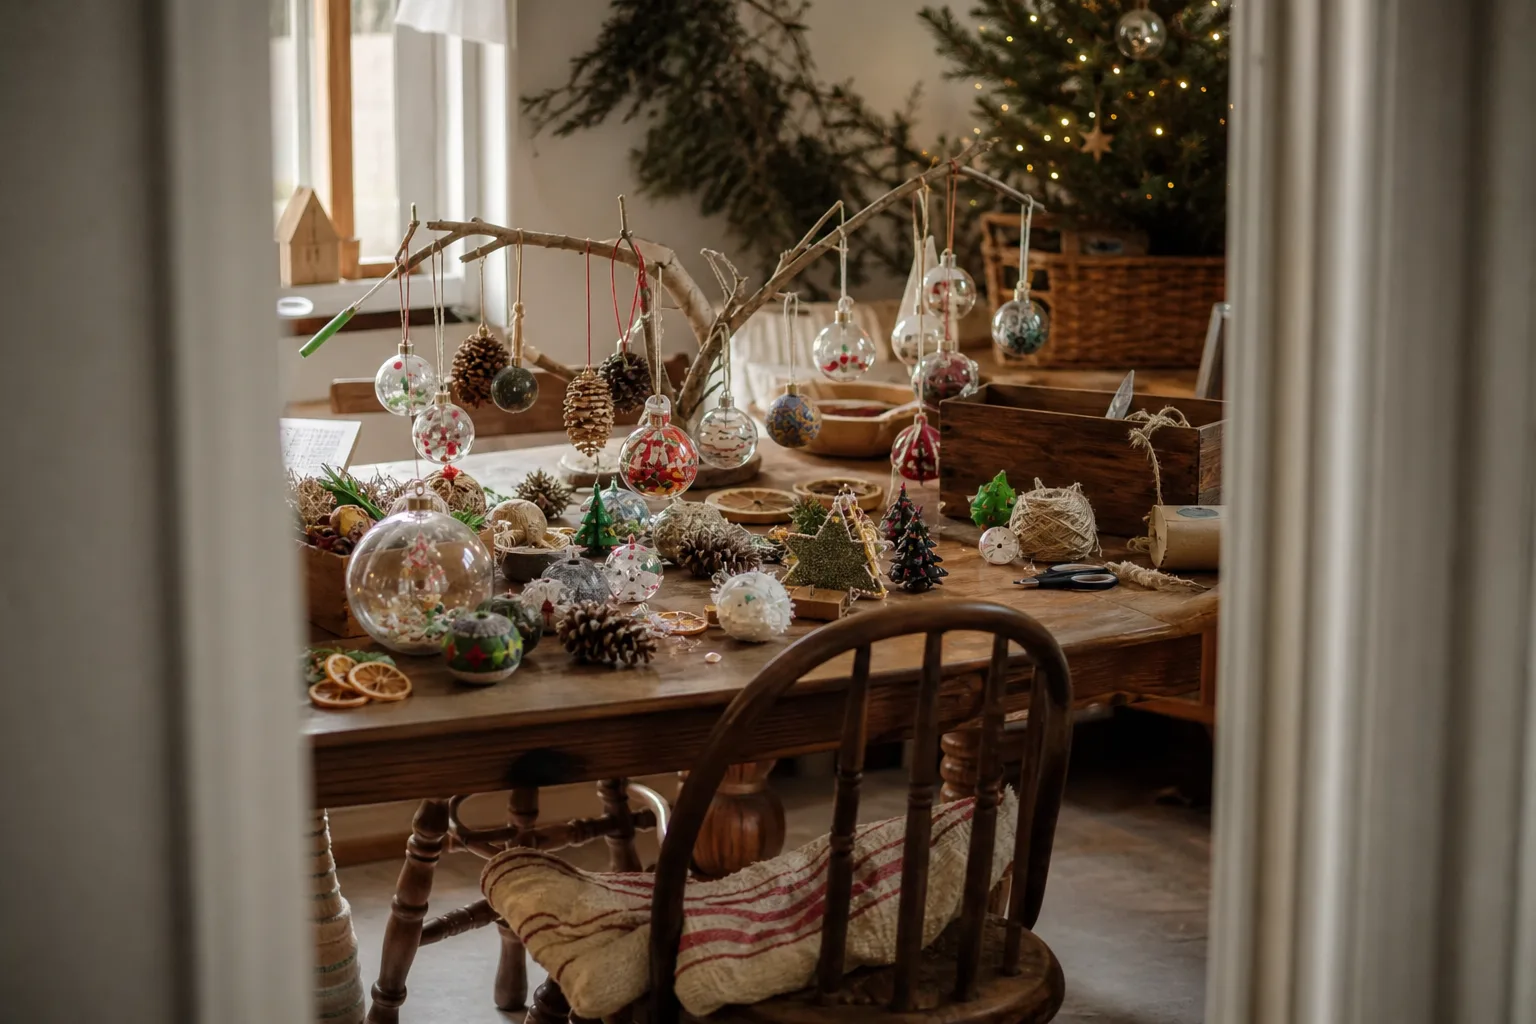
Every ornament on this list has to survive small hands, a kitchen table and at least one spilled cup of glitter, so none of it is precious. Some need an oven and an adult standing right there. Others are done before the kettle boils. If she wants the slightly tidier, more grown up cousin of this list for her own tree, these easy kids Christmas ornaments sit at the other end of the shelf.
This post contains affiliate links. If you buy through them, I may earn a small commission at no extra cost to you.
- Salt Dough Handprint Ornament
- Wooden Bead Candy Cane Ornament
- Melted Pony Bead Snowflake Ornament
- Puffy Paint Fingerprint Reindeer Ornament
- Fillable Plastic Bauble Confetti Ornament
- Popsicle Stick Star Ornament
- Felt Christmas Tree Ornament
- Paper Plate Santa Face Ornament
- Cinnamon Applesauce Dough Ornament
- Glitter Pinecone Ornament
- Button Snowman Ornament
- Melted Crayon Shaving Ornament
- Yarn Wrapped Star Ornament
- Photo Ornament in Mason Jar Lid
- Pompom Googly Eye Monster Ornament
- Folded Paper Star Ornament
- Clothespin Gingerbread Man Ornament
- Wine Cork Penguin Ornament
- Shrink Plastic Ornament
- Painted Rock Ornament
- Cardboard Tube Angel Ornament
- Quilled Paper Snowflake Ornament
- Styrofoam Ball Yarn Wrapped Ornament
- Air-Dry Clay Star Ornament with Stamped Initial
- Frequently Asked Questions
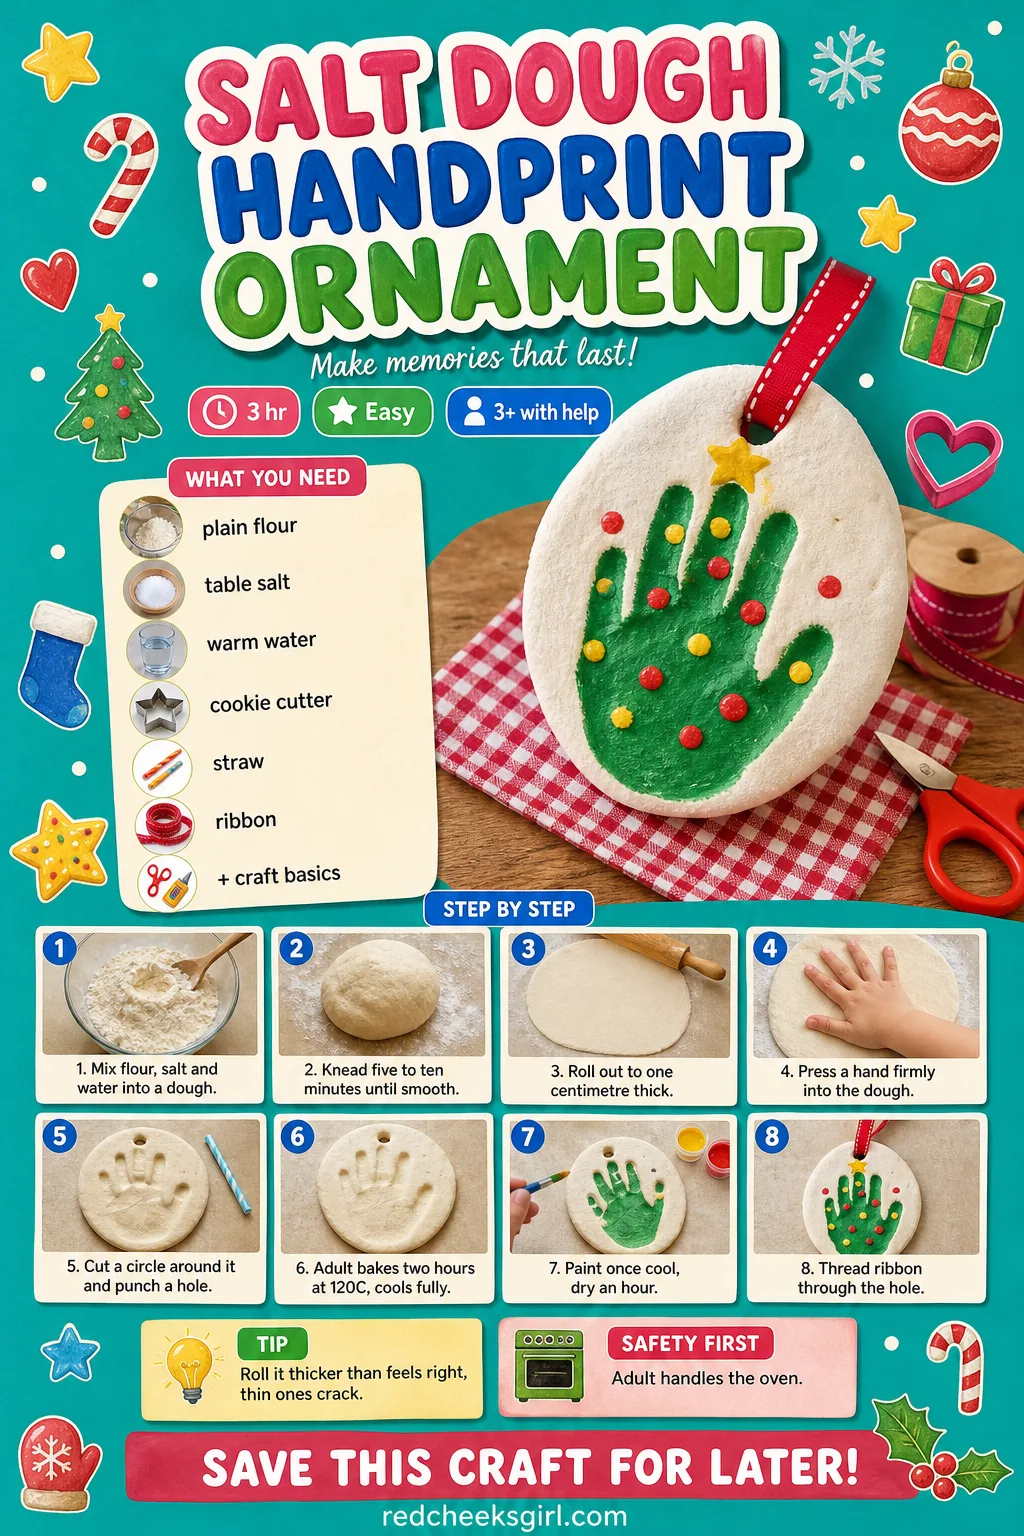
Salt Dough Handprint Ornament
A handprint this small does not last, so bake it into something that does. Finished, it looks like a pale little gingerbread hand hanging from red ribbon, and it keeps for years once sealed. Store it flat, wrapped in tissue, so the thin edges do not snap in the decorations box.
What You Need
- 2 cups plain flour
- 1 cup table salt
- 1 cup warm water
- Rolling pin
- Round cookie cutter, 10cm
- Drinking straw and 20cm ribbon
How to Make It
- Mix the flour and salt, then stir in the water until it forms a rough dough.
- Knead for 5 to 10 minutes until smooth, like firm playdough.
- Roll it out to about 1cm thick, a little thicker than feels right so the handprint survives.
- Press a small hand firmly into the dough and lift straight up without wiggling.
- An adult cuts a circle around the print with the cutter and punches a hole near the edge with the straw.
- An adult bakes at 120C (250F) for around 2 hours, flipping halfway, until hard right through, then cools it on a rack.
- Once fully cool, paint and leave to dry for an hour before threading the ribbon.
🛍 Shopping guide
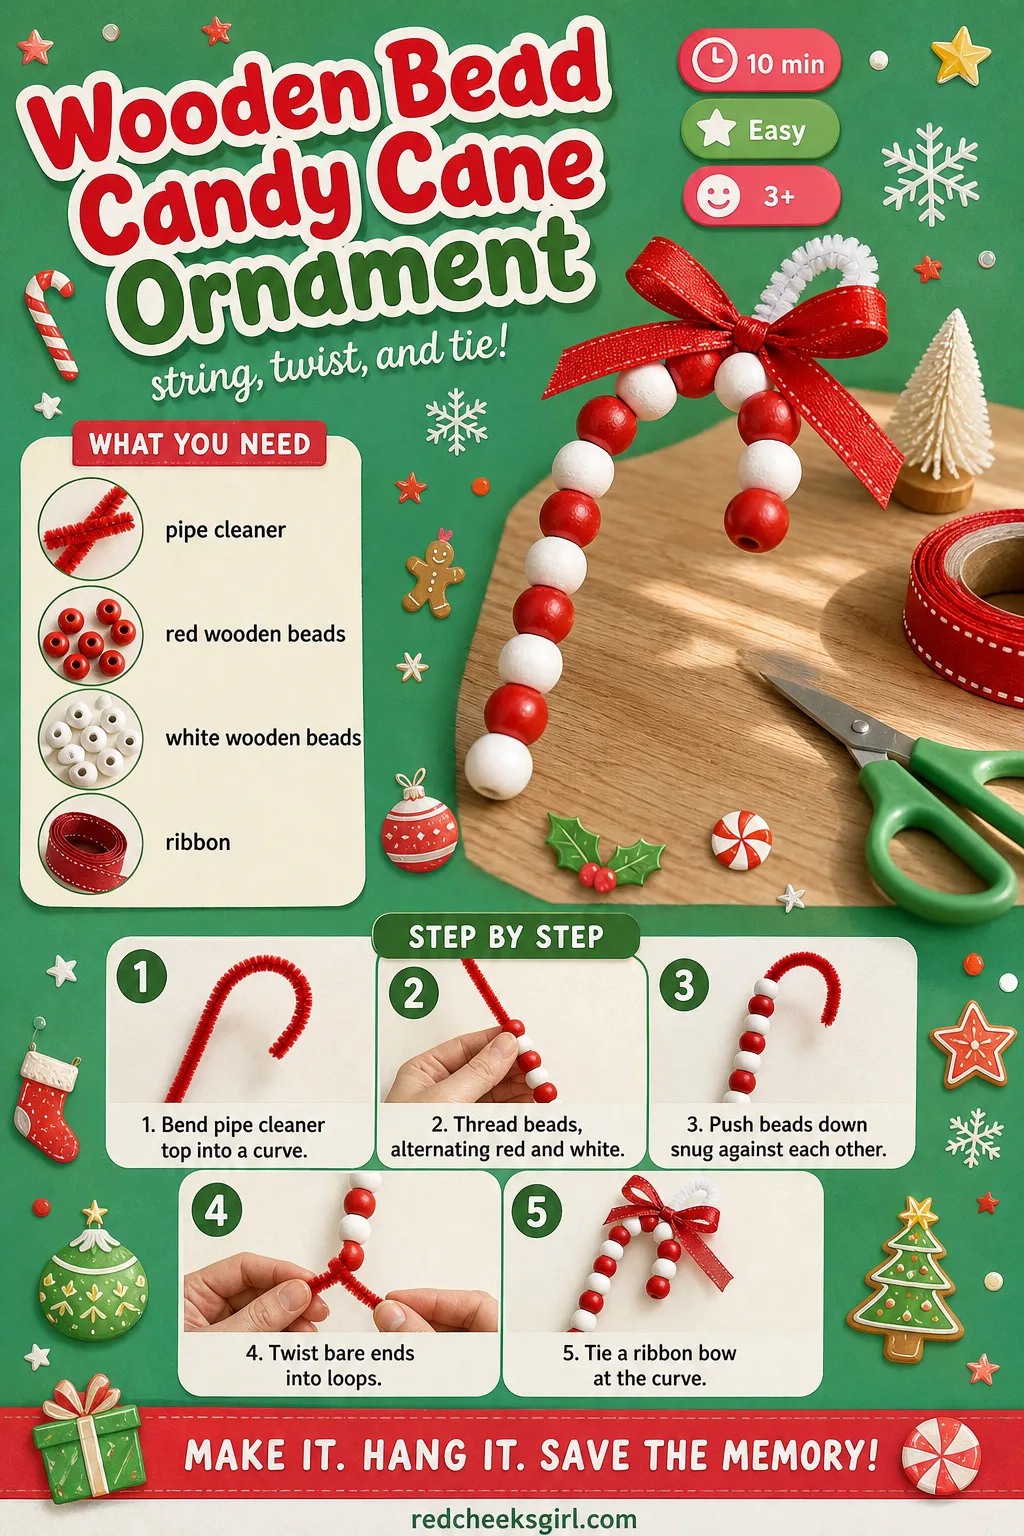
Wooden Bead Candy Cane Ornament
No glue, no drying time, nothing that can go wrong: a pipe cleaner and ten beads is the whole project. It looks exactly like a striped candy cane once bent, and it works just as well tied to a gift as hung on a branch.
What You Need
- 1 white pipe cleaner, 30cm
- 10 red wooden beads, 10mm
- 10 white wooden beads, 10mm
- 15cm ribbon
How to Make It
- Bend the top third of the pipe cleaner into a gentle curve so it looks like a cane handle.
- Thread beads onto the straight end, alternating red and white, pushing each one down snug against the last.
- Leave about 2cm bare at each end and twist it into a small loop so beads cannot slide off.
- Tie the ribbon into a small bow at the curve of the handle.
🛍 Shopping guide
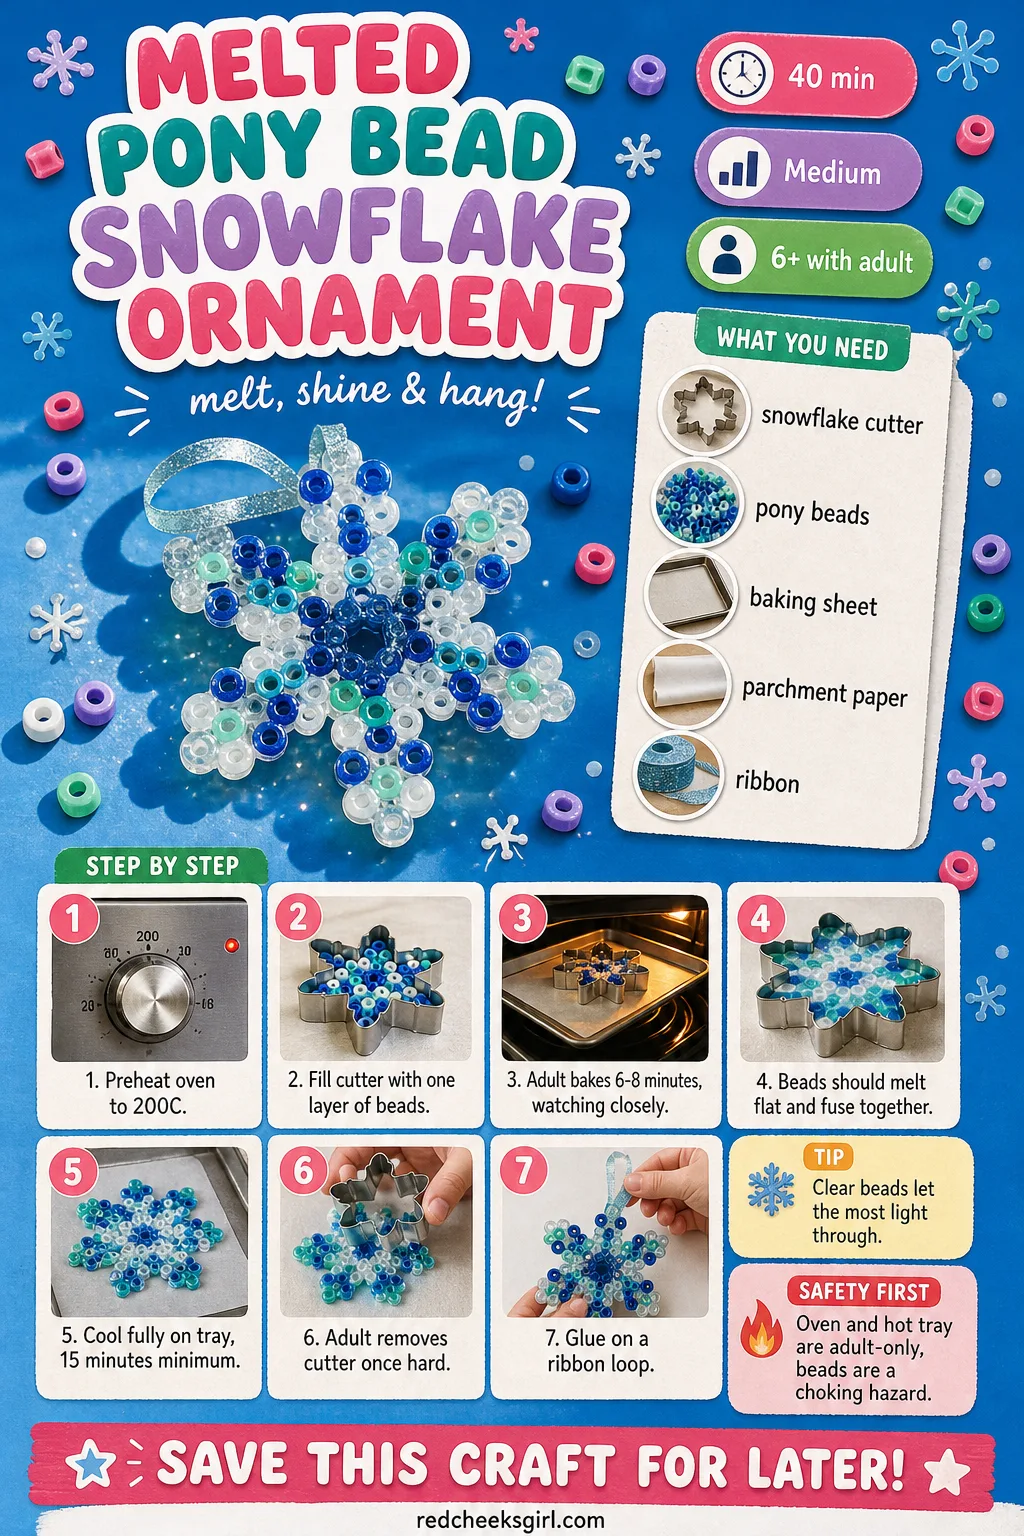
Melted Pony Bead Snowflake Ornament
Plastic beads go into the oven looking like craft store leftovers and come out looking like stained glass. Hang it in a window where the light actually hits it, that is the whole point of this one.
What You Need
- Metal snowflake cookie cutter, 8cm
- 60 to 80 pony beads, 6mm (clear, white, blue)
- Baking sheet
- Parchment paper
- Ribbon, 20cm
How to Make It
- Preheat the oven to 200C (400F).
- Set the cutter on a parchment-lined tray and fill it with a single layer of beads.
- An adult bakes for 6 to 8 minutes, watching closely, until the beads melt flat and fuse together.
- Leave it on the tray to cool fully for at least 15 minutes before touching, it is still liquid-soft when it first comes out.
- Once hard, an adult lifts out the cutter, glues on a ribbon loop, and it is ready to hang.
🛍 Shopping guide
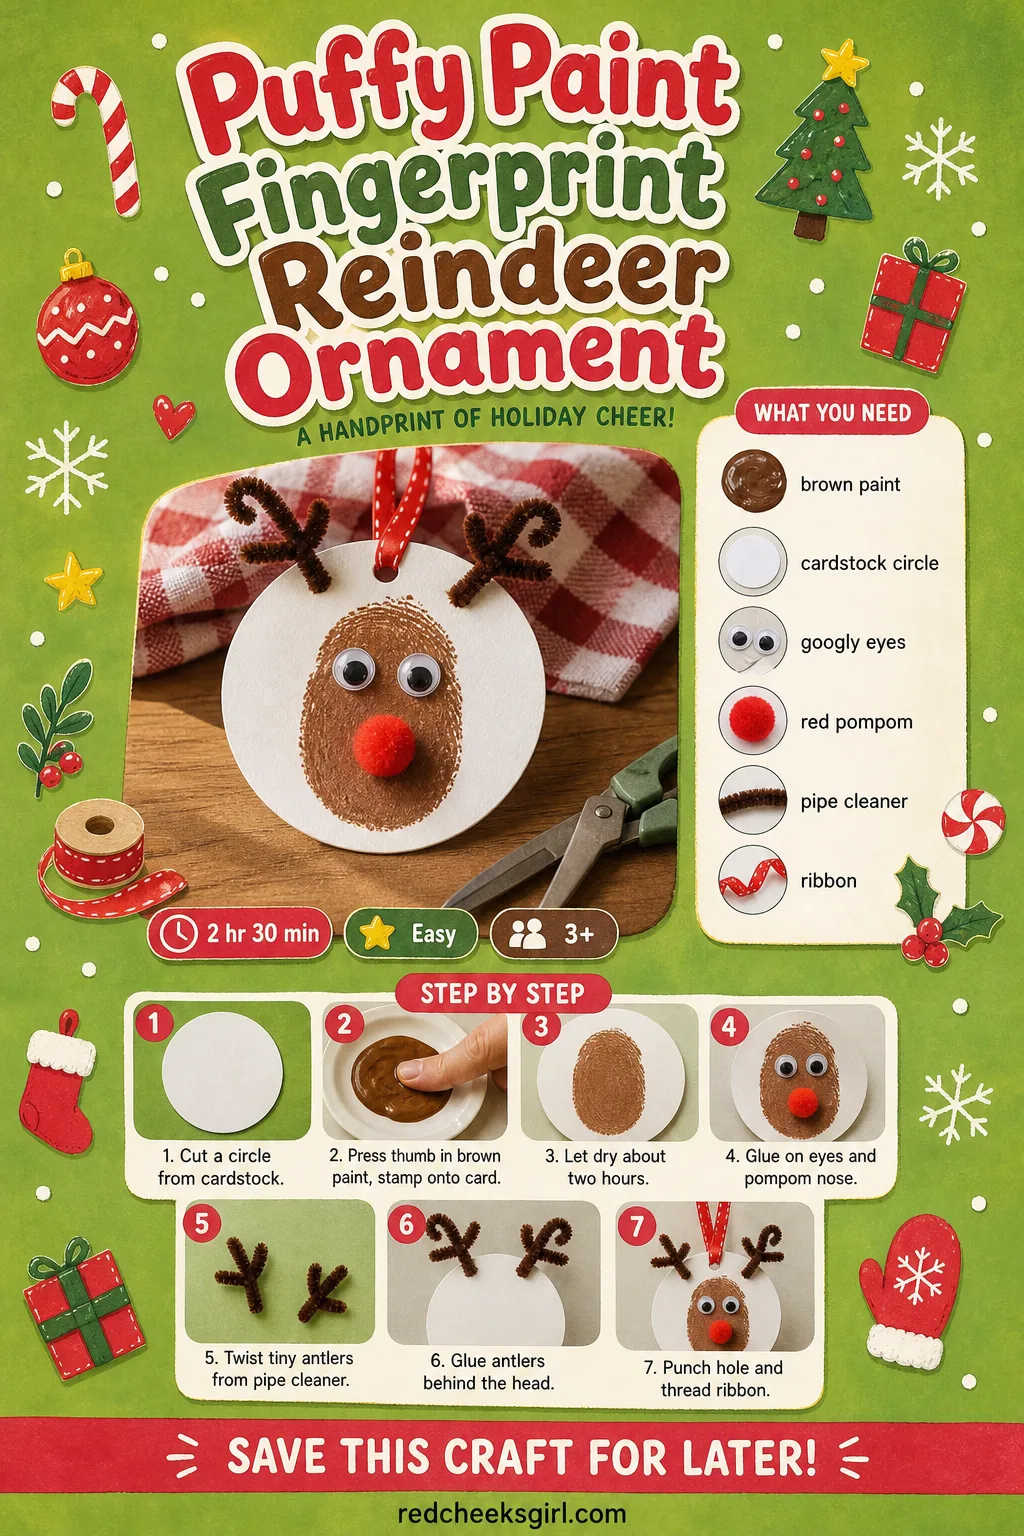
Puffy Paint Fingerprint Reindeer Ornament
A thumbprint in brown paint, two googly eyes and a red pompom nose, and suddenly it is a reindeer. It dries overnight on the windowsill, which makes it an easy swap gift for classmates or a quick grandparent present.
What You Need
- Brown puffy paint or brown acrylic
- Cream cardstock circle, 10cm
- 2 small googly eyes
- 1 red pompom, 10mm
- Brown pipe cleaner
- Ribbon, 20cm
How to Make It
- Cut the cardstock into a circle (an adult cuts if scissors are tricky).
- Press a thumb into the brown paint, then firmly onto the card to leave a print.
- Let it dry for about 2 hours, it should feel fully set and not tacky.
- Glue the googly eyes and red pompom nose onto the print.
- Twist a small loop of pipe cleaner into tiny antlers and glue them behind the head.
- Punch a hole at the top and thread the ribbon.
🛍 Shopping guide
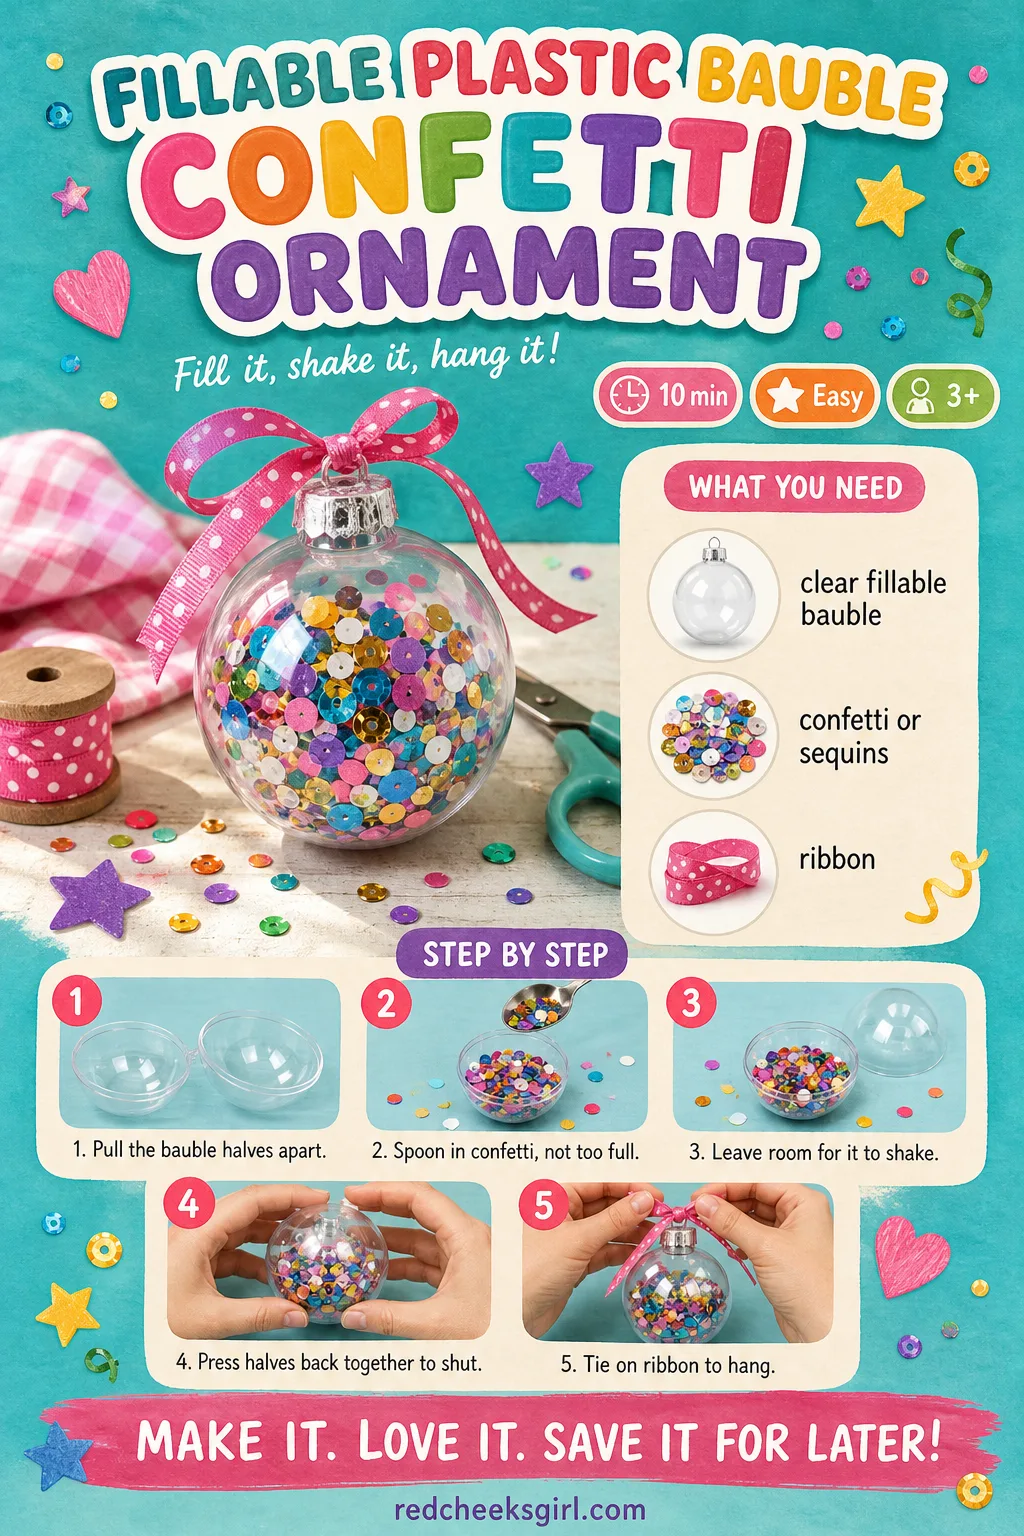
Fillable Plastic Bauble Confetti Ornament
It opens like a tiny locket, so whatever goes inside is up to whoever is making it that afternoon. No glue, no mess on the actual tree, and it shakes like a little snow globe once it is closed.
What You Need
- Clear fillable plastic bauble, 8cm
- 2 tbsp tissue paper confetti or sequins
- Ribbon, 20cm
How to Make It
- Twist or pull the two halves of the bauble apart.
- Spoon confetti or sequins into the bottom half, leaving enough space for it to move when shaken.
- Press the two halves back together until they click or screw shut.
- Tie or hook on the ribbon to hang it.
🛍 Shopping guide
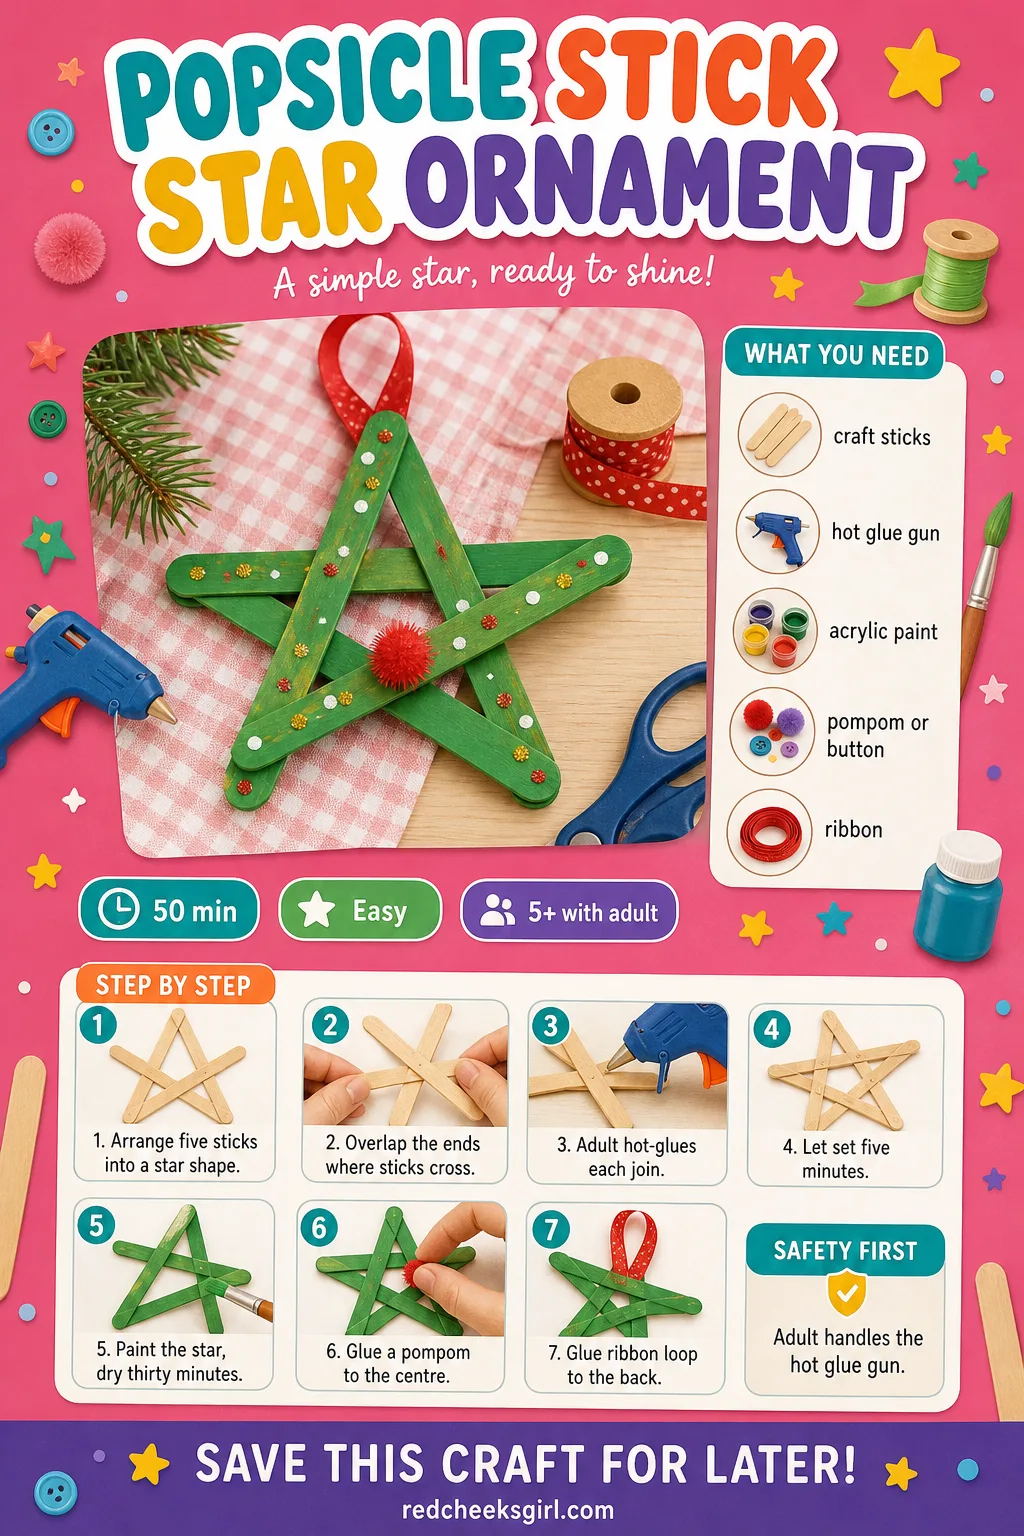
Popsicle Stick Star Ornament
Five sticks, glued into a star, painted whatever colour the tree is missing. It writes the year or a name on the back easily, which turns a scrap-wood craft into a keepsake without any extra effort.
What You Need
- 5 jumbo craft sticks, 15cm
- Hot glue gun
- Acrylic paint
- 1 small pompom or button
- Ribbon, 15cm
How to Make It
- Arrange the 5 sticks into a star shape, overlapping the ends where they cross.
- An adult hot-glues each overlapping join and holds for a few seconds to set.
- Leave for 5 minutes, then paint the whole star and let it dry for about 30 minutes.
- Glue a pompom or button to the centre as a finishing detail.
- Glue a small ribbon loop to the back of one point for hanging.
🛍 Shopping guide
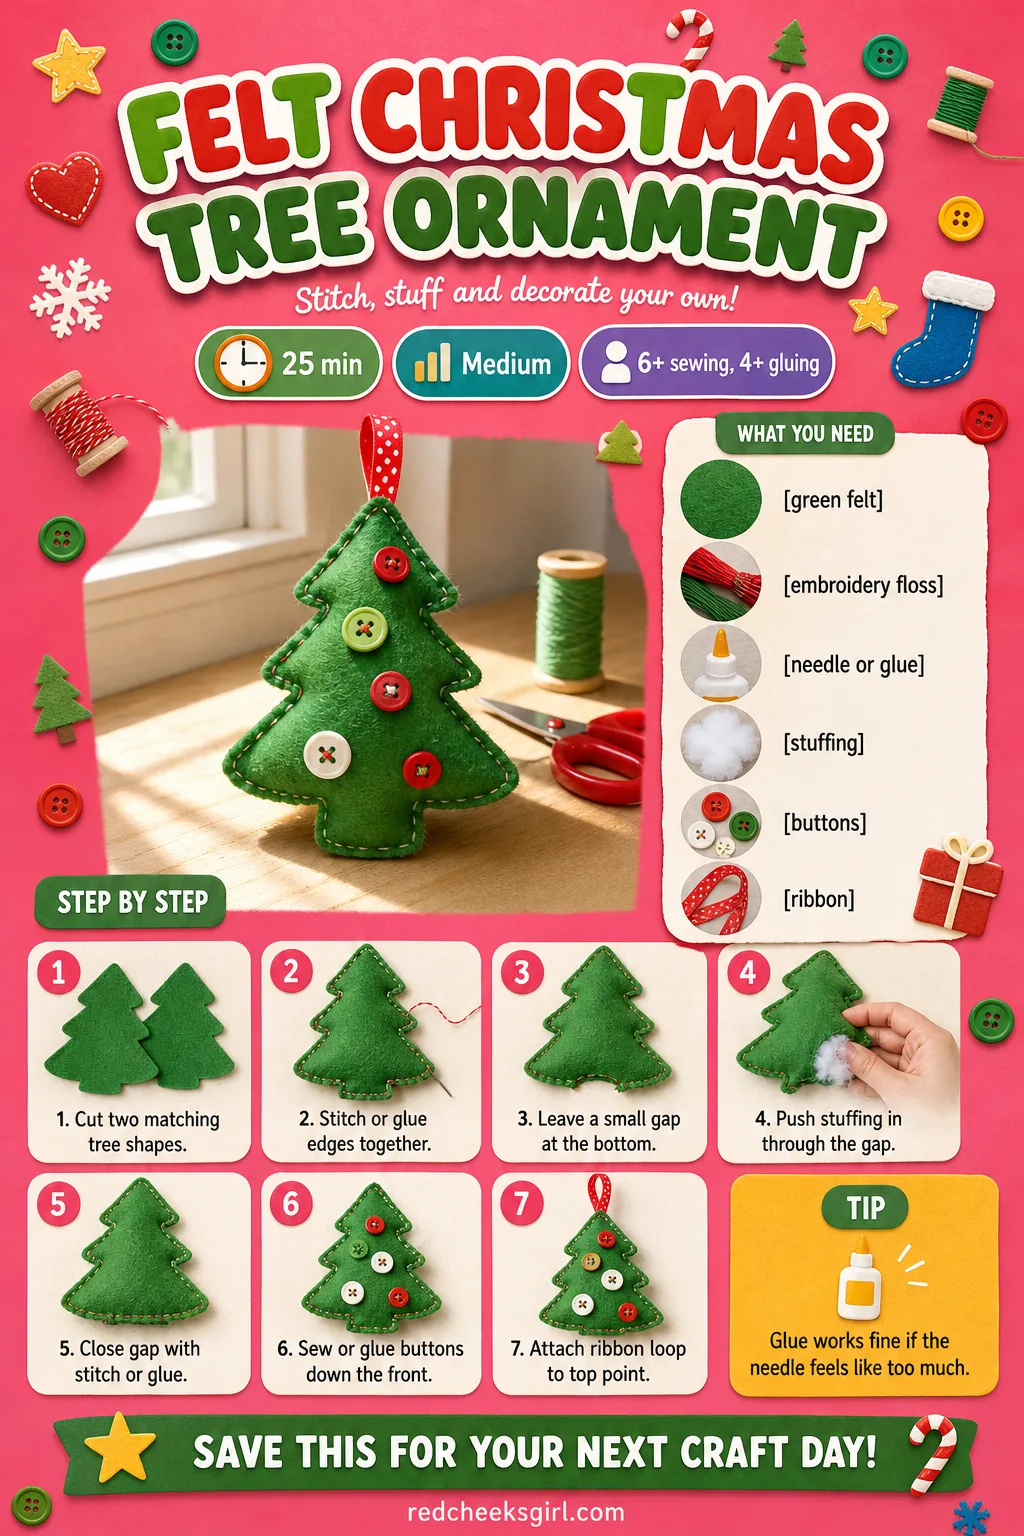
Felt Christmas Tree Ornament
Soft felt holds its shape without fraying, so it is forgiving of wobbly first stitches, or you can skip the needle entirely and glue it instead. Stuffed lightly, it has a nice bit of weight on the branch. If this is going into a school swap, these classroom Christmas decorations use a similar low-mess approach.
What You Need
- Green felt, 2 pieces 10x12cm
- Red embroidery floss, 50cm
- Needle (or fabric glue)
- Small handful of stuffing
- 3 small buttons
- Ribbon, 15cm
How to Make It
- Cut two matching tree shapes from the felt, an adult cuts or helps with blunt scissors.
- Stitch (or glue) the edges together with a simple running stitch, leaving a small gap at the bottom.
- Push a little stuffing in through the gap before closing it, just enough to give it shape, not stiff.
- Sew or glue the buttons down the front like ornaments.
- Attach a ribbon loop to the top point.
🛍 Shopping guide
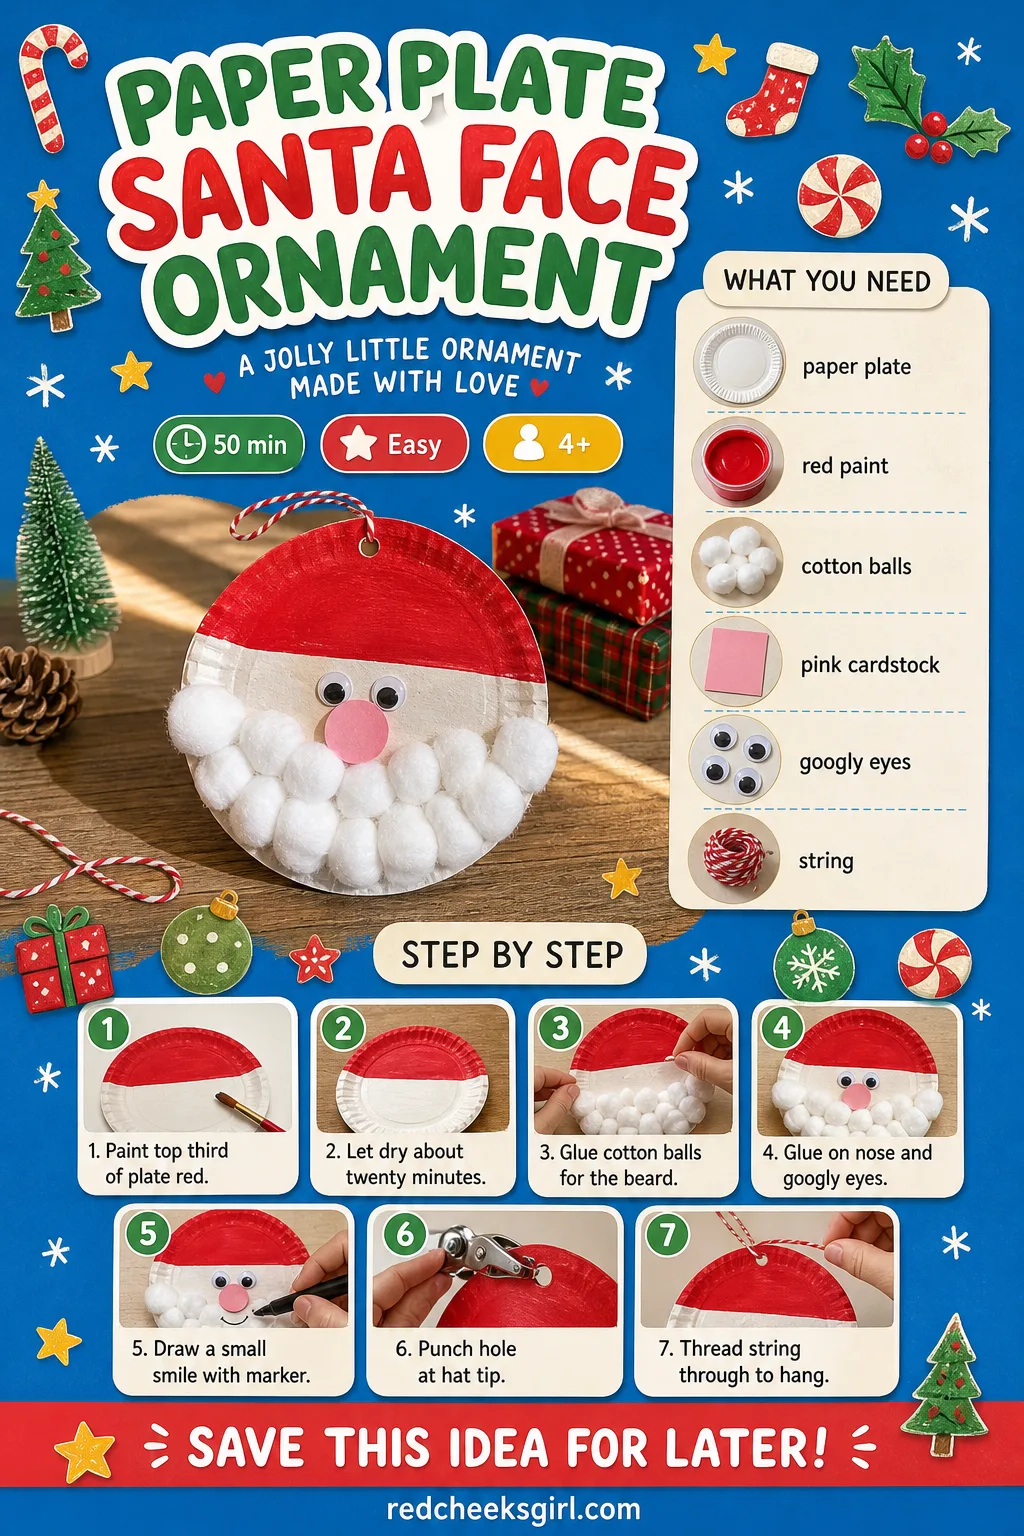
Paper Plate Santa Face Ornament
A paper plate gives Santa’s face its round shape for free, and the cotton ball beard is the genuinely fun fiddly bit nobody minds doing. Every one ends up slightly lopsided and that is exactly right for a classroom party.
What You Need
- Small paper plate, 15cm
- Red paint
- 15 to 20 cotton balls
- Pink cardstock circle for nose
- 2 googly eyes
- String, 20cm
How to Make It
- Paint the top third of the plate red for the hat and let it dry about 20 minutes.
- Glue cotton balls across the rest of the plate for the beard, hat trim and hat pompom.
- Glue the pink nose circle and googly eyes in place.
- Draw a small smile with marker under the nose.
- Punch a hole at the tip of the hat and thread the string through.
🛍 Shopping guide
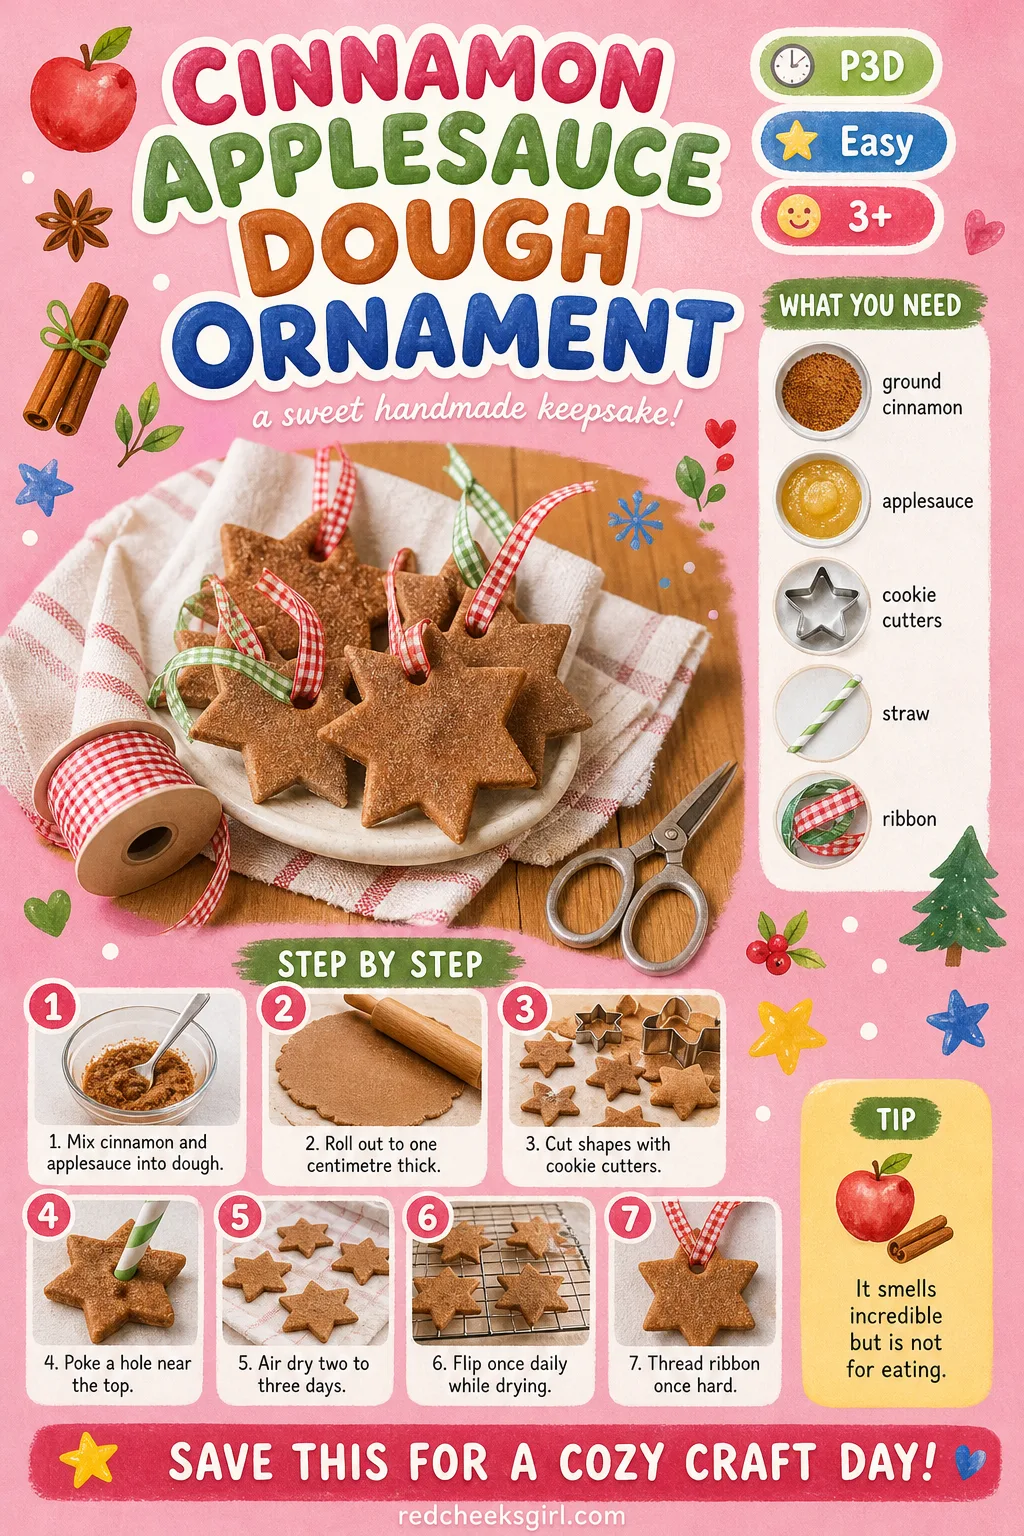
Cinnamon Applesauce Dough Ornament
No oven, no baking tray, just cinnamon and applesauce mixed into a dough that smells like Christmas before it is even shaped. It air-dries over a couple of days, which is long enough that drying is the real wait here, not the making.
What You Need
- 1 cup ground cinnamon
- 1 cup unsweetened applesauce
- Cookie cutters
- Drinking straw
- Ribbon, 20cm
How to Make It
- Mix the cinnamon and applesauce together into a stiff, slightly sticky dough.
- Roll it out between two sheets of paper to about 1cm thick.
- Cut shapes with the cookie cutters and lift them carefully onto a flat tray.
- Poke a hanging hole near the top with the straw.
- Leave flat to air dry for 2 to 3 days, flipping once a day, until firm and darker brown all through.
- Thread the ribbon once completely dry.
🛍 Shopping guide
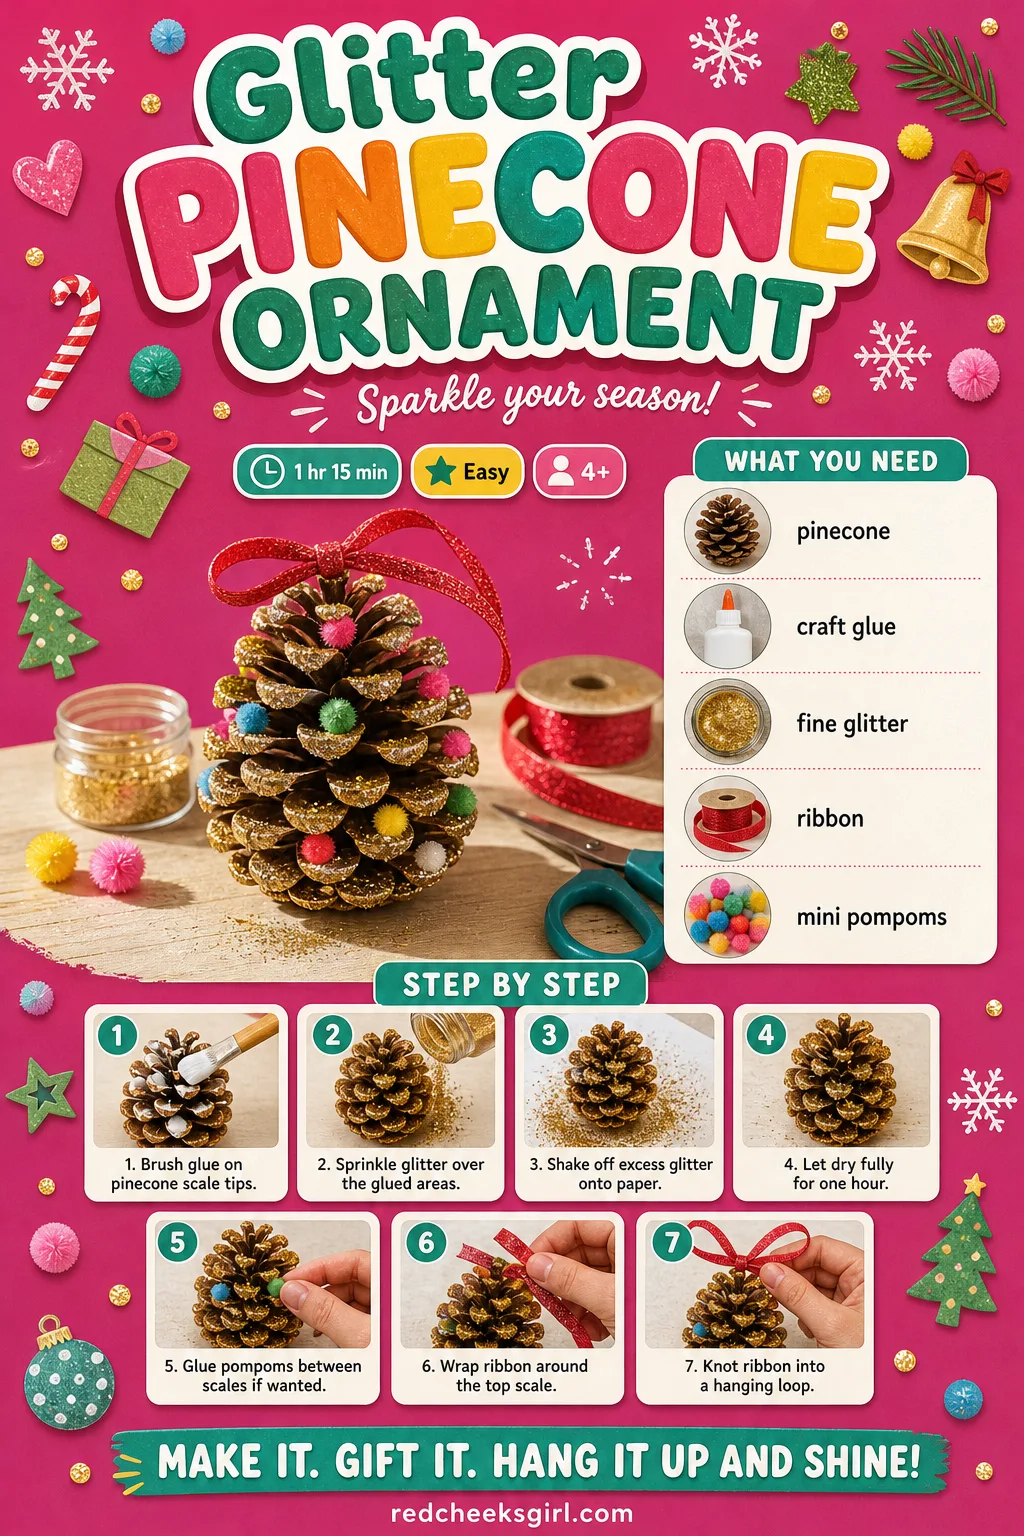
Glitter Pinecone Ornament
A pinecone from the yard costs nothing and already looks half-finished. Glue on the tips, shake on glitter, and it frosts over like the first snowfall. Hang it near a window so the light actually catches it.
What You Need
- 1 medium pinecone, 7cm
- White craft glue
- 1 tbsp fine glitter
- Ribbon, 20cm
- Small pompoms, optional
How to Make It
- Brush glue over the tips of the pinecone’s scales.
- Sprinkle glitter generously over the glued areas, holding it over paper to catch the excess.
- Let it dry fully for about an hour before handling.
- Tuck small pompoms between a few scales and glue in place, if using.
- Wrap ribbon around the top scale and knot it into a hanging loop.
🛍 Shopping guide
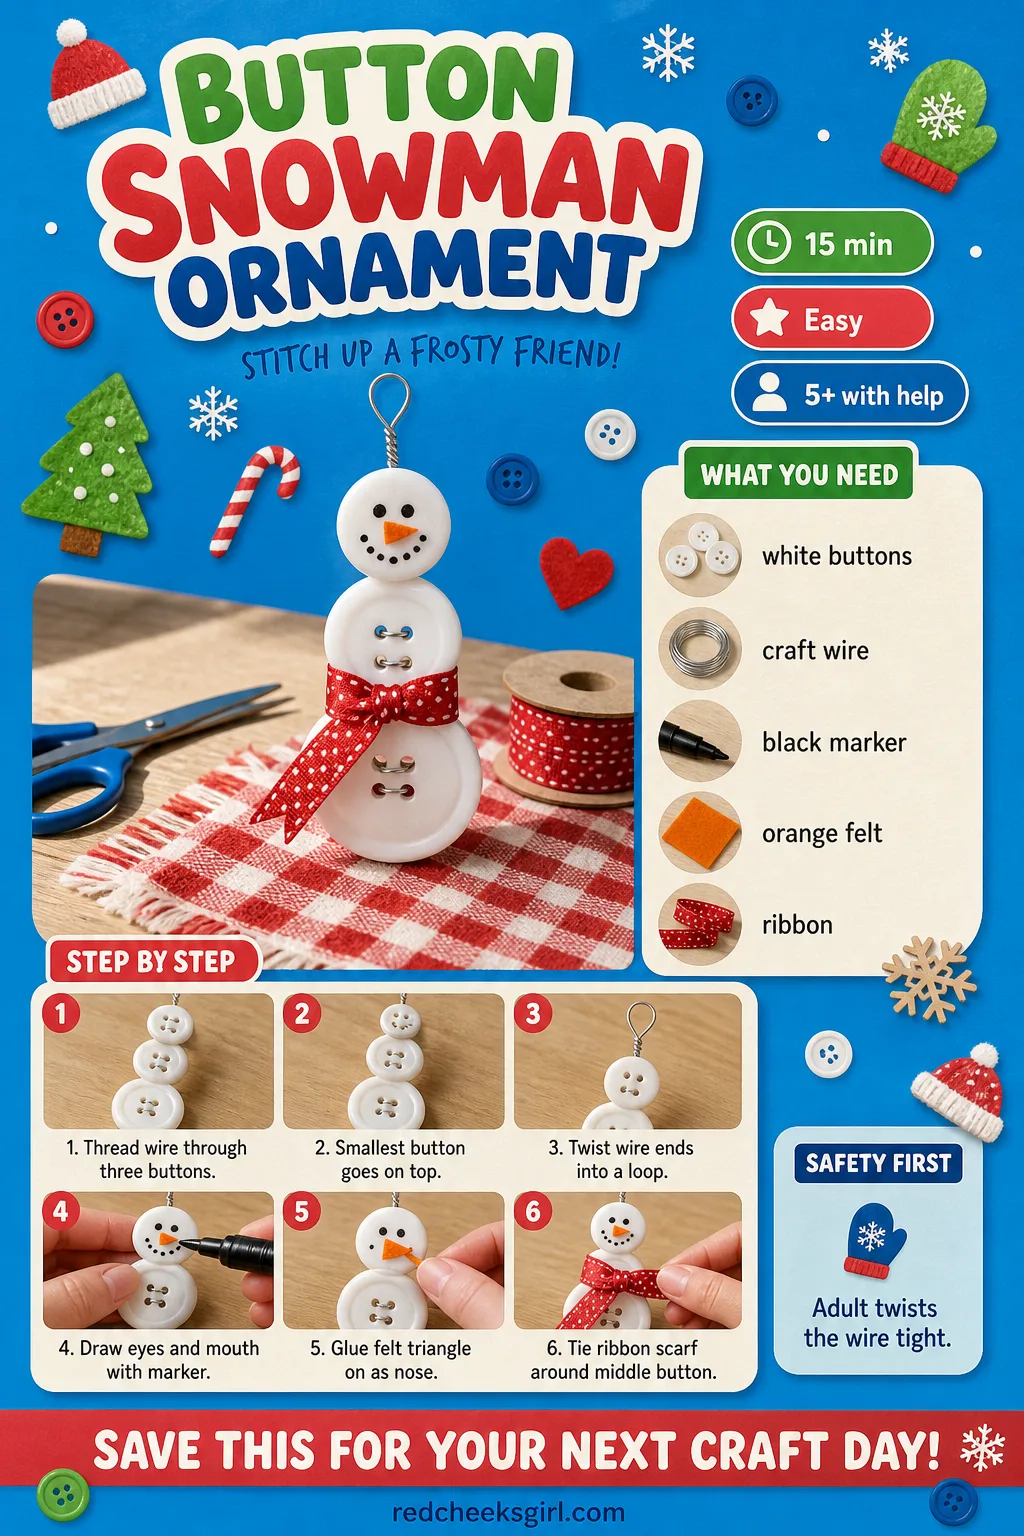
Button Snowman Ornament
Three buttons stacked largest to smallest and it is impossible to get wrong. Good use for whatever is sitting in the button jar, and a name on the back turns it from craft into keepsake.
What You Need
- 3 white buttons, graduating sizes
- Thin craft wire, 15cm
- Black marker
- Orange felt scrap
- Ribbon, 10cm
How to Make It
- Thread the wire through all three buttons, smallest on top, largest at the bottom.
- Twist the wire ends at the top into a loop for hanging (an adult helps twist it tight).
- Draw dot eyes and a mouth on the top button with the marker.
- Snip a tiny triangle from the orange felt and glue it on as a carrot nose.
- Tie the ribbon around the middle button like a scarf.
🛍 Shopping guide
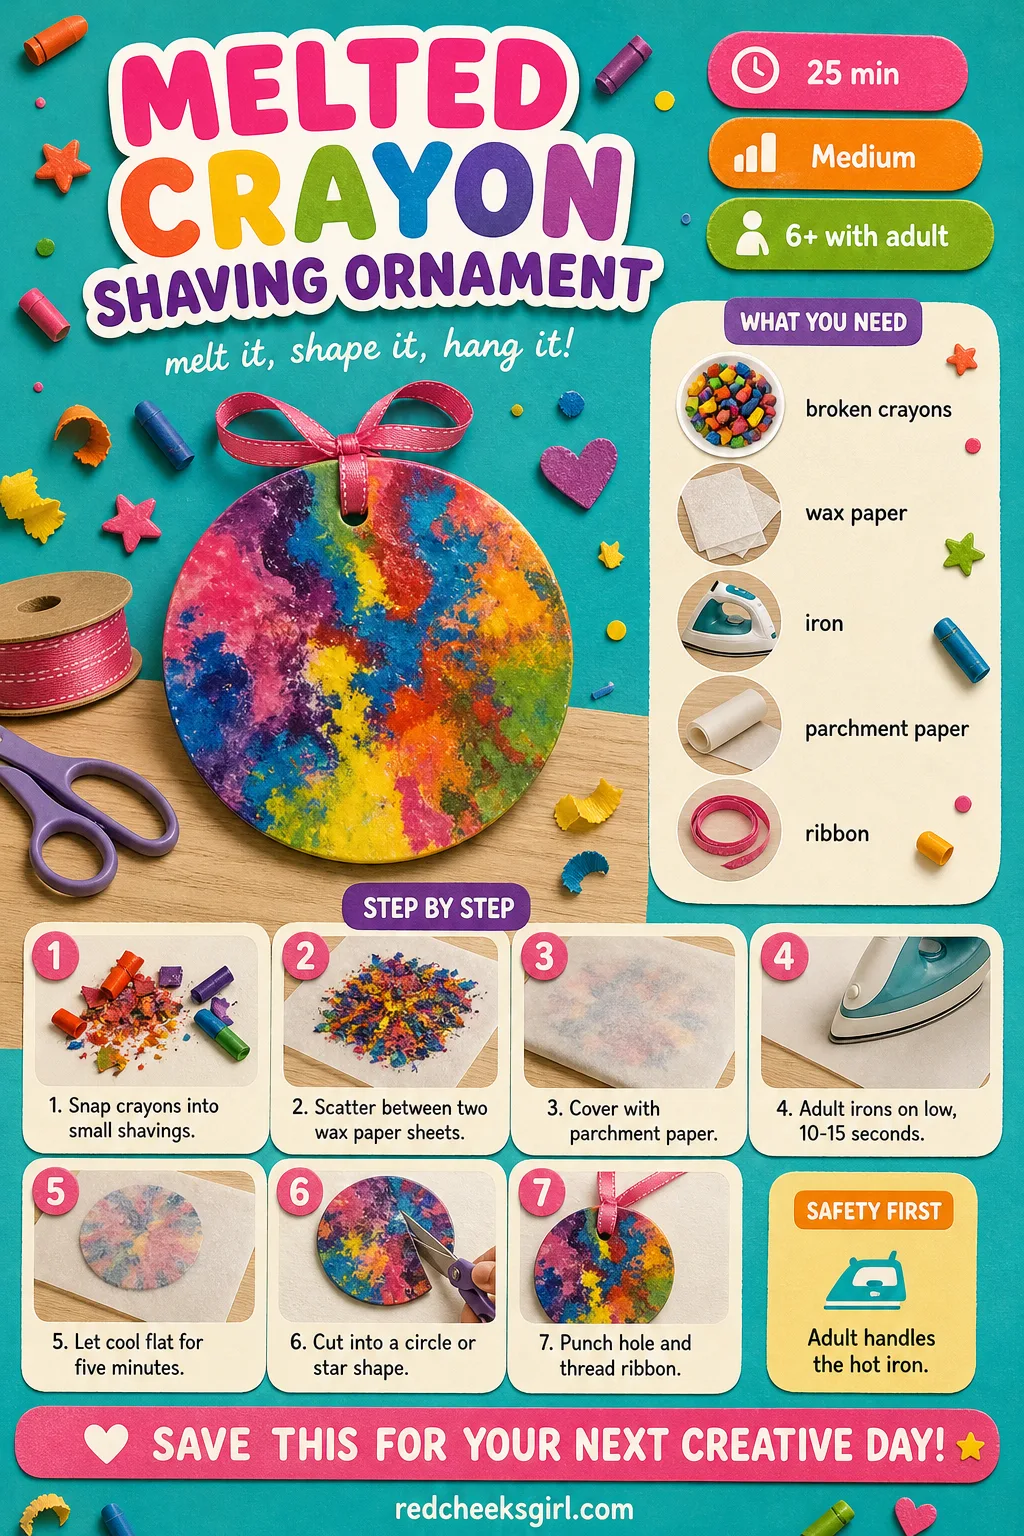
Melted Crayon Shaving Ornament
Broken crayon ends melt into something that looks like stained glass, and no two come out the same. This is an adult-run station since the iron does the melting, but the pay-off is worth setting it up.
What You Need
- 15 to 20 broken crayon pieces, mixed colours
- 2 sheets wax paper, 20x20cm
- Iron
- Parchment paper
- Ribbon, 15cm
How to Make It
- Peel the paper off the crayons and snap or grate them into small shavings.
- Scatter the shavings between the two sheets of wax paper.
- An adult covers it with parchment paper and irons on low heat for 10 to 15 seconds, checking often, until the shavings melt.
- Let it cool flat for 5 minutes, it should look marbled and slightly see-through.
- Cut into a circle or star once cool, then punch a hole and thread the ribbon.
🛍 Shopping guide
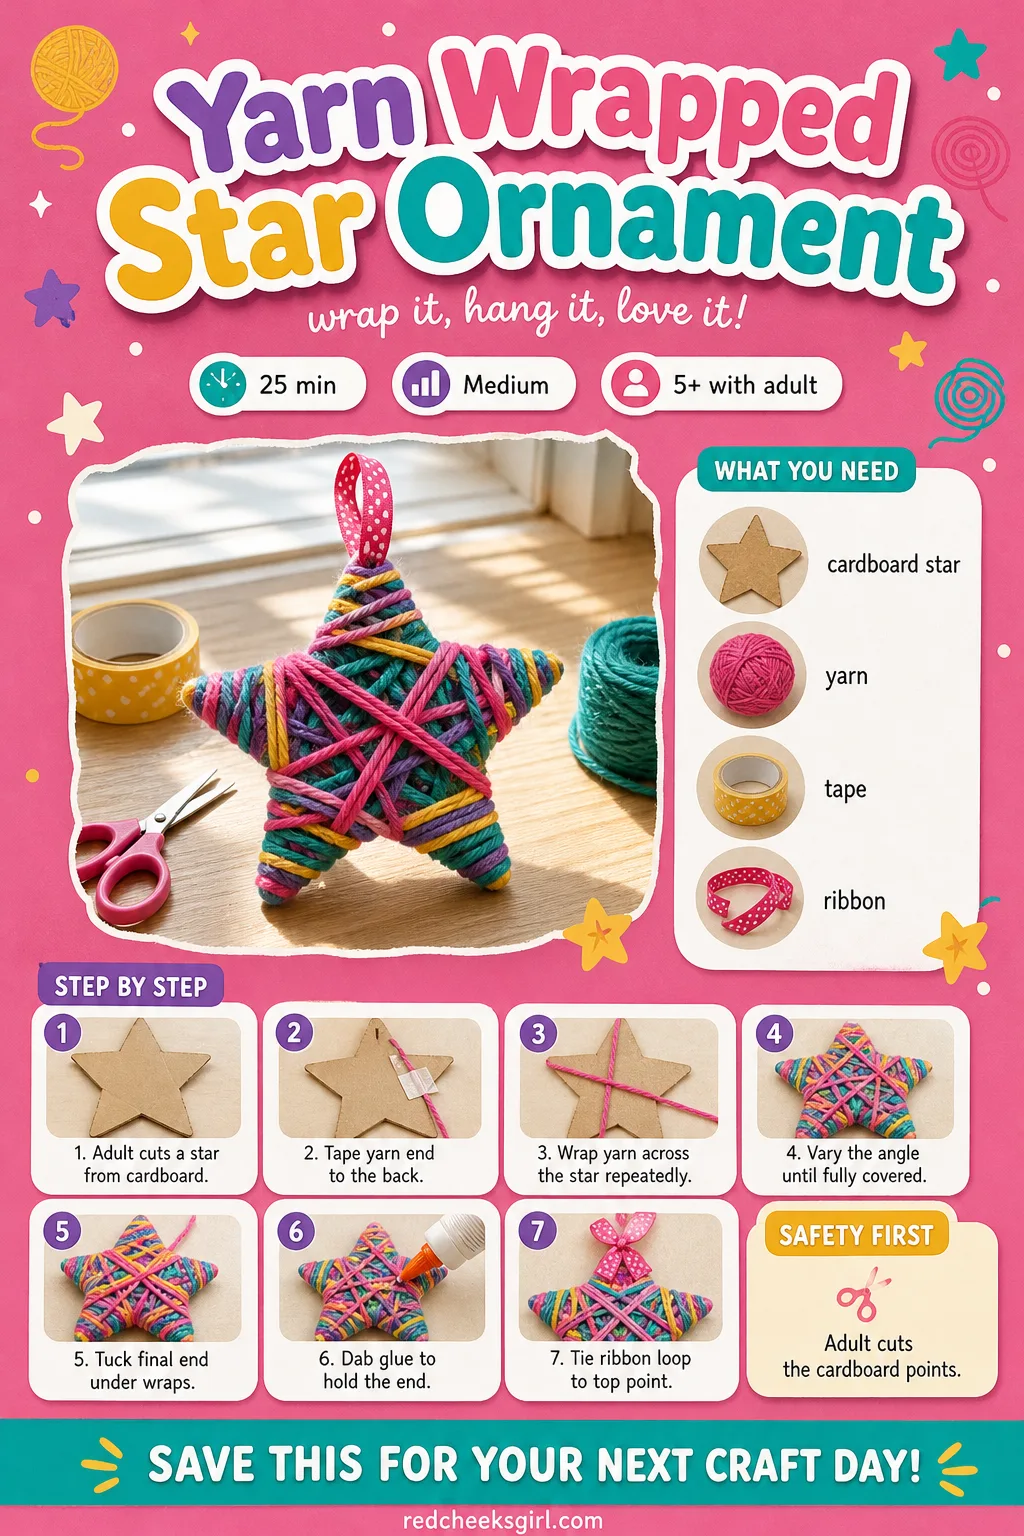
Yarn Wrapped Star Ornament
A plain cardboard star disappears under tightly wound yarn until it looks woven rather than wrapped. It is a quiet, repetitive one, good for using up yarn ends left over from other projects.
What You Need
- Cardboard star cutout, 12cm
- Yarn, 3m
- Tape
- Ribbon, 15cm
How to Make It
- An adult cuts a star shape from cardboard, the points are the fiddly part.
- Tape the end of the yarn to the back of the star.
- Wrap the yarn around and across the star repeatedly, varying the angle, until the cardboard is fully covered.
- Tuck the final end under previous wraps and dab a little glue to hold it.
- Tie a ribbon loop to the top point for hanging.
🛍 Shopping guide
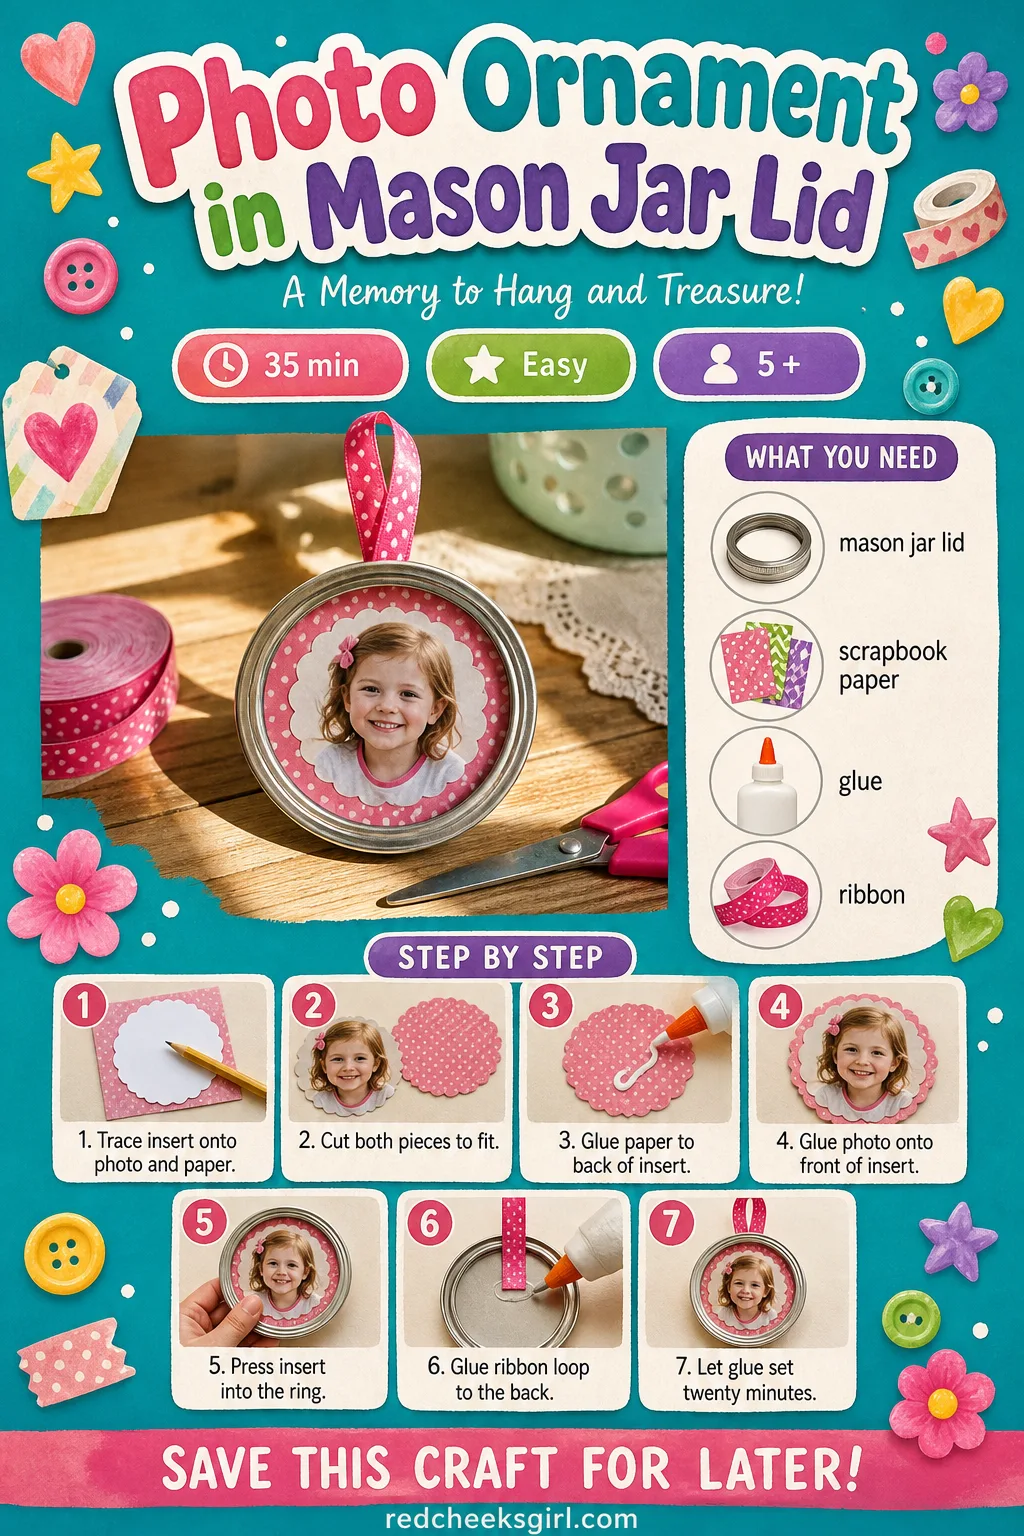
Photo Ornament in Mason Jar Lid
The ring part of a jar lid makes a near-perfect little frame, and the flat insert holds this year’s school photo behind it. It looks far more finished than the five minutes it takes, and it is the one grandparents actually ask for again.
What You Need
- Mason jar lid, ring and flat insert, 7cm
- Small photo
- Scrapbook paper circle
- Glue
- Ribbon, 20cm
How to Make It
- Trace the flat insert onto the back of the photo and the paper, then cut both to fit.
- Glue the paper circle to the back of the insert for a neat finish.
- Glue the photo centred on the front of the insert.
- Press the insert into the ring to seal it in place.
- Glue a ribbon loop to the back of the ring for hanging and let it sit 20 minutes to set.
🛍 Shopping guide
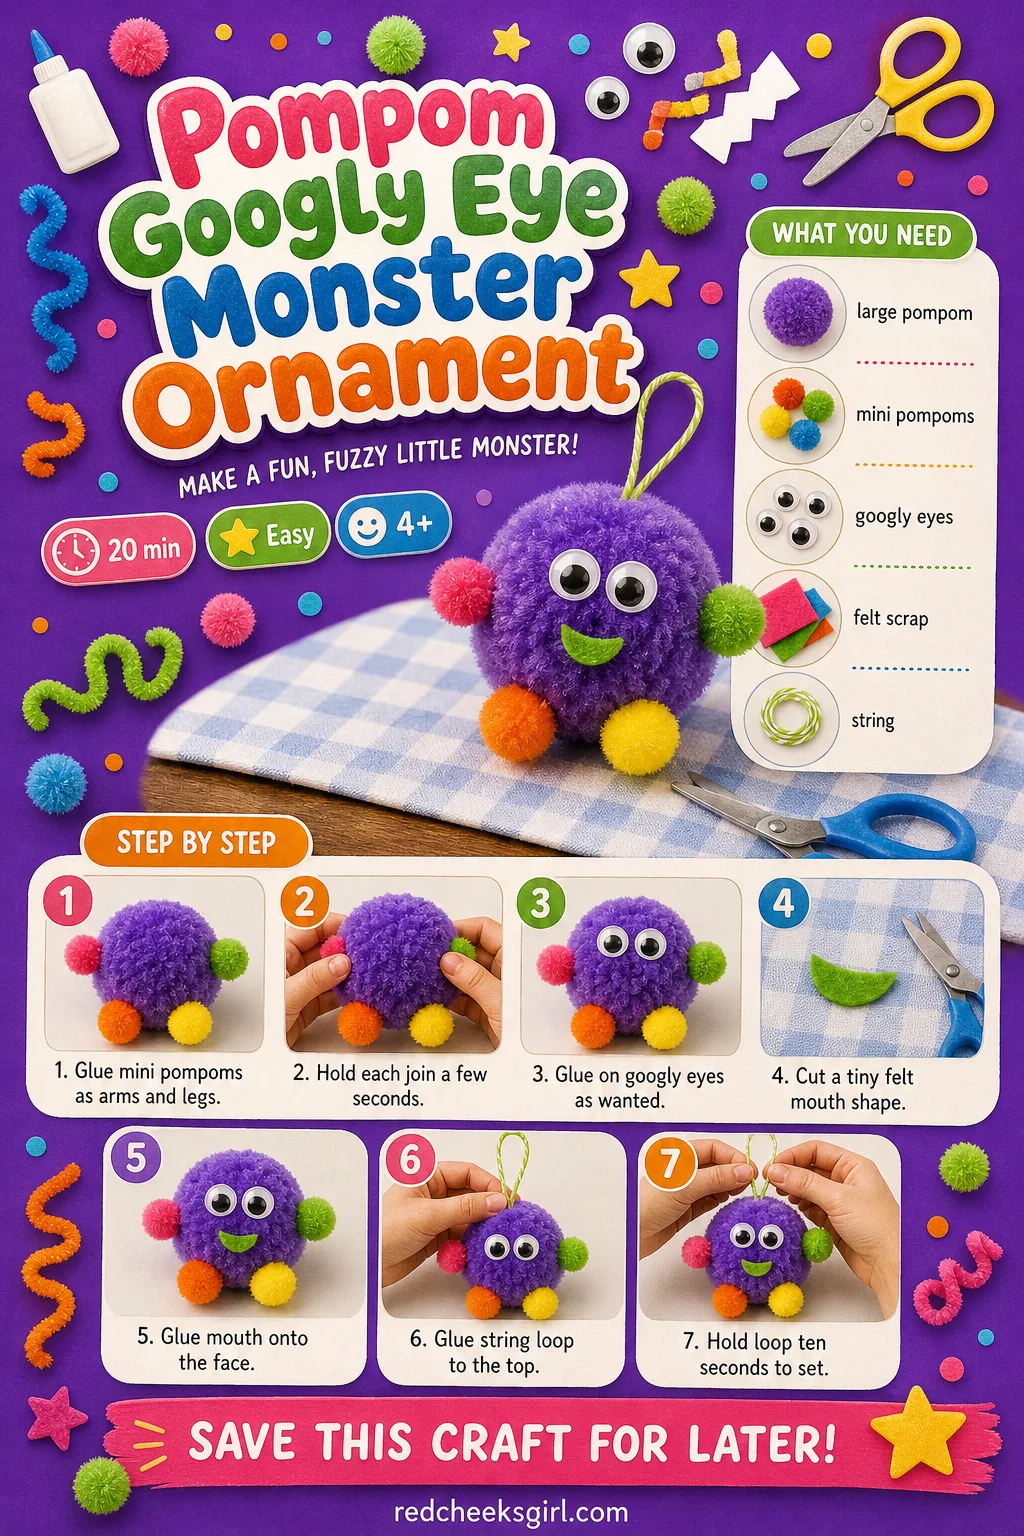
Pompom Googly Eye Monster Ornament
No two monsters turn out alike, since the colours and the eye count are entirely up to whoever is gluing. It needs no scissors if the pompoms come precut, which makes it a good one for a mixed-age group at a party table.
What You Need
- 1 large pompom, 5cm (body)
- 4 mini pompoms (arms and legs)
- 4 to 6 googly eyes, assorted sizes
- Felt scrap for the mouth
- String, 15cm
How to Make It
- Glue the mini pompoms around the large pompom as arms and legs, holding each for a few seconds to set.
- Glue on as many googly eyes as looks right, this is the fun decision.
- Snip a tiny mouth shape from the felt scrap and glue it onto the face.
- Glue a loop of string to the top and hold for 10 seconds to set before letting go.
🛍 Shopping guide
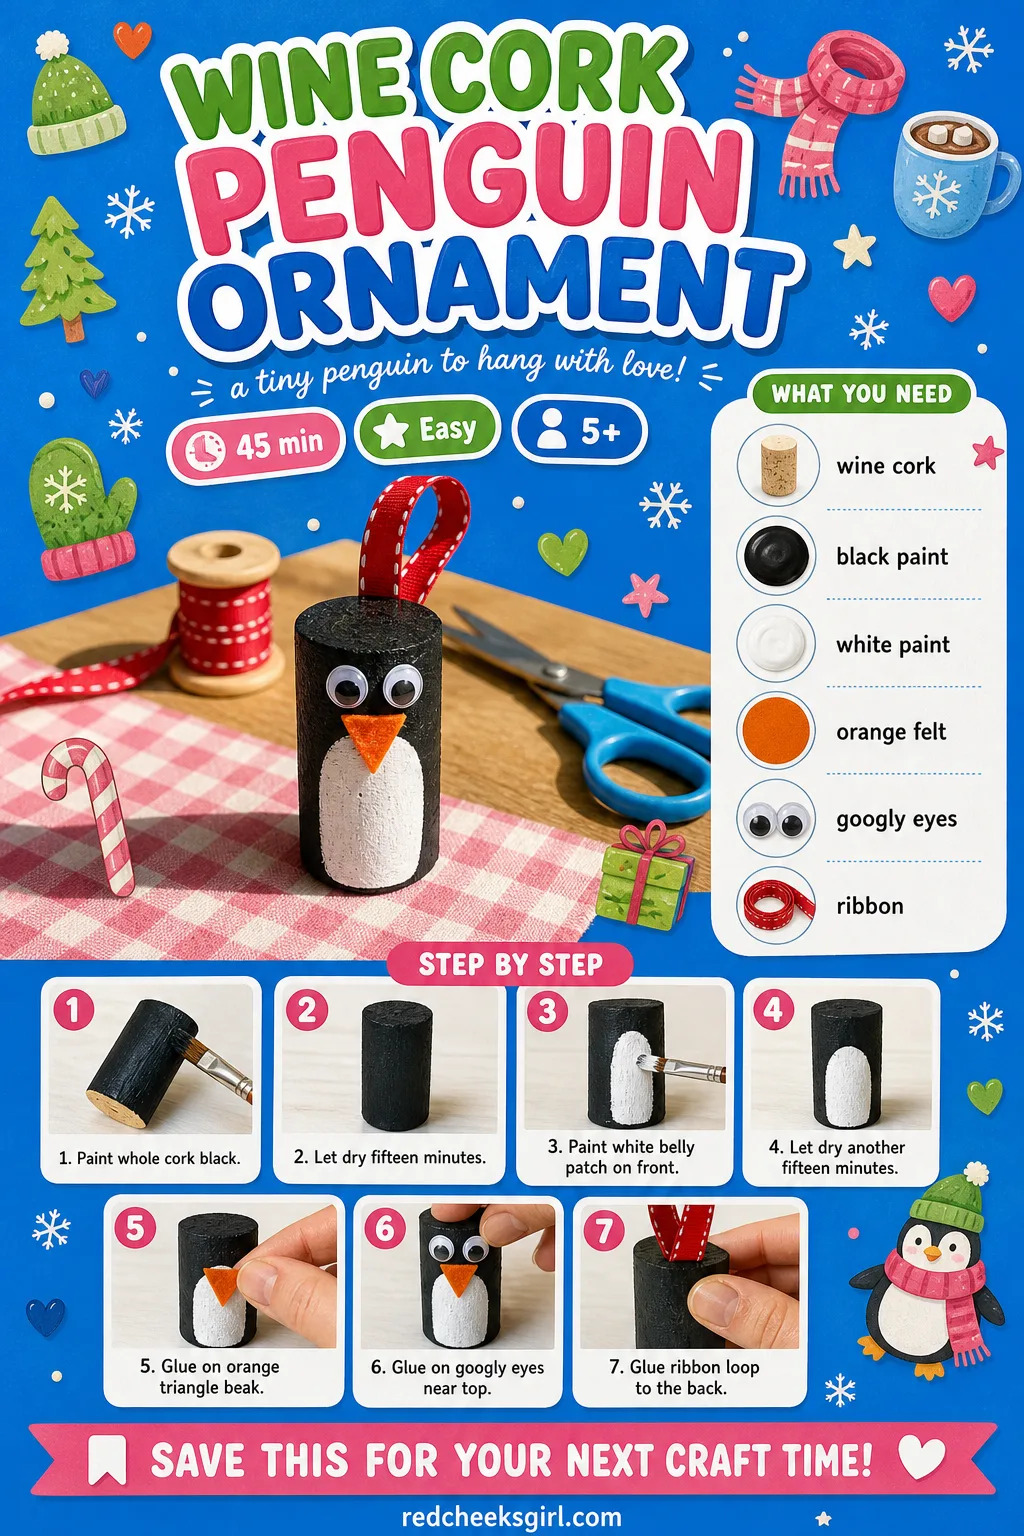
Wine Cork Penguin Ornament
A cork saved from dinner stands up on its own, which means this one works as easily on a shelf as hanging on a tree. It is a tidy use for whatever is sitting in the recycling pile.
What You Need
- 1 wine cork
- Black acrylic paint
- White acrylic paint
- Small orange felt triangle
- 2 googly eyes
- Ribbon, 15cm
How to Make It
- Paint the whole cork black and let it dry 15 minutes.
- Paint a white oval belly patch down the front, then dry another 15 minutes.
- Glue on the tiny orange triangle beak and the googly eyes near the top.
- Glue a thin ribbon loop to the top back for hanging.
🛍 Shopping guide
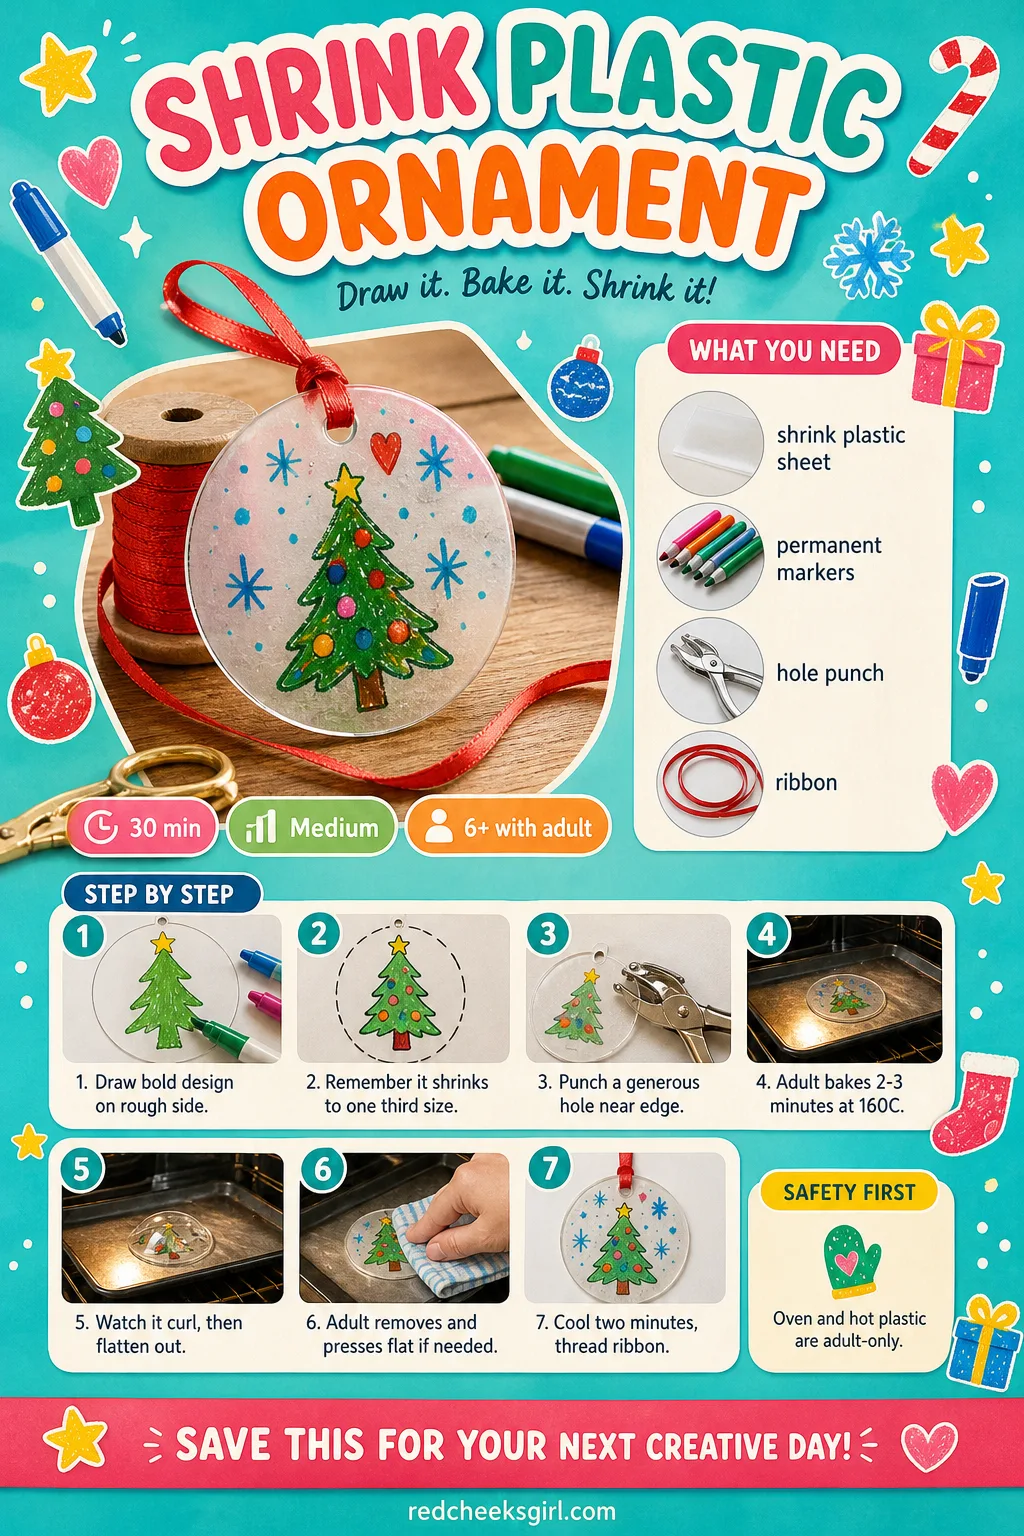
Shrink Plastic Ornament
A big, bold drawing goes into the oven and comes out a third of the size, thick like glass and twice as satisfying. The size change is the actual delight here, so let her watch through the oven door rather than from across the room.
What You Need
- Frosted shrink plastic sheet, A5
- Permanent markers or coloured pencils
- Hole punch
- Ribbon, 15cm
How to Make It
- Draw the design on the rough side of the sheet in bold colours, remembering it will shrink to about a third of this size.
- Punch a hole near the edge before baking, since the hole shrinks too, so make it a little generous.
- An adult bakes it on a parchment-lined tray at 160C (325F) for 2 to 3 minutes, it will curl up and then flatten back out.
- An adult removes it immediately and presses flat with a book if it has not laid flat on its own, then lets it cool 2 minutes.
- Thread the ribbon once cool to the touch.
🛍 Shopping guide
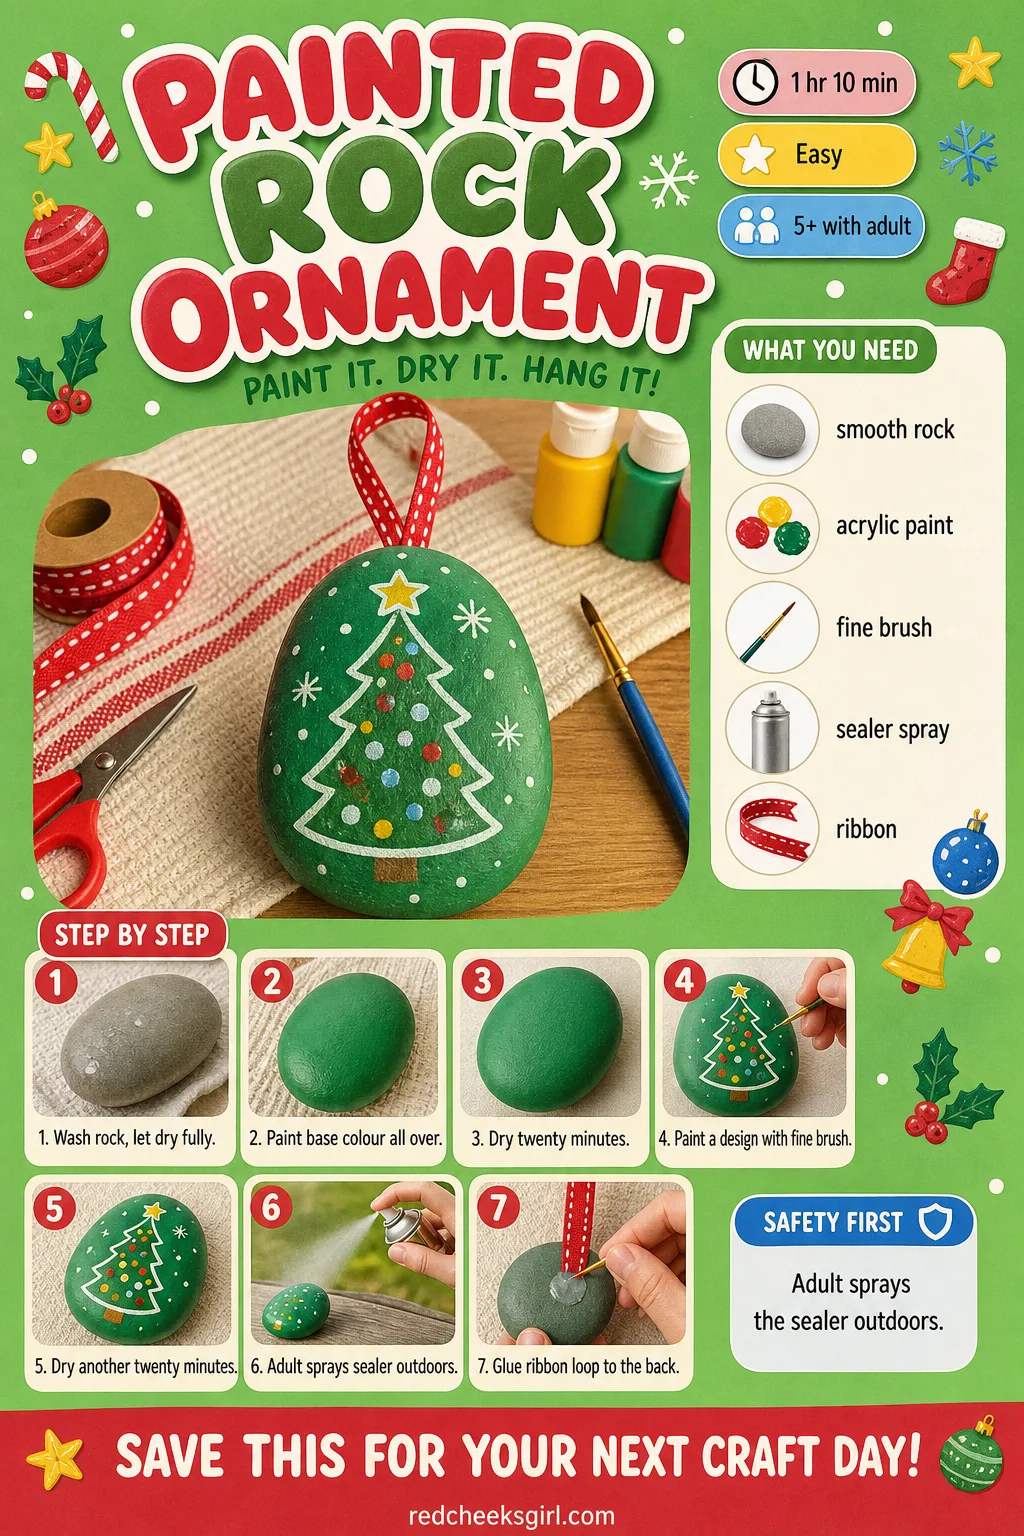
Painted Rock Ornament
A plain rock from the garden turns into a tiny painted bauble with real weight, which means it swings nicely instead of spinning in the draft near the door. Make the collecting trip part of the afternoon, not a chore before it.
What You Need
- 1 smooth flat rock, 4-5cm
- Acrylic paint
- Fine paintbrush
- Clear sealer spray
- Ribbon, 15cm
How to Make It
- Wash the rock and let it dry completely.
- Paint a base colour all over and let it dry 20 minutes.
- Paint a design, holly, a snowman or a star, with the fine brush, then dry another 20 minutes.
- An adult sprays clear sealer outdoors and lets it dry 10 minutes.
- Glue a ribbon loop to the back, holding it 20 seconds to set.
🛍 Shopping guide
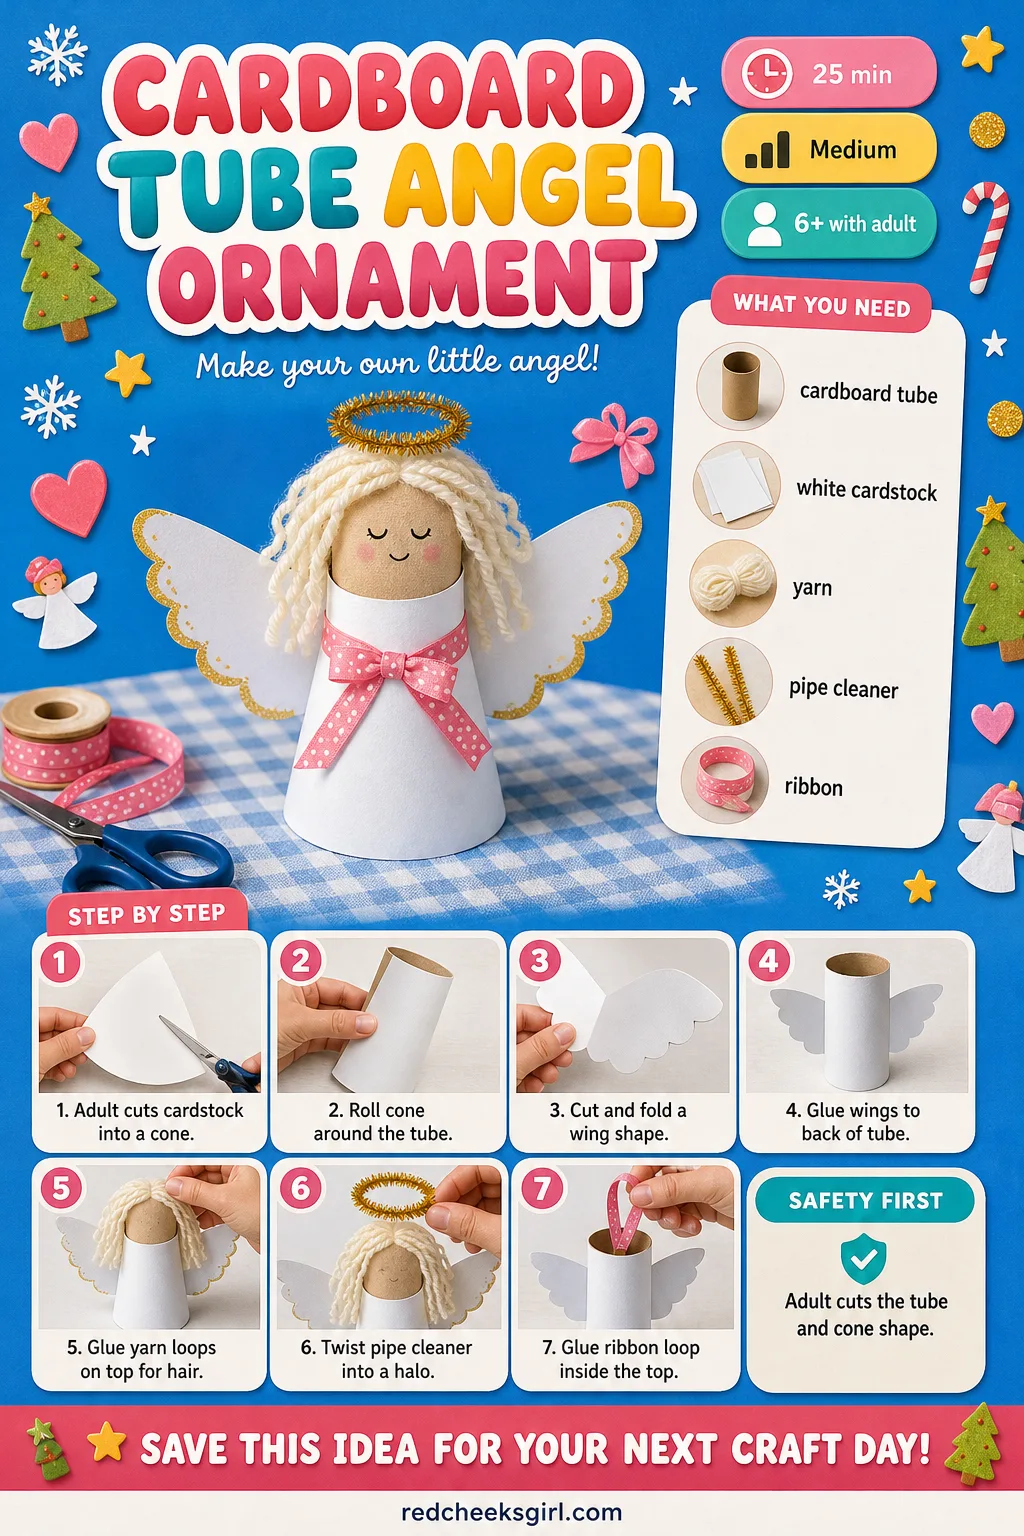
Cardboard Tube Angel Ornament
A toilet paper tube stands in for the body, which means this one costs nothing but patience and a bit of cutting. The paper wings fold flat for storage, so it survives the trip back into the decorations box better than most. More ways to use what is already in the recycling bin live in this list of unexpected ornament materials.
What You Need
- Cardboard tube, 5cm, cut from a toilet roll
- White cardstock, A4
- Yarn for hair
- Gold pipe cleaner for halo
- Ribbon, 15cm
How to Make It
- An adult cuts the cardstock into a cone shape and rolls it around the tube as a pointed robe.
- Cut a wing shape from cardstock, fold it in half, and glue it to the back of the tube.
- Glue small loops of yarn on top for hair.
- Twist the pipe cleaner into a circle and glue it behind the head as a halo.
- Glue a ribbon loop inside the top of the robe for hanging.
🛍 Shopping guide
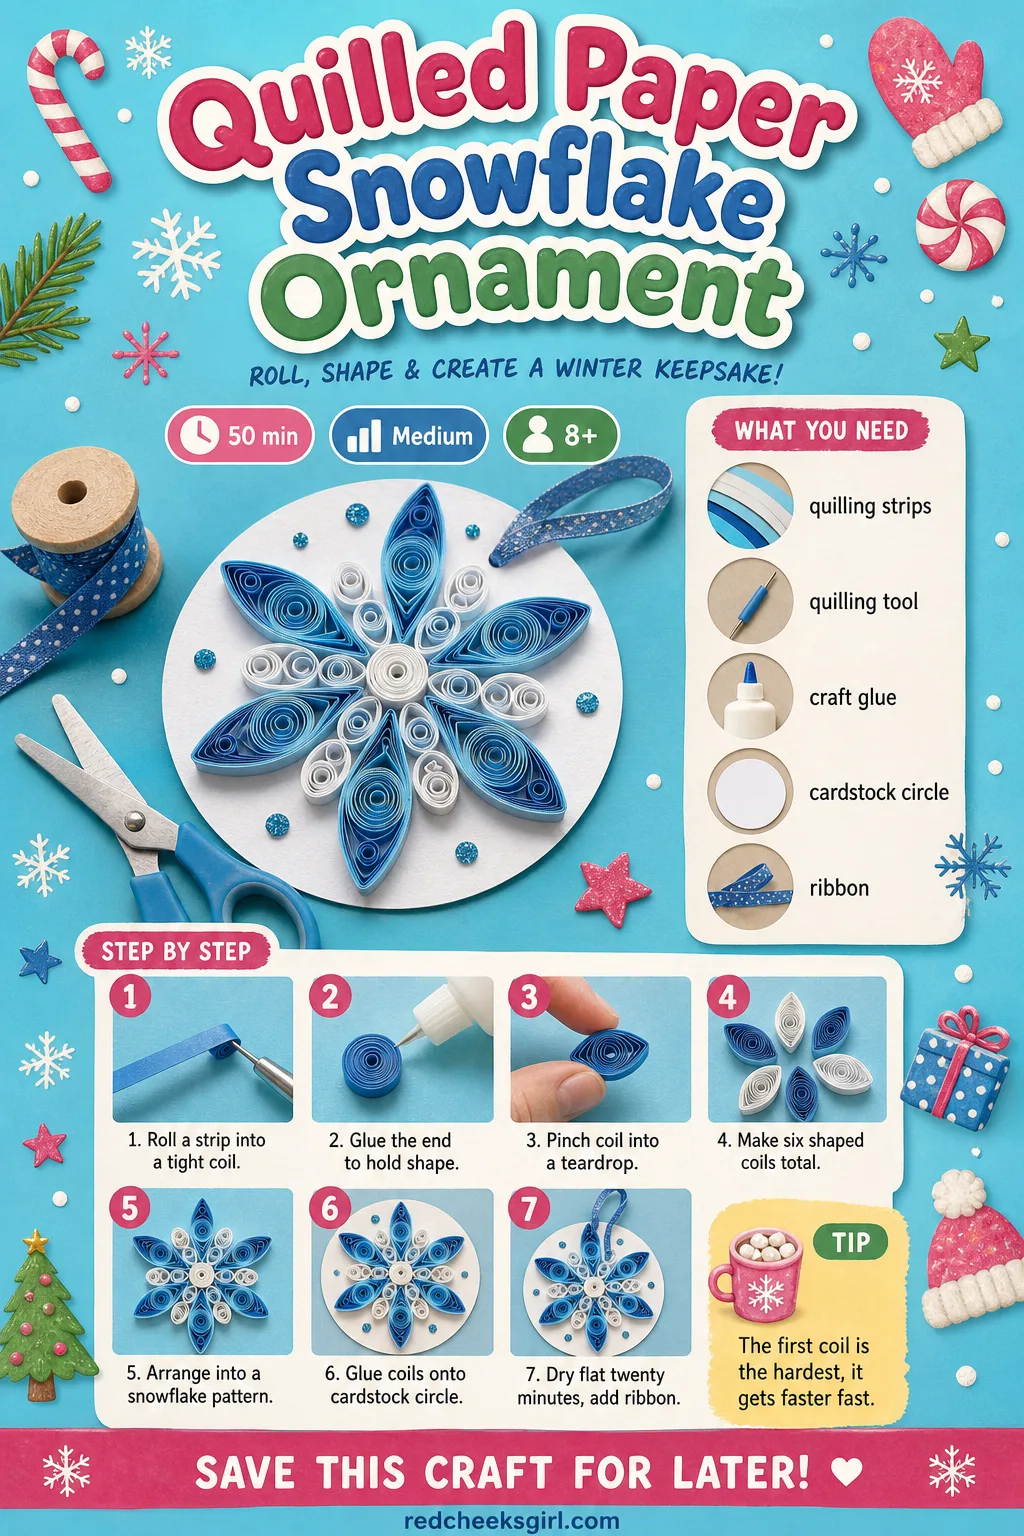
Quilled Paper Snowflake Ornament
Thin paper strips coil into tight spirals that glue flat into something that looks like lace once it is finished. It is fiddly the first time and oddly addictive after that, good for a patient kid who likes detail work more than speed.
What You Need
- 12 quilling paper strips, 5mm x 30cm
- Quilling tool or toothpick
- Craft glue
- Cardstock backing circle, 8cm
- Ribbon, 15cm
How to Make It
- Roll one strip tightly around the tool into a coil, let it relax slightly, then glue the end to hold the shape.
- Pinch the coil into a teardrop or marquise shape.
- Repeat to make 6 shaped coils in total.
- Arrange the coils in a snowflake pattern radiating out from the centre on the cardstock circle, gluing each one down.
- Let it dry flat for 20 minutes, then glue a ribbon loop to the back.
🛍 Shopping guide
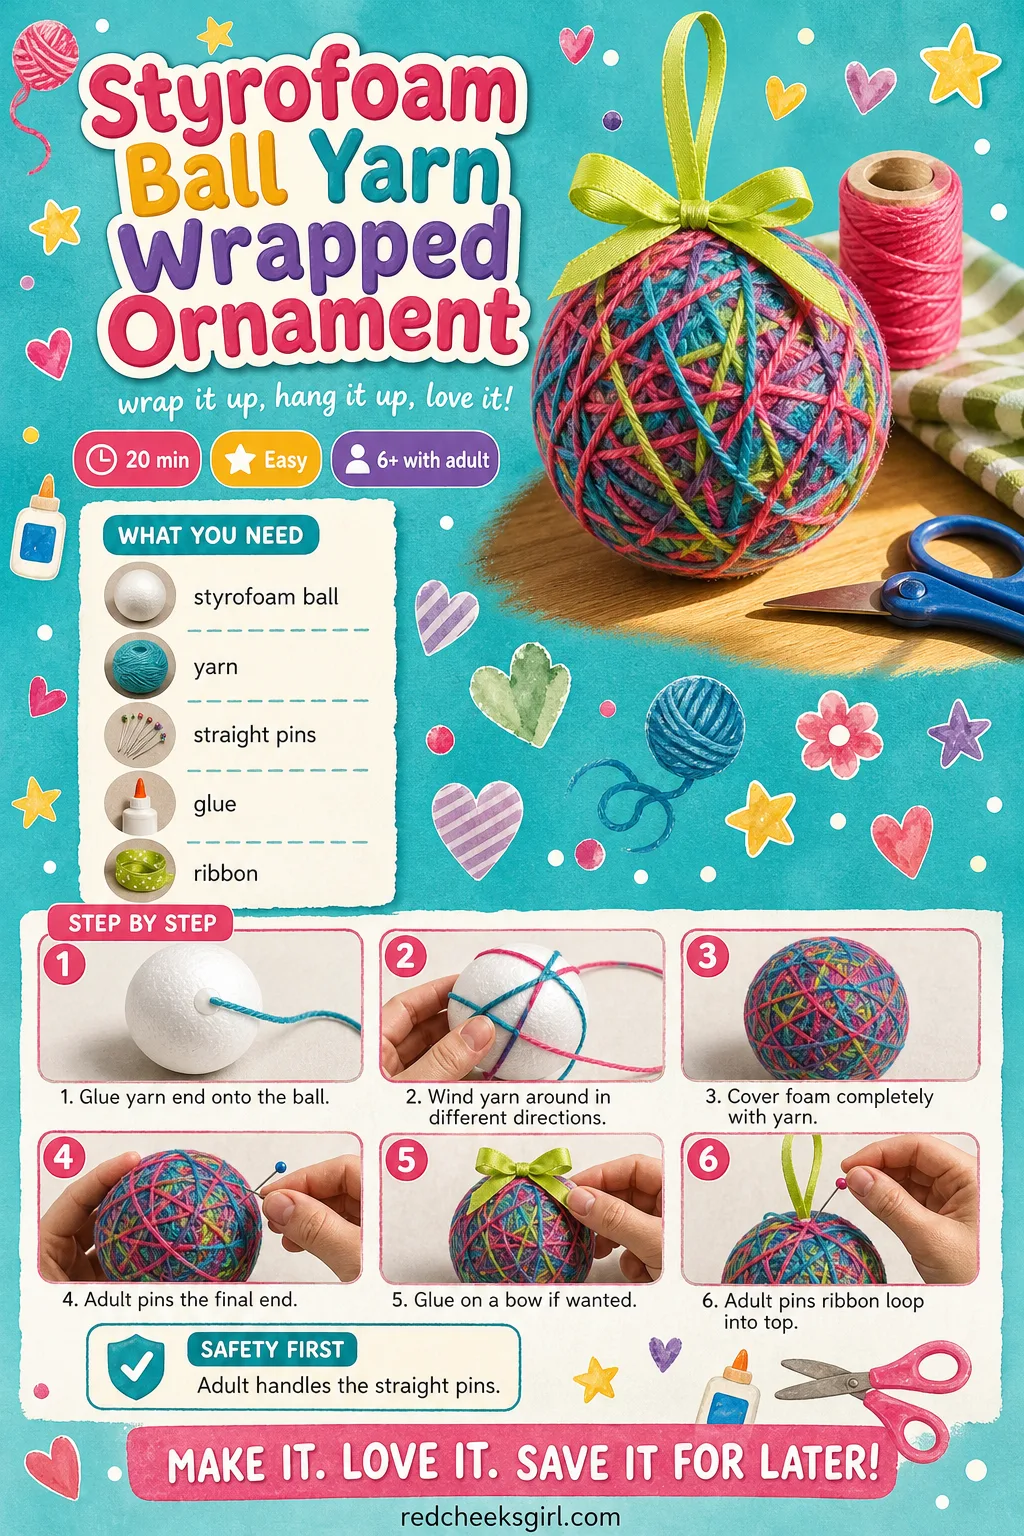
Styrofoam Ball Yarn Wrapped Ornament
A plain foam ball disappears completely under wound yarn, coming out looking knitted without a single stitch. It is a good one for using up yarn ends left over from other crafts on this list.
What You Need
- Styrofoam ball, 6cm
- Yarn, 4m
- 6 to 8 straight pins
- Glue
- Ribbon, 15cm
How to Make It
- Dab glue on the ball and press the yarn end onto it to start.
- Wind the yarn around the ball in different directions until the foam is fully covered.
- An adult pushes a pin through the final end to secure it.
- Glue a small bow or button to the front, if wanted.
- An adult pushes a ribbon loop into the top with a pin for hanging.
🛍 Shopping guide
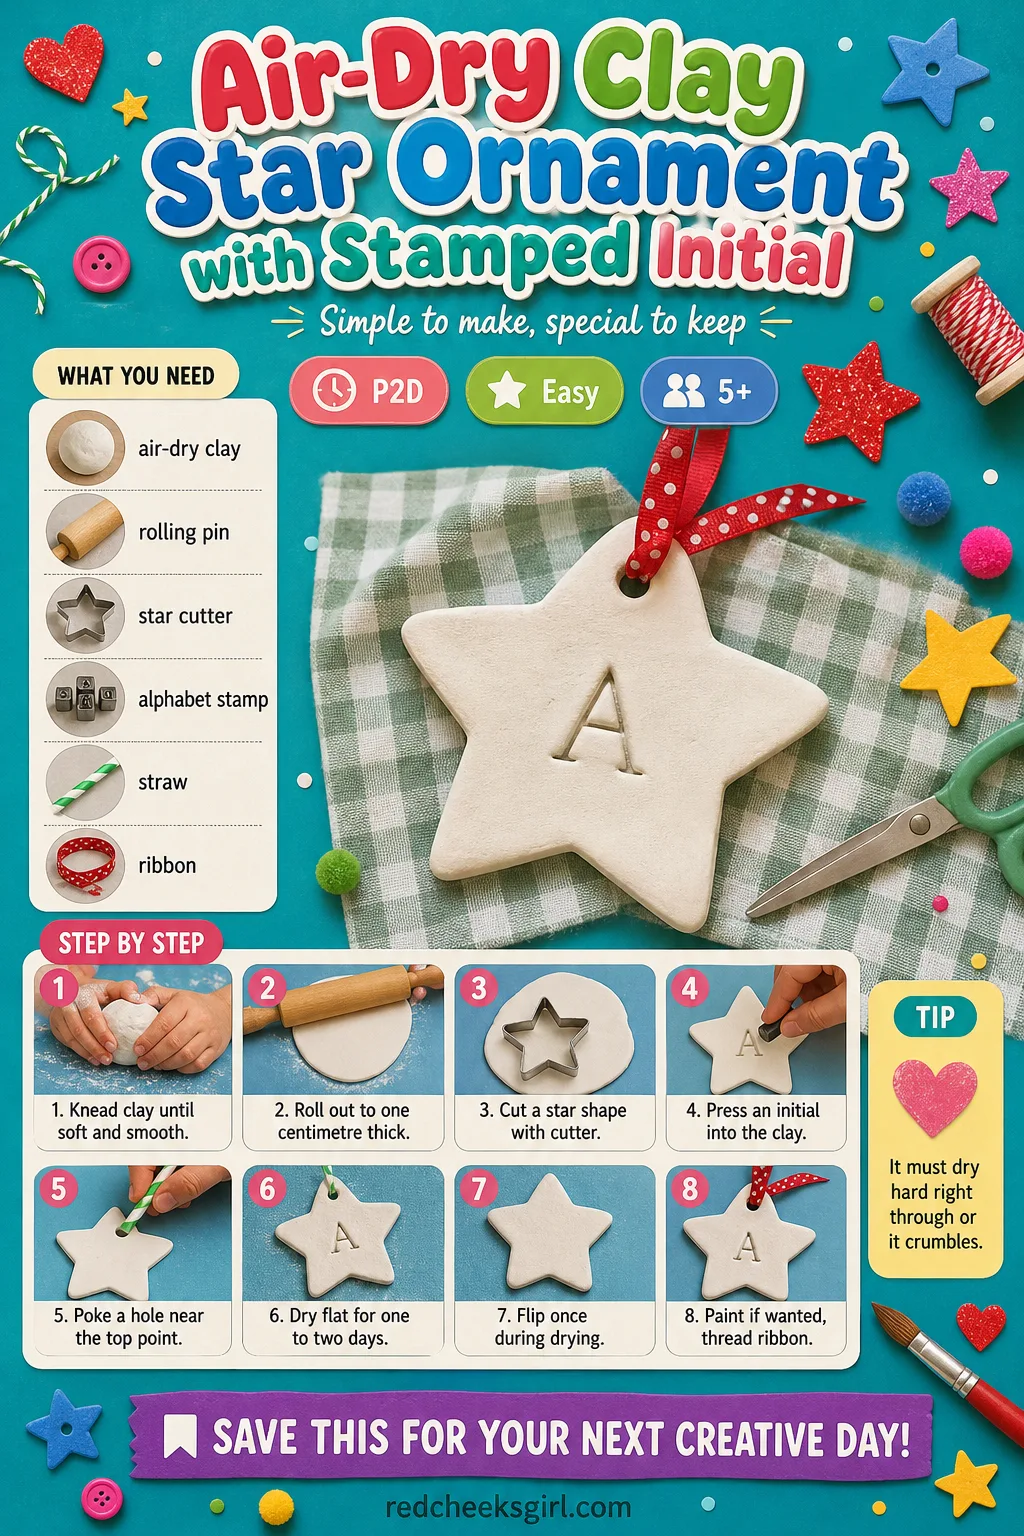
Air-Dry Clay Star Ornament with Stamped Initial
This one skips the oven entirely. The clay stays soft long enough to press a shape and a stamped initial, then hardens on its own over a couple of days, which turns a craft into a small, named gift without much effort at all.
What You Need
- White air-dry clay, 100g
- Rolling pin
- Star cookie cutter, 8cm
- Alphabet stamp or toothpick
- Drinking straw
- Ribbon, 15cm
How to Make It
- Knead the clay until it is soft and smooth, like firm dough.
- Roll it to about 1cm thick between two sheets of paper.
- Cut a star shape with the cutter.
- Press an initial or a small pattern into the surface with the stamp or toothpick tip.
- Poke a hanging hole near the top point with the straw.
- Leave flat to air dry for 24 to 48 hours, flipping once, until hard all the way through.
- Paint if wanted once fully dry, then thread the ribbon.
🛍 Shopping guide
Frequently Asked Questions
How long does it take to bake salt dough ornaments?
It depends entirely on thickness: dry time varies based on the thickness and size of your ornaments and the amount of water added, and time can range from an hour to several hours. Keep the oven low and check often rather than trusting a fixed clock.
Can you make salt dough ornaments without baking them?
Yes. You don’t have to bake them at all if you have a little patience, and instead you can set them in a warm, dry place 3-7 days or until moisture has been eliminated and they harden. It is slower but needs no oven time at all.
What age can kids start making Christmas ornaments?
Three year olds can make lots of these ornaments, and cinnamon dough ornaments are a particularly good starting point since there is no oven and the dough is forgiving of small hands pressing too hard or not hard enough.
How do you store homemade ornaments so they last until next year?
For dough-based ones, wrap them individually in tissue paper or bubble wrap and stack them flat inside a box with a lid, away from direct sunlight or extreme temperatures. The same approach works for felt, clay and painted rock ornaments on this list, just avoid stacking anything heavy on top.
Do I need a glue gun for kids’ Christmas ornaments?
Only for a handful of these, mainly the popsicle stick star and anything joining wood or cardboard at an angle. Most of the list uses craft glue or tape instead, which any age can handle without an adult standing over the glue gun.
What is the easiest Christmas ornament for a young child to make alone?
The wooden bead candy cane and the fillable plastic bauble both need no glue, no oven and no adult tool, just threading and closing, which makes them genuinely independent crafts for a three or four year old.
Eleven full tree looks built around the topper first, real and artificial, with the exact baubles, p

20 fun Christmas party games for every age — from hilarious active relays to printable sheets ever

18 gorgeous Christmas party invitation ideas from classic red and green to modern minimalist — all
Leave a Reply