

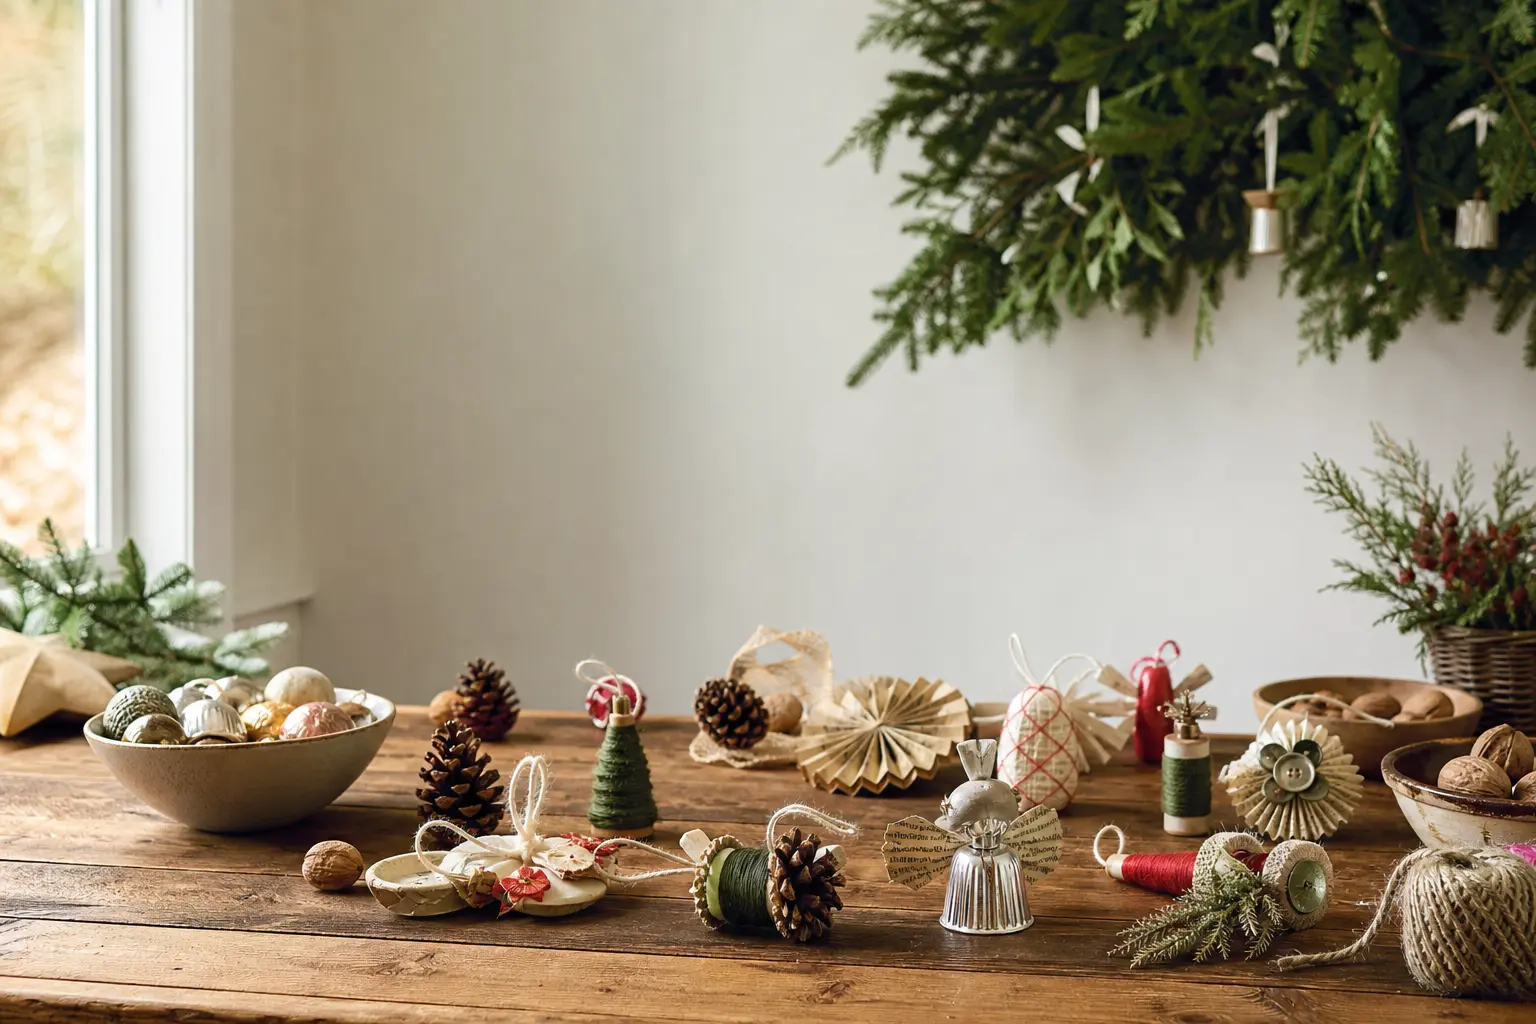
The best diy christmas ornaments are the ones that make someone pause, turn the thing over, and say “wait, what is this made from?”
Every ornament in this collection starts its life as something entirely unrelated to Christmas: a burnt-out light bulb, a wine cork, a domino, a chess pawn, a matchbox, a thimble. The Christmas part is the transformation, and that surprise is the whole point.
None of these require a craft room. Most of the materials are things you were going to throw away. For the few you need to buy, one supermarket trip or a single online order covers almost everything.
The methods below are written for adults, with safety notes built into every step that needs one, so you know exactly where to pay attention and where to relax.
If you want to keep going after this, the cluster links below connect to christmas baubles ideas, felt christmas ornaments, christmas tree ornaments, a full guide to building your diy christmas tree, and a wide collection of christmas crafts for every skill level.
This post contains affiliate links. If you buy through them, I may earn a small commission at no extra cost to you.
- Burnt Bulb Perched Bird
- Walnut Shell Diorama
- Wine Cork Snowflake Stamp
- Broken Watch Face Bauble
- Jar Lid Paper Scene
- Chess Pawn Nutcracker
- Spent Matchbox Drawer Ornament
- Domino Snowman Face
- Thimble Bell
- Puzzle Piece Gold Star
- Bottle Cap Portrait
- Playing Card Fan Fir Tree
- Marble Snow Globe Bauble
- Paperclip Thread Star
- Seashell Holly Leaf
- Nut and Bolt Robot
- Frequently Asked Questions
Burnt Bulb Perched Bird
A dead incandescent bulb has exactly the right silhouette for a small roosting bird. Paint it well and the metal cap becomes the head; the glass globe is the body. Finished, it hangs from a branch looking like a Victorian glass ornament, and nobody identifies the original object until you tell them.
Store it in tissue paper inside any small box. The glass is still glass, so don’t let it knock against metal ornaments.
What You Need
- 1 burnt-out standard incandescent bulb, any wattage
- White acrylic primer, 1 small pot
- Acrylic craft paint: red, orange, black, white, and one colour for the body (robin red-breast: terracotta; or winter blue-grey)
- 2 small pointed craft brushes (size 1 and size 3)
- 30 cm fine gold or copper wire, 0.4 mm gauge
- Small needle-nose pliers (adult step)
- Strong clear-drying craft glue (such as E6000 or Loctite All-Purpose)
- 2 small orange seed beads for feet
- Satin varnish spray, 1 small can
How to Make It
- Wipe the bulb clean with a dry cloth. Apply one thin coat of white acrylic primer over the entire glass surface and the metal cap. Let it dry completely, about 45 minutes: the surface should feel chalky and totally opaque before you move on.
- Paint the glass globe in your chosen body colour. Two thin coats give a cleaner finish than one thick one. Let each coat dry for 20 minutes.
- Paint the metal cap and the very top of the glass (where cap meets globe) in black. This is the head. Add a small white dot near the top of the cap for the eye, then a tiny black pupil inside it once the white is dry.
- Mix a little orange and white to make a beak colour. Using the size 1 brush, paint a small pointed triangle just below the eye. Let it dry.
- If you are making a robin, paint a rough oval of terracotta-red on the lower front of the globe for the red breast.
- Cut the wire into two equal 15 cm lengths. Using pliers (adult step), curl one end of each piece into a small loop for a foot, then bend each wire into a “Z” shape to suggest a leg and claw. Twist the straight end into a loop at the top for hanging. Glue the foot-ends to the base of the bulb with strong craft glue and hold for 60 seconds. Let cure for 2 hours.
- Slip one orange seed bead onto each foot curl and close the curl gently with pliers so the bead sits like a toe. Spray the whole ornament with one coat of satin varnish outdoors or in a ventilated space (adult step). Hang when touch-dry, about 20 minutes.

🛍 Shopping guide
Walnut Shell Diorama
Half a walnut shell is almost exactly the size of a human thumbnail, which makes it the ideal frame for a miniature scene.
A snowy cottage, a tiny deer, a single bare tree cut from card: whatever fits inside becomes a window into a world so small it feels genuinely magical.
The shell’s natural ridged interior suggests rock or a cliff face, and you barely have to disguise it.
Finished ornaments pack flat in an egg box for storage. They survive years if you keep them away from damp.
What You Need
- 1 walnut, halved cleanly (tap the seam with a butter knife)
- White acrylic paint for the shell interior
- Small piece of white card, A6 size, 200 gsm minimum
- Coloured pencils or fine-tipped pens
- Craft knife and cutting mat (adult step)
- Strong clear-drying craft glue
- Bicarbonate of soda or fine white sand, 1 teaspoon, for snow texture
- 20 cm gold thread for hanging
- Small drill bit or thick needle (adult step) to pierce the shell top
How to Make It
- Ease the walnut meat out cleanly. Paint the inside of one shell half with white acrylic and let it dry. The paint steadies the colour and stops the wood grain showing through your scene.
- Sketch your scene on the white card very small, about 2 cm wide by 1.5 cm tall. A simple silhouette (one house, one tree, one moon) works far better than something complicated. Cut it out with the craft knife on the cutting mat (adult step).
- Colour your scene with pencils or fine pens. Keep the palette to two or three colours: midnight blue sky, a yellow window, a black tree. Add a dot of white for snow on a roof.
- Glue the scene standing upright inside the shell, at the back. You may need to fold a small tab at the base so it stands. Hold it for 30 seconds and let it cure for 10 minutes.
- Dab a thin layer of craft glue across the bottom of the shell interior, then sprinkle bicarbonate of soda over it for a snow floor. Tip out any excess. Let dry for 20 minutes: the snow should look powdery and settled.
- Pierce a small hole through the top ridge of the shell using a drill bit or thick heated needle (adult step). Thread the gold cord through, double-knot it, and the ornament is done.

Wine Cork Snowflake Stamp
Slice a wine cork across its width and you have a perfectly round, slightly porous disc with a surface that holds paint beautifully. Press several of them together in a radiating pattern on a circle of dark card and the result is a crisp snowflake.
The texture the cork leaves behind is the texture of real snow crystals under a microscope: irregular, honest, lovely.
Laminate the finished card disc or seal it with a coat of matte medium and it will last for years. Store flat in an envelope.
What You Need
- 3 natural wine corks
- Sharp serrated knife (adult step) for slicing
- Navy or dark green card, A5, 300 gsm
- Compass or round cutter to cut a 9 cm circle
- White acrylic paint, 1 small pot
- Flat palette or old plate for loading paint
- Matte medium or PVA sealer, 1 coat
- Hole punch
- 30 cm white or silver ribbon, 5 mm wide
How to Make It
- Slice each cork into rounds about 5 mm thick using the serrated knife (adult step). You need six identical rounds for one snowflake. The flat cut face is your stamp.
- Cut a 9 cm circle from the dark card using a compass-drawn template or a round cutter. Punch a hole at the top, about 5 mm from the edge, before you start stamping so the card stays flat.
- Pour a small pool of white paint onto the palette and press one cork face flat into it. The cork should be evenly coated but not drowning in paint: blot once on a spare scrap of card to check the texture.
- Stamp the six rounds in a radiating ring around the centre of the card circle. Work quickly so the paint stays wet enough for a clean impression. The arrangement does not need to be mathematically perfect: a very slight irregularity looks more like an actual snowflake.
- Reload the cork lightly and add a second, smaller ring of stamps between the first ones, or add a single central stamp. Let the paint dry for 20 minutes.
- Seal the front with one coat of matte medium. Let dry for 15 minutes, then thread ribbon through the hole and tie. The finished disc should rattle gently on the tree like a mini tambourine.

Broken Watch Face Bauble
A watch with a dead movement is still the most beautifully detailed small object in most households. The face alone, behind its glass, is a finished world: Roman numerals, jewel-pivot holes, a maker’s name.
Pull it out, back it with a circle of midnight blue velvet, and hang it as a clock-face ornament. The hands can read midnight or noon. Either works.
This needs almost no making, which is the point: the object is already art. The craft is the framing. Store in a spectacle case between seasons.
What You Need
- 1 broken or unwanted watch with an interesting face, diameter 25-40 mm
- Small flathead screwdriver and watch-back opener (adult step) to open the case
- Scrap of dark velvet or felt, 5 x 5 cm
- Strong jewellery-grade adhesive (E6000 or equivalent)
- Small brass or gold-toned jump ring, 5 mm diameter
- Needle-nose pliers (adult step)
- 30 cm thin gold chain or heavy gold thread
- Small drill bit or diamond-tip hand drill (adult step) if adding a hanging hole to the case edge
How to Make It
- Open the watch case back with the screwdriver and watch-back opener (adult step). Carefully remove the movement so only the face and its glass or crystal remains in the front case half. Set the movement aside: it is not needed.
- Cut the velvet into a circle fractionally smaller than the watch case interior. Tuck it behind the face so it shows behind any transparent sections of the dial. It should sit flush with no wrinkles: if the fit is tight, trim 1 mm at a time.
- Run a thin bead of adhesive around the inside edge of the case back rim and press it closed over the velvet. Let cure for at least 2 hours. The velvet is now the backing.
- Using the hand drill (adult step), carefully drill one small hole through the top edge of the watch case, sized for the jump ring. Alternatively, if the case already has a crown hole at the 12 o’clock position, enlarge it just enough for the jump ring.
- Open the jump ring with pliers, pass it through the hole, close it firmly. Attach the chain or thread through the ring. The watch face should hang dial-forward, perfectly flat.

🛍 Shopping guide
Jar Lid Paper Scene
A standard metal jar lid is a ready-made circular frame, and its raised rim is deep enough to hold a layered paper scene three or four elements tall.
Think of it as a tiny shadow box: a background, a middle distance, a foreground, all glued in on rising platforms of folded card so the layers read separately. The chrome or gold rim of the lid becomes the frame.
Nobody looks at it and thinks “that used to hold jam.”
Seal the finished scene with a layer of clear resin or a disc of acetate cut to fit, and it becomes weatherproof enough to handle every year without damage. Store standing upright in an egg cup.
What You Need
- 1 clean metal jar lid, 6-8 cm diameter (jam jar or pickle jar size)
- White A5 card, 200 gsm, for the scene
- Craft knife and cutting mat (adult step)
- Acrylic or watercolour paint in 2-3 colours
- Thin paintbrush, size 2
- PVA glue and small brush for applying it
- Small piece of acetate or clear plastic folder, to cover the scene (optional)
- Hot glue gun (adult step)
- 30 cm ribbon or twine for hanging
How to Make It
- Paint the inside of the lid in a deep background colour, such as midnight blue or forest green. Let dry for 15 minutes. This is the sky or the backdrop of your scene.
- Cut three strips of white card, each about 1 cm shorter than the previous one: the longest reaches edge to edge inside the lid, the shortest is perhaps 2 cm wide. These are your layers.
- On the longest strip, paint or draw the background element: a silhouette of distant trees or a rooftop skyline. On the middle strip, paint a mid-ground: a fence, a lamppost. On the shortest, paint a foreground detail: a single snowdrift, a letterbox.
- Fold a small accordion tab, about 5 mm deep, at the base of each strip. This raises each layer off the surface so they stand up. Trim each strip to fit snugly inside the lid diameter before gluing.
- Glue the background strip to the back of the lid with PVA; hold for 30 seconds. Then glue the middle strip in front, and finally the foreground strip closest to you. Each layer should be slightly higher than the last, giving clear depth.
- If you are sealing the scene, cut a disc of acetate to fit exactly inside the rim and secure with a thin bead of hot glue around the edge (adult step). This protects the paper permanently.
- Use the hot glue gun (adult step) to attach a loop of ribbon or twine to the top of the lid back. Let the glue set for 5 minutes before hanging.

Chess Pawn Nutcracker
A spare chess pawn is already shaped remarkably like a nutcracker body. The bulb at the top is the head, the waist nips in correctly, and the flat base gives it stability even as a hanging ornament.
Paint it in the classic red-and-gold palette, add a tiny painted belt buckle and boots, and the connection becomes instantly obvious. The piece is solid enough to hang on thicker branches without swinging.
Any unused pawn works: plastic, wood or resin all accept acrylic paint with a primer undercoat. Store loose in a small tin or wrap in tissue.
What You Need
- 1 chess pawn, any material, 3-4 cm tall
- White acrylic spray primer or brush-on primer
- Acrylic craft paint: red, gold, black, flesh-tone (or pale pink-beige mix), white
- Size 0 and size 3 paintbrushes
- Clear satin varnish spray
- Small screw eye, 3 mm, for the top (adult step)
- Small pliers or thick needle to start the screw-eye hole (adult step)
- 30 cm red ribbon, 3 mm wide
How to Make It
- Prime the pawn with one thin coat of white primer. Let dry for 30 minutes. The surface should feel smooth and uniformly white before you paint: plastic and resin especially need this step or the paint will peel.
- Paint the body of the pawn red from the base to the mid-point. Paint the upper round section (head) in flesh tone. Let each section dry before the next colour touches it.
- Using the size 0 brush, paint a black belt across the waist, then a tiny gold rectangle for the buckle. Add black boots at the base by painting the lower 3 mm of the foot section solid black.
- Paint a small white collar just below the head. Add two small black dots for eyes, a red dot for the mouth. If the pawn is tall enough, paint a thin gold band for a crown across the very top of the head.
- Let all paint dry fully, about 20 minutes. Spray with one coat of clear satin varnish (adult step, ventilate well). Dry for another 20 minutes.
- Using a needle or small drill (adult step), make a starter hole in the very top of the pawn. Twist the screw eye in by hand, using pliers for the last few turns so it sits firm. Thread the red ribbon through, double-knot, and hang.

🛍 Shopping guide
Spent Matchbox Drawer Ornament
A standard matchbox is a box with a sliding drawer, which means it is already the world’s smallest cabinet.
Pull the drawer out, line it with a rectangle of wrapping paper, build a tiny scene inside, and push the drawer back so only the scene shows when someone pulls it.
The outside of the box becomes the label: decoupage it with a strip of vintage map, a page of music, or a scrap of marbled paper. Nobody touches it once without opening the drawer.
The matchbox is naturally small and surprisingly sturdy. Stack finished ornaments in a larger box between seasons; they nest without damage.
What You Need
- 1 spent standard matchbox, emptied and clean
- Scrap of decorative paper (wrapping paper, music sheet, vintage map): one piece 20 x 6 cm for the outer box, one piece 4 x 3 cm for the drawer lining
- PVA glue and small brush
- Craft knife and cutting mat (adult step)
- White acrylic paint for the drawer interior
- Small collage materials for the scene: a stamp-sized image, tiny paper figures, dried flower petal, cotton wool pinch
- Strong clear-drying craft glue
- Hole punch or thick needle (adult step)
- 20 cm fine gold thread
How to Make It
- Slide the inner drawer out of the matchbox sleeve. Paint the inside of the drawer with white acrylic and let it dry for 15 minutes. This is the scene’s background.
- Cut the decorative paper to wrap the outer sleeve neatly: score and fold it around the box, trim with the craft knife (adult step) for a clean join, and glue with PVA. Smooth out any air bubbles with your fingertip. Let dry for 20 minutes.
- Line the drawer interior with the small decorative paper rectangle. Build your scene: a tiny paper tree cut from green card and stood up at the back, a snippet of cotton wool for snow on the floor, a small printed or hand-drawn figure. Keep it to three elements maximum or the drawer will not close.
- Glue each scene element with the strong craft glue. Let the glue cure for 20 minutes before testing the drawer: it should slide in and out smoothly with the scene intact.
- Pierce a hole through the short top edge of the outer sleeve with a needle or punch (adult step). Thread the gold cord through, knot it firmly, and the ornament is ready.

Domino Snowman Face
A double-six domino is a long thin rectangle with two circular sections already marked out, which makes it a near-perfect template for a two-section snowman face: the larger pip section becomes the head, the smaller section the hat brim, and all you need to do is paint over the existing pips and build from there.
The finished ornament is flat, tactile, heavy enough to hang steadily, and about as satisfying as a pebble in the hand.
Dominoes are almost indestructible. This ornament genuinely lasts decades. Store it loose in a box or let it lie flat in a drawer.
What You Need
- 1 standard domino tile, any colour or material
- White acrylic paint, 1 small pot
- Acrylic craft paint: black, orange, red
- Size 1 and size 3 paintbrushes
- Small hand drill or pin vise with a 2 mm bit (adult step)
- Satin varnish spray or brush-on
- 25 cm thin red ribbon, 4 mm wide
How to Make It
- Paint the entire domino with two coats of white acrylic, letting each coat dry for 20 minutes. The pips will disappear under two good coats; one coat usually is not enough.
- Using the size 3 brush, paint the lower larger section of the domino as the snowman’s face. Leave it white. Paint the upper smaller section in black: this is the hat.
- Using the size 1 brush and orange paint, add a small carrot nose roughly in the centre of the face section. Let it dry for 5 minutes, then add two black dot eyes above the nose, and a curved red smile below it.
- Add a thin red stripe along the hat brim boundary (the domino’s centre bar) for a hat band. Let everything dry fully, about 20 minutes.
- Spray or brush one coat of satin varnish over the painted face. Let dry for 20 minutes.
- Drill a small hole through the top of the domino at the hat section, about 3 mm from the top edge (adult step). Thread the red ribbon through, fold it in half to make a loop, and tie a knot to secure it.

Thimble Bell
A thimble hangs with exactly the same silhouette as a bell. It already has a domed top and an open bottom, and the dimpled surface catches light the way hammered metal does.
Drop a bead inside on a short thread so it swings against the thimble’s walls and it rings with a small clear note. The whole ornament is the size of a gumball and ten times more interesting.
Metal thimbles work best for the sound. Plastic ones are quieter but lighter and easier to drill. Store loose in a tin or pile of other small ornaments.
What You Need
- 1 metal thimble, standard sewing size
- Gold or silver acrylic paint (optional, if the thimble is plain)
- 1 small brass bell bead or any round bead 6 mm diameter
- 15 cm thin nylon thread or beading wire
- Small hand drill with 1.5 mm bit (adult step)
- Strong jewellery adhesive
- 20 cm gold thread or fine chain for hanging
- Small needle-nose pliers
How to Make It
- If you want to decorate the thimble, paint it with one coat of gold or silver acrylic. Let dry for 20 minutes. The dimpled surface takes paint well and the texture shows through, which is the look to keep.
- Drill one small hole through the very top centre of the thimble dome (adult step). This is fiddly because the dome curves: press the bit in gently and let it bite before applying any pressure, or the bit skates off. Drill a second small hole through the dome beside the first, about 1 mm away, for the clapper thread.
- Thread the bead onto the 15 cm nylon thread. Push one end of the thread up through the clapper hole from inside the thimble so the bead hangs inside. Knot the thread on the outside of the hole to hold the bead in place; the bead should swing freely inside the thimble when it moves. Trim the tail close to the knot.
- Thread the 20 cm gold hanging thread through the first hole, double it, and knot firmly on the inside with a generous knot so it cannot pull through. Test by giving it a gentle tug.
- If needed, add a small drop of jewellery adhesive to the knot inside the dome to lock it. Let cure for 20 minutes. Hang and give it a gentle flick: you should hear a small clear ring.

🛍 Shopping guide
Puzzle Piece Gold Star
A single interlocking puzzle piece, painted gold, is one of the most casually elegant ornaments on this list. The tab-and-socket silhouette is already abstract and vaguely stellar; the gold paint turns it into something that looks designed rather than found.
A cluster of five hanging at different heights on a bare branch reads as a constellation. One alone is a curiosity.
Use pieces from a puzzle that is already incomplete so nothing is wasted. Any size works, but 500-piece puzzle pieces (roughly 2 x 3 cm) hang best. Store in an envelope between seasons.
What You Need
- 1 or more cardboard puzzle pieces, 2-3 cm in size
- Gold acrylic paint, 1 small pot
- Size 5 flat paintbrush
- Matte or satin varnish, brush-on
- Small hand drill with 1.5 mm bit, or thick blunt needle and block of scrap wood (adult step)
- 20 cm gold cord or thread per piece
How to Make It
- Paint both sides of the puzzle piece with gold acrylic, using the flat brush. The cardboard absorbs the first coat quickly; let it dry for 10 minutes and then apply a second coat. The piece should look like stamped metal when both coats are dry.
- Varnish both sides with one coat of matte or satin finish. Let dry for 15 minutes. This seals the gold and stops it scuffing when the ornament is handled.
- Drill or pierce a hanging hole through one tab of the puzzle piece (adult step for the drill; a thick needle pushed through on a scrap block works for children with supervision). The tab is the strongest part of the piece, so use it.
- Thread the gold cord through the hole, fold it to make a loop, and knot firmly. Hang and adjust the length to suit the branch.

Bottle Cap Portrait
A flattened bottle cap is almost exactly the size of an old-fashioned miniature portrait: the kind you find in an oval locket, painted in oils on ivory.
Paint one as a tiny face, frame it with a neat ring of gold paint around the inside rim, and hang it on thin chain.
The result is something between a Victorian keepsake and a very small painting, and the fact that it is a beer cap underneath is the most pleasing possible joke.
Steel caps paint beautifully with acrylic and a primer coat. The finished portrait is waterproof enough to last indefinitely. Store flat in a tin.
What You Need
- 1 clean bottle cap, steel, crimped edge intact
- White acrylic spray primer or brush-on
- Acrylic craft paint: flesh tone, brown, blue or green (eyes), red (lips), black, gold
- Size 0 and size 1 paintbrushes
- Clear gloss varnish, brush-on
- Small drill bit or nail and hammer to pierce hanging hole (adult step)
- Small jump ring, 4 mm
- 20 cm fine gold chain or thread
How to Make It
- Prime the inside of the bottle cap with a coat of white primer. Let it dry for 20 minutes. The surface should feel solid white and slightly chalky.
- Paint the background of the portrait in a deep colour: navy, bottle green or burgundy works well and makes the face pop. Bring the background paint to about 2 mm from the inside rim, leaving a thin gold ring at the edge to add later.
- Paint an oval flesh-tone face roughly in the centre of the cap. It will be about 1 cm tall. Let it dry for 5 minutes, then add the features with the size 0 brush: two small coloured circles for eyes, a thin stroke for the nose, a small red mouth. Add a few strokes of darker tone for hair at the top of the oval.
- Once the portrait is dry (15 minutes), paint the rim ring gold. This frames the scene and disguises the crimped edge neatly.
- Seal the inside with a coat of clear gloss varnish. Let dry for 20 minutes.
- Pierce a hole through the crimped rim at the top of the cap using a small drill bit or nail and hammer on a wooden block (adult step). Fit the jump ring with pliers. Attach the chain and hang.

Playing Card Fan Fir Tree
One standard playing card, folded accordion-style and fanned open, makes a flat fir tree shape that is immediately, recognisably festive. The suits printed on the card become an accidental pattern on the tree’s surface.
Paint the edges with gold or green and the card origin is hidden; leave them unpainted and the diamond or spade motifs show through as a winking joke. Either version works beautifully against dark foliage.
Use a card from an incomplete deck so nothing with sentimental value is lost. Finished ornaments store flat in an envelope and take thirty seconds to reassemble next year.
What You Need
- 1 standard playing card, 88 x 63 mm
- Green or gold acrylic paint (optional, for the edges)
- Fine paintbrush, size 3
- Strong clear craft glue or a stapler (adult step for the stapler)
- Small gold star sticker or a tiny painted star for the treetop
- 20 cm green or gold ribbon, 4 mm wide
- Hole punch
How to Make It
- Fold the playing card accordion-style: make the first fold about 8 mm from one short edge, then fold back and forth in equal 8 mm pleats across the length of the card. You should end up with roughly nine or ten pleats.
- Pinch one short end of the accordion firmly between thumb and finger so the pleats fan out at the opposite end into a semicircle. This fanned end is the tree top; the pinched end is the trunk base.
- Secure the pinched base tightly with a dab of strong craft glue or a staple (adult step for stapling). Hold or clamp for 60 seconds. The fan should hold its shape without springing open.
- If you want a green tree rather than a patterned one, paint the edges of the fanned section with green acrylic using the size 3 brush. Let dry for 10 minutes.
- Press a small gold star sticker onto the topmost point of the fan, or paint a tiny star with gold paint. Punch a hole through the top 5 mm of the fan, thread the ribbon through, fold and knot.

Marble Snow Globe Bauble
Drop a single glass marble into a clear plastic fillable ornament and you have a snow globe in miniature, without the water. The marble rolls and settles at the bottom of the sphere, catching light from a dozen angles simultaneously.
Add a small paper scene folded inside the ornament before you drop the marble in, and every tilt changes the picture. The ornament reads as sophisticated from a metre away and delightful up close.
This is one of the fastest crafts here. It takes more time to decide on the paper scene than to make the actual ornament. Clear fillable baubles are widely available in craft shops from October onward.
What You Need
- 1 clear fillable plastic ornament bauble, 8 cm diameter
- 1 glass marble, 16 mm diameter (standard shooter size)
- White A5 card, 200 gsm
- Fine-tip black pen and coloured pencils
- Scissors
- PVA glue and fine brush
- 30 cm white or iridescent ribbon, 6 mm wide
How to Make It
- Open the fillable bauble by unscrewing the two halves. Set the cap aside.
- Cut a strip of white card 3 cm wide and long enough to curve around the inside circumference of one bauble half. Draw a simple winter scene along its length: a row of bare trees, a distant church, a figure with an umbrella. Colour lightly with pencils so the scene shows without being crowded.
- Curl the card strip gently around a pencil to pre-curve it. Fit it inside one bauble half so it lines the inside wall like a panoramic backdrop. Dab PVA at the ends to hold it in place. Let dry for 5 minutes.
- Place the marble inside the same bauble half. It should rest at the bottom without squashing the card scene.
- Screw the two halves of the bauble back together firmly. Shake gently: the marble should roll around and settle, not rattle violently. Thread the ribbon through the cap loop, fold in half, and knot.

🛍 Shopping guide
Paperclip Thread Star
A single standard paperclip bent into a five-point star outline and then wrapped entirely in thread is ten minutes of meditative work with a result that genuinely resembles a hand-embroidered star ornament.
The thread covers the metal entirely, so the finished object looks textile rather than hardware. Use a variegated thread in cream and gold for a frosted look, or saturated red for something bolder.
The trick is the bending. A standard 32 mm clip has exactly enough wire for a five-point star if you work methodically. Too fast and the points are uneven; too slow and the metal work-hardens. Take it steadily and you get it right on the first try most of the time.
What You Need
- 1 standard steel paperclip, 32 mm or larger
- Small needle-nose pliers (adult step for bending)
- Embroidery thread or thin wool, 2 m in one or two colours
- Clear-drying craft glue or a tiny drop of nail varnish to secure thread ends
- 25 cm thin gold or red cord for hanging
How to Make It
- Straighten the paperclip completely using the pliers (adult step). You should have a single length of steel wire about 9 cm long.
- Using the pliers, bend the wire into a five-pointed star outline. Work from one end: make the first point, then bend sharply at the inner angle, make the second point, and so on. The wire ends meet at a bottom point; twist them together with pliers for 2-3 turns to lock the shape. The star does not need to be perfect: slight irregularity looks handmade, not wrong.
- Tie one end of the embroidery thread to one star point with a double knot, leaving a 2 cm tail. Begin wrapping the thread around the star frame: take it across diagonally to the opposite section, wrap twice, then move to the next section. There is no single right pattern; vary the wrapping direction to fill the frame evenly. The goal is to cover all the wire.
- When the wire is covered, run the thread end through the last few wraps, pull tight, and secure with a drop of craft glue or nail varnish. Let dry for 5 minutes.
- Tie the hanging cord to one star point, fold in half, and knot. The cord should sit at one of the upper points so the star hangs diamond-style.

🛍 Shopping guide
Seashell Holly Leaf
A smooth flat seashell, bivalve or scallop, is already an organic oval that takes paint without primer if the surface is clean and dry.
Paint the whole shell deep green, then paint a single glossy holly leaf in lighter green over it using a fine brush, add three small red berry dots, and the shell becomes something that belongs entirely to Christmas.
The natural ridges of the shell suggest the veins of the leaf without any additional painting.
Flat shells survive storage best when wrapped in tissue and laid in a box. Avoid shells with thin edges, which chip; look for shells at least 2 mm thick at the rim.
What You Need
- 1 clean dry flat shell, at least 4 cm across and 2 mm thick at the rim
- Acrylic craft paint: dark holly green, lighter green, red
- Size 1 and size 3 paintbrushes
- Clear gloss varnish spray or brush-on
- Small hand drill with 2 mm bit, or nail and hammer on a wooden block (adult step)
- 25 cm green or gold ribbon, 4 mm wide
How to Make It
- Make sure the shell is completely clean and dry. Wipe with a dry cloth; any moisture under the paint causes bubbling. Paint the entire upper surface in dark holly green. The shell may need two coats as the texture is porous. Let each coat dry for 15 minutes.
- Using the size 1 brush and the lighter green, paint a single holly leaf shape: a pointed oval with small jagged points along its edges, covering most of the shell surface. The shape does not need to be precise; a slightly irregular leaf looks more natural.
- Once the leaf is dry (10 minutes), paint a thin darker-green vein down the centre of the leaf. Add two smaller side veins branching from it.
- Paint three small circles of red near the base of the leaf for berries. Let dry for 10 minutes. A dot of white in the corner of each berry makes them look round and glossy.
- Seal the entire painted surface with one coat of gloss varnish. This gives the holly its characteristic shine and protects the paint permanently. Let dry for 20 minutes.
- Drill a small hole through the top of the shell, about 5 mm from the edge (adult step). Thread the ribbon through, fold to make a loop, and knot.

Nut and Bolt Robot
A single hex nut threaded onto a short machine bolt with two smaller nuts for ears and a bead for a head produces a tiny robot that is unmistakably a figure, not a piece of hardware, once it has a painted face.
The satisfying weight of the metal, the precise geometry of the hex shapes, and the fact that you built it from a kitchen-drawer junk collection are all part of what makes it compelling.
It is the heaviest ornament on this list and hangs with pleasing steadiness.
Use zinc or stainless fixings if you want a silver finish without paint. Paint any colour for a retro robot or leave bare for industrial style. Store loose in a tin; the metal is almost indestructible.
What You Need
- 1 machine bolt, M6 x 30 mm
- 3 hex nuts, M6
- 2 smaller hex nuts, M4, for ears or arms
- 1 round bead, 8 mm, for the head
- Strong two-part epoxy adhesive (adult step)
- Silver or coloured acrylic paint
- Size 1 paintbrush
- Black fine-tip permanent marker for face detail
- 30 cm thin red or silver cord for hanging
- Small pliers (adult step)
How to Make It
- Thread the three M6 hex nuts onto the bolt: one near the head of the bolt (this is the robot’s body), one about two-thirds down (the lower body), and one at the very end (the feet section). Twist them firm by hand so they hold position.
- Mix a small amount of two-part epoxy (adult step). Dab epoxy between each nut where it sits on the bolt shank to lock the position permanently. Let cure for the time the adhesive specifies: usually 5-10 minutes for handling strength, 60 minutes for full cure.
- Glue the round bead to the bolt head top with epoxy (adult step). This is the robot’s head. Hold for 60 seconds. Let cure for the same time as above.
- Glue one small M4 nut to each side of the top M6 body nut with epoxy, for arms or ear antennae. These are small and fiddly; pliers help position them (adult step).
- Once fully cured, paint the assembly if you want colour. Two coats of silver paint over the entire assembly give a clean toy-robot look. Let dry for 20 minutes between coats.
- Using the black permanent marker, add two small dot eyes and a line mouth to the bead head. Add a small rectangle for a mouth panel if the bead is large enough.
- Tie the hanging cord around the bolt just above the topmost body nut, with a firm double knot. Alternatively, drill a small hole through the bolt head (adult step) and thread the cord through for a cleaner hang.

🛍 Shopping guide
Frequently Asked Questions
What DIY Christmas ornaments can I make from scratch?
Every ornament in this collection starts from a found or recycled object and is made entirely by hand: a walnut shell opened into a tiny diorama, a chess pawn painted into a nutcracker, a matchbox turned into a miniature drawer ornament, a thimble converted into a bell with a bead clapper.
No kits, no transfers, and no pre-made bauble bases. Full materials and step-by-step methods are provided for all 16 crafts.
What DIY Christmas ornaments last more than one year?
Seal all painted ornaments with a coat of satin or gloss varnish and they survive seasonal storage for many years.
What DIY Christmas ornaments need no special tools?
The playing card fan fir tree needs only scissors, glue and a hole punch. The puzzle piece gold star needs a brush and paint, plus a needle to pierce the hole. The marble snow globe bauble needs only scissors, a pen and glue.
The seashell holly leaf needs only a brush and paint if you use a shell with a natural hole at the top. The wine cork snowflake stamp needs only a knife for the cork slicing, which is the one adult step.
How do I hang DIY Christmas ornaments without wire hooks?
Thread is the simplest alternative: fold 20-30 cm of embroidery thread, thin cord or ribbon in half, pass the loop through the hanging hole and pull the cut ends through the loop to form a lark’s-head knot, then tie the ends to the branch.
Jump rings threaded onto chain work for heavier metal ornaments like the watch face and bottle cap portrait. For ornaments without a pre-drilled hole, wrap fine wire around the top and twist a loop, or hot-glue a small D-ring to the back.

20 Christmas charcuterie board ideas, from a tree and wreath to mini boards for two, with shop lists

Jump beyond generic presents and discover 15 heartfelt Christmas gifts that will make your grandpare
15 named christmas bento cake designs in red, white and pink, each one a tiny lunchbox cake small en
Leave a Reply