

18 DIY Christmas Gifts Grandparents Actually Display, Not Just Say Thank You For
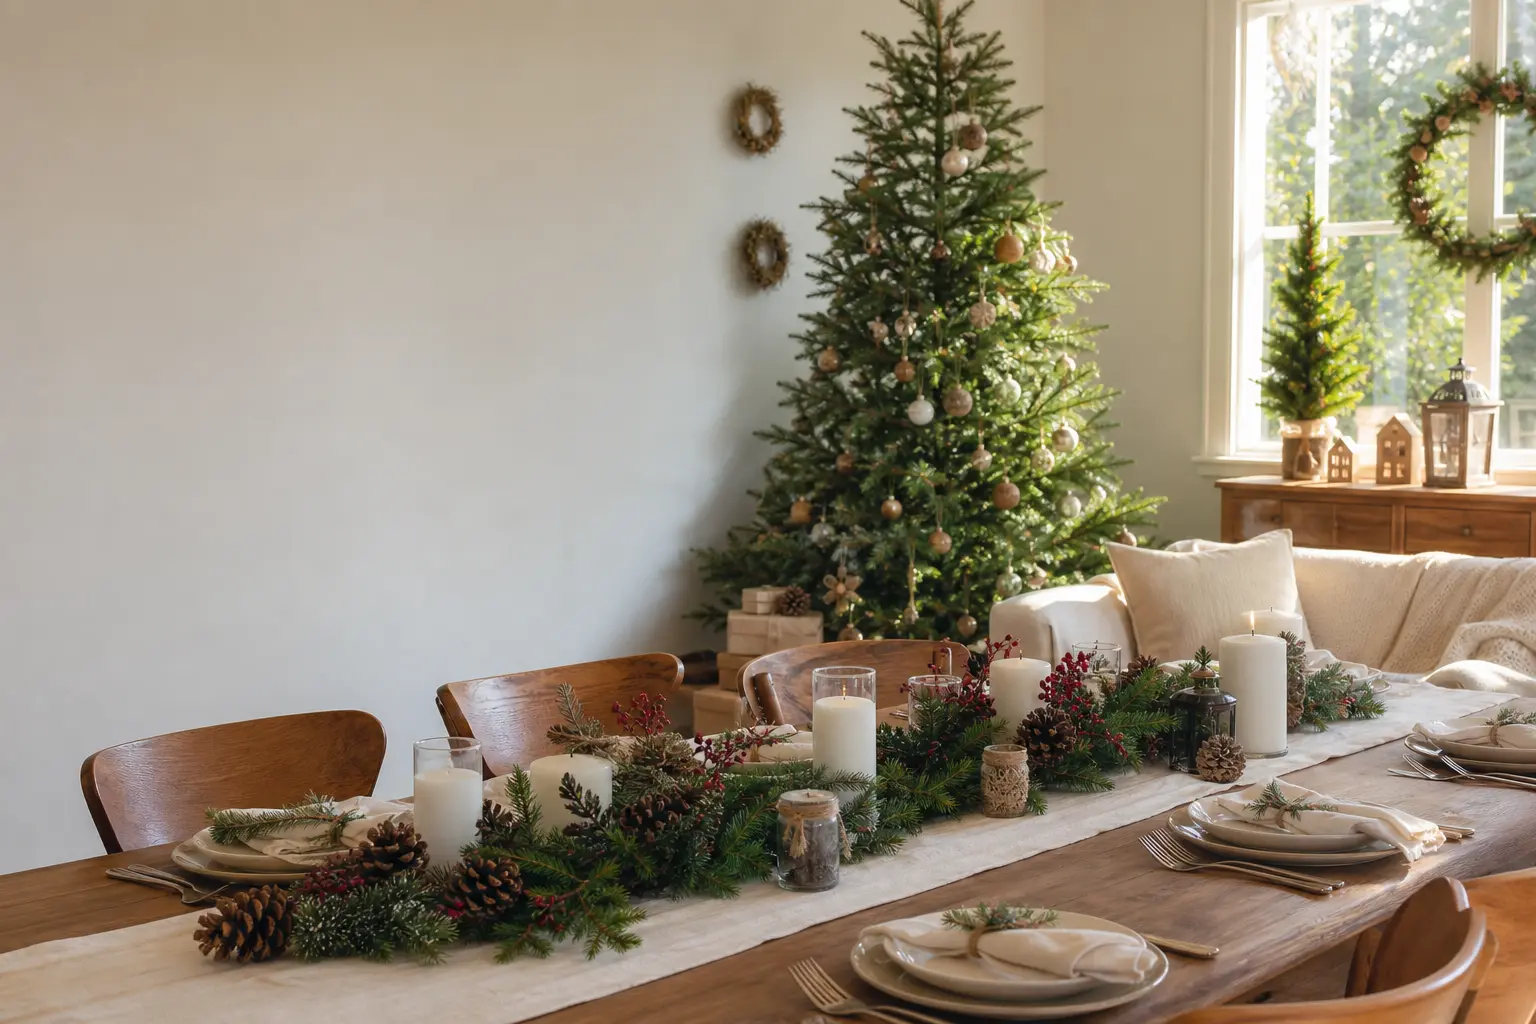
The test for diy christmas gifts grandparents is brutal: does it earn a spot on a shelf that already has a system, or does it live in a drawer until it quietly disappears?
Every gift on this list was chosen because it fits somewhere specific in the grandparent’s house, on the fridge, inside the wardrobe door, beside the bed, or straight onto the tree. No generic sentiment, no extra dusting, no bought thing dressed up with a ribbon.
A few of these take twenty minutes. A few need an overnight dry. None of them need a craft room or a special trip to three shops.
If you are working through the season, start with the clay hand impression and the height ribbon first, since both need measurements taken from the child on the day.
Browse our full christmas crafts for kids hub for even more ideas once you have picked your favourites here.
This post contains affiliate links. If you buy through them, I may earn a small commission at no extra cost to you.
- Dated Clay Hand Impression
- Framed Grandchild Interview
- Height Ribbon
- Recipe Card in a Child’s Handwriting
- Photo Magnet Set
- Pressed Flower Frame
- Letter to Open Next Christmas
- Hand-Drawn Family Portrait Framed
- Voice Recording Sound Wave Print
- Painted Mug Wrap
- Dated Christmas Ornament
- Stamped Keyring
- Calendar of Twelve Dated Drawings
- Hand Embroidered Handkerchief
- Painted Tile Coaster
- Memory Jar of Handwritten Notes
- Pocket Photo Card
- Stitched Bookmark with the Date
- Frequently Asked Questions
Dated Clay Hand Impression
This one sits on a windowsill, not in a box. A shallow oval of air-dry clay holds the child’s handprint, a name scratched underneath, and the date pressed in neat letters along the bottom edge.
It reads as a small sculpture, not a keepsake that needs explaining. Grandparents who already have a plant or a candle on the sill will move one two inches to the left and never move it back.
What You Need
- 200g air-dry clay (one standard block is plenty)
- A rolling pin or smooth glass
- A blunt skewer or toothpick for lettering
- Fine sandpaper, 220 grit
- Clear acrylic varnish, small pot
- A soft brush for the varnish
How to Make It
- Break off roughly half the block and knead it for two minutes until it feels smooth and without cracks. Roll it to about 1 cm thick: it should be wide enough to fit the child’s hand with a centimetre border all around.
- Trim the edges into a rough oval with a blunt knife (an adult does this part). The shape does not need to be perfect; organic edges look better than ruler-straight ones.
- Press the child’s hand firmly and evenly into the clay, fingers slightly spread. Hold for five seconds, then lift cleanly and straight upward so the print stays crisp.
- Use the skewer to scratch the child’s name and the year along the bottom edge inside the impression. Press slowly: the letters should be about 5mm tall and readable from arm’s length.
- Leave flat on a piece of baking paper in a warm room for at least 24 hours. The clay is dry when it feels cool and hard all the way through, not just on the surface.
- Sand any rough edges lightly, then brush on one coat of clear acrylic varnish. Let it dry for two hours before wrapping. The varnish gives it a faint sheen and stops it chipping on a windowsill.

🛍 Shopping guide
Framed Grandchild Interview
Ask a five-year-old what their grandparent’s job is, and the answer will be funnier and more honest than anything a greeting card has ever said.
Type up ten questions and the child’s exact answers, set them in a clean two-column layout, print on cream card, and frame it. It displays like a small artwork: think a 13x18cm frame in white or natural wood.
This one belongs on a desk or a dressing table, wherever the grandparent already keeps a framed photo.
What You Need
- A list of 10 interview questions printed or handwritten on a sheet for the child
- A pen and paper to record exact answers
- Access to a word processor and printer
- Cream card stock, A4, 200 gsm minimum
- A 13x18cm photo frame (white or natural wood)
How to Make It
- Ask the questions one at a time and write down every word the child says, exactly as they say it. Do not tidy the grammar: the malapropisms are the point. Good questions: What does Grandma do all day? How old is she? What is her favourite food? What makes her laugh? What do you love doing together?
- Type the questions in bold in the left column and the child’s answers in regular weight on the right, in a simple two-column table with no visible borders. Use a clean serif font at 11pt.
- Add the child’s name and the date in small text at the bottom, centred.
- Print onto the cream card stock. The heavier weight keeps it from curling in the frame. Trim to 13x18cm if needed: the printed area should have at least 1cm of white border on each side.
- Slot into the frame. Done. The whole thing looks like a considered piece of typography, not a school project.

🛍 Shopping guide
Height Ribbon
A length of grosgrain ribbon, marked with the child’s height in permanent pen, their name, and the date, hangs inside a wardrobe door on a single small hook. The grandparent sees it every morning when they reach for a coat.
Next Christmas, a second ribbon goes up beside it, and suddenly it is a record. Start this one: one ribbon is the beginning of something they will not throw away.
What You Need
- 1.5m grosgrain ribbon, 2.5cm wide, in a colour that suits the grandparent (ivory or forest green read well)
- A fine-tip permanent marker, black
- A ruler or tape measure
- A small self-adhesive hook rated for at least 500g
- Fabric glue or a lighter to seal the ribbon ends (adult step)
How to Make It
- Measure the child’s height on the day, ideally barefoot against a wall. Write the measurement in centimetres at the relevant point on the ribbon, with the child’s name above it and the date below. The lettering should be large enough to read without glasses.
- Mark the floor-level end with a horizontal line across the ribbon so the grandparent knows where to anchor it when hanging.
- Seal both ribbon ends: either run a bead of fabric glue along the cut edge and let it dry for ten minutes, or an adult passes the end briefly through a lighter flame to melt the weave closed.
- Fold the top end over by 3cm to make a hanging loop and secure it with a stitch or a dot of fabric glue. This is what sits on the hook.
- Attach the self-adhesive hook to the inside of the wardrobe door at the right height, press firmly for 30 seconds, and allow the recommended setting time before hanging the ribbon. Most need an hour.

Recipe Card in a Child’s Handwriting
This gift is for the grandparent who already has a recipe box on the counter. A child copies a recipe, in their own handwriting, on a properly sized index card, and it clips into the box among the others.
Ask the child to copy a recipe the grandparent taught their own child, or a family dish. The card is used. It gets food on it. That is the best possible outcome.
What You Need
- A 15x10cm (6×4 inch) index card in white or cream, 200 gsm
- A fine black felt-tip pen (0.5mm tip or finer)
- A pencil for a light ruled grid
- A ruler
- The recipe written out for the child to copy from
How to Make It
- Use a pencil and ruler to draw faint horizontal lines across the card at 1cm intervals. These keep the child’s writing straight and can be erased after.
- Have the child write the recipe name in slightly larger letters at the top, then copy the ingredients list on the left half of the card and the method in brief numbered steps on the right, or simply top to bottom if the recipe is short. The child’s handwriting, not a neat adult’s, is the whole point.
- At the bottom, the child signs their name and adds the date.
- Erase the pencil lines gently once the ink is fully dry (wait at least five minutes with a felt-tip). The card should look like a considered small document, not a homework sheet.
- Add a small hand-drawn decoration in one corner, a sprig, a star, or a tiny Christmas tree, if the child wants to. Keep it to one corner: any more and it competes with the text.

🛍 Shopping guide
Photo Magnet Set
These are not fridge magnets in the novelty sense. They are small, square, borderless photos printed on matte paper, laminated, and fitted with a strong neodymium magnet on the back.
Sized at 6x6cm, they slot into a fridge that already has a magnet system without shouting over it. Print three to five, all in the same square format, so they look like a considered set rather than a random scattering.
What You Need
- 3-5 photos printed at 6x6cm on matte photo paper
- A cold laminating pouch or self-adhesive laminate sheet
- Scissors
- 3-5 neodymium disc magnets, 20mm diameter, self-adhesive backing
- A bone folder or credit card for pressing the laminate flat
How to Make It
- Print the photos at exactly 6x6cm on matte paper. Glossy prints look cheaper once laminated; matte holds up better and photographs better on a fridge door.
- Apply the cold laminate by peeling the backing and laying the photo face-down onto the adhesive side, then fold over the top layer and press flat with the bone folder. Work from the centre outward to push out any bubbles. Trim each photo to 6x6cm with clean scissors, leaving about 1mm of laminate border all the way around to seal the edge.
- Peel the backing off one neodymium magnet and press it firmly to the centre of the back of each laminated photo. Hold for ten seconds. These magnets are strong enough that the photo will not slide down the fridge even with a note tucked behind it.
- If giving more than three, arrange them in a small kraft paper envelope with a note saying they are designed to sit together in a row or a loose cluster. That framing helps the grandparent see the intention.

Pressed Flower Frame
A single pressed flower or a small cluster, arranged on cream watercolour paper inside a 10x15cm frame, belongs on a bedside table rather than a wall.
The key to this one looking gallery-quality rather than school-project is restraint: one botanical specimen, or three arranged with space between them, against plain cream paper. The child picks and presses the flowers; the arrangement is a ten-minute job together.
What You Need
- Fresh flowers or leaves picked at least 2-3 weeks before (pansies, daisies, fern fronds, and clover press well)
- A heavy book or flower press
- Blotting paper or plain newspaper
- Cream watercolour paper, 300 gsm, cut to 10x15cm
- A 10x15cm frame with a thin border (white or natural wood)
- A glue pen or small amount of PVA glue
How to Make It
- Press the flowers two to three weeks ahead. Lay each flower flat between two sheets of blotting paper inside a heavy book. Close the book and stack more books on top. Check after one week: a pressed flower should feel papery and completely flat. If it still feels damp, re-press with fresh blotting paper.
- When fully pressed and dry, lay the watercolour paper on a flat surface. Arrange the flowers on it without gluing first, and step back to look. One centred flower with a small leaf at the corner is enough. Avoid the urge to fill the space.
- Once happy with the arrangement, dab a tiny amount of glue to the back of each flower with the glue pen and press it gently down. Hold for 20 seconds. The pressed petals are fragile: do not slide them, only press straight down.
- Let the glue dry for 15 minutes, then slot the paper into the frame. No need to write on the front. The child’s name and the date written in pencil on the back of the paper is the right amount.

Letter to Open Next Christmas
This goes into a drawer the grandparent already checks, because it is sealed and addressed ‘Open Christmas [next year]’. It is the simplest craft on this list and the one most likely to make someone cry in a good way.
The child dictates or writes the letter; the point is that the grandparent will be thinking about this child for twelve whole months. Seal it with wax for drama, or just tuck the flap. The envelope does the work.
What You Need
- One sheet of writing paper, A5, at least 100 gsm
- An envelope to fit (C5 or a square envelope that suits the paper)
- A black pen for writing, or a fine felt-tip
- Optional: sealing wax and a stamp, or a plain sticker to seal the flap
How to Make It
- Have the child answer four or five prompts on the paper: What is your favourite thing about this grandparent? What did you do together this year that you want to remember? What do you hope to do together next year? How tall are you right now, and what is your favourite thing to eat? These are the questions that make the letter worth keeping.
- Younger children can dictate while an adult writes, then the child draws a picture in the corner and signs their name. The handwriting, whether it is the child’s or a parent’s transcription, should be in the first person from the child.
- Fold the letter, slide it into the envelope, and write on the front in clear, friendly lettering: ‘For [Grandparent’s name]. Open at Christmas [next year].’ Do not write the year number; write ‘next Christmas’ so the instruction is clear even if it gets moved.
- Seal with wax (an adult does this part, the wax is hot) or press a sticker firmly over the flap. Tuck it in a gift bag or tie it to another gift so it does not get lost in the unwrapping.

🛍 Shopping guide
Hand-Drawn Family Portrait Framed
A child’s drawing of the family, framed in a 15x20cm white frame, belongs on a gallery wall because it looks like a considered print, not an afterthought.
The key step is scanning or photographing the drawing and printing it on good paper rather than framing the original: the original can stay at home, and the grandparent gets a clean, properly sized print.
Ask the child to draw every family member and label them by name.
What You Need
- White cartridge paper, A4, 120 gsm, for the original drawing
- Black or coloured felt-tips or wax crayons
- A smartphone or scanner to photograph the drawing
- A photo printer or online print order (matte finish, 15x20cm)
- A 15x20cm frame, white or light wood, with a white mount if possible
How to Make It
- Ask the child to draw the whole family on the cartridge paper, labelling each person. Give them space and time: the best drawings happen without hovering. Wax crayons or bright felt-tips both reproduce well; pencil-only drawings tend to look faint when printed.
- Photograph the drawing in good natural light, flat on a table, holding the phone directly above it. Or scan it at 300 dpi if a scanner is available. Check the image: if any labels are too faint to read, go over them with a black felt-tip before photographing again.
- Print at 15x20cm on matte photo paper. Matte finishes look more like art; gloss reads as a holiday photo and sits wrong on a gallery wall.
- Mount and frame. If the frame has a white mount, the drawing will look like it was made to be there. Add the child’s name and the date in small text at the bottom of the print, either before printing or written neatly in pencil after.

🛍 Shopping guide
Voice Recording Sound Wave Print
The child records a short message (their name, age, a joke, or ‘I love you, Grandma’). A free sound wave generator turns that audio into a waveform image. The image is printed, framed at 15x20cm, and sits beside a photo they already display.
It looks like modern art until you explain it, and then it is the most personal thing on the shelf. This one requires no craft skill at all, which means the whole effect comes from the idea.
What You Need
- A smartphone or tablet to record the message
- Access to a free online sound wave generator (search ‘voice to sound wave print generator’)
- Matte photo paper, A5 or 15x20cm, 200 gsm minimum
- A 15x20cm frame, thin border, white or black
- A printer with at least standard quality output
How to Make It
- Record the child’s message. 10-20 seconds is ideal: long enough to make an interesting wave shape, short enough to keep the waveform readable. Say the child’s name and something specific to the grandparent.
- Upload the audio file to a free sound wave generator. Most let you choose the colour of the wave, the background colour, and whether to add text beneath it. Choose a clean, high-contrast combination: black wave on white, or white wave on a deep forest green or navy. Avoid too many colours.
- Add the child’s name and the date as a small line of text beneath the waveform if the tool allows it. Download the image at the highest resolution available.
- Print on matte paper at 15x20cm. If the home printer cannot manage this quality, upload the file to an online print service and collect it in 24 hours.
- Frame without a mount so the waveform fills the frame. On the back, write what the recording says, the date, and the child’s age. The grandparent will want to know.

🛍 Shopping guide
Painted Mug Wrap
Not a painted mug, which requires an oven and chips at the dishwasher. A painted paper wrap: a strip of heavy watercolour paper, sized to wrap around the grandparent’s specific mug, with the child’s painting on it, slipped on each morning.
It is removable, replaceable, and does not alter the mug they already love. Measure the mug first. The wrap should be about 7cm tall and long enough to overlap by 2cm at the join.
What You Need
- Watercolour paper, 300 gsm, cut to the correct width and height for the mug
- Watercolour paints or tempera paints
- A fine brush and a medium brush
- A ruler and pencil
- Two small metal eyelets and an eyelet punch, or two small sticky Velcro dots to fasten the join
How to Make It
- Measure the mug circumference with a tape measure and the height of the body (avoiding the handle join). Cut the watercolour paper strip to those dimensions, adding 2cm to the length for overlap.
- The child paints a design on the strip: a winter scene, dots, stripes, or simply their name in big letters with a border. Leave at least 1cm clear at each short end, where the fastening will go. Let the paint dry fully before continuing (about 30 minutes for watercolour, up to an hour for tempera).
- Once dry, an adult punches one eyelet through each short end, or simply presses one side of a Velcro dot to each end. Velcro is easier for a child to manage daily and does not require a tool.
- Curl the strip gently around the mug and fasten it at the join. It should sit snugly without gripping so hard that it is difficult to remove. Write the date lightly in pencil on the inside of the strip.

Dated Christmas Ornament
A wooden disc ornament, painted by the child and inscribed with the date and their name, goes straight onto the tree. Not onto a shelf, not into a bowl.
Grandparents who put up a tree every year accumulate ornaments the same way they accumulate photographs: each one marks a point in time and they are all out at once every December. This one adds to that collection rather than competing with it.
What You Need
- 1 unfinished wooden disc, 8cm diameter, pre-drilled with a hanging hole
- White gesso or acrylic primer, small pot
- Acrylic paints in two or three colours
- A fine brush and a medium brush
- A fine-tip paint pen or black Posca pen for lettering
- Clear acrylic varnish
- 30cm of thin ribbon or twine for hanging
How to Make It
- Apply one coat of white gesso to both sides of the disc. This seals the wood and makes the paint colours true. Let it dry for 20 minutes.
- The child paints a design on the front. Keep it simple: a star, a tree, a snowman, a name in big block letters, or abstract dots. Acrylic paint dries quickly; if the child overworks the surface it can go muddy, so encourage bold shapes and stop early.
- Once dry (15-20 minutes), use the paint pen to add the child’s name and the year in small letters along the bottom edge of the disc front. The lettering is the part that makes this a dated record rather than a decoration. If the paint pen feels too fiddly for the child, an adult can add the lettering.
- Brush one coat of clear varnish over the front and edges. Let it dry for 30 minutes.
- Thread the ribbon through the hanging hole and tie a firm knot. The ribbon should be long enough to hang from a branch without the disc resting on lower branches.

🛍 Shopping guide
Stamped Keyring
A single oval metal stamping blank, stamped with the child’s name and the date, and threaded on a split ring with one small charm, replaces the keyring the grandparent already carries. The charm can be a small initial, a heart, or a birthstone-coloured bead.
Keep it to three elements at most: blank plus one charm plus the split ring. More than that and it feels like a carnival prize rather than a considered piece.
What You Need
- 1 oval aluminium stamping blank, approximately 25x35mm, with a hole pre-punched
- A set of 3mm metal letter stamps
- A small hammer (a ball-peen works well)
- A steel stamping block or a piece of hard wood
- A black permanent marker or stamping ink pad
- A fine steel wool pad or 400-grit sandpaper to finish
- 1 split ring, 25mm
- 1 small charm or bead, optional
How to Make It
- Tape the blank to the stamping block with masking tape so it does not move. Mark the letter positions with a pencil first to keep the name centred. This step makes the difference between a professional-looking result and a wonky one, so spend two minutes on the layout before touching the stamps.
- An adult or an older child (8+) strikes each letter stamp with one firm, decisive hit. A glancing blow makes a partial impression that cannot be corrected. Strike straight down and with genuine force. Work across the name from left to right.
- Add the date on a second line in smaller letters, or on the back of the blank.
- Once all letters are stamped, rub the black marker firmly over the whole surface and then wipe it back immediately with a cloth. The ink settles in the impressions and makes them legible. Wipe completely clean from the raised surface so only the letters hold the colour.
- Buff the surface lightly with fine steel wool to smooth any roughness, then thread the blank and charm onto the split ring. Open the split ring with a fingernail or a flat key, not pliers, to avoid distorting it.

Calendar of Twelve Dated Drawings
Twelve sheets of A5 card, each with a child’s drawing for one month, bound together with two rings through a hole punch at the top. It hangs where the current calendar hangs, in the kitchen or by the front door, and it is genuinely useful.
The child dates each drawing at the bottom. One drawing per month takes about fifteen minutes per child; split across a couple of sessions it is not a burden.
What You Need
- 12 sheets of white card, A5, 250 gsm
- 1 sheet of heavier card, A5, 300 gsm or more, for the cover
- Felt-tips, wax crayons, or watercolour paints
- A single-hole punch
- 2 metal binder rings, 25mm
- A ruler and pencil for a light grid at the bottom of each sheet to show the month and dates (adult draws these)
How to Make It
- An adult draws a simple calendar grid at the bottom quarter of each A5 sheet, leaving the top three-quarters blank for the drawing. The grid should show the month name and the day numbers in the correct positions. Do all twelve sheets before handing them to the child.
- The child draws a picture on each sheet that represents something about that month: snow for January, hearts for February, flowers for March, and so on. Write the child’s name and the year of the drawings at the bottom of each sheet, outside the grid.
- Design a simple cover sheet on the heavy card: the child can write ‘Grandma’s Calendar’ (or the appropriate name) and draw a border or decoration. Add the year in bold lettering.
- Stack the cover on top, then the twelve month sheets in order. Punch two holes along the top edge, about 3cm in from each side. Thread a binder ring through each hole. The calendar should open flat and hang evenly.

🛍 Shopping guide
Hand Embroidered Handkerchief
A plain white cotton handkerchief, embroidered in one corner with the child’s initials and the date, is something a grandparent actually carries. The stitching does not need to be intricate: a simple stem stitch initial in one colour, the year in smaller letters beneath it.
That is enough. The handkerchief needs to be proper cotton, not a paper substitute, and sized to fold to a quarter and fit in a pocket.
What You Need
- 1 plain white cotton handkerchief, at least 30x30cm, hemmed
- Embroidery hoop, 10cm diameter
- Embroidery thread (floss), in one colour: navy, forest green, or burgundy all read well on white
- An embroidery needle, size 7 or 8
- A water-soluble fabric pen for tracing letters
- A printed letter template (optional but helpful)
How to Make It
- Draw or trace the initial lightly onto the corner of the handkerchief with the water-soluble pen. The letter should be about 2cm tall and sit about 2cm in from each hemmed edge. Beneath it, write the year in smaller letters, about 1cm tall.
- Mount that corner in the embroidery hoop, pulling the fabric taut without distorting it. The fabric should feel like a drum skin, not slack.
- Thread the needle with two strands of embroidery floss (peel two strands from the six that come off the skein). An adult knots the thread and brings the needle up through the fabric from the back at the start of the first letter line.
- Use stem stitch: bring the needle up, take a small stitch forward, then bring the needle back up halfway along the last stitch. Each new stitch starts from the midpoint of the previous one, which creates a smooth, rope-like line. This stitch is easier than it sounds after the first two attempts.
- Stitch the initial, then the year below it, following the water-soluble pen lines. Once done, rinse the corner briefly under cold water: the pen marks dissolve completely, leaving only the stitching.
- Press the handkerchief flat with a warm iron (an adult does this), fold it into quarters, and tie it with a length of narrow ribbon.

🛍 Shopping guide
Painted Tile Coaster
A plain white ceramic tile, painted with enamel paint and sealed, becomes a coaster that matches the set already on the coffee table if you buy matching tiles. A 10x10cm tile is the standard coaster size.
The child paints the design; an adult seals it with tile varnish. Add self-adhesive felt pads to the base so it does not scratch the table. This gift lives in use, which is exactly where a handmade thing should be.
What You Need
- 1 plain white ceramic tile, 10x10cm
- Enamel craft paint or ceramic paint, in two or three colours
- A medium and a fine brush
- Tile or ceramic varnish (water-based, dishwasher-safe if available)
- 4 self-adhesive felt pads for the base
How to Make It
- Wipe the tile surface with a damp cloth and let it dry completely. Any grease or dust will make the paint bead rather than lie flat.
- The child paints a design directly onto the tile in enamel paint. Enamel takes about 20 minutes to dry to the touch. If the child adds a second layer, wait for the first to feel completely dry or the colours will blend unintentionally. A simple bold design, a sun, a flower, a geometric border, works better than a detailed one on a small surface.
- Once the design is dry (minimum 20 minutes, ideally 1 hour), apply two coats of ceramic varnish with a clean brush, letting the first coat dry fully before the second. Two coats are not optional: one coat will not protect the paint from a hot cup.
- Allow the varnish to cure for 24 hours before using. Press four felt pads to the corners of the base. These keep the tile from scratching the table and stop it sliding.
- Write the child’s name and the date in permanent marker on the base, inside the felt pads where it will not be seen in use.

Memory Jar of Handwritten Notes
Before anyone dismisses this as ‘putting things in a jar’: this one is entirely handmade. The child writes or dictates twenty short memories, jokes, or observations on individual folded slips of paper, and the jar is a small glass container the parent already has.
It earns a mantel spot because the jar is kept small (a 250ml jam jar works perfectly) and because the writing is specific, not generic.
‘The time we made soup and you let me add too much pepper’ beats ‘I love spending time with you’ every single time.
What You Need
- 20-25 strips of paper, 2x10cm, cut from white or cream 120 gsm card
- A fine-tip black pen (0.5mm)
- A 250ml clean glass jar with a lid
- A short label for the outside: ‘Open one when you need a smile’
- A 30cm length of narrow ribbon to tie around the lid
How to Make It
- Cut the paper strips cleanly and stack them. Have the child think of twenty specific memories, funny moments, or things they love about this grandparent. Younger children can dictate while an adult writes. The child should sign each strip with their name.
- Write one memory per strip, in the child’s hand or with the child’s words transcribed. Fold each strip in thirds once written so the text is hidden inside. The folding is part of the ritual: the grandparent unfolds each one.
- Fill the jar with the folded strips. They should fit without forcing; if the jar is too full, the grandparent cannot easily get them out one at a time.
- Write the label text on a small piece of card and attach it to the front of the jar with a dab of glue or a loop of ribbon. Tie the narrow ribbon around the neck of the jar in a simple bow.
- If the jar has a plain lid, the child can paint it with enamel paint in one solid colour to finish the look. Let it dry fully before tying on the ribbon.

🛍 Shopping guide
Pocket Photo Card
One photograph of the grandchild, printed at exactly 5.4×8.6cm (the standard credit card slot size), laminated and slipped into the wallet the grandparent already carries. Measure the wallet slot if possible.
The photo should be portrait orientation, printed on matte paper, with the child’s name and the date printed in small text at the bottom edge. It replaces nothing and takes up one slot that would otherwise hold an old loyalty card.
What You Need
- 1 photo printed at 5.4×8.6cm on matte photo paper (portrait)
- Self-adhesive cold laminating film or a laminator with a credit-card-size pouch
- Sharp scissors or a craft knife and ruler (adult cuts)
- A black fine-tip pen for dating before laminating
How to Make It
- Print the photo at exactly 5.4×8.6cm, matte finish. Before laminating, write the child’s name and the date in small, neat letters along the bottom edge of the photo in fine-tip black pen. This needs to be done before laminating, not after.
- Apply the cold laminate carefully, peeling the backing and lowering the photo face-down onto the adhesive side. Fold the top layer over and press from the centre outward with a credit card or bone folder to eliminate bubbles.
- Trim the laminated photo to exactly 5.4×8.6cm with sharp scissors or a craft knife and ruler (adult does the cutting). The laminate border should be about 1mm all the way around the photo edge to seal it properly. A cleanly cut edge is what makes this look considered rather than homemade.
- The photo card is finished. Slip it into the wallet with a note saying which slot it is sized for.

🛍 Shopping guide
Stitched Bookmark with the Date
A 5x20cm strip of linen or medium-weight cotton fabric, hemmed on all four sides, with the child’s initial and the date worked in running stitch along the length. It goes directly into the book the grandparent is currently reading.
It is slim enough not to make the spine crack, personal enough to keep, and practical enough to use every day. If the grandparent reads, this is the gift they will see most often.
What You Need
- One strip of natural linen or medium cotton, 5x20cm
- Matching thread for hemming
- Embroidery floss in one contrasting colour (navy on natural linen reads beautifully)
- An embroidery needle, size 7
- A water-soluble fabric pen
- Sewing pins
- An iron for pressing hems (adult step)
How to Make It
- Press a 5mm hem on all four sides of the fabric strip and pin it in place. An adult sews the hem by machine or hand, or secures it with iron-on hemming tape. The bookmark should be neat and flat with no fraying edges.
- Using the water-soluble pen, write the child’s initial in the centre of the bookmark and the year below it in small lettering. Both should be positioned so they sit in the middle of the strip lengthways, not at one end.
- Thread the embroidery needle with two strands of floss. An adult knots the end and brings it through from the back. The child works running stitch along the pen lines: in, out, in, out, keeping the stitches roughly 3mm long. Running stitch does not need to be perfectly even to look good; slight irregularity reads as handmade in the right way.
- Once the initial and year are stitched, rinse the bookmark under cold water to remove the pen marks. Pat it flat between two clean cloths and press it with a warm iron (adult does this). The bookmark should lie completely flat.
- Tie a short length of narrow ribbon through a small slit cut at the top end (or through a pre-made hole reinforced with a few stitches) for a ribbon tail. This is the part that peeks out from the top of the book.

🛍 Shopping guide
Frequently Asked Questions
What DIY Christmas gifts grandparents actually keep?
Grandparents keep gifts that earn a real spot in their home: something that fits a surface they already use, like a windowsill, fridge door, or wardrobe hook. Dated handmade pieces, a clay handprint, a height ribbon, or a framed family portrait, stay because they mark a specific moment in time that cannot be bought or replaced.
What can grandchildren make for grandparents who have everything?
The answer is always something personal and dated. A grandchild interview framed like a small artwork, a sound wave print of their voice, or a memory jar of handwritten notes cannot be bought and cannot be replicated. The child’s age and handwriting at this exact moment are what make it irreplaceable, regardless of how full the grandparent’s shelves already are.
How do I date a handmade gift so it lasts?
Write the date as part of the design, not as an afterthought on the back. Scratch it into clay before it dries, stamp it into metal, stitch it into fabric, or include it in the printed text of a framed piece.
When the date is embedded in the material itself, it cannot be lost or separated from the gift. Use a year-neutral approach on labels, but always write the specific year on the object.
What DIY Christmas gifts grandparents can display all year?
The best year-round displays are things that already have a home in a room.
A pressed flower frame on a bedside table, a framed grandchild interview on a desk, a sound wave print on a shelf, a height ribbon inside a wardrobe door, and a painted tile coaster in daily use all stay out twelve months a year because they fit where the grandparent already lives, not because they have been given a special spot.

Christmas kids activities for the table, the floor and the craft box. 16 free printables plus 8 no-p
12 free printable Christmas garlands built around a pink christmas garland palette plus red, white,
19 christmas wood crafts that let the grain show through: stamped slices, routed signs, driftwood st
Leave a Reply