

23 Christmas Handprint Crafts That Turn Little Hands Into Reindeer, Santas and Snowmen

Little hands change size every few months, which is exactly why a handprint craft matters more than it looks like it should. Paint one now and in a year it will not fit, so the ornament or the card becomes a small, dated record nobody meant to make on purpose. None of these need a kit from a craft shop: most use paint, paper and glue already in the house, plus the odd pom pom. If the whole thing feels like a lot for one afternoon, the gentler end of the list (the card, the gift tag, the bookmark) is where to start, and there is a fuller spread of easy wins in 31 Christmas Crafts for Kids That Turn Into Something Else Halfway Through if this list only whets her appetite.
This post contains affiliate links. If you buy through them, I may earn a small commission at no extra cost to you.
- Handprint Reindeer Salt Dough Ornament
- Handprint Santa Christmas Card
- Handprint Snowman Mason Jar Luminary
- Handprint Christmas Tree Canvas
- Handprint Paper Plate Wreath
- Handprint Angel Ornament
- Handprint Penguin Gift Tags
- Handprint Polar Bear Framed Keepsake
- Handprint Grinch Hand Stocking
- Handprint Nativity Canvas
- Handprint Elf Wood Slice Ornament
- Handprint Paper Chain Garland
- Handprint Poinsettia Coasters
- Handprint Holly Place Cards
- Handprint Snow Globe Jar
- Handprint Reindeer Throw Pillow
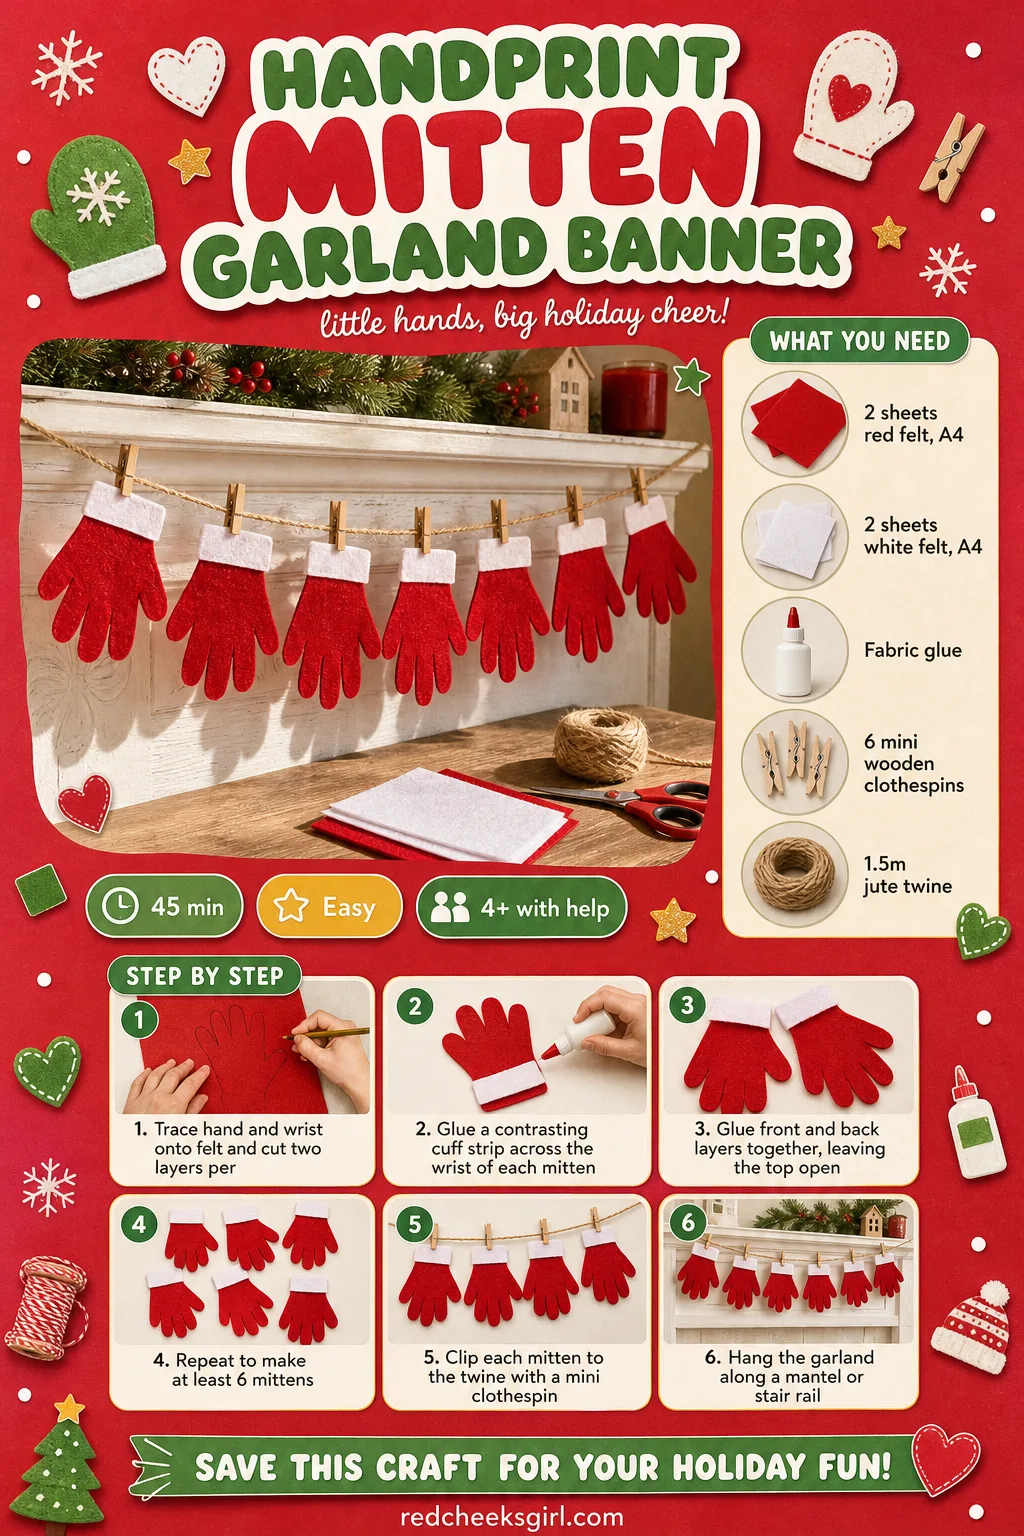
- Handprint Mitten Garland Banner
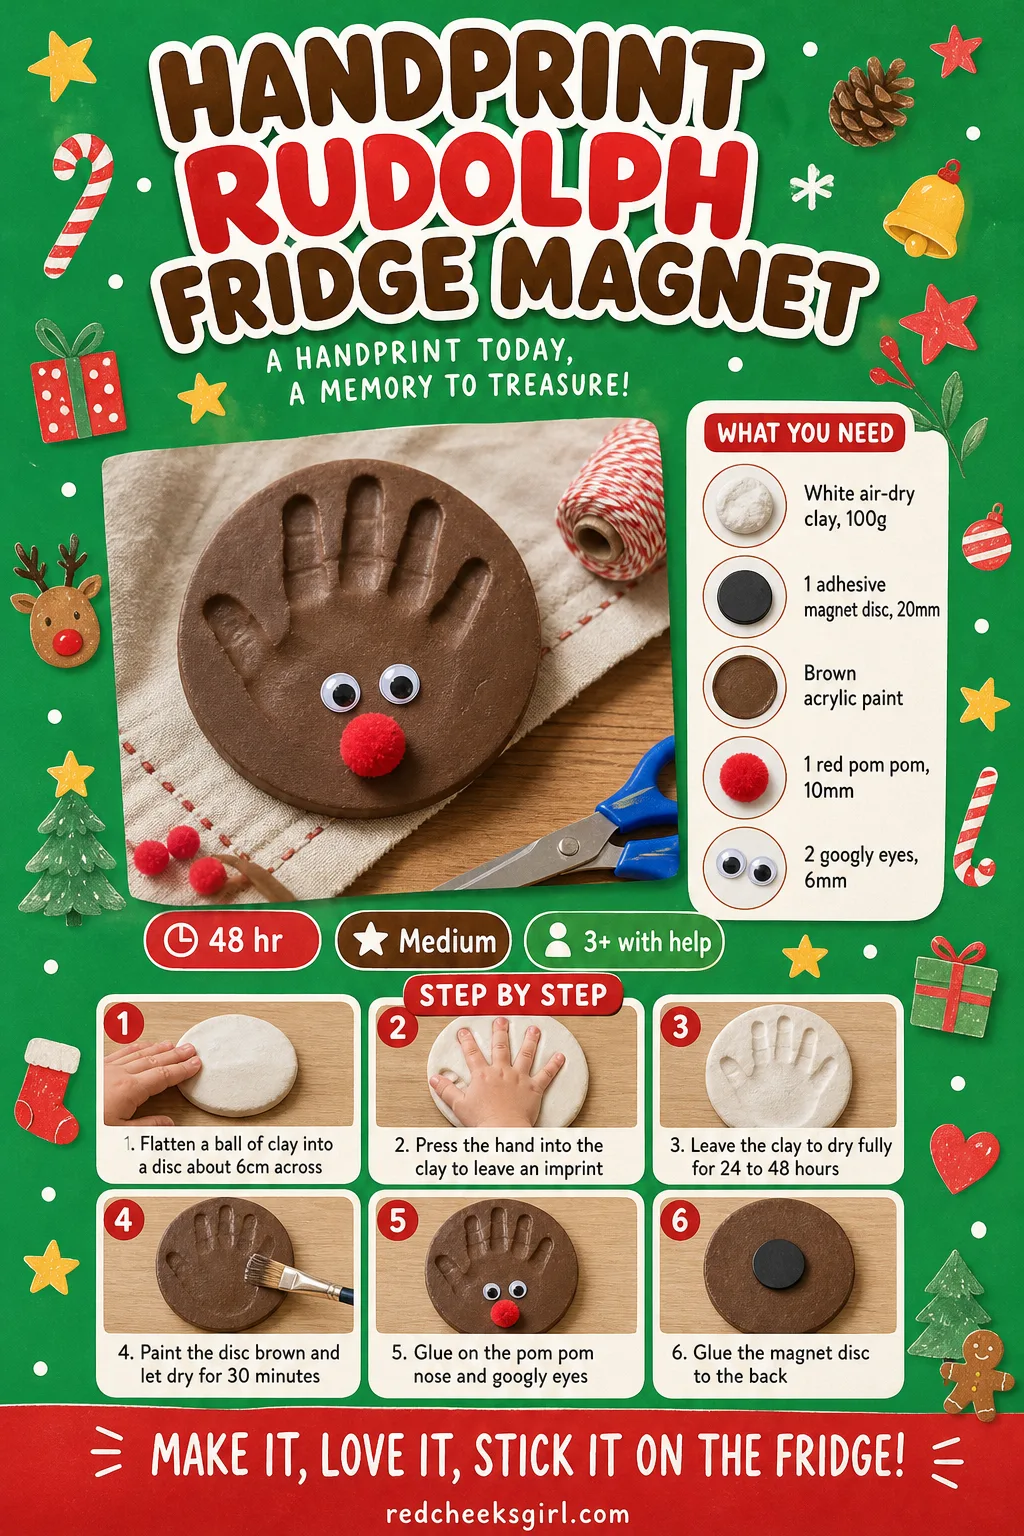
- Handprint Rudolph Fridge Magnet
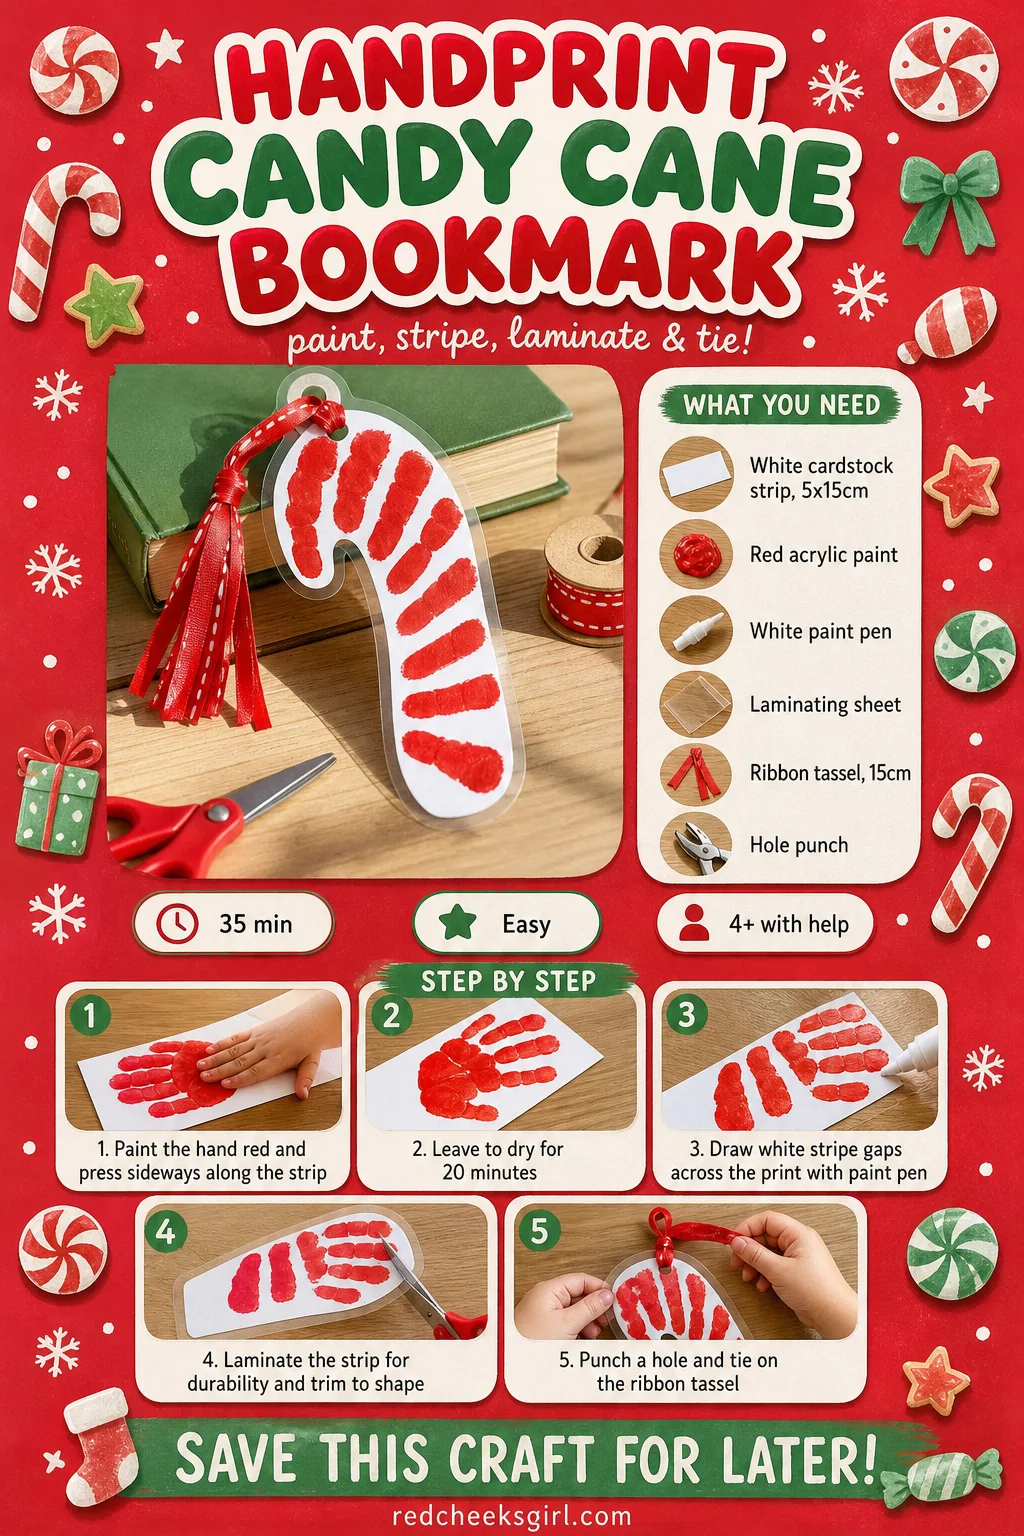
- Handprint Candy Cane Bookmark
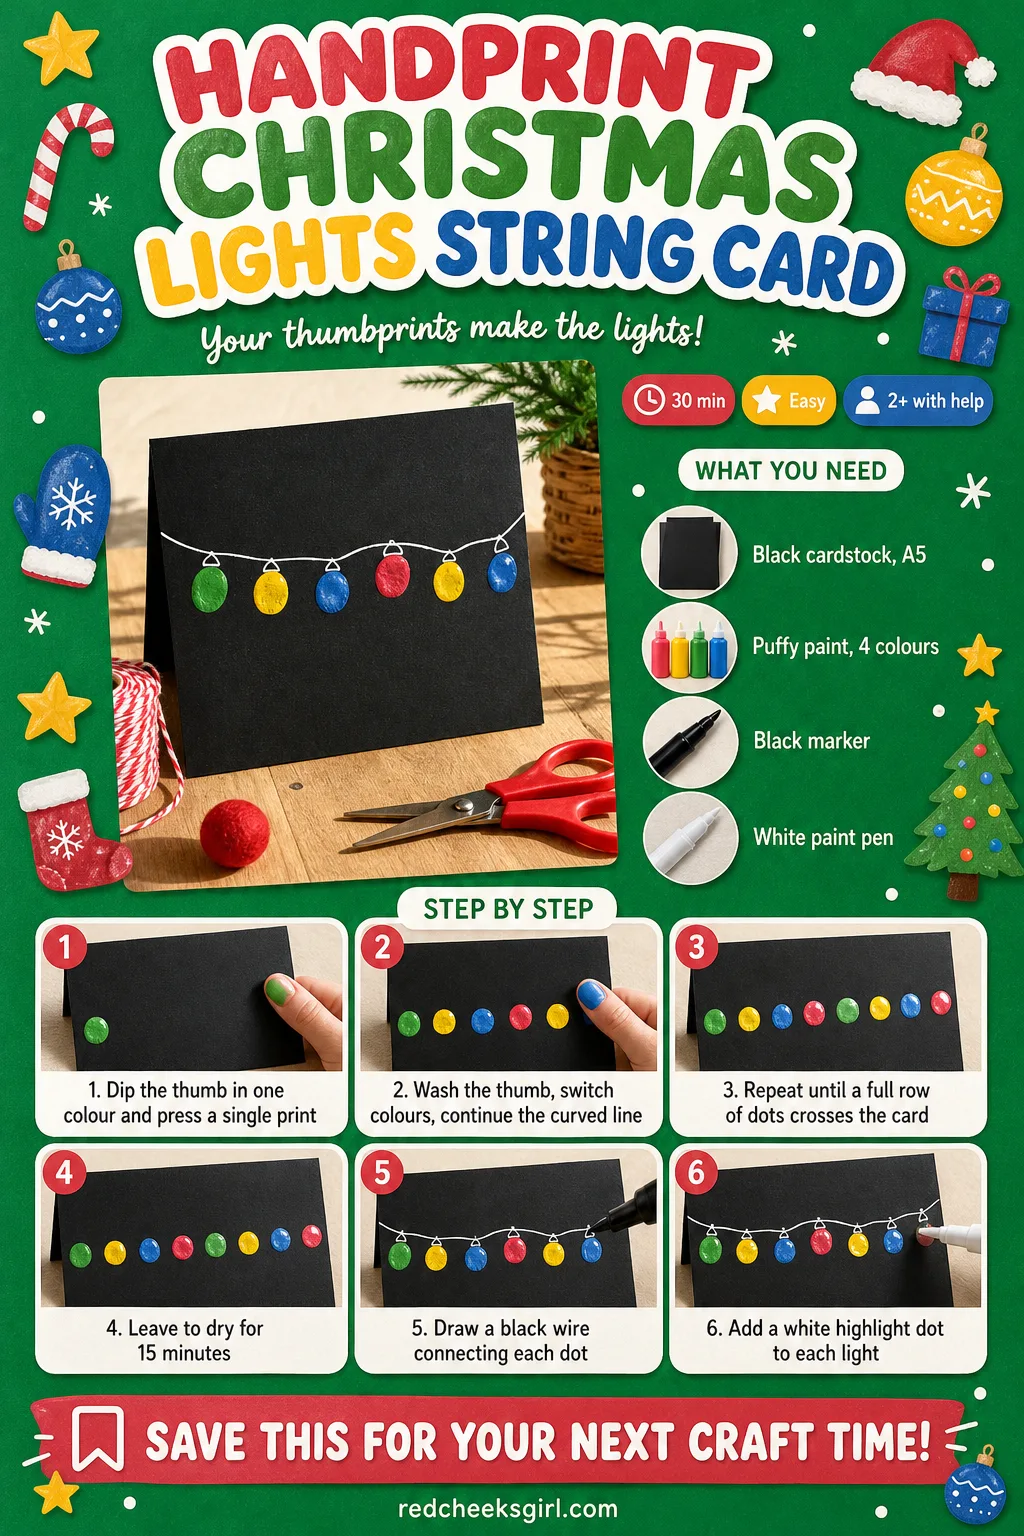
- Handprint Christmas Lights String Card
- Handprint Christmas Tree Skirt
- Handprint Star Wood Ornament
- Handprint Keepsake Trinket Box
- Frequently Asked Questions
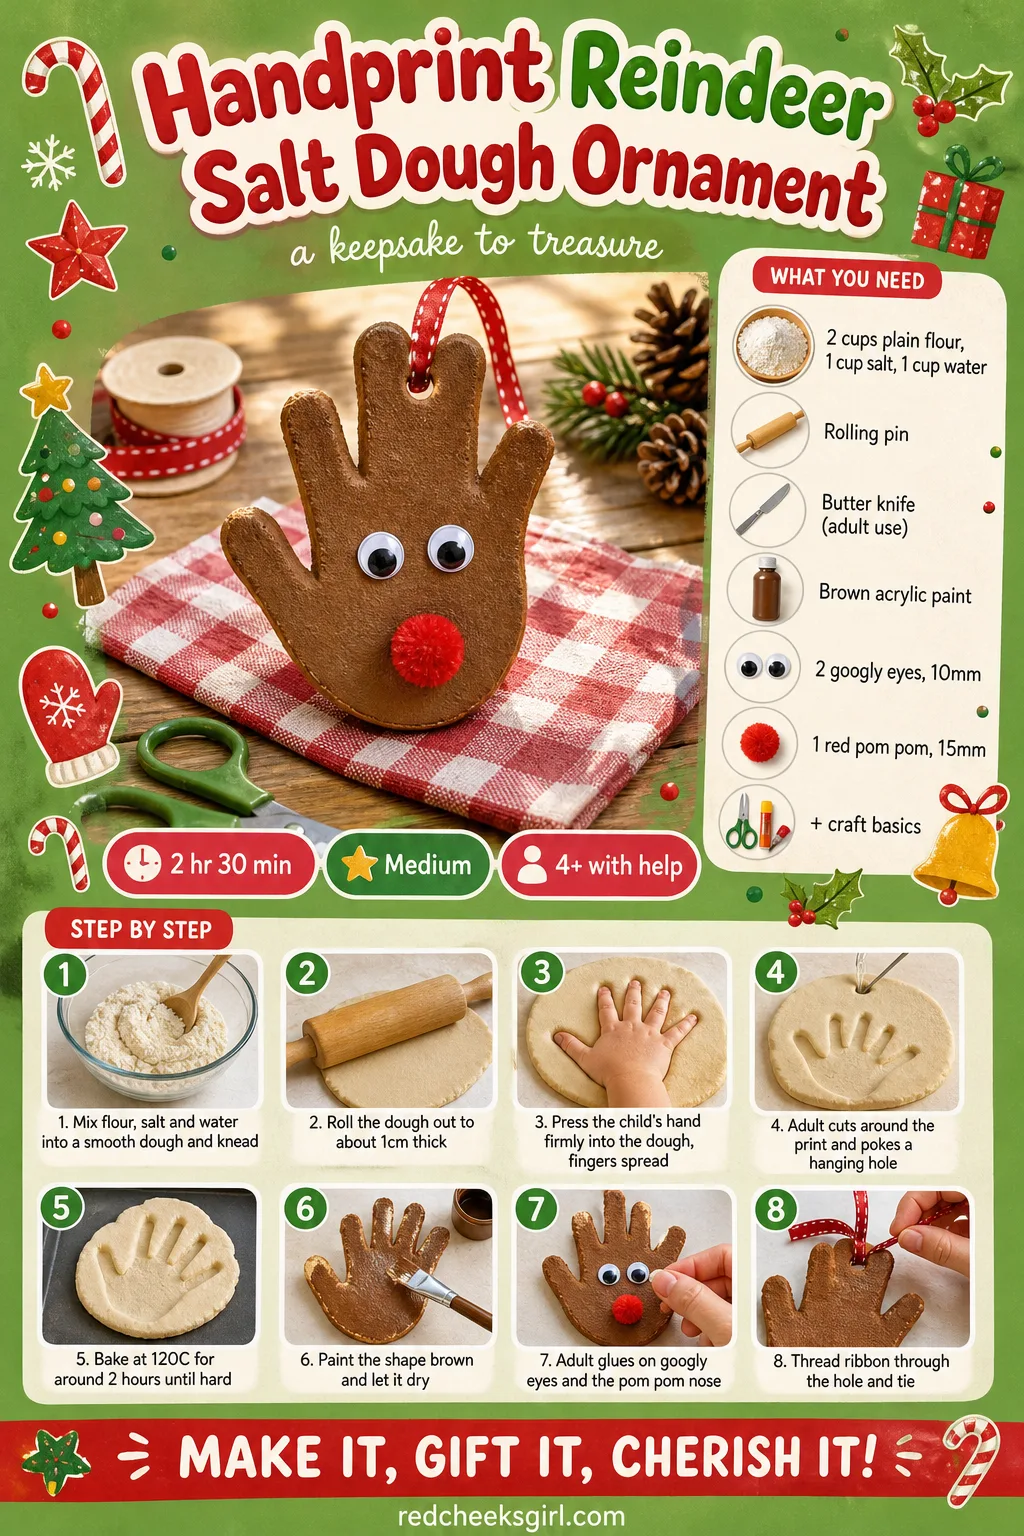
Handprint Reindeer Salt Dough Ornament
This is the one that ends up on the tree every single year, a little heavier and a little more battered each time, which is the whole point. The thumb becomes the reindeer’s face, the four fingers fan out as antlers, and a single red pom pom finishes the joke. Hang it near the front, where it will get noticed.
What You Need
- 2 cups plain flour, 1 cup table salt, 1 cup water (for the dough)
- Rolling pin
- Butter knife (adult use)
- Brown acrylic paint, 1 small pot
- 2 googly eyes, 10mm
- 1 red pom pom, 15mm
- 20cm ribbon, for hanging
How to Make It
- Mix the flour, salt and water into a smooth dough and knead for two minutes.
- Roll it out on a floured surface to about 1cm thick.
- Press the child’s hand firmly into the dough, fingers spread, thumb apart from the fingers.
- An adult cuts around the print leaving a 1cm border and pokes a hanging hole near the wrist with a straw.
- Bake at 120C (250F) for around 2 hours until hard, or let air-dry clay set for two days instead.
- Once cool, paint the whole shape brown and leave to dry for 30 minutes.
- An adult hot-glues the googly eyes near the thumb tip and the pom pom nose just below.
- Thread the ribbon through the hole and tie a loop for hanging.
🛍 Shopping guide
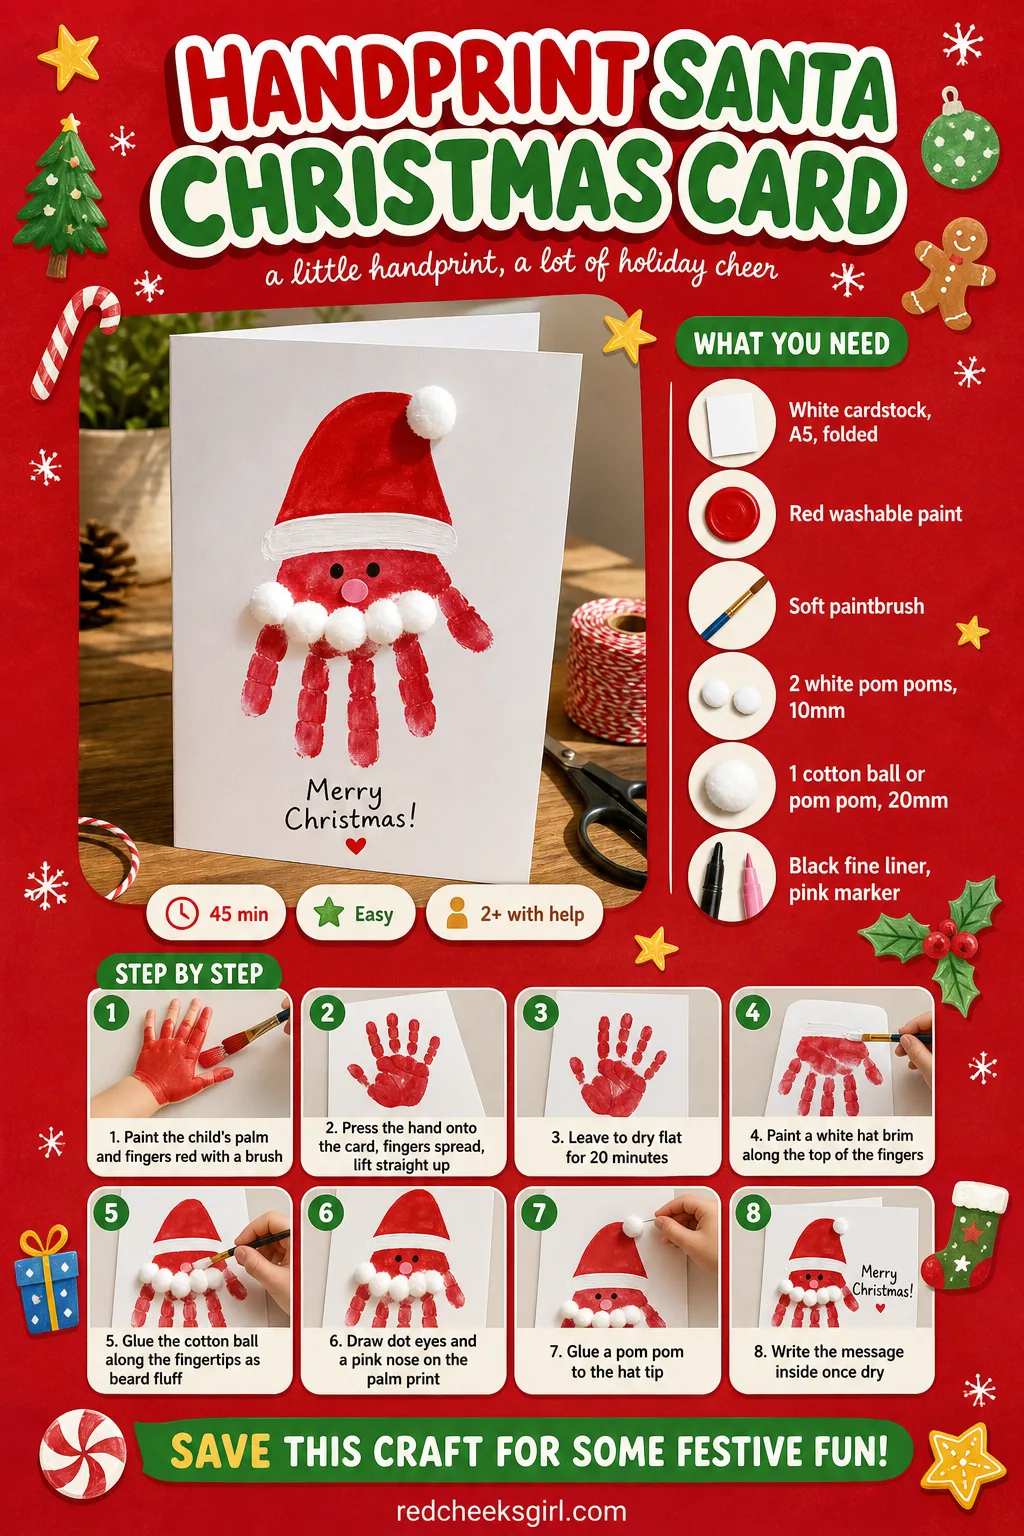
Handprint Santa Christmas Card
Nobody needs another shop-bought card with a photo of a stranger’s chimney on the front. This one arrives with an actual handprint under the beard, which is the part grandparents keep. It folds flat to post or prop on a mantelpiece, whichever she is sending it for.
What You Need
- 1 sheet white cardstock, A5, folded
- Red washable paint, 1 small pot
- Soft paintbrush
- 2 white pom poms, 10mm, for the hat
- 1 cotton ball or white pom pom, 20mm, for the beard
- Black fine liner and pink marker
How to Make It
- An adult paints the child’s palm and fingers red with a brush, keeping the coat thin and even.
- Press the hand onto the card front, fingers spread, then lift straight up without dragging.
- Leave to dry flat for 20 minutes.
- Paint a curved white hat brim along the top of the fingers with a paint pen or thick brush.
- Glue the cotton ball or pom pom along the fingertips as the beard fluff.
- Draw two dot eyes and a small pink nose circle on the palm print.
- Glue a white pom pom to the tip of the hat.
- Write the message inside once everything is dry.
🛍 Shopping guide
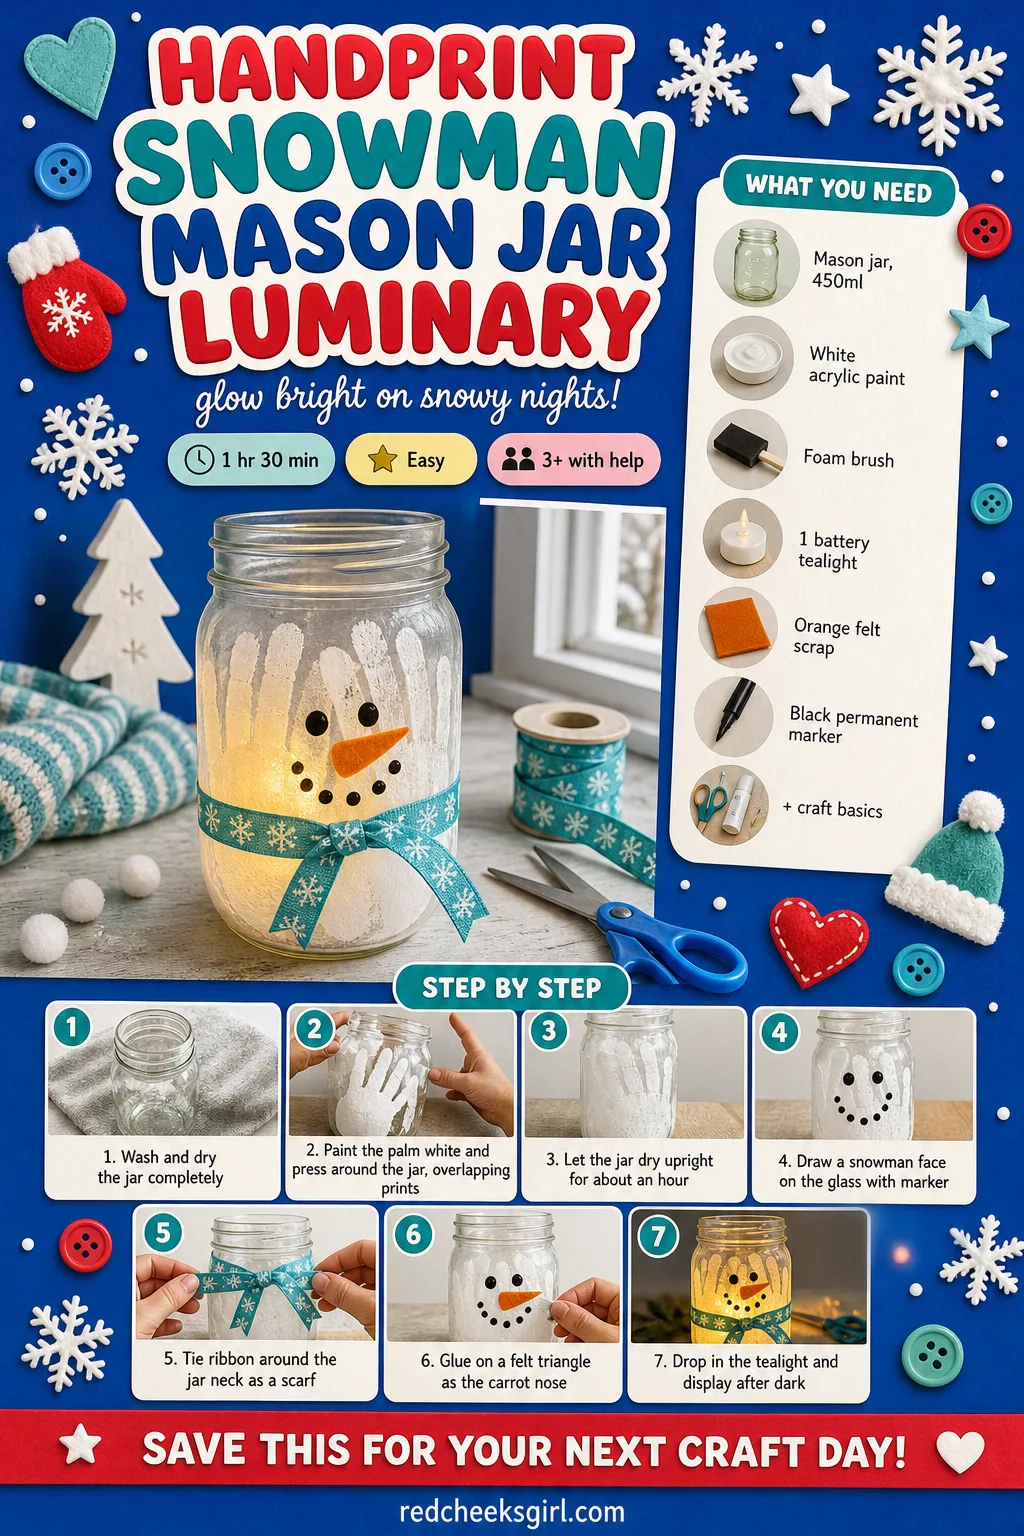
Handprint Snowman Mason Jar Luminary
A plain jar is nothing, but a jar covered in overlapping white handprints and lit from inside turns into the thing people photograph on the windowsill. The texture of layered prints reads as snow even before anyone adds a face, and the battery light means no naked flame near small hands.
What You Need
- 1 clean mason jar, 450ml
- White acrylic paint, 1 small pot
- Foam brush
- 1 battery tealight
- Small orange felt scrap, for the nose
- Black permanent marker
- 30cm ribbon or twine, for the scarf
How to Make It
- Wash and dry the jar completely so paint grips the glass.
- Paint the child’s palm white and press it around the outside of the jar, overlapping prints until the surface is mostly covered.
- Let the jar dry upright for about an hour, untouched.
- Draw a simple snowman face directly onto the glass with permanent marker.
- Tie the ribbon around the jar neck as a scarf and trim the ends.
- Glue a tiny orange felt triangle on as the carrot nose.
- Drop in the battery tealight and set the jar on a windowsill after dark.
🛍 Shopping guide
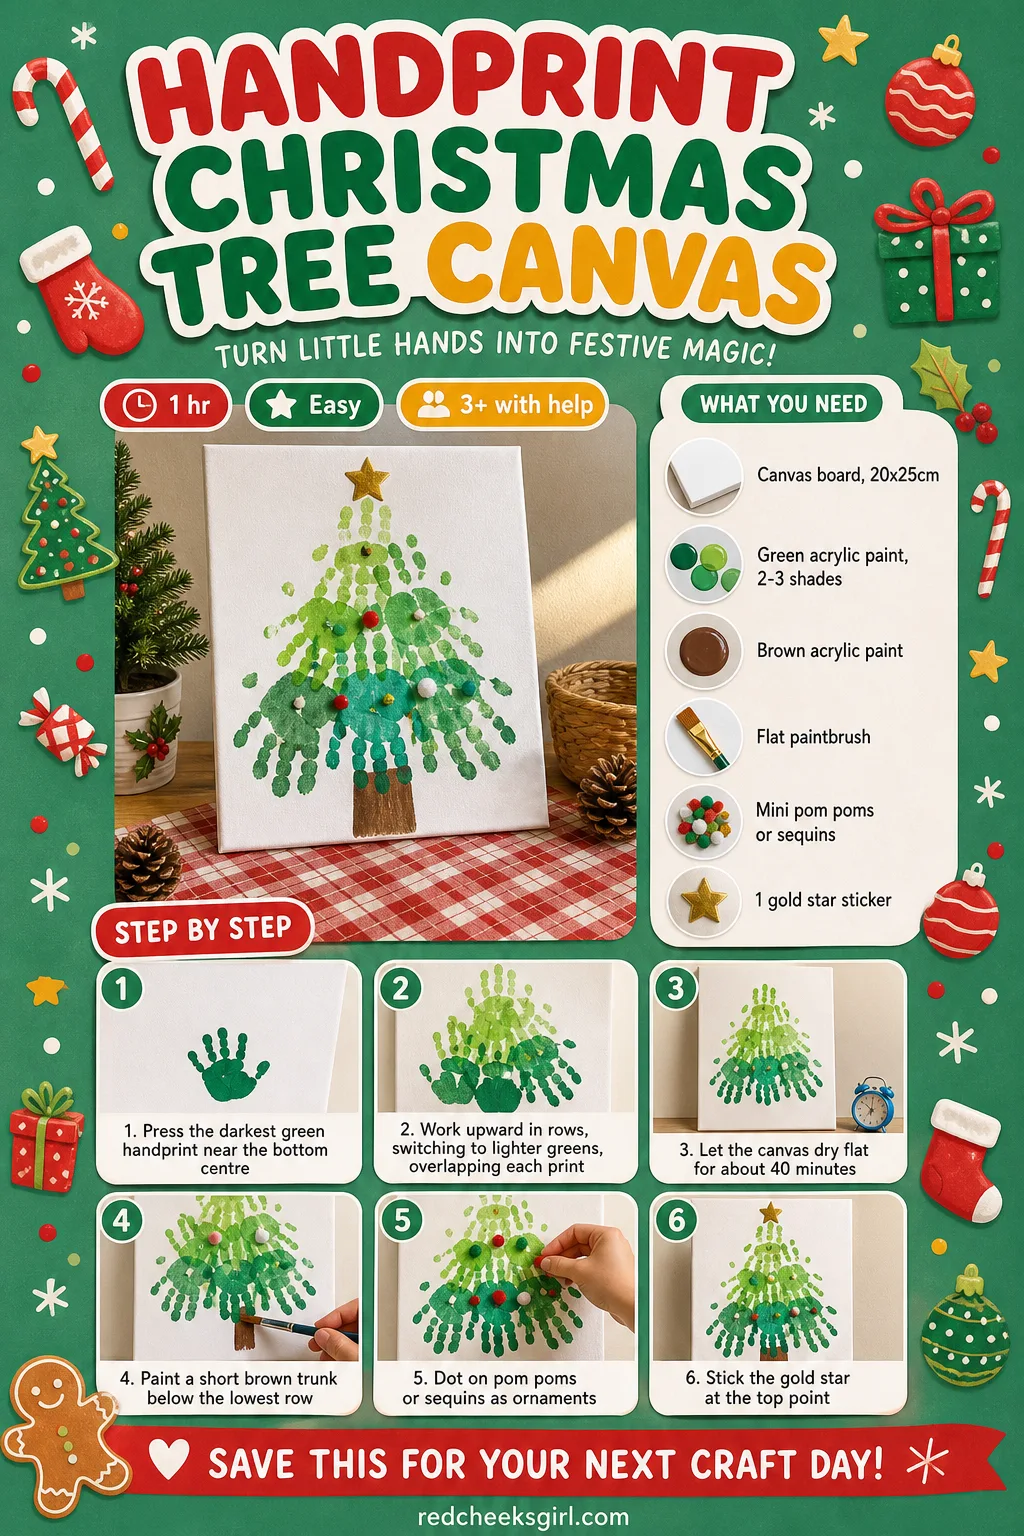
Handprint Christmas Tree Canvas
This is the handprint craft that actually earns wall space instead of a drawer. Rows of overlapping green prints build a tree shape nobody has to be able to draw, and a single star sticker at the top finishes it in seconds. Hang it where afternoon light lands, since the paint has a faint sheen once dry.
What You Need
- 1 stretched canvas board, 20x25cm (8x10in)
- Green acrylic paint, 2 or 3 shades
- Brown acrylic paint, for the trunk
- Flat paintbrush
- Mini pom poms or sequins, for ornaments
- 1 gold star sticker
How to Make It
- Paint the hand in the darkest green and press it near the bottom centre of the canvas, fingers pointing outward and down.
- Work upward in rows, switching to lighter greens, overlapping each print slightly over the last, narrowing the rows as the tree gets taller.
- Let the whole canvas dry flat for about 40 minutes.
- Paint a short brown trunk below the lowest row.
- Dot on pom poms or sequins as ornaments once the paint is fully dry.
- Stick the gold star at the very top point.
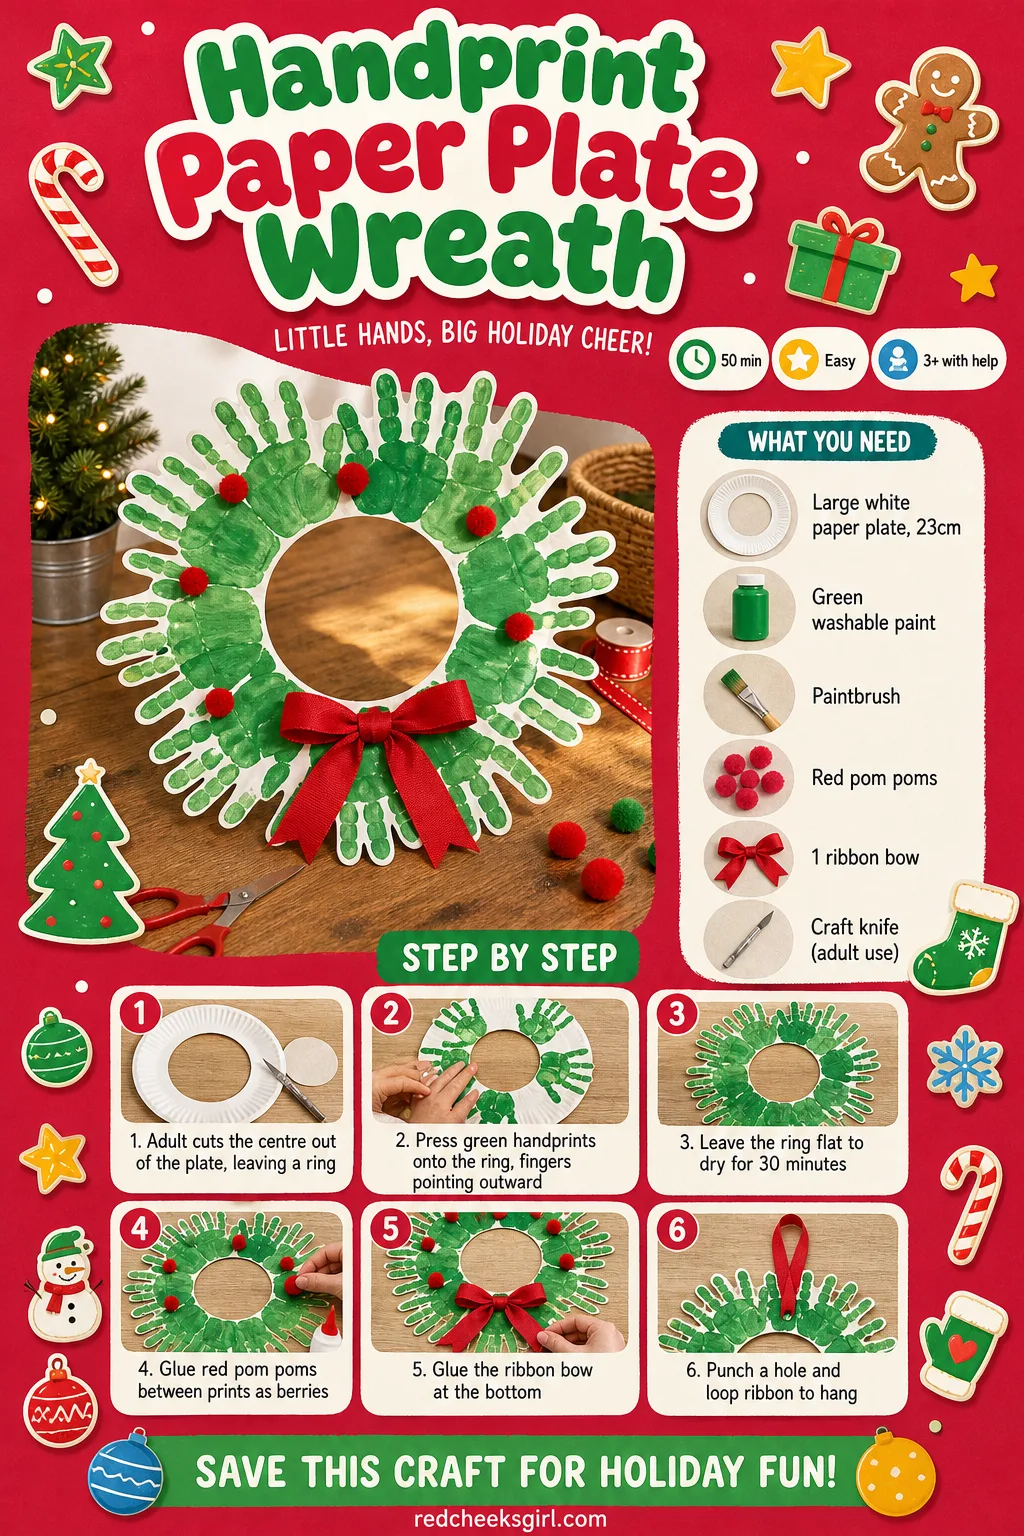
Handprint Paper Plate Wreath
A wreath that costs the price of one paper plate and a bow, which matters if the front door already has somewhere nicer to hang. Handprints pointing outward from a cut ring read as leaves from two steps away, and it comes down in January without leaving a mark.
What You Need
- 1 large white paper plate, 23cm
- Green washable paint
- Paintbrush
- Red pom poms, small, for berries
- 1 ribbon bow
- Craft knife (adult use)
How to Make It
- An adult cuts the centre out of the paper plate with a craft knife, leaving a ring about 4cm wide.
- Paint the child’s hand green and press it onto the ring, fingers pointing outward like a leaf, overlapping prints all the way around.
- Leave the ring flat to dry for about 30 minutes.
- Glue red pom poms in small clusters between some of the prints as berries.
- Glue the ribbon bow at the bottom of the wreath.
- Punch a small hole at the top and loop ribbon through to hang.
🛍 Shopping guide
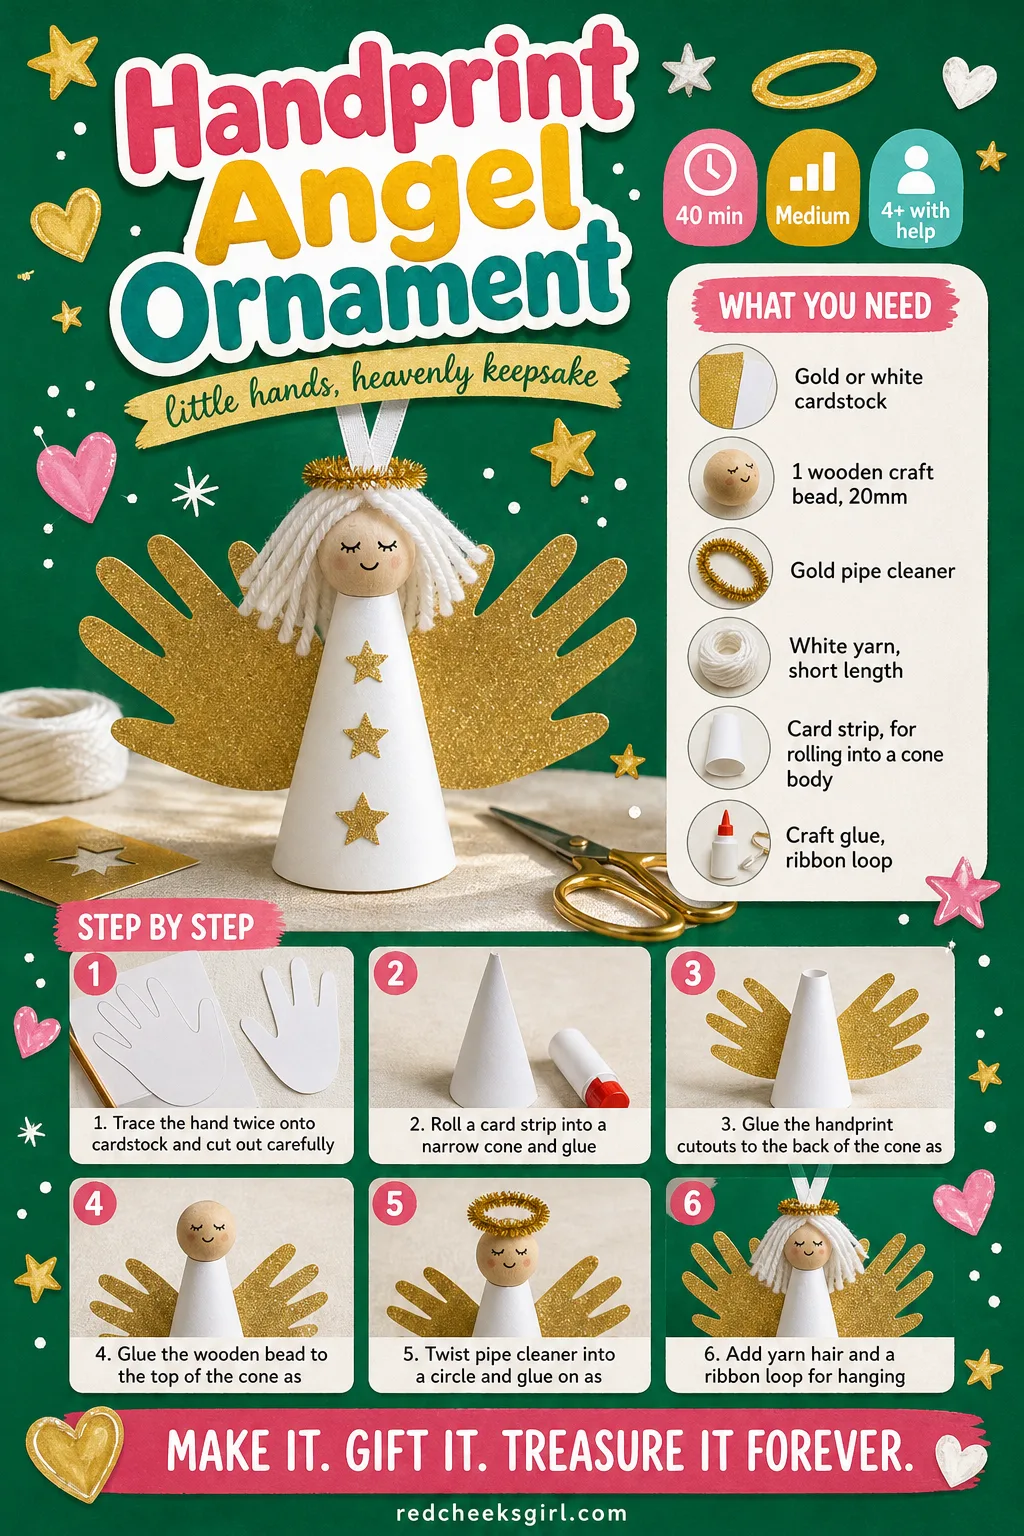
Handprint Angel Ornament
Two handprints, cut and glued as wings, turn a plain wooden bead into something that looks deliberate rather than rushed. It sits well near the top of the tree, catching light, and it is light enough that even a thin branch holds it without bending.
What You Need
- 1 sheet gold or white cardstock
- 1 wooden craft bead, 20mm, for the head
- Gold pipe cleaner, for the halo
- White yarn, short length, for hair
- Small cone of white paper or card, for the body
- Craft glue and ribbon loop
How to Make It
- Trace the child’s hand twice onto the cardstock and cut both out carefully (adult does the cutting).
- Roll a strip of card into a narrow cone for the body and glue the seam.
- Glue the two handprint cutouts to the back of the cone, pointing outward, as wings.
- Thread the wooden bead onto a loop of thread and glue it to the top of the cone as the head.
- Twist the gold pipe cleaner into a small circle and glue it behind the head as a halo.
- Add a few short strands of yarn for hair and a ribbon loop at the back for hanging.
🛍 Shopping guide
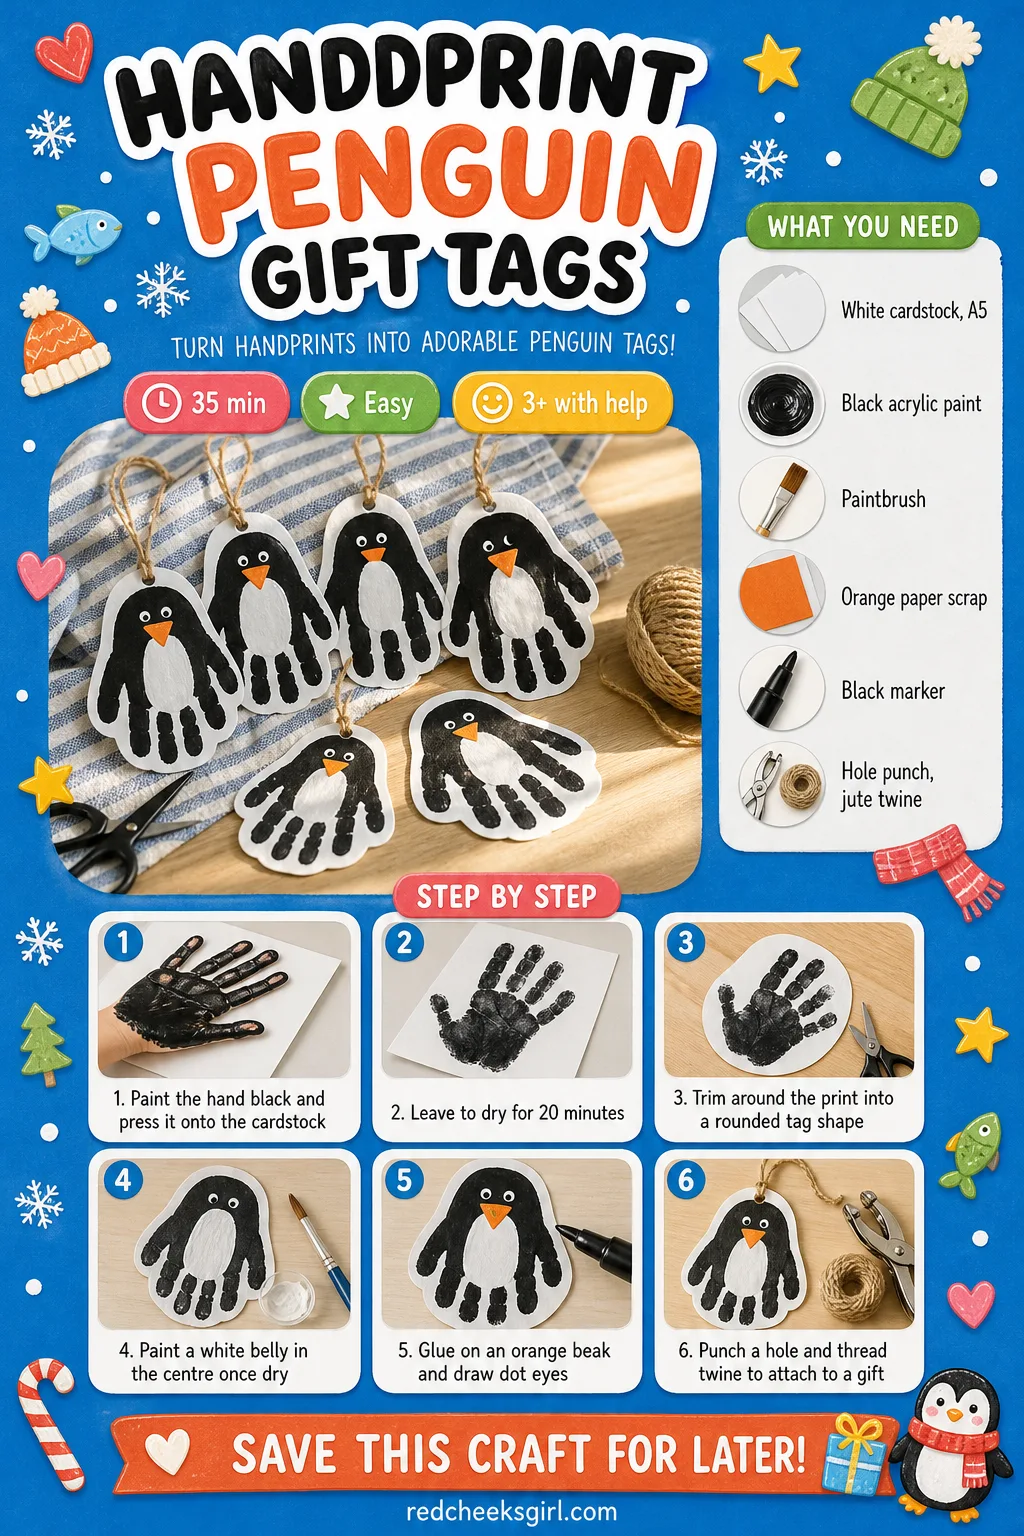
Handprint Penguin Gift Tags
Wrapped presents under the tree look better with a proper tag rather than a sticker from the roll, and a whole black handprint already looks like a penguin standing upright before anyone decorates it. These take minutes each once the paint stage is done, so make a batch while the paint is already out.
What You Need
- 1 sheet white cardstock, A5
- Black acrylic paint
- Paintbrush
- Small orange paper scrap, for the beak
- Black marker, for eyes
- Hole punch and jute twine
How to Make It
- Paint the whole hand black and press it firmly onto the cardstock, fingers together rather than spread.
- Leave to dry for 20 minutes.
- An adult trims around the print into a rounded tag shape, leaving a small border.
- Paint a white oval belly in the centre of the palm area once the black is dry.
- Cut a tiny orange triangle for the beak and glue it on, then draw two dot eyes.
- Punch a hole at the top and thread a loop of twine to attach to a gift.
🛍 Shopping guide
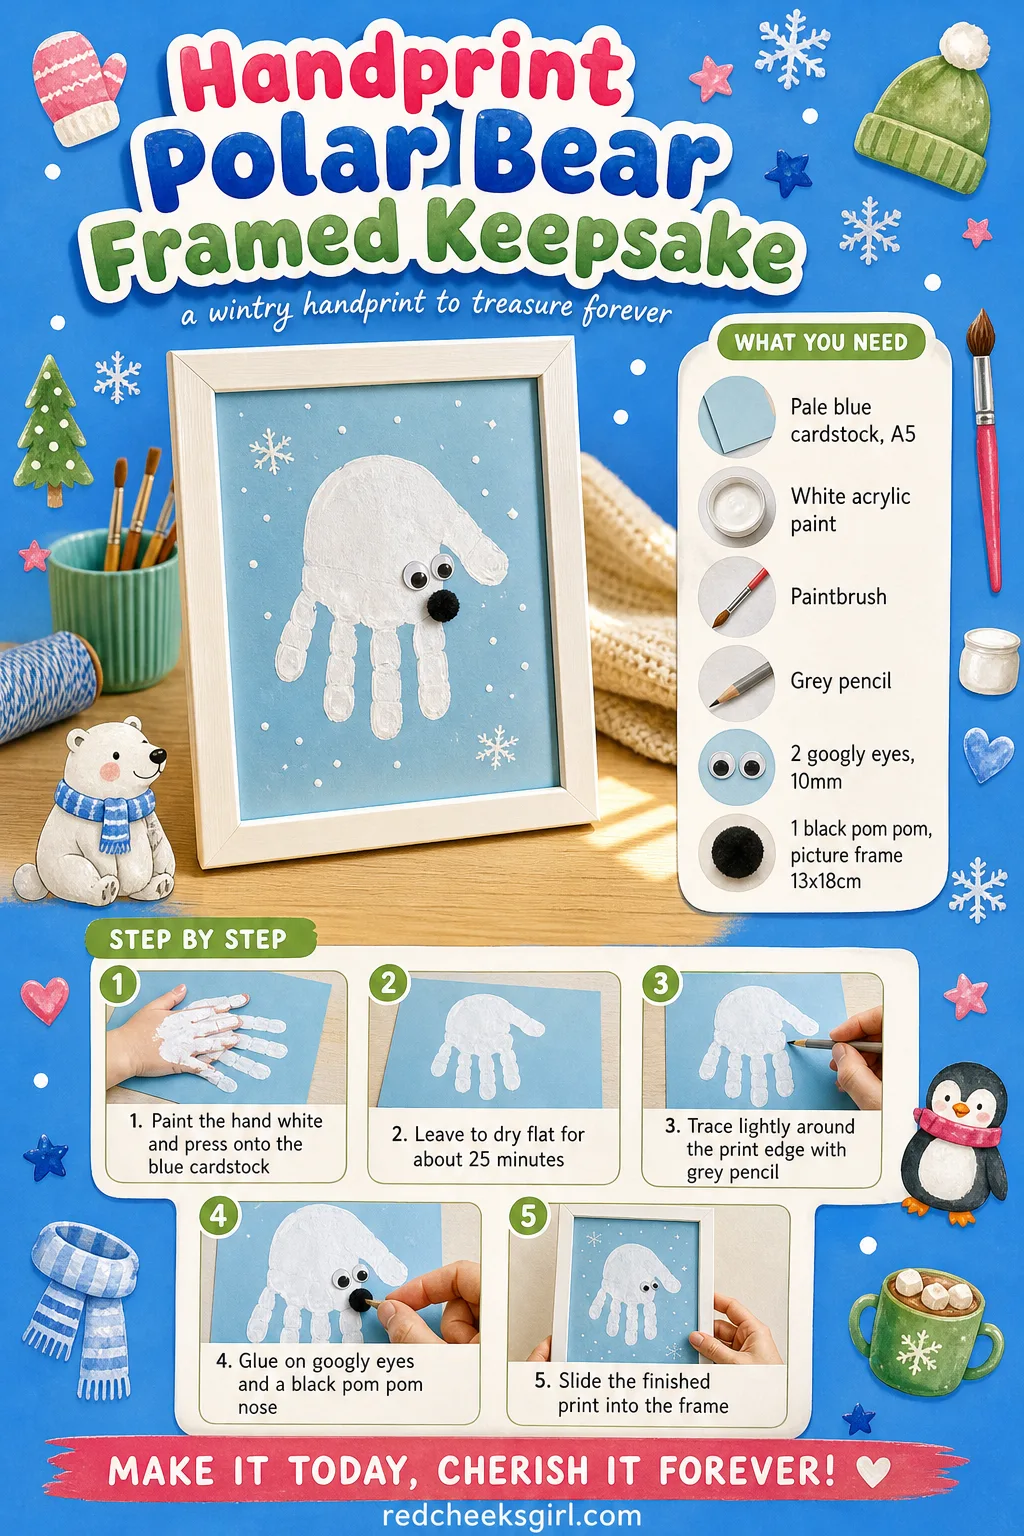
Handprint Polar Bear Framed Keepsake
Framed art feels more finished than a page stuck to the fridge, and this one earns its spot on a shelf rather than a drawer. A plain white handprint nearly disappears against white paper, which is the trick: a pale blue background and a soft pencil outline are what make it visible at all.
What You Need
- 1 sheet pale blue cardstock, A5
- White acrylic paint
- Paintbrush
- Grey pencil, for outlining
- 2 googly eyes, 10mm, and 1 small black pom pom
- 1 picture frame with mat, 13x18cm
How to Make It
- Paint the hand white and press it onto the pale blue cardstock, fingers together.
- Leave to dry flat for about 25 minutes, since white paint stays wet longer than darker colours.
- Once dry, trace lightly around the edge of the print with a grey pencil so it reads clearly against the paper.
- Glue on two googly eyes near the thumb and a small black pom pom as the nose.
- Slide the finished print into the frame in place of the included print.
🛍 Shopping guide
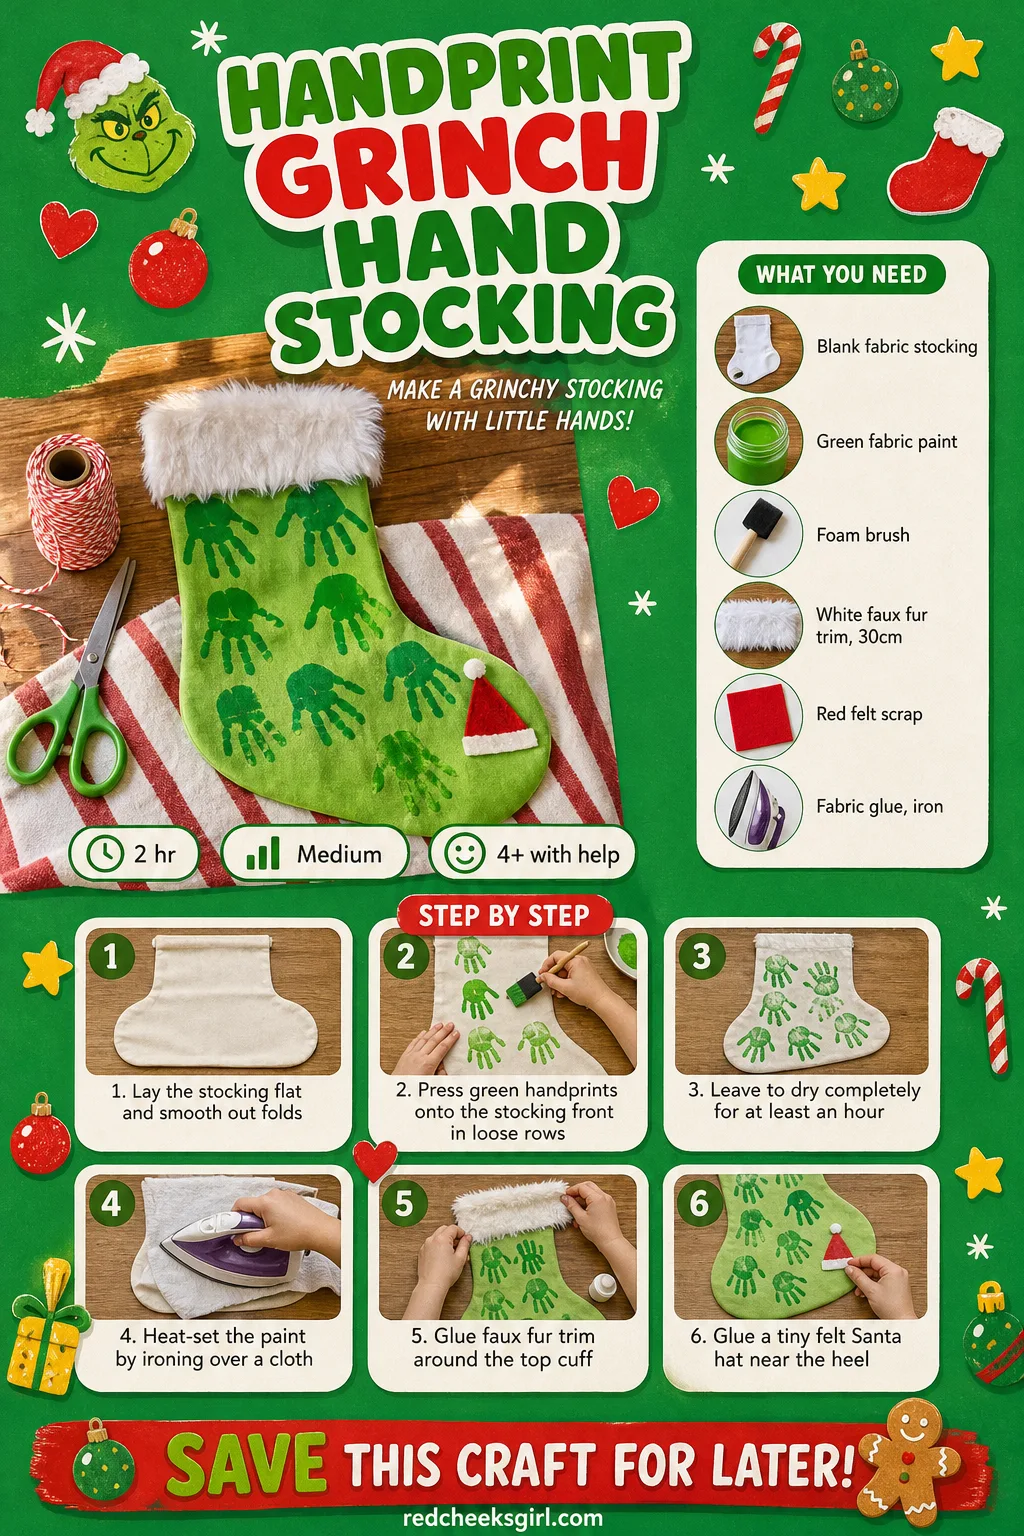
Handprint Grinch Hand Stocking
Green handprints marching down a stocking front do a better job of saying Grinch than any printed fabric from a shop, and the joke only improves with a scruffy fur cuff at the top. Hang it on its own hook rather than with the matching set, it is meant to stand out.
What You Need
- 1 blank fabric Christmas stocking
- Green fabric paint
- Foam brush
- White faux fur trim ribbon, 30cm
- Small red felt scrap, for a mini Santa hat
- Fabric glue, iron (adult use)
How to Make It
- Lay the stocking flat on a protected surface and smooth out any folds.
- Paint the child’s hand green and press it onto the stocking front, repeating in loose rows to fill the space like a cluster of reaching hands.
- Leave the stocking flat to dry completely for at least an hour.
- An adult heat-sets the paint by ironing over a cloth placed on top, following the paint’s instructions.
- Glue the faux fur trim around the top cuff of the stocking.
- Cut a tiny triangle of red felt and glue it near the heel as a mini Santa hat.
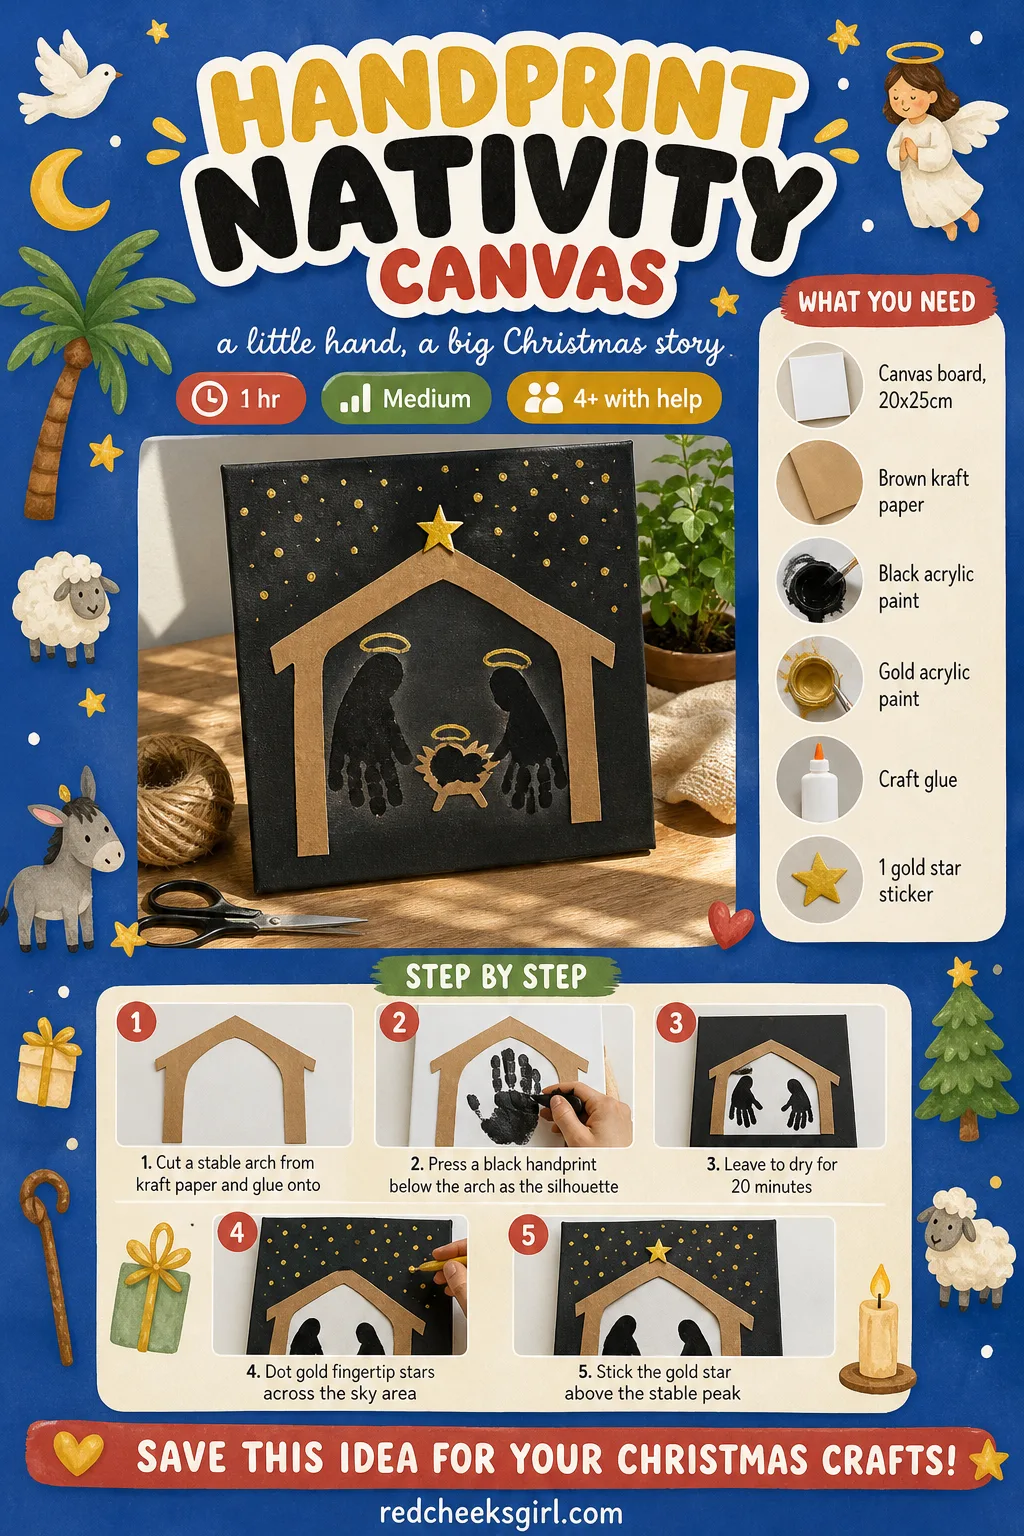
Handprint Nativity Canvas
For a household that wants the religious side of Christmas on the wall as well as the reindeer, this keeps the scene simple: a stable shape, a scatter of golden fingertip stars, and one black handprint standing in as the whole holy family in silhouette. It reads from across a room, which is more than can be said for most nativity sets.
What You Need
- 1 canvas board, 20x25cm
- Brown kraft paper, for the stable
- Black acrylic paint
- Gold acrylic paint, for fingertip stars
- Craft glue
- 1 gold star sticker
How to Make It
- An adult cuts a simple stable arch from brown kraft paper and glues it onto the upper half of the canvas.
- Paint the hand black and press one print below the arch, fingers together, as the silhouette figure.
- Leave to dry for 20 minutes.
- Dip a fingertip in gold paint and dot several small stars across the sky area above the stable.
- Stick the gold star sticker directly above the stable peak once everything is dry.
🛍 Shopping guide
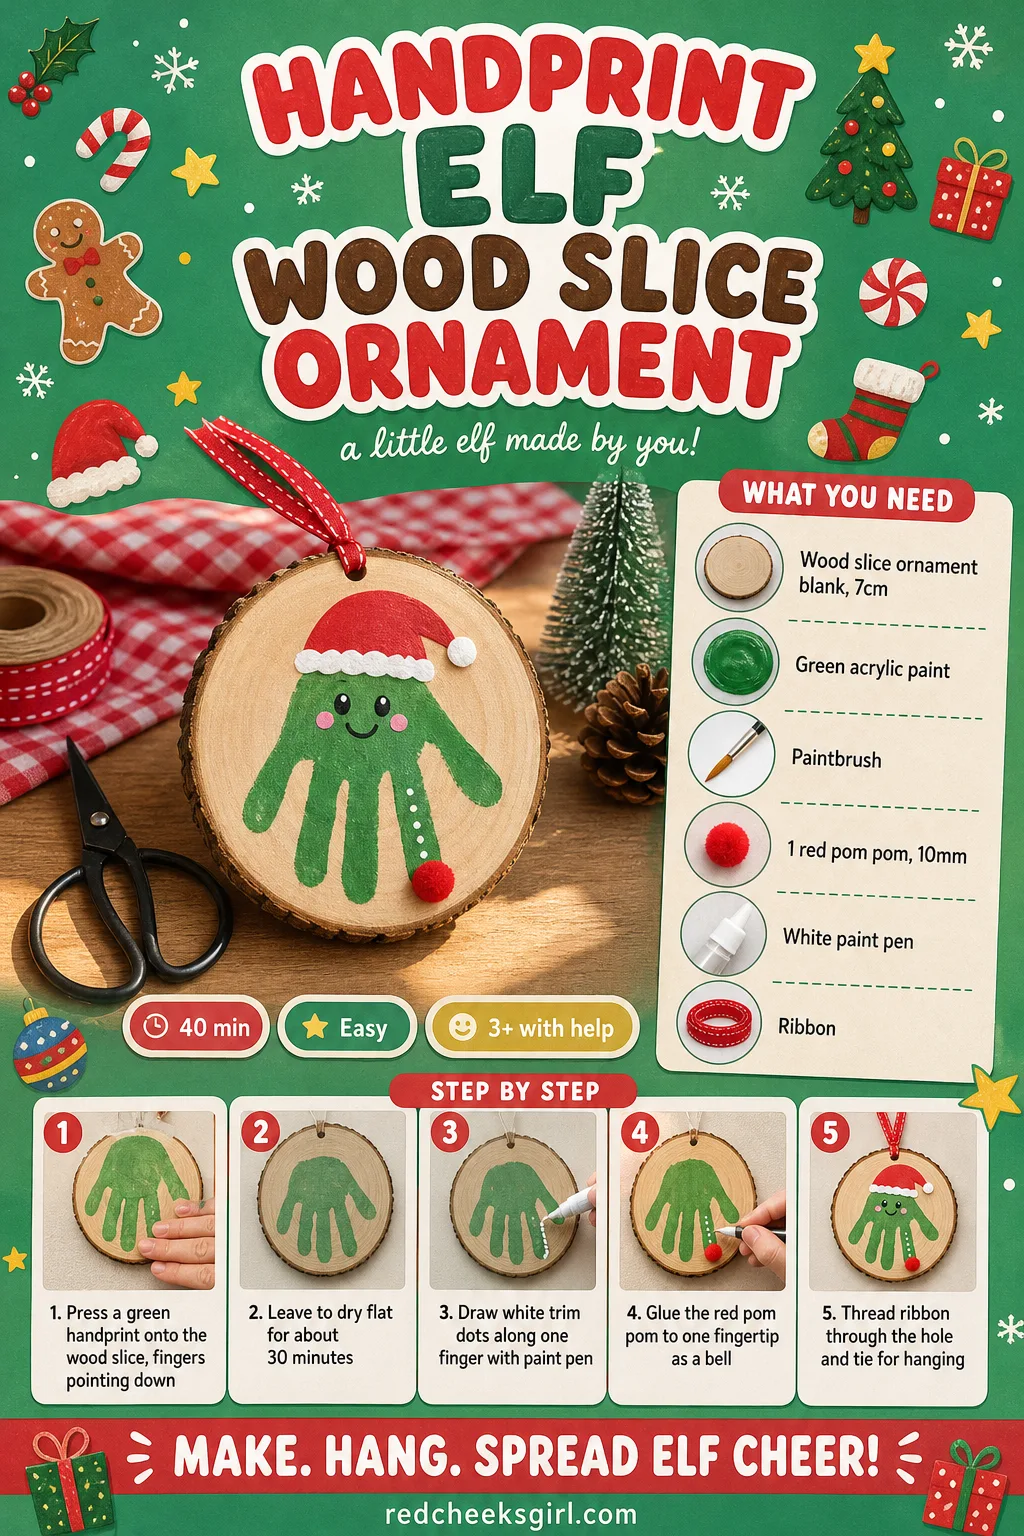
Handprint Elf Wood Slice Ornament
Wood slice ornaments already look expensive before anyone touches them, and a single green handprint pointing downward turns the pale wood into an elf hat without needing to be good at painting. It hangs with weight and sits nicely among plainer glass baubles.
What You Need
- 1 wood slice ornament blank, 7cm, pre-drilled
- Green acrylic paint
- Paintbrush
- 1 small red pom pom, 10mm
- White paint pen, for trim
- Ribbon, for hanging
How to Make It
- Paint the child’s hand green and press it onto the wood slice, fingers pointing down toward the bottom edge like a pointed hat.
- Leave to dry flat for about 30 minutes, since wood absorbs paint more slowly than paper.
- Draw small white dots or a zigzag trim line along one finger with the paint pen.
- Glue the red pom pom to one fingertip as the hat bell.
- Thread ribbon through the pre-drilled hole and tie for hanging.
🛍 Shopping guide
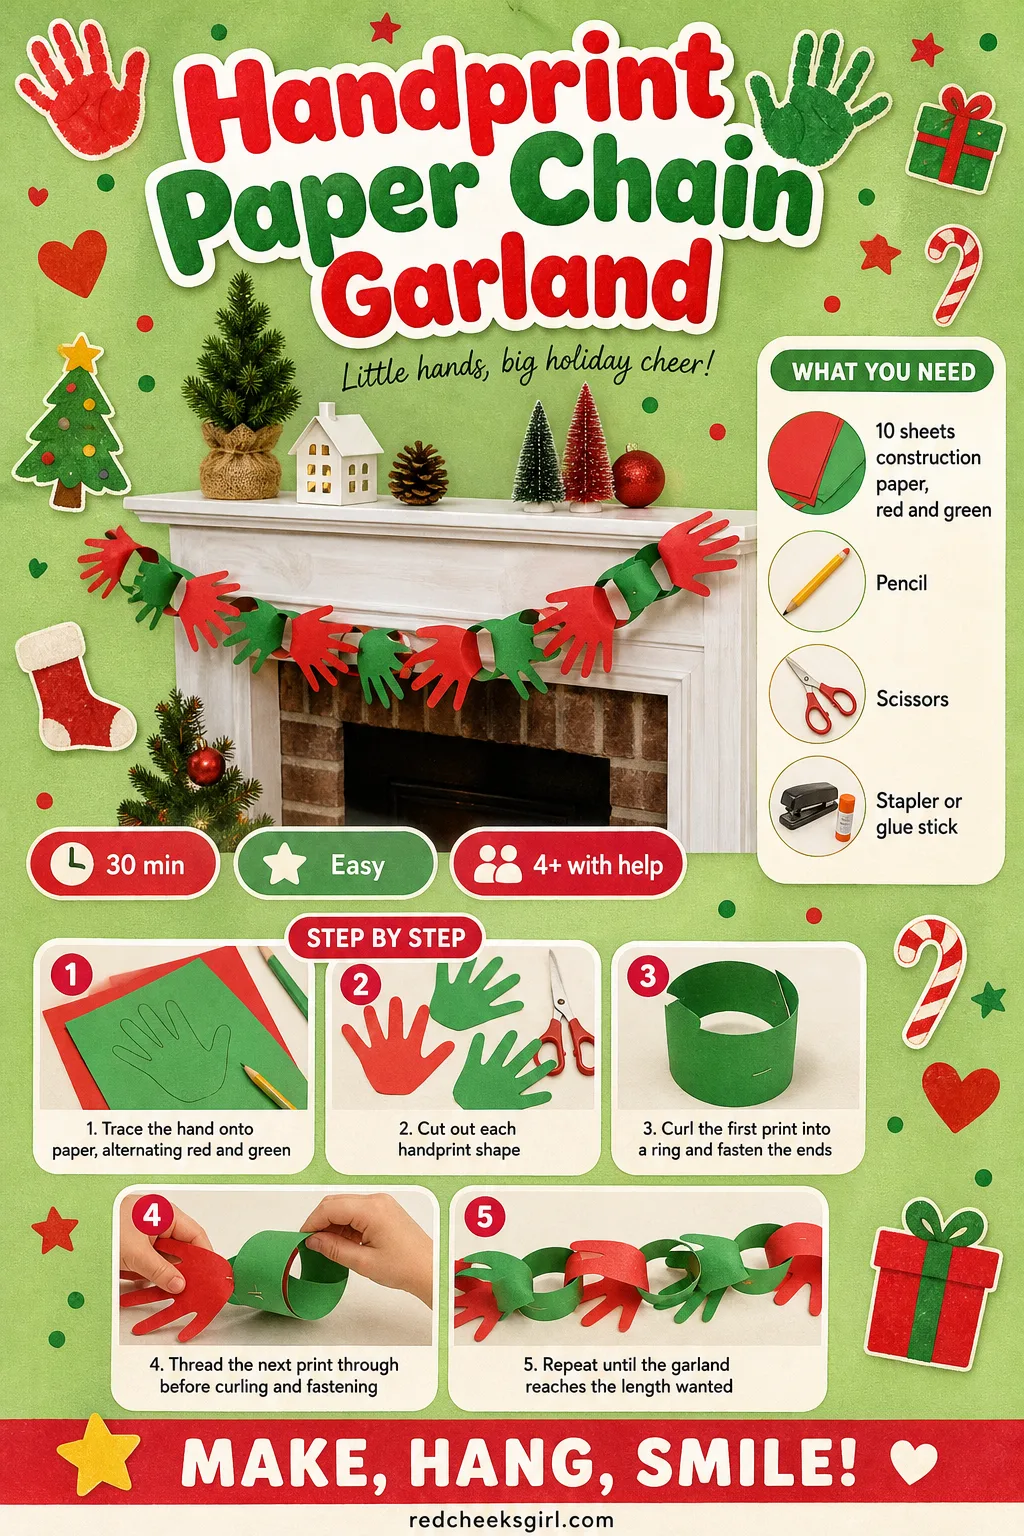
Handprint Paper Chain Garland
This is the one to make a full classroom or a full living room of cousins work on together, since it keeps going as long as there are hands and paper left. Each link is a traced hand cut into a ring and threaded through the last, so the garland grows a little lopsided and entirely personal. It is the same cheerful idea behind 23 Christmas Crafts Preschool Teachers Can Set Up on One Tray, just with more hands involved.
What You Need
- 10 sheets construction paper, red and green
- Pencil
- Scissors
- Stapler or glue stick
How to Make It
- Trace around the child’s hand onto construction paper, alternating red and green, making 10 or more tracings.
- Cut out each handprint shape.
- Curl the first print into a ring, fingers overlapping the wrist edge, and staple or glue the ends together.
- Thread the next handprint through the first ring before curling and fastening it, so each link locks the one before it.
- Repeat until the garland reaches the length wanted, then string it along a mantel or banister.
🛍 Shopping guide
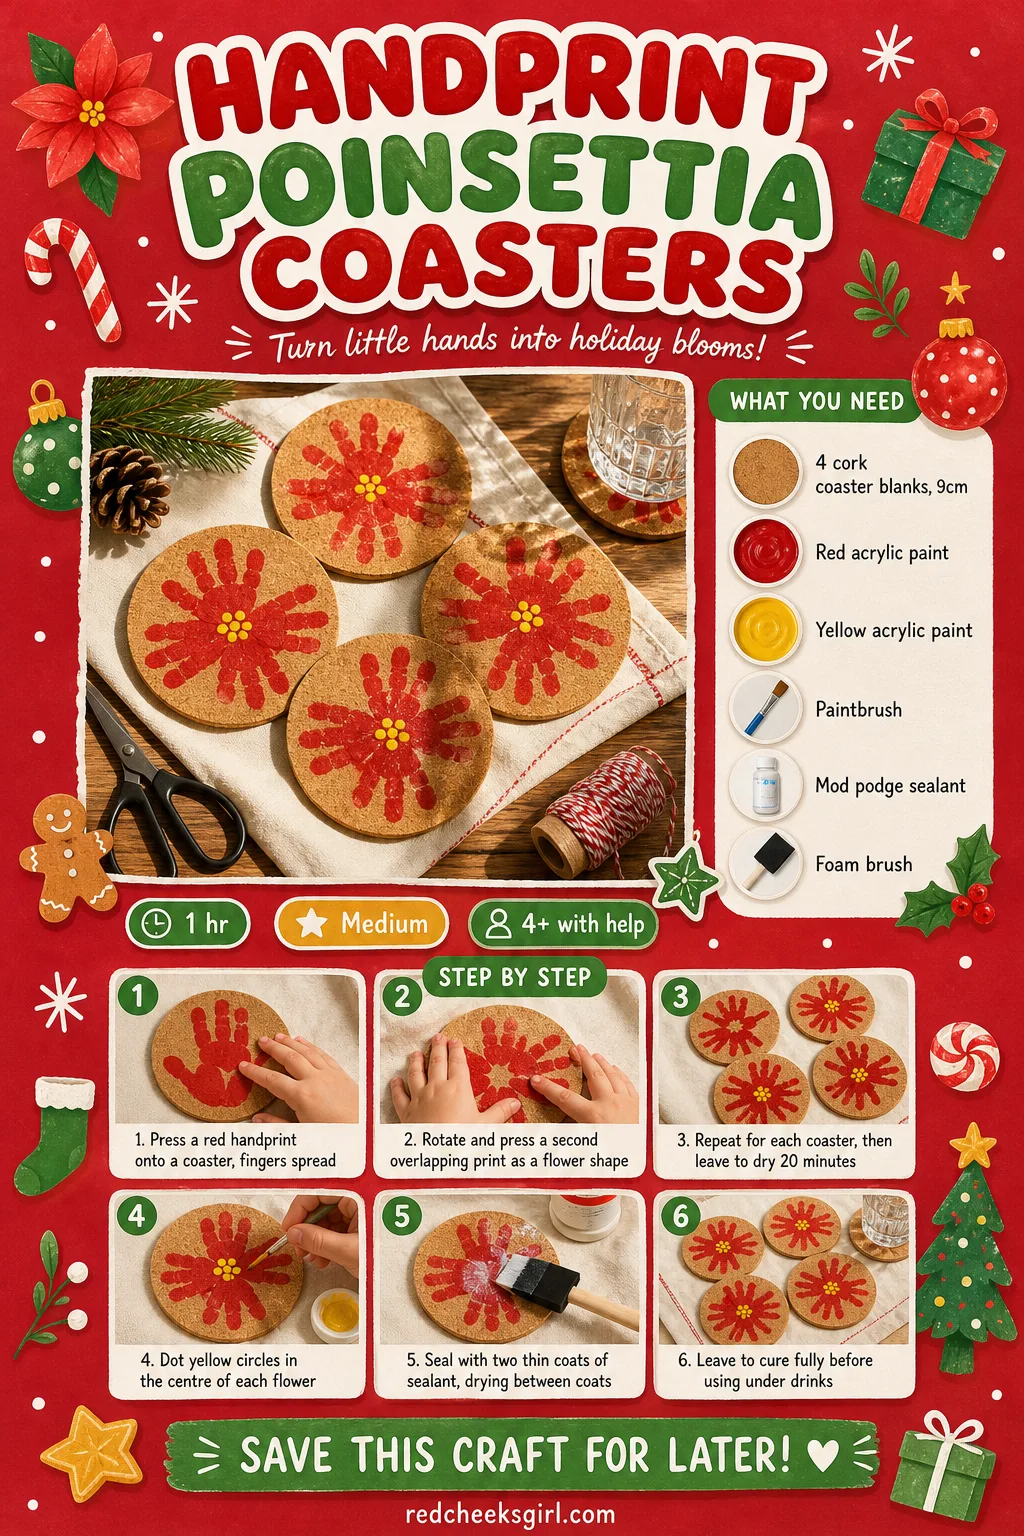
Handprint Poinsettia Coasters
If the coffee table needs something under the mugs that is not a sticky note, a set of these does the job and still looks like it belongs on a holiday table. Two overlapping red prints rotated into a flower shape read as a poinsettia bloom the moment the yellow centre goes on.
What You Need
- 4 cork coaster blanks, 9cm
- Red acrylic paint
- Yellow acrylic paint, for the centres
- Paintbrush
- Mod podge or similar sealant
- Foam brush
How to Make It
- Paint the hand red and press one print onto a coaster, fingers spread.
- Rotate the hand slightly and press a second print overlapping the first in a star-like flower shape.
- Repeat for each coaster, then leave flat to dry for 20 minutes.
- Dot small yellow circles in the centre of each flower once dry.
- Seal each coaster with two thin coats of sealant, letting the first coat dry before the second.
- Leave the coasters to cure fully for a few hours before using them under drinks.
🛍 Shopping guide
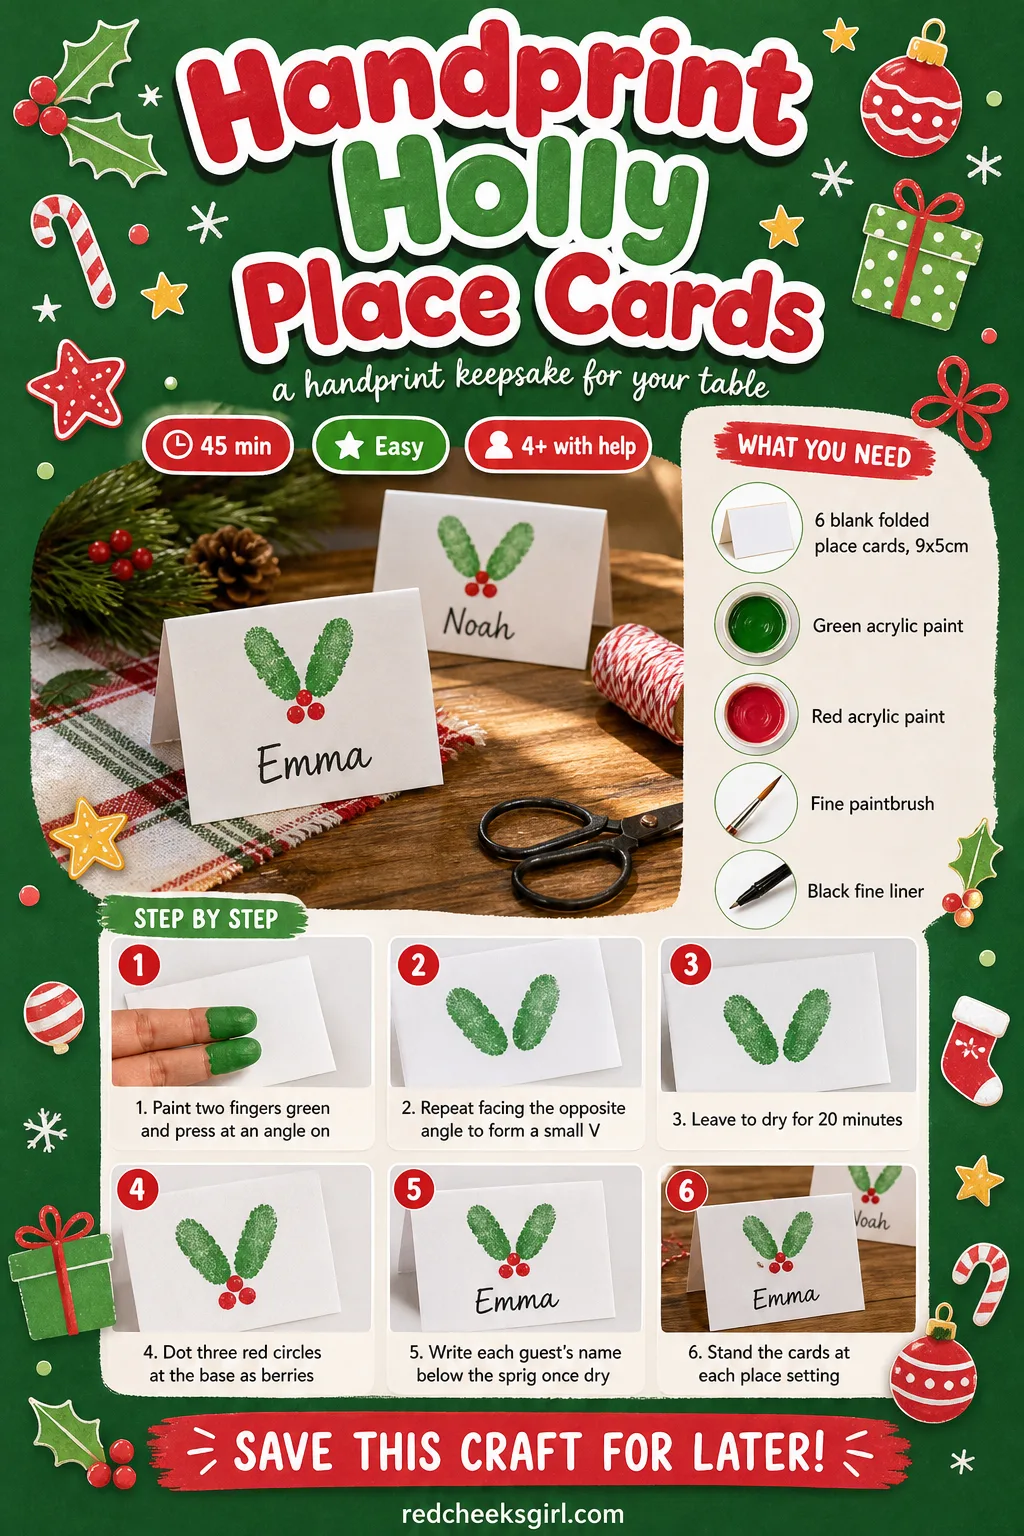
Handprint Holly Place Cards
A folded place card with a tiny painted holly sprig does more to make a kids’ table feel like an occasion than any bought decoration, and guests tend to keep theirs. Two small green prints angled into a V, three red dots at the base, name written below once it is dry.
What You Need
- 6 blank folded place cards, 9x5cm
- Green acrylic paint
- Red acrylic paint
- Fine paintbrush
- Black fine liner, for names
How to Make It
- Paint two fingers (just the index and middle) green and press them side by side at an angle on the card, overlapping slightly like two holly leaves.
- Repeat facing the opposite angle just beside it to complete a small V shape.
- Leave to dry for 20 minutes.
- Dot three small red circles at the base of the leaves as berries.
- Once fully dry, write each guest’s name below the sprig in fine liner.
- Stand the folded cards at each place setting.
🛍 Shopping guide
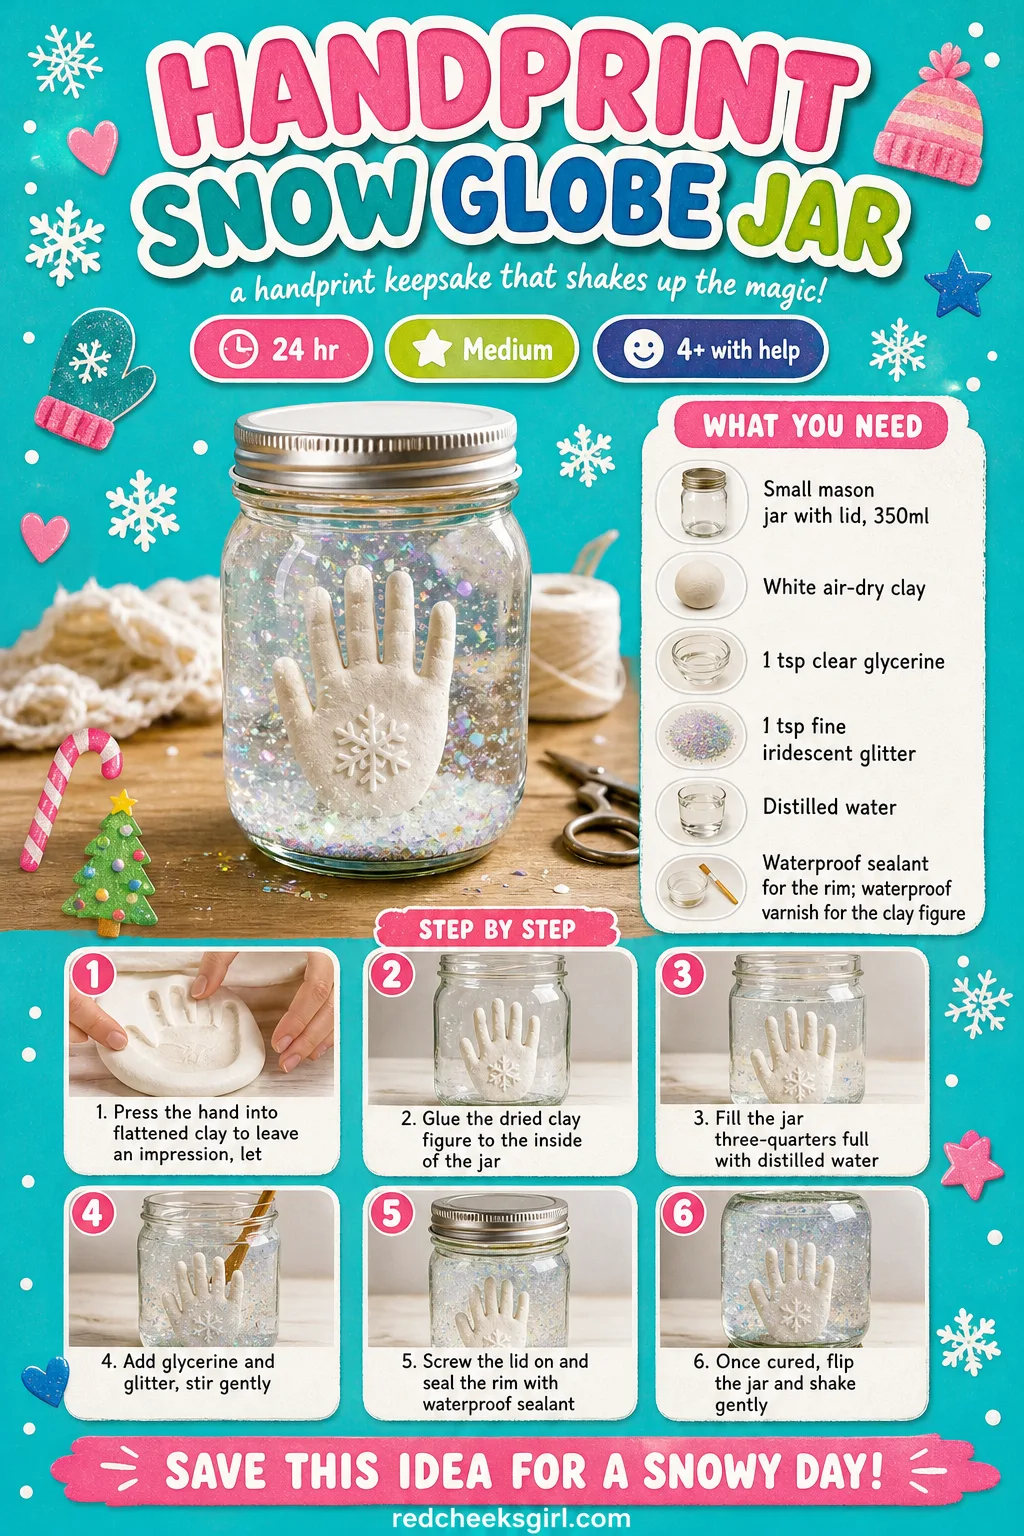
Handprint Snow Globe Jar
A real snow globe takes glass-cutting skill nobody has on a Tuesday night, but this version gets the same shake-and-watch effect using a jam jar and a laminated handprint figure glued to the lid. It needs a full day of patience before the first shake, so start it the night before it needs to be a surprise.
What You Need
- 1 small mason jar with lid, 350ml
- White air-dry clay, for a small handprint snowman figure
- Clear glycerine, 1 teaspoon
- Fine iridescent glitter, 1 teaspoon
- Distilled water
- Waterproof hot glue or sealant, for the lid rim
How to Make It
- Flatten a small disc of white clay and press the child’s hand into it to leave a snowman-shaped impression, then let it dry hard for about a day.
- An adult hot-glues the dried clay figure to the inside centre of the jar lid and lets the glue set for 20 minutes.
- Fill the jar three-quarters full with distilled water.
- Add the glycerine and glitter to the water and stir gently.
- An adult screws the lid on tightly and runs a thin line of waterproof sealant around the rim to stop leaks.
- Once the sealant has cured for a few hours, flip the jar over and shake gently to watch the snow fall.
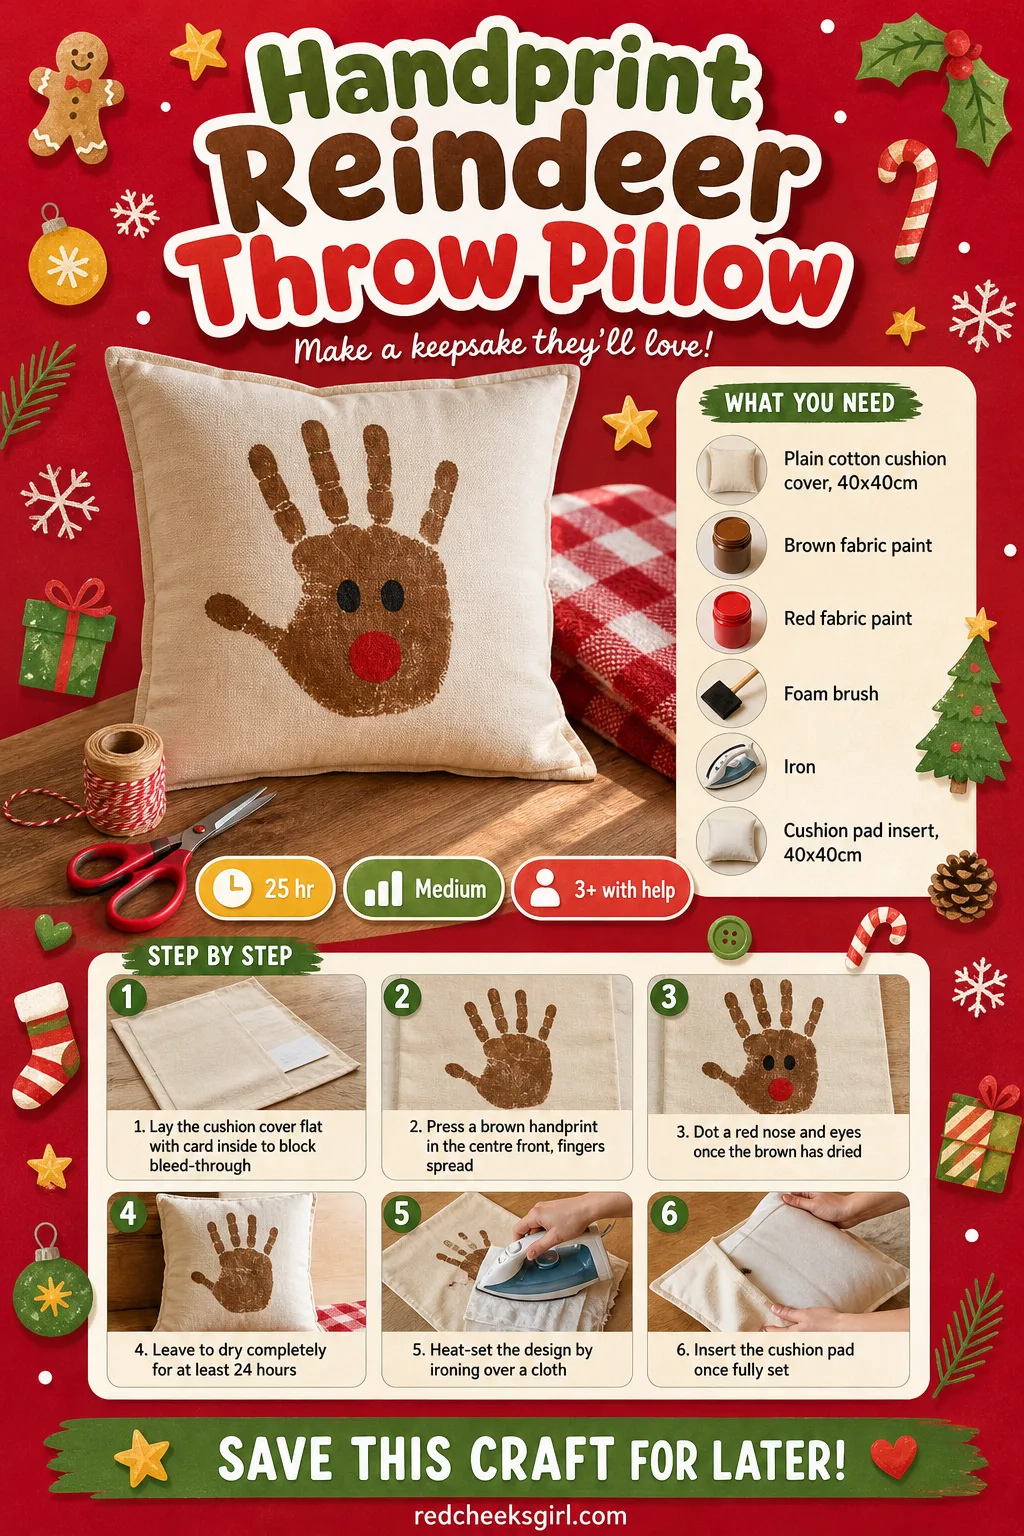
Handprint Reindeer Throw Pillow
A cushion with a single brown handprint reindeer on the front is the kind of gift that gets used instead of stored, since it sits on a sofa doing an actual job all year, not just at Christmas. Keep it on a chair she walks past daily rather than a spare room nobody visits.
What You Need
- 1 plain cotton cushion cover, 40x40cm
- Brown fabric paint
- Red fabric paint, for the nose
- Foam brush
- Iron (adult use)
- Cushion pad insert, 40x40cm
How to Make It
- Lay the cushion cover flat with a sheet of card inside to stop paint bleeding through to the back.
- Paint the hand brown and press it in the centre front, fingers spread and pointing down.
- Dot a small red nose at the thumb tip and two dot eyes above it once the brown has dried a little.
- Leave the cover to dry completely for at least 24 hours before touching it again.
- An adult heat-sets the design by ironing over a cloth, following the paint’s instructions.
- Insert the cushion pad once the fabric paint is fully set.
Handprint Mitten Garland Banner
Felt does not fray and does not need hemming, which is why this garland works even for a household with zero sewing supplies. Each mitten is traced straight from a hand plus a bit of wrist room, clipped to a length of twine with tiny wooden pegs, and taken down and reused every year without fading.
What You Need
- 2 sheets red felt, 2 sheets white felt, A4
- Pencil
- Fabric glue
- 6 mini wooden clothespins
- 1.5m jute twine
How to Make It
- Trace around the child’s hand and wrist onto felt to make a mitten shape, then cut two matching layers per mitten (adult cuts).
- Glue a contrasting strip of felt across the wrist as a cuff on each mitten.
- Glue the front and back layers together around the edges, leaving the top wrist edge open.
- Repeat to make at least 6 mittens, alternating red and white.
- Clip each mitten to the length of twine using a mini clothespin, spacing them evenly.
- Hang the finished garland along a mantel or stair rail.
🛍 Shopping guide
Handprint Rudolph Fridge Magnet
A tiny thing for the fridge door that does not take up tree space, which matters once the tree is already crowded with everyone else’s ornaments. A hand pressed into flattened clay leaves a relief print rather than a cutout, so the antlers have real texture once painted.
What You Need
- White air-dry clay, 100g
- 1 adhesive magnet disc, 20mm
- Brown acrylic paint
- 1 red pom pom, 10mm
- 2 googly eyes, 6mm
How to Make It
- Flatten a ball of clay into a disc about 6cm across and 1cm thick.
- Press the child’s hand into the clay surface, fingers spread at the top, to leave an imprint rather than cutting all the way through.
- Leave the clay to dry fully for 24 to 48 hours, until hard and pale.
- Paint the whole disc brown and leave to dry for 30 minutes.
- An adult hot-glues the red pom pom at the bottom point as the nose and the googly eyes just above it.
- Glue the magnet disc to the back once everything else is dry.
🛍 Shopping guide
Handprint Candy Cane Bookmark
A page marker that actually survives a school bag, since a strip of laminated cardstock shrugs off crumbs and spilled juice in a way a plain paper one never does. The thumb’s natural curve becomes the hook of the cane, which is a neater trick than it sounds.
What You Need
- White cardstock strip, 5x15cm
- Red acrylic paint
- White paint pen, for stripes
- Self-adhesive laminating sheet or clear contact film
- Ribbon tassel, 15cm
- Hole punch
How to Make It
- Paint the hand red, including the thumb, and press it sideways along the cardstock strip so the curved thumb sits at one end like the hook of a cane.
- Leave to dry for 20 minutes.
- Draw diagonal white stripe gaps across the print with the paint pen once dry.
- An adult laminates the strip for durability, then trims it to shape.
- Punch a hole at the straight end and tie on the ribbon tassel.
Handprint Christmas Lights String Card
This swaps the whole hand for just thumbprints, which is a kinder option for a toddler who has already had enough of the big messy version today. Each dot becomes a bulb along a drawn wire, and the effect against black card is genuinely pretty, not just cute.
What You Need
- Black cardstock, A5
- Puffy paint or paint pens, 4 bright colours
- Black marker
- White paint pen, for highlights
How to Make It
- Dip just the thumb in one colour and press a single print in a gentle curved line across the card.
- Wash the thumb, switch colours, and continue the line with a different colour print.
- Repeat until a full curved row of coloured dots crosses the card.
- Leave to dry for 15 minutes.
- Draw a thin black wire connecting each dot, with a small socket shape where the wire meets each light.
- Add a tiny white highlight dot to each light with the paint pen.
🛍 Shopping guide
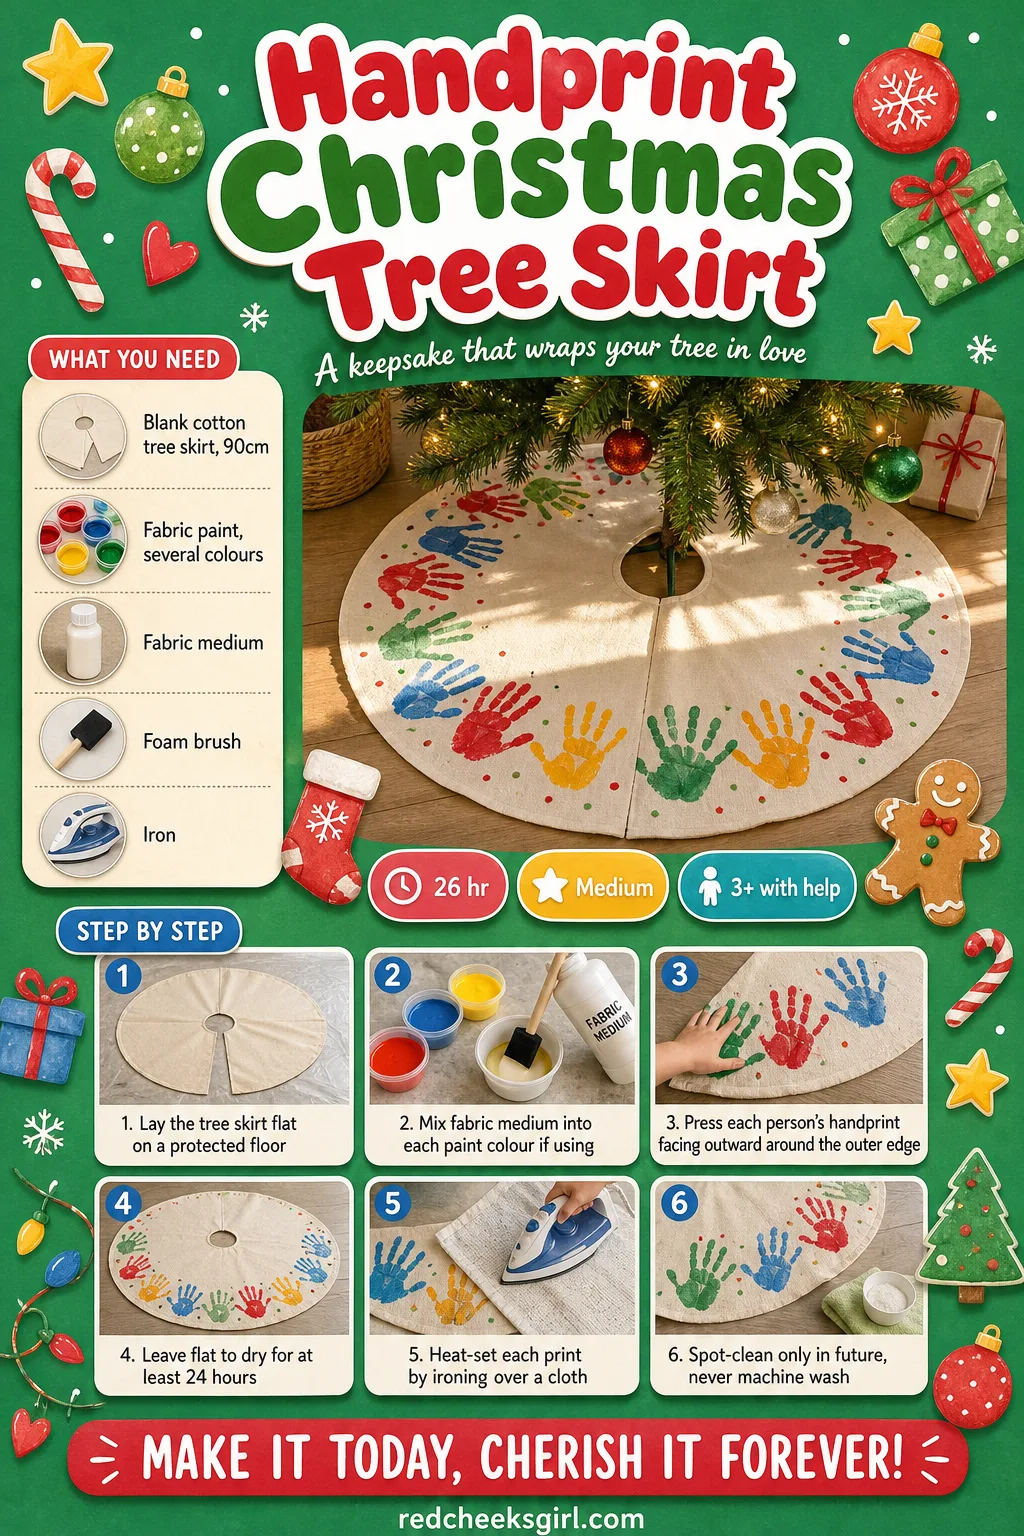
Handprint Christmas Tree Skirt
This is the one to spread across a whole afternoon rather than squeeze into an hour, since a ring of handprints around a tree skirt works best with everyone in the house taking a turn, including whoever is visiting that year. It lives under the tree, which means nobody has to find wall space for it.
What You Need
- 1 blank cotton tree skirt, 90cm diameter
- Fabric paint, several colours
- Fabric medium, optional, to stop cracking
- Foam brush
- Iron (adult use)
How to Make It
- Lay the tree skirt flat on a protected floor with newspaper underneath.
- Mix a little fabric medium into each paint colour if using, to help it flex with the fabric once dry.
- Paint each person’s hand in turn and press it facing outward around the outer edge of the skirt, spacing prints evenly like a sunburst.
- Leave the skirt flat to dry for at least 24 hours before moving it.
- An adult heat-sets each print by ironing over a cloth, working in sections.
- Spot-clean only in future, rather than machine washing, to protect the paint.
🛍 Shopping guide
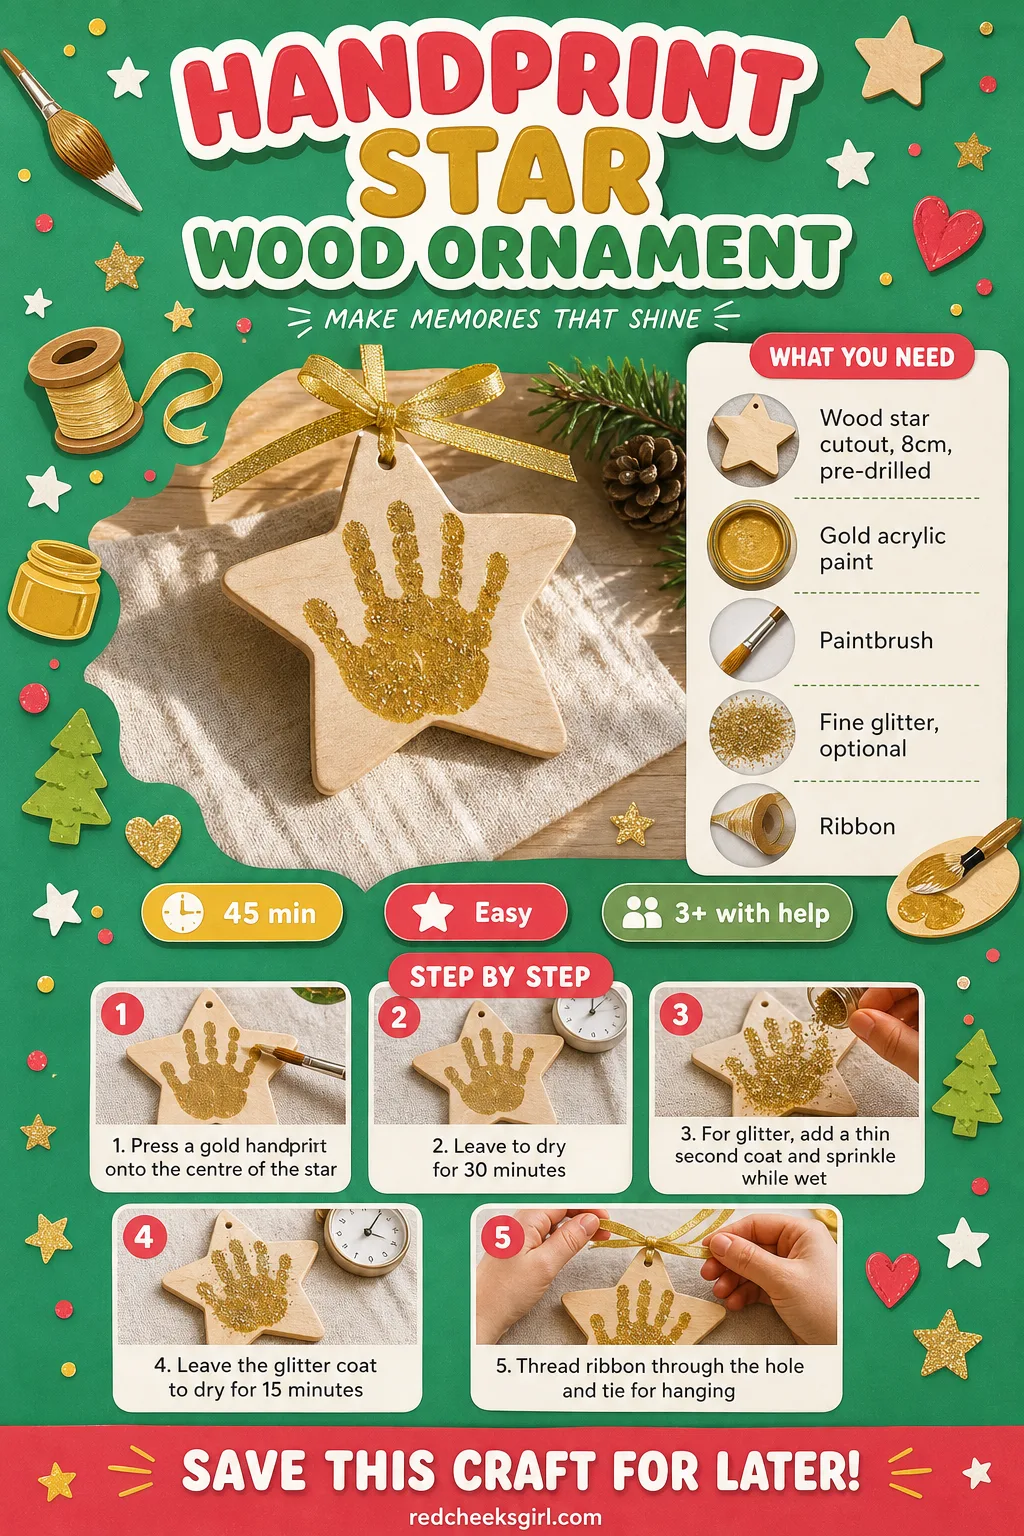
Handprint Star Wood Ornament
A gold handprint nearly filling a wooden star looks like it belongs among the shop-bought ornaments rather than beside them, which is useful on a tree where everything else is matching. Hang it front and centre, it earns the spot.
What You Need
- 1 wood star cutout blank, 8cm, pre-drilled
- Gold acrylic paint
- Paintbrush
- Fine glitter, optional
- Ribbon, for hanging
How to Make It
- Paint the child’s hand gold and press it onto the centre of the star, fingers spread to nearly fill the shape.
- Leave to dry for 30 minutes.
- If adding glitter, paint a second very thin coat of gold and sprinkle glitter over it while still wet, then tap off the excess.
- Leave the glitter coat to dry for another 15 minutes.
- Thread ribbon through the pre-drilled hole and tie for hanging.
🛍 Shopping guide
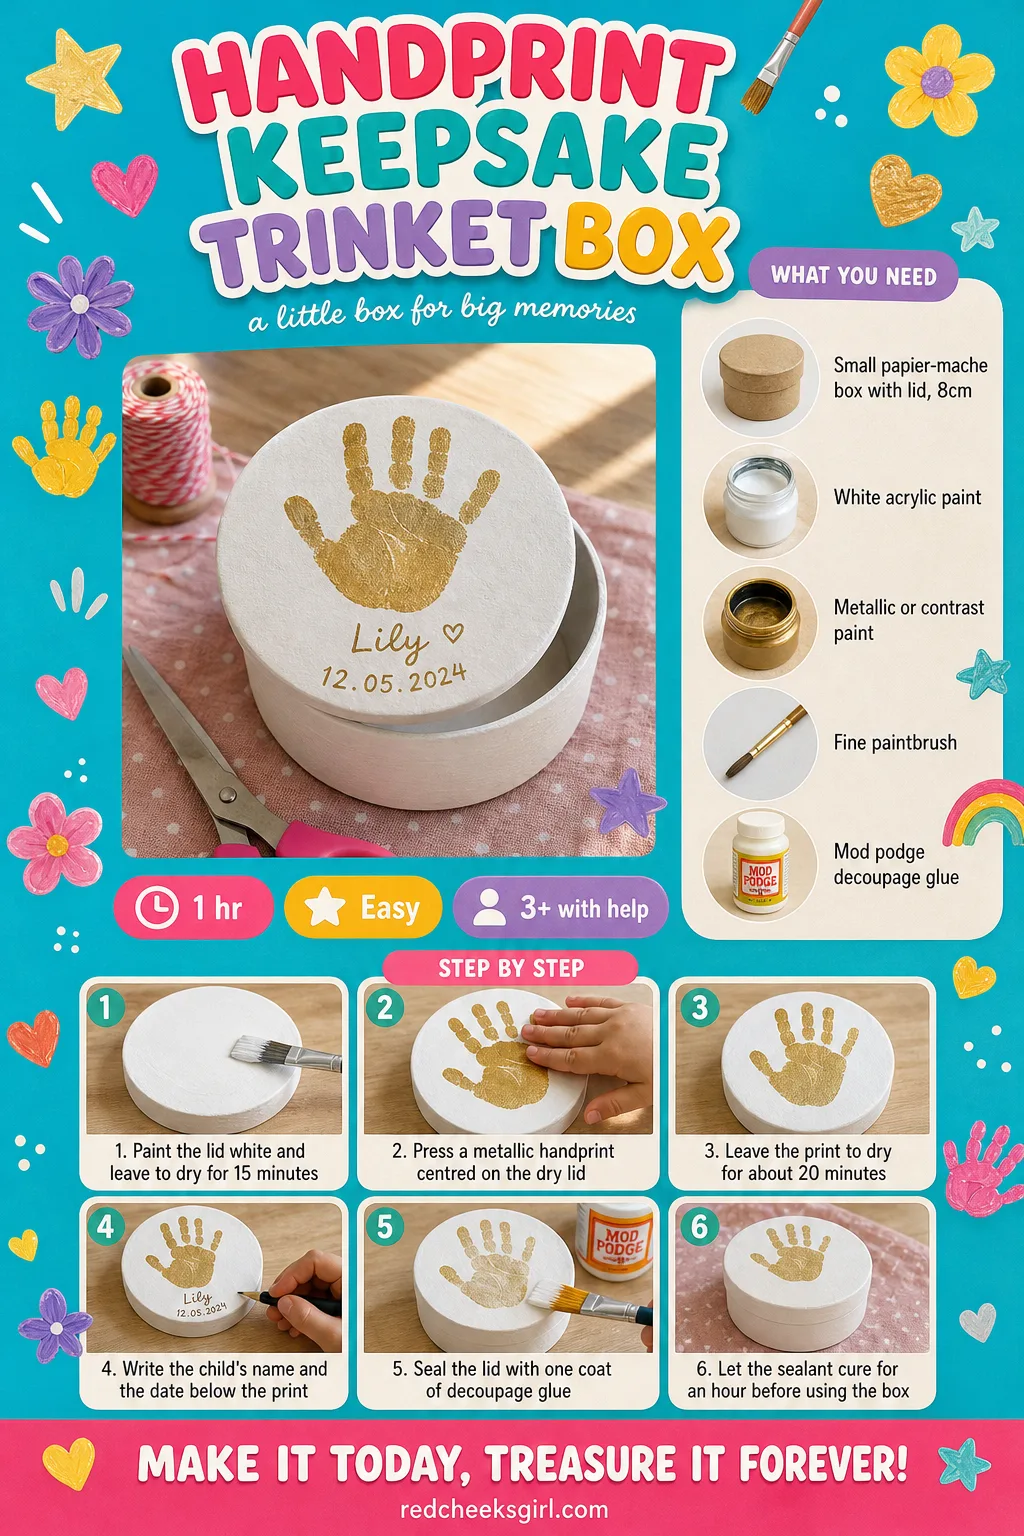
Handprint Keepsake Trinket Box
Somewhere to keep the fiddly ornament hooks and spare baubles between seasons, which is a real problem in most houses by the second week of December. The lid carries one handprint and the year’s date, so it doubles as a growth record nobody has to remember to update.
What You Need
- 1 small papier-mache box with lid, 8cm
- White acrylic paint, for the base coat
- Metallic or contrast paint, for the print
- Fine paintbrush
- Mod podge or similar decoupage glue
How to Make It
- Paint the lid white as a base coat and leave to dry for 15 minutes.
- Paint the child’s hand in a metallic or contrasting colour and press it centred on the dry lid.
- Leave the print to dry for about 20 minutes.
- Write the child’s name and this year’s date in fine marker at the base of the print.
- Seal the whole lid with one even coat of decoupage glue for shine and durability.
- Let the sealant cure for at least an hour before using the box to store small trinkets.
🛍 Shopping guide
Frequently Asked Questions
What is the best paint for Christmas handprint crafts?
For anything on paper, washable tempera paint is the easiest to work with because it goes on opaque and creamy and comes off skin with a single wipe. For fabric or wood, a fabric or acrylic paint holds up better, though acrylic paint gives the best results on canvas once sealed and patch-tested first.
How do you stop a handprint from smudging?
The two things that actually matter are a thin, even coat and a clean lift. A sponge brush applying a thin layer works better than dipping the hand in a puddle of paint, and once the hand is down, pressing firmly and lifting straight up prevents smudging.
What age can kids start making handprint crafts?
Most of these work from around 18 months with an adult doing the painting and pressing, and from about age 4 a child can manage more of the steps alone, though cutting, hot glue, the oven and the iron always stay with an adult regardless of age.
Can you use acrylic paint for a handprint craft on fabric or canvas?
Yes, with care. Acrylic works well on canvas and wood because it will not crack or fade, but it behaves differently on clothes and skin: it is non-toxic but not washable, so it is worth covering the workspace and washing hands immediately rather than letting it dry on skin.
How long does it take for a handprint craft to dry before decorating it?
A thin coat on paper is usually touch-dry within 20 to 30 minutes, but white and metallic paints take longer than darker colours, and anything baked, heat-set or air-dry clay needs a few hours to a full day before it can be handled safely.
How do you preserve a handprint keepsake so it lasts for years?
Seal paper or cork pieces with a couple of thin coats of decoupage glue once the paint is fully dry, and heat-set any fabric project with an iron over a cloth so the paint does not crack or lift with handling over time.
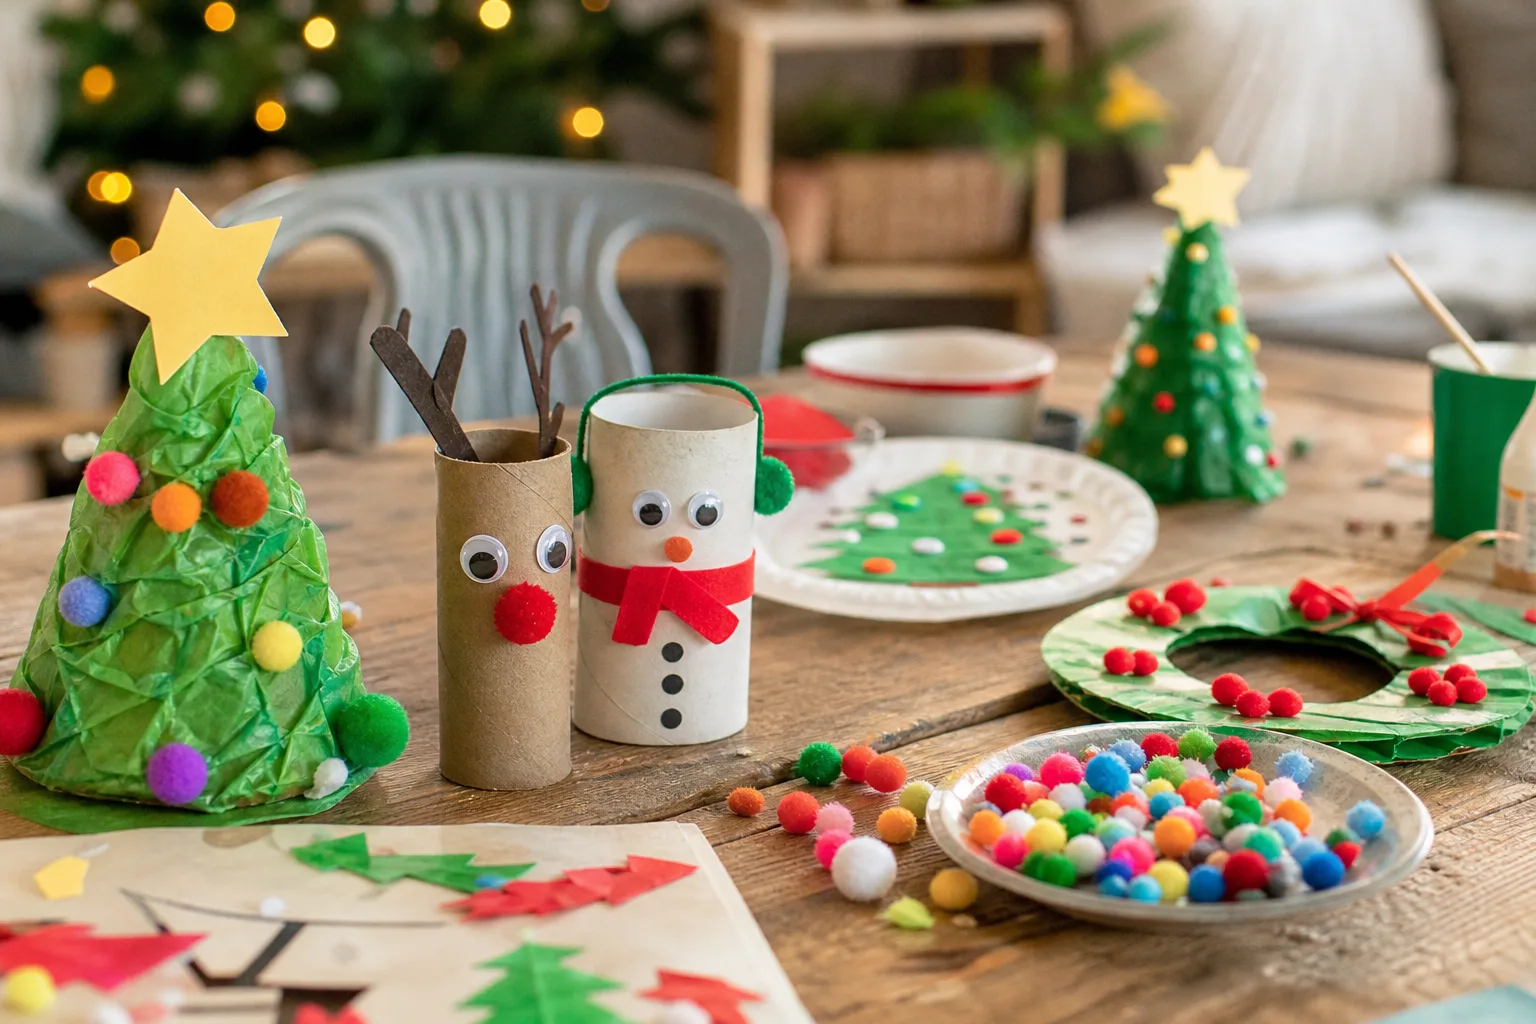
24 genuinely toddler-proof Christmas crafts: real steps, honest timings, nothing small enough to swa

72 Christmas never have i ever questions sorted into 6 festive rounds. Print the free cards and play

Outdoor christmas decor that actually stays put: 24 ideas sorted by weather, each one named for how
Leave a Reply