

24 Christmas Crafts for Toddlers That Little Hands Can Truly Make on Their Own
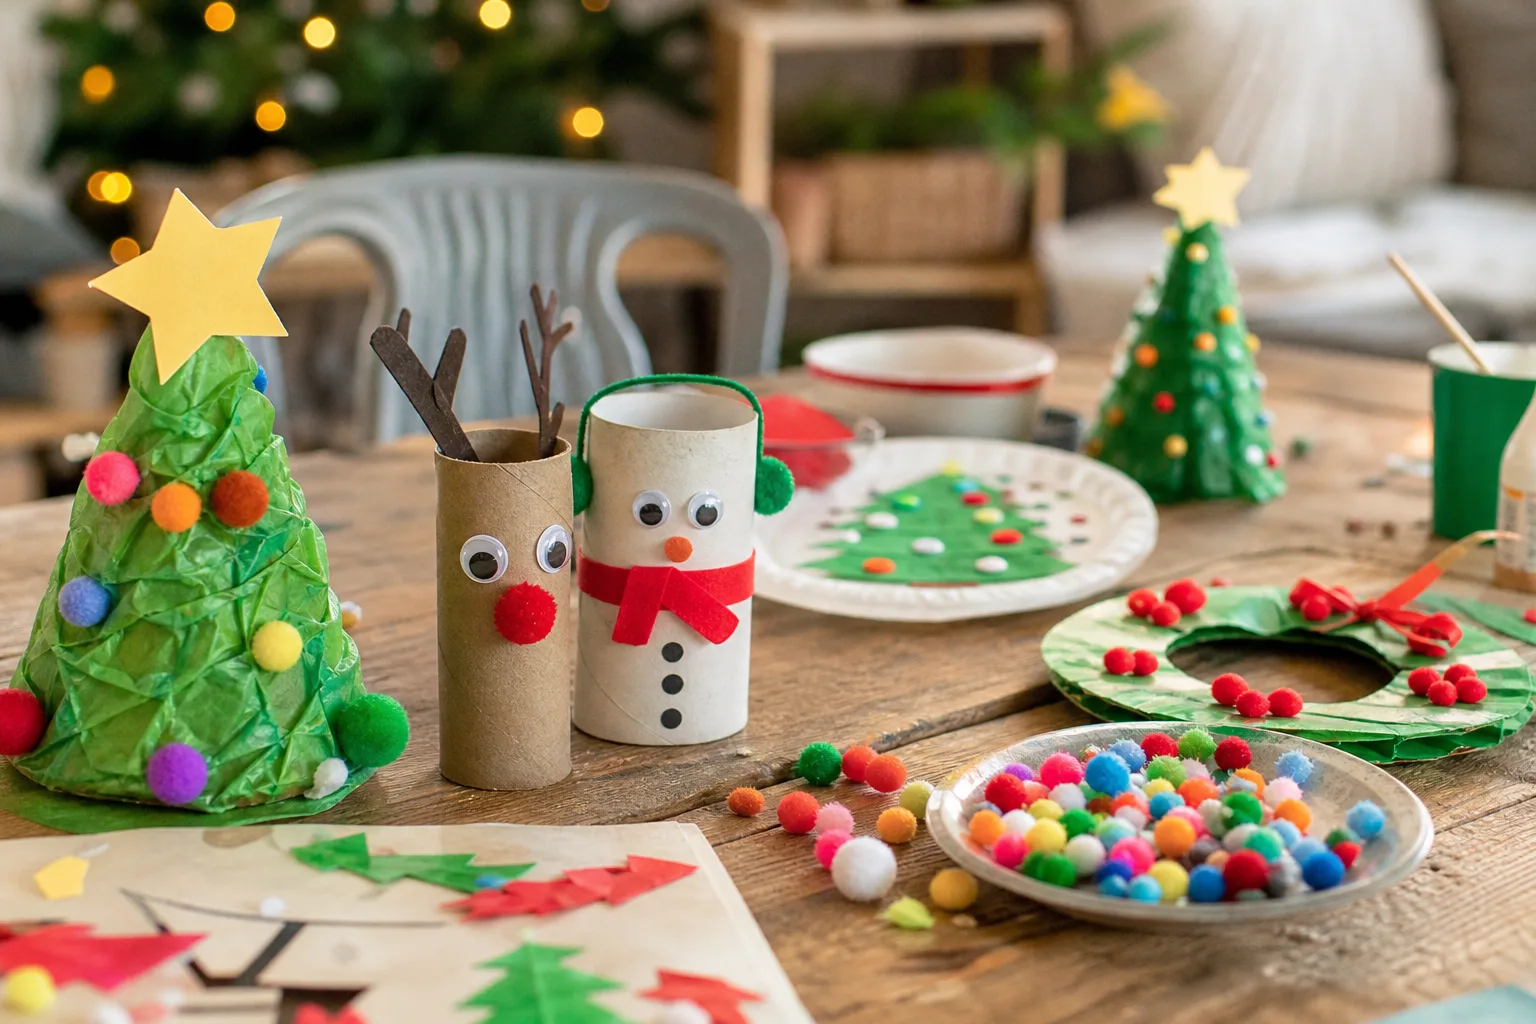
Toddlers do not want a craft that looks nice when it is finished. They want paint on their hands right now and they want to see what happens when a sponge meets a plate. The good news is that the crafts a two or three year old can actually finish alone, with only a little steering from you, are often the prettiest things on the tree by January.
Nothing below needs a trip to a specialty shop, and nothing hides a small part a toddler could put in her mouth without a clear note saying so. If the glue gun or the oven is doing the work, that step says so plainly, because that is the part you do and she watches.
Pair any of these with the free run of the Christmas games for toddlers for the bits of the afternoon when hands need a rest from glue, and if you are hosting the whole nursery class rather than just your own small person, the preschool Christmas party games and the Christmas crafts for preschool cover the slightly older cousins at the same table.
This post contains affiliate links. If you buy through them, I may earn a small commission at no extra cost to you.
- Handprint Christmas Tree
- Paper Plate Santa Face
- Salt Dough Handprint Ornament
- Pinecone Reindeer
- Toilet Paper Roll Reindeer
- Thumbprint Reindeer Cards
- Cotton Ball Snowman Stack Garland
- Tissue Paper Stained-Glass Star
- Pom-Pom Wreath
- Bubble Wrap Christmas Tree Print
- Yarn-Wrapped Cardboard Star
- Paper Chain Countdown Garland
- Potato-Stamped Christmas Tree Cards
- Marshmallow Snowman Skewers
- Footprint Reindeer
- Paper Straw Christmas Tree Ornament
- Melting Coffee Filter Snowman
- Clothespin Reindeer Ornament
- Painted Rock Santas
- Sequin Dot Ornament
- Handprint Wreath Plate
- Snow Globe Jar Shake
- Cinnamon Applesauce Dough Ornament
- Pony Bead Candy Cane
- Frequently Asked Questions
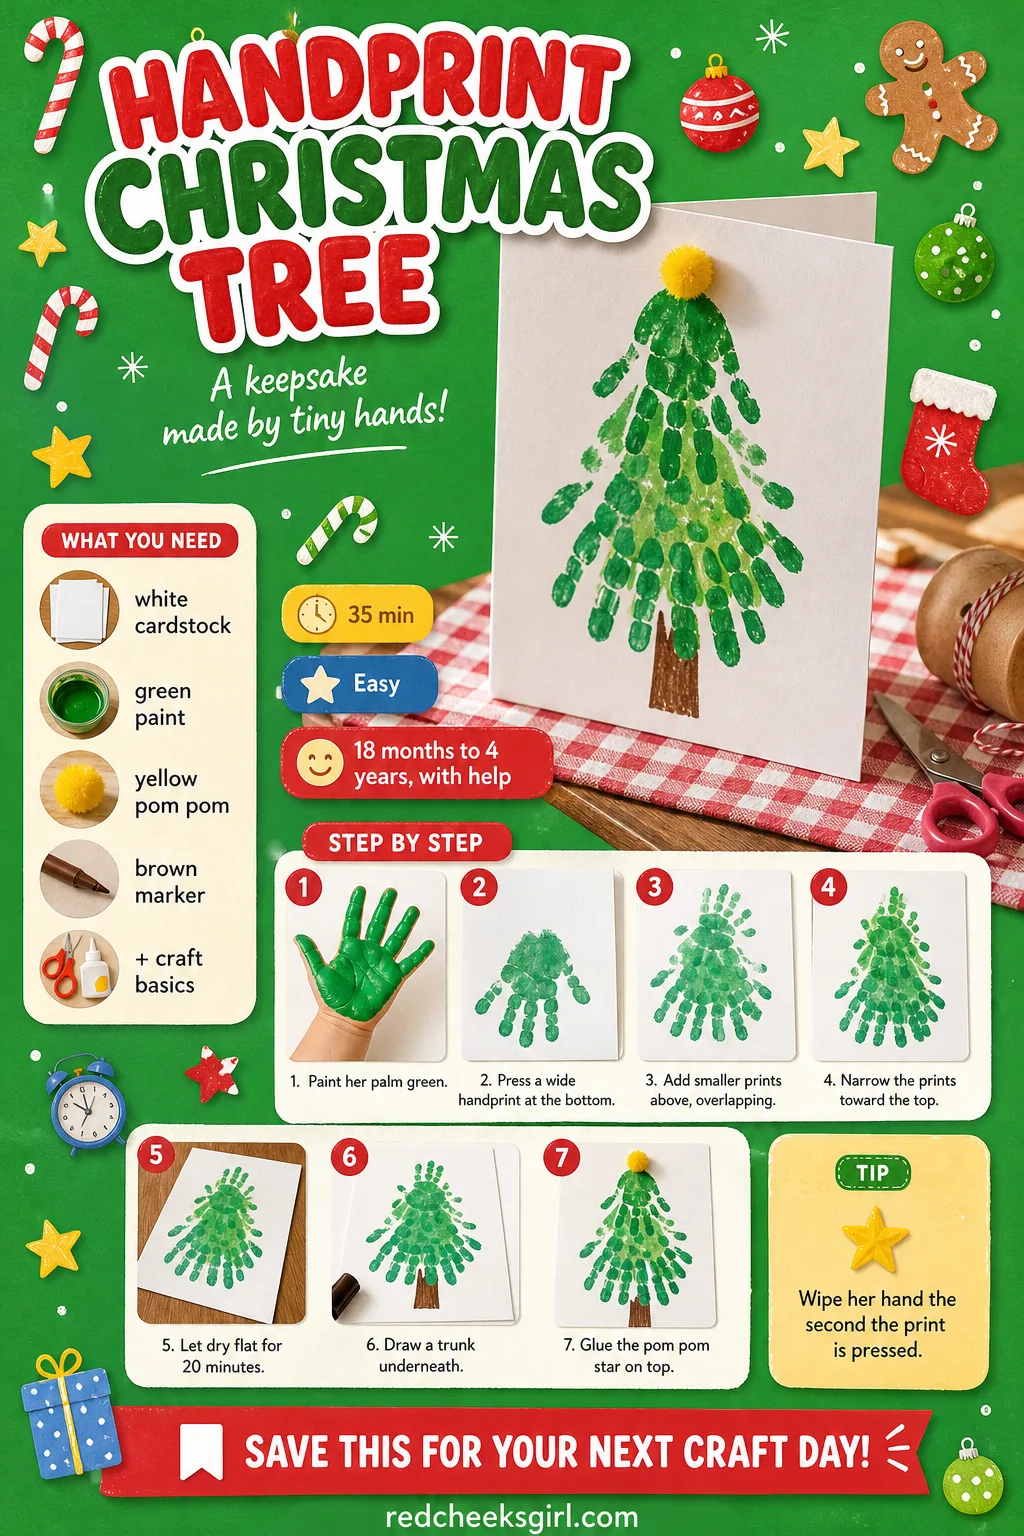
Handprint Christmas Tree
One handprint is sweet. A whole tree of them, stacked smaller toward the top, is the kind of thing that ends up framed. It costs one pot of paint and takes fifteen minutes of actual doing.
What You Need
- 1 sheet A4 white cardstock
- Washable green paint, 1 small pot
- Paintbrush or sponge dauber
- 1 small yellow pom pom (star topper)
- Brown marker
- Old shirt or apron
How to Make It
- Paint her whole palm green with the brush or dauber.
- Press a handprint low and wide near the bottom of the page.
- Press smaller, higher handprints above it, slightly overlapping, narrowing toward the top.
- Leave flat to dry for 20 minutes before touching again.
- Draw a short trunk under the lowest print with the marker.
- Glue the pom pom star at the very top point.
🛍 Shopping guide
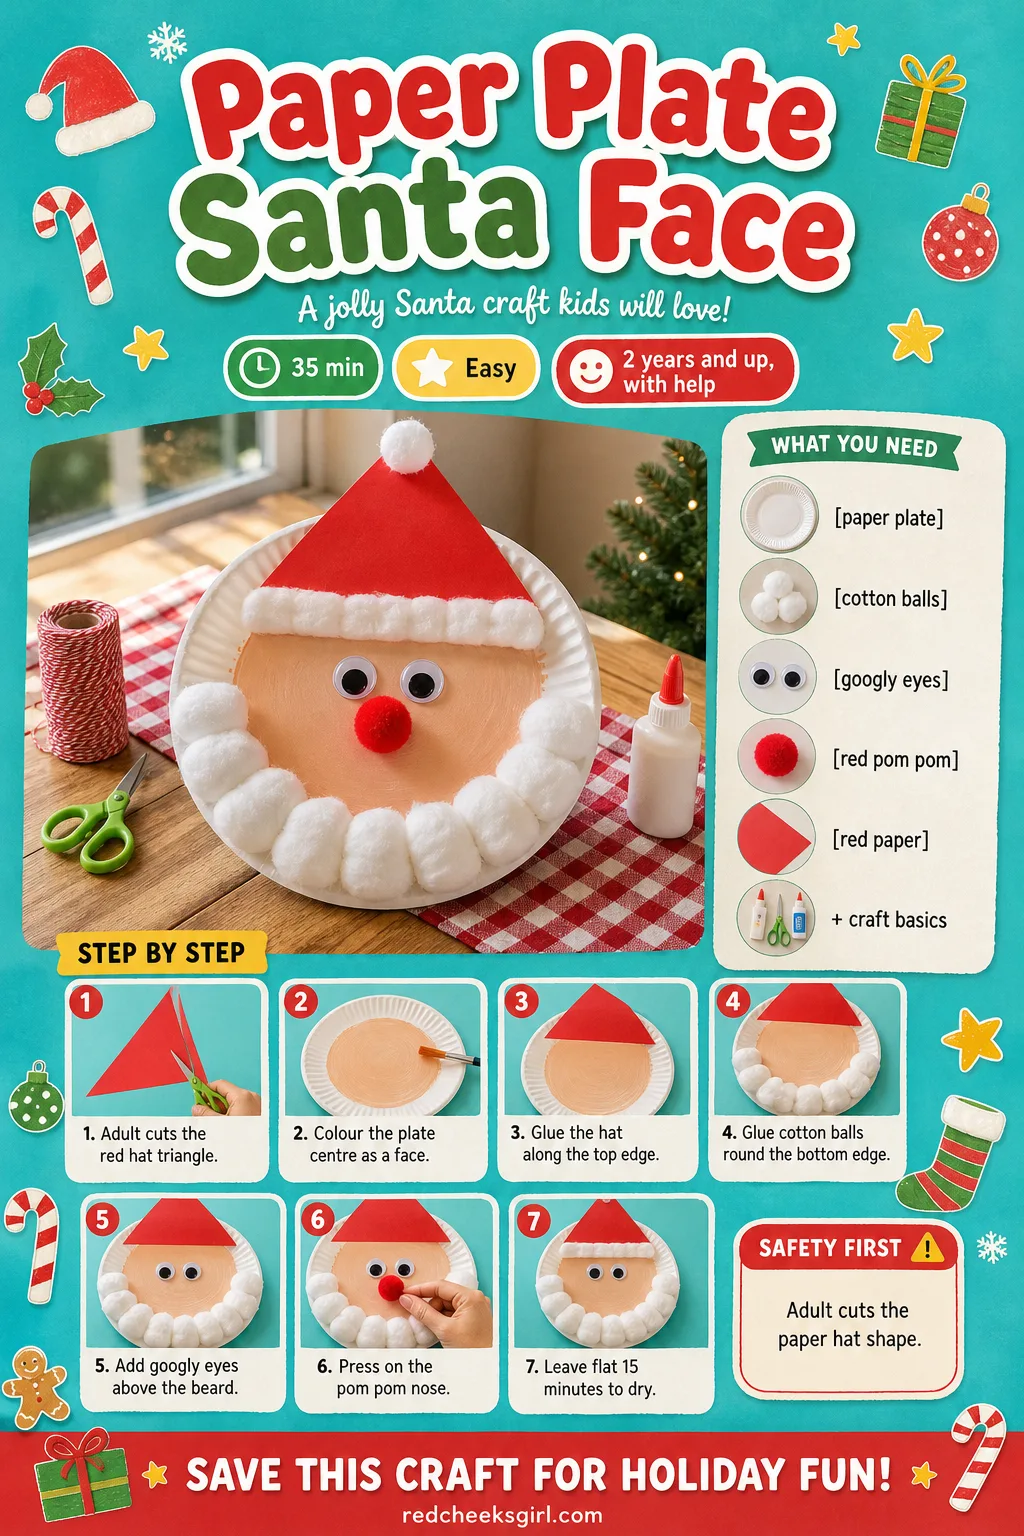
Paper Plate Santa Face
Every toddler Christmas box needs a Santa, and this one is built almost entirely from things that live in your kitchen cupboard already. The beard is the fun part: squishy cotton that she can press for as long as the plate stays interesting.
What You Need
- 1 paper plate, 9 inch
- Pink or peach paint, or a crayon
- Red paper triangle hat, precut
- 15 cotton balls
- 2 googly eyes, 15mm
- 1 red pom pom nose, 25mm
How to Make It
- Adult cuts a red paper triangle to sit across the top of the plate.
- Colour or paint the centre circle of the plate as the face.
- Glue the red triangle hat along the top edge.
- Glue cotton balls around the lower edge of the plate for the beard, working from outside in.
- Glue on the googly eyes above the beard line.
- Press the pom pom nose into the centre and leave flat 15 minutes to set.
🛍 Shopping guide
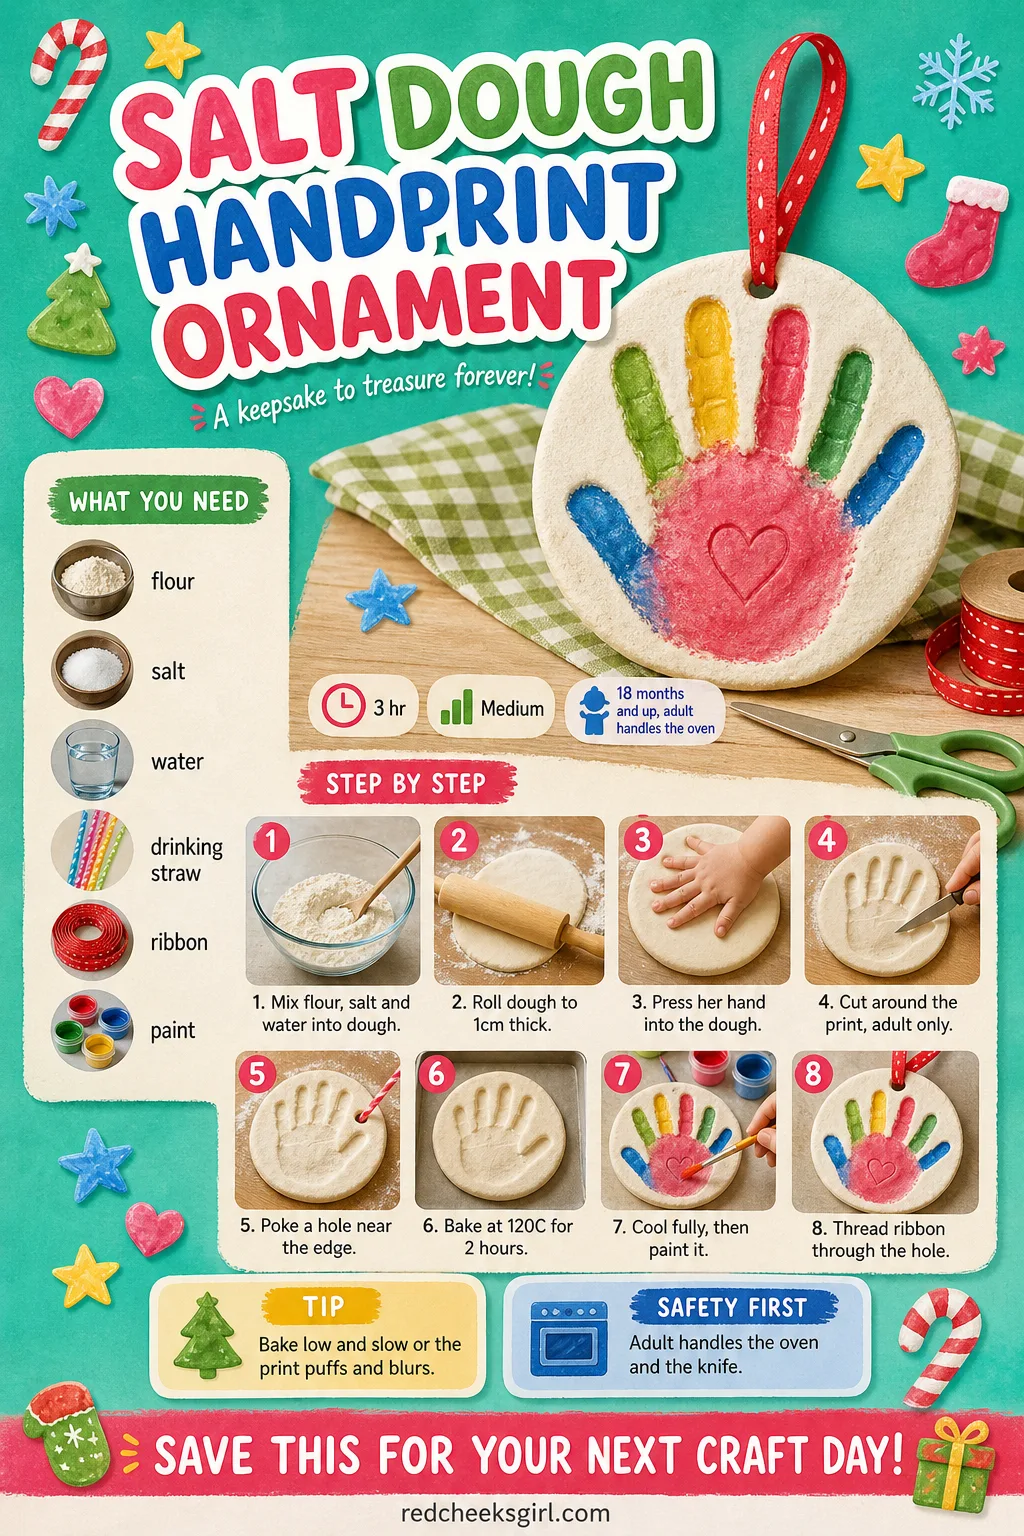
Salt Dough Handprint Ornament
Say what you like about plastic baubles, none of them still fit her hand next year. This one needs the oven, so it is a two person job, but the actual pressing takes her thirty seconds and the keeping lasts for years.
What You Need
- 1 cup plain flour
- 1/2 cup table salt
- 1/2 cup water
- Rolling pin
- Drinking straw
- Acrylic paint and ribbon, 20cm
How to Make It
- Adult mixes flour, salt and water into a firm dough.
- Roll the dough out to about 1cm thick on a floured surface.
- Press her hand firmly and briefly into the dough to leave a clear print.
- Adult cuts around the print with a butter knife, leaving a 1cm border.
- Poke a hanging hole near the top edge with the straw.
- Adult bakes flat at 120C for about 2 hours, then cools completely before touching.
- Once cool, let her paint it, then thread the ribbon through the hole.
🛍 Shopping guide
Pinecone Reindeer
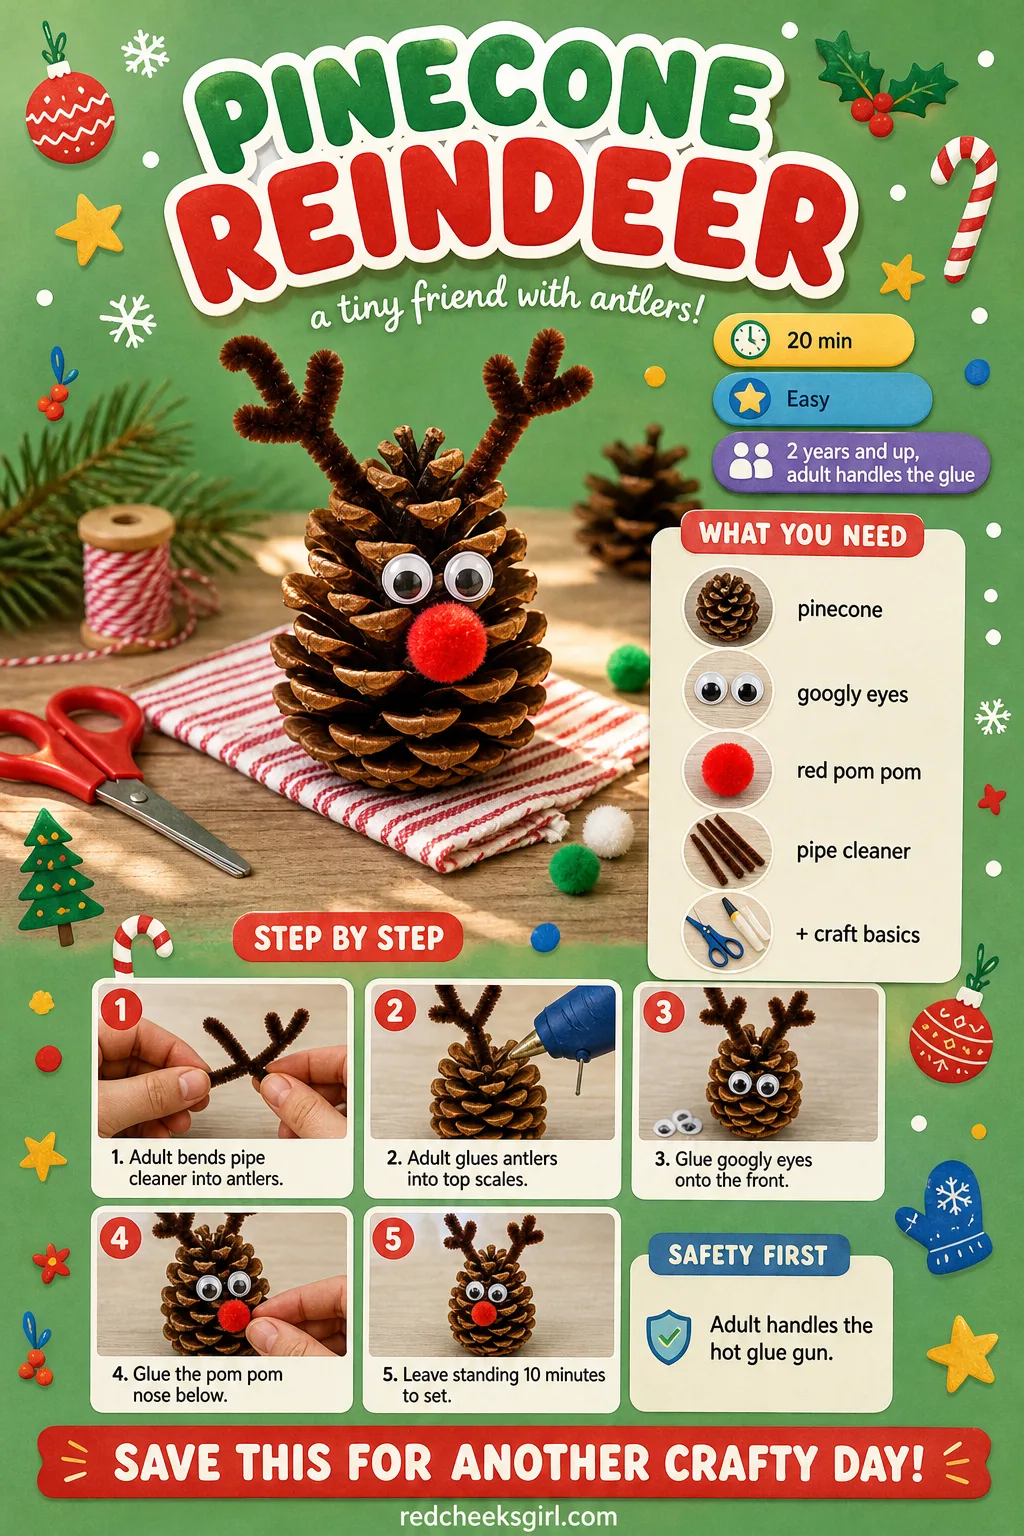
A pinecone already looks half like an animal before you touch it. Give it two eyes and a pom pom nose and the resemblance to a reindeer is honestly a little unsettling, in the best way. It sits on a windowsill or shelf and needs no hanging at all.
What You Need
- 1 large pinecone, about 10cm
- 2 googly eyes, 10mm
- 1 small red pom pom, 15mm
- 1 brown pipe cleaner, 15cm
- Craft glue or a glue gun
How to Make It
- Adult bends the pipe cleaner into a narrow V shape for antlers.
- Adult tucks and glues the antler ends between the top scales of the pinecone.
- Let her glue the googly eyes onto two front scales.
- Let her glue the pom pom nose just below the eyes.
- Leave standing upright for 10 minutes until the glue grips.
🛍 Shopping guide
Toilet Paper Roll Reindeer
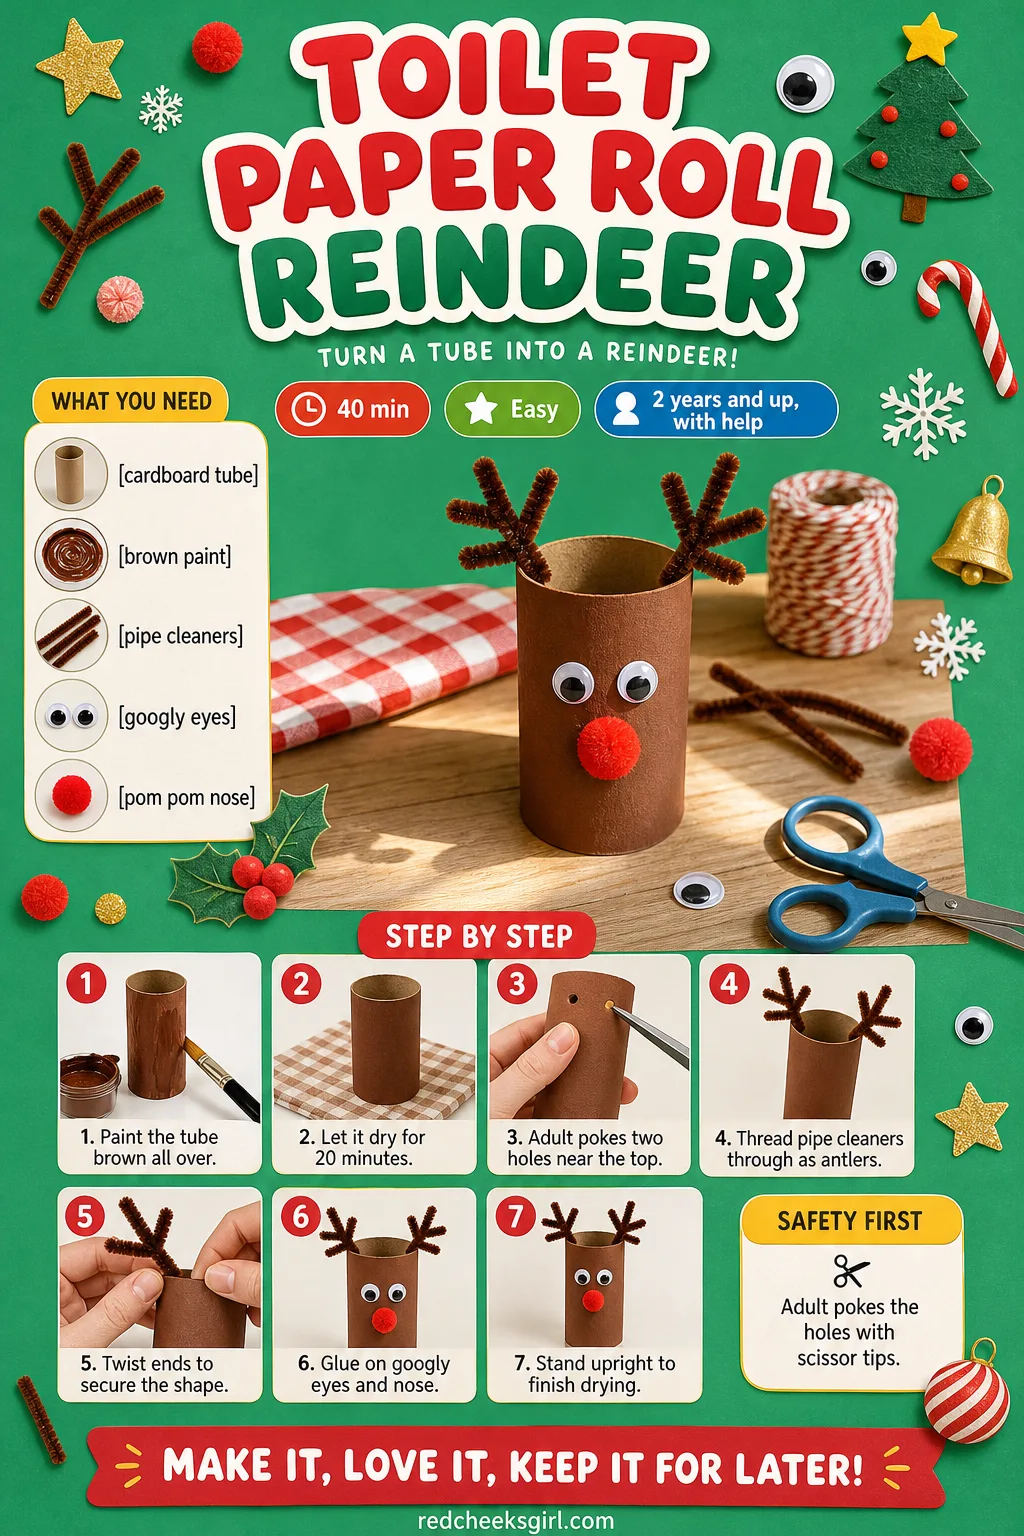
If the recycling bin has three cardboard tubes in it already, this one is free. It stands on its own on a shelf, antlers and all, which feels like a small miracle the first time it balances.
What You Need
- 1 cardboard tube
- Brown paint, 1 small pot
- 2 brown pipe cleaners, 20cm each
- 2 googly eyes, 12mm
- 1 red pom pom nose, 20mm
How to Make It
- Paint the whole tube brown, inside rim included, and let it dry 20 minutes.
- Adult pokes two small holes near the top rim with scissor tips.
- Thread a pipe cleaner through each hole and twist the ends to secure and shape as antlers.
- Glue on the googly eyes toward the front bottom edge.
- Glue the pom pom nose below the eyes and stand it upright to dry.
🛍 Shopping guide
Thumbprint Reindeer Cards
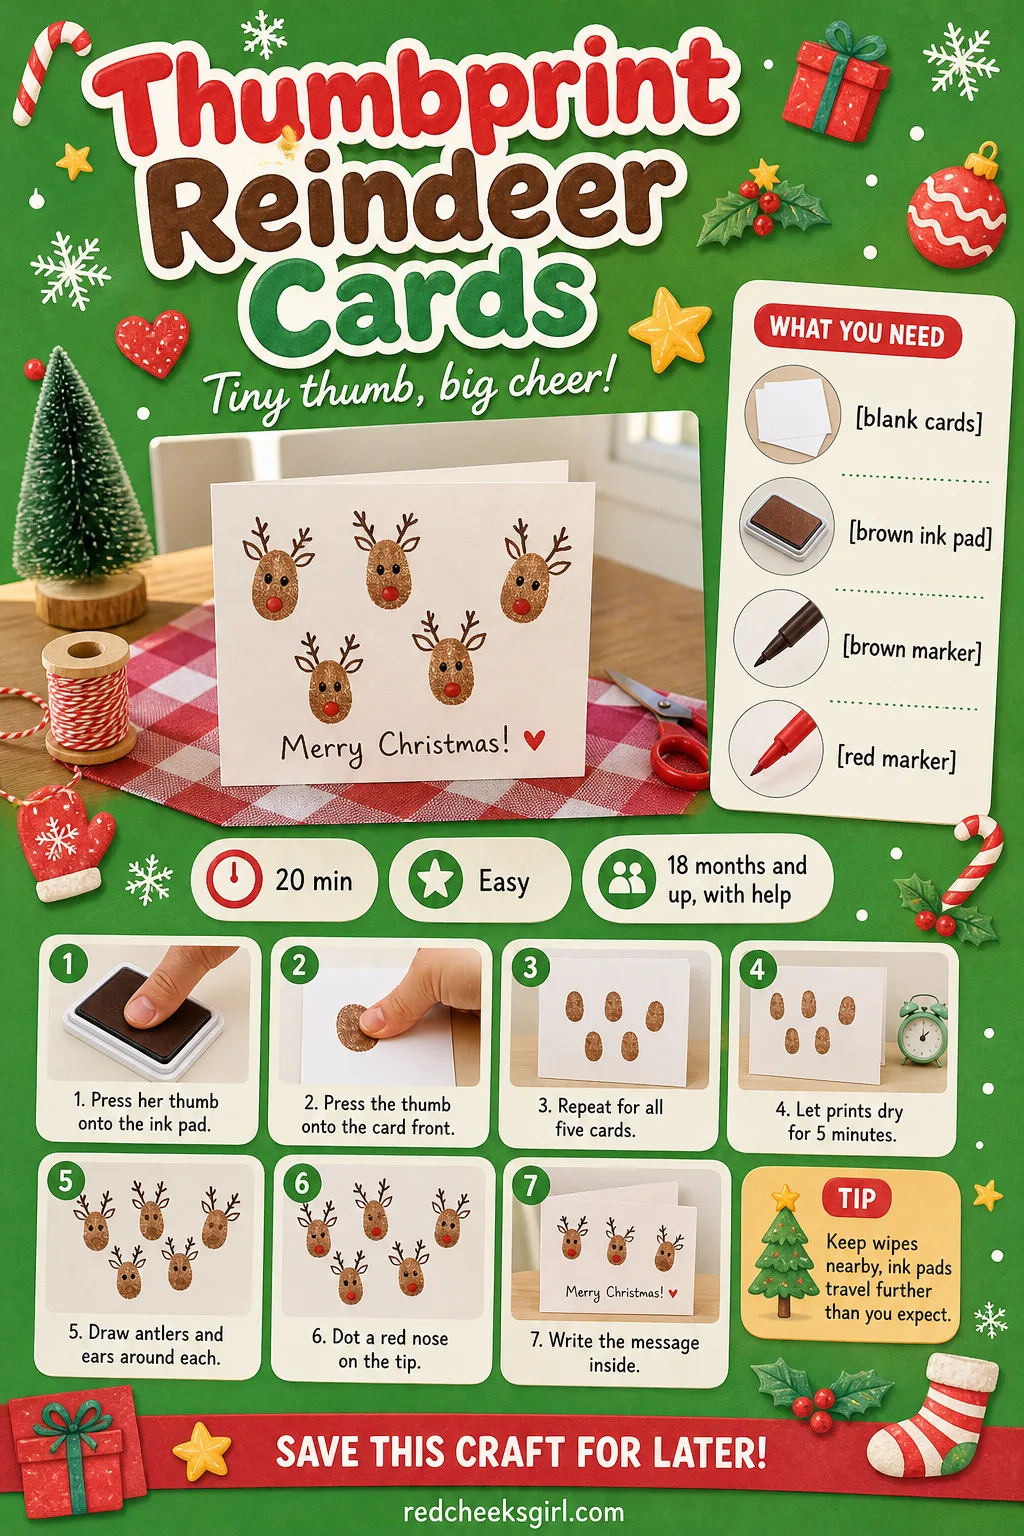
These are the cards that actually get stuck to a grandparent’s fridge past New Year. One ink pad makes a whole stack, and the thumb press itself takes about two seconds per card, which is roughly her attention span for this stage anyway.
What You Need
- 5 blank cards, A6
- 1 brown ink pad
- Fine brown marker
- Red marker
How to Make It
- Press her thumb onto the ink pad, then firmly onto the card front.
- Repeat across all five cards, re-inking the thumb each time.
- Leave the prints 5 minutes to dry fully before drawing on them.
- Draw two antler lines and two ear shapes around each print.
- Dot a small red nose at the tip of the thumbprint.
- Write the message inside once the front is finished.
🛍 Shopping guide
Cotton Ball Snowman Stack Garland
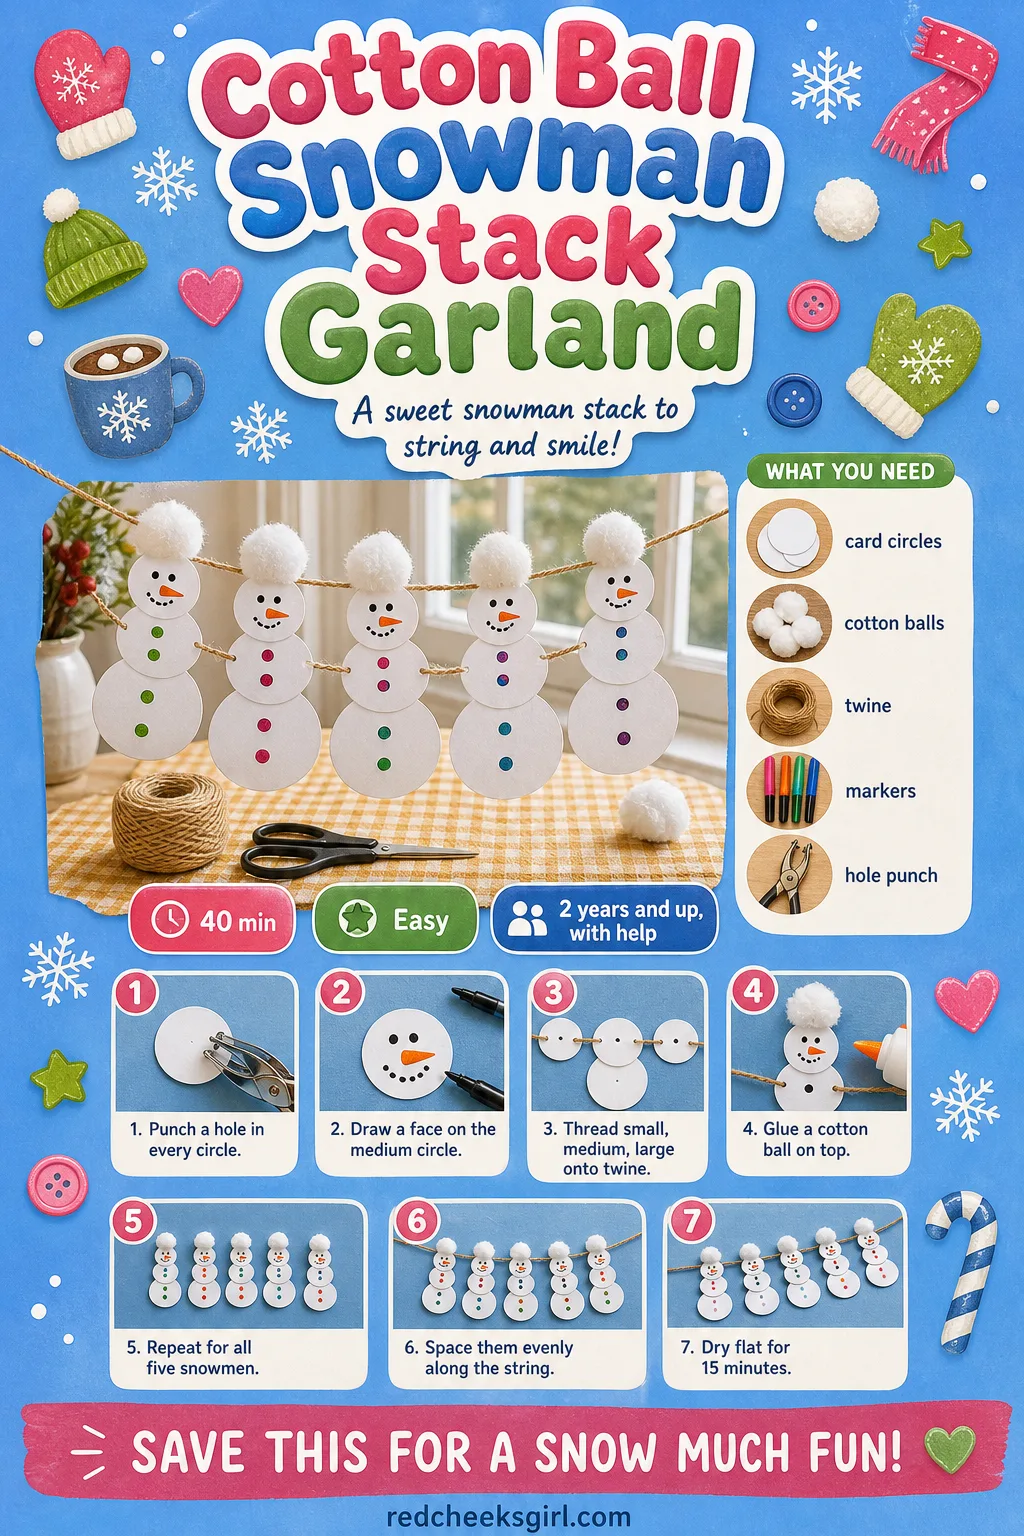
A string of small snowmen along the mantel does more for a room than one giant one ever could. It rolls up flat into a drawer in January, which is the whole point of a garland over a sculpture.
What You Need
- White card circles, 3 sizes, 5 sets
- 5 white cotton balls
- 1.5m twine or string
- Black and orange markers
- Hole punch
How to Make It
- Adult punches a hole through the centre of every circle.
- Draw a simple face and buttons on the medium circle of each set.
- Thread small, medium, then large circle onto the twine to build one snowman, spacing sets evenly along the string.
- Glue one cotton ball on top of each small circle as a snowy hat pom.
- Repeat until all five snowmen sit along the string, then leave flat 15 minutes to dry before hanging.
🛍 Shopping guide
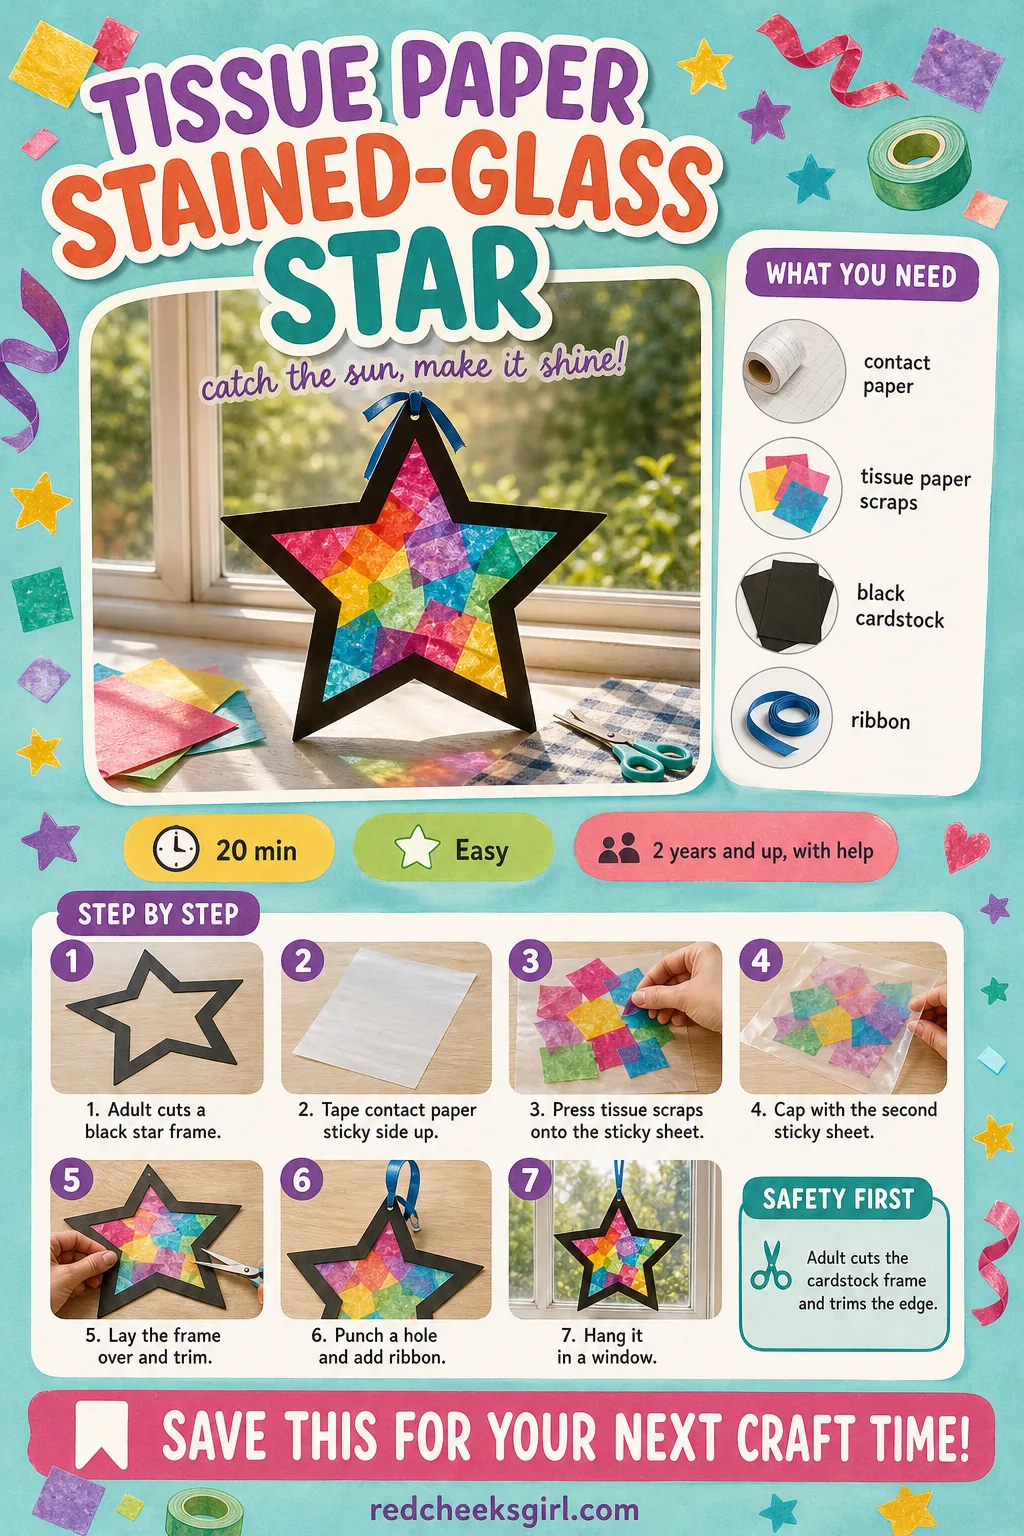
Tissue Paper Stained-Glass Star
Hold this one up to a window on a grey afternoon and the whole room gets a bit warmer looking. The sticky contact paper does the actual gripping, so there is no glue drying time at all, which is a small relief on a day short of patience.
What You Need
- Clear contact paper, 2 sheets, 20x20cm
- Torn tissue paper scraps, assorted colours
- Black cardstock star frame, precut
- Ribbon, 20cm
How to Make It
- Adult cuts a star outline from black cardstock, leaving an open frame.
- Tape one contact paper sheet sticky side up to the table.
- Let her press torn tissue scraps onto the sticky surface, filling the star shape with colour.
- Adult caps the second contact sheet on top, smoothing from the centre out.
- Lay the black star frame over the top and adult trims around the outer edge.
- Punch a hole and thread the ribbon, then tape or hang in the window.
🛍 Shopping guide
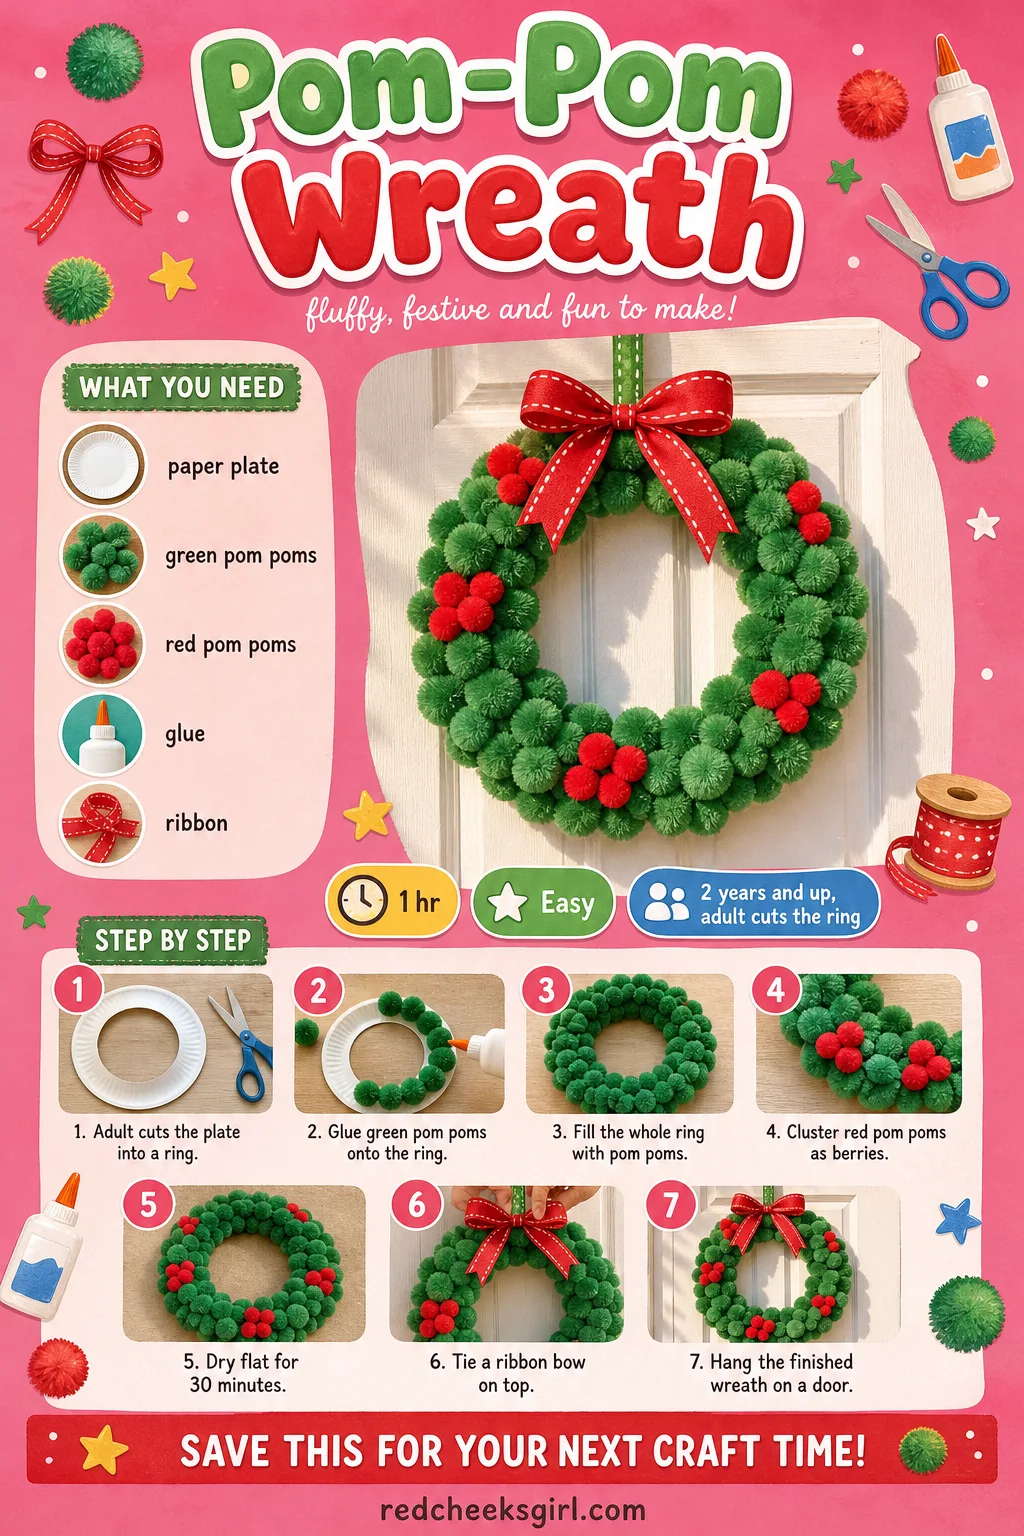
Pom-Pom Wreath
This is the wreath that survives being touched forty times a day, because it is already made of the thing a toddler wants to touch most. Hang it low on the door and watch it get patted on the way out every single time.
What You Need
- 1 paper plate
- 30 green pom poms, mixed sizes
- 6 red pom poms
- Craft glue
- Ribbon for a bow
How to Make It
- Adult cuts the inner circle out of the paper plate, leaving a flat ring.
- Let her glue green pom poms onto the ring, working in small sections.
- Keep filling until the whole ring is covered edge to edge with no plate showing.
- Cluster three red pom poms in two spots as berries.
- Leave flat to dry for 30 minutes before lifting.
- Adult ties a ribbon bow at the top and loops ribbon for hanging.
🛍 Shopping guide
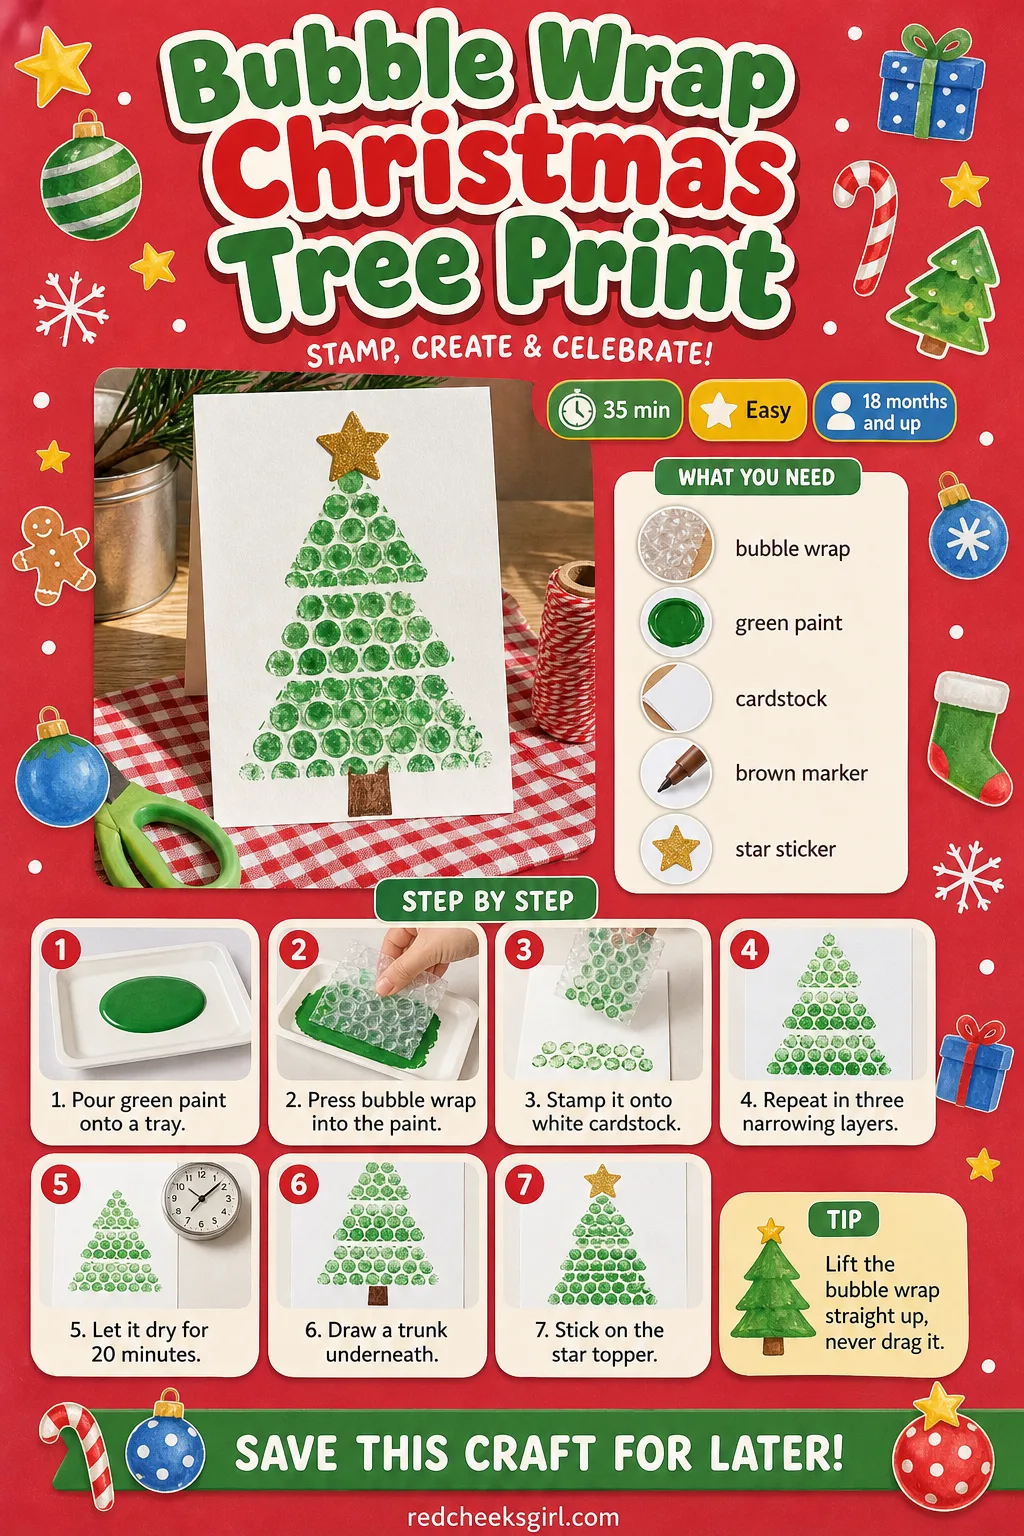
Bubble Wrap Christmas Tree Print
If she likes popping bubble wrap more than any actual toy, let that energy do the printing instead. The texture it leaves behind looks like real pine needles without anyone drawing a single branch by hand.
What You Need
- Bubble wrap sheet, 20x20cm
- Green paint, 1 small pot
- Paper plate, for a paint tray
- White cardstock, A4
- Brown marker and 1 star sticker
How to Make It
- Pour a shallow pool of green paint onto the paper plate tray.
- Press the bubble wrap bumpy side down into the paint, then stamp it onto the cardstock.
- Stamp three overlapping layers, narrower toward the top, to build a triangle tree.
- Let it dry flat for 20 minutes without touching.
- Draw a short trunk underneath with the brown marker.
- Stick the star at the top point to finish.
🛍 Shopping guide
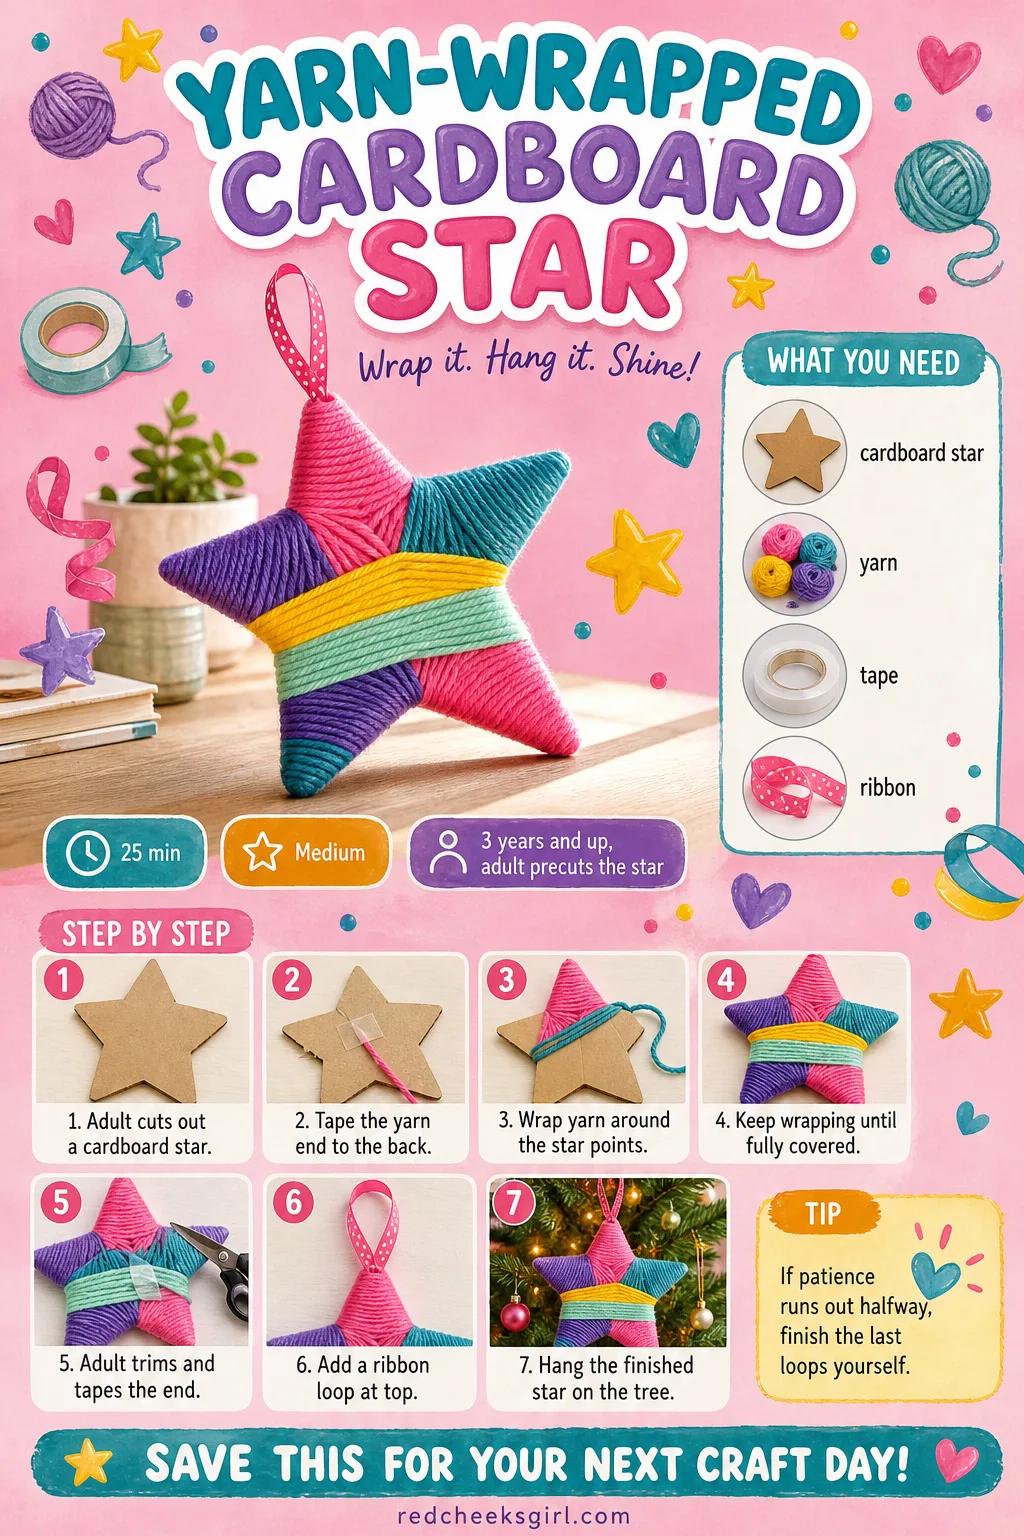
Yarn-Wrapped Cardboard Star
There is something satisfying for a small person about wrapping something round and round until it disappears completely under colour. It is fiddly, so expect to help steady the star while she loops, and that is completely normal.
What You Need
- Cardboard star cutout, precut, 10cm
- Yarn, 3m length
- Tape
- Ribbon loop, 15cm
How to Make It
- Adult cuts a star shape from cardboard and tapes the yarn end to the back.
- Let her wrap yarn around the points, following the shape round and round.
- Keep wrapping until no cardboard shows through anywhere on the star.
- Adult trims the yarn and tapes the loose end down at the back.
- Attach a ribbon loop at the top point for hanging.
🛍 Shopping guide
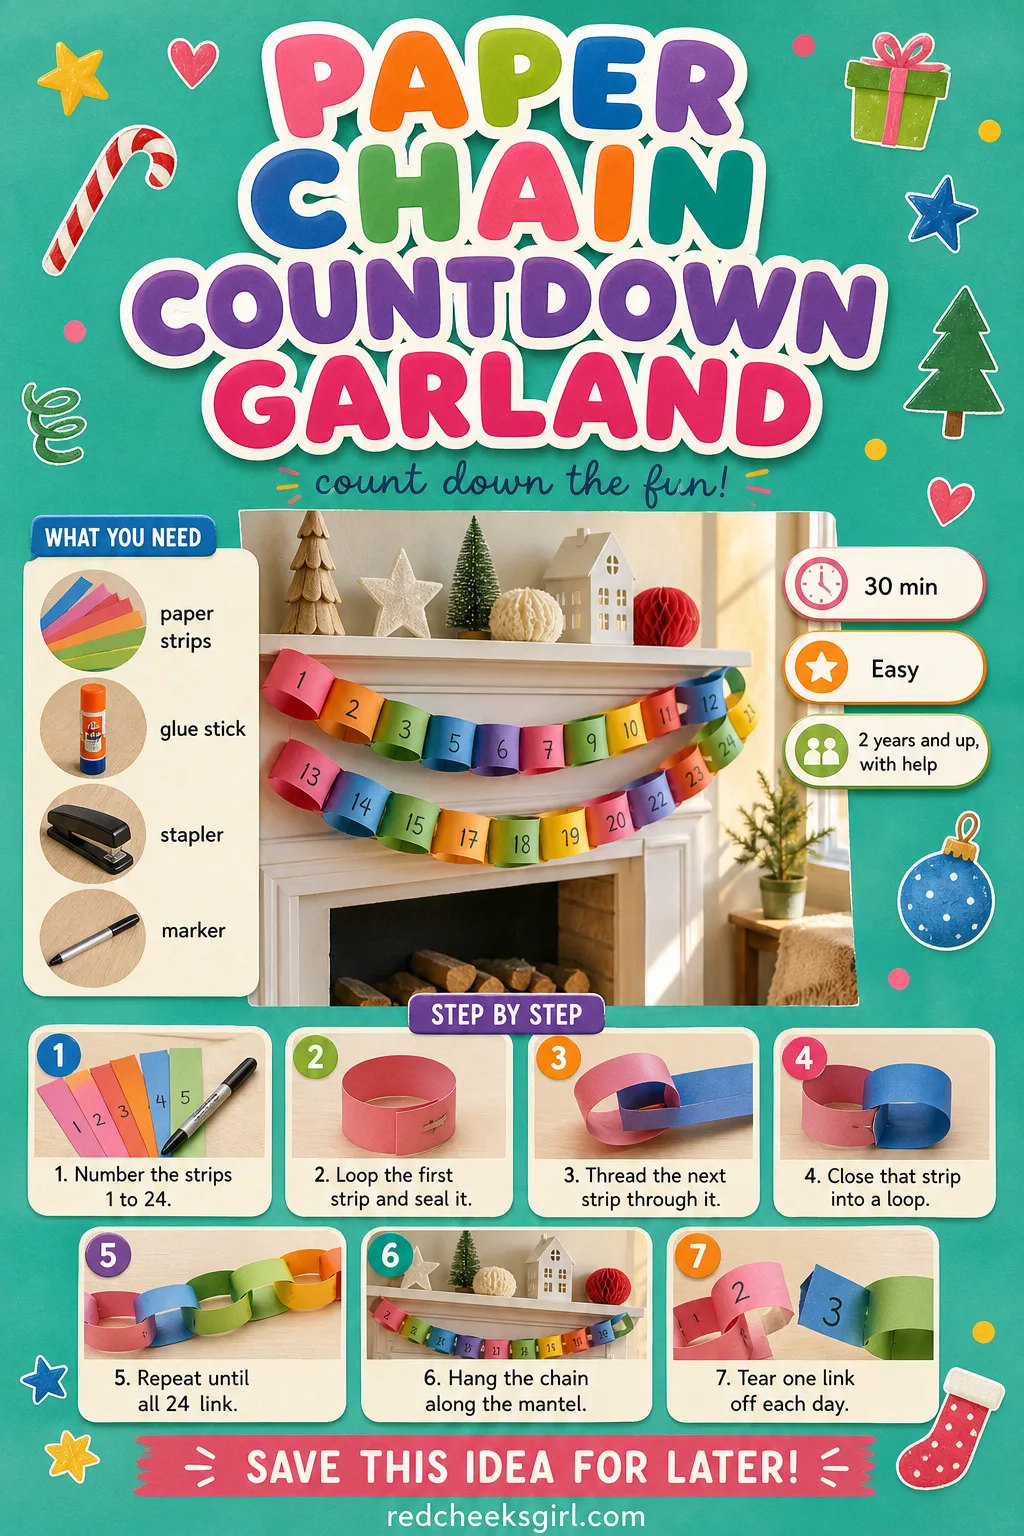
Paper Chain Countdown Garland
She tears one link off every morning and that single act of destruction is somehow the highlight of her whole day. It drapes along a mantel or a bannister and folds flat into an envelope once the last link is gone.
What You Need
- 24 construction paper strips, 2x20cm
- Glue stick or stapler
- Marker
How to Make It
- Adult numbers the strips 1 to 24, or lets her scribble a mark on each.
- Loop the first strip into a circle and glue or staple the ends together.
- Thread the next strip through that loop before closing it into its own circle.
- Repeat, always threading the new strip through the last closed loop, until all 24 are linked.
- Hang the chain along the mantel and tear one link off each morning.
🛍 Shopping guide
Potato-Stamped Christmas Tree Cards
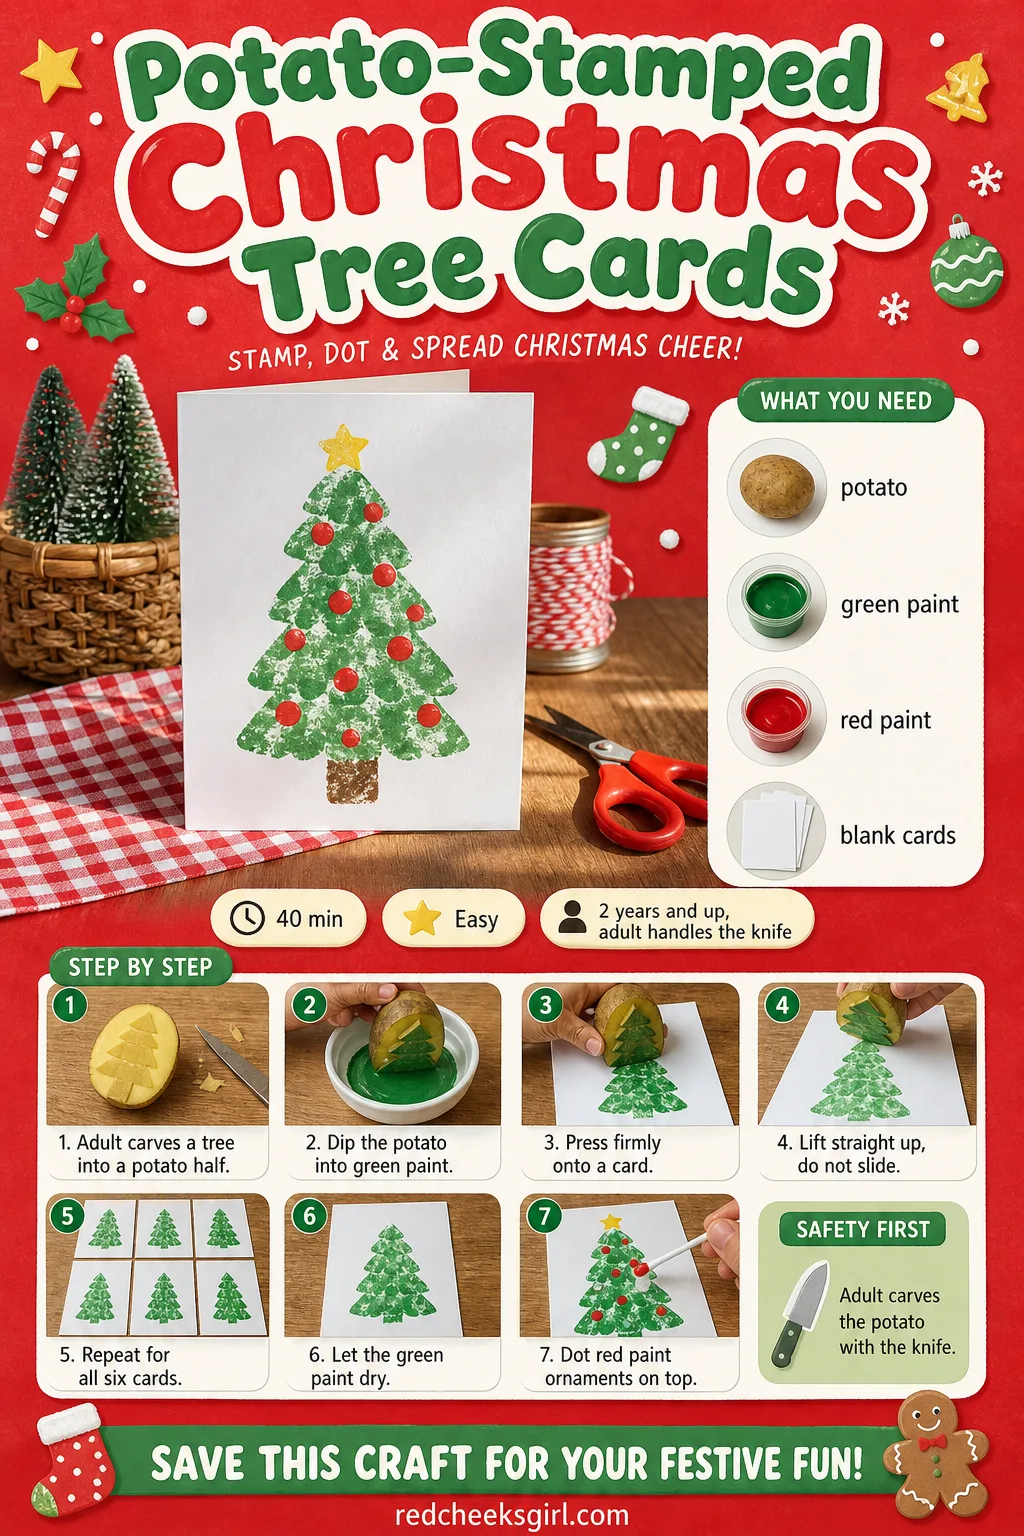
A potato is a strange thing to carve a tree out of, and that is exactly why it works: no pencil skills needed, just a firm press and a straight lift. The result looks hand drawn even though nobody drew a thing.
What You Need
- 1 potato, halved
- Green paint
- Red paint, small dot
- 6 blank cards
How to Make It
- Adult halves the potato and carves a simple triangle tree shape into the flat cut face.
- Dip the carved face into green paint, covering it evenly.
- Press it firmly onto a card and lift straight up without sliding.
- Repeat on each of the six cards, re-dipping the potato each time.
- Once the green dries, about 20 minutes, dot red paint fingertips on as ornaments.
🛍 Shopping guide
Marshmallow Snowman Skewers
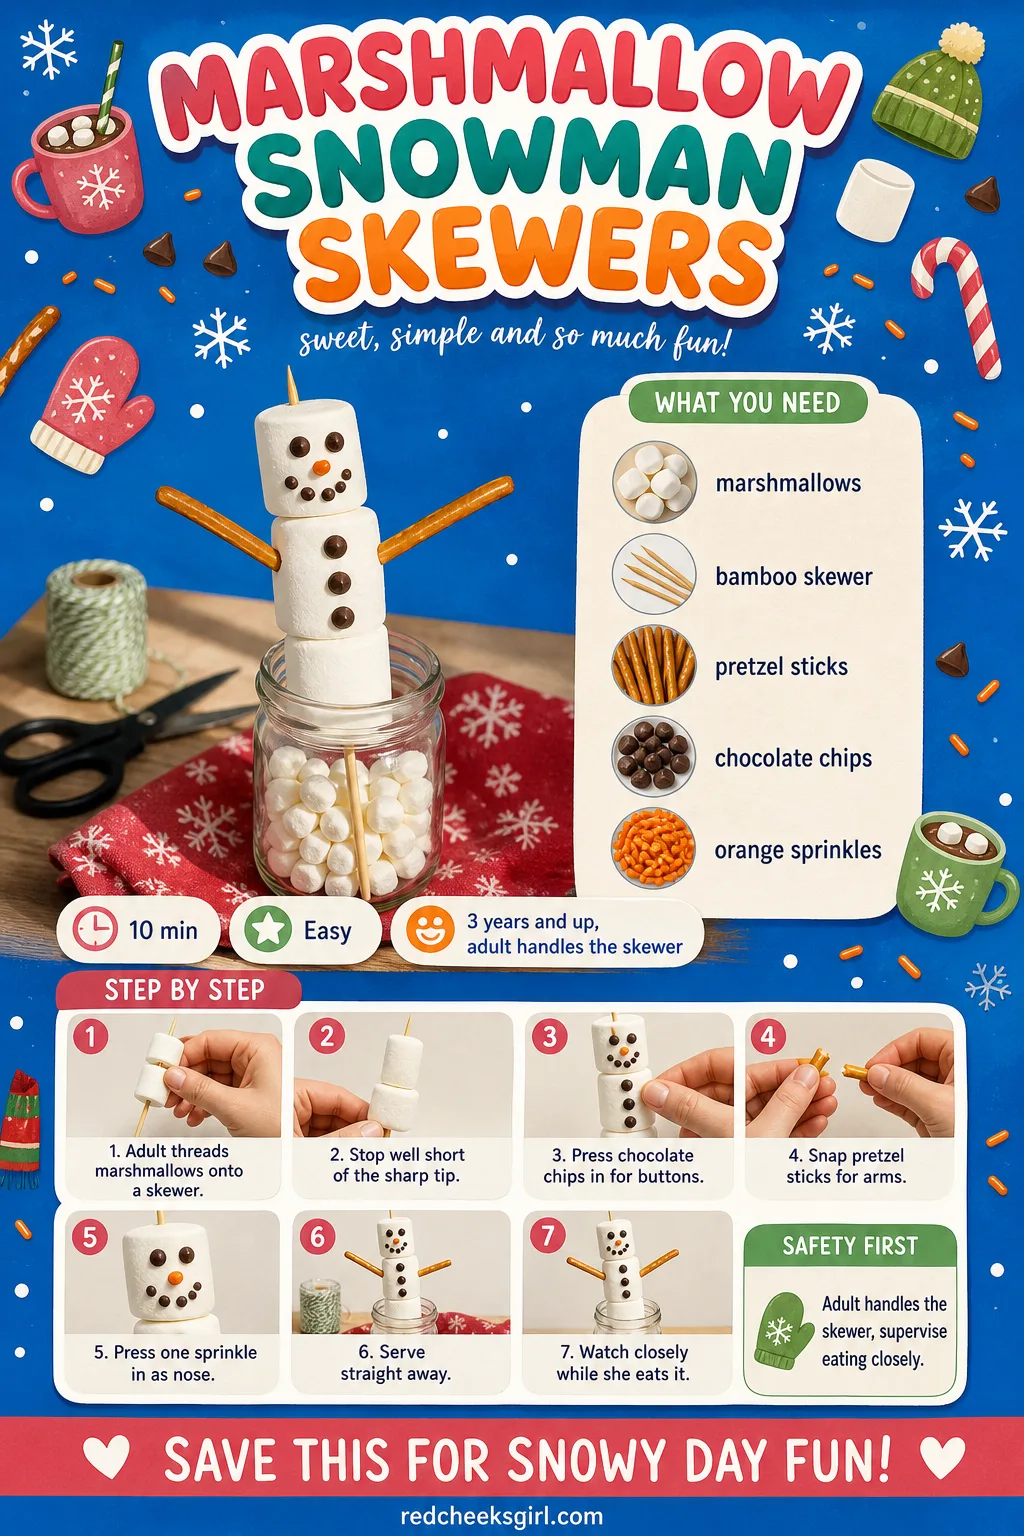
This one disappears within the hour, which is sort of the charm of it. It is a craft and a snack in the same ten minutes, and nothing about it needs to last until Christmas morning.
What You Need
- 3 large marshmallows per skewer
- 1 bamboo skewer per snowman
- 2 pretzel sticks per snowman
- Mini chocolate chips
- Orange sprinkles for the nose
How to Make It
- Adult threads three marshmallows onto the skewer, stopping well short of the sharp tip.
- Let her press mini chocolate chips into the top marshmallow for eyes and buttons down the rest.
- Snap a pretzel stick in half and push both halves in as arms.
- Press one orange sprinkle in as the nose.
- Serve right away and supervise the eating closely because of the skewer.
🛍 Shopping guide
Footprint Reindeer
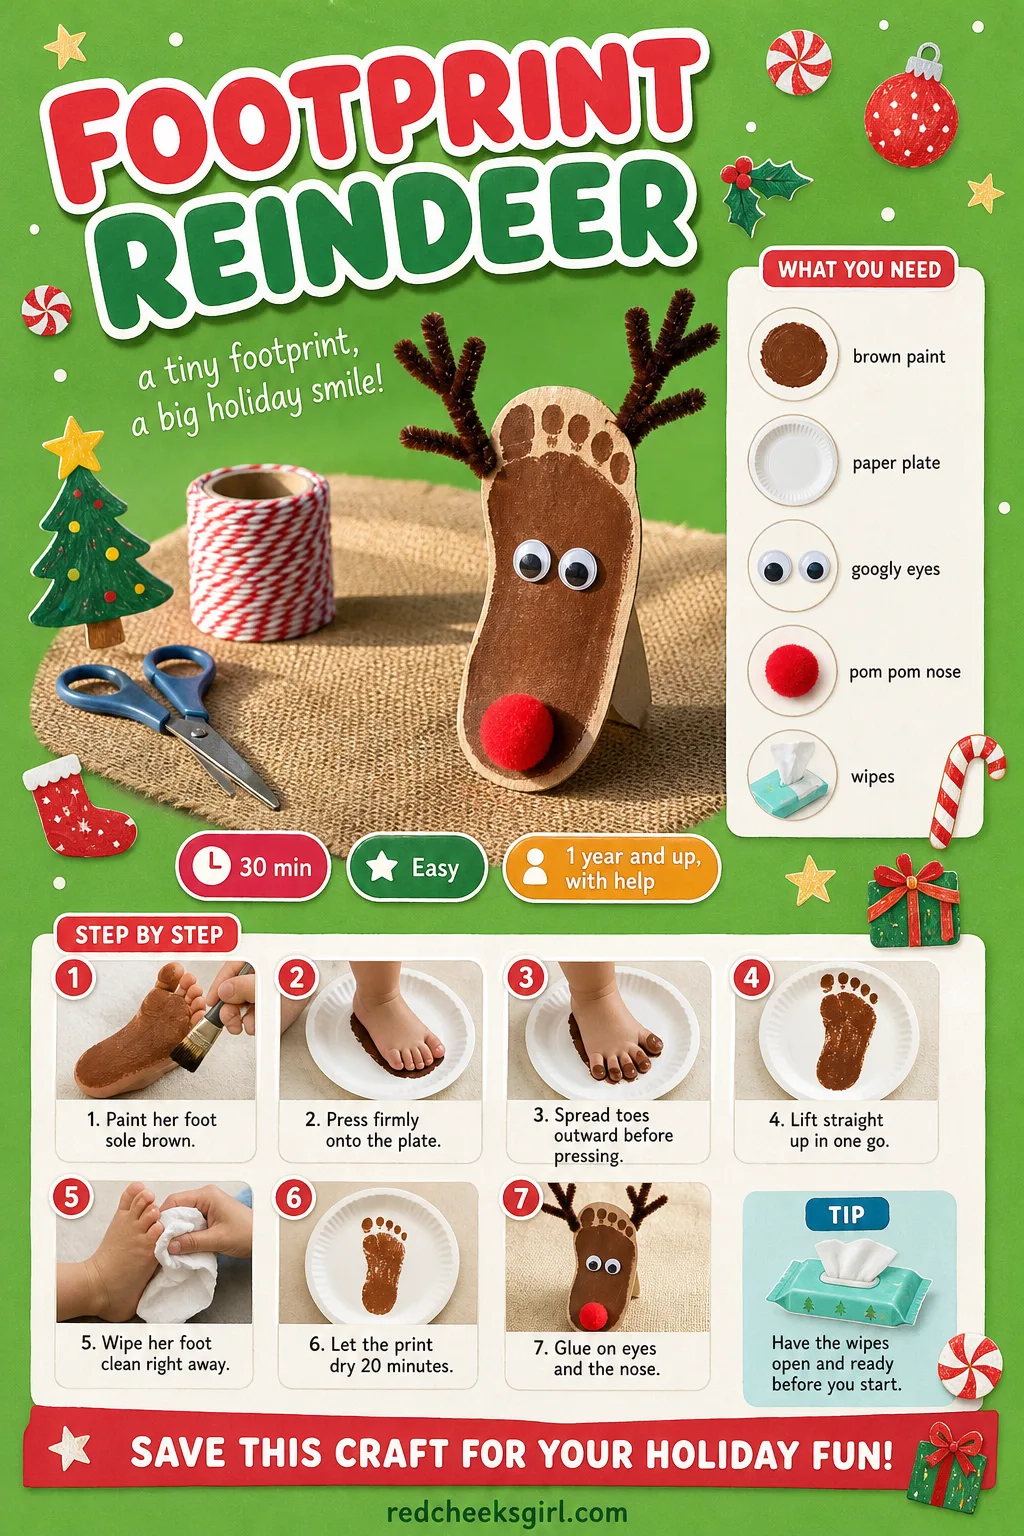
Her actual foot, toes splayed into antlers: there is no version of this that is not a keepsake. Keep a warm wet cloth within arm’s reach, because the paint comes off faster than you’d think if you move quickly.
What You Need
- Brown washable paint
- 1 paper plate or cardstock
- 2 googly eyes
- 1 red pom pom nose
- Baby wipes, ready beforehand
How to Make It
- Paint the sole of her foot brown, covering heel to toes.
- Press it firmly onto the plate with toes spread and pointing outward.
- Lift straight up in one motion, then wipe her foot clean right away.
- Leave the print to dry flat for 20 minutes.
- Glue googly eyes just above the toe prints and a pom pom nose at the heel tip.
🛍 Shopping guide
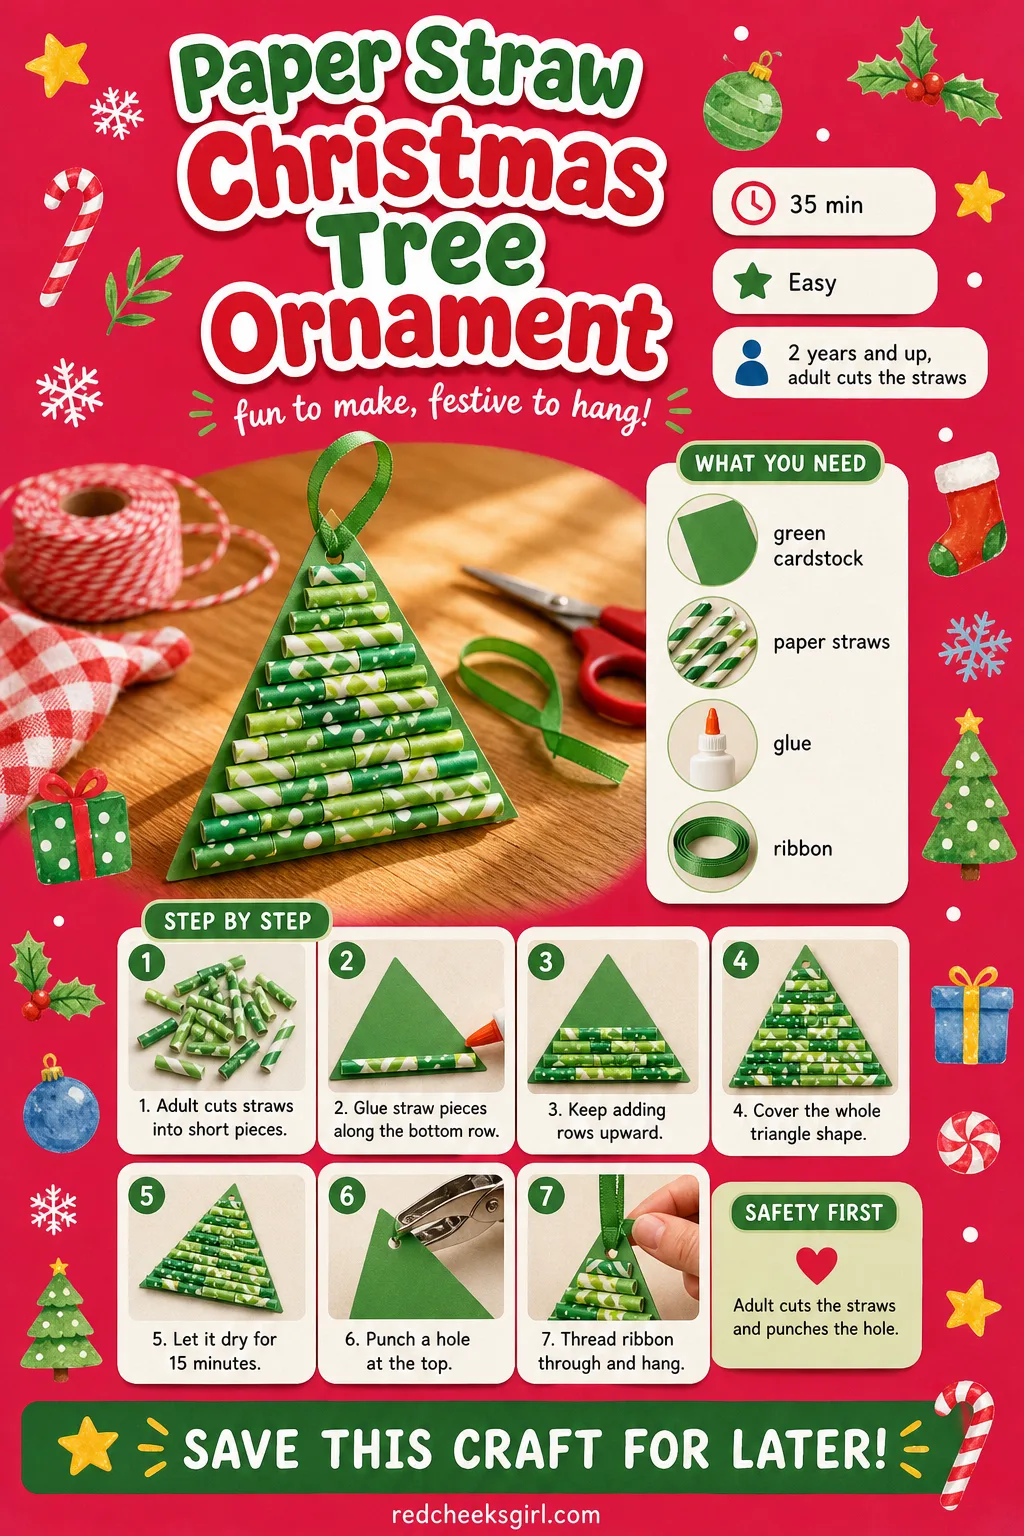
Paper Straw Christmas Tree Ornament
Leftover paper straws from a birthday party find their second life here, lined up like branches on a flat triangle. It hangs on the tree without weighing a single branch down, which matters more than you’d think once the baubles start piling up.
What You Need
- Green cardstock triangle, precut
- 20 paper straw pieces, 3cm each
- Glue
- Ribbon loop, 15cm
How to Make It
- Adult cuts paper straws into short 3cm segments.
- Let her glue segments onto the triangle in rows, starting from the bottom edge.
- Keep filling rows upward until the whole triangle is covered.
- Leave flat to dry for 15 minutes.
- Adult punches a hole at the top point and threads the ribbon loop through.
🛍 Shopping guide
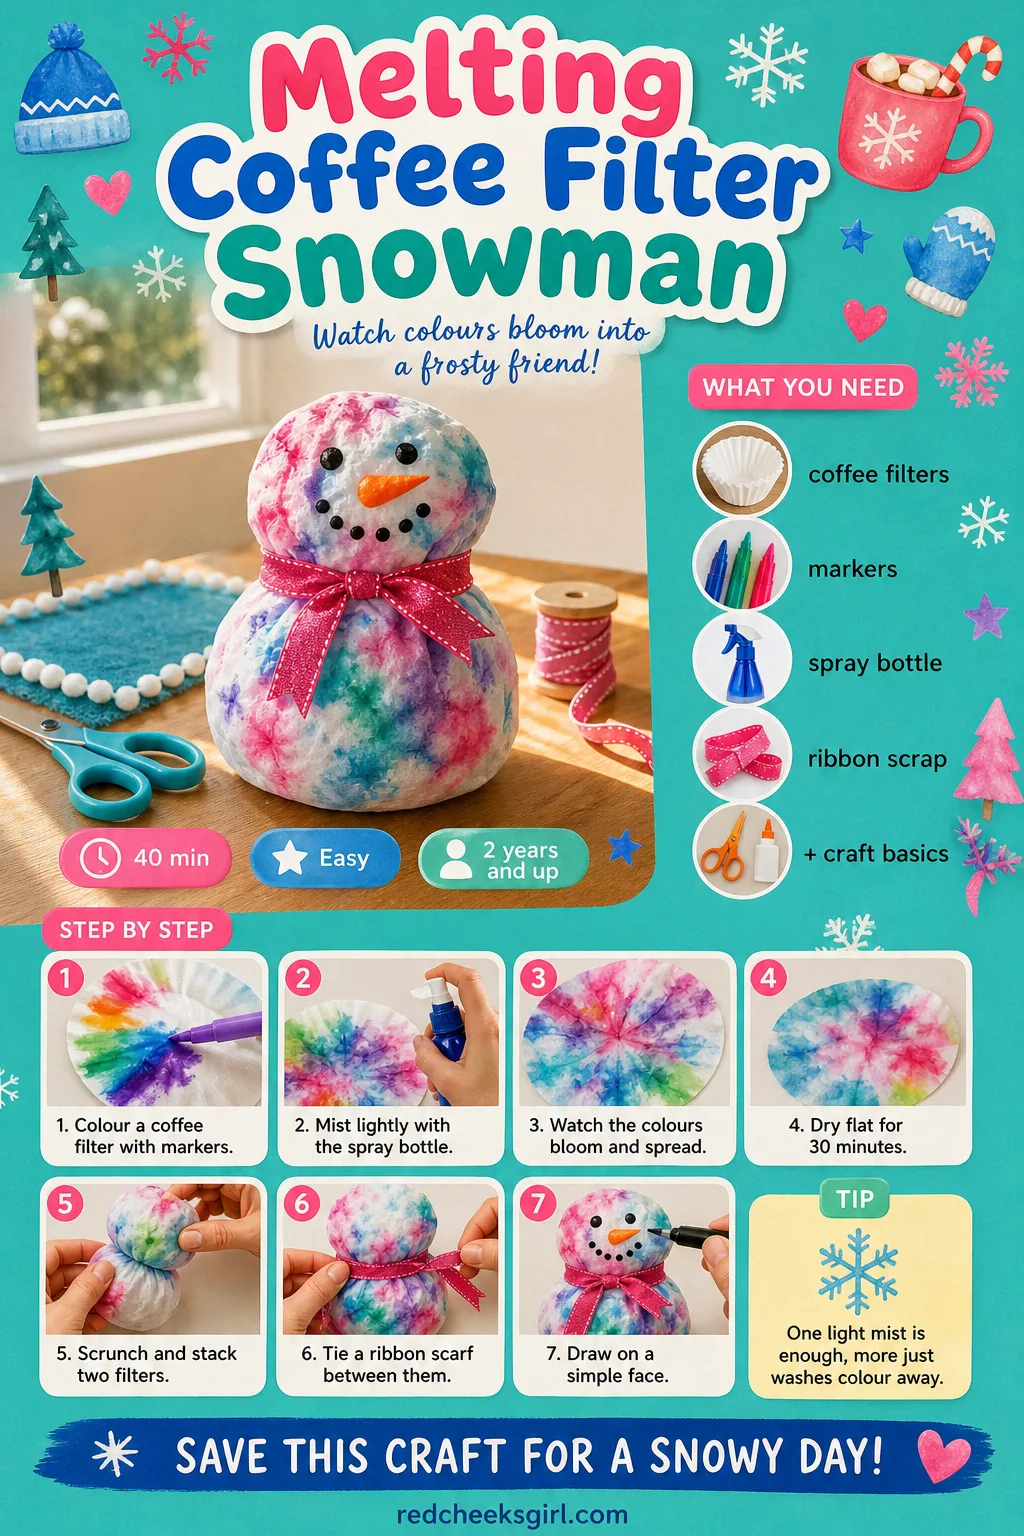
Melting Coffee Filter Snowman
The moment the spray bottle hits the marker lines and the colour blooms outward, she gasps every single time, and that is the one exclamation this craft earns honestly! It is nearly mess-free and dries flat on its own.
What You Need
- 2 round coffee filters per snowman, one larger and one smaller
- Washable markers
- Small spray bottle with water
- Black and orange markers for the face
- Ribbon scrap, 15cm, for a scarf
How to Make It
- Let her colour rings and dots across one flat coffee filter with the markers.
- Lightly mist it with the spray bottle and watch the colours bloom and bleed.
- Lay both flat to dry completely, about 30 minutes.
- Scrunch two dried filters slightly and stack them, smaller on top, for the body and head.
- Tie the ribbon scrap between the two as a scarf.
- Draw a simple face and buttons once everything is in place.
🛍 Shopping guide
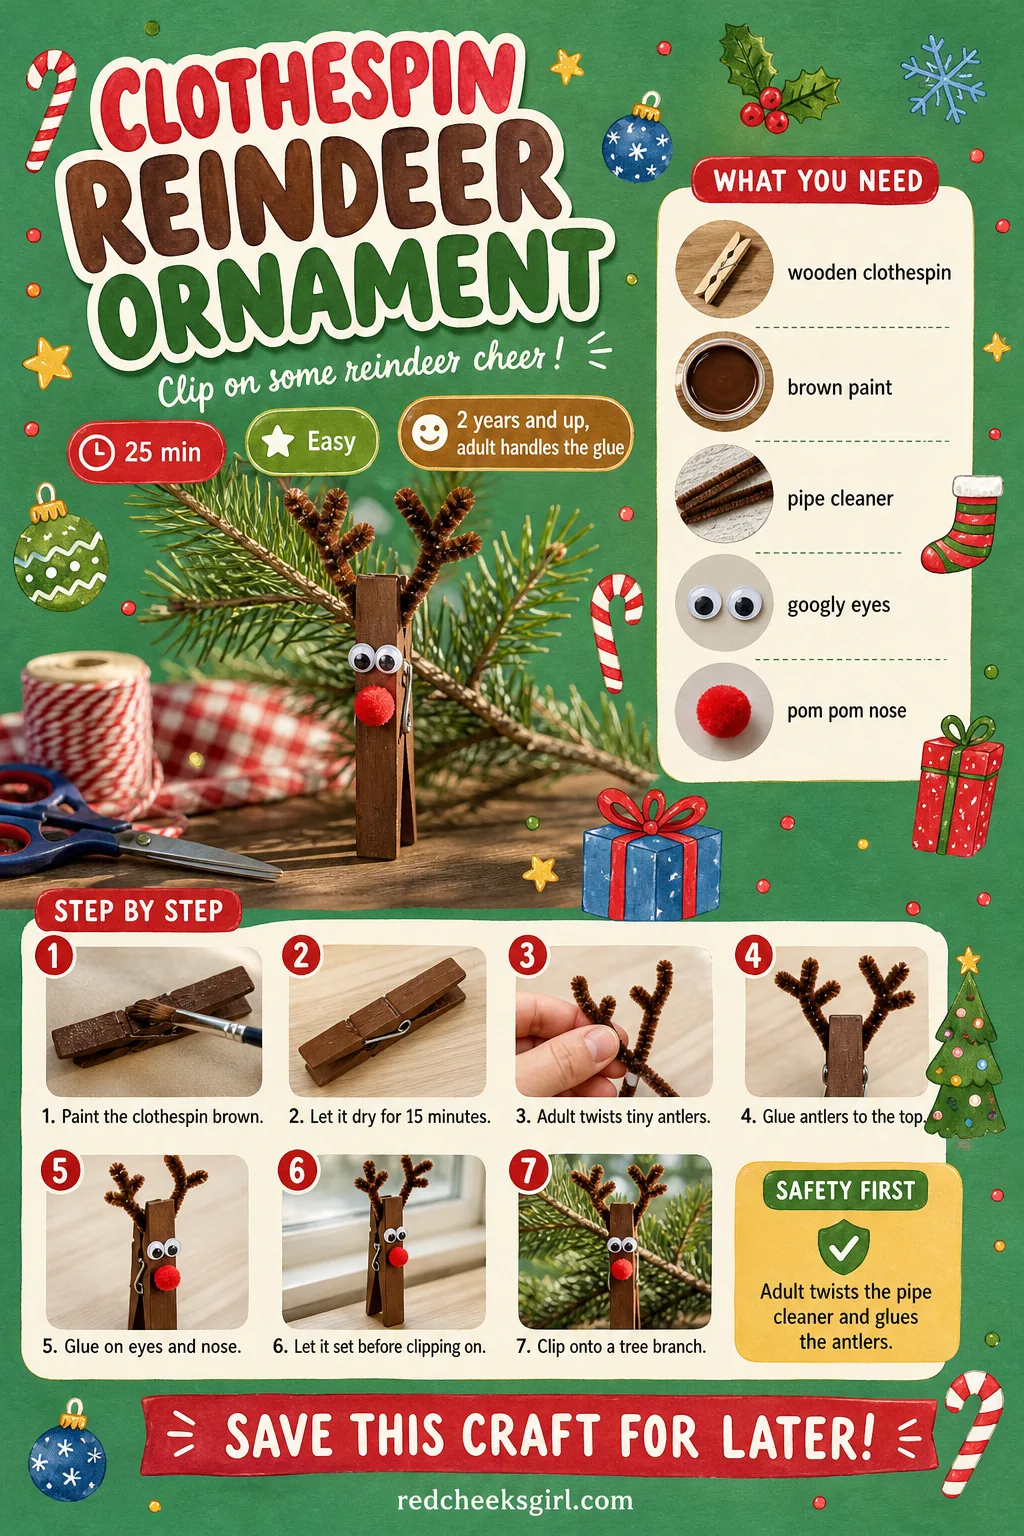
Clothespin Reindeer Ornament
A plain wooden peg becomes a reindeer small enough to clip straight onto a branch or a stocking, no hanging loop required. It is the fastest thing on this whole list once the paint is dry.
What You Need
- 1 wooden clothespin
- Brown paint
- 1 mini pipe cleaner, 5cm, brown
- 2 tiny googly eyes
- 1 red pom pom nose, 10mm
How to Make It
- Paint the clothespin fully brown and leave it to dry for 15 minutes.
- Adult twists the mini pipe cleaner into a small antler shape.
- Adult glues the antlers to the top of the peg.
- Let her glue on the googly eyes and pom pom nose to the face area.
- Clip it straight onto a tree branch once set.
🛍 Shopping guide
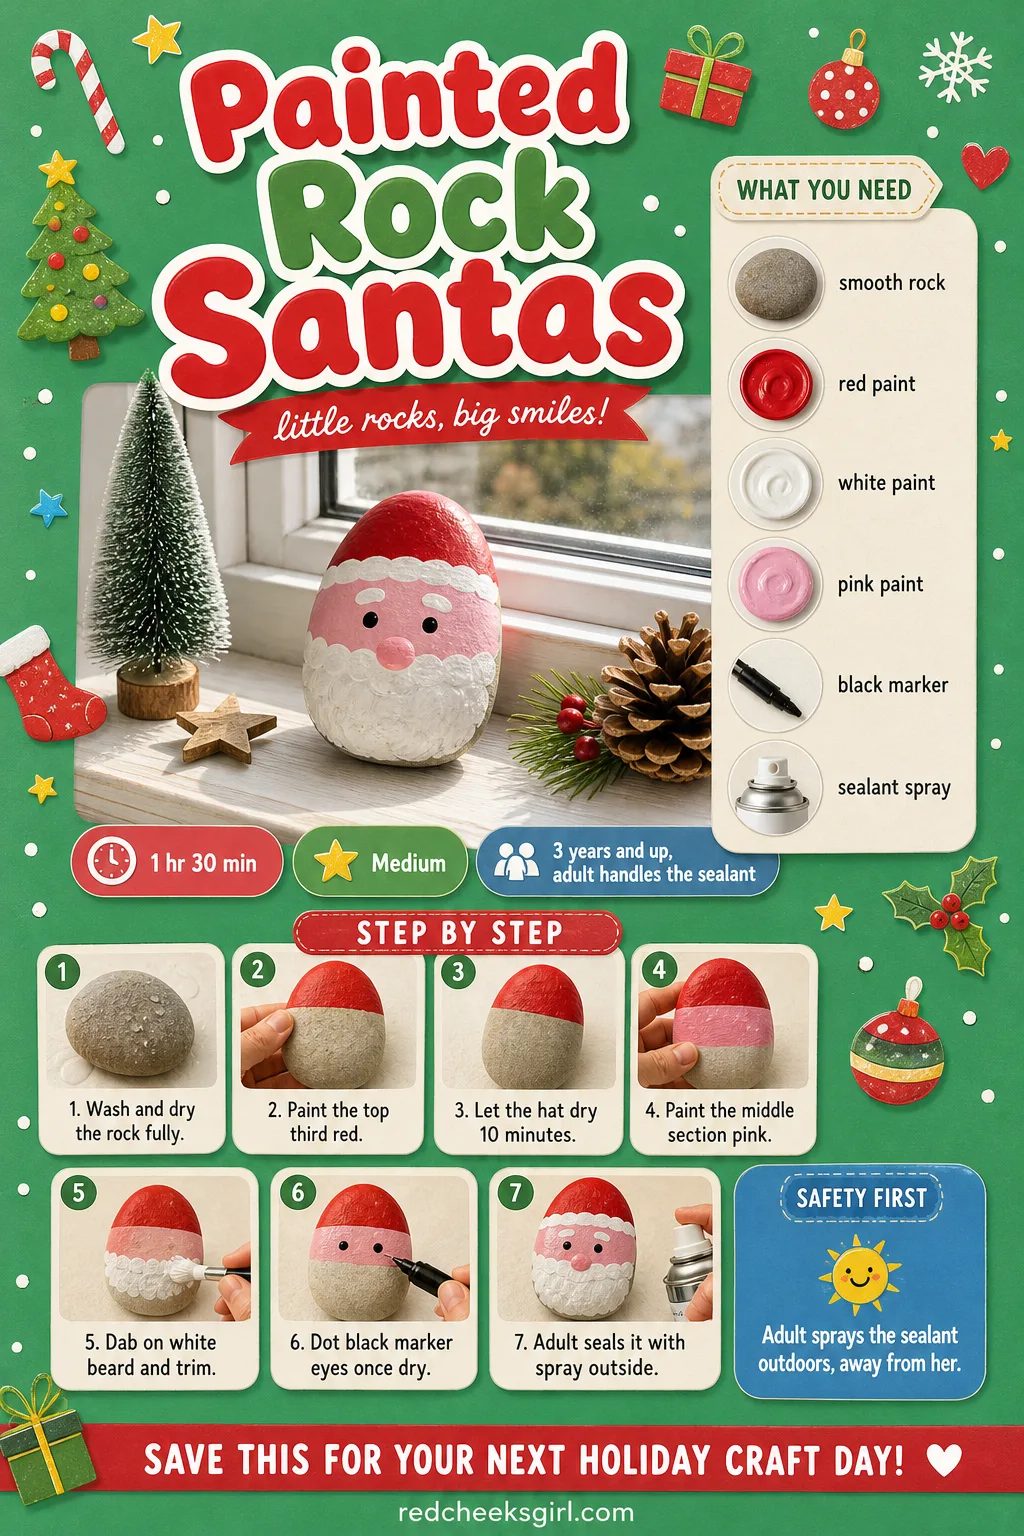
Painted Rock Santas
A smooth rock from the garden, painted into a round little Santa face, makes an oddly satisfying paperweight for a windowsill all winter. If outdoor stones feel like too much hunting, a bag of pebbles from a craft shop does exactly the same job.
What You Need
- 1 smooth flat rock, 5-6cm
- Red, white and pink acrylic paint
- Small paintbrush
- Black marker
- Clear sealant spray
How to Make It
- Wash the rock and let it dry completely before starting.
- Paint the top third red for the hat and leave it to dry 10 minutes.
- Paint the middle section pink for the face.
- Dab white paint along the hat brim and as a beard with a cotton swab.
- Once fully dry, dot two eyes with the black marker.
- Adult takes it outdoors to seal with clear spray and leaves it to cure 1 hour.
🛍 Shopping guide
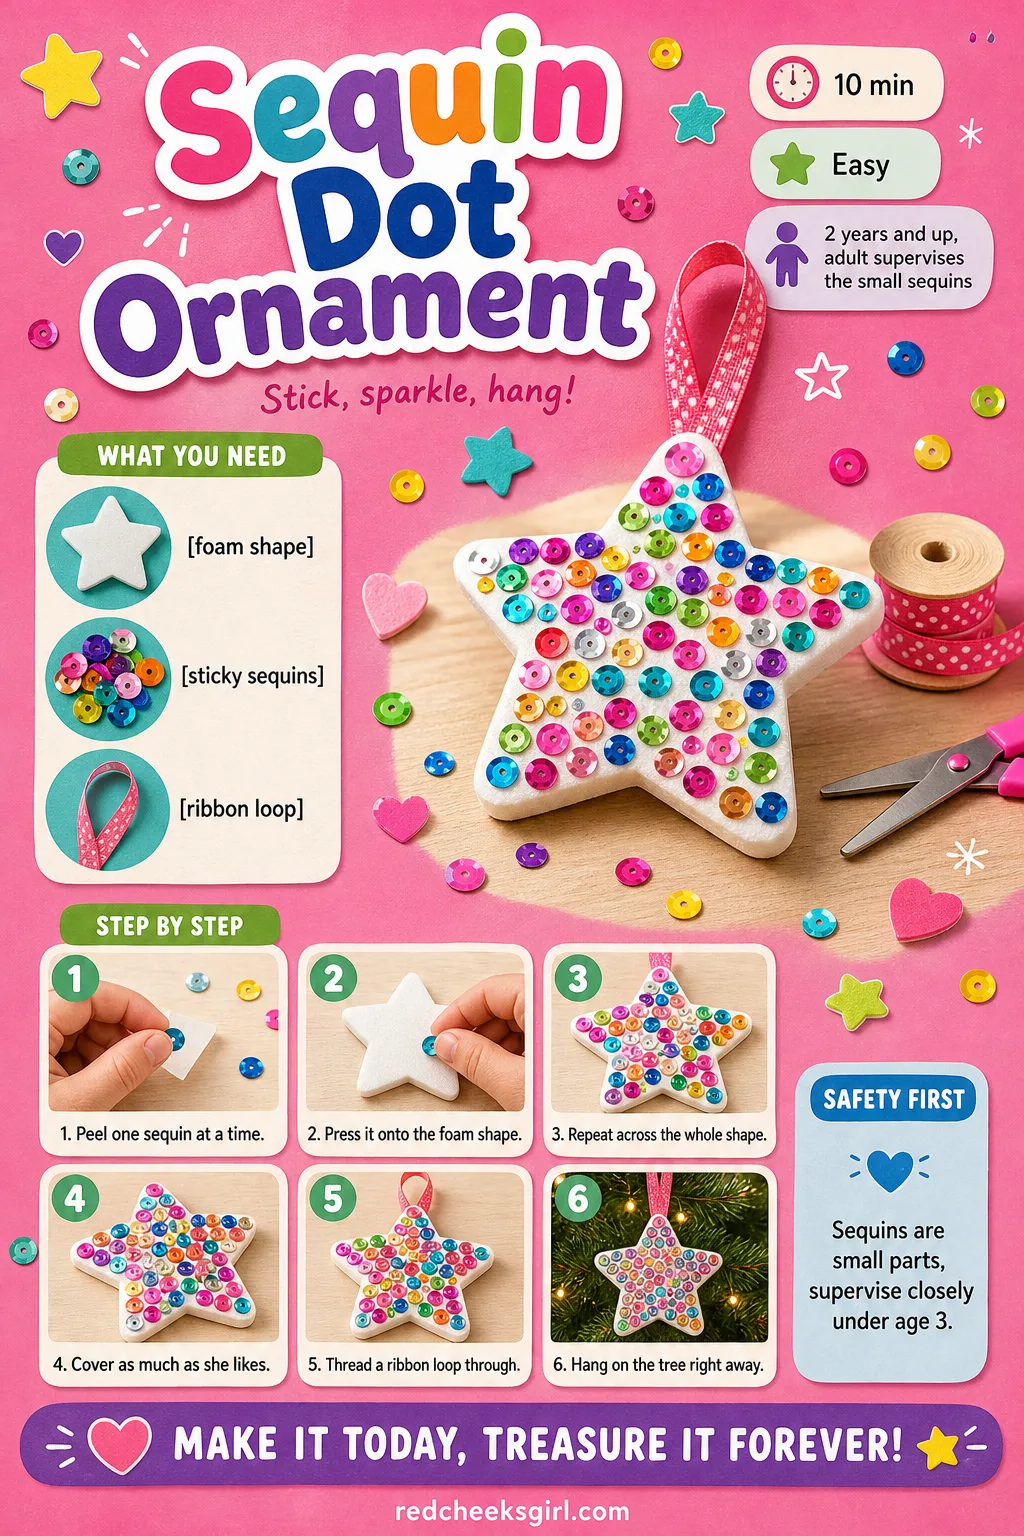
Sequin Dot Ornament
No glue, no paint, no drying time at all: just peel and press. It is the one to reach for on the day you genuinely cannot face a mess, and it is finished before the kettle boils.
What You Need
- 1 foam ornament shape, precut, 8cm
- Self-adhesive sequins, assorted, 1 pack
- Ribbon loop, 15cm
How to Make It
- Peel the backing off one sequin at a time.
- Press each sequin onto the foam shape, working in rows or a loose pattern.
- Keep going until the shape is as covered as she wants it.
- Adult threads a ribbon loop through the top hole.
- Hang it straight on the tree, no waiting required.
🛍 Shopping guide
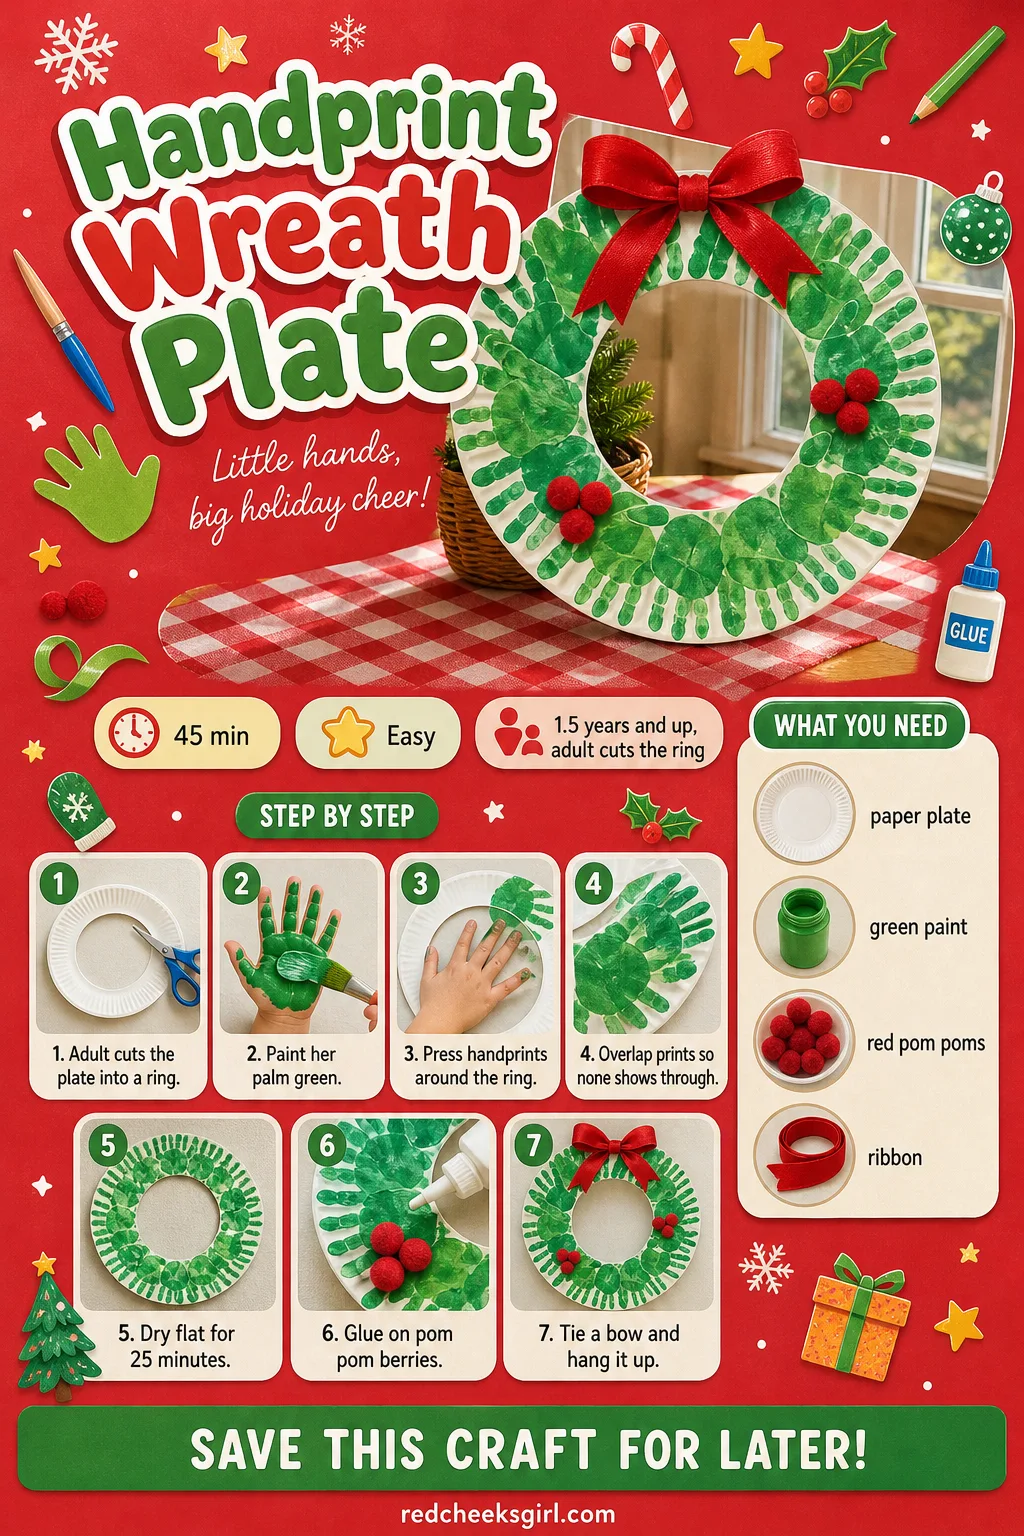
Handprint Wreath Plate
Green handprints fanned around a paper plate ring read as wreath leaves from across the room, and nobody needs to know how it was actually made up close. It hangs on the inside of the front door where guests notice it first.
What You Need
- 1 paper plate, ring precut
- Green paint
- 8 red pom poms
- Ribbon for a bow
How to Make It
- Adult cuts the centre out of the plate, leaving a flat ring.
- Paint her palm green and press handprints pointing outward all the way around the ring.
- Overlap the prints slightly so no bare plate shows through.
- Leave flat to dry for 25 minutes.
- Glue red pom poms in two or three clusters as berries.
- Adult ties a ribbon bow at the top for hanging.
🛍 Shopping guide
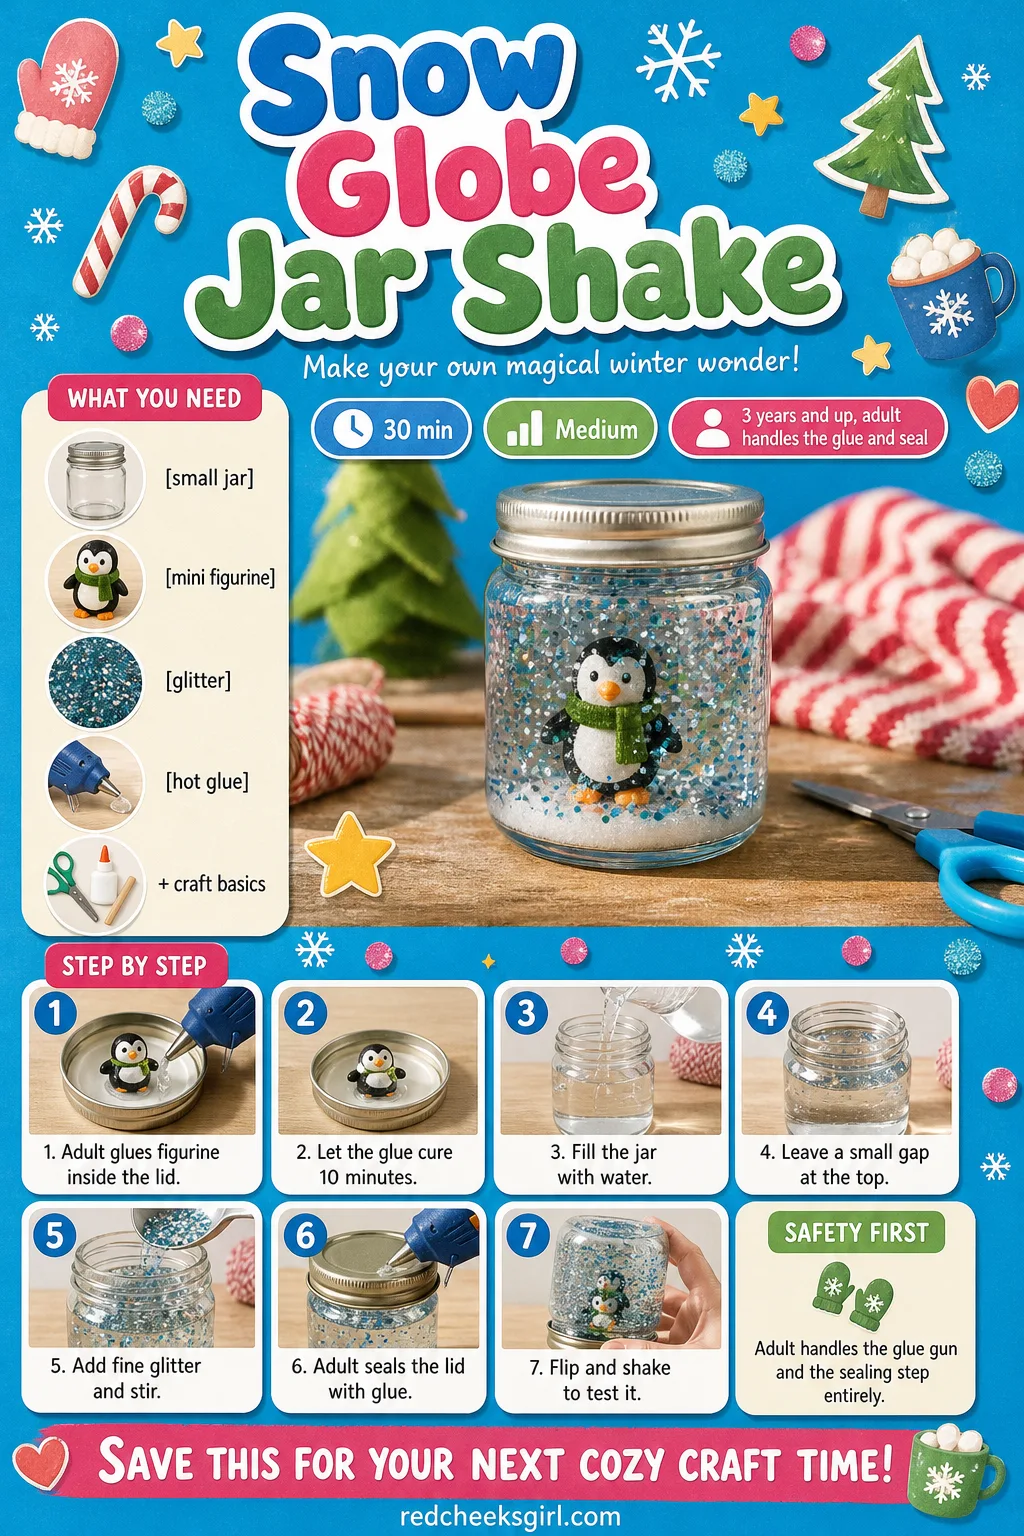
Snow Globe Jar Shake
No glitter dust across the carpet, no spilled water, because once the lid is sealed this one is sealed for good. Keep an old baby food jar aside through the year specifically for this and it costs almost nothing.
What You Need
- 1 small glass or plastic jar, 200ml, with lid
- 1 mini waterproof Christmas figurine
- Distilled water
- 1 tsp fine glitter
- Hot glue gun
How to Make It
- Adult glues the figurine firmly to the inside of the lid and lets it cure 10 minutes.
- Let her fill the jar with water, leaving a little gap at the top.
- Add the fine glitter and give it a stir.
- Adult screws the lid on tightly and runs a bead of glue around the rim to seal it.
- Flip the jar over and shake to test, then set on a shelf.
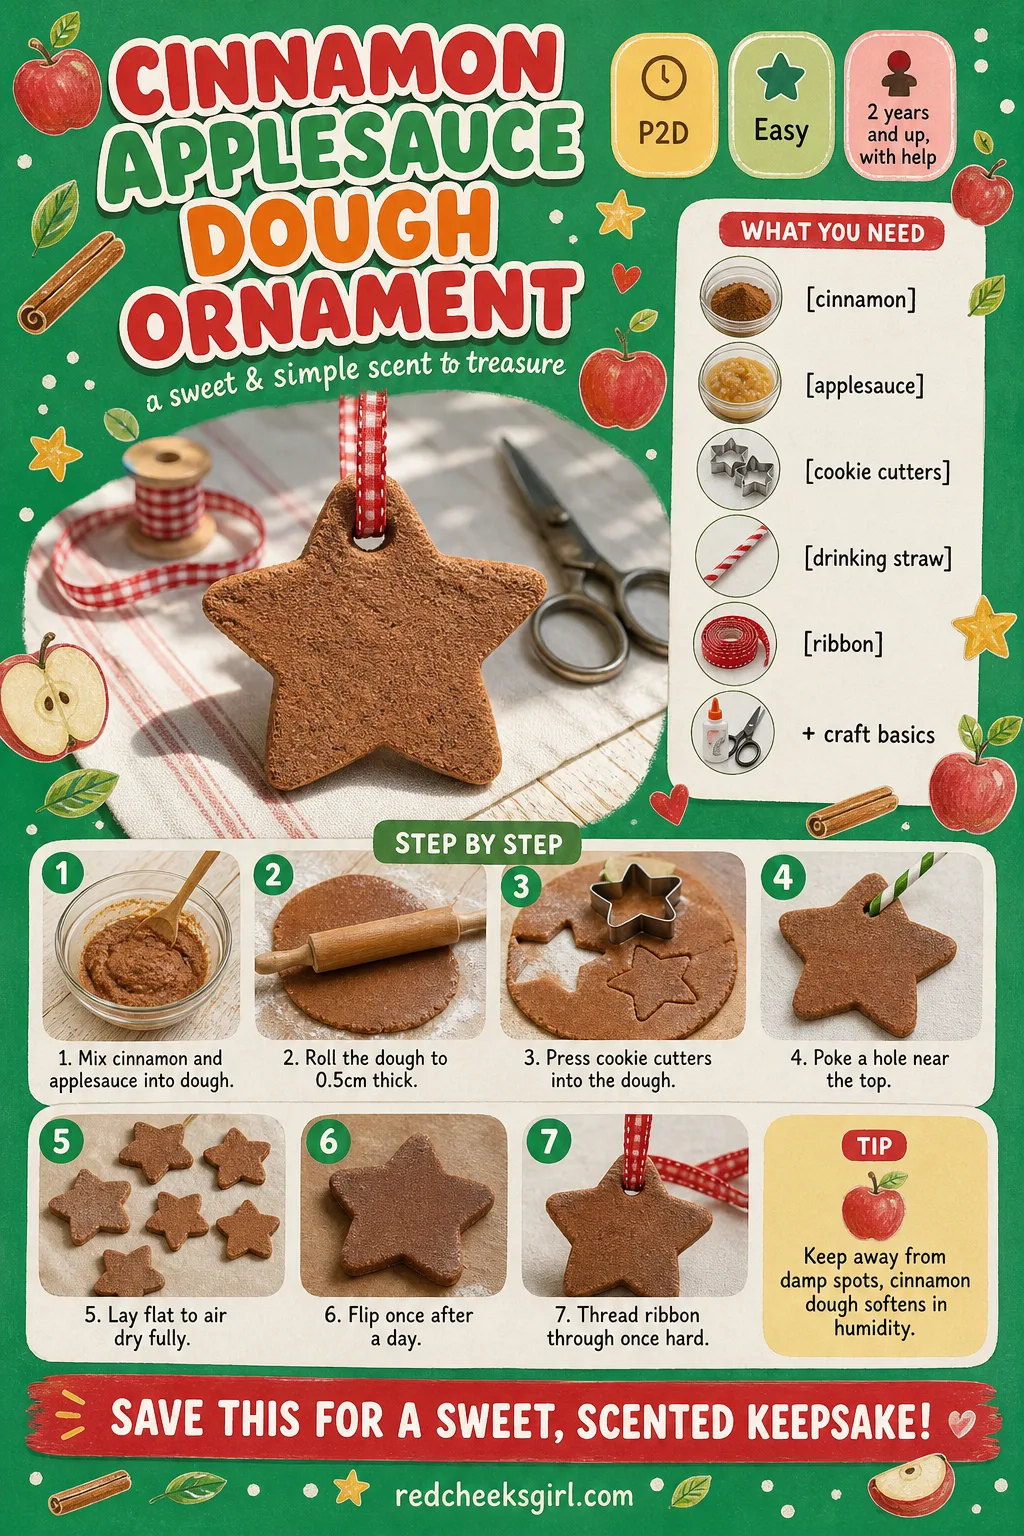
Cinnamon Applesauce Dough Ornament
This one does double duty: it looks like a gingerbread cutout and it smells like one too, for months, with nothing in the oven at all. Hang a few near the front door and the whole hallway smells like Christmas before anyone sees a single decoration.
What You Need
- 1 cup ground cinnamon
- 2/3 cup applesauce
- Cookie cutters, star or tree
- Rolling pin
- Drinking straw
- Ribbon, 20cm
How to Make It
- Adult mixes the cinnamon and applesauce into a firm, pliable dough.
- Roll it out to about 0.5cm thick.
- Let her press cookie cutters into the dough to stamp out shapes.
- Adult pokes a hanging hole near the top of each shape with the straw.
- Lay flat on a tray to air dry for 2 days, flipping once halfway through.
- Once hard, thread ribbon through the hole and hang on the tree.
🛍 Shopping guide
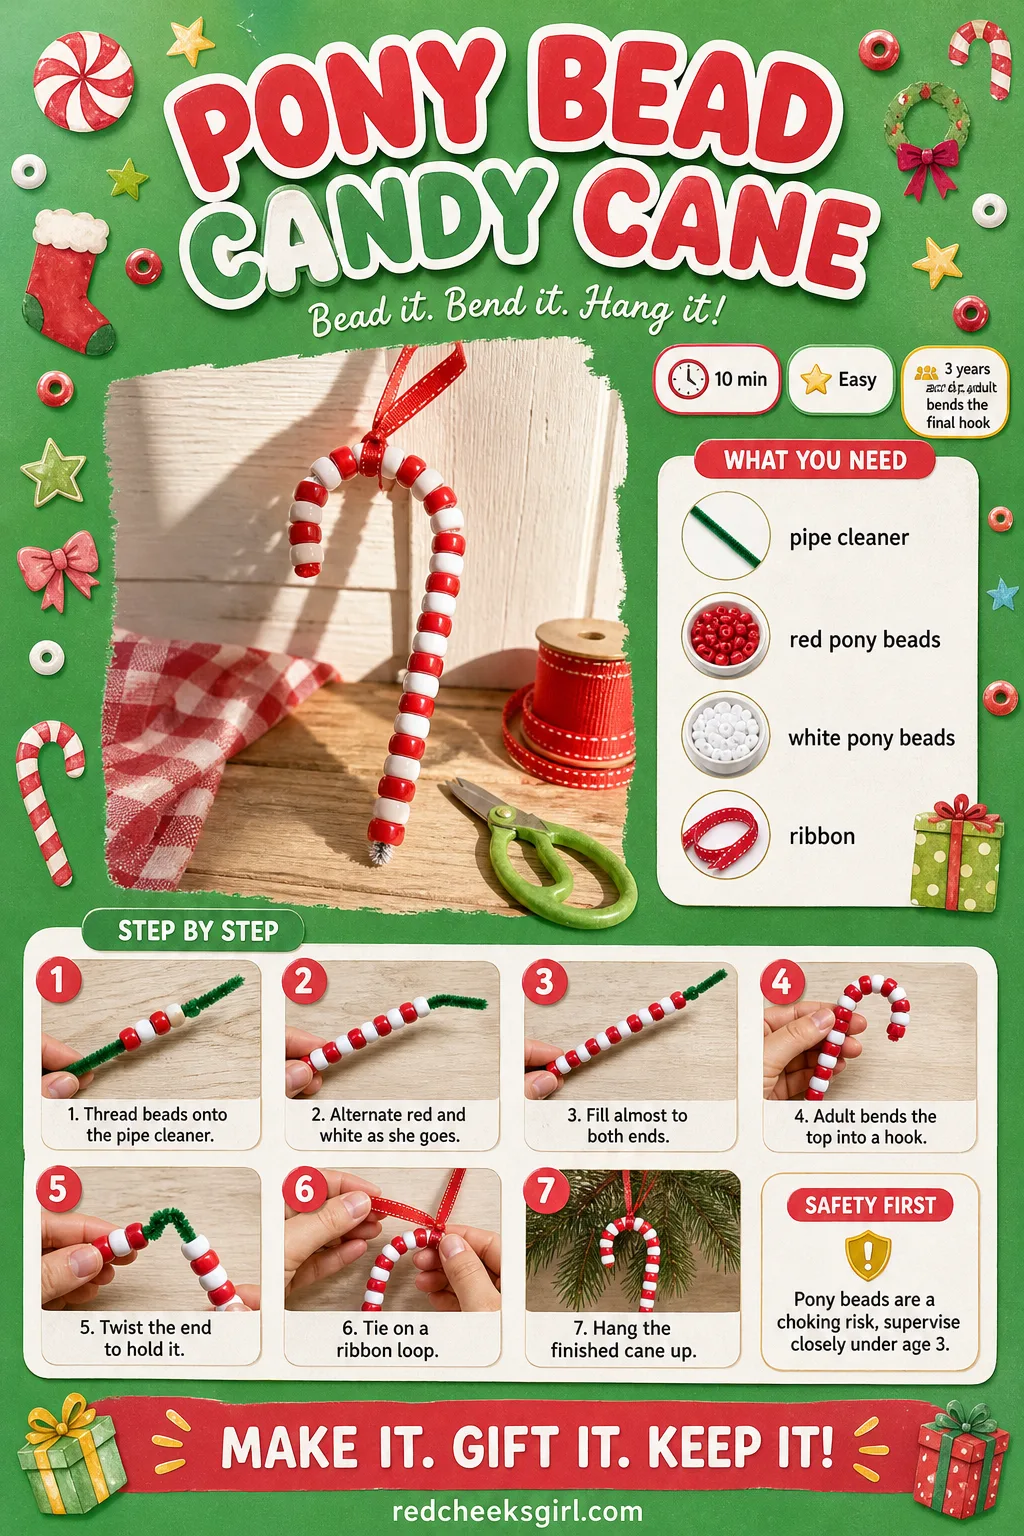
Pony Bead Candy Cane
Threading beads onto a pipe cleaner is proper fine motor work disguised as a treat, and the red and white stripes are genuinely satisfying once it is bent into shape. Small beads mean this one is for the slightly steadier hands in the room, past the stage of tasting everything.
What You Need
- 1 white pipe cleaner, 15cm
- 6 red pony beads
- 6 white pony beads
- Ribbon loop, 10cm
How to Make It
- Let her thread beads onto the pipe cleaner, alternating red and white.
- Keep threading until the beads reach almost to both ends.
- Adult bends the top of the threaded pipe cleaner over into a candy cane hook.
- Twist the short end back around the length to hold the hook in place.
- Tie a small ribbon loop at the straight end and hang on the tree.
🛍 Shopping guide
Frequently Asked Questions
What age can toddlers start doing Christmas crafts?
Most of the crafts here work from about 18 months with an adult doing any cutting, gluing with a gun, or oven step. Anything using small beads, sequins or skewers is better saved for 3 and up, once mouthing objects has mostly stopped.
How do I keep toddler Christmas crafts from turning into a total mess?
Pick one with no drying step, like the sequin ornament or the stained glass star, for the days you genuinely cannot face cleanup. Otherwise an old shirt, a wipeable mat under the table and wipes ready before she starts save most of the stress.
What is the easiest Christmas craft for a 2 year old?
Anything that is a single press, like the handprint tree, the footprint reindeer or the bubble wrap print, works well at this age because the satisfying part happens in seconds rather than through several fiddly steps.
Can toddlers use a hot glue gun?
No, a hot glue gun is always an adult-only step on this list. Where a craft calls for it, like the pinecone reindeer or the snow globe jar, swap in a craft glue stick for any part she touches directly.
How far ahead can we make Christmas ornaments so they are ready in time?
Salt dough and cinnamon dough ornaments need the longest runway, up to 2 days for the cinnamon dough to air dry fully, so start those first. Paint and glue crafts are usually ready to hang within the hour.
What is a quick Christmas craft for a toddler with a short attention span?
The melting coffee filter snowman and the sequin dot ornament both finish in under 15 minutes of actual doing, with the coffee filter giving an instant payoff the moment the water hits the marker lines.

20 plaid Christmas decor ideas for a tartan cabin look, room by room, with tartan throws, buffalo ch

Need diy christmas decorations easy enough to finish tonight? All 29 use two to four materials, take
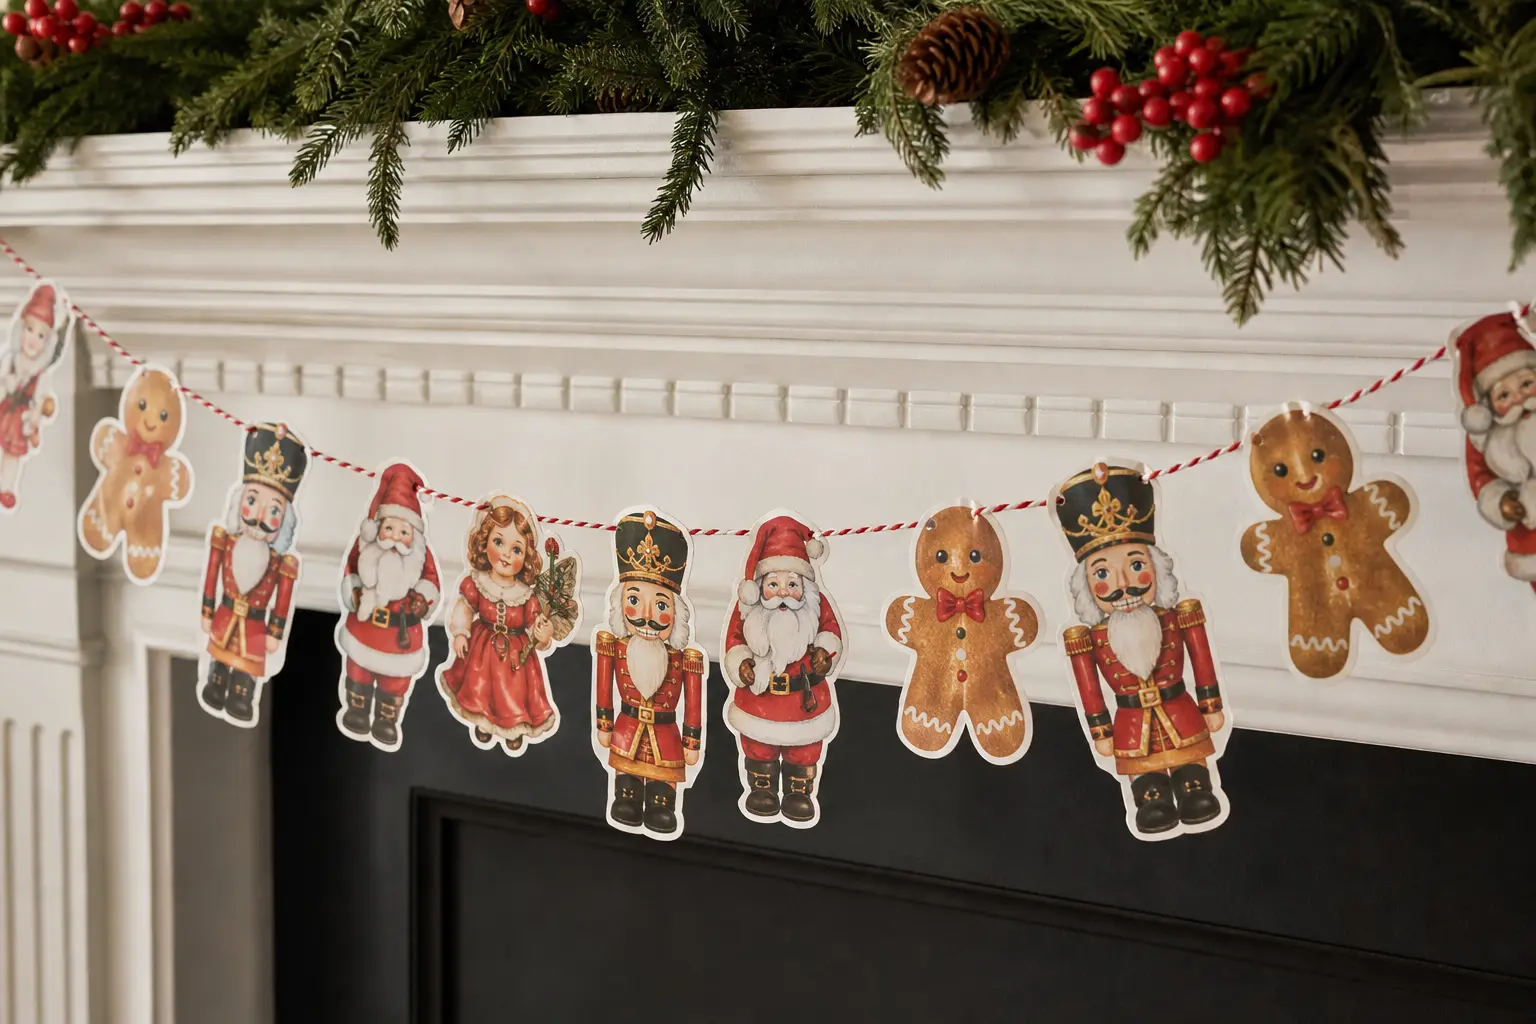
18 printable paper christmas garland designs, chains and cut shapes, each with a free sheet to print
Leave a Reply