

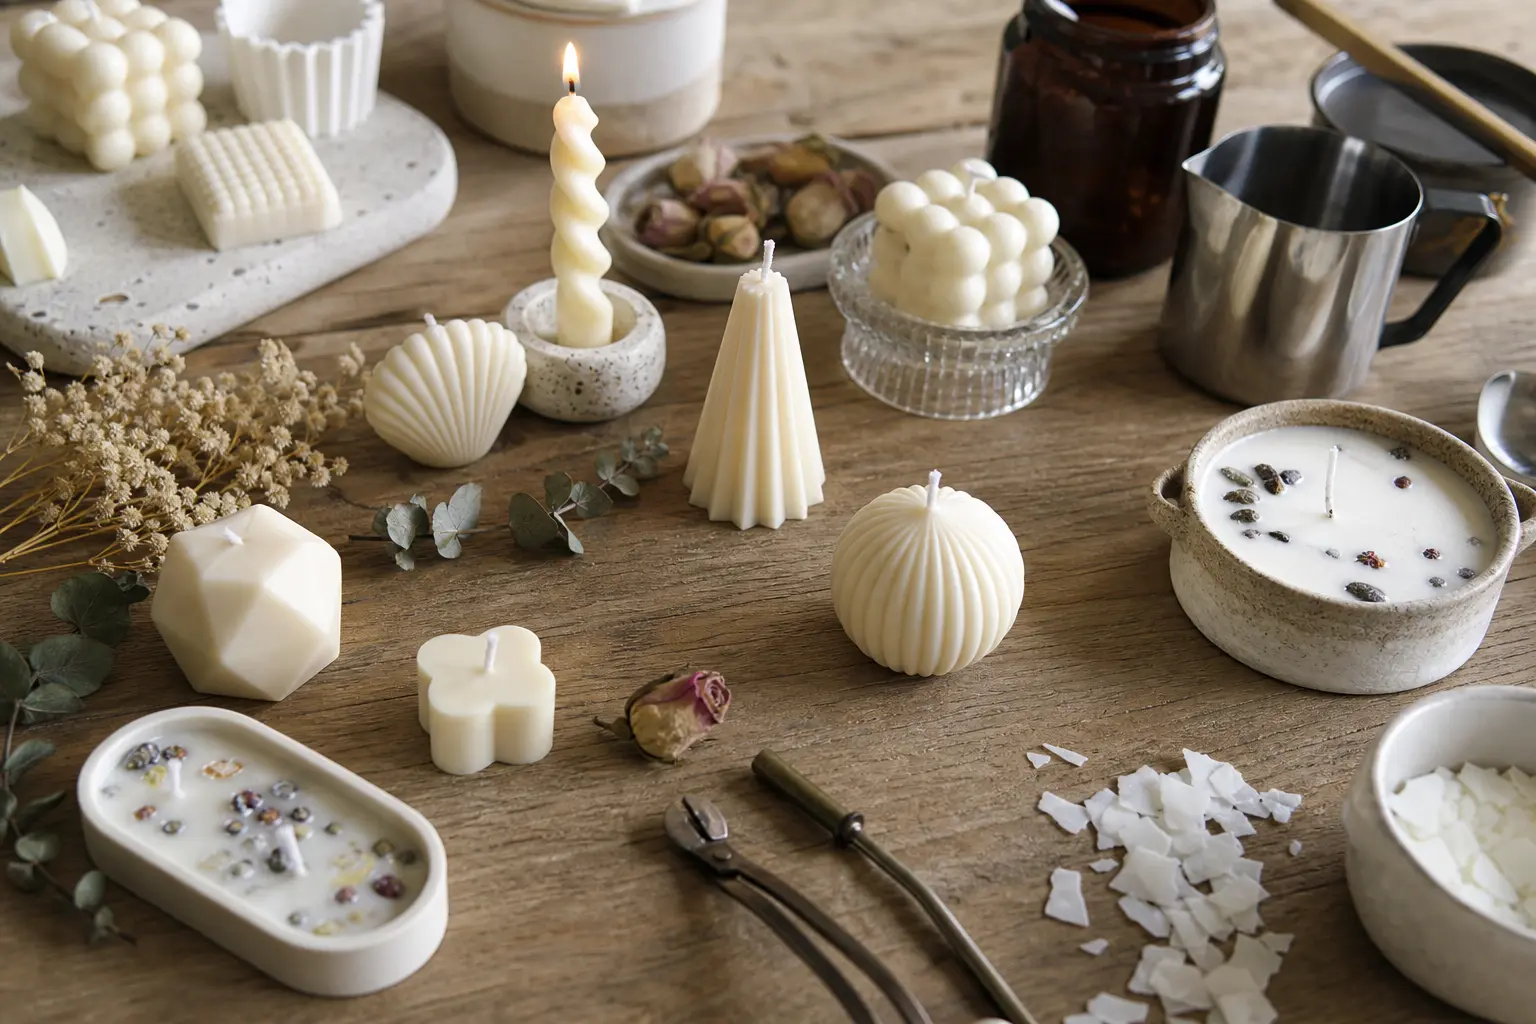
Anyone can melt wax into a jar. What separates a candle that photographs well and one that reads as a school craft project is the formula behind it: the right wax for the shape, a fragrance load measured by weight, a wick sized to the vessel, and a pour temperature that does not leave a crater in the top. None of that is complicated once it is written down properly, which is the whole point of this list.
Every idea below comes with its own numbers: wax type, fragrance oil as a percentage of wax weight, wick size, pour temperature and cure time. Follow them and the candle burns evenly, throws scent properly and looks intentional, whether it is sitting in a thrifted teacup or unmoulded from a silicone bubble mould.
The forms go past the standard container: hand-dipped tapers, fruit shapes, shell candles, ribbed pillars and small vessels rescued from charity shops. For the days scent in the house matters more than the making of it, a simmer pot on the stove gets close for the price of fruit peel and spices, but for everything else, here is the full set.
This post contains affiliate links. If you buy through them, I may earn a small commission at no extra cost to you.
Thrifted and Vintage Vessel Candles
Charity shops and estate sales are full of odd little vessels that cost less than a scented candle at the supermarket: teacups with a hairline crack nobody will see once wax fills it, tins with a dented lid, a single sherry glass with no pair. Wash them properly, dry completely, and check heat tolerance before pouring: thin glass and unglazed ceramic are the two things to leave on the shelf.
The same instinct that makes air-dry clay jewelry look boutique-made applies here: a candle in a strange little vessel reads as chosen, not default, and it is the fastest way to make a candle look like it should cost more than the wax did.
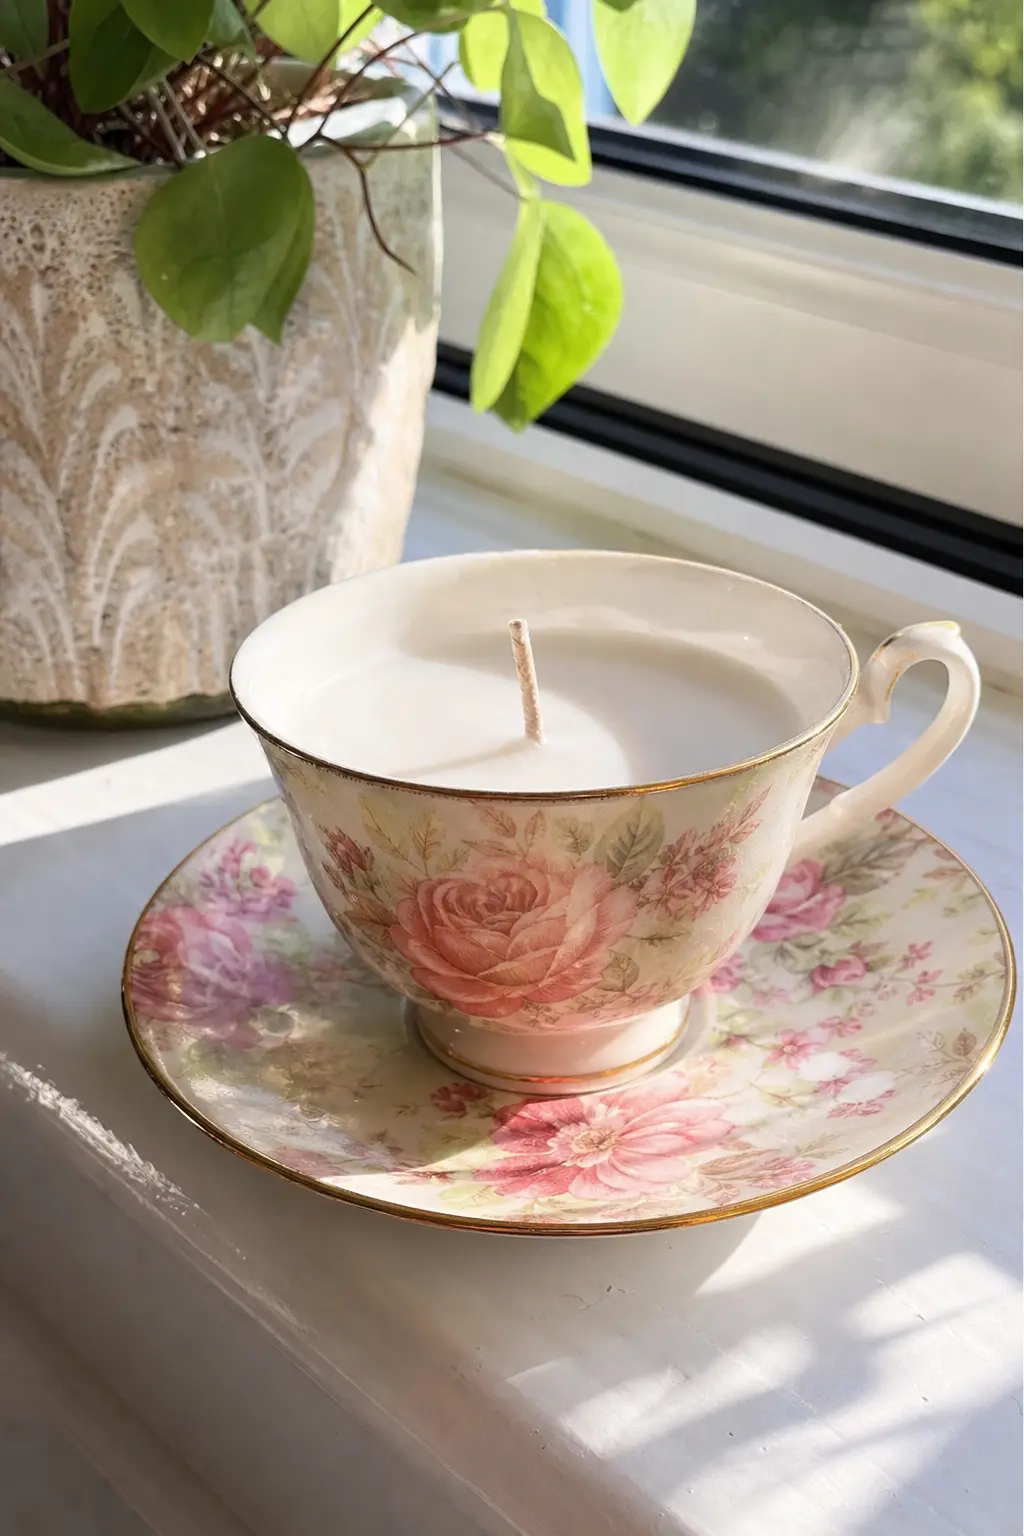
Teacup Candle in a Floral Bone China Cup
A cracked-glaze teacup with a gold rim holds a candle better than most new containers, because the shape was already built to be picked up and admired. Rose and fig fragrance suits the femininity of the china without turning saccharine.
Melt soy wax 464 to 185 degrees, stir in rose and fig fragrance oil at an 8 percent load, cool to a 135 degree pour, set a CD-6 wick centred in the cup, and cure for two weeks before the first burn.
Keep the saucer underneath: it catches drips and doubles as the coaster once the candle is out and the cup goes back to holding tea.
🛍 Shopping guide
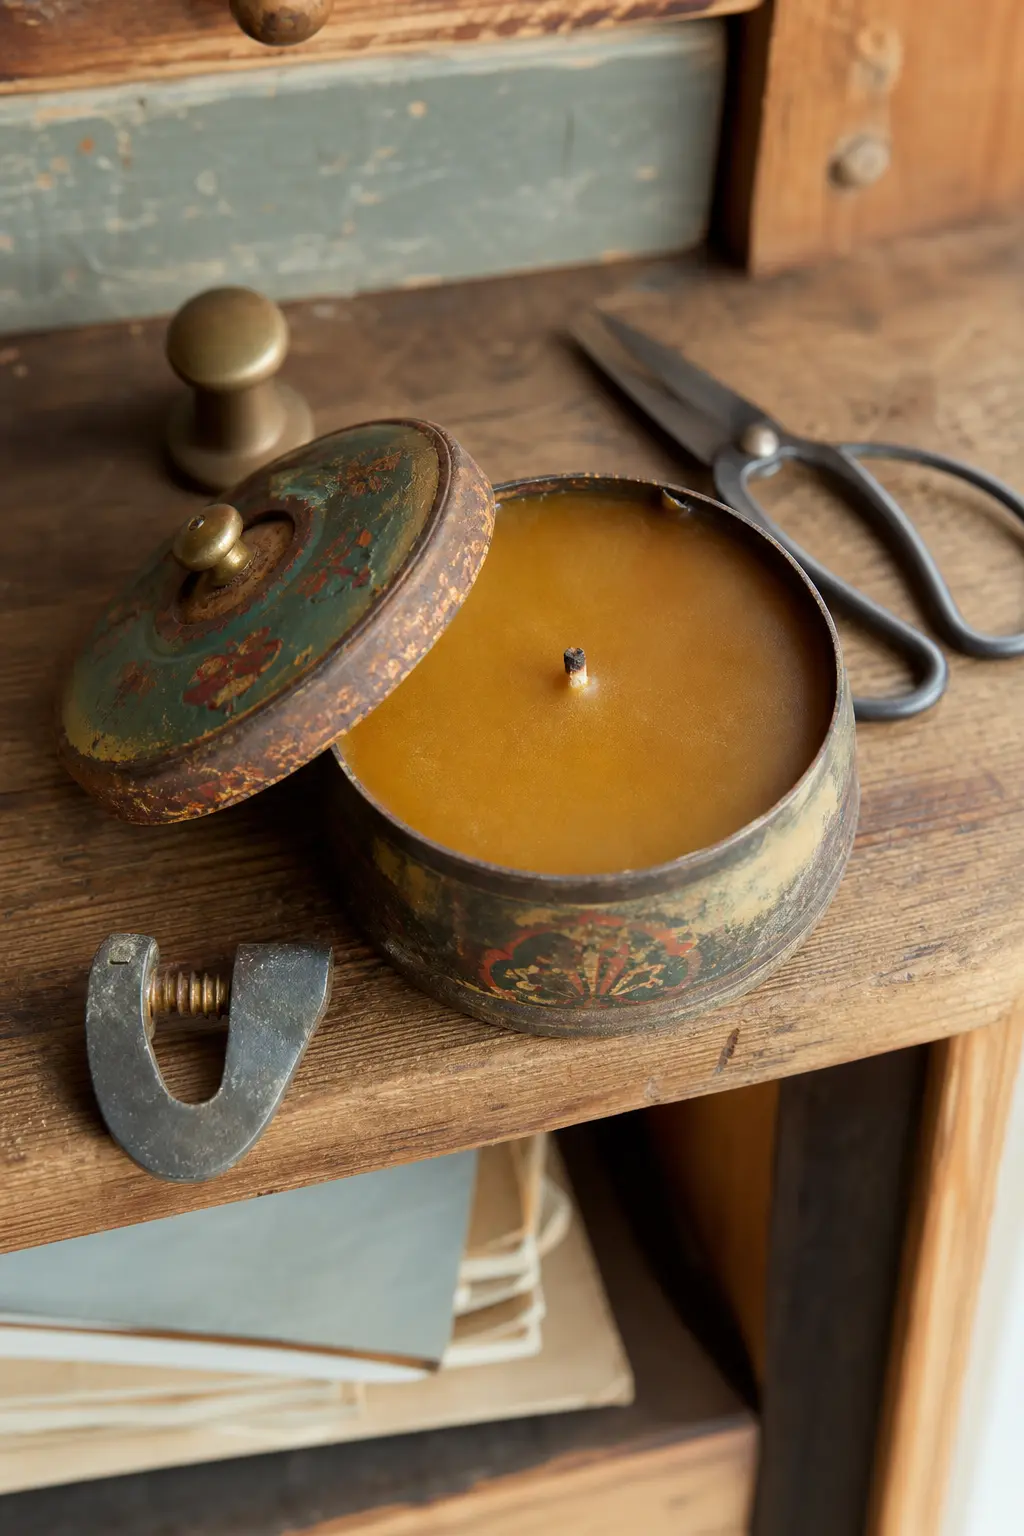
Vintage Tin Candle with a Push-Lid
An old tobacco or spice tin with a bit of rust at the seam makes an amber candle look like it was always meant to live there. Tobacco leaf and clove lean masculine, which balances a tin that already has some patina to it.
Melt a coconut soy blend to 180 degrees, add tobacco leaf and clove fragrance oil at a 9 percent load, pour at 130 degrees, set a CD-8 wick, and cure for twelve days with the lid off.
🛍 Shopping guide
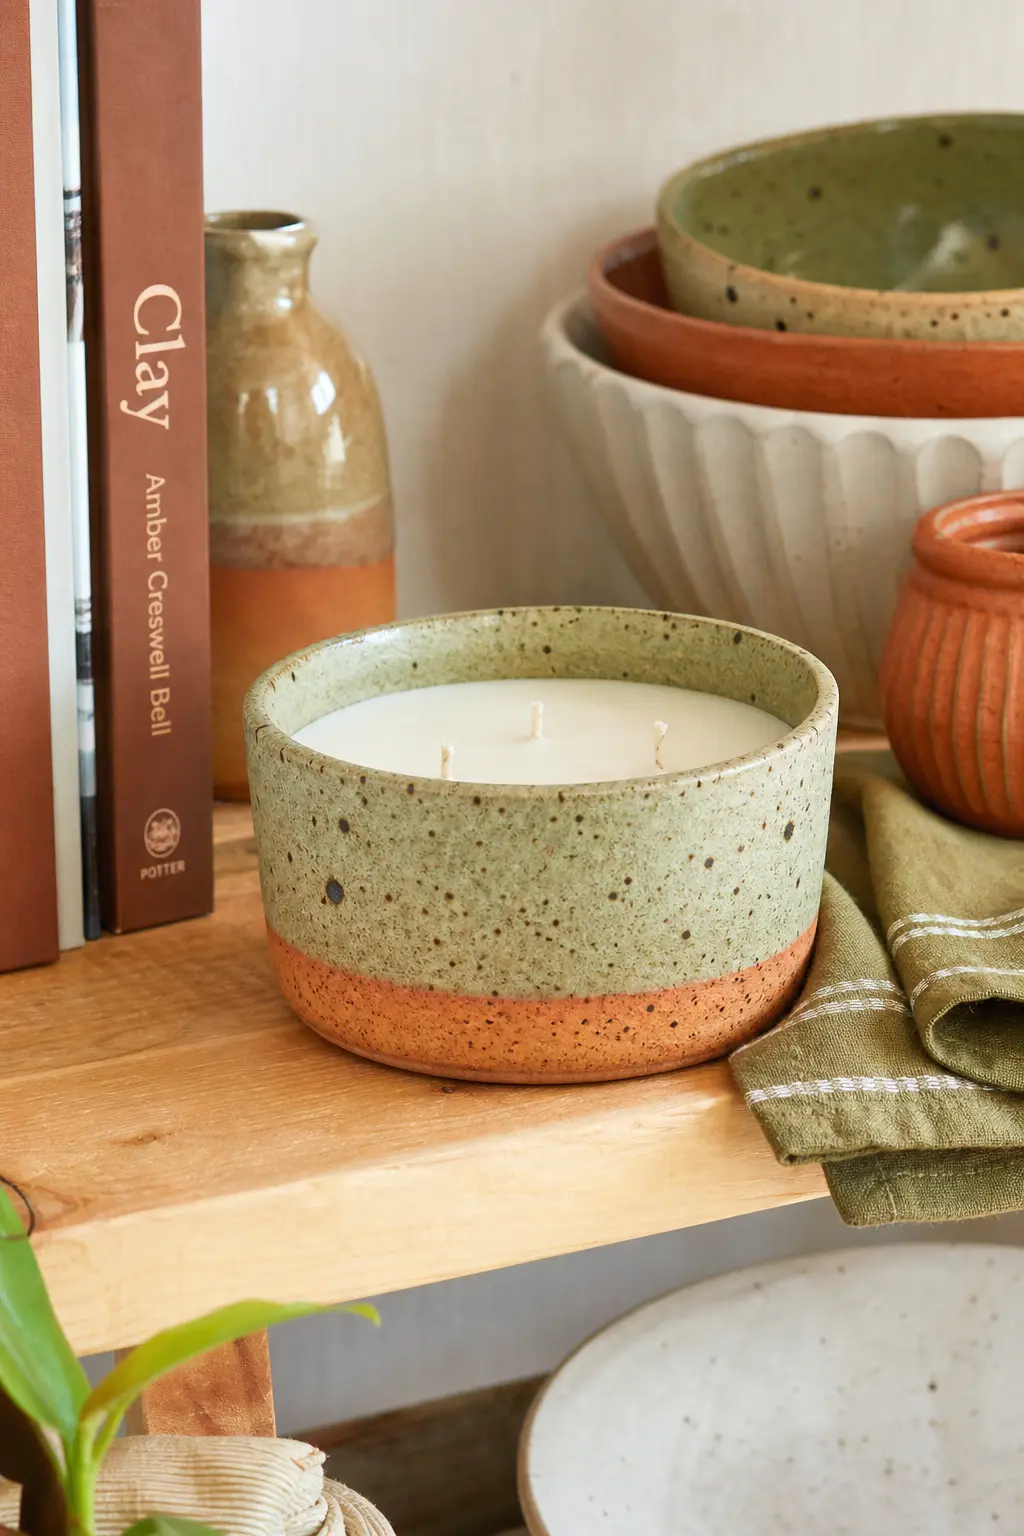
Speckled Stoneware Bowl Candle
A small handmade-looking stoneware bowl, the kind with visible speckling in the glaze, takes a sage and fig fragrance well and reads as pottery studio rather than dollar store.
Melt soy wax 464 to 185 degrees, add fig and sage fragrance oil at an 8 percent load, cool to a 135 degree pour, wick with an ECO-6, and cure for two weeks before burning.
🛍 Shopping guide
Cut-Glass Sherry Glass Candle
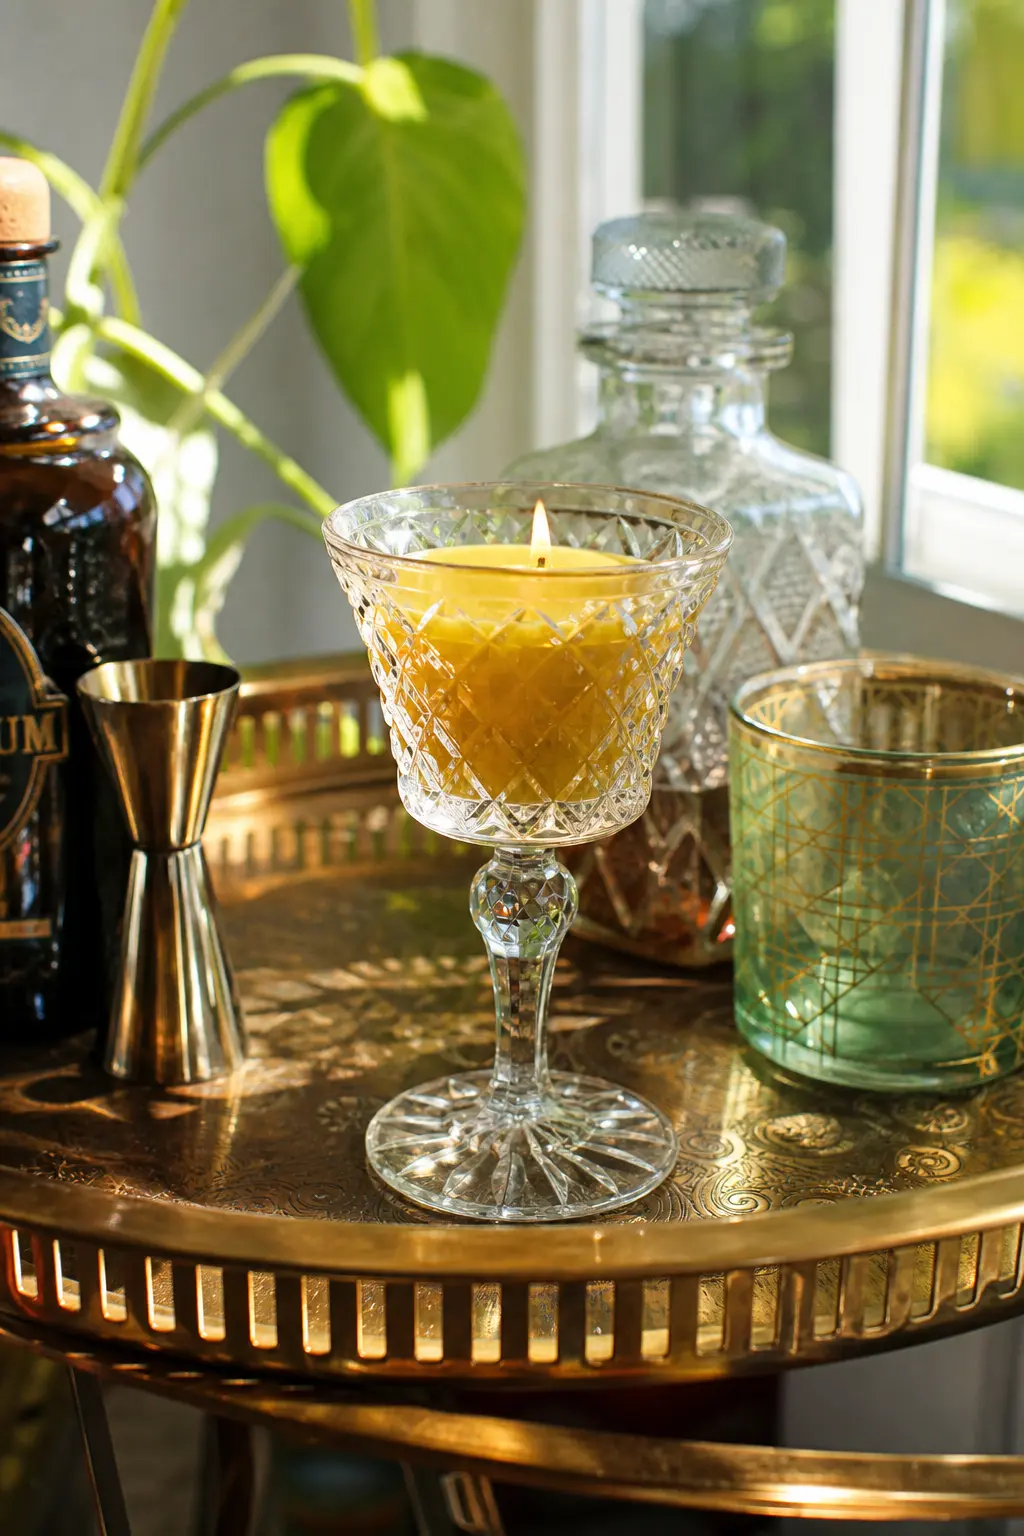
A single cut-glass sherry or cordial glass, orphaned from its set, throws light beautifully once a honey gold candle sits inside it. Amber and clove fragrance suits the warmth of the cut pattern.
Melt a beeswax soy blend to 180 degrees, add amber and clove fragrance oil at a 7 percent load, pour at 140 degrees, set a CD-4 wick, and cure for ten days before lighting.
🛍 Shopping guide
Enamelware Mug Candle
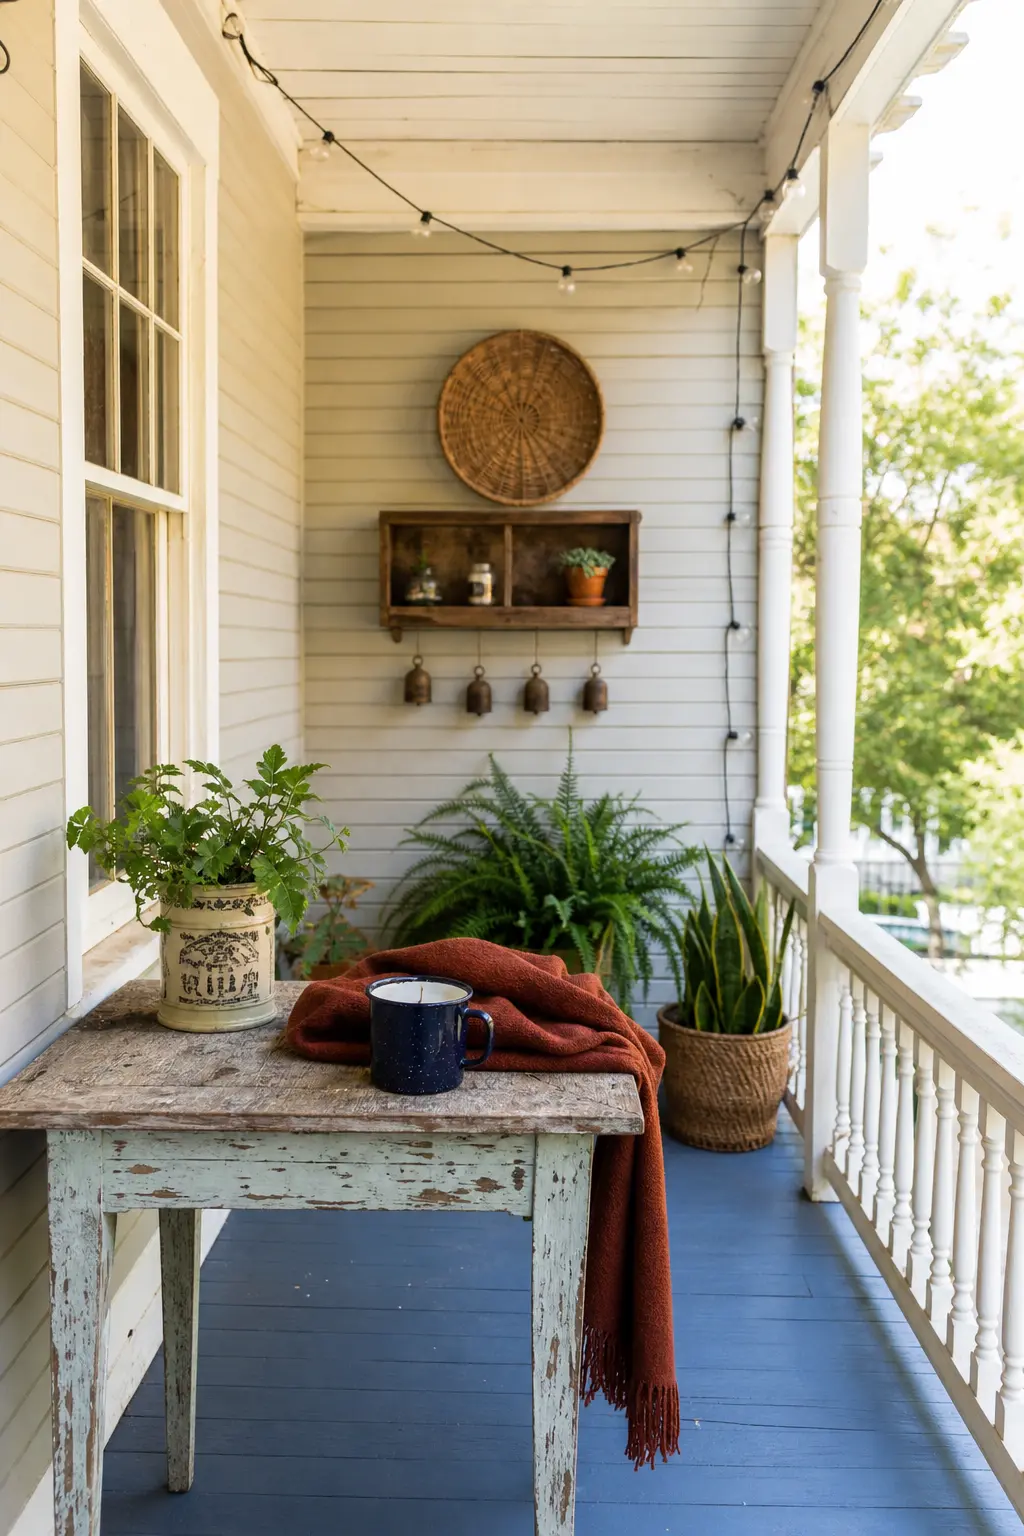
Chipped enamelware, navy with a rust fleck pattern, holds a candle with genuine character rather than trying to hide the chips. Cedar and leather fragrance suits its camping-tin origins.
Melt a soy coconut blend to 180 degrees, add cedar and leather fragrance oil at an 8 percent load, pour at 135 degrees, wick with a CD-10, and cure for two weeks before burning.
🛍 Shopping guide
Milk Glass Compote Candle
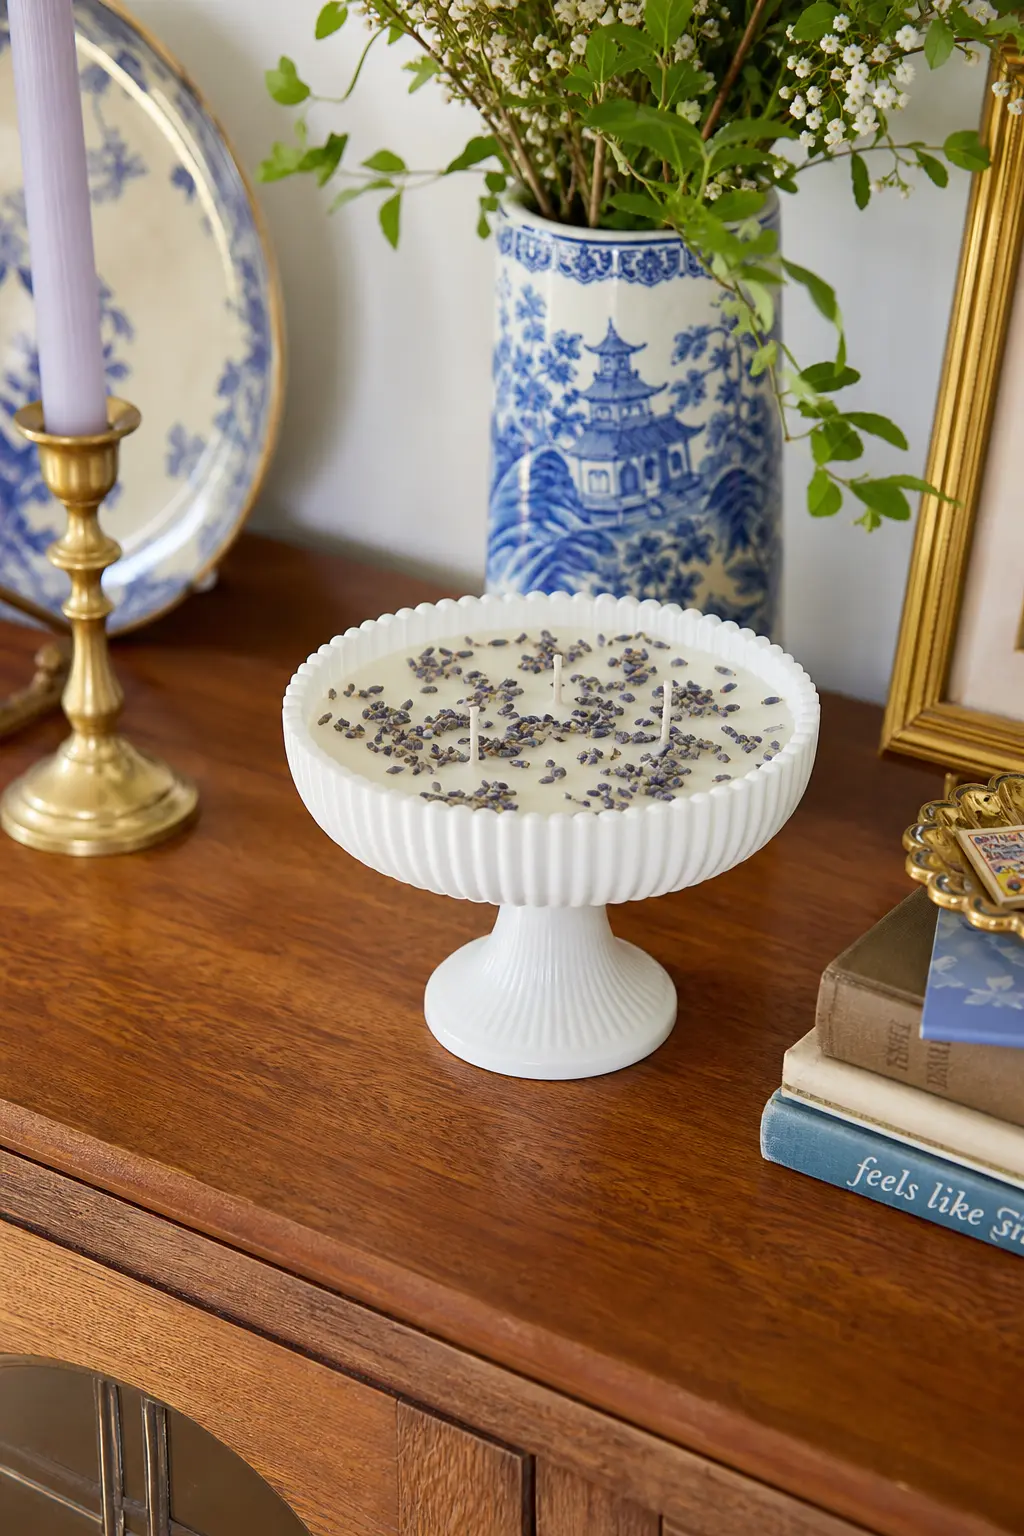
A footed milk glass compote dish, opaque white and slightly ribbed, holds an ivory candle finished with a scattering of dried lavender pressed into the warm surface before it sets.
Melt soy wax 464 to 185 degrees, add lavender and chamomile fragrance oil at an 8 percent load, pour at 135 degrees, wick with a CD-8, and cure for twelve days before lighting.
🛍 Shopping guide
Amber Apothecary Jar Candle
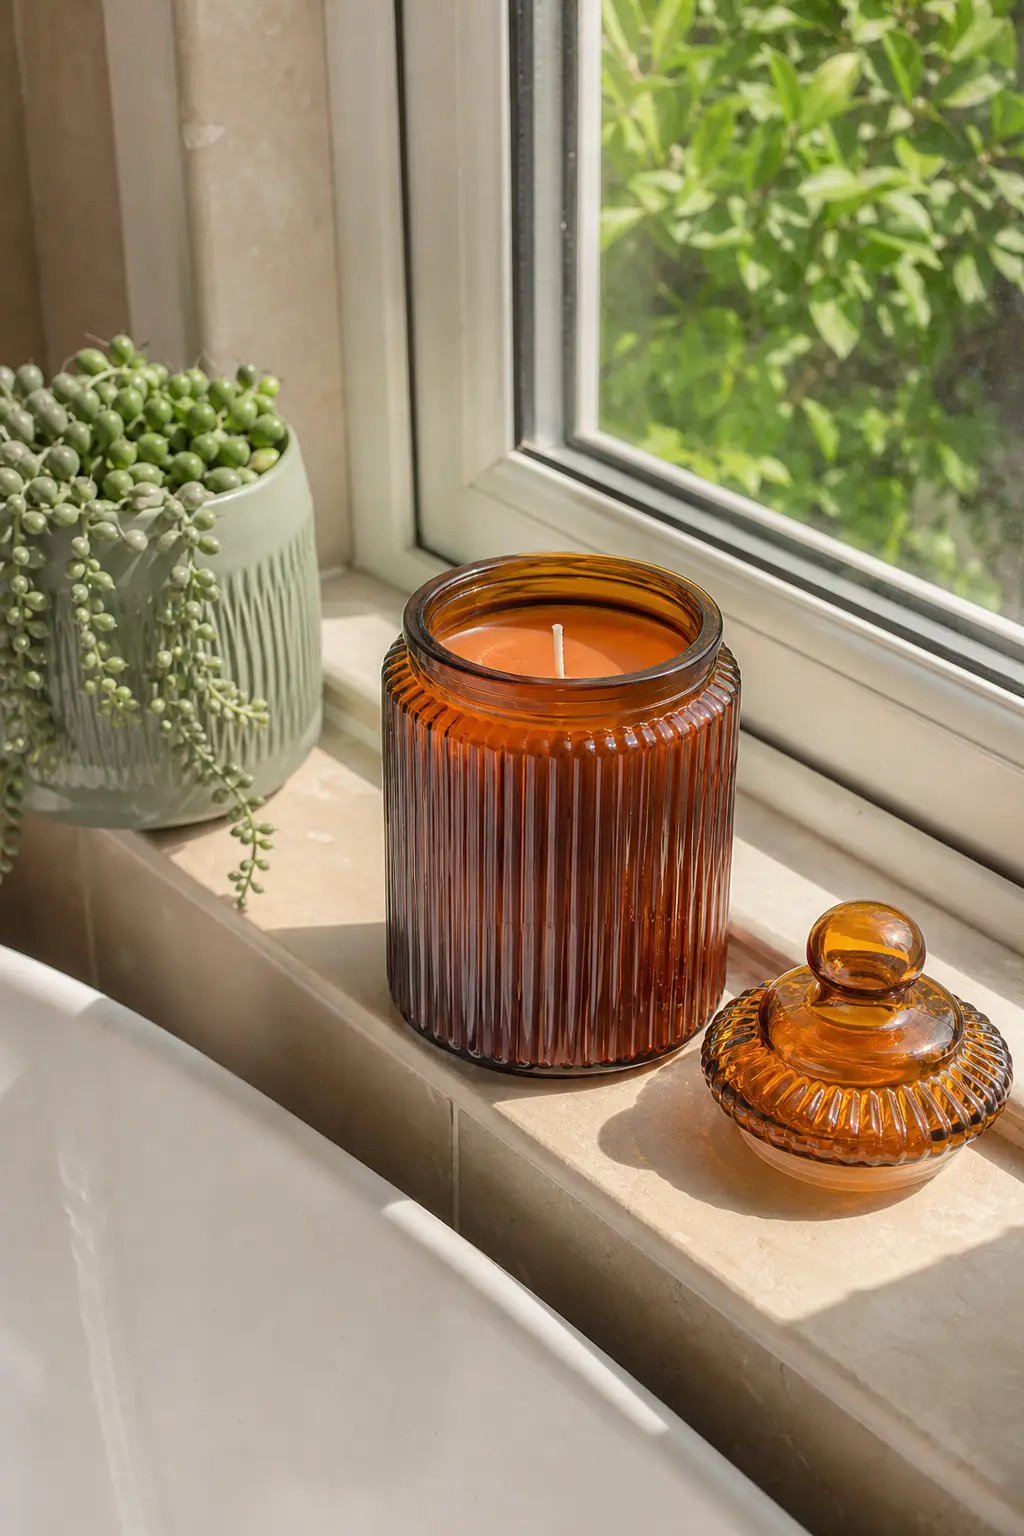
An amber ribbed apothecary jar with its glass stopper set aside during burning suits a sandalwood and bergamot candle that matches the glass tone almost exactly, so the wax nearly disappears into the jar.
Melt a soy paraffin container blend to 185 degrees, add sandalwood and bergamot fragrance oil at a 9 percent load, pour at 140 degrees, wick with a CD-12, and cure for two weeks.
🛍 Shopping guide
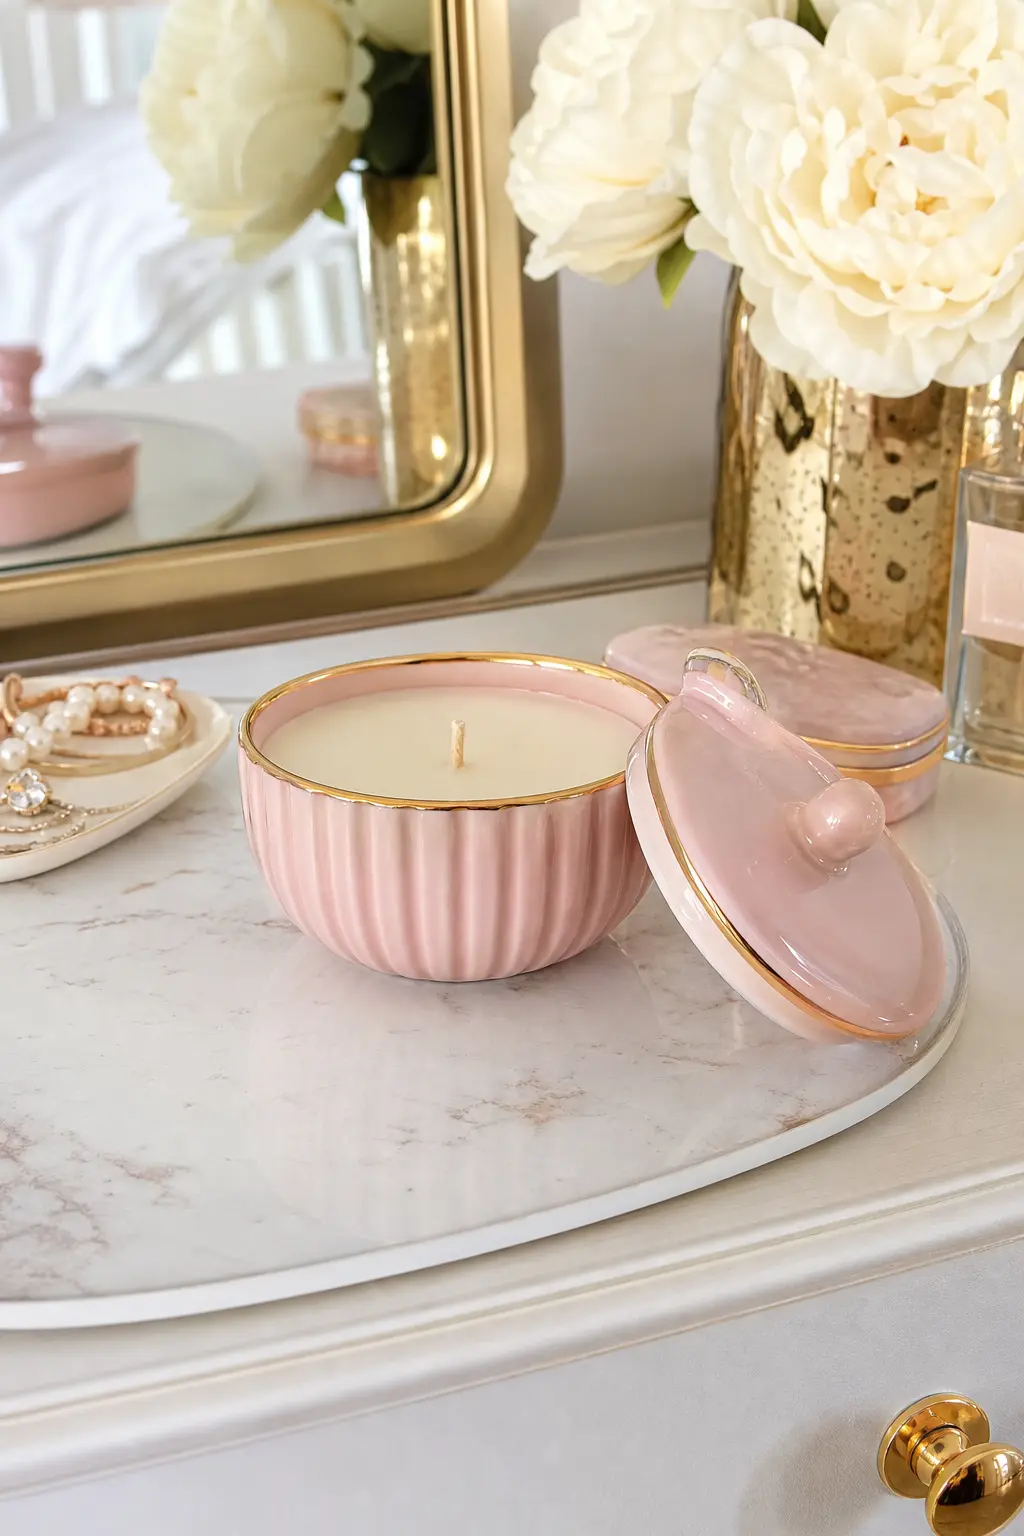
Blush Ceramic Trinket Dish Candle with Lid
A small lidded ceramic trinket dish, blush pink with a thin gold rim, becomes a candle you close between burns, which keeps the scent for months rather than weeks.
Melt soy wax 464 to 185 degrees, add peony and pink pepper fragrance oil at an 8 percent load, pour at 135 degrees, wick with an ECO-4, and cure for ten days before lighting.
🛍 Shopping guide
Bubble and Ribbed Candles From Silicone Moulds
Silicone moulds turn a beginner into someone who makes shaped pillars, provided the wax is right: soft container soy slumps out of a bubble cube, so these need a soy pillar blend or a paraffin blend with added stearin for clean release and sharp detail on the ribs.
Rub a trace of mineral oil into the mould before every pour, wick after the wax has set enough to hold it upright, and expect a small dip to form around the wick as it cures: that is normal and gets topped up with a second small pour, not panicked over.
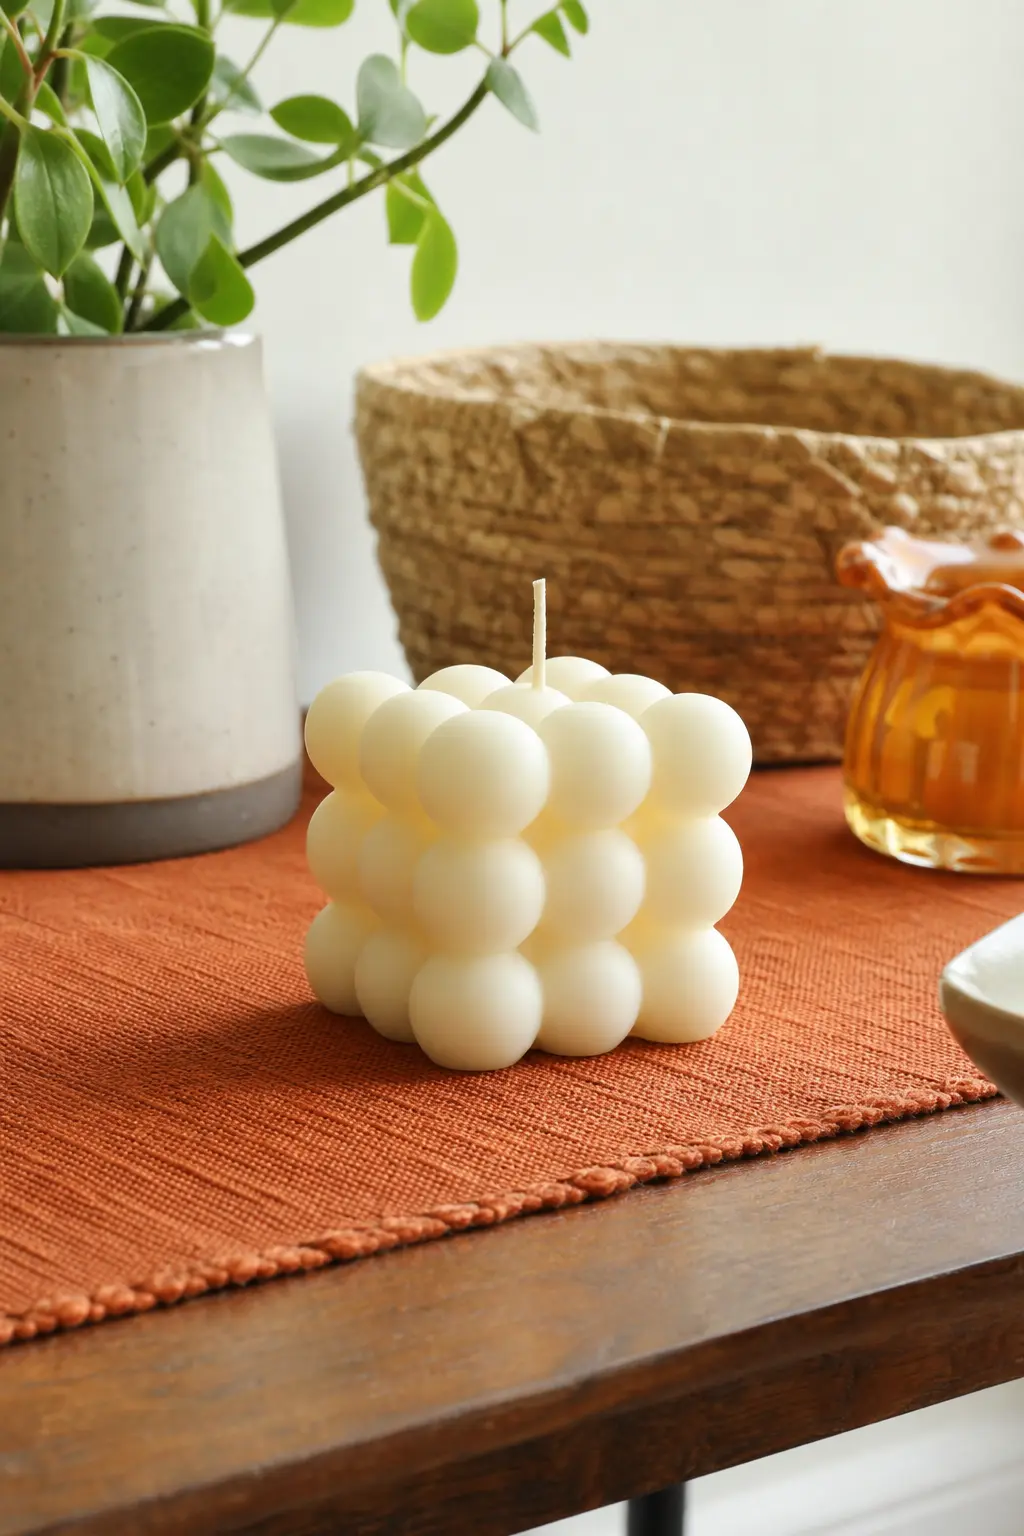
Classic Three-Row Bubble Cube
The bubble cube is the shape that made silicone moulds popular in the first place, and an ivory version reads as expensive minimalism rather than a trend candle.
Melt a soy pillar blend to 195 degrees, add a light fragrance load of 5 percent or leave unscented, pour at 185 degrees into the mould, unmould after a full 24 hours, wick with a medium zinc-core pillar wick, and cure for five days.
🛍 Shopping guide
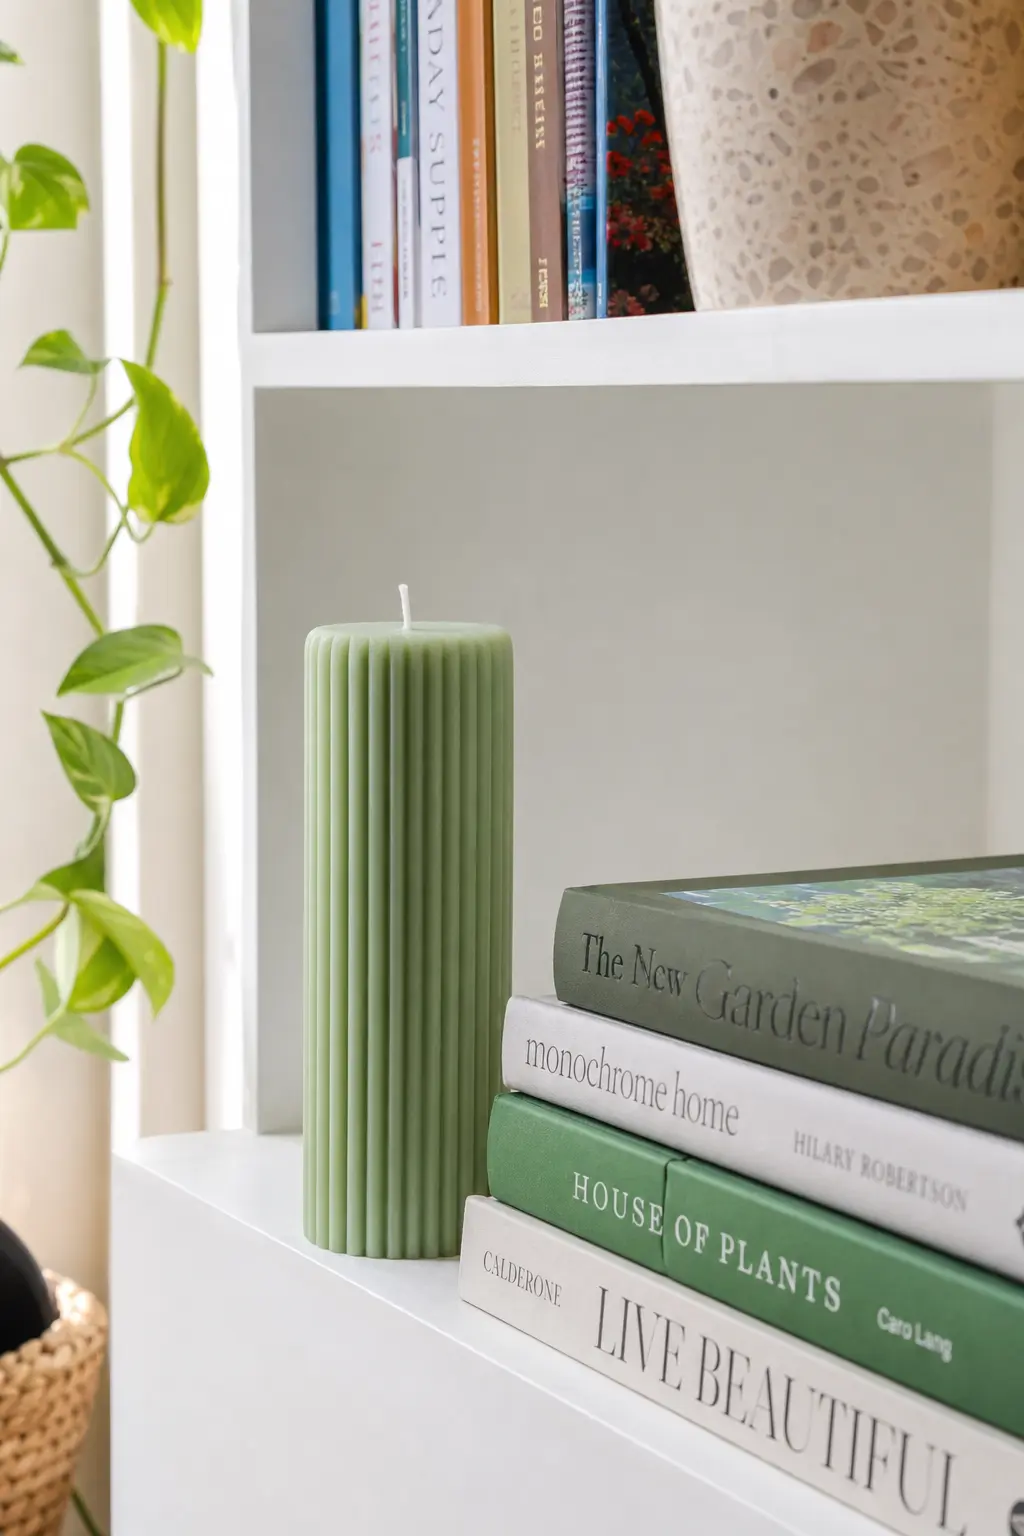
Fluted Ribbed Cylinder Pillar
A tall fluted cylinder in sage green looks architectural next to a stack of books, and eucalyptus fragrance keeps it from feeling too formal.
Melt a paraffin soy pillar blend to 190 degrees, add eucalyptus fragrance oil at a 6 percent load, pour at 175 degrees, unmould after 24 hours, wick with a small zinc-core, and cure for four days.
🛍 Shopping guide
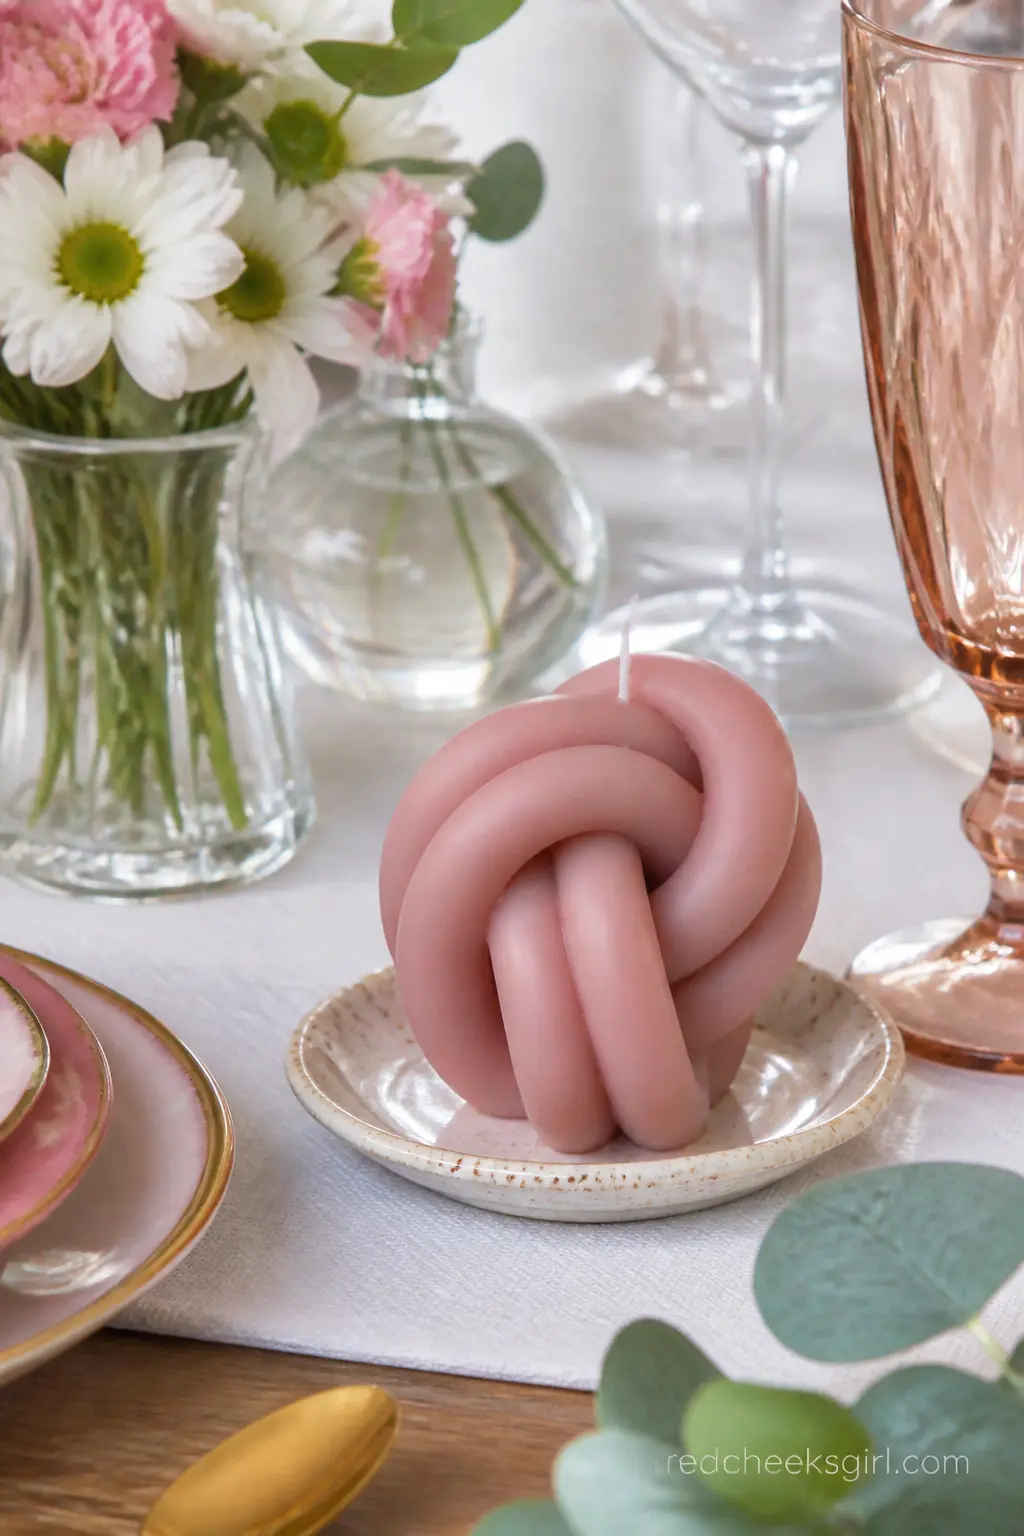
Twisted Knot Candle
A soft dusty rose knot shape, sculptural without being fussy, sits well on a mantel where its curves catch shadow. Rosewood fragrance keeps the palette warm rather than sweet.
Melt a soy pillar blend to 195 degrees, add rosewood fragrance oil at a 6 percent load, pour at 180 degrees, unmould after 24 hours, wick with a zinc-core pillar wick, and cure for five days.
🛍 Shopping guide
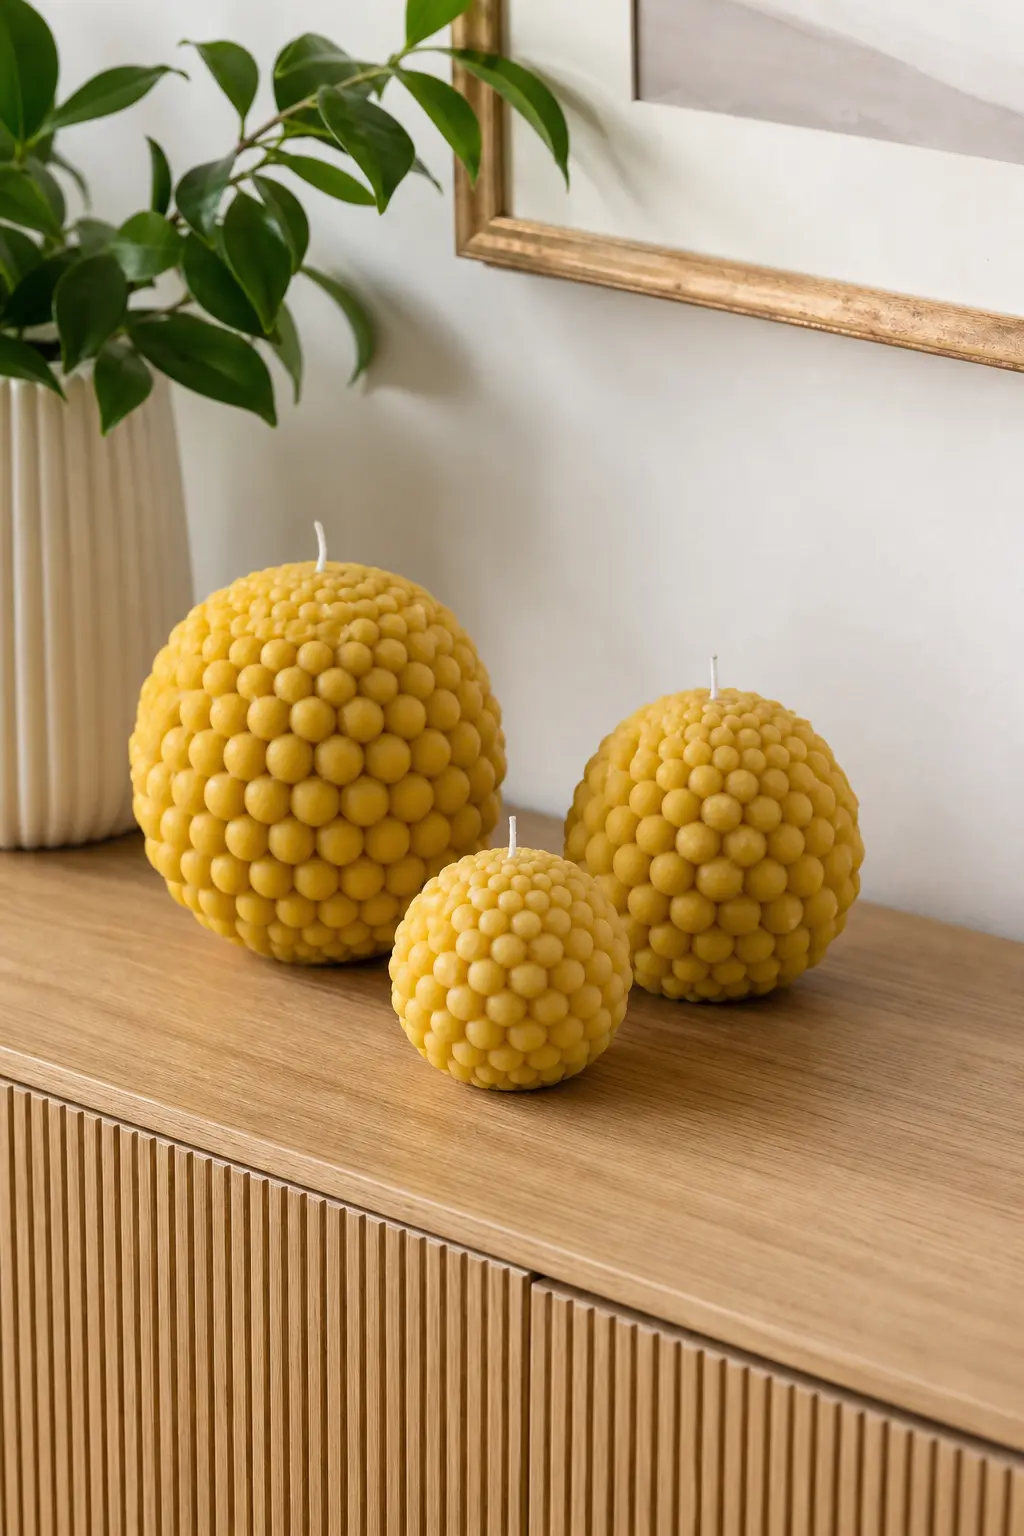
Graduated Bubble Sphere Trio
Three bubble spheres in mustard yellow, graduated from largest to smallest, group like a still life on a console table. Amber fragrance matches the warmth of the colour.
Melt a beeswax paraffin blend to 195 degrees, add amber fragrance oil at a 6 percent load, pour at 185 degrees, unmould after 24 hours, wick each with a small zinc-core, and cure for six days.
🛍 Shopping guide
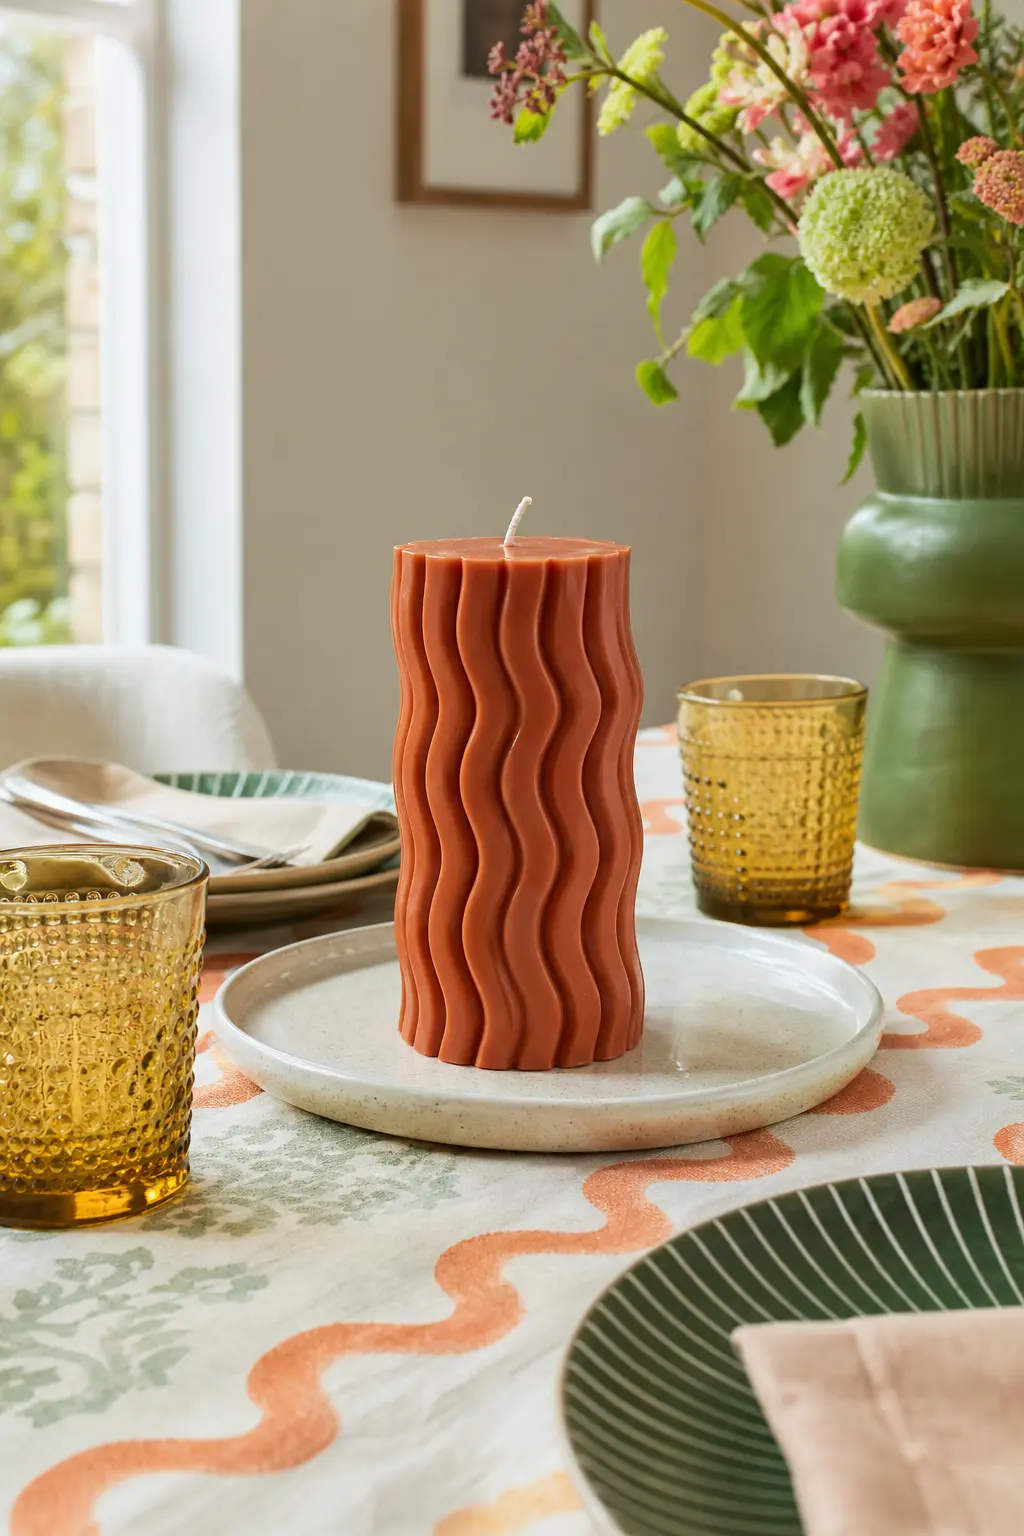
Wavy Ribbon Pillar
A wave-textured pillar in terracotta and rust looks handmade in the good sense, with clove and orange fragrance leaning into an autumnal mood without naming a season.
Melt a soy pillar blend to 195 degrees, add clove and orange fragrance oil at a 6 percent load, pour at 180 degrees, unmould after 24 hours, wick with a medium zinc-core, and cure for five days.
🛍 Shopping guide
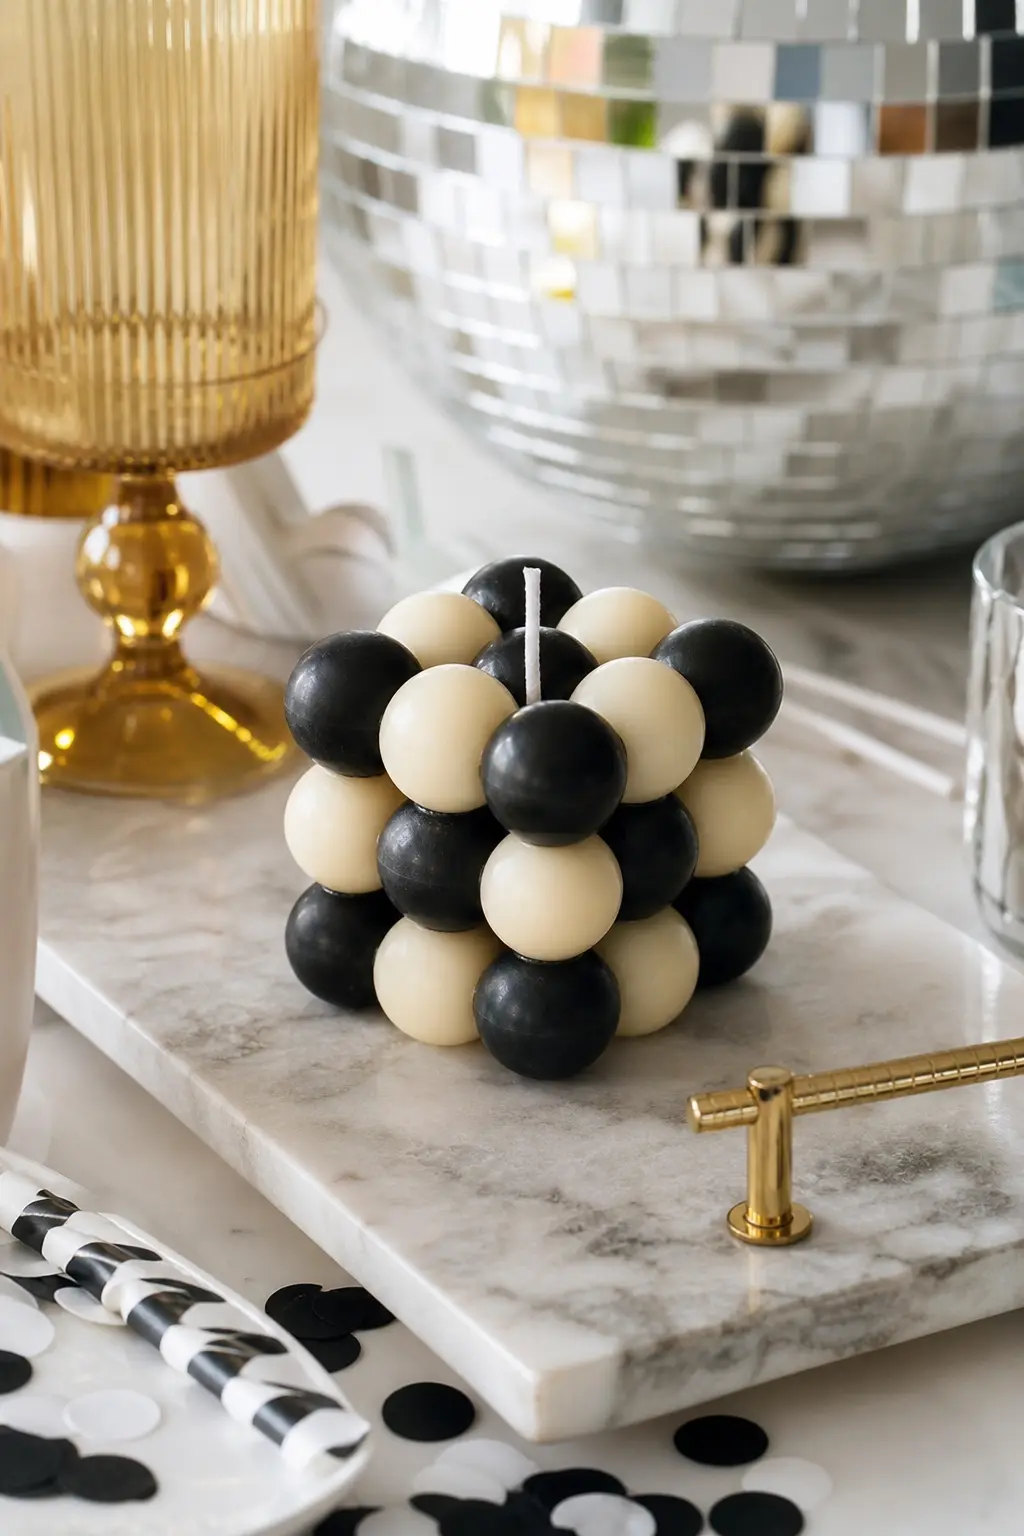
Two-Tone Checkerboard Bubble Cube
Black and cream in the same bubble cube, poured in alternating bubbles using a masking technique, is a genuinely advanced project that pays off in how it photographs.
Melt a soy pillar blend to 195 degrees, pour the first colour at 185 degrees into masked-off bubbles, let it fully set, then pour the second colour at 175 degrees into the rest, wick with a medium zinc-core, and cure for five days.
🛍 Shopping guide
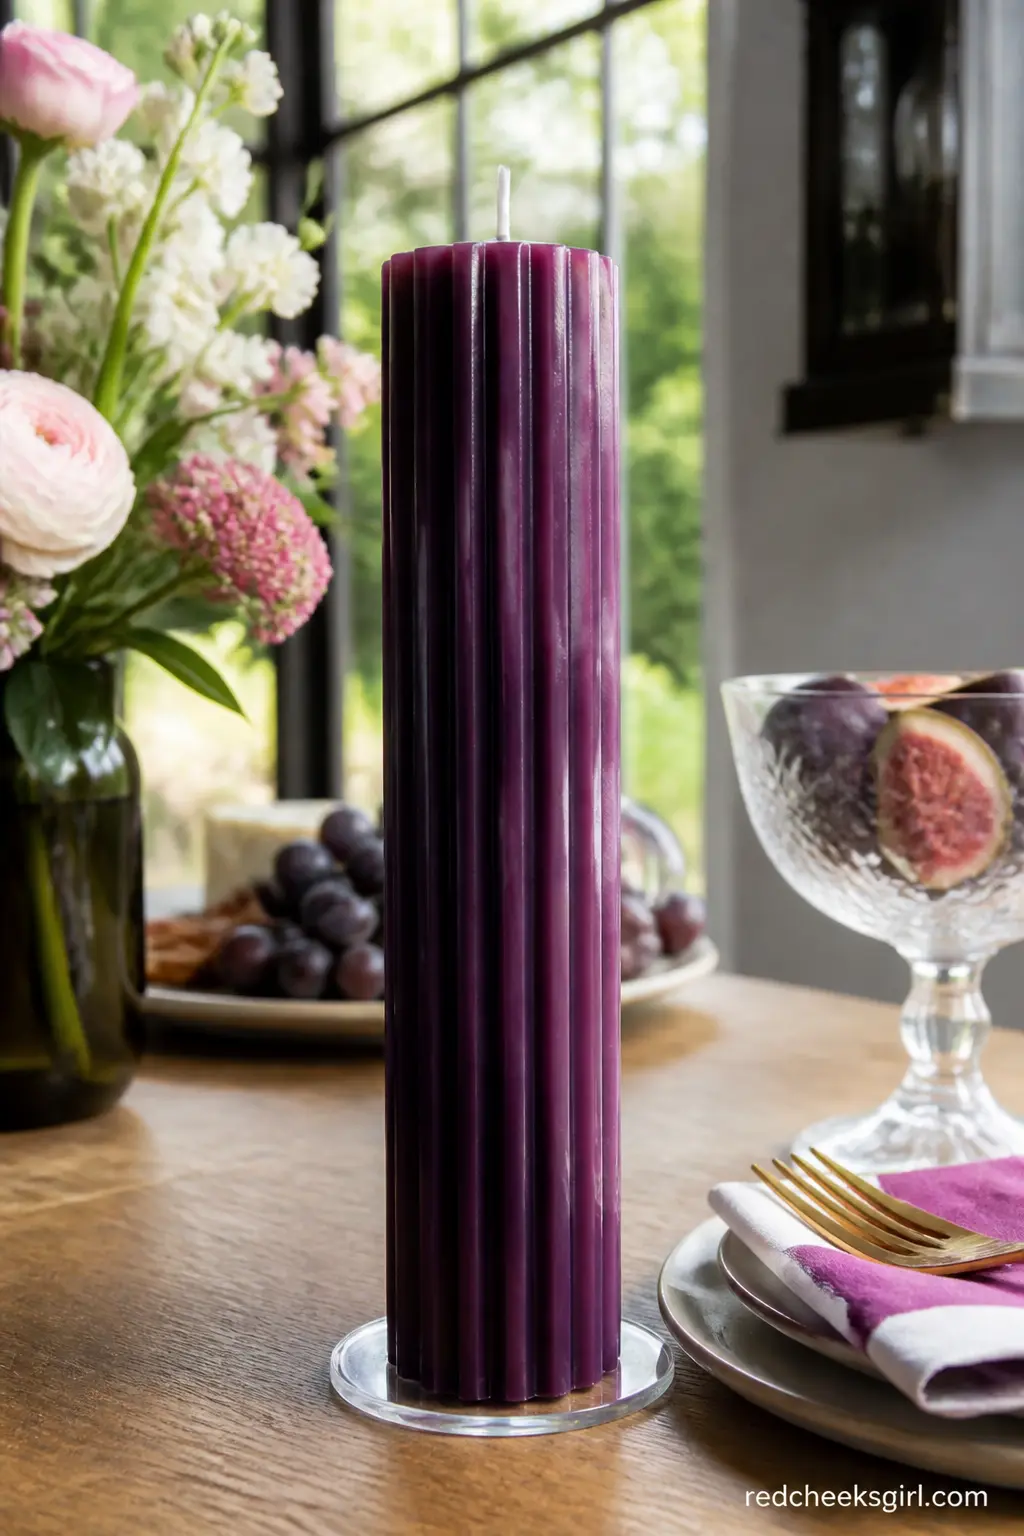
Tall Fluted Column Pillar
A genuinely tall fluted column, deep plum and structural enough to stand alone on a plinth by a doorway, needs a firmer wax than the smaller shapes above.
Melt a paraffin stearin pillar blend to 200 degrees, add fig and blackcurrant fragrance oil at a 5 percent load, pour at 190 degrees, unmould after 36 hours, wick with a large zinc-core, and cure for six days.
🛍 Shopping guide
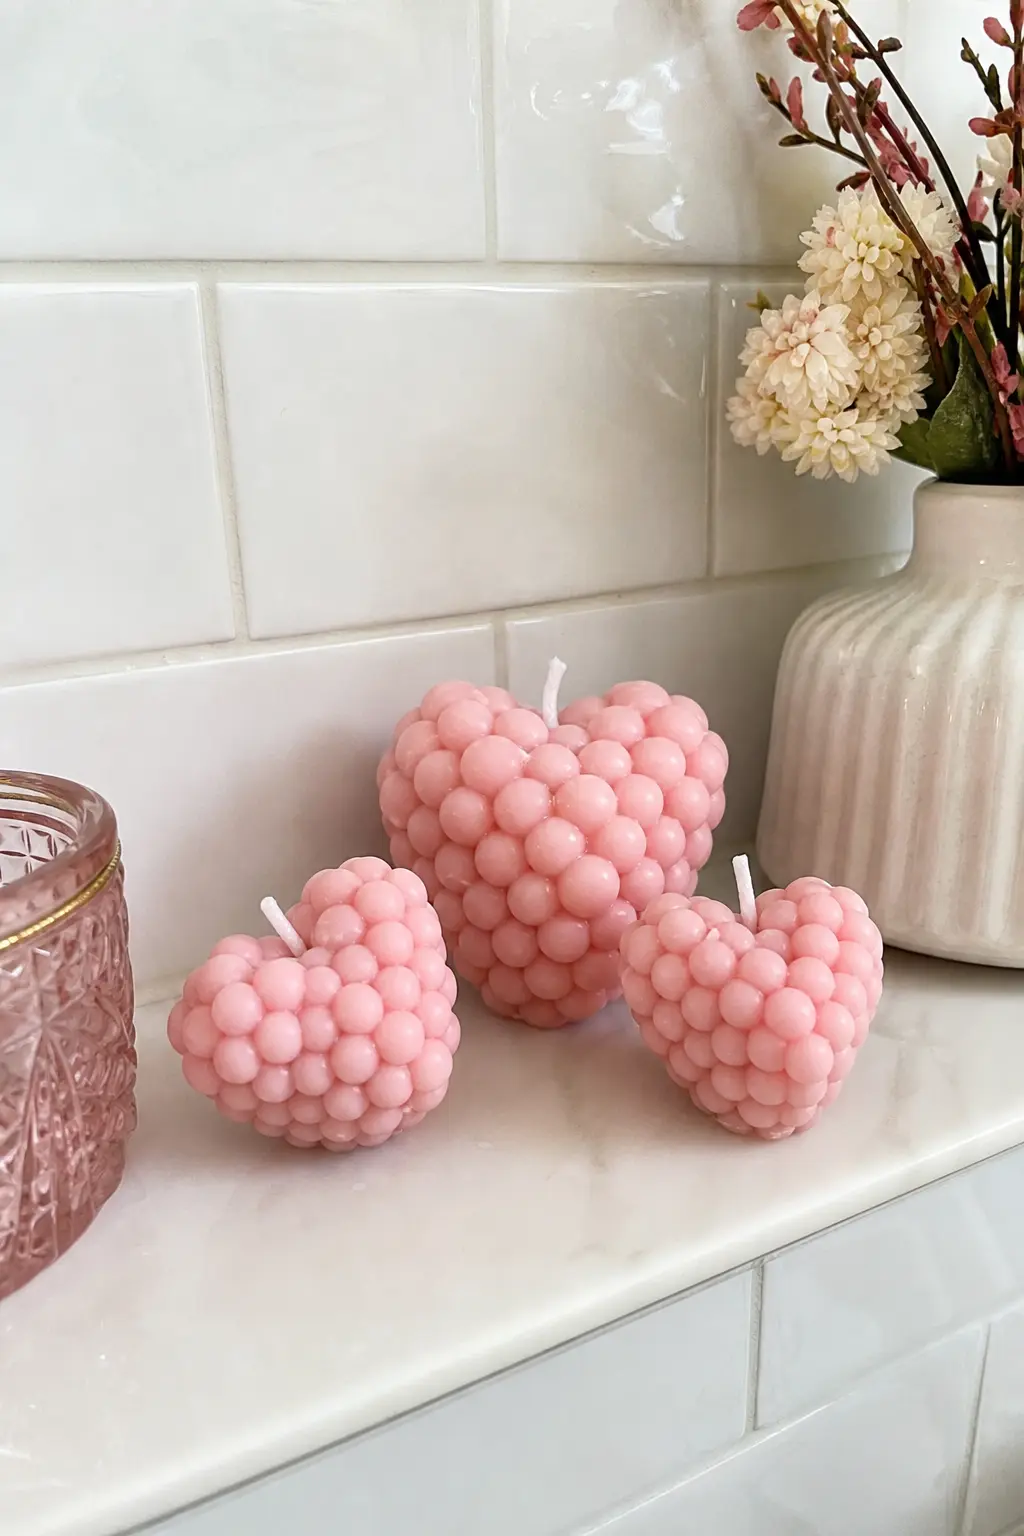
Small Bubble Heart Trio
Three small bubble hearts in blush pink cluster nicely on a bathroom shelf, with a soft rose quartz floral fragrance that suits a self-care corner.
Melt a soy pillar blend to 195 degrees, add rose and geranium fragrance oil at a 6 percent load, pour at 180 degrees, unmould after 24 hours, wick each with a mini zinc-core, and cure for five days.
🛍 Shopping guide
Fruit-Shaped Candles
Fruit moulds are having a real moment because they photograph like a still life without any styling effort. Palm wax and soy pillar blends both hold fine detail well, and a two-tone pour, one colour set first, a second poured over it once cool, is what gives a lemon its pith or a fig its blush interior.
Dry mica dusted on with a soft brush after unmoulding adds the blush or the freckling real fruit has, and it is the single step that pushes these from craft fair to boutique shelf.
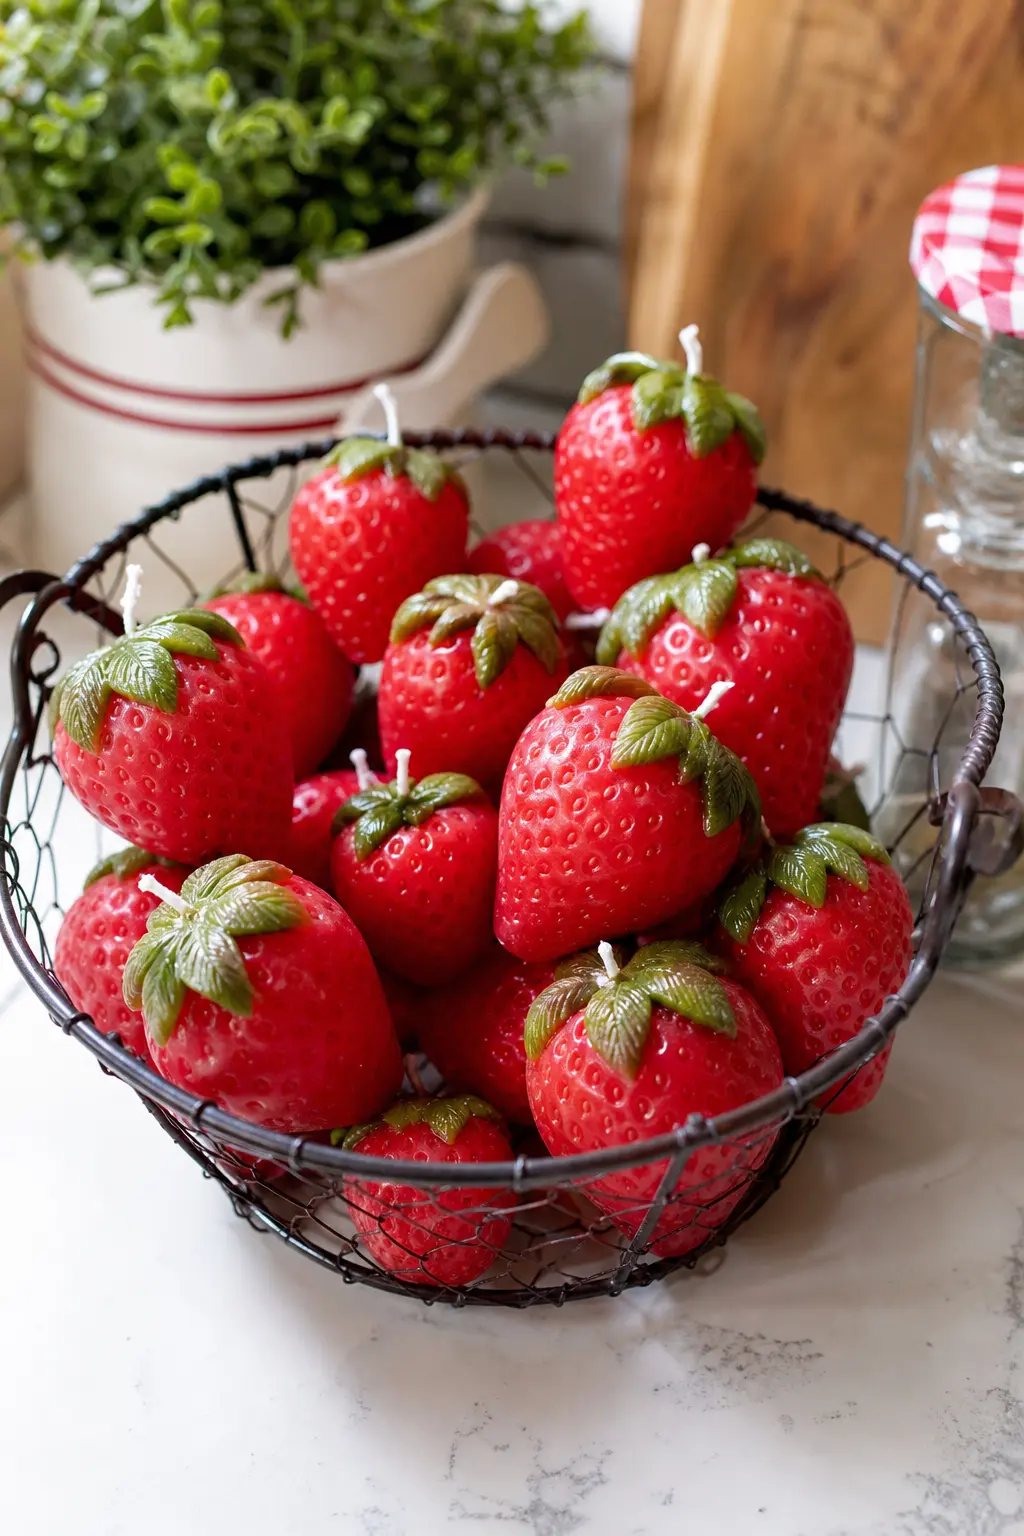
Strawberry Cluster Candle
A cluster of strawberry candles in deep red with a green wax calyx detail sells itself at a market table without a single word of description.
Melt a palm pillar wax to 195 degrees, add strawberry rhubarb fragrance oil at a 6 percent load, pour at 180 degrees, unmould after 24 hours, wick each berry with a mini CD-4, and cure for five days.
🛍 Shopping guide
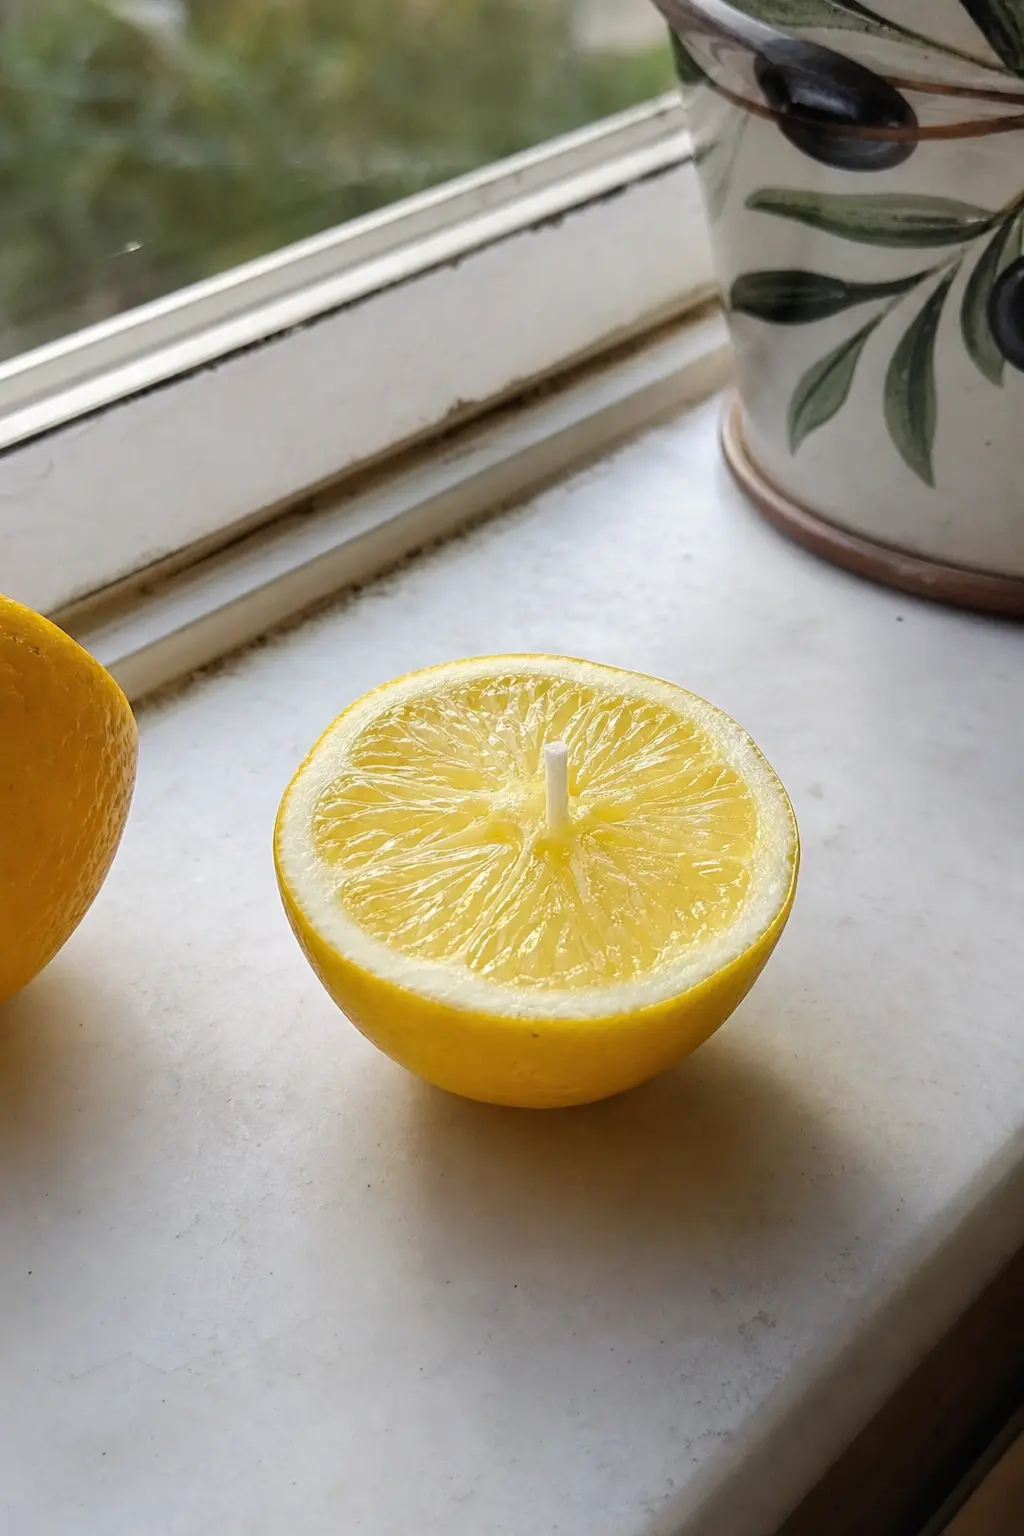
Cut Lemon Half Candle
A lemon half candle, bright yellow rind with a paler two-tone pour for the pith and flesh, sits well on a kitchen windowsill where the light hits citrus colour best.
Melt a soy pillar blend to 195 degrees, add lemon verbena fragrance oil at a 6 percent load, pour the yellow layer at 180 degrees, add the pale second pour once set, wick with a mini CD-4, and cure for five days.
🛍 Shopping guide
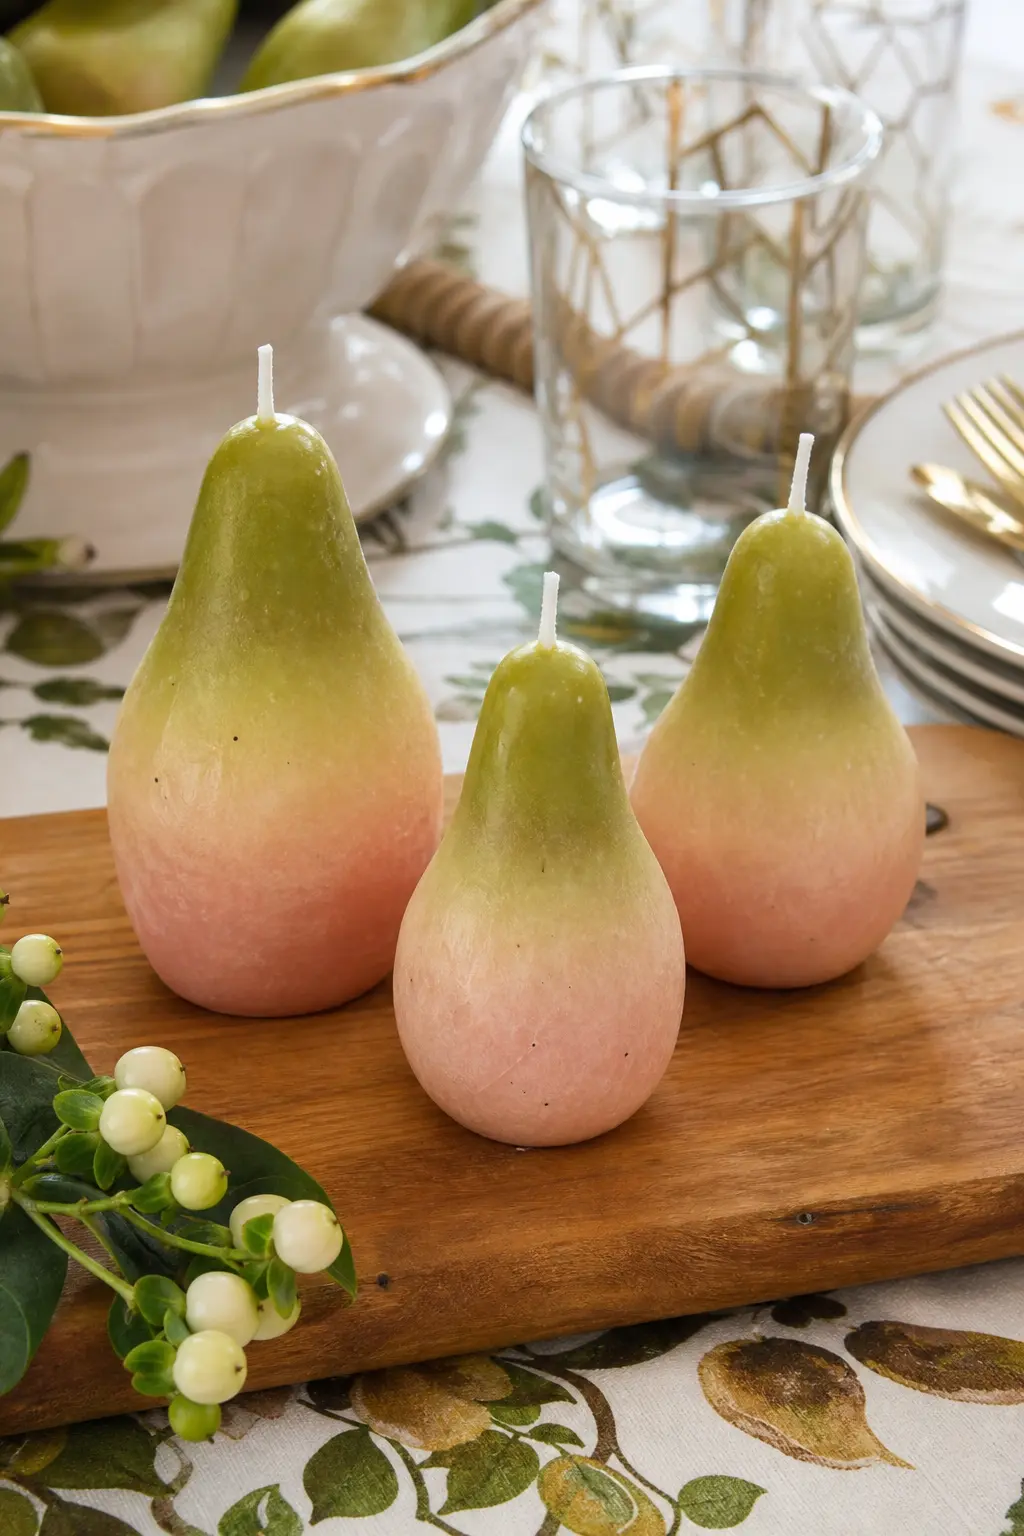
Ombre Pear Trio
Three pear candles dipped from green to blush at the base sit together on a wooden cutting board, their ombre finish doing most of the visual work.
Melt a palm pillar wax to 195 degrees, add pear and freesia fragrance oil at a 6 percent load, pour green at 180 degrees, unmould, then dip the base in blush wax at 170 degrees, wick with a mini zinc-core, and cure for six days.
🛍 Shopping guide
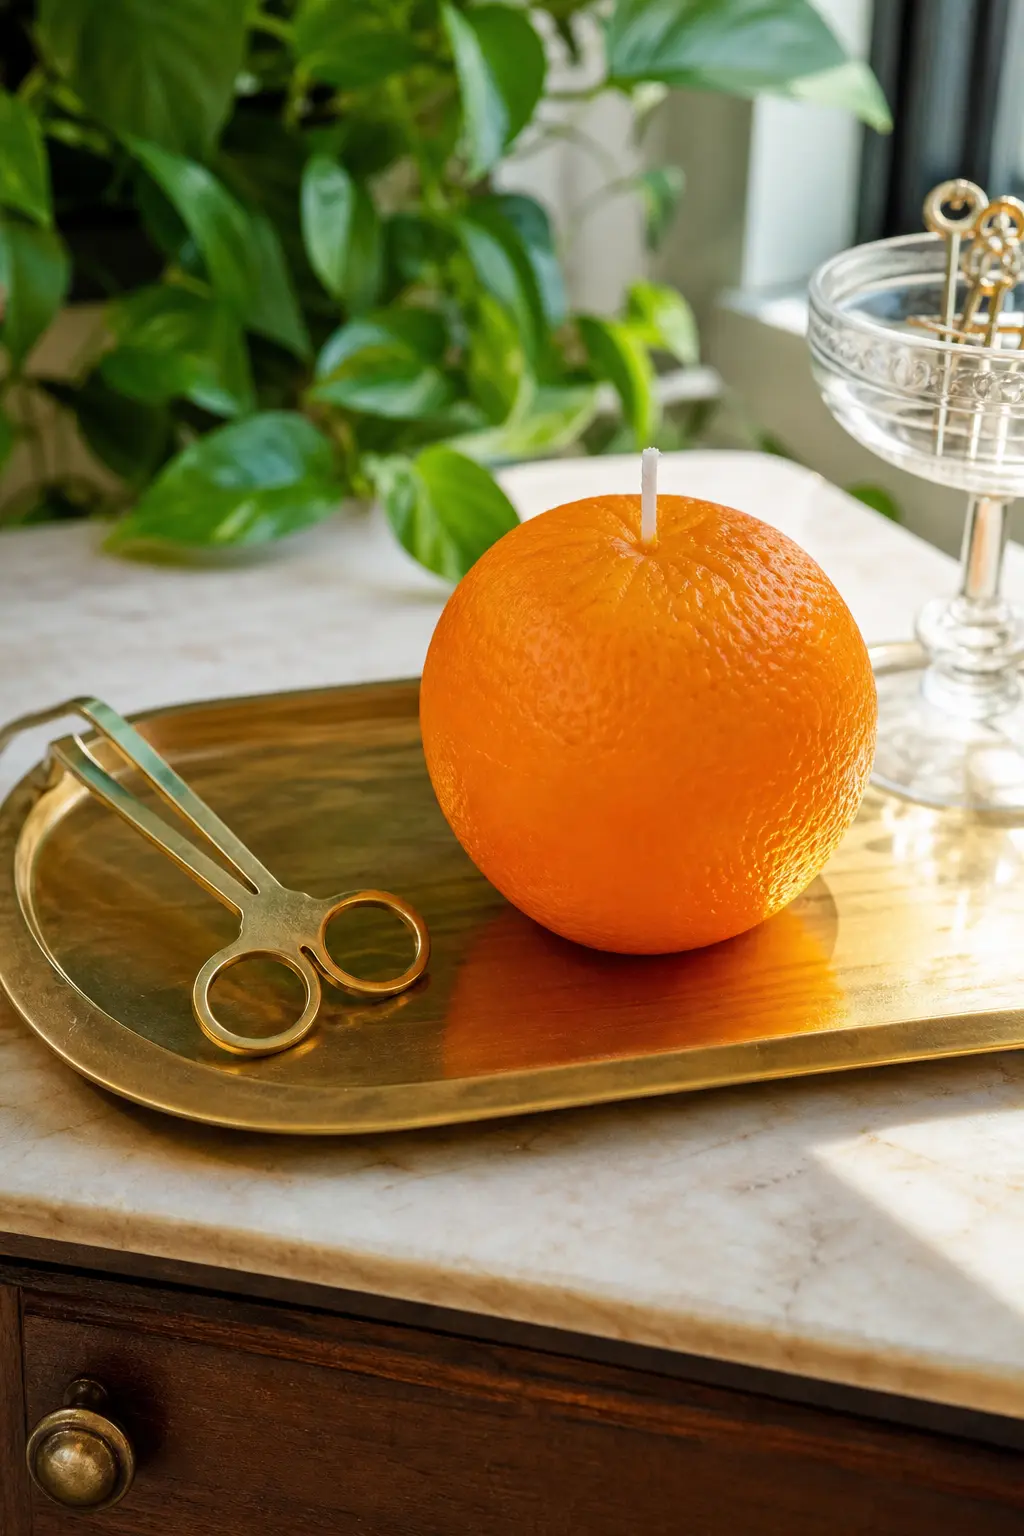
Whole Orange Candle with Peel Texture
A whole orange candle, textured to look freshly peeled, sits bright against brass on a bar tray, with blood orange and clove fragrance for a scent that matches the colour.
Melt a soy pillar blend to 195 degrees, add blood orange and clove fragrance oil at a 6 percent load, pour at 180 degrees, unmould after 24 hours, wick with a CD-6, and cure for six days.
🛍 Shopping guide
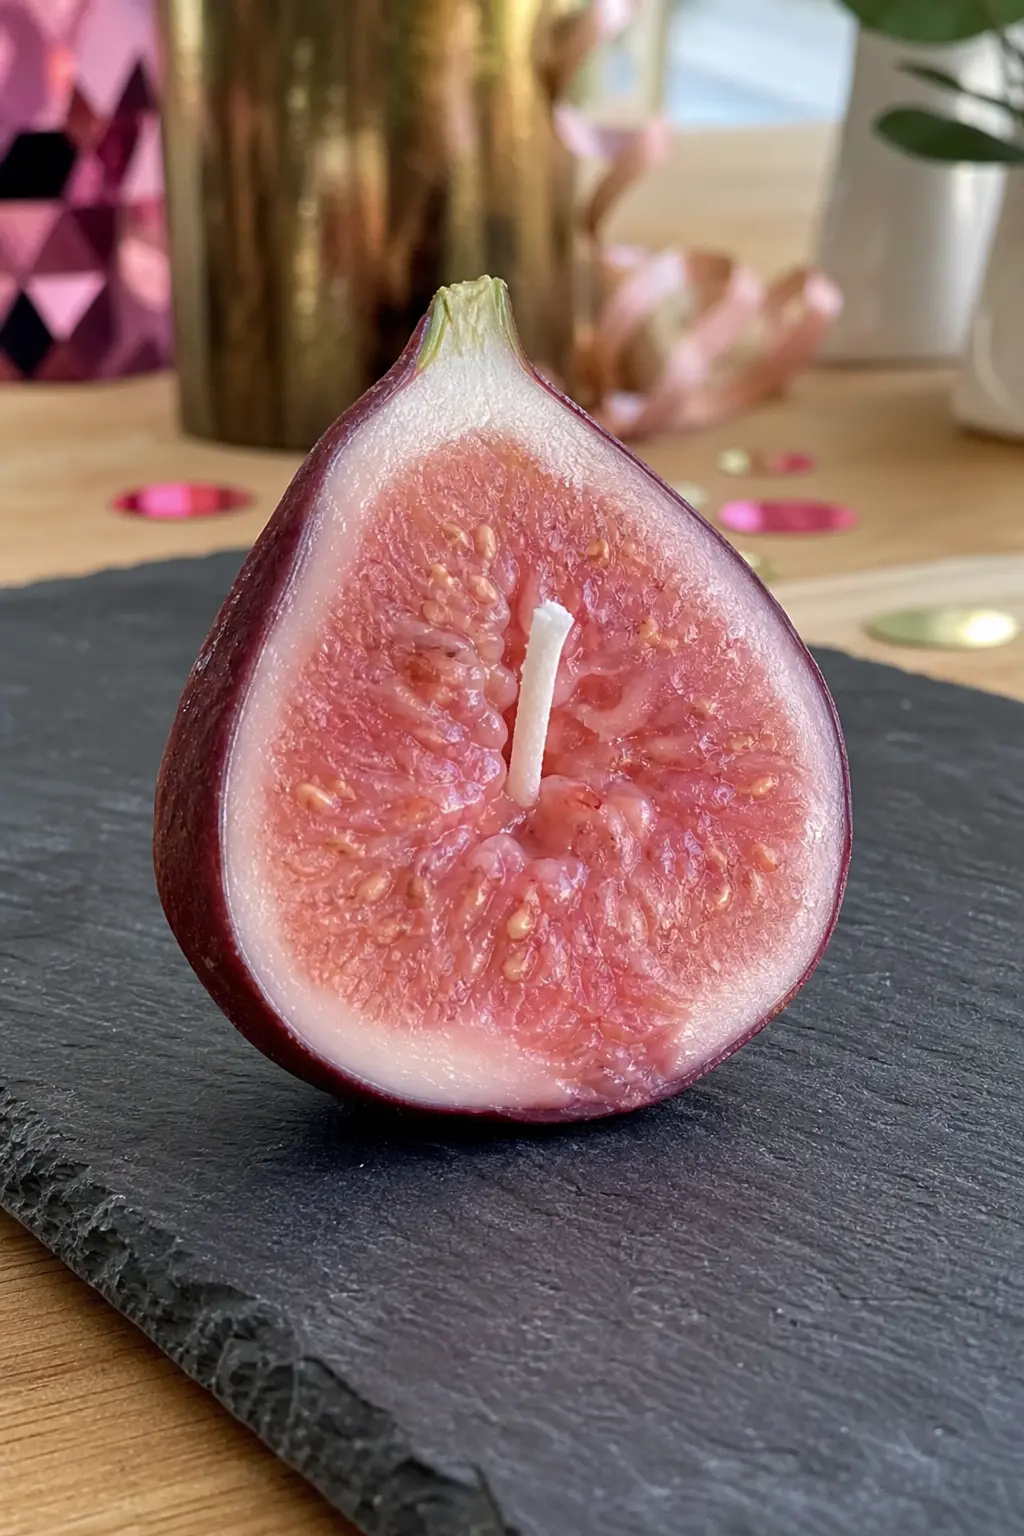
Halved Fig Candle
A halved fig candle, deep burgundy skin opening onto a pink interior, is a more sophisticated fruit shape than a strawberry and suits a slate cheese board setting.
Melt a palm pillar wax to 195 degrees, add fig and cassis fragrance oil at a 6 percent load, pour the burgundy skin at 175 degrees, add the pink centre pour once set, wick with a mini CD-4, and cure for five days.
🛍 Shopping guide
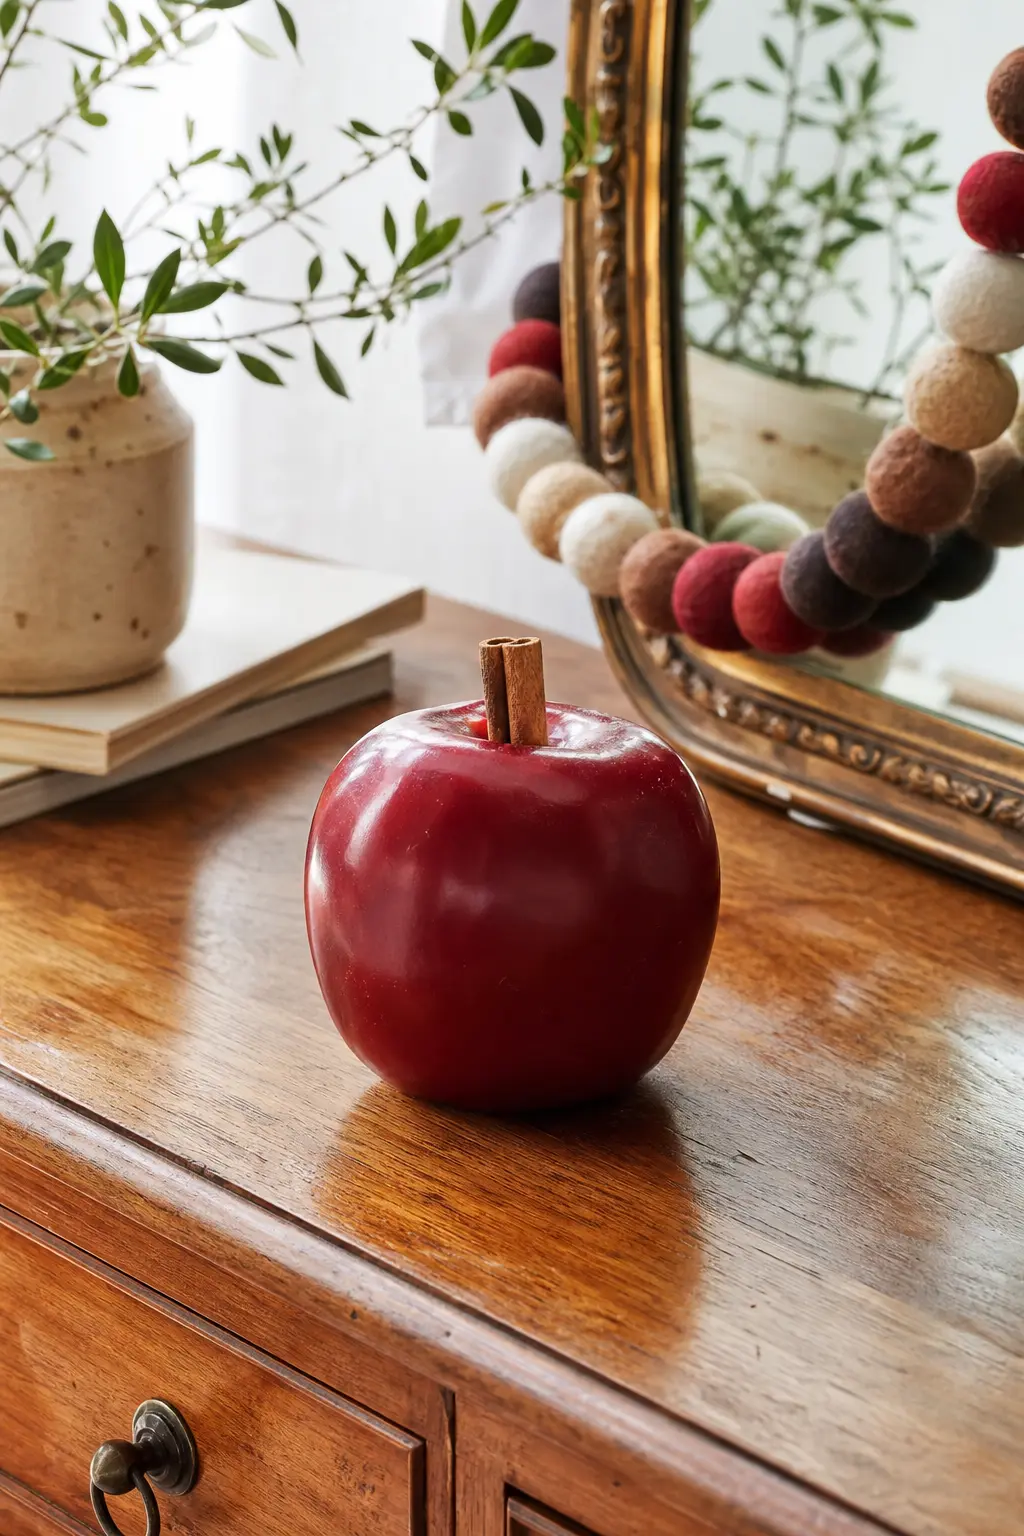
Apple Candle with Cinnamon Stem
A deep red apple candle finished with a real cinnamon stick pushed in as a stem while the top is still soft is a small detail that makes it look finished rather than moulded.
Melt a soy pillar blend to 195 degrees, add apple and clove fragrance oil at a 6 percent load, pour at 180 degrees, insert the cinnamon stick once the surface skins over, unmould after 24 hours, wick with a CD-6, and cure for six days.
🛍 Shopping guide
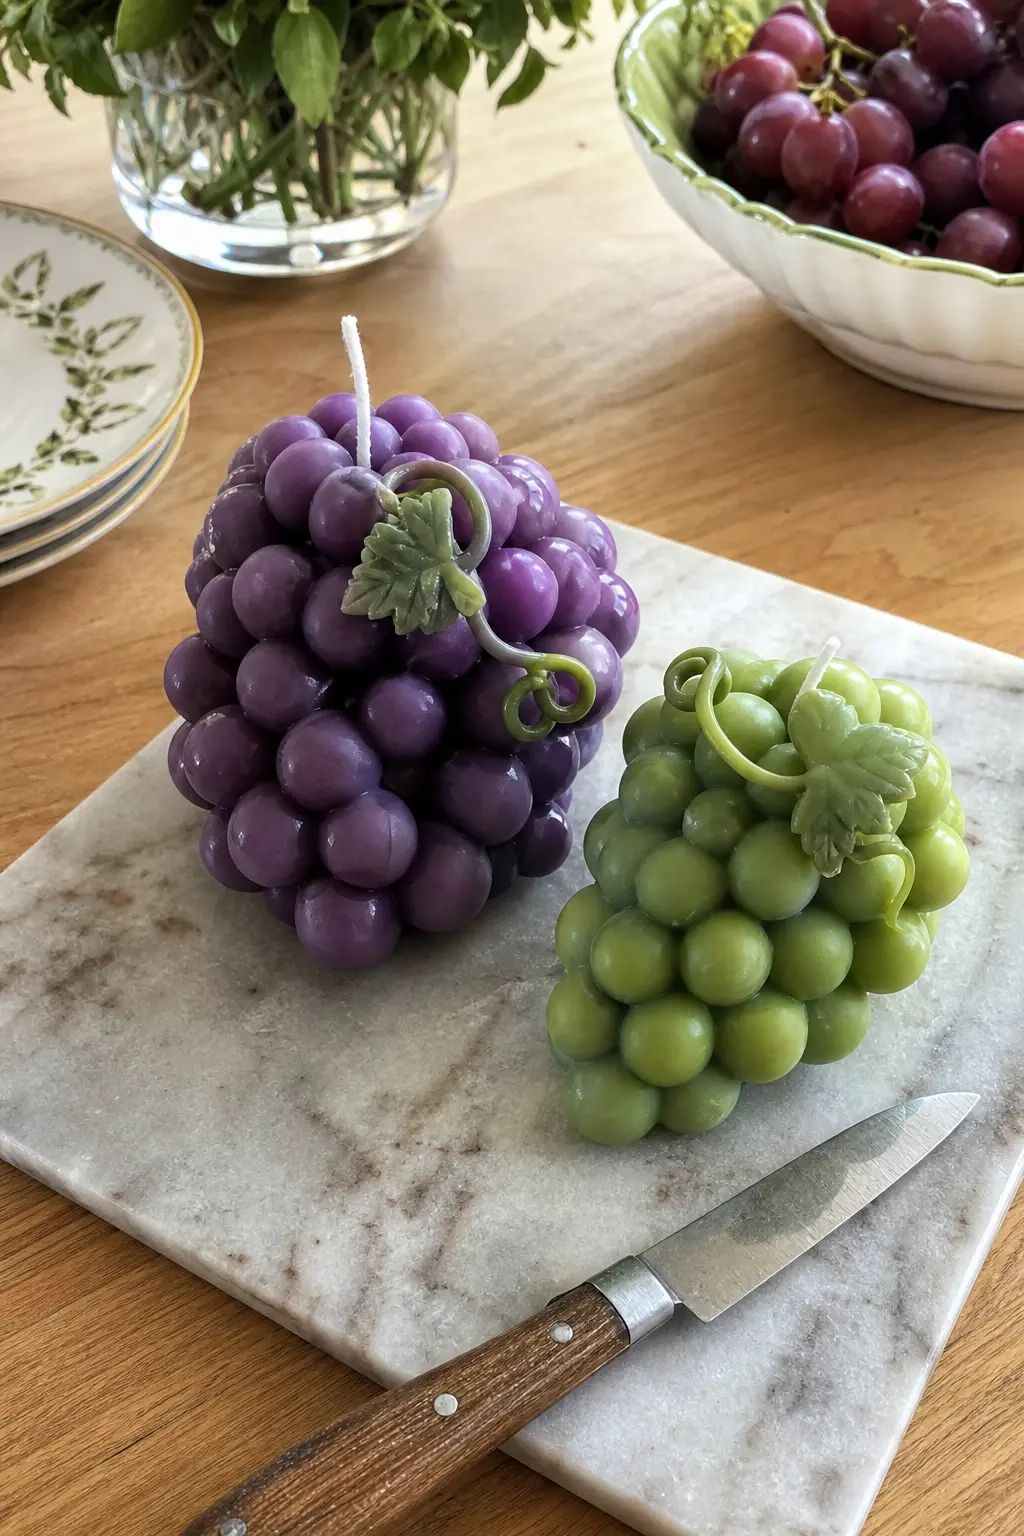
Grape Cluster Candle
A grape cluster candle, purple fading to green at the tips, sits on a marble cheese board looking closer to fruit than to a candle until it is lit.
Melt a palm pillar wax to 195 degrees, add muscat grape fragrance oil at a 6 percent load, pour at 175 degrees, unmould after 24 hours, wick the cluster centrally with a mini zinc-core, and cure for six days.
🛍 Shopping guide
Hand-Dipped Tapers
Dipping is a different skill from pouring: a tank of wax kept at a steady temperature, a primed wick lowered and lifted dozens of times, each layer building thickness by a fraction of a millimetre. It takes longer than a pour and looks it, which is exactly the appeal.
Keep two clean tanks going for a two-colour taper, a bucket of cold water beside the dip tank to firm each layer fast, and patience: rushed dips crack.
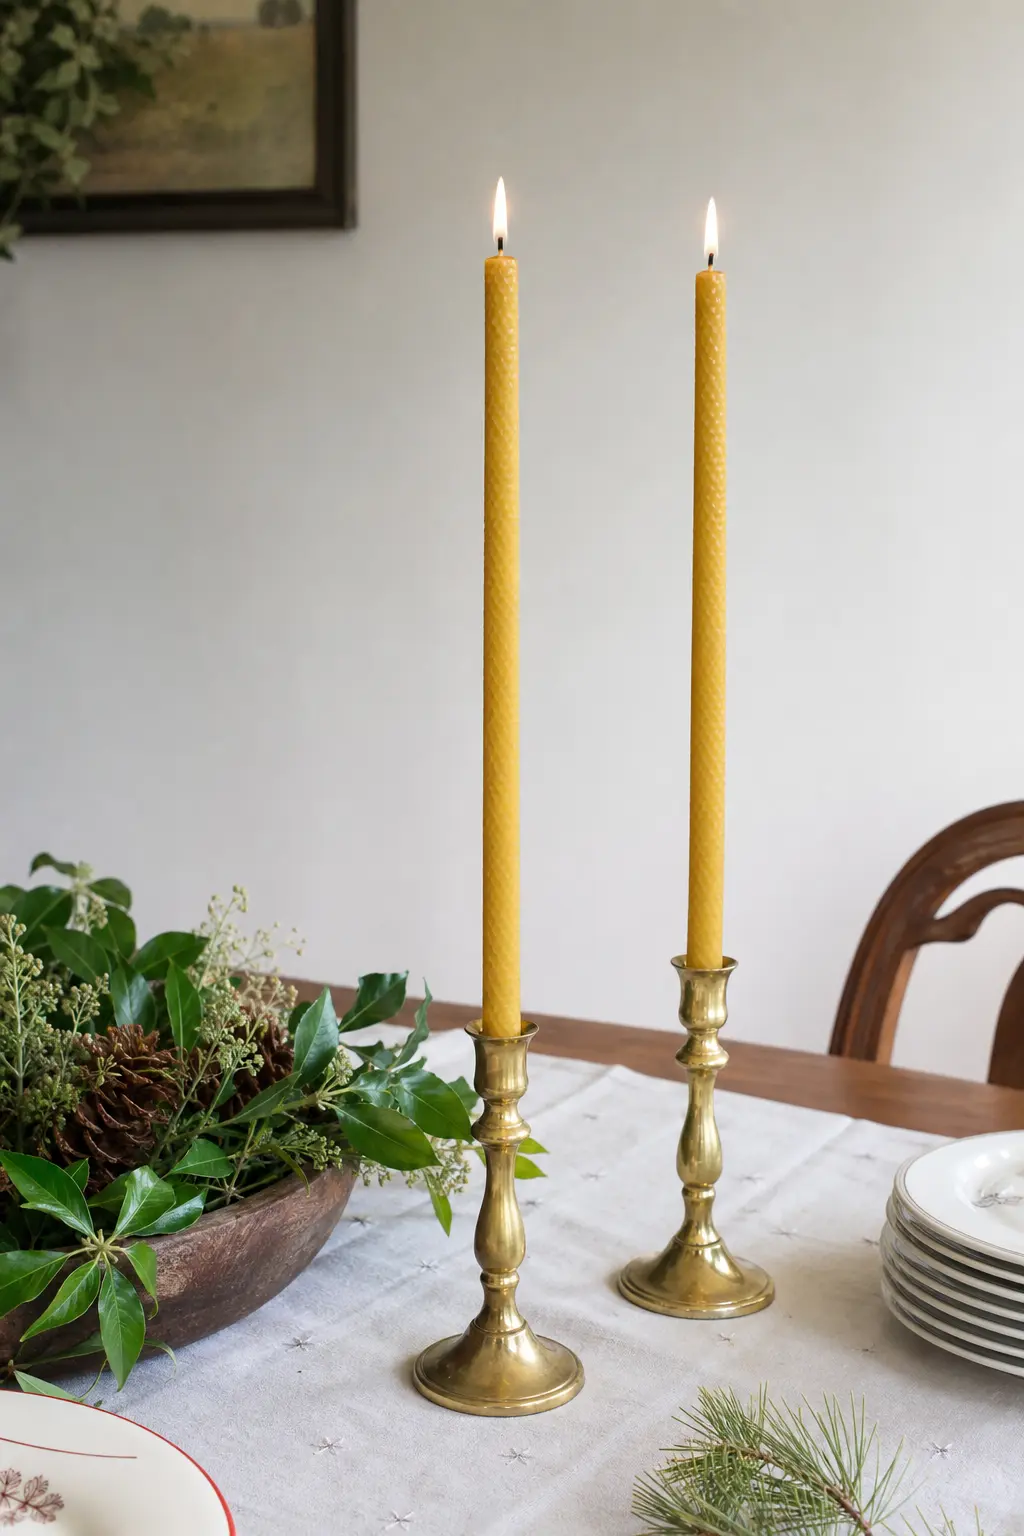
Classic Beeswax Taper Pair
A pair of natural gold beeswax tapers, hand-dipped rather than extruded, has a slightly imperfect taper that looks better in brass candlesticks than anything from a shop.
Keep the dip tank of pure beeswax at 160 degrees, dip a primed square braid wick roughly twenty five times to build a half inch taper, leave unscented for the natural honey note, and cure the pair for three days before lighting.
🛍 Shopping guide
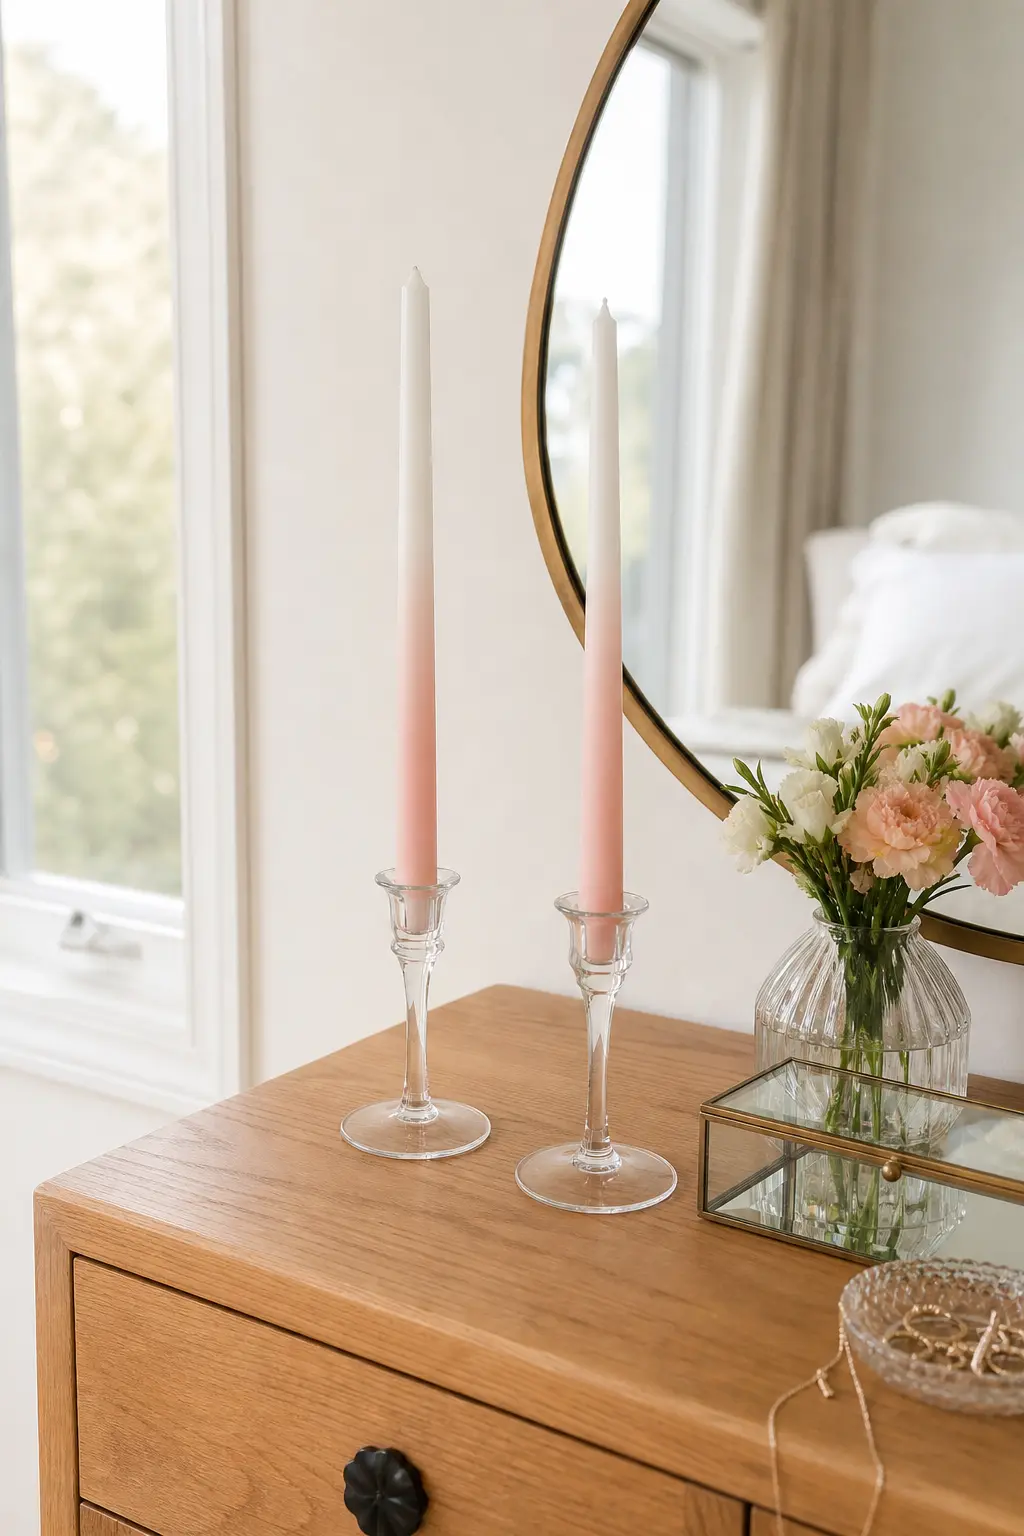
Blush Ombre Dipped Taper
A taper dipped white at the tip and blush at the base, blended gradually between dips, brings a soft ombre effect to a shape that is usually just one flat colour.
Keep a paraffin beeswax blend at 155 degrees for the base colour and 165 degrees for the white, dip alternating layers to build the gradient, and cure the finished pair for four days.
🛍 Shopping guide
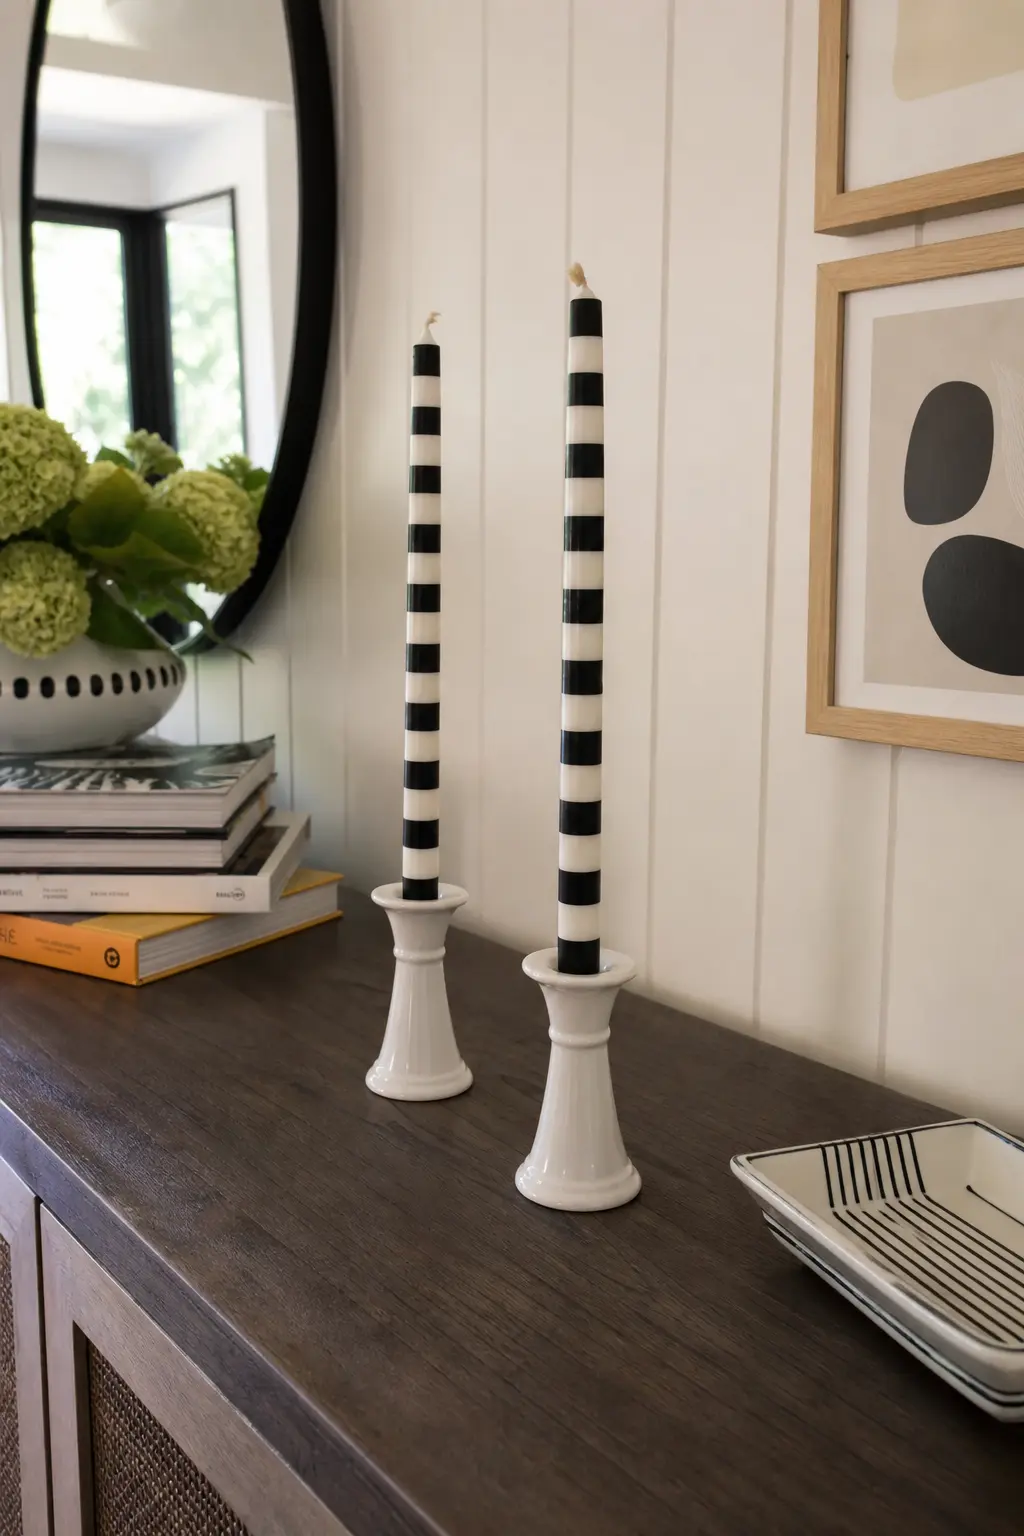
Striped Black and White Taper
Alternating black and white bands down a single taper is a graphic, almost architectural look that suits a pair of plain ceramic holders on a console.
Keep two separate dip tanks of a paraffin blend at 160 degrees, add sandalwood fragrance oil at a 5 percent load to each, dip alternately in short bands, and cure the pair for four days.
🛍 Shopping guide
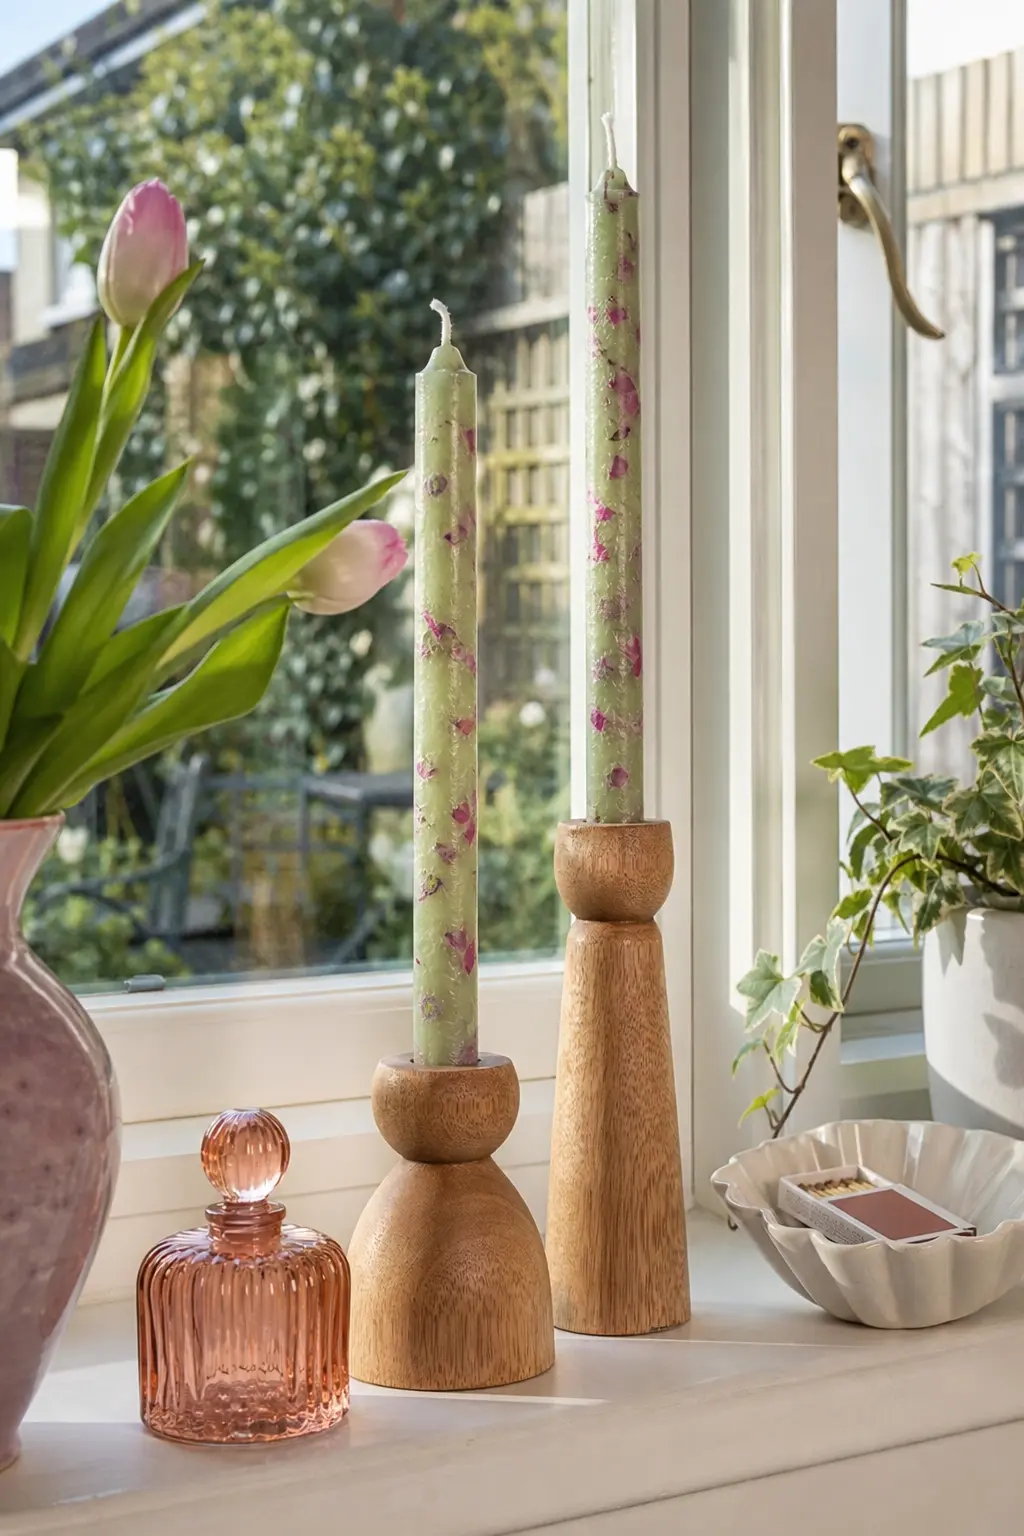
Pressed Petal Confetti Taper
A sage taper rolled in dried pink petals while the final layer is still tacky, then sealed with one clear dip, holds the petals in place without them scorching near the flame.
Keep a soy paraffin dip blend at 155 degrees, add chamomile fragrance oil at a 5 percent load, roll the tacky layer in dried petals, seal with a final clear dip, and cure for four days.
🛍 Shopping guide
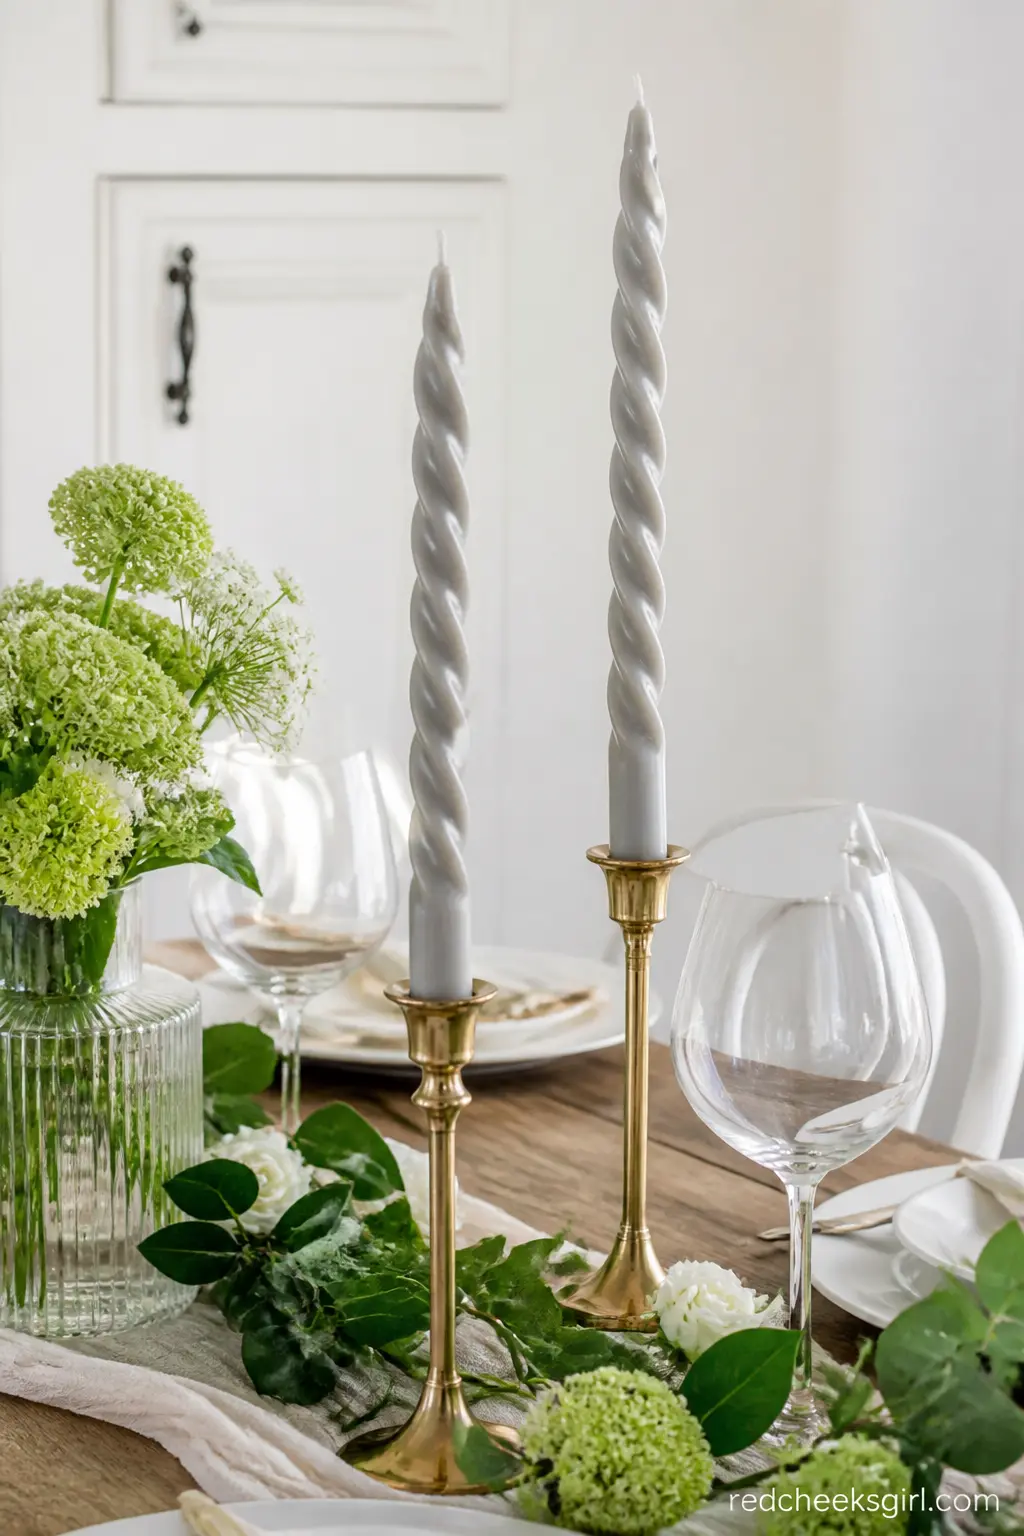
Twisted Herringbone Taper
A dove grey taper twisted by hand into a gentle herringbone spiral while the wax is still warm and pliable stands out in pewter candlesticks on a mantel.
Keep a paraffin beeswax blend at 158 degrees, add smoked cedar fragrance oil at a 5 percent load, dip to full thickness, then twist gently within a narrow warm window before it sets, and cure for four days.
🛍 Shopping guide
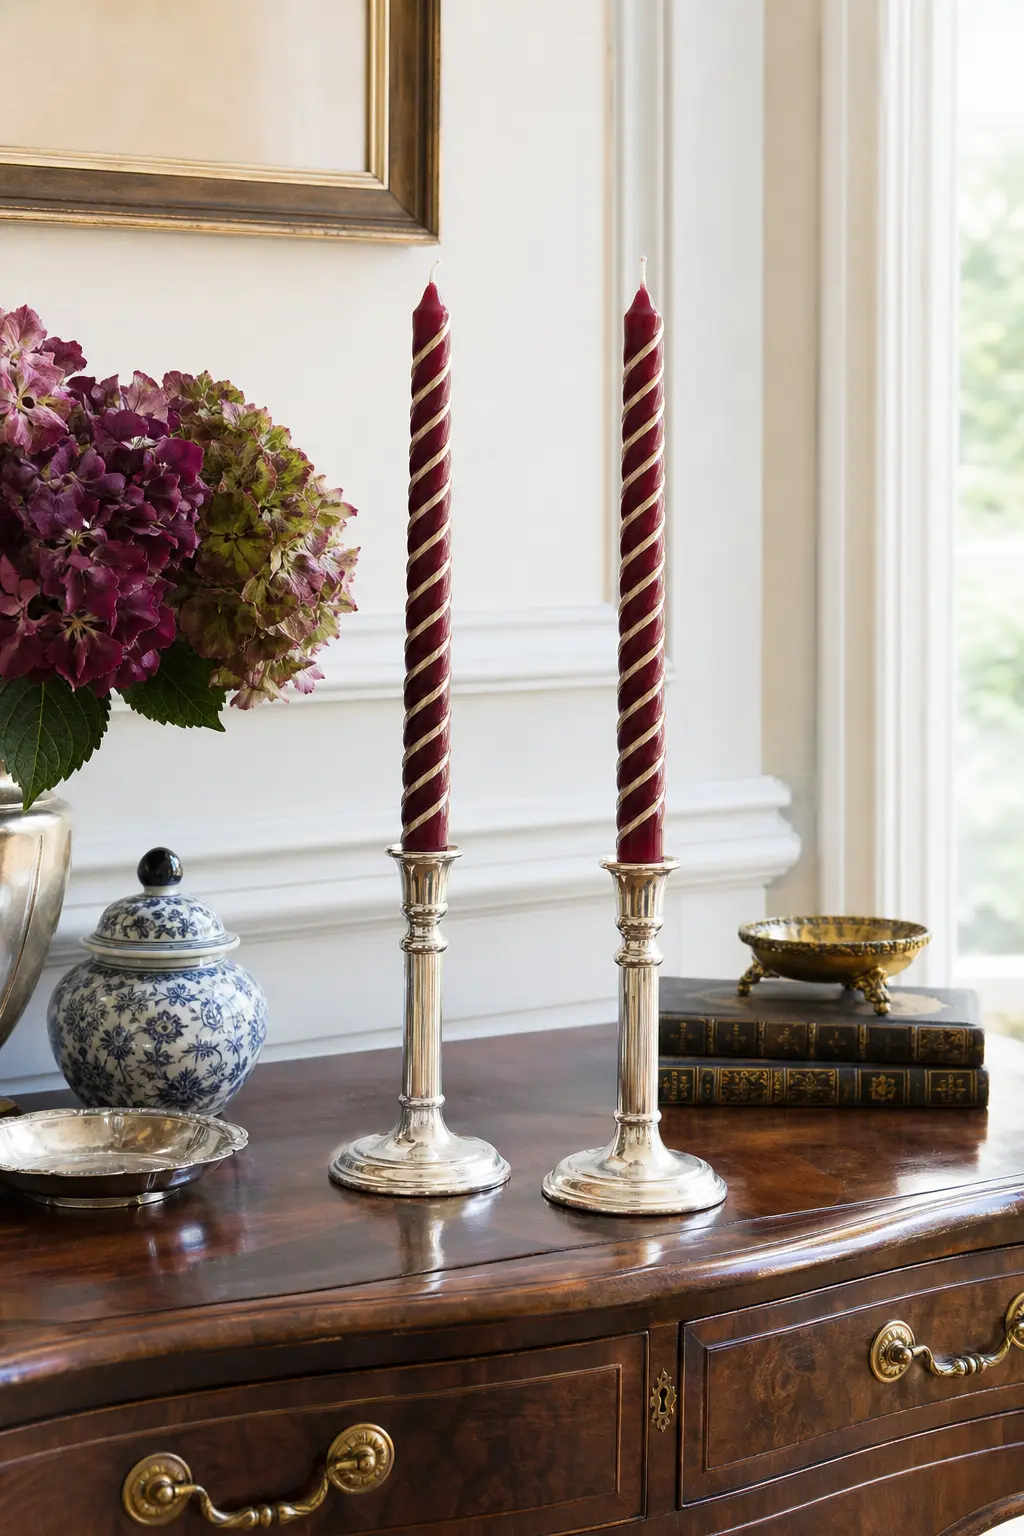
Barber-Pole Spiral Taper
A burgundy taper with a thin cream spiral trailed by hand around the base is a slower, more advanced technique that rewards patience with a genuinely striking result.
Keep the base tank of paraffin blend at 160 degrees, add clove and orange fragrance oil at a 5 percent load, dip to full burgundy thickness, then trail a thin cream wax spiral by hand while still warm, and cure for four days.
🛍 Shopping guide
Shell Candles
A real shell filled with wax instead of a mould shaped like one is the difference between a novelty candle and something a coastal shop would sell. If the shell itself is the draw, the source material overlaps with seashell crafts that look like they came from a coastal boutique, just with a wick added.
Choose a lower melt point wax than a jar candle would use, since a shell is a poor insulator and burns hotter than glass, and always hot glue the wick tab to the deepest point before pouring so it does not float.
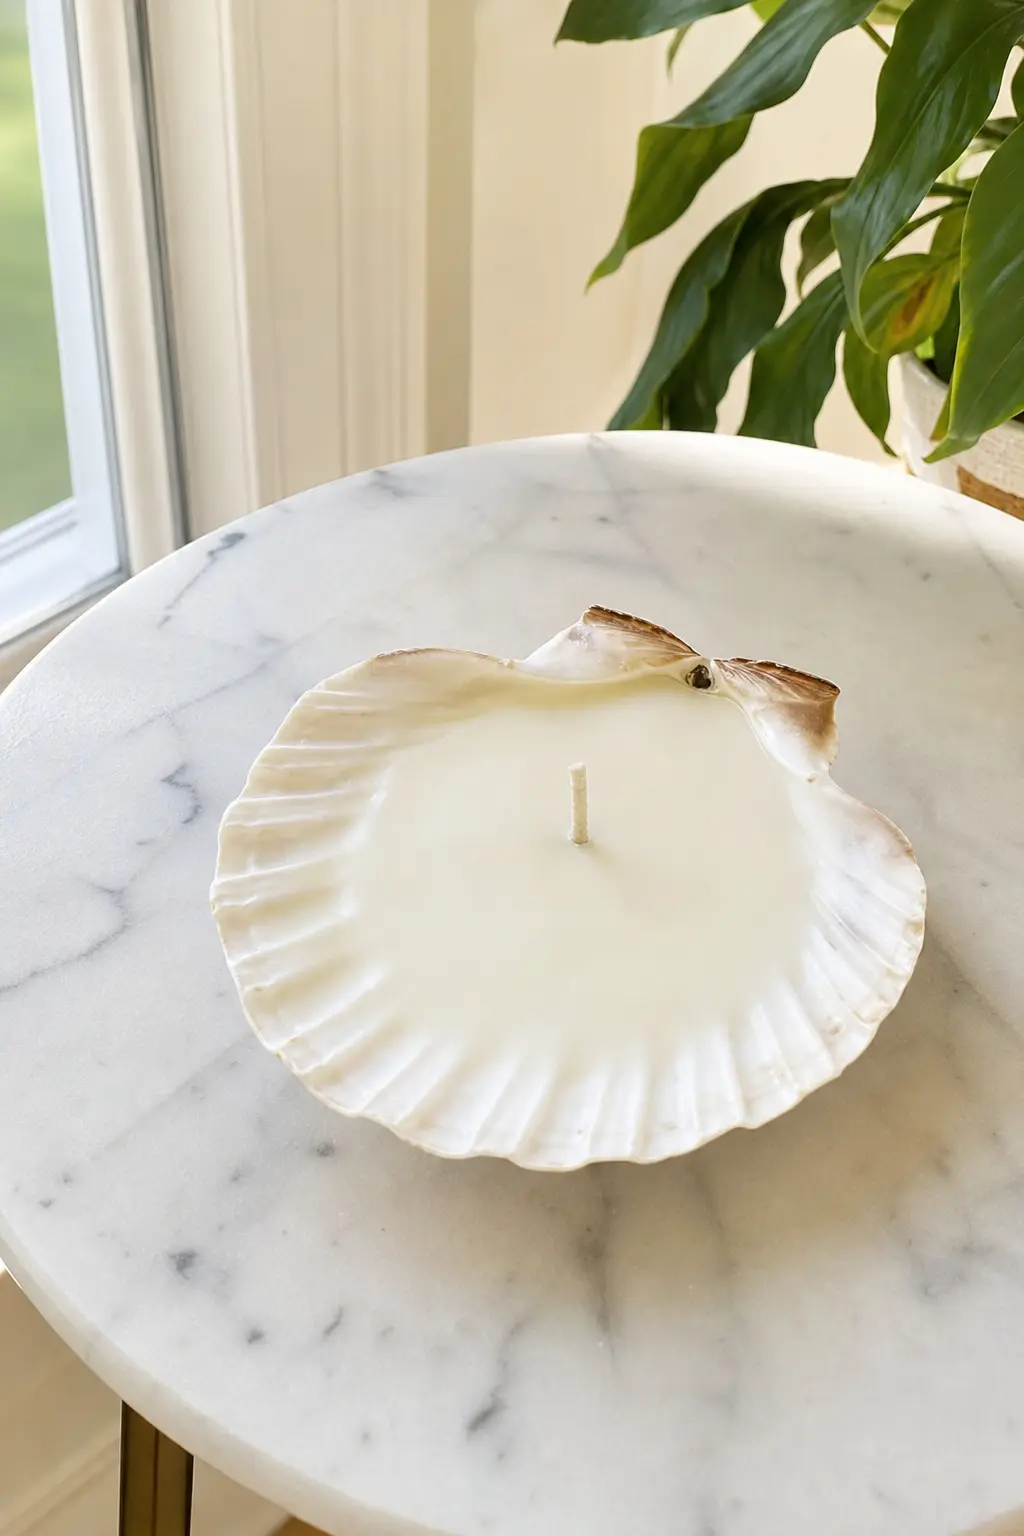
Scallop Shell Candle
A single large scallop shell filled with a cream wax candle needs almost no styling: the natural ridges do the decorative work on their own.
Melt a coconut apricot creme wax to 185 degrees, add sea salt and driftwood fragrance oil at a 7 percent load, pour at 130 degrees directly into the cleaned shell, wick with a mini CD-4 secured with hot glue, and cure for one week.
🛍 Shopping guide
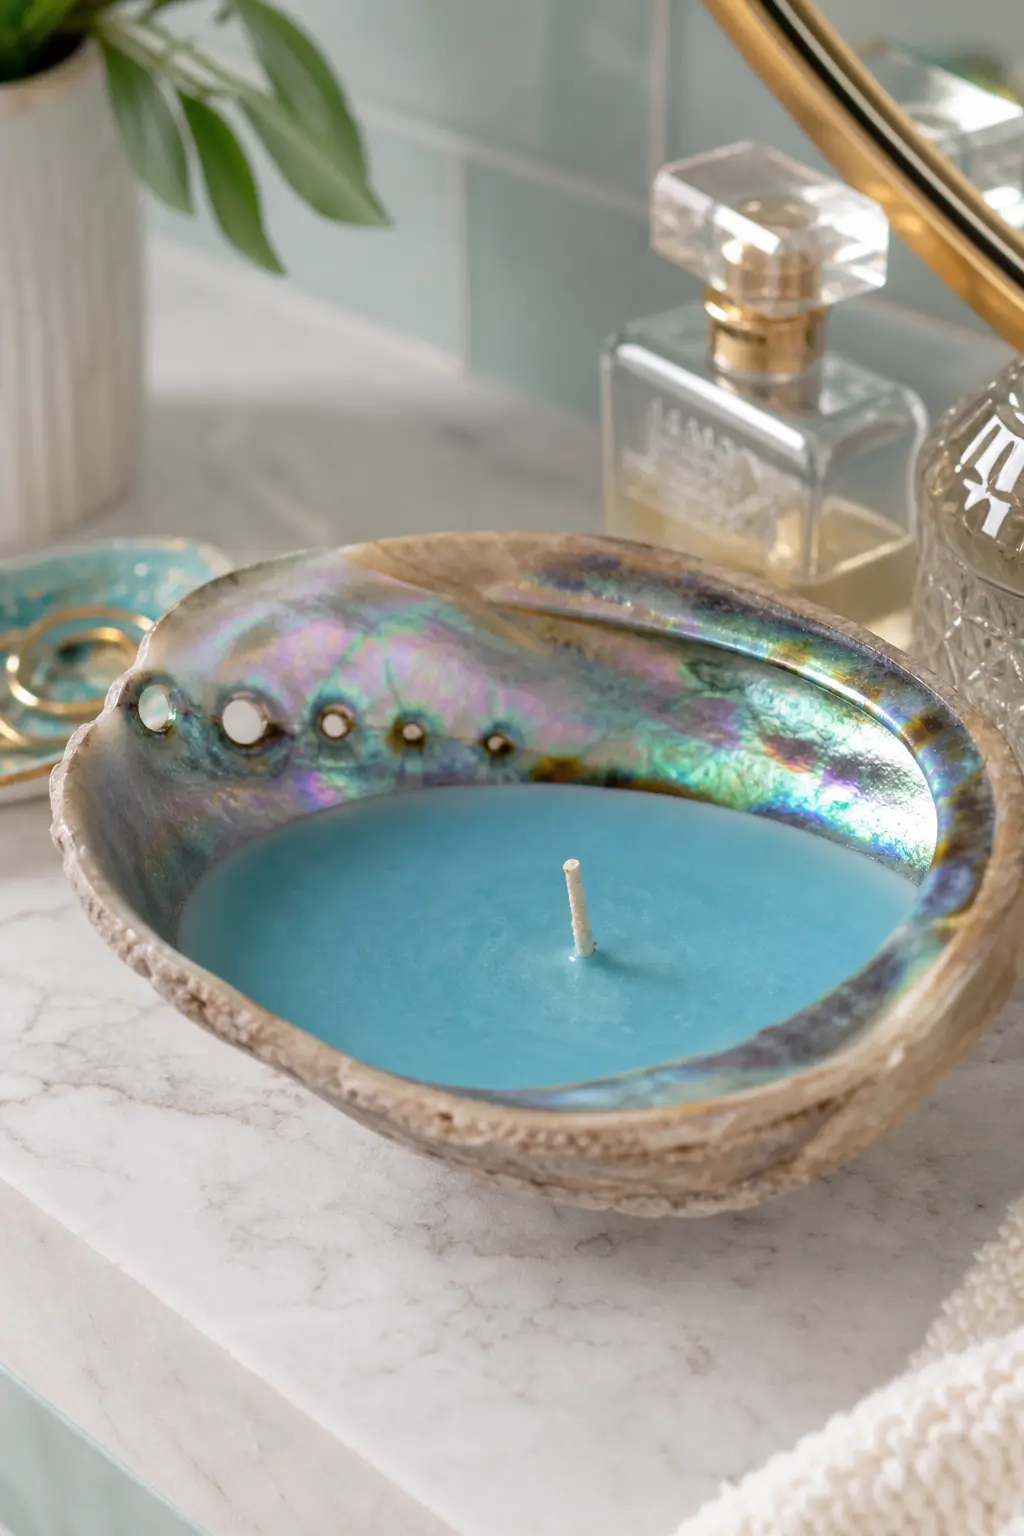
Iridescent Abalone Shell Candle
An abalone shell holds only a shallow pool of wax, but the teal blue colour against the shell’s natural iridescence is worth the smaller burn time.
Melt a low melt point soy blend to 180 degrees, add ocean air fragrance oil at a 6 percent load, pour at 125 degrees, wick with a mini CD-2 glued low in the shell’s deepest curve, and cure for one week.
🛍 Shopping guide
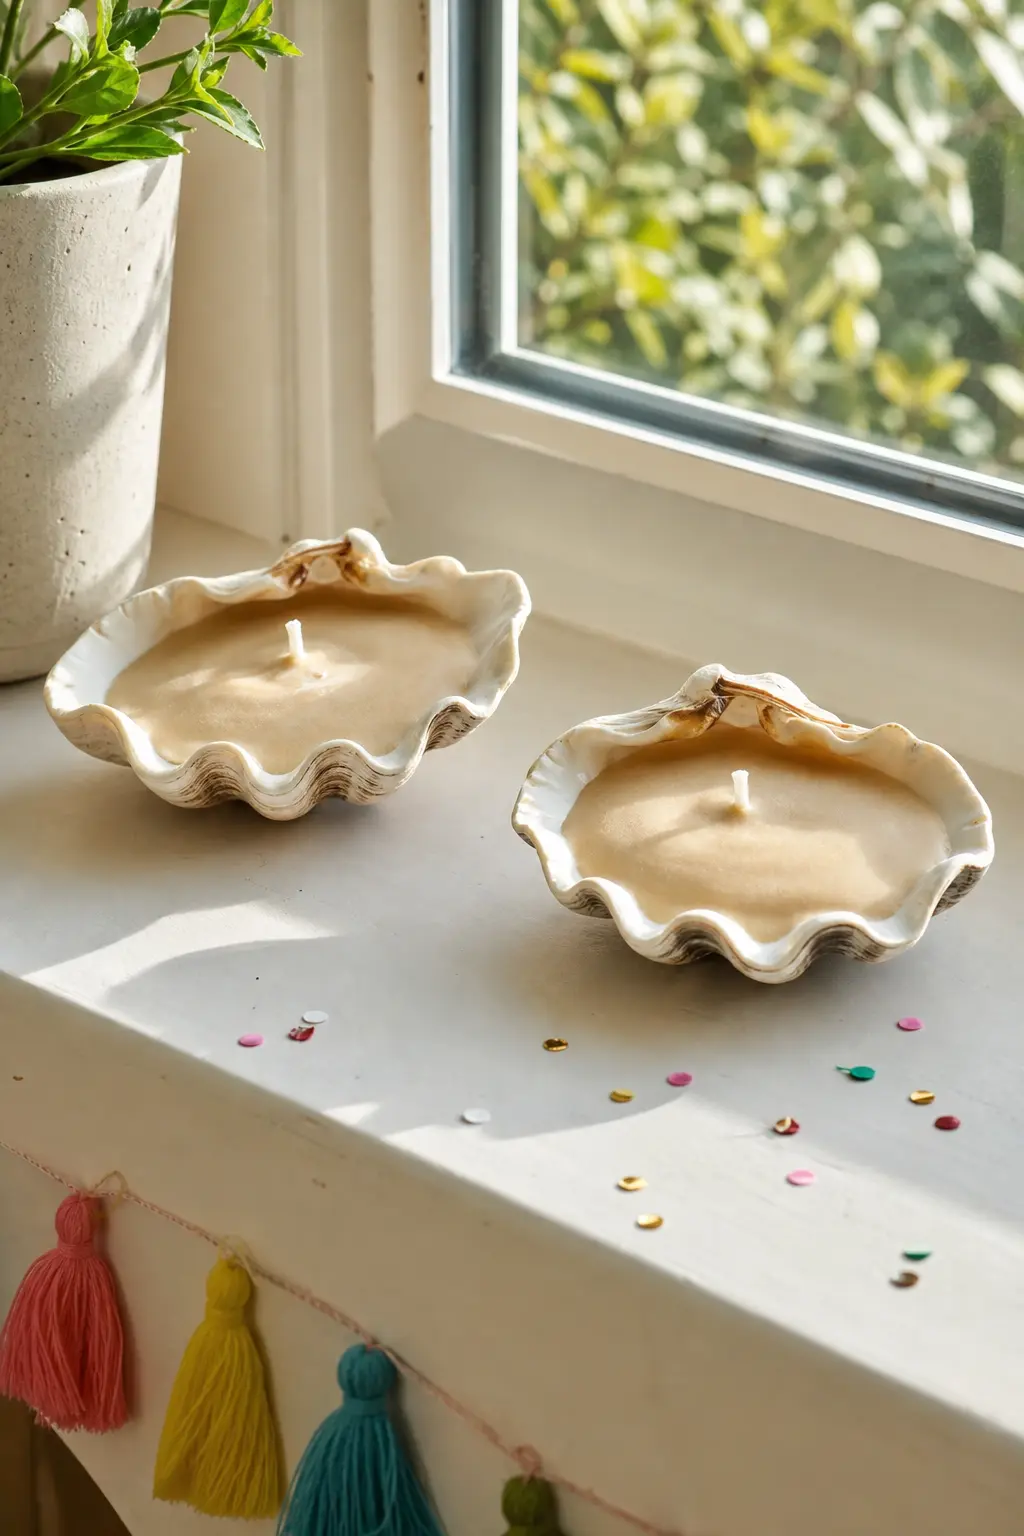
Clam Shell Votive Duo
A pair of clam shells filled with a sandy beige wax makes a small, unfussy votive set that sits well on a windowsill without needing a saucer underneath.
Melt a coconut wax to 180 degrees, add salt air and citrus fragrance oil at a 7 percent load, pour at 130 degrees, wick each shell with a mini CD-4, and cure for six days.
🛍 Shopping guide
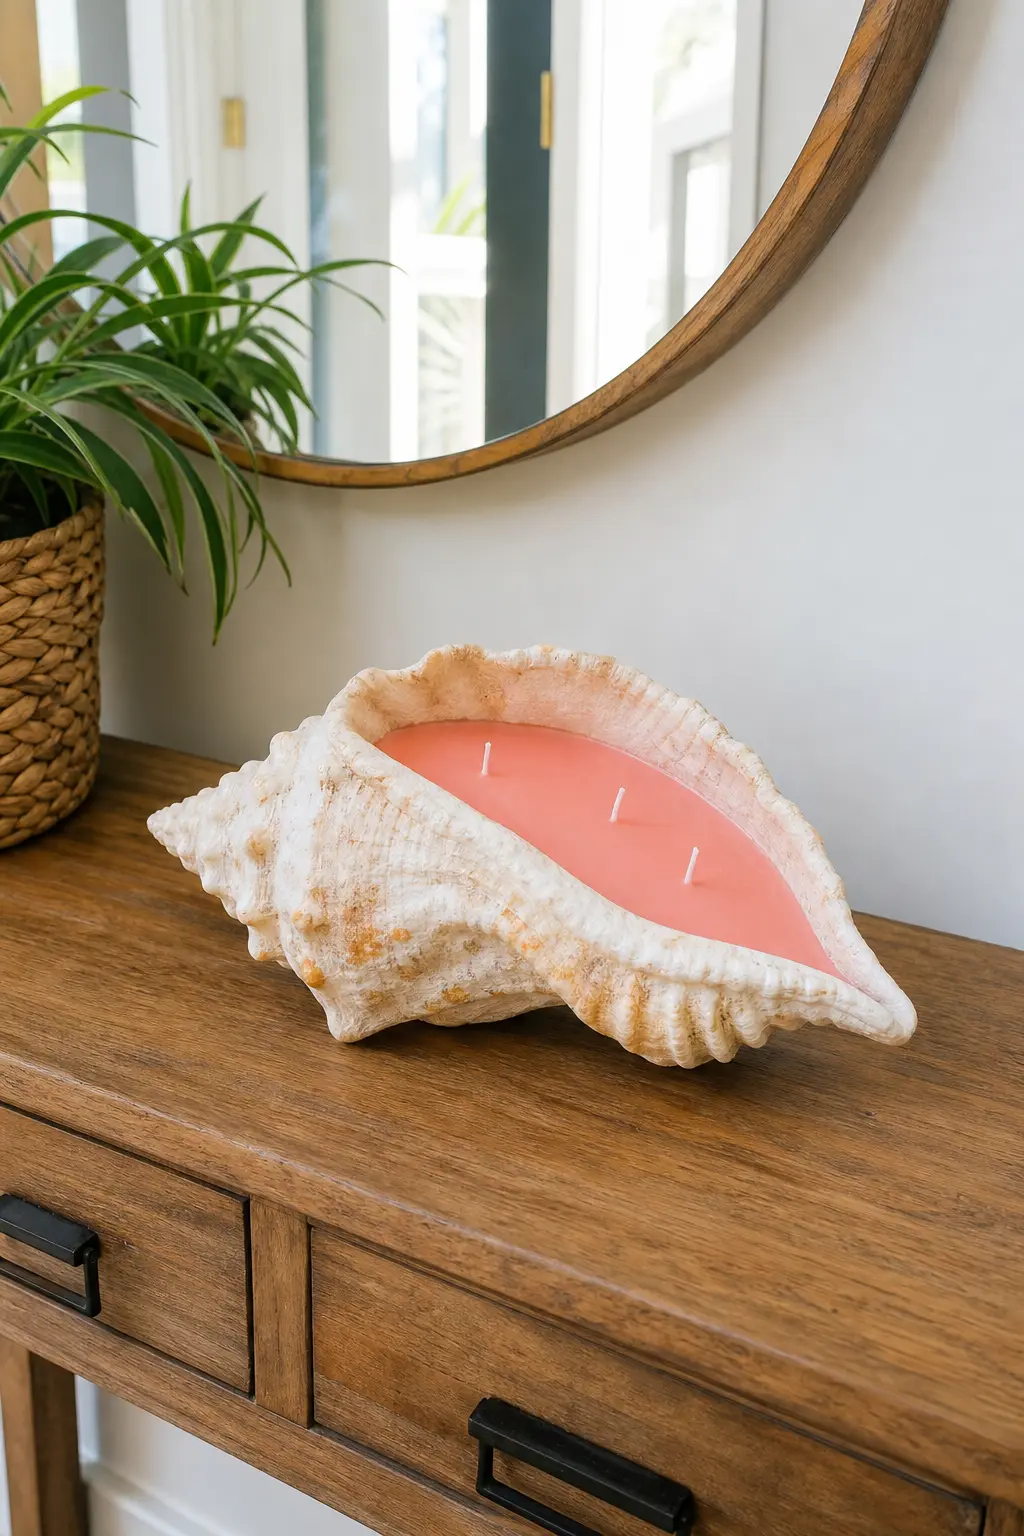
Conch Shell Candle
A large conch shell filled with a coral blush candle, poured deep into the spiral opening, is the most dramatic of the shell candles and needs a wick tabbed further down than usual.
Melt a coconut apricot wax to 185 degrees, add pink grapefruit and coconut fragrance oil at a 7 percent load, pour at 130 degrees, wick with a mini CD-6 glued deep in the spiral, and cure for eight days.
🛍 Shopping guide
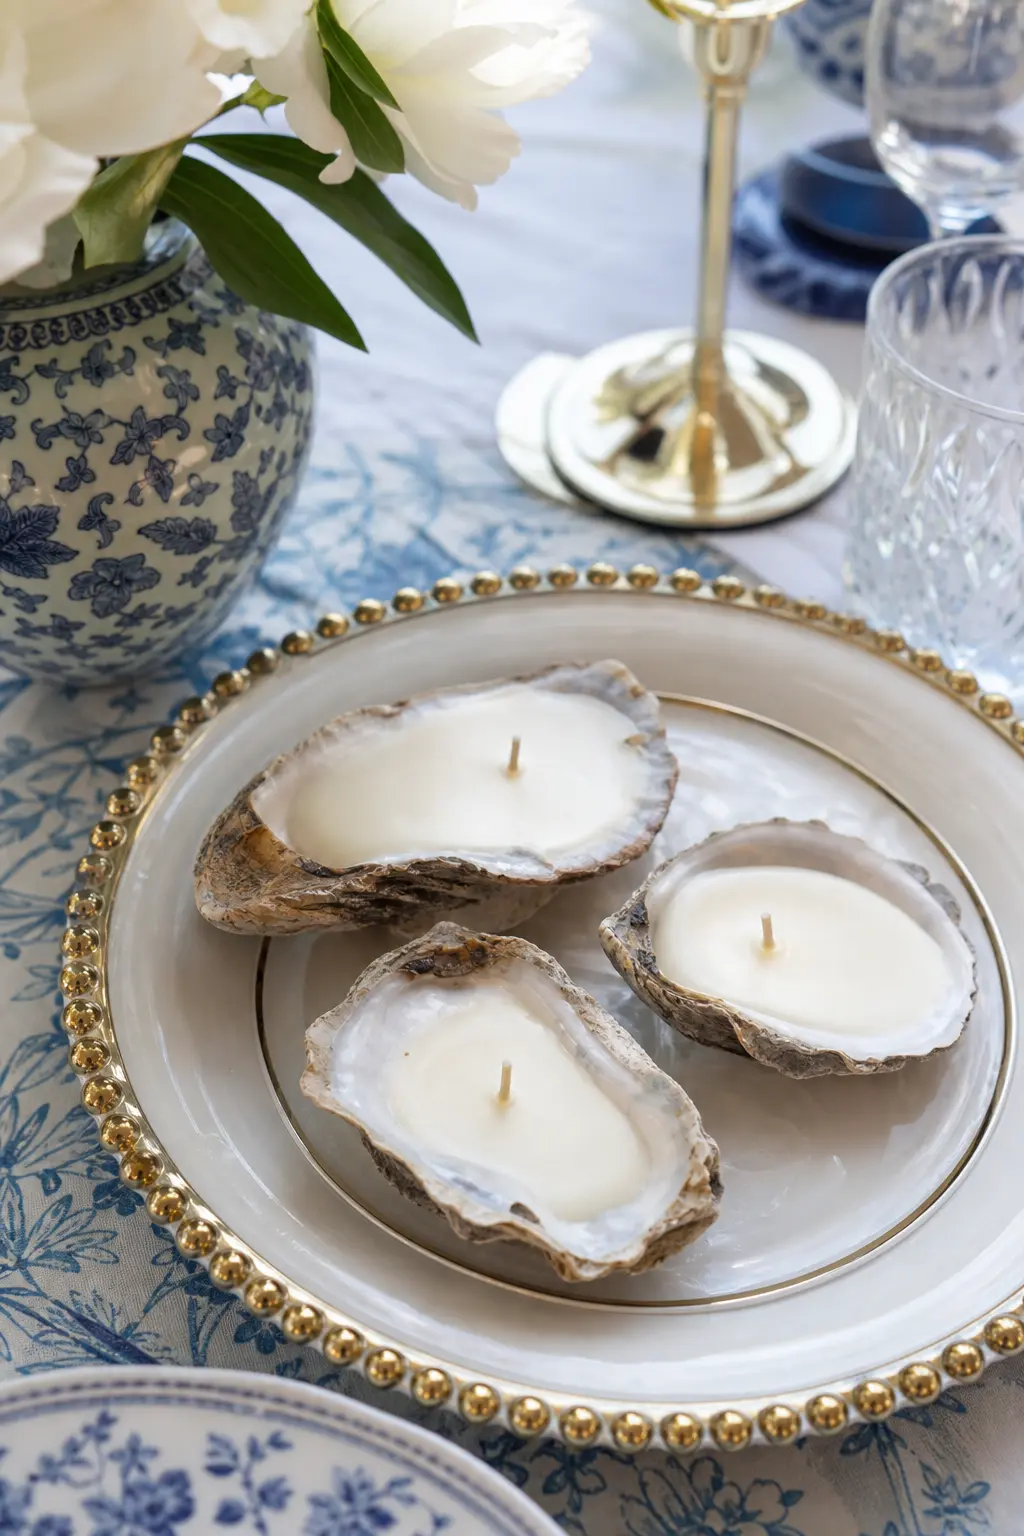
Oyster Shell Mini Trio
Three tiny pearl white candles nestled into oyster shells make an elegant place setting detail, small enough to sit beside a napkin without crowding the plate.
Melt soy wax 464 to 185 degrees, add white tea fragrance oil at a 7 percent load, pour at 125 degrees, wick each shell with a mini CD-2, and cure for six days.
🛍 Shopping guide
Sculptural Pillar Shapes
Once a mould goes past bubbles and ribs into an actual shape, a heart, a rose, a pinecone, the wax needs to hold a crisp edge without slumping in a warm room. A pillar blend with a hardening additive is what gets a clean line on a netted heart or a mushroom cap instead of a soft, rounded version of it.
The pinecone and mushroom shapes below sit happily alongside other fall crafts for adults on the same shelf, cured and ready before the season needs them.
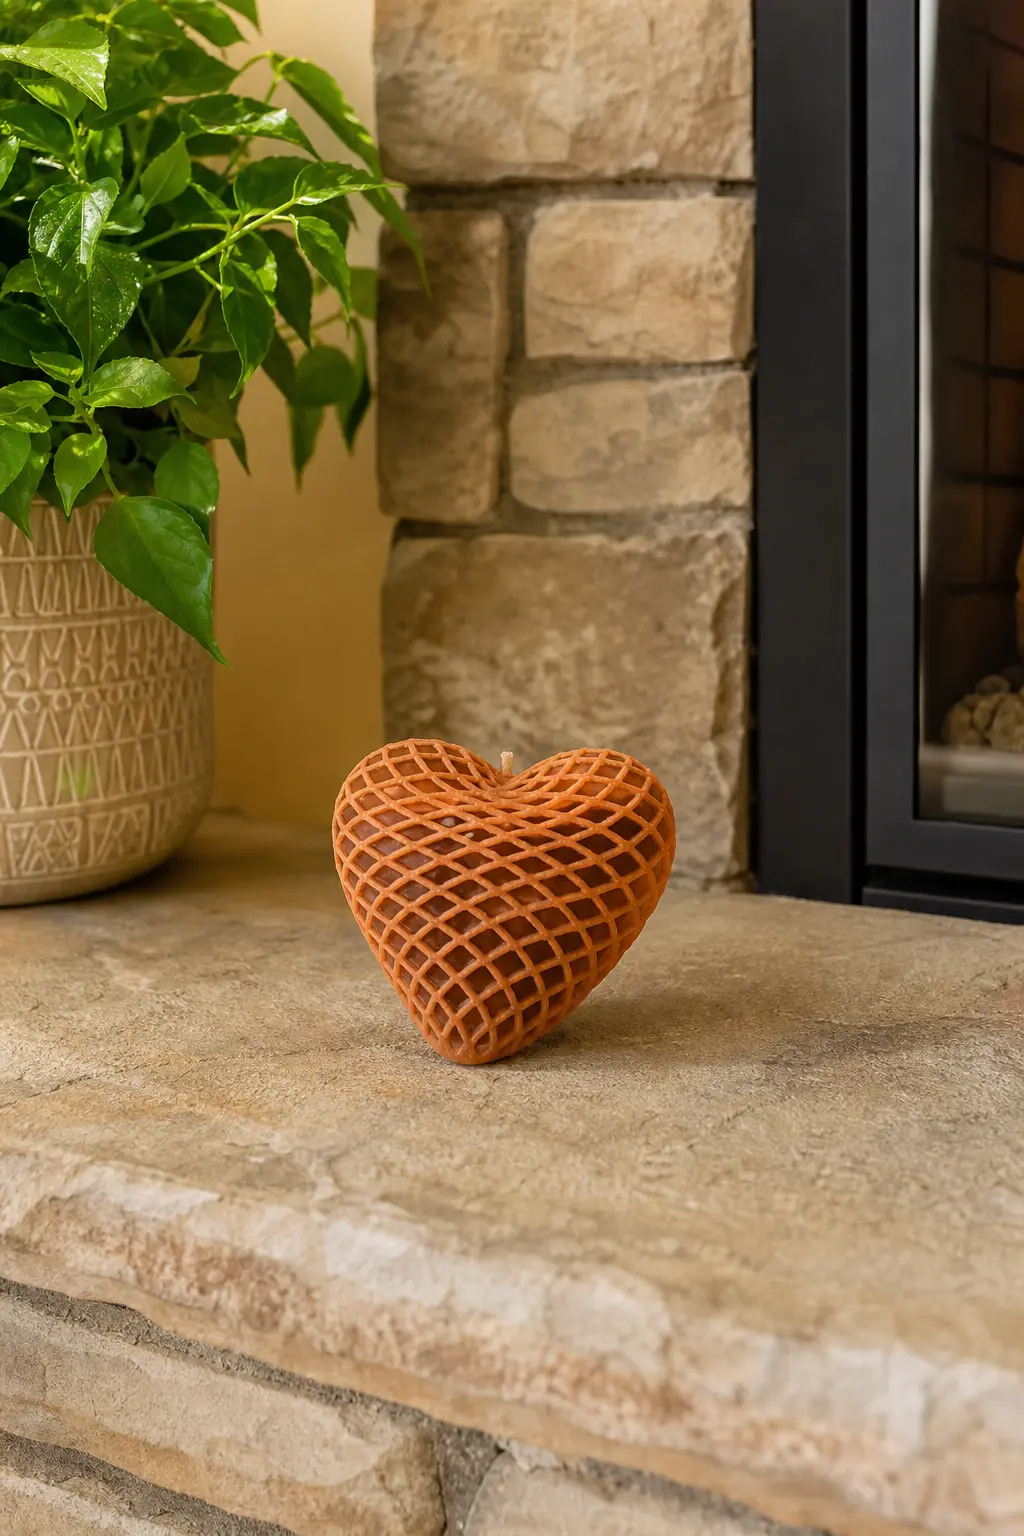
Netted Heart Candle
A netted heart shape in terracotta and rust, the texture like a raspberry’s surface, sits well on a stone hearth where its warm colour matches the setting.
Melt a soy pillar blend to 195 degrees, add smoked amber fragrance oil at a 6 percent load, pour at 180 degrees, unmould after 24 hours, wick with a zinc-core, and cure for five days.
🛍 Shopping guide
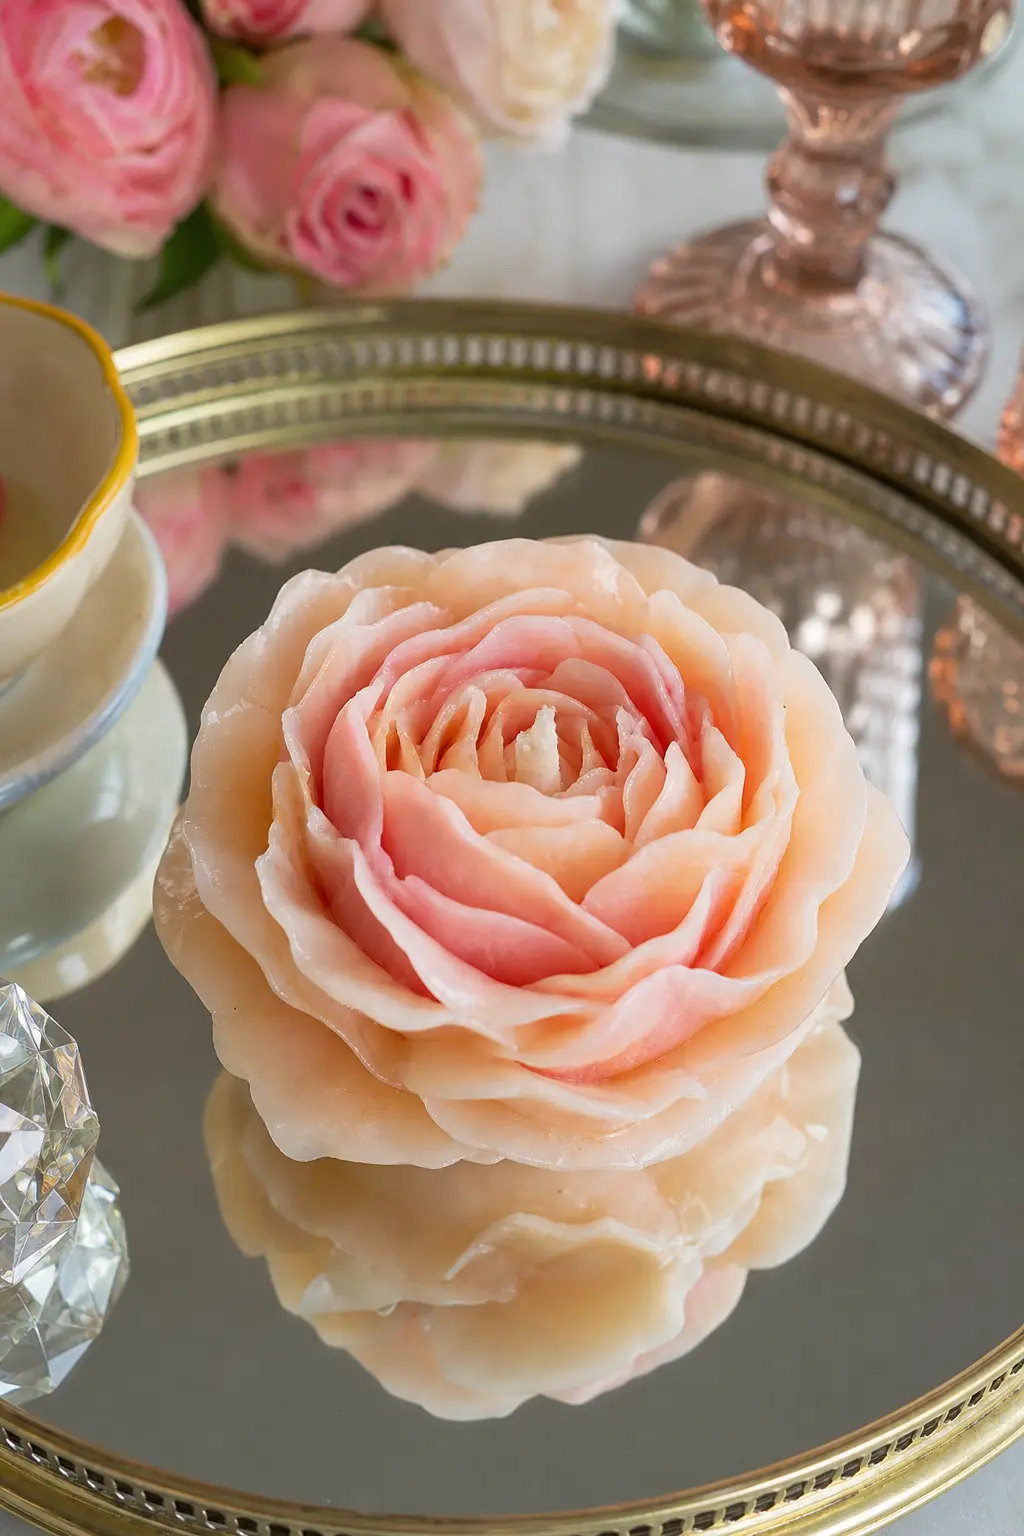
Rose Bloom Candle
A blush and peach rose bloom candle, petals layered in fine mould detail, suits a vanity tray in front of a mirror where the reflection doubles the effect.
Melt a soy pillar blend to 195 degrees, add rose and oud fragrance oil at a 6 percent load, pour at 180 degrees, unmould after 24 hours, wick with a small zinc-core, and cure for five days.
🛍 Shopping guide
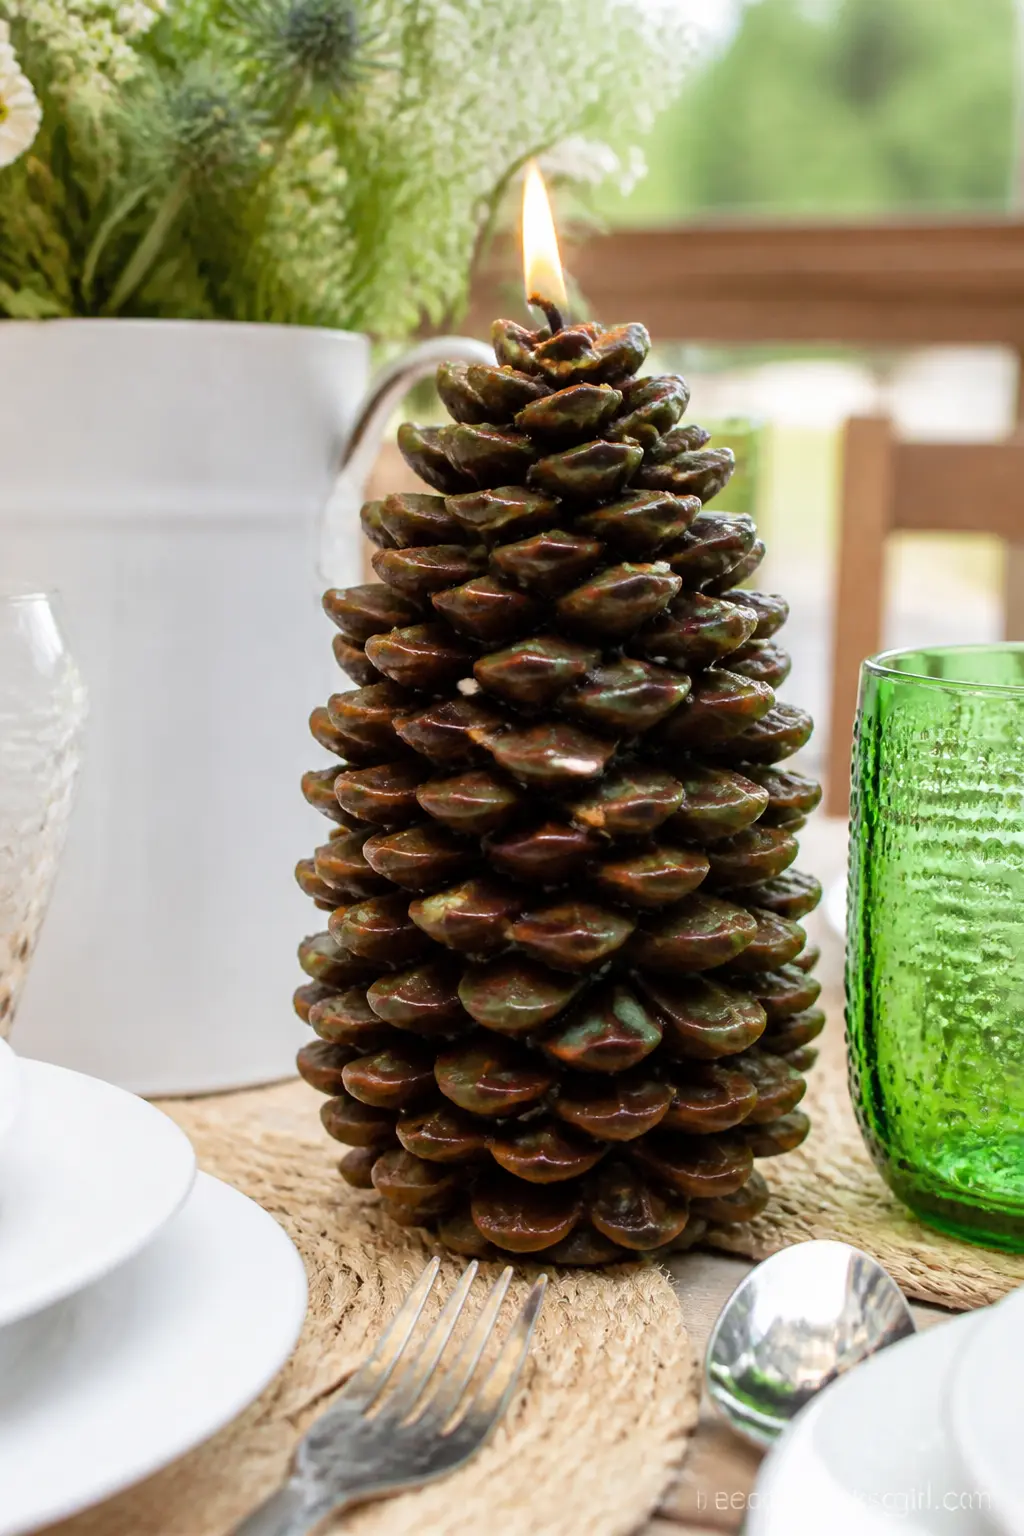
Pinecone Pillar Candle
A deep brown and olive pinecone candle, its scales textured with real definition, belongs on a mantel once the weather turns, with balsam fir fragrance to match.
Melt a paraffin soy pillar blend to 195 degrees, add balsam fir fragrance oil at a 6 percent load, pour at 185 degrees, unmould after 24 hours, wick with a medium zinc-core, and cure for six days.
🛍 Shopping guide
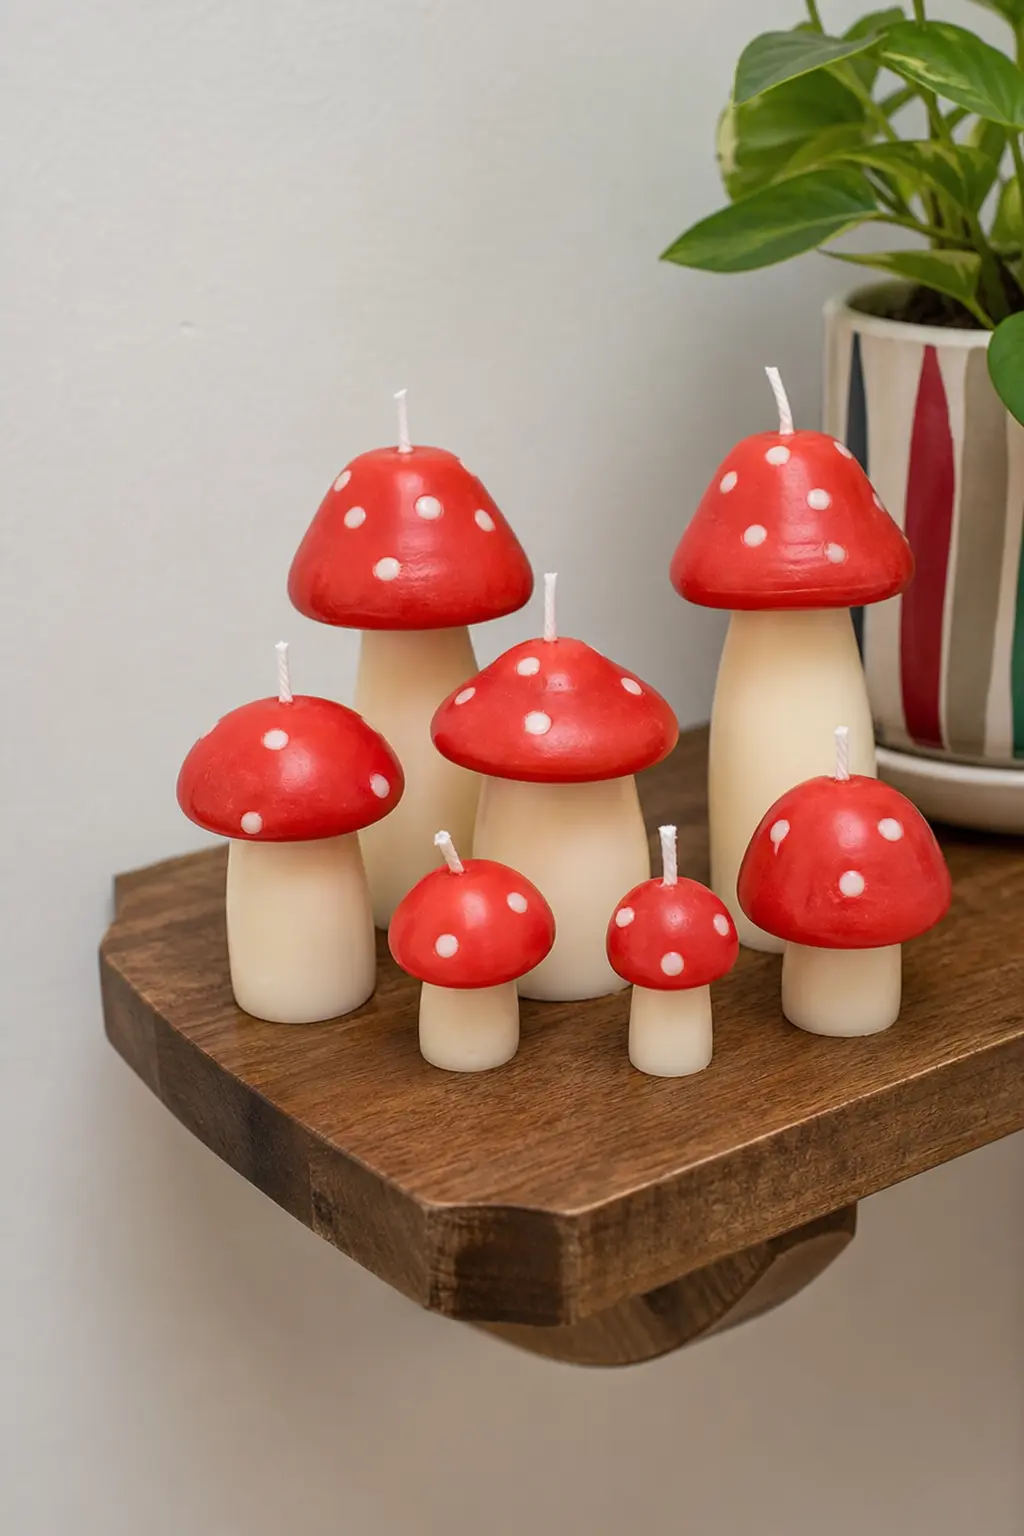
Whimsical Mushroom Cluster Candle
A cluster of small toadstool candles, red caps over cream stems poured in two stages, sits on a floating shelf and photographs like a tiny woodland scene.
Melt a soy pillar blend to 195 degrees, add forest moss fragrance oil at a 6 percent load, pour the cream stems at 180 degrees, add the red cap layer once set, wick each with a mini zinc-core, and cure for five days.
🛍 Shopping guide
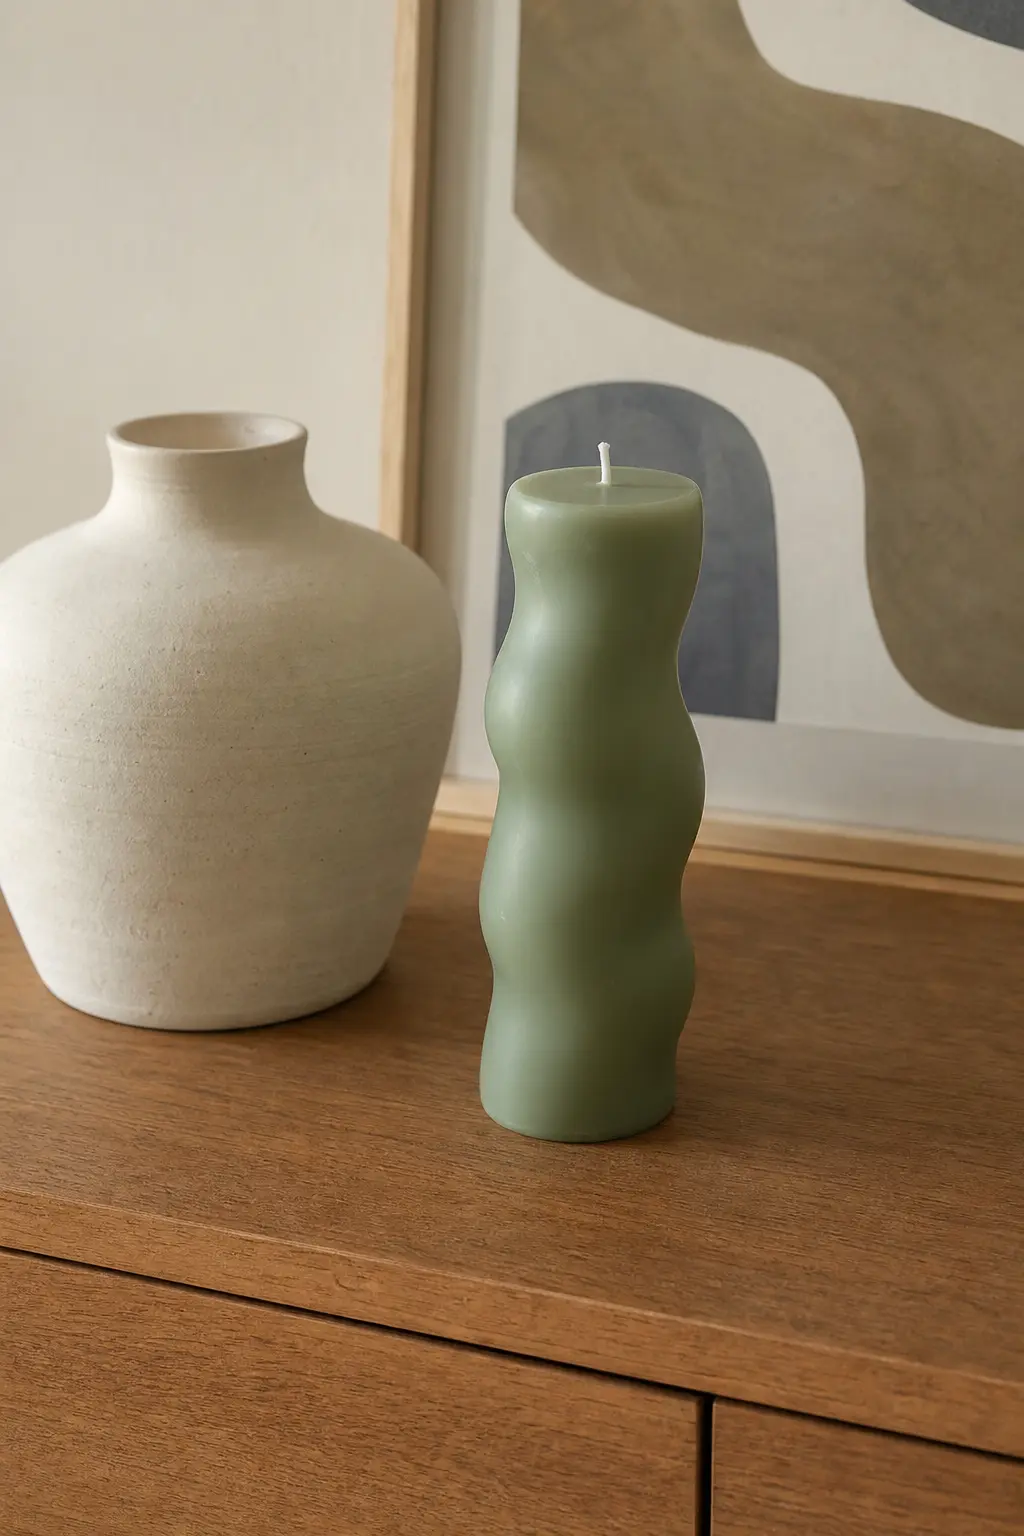
Abstract Wave Blob Pillar
An organic, freeform blob pillar in sage green, all soft curves and no straight edges, sits on a console beside a plaster vase and looks entirely current.
Melt a soy pillar blend to 195 degrees, add cedar and sage fragrance oil at a 6 percent load, pour at 180 degrees, unmould after 24 hours, wick with a medium zinc-core, and cure for five days.
🛍 Shopping guide
Frequently Asked Questions
How much fragrance oil should I use in a candle?
Most beginners start between 6 and 10 percent of the wax weight, and soy waxes specifically tend to perform best between 8 and 12 percent, always measured on a scale rather than by volume.
What temperature do you add fragrance oil to melted wax?
Most fragrance oils bind best when stirred in between 180 and 185 degrees Fahrenheit, since adding it too hot burns off the top notes and too cool leaves it unevenly distributed.
How long do candles need to cure before you can burn them?
Give a container candle one to two weeks so the fragrance fully bonds with the wax; testing earlier gives a misleadingly weak scent throw even in a well-made candle.
How do I know what wick size to use?
Wick size is decided by the vessel’s diameter and the wax type, not appearance, so it is worth testing two or three sizes in small batches before committing to one for a full run.
Why did my candle sink in the middle or crack on top?
That is almost always a pour temperature problem: pouring too hot causes sinkholes as the wax cools unevenly, while pouring too cold leaves poor adhesion and a rough top.
Can I just add more fragrance oil for a stronger scent?
No, going over the wax’s recommended fragrance load does not throw more scent, it usually causes sweating, a weak burn or wick problems, so a better fragrance oil and a full cure time do more than extra volume.
19 fall crafts for adults that finish as real decor: mantel-worthy pumpkins, garlands, wreaths and c
This post contains affiliate links. If you buy something through these links, I may earn a small com
21 candle painting ideas with the exact acrylic and medium ratio and the time each design takes, for
Leave a Reply