

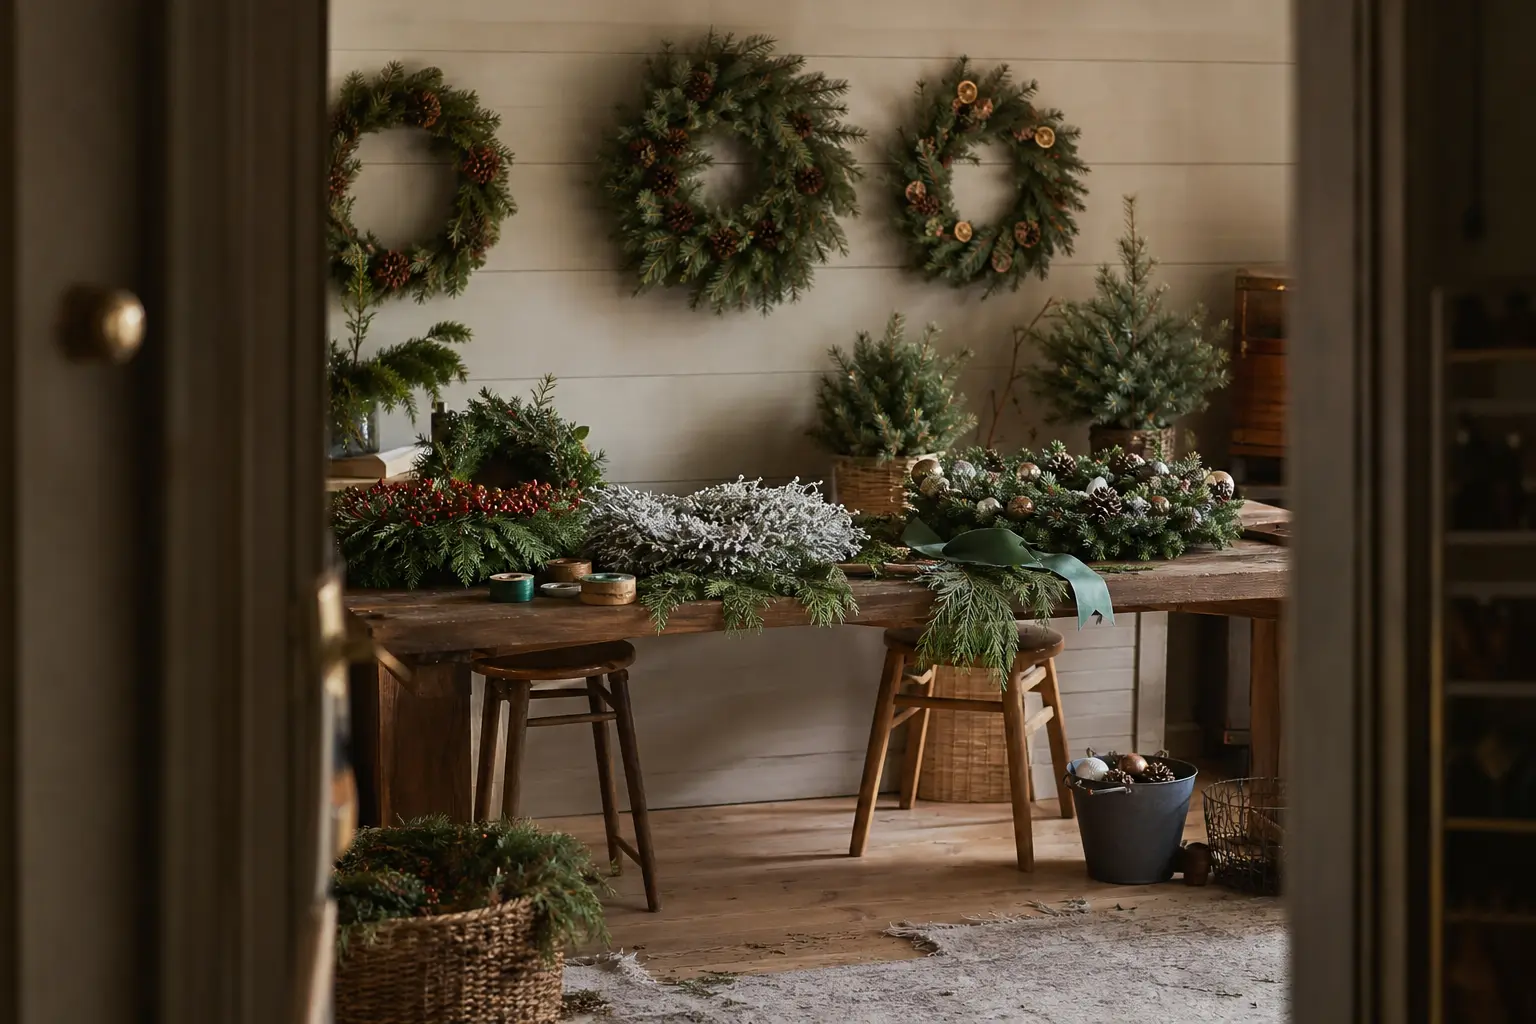
Christmas wreaths diy projects solve the oldest decorating problem there is: one round shape, hung in one obvious spot, and the whole house reads as Christmas before a single bauble comes out of the box. You do not need a florist’s workshop or a car boot full of foliage. Most of these use a frame you already own, a glue gun, and whatever is sitting in the fruit bowl or the button tin.
Some of the 22 below are fresh and fragrant and built to last the season outdoors. Others are glitter, felt or paper and will survive being packed flat in a drawer for next year. A few are genuinely five minutes with a toddler. Pick by the room, the hands helping, and how much mess you can live with, then work through the list the way you would a buffet: a little of everything, nothing you have to apologise for. For more projects that fill out the rest of the house once the door is sorted, the easy Christmas decorations roundup picks up where this one leaves off.
This post contains affiliate links. If you buy through them, I may earn a small commission at no extra cost to you.
- Classic Fresh Evergreen Wreath
- Dried Orange Slice and Cinnamon Wreath
- Embroidery Hoop Boho Wreath
- Yarn Pom-Pom Wreath
- Natural Pinecone Wreath
- Fresh Cranberry and Rosemary Wreath
- Burlap Mesh Ribbon Wreath
- Paper Rosette Wreath
- Jingle Bell Wreath
- Felt Ball Wreath
- Vintage Button Wreath
- Candy Cane Wreath
- Eucalyptus and Velvet Ribbon Wreath
- Grapevine Half-Wreath Swag
- Mason Jar Lid Wreath
- Clothespin Photo Memory Wreath
- Pipe Cleaner Candy Wreath
- Plaid Ribbon Wreath
- Popcorn and Cranberry Garland Wreath
- Birch Twig Wreath
- Tinsel Glam Wreath
- Wooden Initial Door Hanger Wreath
- Frequently Asked Questions
Classic Fresh Evergreen Wreath
This is the wreath people mean when they say wreath: real fir, a proper round shape, and that smell the second the door opens. It belongs on the front door and nowhere else, because it needs cold air and a bit of weather to last.
What You Need
- 1 wire wreath frame, 12 inch diameter
- 1 roll green floral paddle wire
- About 30 fresh evergreen sprigs, 6 inch each (fir, pine or cedar)
- Garden snips or floral shears
- 1 yard ribbon for hanging
How to Make It
- Cut the evergreen into 6 inch sprigs with the snips (an adult handles the cutting tool).
- Gather 3 to 4 sprigs into a small bundle, all facing the same direction.
- Wire the bundle tightly to the frame, leaving the wire attached to keep working.
- Lay the next bundle over the stems of the first, hiding the join, and wire again.
- Repeat all the way around until the frame disappears under greenery.
- Tie a ribbon loop to the back of the frame and hang away from direct heat.

🛍 Shopping guide
Dried Orange Slice and Cinnamon Wreath
This one smells like mulled wine and looks like a magazine shoot, for the cost of a bag of oranges. It dries flat and keeps for years, so it suits a kitchen wall or a pantry door, somewhere warm and dry rather than outside.
What You Need
- 4 to 5 oranges, sliced 1/4 inch thick
- 10 cinnamon sticks, 3 inch
- 1 grapevine wreath base, 12 inch diameter
- Hot glue gun
- 8 star anise (optional)
- 1 yard twine for hanging
How to Make It
- Slice the oranges evenly and pat the slices dry with a towel.
- An adult bakes the slices at 200 F (95 C) for about 3 hours, flipping halfway, until stiff and not sticky.
- Let the slices cool completely on a rack before handling them further.
- An adult hot glues the orange slices onto the grapevine base, overlapping them like scales.
- Glue cinnamon sticks and star anise into the gaps between slices.
- Tie twine to the back for hanging.

🛍 Shopping guide
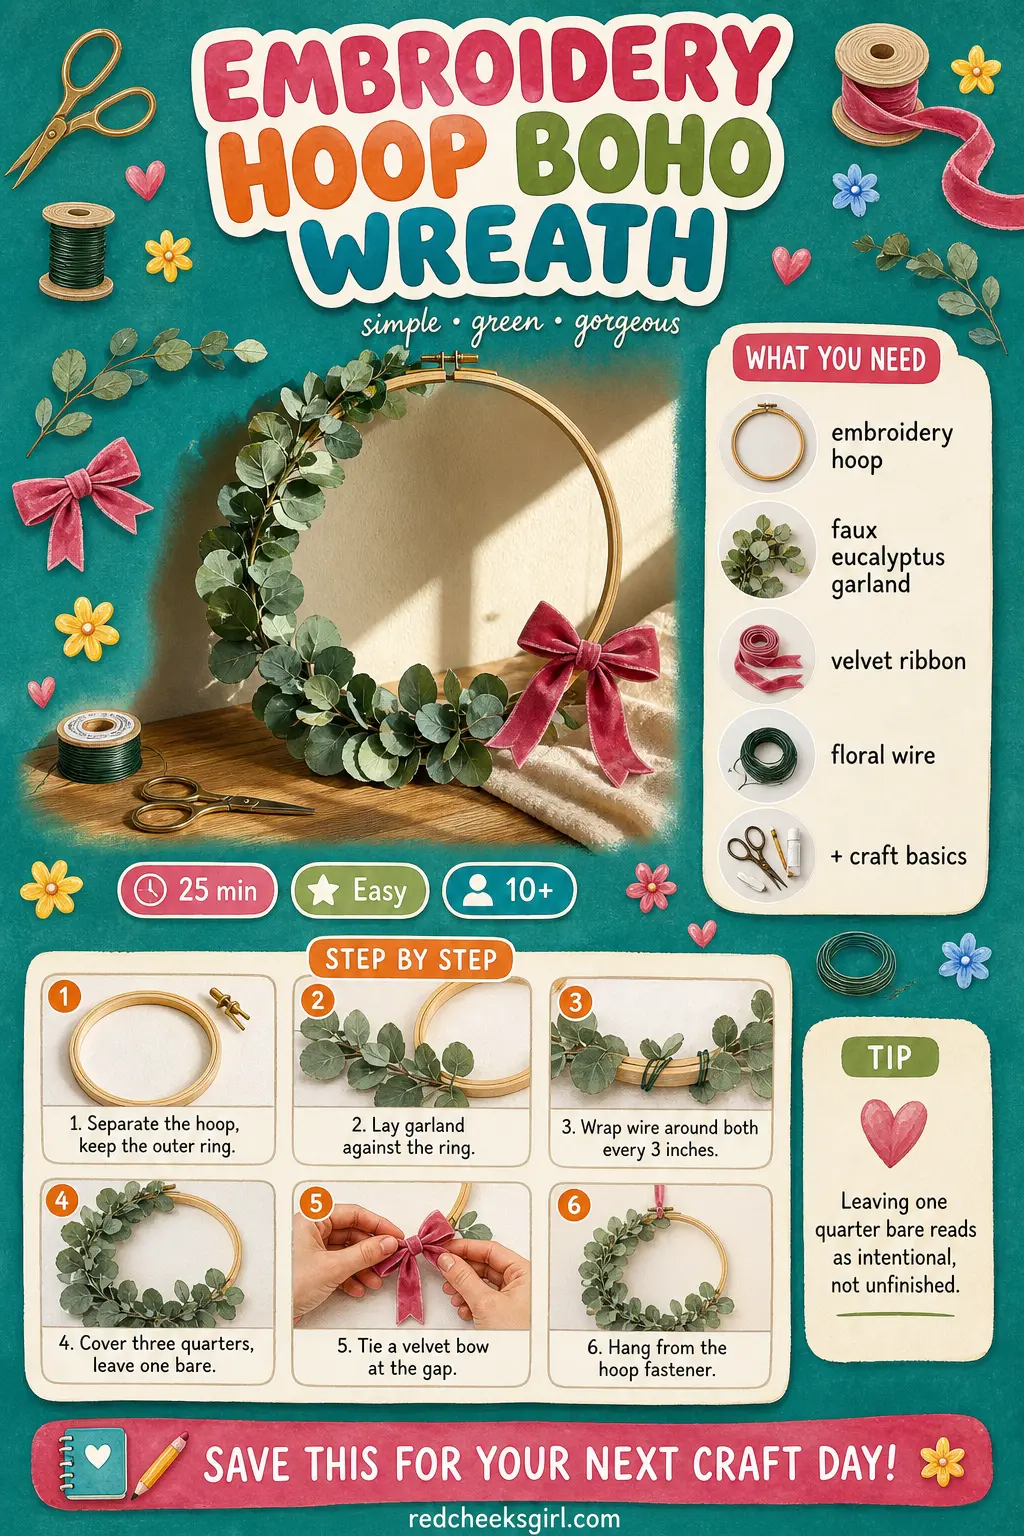
Embroidery Hoop Boho Wreath
Swap the heavy wire frame for a wooden hoop and the whole thing gets lighter, both in weight and in mood. It suits a bedroom wall, a nursery, or anywhere a traditional fir wreath would feel too much.
What You Need
- 1 wooden embroidery hoop, 10 inch
- Faux eucalyptus garland, 3 feet
- Velvet ribbon, 1 yard, 1 inch wide
- Thin floral wire, 2 feet
- Scissors
How to Make It
- Separate the two rings of the hoop and set the inner ring aside for another project.
- Lay the eucalyptus garland against the outer ring and wrap wire around both every 3 inches to secure it.
- Cover about three quarters of the hoop, leaving one section bare for a modern, asymmetrical look.
- Tie the velvet ribbon into a bow where the greenery ends and let the tails hang.
- Use the hoop’s own screw fastener as the hanging point.
🛍 Shopping guide
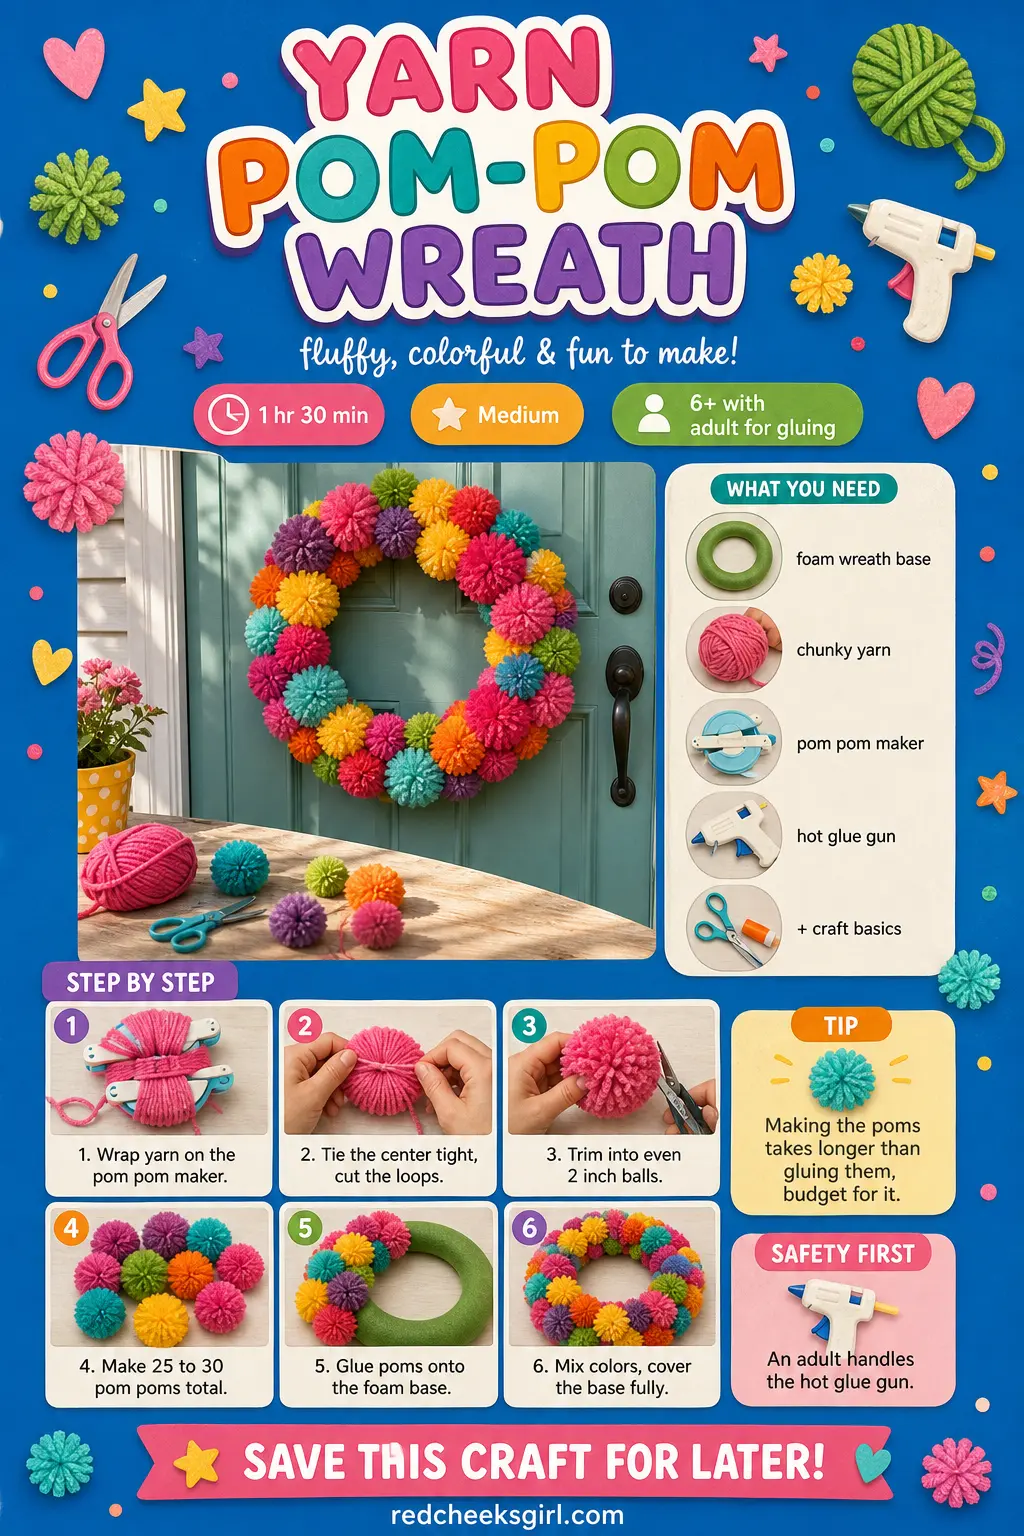
Yarn Pom-Pom Wreath
Every pom pom is soft, which makes this the one wreath a toddler can actually touch without anyone wincing. It suits a nursery door or a kid’s bedroom wall, and it packs flat in a bag for storage.
What You Need
- 1 foam wreath base, 12 inch
- 3 skeins chunky yarn, mixed shades
- 1 pom pom maker (or cardboard rings)
- Scissors
- Hot glue gun
How to Make It
- Wrap yarn around the pom pom maker and tie the center tightly before cutting the loops open.
- Trim each pom into a tidy, even ball about 2 inches across, you will need 25 to 30.
- An adult hot glues pom poms onto the foam base, packing them in tightly so no foam shows.
- Mix colors randomly as you go rather than in blocks, it reads less stripy.
- Glue a ribbon loop to the back once the whole base is covered.
🛍 Shopping guide
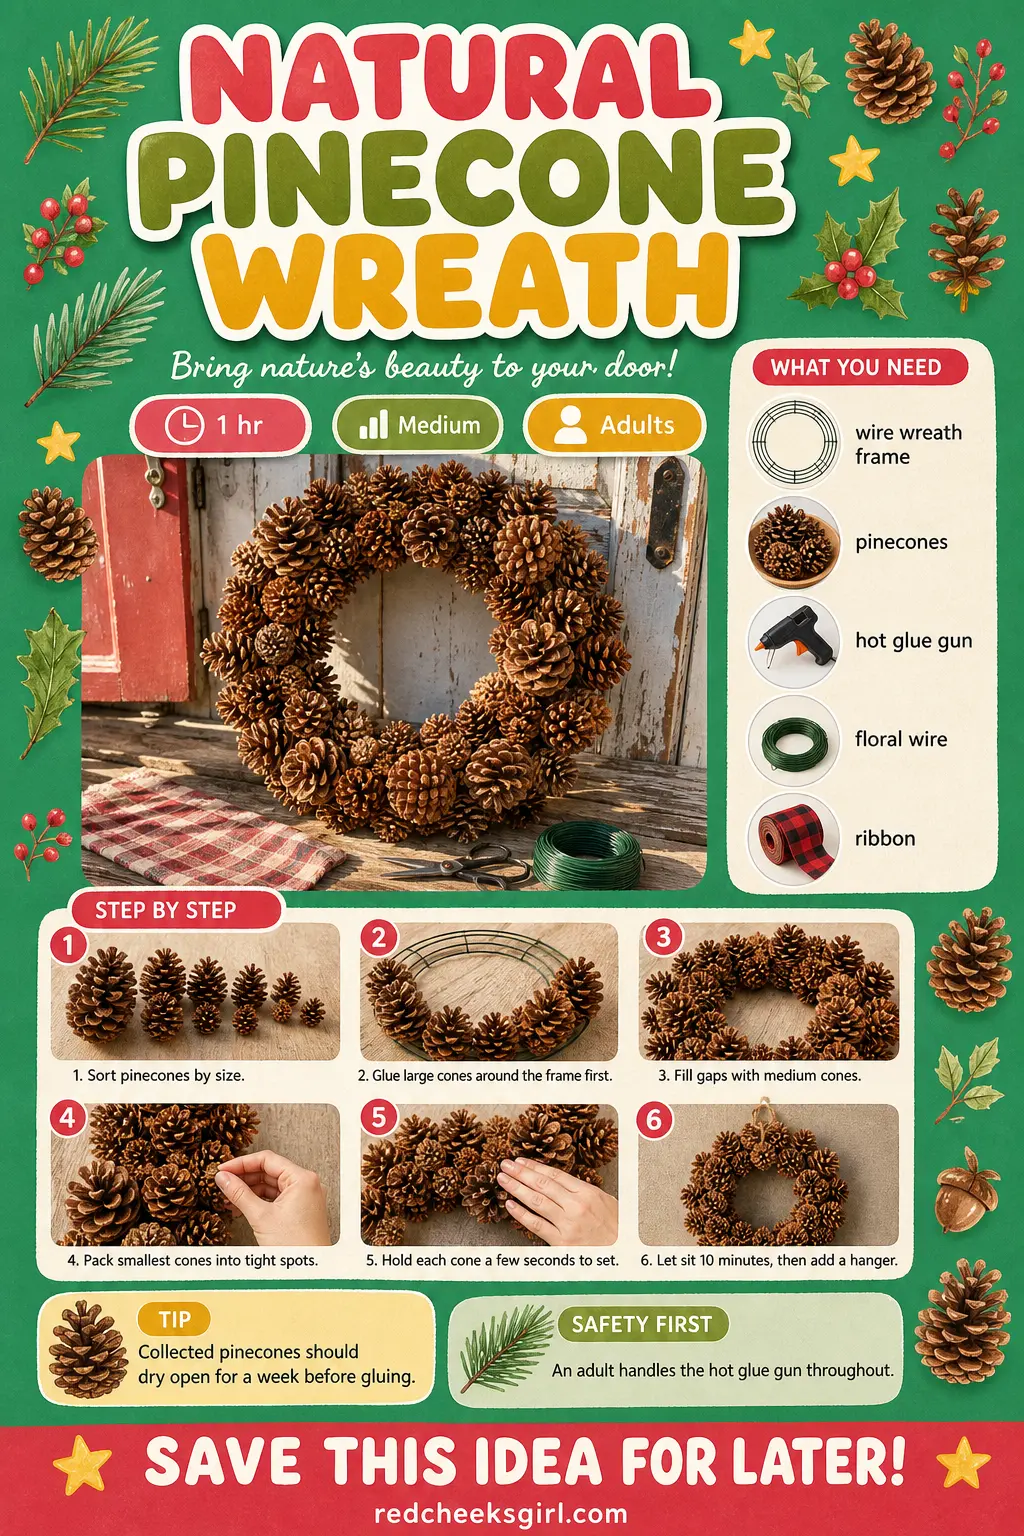
Natural Pinecone Wreath
Pinecones cost nothing if there is a park nearby, and the finished wreath looks expensive, textured and entirely unfussy. It belongs outdoors, on a porch or a shed door, somewhere it can get rained on without complaint.
What You Need
- 1 wire wreath frame, 14 inch
- 40 to 50 pinecones, mixed sizes
- Hot glue gun
- Floral wire
- 1 yard ribbon
How to Make It
- Sort pinecones into large, medium and small piles before you start gluing anything.
- An adult hot glues the largest pinecones around the frame first, pointing outward like petals.
- Fill the gaps between them with medium cones, then small cones for the tightest spots.
- Press each cone for a few seconds while the glue grabs, it sets fast but needs that pressure.
- Let the whole wreath sit for 10 minutes before moving it, then wire on a hanging loop.
🛍 Shopping guide
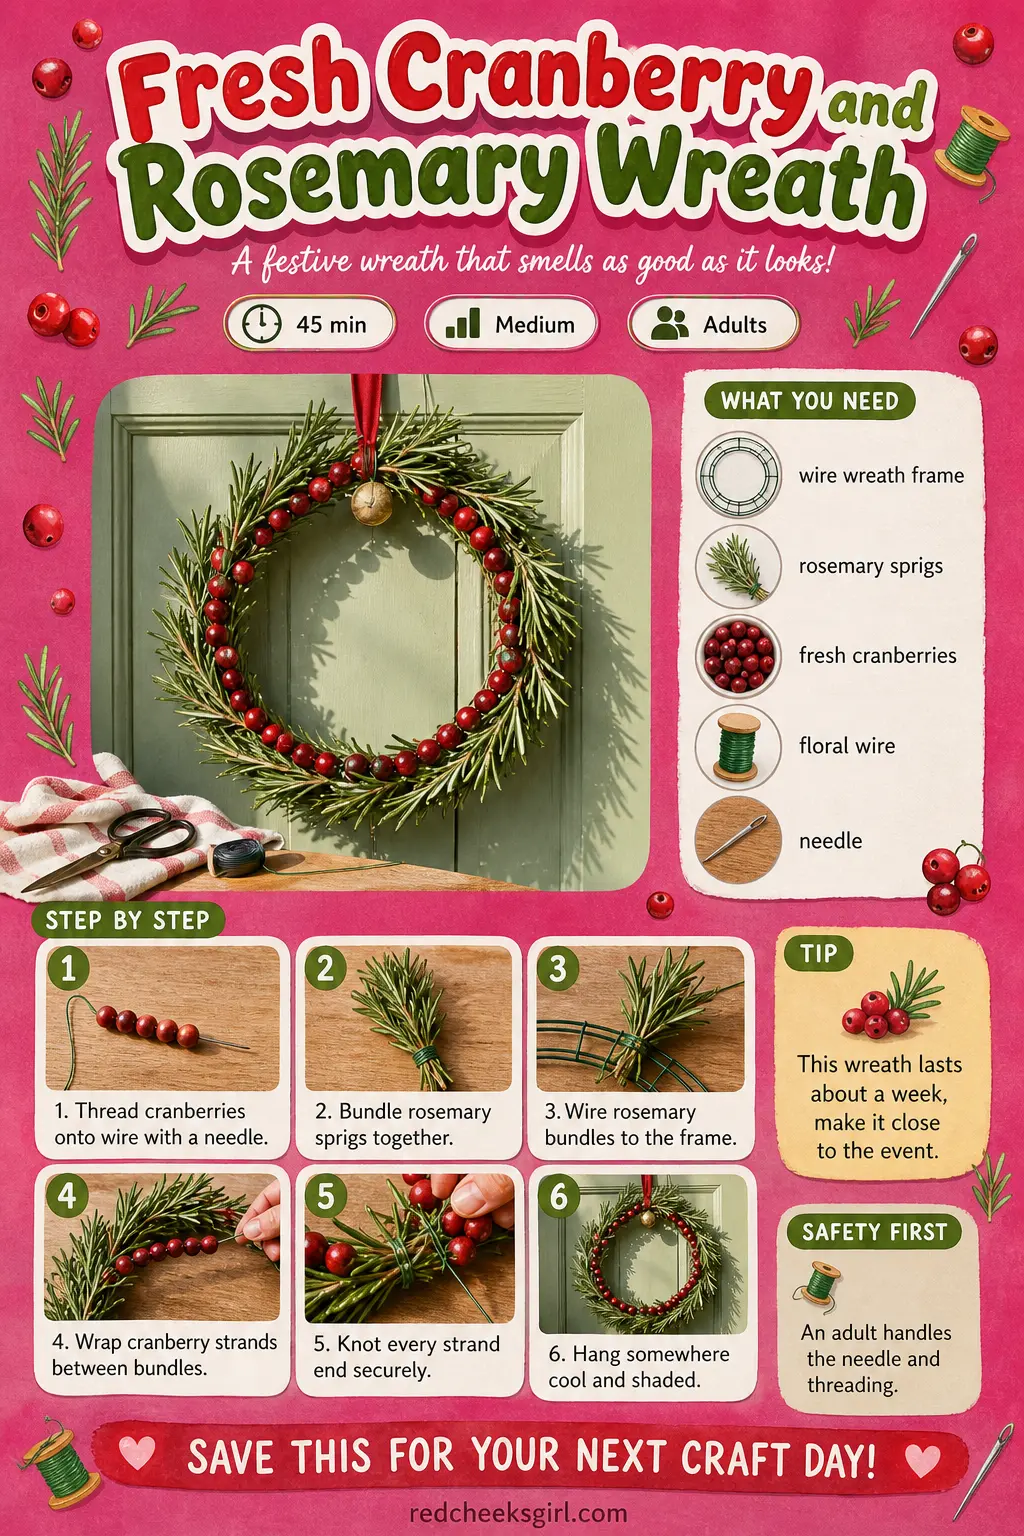
Fresh Cranberry and Rosemary Wreath
This is the smallest wreath on the list and the one with the shortest life, a week or so, but it earns its spot on a kitchen door or a table setting for sheer color and scent. Treat it as a one-occasion piece rather than something to store.
What You Need
- 1 wire wreath frame, 10 inch
- 20 fresh rosemary sprigs, 6 inch
- 2 cups fresh cranberries
- Floral wire
- 1 long needle or skewer for threading
How to Make It
- An adult threads cranberries onto a length of floral wire with the needle, like beading a necklace, making several short strands.
- Gather rosemary into small bundles and wire them to the frame, all facing one direction.
- Wrap the cranberry strands around the frame, weaving between the rosemary bundles.
- Secure both ends of every strand firmly so berries cannot slide loose.
- Hang somewhere cool, this wreath does not like heat or direct sun.
🛍 Shopping guide
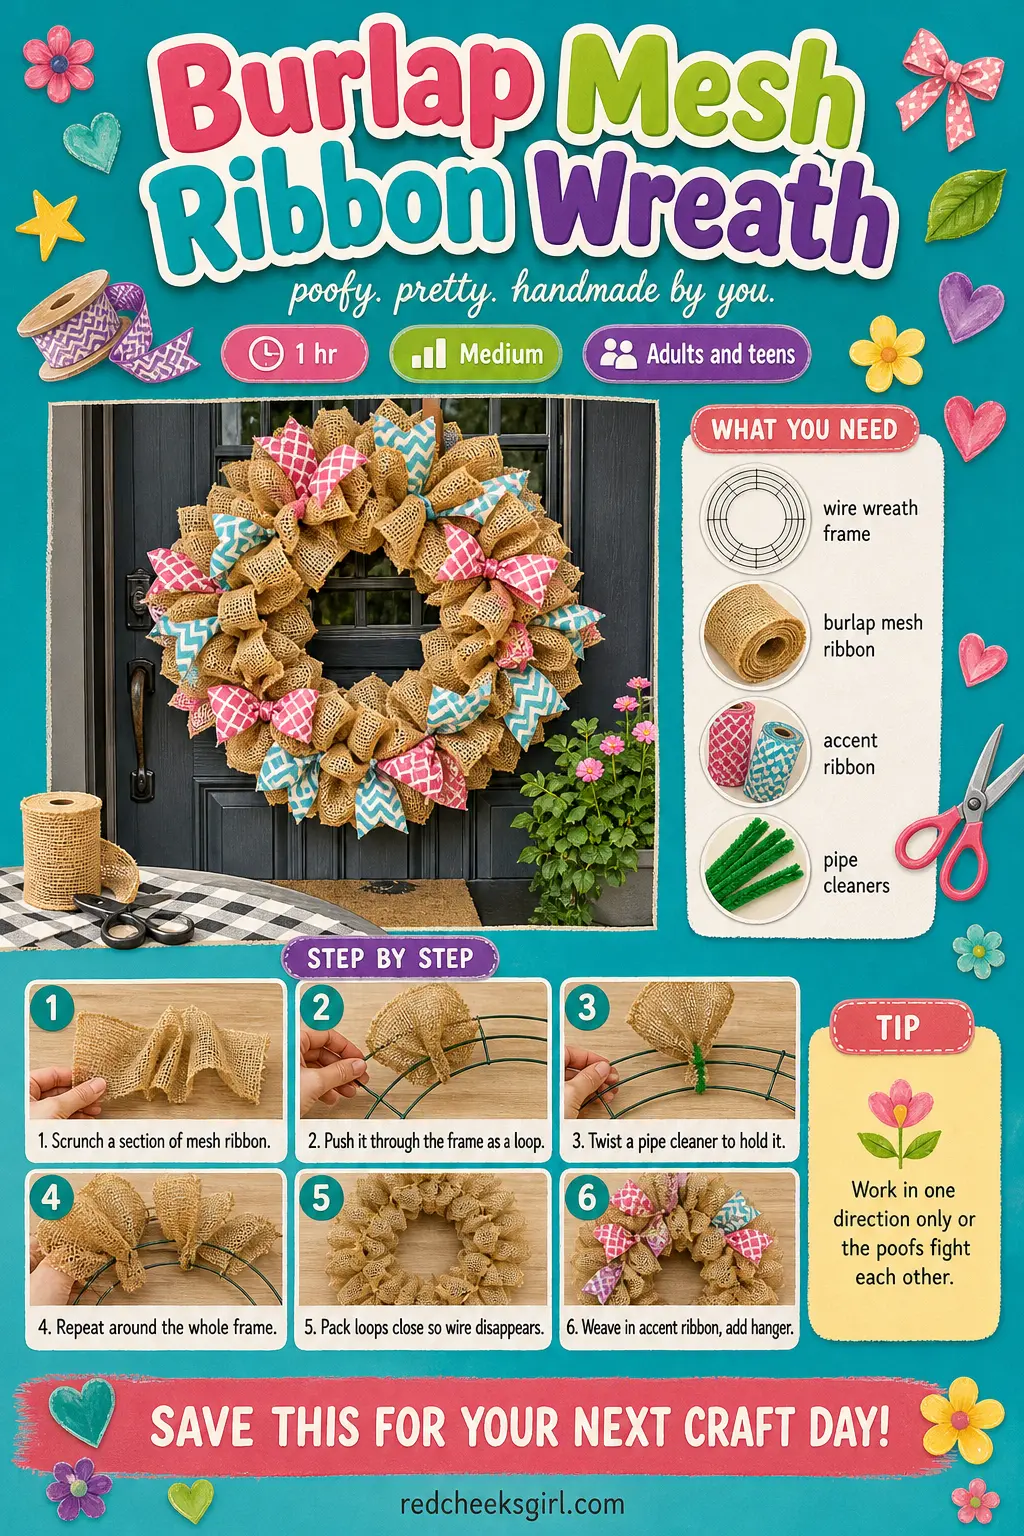
Burlap Mesh Ribbon Wreath
This is the big, poofy, farmhouse-style wreath people pay a lot for at a market stall. It is really just ribbon pushed through a frame over and over, and it suits a front door or a porch, rain or shine.
What You Need
- 1 wire wreath frame, 14 inch
- 10 yards burlap mesh ribbon, 10 inch wide
- 2 yards decorative accent ribbon
- 6 pipe cleaners or floral wire
How to Make It
- Scrunch a 6 inch section of mesh ribbon and push it through the frame to form a loop, or poof.
- Twist a pipe cleaner around the base of the poof to hold it in place against the frame.
- Scrunch the next section and repeat, working all the way around in one direction.
- Keep poofs close together so the wire frame disappears entirely under ribbon.
- Weave the accent ribbon through the gaps for a second layer of color, then add a hanging loop.
🛍 Shopping guide
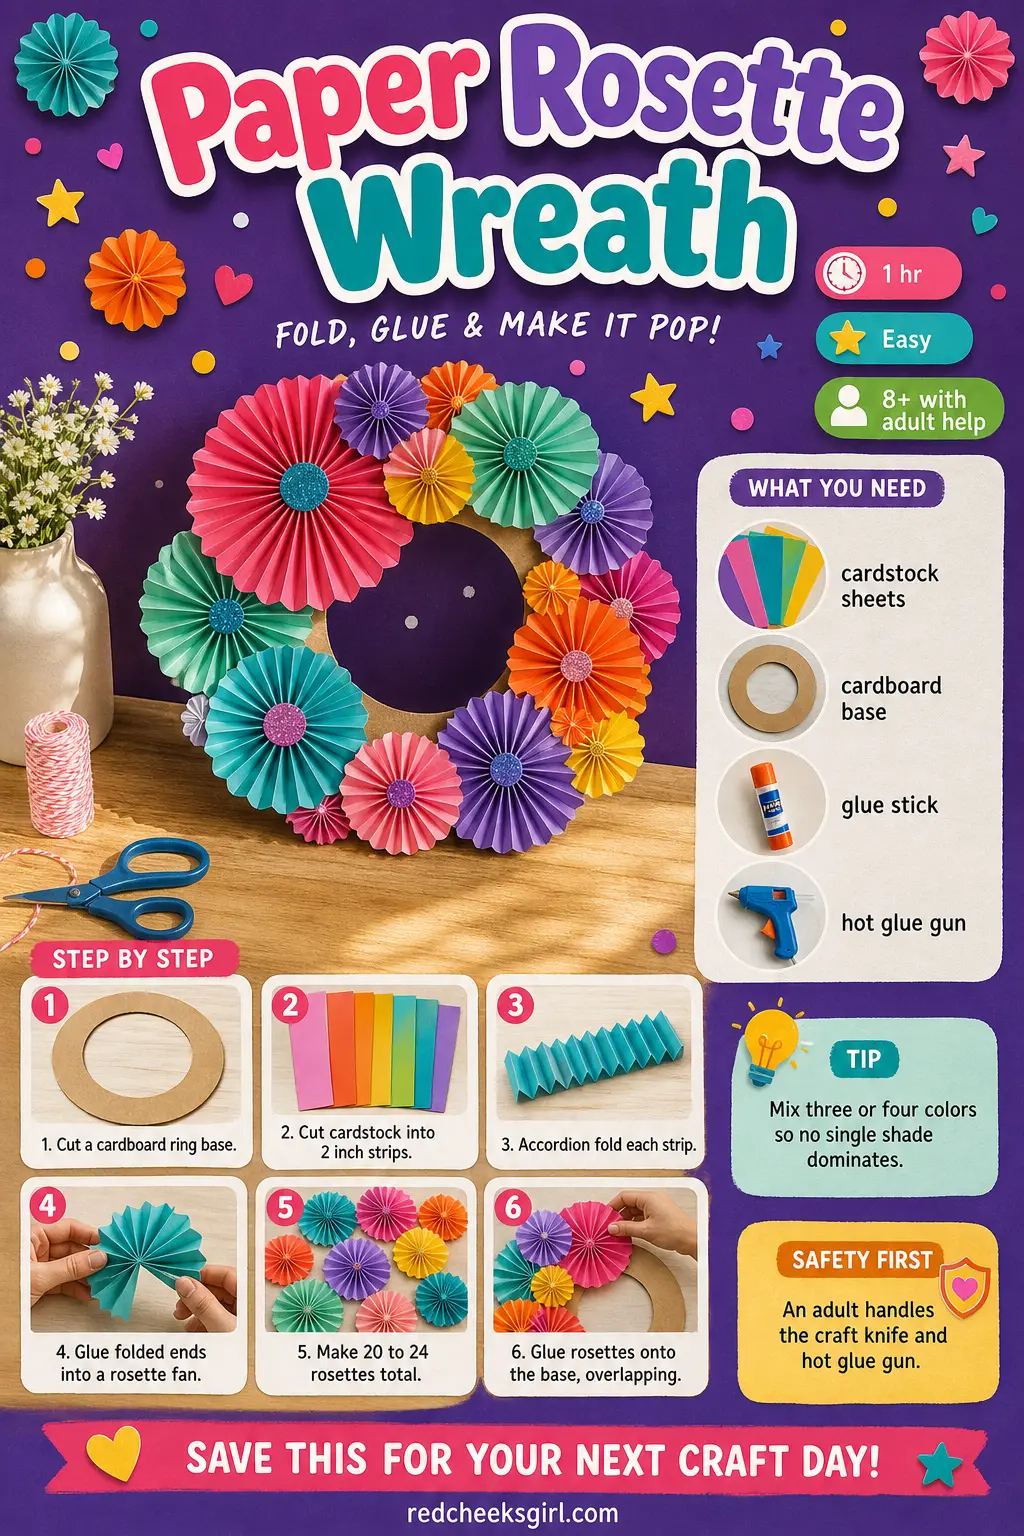
Paper Rosette Wreath
No glue gun burns, no stray berries, just folded cardstock in whatever colors suit the room. It is the one to make on an office desk or a kitchen table covered in newspaper, and it folds flat for storage afterward.
What You Need
- 12 sheets cardstock, A4, assorted colors
- 1 cardboard circle base, 12 inch (cut from a box)
- Glue stick
- Hot glue gun
How to Make It
- An adult cuts the cardboard circle using a craft knife, with a smaller circle removed from the center.
- Cut cardstock into 2 inch wide strips the long way of the sheet.
- Fold each strip accordion-style, then glue the two end folds together with the glue stick to form a fan shape, a rosette.
- Make 20 to 24 rosettes before gluing any of them down.
- An adult hot glues rosettes onto the cardboard base, overlapping edges so no cardboard shows.
- Glue a ribbon loop to the back for hanging.
🛍 Shopping guide
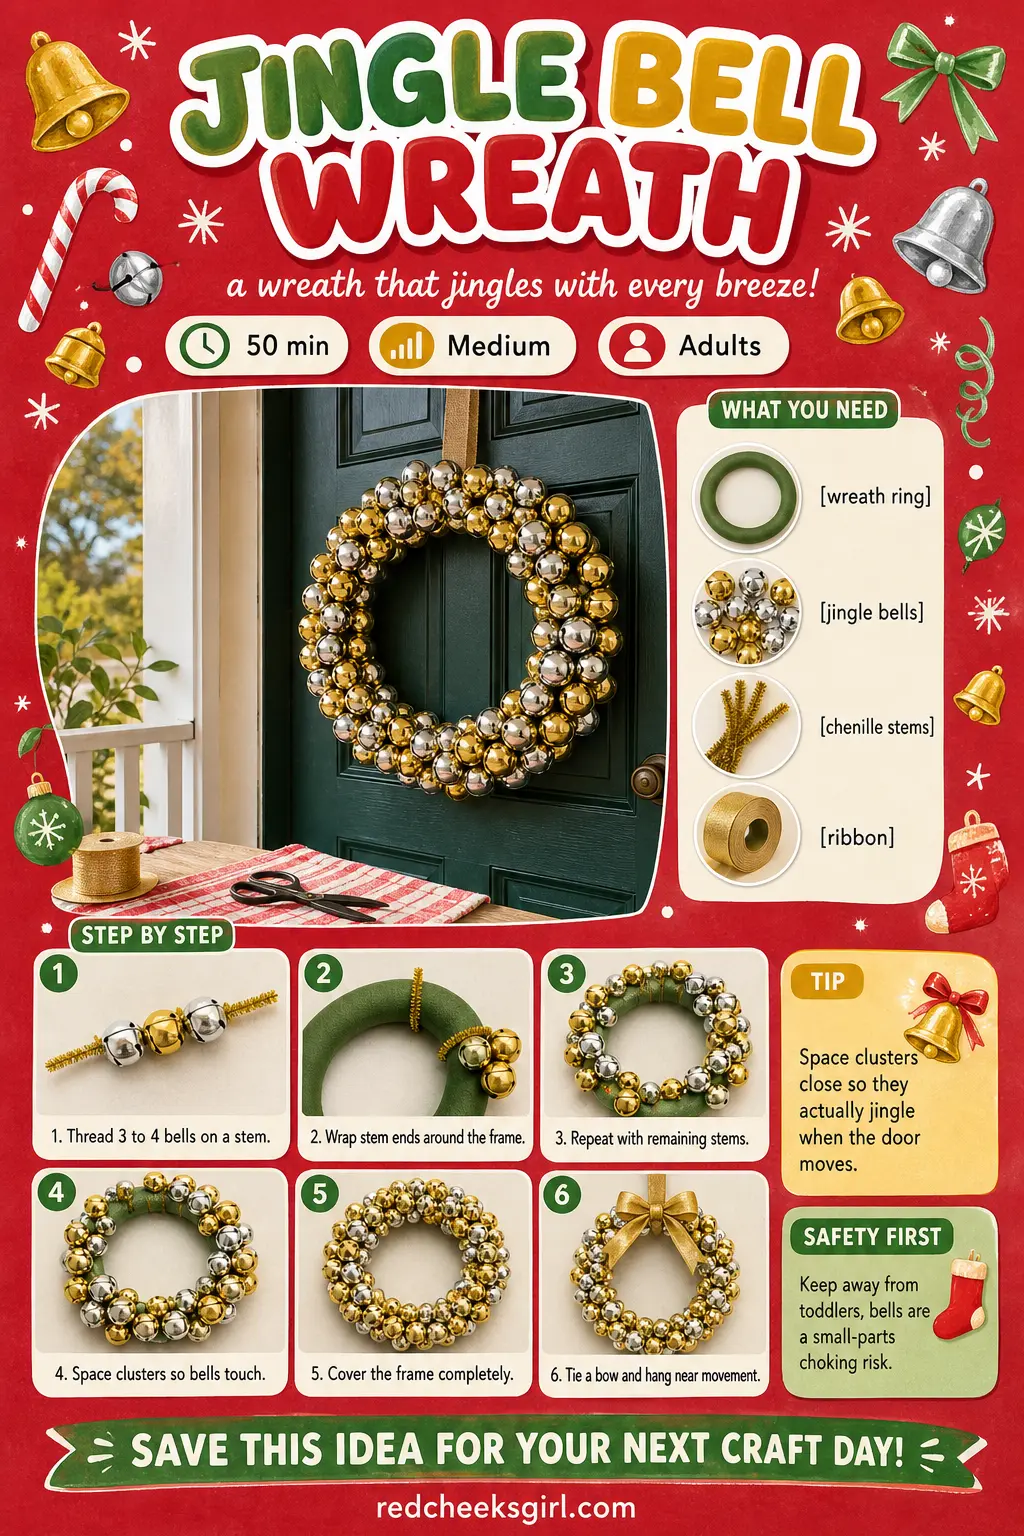
Jingle Bell Wreath
This is a wreath with a sound, which makes it the one to hang where the door swings and catches the wind, a porch or a breezy hallway. It skips greenery entirely for a bright, metallic, almost retro look.
What You Need
- 1 foam or wire wreath ring, 12 inch
- 40 jingle bells, mixed sizes 1 to 2 inch
- 10 chenille stems or floral wire
- 1 yard wide ribbon
How to Make It
- Thread 3 to 4 bells onto a chenille stem, clustering them in the middle.
- Wrap the ends of the stem tightly around the frame to lock the cluster in place.
- Repeat with the remaining stems, spacing clusters so they touch and jingle against each other.
- Continue until the whole frame is hidden under bells.
- Tie a ribbon bow at the top and hang somewhere the door movement will set it off.
🛍 Shopping guide
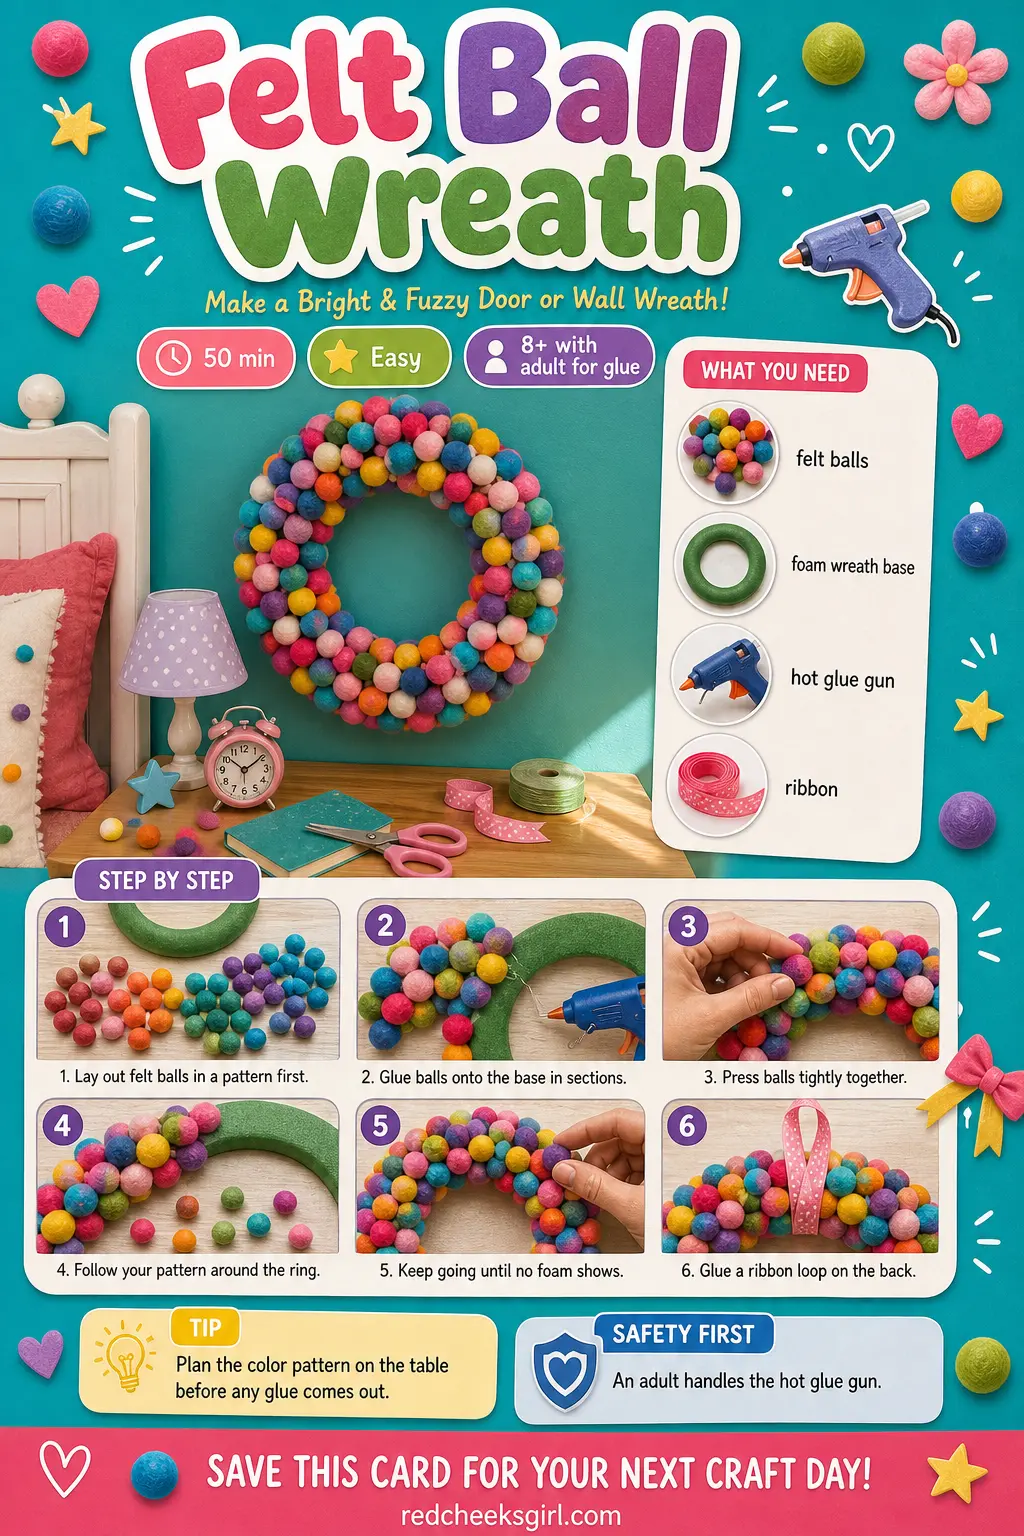
Felt Ball Wreath
Felt balls read as softer and more grown-up than yarn pom poms, more Scandinavian than kindergarten, and they are already made, which saves an hour. This one suits a bedroom or nursery wall where color matters more than scent.
What You Need
- 60 wool felt balls, 1 inch, pre-made
- 1 foam wreath base, 12 inch
- Hot glue gun
- 1 yard ribbon
How to Make It
- Lay the felt balls out on a table in your chosen color pattern before gluing anything, it is much easier to adjust now than later.
- An adult hot glues balls onto the foam base working in one small section at a time.
- Press balls tightly against each other so no foam peeks through the gaps.
- Keep following the laid-out pattern around the whole ring.
- Glue a ribbon loop to the back once the base is fully covered.
🛍 Shopping guide
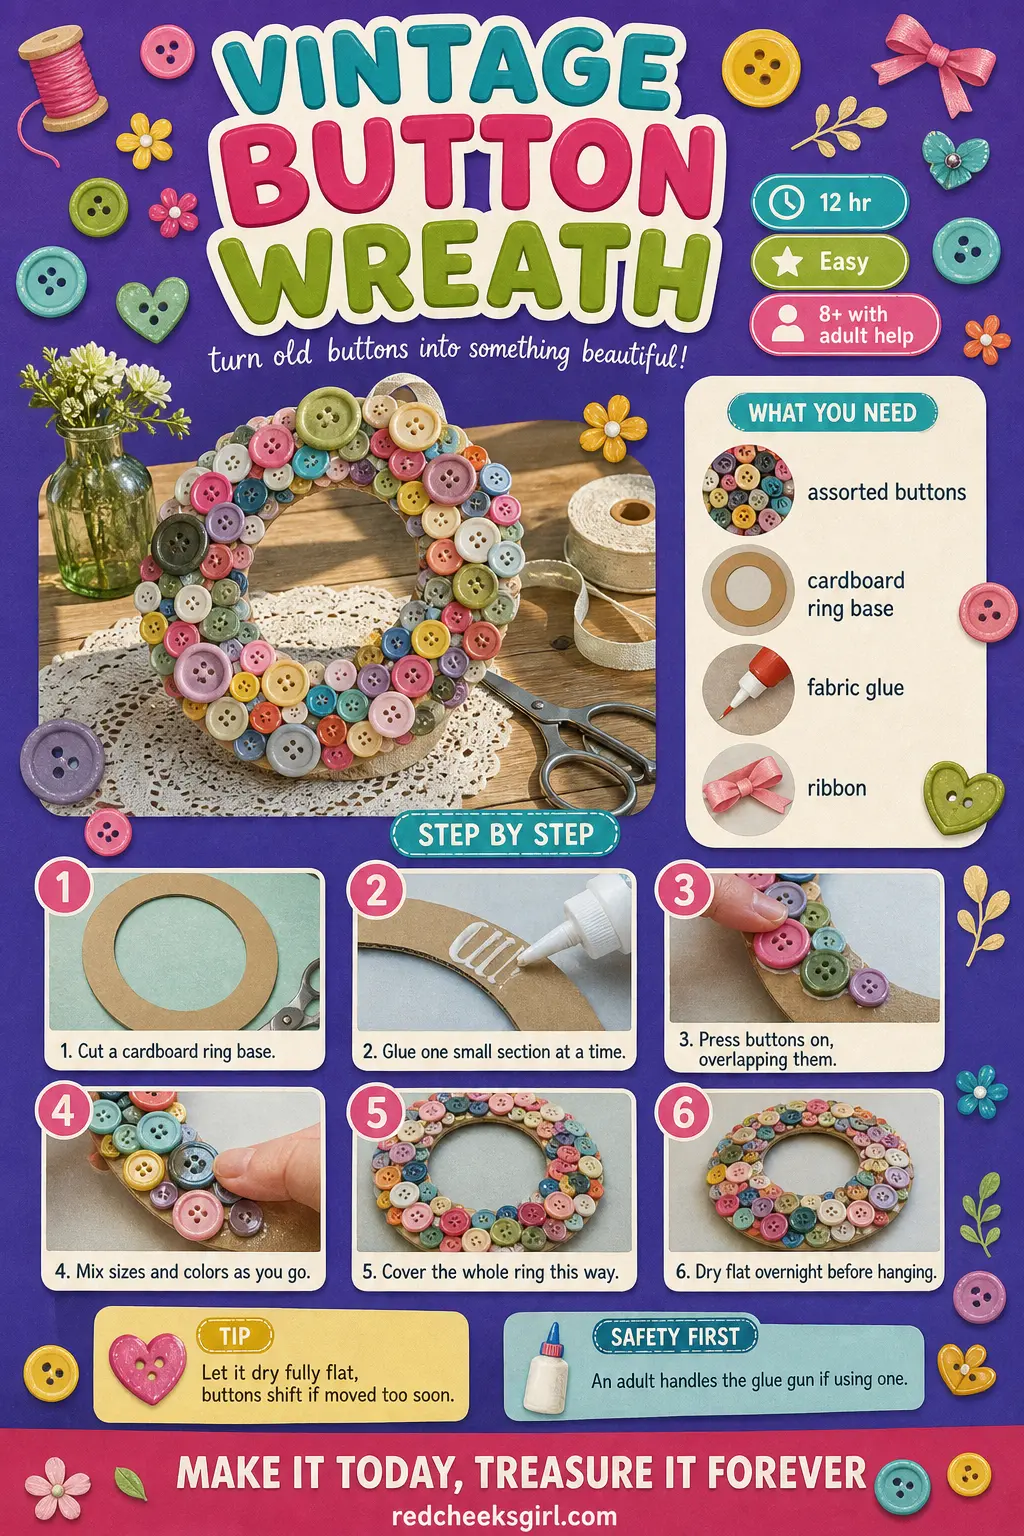
Vintage Button Wreath
A jar of mismatched buttons, the kind every household quietly accumulates, turns into something that looks like it came from a flea market. It suits a mantel or a small guest room door, and it needs an overnight dry before anyone touches it.
What You Need
- 200+ assorted buttons, mixed sizes and colors
- 1 cardboard circle base, 10 inch (cut from a cereal box)
- Strong fabric glue or hot glue gun
- 1 yard ribbon
How to Make It
- Cut the cardboard circle, including a smaller circle removed from the center for the ring shape.
- Apply glue to one small section of the ring at a time, not the whole thing at once.
- Press buttons on overlapping, mixing sizes and colors so nothing looks sorted.
- Continue section by section until the whole ring is covered.
- Let it dry flat overnight before gluing on a ribbon loop and hanging it.
🛍 Shopping guide
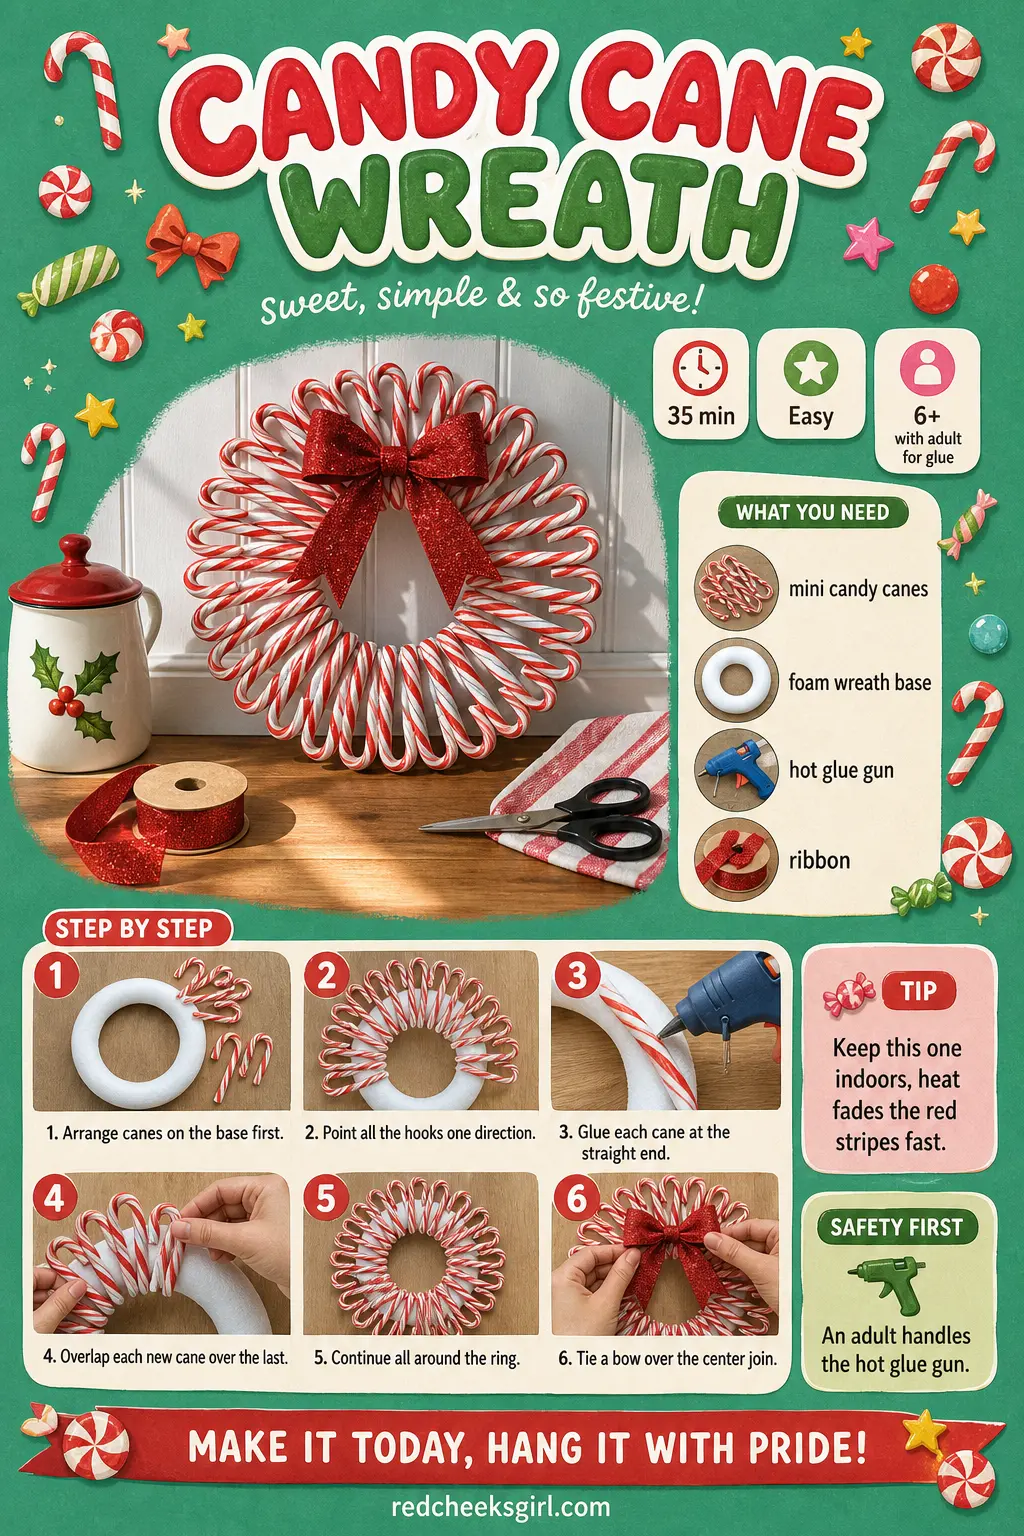
Candy Cane Wreath
This one is pure sugar-shop charm and it belongs in the kitchen, not outside, since heat and sun fade the stripes fast. It takes under an hour and doubles as a talking point every time someone reaches for a snack.
What You Need
- 30 mini candy canes, individually wrapped
- 1 foam wreath base, 10 inch
- Hot glue gun
- 1 yard wide ribbon
How to Make It
- Arrange the candy canes directly on the foam base in a fan pattern, hooks all pointing the same direction, before gluing anything.
- An adult hot glues each cane at the straight end only, leaving the curved hook free.
- Overlap each new cane slightly over the last so the foam disappears.
- Continue all the way around the ring.
- Tie a ribbon bow over the center join where the pattern meets itself.
🛍 Shopping guide
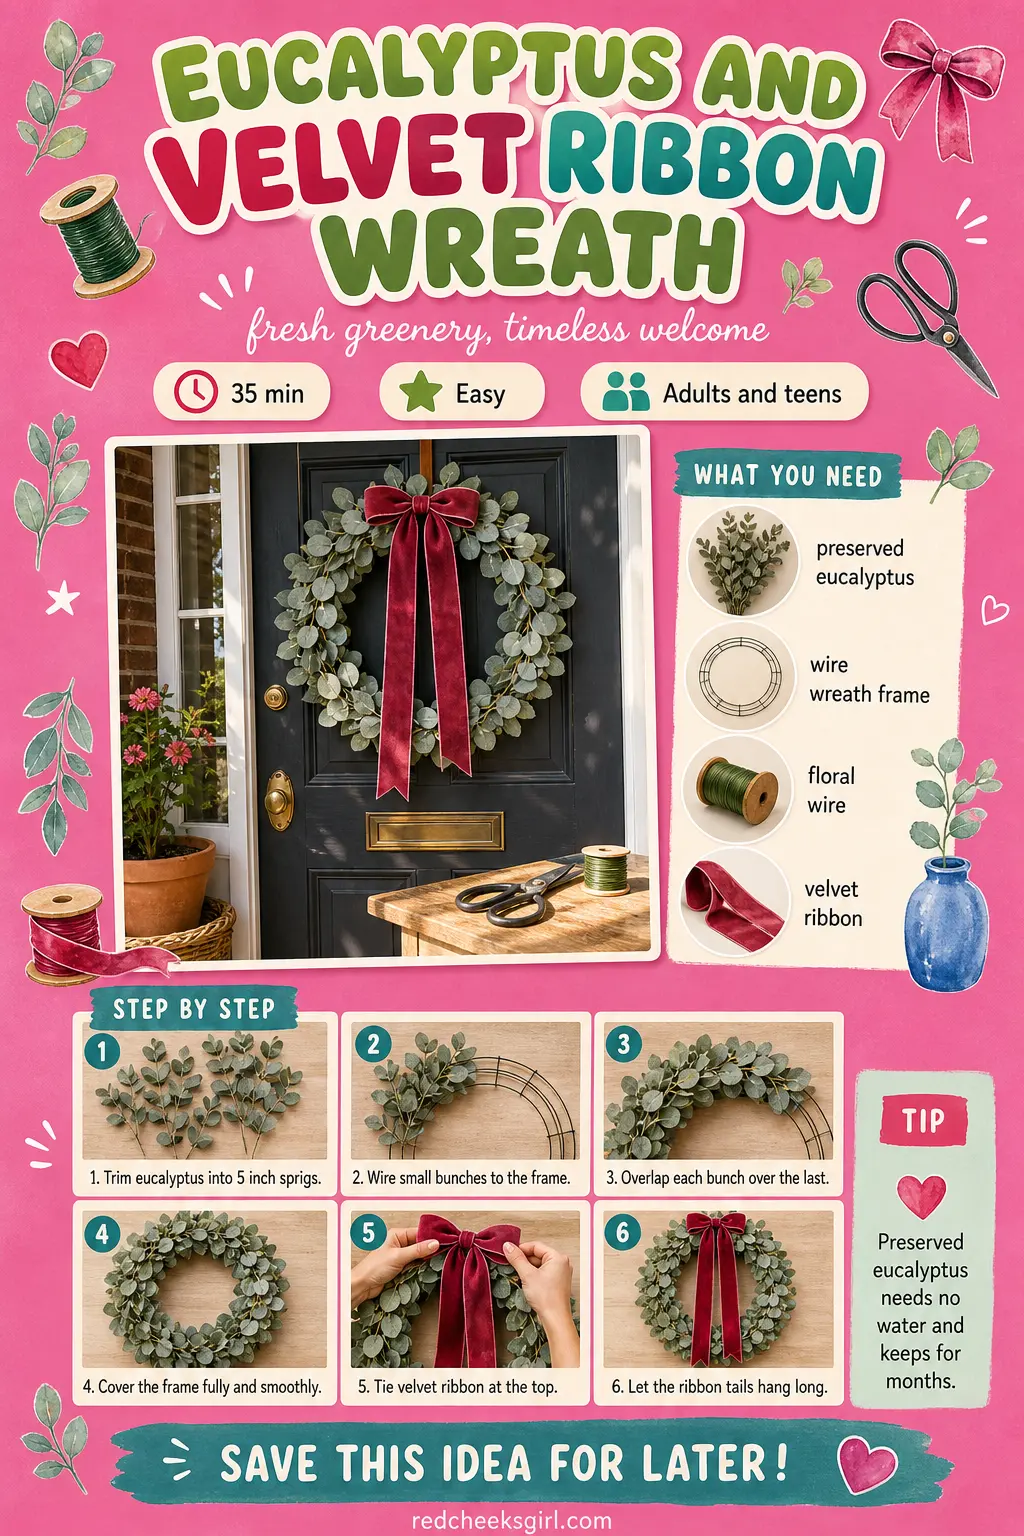
Eucalyptus and Velvet Ribbon Wreath
Preserved eucalyptus holds its silvery color for months with zero water or misting, which makes this the low-fuss answer to an elegant front door. It suits a formal entry or a dining room, anywhere ribbon streamers can hang free without catching on anything.
What You Need
- 3 bunches preserved eucalyptus
- 1 wire wreath frame, 12 inch
- Floral wire
- 2 yards velvet ribbon, 1.5 inch wide
How to Make It
- Trim the eucalyptus into 5 inch sprigs, keeping a mix of single leaves and small clusters.
- Wire small bunches to the frame, all facing one direction, overlapping each new bunch over the last.
- Continue until the frame is fully covered and the leaves lie smooth, not clumped.
- Tie the velvet ribbon at the top in a loose knot and let both tails hang long.
- Trim the ribbon ends on an angle for a tidier finish.
🛍 Shopping guide
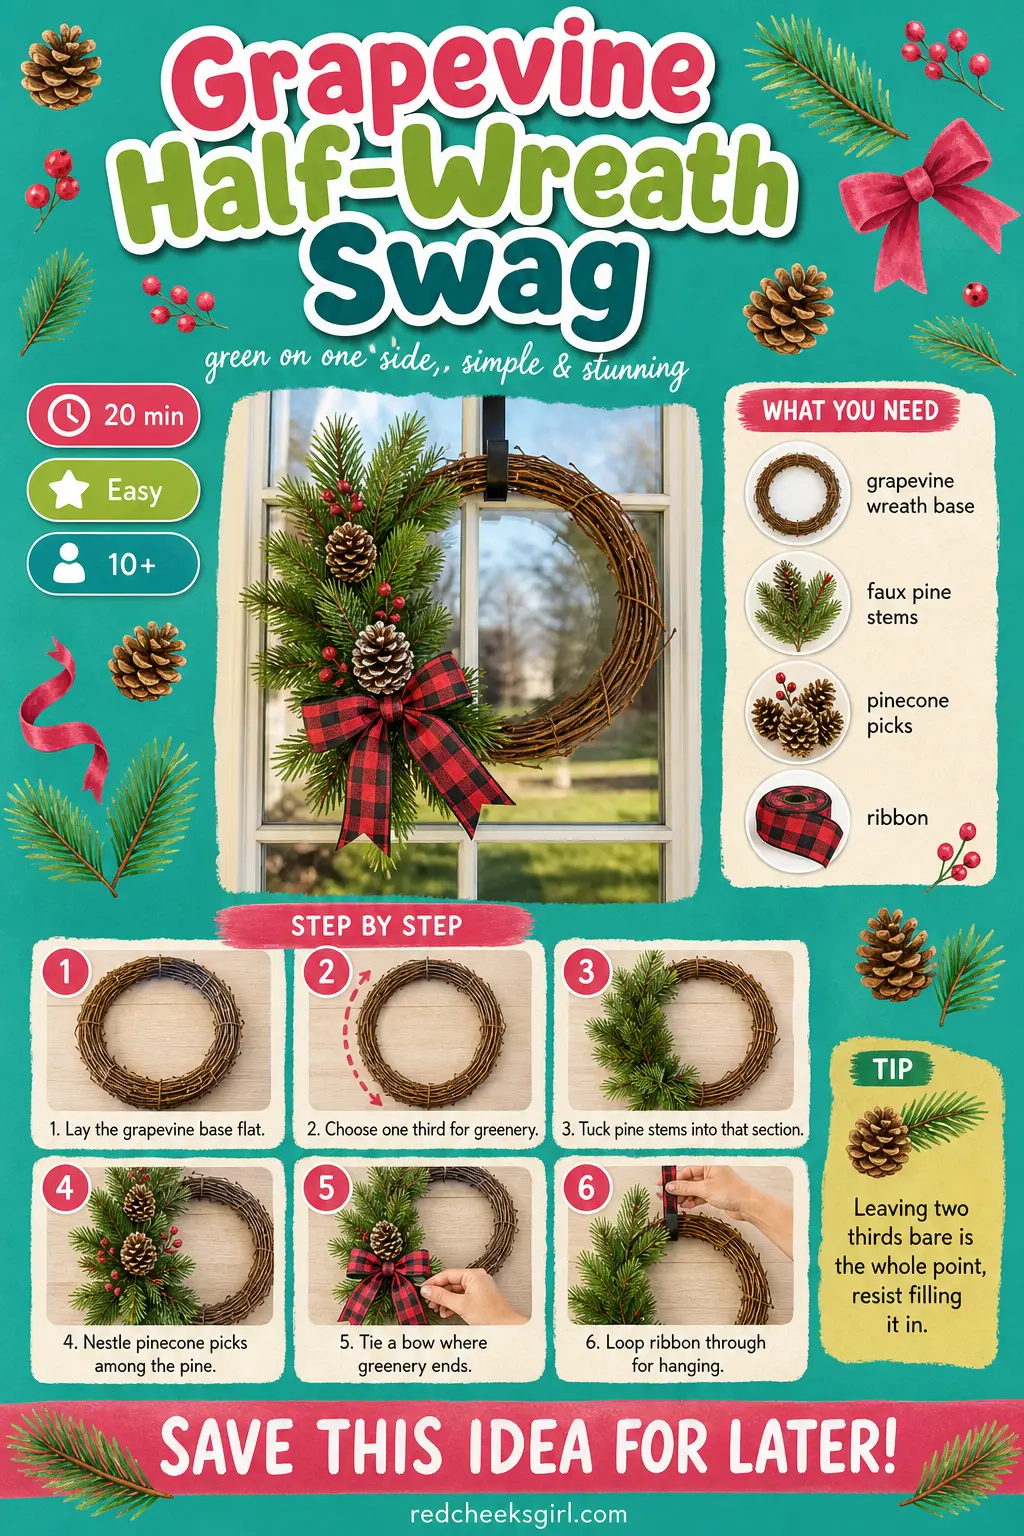
Grapevine Half-Wreath Swag
This is the shortcut for anyone short on patience: cover a third of a grapevine ring and let the rest stay bare and sculptural. It suits a minimalist door or a glass front door where a full, dense wreath blocks too much light.
What You Need
- 1 grapevine wreath base, 16 inch
- 3 faux pine stems, 18 inch
- 3 pinecone picks
- 2 yards ribbon
How to Make It
- Lay the grapevine base flat and decide which third will carry the greenery.
- Tuck the pine stems into the vines on that side only, pushing the wire stems between the branches to lock them in.
- Add the pinecone picks the same way, nestling them among the pine for texture.
- Tie a ribbon bow where the greenery ends and the bare vine begins.
- Loop extra ribbon through the top of the vine for hanging.
🛍 Shopping guide
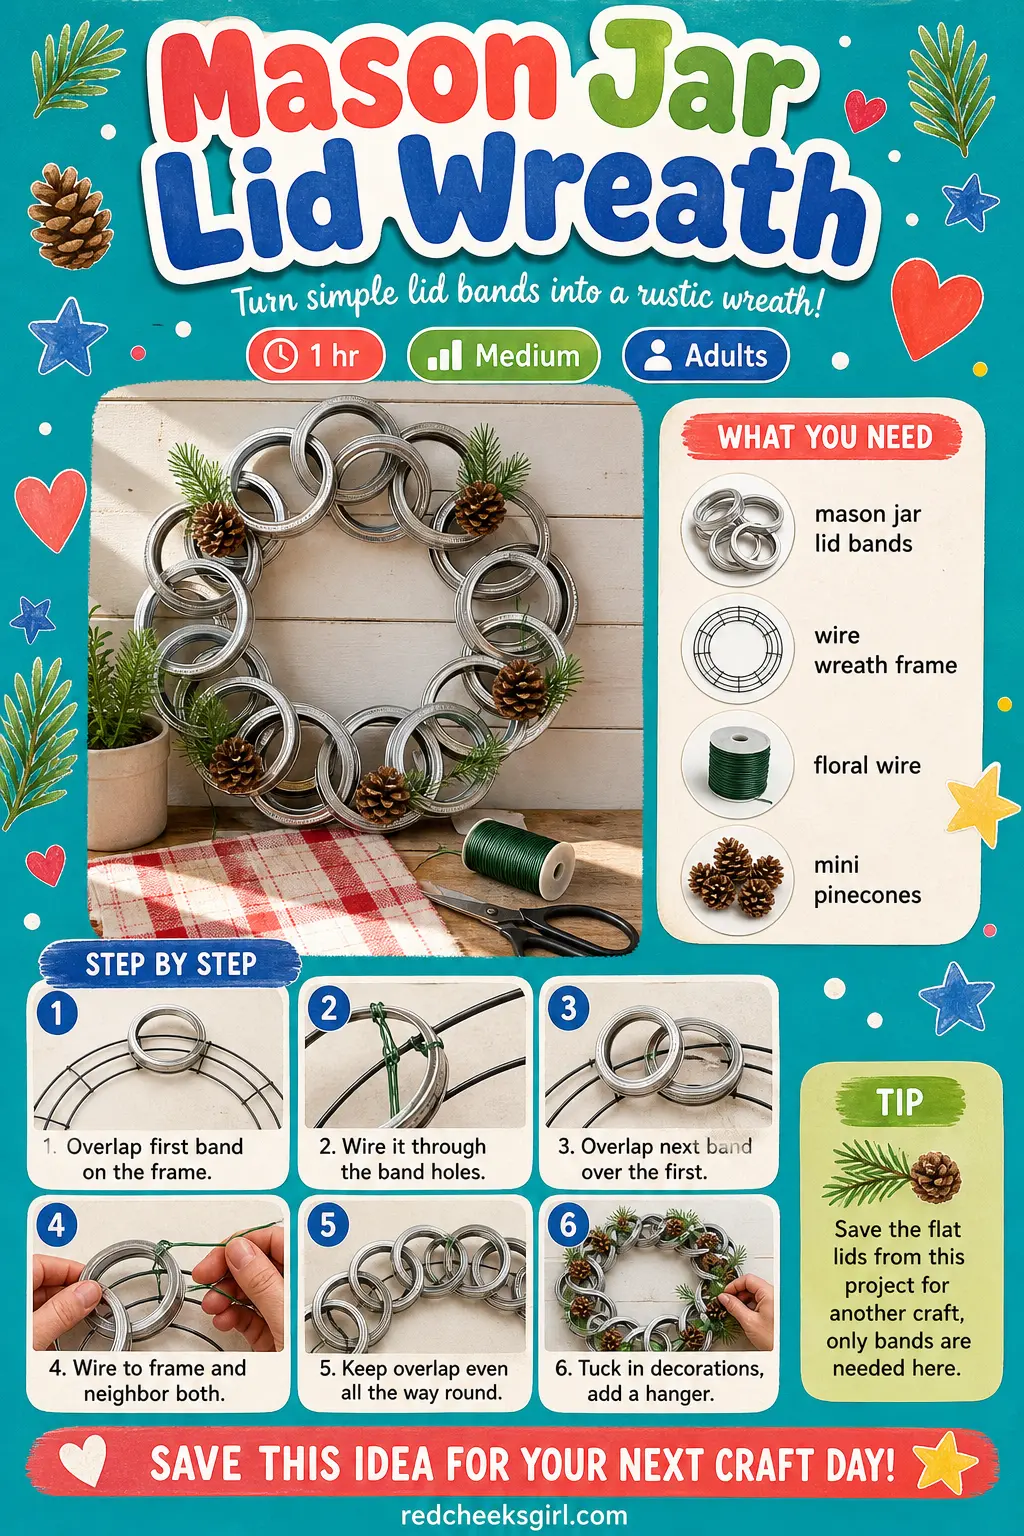
Mason Jar Lid Wreath
This is the wreath for anyone with a drawer of leftover jar lids and bands from a canning phase. The overlapping metal catches light like fish scales, and it suits a farmhouse kitchen or a pantry door.
What You Need
- 20 mason jar lid bands, rings only
- 1 wire wreath frame or heavy wire circle, 10 inch
- Floral wire
- 10 small pinecones or mini bells (optional)
How to Make It
- Overlap the first band against the frame like a fish scale and wire it on through the band’s holes.
- Overlap the next band halfway over the first, wiring it both to the frame and to its neighbor.
- Continue around, keeping the overlap consistent so the pattern looks deliberate.
- Tuck mini pinecones or bells into any gaps near the center opening.
- Attach a ribbon loop to the back for hanging.
🛍 Shopping guide
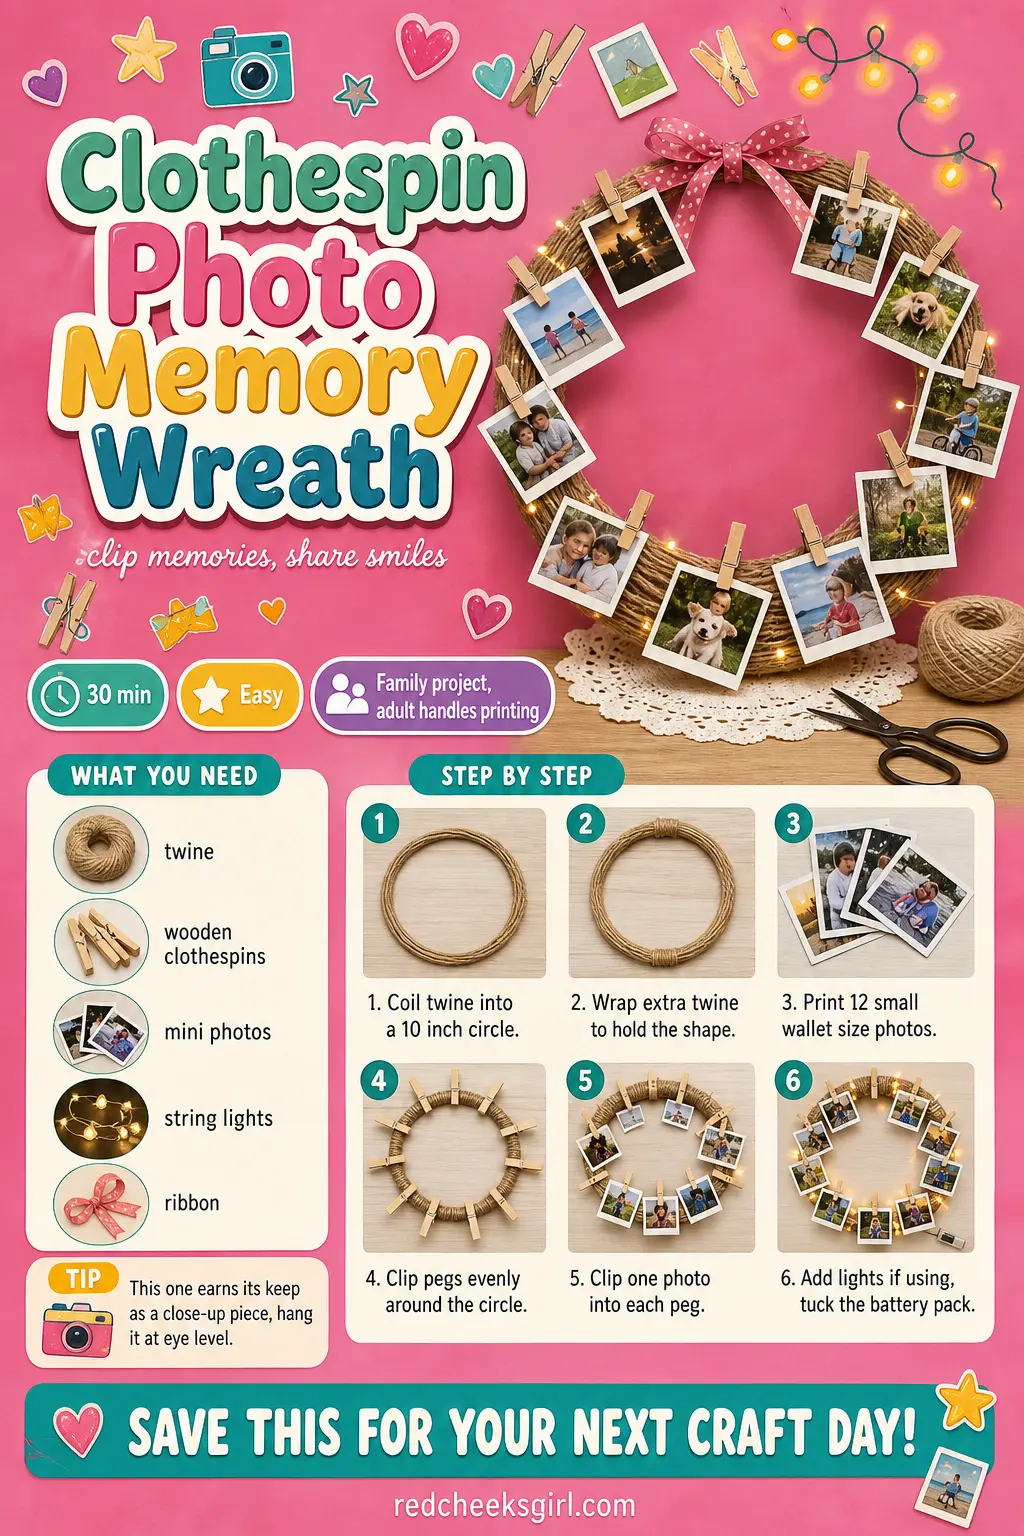
Clothespin Photo Memory Wreath
Instead of greenery, this wreath carries the people the greenery is really for. Twelve tiny photos clipped around a ring turns it into something guests actually stop and look at, which suits a hallway or a mantel at eye level rather than a door.
What You Need
- 2 yards twine or thin rope
- 12 wooden clothespins
- 12 mini printed photos, wallet size
- 1 battery string lights set (optional)
- 1 yard ribbon
How to Make It
- Coil the twine into a 10 inch circle, wrapping extra twine around the coil to hold the shape.
- An adult prints or sources 12 small photos sized to fit a clothespin’s grip.
- Clip the clothespins evenly spaced around the twine circle.
- Clip one photo into each peg, facing outward.
- Weave the battery lights through the twine if using them, tucking the battery pack at the back.
- Attach a ribbon loop and hang somewhere it will be seen up close.
🛍 Shopping guide
Pipe Cleaner Candy Wreath
This is the one to hand a child almost entirely, since nothing here needs heat or a blade once the twisting starts. The finished wreath looks like a candy-colored sun and suits a kid’s bedroom door more than a formal entry.
What You Need
- 15 pipe cleaners, 12 inch, green
- 60 pony beads, red and white
- 1 small plate or ring template for shaping
- 1 yard ribbon
How to Make It
- Thread 4 beads onto each pipe cleaner, leaving about an inch bare at each end.
- Lay a plate down as a guide and twist the bare ends of each pipe cleaner around a central ring shape (use a second pipe cleaner twisted into a circle as the ring).
- Bend the beaded sections outward so they curve like little branches.
- Keep adding beaded pipe cleaners around the ring until it looks full.
- Tie a ribbon loop to the ring for hanging.

🛍 Shopping guide
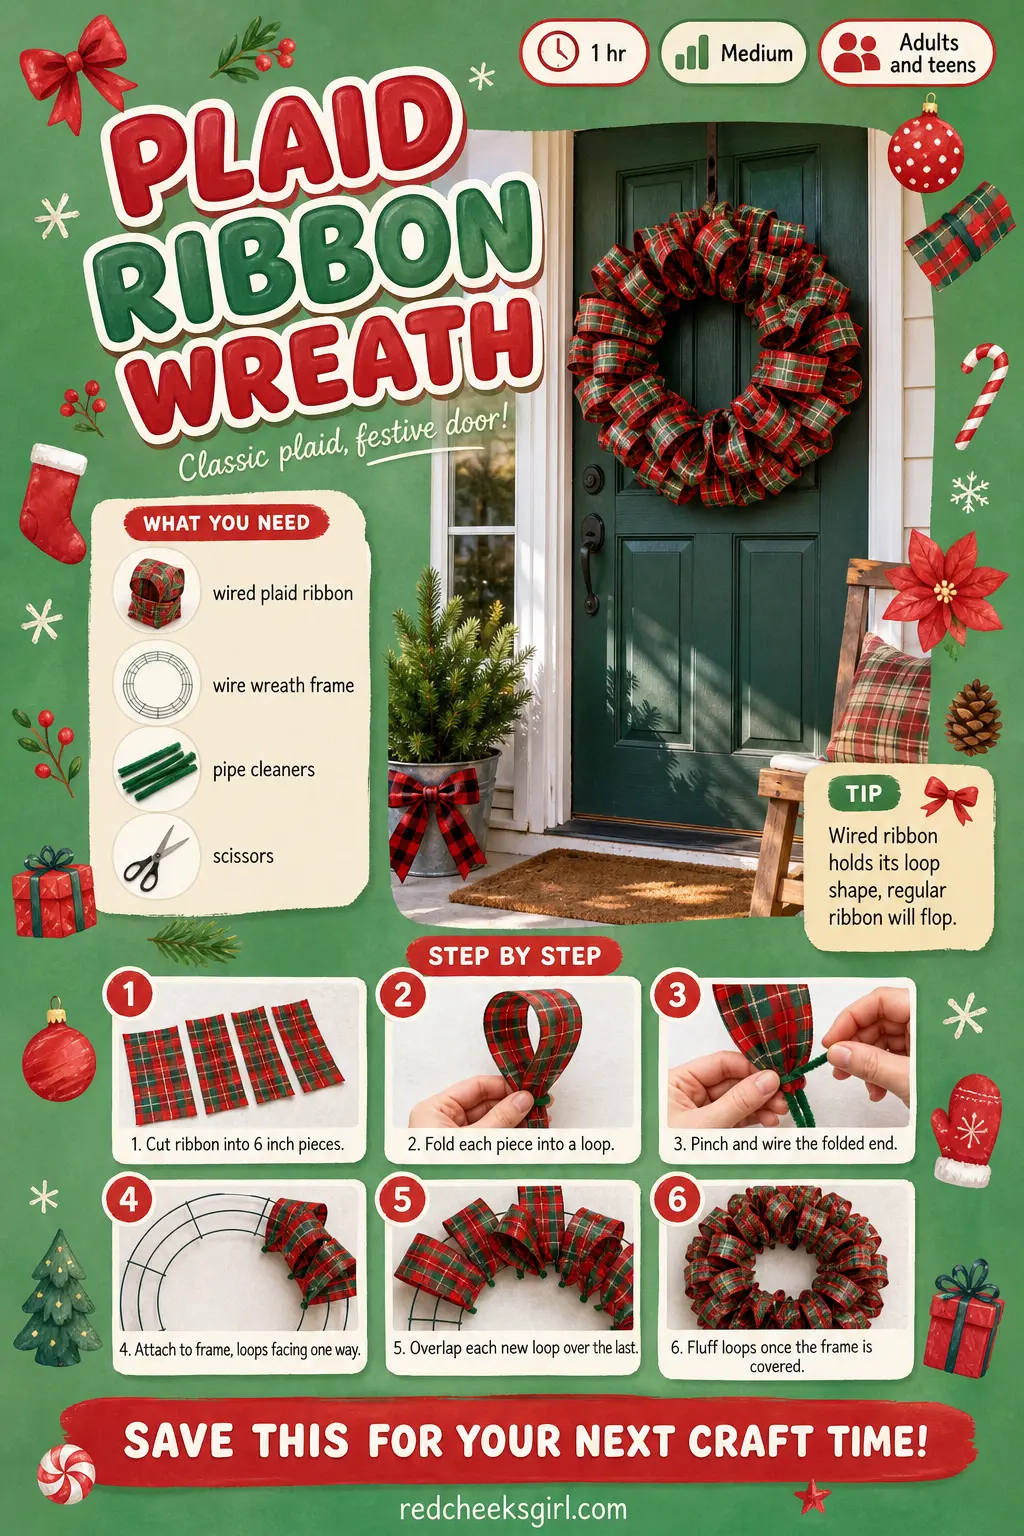
Plaid Ribbon Wreath
This is the traditional American front-door wreath, loop after loop of wired plaid ribbon with nothing else needed. It suits a classic front door and folds flat-ish for storage once the loops are gently compressed.
What You Need
- 5 yards wired plaid ribbon, 2.5 inch wide
- 1 wire wreath frame, 12 inch
- 8 pipe cleaners or short lengths of floral wire
- Scissors
How to Make It
- Cut the ribbon into 6 inch lengths, you will need about 24 pieces.
- Fold each piece in half to make a loop and pinch the folded end.
- Wire the pinched end to the frame, keeping all loops facing the same direction.
- Overlap each new loop slightly over the last one as you go around.
- Continue until the frame is completely hidden, then fluff every loop to hide the wires.
- Attach a hanging loop at the back.
🛍 Shopping guide
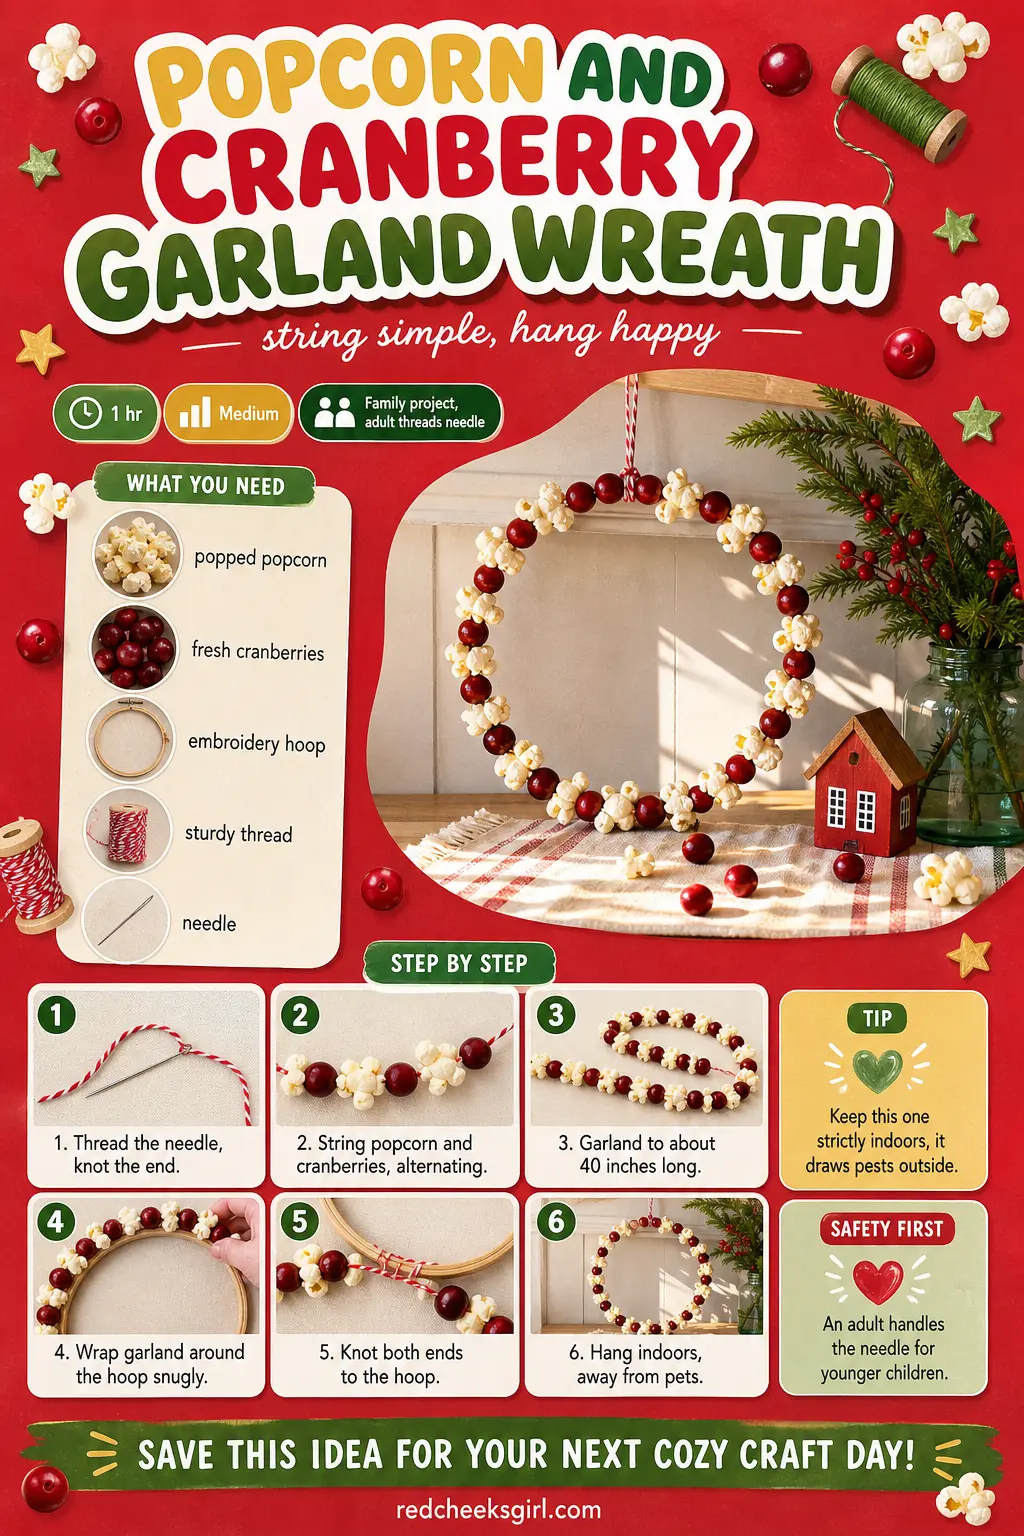
Popcorn and Cranberry Garland Wreath
This is the kind of wreath that smells faintly like a Victorian Christmas card, strung popcorn and berries wound around a plain hoop. Keep it indoors, since food on a wreath invites birds and insects outdoors, and treat it as a short-term, single-season piece.
What You Need
- 6 cups plain popped popcorn
- 2 cups fresh cranberries
- 1 wooden embroidery hoop, 10 inch, outer ring only
- 3 yards sturdy thread (button or quilting thread)
- 1 long needle
How to Make It
- An adult threads the needle and knots the end securely.
- String popcorn and cranberries alternating in whatever pattern looks good, older kids can push pieces onto the needle themselves.
- Keep going until the garland measures about 40 inches.
- Wrap the garland snugly around the hoop, overlapping the ends.
- Tie off both ends firmly and knot them to the hoop so nothing unravels.
- Attach a ribbon loop and hang it somewhere indoors, away from pets.
🛍 Shopping guide
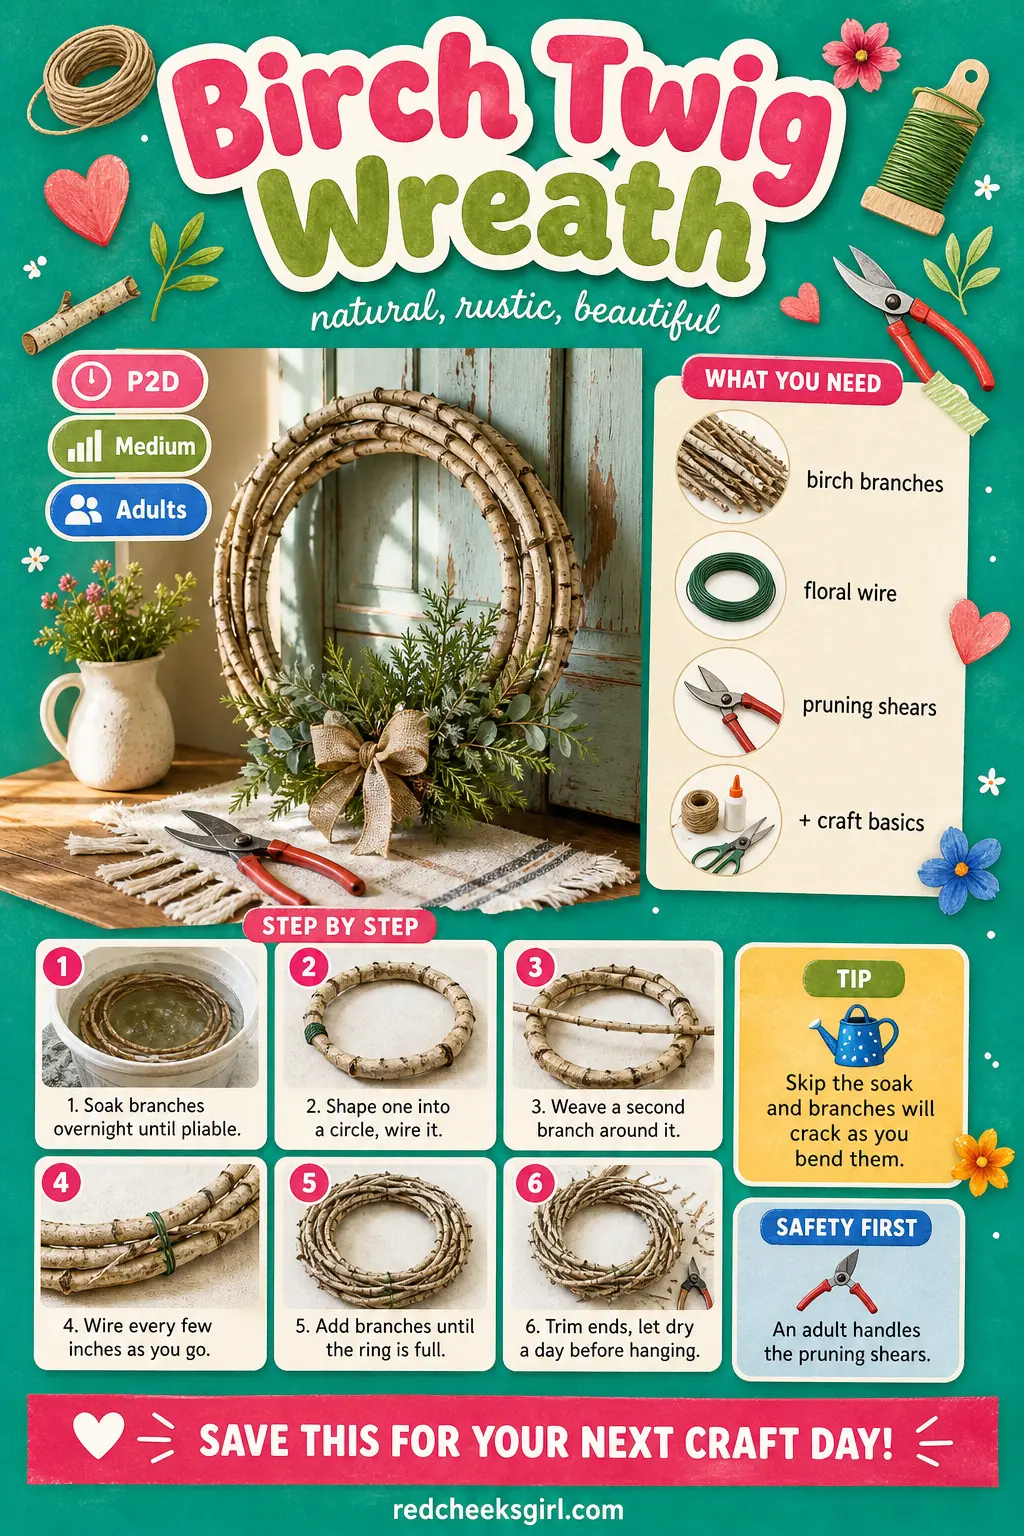
Birch Twig Wreath
Thin branches, soaked soft and coiled into a ring, give you a pale, sculptural wreath with no glue and no wire showing. It suits a rustic entryway or layered over a mirror, and it needs a soak and a dry, so it is the slow one on this list.
What You Need
- 15 thin birch or willow branches, 3 to 4 feet long
- Floral wire
- Pruning shears
- Large basin or bathtub for soaking
How to Make It
- Soak the branches in water overnight so they bend without snapping.
- Shape one branch into a circle and secure the overlapping ends with wire.
- Weave a second branch around the first, following the same circle, and wire it every few inches.
- Keep adding branches one at a time until the ring looks thick and full.
- An adult trims any stray ends with pruning shears.
- Let the wreath dry in its shape for a day before hanging, so it holds the curve.
🛍 Shopping guide
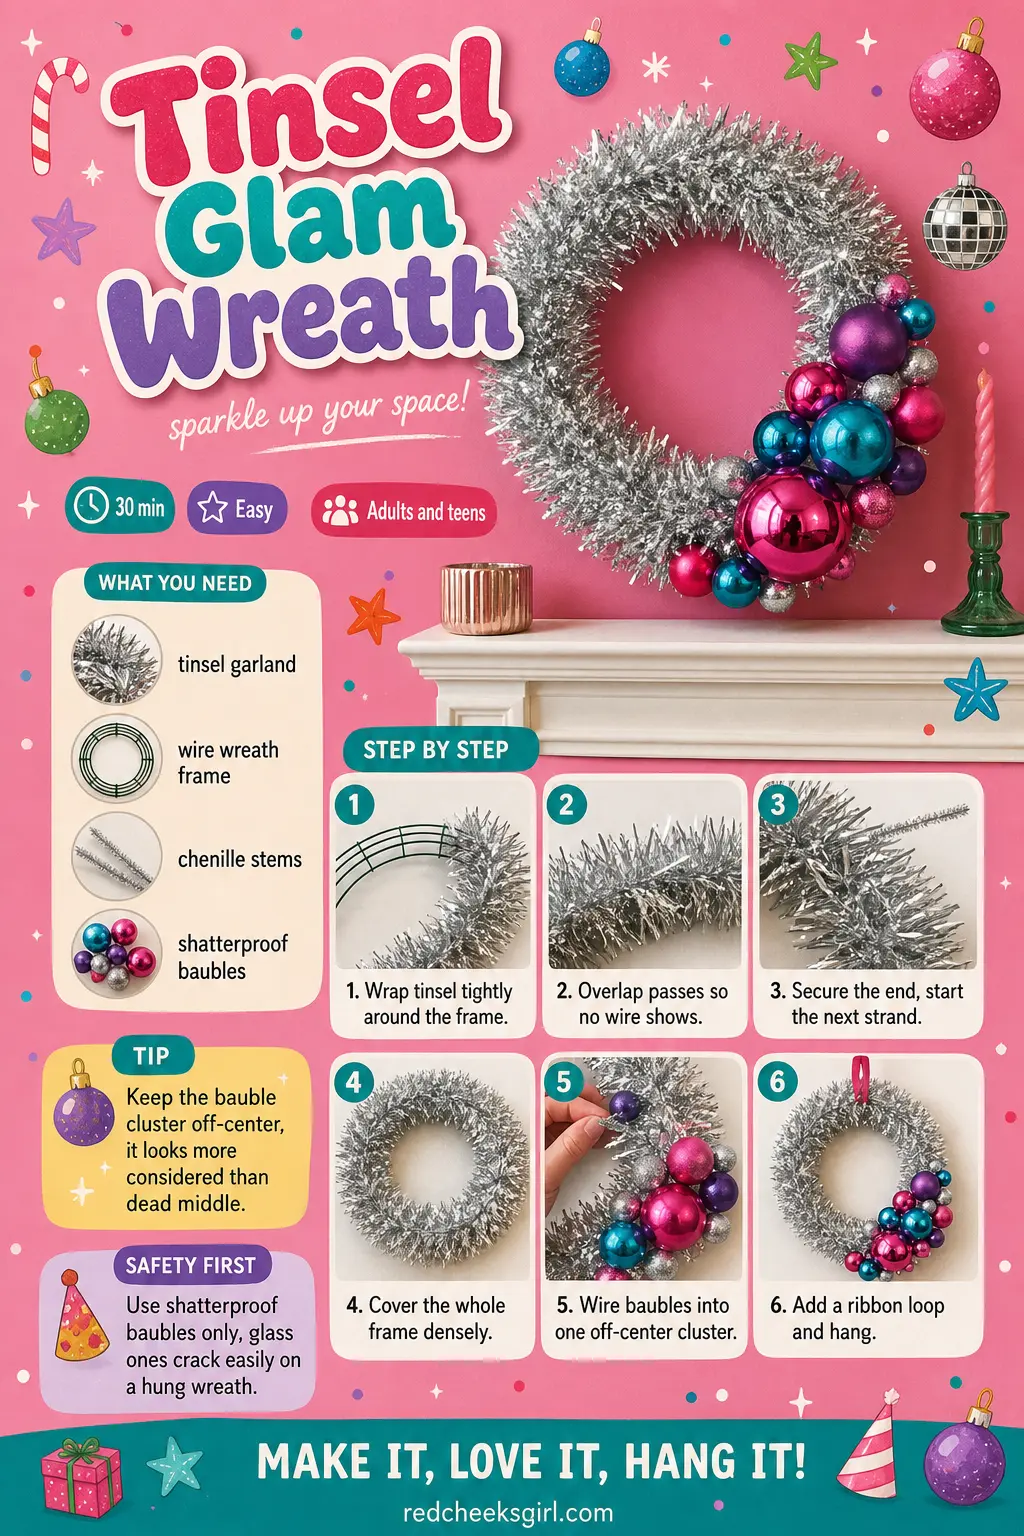
Tinsel Glam Wreath
For a party rather than a church door, this one trades greenery for pure sparkle. It suits a mantel or a cocktail party entrance, and it packs down small in a bag between seasons since tinsel does not crush the way fresh foliage does.
What You Need
- 2 strands tinsel garland, 9 feet each
- 1 wire wreath frame, 12 inch
- 6 chenille stems or wire
- 5 shatterproof oversized baubles
How to Make It
- Wrap the first tinsel strand tightly around the frame, overlapping each pass so no wire shows through.
- Secure the end with a twist of wire, then start the second strand where the first ended.
- Continue until the whole frame is covered in dense, even sparkle.
- Wire the baubles into a small cluster and attach it to one side of the wreath, off-center rather than in the middle.
- Add a ribbon loop at the top for hanging.
🛍 Shopping guide
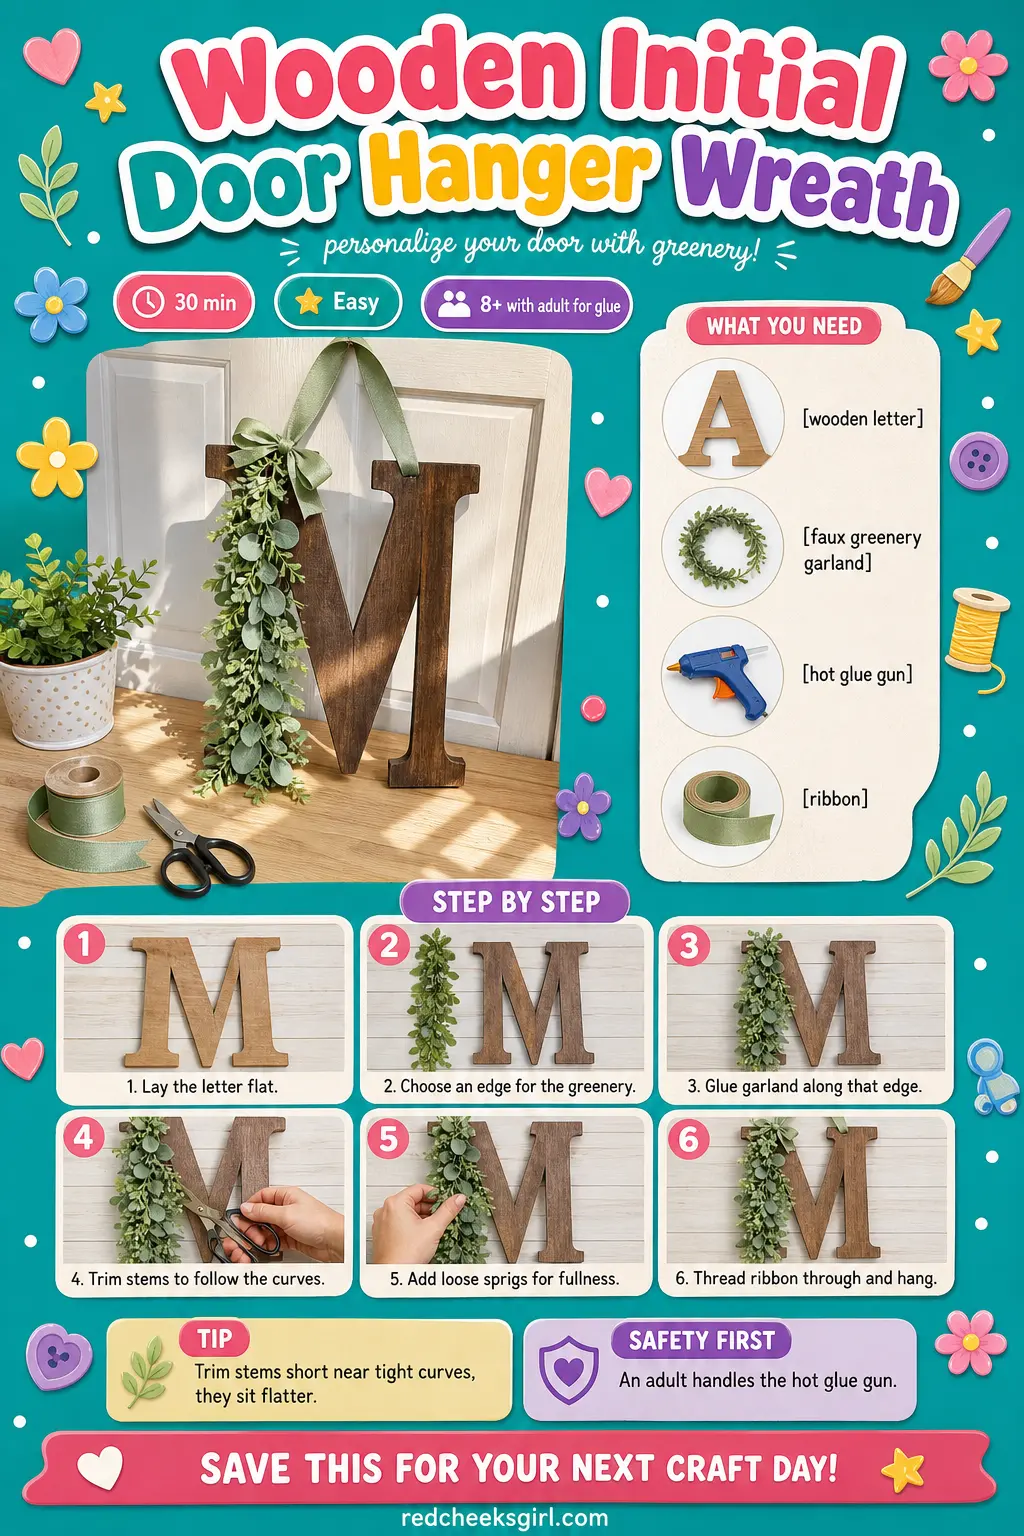
Wooden Initial Door Hanger Wreath
Half letter, half wreath, this is the personalized piece people put on a nursery door or hang alongside the main wreath by the family name. It is quick, uses almost no materials, and suits anyone who wants something that is clearly theirs.
What You Need
- 1 wooden letter, 12 inch, unfinished
- Faux greenery garland, 3 feet
- Hot glue gun
- 1 yard ribbon
How to Make It
- Lay the letter flat and decide which edge or corner will carry the greenery.
- An adult hot glues the garland along that edge, trimming stems with scissors to follow the letter’s curves.
- Let the glue set for a minute or two between sections so the garland does not slide.
- Add a few loose sprigs crossing over the main line for a fuller look.
- Thread ribbon through a pre-drilled hole or around the top of the letter and hang on the door.
🛍 Shopping guide
Frequently Asked Questions
How long does a fresh Christmas wreath actually last?
It depends almost entirely on where it hangs. Cared for well, a fresh wreath will typically stay full and fragrant for four to six weeks.Cooler outdoor temperatures help wreaths last six to eight weeks, while warm and dry conditions typically shorten their lifespan to four to five weeks. Indoors, somewhere warm, expect closer to two to three weeks.
How do you make a DIY wreath last longer?
Place and water matter more than anything you glue on. If hanging it indoors, keep it away from heating vents, fireplaces, and any spot that gets direct afternoon sun.A light misting with water every two to three days helps keep the needles hydrated, and a spray bottle works fine, you don’t need to soak it, just enough to dampen the greens.
What can I use instead of a wreath frame?
Almost any sturdy ring works. A wooden embroidery hoop, a cut cardboard circle, a bent wire coat hanger, or even an old grapevine wreath stripped bare all hold a new design, which is why several of the ideas above start from something you likely already own rather than a dedicated wire frame.
Should you glue or wire decorations onto a wreath?
Use wire for anything living or heavy, fresh greenery, pinecones on an outdoor piece, or metal bands, because glue goes brittle in the cold and lets go. Save hot glue for lightweight, indoor pieces like paper, felt or dried fruit, where it sets fast and never needs to flex in the wind.
What size wreath should I make for a front door?
Most standard front doors suit a 12 to 16 inch wreath, large enough to read from the street without overwhelming the door panel. Go smaller, around 10 inches, for an interior door, a cabinet, or a photo-style piece meant to be seen up close rather than from a distance.
How do you hang a wreath without damaging the door?
An over-the-door wreath hanger, the kind with a hook on both sides, avoids nails or adhesive entirely and lifts straight off in January. For glass doors, a small suction hook holds most lightweight wreaths fine, just choose one rated for the actual weight of what you built, pinecones and jar lids are heavier than they look.

6 christmas candles diy recipes with exact wax, wick and fragrance load numbers, from fresh pine to

Vintage christmas cards you print at home, write by hand and post today. 30 designs, blank inside, f

21+ only! 15 hilarious drinking Christmas party games — from movie sip rules to festive pong. Mock
Leave a Reply