

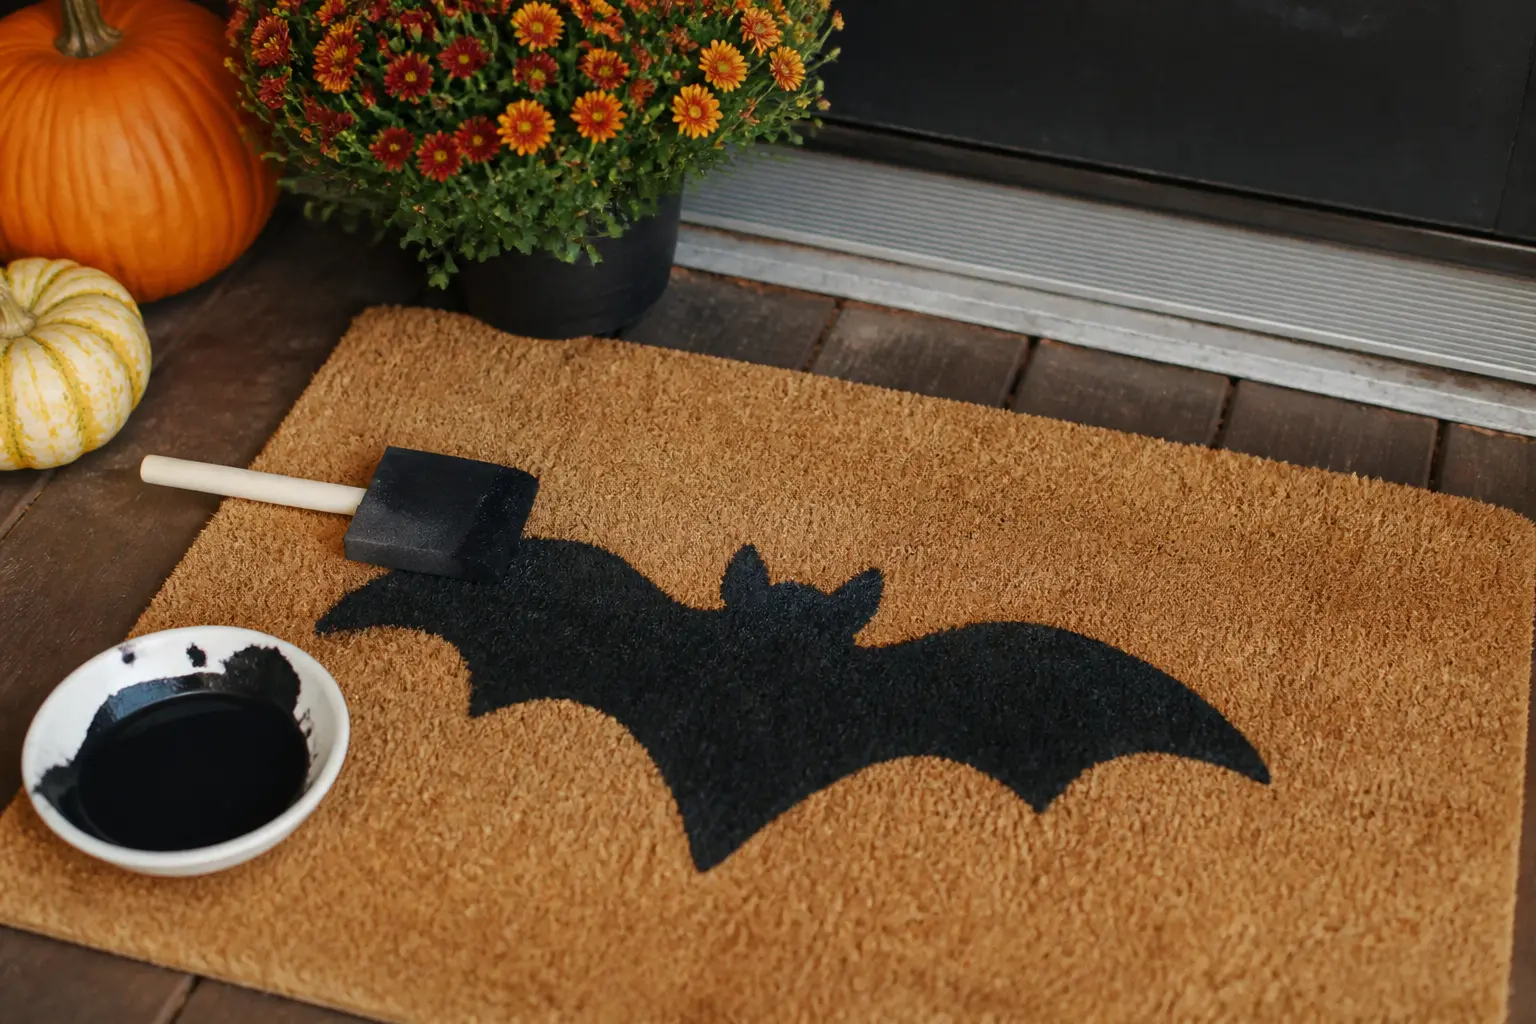
A plain coir mat costs less than a takeaway, and a bottle of outdoor acrylic paint costs about the same as a coffee. That is the whole budget conversation. What sits between those two purchases is an afternoon, a stencil or a steady hand, and the fourteen ideas below.
These are not beginner-proof kits or store-bought designs with a personal-touch story bolted on. They are real painted mats, finished in a single session, that look considered rather than frantic. The craft is visible on purpose. The seal coat is non-negotiable, and the shopping list for each one fits in four products or fewer.
If you want more to do with the afternoon, 15 Easy DIY Halloween Decorations With Three Steps or Fewer and 16 Halloween DIY Crafts That Look Like You Bought Them both sit comfortably alongside a mat project and use mostly the same supplies.
This post contains affiliate links. If you buy through them, I may earn a small commission at no extra cost to you.
Bold Typography Mats
A single word or a short phrase, painted large, is the fastest route to a finished mat that looks like a deliberate design choice. The trick is keeping the letterforms simple: chunky, upright, no serifs. Block letters with a flat brush read well on coir texture without any stencil at all.
Chalk the outline first with a piece of white chalk or a chalk pen, correct it, then fill with paint. Two coats, dry between each. Seal with Mod Podge Matte, and the whole job takes under ninety minutes including drying time.
"Boo" Three Ways: Letter, Ghost, Pumpkin
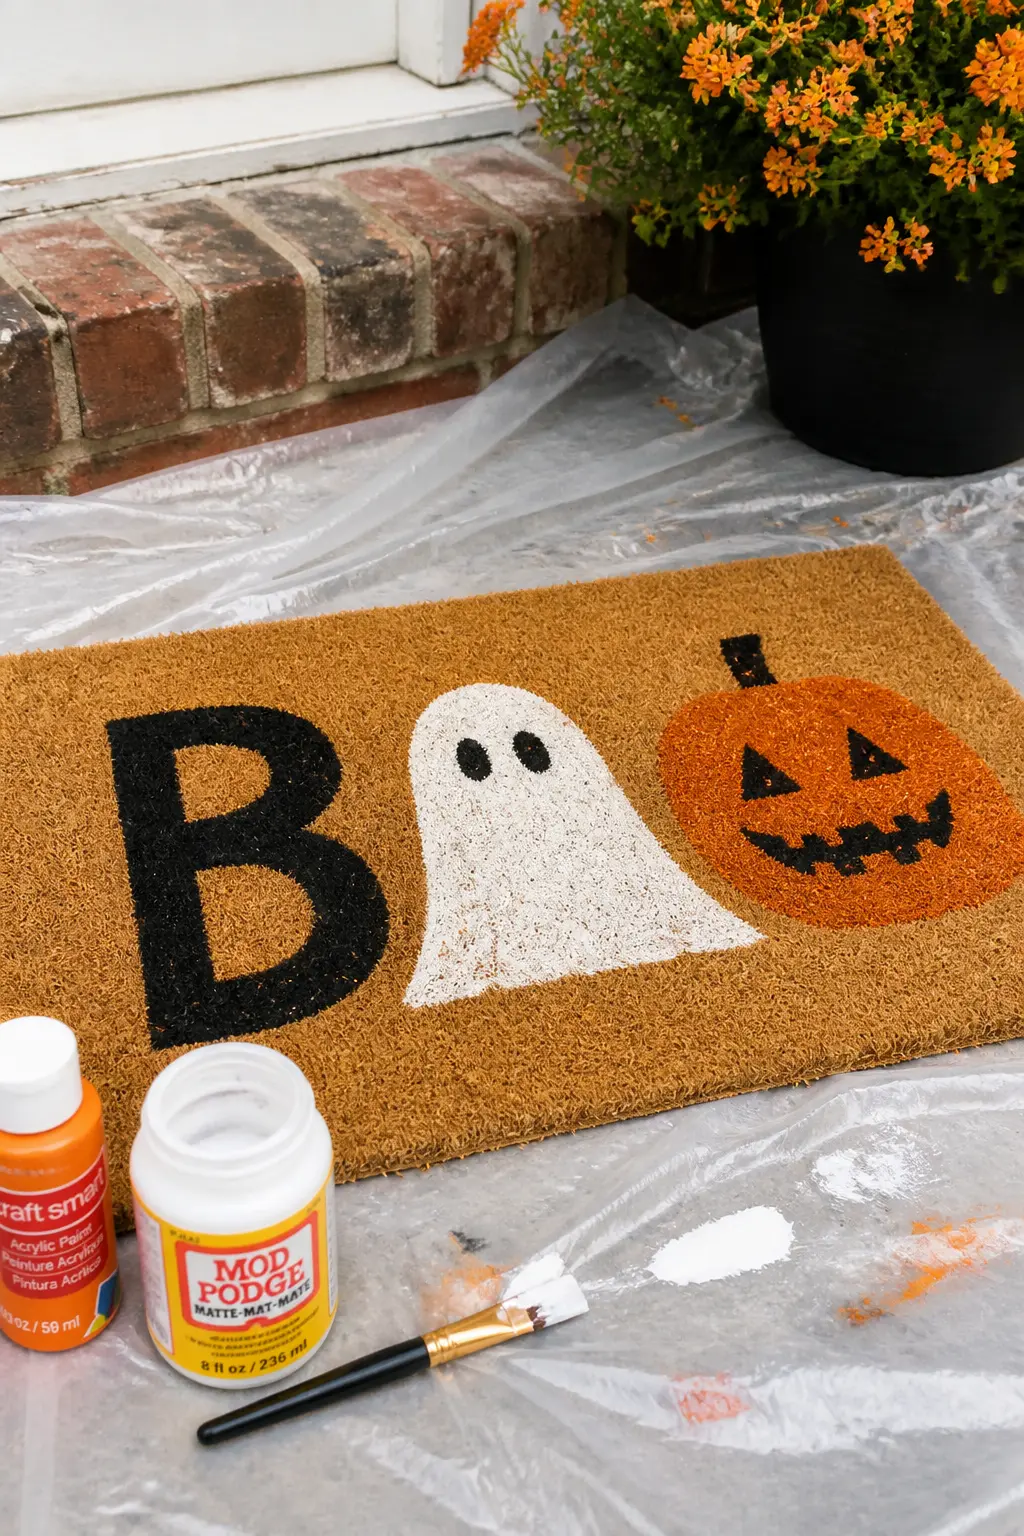
The word BOO reads as a complete composition when each letter is a different object: a tall block B, a ghost body forming the first O, and a glitter-orange pumpkin standing in for the second. The whole word spans the mat from edge to edge. Paint the B in matte black first, then the ghost in white with two small dot eyes, then the pumpkin in orange with a black carved face on top.
Mod Podge mixed with fine glitter pressed onto the wet orange paint before it sets gives the pumpkin the slightly iridescent finish that photograph well and catches porch light at night. Seal the whole mat with two coats of Mod Podge Matte once everything is fully dry.
🛍 Shopping guide
Skeleton Hands Reaching Up from the Bottom Edge
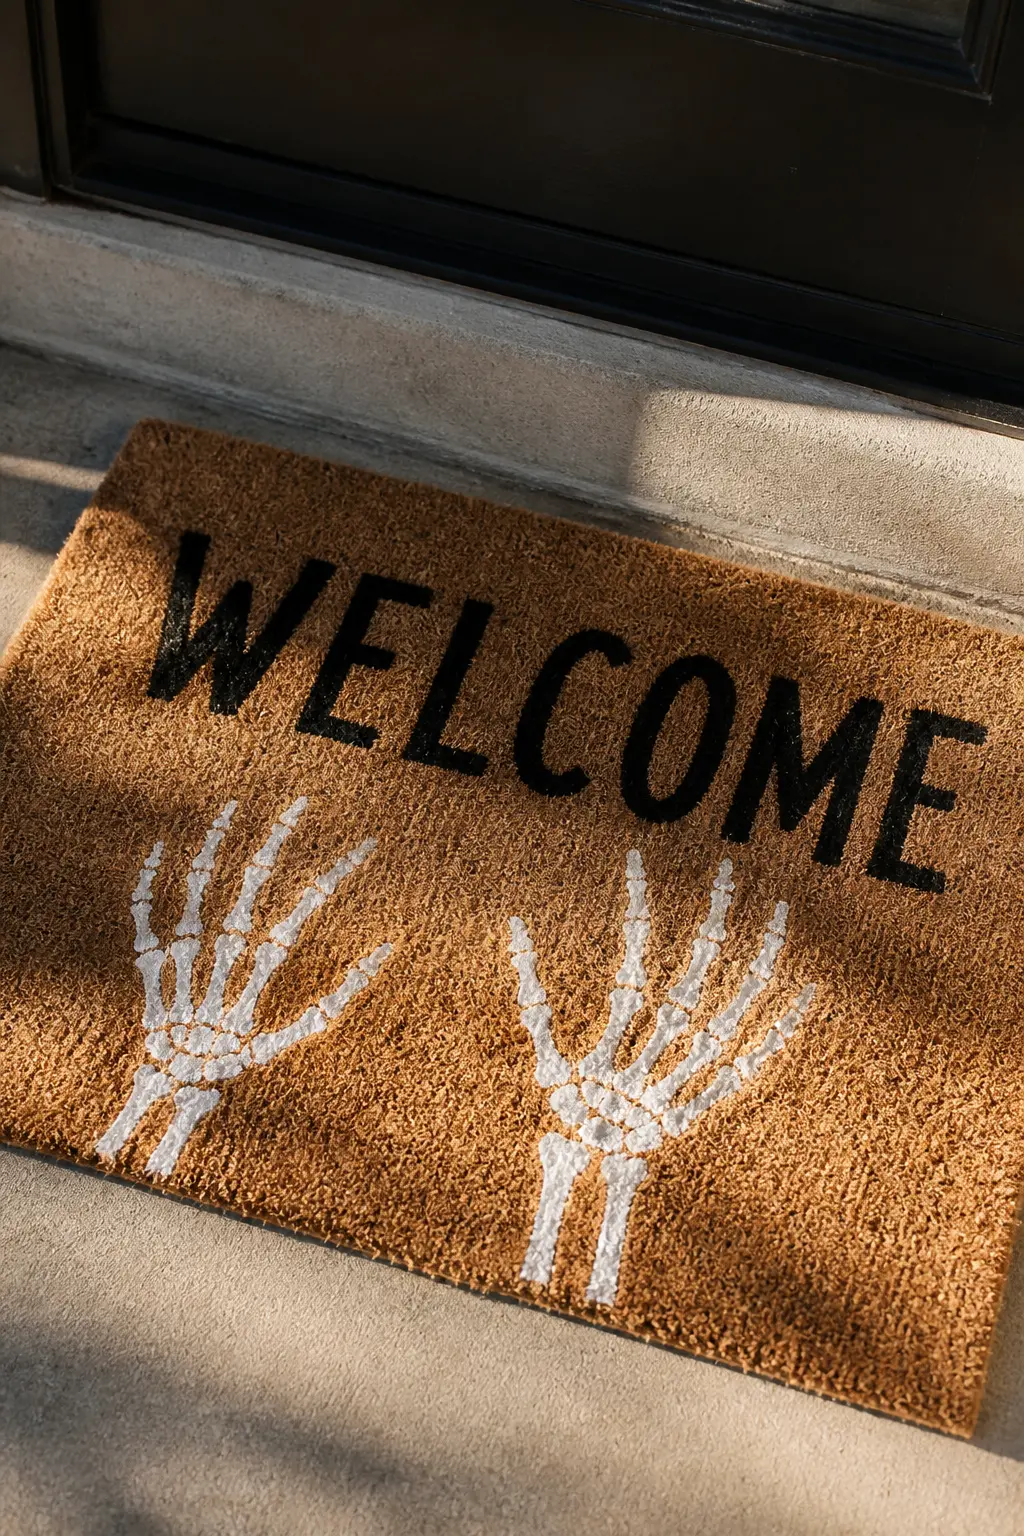
Two bony white hands, painted rising from the bottom edge of the mat as though clawing up from below, with the word WELCOME in tight black capitals above them. The hands are the illustration, the text is the punchline. Keep the skeleton anatomy loose: three elongated finger bones per hand, a rough knuckle line, that is all.
Use a fine liner brush for the bone detail, or draw the outlines with a white paint pen first and then fill. The contrast between the warm coir ground and the chalky white paint reads very clearly, even on a doorstep that does not get direct light.
🛍 Shopping guide
Spider Web Corner with Block "EEK"
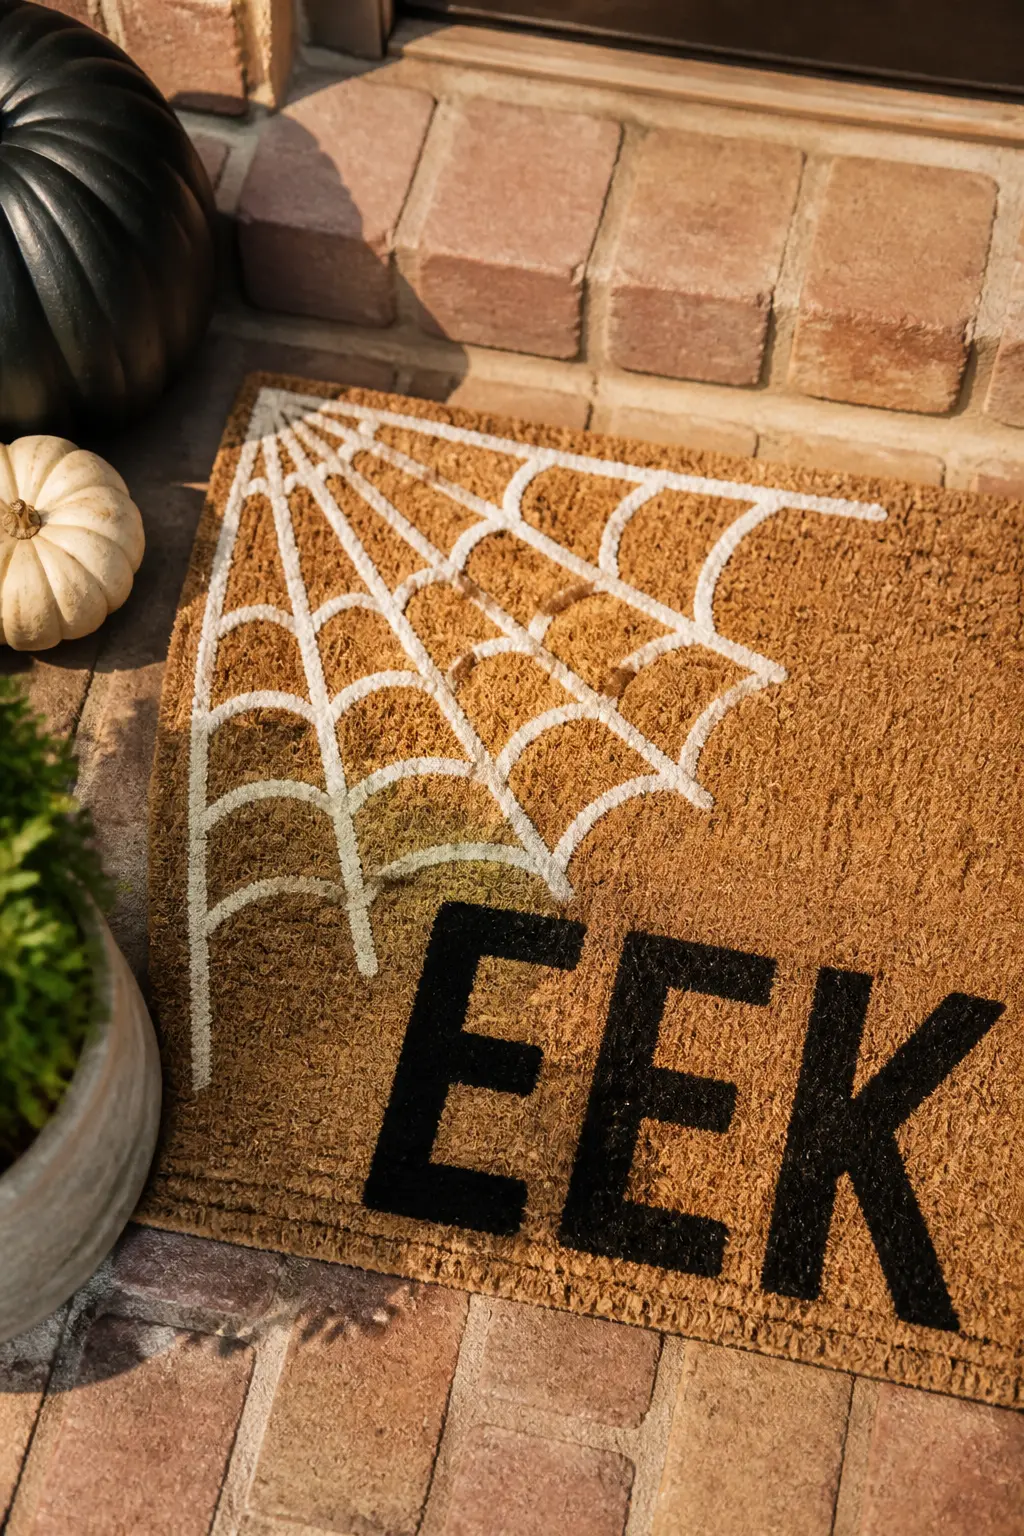
A quarter-circle web painted in white in the upper left corner, lines radiating from the corner point with connecting arcs at even intervals. In the lower right two-thirds of the mat, the word EEK in solid black block capitals, large enough to fill the space. The two elements balance each other visually without touching.
The web is easier than it looks: start with three or four straight lines from the corner, then connect them with curved arcs painted freehand. Imperfect arcs look more like real webs than perfect ones. A small white spider body with four legs either side, sitting at the corner point, takes the composition from graphic to narrative.
🛍 Shopping guide
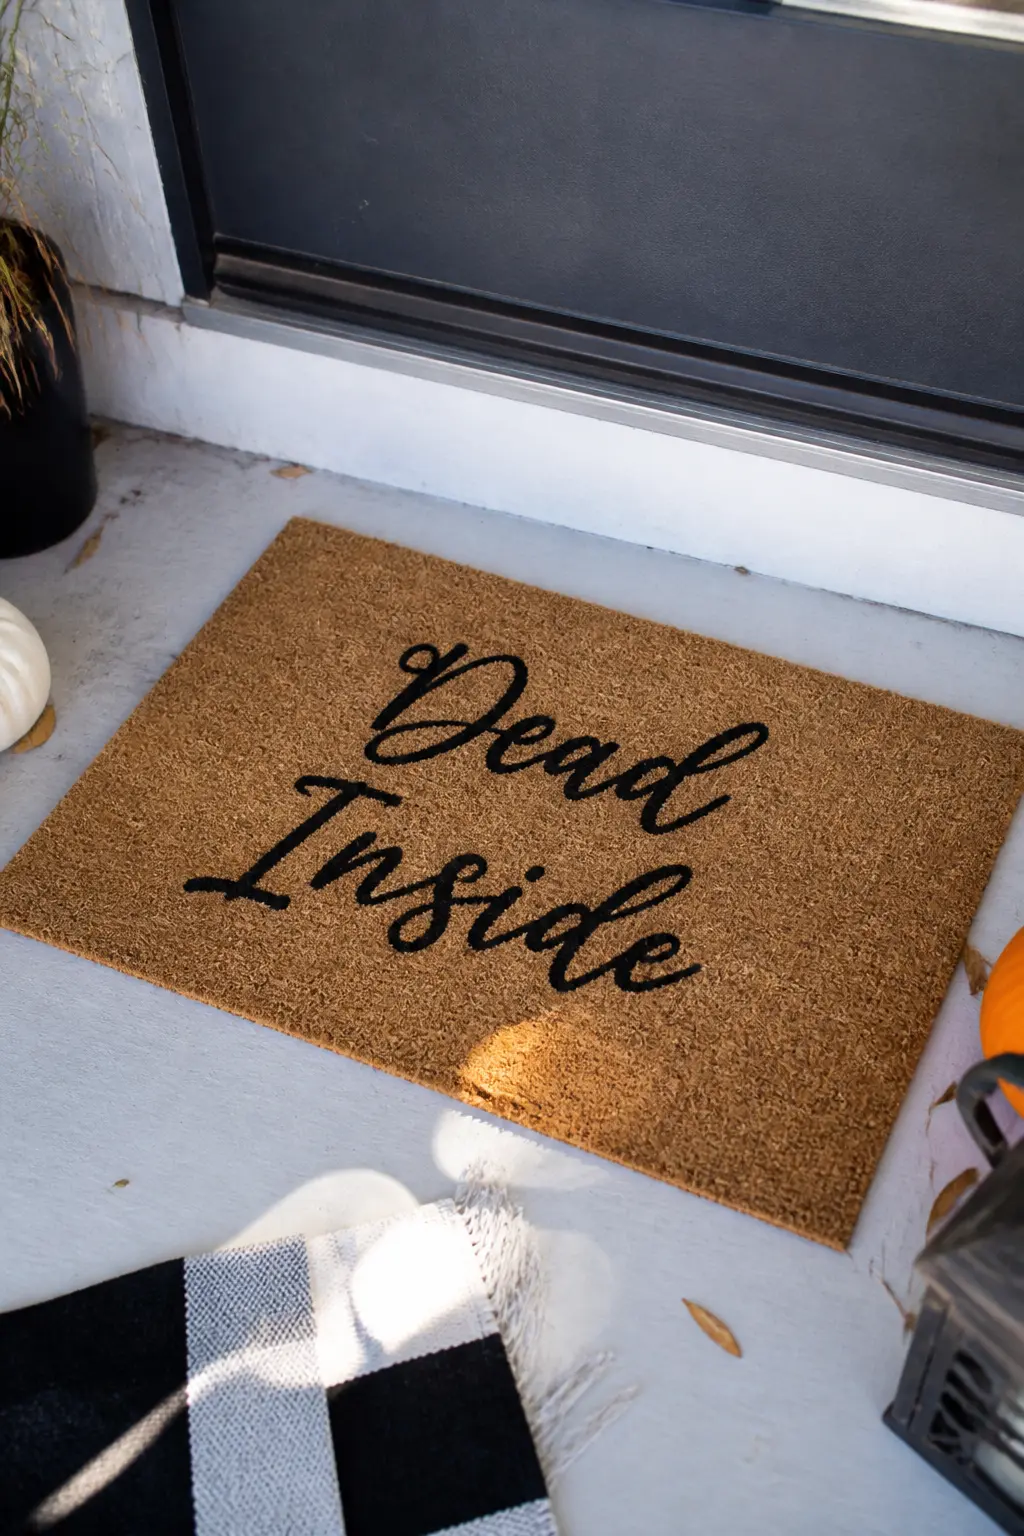
"Dead Inside" in Elegant Script, Black on Natural
The phrase DEAD INSIDE painted in a loose, tall script across the center of the mat, all in matte black. No illustration, no border, no second color. The humor lives entirely in the contrast between the elegant handwriting style and the message. Size the lettering so it fills about sixty percent of the mat width and sits centered vertically.
Chalk the baseline and the cap height across the mat before painting so the script stays level even when painted freehand. A pointed round brush in size 6 gives enough flexibility for thick downstrokes and thin upstrokes without switching tools. This is the mat that gets photographed by every visitor and costs under fifteen dollars total.
🛍 Shopping guide
Scattered Motif Mats
Repeat patterns work because the eye forgives a slightly wobbly bat or an imperfect moon when it sees twenty of them tossed across the surface. Paint the larger shapes first, let them dry, then fill the negative space with smaller ones. The result reads as a textile print, not a craft project.
Keep to two or three motif shapes maximum per mat. More than that and the composition tips from lively into chaotic. Odd numbers of each shape feel more natural than even ones.
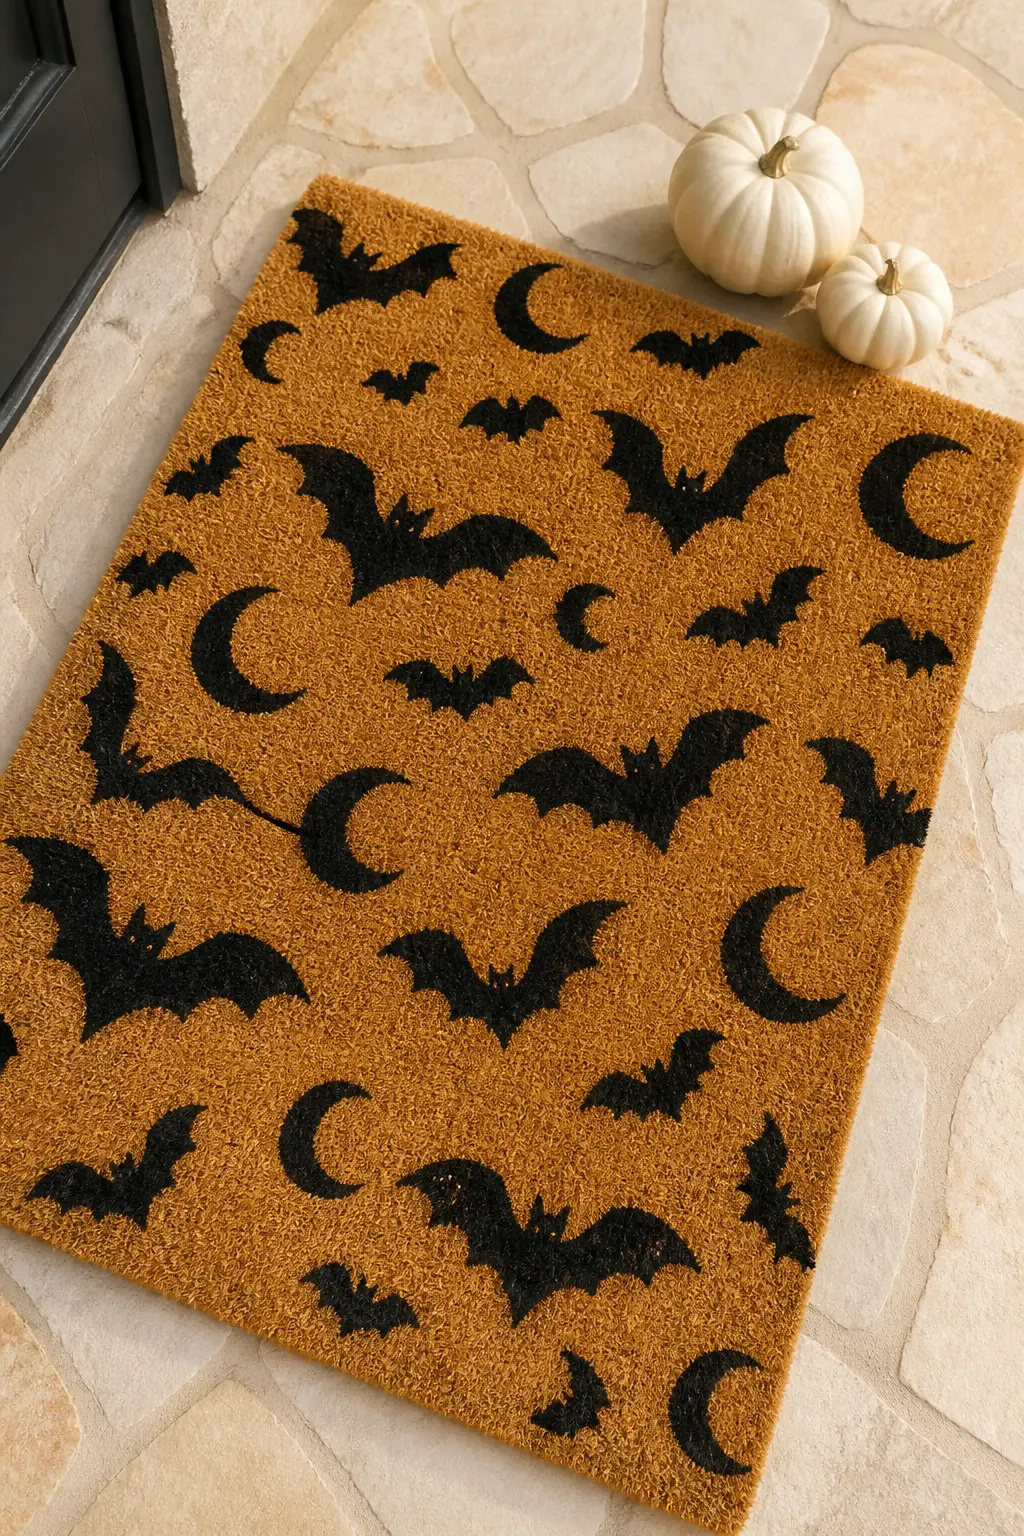
Scattered Bats and Crescent Moons
Twelve to fifteen bat silhouettes in matte black, varied slightly in wingspan, scattered across the mat at different angles. Between them, seven or eight crescent moons in the same black, some facing left, some right. The randomness is the point: trace or freehand the bats from a simple cut paper template folded in half so both wings match, then paint freely.
The density of the pattern should be heavy enough that the coir ground feels like a dark sky rather than empty space. Leave a thin margin around the edges unpainted, which makes the whole thing look like a printed textile rather than a rushed craft.
🛍 Shopping guide
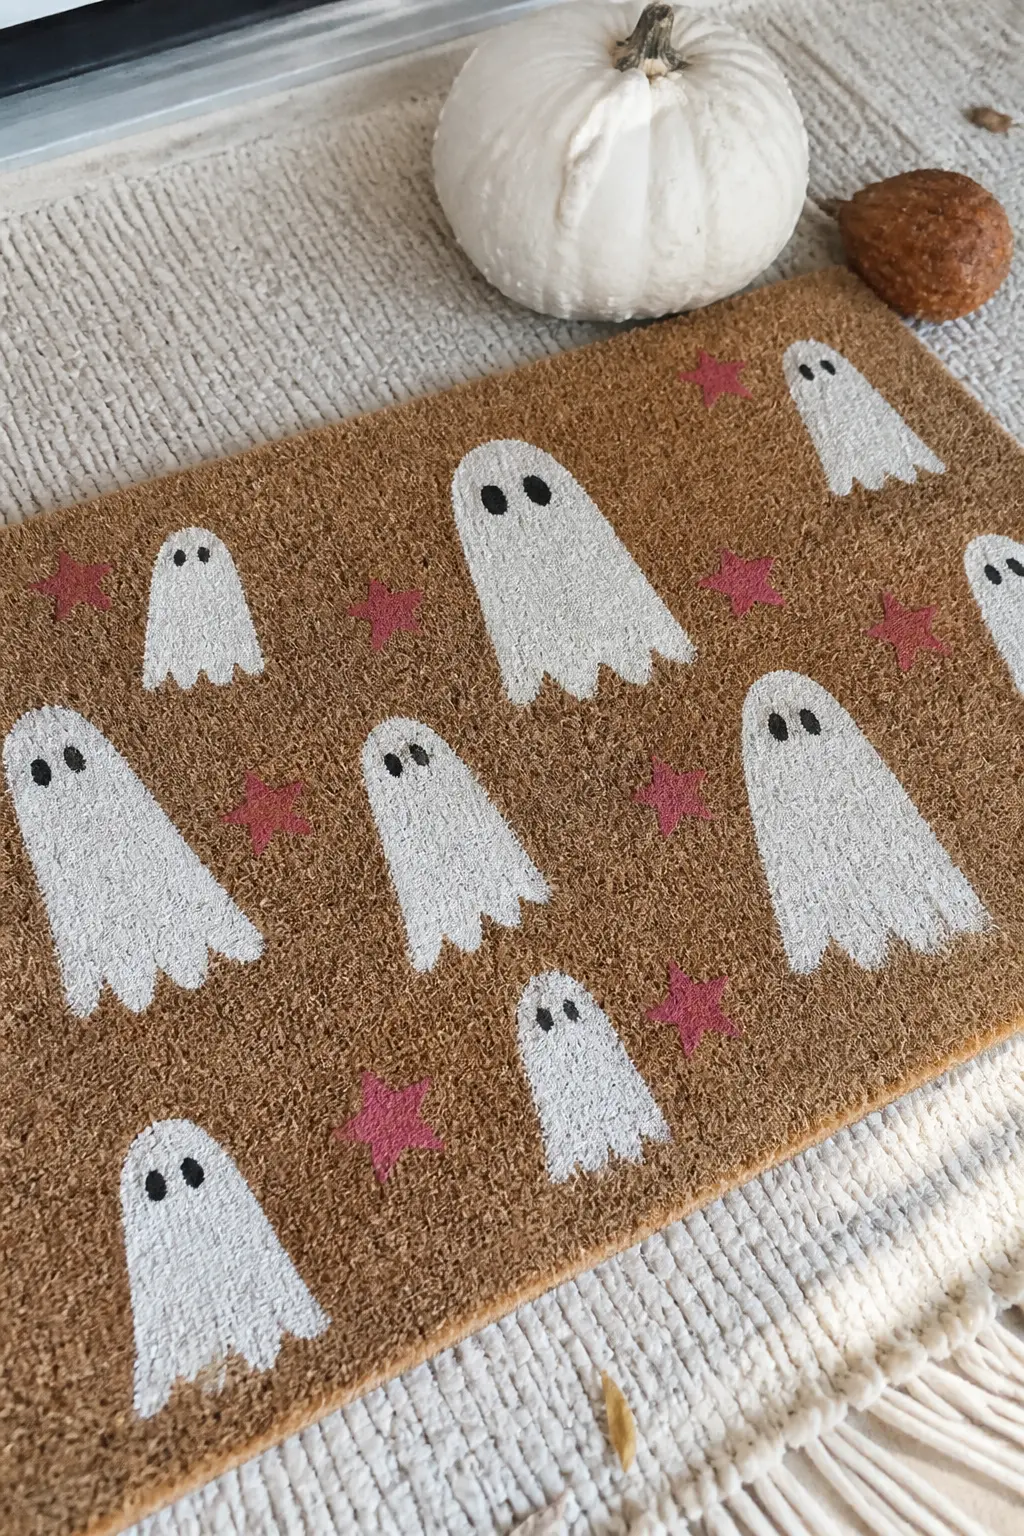
Ghost Parade with Pink Star Accents
Five or six rounded ghost shapes in chalky white, scattered across the mat in no particular order, each with two small black dot eyes. Between them, tiny four-pointed stars in dusty berry-pink, just three or four strokes each. The pink is the edit that makes this feel current rather than default Halloween, and it takes about thirty seconds per star.
Paint the white ghosts first and let them cure completely. The slightly rough coir surface gives the white paint a natural texture that reads as a fabric ghost body rather than flat paint. Come back with the pink stars once everything is dry, and seal the whole mat in one session.
🛍 Shopping guide
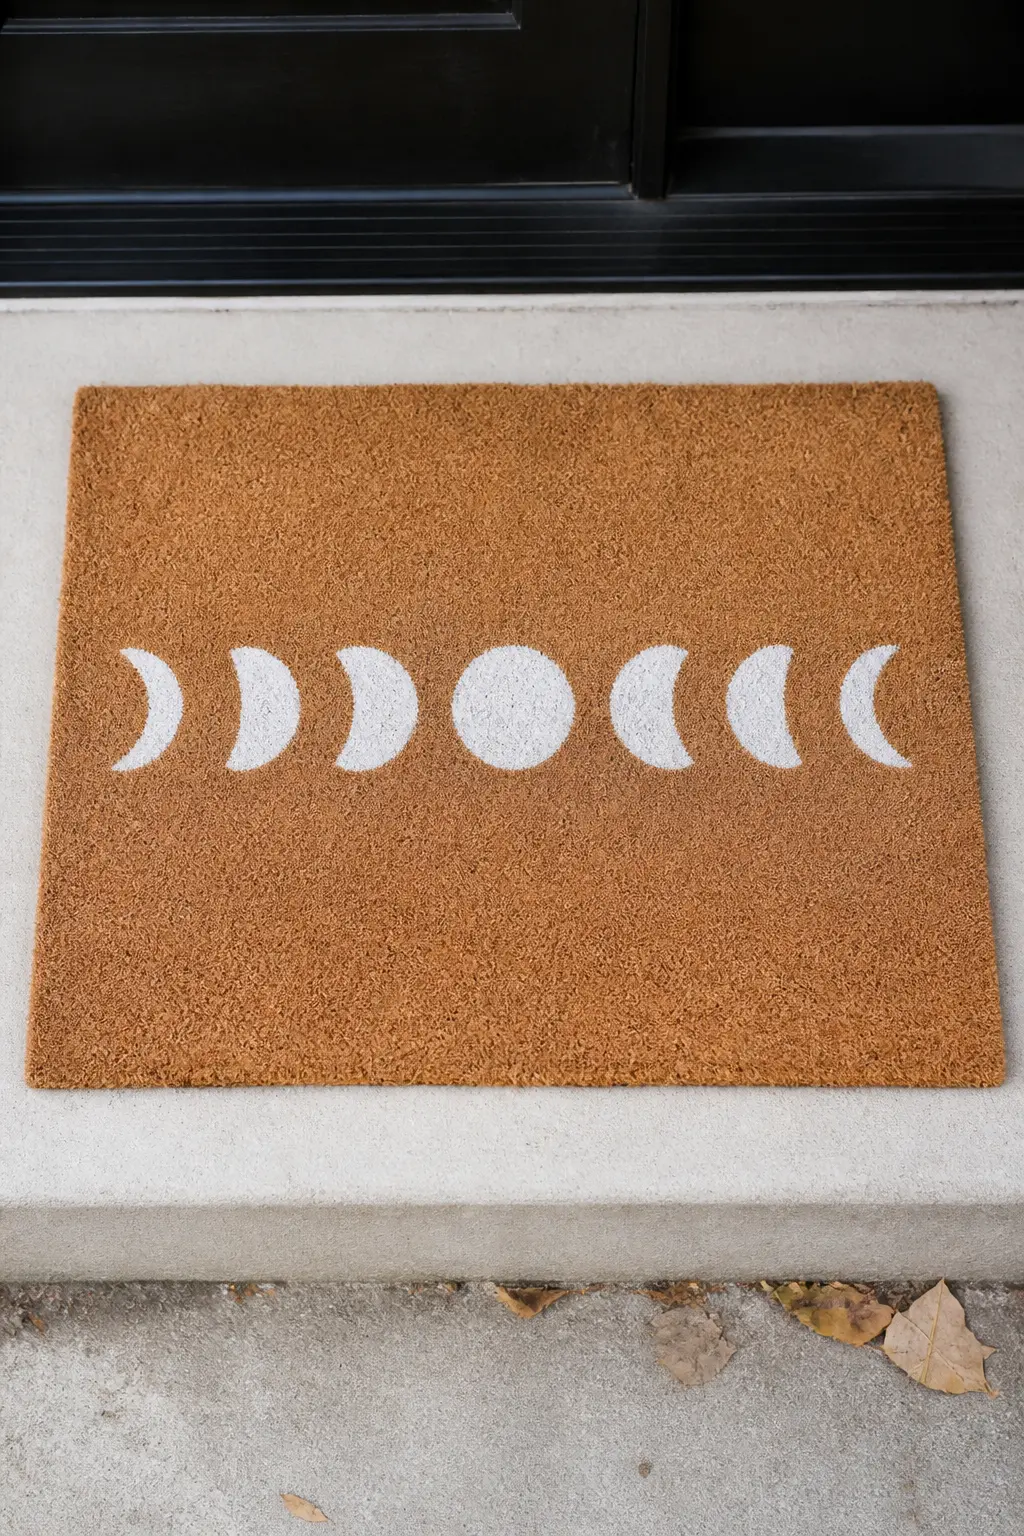
Moon Phase Row Across the Center
Seven moon phases painted in a centered horizontal row across the mat: full circle, three-quarter crescent, half circle, thin crescent, dark circle, thin crescent the other way, building back to full. All in warm white on the natural coir ground. The shapes are geometric enough to trace from simple paper templates cut with scissors.
Space the seven shapes evenly with chalk marks before painting. The full moon circles can be traced around a small jar lid. The sequence reads as lunar calendar art when framed and styled, but sitting on a doorstep it reads as decoration. Seal with two coats of Mod Podge Matte to keep the white from graying with foot traffic.
🛍 Shopping guide
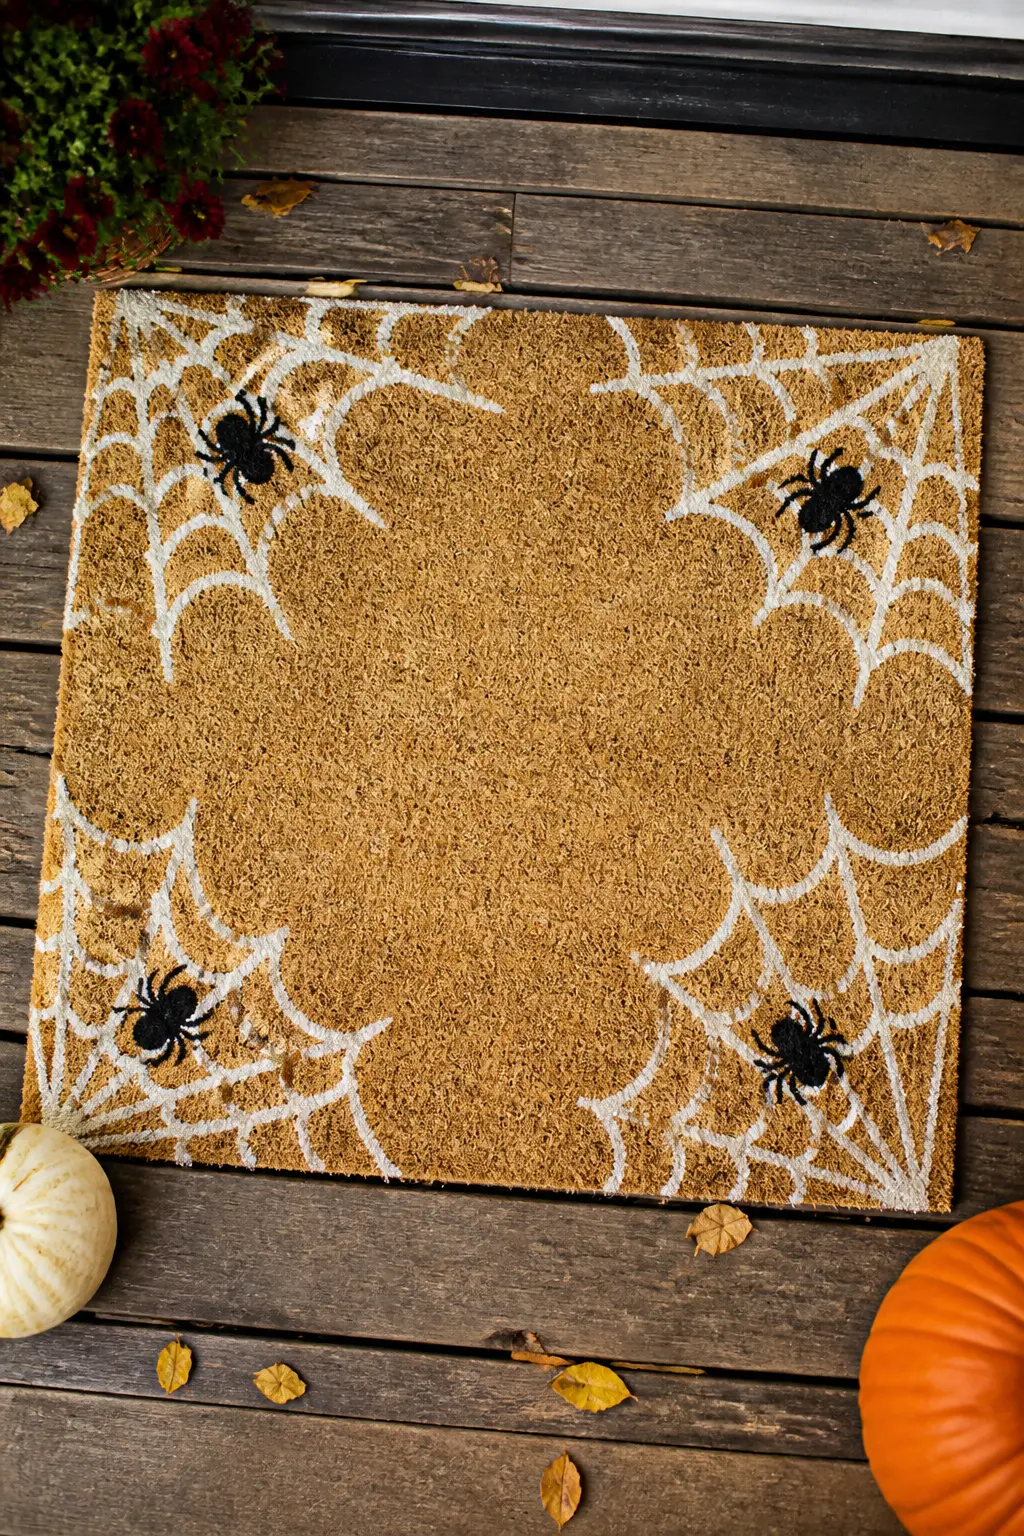
Cobweb Border with Open Center
A web painted in white in all four corners simultaneously, each radiating outward from the corner point with arcs connecting the spokes, so the four webs nearly meet in the middle and leave just the center of the mat as natural coir. A small spider in each corner, sitting at the corner point. No text, no other motif: the pattern carries the whole design.
This works best on a larger mat, 24×36 or bigger, where the corner webs have room to breathe without colliding. On a smaller mat, do two corners diagonally opposite each other and leave the other two plain. The open center reads as a window rather than an accident.
🛍 Shopping guide
Portrait and Character Mats
A single large character centered on the mat is the equivalent of a monogram: simple, graphic, impossible to misread from the kerb. The character does not need to be perfectly drawn. Intentional looseness reads as illustration rather than mistake, which is exactly the mood these mats are after.
Scale matters more than precision here. The image should fill at least two-thirds of the mat surface. Anything smaller gets swallowed by the coir texture and reads as timid rather than graphic.
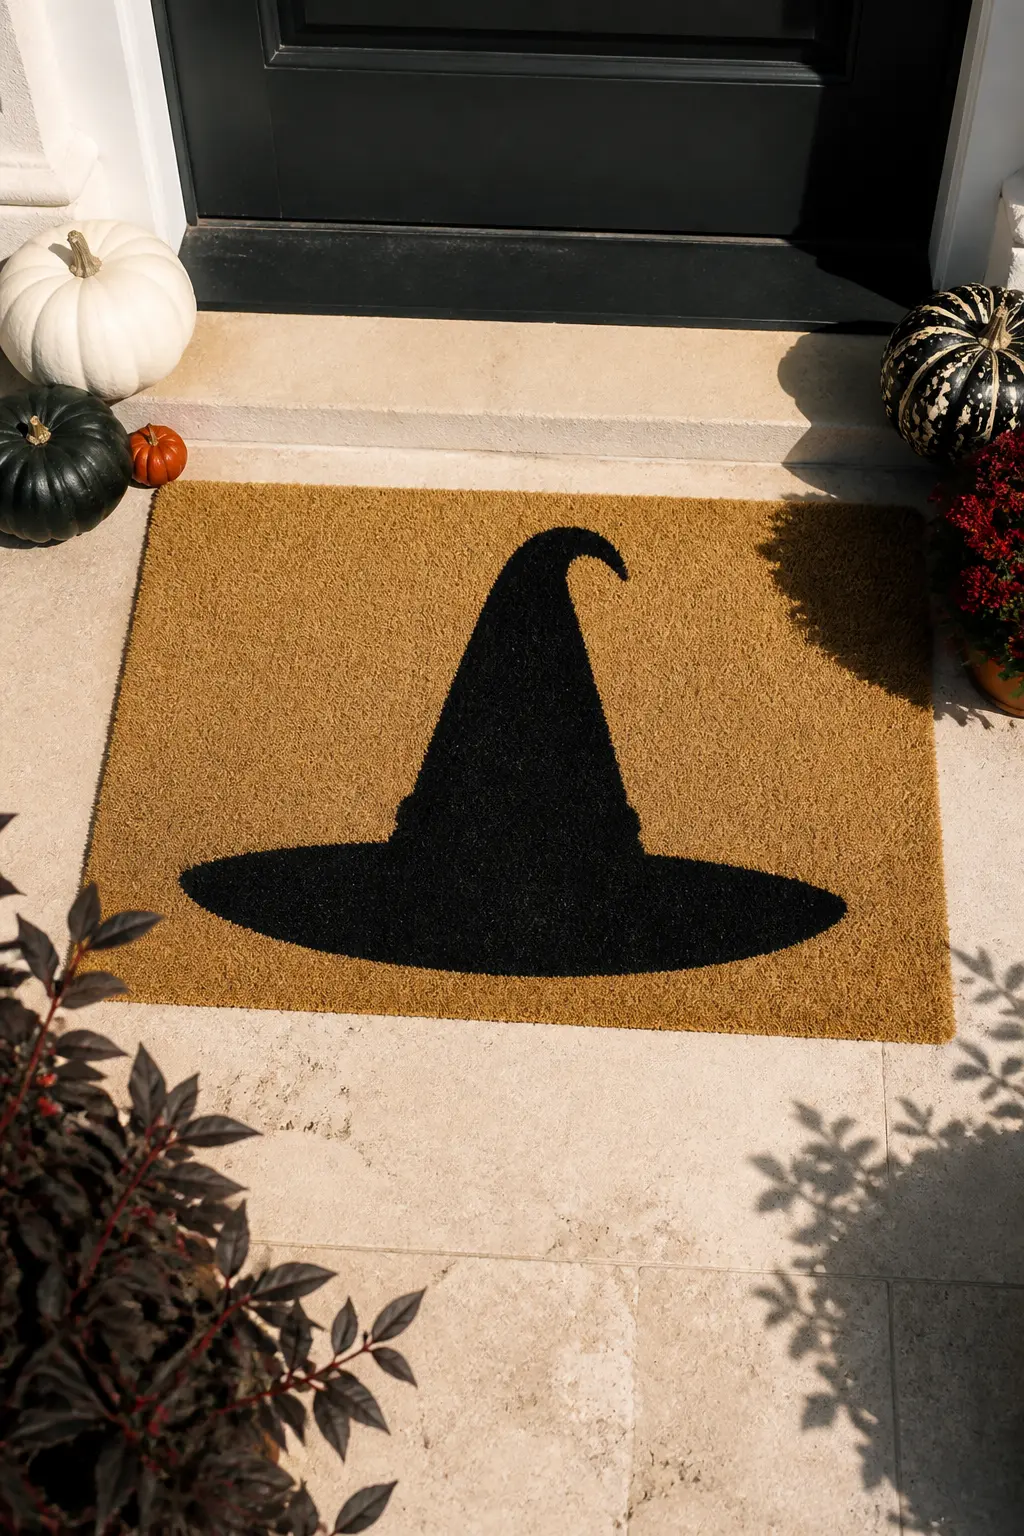
Centered Witch Hat in Silhouette
A single large witch hat silhouette painted in matte black, centered on the natural coir ground. The hat brim spans almost the full width of the mat. Above and below it, nothing: just the warm tan coir. The restraint is what makes this one work. One shape, perfect placement, done.
Trace the hat outline onto the mat with chalk, adjusting the proportions until the brim nearly touches both side edges. Fill with two coats of black, letting the coir texture show through slightly on the first coat for depth. A very thin band of berry red painted along the base of the hat crown, between hat and brim, adds one note of color without breaking the graphic simplicity.
🛍 Shopping guide
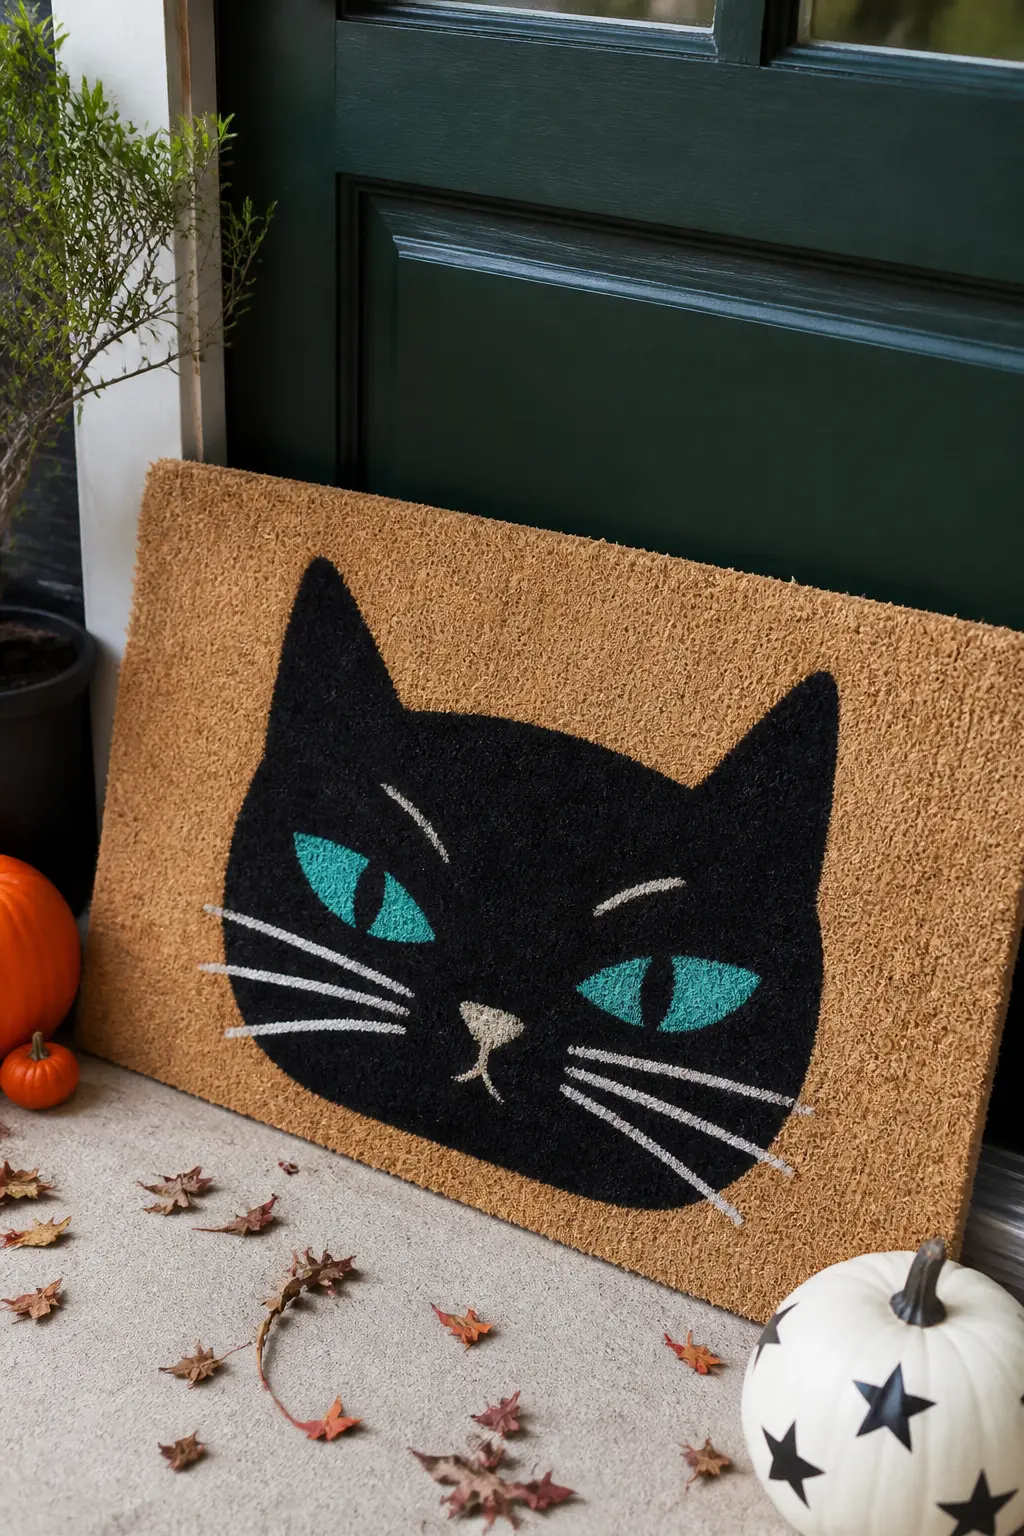
Friendly Cat Face, Full Mat Width
A cat face painted in solid black, centered on the mat, large enough that the ears nearly touch the top edge and the chin sits just above the bottom edge. Two teal or deep green oval eyes with vertical slit pupils, a small pink triangle nose, and four white whisker lines per side. The face reads as both decoration and a small visual joke about who actually owns the house.
The ears are painted as simple filled triangles. The round head is drawn freehand with chalk first, then filled. Work from the outer face inward: head first, then eyes, then the small nose, then the whiskers last with a liner brush so they sit on top of the dried face paint cleanly.
🛍 Shopping guide
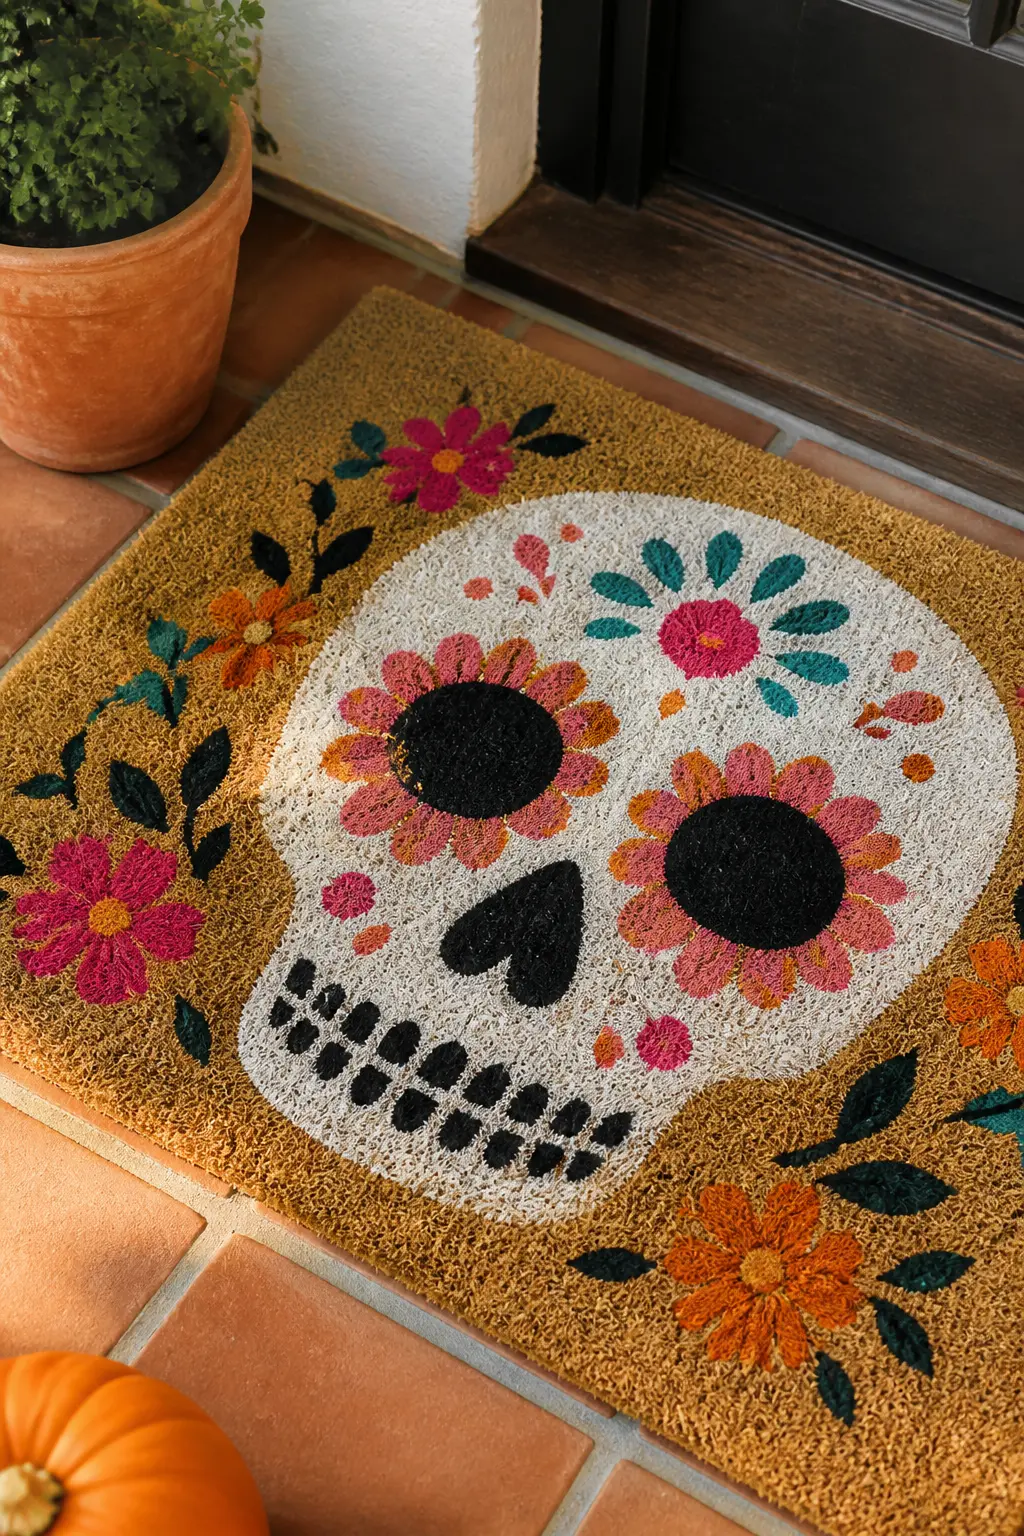
Single Large Skull, Dia de los Muertos Style Florals
A skull outline in white, centered on the natural coir ground and sized to fill most of the mat. Over and around the eye sockets and forehead, simple floral shapes painted in dusty orange, berry pink and deep teal: five-petal rounds, no shading, flat color. The black details, nasal cavity and teeth, are added last with a liner brush.
The florals are the fastest part. Each flower is a center dot and five surrounding dots, painted in two seconds per bloom. Cluster them around the eyes and top of the skull and leave the lower jaw relatively plain so the teeth read clearly. This mat looks deliberate, seasonal and slightly different from anything sold in a shop, which is the whole point.
🛍 Shopping guide
Dark-Ground Mats
Most painted coir mats use the natural tan as the background. Painting the entire mat black first and then adding white or color on top reverses the logic and produces something that looks genuinely different sitting next to every other front door on the street.
Black outdoor acrylic covers coir in two coats. Let it cure fully before adding the design on top, or the top-coat colors will lift. The finished mat feels moodier and more editorial than anything with a visible natural ground.
Midnight Black Ground with White Dripping Letters
The entire mat painted solid black first, two full coats of outdoor acrylic allowed to cure for at least two hours. Then the word HAUNTED painted in white across the center, with short drip lines extending from the bottom of each letter, varying in length so they do not look like a ruler was involved. The drips are the detail that elevates this from a basic painted mat to something that looks designed.
The drip lines are painted freehand with a liner brush: start at the base of the letter, pull downward with light pressure, lift the brush to taper the end. Three to five drips per letter is plenty. Seal in Mod Podge Matte, which keeps the black from reading flat and the white from yellowing through rain exposure.
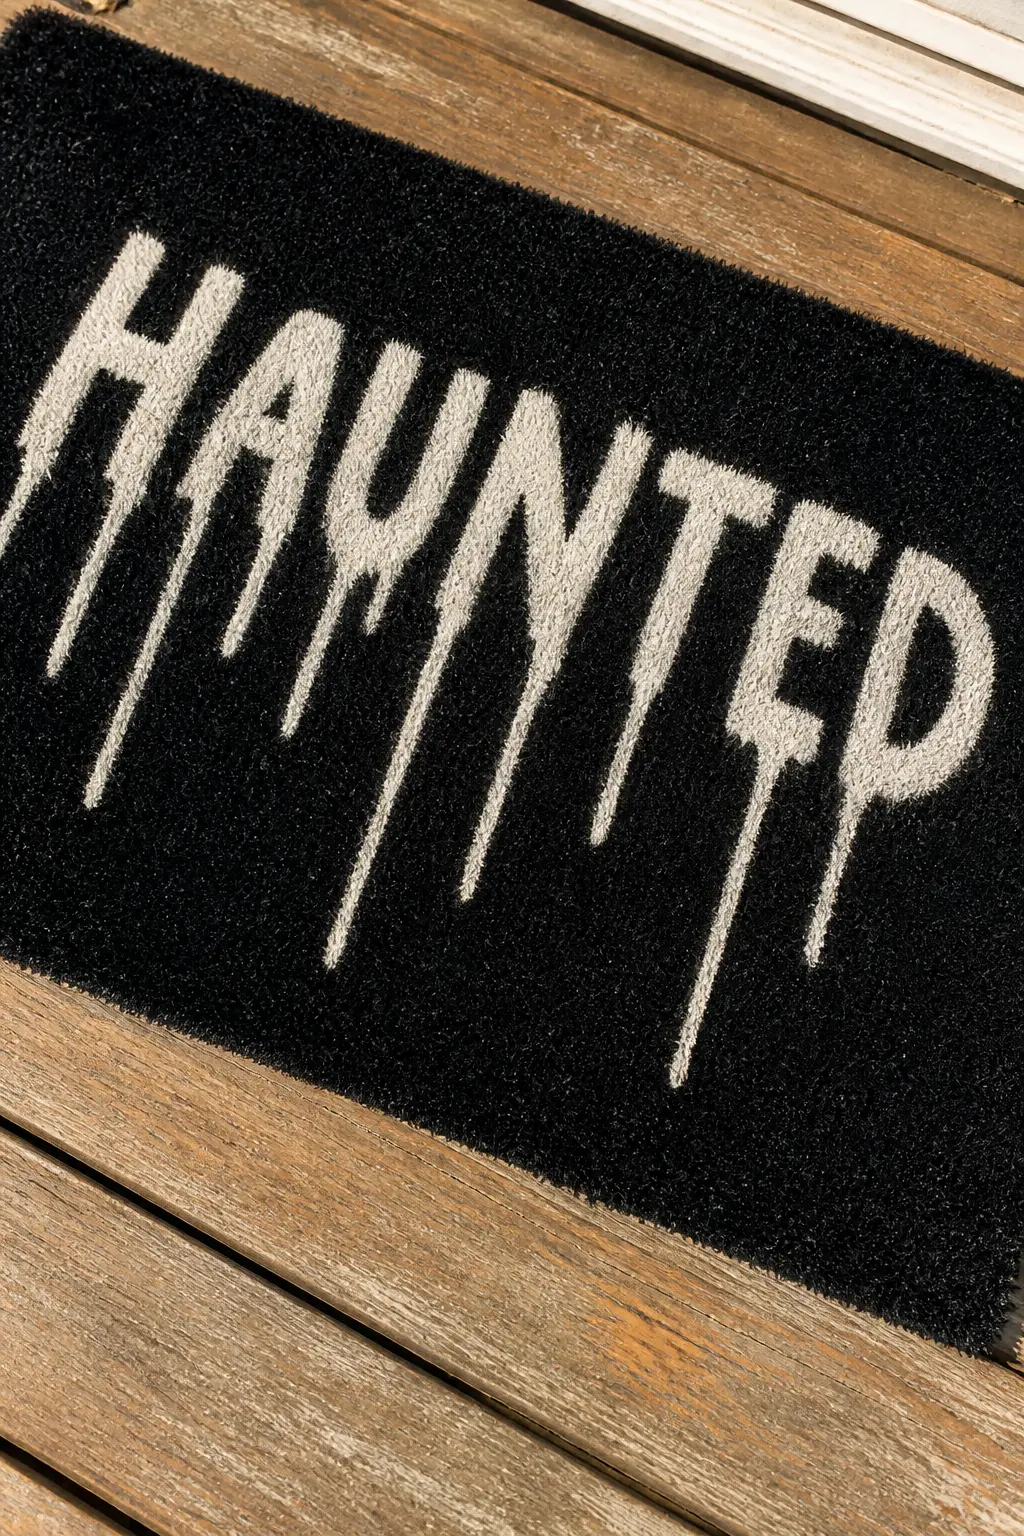
🛍 Shopping guide
Black Ground, Teal Eyeball Pattern
A black-ground mat with eight to ten scattered eyeball shapes painted in deep teal and white. Each eye is a teal oval, a white inner oval, a black circular iris, and a white dot highlight. The shapes point in different directions, as though each one is looking a slightly different way. The result is surreal and a little unsettling without leaning into gore.
Teal is the accent color that separates this from every orange-and-black mat on the street, and it photographs beautifully against the black ground in both daylight and porch-light conditions. Use a food-safe sponge cut into an oval for the base teal shape, then add the detail with a round brush.
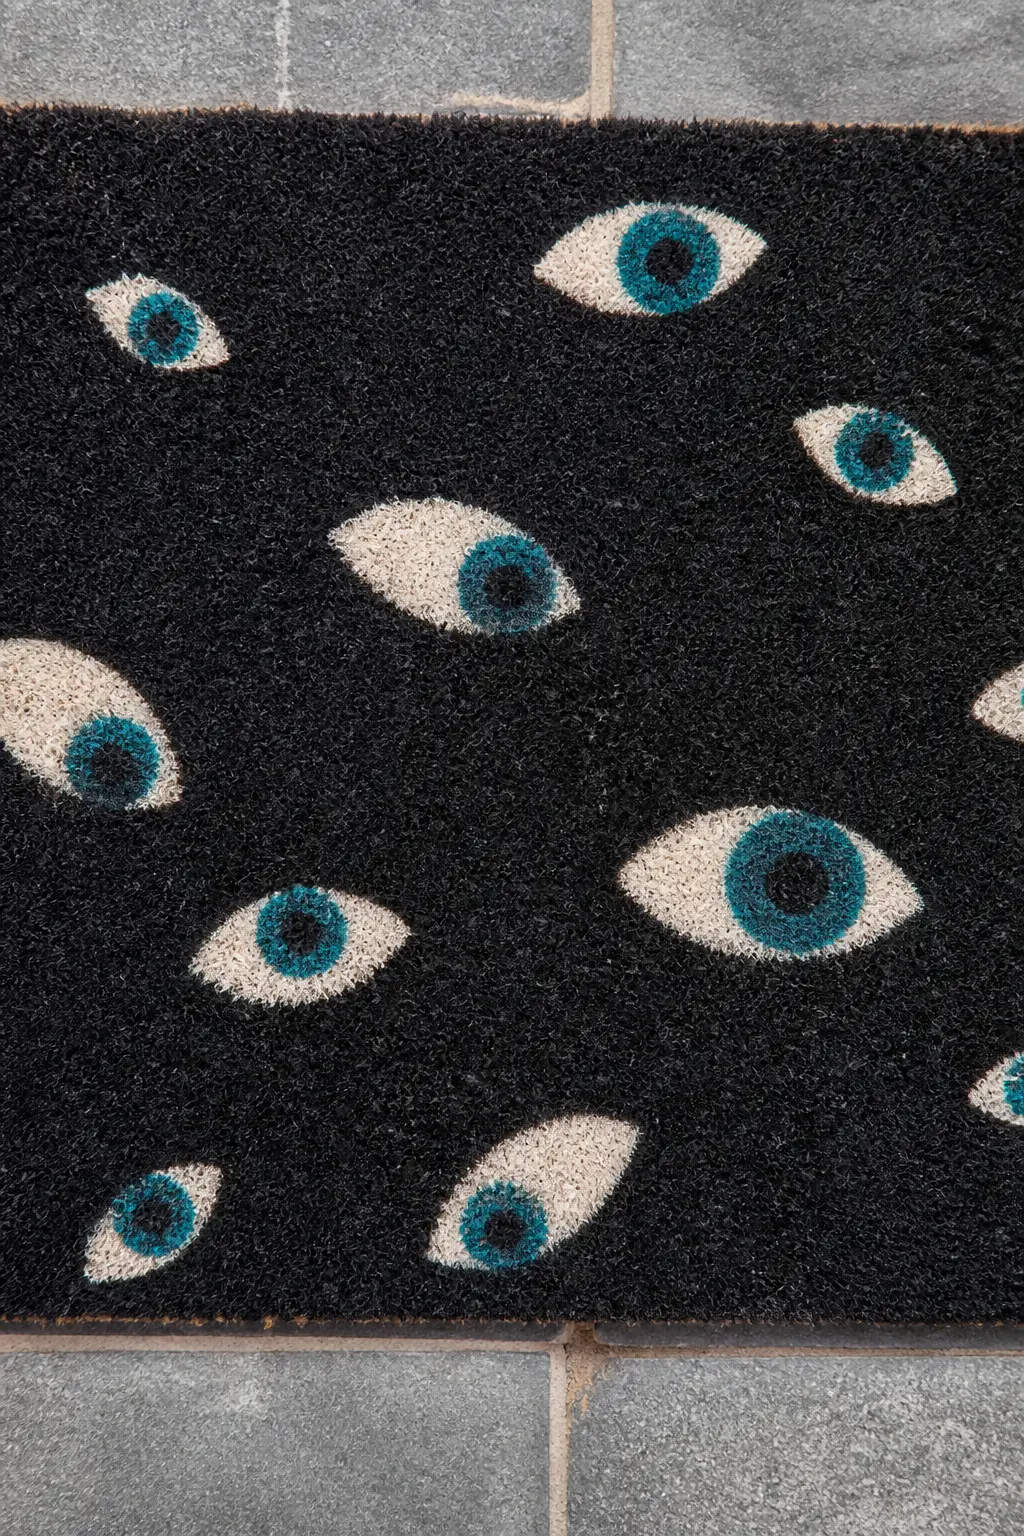
🛍 Shopping guide
Mummy Wrap Pattern in White on Black
The mat is painted fully black as a base, then diagonal bands of white painted across it in rough horizontal strips to suggest linen wrapping, with two oval white eyes with black pupils painted at one end as though a mummy is lying face-up. The bands do not need to be parallel or even: slight wobble reads as fabric rather than error.
Use a half-inch flat brush and drag it across the mat in one stroke per band, reloading minimally so each pass is slightly dry-brushed and shows the black coir texture beneath. The eye detail takes a round brush and about three minutes. This one photographs best from directly above.
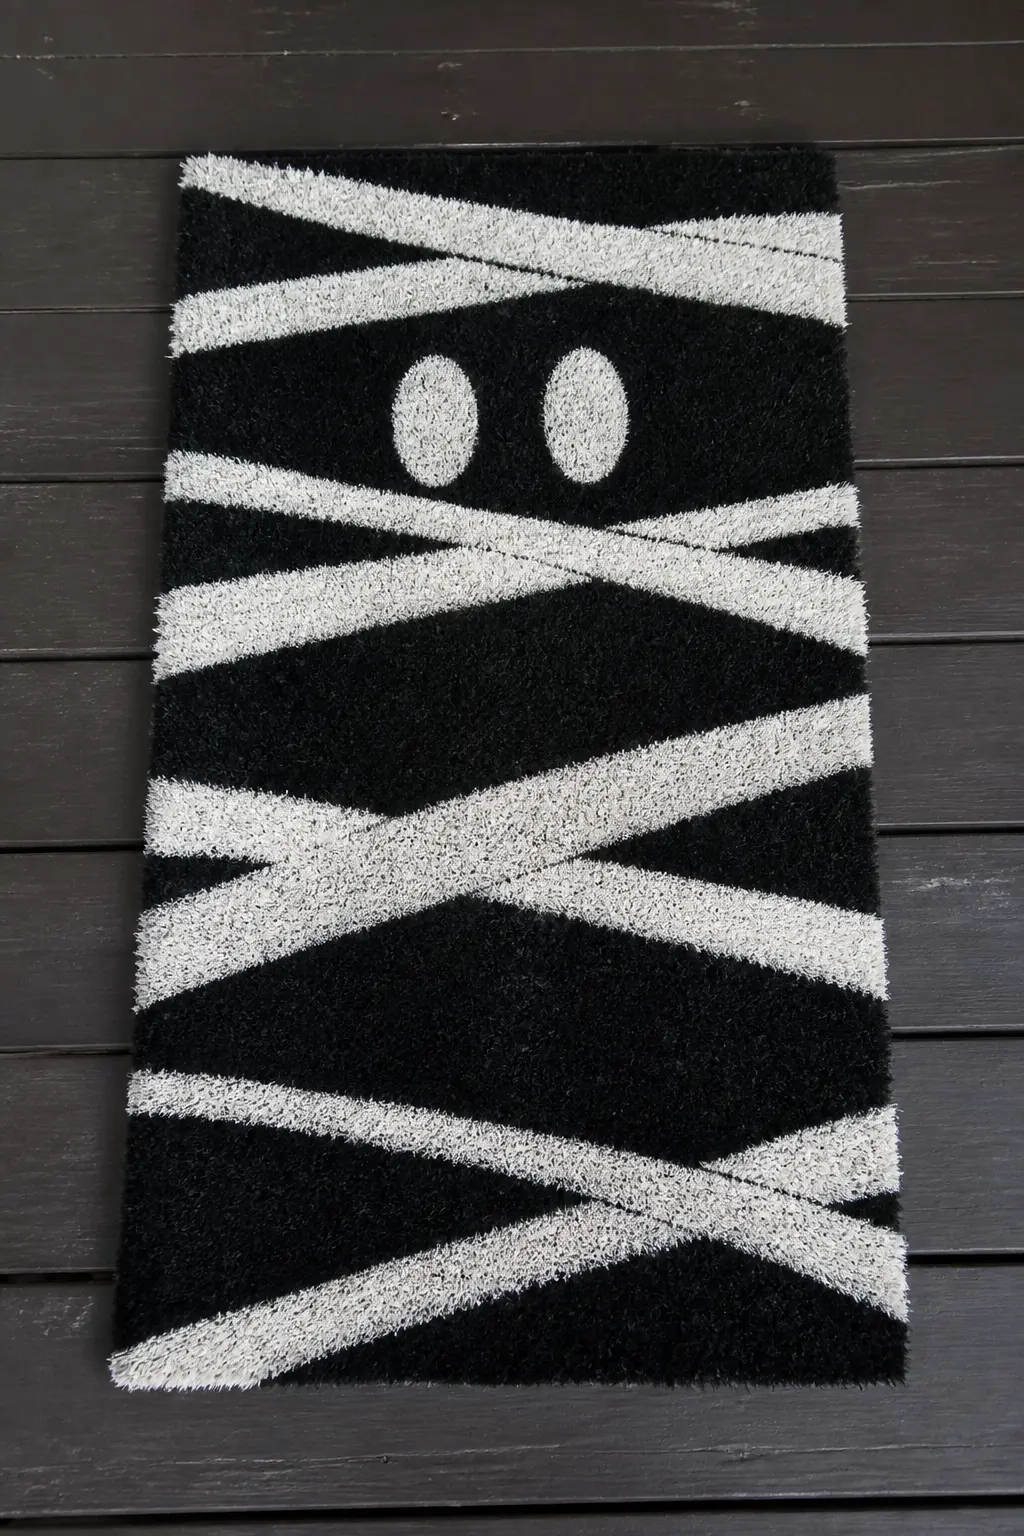
🛍 Shopping guide
Frequently Asked Questions
What paint do you use on a coir doormat?
Outdoor acrylic craft paint is the standard choice. It flexes slightly as the mat fibers compress underfoot, bonds well to natural coir without a primer, and is widely available in small bottles. Avoid fabric paint formulas, which stay tacky longer, and avoid oil-based paint, which cracks when the mat bends.
Do you need to seal a painted coir doormat?
Yes. Two coats of Mod Podge Matte or Mod Podge Outdoor, applied with a wide brush once the paint is fully dry, dramatically extends the life of the design. Without a sealer, foot traffic removes the paint within a week or two. With it, a mat in a covered porch can hold its design for a full season.
How do you stop paint bleeding under a stencil on coir?
The texture of coir is too uneven for adhesive stencils alone to seal perfectly. Apply a very light coat of Mod Podge over the stencil before painting, let it dry for two minutes, then paint over it. The Mod Podge fills the gaps between the stencil edge and the coir fibers and stops most bleed. Alternatively, use a dry-brush technique with minimal paint on the brush.
How long does a painted doormat last outside?
Under a covered porch, a well-sealed mat typically holds its design for one full season of use. In a fully exposed position with rain falling directly on it, expect four to six weeks before fading begins. Bringing the mat inside during heavy rain in the first week while the Mod Podge cures fully makes a meaningful difference to longevity.
Can you use a Cricut or vinyl on a coir doormat?
Vinyl does not adhere permanently to coir. The fibers are too irregular and the mat flexes too much. The Cricut method that actually works uses the vinyl as a paint mask: press it onto the mat, paint over it, let the paint dry, then peel the vinyl away to reveal crisp edges beneath. The vinyl goes in the bin after one use, but the result is a clean stenciled line on a surface where brush stencils often bleed.
18 DIY Halloween masks to make for kids and adults, from papier-mache celestial forms to layered lea

Halloween party activities for kids that run in parallel, no queues. Eleven free printables plus nin

Boo basket ideas for boyfriends that feel personal and intentional: gourmet snacks, grooming picks,
Leave a Reply