

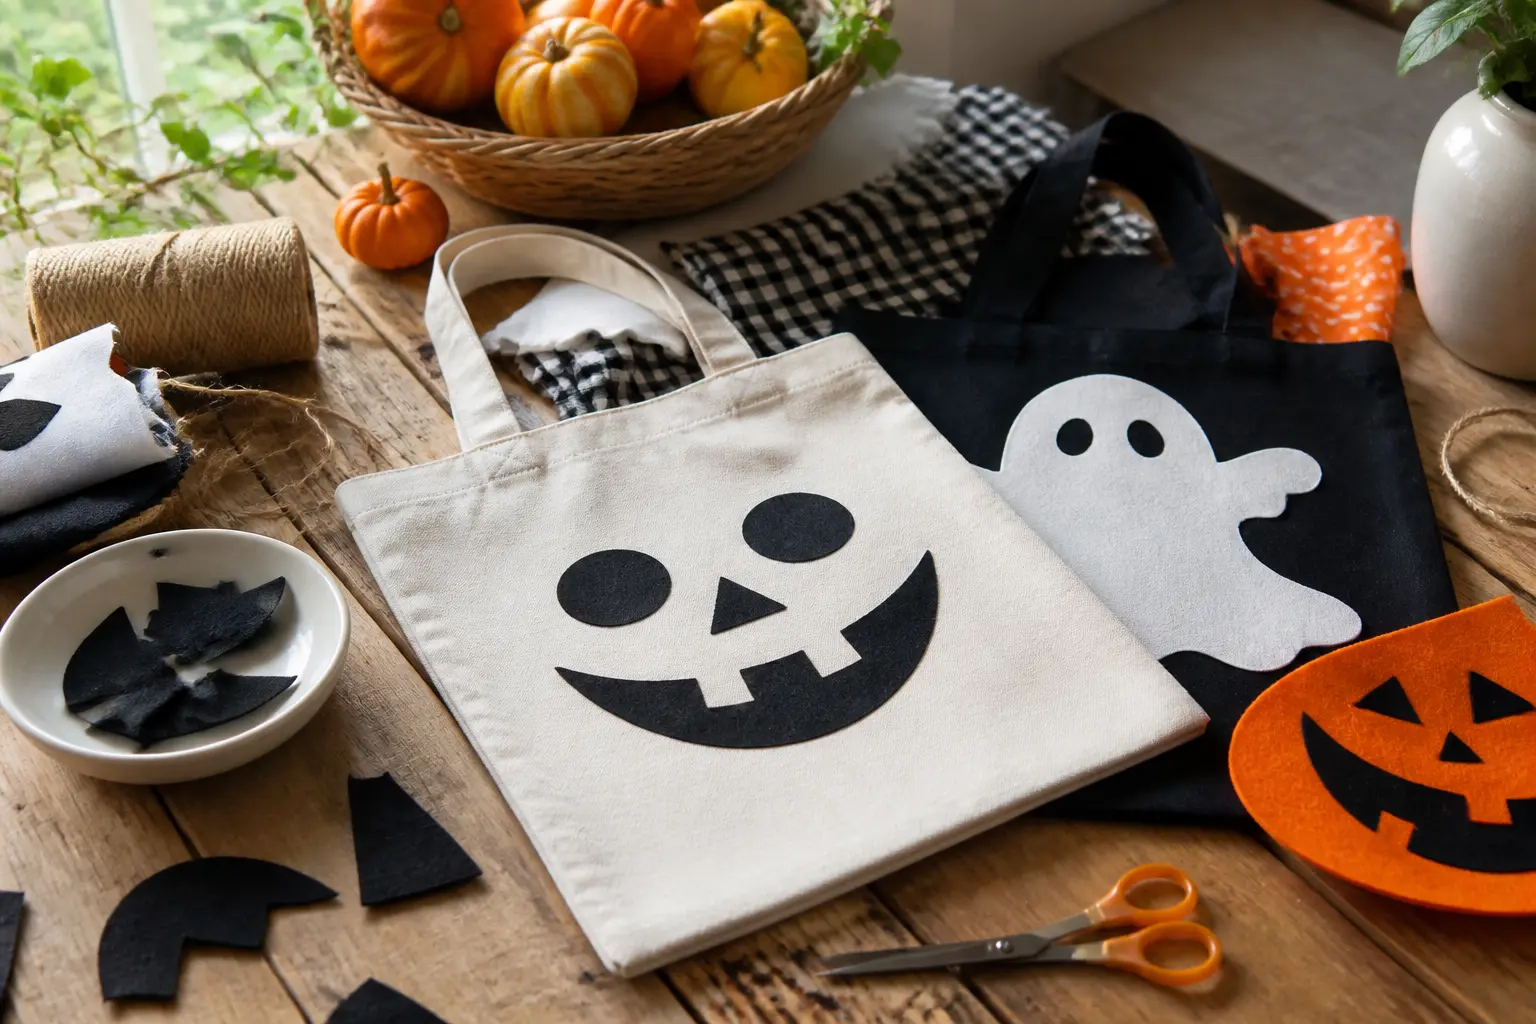
A plastic bucket holds candy for one night and then clutters a drawer until someone throws it away. A canvas tote holds the same haul, folds flat in a coat pocket and, if it has a child’s name painted across the front in bold black letters, actually gets used again.
The 24 ideas below cover every skill level from ‘I own fabric markers’ to ‘I have a cutting machine and a free afternoon.’ Each one is grouped by technique so you can skip straight to what your kitchen table can handle. For more ways to fill the evening once the bags come home full, the 25 Not-Too-Scary Halloween Party Games for Kids and the 16 Halloween Games and Activities for Kids round-ups are worth bookmarking alongside this one.
Every bag here uses a plain canvas tote as its base. Buy a multipack, set up a drop-cloth station and let the kids do as much as they can reach. The mess is the activity.
This post contains affiliate links. If you buy through them, I may earn a small commission at no extra cost to you.
Fabric Paint and Brush
Fabric paint and a cheap brush are the lowest-commitment entry point on this list. No machine, no cutting mat, no heat press. You load the brush, you press it to canvas, you let it dry overnight.
The keys to a clean result: thin layers, a piece of cardboard inside the bag to stop bleed-through, and a light pencil sketch first if you want a shape rather than pure freehand. Fabric paint sets permanently with a warm iron on the reverse side once it is dry.
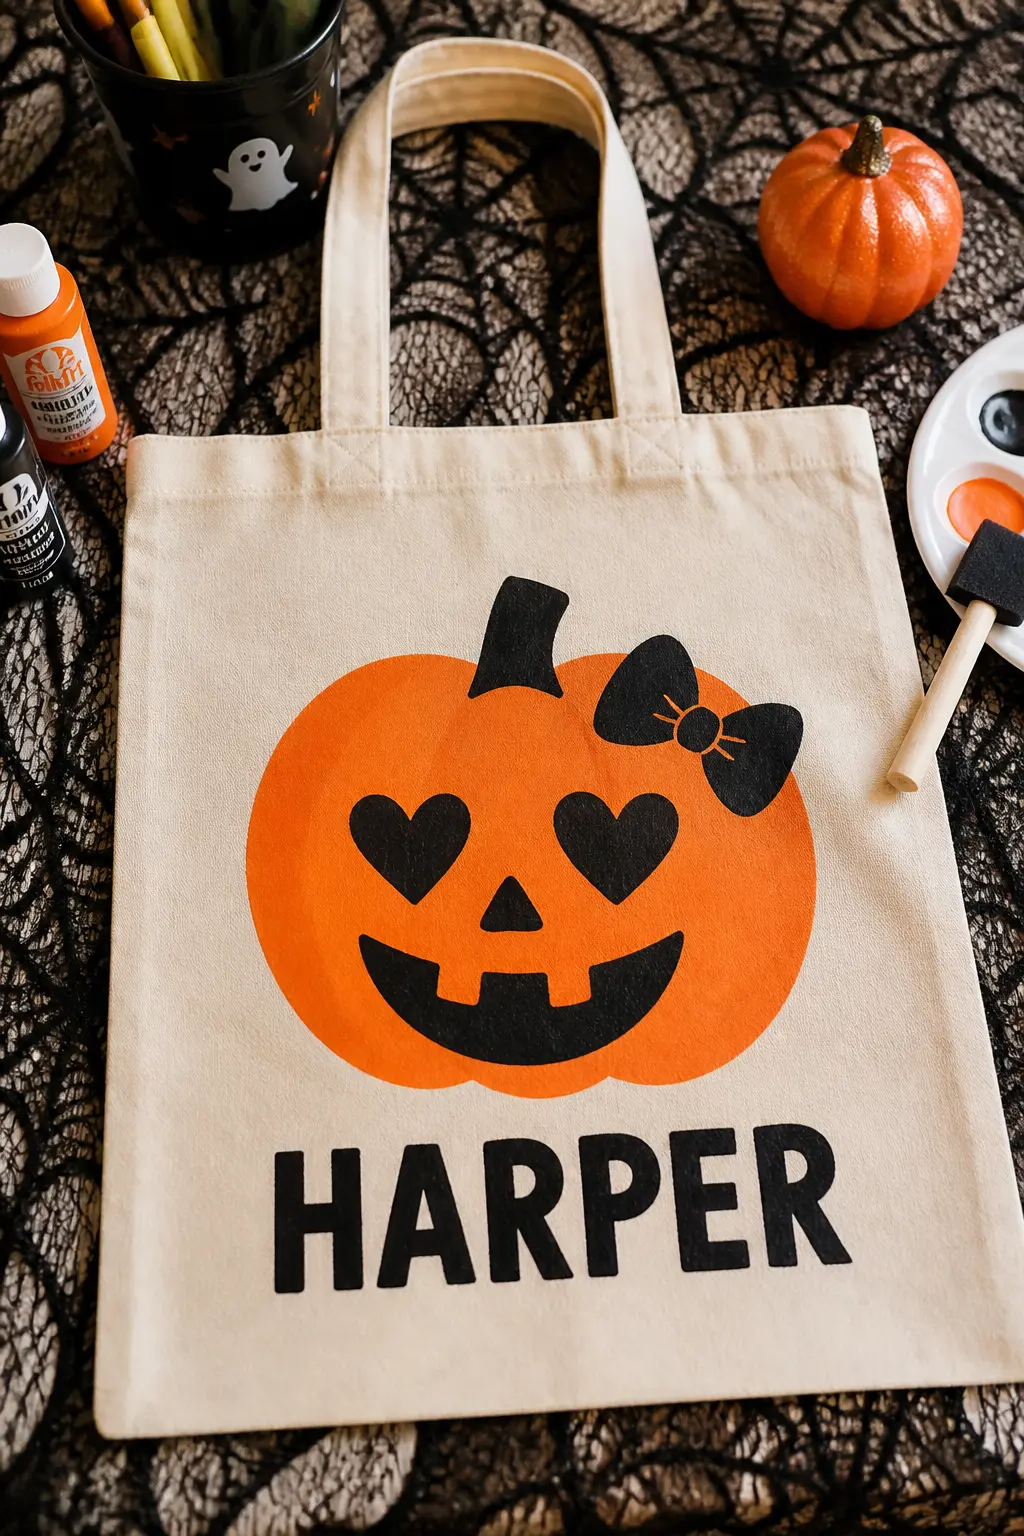
Bold Pumpkin Face With a Name Underneath
Paint a round orange pumpkin in the centre of the bag, keeping the shape simple: a circle, a rough triangle for the nose, two square eyes, a jagged smile. Let that layer dry fully before adding black details on top. The name goes underneath in wide black capital letters, painted freehand with a flat brush.
The bow on top is optional but it doubles the bag’s charm on a girl’s costume night. A small white bow painted at the pumpkin’s stem takes about two minutes and reads clearly from across the street under a torch beam.
🛍 Shopping guide
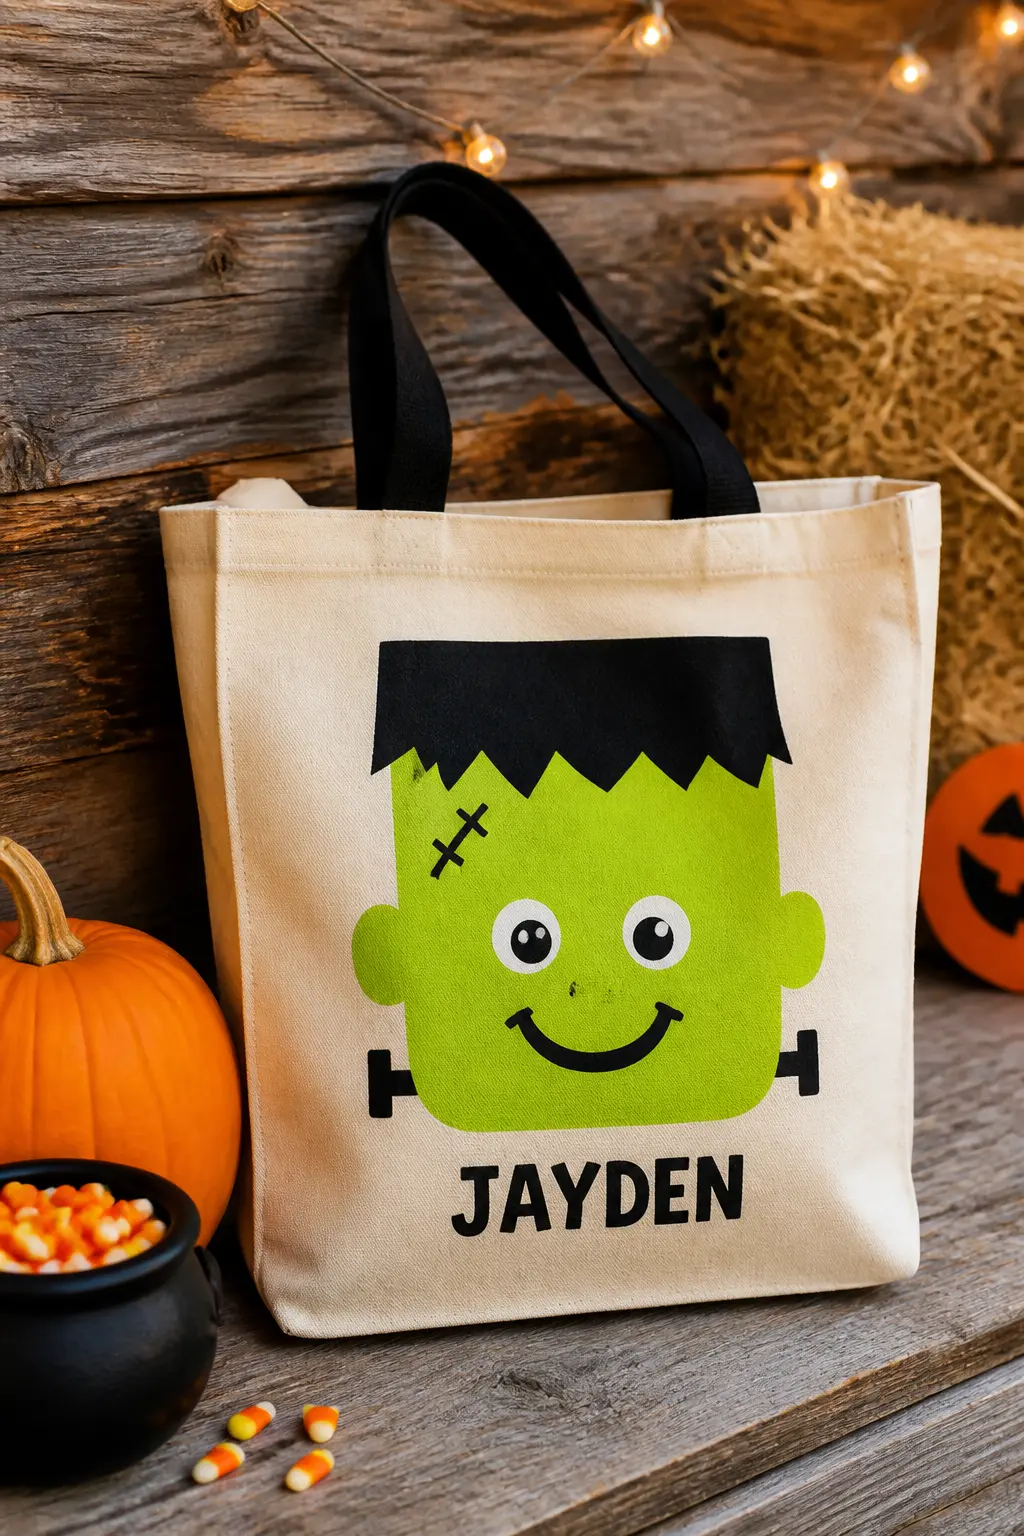
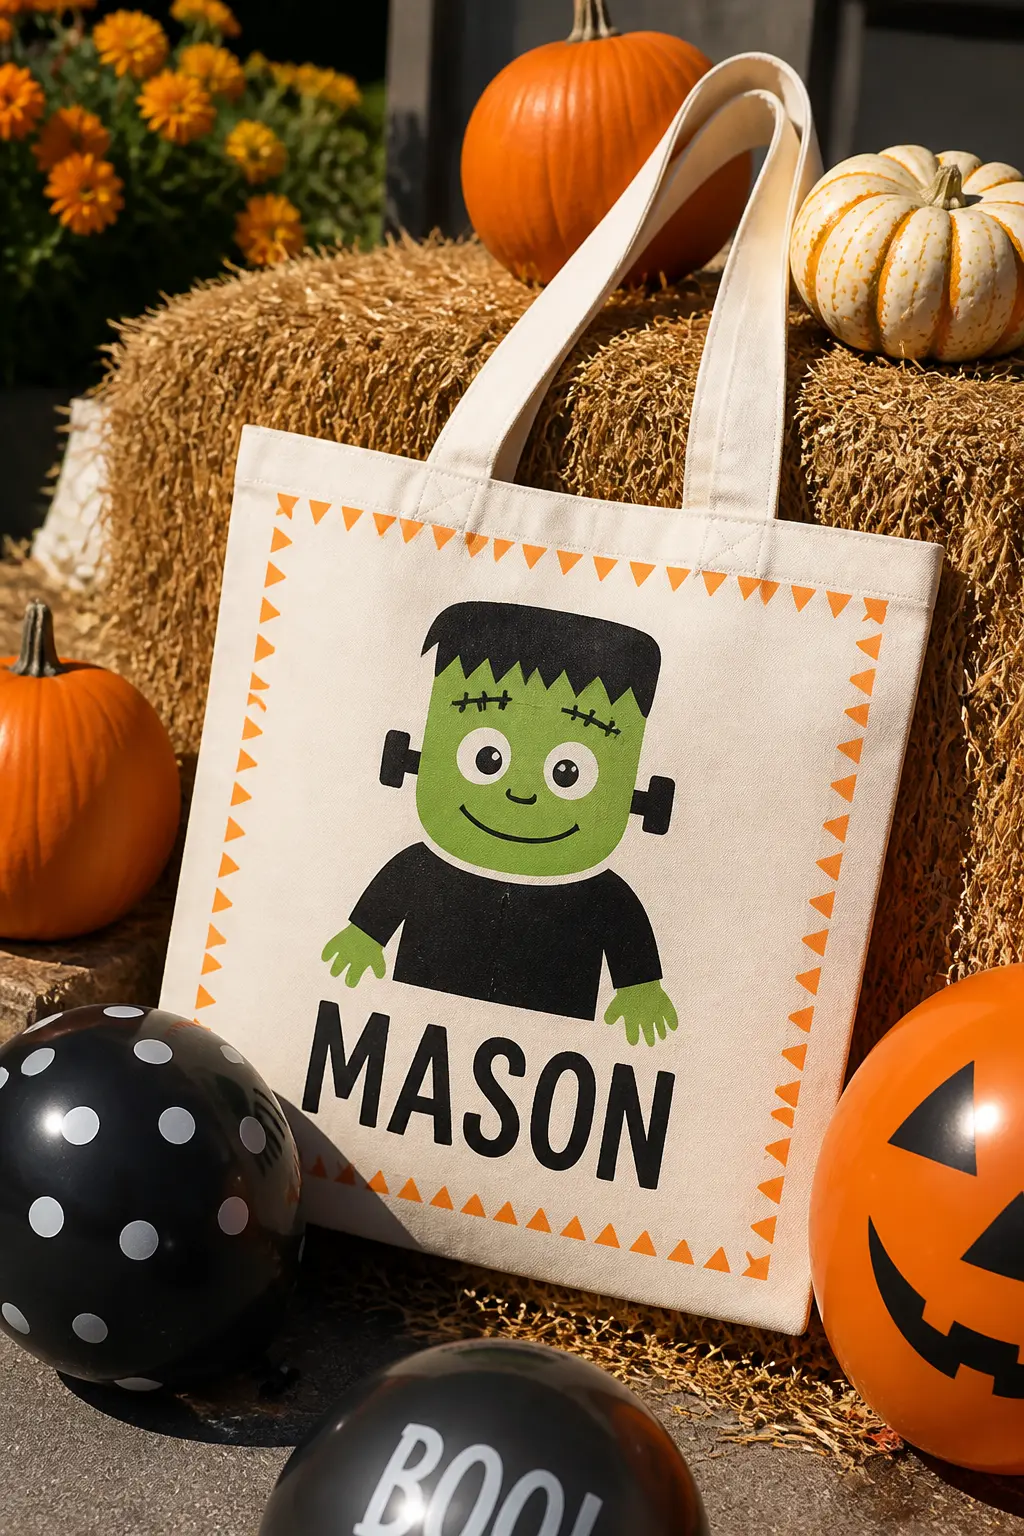
Friendly Frankenstein Head in Lime Green
Mix lime green and a touch of yellow fabric paint to get that specific monster green, then block in a square head shape filling most of the bag’s front. Black hair sits flat across the top like a rectangle. Two bolt shapes painted in grey or silver flank the sides of the neck.
The face stays friendly: round dot eyes, a wide curved smile, rosy circular cheeks in a slightly darker green. A child’s name in chunky black paint anchors the bottom. This one photographs well under string lights or near hay bales, which makes it a natural for a Halloween party setup station.
🛍 Shopping guide
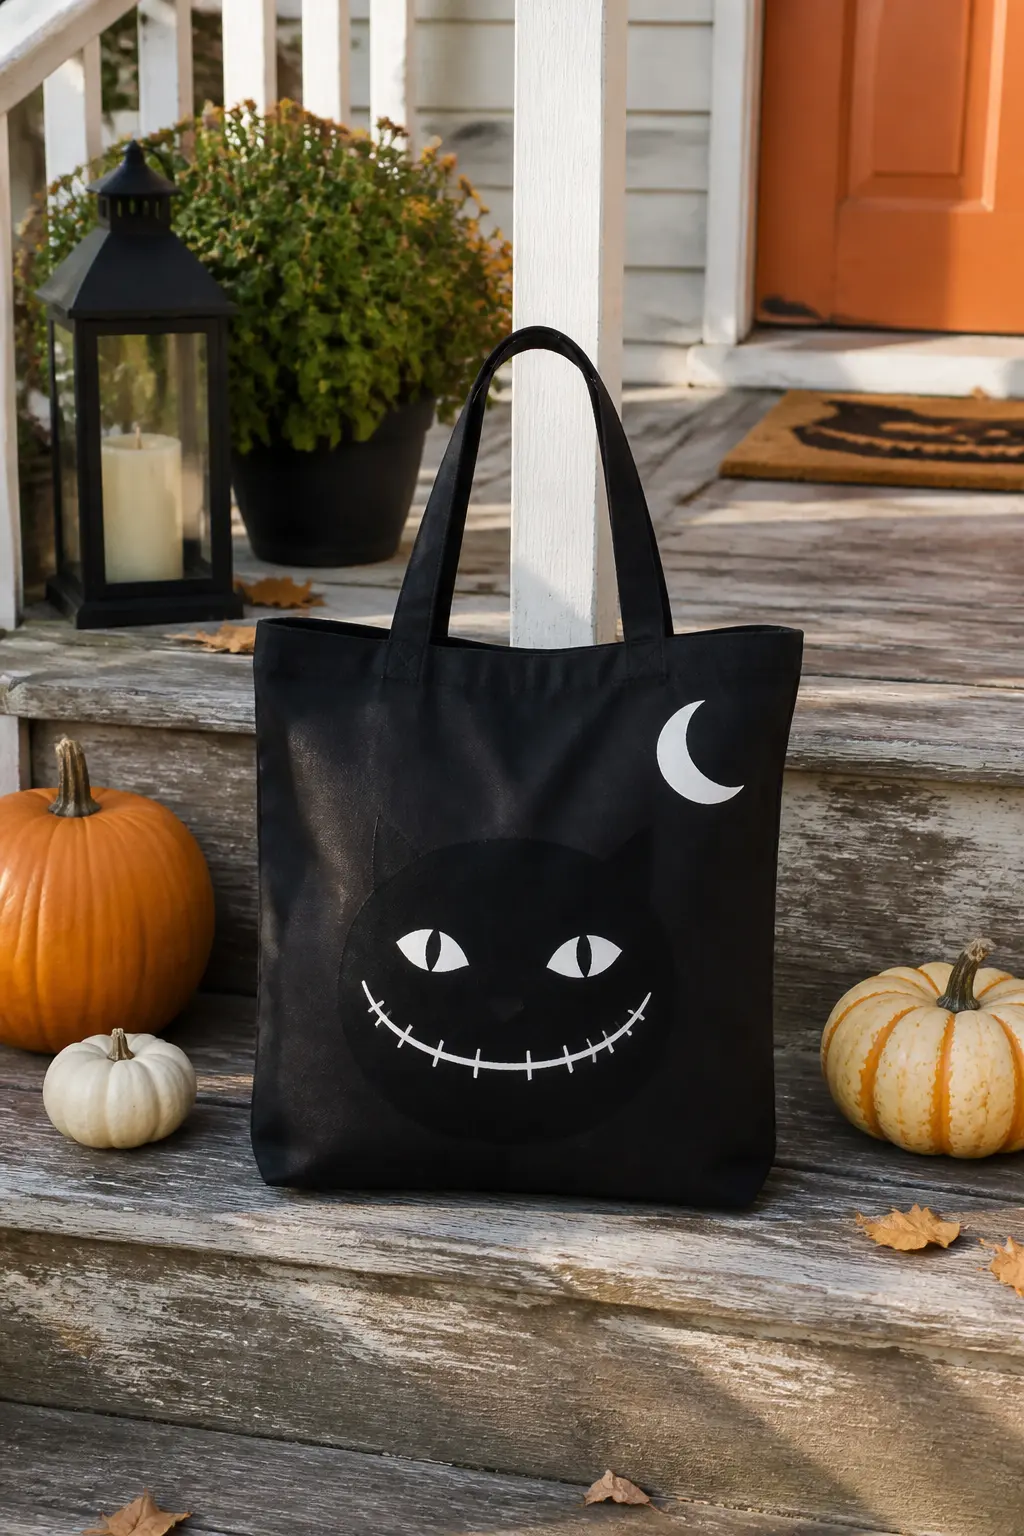
Black Cat With a Stitched Smile
Paint a rounded black cat head with two pointed ears, wide white eyes with slit pupils and a stitched grin made from short parallel dashes rather than a solid curve. The stitched detail reads as slightly sinister without being scary, which is exactly the right note for a six-year-old who considers themselves mature.
Add a curling tail that wraps around one side of the bag. A small crescent moon in white or pale yellow sits in the upper corner. This is the bag for the child wearing the black-cat costume: matching bag, matching moment.
🛍 Shopping guide
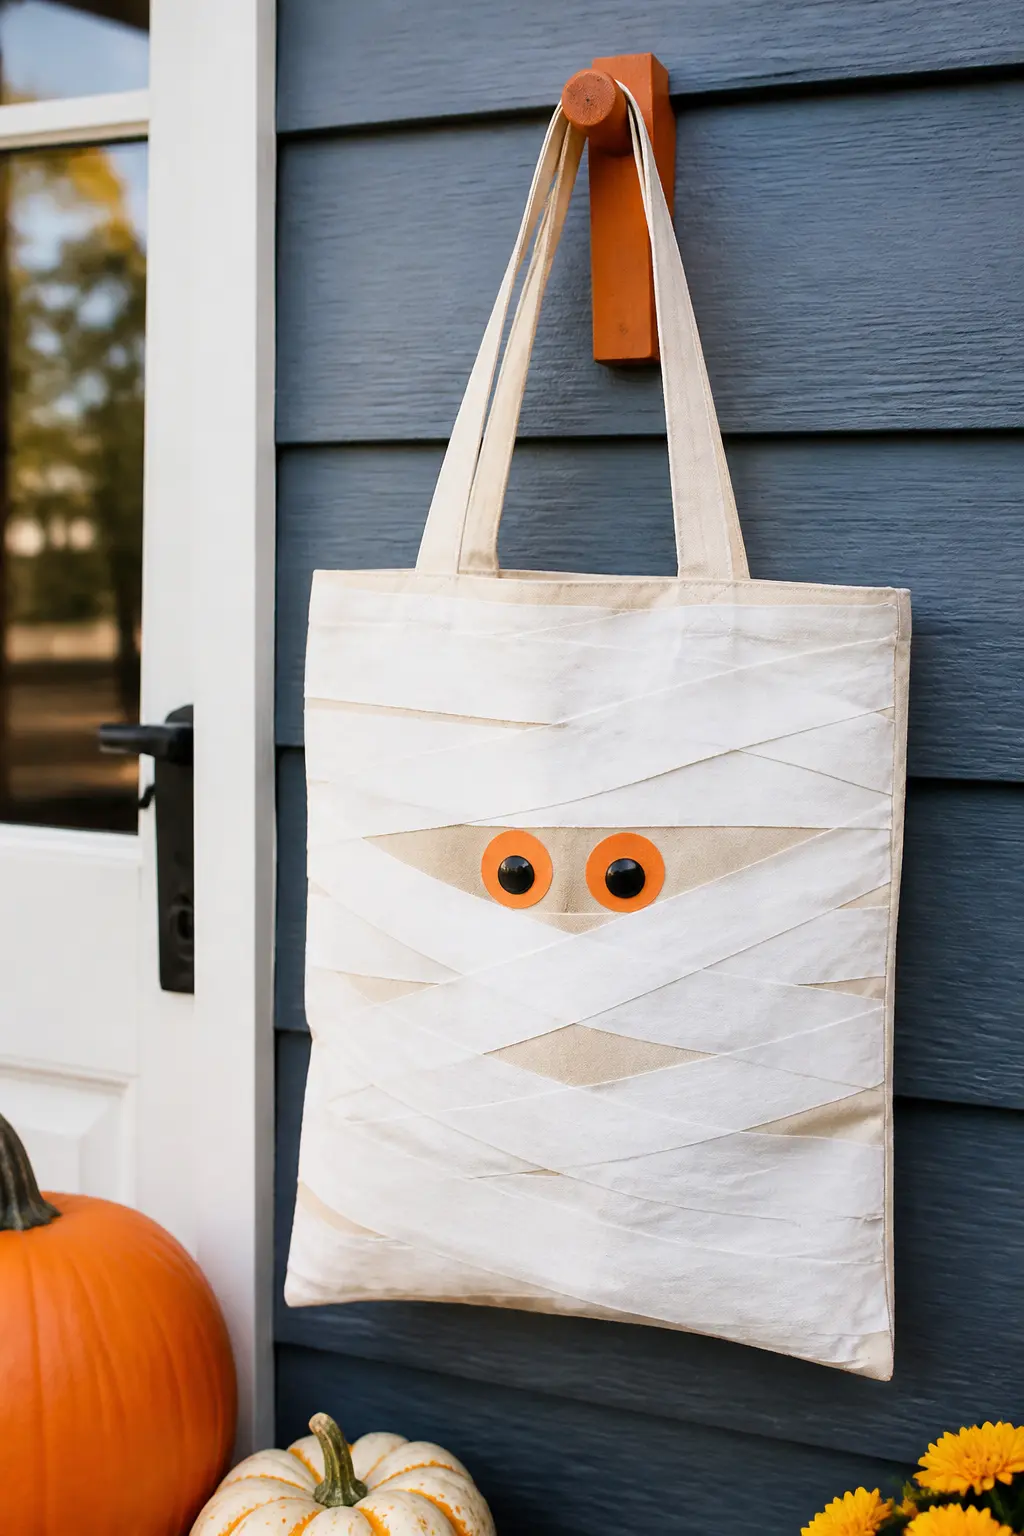
Mummy Wrap With Googly Eyes
Cover the entire front panel in overlapping horizontal white strips painted with a medium flat brush, leaving small gaps of natural canvas showing through. The strips do not need to be perfectly parallel: a little wobble reads as actual bandage wrap. Two large oval eyes peer out from a gap near the top centre.
Glue fabric-safe googly eyes on top of the painted ovals once everything is dry for a 3D effect that kids find genuinely funny. Or paint the eyes flat in bright orange for a cleaner finish that survives repeated washing better.
🛍 Shopping guide
Fabric Markers and Pens
Fabric markers sit between paint and a regular pen. They give a crisp line without loading a brush, which makes them the right tool for lettering names and drawing smaller details like spider legs or stitch marks on a Frankenstein head.
The trick is to work on a hard, flat surface, not the bag lying in your lap. Stretch the canvas over a cutting board, secure it with clips and draw slowly. Ink bleeds less on natural canvas than on synthetic blends, so read the label before you buy.
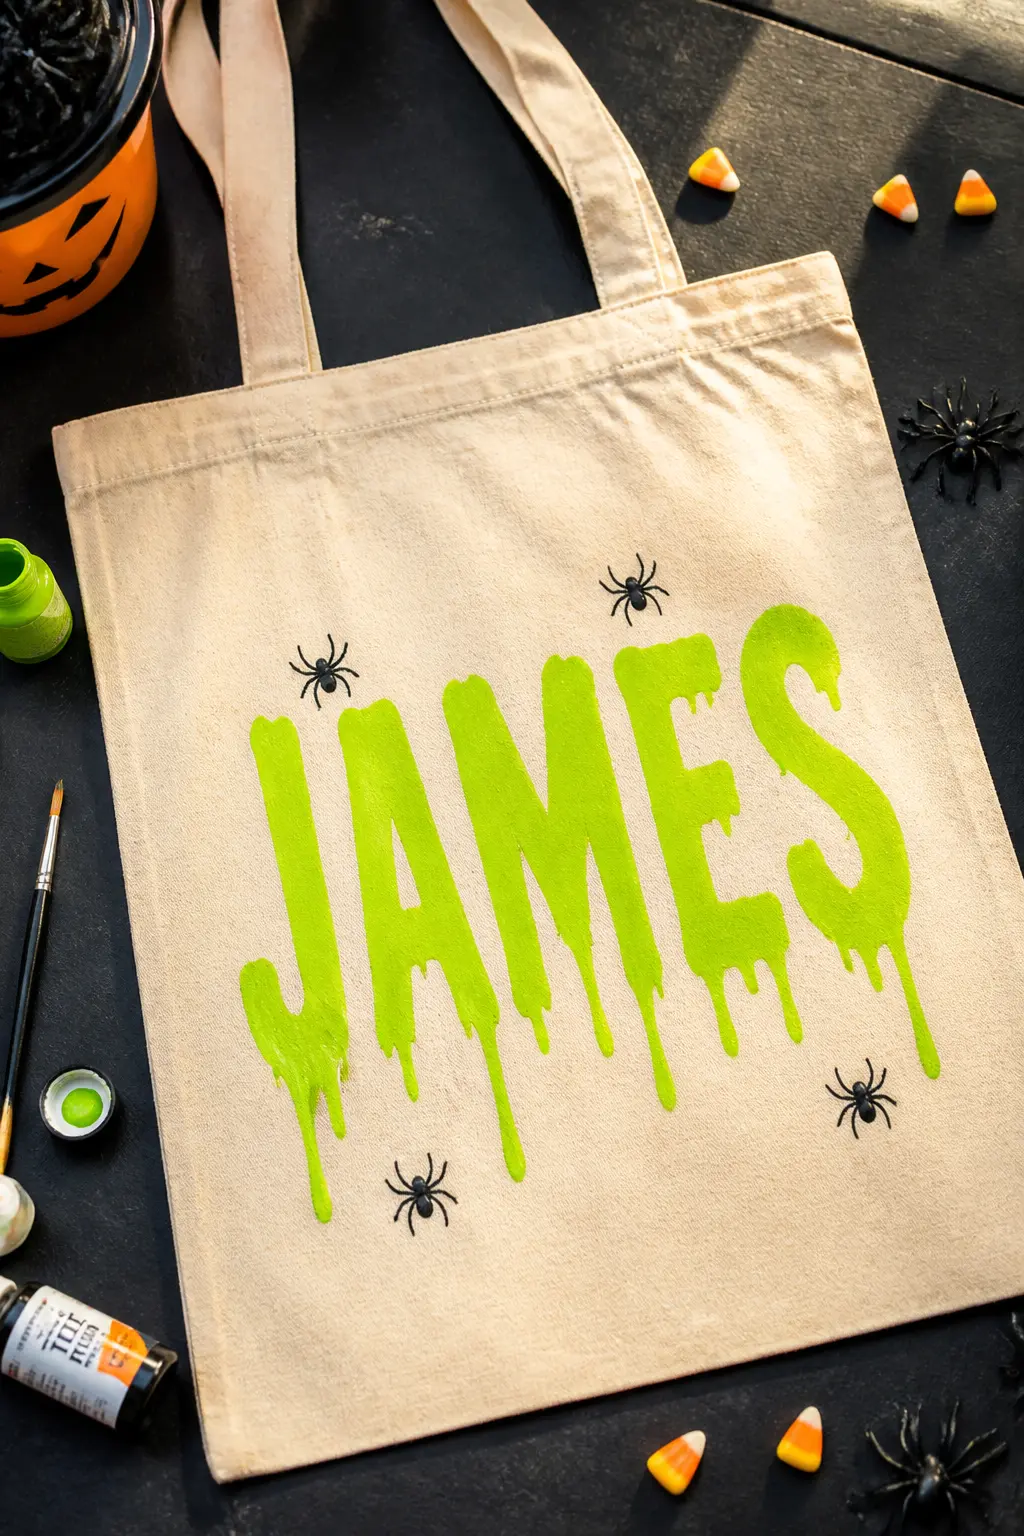
Name in Dripping Slime Letters
Write the child’s name in tall block letters with a lime-green fabric marker, then add drip lines hanging from the bottom edge of each letter. The drips are just curved downward strokes that taper to a point, simple enough for a nine-year-old to add their own name.
Outline each letter in black once the green is dry for a bold graphic effect. Fill the gaps between letters with small black spiders, stars or skull dots. This is the bag for the child who rejects every cutesy option: it looks edgy, it takes under twenty minutes and the marker is washable until heat-set.
🛍 Shopping guide
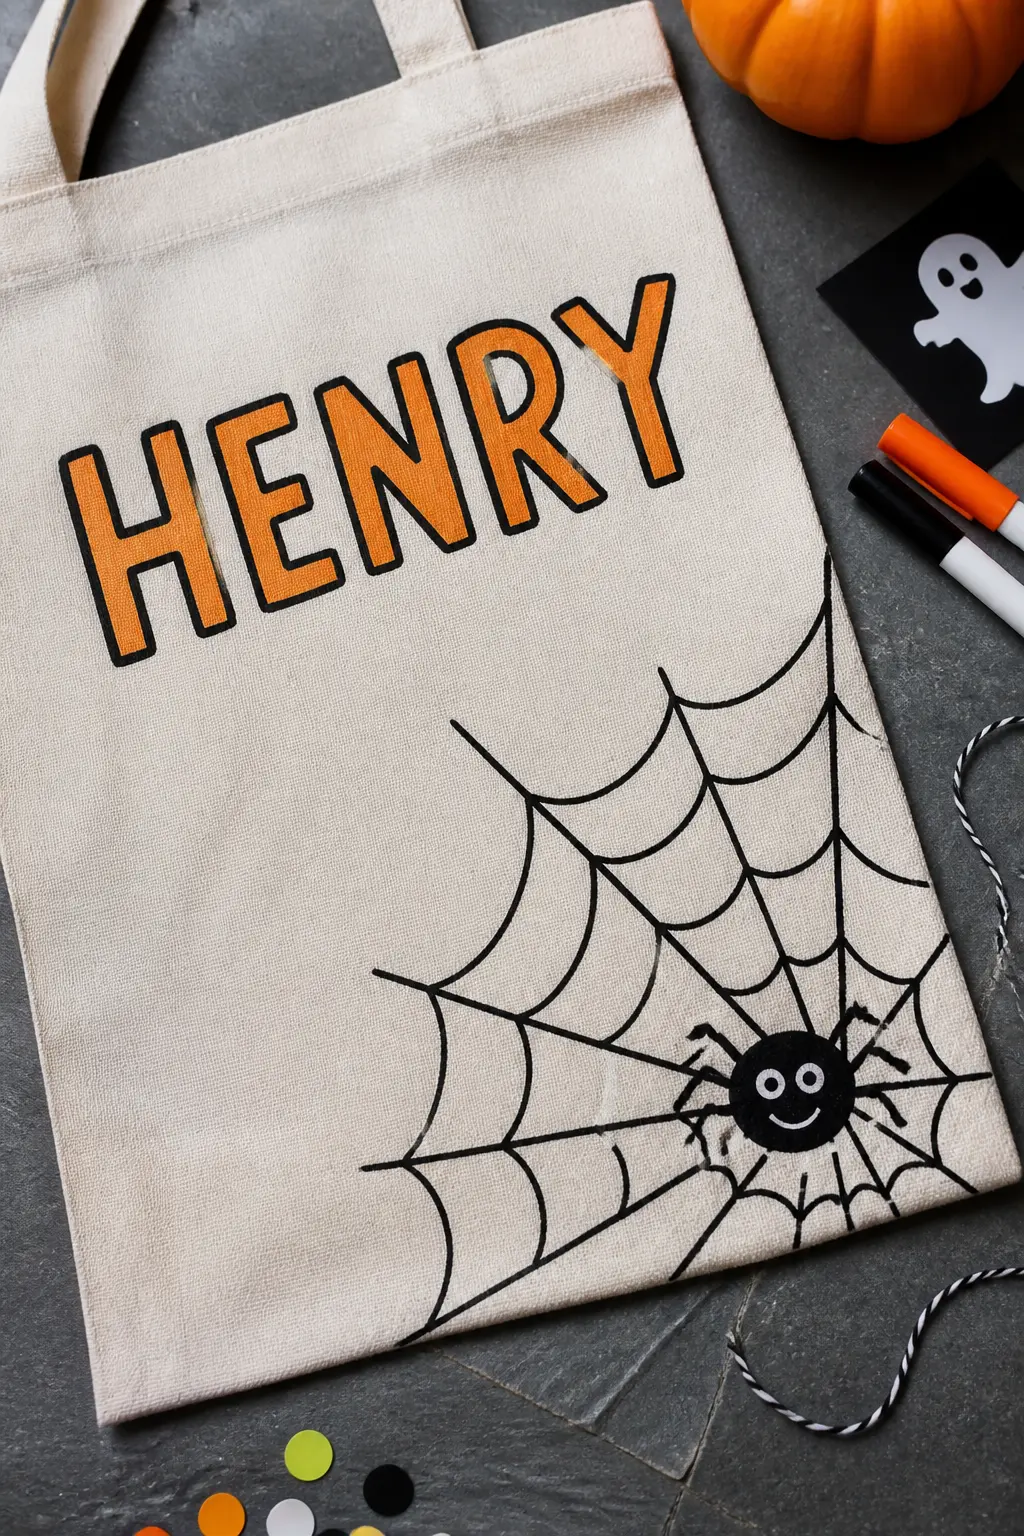
Spider Web Corner Detail With Name Tag
Draw a classic spider web radiating from the lower right corner of the bag using a fine black fabric marker. Add a small cartoon spider at the centre, two circles for the body and eight bent lines for legs. In the upper left area, block-letter the child’s name in orange marker and outline it in black.
The negative space of natural canvas acts as the background, so the design stays light and graphic. This style suits a child carrying any costume: the bag does not compete with what they are wearing.
🛍 Shopping guide
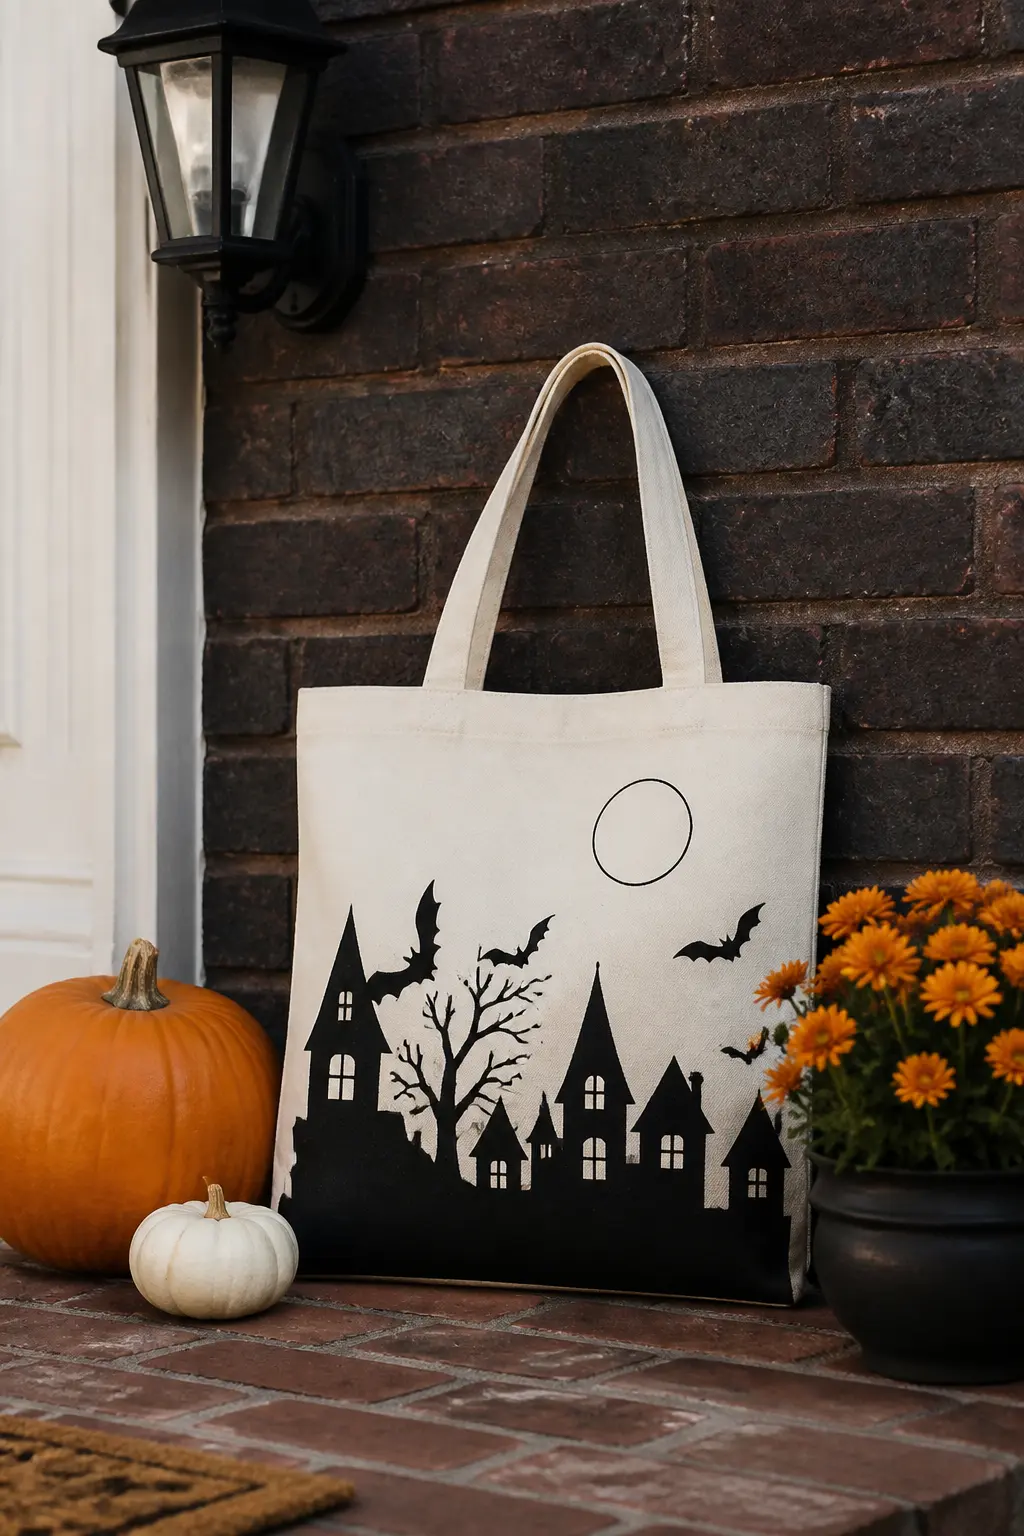
Haunted House Skyline
Draw a row of silhouetted haunted house shapes across the lower third of the bag in black fabric marker: pointed roofs, arched windows, a single dead tree to one side. Keep the shapes flat and filled solid. Above the skyline, add a few bats and a round moon.
The scene is the whole decoration: no name needed unless you want to add it in orange along the very bottom edge. This one suits older kids who want something that reads more like a graphic tee than a trick-or-treat bag.
🛍 Shopping guide
Stamp and Sponge
Stamping suits younger kids and party setups where speed matters. Cut a potato, a sponge or a foam sheet into a bat, a star or a moon shape, dip it in fabric paint and press. Repeat across the bag for an allover pattern that looks purposeful rather than accidental.
Foam stamps from a craft store give a cleaner edge than potato prints, but potato prints have their own rough charm. Either way, the key is a thin, even coat of paint on the stamp and a firm, flat press with no rocking.
Witch Hat and Stars Scatter
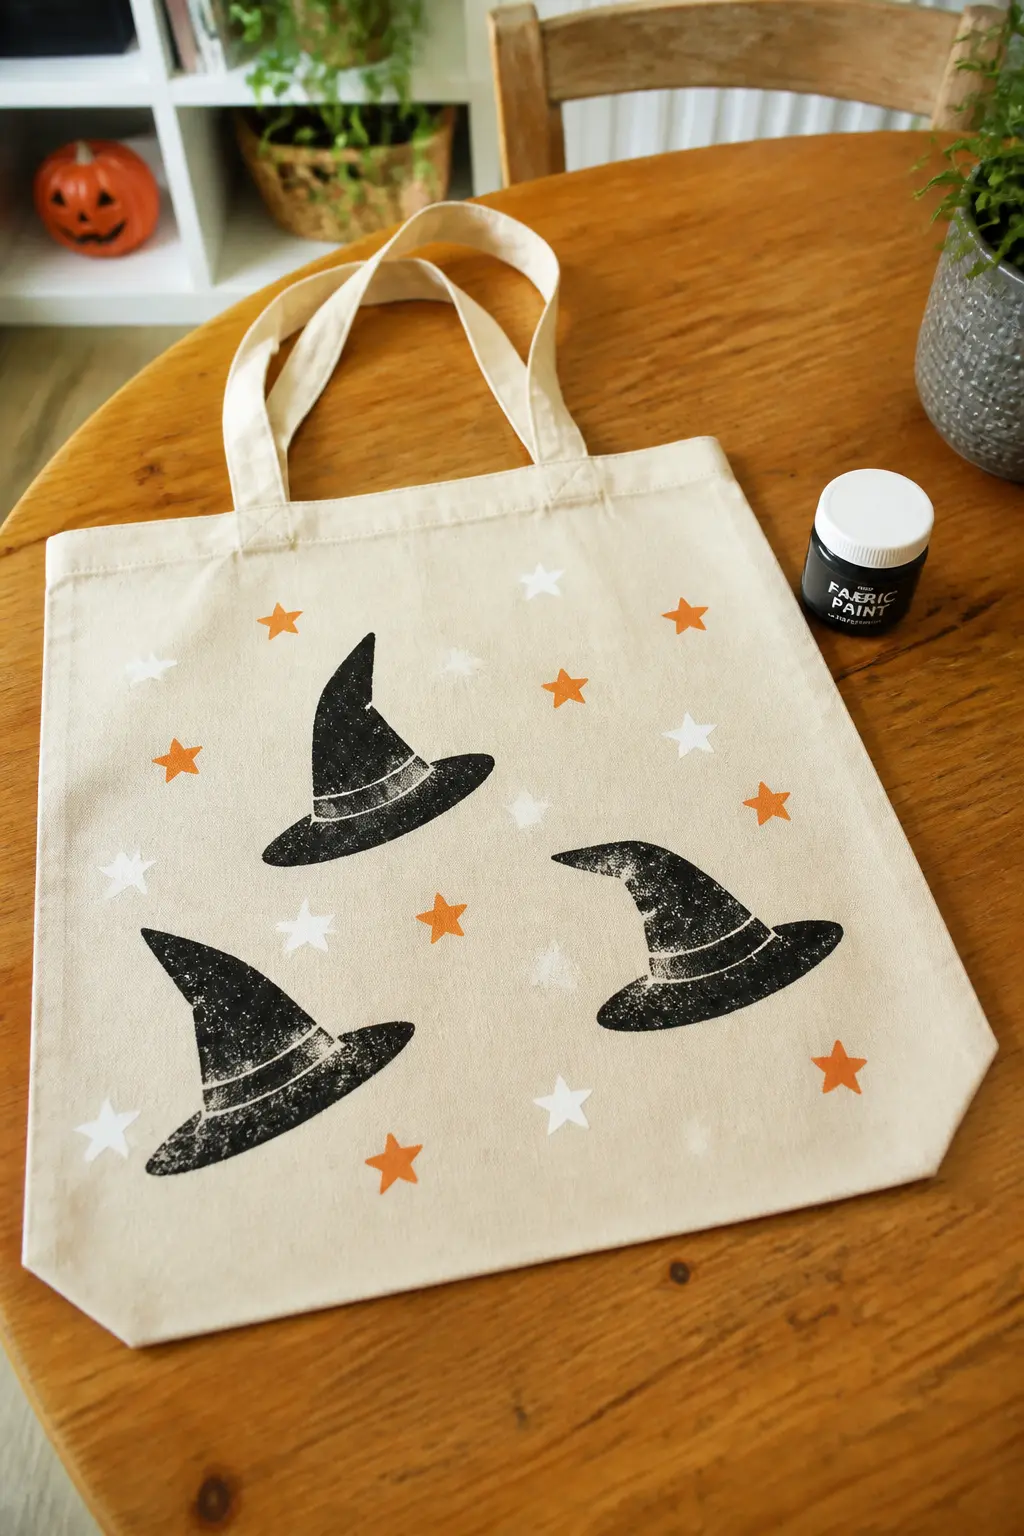
Cut a witch hat shape from a dense kitchen sponge and dip it in black fabric paint. Stamp it once large and centred, or scatter three smaller hats across the bag at different angles. Cut star shapes from the same sponge and stamp them in orange and white around the hats.
The stamped texture shows the sponge grain, which gives the design a deliberately handmade quality. Finish with a thin orange band stamped around the hat brim using a strip of sponge, or paint it on with a brush for a cleaner edge.
🛍 Shopping guide
Potato-Print Bat Colony
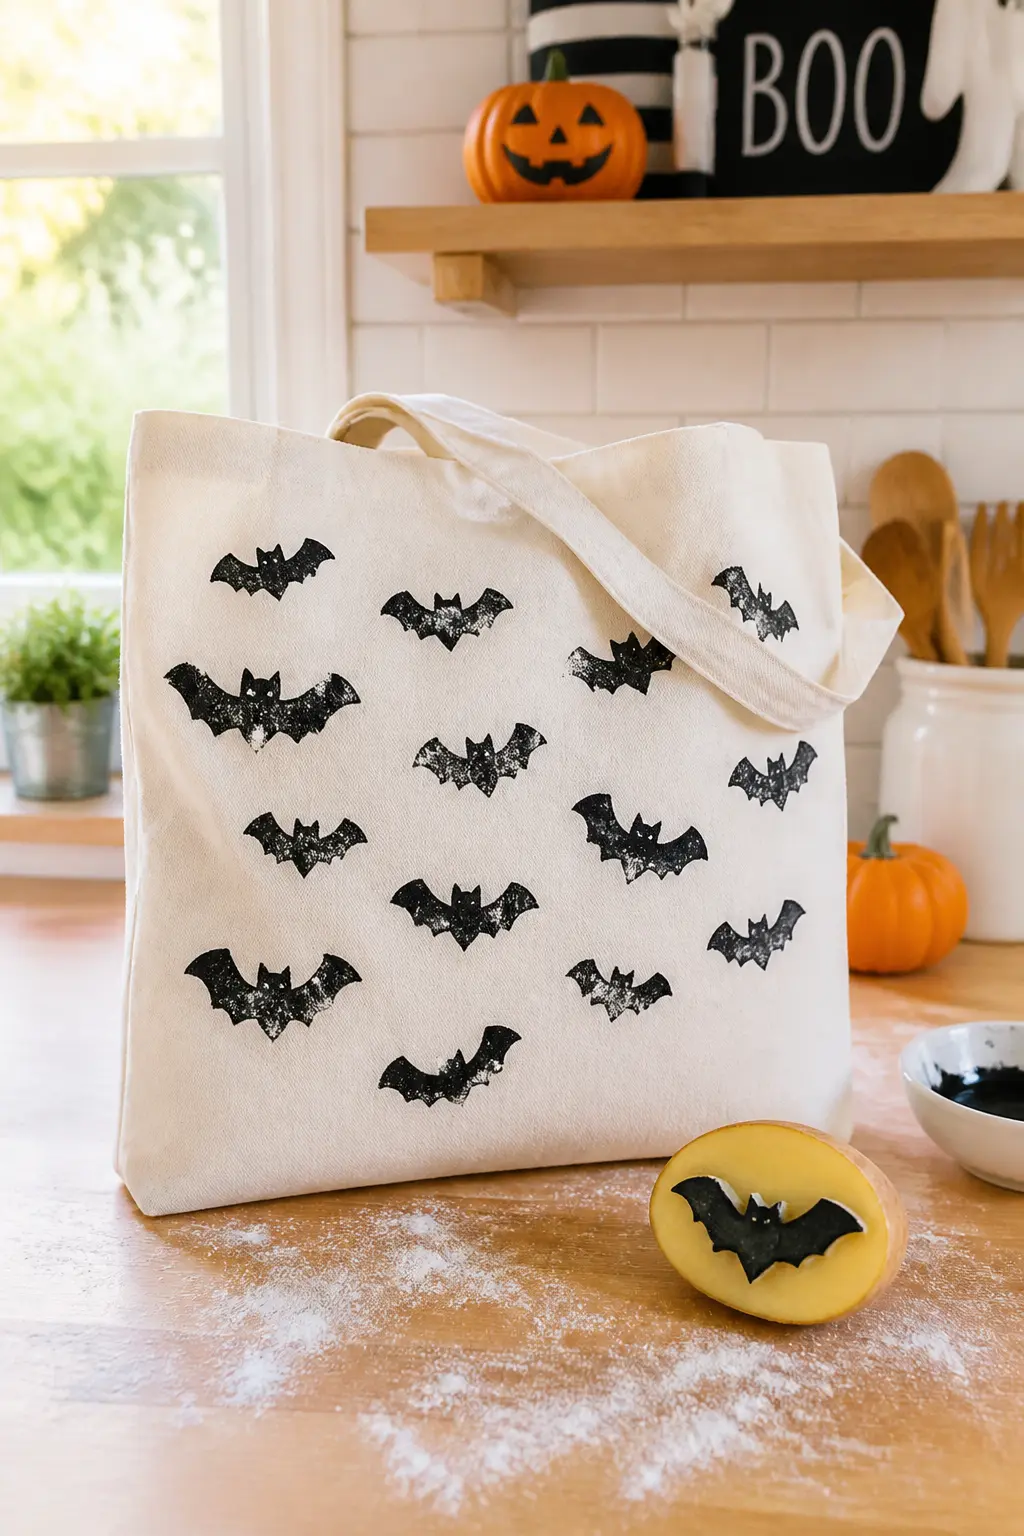
Cut a small potato in half and carve a bat shape into the flat face: two curved wings, a small oval body. Dip in black paint and stamp across the upper half of the bag, overlapping some bats slightly to suggest a group in flight. Tilt the stamp at different angles for each print so no two bats face the same way.
The irregular edges of a potato stamp read as charming rather than amateurish when the shapes are repeated with confidence. Fill in any thin patches with a small brush. This is the kind of bag that becomes a family story: the year everyone made bat bags at the kitchen table.
🛍 Shopping guide
Foam Moon and Star Allover Print
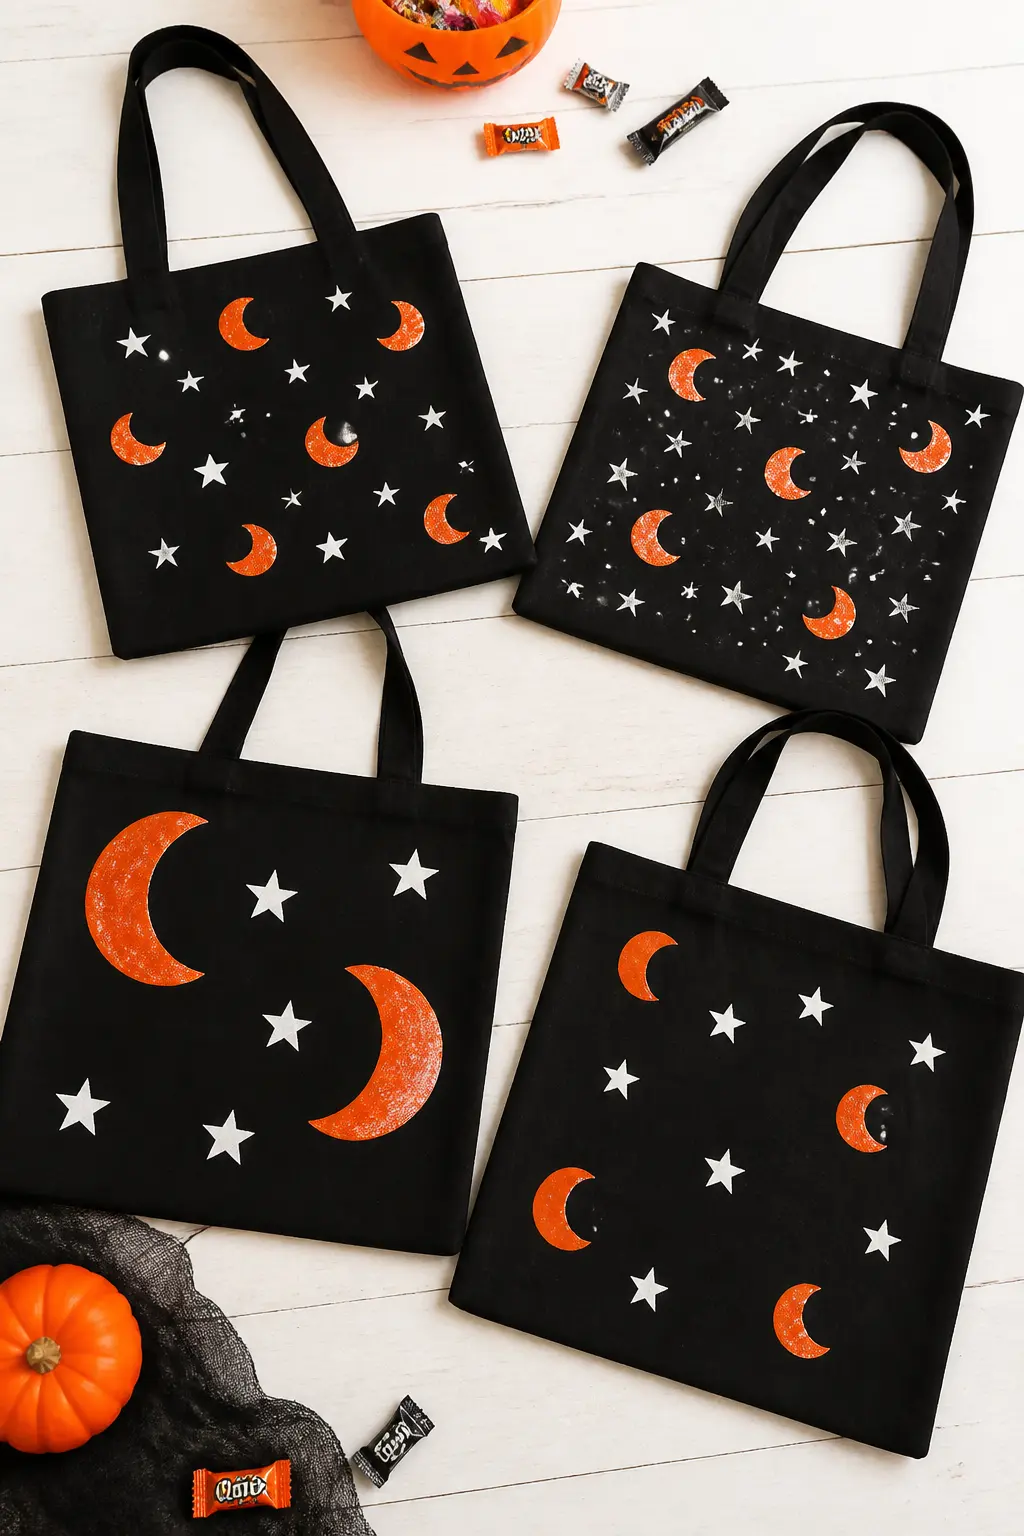
Buy a foam stamp set that includes a crescent moon and several star sizes, or cut the shapes from craft foam sheets with scissors. Stamp in a repeat across the whole bag surface in orange and white on black canvas, or black and orange on natural canvas. Vary the stamp size and orientation so the pattern reads organic rather than wallpaper-rigid.
This is the fastest technique for decorating multiple bags at one party station. Set out the stamps, the paint and the bags and let each child do their own. No two will come out the same, which is the whole point.
🛍 Shopping guide
Iron-On Vinyl (Cricut or Silhouette)
Heat transfer vinyl cuts on a home cutting machine and irons on in about sixty seconds. The result looks printed: clean edges, flat colour, the kind of finish a child will show off rather than hide. Names come out bold and legible even at small sizes.
Orange and black HTV on natural canvas is the combination that matches every costume. White vinyl on a black canvas bag is the sharper, more graphic alternative. Either way, weed carefully, apply a pressing cloth and hold the iron steady for the full thirty seconds the manufacturer recommends.
Name in Orange HTV With Jack-O-Lantern Icon
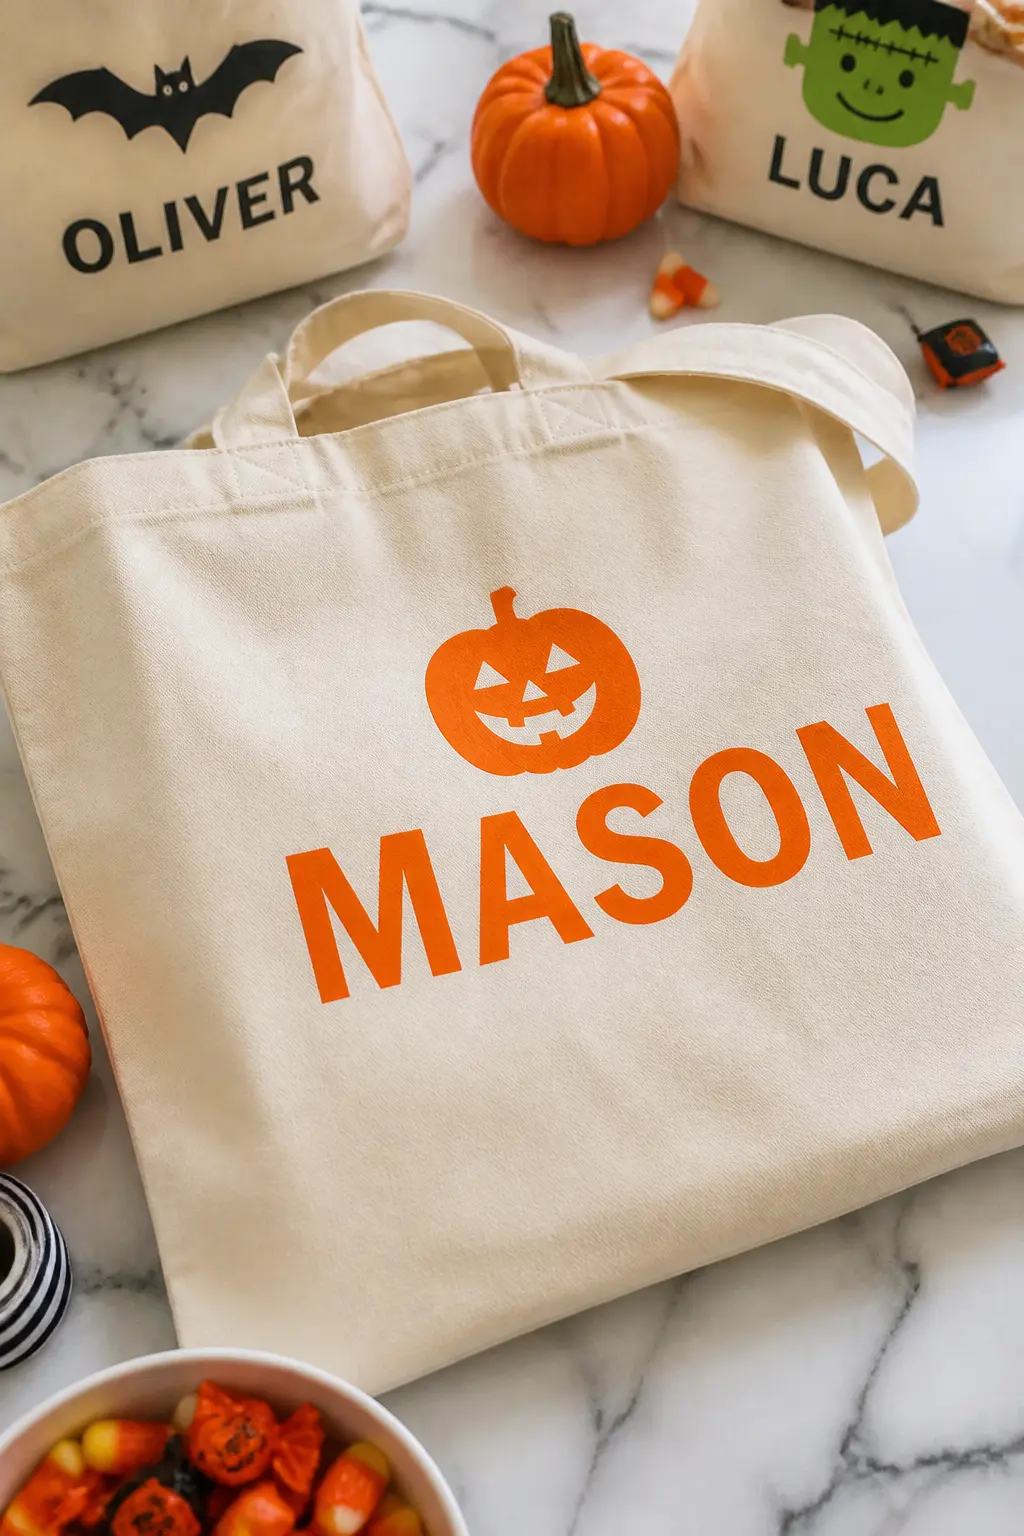
Cut a child’s name in a bold sans-serif font from orange heat transfer vinyl, then cut a small jack-o-lantern icon above it from the same sheet. Weed both pieces, arrange them on the bag and press with a household iron or heat press for thirty seconds. The result looks exactly like a custom-printed bag from a boutique, at a fraction of the cost.
Natural canvas takes HTV best: the fibres grip the adhesive cleanly and the colour shows true. If the bag has a seam running through your placement area, shift the design slightly to one side and press each half separately.
🛍 Shopping guide
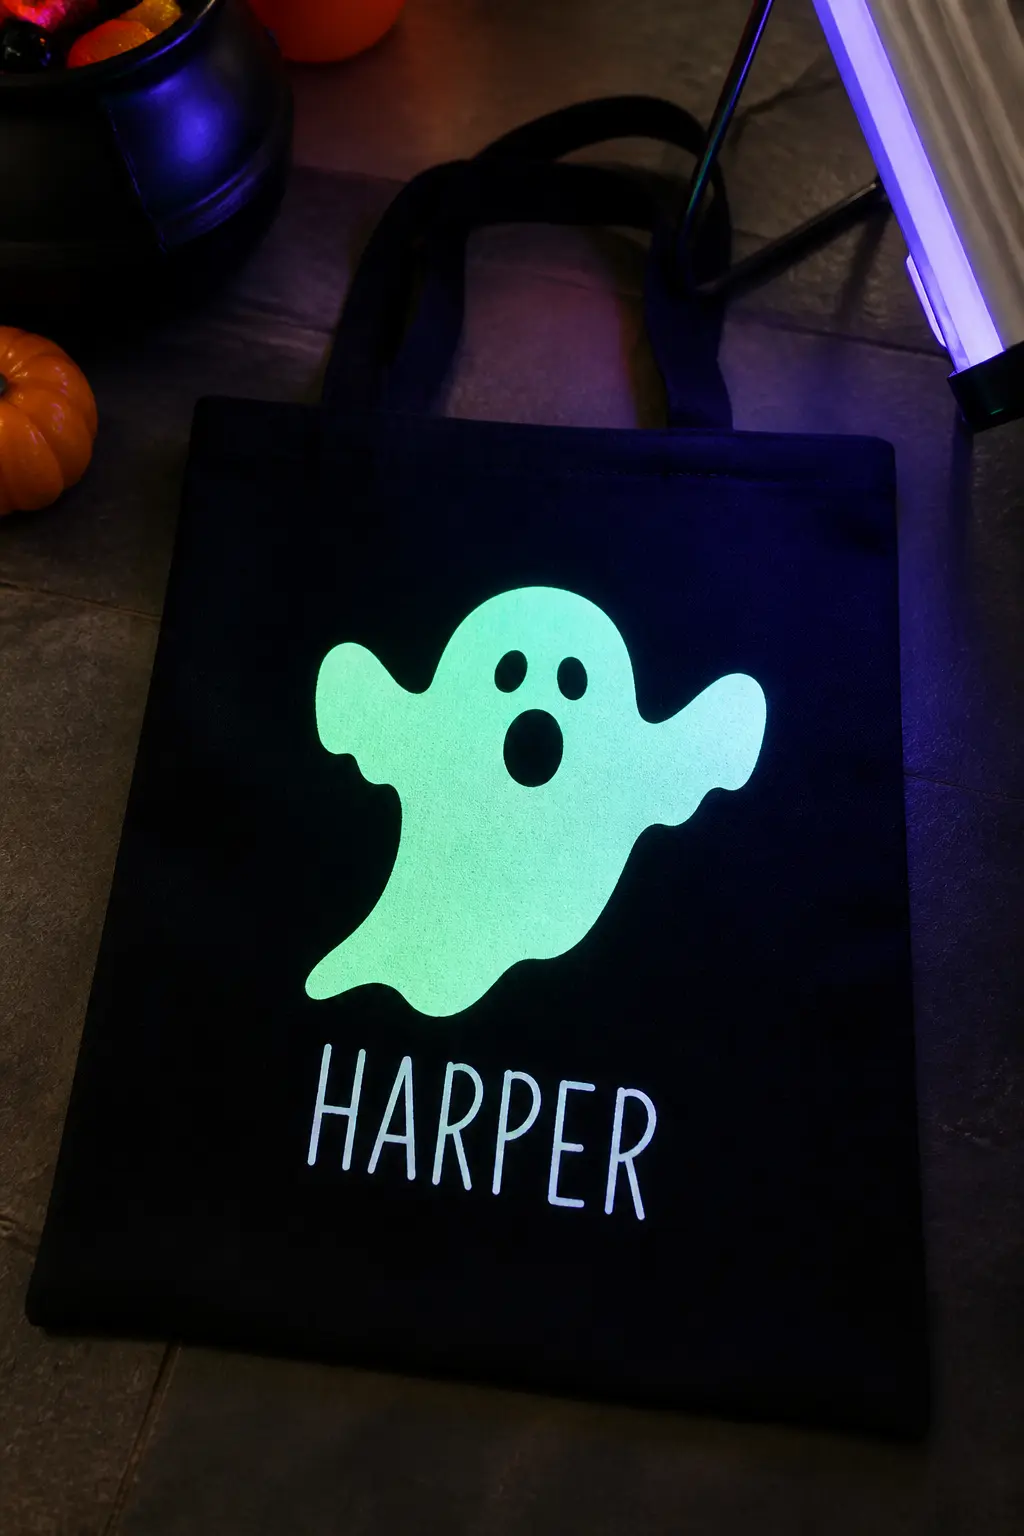
Glow-in-the-Dark Ghost on Black Canvas
Cut a classic rounded ghost shape from glow-in-the-dark heat transfer vinyl and press it to a black canvas tote. Under regular light it reads as a pale cream or white ghost. In the dark it glows green-white, which children find genuinely thrilling at the door of every house they visit.
Add the child’s name below the ghost in standard white HTV so it is readable in daylight. Keep the ghost expression simple: two oval eyes cut from black regular HTV applied on top of the glow layer before pressing. The cutting machine handles all the precision.
🛍 Shopping guide
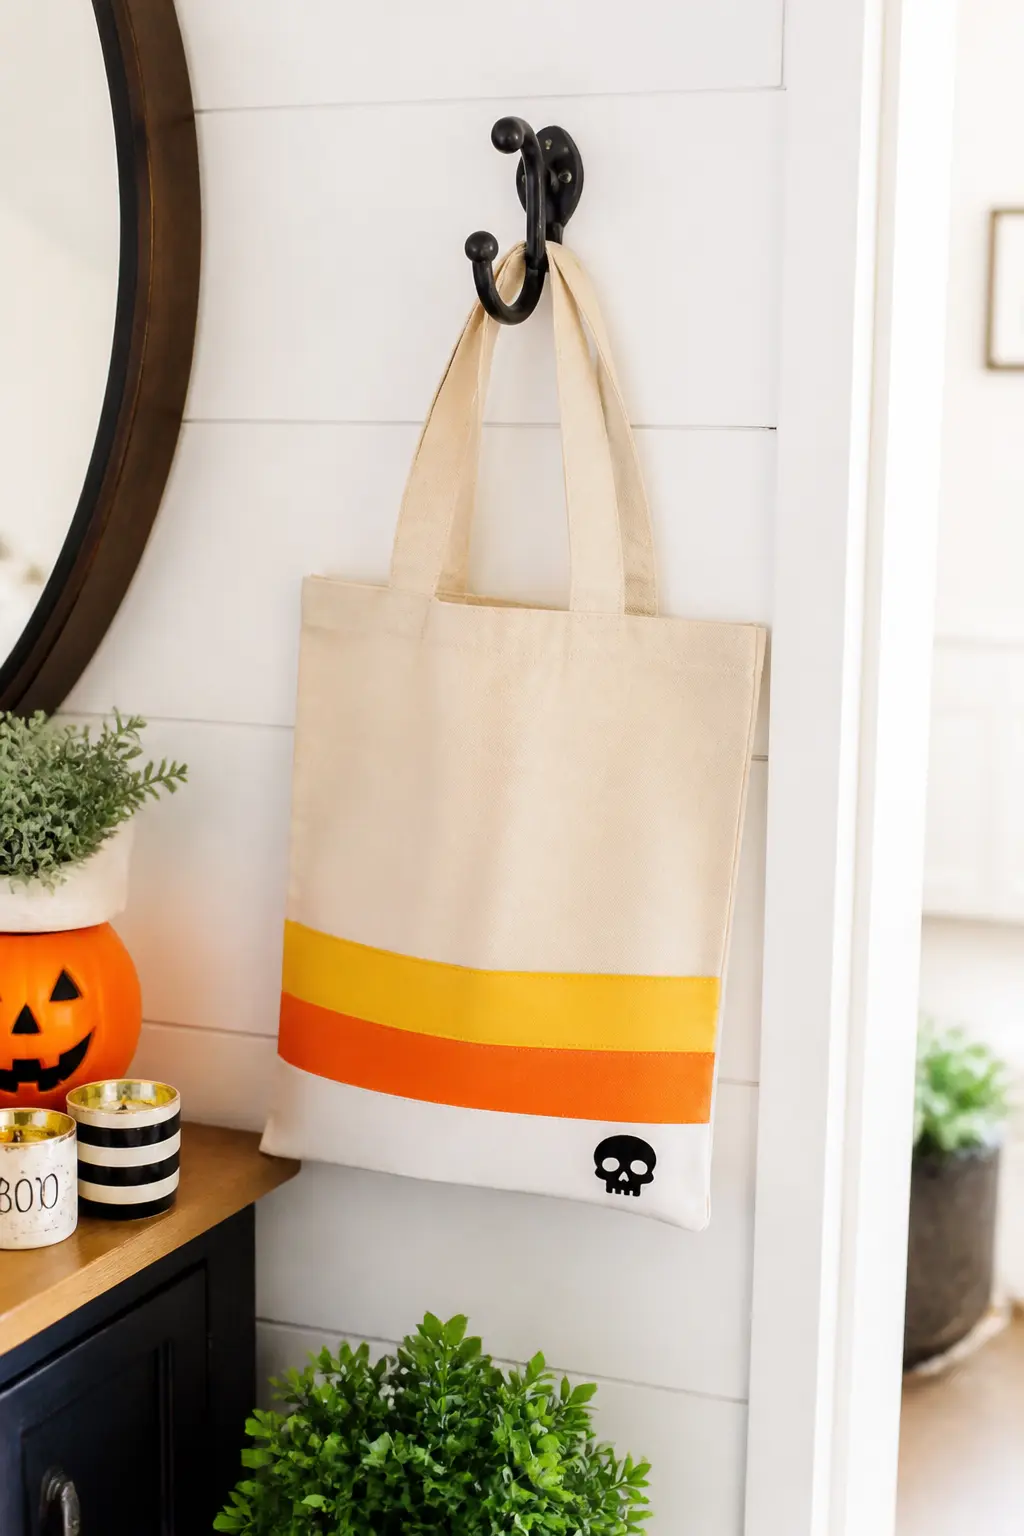
Candy Corn Stripe at the Base
Cut three horizontal band shapes in yellow, orange and white HTV to run across the bottom third of the bag, mimicking a candy corn’s layers. The bands do not need to be perfectly straight: a slight wave looks intentional. Press each colour separately, starting from yellow at the very bottom.
A child’s name or a small skull icon sits in the white band at the top. The design is recognisable without needing to explain the reference, and the palette matches almost every Halloween costume palette going.
🛍 Shopping guide
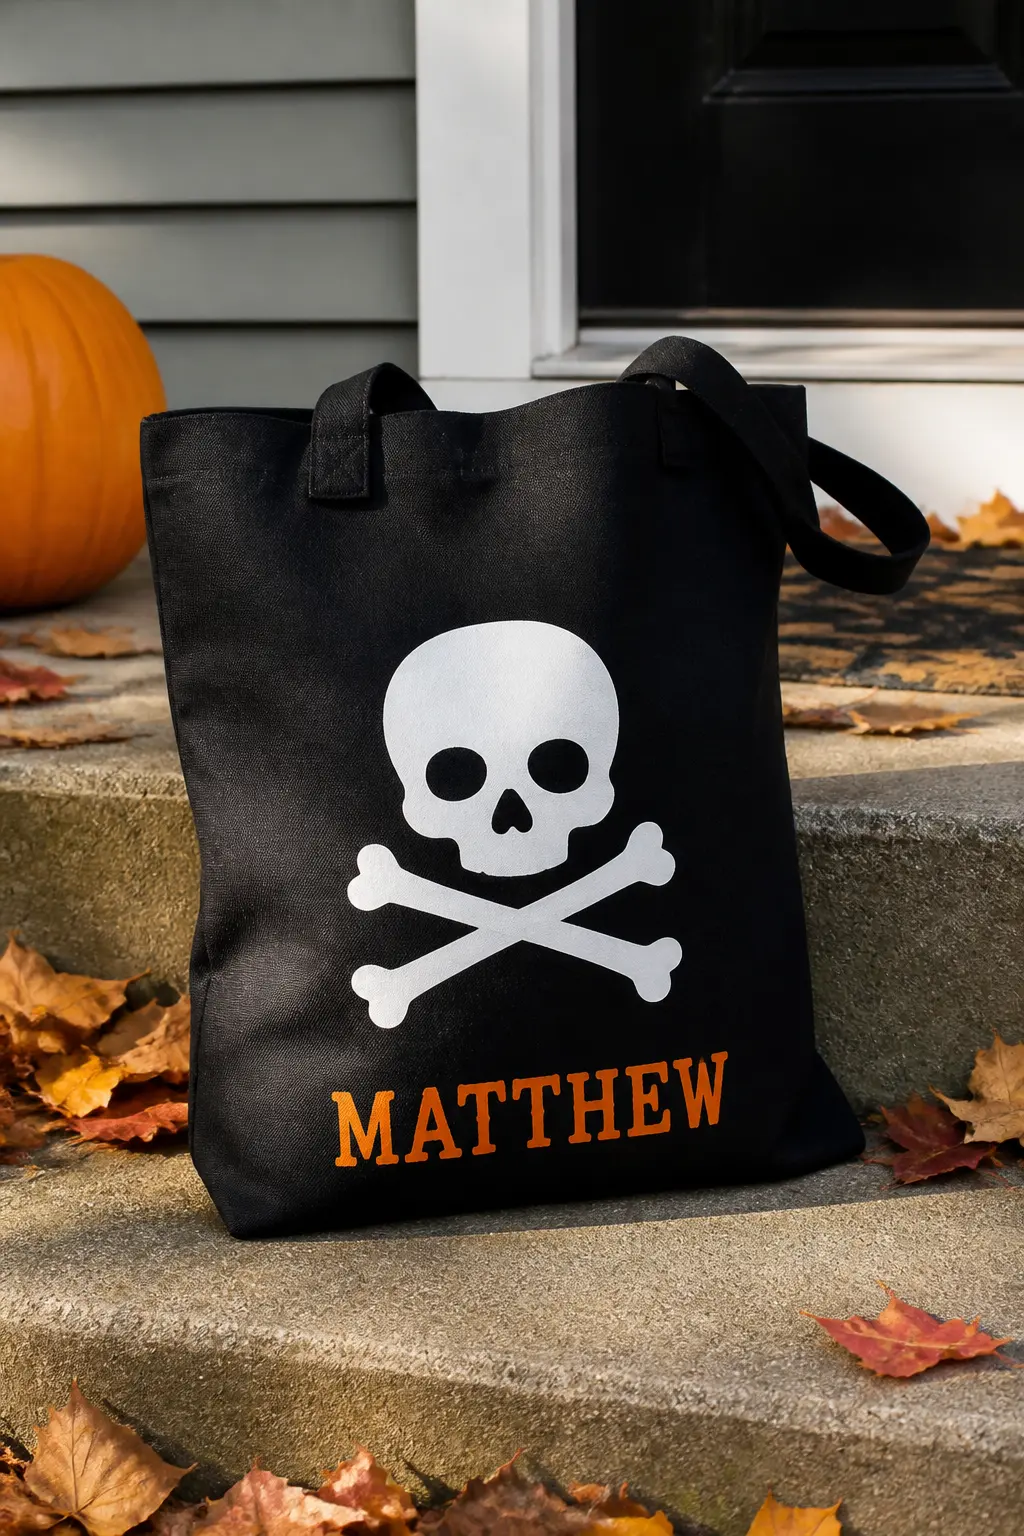
Skull and Crossbones in Classic White
Cut a clean graphic skull with crossed bones underneath from white HTV and press it centred on a black canvas bag. This is the design for the child who considers themselves above cute: it reads more rock-band T-shirt than trick-or-treat, which is precisely why it works.
Personalise with the child’s name in a rough serif font cut from orange HTV, placed below the skull. The font choice does a lot of work here: a serif with a slightly worn feel suits the design better than a clean geometric sans-serif.
🛍 Shopping guide
Stencil Cut From Card Stock
No cutting machine? Print a shape from a free online source, cut it out with scissors or a craft knife and tape it flat to the bag. Dab paint through the opening with a sponge or a stiff-bristled brush. Lift and repeat.
Card stock stencils hold for three or four uses before the edges go soggy, which is enough for a sibling set. If you want to reuse a stencil across more bags, cut from acetate or a plastic folder instead. Tape the edges down on all four sides before you paint: any gap lets paint seep under and blur the line.
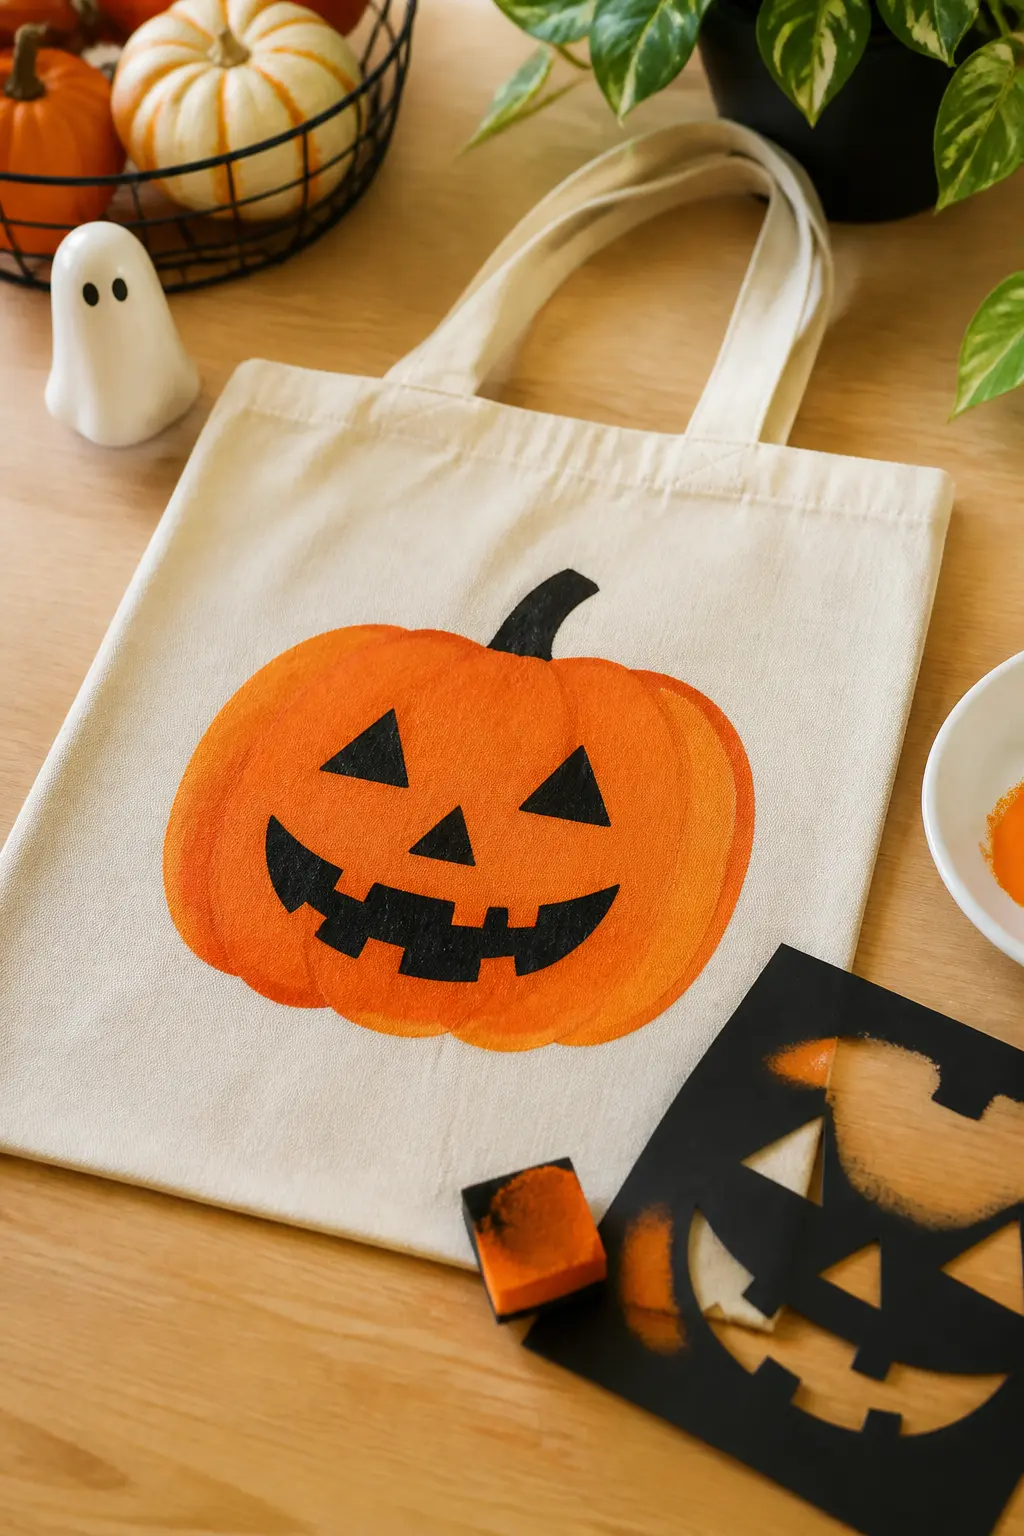
Pumpkin Face Stencil With Sponge-Dabbed Paint
Print a pumpkin outline and face details on card stock and cut each element separately: the round body first, then the eyes, nose and mouth as a second stencil layer. Tape the body stencil flat, sponge orange paint through it and let it dry. Then tape the face stencil over the top and dab black paint through the cutouts.
Two-layer stencilling gives much cleaner results than trying to cut a single stencil with all the details included. The face sits perfectly centred on the body every time because the second card stock piece guides the placement automatically.
🛍 Shopping guide
Spider Web Stencil Scattered Across the Bag
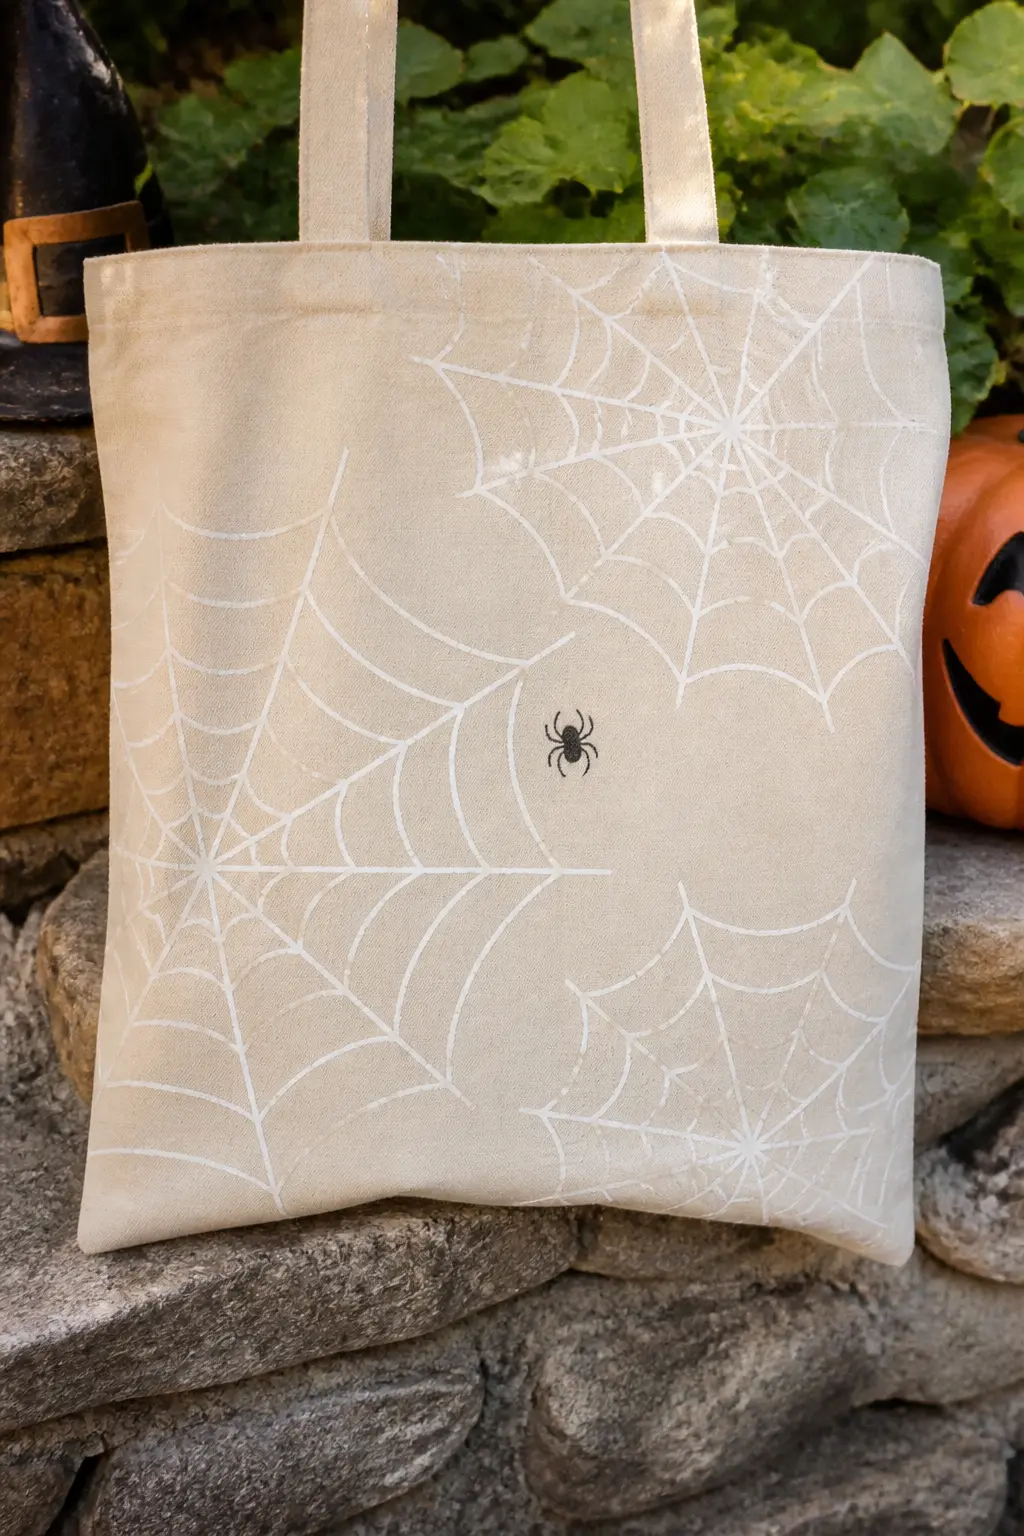
Cut a spider web from acetate or thick card stock so it holds its shape through multiple uses. Press it to one corner of the bag and sponge white paint through it. Move the stencil to a second corner and repeat, overlapping slightly for a more layered look. Three placements cover the bag without crowding it.
Add a painted or stamped spider in a gap between webs once the white is dry. The repetition of one stencil in multiple positions is faster than painting three separate webs freehand and looks more consistently graphic.
🛍 Shopping guide
Zombie Hand Reaching From the Bottom
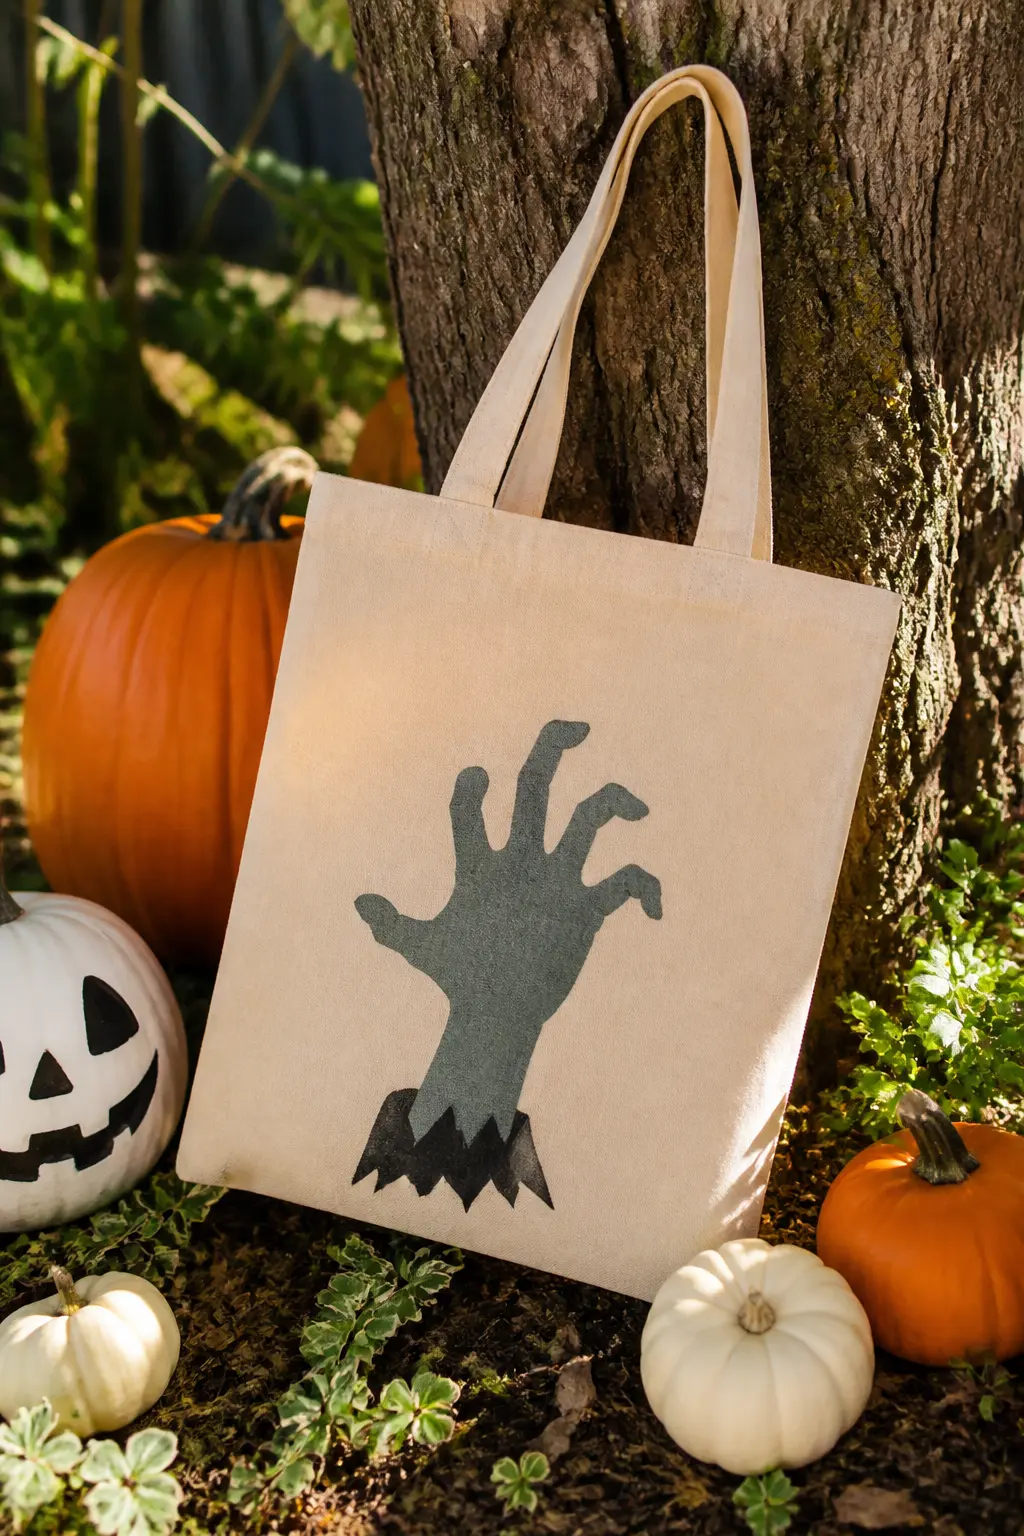
Trace a child’s own hand on card stock to make the stencil, then cut it out and use it to sponge a grey-green zombie hand reaching upward from the bottom hem of the bag. Add ragged cuff details at the wrist with a fine brush. A second hand, slightly smaller and offset, adds depth.
The child tracing their own hand to make the zombie stencil is the craft activity built into the craft activity. It works as a party station with all the materials set out and each guest making their own version. No two hands are the same size, so no two bags come out identical.
🛍 Shopping guide
No-Sew Felt Add-Ons
Felt shapes glued to canvas with fabric glue add dimension without a sewing machine. A felt bow on top of a painted pumpkin, a row of felt teeth along the bottom hem, a felt spider sitting in the corner: each one takes under ten minutes to cut and stick.
Use a fabric glue that dries clear and flexible, not a hot glue gun, which cracks when the canvas bends during use. Press the felt flat under a heavy book for an hour after gluing. The bond holds through a full season of regular use.
Felt Bow on a Painted Pumpkin
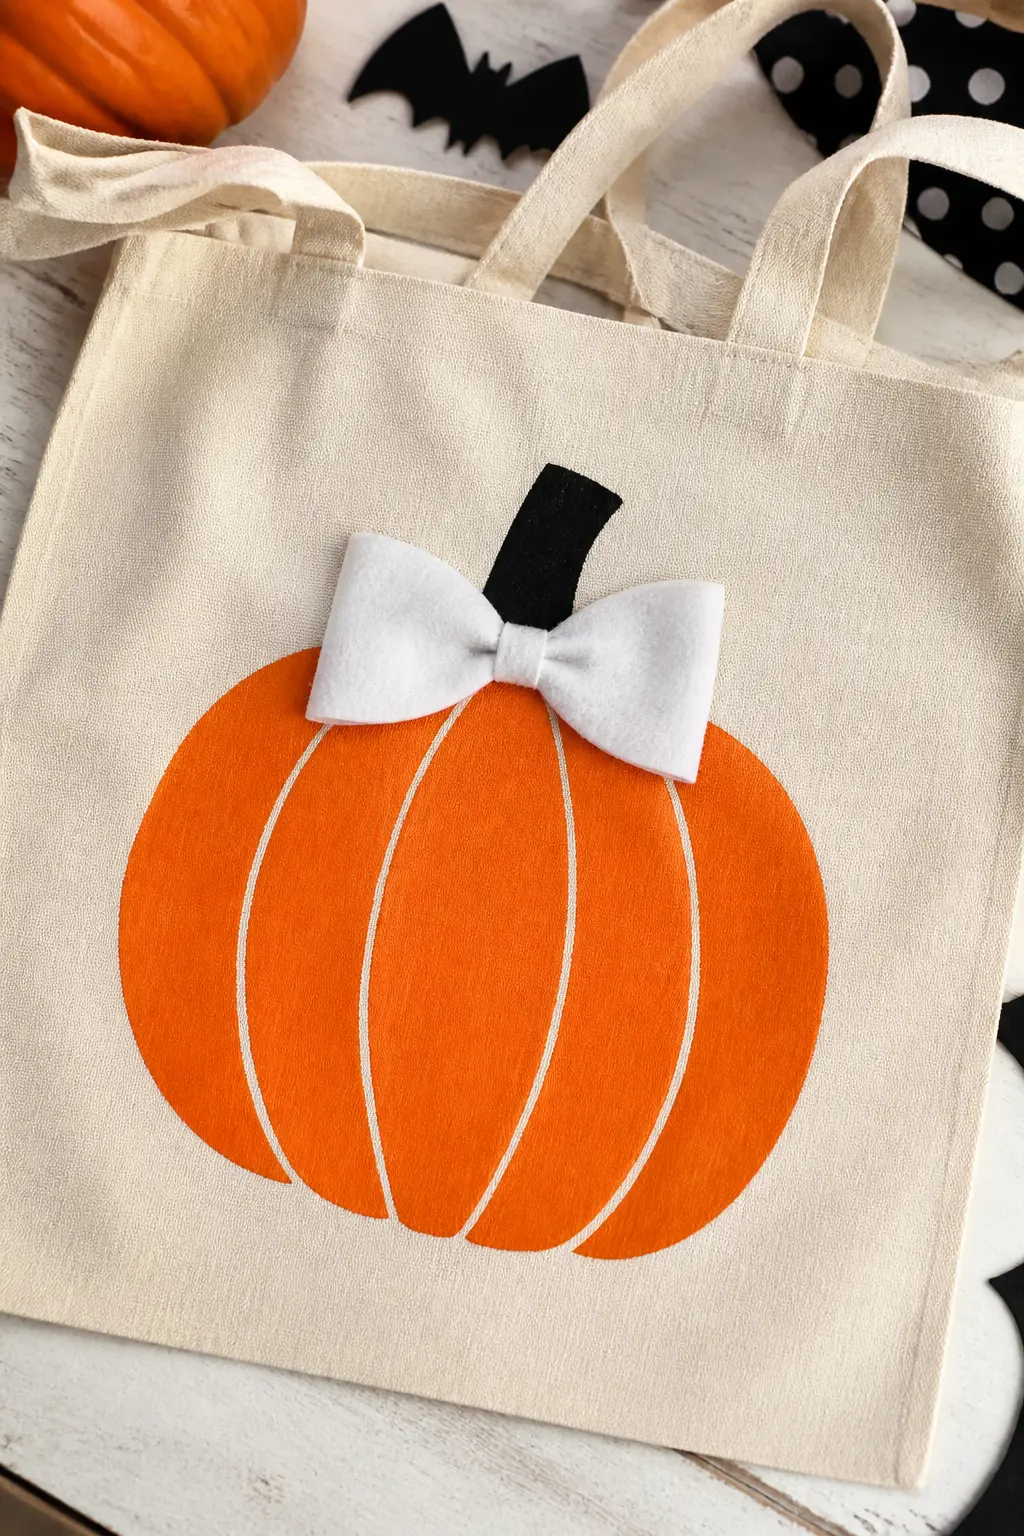
Paint or stamp an orange pumpkin on the bag front, then cut a bow from white felt: two rectangles pinched at the centre and a small strip wrapped around the pinch point. Glue the bow to the top of the pumpkin where the stem would be. The dimensional bow sits about five millimetres off the canvas surface and casts a small shadow.
White bow on orange pumpkin is the combination that reads as deliberately styled rather than assembled from whatever was in the craft drawer. It works on a pale canvas and on a natural one. It takes twelve minutes from cut to dry.
🛍 Shopping guide
Felt Monster Teeth Along the Bag Opening
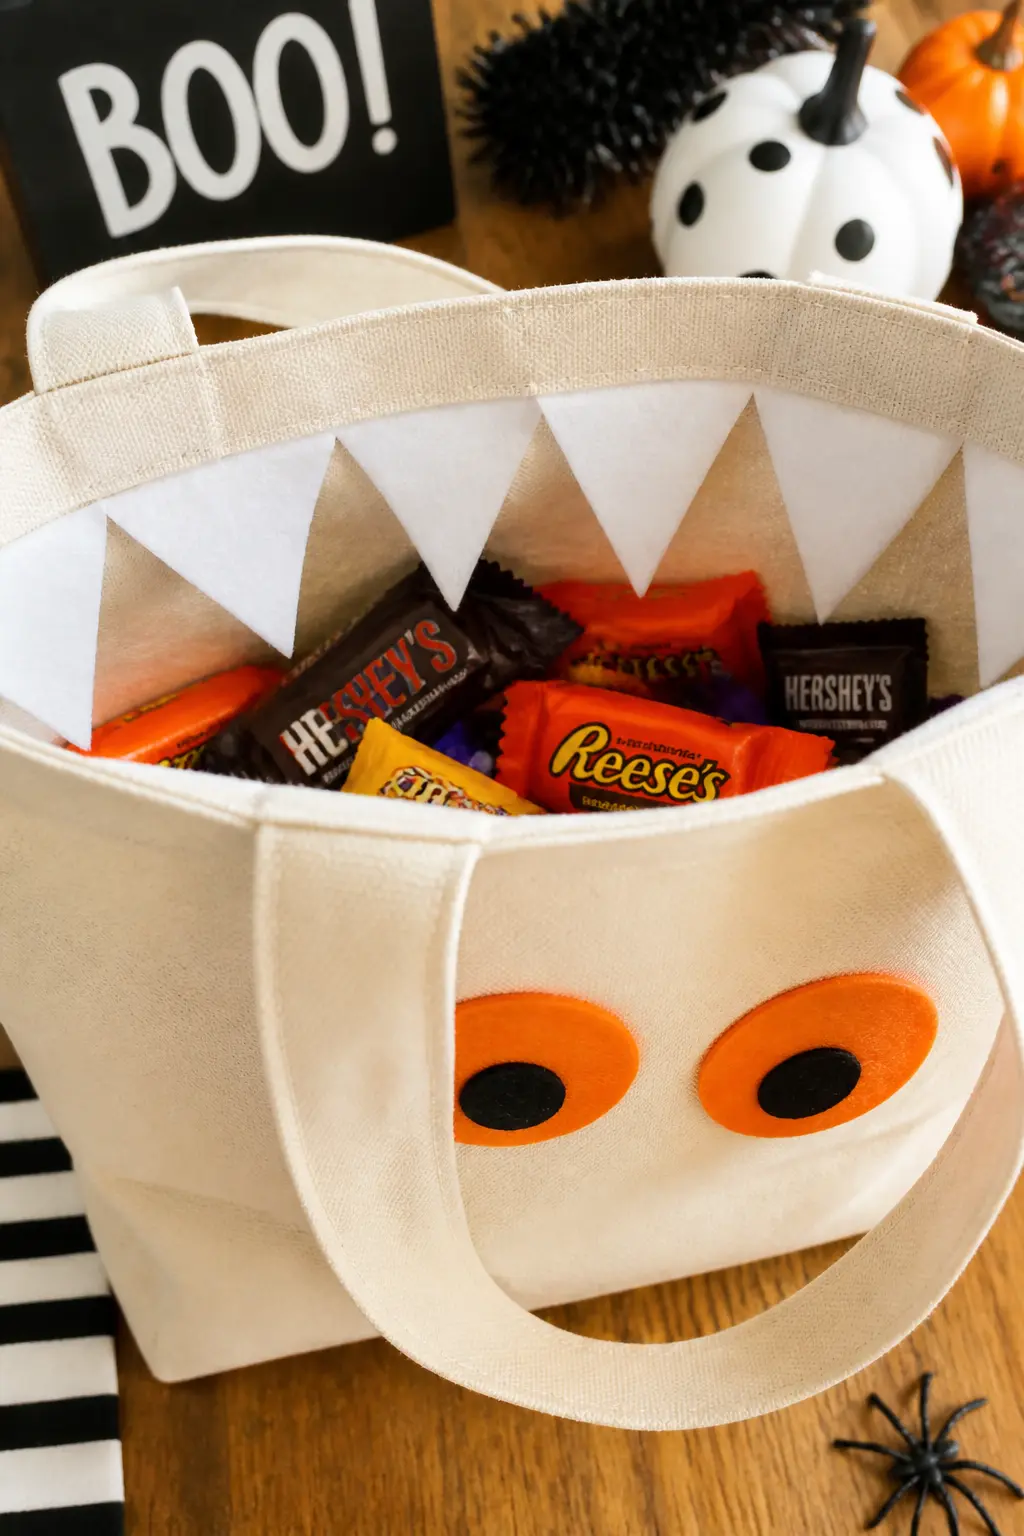
Cut a row of triangle teeth from white felt and glue them along the inside of the bag’s top opening so they point downward and are visible when the bag is open or slightly full. From the front, the bag looks normal. From above, it looks like a gaping monster mouth full of candy. Children find this deeply pleasing.
Add two felt circles in orange or red at the top corners of the front panel as eyes. The face forms itself when the bag is stuffed full and the opening gapes wide. The effect costs under a dollar in felt and takes fifteen minutes.
🛍 Shopping guide
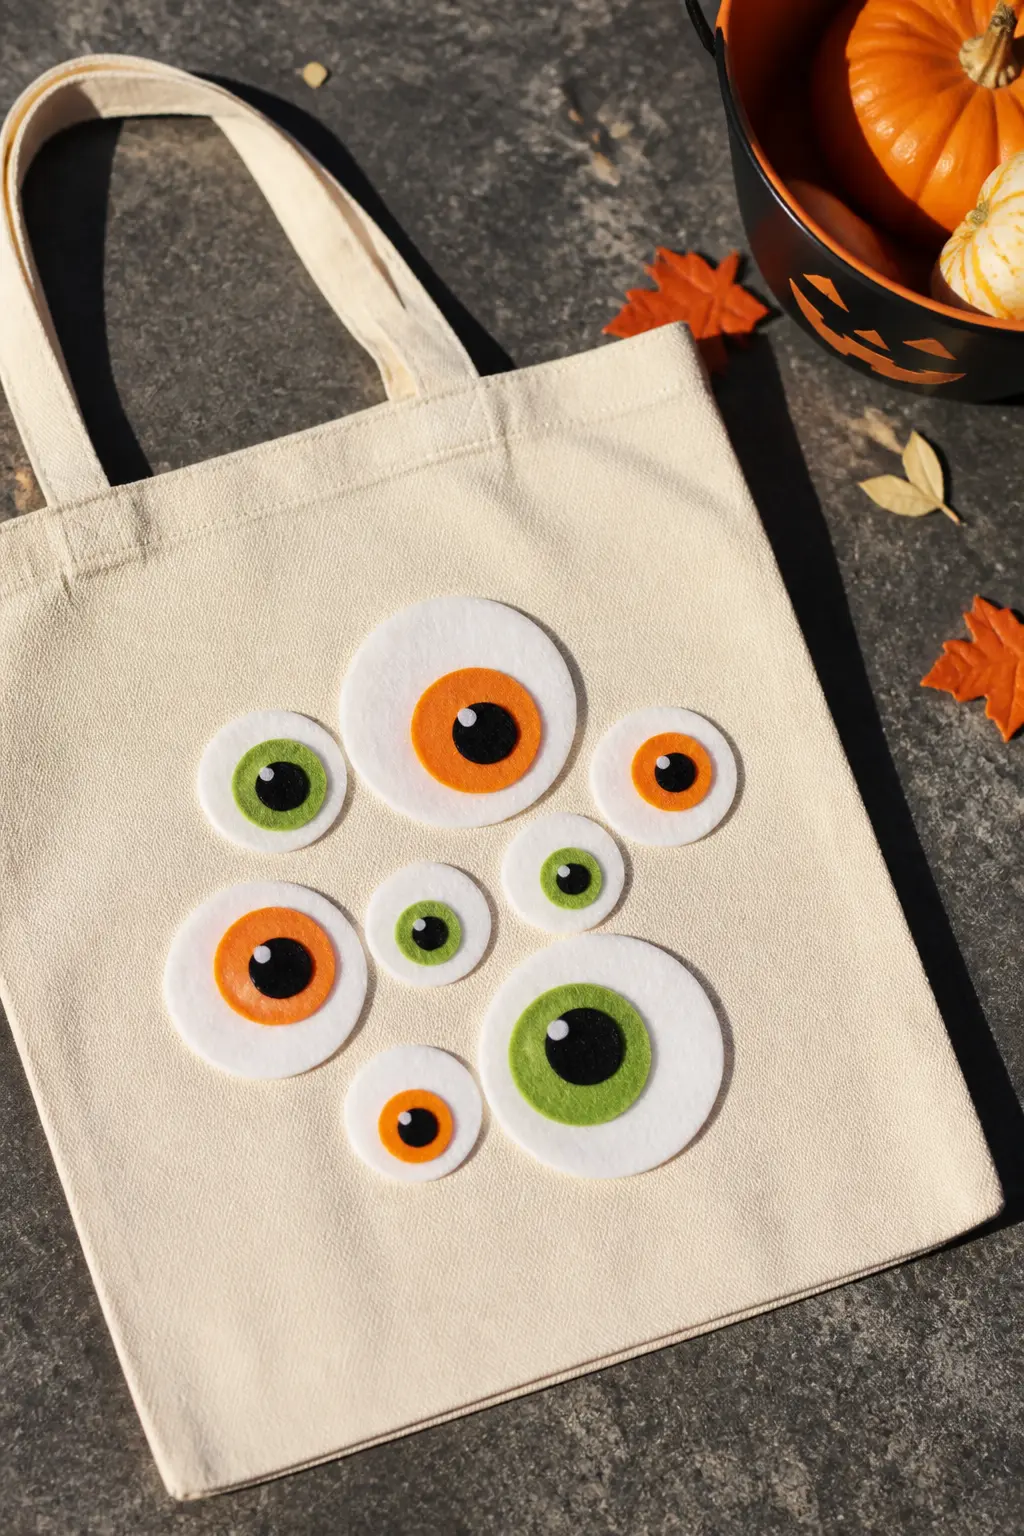
Felt Eyeball Cluster
Cut five to seven circles of varying sizes from white felt. Add a smaller iris circle in a colour, green, orange or red, and a small black pupil dot glued on top. Cluster the eyeballs across the front of the bag at different angles, some overlapping slightly. Glue them down with fabric glue and press under a book.
Red veins drawn on each eyeball with a fine red fabric marker before gluing add a level of detail that children appreciate and adults quietly find impressive. The cluster reads as spooky in a cartoonish way, which is the right register for kids under ten.
🛍 Shopping guide
Bleach Pen and Reverse Stencil
A bleach pen on a black canvas bag draws colour out rather than adding it, leaving an orange or cream ghost of whatever shape you place. Tape a shape to the bag, apply the pen around it, remove the shape, rinse and neutralise. The area under the tape stays dark while everything around it lightens.
This technique needs adult hands and good ventilation. Work outside or with a window open. The result is subtle and slightly aged, which suits an older child who considers the jack-o-lantern approach beneath them.
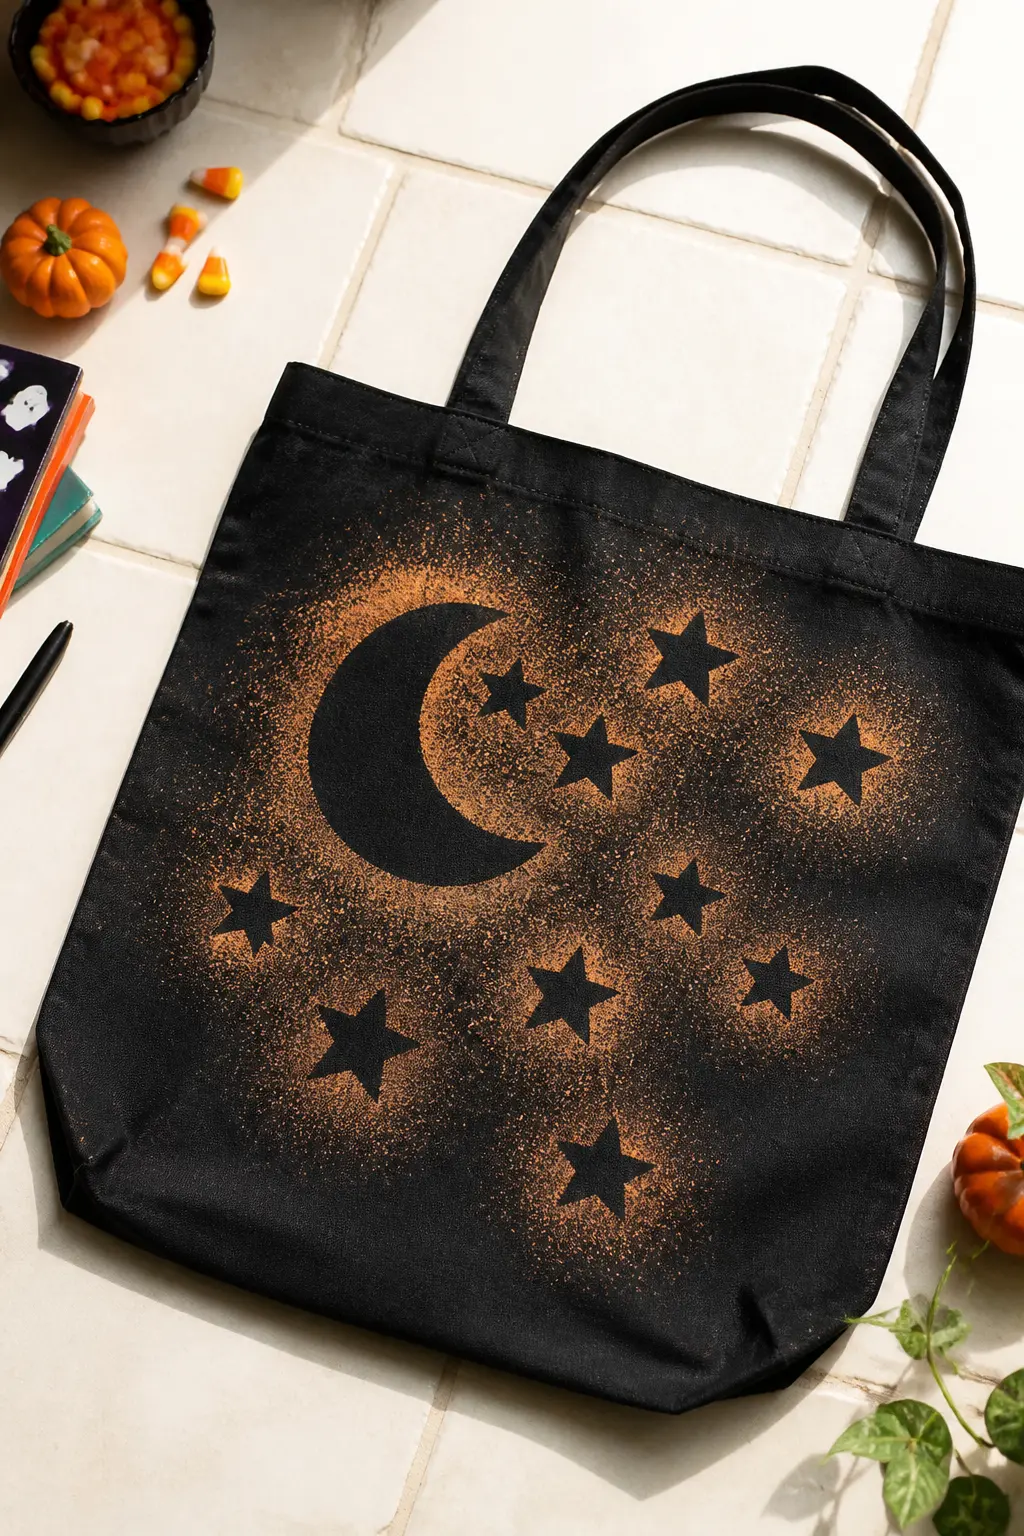
Bleach Pen Moon and Stars on Black Canvas
Tape crescent moon and star shapes cut from card stock onto a black canvas tote, covering the areas you want to stay dark. Apply a bleach pen generously around and between the shapes. After five minutes, remove the tape and card stock, rinse the bag under cold water and neutralise with a splash of white vinegar. The revealed shapes stay black while the surrounding canvas fades to a warm orange-cream.
Work fast: the longer the bleach sits, the lighter and more orange the faded area becomes. Test on a scrap of the same canvas before working on the final bag. This technique cannot be undone once it starts, so adult hands only.
🛍 Shopping guide
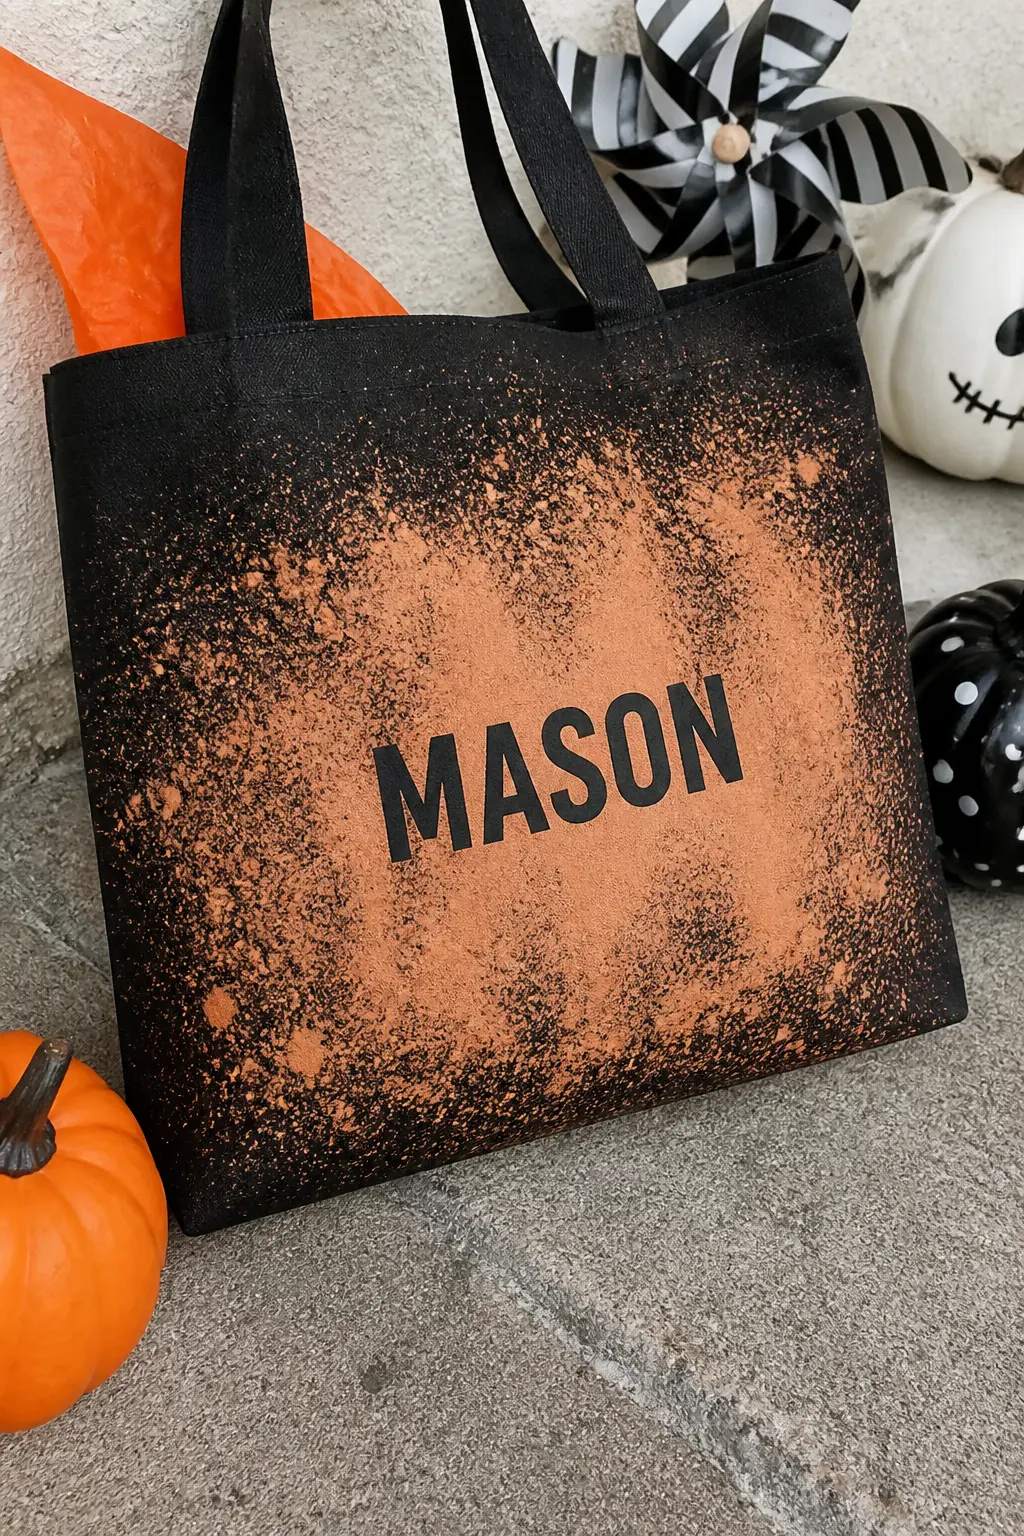
Bleach Spray Splatter With Masked Name
Cut a child’s name from adhesive vinyl or contact paper and stick it to the centre of a black canvas bag. Dilute bleach fifty-fifty with water in a spray bottle and mist the front of the bag from about thirty centimetres away. The sprayed areas mottle to orange and cream while the vinyl-masked name stays crisp black. Rinse and neutralise after two minutes.
The splatter effect looks intentional rather than accidental when you keep the spray distance consistent. Peel the vinyl name away after rinsing to reveal the black lettering. The contrast between the faded halo and the sharp letters is the whole design.
🛍 Shopping guide
Pre-Made Personalisation for Parents With Zero Time
Some parents have the afternoon and some parents have the budget. A custom-printed canvas tote ordered online, personalised with a name and a spooky character, costs around the same as a themed plastic bucket and arrives flat-packed, ready to fill.
The ideas in this section are not fully DIY, but they fit the article’s premise: they replace the plastic bucket with something reusable, good-looking and personal. They also make a useful baseline for anyone who wants to start with a printed bag and add hand-painted details on top.
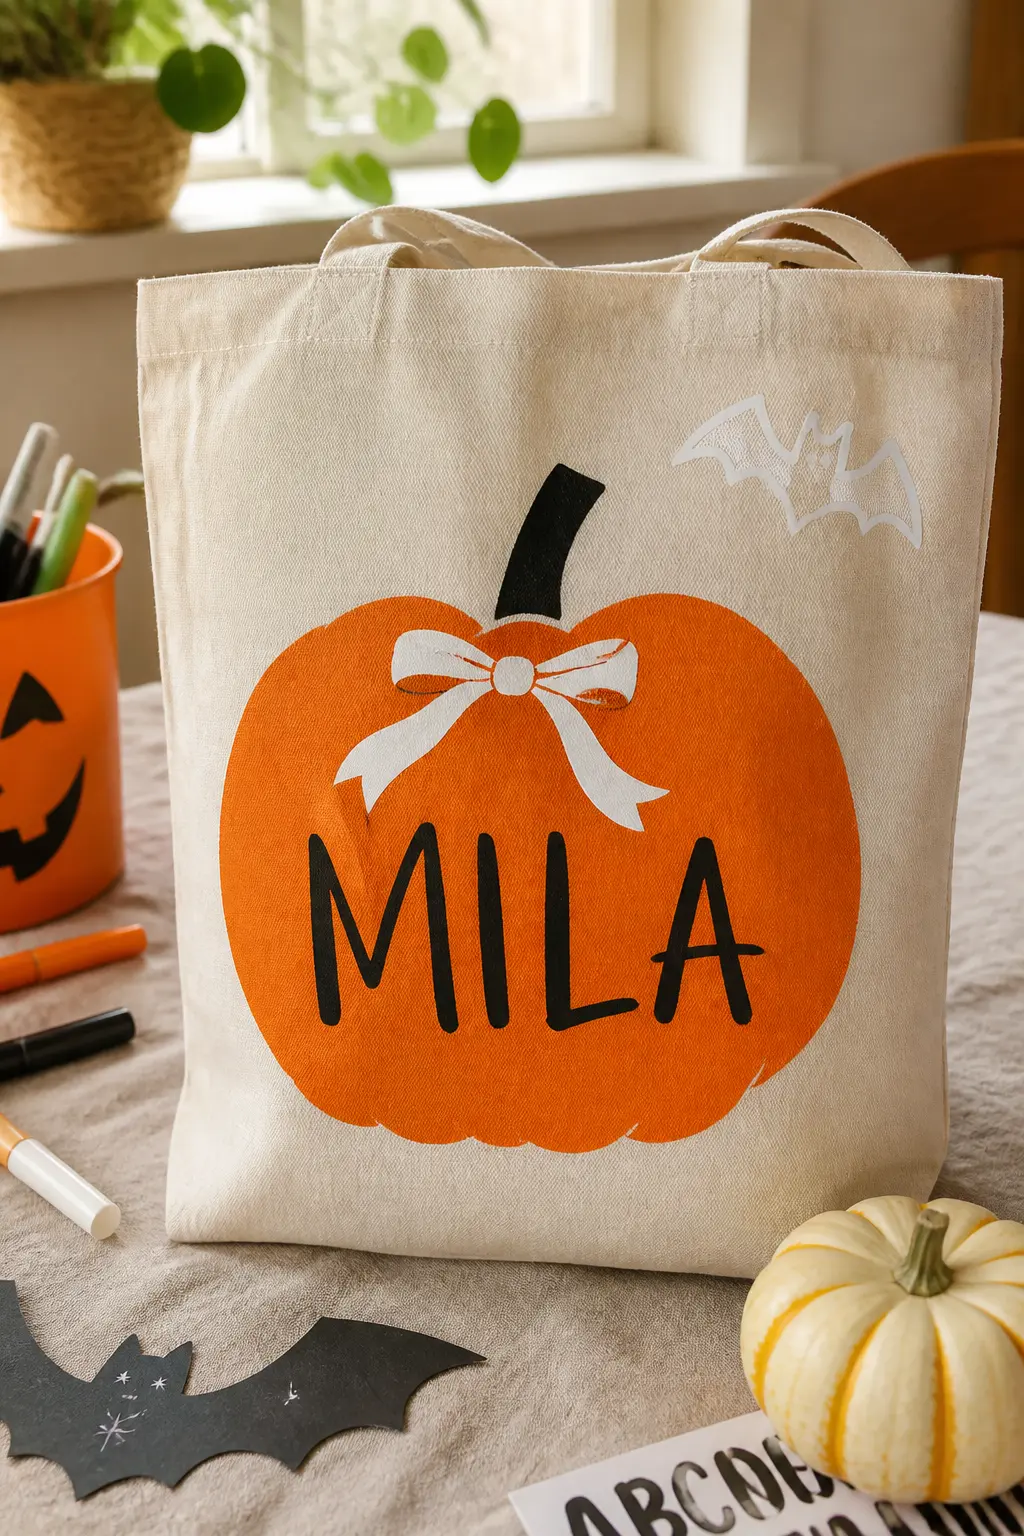
Custom-Printed Pumpkin With Bow, Name Added by Hand
Order a custom canvas tote printed with a pumpkin face and a bow, personalised with the child’s name. These ship from print-on-demand shops and arrive ready to use. The base print handles everything a cutting machine or skilled brush would do. Then add one hand-painted detail: a splatter of white dots for stars, a small bat outline, or a second name on the back.
The hand-added detail costs five minutes and makes the bag feel personal rather than ordered. It also gives the child something they helped make, which changes how they treat the bag afterward. For ideas on what to do once the bags come home stuffed, 24 Halloween Activities for Kids has a full evening covered.
🛍 Shopping guide
Frankenstein Monster Printed Tote With Hand-Stamped Border
Start with a custom-printed Frankenstein tote, name and all. Then stamp a border of small orange diamonds or triangles around the outer edge of the bag front using a sponge and orange fabric paint. The geometric border frames the printed character and adds a handmade element that lifts the bag above a straight off-the-shelf purchase.
The stamped border also personalises the bag visually if two children at the same party end up with the same printed character. Each border comes out differently. For a full Halloween party plan that puts these bags to work, the 25 Not-Too-Scary Halloween Party Games for Kids pairs well with this whole project.
🛍 Shopping guide
Frequently Asked Questions
What is the best fabric paint for a canvas trick-or-treat bag?
A water-based acrylic fabric paint that sets with heat works on every canvas tote. Look for ones labelled ‘permanent when heat-set’: they wash without fading and stay flexible so the canvas does not stiffen. Tulip, Jacquard and DecoArt SoSoft are all reliable options available in Halloween colours.
How do you stop fabric paint bleeding through to the back of the bag?
Slide a piece of cardboard or a plastic cutting board inside the bag before you paint. It creates a firm surface, stops bleed-through and makes it easier to paint in the first place. Remove it only after the paint is fully dry.
Can a child use a heat transfer vinyl tote without a Cricut machine?
Not really: HTV needs a cutting machine to produce clean shapes. The workaround for families without a machine is to order pre-cut HTV shapes or use fabric markers and paint instead. Both give results that look intentional rather than like a fallback.
How big should a DIY trick-or-treat tote bag be?
A 15 x 16 inch canvas tote is the standard size for trick-or-treating: big enough for a full evening’s haul, light enough for a young child to carry comfortably once full. Smaller tote sizes work for toddlers or for party favour bags that go home half-full.
How do you wash a painted canvas tote bag without ruining the design?
Turn the bag inside out, wash on a cold gentle cycle and air dry flat. Avoid the dryer for the first few washes. Heat-set designs hold better than non-heat-set ones, but rough washing shortens any painted design’s life. Hand washing is safest for felt add-ons.
Is a bleach pen safe to use with children around?
The bleach pen technique is an adult-only step. Do it outdoors or in a well-ventilated room, wear gloves and keep children away until the bag has been rinsed and neutralised with white vinegar. Once dry, the bag is completely safe to handle and use.
9 baby first halloween crafts that capture tiny footprints, handprints and keepsakes in under an hou
17 Halloween paper crafts that use only scissors, glue, and cardstock. Cut, fold, layer, and weave y
22 trunk or treat ideas that keep crowds moving fast, every car a distinct themed station with light
Leave a Reply