

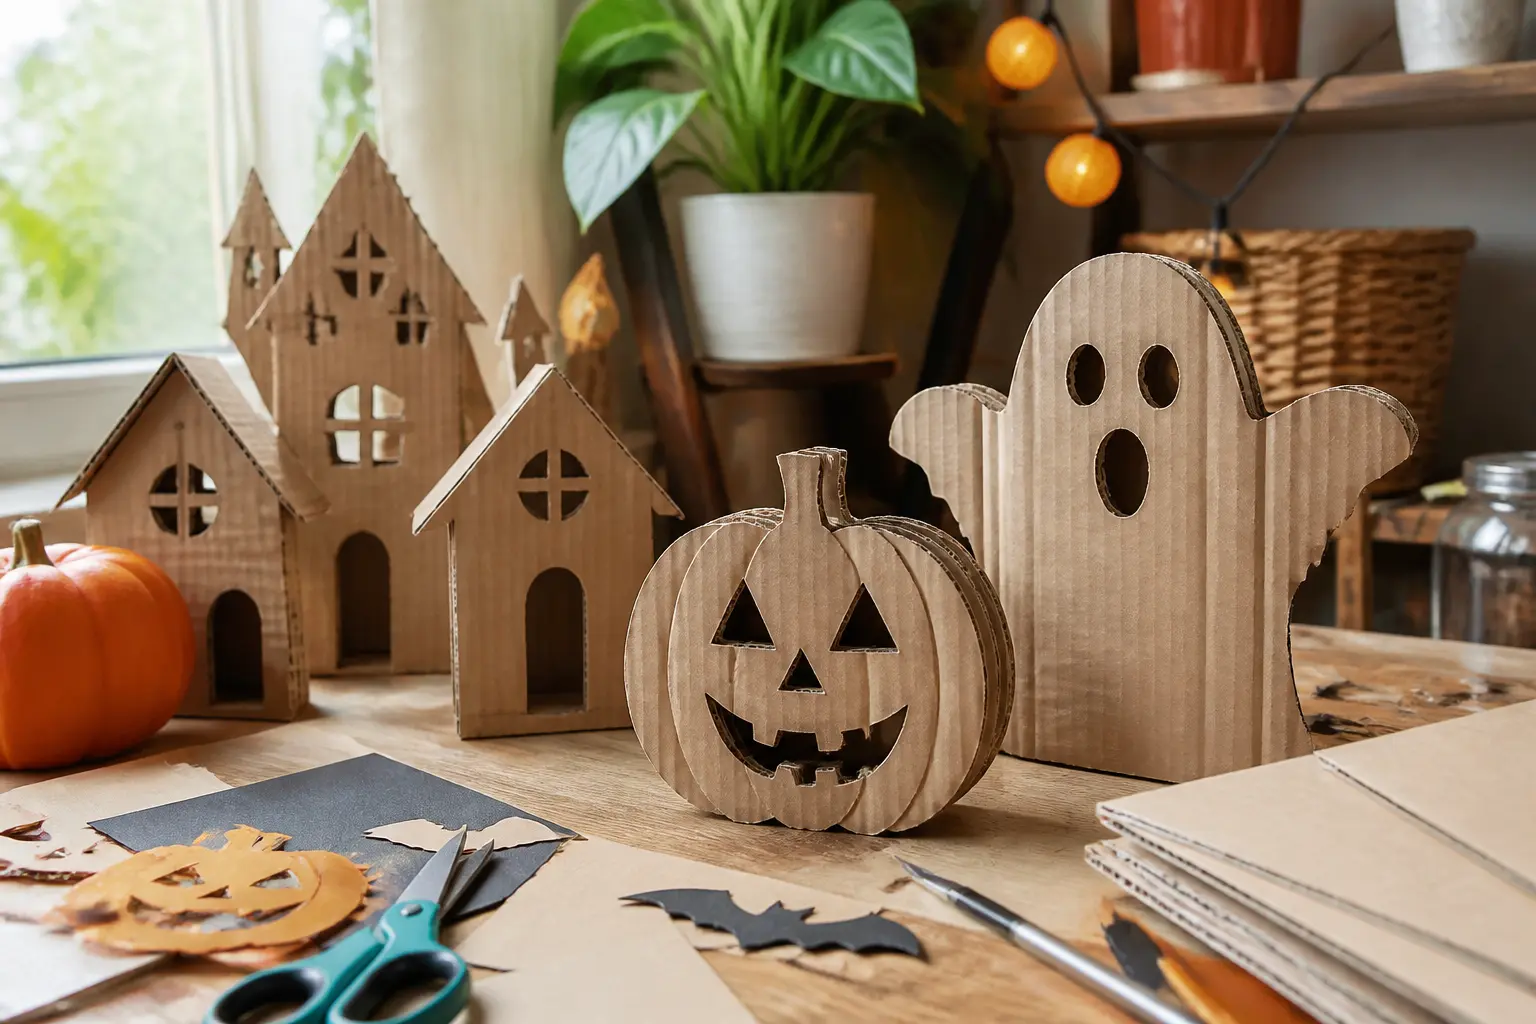
Cardboard is the material that styling editors quietly keep in the back of the studio. It cuts cleanly, takes paint without priming, holds a shape when scored, and costs almost nothing. The 23 ideas below treat it like a proper decorating material, not a last resort.
Each one builds from corrugated cardboard or heavy card stock, uses basic craft supplies, and lands somewhere between gothic parlour and considered Halloween vibe. For anyone who wants even simpler starting points, 15 Easy DIY Halloween Decorations With Three Steps or Fewer is worth a look before you start cutting. And if the decor leads into a full party, 34 Halloween Table Decorations That Survive a Dinner Party covers the table side of things.
Nothing here requires a cutting machine or specialist tools. A craft knife, a metal ruler, and a hot glue gun get you through the whole list. Seal anything that will live outdoors with a coat of Mod Podge or clear acrylic spray, and a wet week will not undo an evening’s work.
This post contains affiliate links. If you buy through them, I may earn a small commission at no extra cost to you.
Wall Statements
A blank wall is the most underused surface at Halloween. Large cardboard pieces fill it faster than any wreath or banner, and they store flat when the season ends. The ideas in this section work at scale because silhouette and contrast do the heavy lifting, not colour or detail.
Life-Size Haunted House Wall Mural
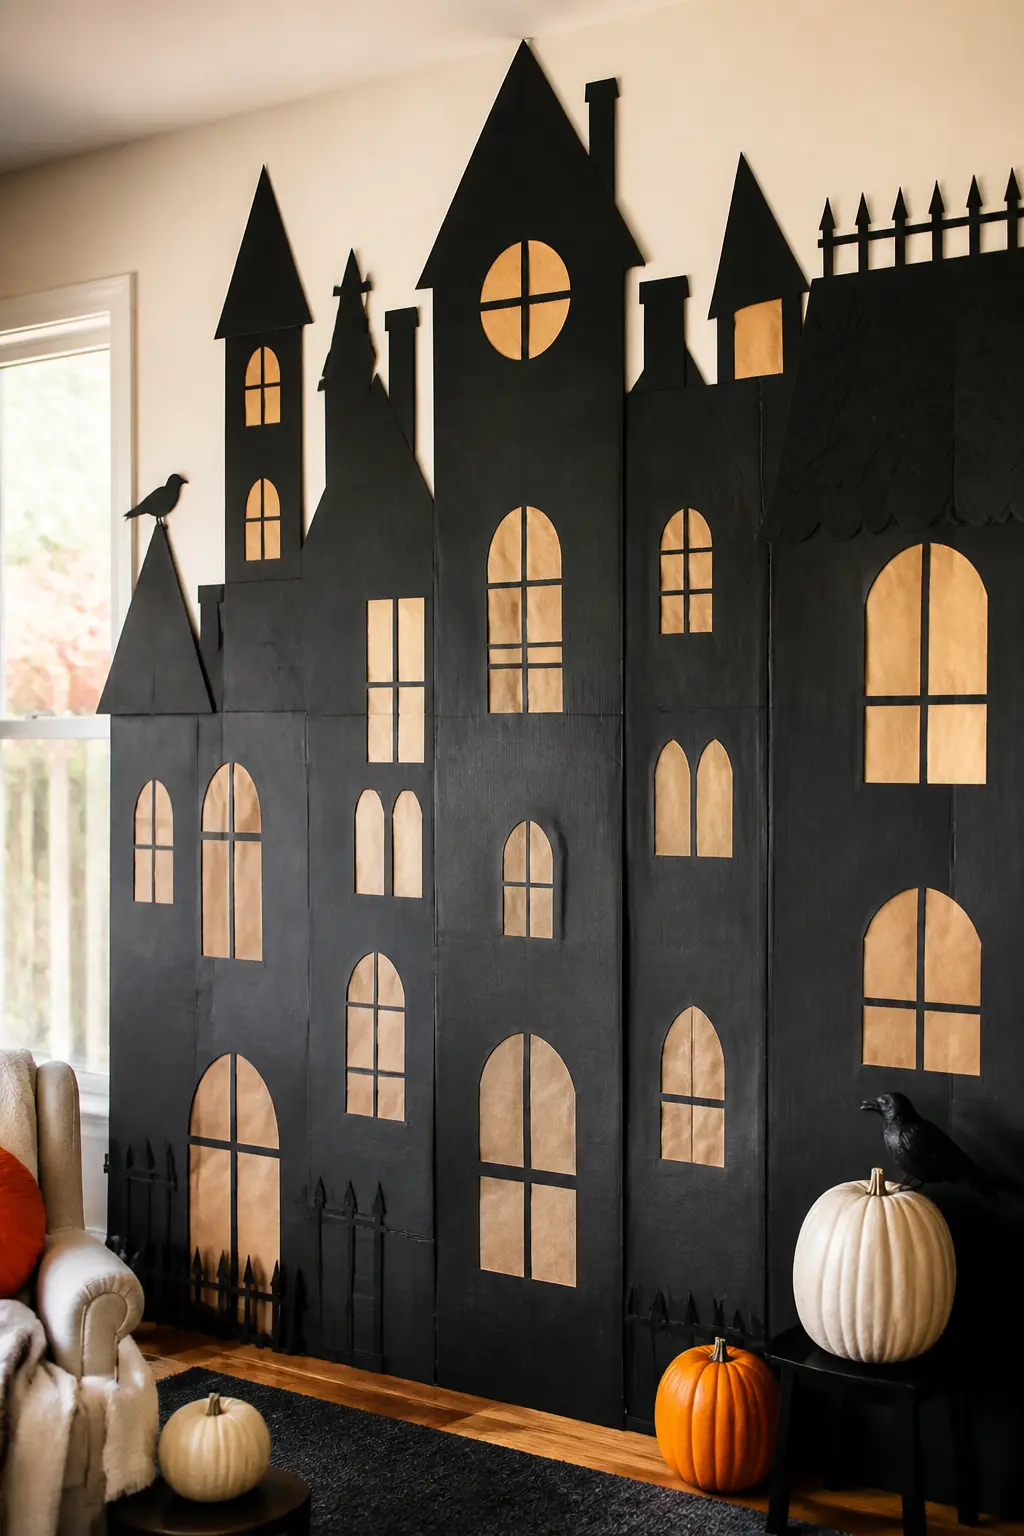
Cut a haunted mansion silhouette from large sheets of black corrugated cardboard and mount it directly on a living room wall with painter’s tape. Work in panels so each piece is manageable, and overlap the joins slightly so the seams read as architectural lines rather than mistakes.
Back the windows with kraft paper to suggest lit rooms. The contrast of black and warm brown reads at a distance and photographs beautifully against a neutral wall.
🛍 Shopping guide
Black Bat Scatter Wall
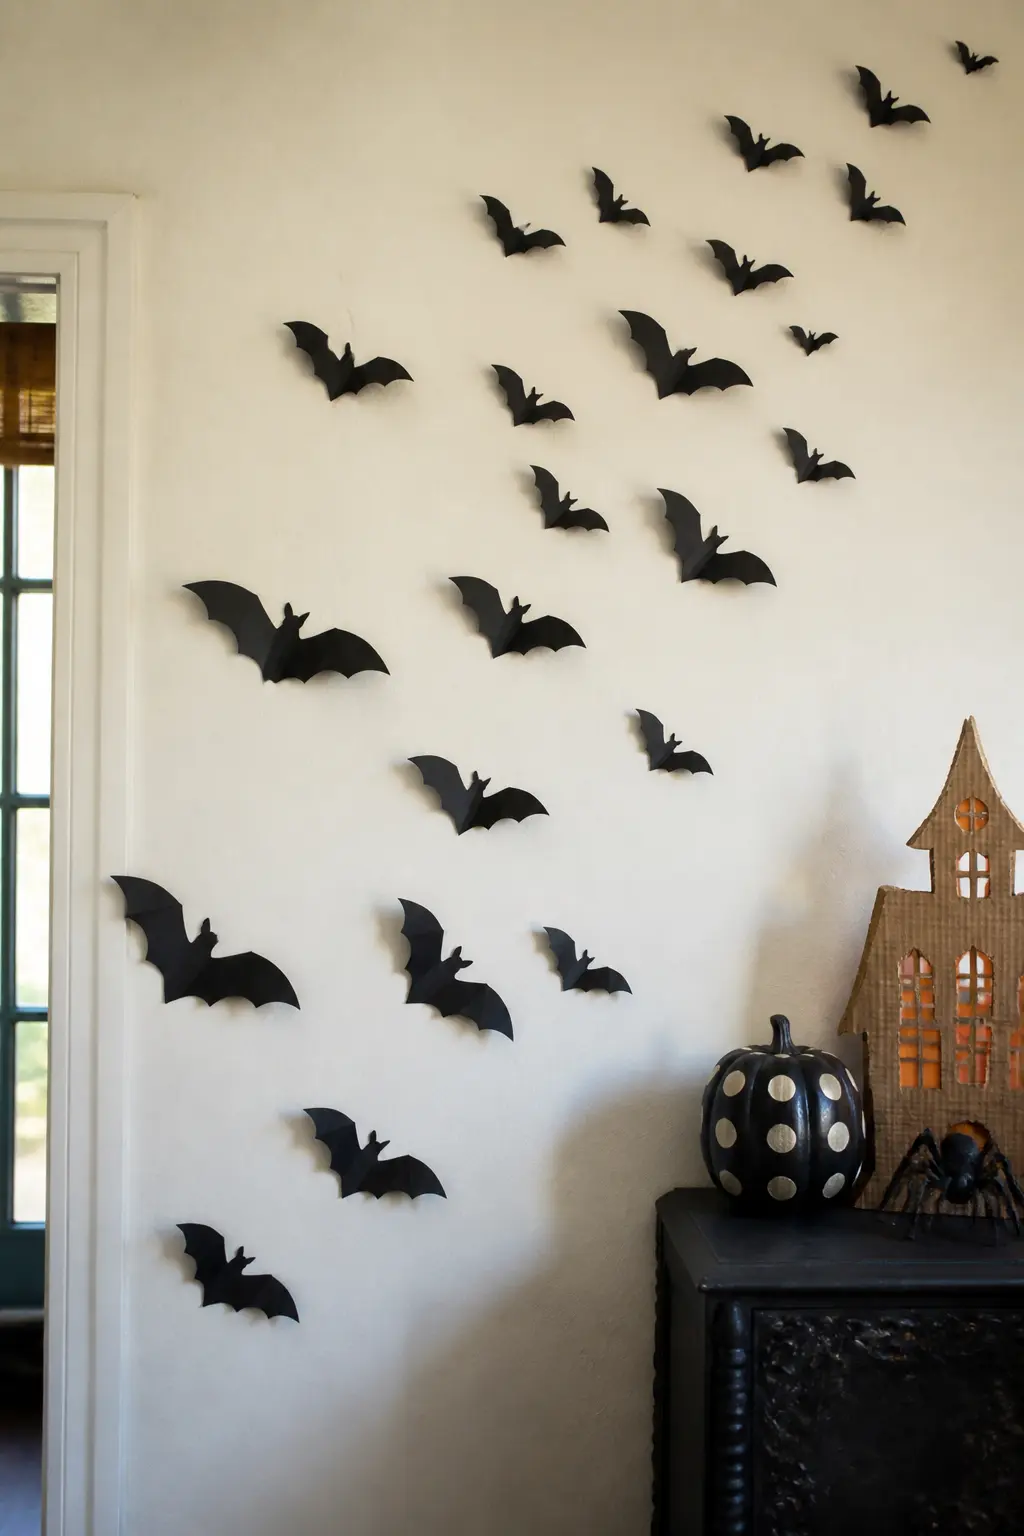
Trace and cut fifty or so bats in three sizes from black card stock. Fold each body slightly along the spine so the wings lift off the wall at an angle. Arrange them in a loose spiral or diagonal sweep that climbs from a sideboard up toward the ceiling.
The depth each folded body creates casts small shadows that shift as the room light changes. That shadow movement is the whole point: the wall feels alive without a single moving part.
🛍 Shopping guide
Gothic Arch Window Silhouette
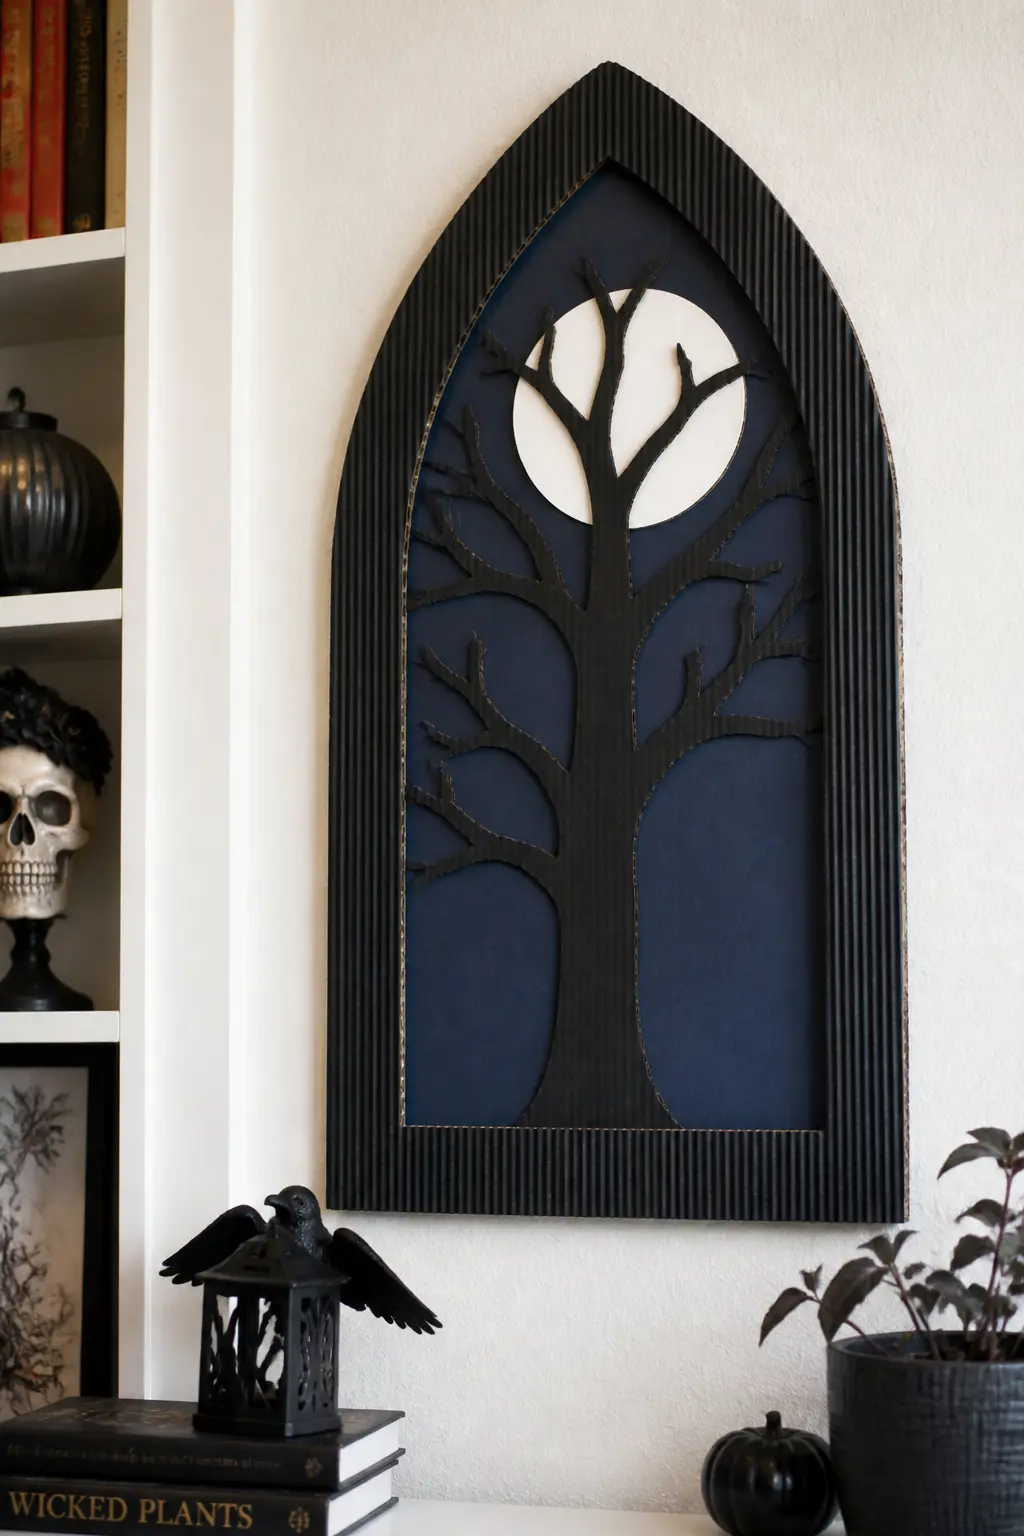
Cut a pointed arch frame from black corrugated board to fit a blank wall section. Inside the arch, layer a midnight-blue card backing and glue a simple tree-branch silhouette cut from thinner black card. The arch reads like a window looking out onto a moonlit night.
Add a circle of white card behind the branches as a moon. Keep every edge clean and the effect looks printed, not handmade.
🛍 Shopping guide
Framed and Hanging Pieces
The framed-portrait format is having a moment right now, and cardboard makes it achievable without a trip to the frame shop. Cut a frame shape, layer it over a contrasting backing, and hang it with ribbon or twine. Grouped in odd numbers, these read as a deliberate gallery wall rather than a craft project.
Spellbook Page Silhouette Frames
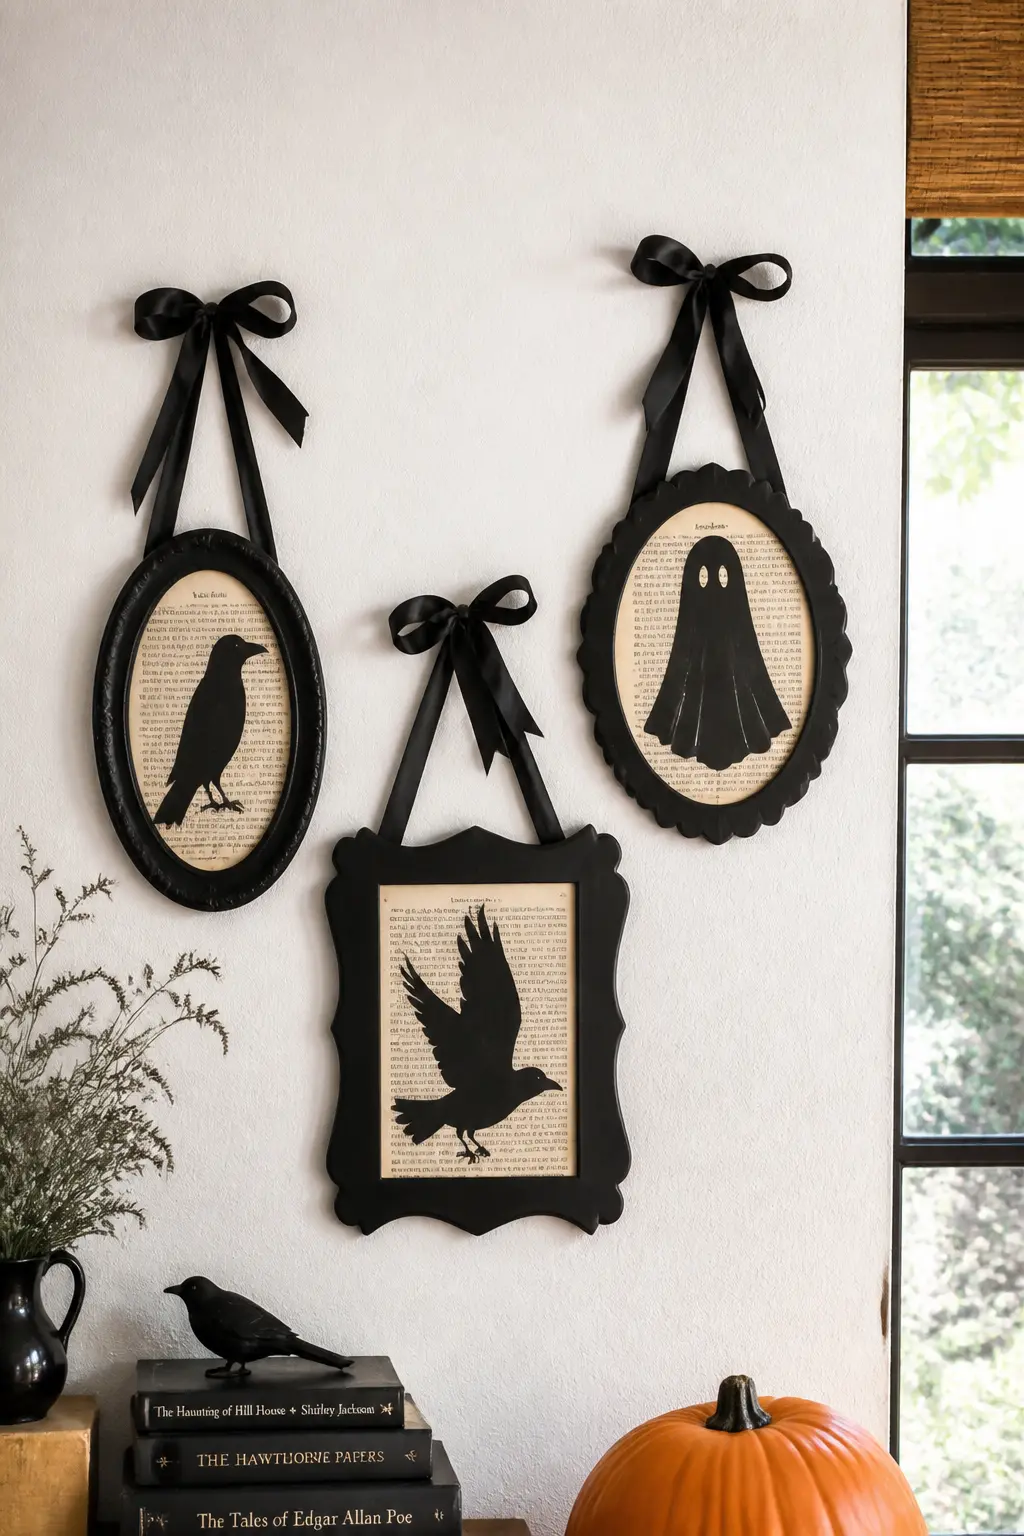
Cut ornate frame shapes from black card stock: oval, rectangular with curved corners, and a wider cartouche. Back each with a torn page from an old paperback so the printed text shows through the frame opening. Glue a single black silhouette, a raven, an owl, or a ghost, over the text layer.
Hang each frame from a doubled length of black satin ribbon tied in a bow at the top. Group three or five frames on a wall at slightly different heights. The layering of type, silhouette, and frame gives each piece an antique natural-history print quality that reads as expensive.
🛍 Shopping guide
Egg-Carton Ghost Portrait Gallery
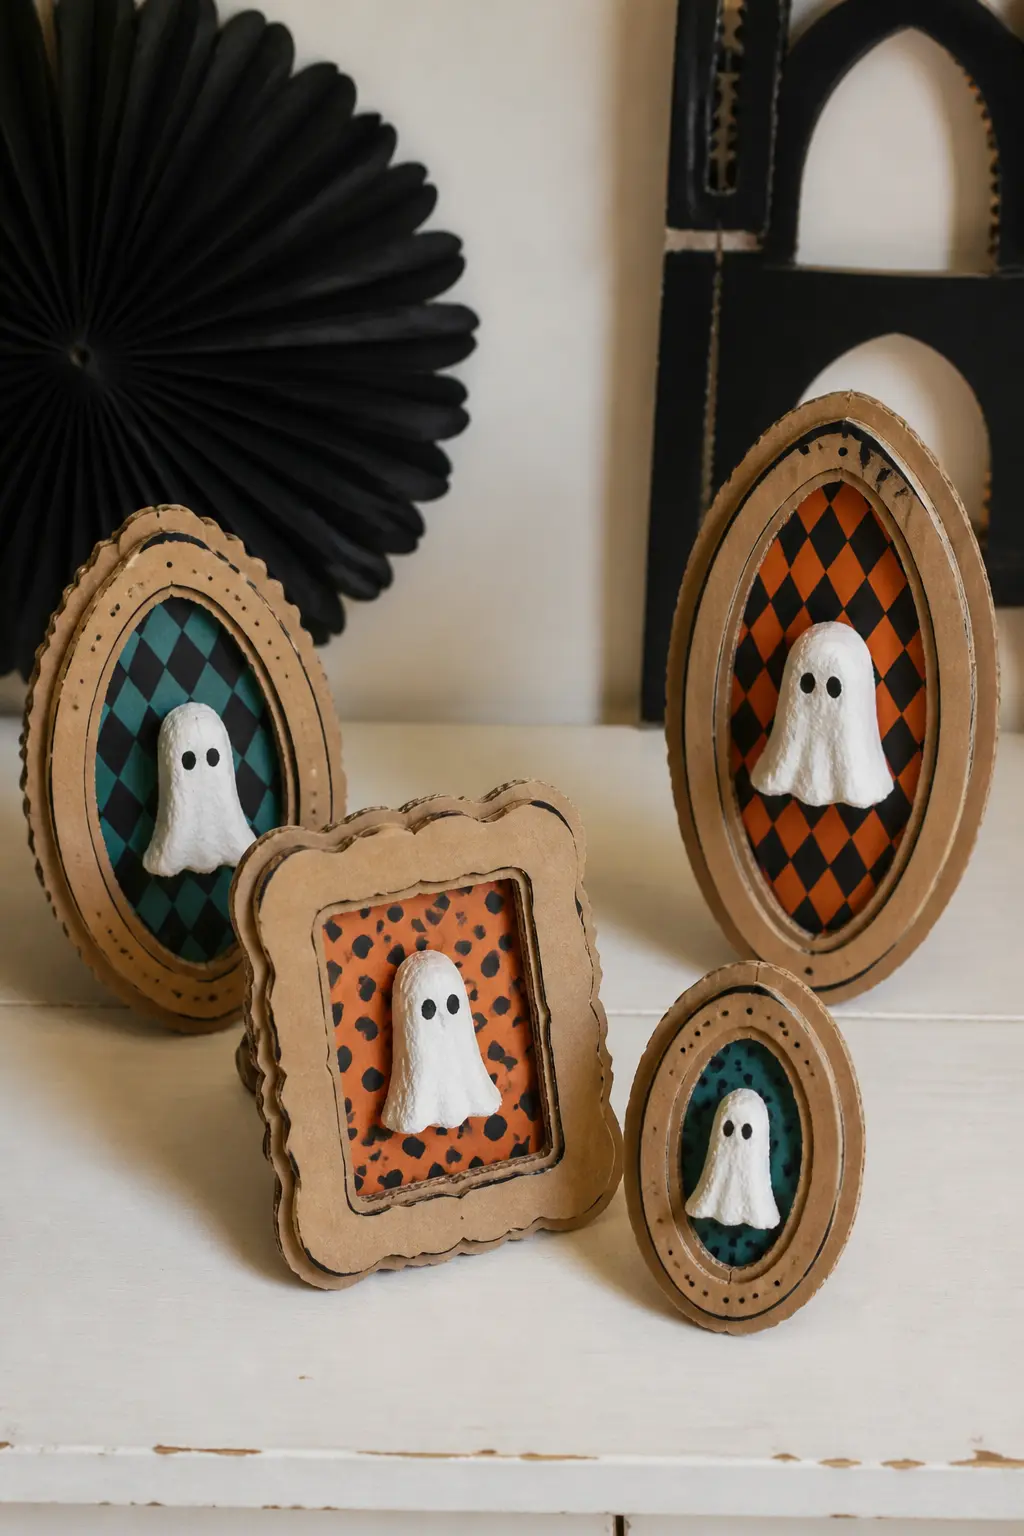
Cut wavy-edged frame shapes from corrugated cardboard and paint them in warm tan and mustard tones. Back each with a sheet of patterned card stock in teal, blue, or warm orange. Pull a single egg-carton cone from a standard box, paint it white, add two small dot eyes, and glue it into the centre of the backing as a tiny 3D ghost figure.
Each ghost gets a personality detail: a tiny card witch hat, a scrap-ribbon bow, a miniature pumpkin cut from orange card. The portraits hang in a loose cluster and the 3D element casts a real shadow, which moves with the room light.
🛍 Shopping guide
Vintage Specimen Plaques
Cut shield-shaped backing pieces from corrugated board and paint them in dark forest green or burgundy. Onto each, glue a cream card rectangle and draw or print a simple scientific-style illustration: a moth, a spider, a skeletal hand. Add a handwritten Latin-style label below each image in fine black pen.
The specimen plaque format makes even the simplest drawing look deliberate and slightly sinister. Five or six along a hallway wall turn a corridor into a cabinet of curiosities.
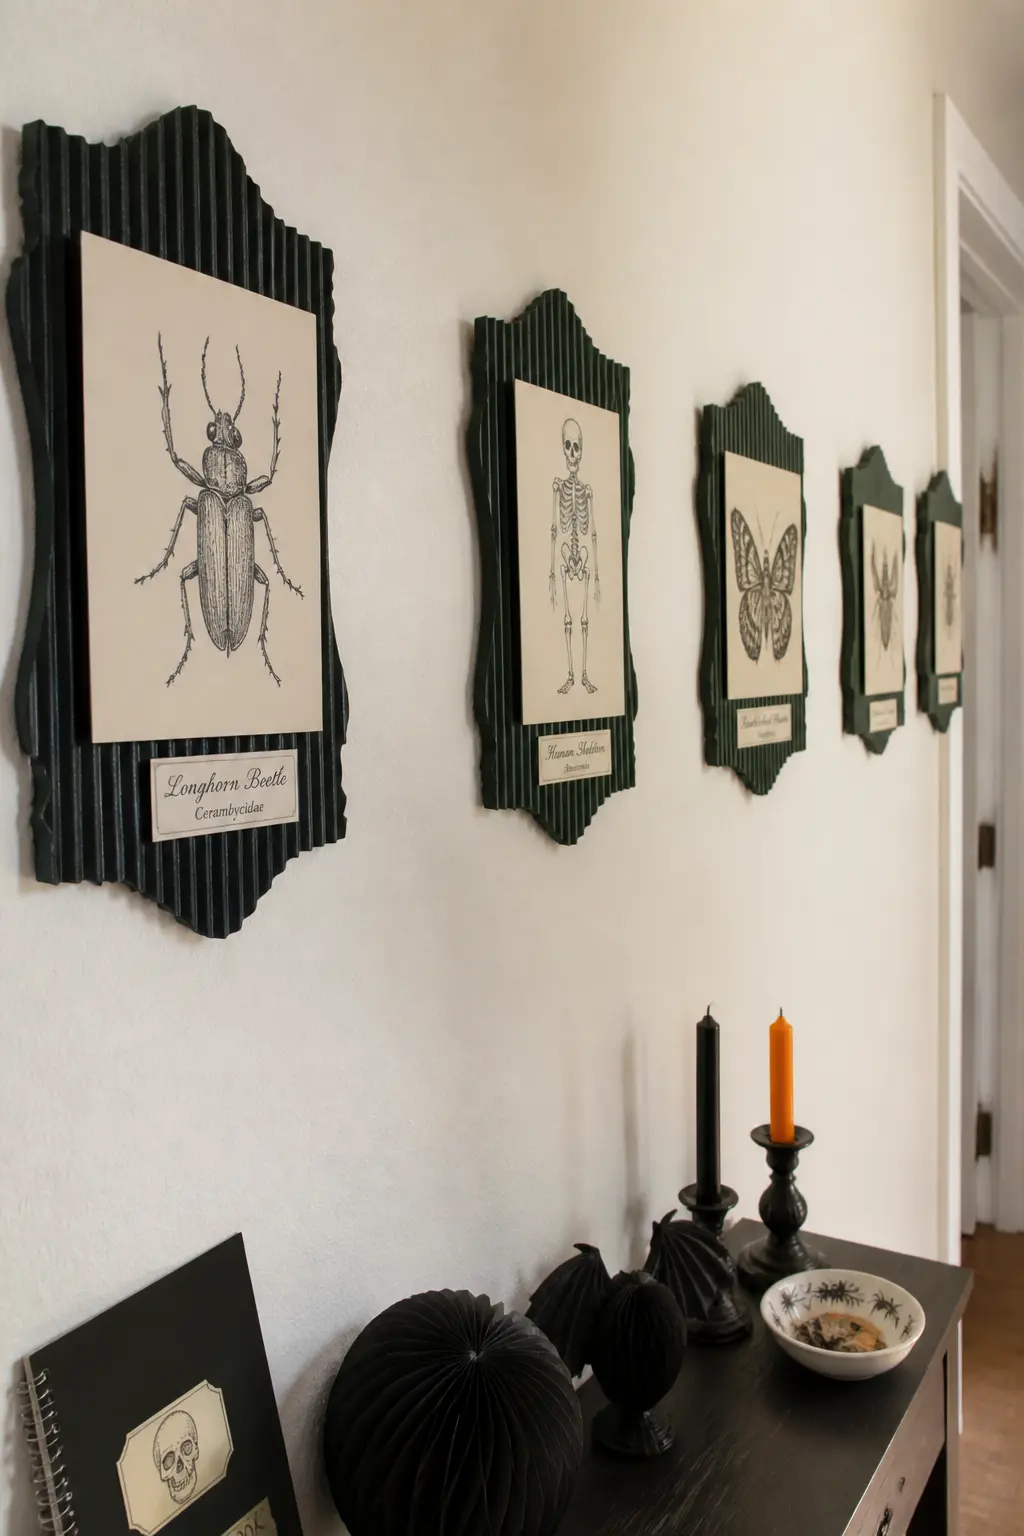
Table and Surface Decor
Cardboard centrepieces outperform candles in one important way: nobody knocks them over and starts a fire. These ideas sit at table height where guests actually look, so finish the edges and paint the back. A rough reverse ruins the effect on a piece that gets handled.
For a full picture of what else belongs on the table, 31 Fall Table Decor Ideas That Still Leave Room to Eat adds the non-cardboard layer.
Coffin Centrepiece Box
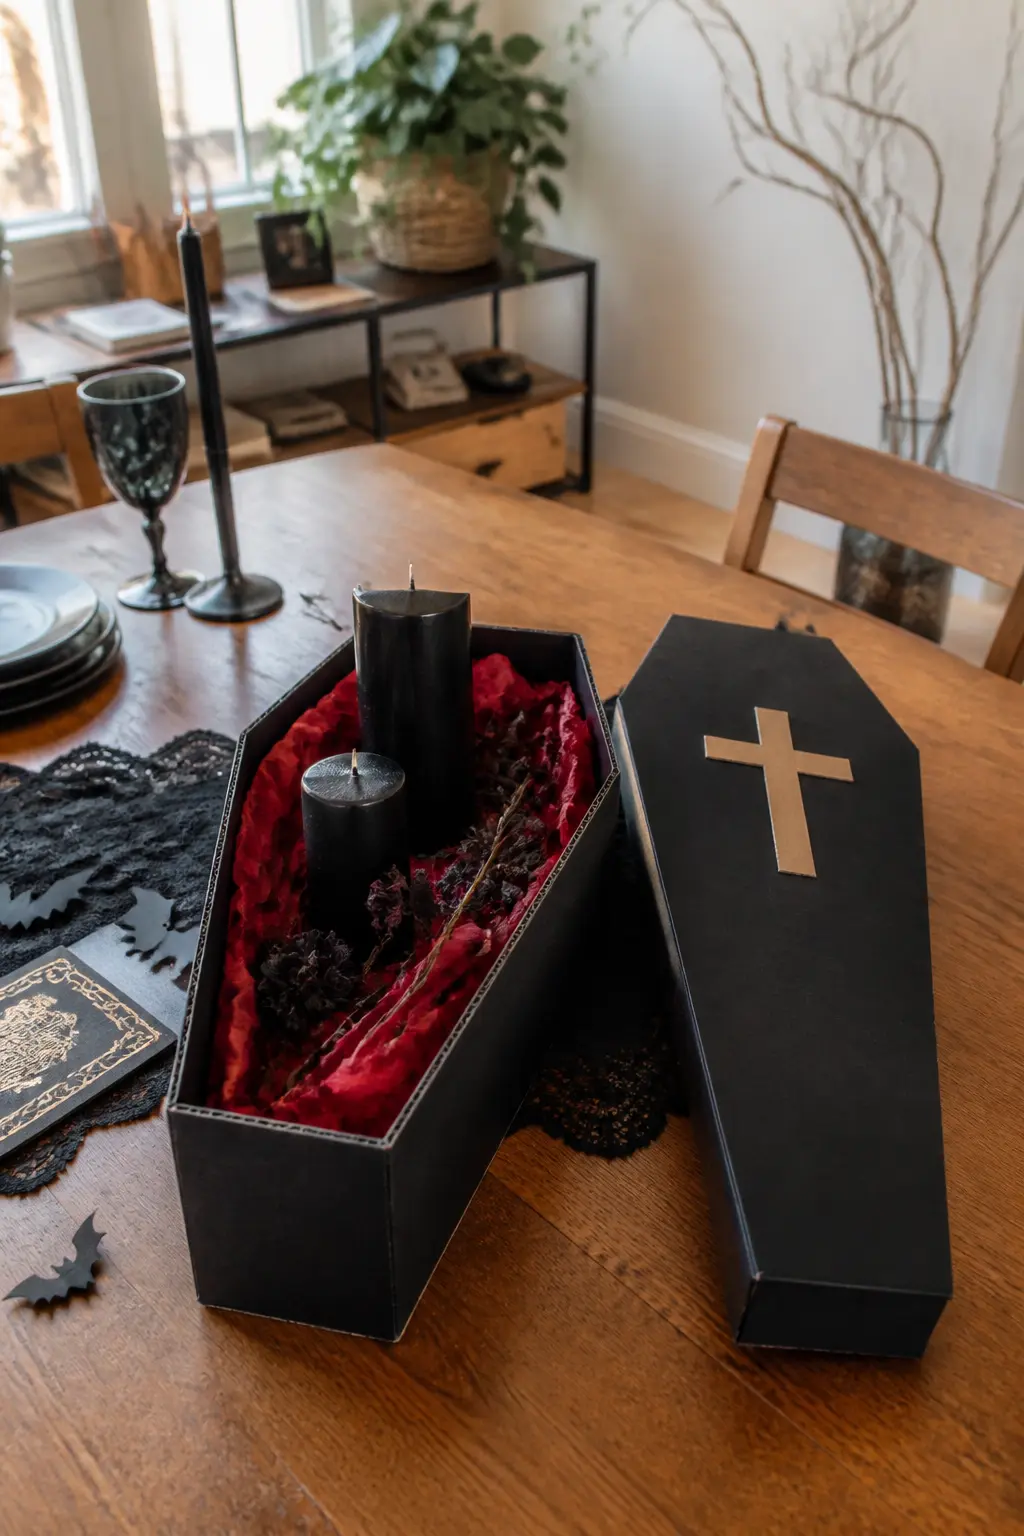
Score and fold corrugated cardboard into a shallow coffin shape with a removable lid. Paint the outside in matte black and line the inside with a scrap of deep red tissue paper or fabric. Fill it with pillar candles, dried flowers, or a cluster of small pumpkins.
The coffin outline is recognisable enough to read instantly as Halloween but restrained enough to sit on a dining table alongside actual food and wine. Build two different sizes and nest them on the table for a layered centrepiece.
🛍 Shopping guide
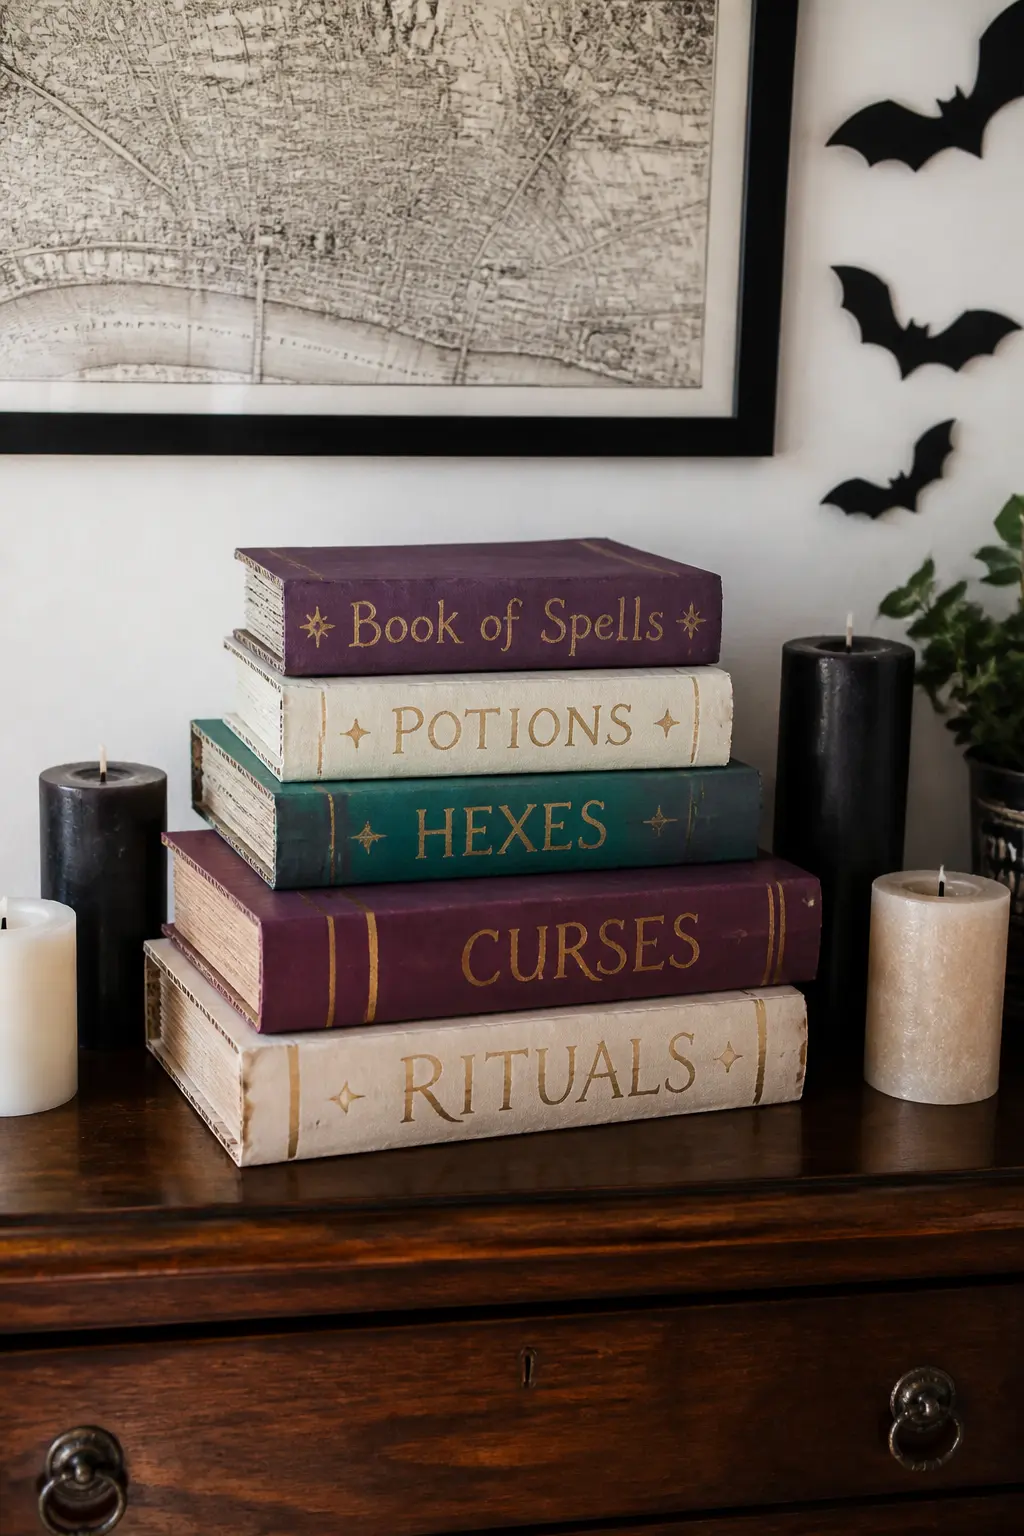
Stacked Cardboard Books
Cut several rectangular book-block shapes from thick corrugated board and seal the edges with kraft tape to suggest a spine. Paint each in a different moody shade: deep plum, aged cream, dark teal. Add a painted or stamped title on the spine in gold or black.
Stack three or five at varying heights on a sideboard, tucked among candles and small ceramic pumpkins. They read as spellbooks at a glance and hold their shape all season without any care.
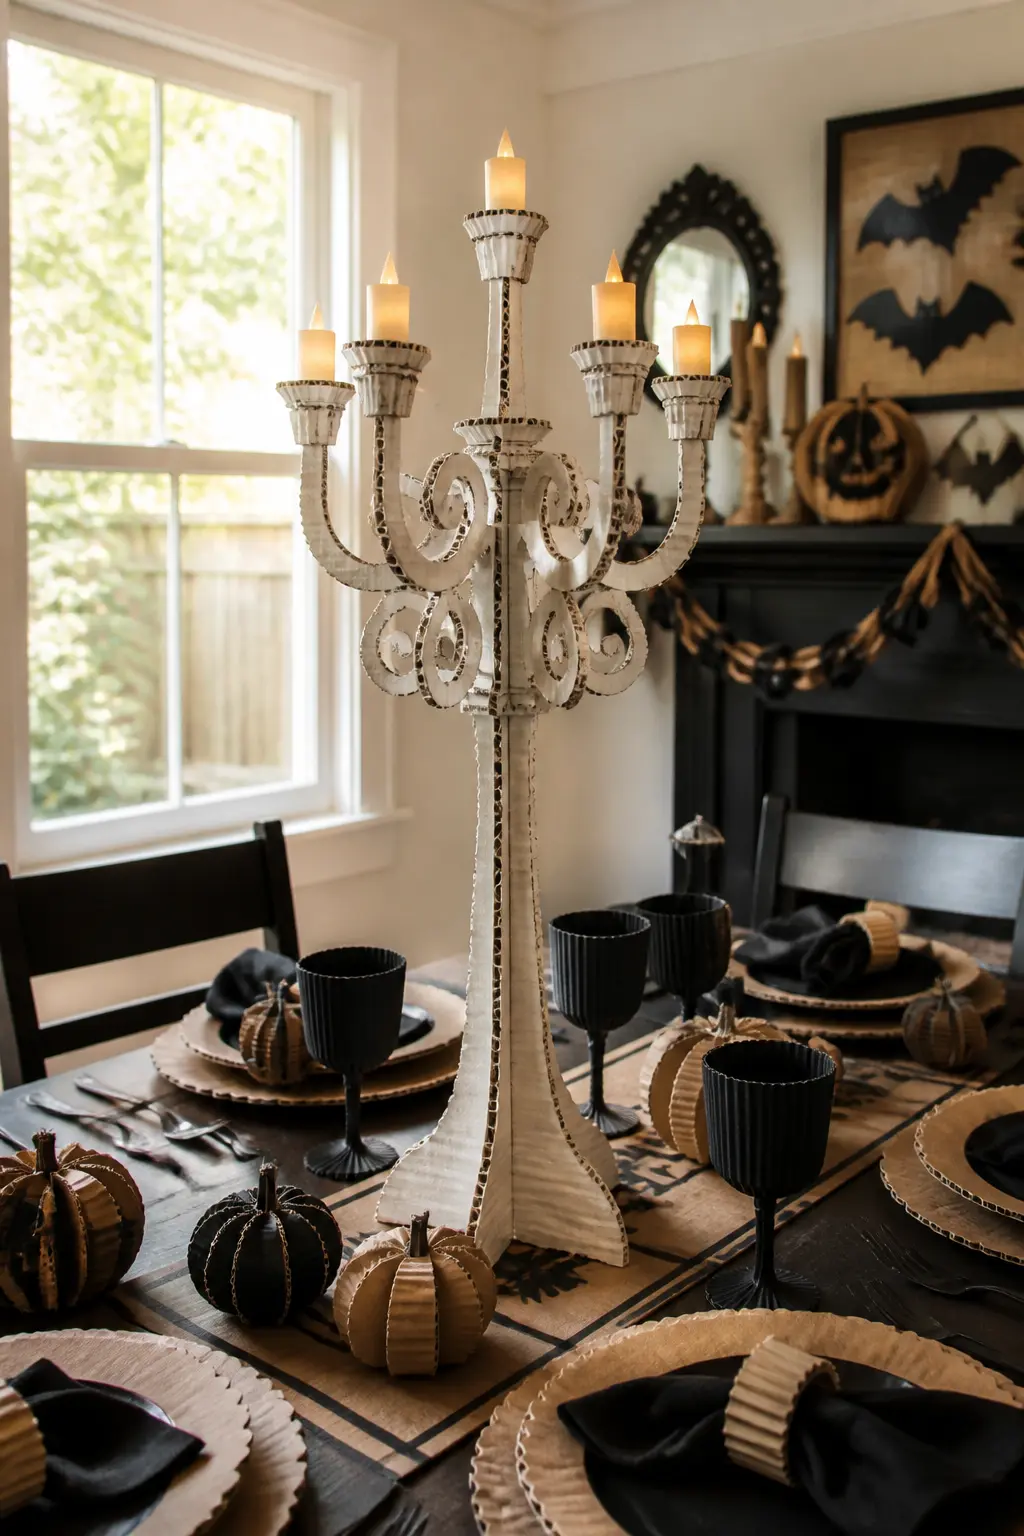
Cardboard Candelabra
Roll sheets of corrugated board into tight cylinders for the column and arms, then cut and glue a drip-shaped wax-drip collar around the top of each arm. Paint everything in aged white or bone and dry-brush the ridges with raw umber to suggest real tallow-stained silver.
Set battery tea lights in the tops. From across the table it reads as a real candelabra. Up close the corrugated texture is visible and somehow makes it more interesting, not less.
🛍 Shopping guide
Door and Threshold Decor
The door is the first impression. Cardboard handles moisture poorly when it sits in pooled water, but vertical surfaces dry out fast, and a coat of clear spray buys days of outdoor life. Keep the shapes bold: fine detail disappears at distance, and guests read a front door in roughly two seconds.
39 Halloween Door Decorations Classroom Doors Are Judged On has more silhouette ideas that scale up to a front door just as easily.
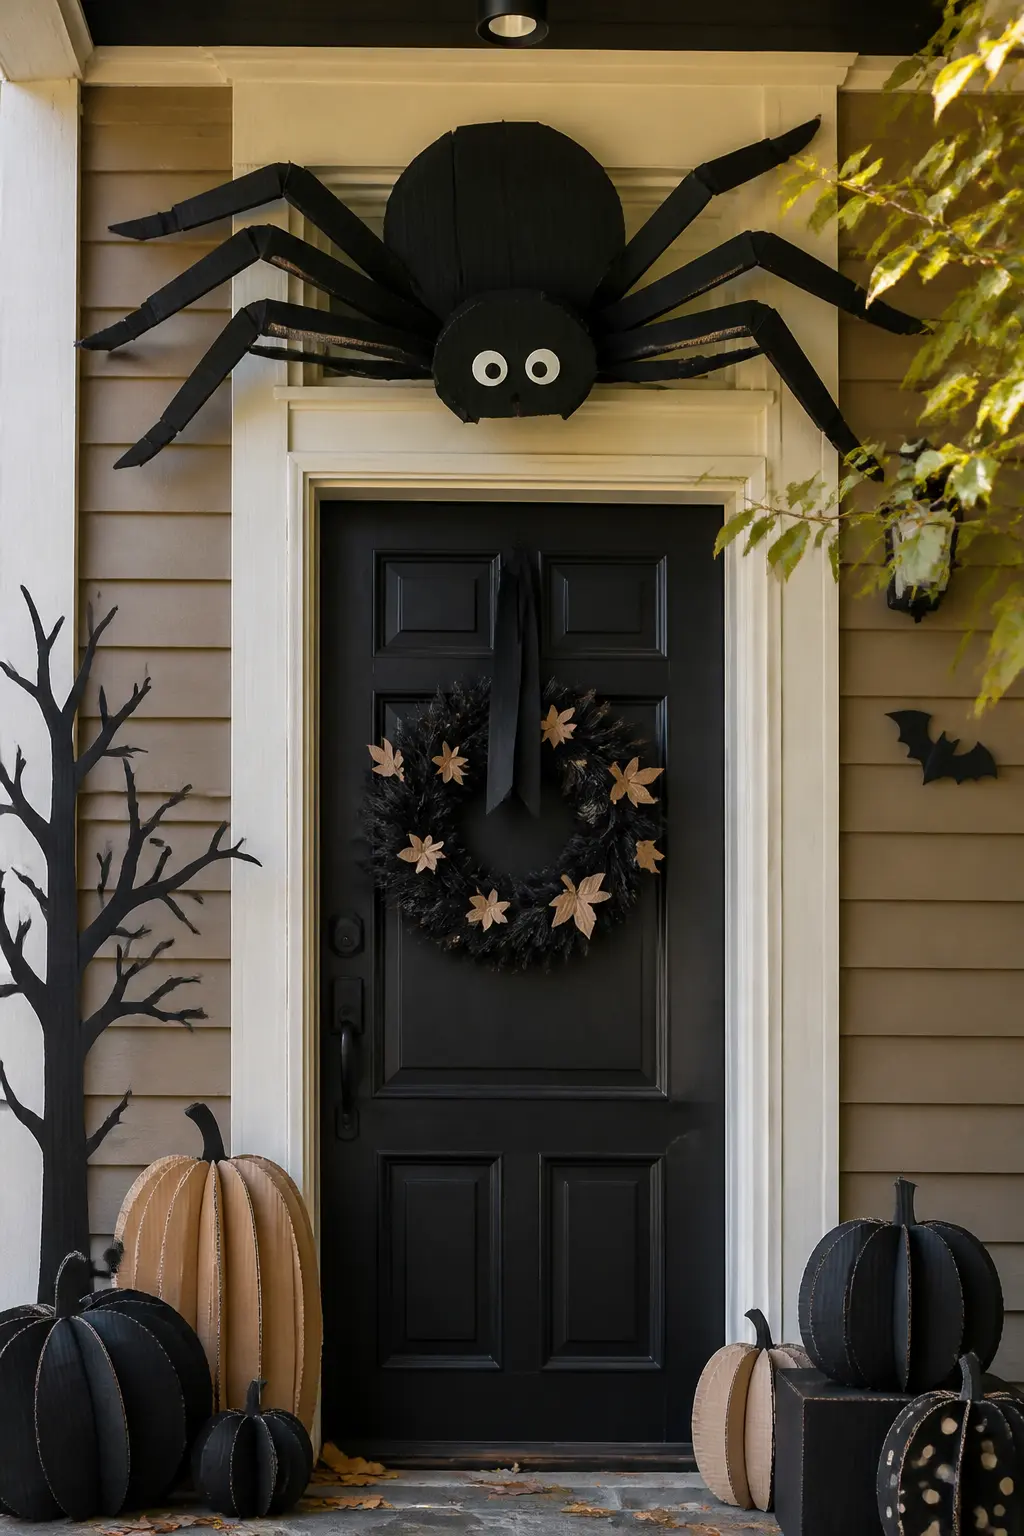
Giant Spider Over the Door
Cut a large circle body and a smaller head circle from black corrugated board. Roll eight leg pieces from tightly rolled card stock tubes, bend them at the knee joint, and glue them to the body underside. Mount the whole spider so it appears to crawl over the top of a door frame.
Add two white card circles for eyes. The scale makes it: a spider the size of a dinner plate is funny; one that spans most of the door frame is genuinely startling at night.
🛍 Shopping guide
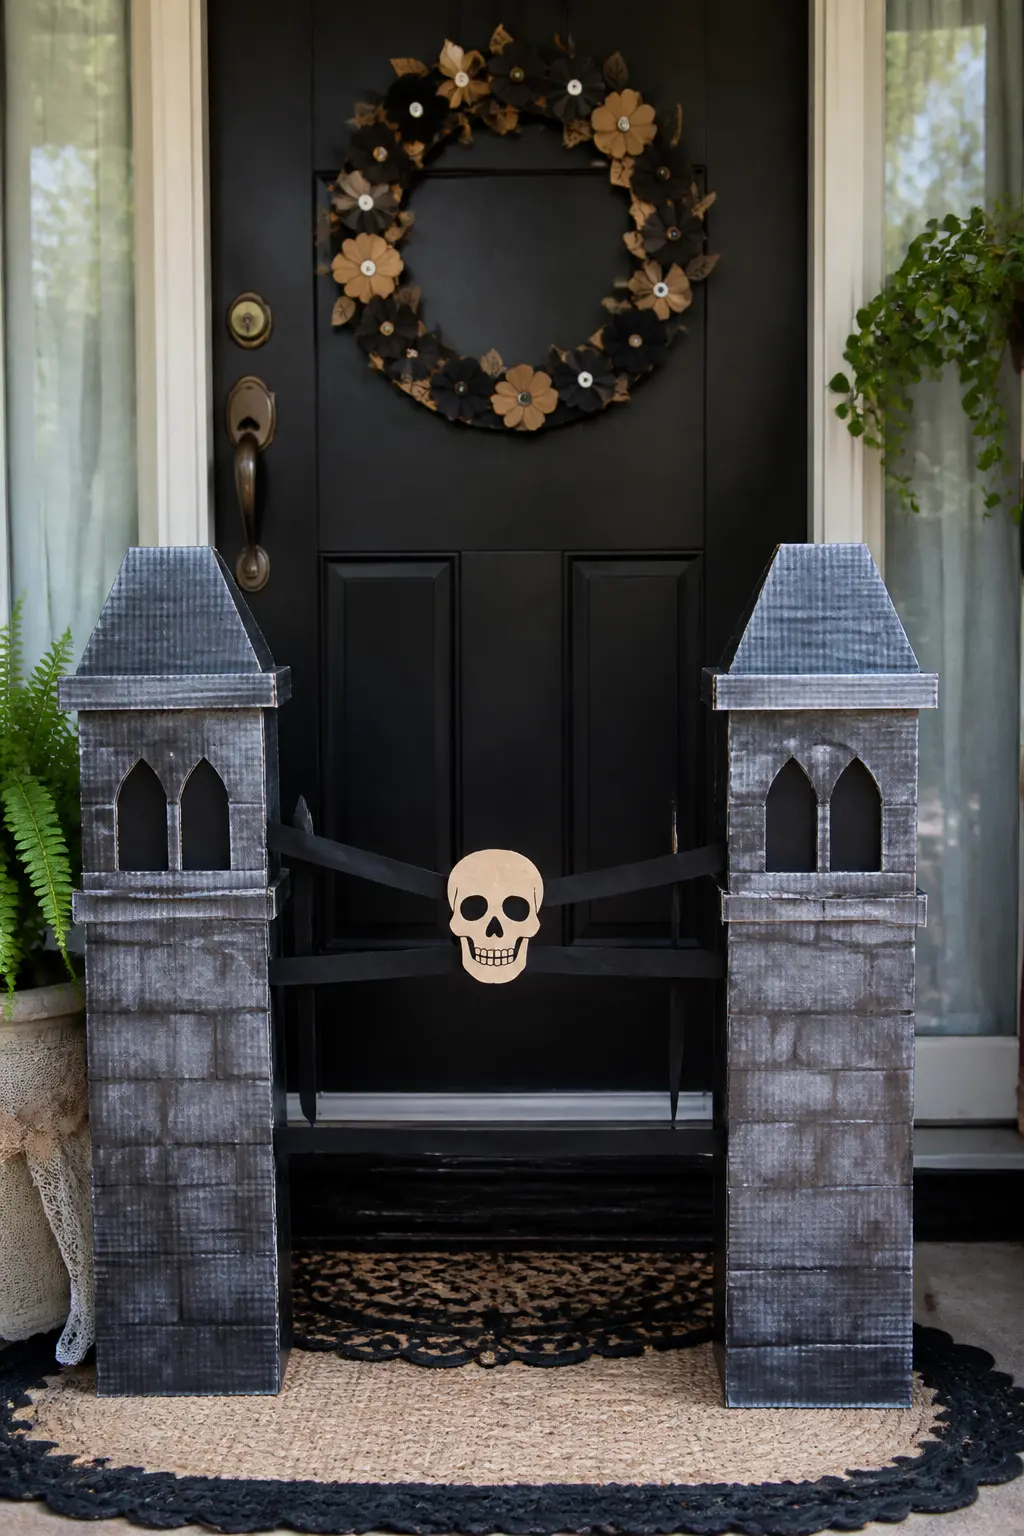
Wreath-Frame Graveyard Gate
Cut two tall gate-post shapes from corrugated board and paint them in stone grey, dry-brushed with white to suggest aged granite. Between them, stretch a length of black ribbon or twine as a fence rail. Mount a small card skull or crossed bones to the cross-bar in the centre.
Hang the whole assembly on the door like an oversized wreath using a wreath hook. The gate motif frames the door rather than covering it, so it reads well even on a glass door where tape will not stick.
🛍 Shopping guide
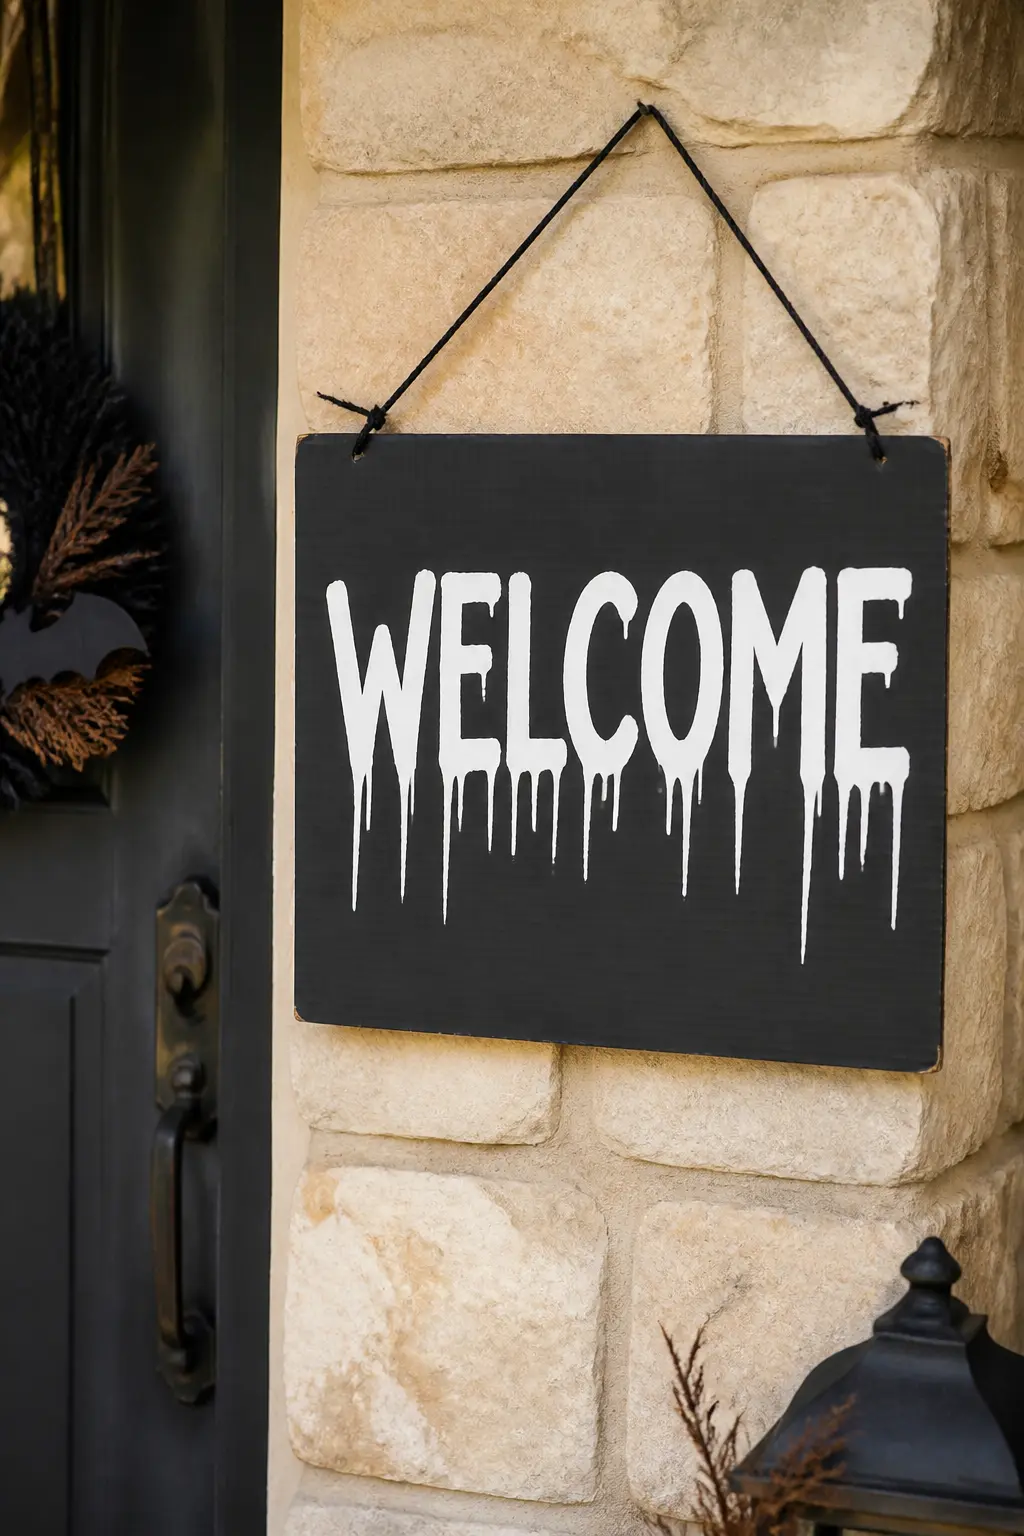
Welcome Sign With Dripped Lettering
Cut a wide rectangular sign blank from double-layered corrugated board for rigidity. Paint the ground in matte black, then letter “welcome” or a short phrase in bone white paint, extending the bottoms of each letter into long drip shapes. Seal with two coats of outdoor Mod Podge.
The drip lettering reads as a nod to horror-film titles without being gruesome, which makes it work for mixed-age parties. Hang it with black twine looped through two punched holes.
3D Sculptural Pieces
Scoring and folding corrugated cardboard creates volume that flat crafts cannot. These pieces work as shelf objects, mantle centrepieces, or standalone floor props. Corrugated card holds a curve surprisingly well when you score the paper side at close intervals, so shapes that look complicated are mostly patient folding.
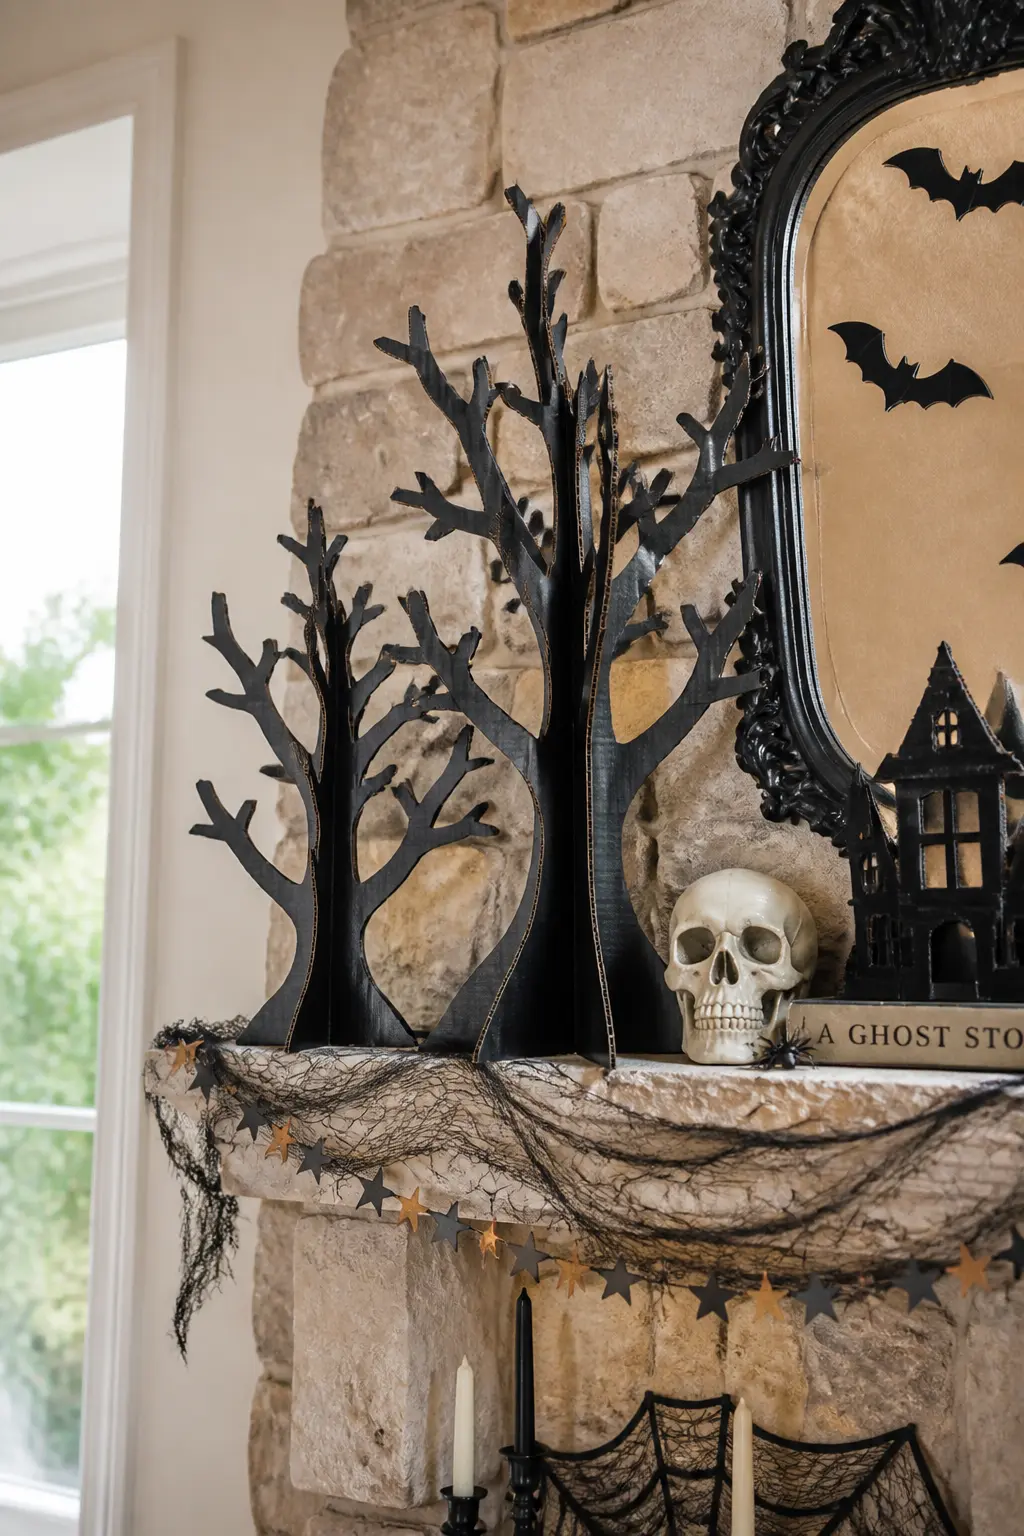
Layered Haunted Tree Sculpture
Cut four identical bare-tree profiles from black corrugated board. Score the centre of each piece vertically, fold one half forward and one backward, then slot two trees together at right angles so the sculpture stands without support. Do the same with the remaining two to create a second tree.
The result is a freestanding 3D tree that reads as a solid object from every angle. Group two or three at different heights on a mantle or shelf. Black-paint any raw corrugated edges with a foam dauber.
🛍 Shopping guide
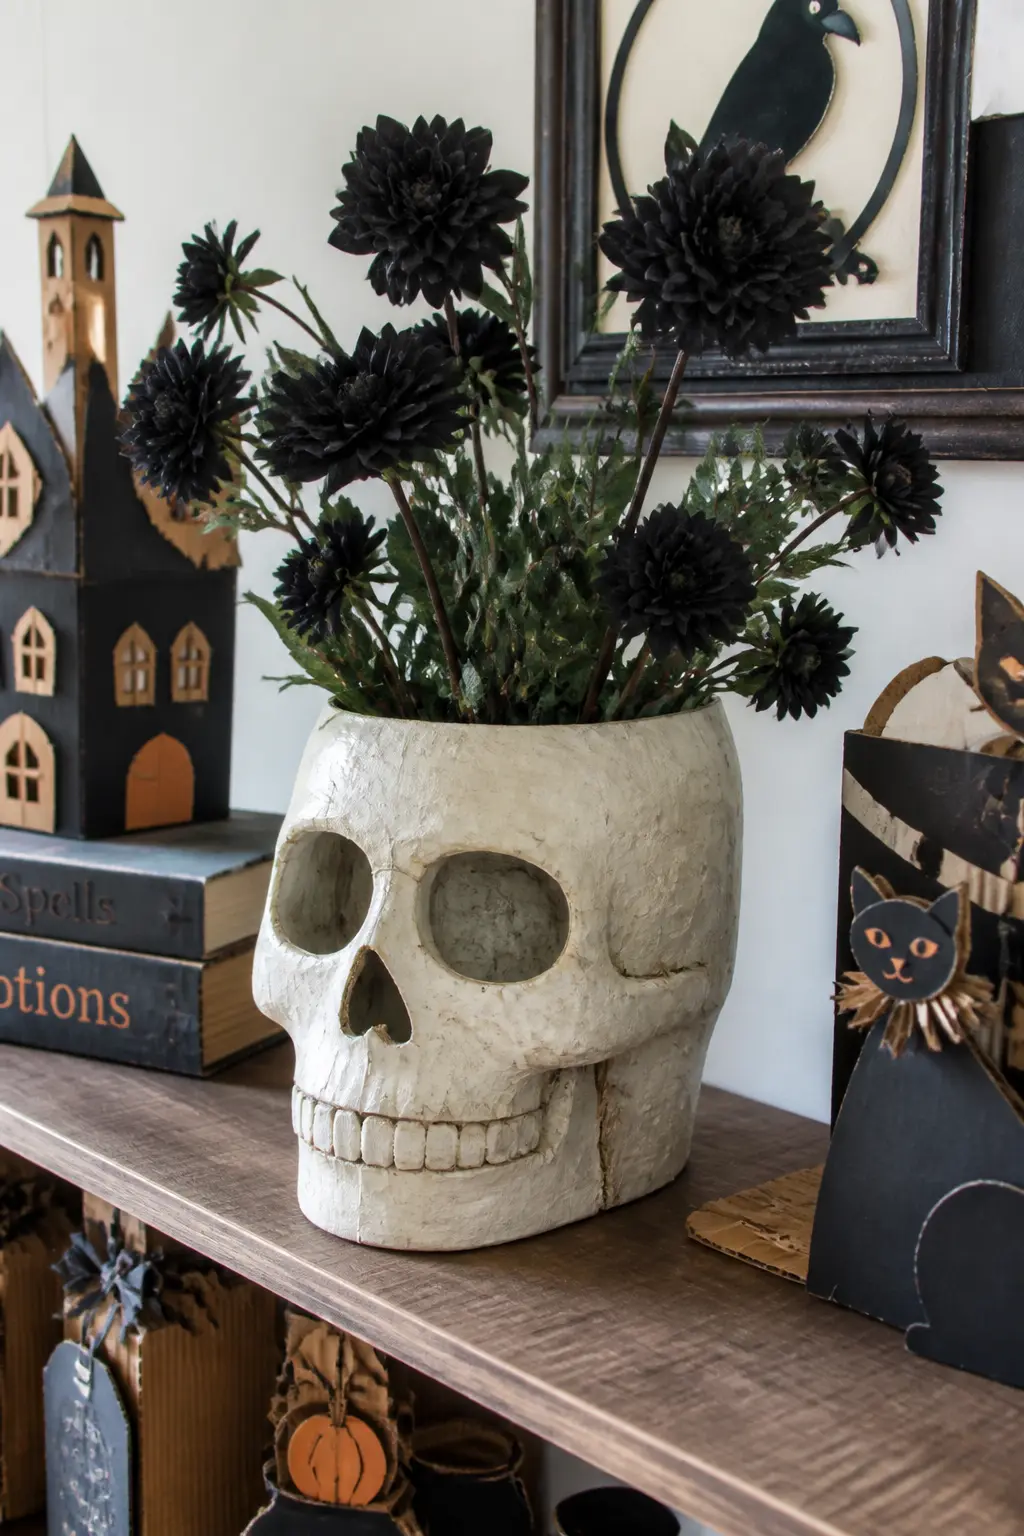
Paper-Tube Skull Vase
Build a skull form over a glass jar using cardboard pieces: a rounded back panel, a jaw shelf, cheekbone wedges, and eye socket rings, all held with hot glue. Sand the edges lightly, then paper-mache over the whole structure with one layer of torn kraft paper strips for a unified surface. Paint in bone or aged white.
The jar inside holds water, so the skull vase actually functions. Fill it with black dahlias or dried stems for a centrepiece that lasts the whole season.
🛍 Shopping guide
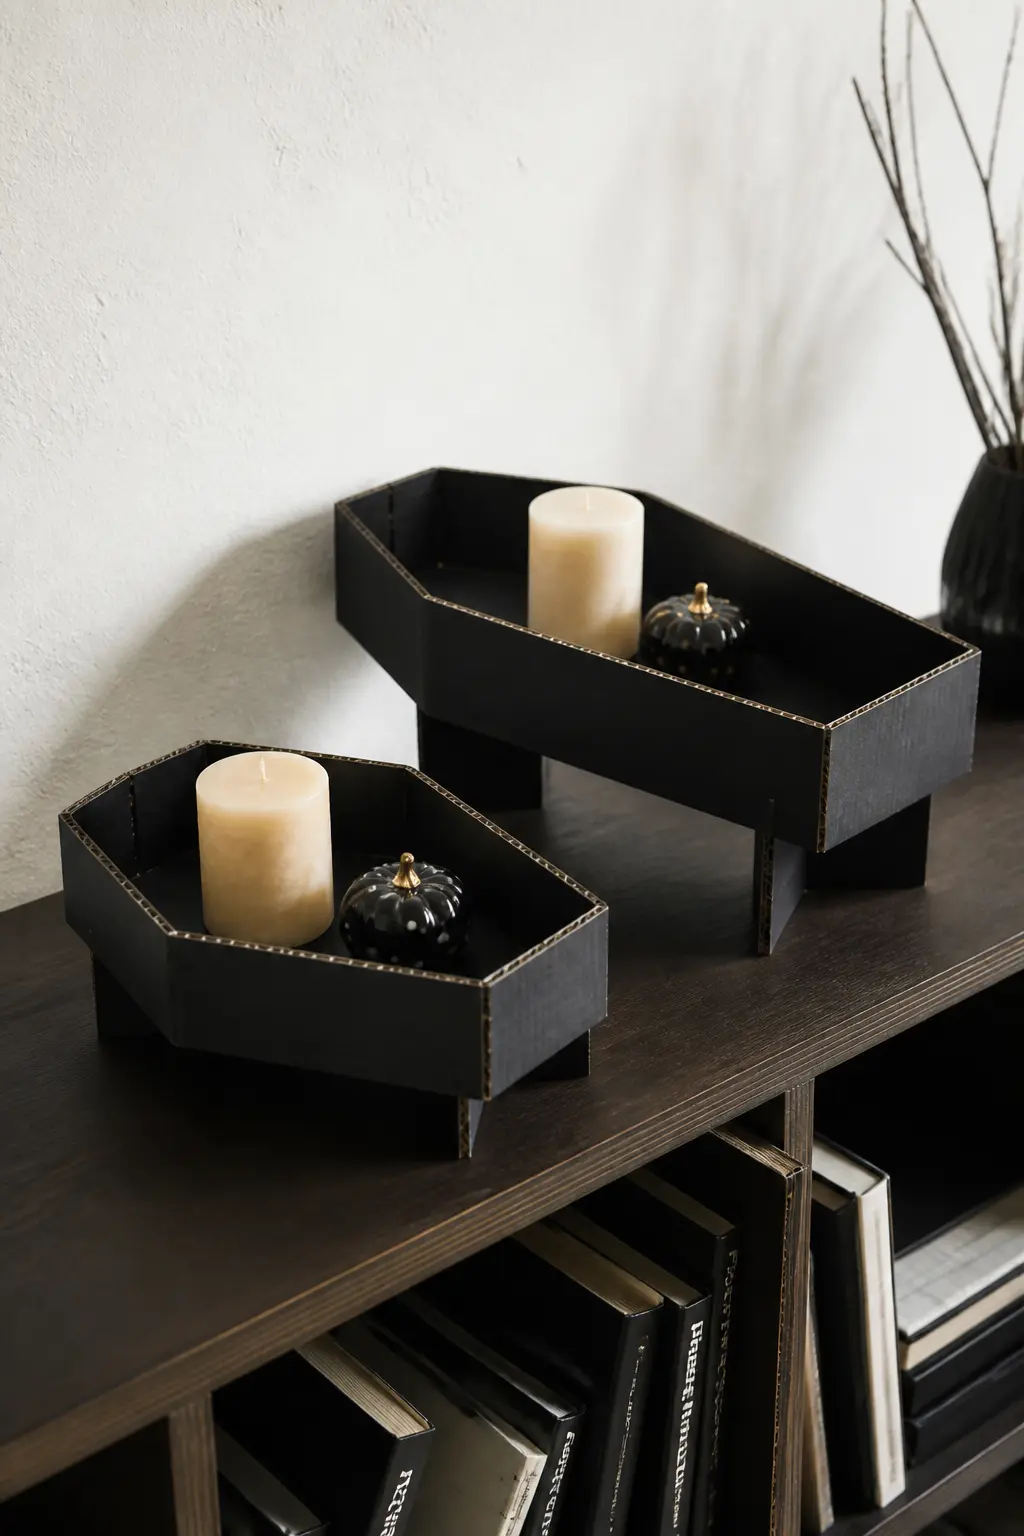
Corrugated Coffin Shelf Risers
Build shallow open-top coffin forms in two sizes from corrugated board, with no lid. Paint them in matte black and use them as raised platforms on a shelf or sideboard to display candles, small pumpkins, or objects at different heights. The coffin outline adds meaning to whatever sits inside it.
Scoring the cardboard cleanly before folding keeps corners tight. A strip of black washi tape along each outer edge seals the corrugated texture and gives a cleaner finish than paint alone on the sides.
🛍 Shopping guide
Mini and Table-Top Accents
Not every surface needs a statement piece. Small cardboard accents, tucked among candles or grouped on a windowsill, pull the whole room together without adding another project to the list. Cut multiples in one session and treat them as a batch: same shape, different finishes.
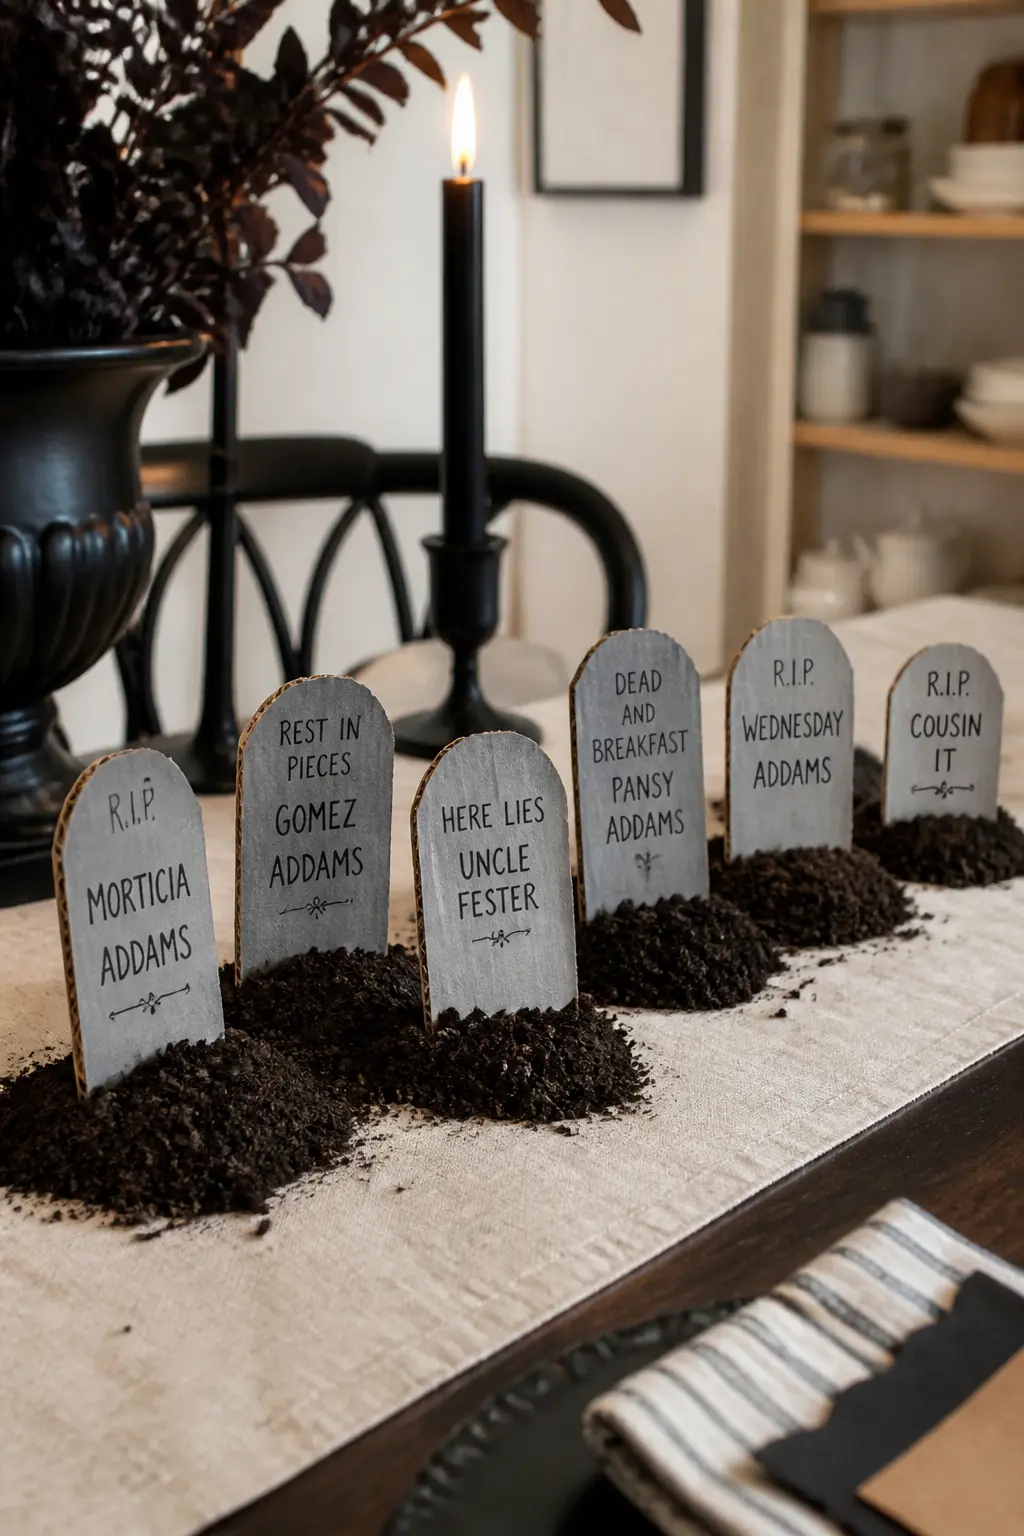
Mini Tombstone Place Cards
Cut tombstone shapes, rounded top with a slight taper, from grey-painted corrugated board scraps. Score a tab at the base of each one so it stands upright. Write or stamp a guest name in black, styled as an epitaph, and tuck each tombstone into a small pile of potting soil in a terracotta pot or just stand them directly in a table runner arrangement.
The epitaph format is funnier the more specific it gets: a reference to a guest’s habit rather than a generic phrase. Keep it affectionate and the table reads the room well.
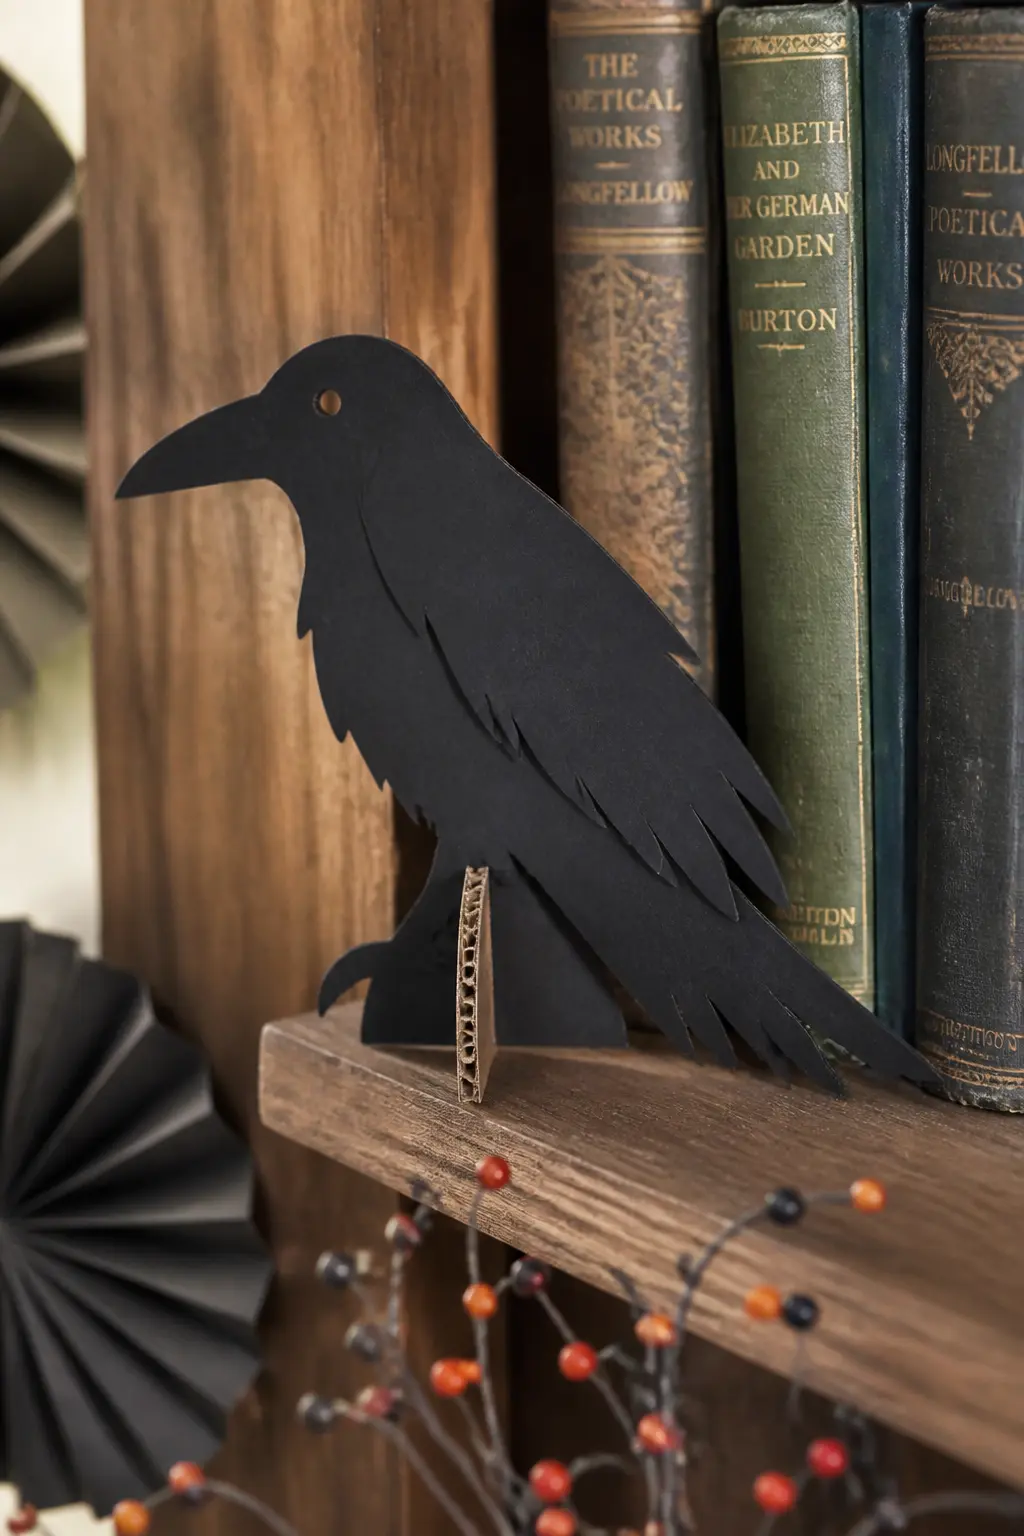
Cardboard Crow Shelf Sitter
Cut two identical crow silhouettes from black card stock and glue them back to back over a strip of corrugated board bent into a base tab. Feather the wing edges with small scissor cuts before gluing so the silhouette breaks up at the edges the way real feathers do.
Set one on every third shelf or window ledge. At arm’s length the feathered edge reads as texture. From across the room it reads as an actual bird, which is the effect worth chasing.
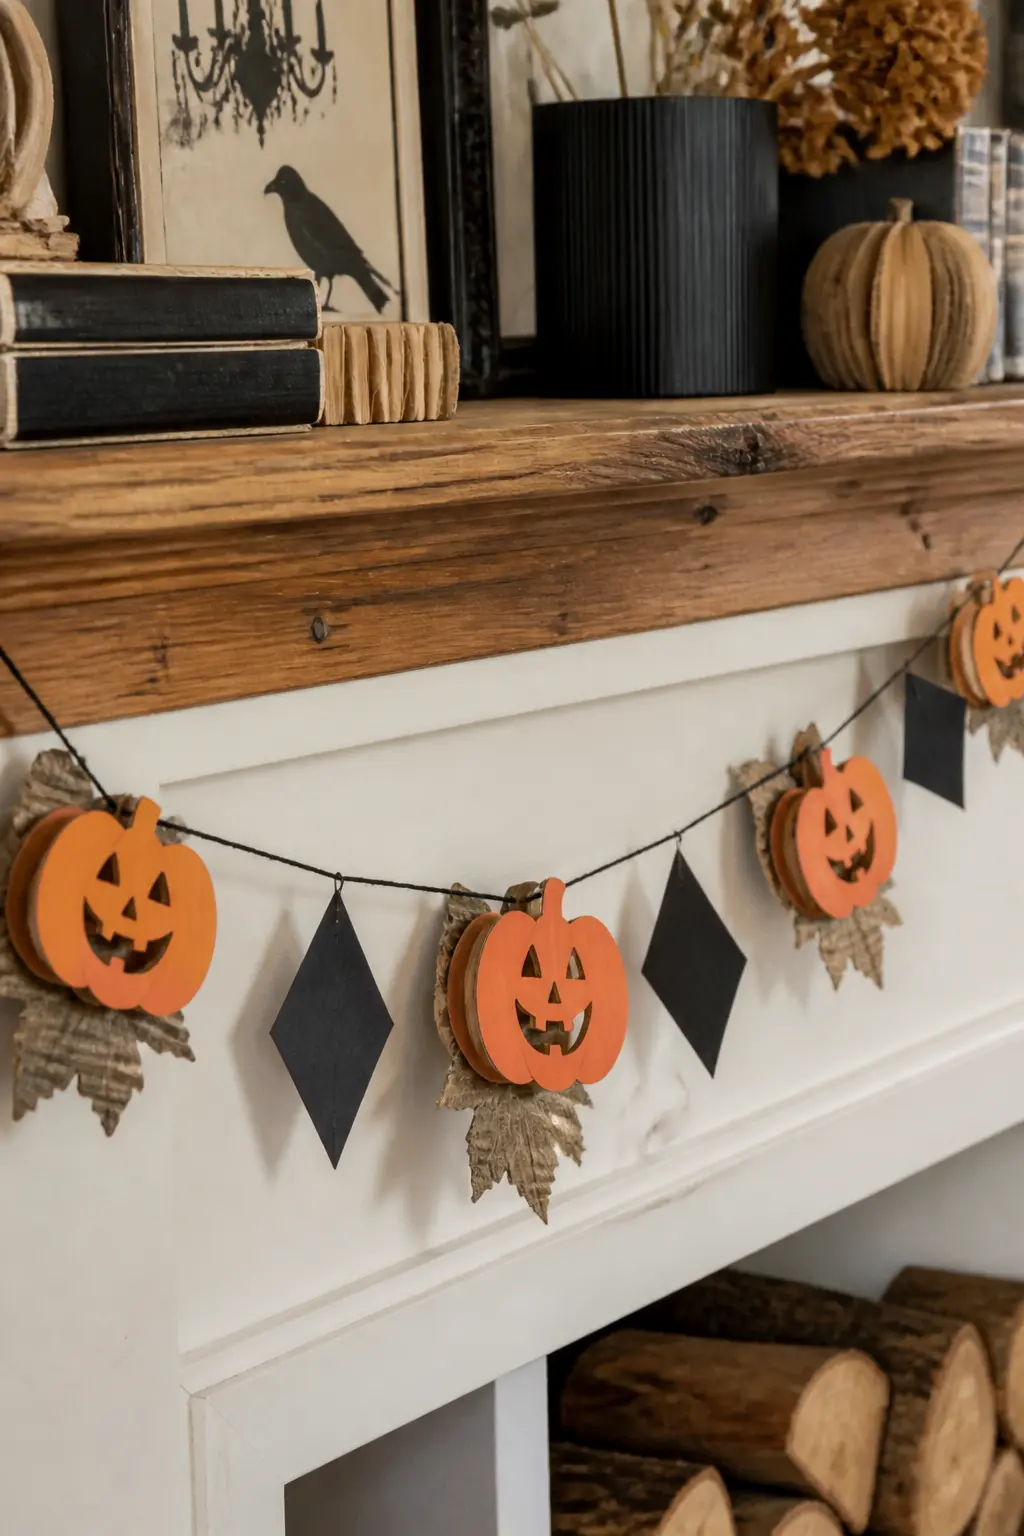
Stacked Pumpkin Garland Tags
Cut small pumpkin shapes from orange and rust-coloured card stock, punch a hole at the top, and string them on black twine alternating with small black card diamonds. The pumpkin shapes stack quickly using a simple rounded-square template.
Drape the garland along a mantle, across a window frame, or looped through a bookshelf. Add a small dried leaf or pressed flower behind each pumpkin shape for a layered, slightly botanical quality that lifts it above a standard paper garland.
🛍 Shopping guide
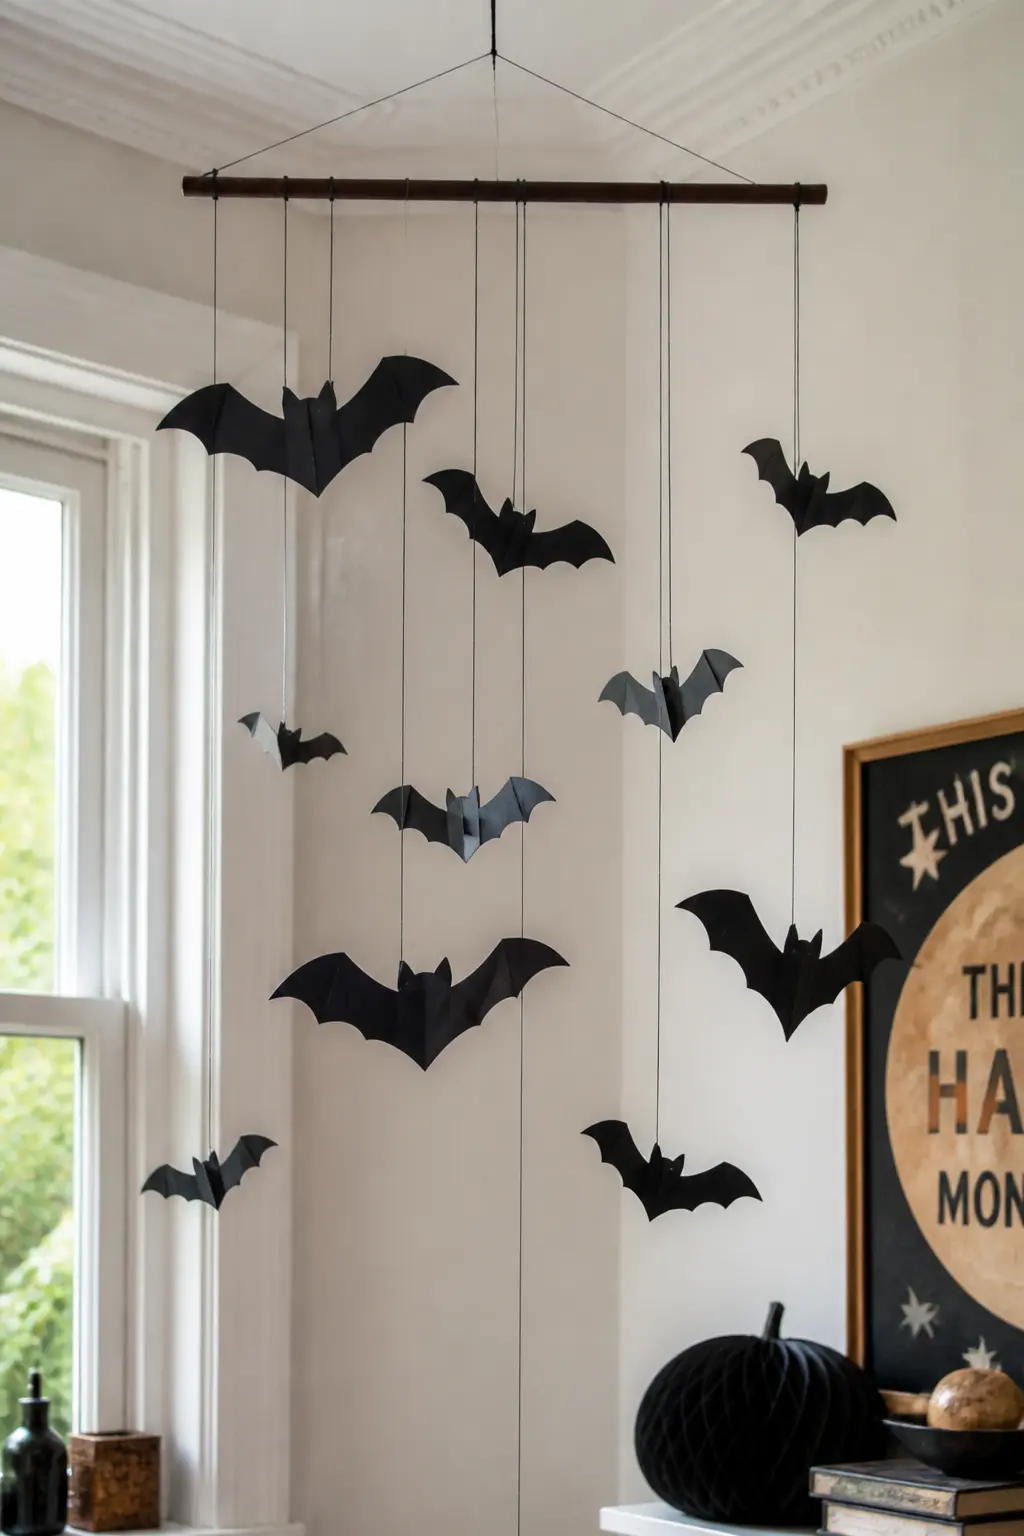
Bat Mobile for High Ceilings
Cut bats from black and very dark charcoal card stock in three sizes. Pierce a small hole in the spine of each bat and thread them onto lengths of black thread at varying drops. Tie the threads onto a length of thin black dowel or a craft-painted cardboard rod.
Hang the mobile from the ceiling in a corner where it catches any air movement. It needs no light or batteries: the slow rotation does the work. Use thread lengths between 15 and 50 cm so the bats occupy a real depth of space rather than hanging flat.
🛍 Shopping guide
Party-Night Functional Pieces
These ideas do a job: hold drinks, display food labels, or mark a spot on the table. Cardboard is sturdy enough for all of it, and a seasonal shape turns a practical object into part of the decor. Build these the night before and they will last the party with no trouble.
If games are on the agenda, 20 Budget-Friendly DIY Halloween Party Games has cardboard-friendly game builds that fit the same aesthetic.
Potion Bottle Favour Boxes
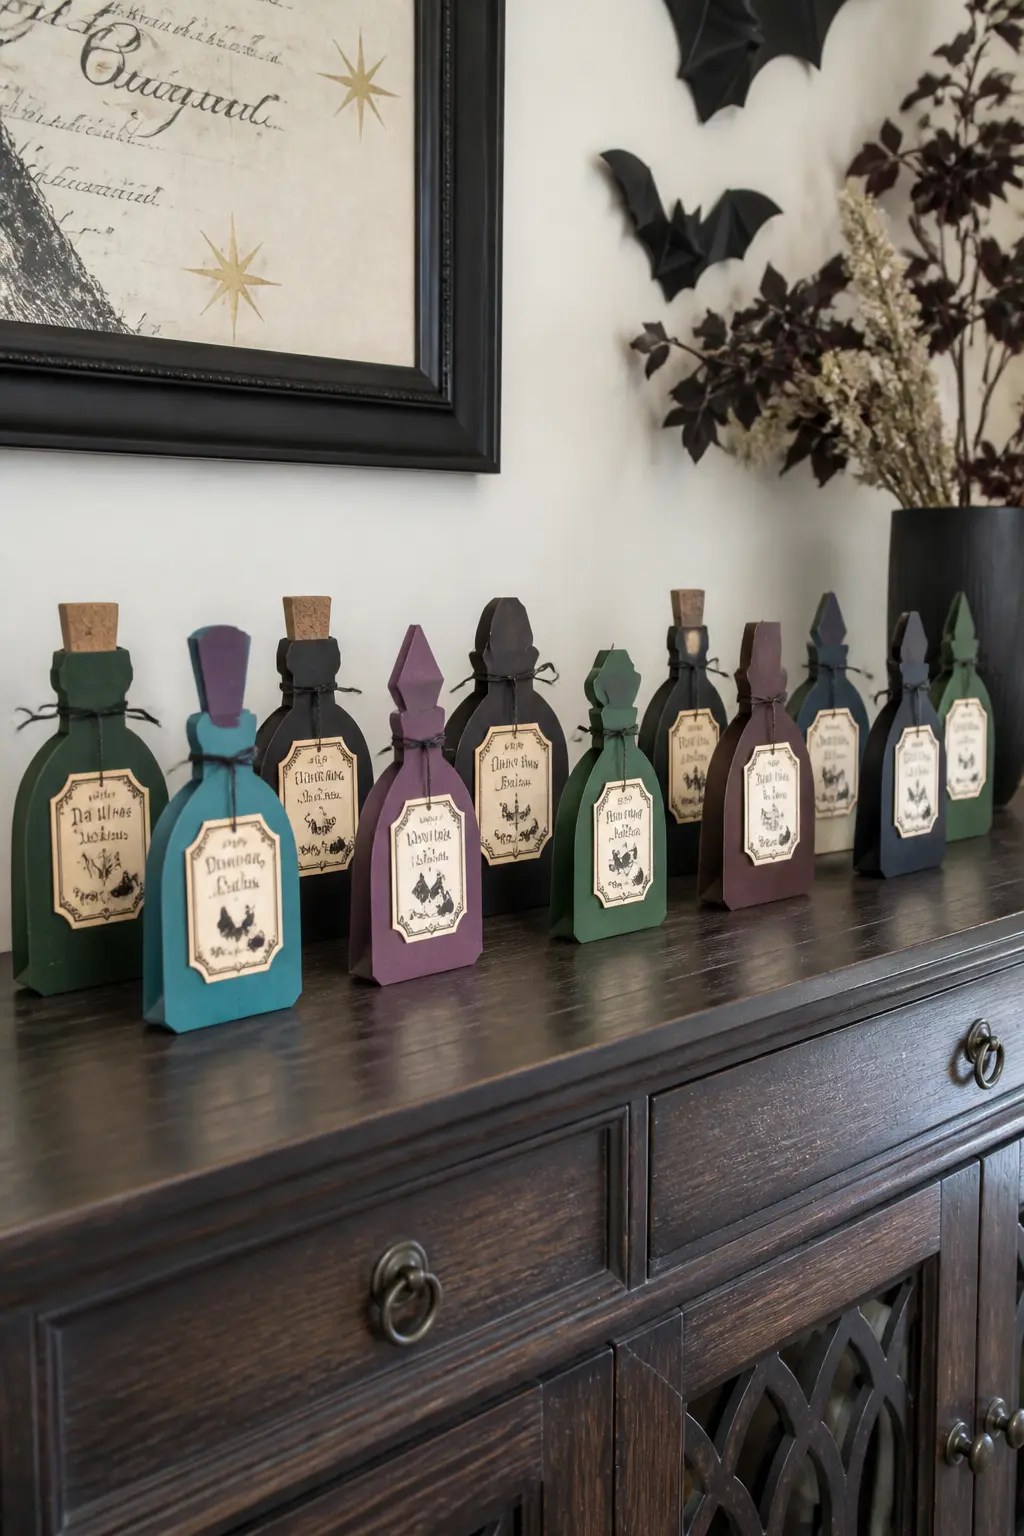
Cut and fold card stock into small potion-bottle shapes: a rounded base with a narrower neck, no wider than a fist. Score the sides cleanly so the bottle form holds. Paint each one in deep jewel tones, dark teal, aubergine, or midnight blue, and add a hand-drawn label on cream card stock tied around the neck with black twine.
Fill with small sweets, bath salts, or a couple of wrapped chocolates. Line them along a sideboard as decor during the party, then guests take one at the end. A row of ten or twelve in slightly different colours looks like a real apothecary shelf.
🛍 Shopping guide
Cardboard Food Label Stakes
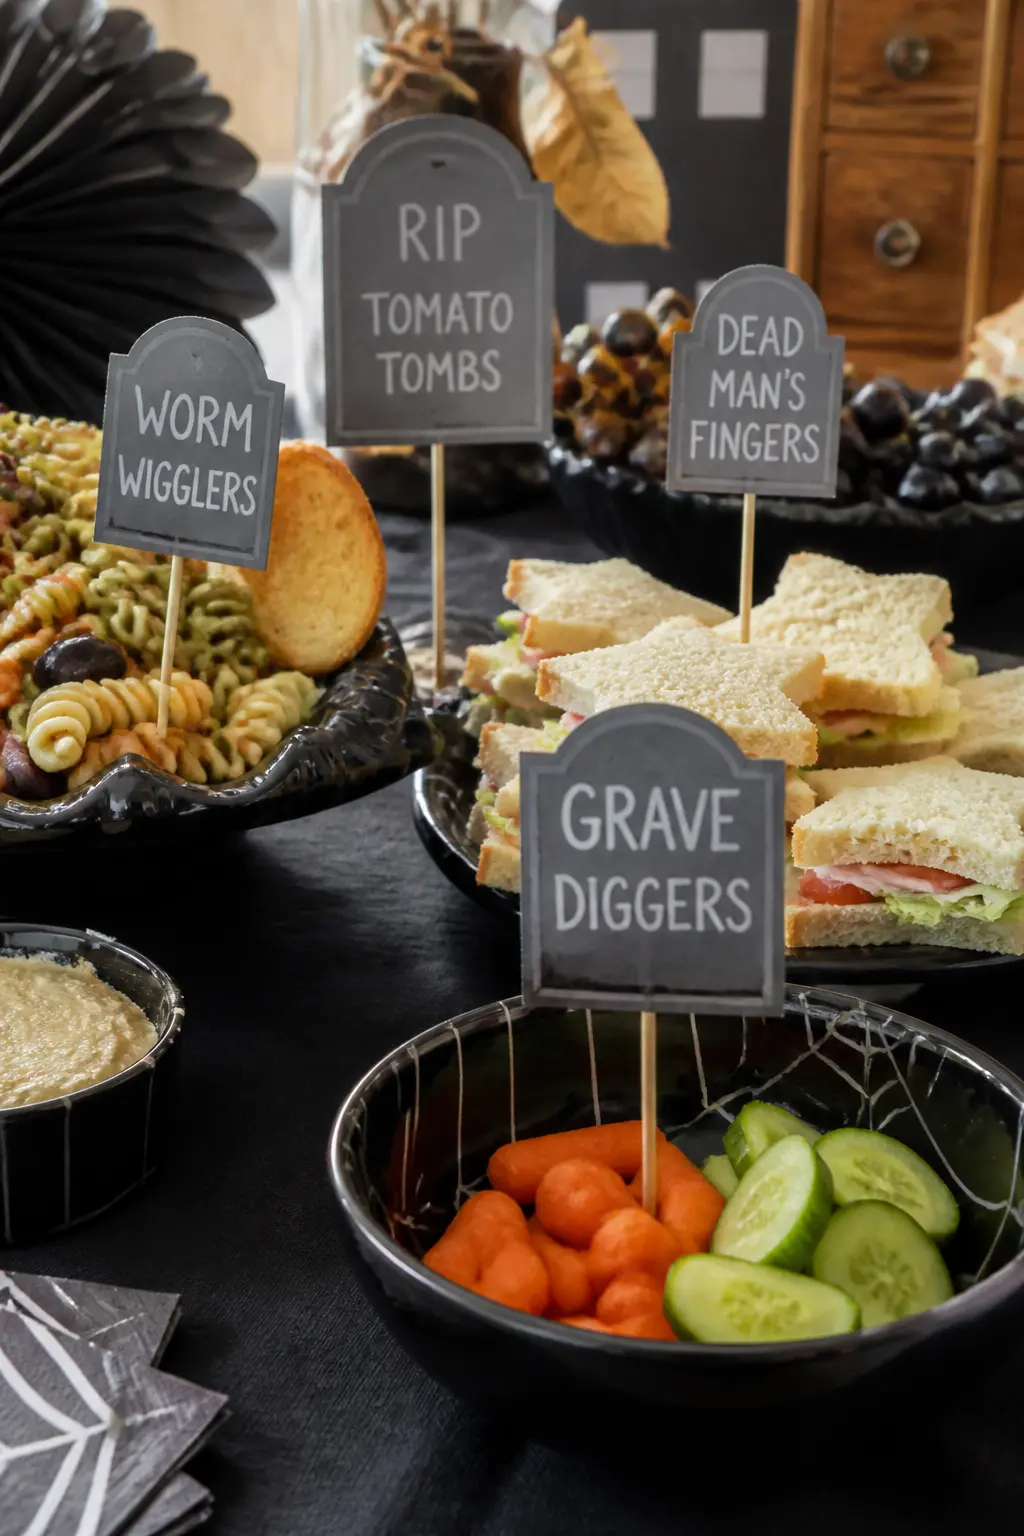
Cut tombstone or ghost shapes from card stock, paint them, and glue each one to a thin bamboo skewer. Write the dish name on the front in chalky white paint or a white paint pen, with a spooky subtitle below in smaller text. Push the stakes directly into soft food, bowls of crisps, or blocks of cheese.
The labels double as decor and genuinely help guests who want to know what they are eating. Make twelve or fifteen as a batch in under an hour.
Countdown Number Chain
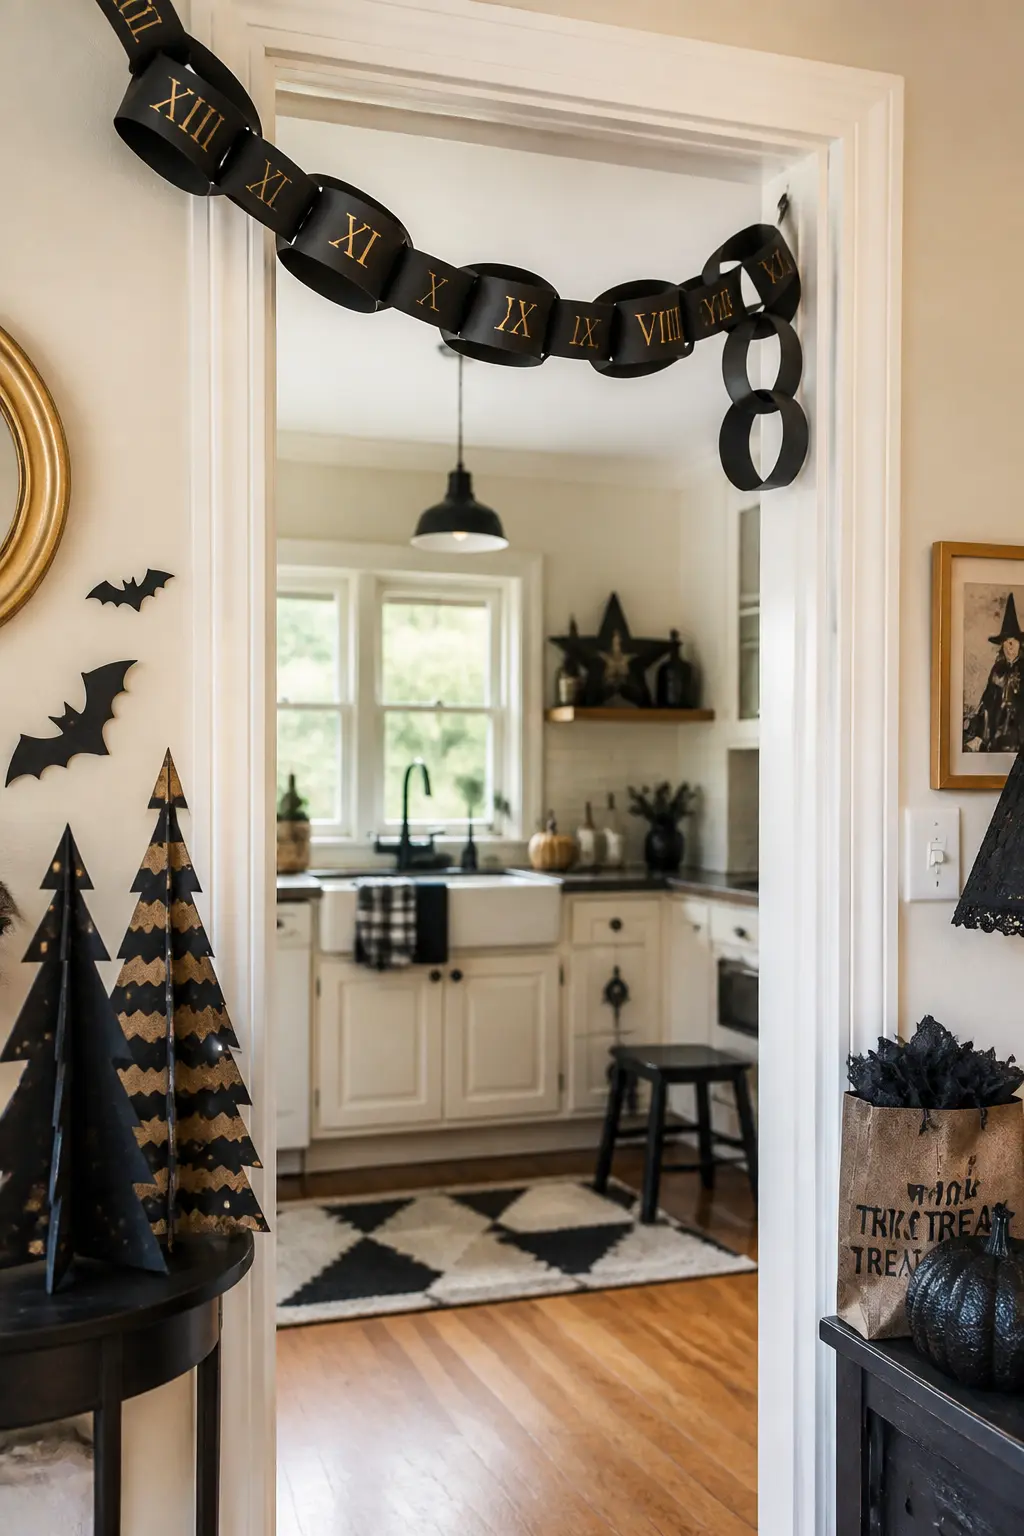
Cut thirteen equal rectangles from black card stock and number them XIII down to I in gold or bone paint. Loop and glue each into a chain link. Each day before the party, remove one link. The remaining chain shrinks visibly and serves as a countdown that is also wall decoration.
On the night, the last link stays up as a single pendant above the entrance or bar area. The chain format is old enough to feel nostalgic and new enough to photograph well.
🛍 Shopping guide
Cardboard Drink Station Arch
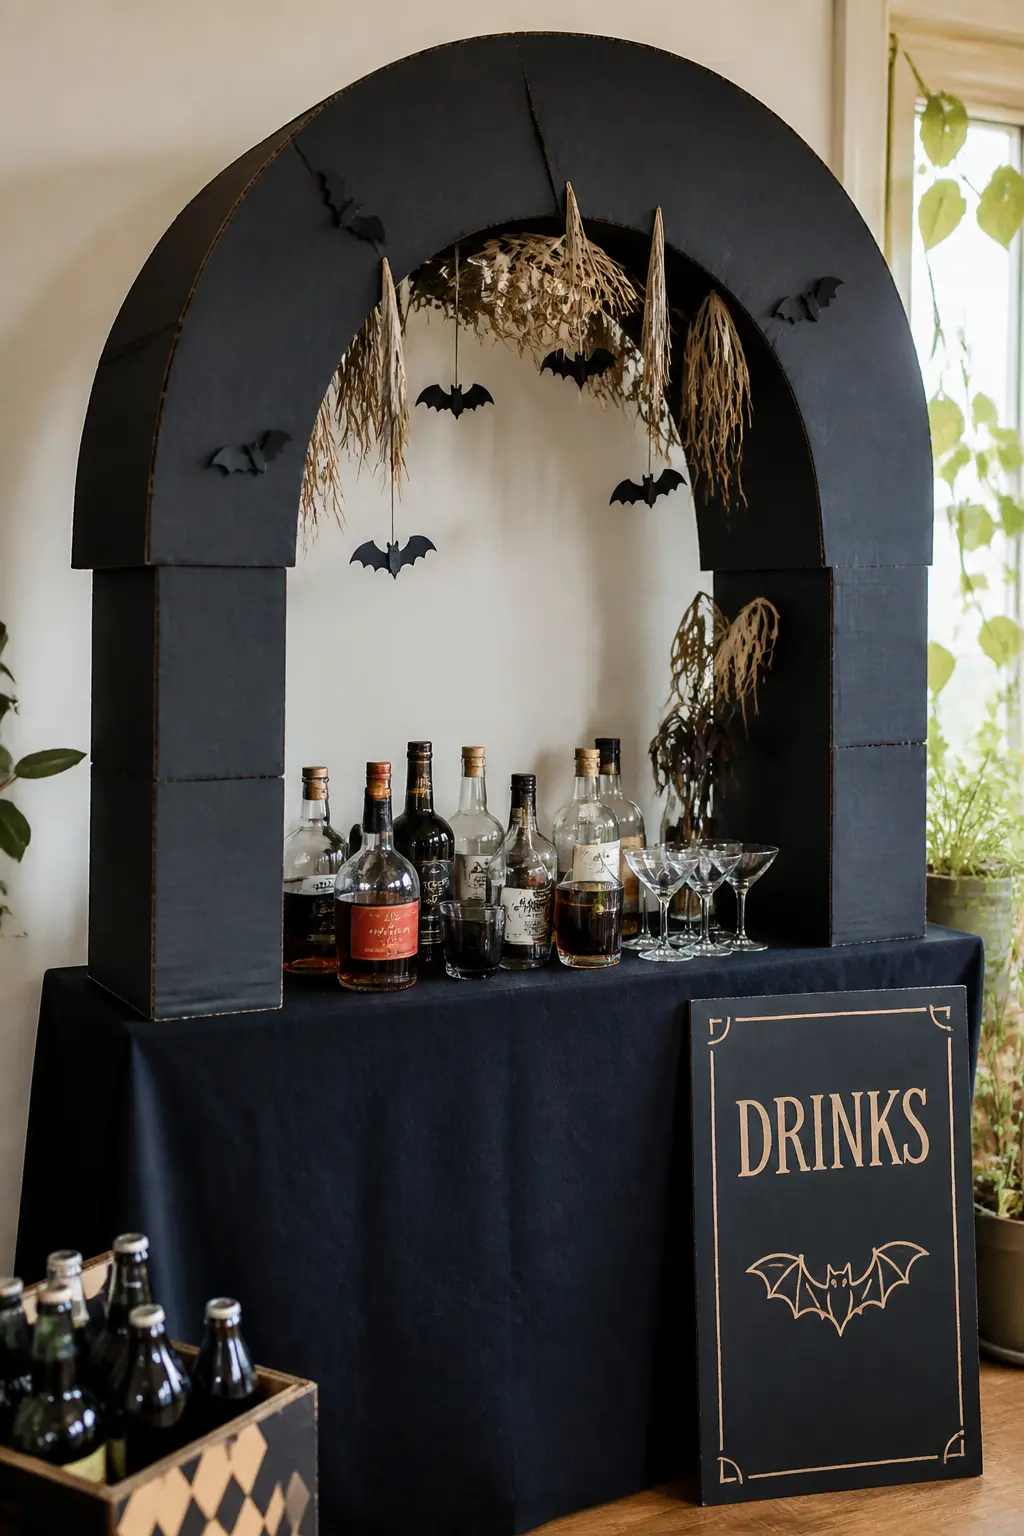
Build a freestanding arch from two tall corrugated-board columns connected at the top with a curved crosspiece. Paint everything matte black and hang small bat cut-outs and sprigs of dried grasses from the arch at different lengths. Position the arch over a drink station table so every pour happens inside the frame.
The arch turns a folding table into a styled moment. It breaks down into three flat pieces for storage and reassembles with hot glue on the night. Size the columns so the arch clears the tallest bottle on the table by at least 20 cm.
🛍 Shopping guide
Frequently Asked Questions
What type of cardboard works best for Halloween decorations?
Single-wall corrugated cardboard (the kind that comes in shipping boxes) handles cutting, painting, and folding well for most projects. Heavy card stock works for smaller pieces like bats, silhouettes, and favour boxes. Double-wall corrugated board suits anything structural, like arches or freestanding sculptures, where rigidity matters.
How do you waterproof cardboard decorations for outdoor use?
Two coats of outdoor-formula Mod Podge, left to dry fully between coats, handle a rainy week on a covered porch or door. A coat of clear acrylic spray over painted pieces adds another layer. Keep the base of any cardboard piece off standing water: even sealed board will soften if it sits in a puddle.
How do you get clean cuts on corrugated cardboard?
A sharp craft knife and a metal ruler give cleaner results than scissors on anything larger than a hand. Replace the blade after every three or four projects: a blunt blade drags and tears the surface layer. Cut on a self-healing mat and run the knife along the cut line twice at low pressure rather than once at full force.
Can you paint corrugated cardboard without it warping?
Yes, with one precaution: apply paint to both sides in the same session so moisture is absorbed evenly. Painting one side only causes the paper layer to expand unevenly and bow. Acrylic craft paint, chalk paint, and spray paint all work without priming, and the textured surface of corrugated board actually holds paint with less dripping than a smooth surface.
Are these decorations safe around candles?
Cardboard is flammable, so keep real flames at least 30 cm from any cardboard piece. Battery-operated tea lights and LED strip lights solve this entirely and are the right choice for anything that encloses a light source, such as the coffin box or the haunted house wall mural.
How far ahead can you make cardboard Halloween decorations?
Most pieces keep well for two to three weeks in a dry room. Build and paint them, let them dry completely, then store flat in a cool spot away from humidity. Anything sealed with Mod Podge or acrylic spray is more durable and can be stored between seasons for use the following year.
38 genuinely unsettling Halloween decoration ideas built on restraint, staging, and lighting. No gor
18 Halloween kids crafts sorted by age so toddlers, preschoolers and older kids work side by side on
21 paper bag Halloween crafts that actually work: monster treat bags, witch broom bags, painted tric
Leave a Reply