

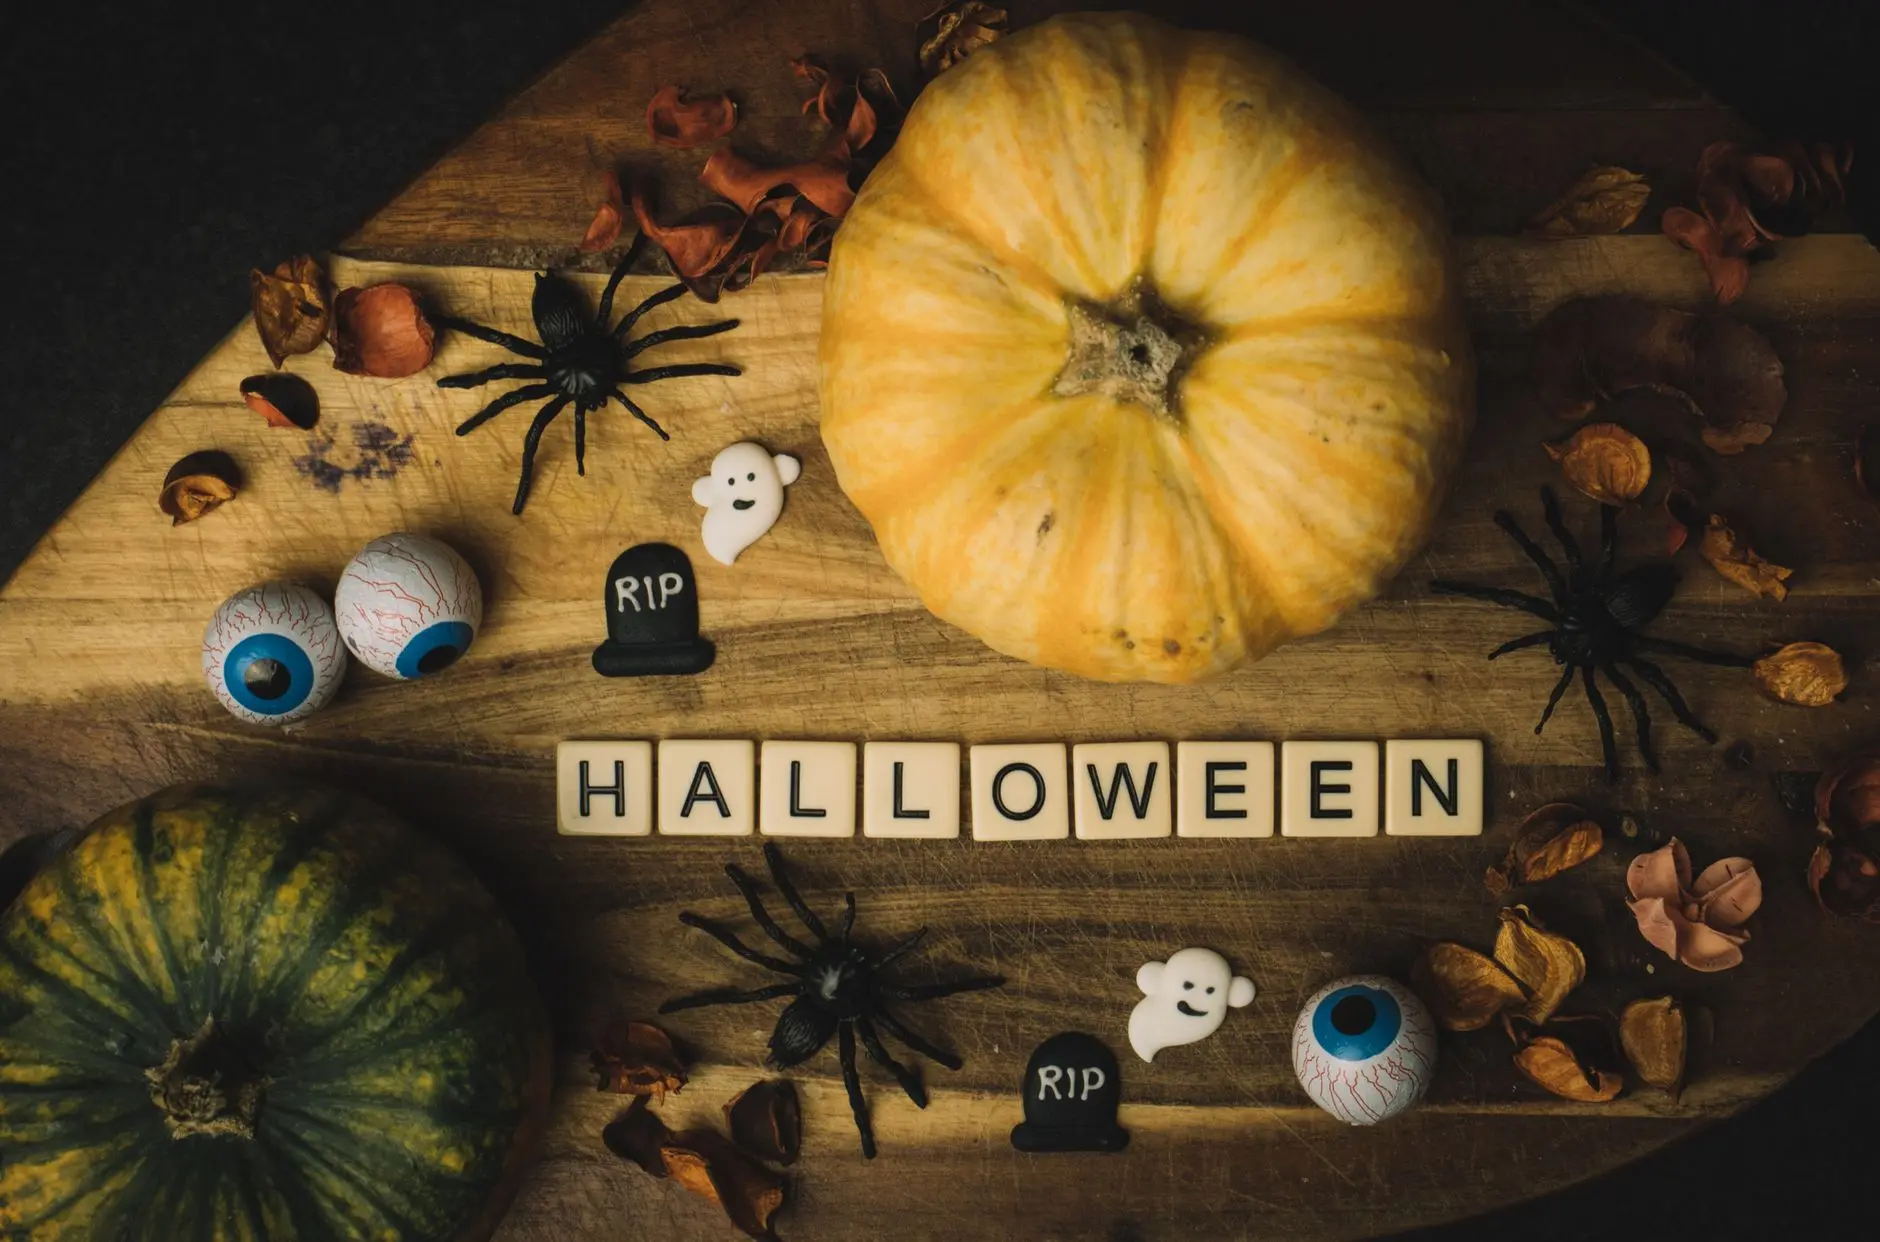
One motif, thirty-four moods. A ghost painted pumpkin is the most forgiving craft on the Halloween calendar: no carving, no candles required, no template more complicated than a white blob with two dots. The same stroke of a brush reads as adorable at noon and quietly wrong at midnight, depending on how you use it.
Every idea here sits on an uncut pumpkin with a white or pale base coat. The entries run from genuinely toddler-safe sweetness through to the kind of eerie that makes a neighbor slow their car. Find your household’s temperature, pick your entry, and paint.
If you want the full Halloween picture beyond pumpkins, the 30 Unforgettable Halloween Party Ideas and Games roundup has you covered. And if October is pulling double duty as a baby celebration, 28 Halloween Baby Shower Ideas That Stay Sweet, Not Spooky keeps the vibe gentle.
This post contains affiliate links. If you buy through them, I may earn a small commission at no extra cost to you.
Sweet Ghost Painted Pumpkins
Sweet entries work for any household with small children, nursery windows, or a front step that greets trick-or-treaters of the very young variety. The shapes are round and soft, the eyes are small dots, and nothing here requires a steady hand. A foam brush and craft acrylic are enough.
Pale orange, white, cream, or blush pumpkins all take these designs well. Two base coats of white chalk paint before you draw your ghost means every color sits clean on top.
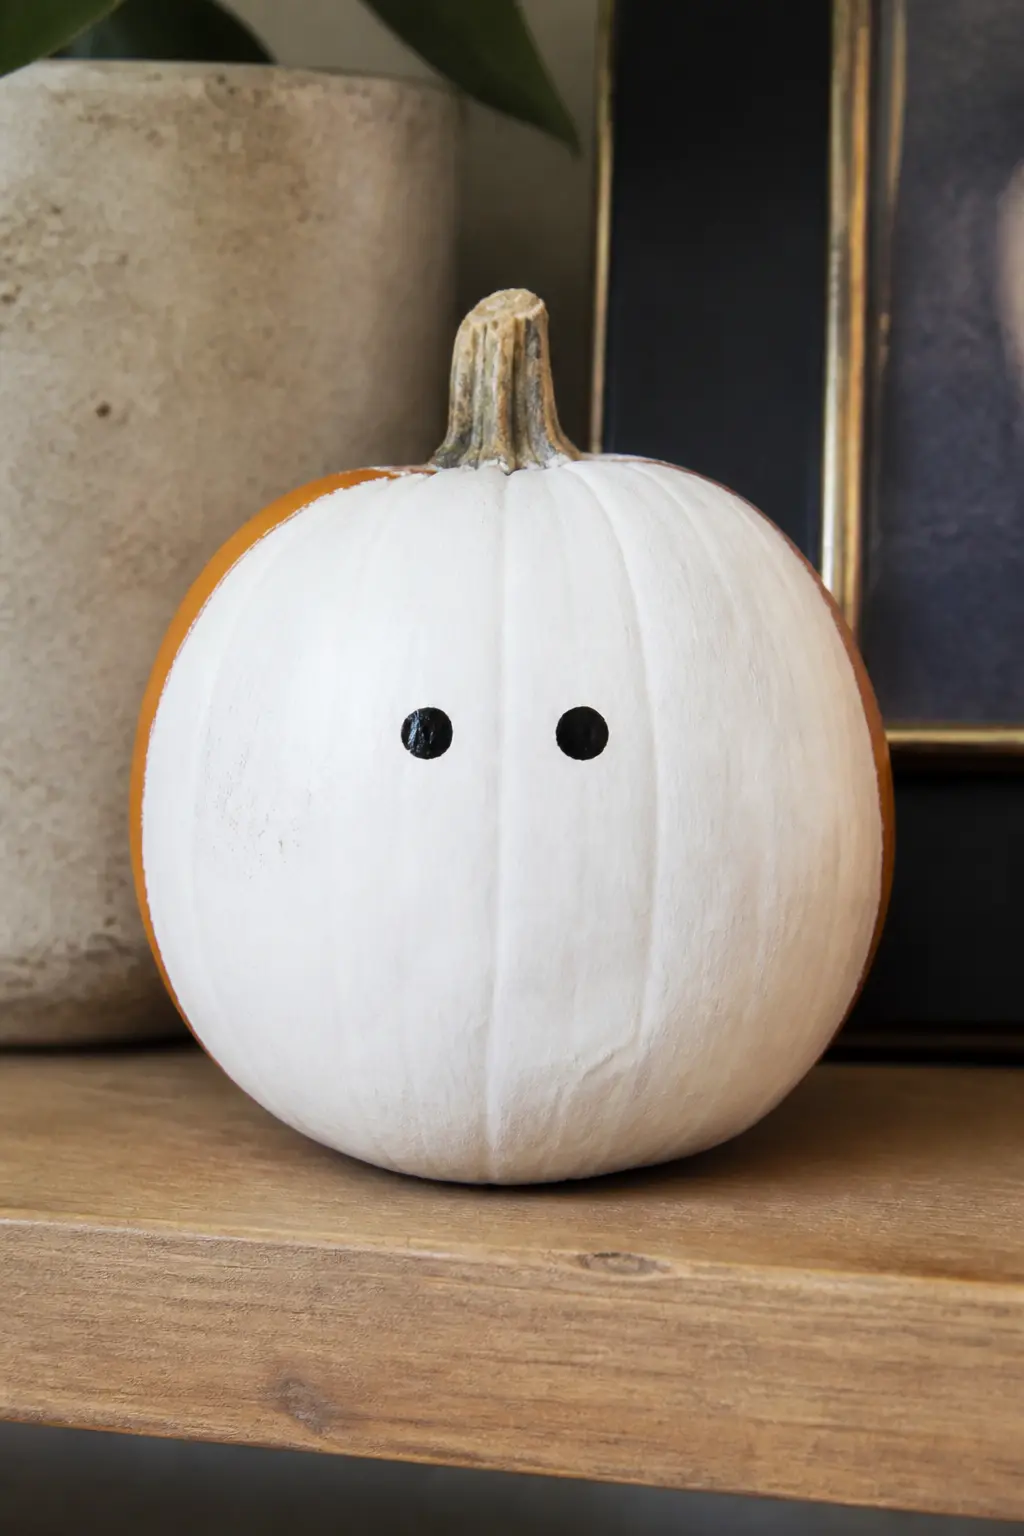
Round Ghost With Two Dot Eyes
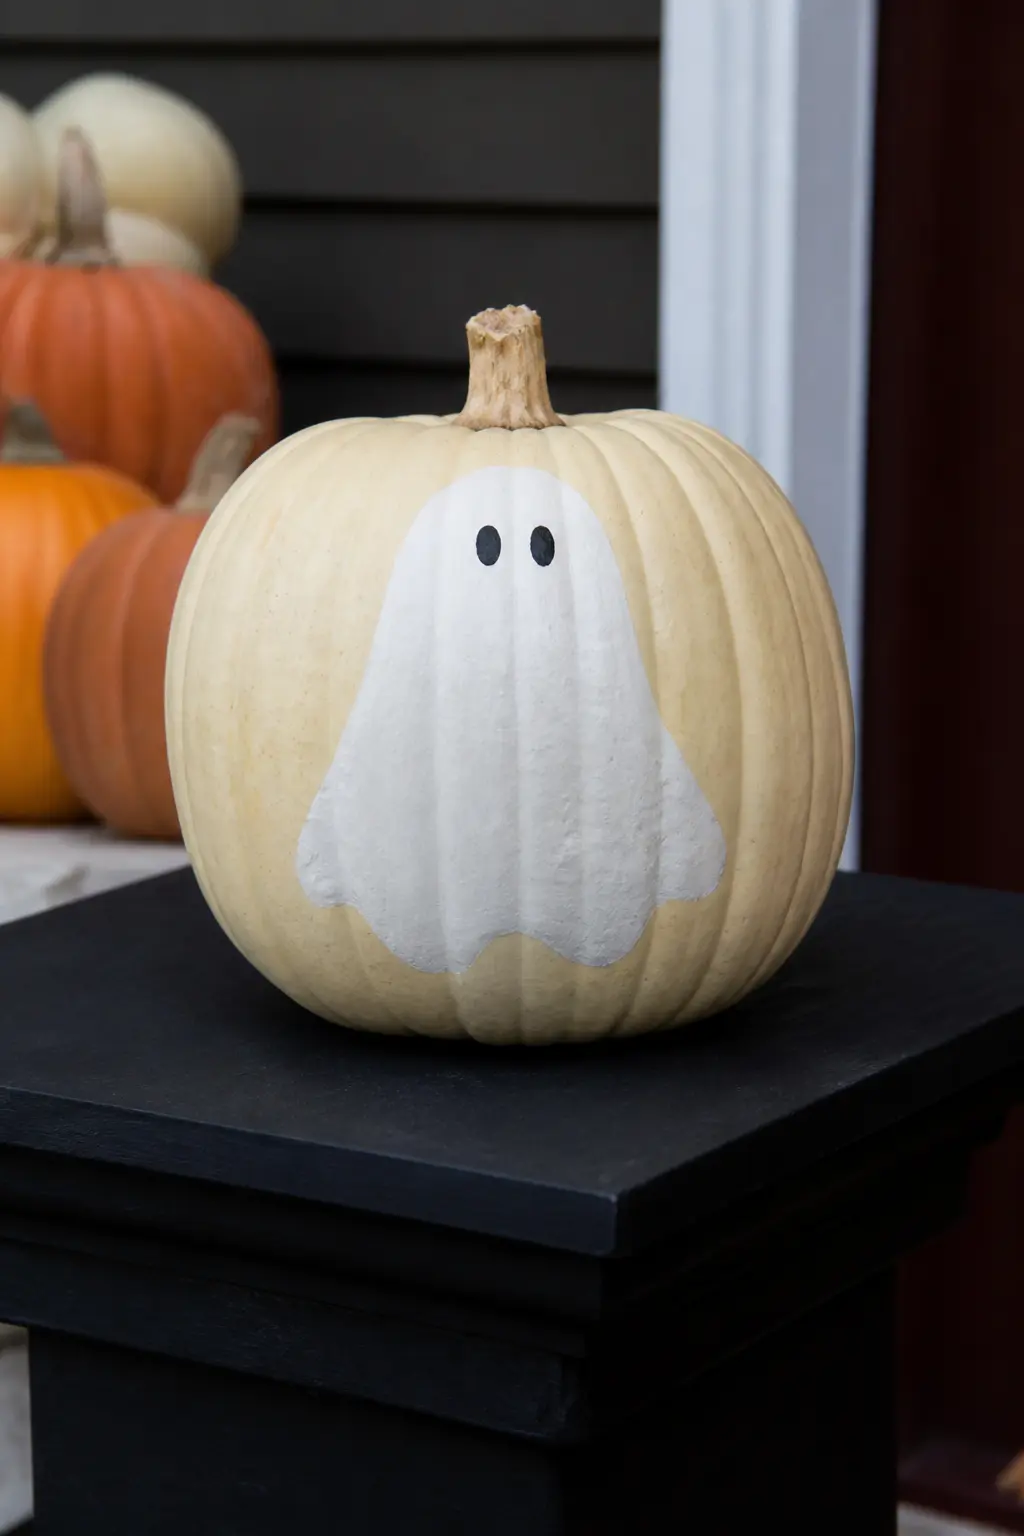
This is the purest version of the ghost painted pumpkin. A round white body, two small black dots for eyes, nothing else. The simplicity is the point.
Paint the body with a large round brush in two coats of white. Let it dry, then place the eyes with the tip of a thin liner brush or the blunt end of a toothpick. That is the whole project. Children can do the dots themselves.
🛍 Shopping guide
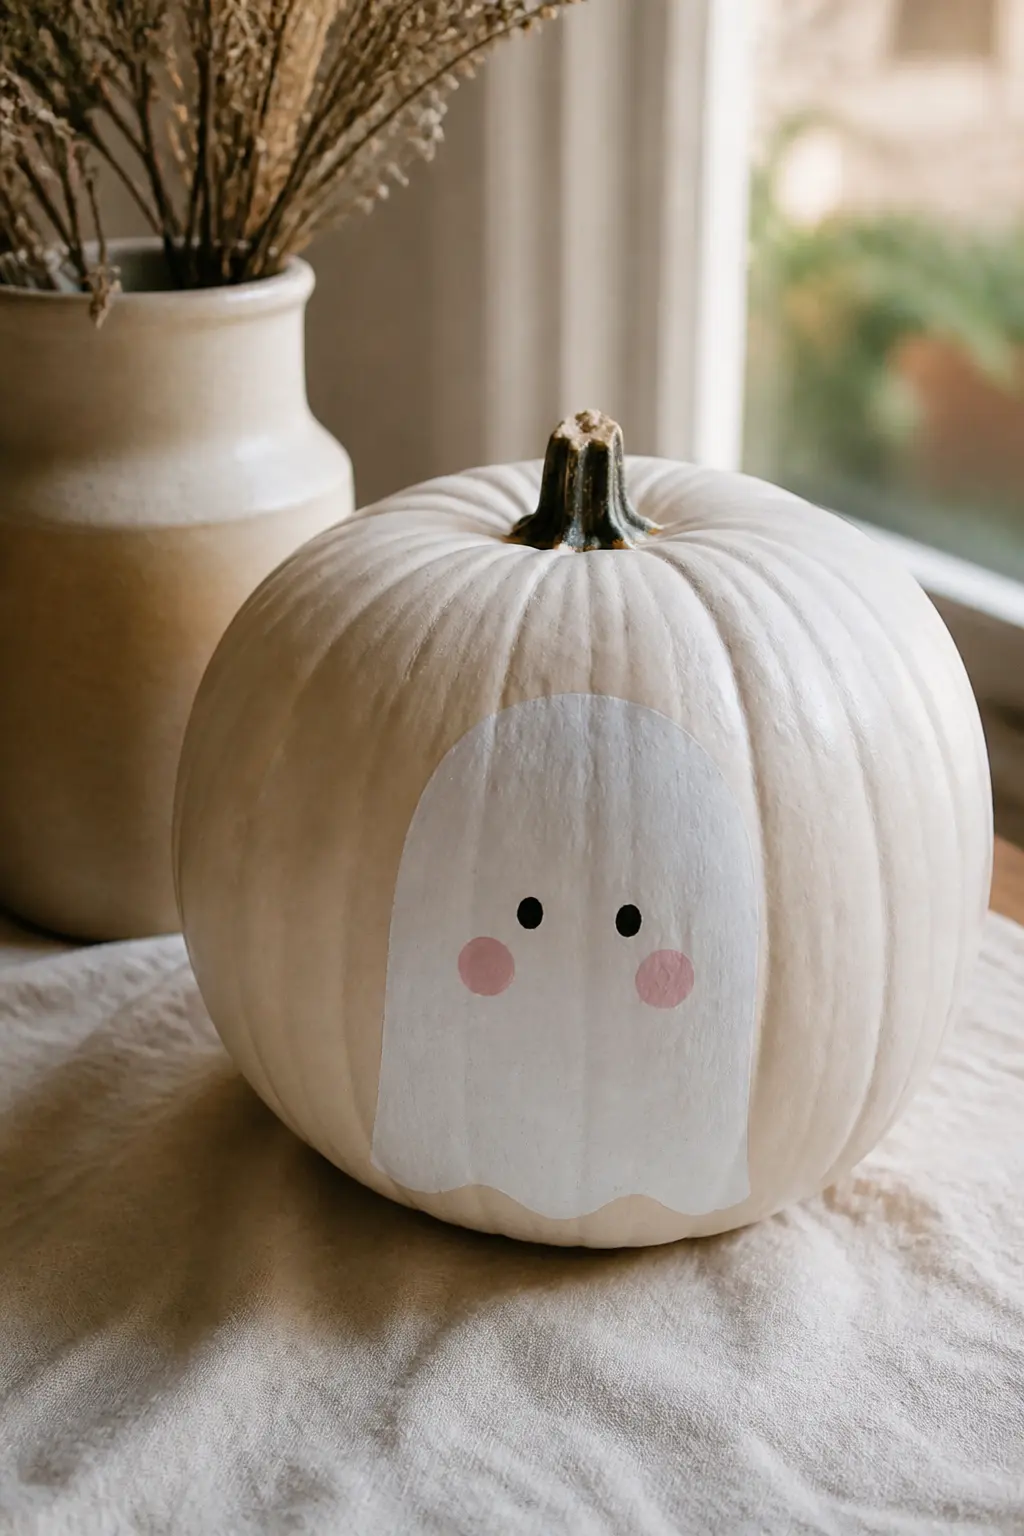
Ghost With Rosy Cheeks
Two small circles of pink or blush, brushed softly below the eyes, turn a plain ghost into something that reads as genuinely sweet. This is the version that photographs well in natural light and suits a nursery or a child’s bedroom windowsill.
Use a dry brush technique for the cheeks: load a flat brush with a tiny amount of pink paint, wipe most of it off on a paper towel, then buff in small circles directly onto the dried white ghost. Build slowly. You want a blush, not a clown.
🛍 Shopping guide
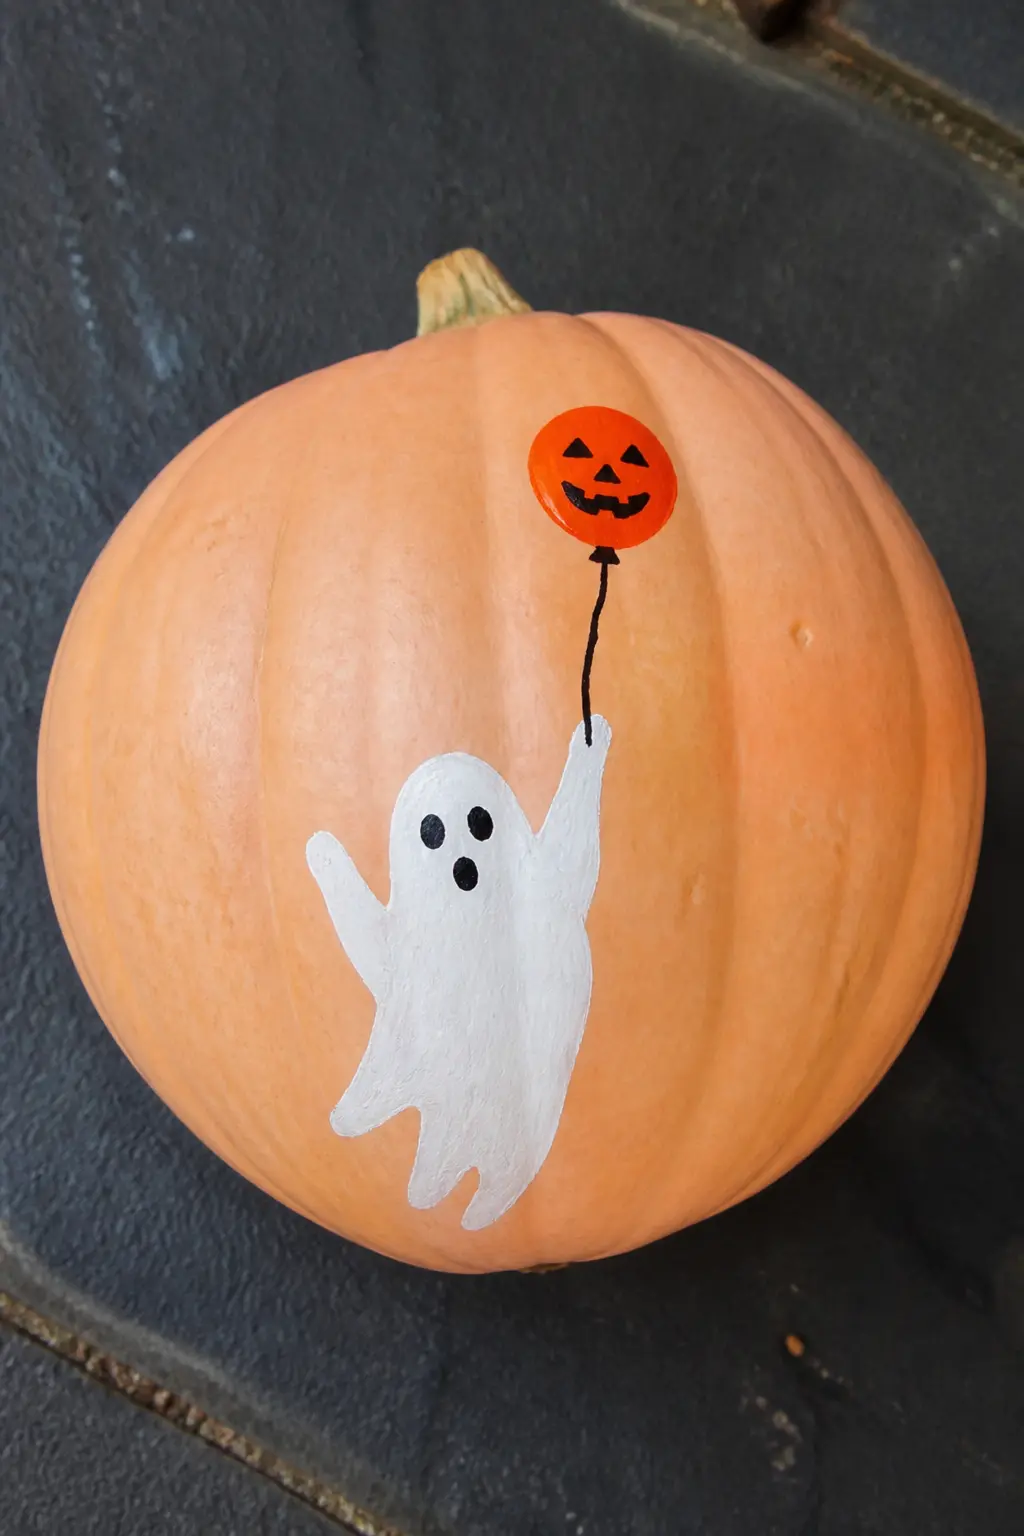
Ghost Holding a Tiny Painted Balloon
One small arm curves up from the ghost’s body, and at the end of a thin painted string floats a balloon in any color you like. The balloon is just a teardrop or oval shape, no larger than a thumbnail.
Sketch the composition lightly in pencil before you paint so the arm, string, and balloon balance correctly. Paint the ghost body first, let it dry, then add the arm and balloon in a second pass. A contrasting balloon color, orange, lavender, or yellow, lifts the whole design.
🛍 Shopping guide
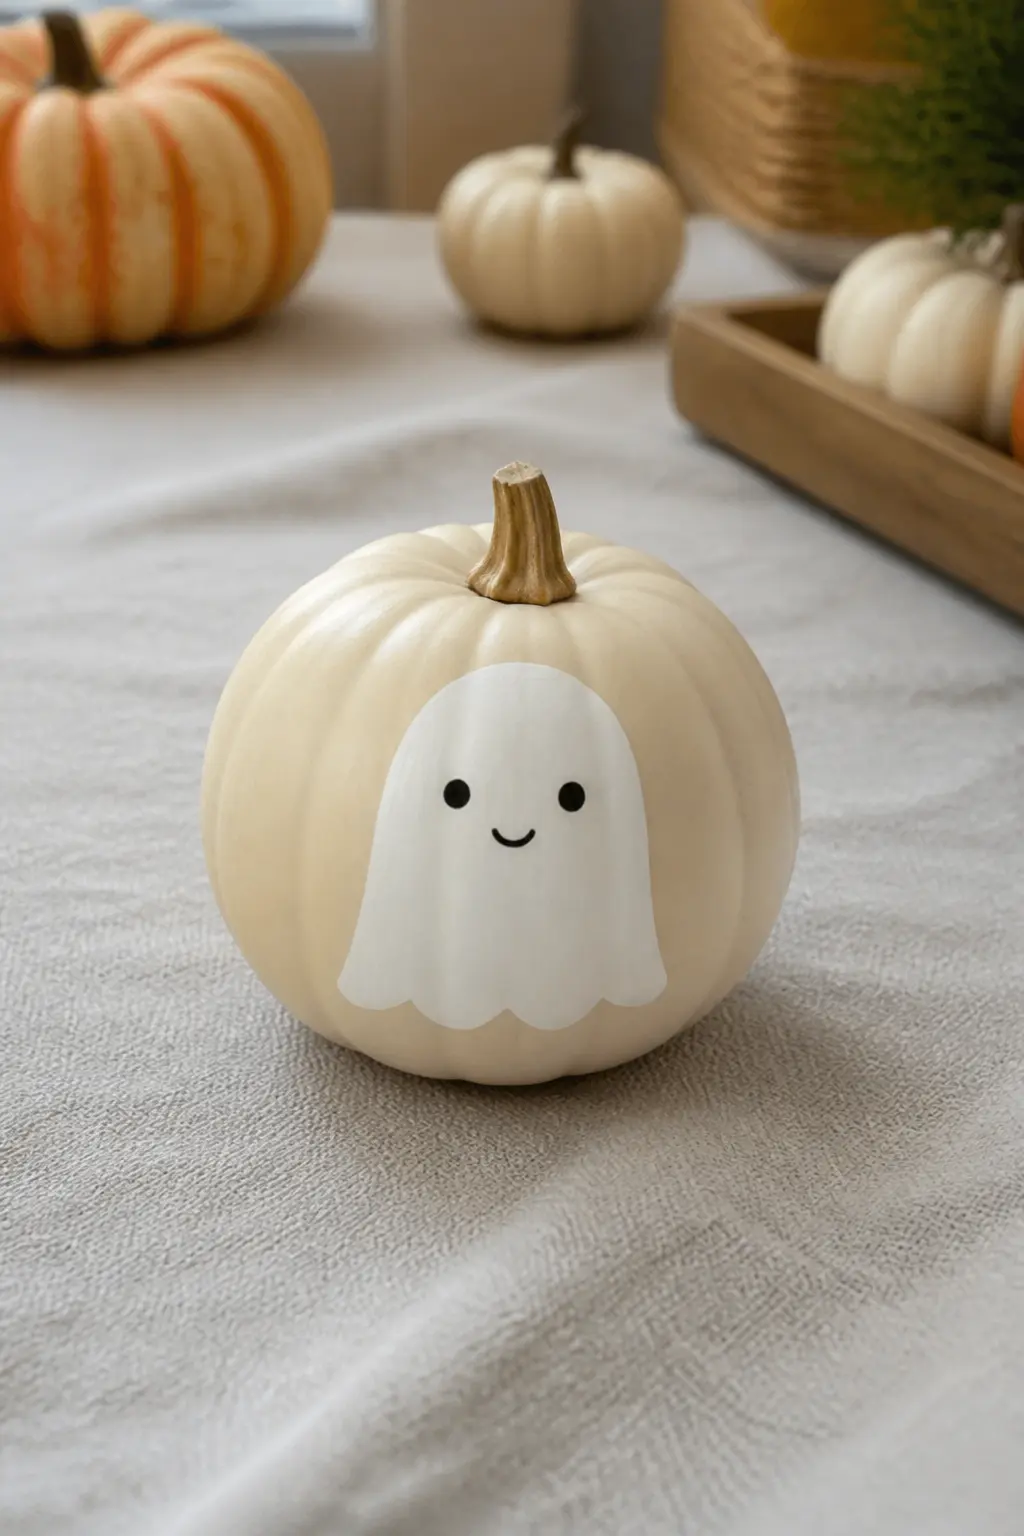
Ghost With a Small Closed Smile
A short curved line replaces the open mouth, and the ghost reads as quietly content rather than excited. It is a subtle distinction that matters enormously in a room full of toddlers who are already on the edge.
Keep the smile narrow, no wider than the space between the two eyes. A single stroke of a size-1 round brush, curved upward at both ends, is all you need. Avoid the temptation to add teeth.
🛍 Shopping guide
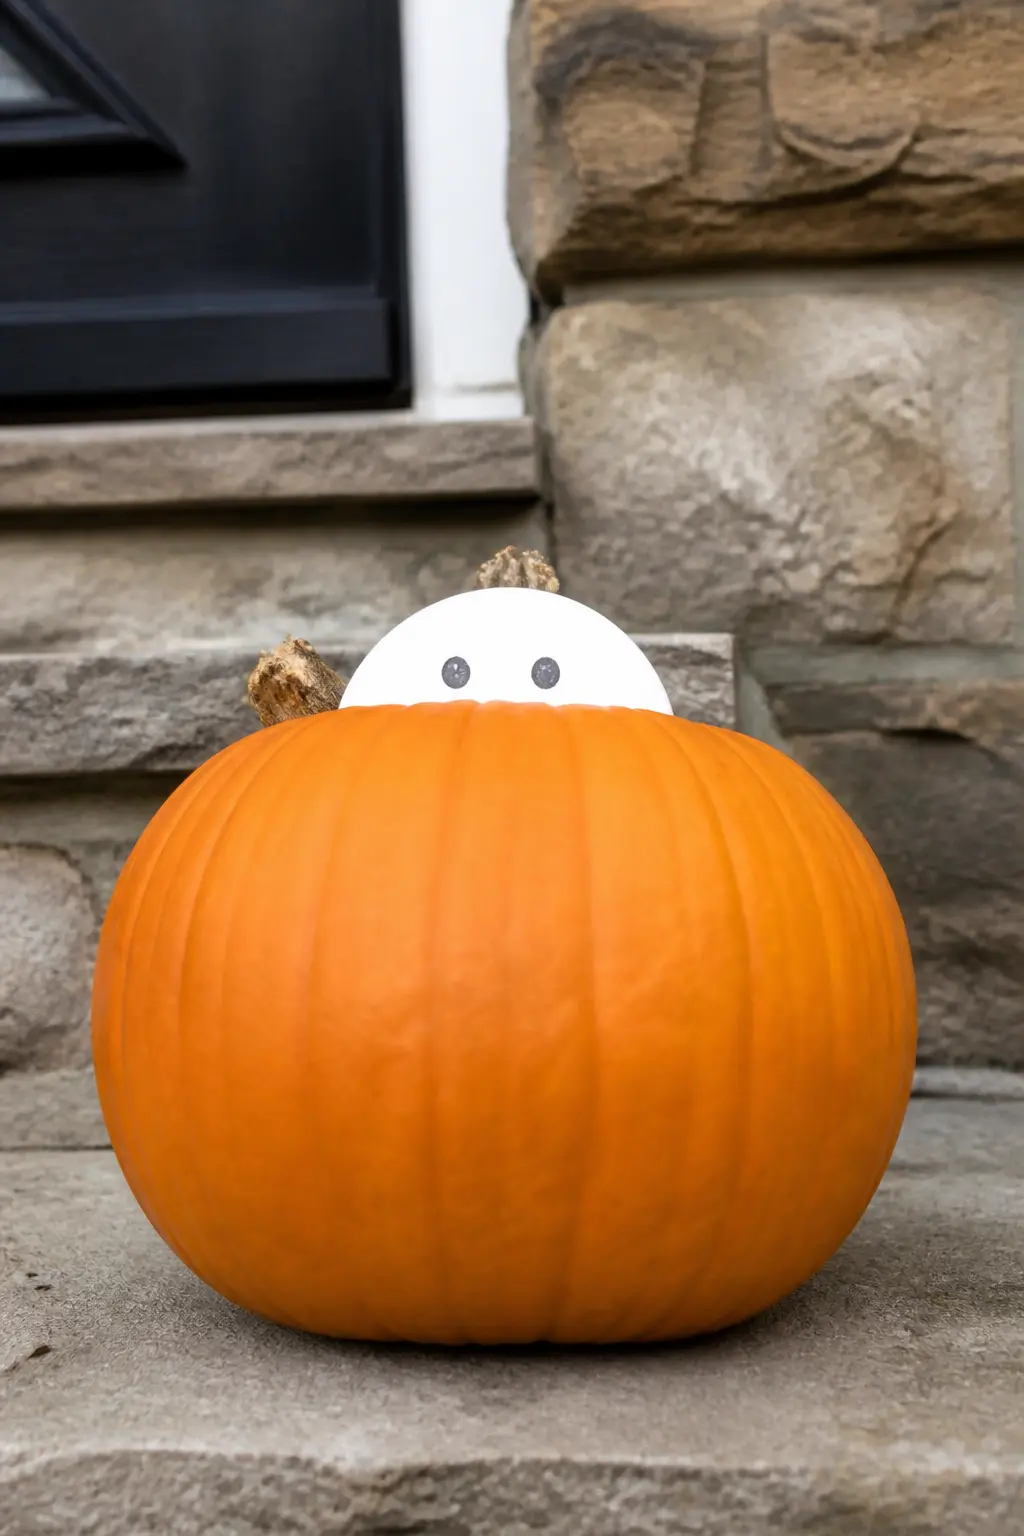
Ghost Peeking Over the Pumpkin’s Widest Point
Only the top arc of the ghost’s head and its eyes appear, cresting the equator of the pumpkin as if peering over a wall. The lower body disappears into the orange. It is a clever use of the pumpkin’s own shape.
Position this at the very top of the widest rib, so the curve of the pumpkin reads as the edge the ghost is peeking over. Two eyes looking upward, slightly asymmetric, sell the idea completely.
🛍 Shopping guide
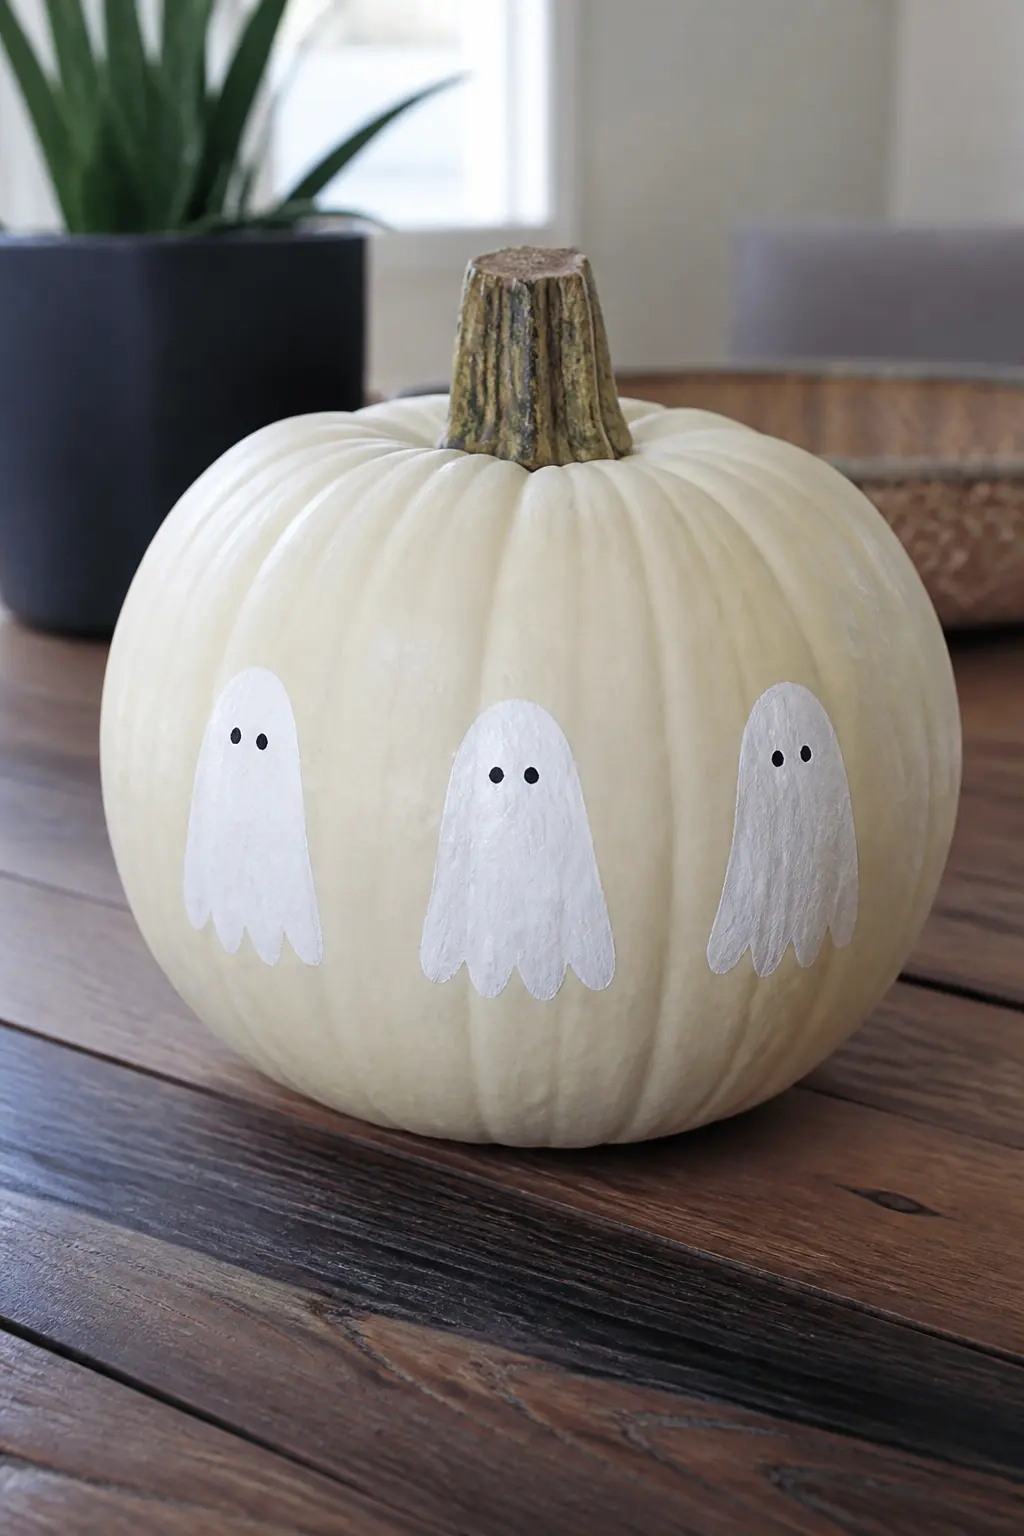
Three Small Ghosts in a Row Around the Middle
Three identical small ghosts, evenly spaced, circle the widest part of the pumpkin like a frieze. Each one is the same size. The repetition is what makes this design work: it is orderly, sweet, and looks more considered than a single ghost.
Measure the circumference loosely with a strip of paper tape and divide it into thirds so the spacing stays even. Paint all three ghost bodies first, let them dry together, then add the eyes to all three in one pass.
🛍 Shopping guide
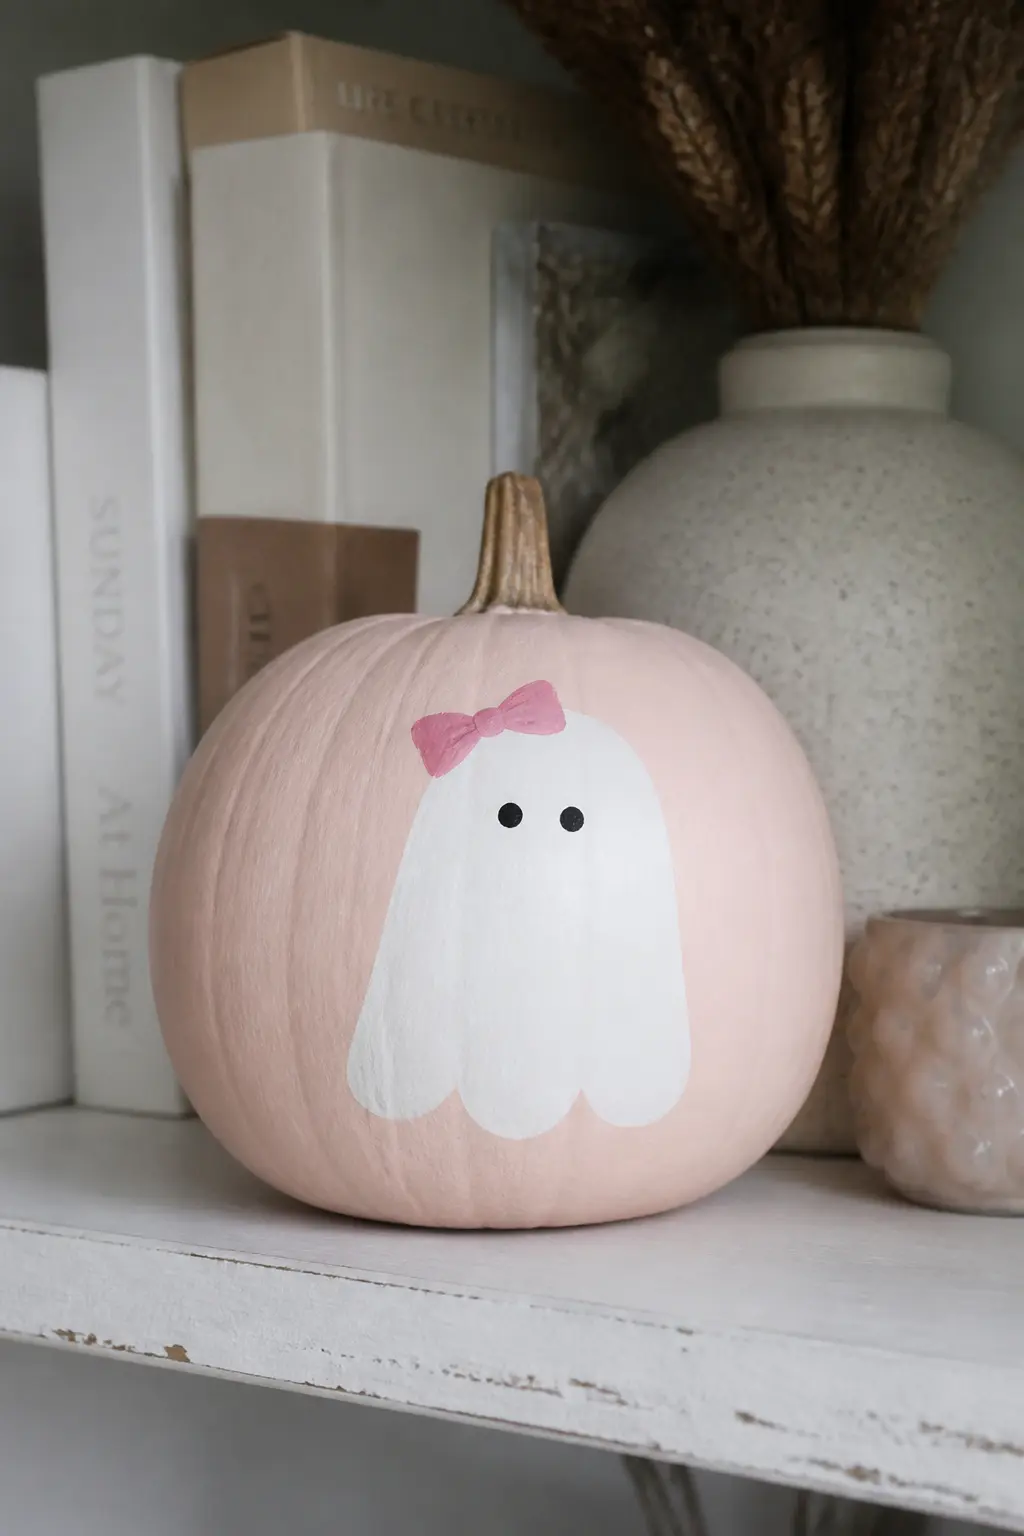
Ghost Wearing a Painted Bow
A small bow sits at the top of the ghost’s head, painted in pink, red, or black depending on how sweet or graphic you want the result. This is a popular choice for a girl’s Halloween party table without leaning on any licensed character.
Paint the bow as two triangles meeting at a center knot, keeping the proportions small relative to the ghost’s head. A black bow on a white ghost reads graphic and modern. A pink bow on a blush pumpkin reads unambiguously sweet.
🛍 Shopping guide
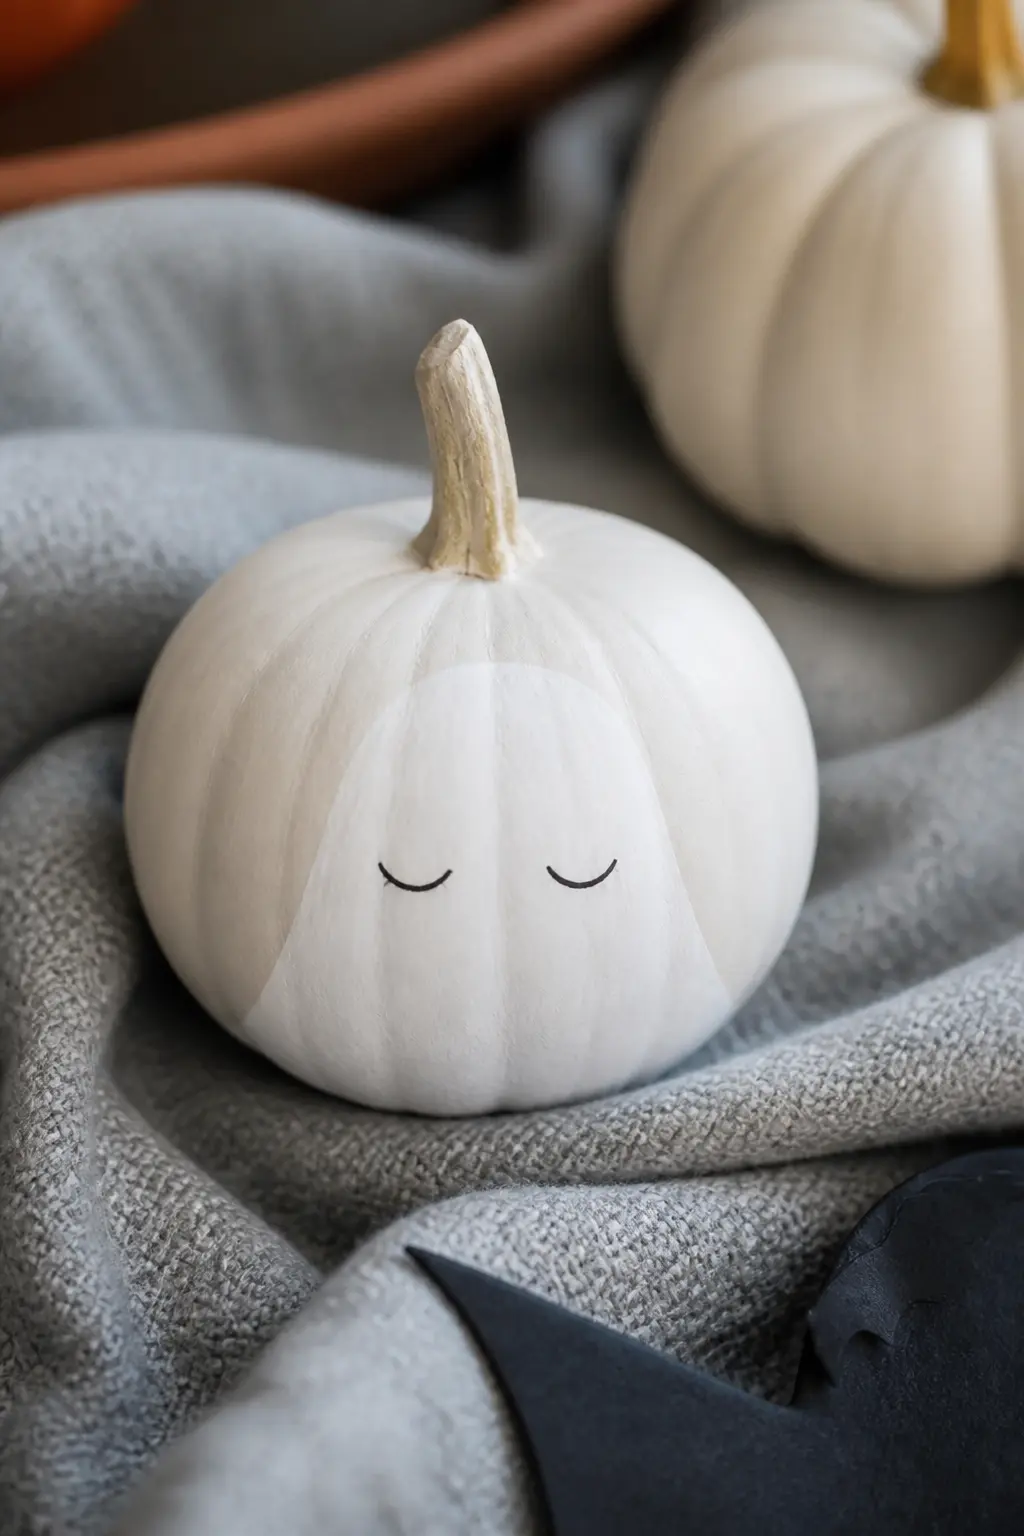
Sleeping Ghost With Closed Curved Eyes
The eyes curve downward as two small arcs, like closed crescent moons. No other features. The ghost reads as deeply asleep, peaceful, and completely harmless. This is the entry for a nursery windowsill or a baby’s first Halloween.
The closed eye shape is easier to paint than open eyes because small wobbles in the arc read as natural. Use a size-1 round brush and pull each stroke in a single confident motion from one end of the arc to the other.
🛍 Shopping guide
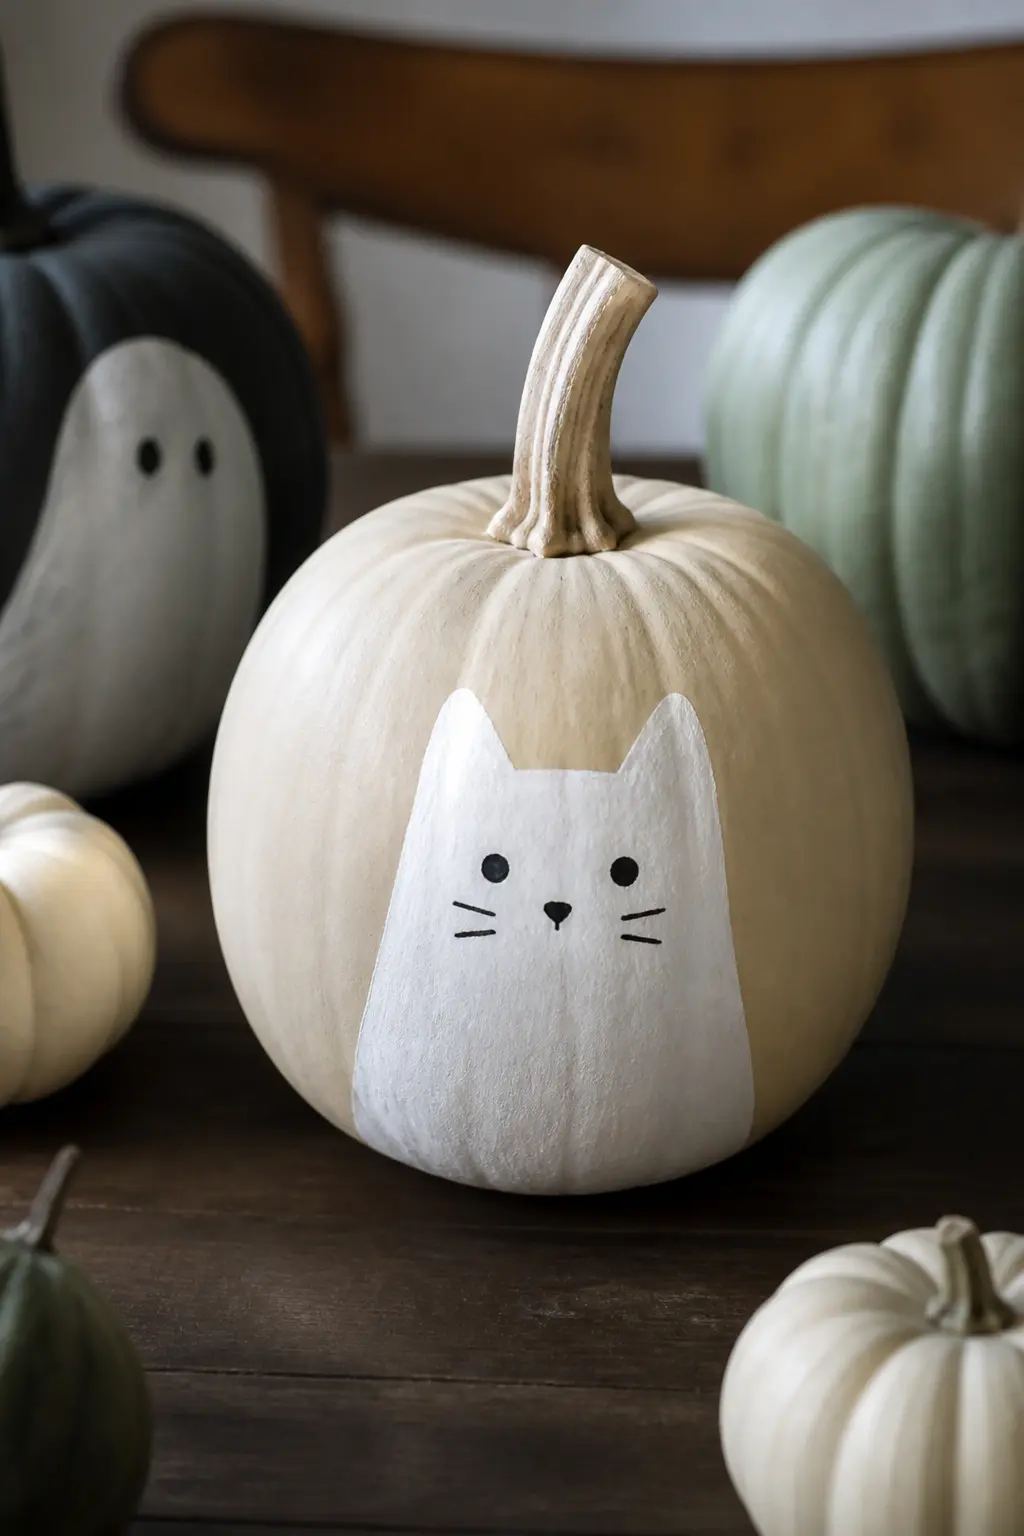
Ghost Cat With Pointed Ears
Two small triangular ears rise from the top of the ghost’s head, turning it into a cat. Add a tiny nose dot and two thin whisker lines on each side and the reading is immediate. Children love this one because it resolves into something familiar.
Keep the ears in proportion: too large and the cat reads unsettling rather than sweet. Paint them as part of the white body so they merge seamlessly rather than looking stuck on. A pink inner-ear triangle, painted small, finishes it neatly.
🛍 Shopping guide
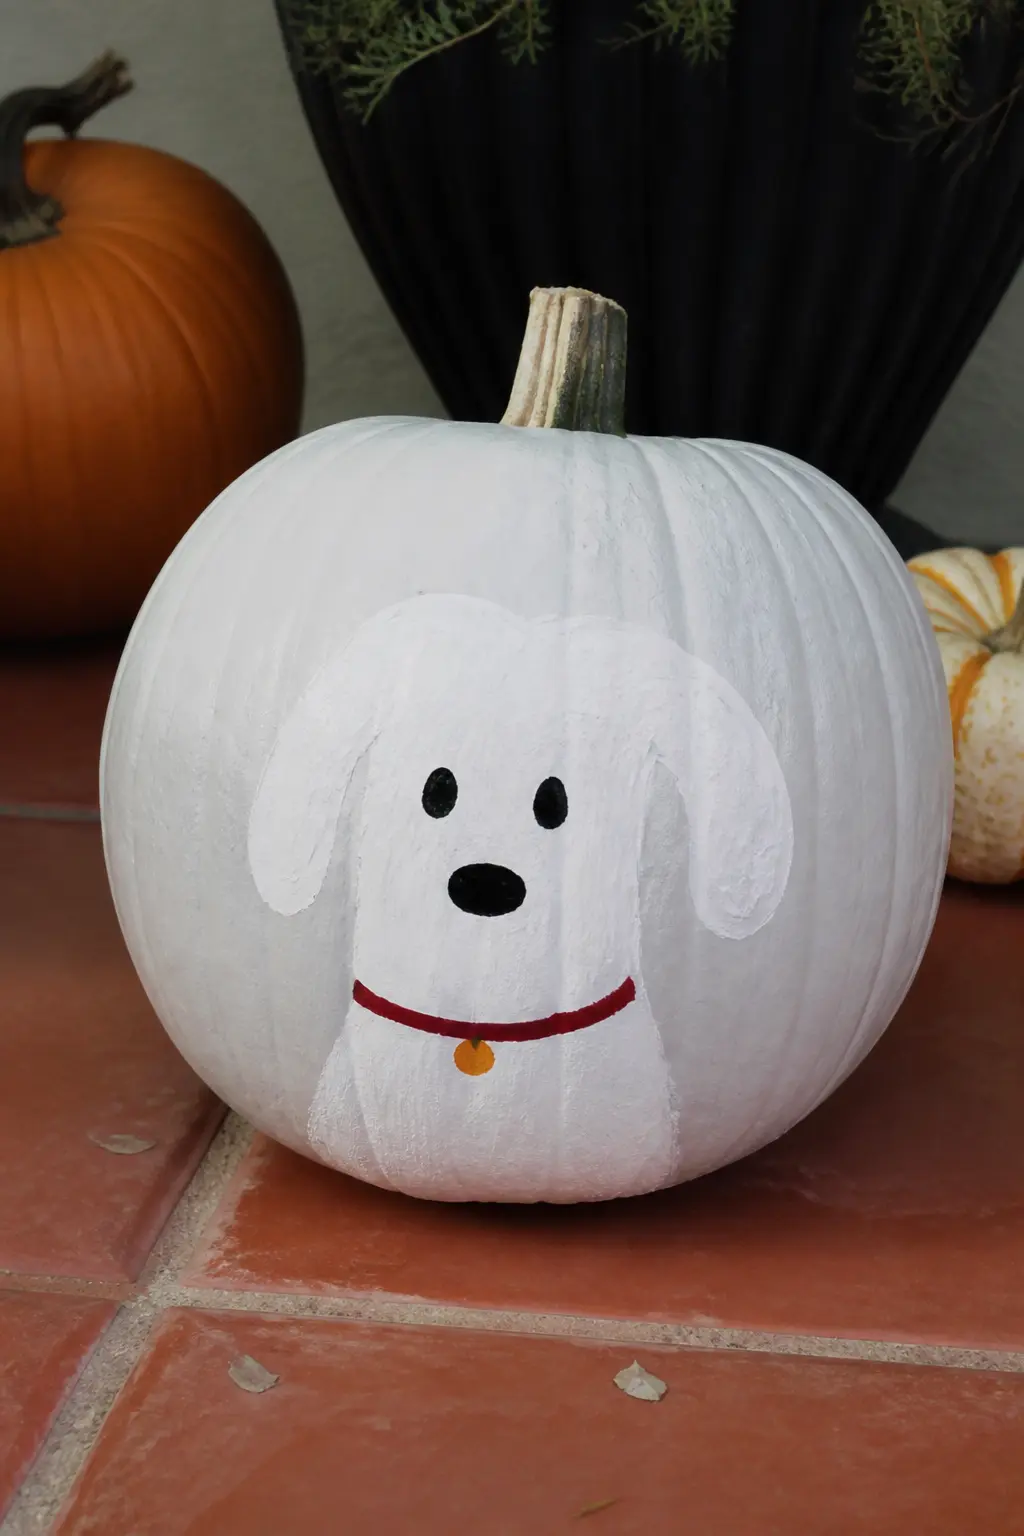
Ghost Dog With a Painted Collar
Floppy ears hanging down on each side of the ghost’s head, a short snout, and a stripe of painted collar at the neck turn the basic ghost shape into a dog. The collar is what makes it charming: a red or blue band with a small painted tag.
The floppy ears can be the same white as the body or a slightly different tone. Try painting them in a warm grey or a pale tan to give the dog a little more dimension without complicating the design.
🛍 Shopping guide
Playful Ghost Painted Pumpkins
Playful entries have personality. The ghosts here do things: wave, float, talk, carry candy. They suit a kids’ party table, a classroom window, or anyone who wants Halloween to feel fun rather than frightening.
These designs reward a little confidence with the brush but still forgive wobbles. A slightly unsteady tail or an imperfect speech bubble reads as charming, not sloppy.
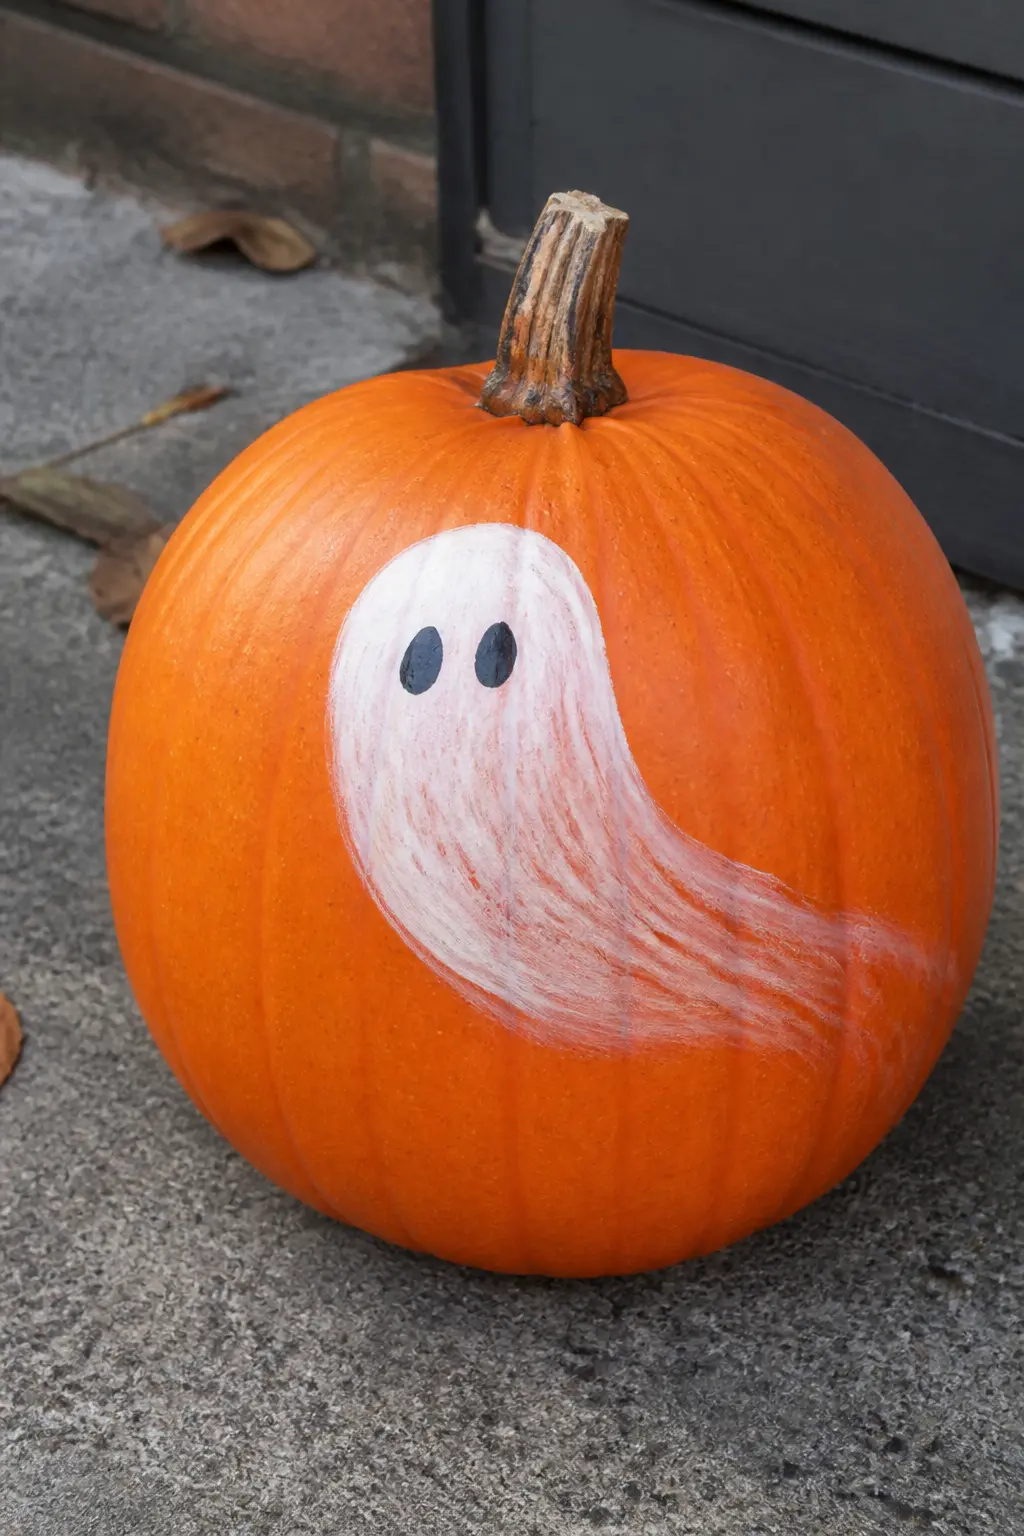
Ghost Mid-Float With a Trailing Tail
The ghost’s hemline curves and lifts to one side, as if caught mid-drift. A trailing wisp extends further in the same direction. The whole figure looks like it is moving through air, which gives a flat painted surface more life than almost any other technique.
Tilt the eyes very slightly in the direction of travel to reinforce the motion. Paint the trail in a thinner diluted white so it fades naturally at its tip rather than ending in a hard edge.
🛍 Shopping guide
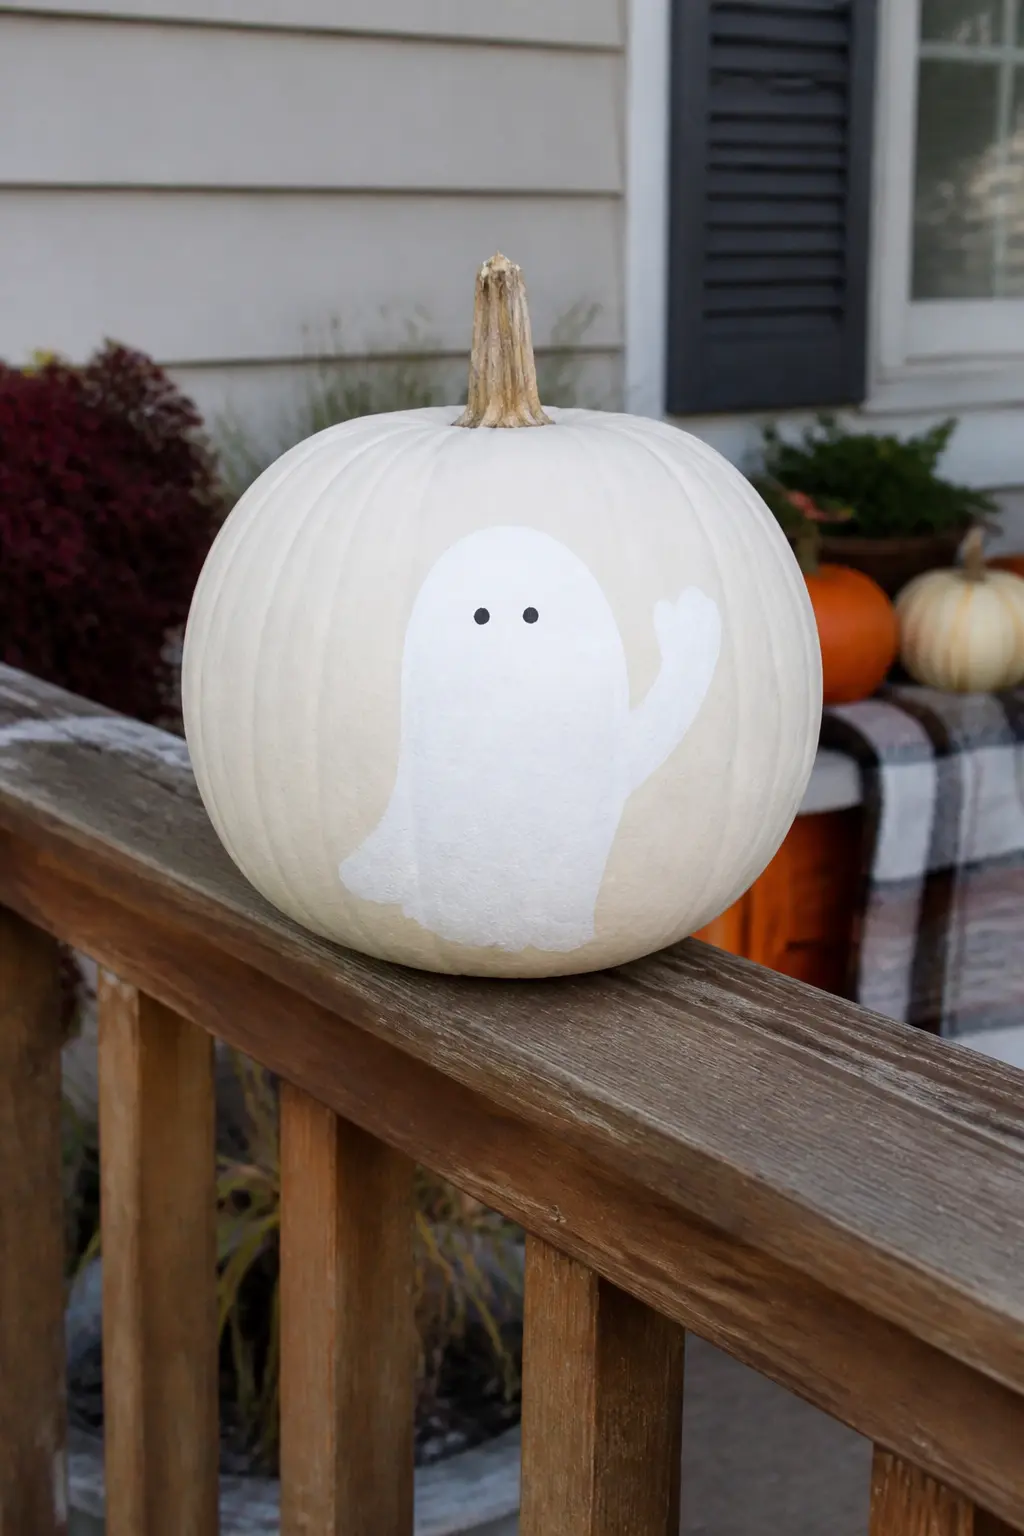
Ghost Waving One Arm
One arm extends upward and to the side, the tip curling slightly in a wave. It is the friendliest gesture available to a ghost, and it works brilliantly at a front door where the pumpkin will greet arriving children.
Keep the arm the same width as the rest of the ghost’s body, tapering only at the very tip. A wrist that is too thin looks broken rather than waving. Add a slight curve to the arm itself so it reads as raised rather than reaching.
🛍 Shopping guide
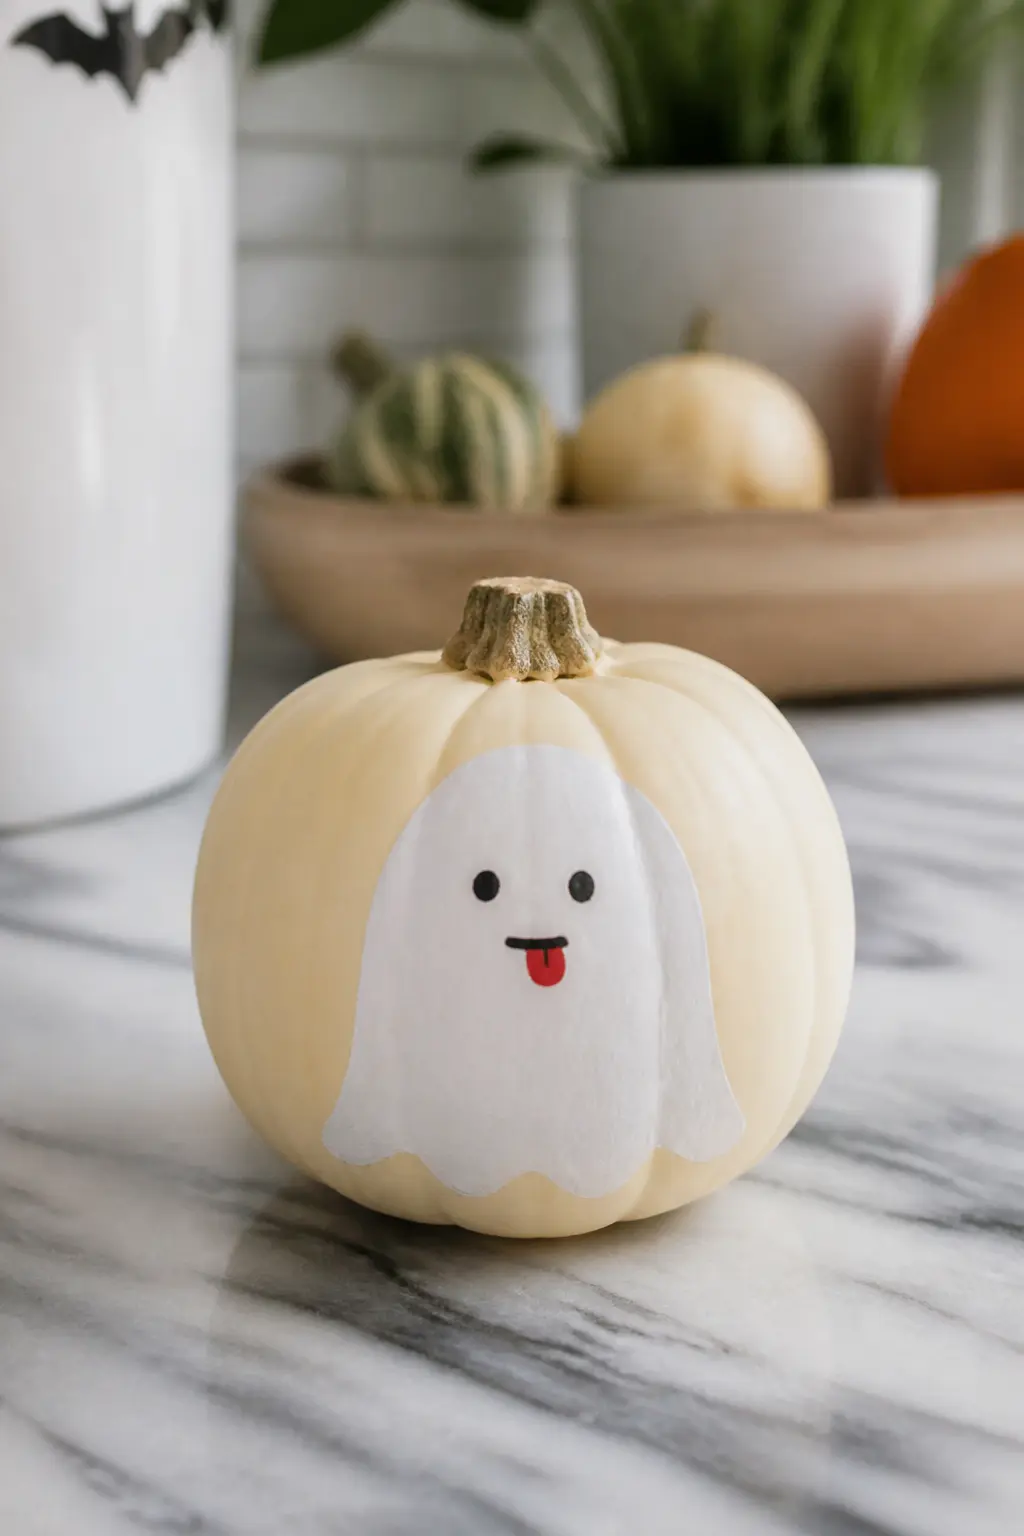
Ghost With Its Tongue Out
A small pink or red tongue pokes out from the bottom of the ghost’s face. The eyes can stay as dots or tilt upward to one side to double down on the cheeky mood. This is the ghost for a kids’ table or a teenager’s room who would reject anything too sweet.
Keep the tongue small relative to the face. A tongue that is too large reads gross rather than playful. A small teardrop shape, painted in a single pass, is exactly right.
🛍 Shopping guide
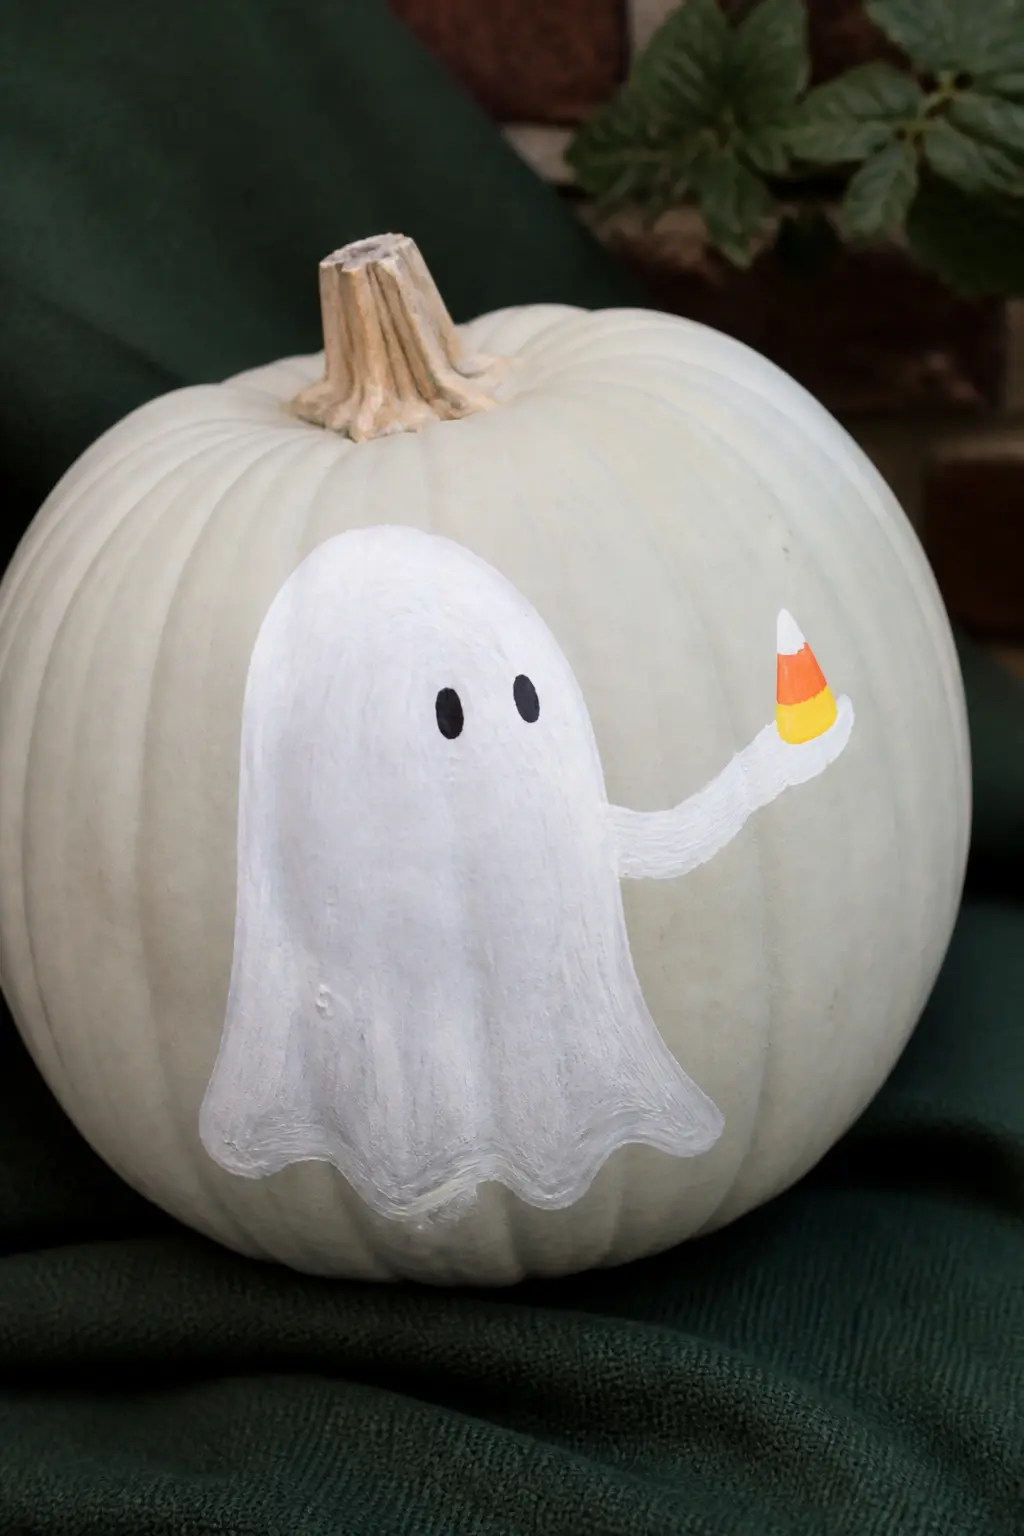
Ghost Holding a Painted Sweet
The ghost holds a small painted candy in its outstretched arm: a lollipop, a candy corn, or a wrapped sweet in any color. The candy is tiny, no larger than the ghost’s own eye, and painted in saturated color against the white of the body.
This design rewards a little color confidence. An orange and yellow candy corn, a red lollipop on a white stick, or a purple wrapped sweet all pop beautifully against the white ghost on a pale pumpkin background.
🛍 Shopping guide
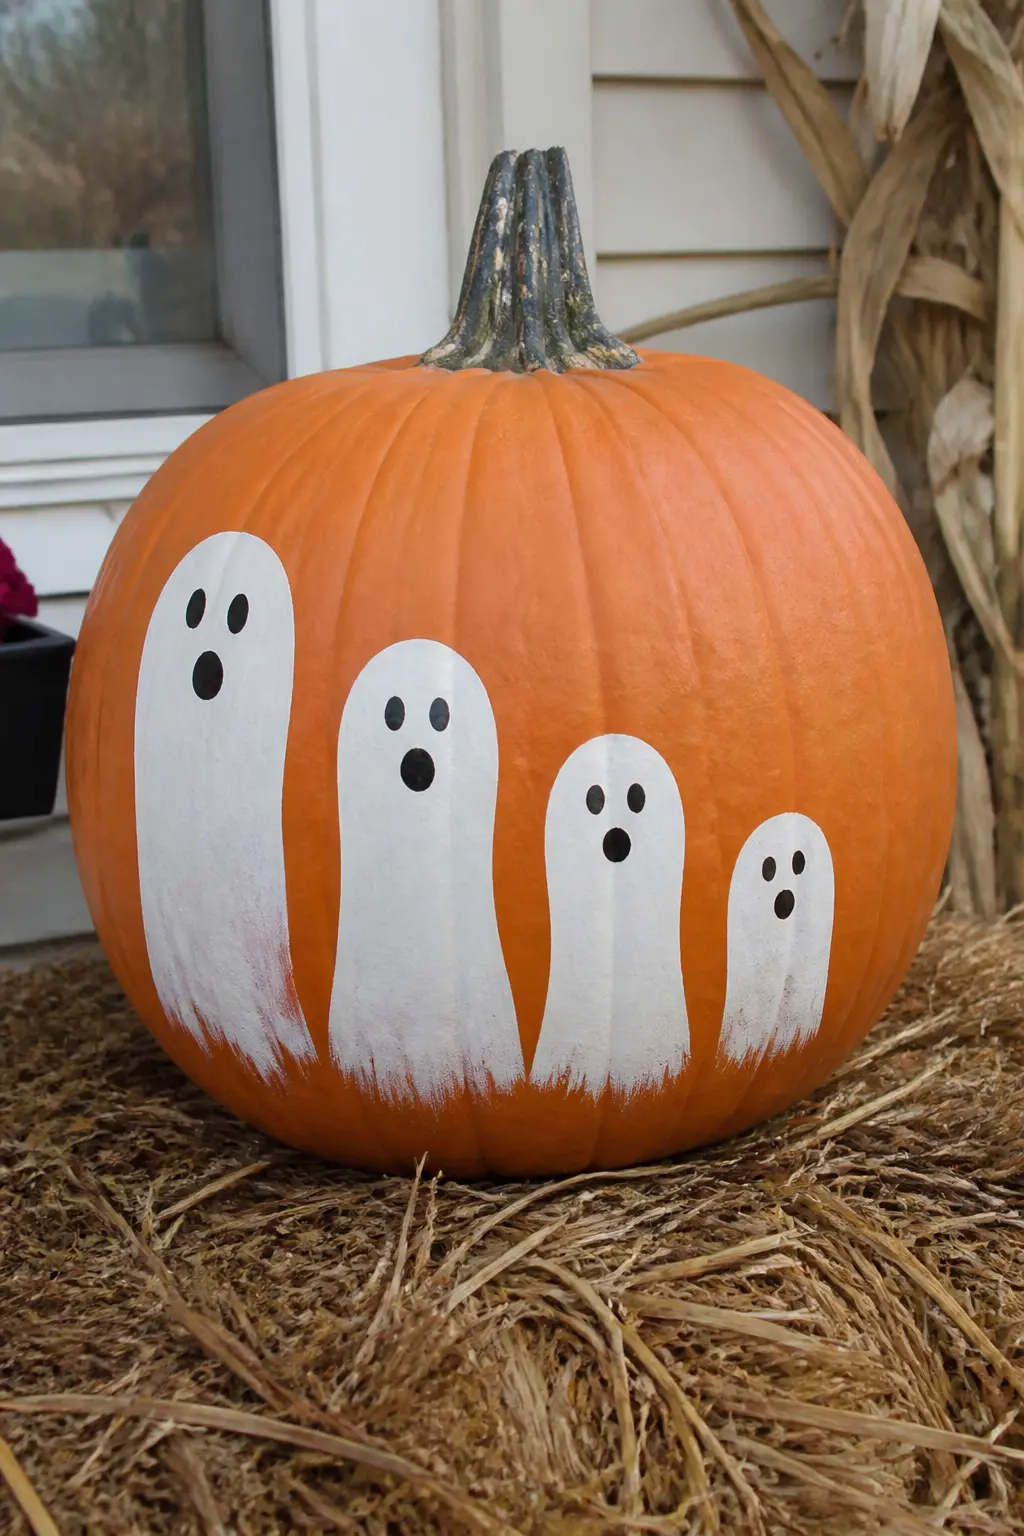
Ghost Family in Graduated Sizes
Three or four ghosts stand in a row, each one a different height: tallest at one end, smallest at the other. The family reading is instant. This works on a wide flat pumpkin or a large round one where there is enough canvas to spread them out.
Sketch the heights in pencil first so the tallest does not crowd the edge and the smallest still has room for visible eyes. The size difference does not need to be dramatic. A ratio of roughly 3:2:1 reads clearly.
🛍 Shopping guide
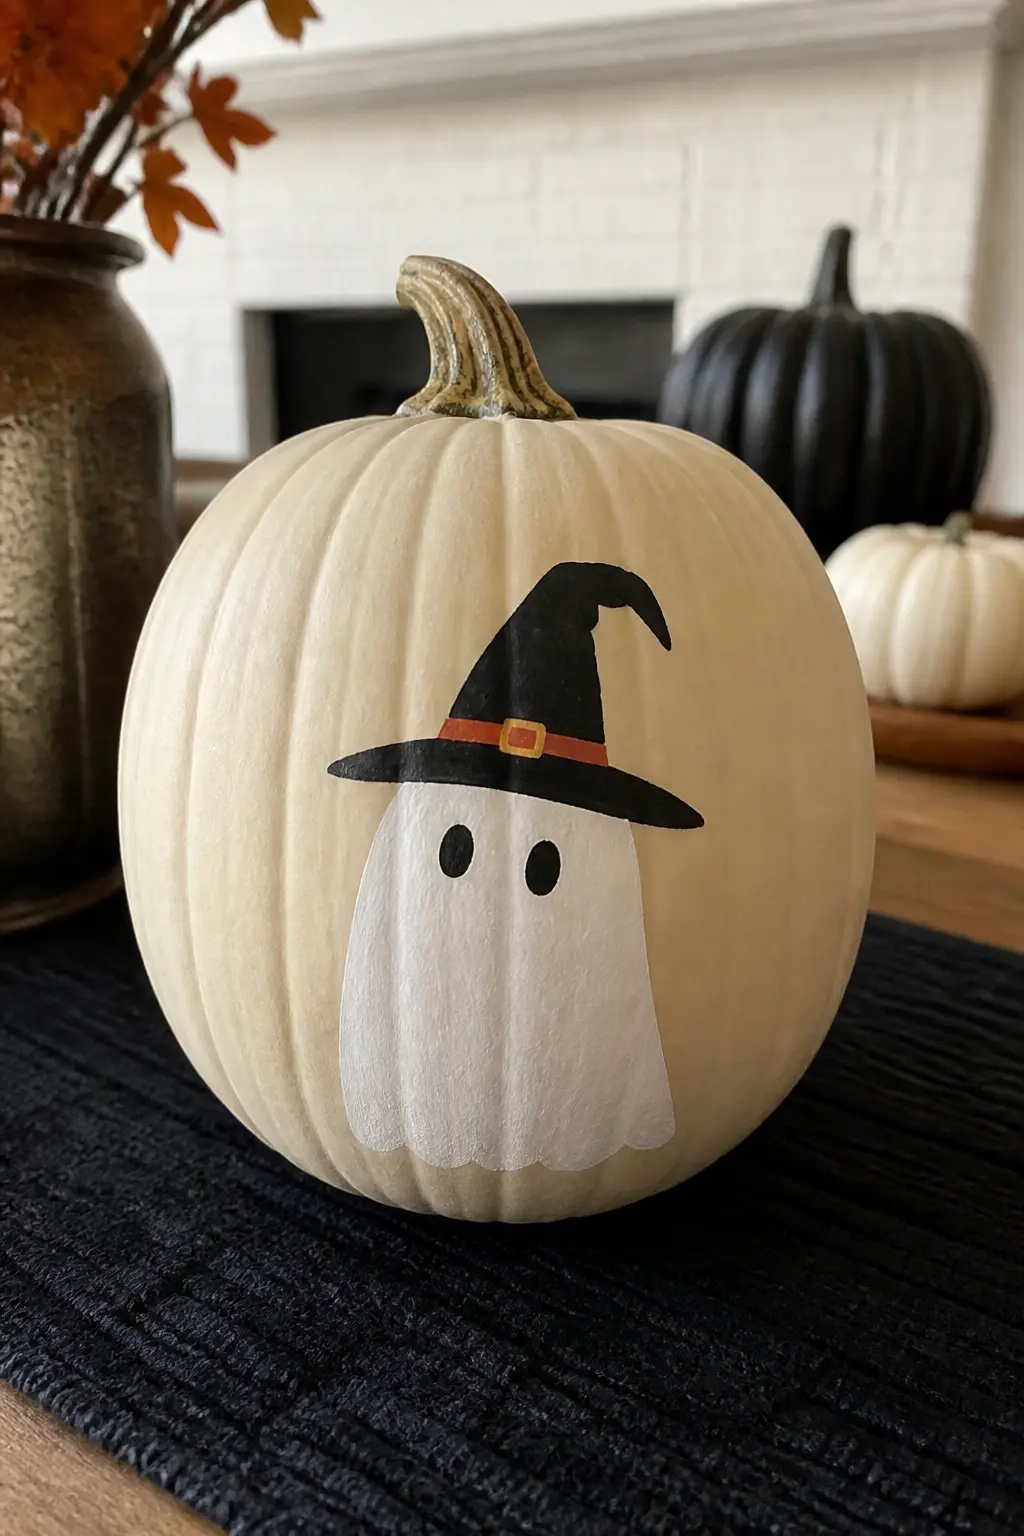
Ghost Wearing a Witch Hat
A black pointed hat, painted at a slight tilt, sits on top of the ghost’s head. Add a small painted hat band in a contrasting color if you want to break up the black. This is the design that photographs best at a Halloween party table because it tells the season immediately.
Paint the hat after the white ghost is fully dry so the black does not bleed into the white. A slightly tilted hat reads more playful than one that sits perfectly straight.
🛍 Shopping guide
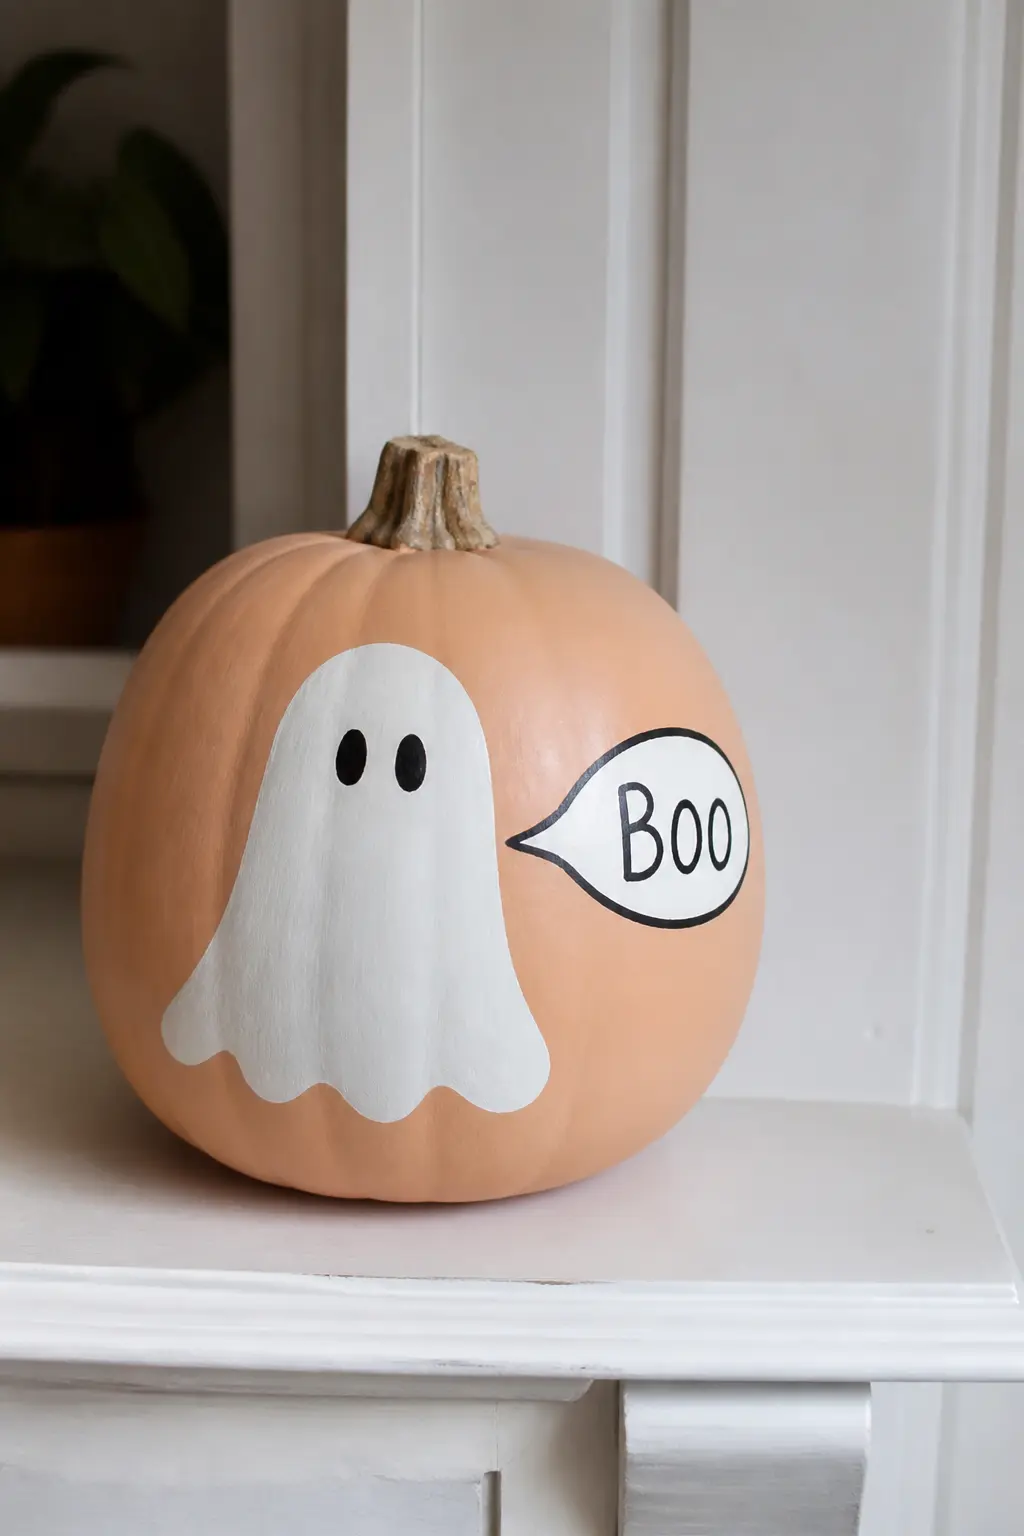
Ghost With a Speech Bubble
A small white oval speech bubble extends from the ghost’s mouth area, with a word or short phrase painted inside in black. The obvious choice is ‘Boo.’ A funnier choice is ‘Excuse me.’ A more useful choice for a party table is a guest’s name.
Paint the bubble in white on a lightly base-coated section of pumpkin so the letters sit cleanly. Use a fine liner brush and keep the lettering minimal: the fewer the characters, the sharper the joke.
🛍 Shopping guide
Elegant Ghost Painted Pumpkins
Elegant entries strip the ghost back to its geometry. No dots, no grins, no narrative. What remains is shape, tone, and finish, which is enough to hold its own on a styled mantel or a dinner table that doubles as party decor.
These designs lean on restraint. One well-loaded brush, one deliberate stroke, and then you stop. The black pumpkin and the tonal ghost both sit in this category, and they require almost no painting skill, only the willingness to commit to the concept.
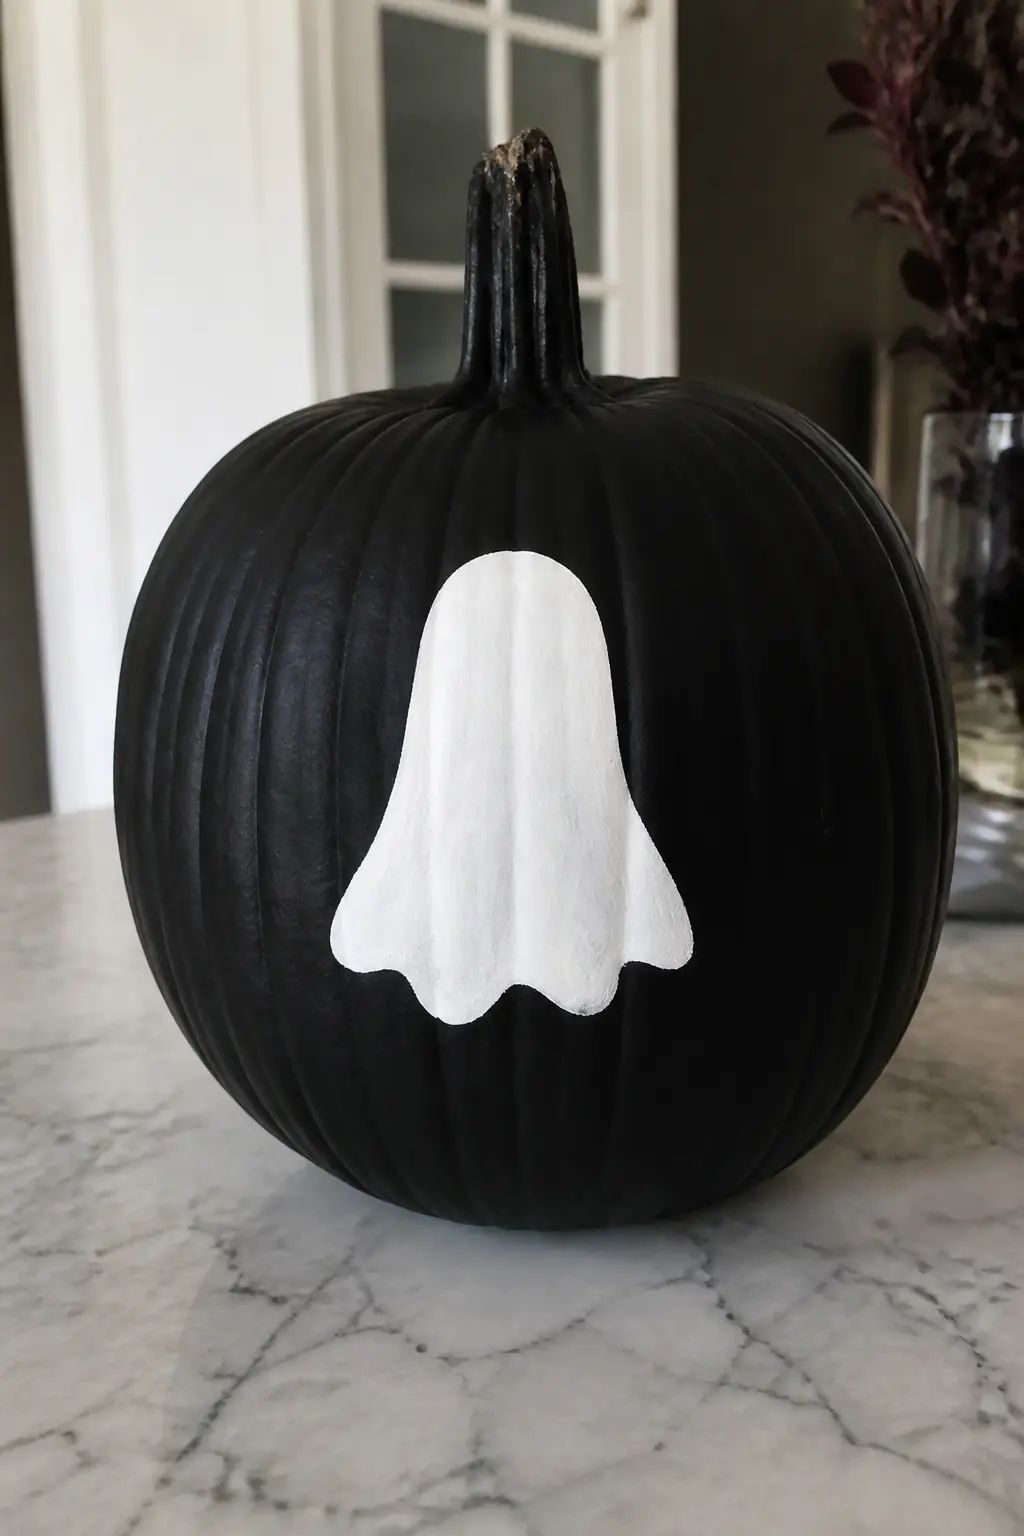
White Ghost on a Black Pumpkin
The pumpkin is painted entirely black first, then a clean white ghost sits on that ground. The contrast is stark and graphic, and the result looks deliberate in a way that a ghost on a natural pumpkin does not.
Apply two to three coats of matte black chalk paint for a ground with no orange showing through. Let it cure fully before painting the white ghost. Do not add eyes or a mouth: the silhouette alone reads beautifully against black.
🛍 Shopping guide
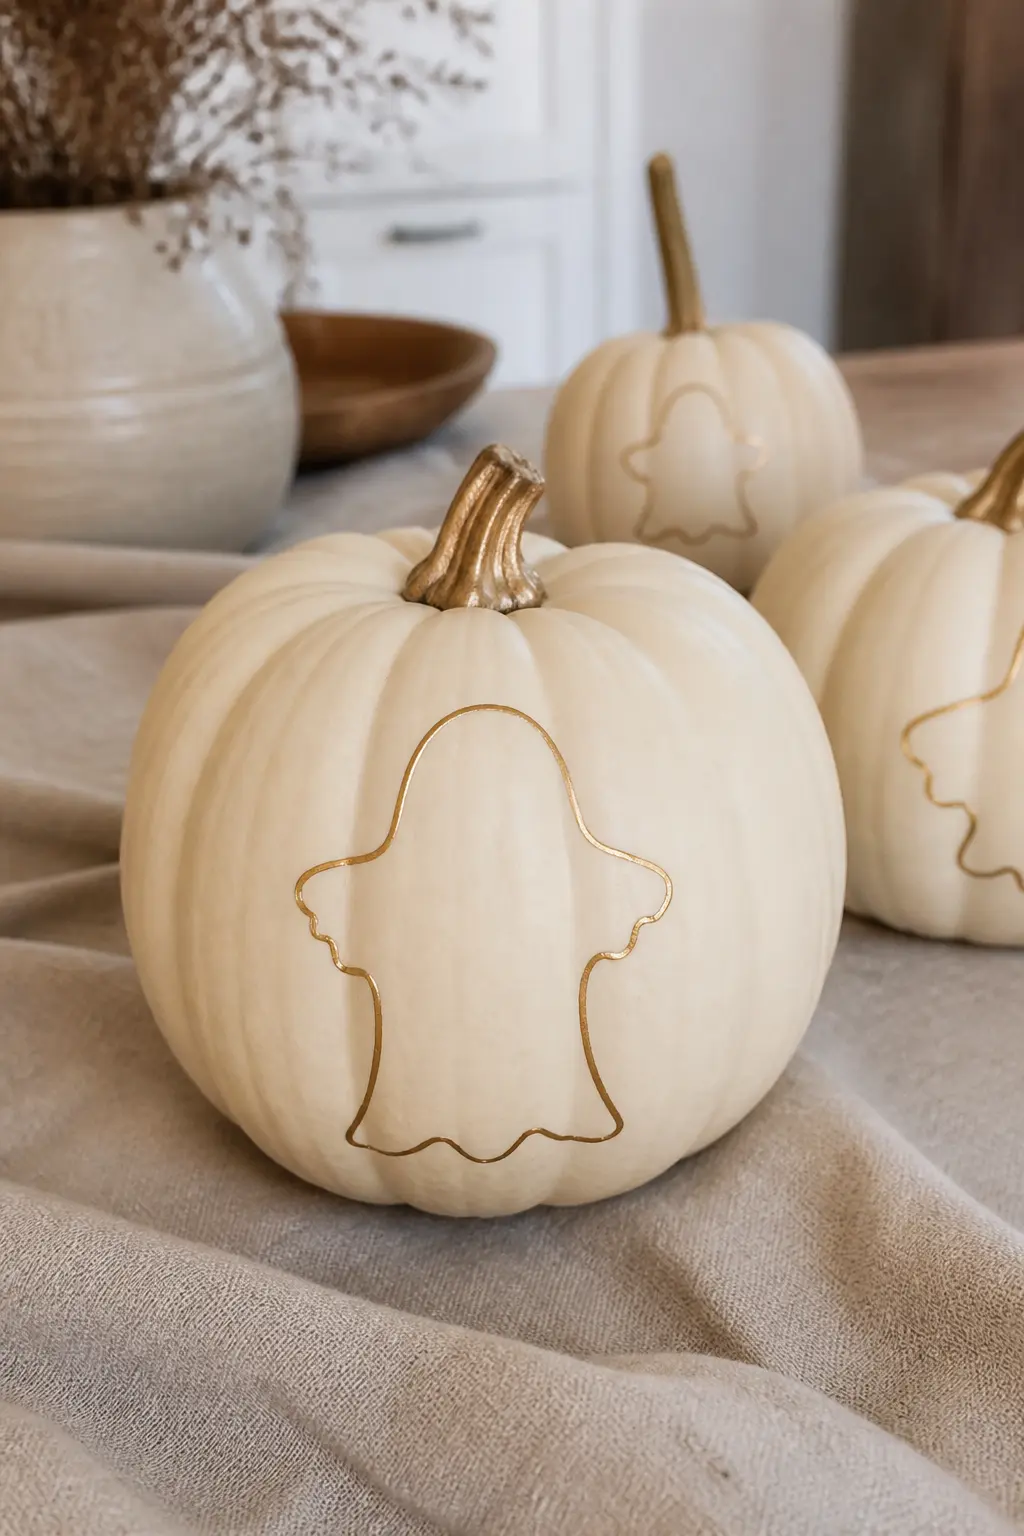
Ghost Outlined in Gold on Cream
A cream or ivory pumpkin provides the ground. The ghost is painted in the same cream as a solid base, then outlined with a thin line of metallic gold paint. No fill color, just the gold contour on a near-invisible body. The result is subtle in daylight and warm in candlelight.
Use a liner brush loaded with gold acrylic and work in one continuous motion around the ghost’s outline. Lift the brush only when necessary and repair joins when the paint is dry. A single unbroken line reads far more elegant than a dotted one.
🛍 Shopping guide
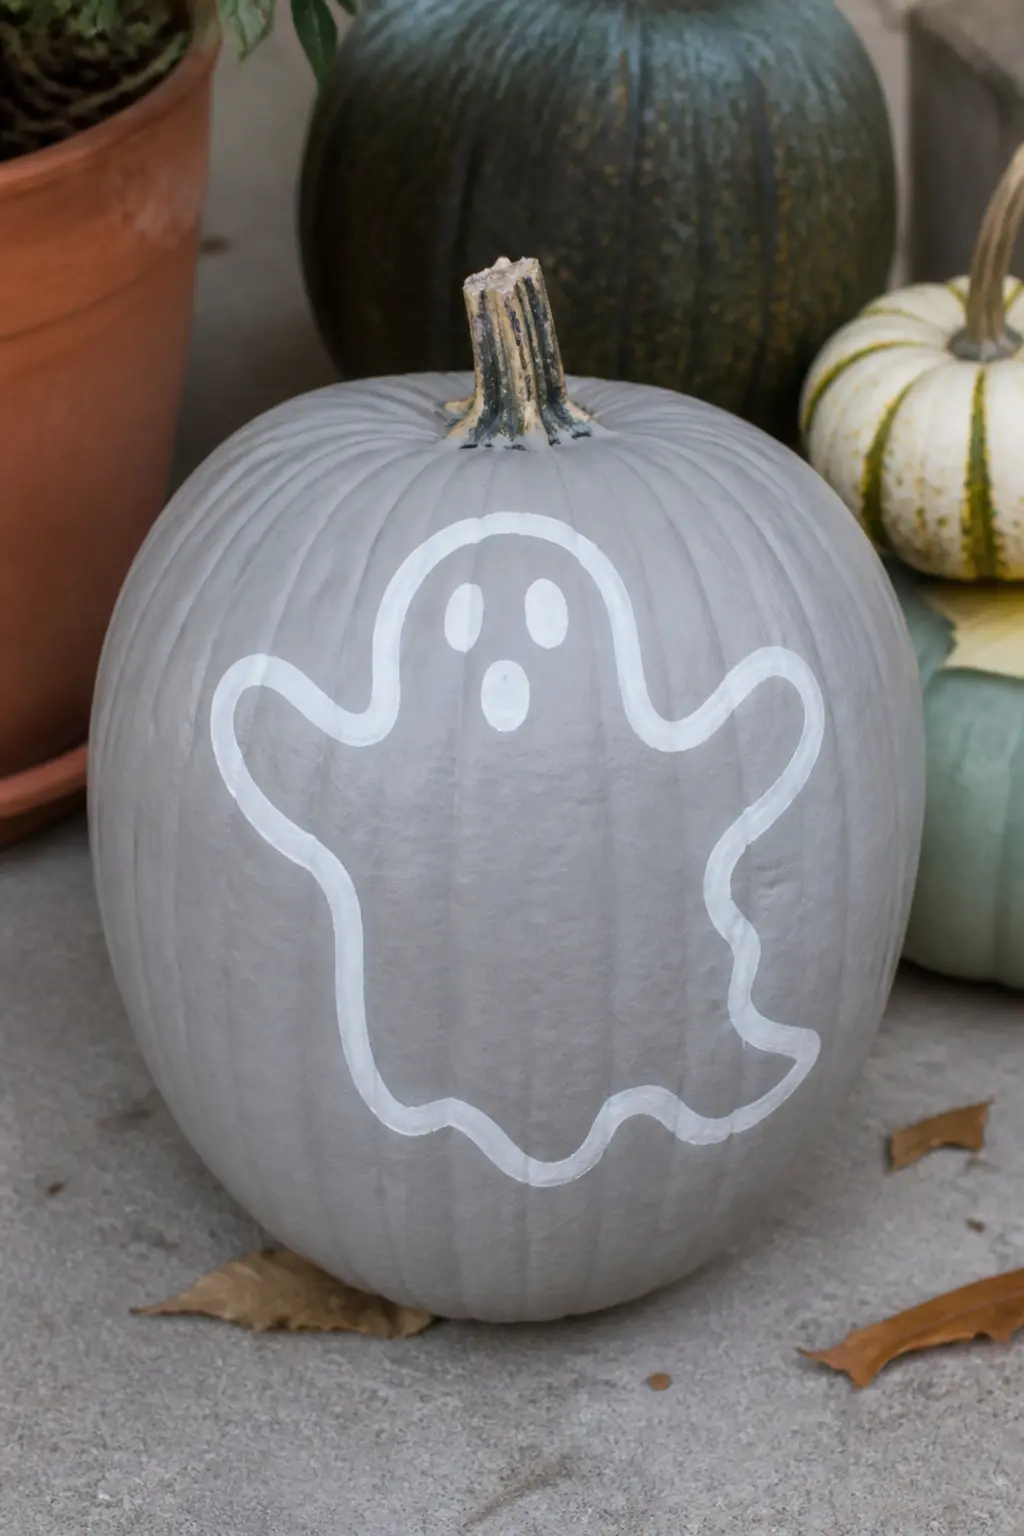
Ghost in a Single Continuous Brush Line
The entire ghost is drawn without lifting the brush: up and over the head, down the right side, along the wavy hem, back up the left, and closed at the top. The line is white on a pale ground and slightly varied in weight where the brush pressed harder.
Practice the gesture on paper three or four times before committing to the pumpkin. Speed matters: a slow deliberate line looks labored. A quick confident stroke looks like the hand of someone who knows exactly what they are doing.
🛍 Shopping guide
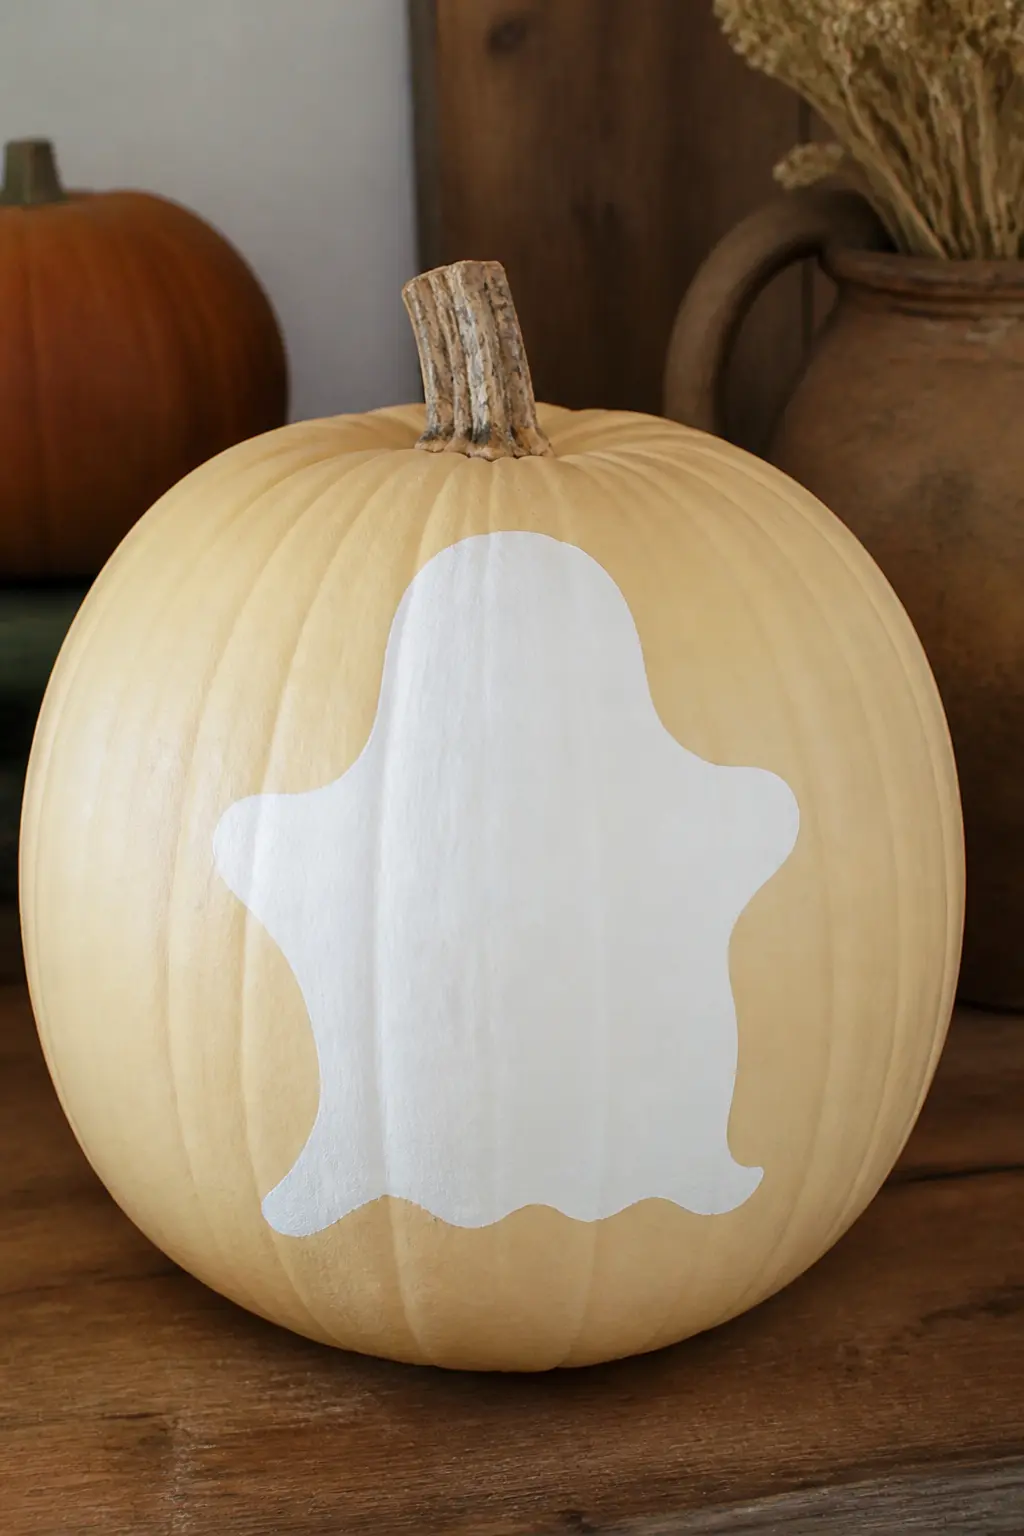
Ghost Silhouette With No Face at All
No eyes, no mouth, no expression of any kind. The ghost is a pure white shape on a natural pumpkin, and the absence of features is the design. It reads as modern and graphic in the way that most Halloween decor does not.
A faceless ghost reads sweet or eerie depending on the context. On a cream pumpkin in daylight, it reads as a design object. On a black pumpkin in a dim room, it reads differently. Let the setting do the emotional work.
🛍 Shopping guide
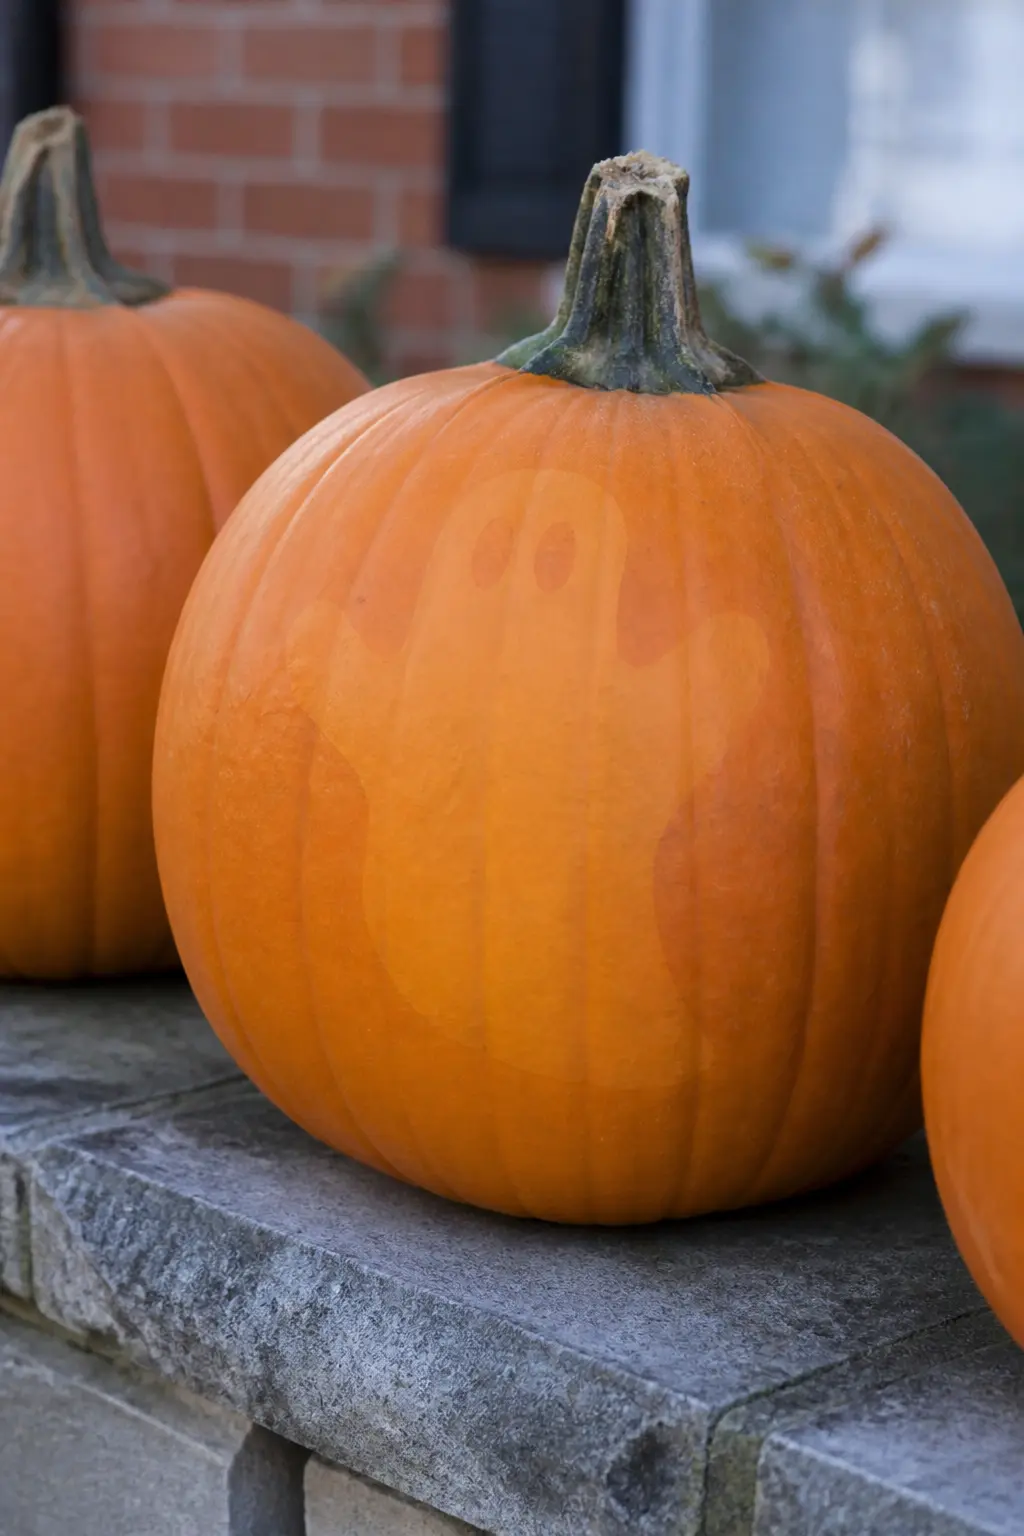
Ghost Painted the Same Tone as the Pumpkin
The ghost is mixed to match the pumpkin’s own skin color as closely as possible, then painted on top. From a distance the pumpkin looks plain. Close up, the ghost reveals itself only in the slight sheen difference or a shadow on the ribs.
Test your paint mix on a paper towel held against the pumpkin before committing. You want a match, not a contrast. Finish with no sealer on the ghost itself so the texture stays slightly different from the surrounding skin, giving the shape just enough presence.
🛍 Shopping guide
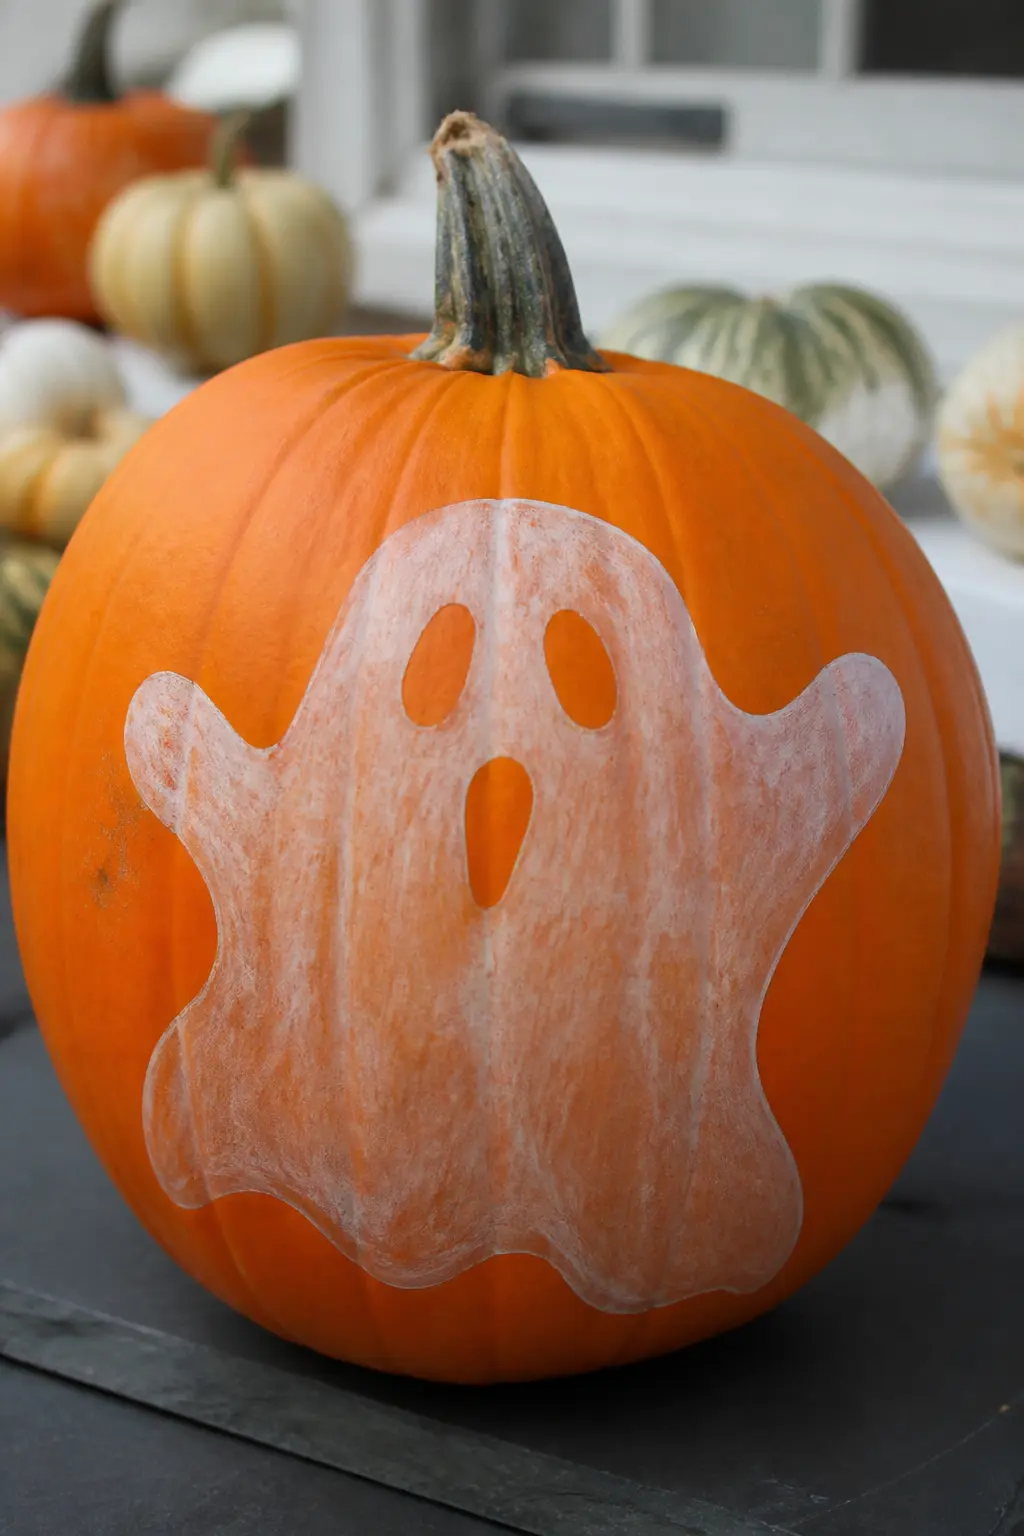
Translucent Ghost With the Base Showing Through
White paint diluted heavily with acrylic medium or water is washed over the ghost shape, leaving the pumpkin’s color visible underneath as if seen through gauze. The effect is ghostly in the most literal sense: the figure is there and not quite there.
Apply two washes, letting each dry before the next, to build opacity without losing the see-through quality. The edges of the ghost should be softer than the center. Do not outline it: that would defeat the translucency entirely.
🛍 Shopping guide
Eerie Ghost Painted Pumpkins
Eerie entries are for the adult porch, the after-dark party, or anyone who finds conventional Halloween too tidy. The discomfort here comes from proportion, placement, and absence: eyes in the wrong place, a mouth that is not there, a figure that only makes sense from ten feet away.
None of this requires gore or any licensed imagery. The unsettling quality is entirely in the craft choice. Keep your base coat matte, keep your lines thin, and let the wrongness do the work.
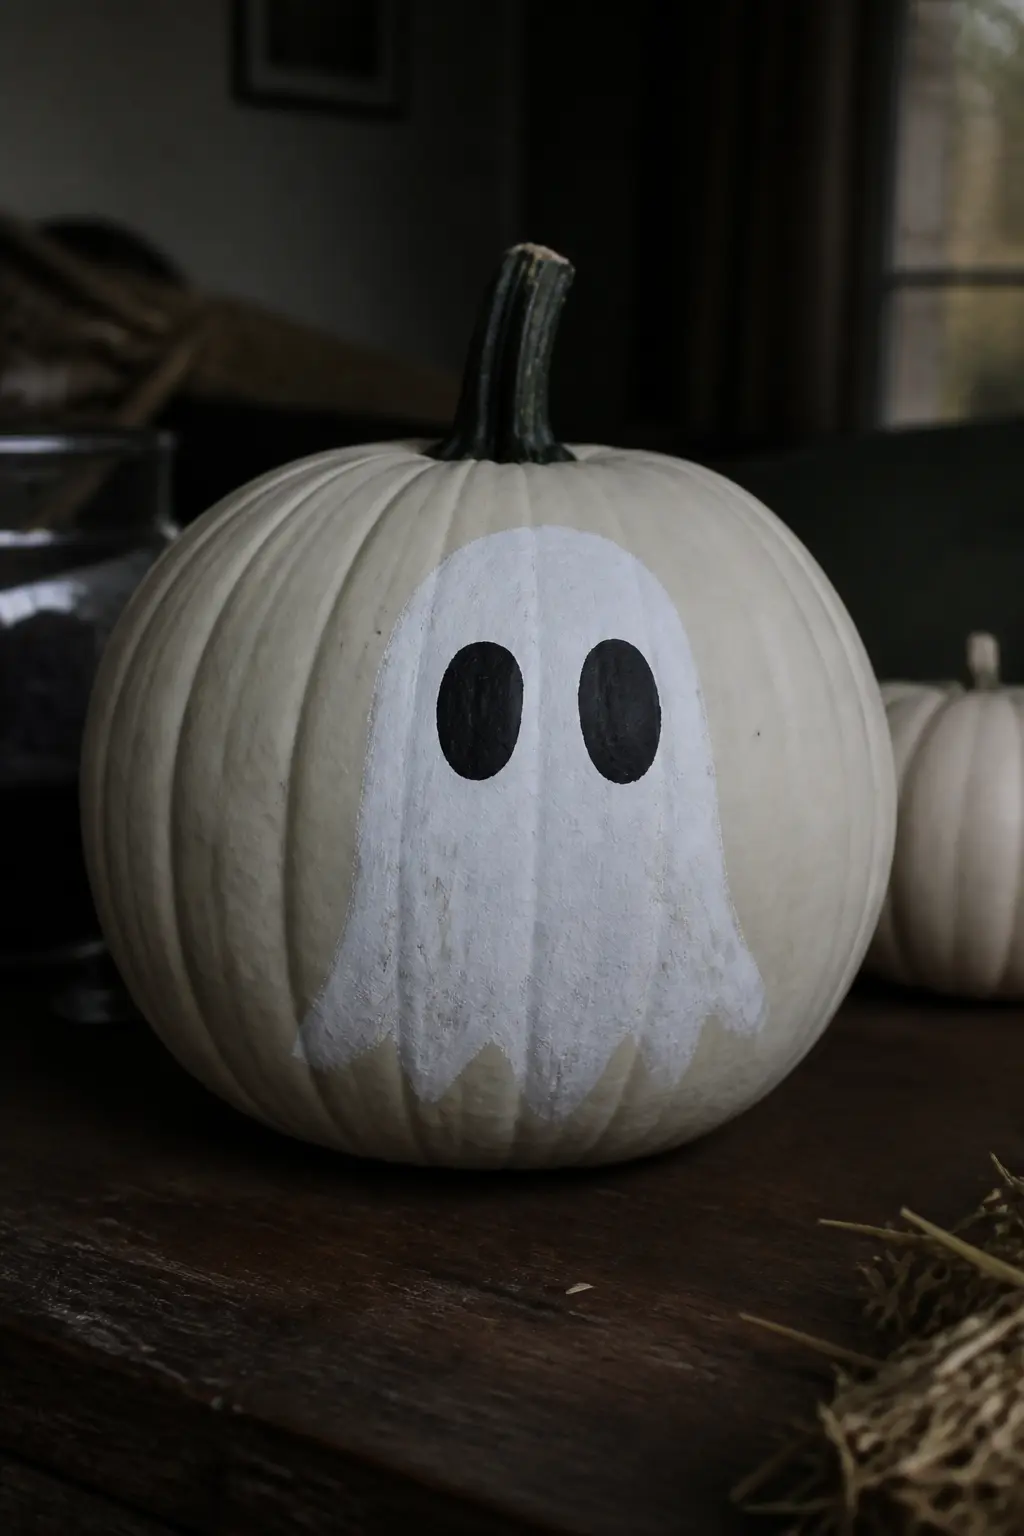
Ghost With Hollow Oval Eyes and No Mouth
The eyes are not dots. They are hollow ovals, each one large enough to feel wrong, painted in black with nothing inside them. No mouth appears anywhere. The absence of a mouth, combined with the empty eyes, reads as unsettled in a way that is hard to name.
Keep the oval eyes perfectly vertical and symmetric. Any tilt makes them read as cartoon. The eeriness comes from correct placement combined with wrong scale. Make each eye about one-quarter the width of the entire ghost head.
🛍 Shopping guide
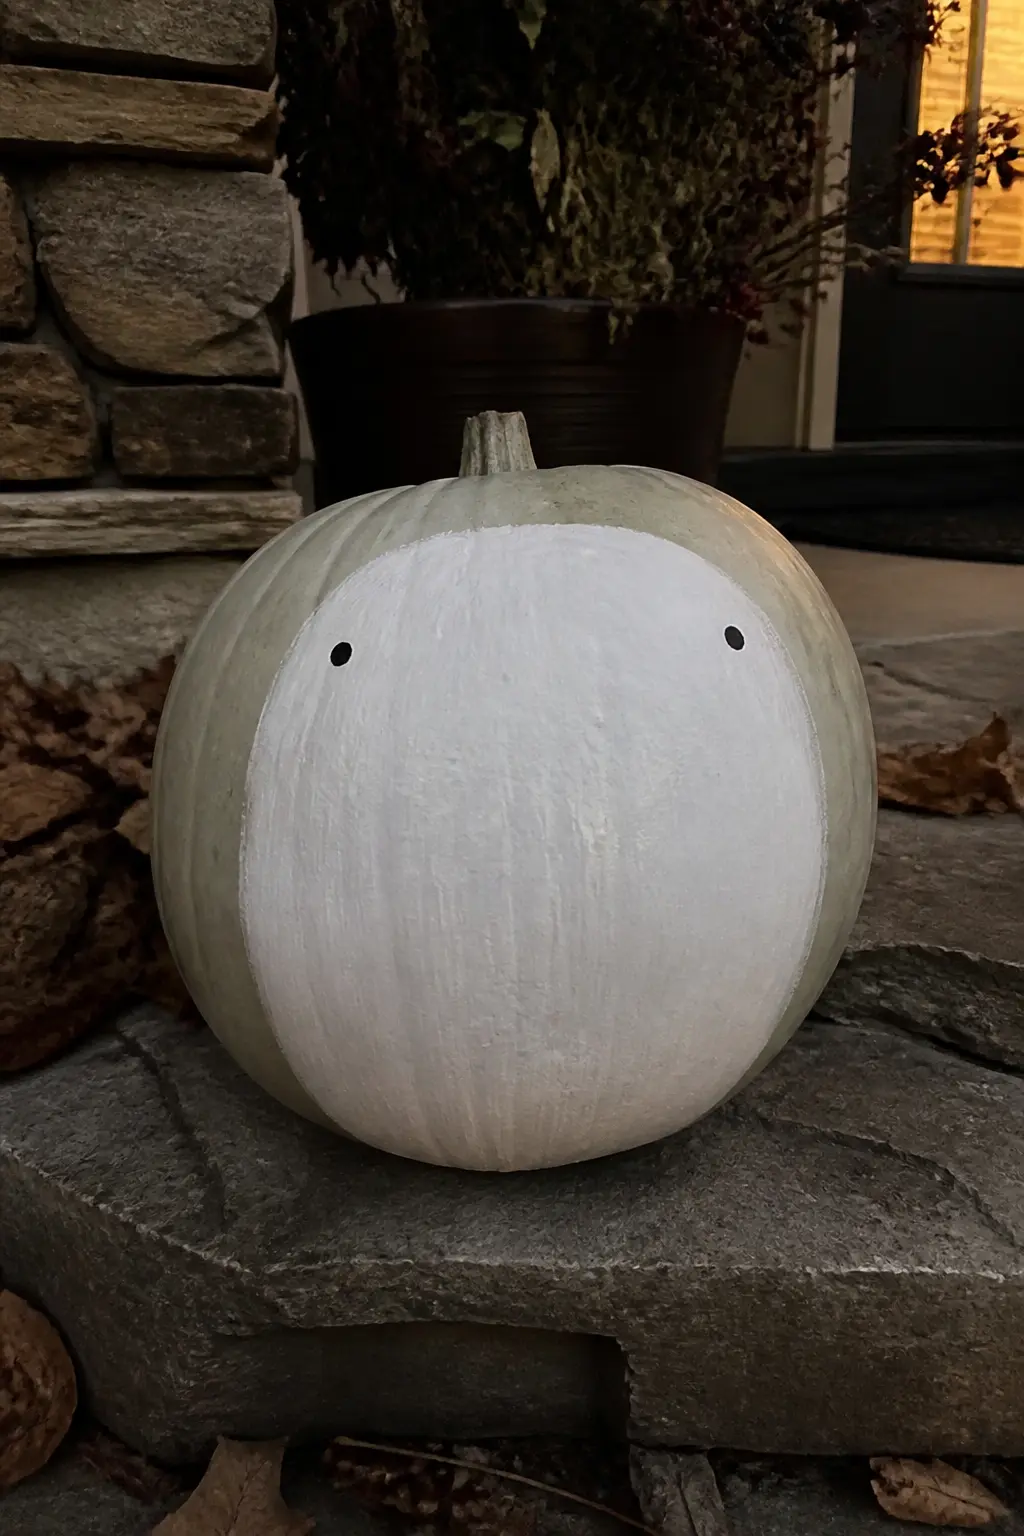
Ghost With the Eyes Placed Too Far Apart
The face looks correct from a quick glance. Then something registers as wrong. The eyes are too far apart, pushed almost to the outer edge of the ghost’s head. The further apart they are, the more the wrongness compounds.
Use small dot eyes so the design does not telegraph its trick immediately. Let the viewer discover it. That delayed recognition is what makes this entry work on a porch where people slow down to look twice.
🛍 Shopping guide
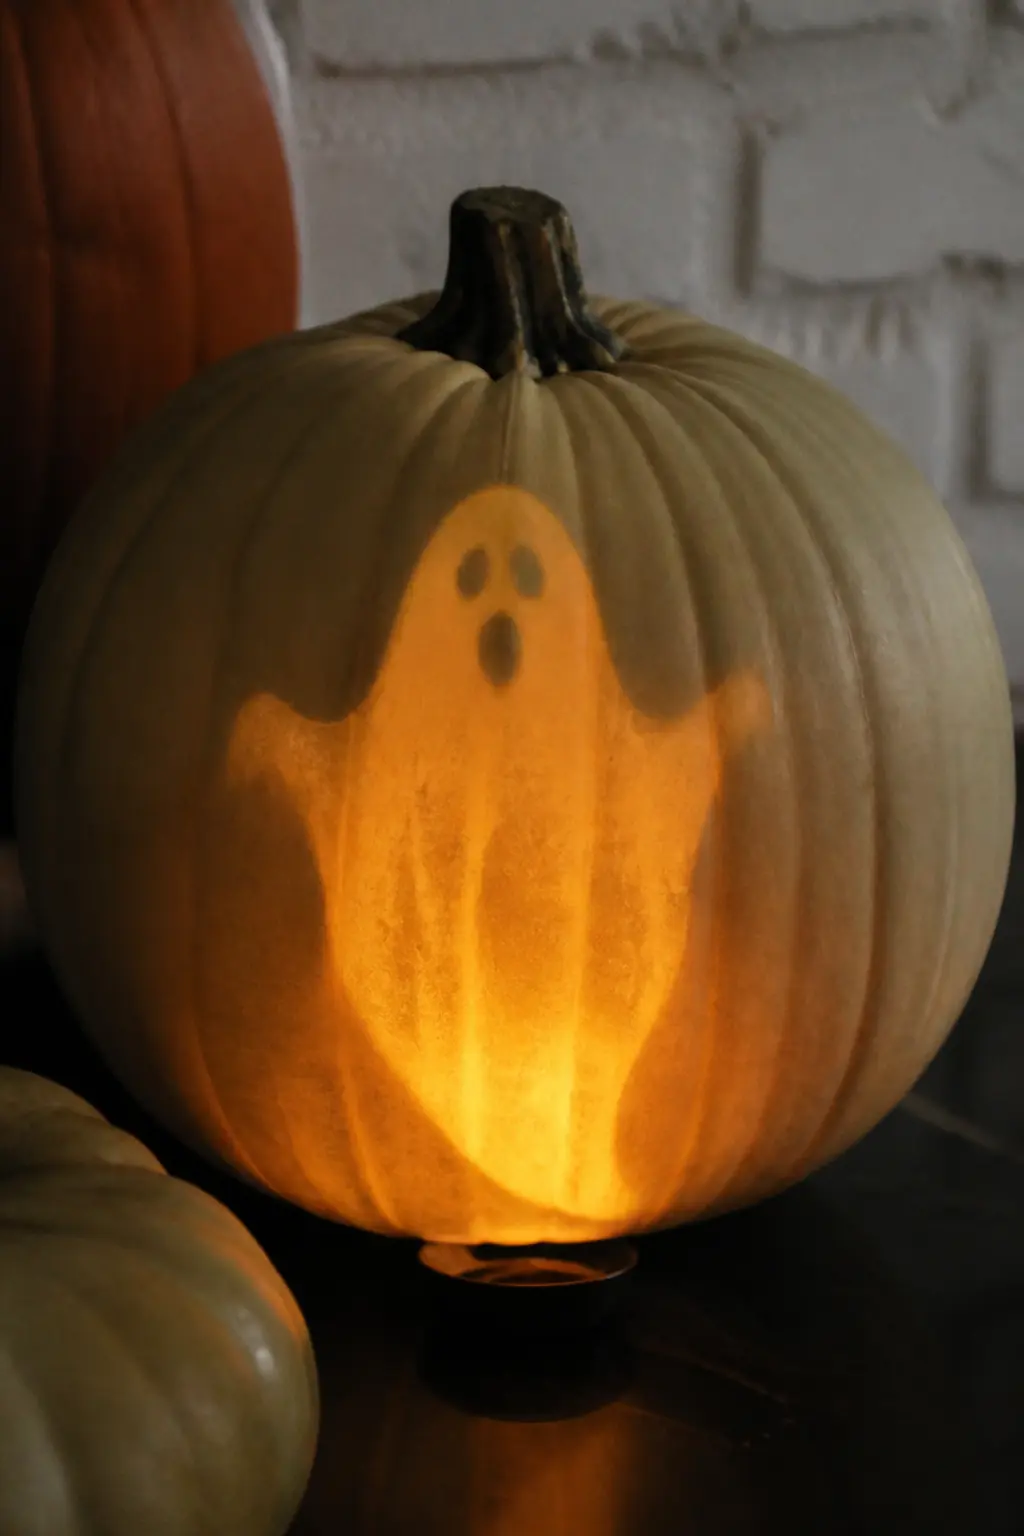
Ghost Only Visible When Lit From Below
The ghost is painted in a color that matches the pumpkin in daylight but catches a warm light source directed upward from below. A pale yellow or gold ghost on a cream pumpkin vanishes in ambient light and emerges when a candle or uplighter sits beneath it.
This works best outdoors on a dark step with a small LED puck light placed directly underneath the pumpkin. Test the effect in a dark room before you commit the pumpkin to a position. Rotate until the ghost faces the viewer at the moment they arrive.
🛍 Shopping guide
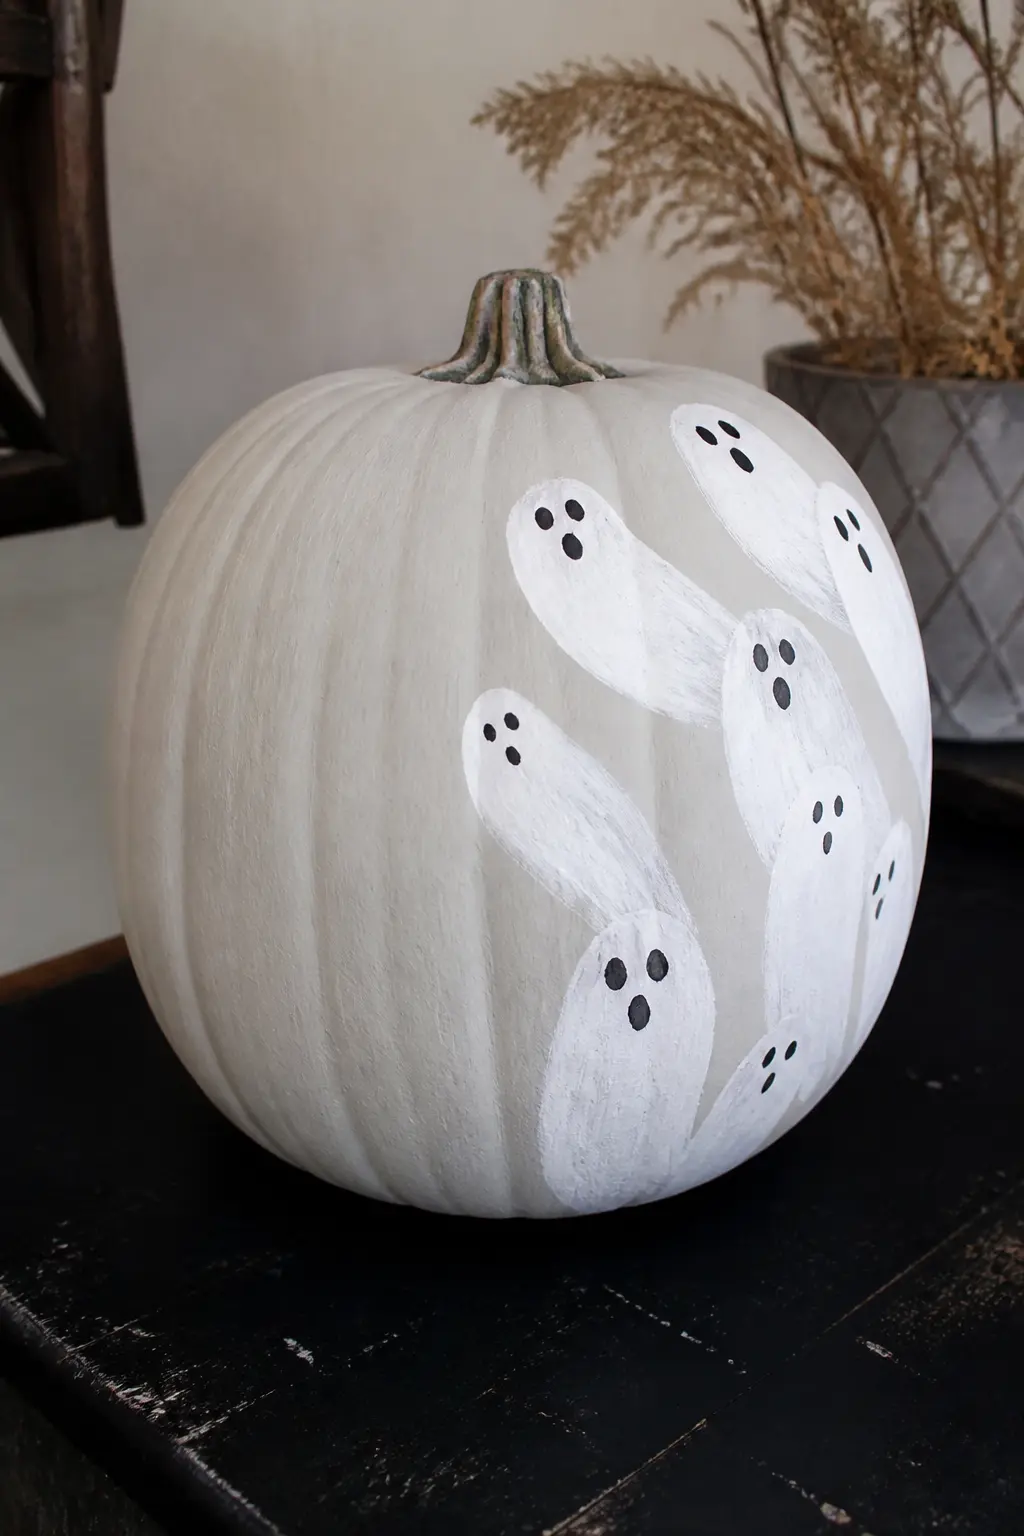
Several Small Ghosts Crowded on One Side
Seven or eight small ghost figures are clustered on one side of the pumpkin, overlapping slightly, all facing the same direction. The other side of the pumpkin is empty. The asymmetry and the crowding are what generate the uneasy feeling.
Vary the heights slightly among the small figures so they do not look like a repeat stamp. Let some overlap others. The cluster should look as if the ghosts have gathered rather than been arranged, because the latter is exactly what you want the viewer to doubt.
🛍 Shopping guide
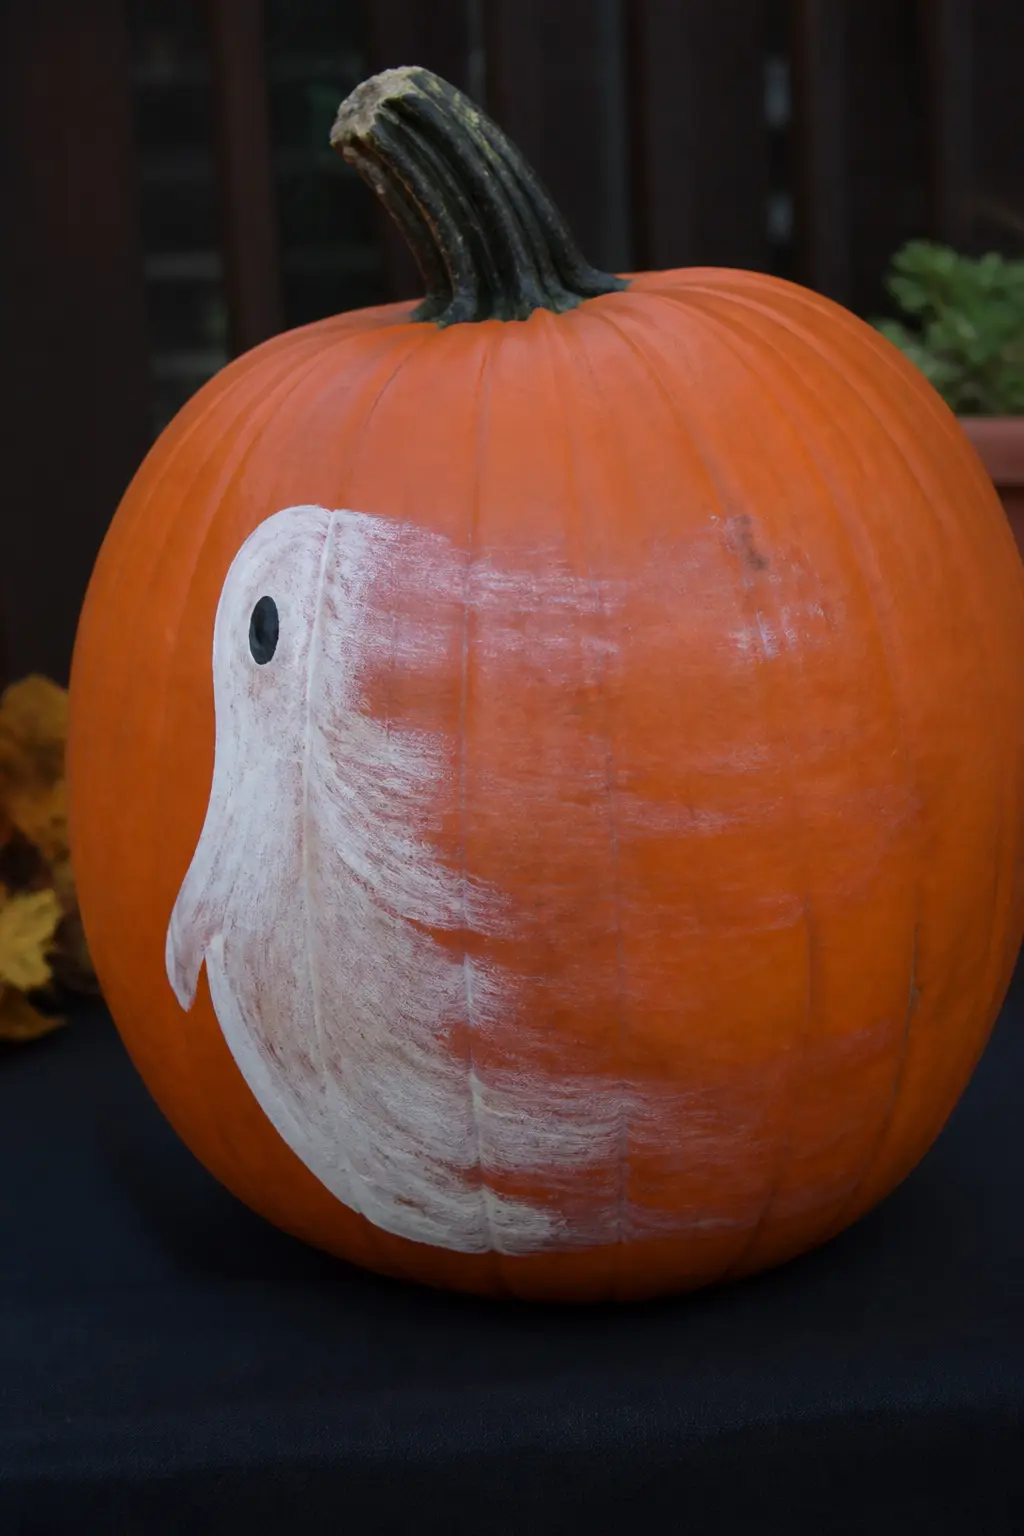
Ghost Half Faded Into the Pumpkin
The ghost is fully rendered on one side of its body and fades progressively to nothing on the other, as if it is in the process of disappearing into the pumpkin’s surface. The head and one eye are clear; the opposite side is barely a trace of diluted white.
Work wet-into-wet to blend the fade. Lay the ghost in full opacity, then immediately drag a damp brush sideways through the paint on the fading side, pulling color away. Repeat as needed while the paint is still open.
🛍 Shopping guide
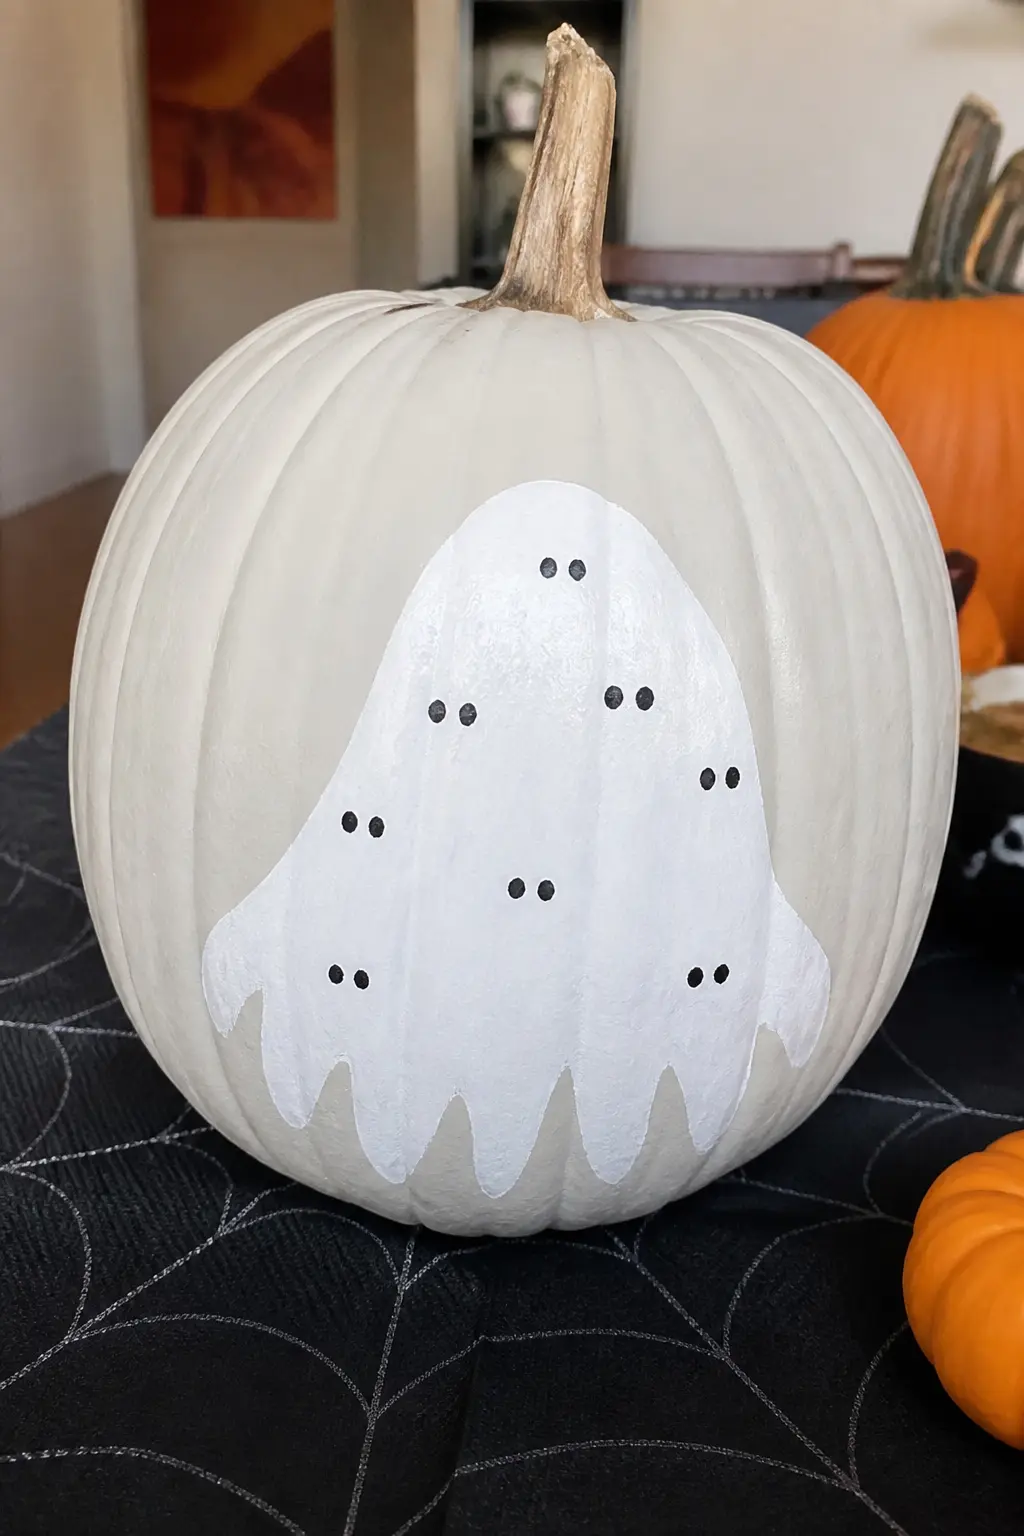
Ghost With Too Many Eyes
The ghost has a regular pair of eyes in the expected place, and then additional pairs scattered irregularly across its body: smaller pairs lower down, one pair at the very edge of the hemline, perhaps one high on the forehead. The extra eyes are the same style as the first pair so the viewer counts before they can decide how they feel.
Use consistent dot-style eyes throughout so the multiples look like features of the same creature rather than decoration. Irregular spacing is more disturbing than a grid.
🛍 Shopping guide
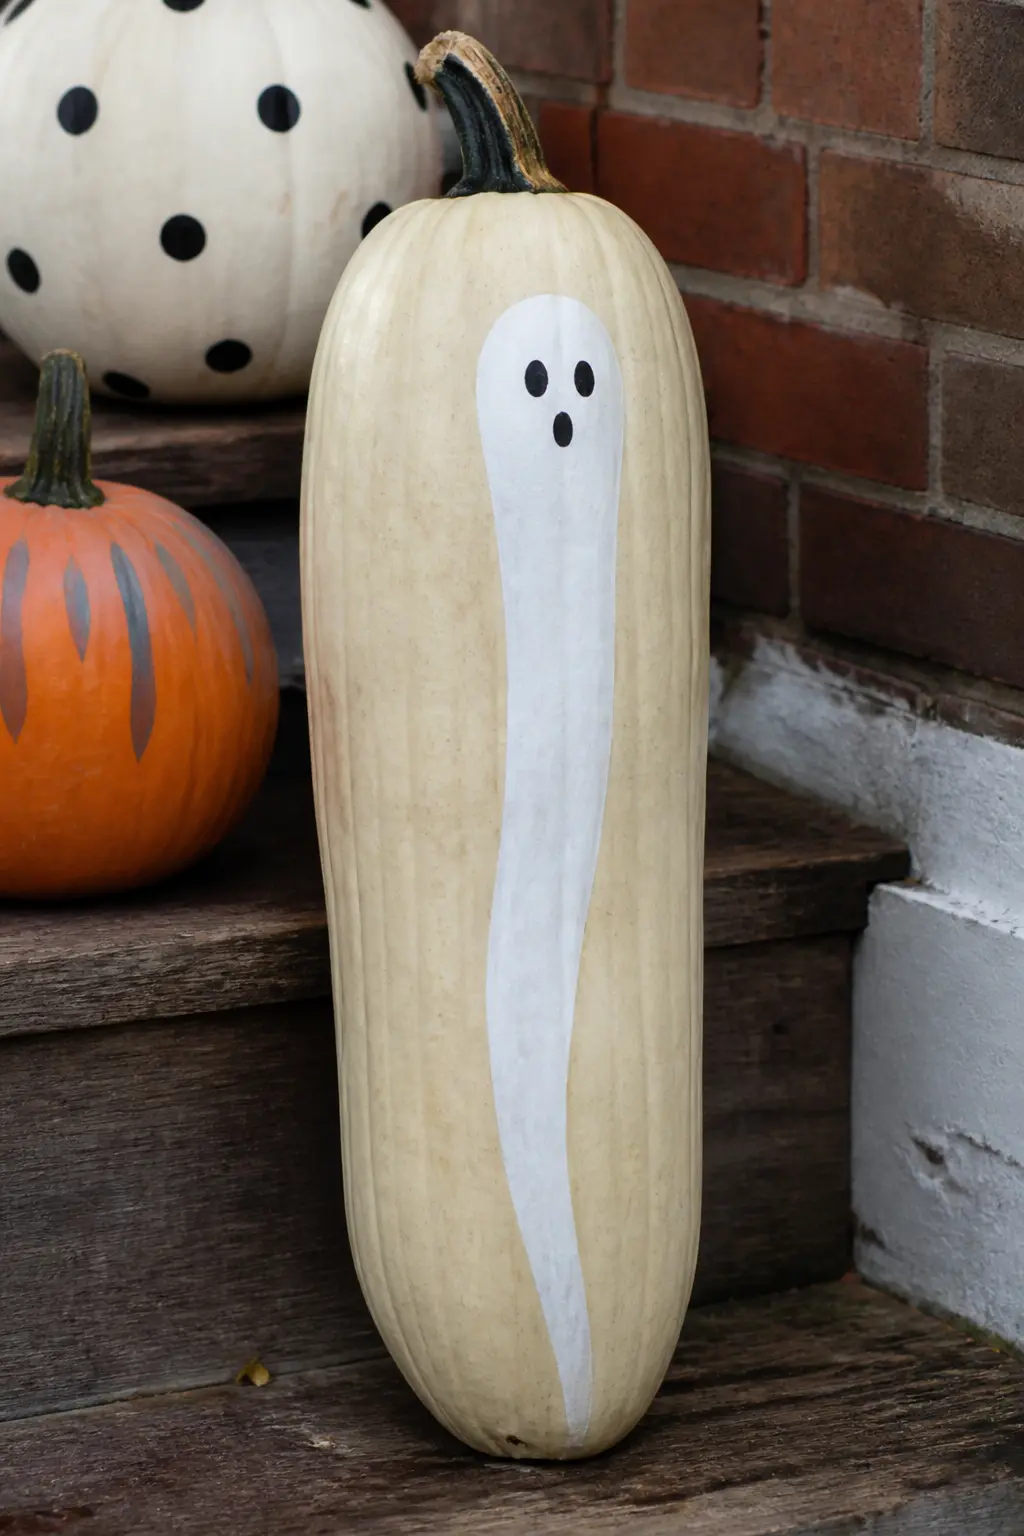
Ghost With a Very Long Thin Body
The head is normal in proportion. The body extends far below it in a thin column before widening into the hemline. The figure is three or four times taller than it is wide. It looks stretched, and the distortion is immediately uncomfortable in a way that a wide ghost is not.
This design works best on a tall oval pumpkin rather than a round one, where the proportions of the pumpkin itself support the elongated figure. On a round pumpkin, the ghost extends to the bottom of the painting surface and the effect is even more pronounced.
🛍 Shopping guide
Two Ghosts on Opposite Sides, Facing Away
One ghost is painted on the front of the pumpkin, facing outward. A second identical ghost is painted directly on the back, also facing outward. From any angle you see only one ghost, with its back to you. The viewer always faces the wrong ghost, and the one behind them is always turned away.
Make the two figures truly identical so the installation reads as intentional rather than accidental. Place the pumpkin on a rotating stand if you want to demonstrate the effect.
🛍 Shopping guide
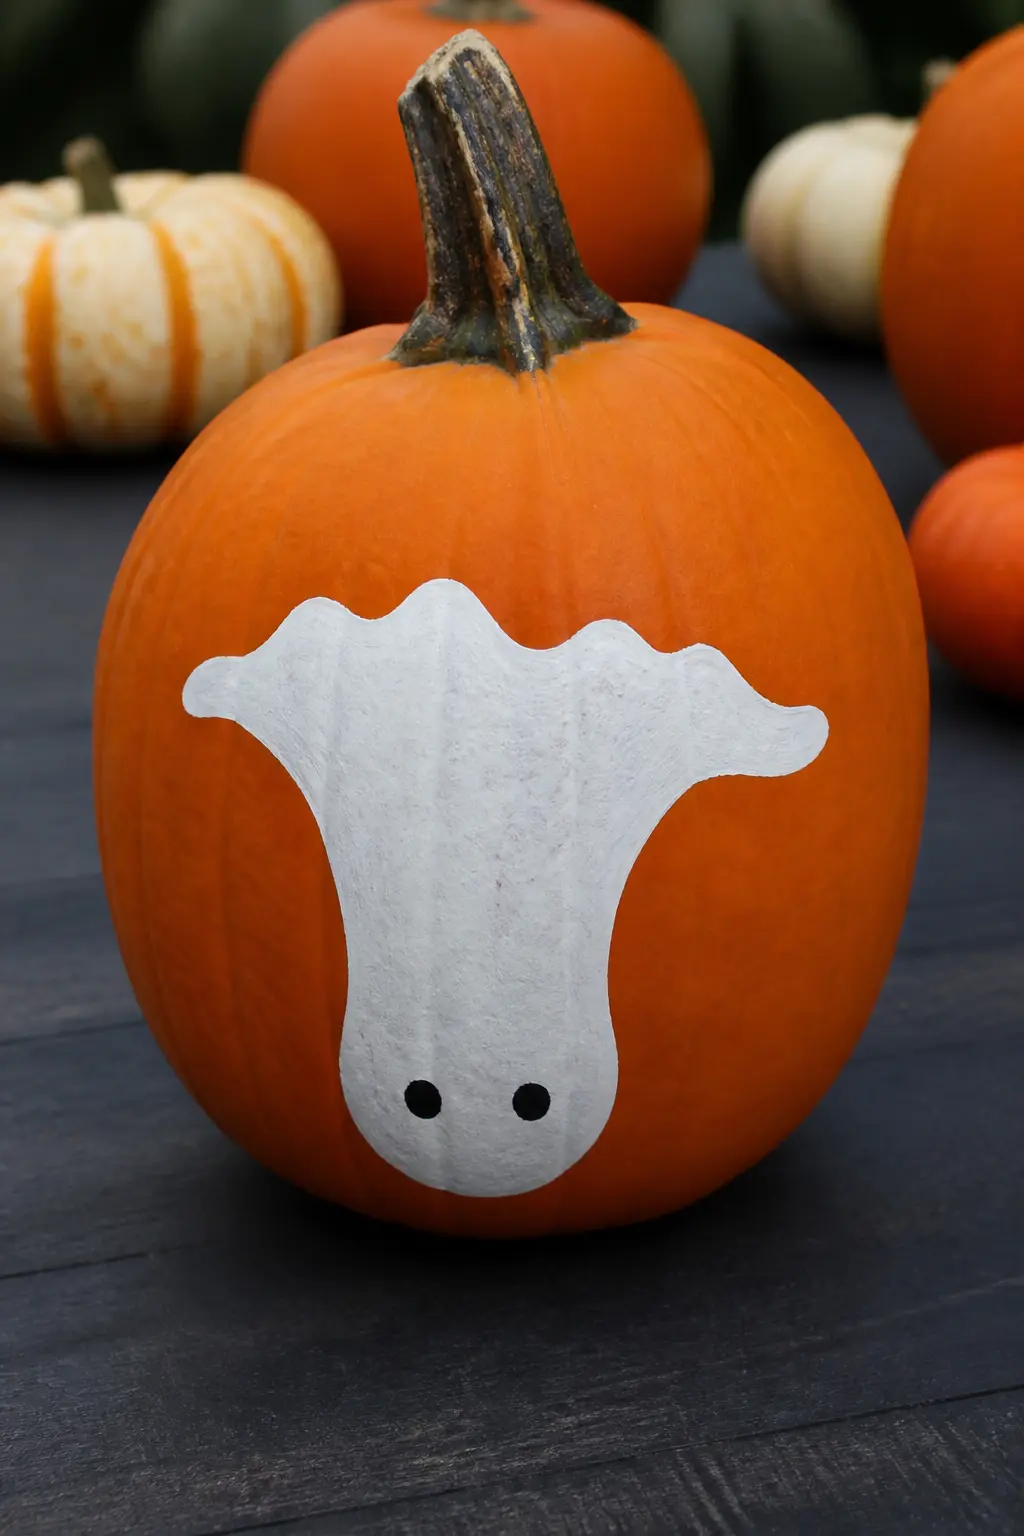
Ghost Painted Upside Down
The ghost is oriented with its head at the bottom of the pumpkin and its hemline at the top. The eyes look downward from below. There is no right reading: the viewer knows what it is and knows something is wrong, and those two facts exist simultaneously.
Invert the pumpkin on its stem end to paint so gravity keeps your wrist comfortable. Then display it right-side-up with the ghost pointing down. The stem at the top grounds the pumpkin and makes the inversion of the ghost below it feel deliberate.
🛍 Shopping guide
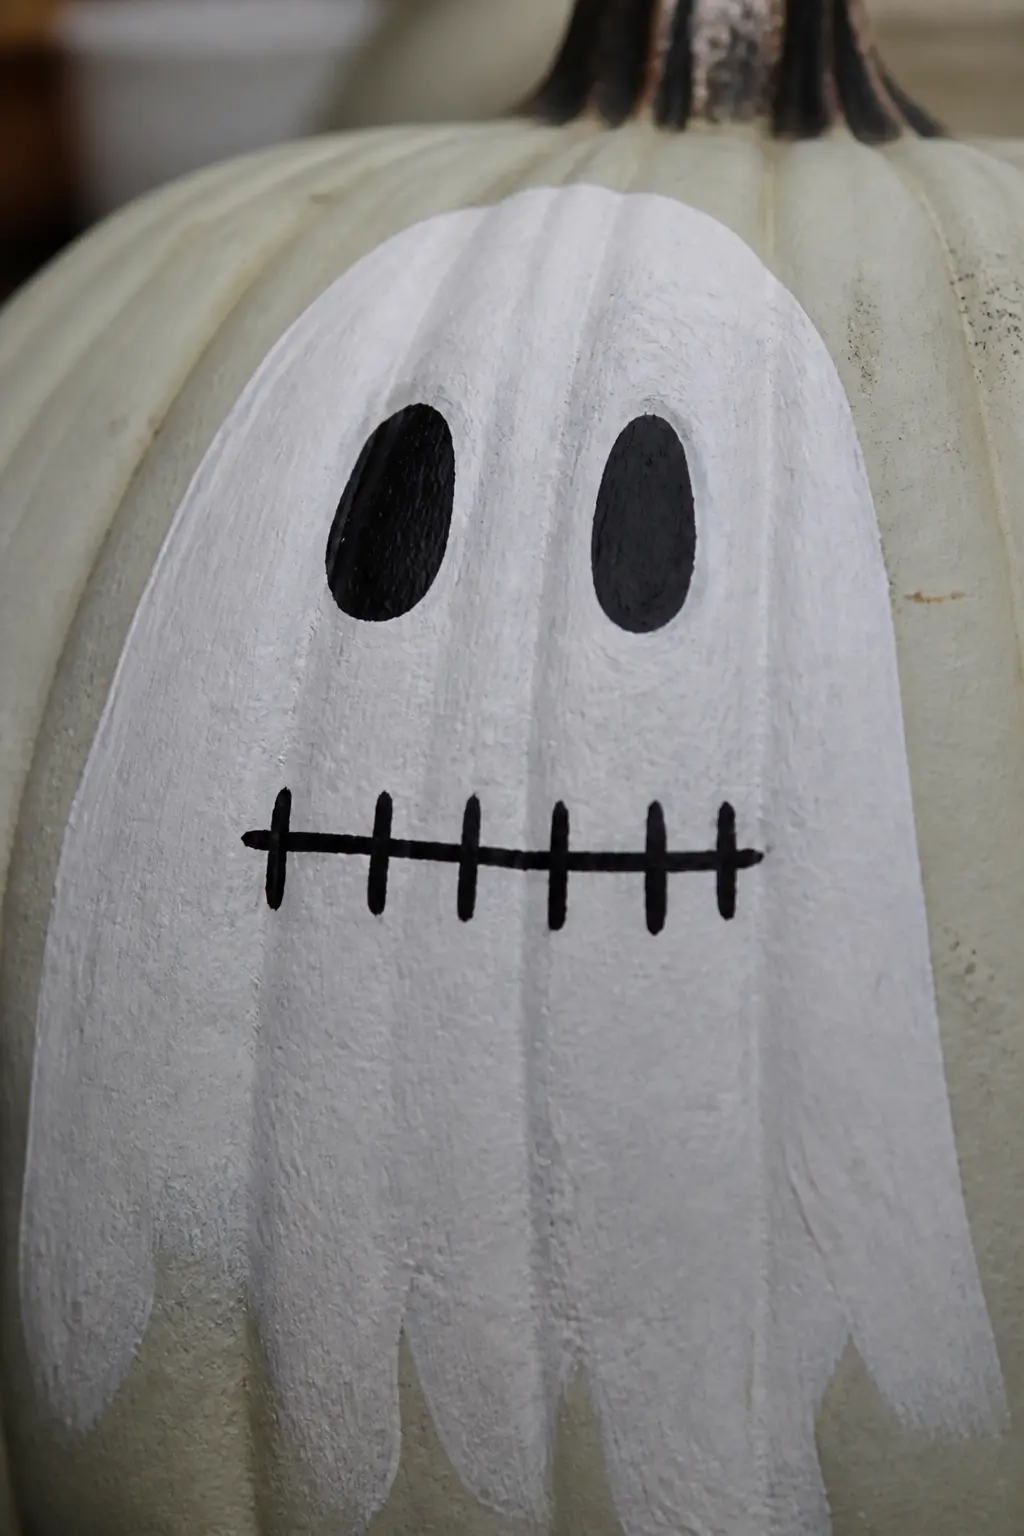
Ghost With the Mouth Stitched Shut in Painted Lines
A horizontal line where the mouth would be is crossed by short vertical stitches at even intervals, painted in black. The eyes are present and open. The ghost cannot speak and does not appear to mind, which is worse than if it did.
Keep the stitches short and parallel. Roughly six to eight stitches across a mouth-width line is the right number. More looks fussy. Fewer looks accidental. Use a size-0 brush and pull each stitch in a single confident downstroke.
🛍 Shopping guide
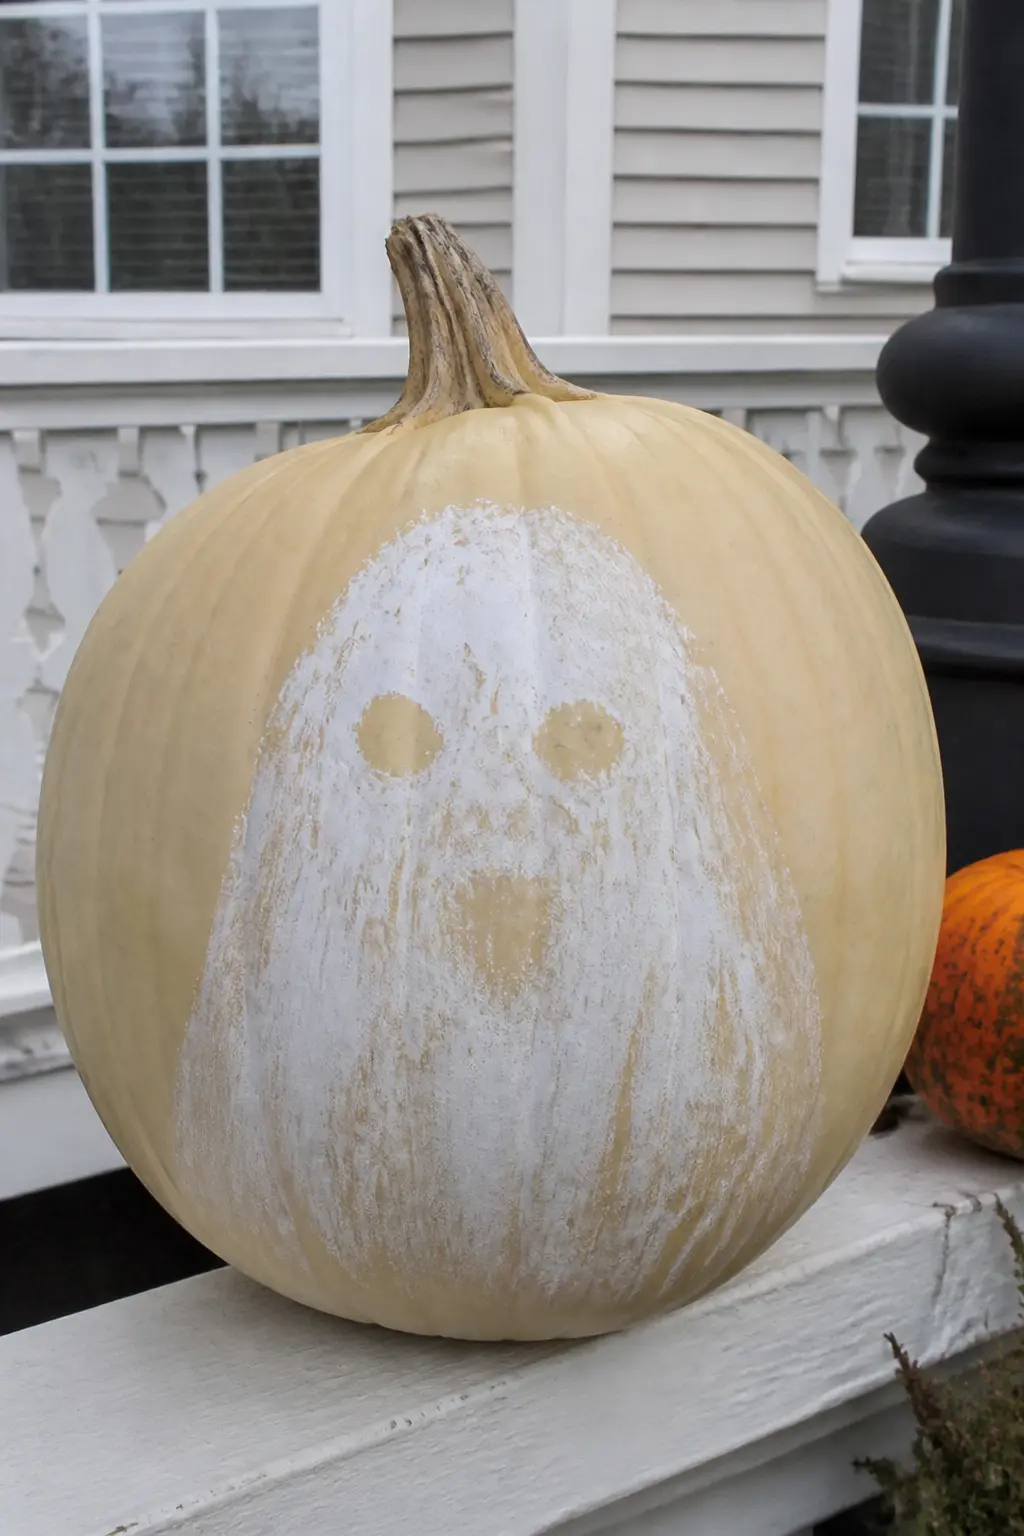
Ghost With a Face That Only Resolves at a Distance
Up close, the ghost’s face is a scatter of pale marks, too diffuse to read as eyes or a mouth. Step back three or four feet and the features resolve into a clear expression. The effect is achieved by painting the features in very diluted paint over a slightly textured area.
This takes the most experimentation of any entry here. Test the viewing distance before you commit to the pumpkin. The sweet spot is usually around the viewer’s body-length away from the object, where the eye is no longer resolving individual brushstrokes.
🛍 Shopping guide
Frequently Asked Questions
What paint works best on a ghost painted pumpkin?
Matte acrylic craft paint or chalk paint in white or pale tones gives the cleanest result on a real or artificial pumpkin. Both grip the surface without primer on most pumpkin skins, though two thin base coats of white chalk paint before adding detail help every subsequent color sit flat and opaque.
Do you need to seal a painted pumpkin?
For pumpkins kept indoors, sealing is optional. For outdoor porch pumpkins, two light coats of a matte acrylic spray sealer extend the life of the design significantly. Wait at least 24 hours after finishing the last layer of paint before sealing, so nothing smudges.
How do you get smooth edges on a painted ghost?
Sketch the ghost lightly in chalk pencil or a light pencil before you paint, so you have a guide to follow. Use a round brush loaded with a medium amount of paint, not too wet, and work from the outer edge inward. Two thin coats produce a smoother edge than one heavy coat.
Can you paint a ghost on an orange pumpkin, or does it need to be white?
Both work. On an orange pumpkin, paint the ghost body in two coats of opaque white to cover the orange ground inside the ghost’s outline, then add your details. The natural orange outside the ghost’s edge acts as part of the design. A white pumpkin removes that step and gives softer contrast overall.
How long does a painted pumpkin last?
A real pumpkin painted with acrylic and sealed with a spray varnish lasts three to four weeks in cool, dry outdoor conditions. Artificial foam or craft pumpkins painted and sealed properly last indefinitely and can be stored flat in tissue paper between seasons.
What is the easiest ghost design for a beginner?
The round ghost with two dot eyes requires nothing more than a medium round brush, white paint, and two dots. If you can paint a rough circle, you can paint this ghost. The slight imperfections in the outline read as part of the charm rather than a mistake.
31 ghost crafts for kids that are genuinely different from each other: tissue paper, wood, lace, pai
19 crochet Halloween decorations you can finish in an evening using leftover yarn: ghosts, pumpkins,
25 halloween party games for kids that are high-energy, not too scary, and totally unforgettable. Pr
Leave a Reply