

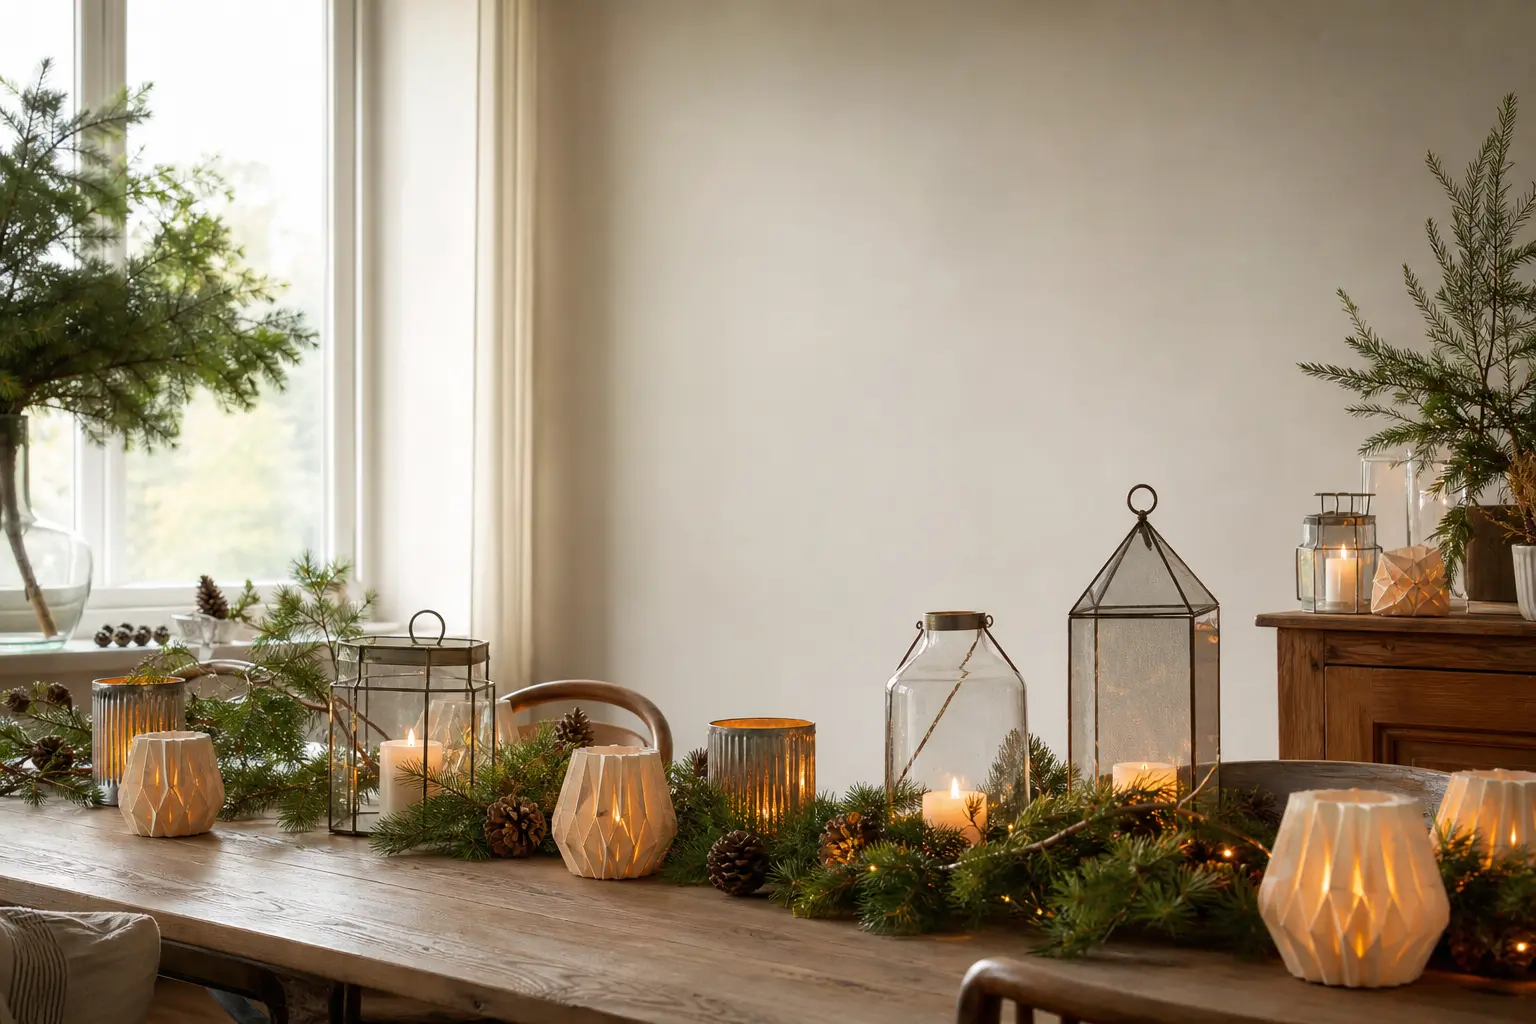
Every diy christmas lantern on this list comes with one piece of information the shop tag never gives you: can it hold a real flame, or does it need a battery light?
That single decision changes everything, because glass and metal are fireproof and wood, paper and fabric are not.
Get it wrong and you have either a fire hazard or a melted LED situation, neither of which is the vibe for a path lined with lanterns on Christmas Eve.
The seventeen builds below cover both options honestly. Some use a jam jar and a length of wire. Some need a weekend afternoon and a tin of copper pipe fittings.
All of them cost less than the equivalent from a home-decor shop, and most use things you can pick up in one run to a hardware store or a craft supplier.
For the outdoor setting, pair these with ideas from our guide to christmas crafts for adults you can make from dollar-store finds, and browse the hub on outdoor christmas decor for the bigger picture.
Each entry lists active time, total time, the age it suits, and the one step that tends to go wrong. Make one, line up six, or work through the whole list over December.
This post contains affiliate links. If you buy through them, I may earn a small commission at no extra cost to you.
- Jam Jar with a Wire Handle
- Tin Can Punched with Holes
- Paper Bag with Sand in the Base
- Wooden Frame with Glass Panes
- Glass Vase Inverted over a Plate
- Fabric Shade over a Battery Light
- Birch Bark Wrap
- Copper Pipe Frame with Glass
- Clay Cylinder Pierced with Holes
- Vellum Panel Box
- Mason Jar with a Wire Cage
- Lace Covered Jar
- Wooden Box with a Cut Window
- Hurricane Glass on a Slate Base
- Punched Metal Bucket
- Folded Card Frame
- Terracotta Pot Inverted with a Cut Door
- Frequently Asked Questions
Jam Jar with a Wire Handle
This is the lantern that lives at the end of every garden path.
A recycled jam jar, a length of galvanized wire twisted into a handle, and a pillar candle inside: the finished piece looks like something from a Scandinavian market stall and costs almost nothing.
The glass takes a real flame safely, and the open top lets heat escape, which is exactly what you want. Store it empty in the jar itself, handle folded flat.
What You Need
- 1 large jam jar, at least 500 ml, clean and dry
- 60 cm galvanized wire, 1.2 mm gauge
- Wire cutters (adult step)
- Round-nosed pliers
- 1 pillar candle, short enough to sit 4 cm below the jar rim
How to Make It
- Cut two 30 cm lengths of wire. An adult should handle the wire cutters here, as the ends are sharp.
- Wrap one length twice around the neck of the jar just below the lip, twisting the ends together tightly with pliers so the coil sits flat and does not slip.
- Take the second length and thread each end under opposite points of the neck coil, then bend both ends upward and twist them together at the top to form an arched handle. The jar should hang level when you lift it by the handle.
- Squeeze the handle joint firmly with pliers so it cannot untwist under the weight of the jar.
- Set the pillar candle inside. The candle top should clear the jar rim by at least 4 cm so heat rises out rather than building up against the glass.
- Light with a long match or a barbecue lighter. Never leave unattended outdoors in wind.

Tin Can Punched with Holes
Punch a pattern into a tin can and a tea light turns it into something between a lantern and a projector: pinpricks of light scatter across a wall or a path edge in whatever pattern you pressed in.
The metal takes a real flame with no risk. Freeze the can before punching so the sides do not cave in, and the holes come out clean and even.
Finished cans store flat in a box, stacked with a sheet of newspaper between each one to protect the pattern.
What You Need
- 1 large tin can, 400 g or bigger, label removed
- Water, to fill the can for freezing
- A marker pen
- A hammer and a sharp nail, 2 mm diameter
- A thick towel
- 1 tea light
How to Make It
- Fill the can with water and freeze overnight. The ice stops the metal buckling when you punch it.
- Draw your pattern on the outside of the frozen can in marker. Simple shapes work best: a star, a tree outline, a row of dots around the rim. Work quickly so the can does not thaw mid-drawing.
- Lay the can on a thick folded towel to muffle the noise and steady it. An adult should hold the nail at each marked dot and tap firmly with the hammer. One clean strike per hole is better than several timid ones. The hole is done when the nail point comes through cleanly and the metal lifts slightly on the inside.
- Rotate the can and continue until the whole pattern is punched. If the ice begins to melt and the can starts to flex, return it to the freezer for 20 minutes.
- Let the ice melt completely, then dry the can and dry the inside thoroughly. Any remaining moisture will rust the base.
- Set a tea light inside on the flat base. The can sits steadily on its own rim.

🛍 Shopping guide
Paper Bag with Sand in the Base
The luminaria is the oldest lantern on this list and still one of the most beautiful when a dozen of them line a path.
A white paper bag, a cup of sand or fine gravel to weight the base, and a battery-operated tea light: that is the whole material list. Use flameless only here, always.
Paper and a real flame is never the combination you want on a garden path in the dark. Fold the top edge down twice for a neat cuff that also stiffens the bag and keeps it from collapsing in a breeze.
After the party, shake out the sand and fold the bags flat.
What You Need
- 1 white paper bag, at least 18 x 30 cm, medium weight
- 250 ml dry sand or fine gravel
- 1 battery-operated tea light
- A ruler (optional, for an even cuff fold)
How to Make It
- Open the bag fully and stand it upright. Pour the sand into the base so it sits about 5 cm deep. The bag should feel solid and not tip.
- Fold the top edge of the bag down by about 4 cm, then fold it down again. The double fold makes a firm cuff that holds its shape and makes the bag look intentional rather than provisional.
- Turn on the battery tea light and set it on top of the sand, pressing it down slightly so it sits level. The glow should show through the paper as a warm pool of light, not a concentrated bright spot.
- Line bags along a path edge or a step, spacing them about 40 cm apart for an even, generous effect.

Wooden Frame with Glass Panes
This is the lantern you keep. Build it once from pine stripwood and four pieces of picture glass and it will come out of the loft every December looking just as good as the year you made it.
It takes a real candle safely because the structure is glass and wood open at the top, with the flame fully enclosed in glass on all four sides.
The woodwork is not difficult, but it does need a saw, wood glue and clamps, so plan for an afternoon rather than an hour.
Finished, it sits on a shelf or a table and looks like something from a garden center at four times the price.
What You Need
- Pine stripwood, 15 x 15 mm section, 2 m total length
- A mitre saw or mitre box and handsaw (adult step)
- 4 pieces of picture glass, each 12 x 18 cm, edges taped with masking tape for handling
- Strong wood glue
- 4 small clamps or bulldog clips
- Sandpaper, 120 grit
- Wood stain or paint, optional
- 1 short pillar candle, no taller than 10 cm
How to Make It
- Cut the stripwood into 8 pieces of 18 cm (the vertical posts) and 8 pieces of 12 cm (the horizontal rails). An adult should operate the saw. Sand all cuts smooth.
- Lay two vertical posts parallel on your work surface, 12 cm apart. Glue a horizontal rail across the top and bottom of each pair to make two identical frames. Clamp until set, about 30 minutes.
- Stand the two frames upright, facing each other, and glue the remaining four horizontal rails between them at top and bottom to complete a box frame. Clamp and leave for 1 hour. The box should sit square on a flat surface with no wobble.
- Slide one glass pane into each side of the box, resting it against the inside face of the stripwood. The glass does not need gluing: the frame holds it snugly. If a pane rattles, press a small strip of masking tape along the inside edge as a shim.
- Stain or paint the wood if you want a darker finish. Apply before inserting glass if possible, or mask the glass edges carefully.
- Set the pillar candle on a small metal plate or a ceramic tile inside the base of the lantern. Light with a long match. The open top allows heat to rise freely.

🛍 Shopping guide
Glass Vase Inverted over a Plate
Turn a tall glass vase upside down over a tea light on a ceramic or slate plate and you have a cloche lantern that looks genuinely elegant. The glass chimney protects the flame from drafts and the plate catches any wax drips.
It takes a real flame because every part in contact with heat is either glass or ceramic.
The one thing to know: the air inside will exhaust the candle faster than an open flame, so use a proper tea light in a metal cup rather than a bare wax disk.
After use, lift the vase straight up to avoid tipping wax onto the plate.
What You Need
- 1 tall clear glass vase, straight-sided, at least 20 cm tall and 10 cm wide at the base
- 1 ceramic or slate plate, wide enough that the vase rim sits on it with 3 cm to spare all around
- 1 tea light in a metal cup
- Optional: a few sprigs of fresh holly or pine placed on the plate around the outside of the vase
How to Make It
- Place the plate on a stable, heat-resistant surface. Set the tea light in its metal cup in the center of the plate.
- Light the tea light before inverting the vase. This is easier than trying to light it through the narrow base opening once the vase is down.
- Lower the vase straight down over the lit tea light, rim-side down, so the rim sits flat on the plate. The flame will flicker briefly as the air shifts, then settle. If it goes out, lift the vase, relight, and lower more slowly.
- Arrange holly or pine sprigs around the outside base of the vase on the plate. Keep them clear of the vase rim so air can still circulate slightly at plate level.
- The tea light will burn for approximately 3-4 hours before exhausting the available oxygen, which is normal and safe. Do not attempt to relight inside the capped vase.

Fabric Shade over a Battery Light
A cone of fabric gathered over a battery puck light makes a soft glowing shade that looks like a tiny lampshade and suits a mantelpiece or a side table perfectly.
Flameless only, always: fabric and a naked flame share nothing but proximity, and proximity is enough to cause a problem. The beauty here is that you can match the fabric to your room, whether that is ivory linen, red velvet or a Liberty print.
The whole thing comes apart in a minute and the fabric folds away into a small square.
What You Need
- 1 piece of fabric, 40 x 40 cm, medium weight (linen, cotton or velvet)
- A glue gun and glue sticks (adult step)
- Scissors
- 1 battery-operated puck light, 8-10 cm diameter
- A rubber band
- 30 cm of narrow ribbon, 6 mm wide
How to Make It
- Cut the fabric into a circle with a diameter of 40 cm. Fold and cut works fine: fold the square into quarters, cut a curved edge at the open corner, unfold. The circle does not need to be perfect.
- Lay the fabric circle flat and set the battery puck light face-down in the exact center.
- Gather the fabric up around the base of the puck, pulling all the edges upward evenly so the fabric forms a smooth dome over the light. Secure the gathered fabric tightly around the base with a rubber band.
- Tie the ribbon over the rubber band in a neat bow to cover it. An adult should use the glue gun to add a small dot of hot glue under the ribbon knot to keep it from slipping.
- Turn the lantern right-side up. The fabric dome should sit smoothly over the puck with the glow coming through evenly. If the fabric bunches badly on one side, release the rubber band, re-gather more evenly, and re-secure.
- Switch the puck on from underneath. The light filters through the fabric as a warm, diffused glow.

Birch Bark Wrap
Birch bark has a creamy, papery texture that glows beautifully when a light sits inside it.
Wrap a sheet of real or faux birch bark paper around a straight-sided glass jar, secure it with twine, and the result looks like something you carried in from a forest. Flameless only: birch bark is thin, dry and highly flammable.
Use a battery tea light and the combination is completely safe and genuinely beautiful. The bark roll lifts off the jar in seconds for storage and the jar can go in the dishwasher.
What You Need
- 1 straight-sided glass jar, 500 ml (a pasta sauce jar works well)
- 1 sheet birch bark paper or faux birch bark craft sheet, at least 20 x 30 cm
- Scissors
- 60 cm natural twine
- A bone folder or butter knife, for creasing
- 1 battery-operated tea light
How to Make It
- Measure the height of the jar and add 1 cm. Cut the bark sheet to that height and long enough to wrap fully around the jar with a 2 cm overlap.
- Curl the bark sheet gently in your hands before wrapping so it curves naturally rather than fighting you. Wrap it around the jar, overlapping the ends at the back.
- Wind the twine around the jar twice at mid-height and twice near the top, then tie it in a knot or a small bow at the front. The twine holds the overlap closed without glue, which means the wrap stays removable.
- Drop the battery tea light into the jar through the open top. Switch it on. The light should shine through the thin bark as a soft, warm glow along the entire surface. If the bark is too thick to transmit light, choose a brighter puck light instead of a single tea light.

Copper Pipe Frame with Glass
Four short lengths of copper pipe and eight elbow fittings from a plumbing supply store build a square frame that looks expensive, architectural and completely intentional.
Drop glass panes into the sides and it becomes a lantern that handles a real pillar candle without a second thought. Copper does not burn, glass does not burn, and the open-top design means heat dissipates freely.
This is a weekend project, not an evening one, but the result is the kind of thing that gets asked about at every gathering. It stores flat by sliding the glass out.
What You Need
- 8 copper pipe lengths, 15 mm diameter, each 15 cm long (cut from standard pipe or buy pre-cut)
- 8 copper elbow fittings, 15 mm, push-fit or solder type
- 4 pieces of picture glass, 14 x 14 cm, edges taped for handling
- Pipe cutter or junior hacksaw (adult step)
- Sandpaper, 120 grit, for smoothing cut ends
- 1 pillar candle, 8 cm diameter max, 10 cm tall max
- A ceramic tile or metal plate for the candle base inside
How to Make It
- If cutting your own pipe, an adult should use a pipe cutter to cut 8 lengths of 15 cm each. Sand each cut end smooth so the fittings push on squarely.
- Assemble a square base by connecting four pipe lengths with four elbow fittings, bending each joint at 90 degrees. Push-fit fittings need no solder: press firmly until the pipe seats fully in the fitting socket. The base should lie flat with no twist.
- Repeat step 2 to build an identical square for the top frame.
- Stand the base square flat on your work surface. Push one elbow fitting onto each corner of the base, pointing upward, then press a vertical pipe into each upward-facing fitting. You now have four corner posts standing up from the base.
- Press the top frame onto the four corner posts, one corner at a time, until all joints are fully seated. The structure should stand square and firm. If a corner rocks, press the joint harder or add a small wrap of PTFE tape to the pipe end before pushing it in.
- Slide one glass pane into each side, resting it inside the four corner posts. The glass does not need gluing.
- Set the ceramic tile inside on the base, place the pillar candle on the tile, and light with a long match.

🛍 Shopping guide
Clay Cylinder Pierced with Holes
Air-dry clay rolled into a cylinder and pierced before it sets gives you a lantern that looks hand-thrown and costs almost nothing.
The clay bakes hard overnight on its own at room temperature, and once it is fully dry it is non-combustible enough to hold a tea light safely.
The key is piercing the holes while the clay is leather-hard, not wet and not bone dry: wet clay tears and dry clay cracks. Give it about 2 hours from rolling to piercing, and you will be at exactly the right stage.
This one is slow because of drying time, but the active work takes under an hour.
What You Need
- 500 g air-dry clay (one standard block)
- A rolling pin
- A smooth cylindrical object for forming, such as a 750 ml glass jar or a tin can
- A sharp pencil, a skewer or a chopstick for piercing
- Cling film, to wrap the cylinder form
- A craft knife for trimming (adult step)
- Fine sandpaper, 180 grit, for finishing the dry cylinder
- 1 tea light in a metal cup
How to Make It
- Wrap the outside of the jar or tin in cling film. This stops the clay sticking to it so you can slide it out later.
- Roll the clay into a slab about 6 mm thick. Roll it on a non-stick surface: a silicone mat or a piece of cling film works well.
- Cut the slab into a rectangle tall enough to wrap around the jar with a 1 cm overlap. An adult should do the cutting with a craft knife.
- Wrap the slab around the cling-filmed jar, overlapping the join by 1 cm and pressing it firmly to close the seam. Smooth the seam with a damp finger until it disappears. The cylinder should sit upright on its own.
- Leave for about 2 hours until the clay feels firm but still slightly cool to the touch. This is the leather-hard stage. Pierce your pattern now: press the skewer or pencil through the clay with a steady, turning motion rather than a stabbing one. Each hole should go all the way through and leave a clean edge. A star of holes around the top and bottom, with a larger motif in the middle, always looks good.
- Leave the clay to dry completely on the jar for 24 hours, then slide the jar out and leave the cylinder on its own for a further 24 hours so the inside dries thoroughly. The cylinder is ready when it feels completely room-temperature all over and has a slightly lighter colour than when wet.
- Sand any rough edges with fine sandpaper. Set the tea light inside on the clay base. The cylinder sits flat on its own base ring.

Vellum Panel Box
Translucent vellum paper stapled or folded into a box gives the cleanest, most modern lantern silhouette on this list. The light comes through evenly and the whole thing looks precise and architectural rather than crafty.
Flameless only without exception: vellum is essentially thin plastic and it melts near any heat source. Use a battery light and the effect is a cool, modern glow that suits a contemporary shelf or a window ledge.
Fold four panels and a base from a single sheet of heavyweight vellum and the structure is self-supporting.
What You Need
- 1 sheet heavyweight vellum, A2 size, 110 gsm
- A craft knife and cutting mat (adult step)
- A metal ruler
- A bone folder or a butter knife, for scoring
- Double-sided tape, 6 mm wide
- 1 battery-operated tea light or small LED puck
How to Make It
- From the vellum sheet, an adult should cut the following with a craft knife and metal ruler: four panels each 12 x 16 cm, and one base piece 12 x 12 cm.
- Score a fold line 1 cm from one long edge of each panel. This tab is what joins the panels together. Fold each tab sharply toward the back of the panel using the bone folder.
- Stand the first panel upright and press a strip of double-sided tape along its tab. Press the second panel’s straight edge firmly onto the tape. The join should be invisible from the front. Continue until all four panels form a square tube, joining the last panel back to the first.
- Score fold lines 1 cm from each edge of the base piece, forming a shallow tray. Fold them all upward, cut the corners at 45 degrees so the sides fold up neatly, and tape the corner tabs inside to make a flat-based tray.
- Slide the base tray up into the bottom of the tube and tape it in place inside. The box should stand firm and sit flat. If it rocks, check the base tabs are all the same depth and re-fold as needed.
- Drop the battery tea light inside, switch it on, and set the box over it so the light glows through all four sides evenly.

Mason Jar with a Wire Cage
A wide-mouth mason jar fitted with a wire cage that keeps it hanging level is a more polished version of the jam jar lantern, and the cage adds real visual interest.
Bend 1.6 mm galvanized wire into a four-legged cradle that grips the jar’s shoulder, add a hanging loop at the top, and the whole assembly looks like something from a vintage hardware store.
The glass takes a real flame; the wire never touches the flame; the design is safe. Hang it from a shepherd’s hook in the garden or from a beam in a covered porch.
What You Need
- 1 wide-mouth mason jar, 500 ml or 1 litre
- 1.5 m of galvanized wire, 1.6 mm gauge
- Wire cutters (adult step)
- Round-nosed pliers
- Flat-nosed pliers
- 1 pillar candle or tall tea light
How to Make It
- An adult should cut four 25 cm wire lengths for the cage legs and one 50 cm length for the top hoop and handle.
- Form the 50 cm length into a circle that fits snugly around the neck of the mason jar just below the lip. Twist the ends together twice with flat-nosed pliers to close the hoop. Bend the twist upward to start the handle.
- Continue bending the wire above the hoop into an arched handle, curving it with your hands and using round-nosed pliers to form a neat loop at the apex for hanging. Squeeze the loop closed with flat-nosed pliers.
- Take each of the four 25 cm leg wires and fold each one in half. Hook the fold over one point of the neck hoop and press it flat against the outside of the jar, running down toward the base.
- Splay the four pairs of legs evenly around the jar’s base and bend each leg end outward by 1 cm to form small feet. The jar should now sit stable in the cage with the four feet touching the surface and the neck hoop holding everything in place above.
- Set the candle inside the jar and light with a long match. When hanging, ensure the hanging point is rated for the weight of the jar plus contents.

Lace Covered Jar
A straight-sided glass jar wrapped in a single strip of cotton lace gives a light that is soft, lacy and completely different from anything metal or paper can achieve.
The lace sits against the outside of the glass, the flame or battery light sits inside, and the pattern of the lace transfers onto every nearby surface as a shadow.
Flameless only: cotton lace placed directly against the outside of a glass jar with a real flame inside gets hot enough to scorch and eventually ignite. Battery light only, and the effect is still beautiful.
What You Need
- 1 straight-sided glass jar, 500 ml to 1 litre, clean and dry
- Cotton lace trim, 5-7 cm wide, length equal to the jar’s circumference plus 2 cm
- Fabric glue or a glue gun and sticks (adult for glue gun)
- Scissors
- A bulldog clip or two, to hold while drying
- 1 battery-operated tea light
How to Make It
- Measure the circumference of the jar and cut the lace to that length plus 2 cm for the overlap.
- Run a thin line of fabric glue, or a line of hot glue from the glue gun (adult step), along the straight long edge of the lace. Press this edge against the jar, starting at the back, and hold it for 30 seconds. The lace should sit level and not pull away from the glass.
- Wrap the lace around the jar, pressing firmly as you go. When you reach the back again, overlap the ends by 1 cm and glue the overlap closed. Secure with a bulldog clip until the glue sets, about 15 minutes for hot glue and 30 minutes for fabric glue.
- Position the lace band wherever you want it on the jar: centered, near the top, or doubled up in two overlapping rows.
- Drop the battery tea light inside and switch it on. The light casts a lace shadow onto the wall behind the jar and the table beneath it.

🛍 Shopping guide
Wooden Box with a Cut Window
A small unfinished wooden box from a craft store, with a window cut into the front and a battery light inside, becomes a proper little lantern that suits a windowsill or a table centerpiece.
Flameless only: the wood must not be near a real flame under any circumstances. The cutting is the adult step; the painting and decorating are completely accessible for children.
A jigsaw or a drill and fretsaw give the cleanest window; a craft knife on thin balsa can work for very thin wood only. The finished box looks chunky and traditional and stores flat under a bed.
What You Need
- 1 unfinished wooden box, approximately 12 x 12 x 16 cm, with a lid
- A jigsaw or fretsaw (adult step)
- Sandpaper, 120 grit
- Acrylic craft paint, white or any colour
- A paintbrush
- 1 battery puck light or string of micro fairy lights
- Optional: a small piece of red acetate film, to colour the window
How to Make It
- An adult should use the jigsaw or fretsaw to cut a window in the front face of the box. A simple arch, a star or a Christmas tree outline all work. Mark the shape in pencil first, drill a pilot hole inside the shape to start the saw blade, then cut along the line. Sand the cut edge smooth.
- Paint the outside of the box with two coats of acrylic paint, leaving the inside bare. Allow each coat to dry fully before applying the next, about 30 minutes per coat.
- If using acetate film, cut a piece slightly larger than the window opening and glue it to the inside face of the front panel with a dot of PVA at each corner. The acetate casts a coloured glow through the window.
- Place the battery puck light inside the box and replace the lid. Switch the light on. The glow should come through the window only, making the cutout shape read clearly against the unlit box face. If light leaks from the lid join, press a strip of dark masking tape along the inside of the join.

🛍 Shopping guide
Hurricane Glass on a Slate Base
A hurricane glass is a tall, straight-sided glass sleeve designed to sit over a candle and protect it from wind.
Pair it with a slate tile as a base and you have a lantern that is both elegant and completely stable on a path or a step.
The glass and slate are non-combustible; the design is open at the top; a pillar candle inside burns safely and beautifully. The slate base also solves the drainage problem: water runs off cleanly and never pools around the candle.
This one takes no crafting skill at all, but the construction of the base from a raw slate tile into a proper weighted platform is the work that makes it worth including.
What You Need
- 1 hurricane glass sleeve, 20-25 cm tall, 10-12 cm internal diameter
- 1 natural slate tile, 20 x 20 cm
- Clear silicone sealant (adult step)
- 4 small adhesive rubber feet, 8 mm diameter
- 1 pillar candle, diameter 2 cm less than the internal glass diameter
How to Make It
- Clean the slate tile with a dry cloth. Stick the four rubber feet to the underside corners of the tile so it sits level and does not scratch the surface beneath.
- An adult should apply a thin ring of clear silicone sealant to the center of the slate’s top surface, matching the diameter of the hurricane glass base. Lower the hurricane glass onto the sealant ring and press gently. Wipe away any sealant that squeezes out immediately with a damp cloth.
- Leave the sealant to cure for at least 1 hour before placing a candle inside. The glass should feel fixed and not slide on the slate when the sealant is fully set.
- Set the pillar candle on the slate inside the hurricane glass. The candle should stand centered and not touch the glass walls. Light with a long match through the open top.
- For outdoor use, set the slate base on a flat, windproof surface. The hurricane glass provides draft protection from all sides and the open top allows smoke to escape freely.

🛍 Shopping guide
Punched Metal Bucket
A galvanized metal bucket punched with a pattern and fitted with a fat pillar candle is one of the most useful lanterns on this list because the handle makes it genuinely portable.
Carry it from the door to a table, from the garden to the porch, with one hand.
The punching technique is identical to the tin can method, but the bucket’s deeper body gives you more surface to work with and the sturdier gauge keeps it from denting.
Freeze it with water inside, punch it, thaw it out, dry it, and you are done. Real flame, completely safe.
What You Need
- 1 small galvanized metal bucket, 2-3 litre capacity, with a handle
- Water, to fill the bucket for freezing
- A marker pen
- A hammer and a 2-3 mm nail
- A thick towel or folded sacking
- 1 pillar candle, short enough to sit 6 cm below the bucket rim
How to Make It
- Fill the bucket with water to within 2 cm of the rim and freeze for at least 8 hours, or overnight.
- Draw the pattern on the outside of the frozen bucket in marker. Keep the design in the lower two-thirds of the bucket so the upper section remains solid and the handle attachment points are not weakened by nearby holes.
- Lay the frozen bucket on its side on a thick folded towel. An adult should hold the nail at each marked dot and strike firmly with the hammer: one clean blow per hole. Work quickly to take advantage of the ice. If the metal begins to flex before the pattern is finished, return the bucket to the freezer for 30 minutes.
- Let the ice melt fully over a sink. Dry the inside and outside of the bucket thoroughly, paying attention to the base where water collects. Rust starts at the base if it stays damp.
- Set the pillar candle inside on the base. The bucket handle means you can carry it lit, though you should do so slowly and with care. Outdoors, place it on a stable, non-combustible surface.

Folded Card Frame
Four scored and folded pieces of thick card, joined at the corners with narrow ribbon lacing, make a square lantern frame that collapses flat in seconds. Sit a battery tea light inside and the card walls glow softly from edge to edge.
Flameless only, always: card stock is paper, and paper has no place near a wick.
The charm here is that the card is completely customisable: stamp it, paint it, cut small shapes through it with a craft punch before assembling, and the light turns those cut shapes into its own pattern.
This is also the best option if you want to make twenty lanterns for a table in an afternoon, because the construction is fast and cheap.
What You Need
- 4 pieces of card, each 15 x 20 cm, 240-300 gsm, white or ivory
- A bone folder and a metal ruler
- A craft knife and cutting mat (adult step, for any decorative cutouts)
- A hole punch, 4 mm
- 80 cm narrow ribbon, 4 mm wide, or thin twine
- 1 battery-operated tea light
How to Make It
- Score a vertical fold line 1.5 cm from each short edge of each card panel, using the bone folder and ruler. These scored tabs are what you will lace together at the corners.
- If you want decorative cut shapes, an adult should do this now with the craft knife before assembly, since it is impossible to cut cleanly once the panels are joined.
- Fold each tab forward along the scored line. The fold should be crisp and straight; run the bone folder along it twice if the card wants to spring back.
- Punch two holes through each tab, one near the top and one near the bottom, using the 4 mm hole punch.
- Stand two panels at right angles, overlapping the tabs so the holes align. Thread ribbon or twine through the holes and tie in a small knot to lace the corner closed. Repeat for all four corners. The frame should stand as a square tube.
- Place the battery tea light inside on a flat surface and lower the card frame over it. The light glows through all four walls evenly. Fold the frame flat for storage by simply pressing two opposite corners toward each other.

🛍 Shopping guide
Terracotta Pot Inverted with a Cut Door
Flip a terracotta pot upside down over a tea light and you have a lantern that looks like a tiny kiln.
Cut a small arched door into the side before inverting it and the flame flickers visibly through the opening, while light also escapes through the drainage hole now sitting at the top like a chimney.
Terracotta is clay, clay is non-combustible, and this is one of the most genuinely fireproof lanterns on the list.
The cutting is the one step that needs care, a tile saw or an angle grinder with a masonry disc, and it is absolutely an adult-only job.
What You Need
- 1 terracotta pot, 15-20 cm diameter, standard garden size
- A tile saw or angle grinder with a masonry cutting disc (adult step)
- Safety goggles and dust mask (adult must wear these)
- A pencil and a template for the door arch, cut from card
- Sandpaper, 60 grit, for smoothing the cut edge
- A flat ceramic or slate tile, slightly larger than the pot rim, as the base plate
- 1 tea light in a metal cup
How to Make It
- An adult should mark the door shape on the side of the terracotta pot in pencil, using the card template. An arch about 5 cm wide and 6 cm tall at the highest point looks well-proportioned on a 15 cm pot.
- Wearing goggles and a dust mask, the adult should cut along the marked line with the tile saw or angle grinder. Work slowly and let the tool do the work; pressing too hard cracks the pot. Make the two vertical cuts first, then the curved top cut in small arcs.
- Sand the cut edge smooth with 60 grit sandpaper to remove sharp fragments.
- Place the flat tile or slate on a stable surface outdoors or on a heat-resistant surface indoors. Set the tea light in its metal cup in the center of the tile.
- Light the tea light with a long match, then lower the inverted pot straight down over it, cut door facing outward. The flame will be visible through the door opening, and a circle of light will come from the drainage hole at the top. The pot sits stably on its own rim.

🛍 Shopping guide
Frequently Asked Questions
Can you put a real candle in a homemade lantern?
Yes, provided every surface the heat reaches is non-combustible. Glass, metal, terracotta and clay all handle a real flame safely. Wood, paper, fabric, card and bark do not.
The rule is simple: if the material would burn on a bonfire, it does not belong near a wick.
Always use a tea light in a metal cup or a pillar candle on a ceramic or metal base inside the lantern, and never leave a lit lantern unattended.
How do you make a lantern from a jar?
The simplest version needs only a clean jam jar, a length of galvanized wire twisted into a handle around the neck, and a pillar candle inside.
Coil one 30 cm wire length around the neck of the jar just below the lip, twist it closed, then bend a second length into an arch and hook each end under the neck coil to form the handle.
Place the candle so its top sits at least 4 cm below the jar rim, and light with a long match.
For a more decorative result, wrap the outside in lace for a battery-lit version, or build a wire cage with four legs that stand the jar on a surface without a plate underneath.
What material is safe for a lantern with a flame?
Glass is the safest and most practical choice because it is transparent, fully non-combustible and easy to clean. Metal (galvanized steel, tin, copper) is equally fireproof and suits punched or framed designs.
Terracotta and air-dry clay that has cured fully are both safe for a tea light, provided the candle sits in a metal cup on the clay base.
No paper, card, vellum, fabric, wood or bark should ever be used in a lantern holding a real flame, even if the flame appears to be fully enclosed.
How do I stop a lantern blowing out outside?
Enclose the flame on all four sides with glass or metal and leave only the top open for ventilation. A hurricane glass over a plate is the most wind-resistant design on this list because the tall glass walls break any horizontal air movement completely.
For path lanterns, set them low to the ground and angle them so the open top faces slightly away from the prevailing wind direction.
A tin can punched with holes also performs well in a breeze because the air that enters through the holes is not strong enough to extinguish the flame but does keep the candle oxygenated. Avoid open-sided designs in any location with consistent wind.

Find the right kids christmas games for every age group, from toddler-safe play to elementary favori

20 Christmas charcuterie board ideas, from a tree and wreath to mini boards for two, with shop lists

Holly Dolly Christmas party ideas room by room: hot pink, white and silver sparkle, rhinestones, but
Leave a Reply