

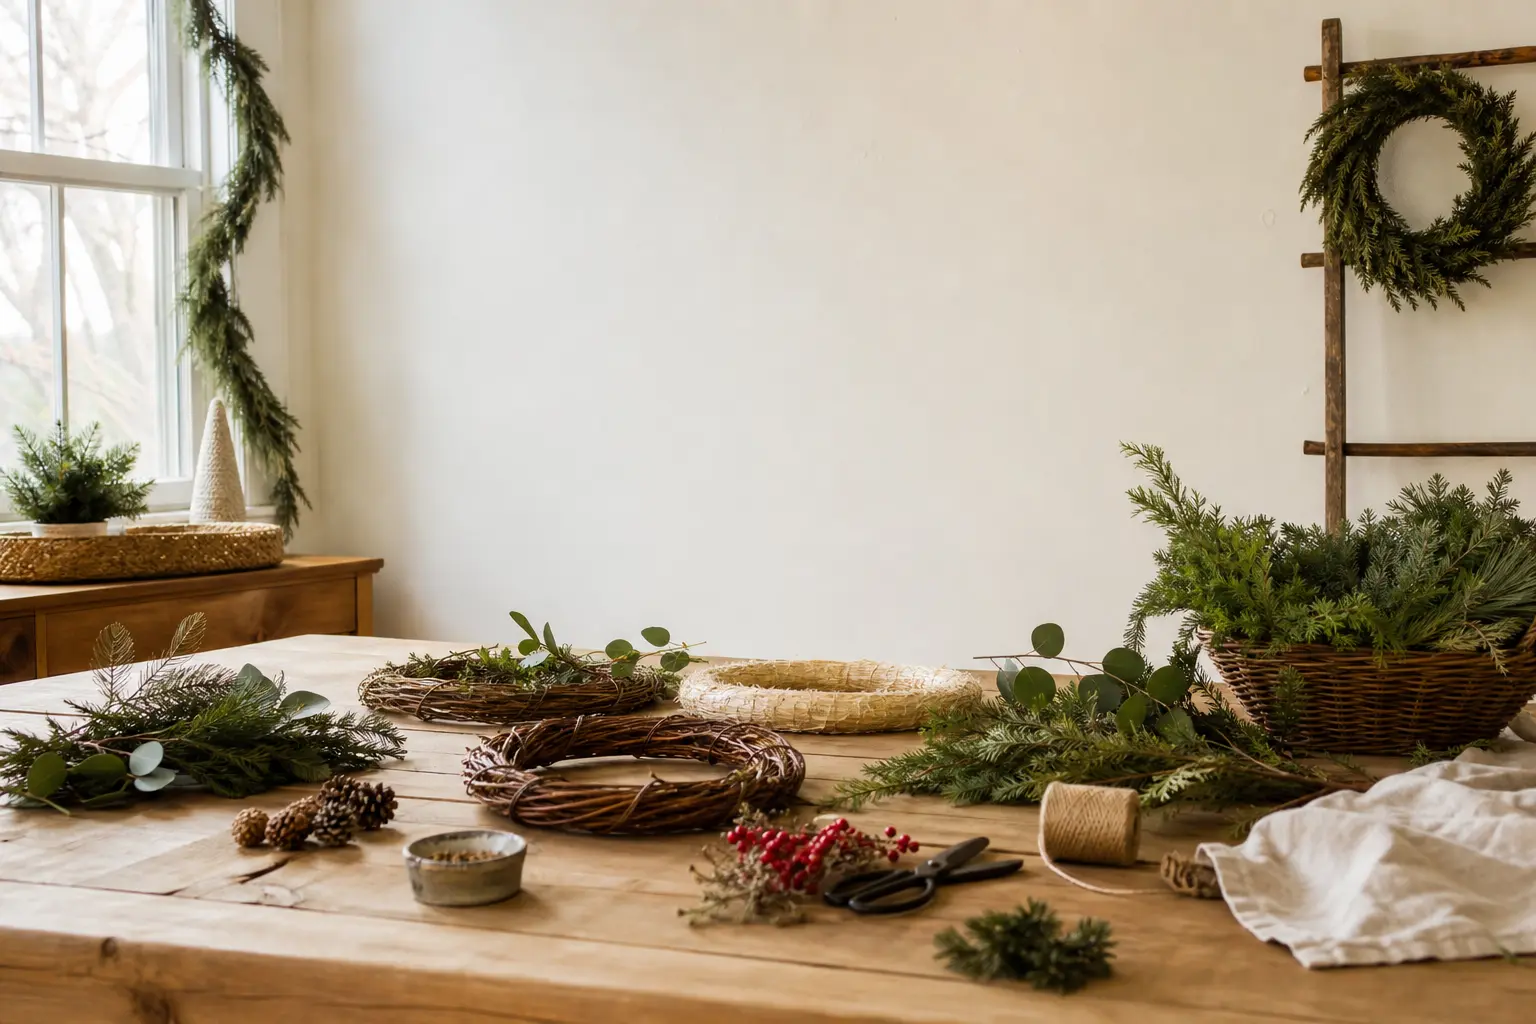
Every christmas wreath diy starts with the same moment of confusion: you have a wire ring, or a straw ring, or an embroidery hoop sitting on the table, and nothing is obviously telling you how anything sticks to it. The answer is not glue guns.
The answer is the base itself. Each of the five bases covered here has one primary fixing, and once you know it, the whole build makes sense.
The materials are cheap, the methods are honest about time, and nothing here ends up in landfill: every wreath listed can be taken apart and composted or stored flat.
If you are also planning the rest of your door and mantel, christmas crafts for adults has the wider picture, and christmas stockings ideas pairs well for the fireplace wall.
This post contains affiliate links. If you buy through them, I may earn a small commission at no extra cost to you.
- Wire Ring Bound With Bunched Cedar
- Wire Ring of Pine Cones on Stub Wire
- Straw Base of Bay Leaves Overlapped
- Straw Base of Dried Hydrangea Heads
- Embroidery Hoop Wrapped in Yarn
- Embroidery Hoop With Three Sprigs and Nothing Else
- Bare Willow Circle With One Bow
- Branch Circle Bound With Copper Wire
- Cardboard Ring Covered in Paper Petals
- Cardboard Ring Covered in Felt Circles
- Wire Ring of Eucalyptus, Tied Not Glued
- Frequently Asked Questions
Wire Ring Bound With Bunched Cedar
The fixing on a wire ring is reel wire, and this wreath makes that obvious from the first bundle. Cedar smells extraordinary and keeps its colour for weeks indoors. Hang it on a door that gets some cold air and it lasts longer still.
When the season ends, cut the reel wire, shake the cedar onto the compost, and the wire ring goes back in the drawer.
Finished, this looks full and deep green, slightly informal, heavier at the sides than the top, which suits a cottage door or a painted kitchen cupboard equally well.
What You Need
- 1 wire wreath ring, 30 cm diameter
- Approximately 10 cedar or cypress stems, each 30-40 cm long
- 1 reel of florist’s reel wire, 0.56 mm gauge, 50 m
- Scissors or wire cutters (adult step)
- 1 length of ribbon, 60 cm, for hanging
How to Make It
- Cut the cedar stems into bundles of three or four, each bundle roughly 15 cm long. An adult should handle the wire cutters or sharp scissors for this step. You want the cut ends clean so the wire grips evenly.
- Tie the reel wire to the inner ring of the wreath frame. Do not cut the wire from the reel yet; you will work continuously.
- Lay the first bundle against the frame with the tips pointing clockwise, cut ends toward the centre, and wrap the reel wire around the stems and the frame three times, pulling firmly. The bundle should not rotate when you tug it.
- Overlap the next bundle so its tips cover the bound stems of the first, and wrap again. Continue all the way around, always in the same direction.
- When the last bundle meets the first, tuck its cut ends under the tips of that opening bundle before you wire it down. This hides the join.
- Twist the reel wire back on itself twice and trim. Thread the ribbon through the top of the frame and knot it for hanging.

Wire Ring of Pine Cones on Stub Wire
No greenery, no drying time, and completely reusable. Pine cones wired to a ring look architectural and slightly Victorian, and they age beautifully, going from pale gold to a warm brown over the weeks.
The fixing here is stub wire looped around the base of each cone, then twisted around the frame. It holds better than glue because the cone can pivot slightly and self-correct as the wire tightens.
Collect cones yourself and this costs almost nothing. Pick ones between 5 and 10 cm long for a ring of this size; very small cones cluster well on the inner ring, larger ones on the outer.
What You Need
- 1 wire wreath ring, 35 cm diameter
- 20-25 pine cones, mixed sizes, 5-10 cm long
- 25 lengths of stub wire, each 20 cm, 0.71 mm gauge
- Wire cutters (adult step)
- Optional: 1 can gold or silver spray paint, used outdoors
- 1 length of wide ribbon, 80 cm, for the bow
How to Make It
- If spraying the cones, do it outdoors in a single light pass and leave them on newspaper for 30 minutes. You want a frosted effect, not a solid coat, so spray from 30 cm away.
- Take one stub wire and thread it between the lowest scales at the base of a cone, pulling both ends level. An adult should handle this step and the wire trimming throughout.
- Twist the two wire ends together twice, then hold the cone against the wreath frame and wrap the twisted tail around the frame twice more, pulling tight. Twist the ends behind the frame and press them flat with pliers so no sharp point protrudes.
- Work from the outside ring inward, placing larger cones on the outer ring first and filling the middle and inner ring with smaller ones. Overlap neighbouring cones so the wire wraps are hidden.
- Stand back and check the balance. Add single cones to any thin patches.
- Tie the ribbon into a full bow and loop the tail around the top of the frame, tying it off at the back.

🛍 Shopping guide
Straw Base of Bay Leaves Overlapped
A straw ring is dense and grippy, which means you can push pins straight in. Bay leaves are the one herb most kitchens have in quantity, they dry flat and fragrant, and they overlap like scales to cover the straw completely.
This wreath suits a kitchen wall or pantry door, and the dried bay is usable in cooking for months afterward if stored in a jar once the wreath comes down.
The finished look is matte, olive-green and slightly Mediterranean. It looks expensive and takes about an hour, most of which is meditative pinning.
What You Need
- 1 foam-free straw wreath base, 30 cm diameter
- Approximately 120 fresh bay leaves (from 4-5 stems), pressed flat to dry for 2-3 days between heavy books
- 1 box of dressmaker’s pins, 150 count
- 1 length of natural twine, 40 cm, for hanging
How to Make It
- Press the bay leaves between the pages of a heavy book for two to three days. They need to lie flat so they do not curl when pinned. Flat leaves make the overlapping scales look intentional; curled ones look untidy.
- Start at the inner edge of the straw ring. Hold a leaf tip-up (stem end down) and push a pin through the stem end at a shallow angle into the straw. The pin goes in at about 30 degrees, not straight down, so it locks into the straw rather than popping out.
- Overlap the next leaf so its lower third covers the pin of the first. Continue around the inner edge until the ring is complete.
- Start a second row on the outer edge of the ring, overlapping toward the centre so the two rows meet in the middle and cover the straw completely.
- If any straw shows through, add single leaves pinned at an angle to fill the gap.
- Tie the twine around the top of the straw ring, knotting it twice, and hang.

Straw Base of Dried Hydrangea Heads
Hydrangea heads dry on the stem if you cut them in late summer and stand them in a vase with a little water that you do not top up.
By December they are papery, blowsy and the colour of old linen or dusty blush, depending on the variety. The fixing on a straw base is still the pin, but large flower heads need two pins each, crossed, to stop them rotating.
This wreath reads as quietly luxurious. It suits a bedroom door or an internal hallway where it will not get rained on, since dried hydrangeas dissolve in damp.
What You Need
- 1 foam-free straw wreath base, 35 cm diameter
- 8-10 dried hydrangea heads, stems trimmed to 3 cm
- 1 box of dressmaker’s pins, 100 count
- Optional: a few dried seed heads or small filler flowers
- 1 length of velvet ribbon, 70 cm, 4 cm wide, in dusty pink or cream
How to Make It
- Check that each hydrangea head is fully dry: it should feel papery and rustle slightly when you move it. Any moisture left will cause mould against the straw.
- Hold the first head against the straw and push two crossed pins through the stem base and into the straw, one from each side. The cross-pin technique stops the head from swinging on a single pivot point.
- Work around the ring, placing heads so they touch or very slightly overlap. You are not trying to cover the straw; a little straw showing between heads adds texture.
- Tuck the optional seed heads into any gaps, pinning their stems the same way.
- Thread the ribbon through the top of the ring from front to back, bring both ends to the front, and tie a loose bow. Let the tails hang long: 15 cm or so looks generous without being fussy.

🛍 Shopping guide
Embroidery Hoop Wrapped in Yarn
An embroidery hoop has two rings that screw together. The fixing strategy here uses that fact: you wrap yarn around the outer ring before tightening the inner one inside it, which locks everything without a single knot showing on the front.
The result is a smooth, solid ring of colour, which you can leave plain, layer with a second colour in a section, or decorate with one pinned sprig.
This is the wreath for someone who finds the naturalist look too demanding. It suits a children’s bedroom door or a modern flat with clean walls. Store it in a zip-lock bag flat, which takes about 30 seconds.
What You Need
- 1 wooden embroidery hoop, 25 cm diameter
- 2 balls of chunky wool or double-knit yarn, 100 g each, in contrasting or toning colours
- Scissors
- 1 length of ribbon or yarn, 40 cm, for hanging
- Optional: 1 small sprig of preserved eucalyptus or dried orange slice
How to Make It
- Loosen the screw and separate the two hoops. You will wrap only the outer (larger) ring.
- Tie your yarn to the outer ring with a double knot. Leave a 5 cm tail, which you will wrap over as you go so it disappears.
- Wrap firmly and evenly, keeping each round tight against the last. Do not leave gaps: any straw-coloured wood showing through will be obvious on the finished piece. This takes about 35 minutes for a 25 cm hoop with chunky yarn.
- If you want a second colour, cut the first yarn leaving a 5 cm tail, tie on the second colour, and continue. The join is easiest on the inner face of the ring where it will show least.
- When the ring is fully covered, tie off with a double knot and trim. Press the inner hoop back inside the wrapped outer ring and tighten the screw. This locks the yarn completely.
- Tie the ribbon to the screw fitting at the top for hanging. Pin or tie your optional sprig at the base of the ring.

Embroidery Hoop With Three Sprigs and Nothing Else
Restraint is a skill. Three sprigs of something interesting, wired at one point on a bare wooden hoop, reads as intentional and contemporary rather than unfinished.
The hoop needs to be beautiful on its own: a natural wood hoop with a visible grain, or one wrapped in a single layer of washi tape for a little colour.
The sprigs can be anything with structure: dried cotton stems, eucalyptus, rosehips, or a mix of all three.
This is the fastest wreath here. It is also the most scalable: make three in different sizes and hang them at different heights on the same wall.
What You Need
- 1 natural wood embroidery hoop, 20-30 cm diameter
- 3 stems of dried material: eucalyptus, dried cotton, rosehips, or similar, each 20-25 cm long
- 1 m of florist’s reel wire, 0.28 mm gauge (fine binding wire)
- Wire cutters (adult step)
- 1 length of ribbon or cord, 50 cm, for hanging
How to Make It
- Hold the three stems together in your hand and arrange them so they fan slightly: one pointing left, one roughly forward, one pointing right. The fan is gentle, not theatrical.
- Hold the stem bundle against the lower third of the hoop, stems pointing toward the 8 o’clock position and tips extending toward 5 o’clock. This asymmetric placement is the point of the design.
- Wind the fine reel wire around both the stems and the hoop about 10 times, very tightly. An adult should handle the wire cutters. Twist the wire back on itself three times and press the end flat behind the hoop so no point sticks out.
- Check that the bundle does not swing. If it does, add two more winds of wire.
- Thread the ribbon through the screw fitting or over the top of the hoop and knot it. Hang the hoop so the sprig sits in the lower third.

🛍 Shopping guide
Bare Willow Circle With One Bow
A willow circle is simply a length of flexible willow or dogwood stem, bent into a circle and tucked back on itself.
That tuck is the fixing: the tension of the bent wood holds the circle closed, and you reinforce it with a single length of twine. Most garden centres sell willow stems for weaving in winter, and dogwood offcuts are free if you prune in November.
One generous ribbon bow at the top is the only decoration. The bare circle shows through the bow, which is the whole aesthetic. Hung on a white wall this looks like something from a Scandinavian design shop, and it costs nearly nothing.
What You Need
- 3-4 fresh willow or dogwood stems, each 90-110 cm long and no thicker than a pencil
- 1 length of natural twine, 60 cm
- 1 length of wide wired ribbon, 100 cm, 6 cm wide, in tartan or solid colour
- Scissors
How to Make It
- Soak dry willow stems in the bath for two hours before bending if they feel at all stiff. Fresh-cut stems bend without soaking.
- Take one stem, form a circle of about 28-30 cm diameter, and overlap the ends by 15 cm. Twist the overlapping end once around the ring and tuck it back along itself. The circle will try to spring open slightly; hold it with one hand.
- Lay a second stem alongside the first and repeat the tuck, this time going the other direction, which locks the first one in place. Continue adding stems until the ring feels solid and does not spring open when you release it.
- Tie the twine tightly at the join point and wind it around that section four or five times before knotting it off. This is your hanging point.
- Tie the ribbon into a full, generous bow directly over the twine. Fluff the loops so they are round, not flat. Trim the ribbon tails at a diagonal so they do not fray as quickly.

Branch Circle Bound With Copper Wire
Copper wire is structural and decorative at once, which means you can let the wire show. Collect fallen twigs after a storm, anything between 30 and 60 cm long and pencil-thick, and bind them into a ring. The copper wire wraps the join points and also spirals along some of the branches for effect, catching the light.
This wreath has almost no mass to it: more shadow than substance, which is exactly right for a modern or industrial interior. It hangs beautifully against a brick or concrete wall. Store it by leaving it hung, since it weighs almost nothing and takes no moisture.
What You Need
- 10-14 dry garden twigs, 30-60 cm long, pencil-thick
- 1 reel of copper craft wire, 0.5-0.6 mm gauge, 10 m
- Wire cutters (adult step)
- 1 length of leather cord or black ribbon, 50 cm, for hanging
How to Make It
- Lay five or six twigs across each other to form a rough circle shape about 30 cm across, overlapping the ends. Do not worry about symmetry at this stage; asymmetry suits this design.
- At each point where two twigs cross, wrap the copper wire tightly around the junction five or six times, then twist the wire back on itself twice. An adult should cut the wire. Leave a decorative tail of 3-4 cm spiralling off if you like the look.
- Add more twigs to thicken the ring where it feels sparse, wiring each new join the same way.
- Once the ring holds its shape without your hands, step back and look at it. Sparse is fine. If it wobbles, add one more twig and wire it.
- Spiral a length of copper wire loosely along three or four of the longer branches just for the light-catching effect, twisting the end around the branch to secure it.
- Tie the leather cord to the sturdiest junction at the top and hang.

Cardboard Ring Covered in Paper Petals
Cardboard is the most forgiving base here because you can glue to it without damaging fresh material, and you can cut it to any size. The fixing is PVA, applied to each paper petal and pressed flat while it dries.
This wreath is all-paper, which means it is light, fully recyclable, and can be made entirely from books you were going to pass on anyway.
Cut the petals in a teardrop shape, roughly 6 cm long, from the pages of an old paperback or from kraft paper, and tile them in overlapping rows the way you would tile a fish with scales. The finished piece looks almost sculptural.
What You Need
- 1 piece of corrugated cardboard, large enough to cut a ring 32 cm outer diameter, 20 cm inner diameter
- A craft knife and cutting mat (adult step)
- PVA glue, 1 small bottle, 50 ml
- Pages from an old paperback, or kraft paper, enough for approximately 150 petal shapes
- A petal template: teardrop shape, 6 cm long, 3 cm wide, cut from card
- Pencil and scissors
- 1 length of ribbon, 50 cm, for hanging
How to Make It
- An adult should draw the ring on cardboard and cut it out with the craft knife on a cutting mat. The ring is 32 cm across the outside and 20 cm across the hole in the middle. A sturdy ring about 6 cm wide results.
- Cut the paper petals using the template and scissors. 150 sounds like a lot; it takes about 20 minutes with a paper stack.
- Brush PVA onto the back of one petal and press it at the outer edge of the ring, pointed tip toward the centre, pressing firmly for 10 seconds. The petal should not slide once pressed.
- Work in rows from the outer edge inward, overlapping each petal by half so the row below it is covered, just as roof tiles overlap. The last row covers the inner edge.
- Leave flat to dry for at least 2 hours. The PVA will be clear and hard when fully dry; white and slightly rubbery means it needs more time.
- Pierce a small hole at the top of the ring, thread the ribbon through and knot it at the back for hanging.

Cardboard Ring Covered in Felt Circles
Felt does not fray, which is what makes it ideal for this kind of surface decoration. Punch circles from felt sheets in three sizes, 2 cm, 3 cm and 4 cm, and glue them in concentric clusters across the ring.
The effect is like a field of flowers seen from above. Use three shades of one colour for a tone-on-tone finish, or go bold with contrasting colours for a child’s door.
This wreath takes time but no skill, and the punching stage is a satisfying job to hand to older children while an adult handles the glue gun. Store it in a flat box at the end of the season; felt does not compress or crease.
What You Need
- 1 piece of corrugated cardboard, cut into a ring 30 cm outer diameter, 18 cm inner diameter (adult step)
- Felt sheets, 30 x 30 cm, in three colours or three tones, 2 sheets each (6 sheets total)
- 1 circle punch, or 3 sizes of circle cookie cutter and scissors
- 1 glue gun and glue sticks (adult step)
- Approx 180 felt circles: 60 of each size (2 cm, 3 cm, 4 cm)
- 1 length of ribbon, 50 cm
How to Make It
- An adult should cut the cardboard ring with a craft knife. Punch or cut all the felt circles before starting to glue; having them sorted by size in small piles speeds the gluing stage considerably.
- Heat the glue gun. An adult must operate the glue gun throughout, as the nozzle and fresh glue reach temperatures that cause burns in seconds.
- Apply a small dot of hot glue to the back of a large felt circle and press it to the ring, holding for 5 seconds. Position the large circles first, spacing them evenly across the ring.
- Fill the spaces between large circles with medium circles, gluing each one the same way. Then fill the remaining gaps with the small circles, tucking them into any space left.
- Continue until the cardboard is completely covered. If a circle lifts at the edge after the glue sets, add a tiny dot of fresh glue and press again for 10 seconds.
- Pierce a hole at the top, thread the ribbon through, and knot to hang.

🛍 Shopping guide
Wire Ring of Eucalyptus, Tied Not Glued
Fresh eucalyptus is sold in petrol stations and supermarkets from October onward, and it costs very little for a bunch large enough to cover a 30 cm ring.
The whole point of this wreath is that it uses no glue on the fresh material: twine loops do all the fixing, which means the ring can be composted entirely when it is done.
Eucalyptus also dries beautifully in place, going from silver-green to grey-green over three or four weeks, and the scent lasts for months.
This is the wreath for someone who wants fresh greenery but does not want to wire bundles. Each stem is simply looped to the ring with a larks-head knot in twine, which takes about 15 seconds per stem.
What You Need
- 1 wire wreath ring, 30 cm diameter
- 1 bunch of fresh eucalyptus, approximately 15-18 stems, 25-30 cm each after trimming
- 1 ball of natural jute twine, at least 30 m
- Scissors
- 1 length of wider twine or ribbon, 60 cm, for hanging
How to Make It
- Cut lengths of twine approximately 25 cm long. You will need about 30 pieces total. Cut them all now so you are not stopping mid-wreath.
- Trim the eucalyptus stems so each is 20-25 cm long. Strip the bottom 5 cm of leaves from each stem so the bare stem is what gets tied to the ring, not a bundle of crushed leaves.
- To attach a stem: fold a twine length in half over the wire ring, bring the two free ends through the loop (this is the larks-head knot), and then tie those two ends around the bare stem section of the eucalyptus once, finishing with a simple knot. Pull it firm. The stem should not slide along the ring.
- Place stems all facing the same direction, each one slightly overlapping the last so the leaves of each stem cover the twine knot of the one before it.
- Work all the way around. On the last few stems, angle them so they tuck under the tip of the first stem you placed, hiding the join.
- Tie the hanging twine or ribbon around the top wire of the ring, double-knotting it at the back.

Frequently Asked Questions
What is the best base for a homemade wreath?
It depends on the materials you plan to use. A wire ring suits fresh or dried greenery attached with reel wire or twine. A foam-free straw base is ideal for anything you can pin: bay leaves, dried flowers or fabric roses.
An embroidery hoop works for yarn, ribbon and light sprigs. A branch circle suits a minimal, sculptural look with very little added. Cardboard is the right base when you want to glue paper, felt or fabric, because glue bonds to it without damaging fresh material.
Match the fixing method to the base and the build becomes straightforward.
How do you attach greenery to a wreath ring?
The most reliable method is reel wire.
Cut stems into short bundles, hold each bundle against the ring with tips pointing in the same direction, and wrap the reel wire around both the bundle and the frame three times before moving on to the next bundle.
Each bundle should overlap the one before it so the wire wraps are hidden.
For a simpler approach with individual stems, a larks-head knot in natural twine works without any wire at all: fold a length of twine in half over the ring, pass the free ends through the loop, then tie those ends around the bare stem section.
Pull firm and the stem will not slide.
How long does a fresh wreath last?
A fresh wreath lasts two to four weeks depending on the material and where you hang it. Cedar, pine and eucalyptus are the most resilient and hold their colour and scent for three to four weeks if kept away from direct heat sources.
Conifer greenery dries out faster in a centrally heated room than near a cool door. Spraying the backs of the leaves with water every few days extends life slightly.
Once the wreath begins to drop needles or brown at the tips, it has reached the end of its fresh life, though many fresh wreaths dry attractively in place over the same period.
Can you make a wreath without floral foam?
Yes, and for most homemade wreaths it is the better choice. Floral foam is not compostable, can release microplastics and is unnecessary for any of the five base types covered here. Wire rings hold greenery with reel wire or twine.
Straw bases grip pins and can hold anything from dried leaves to fabric roses. Embroidery hoops work with yarn, ribbon and light wired sprigs. Branch circles need only wire at the joins. Cardboard takes any glue.
None of these methods require foam, and all of them can be taken apart and composted or stored at the end of the season.

22 christmas candles diy projects sorted by method: rolling, dipping and pouring. Every craft names

23 white Christmas tree looks, real and artificial, room by room, with the exact ornaments and count

22 Christmas games for kids full of movement & hands-on fun — perfect for all December long!
Leave a Reply