

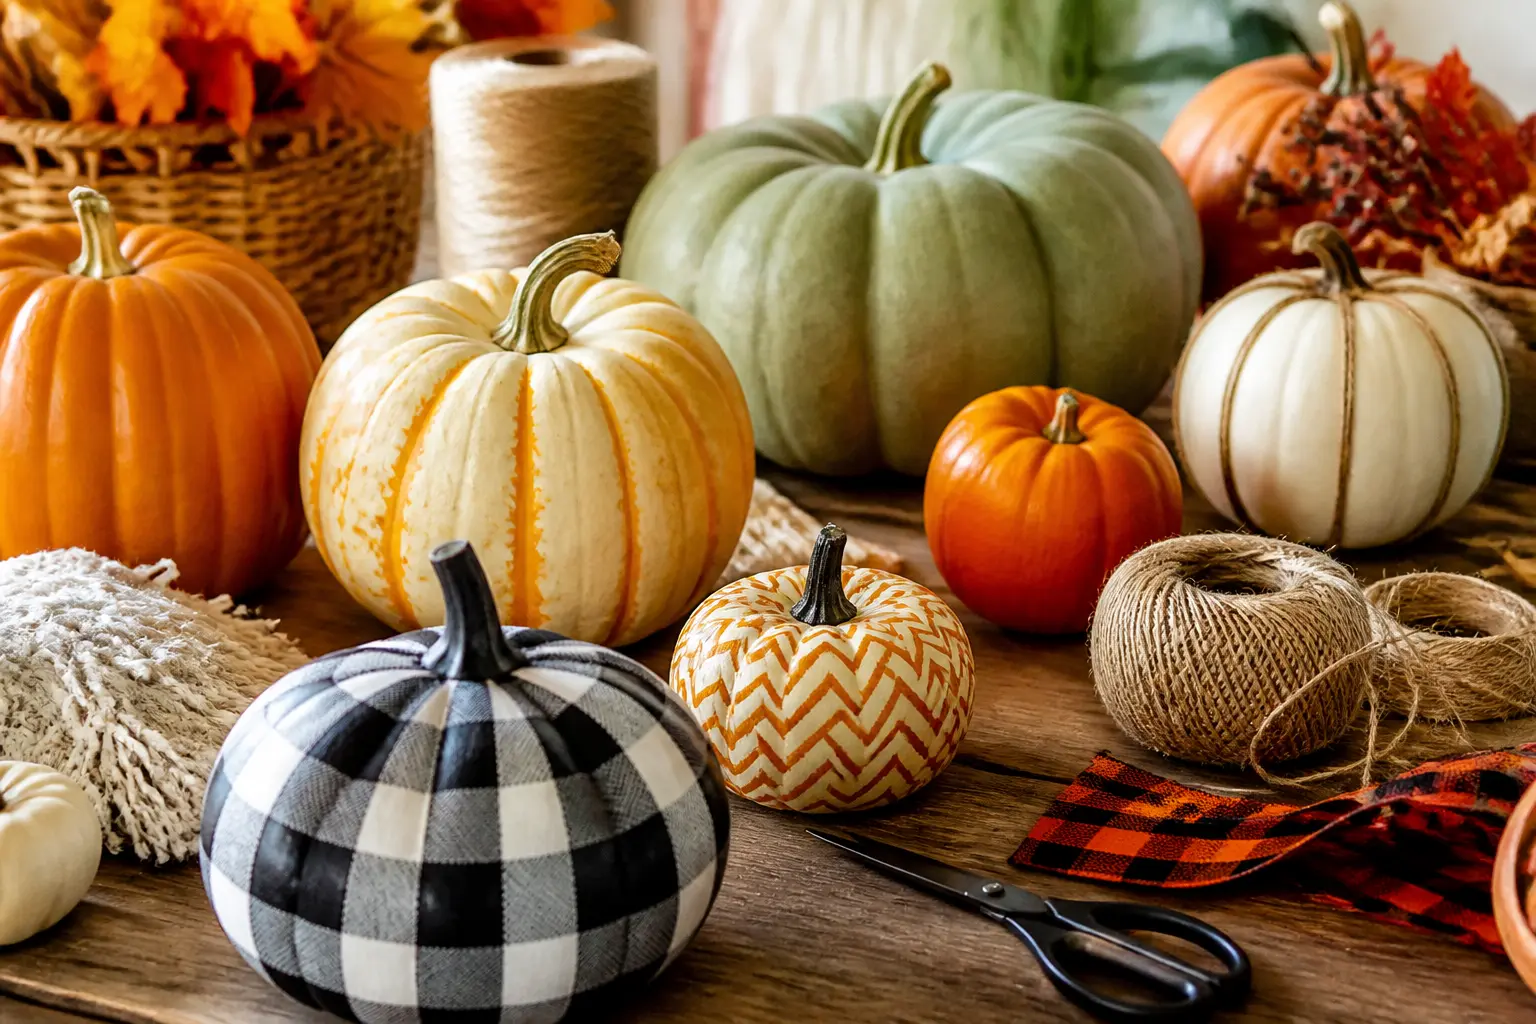
Most porches get the same carved triangle eyes every season. These 15 pumpkin crafts prove there are faster, cheaper and genuinely prettier ways to fill your front steps, and several of them require nothing sharper than a paintbrush.
The list runs from true beginner territory (a sponge dauber and two minutes of patience) all the way to carved silhouettes that look like they took effort. Each entry names every material up front, so you can shop once and make several in an afternoon. If you love the fall crafting season beyond Halloween, 14 Thanksgiving Crafts for Grown-Ups Who Hate Glitter keeps the momentum going through November.
The 15 crafts below are grouped by method: carving, painting, tape-and-paint, mixed media and one genuinely odd technique involving push pins. Find your skill comfort zone and start there.
This post contains affiliate links. If you buy through them, I may earn a small commission at no extra cost to you.
Classic Carving
Carving is the oldest technique on the list, and it still earns the most dramatic after-dark effect. A gutted pumpkin with a candle inside transforms even the sloppiest cut into something atmospheric, which makes this the most forgiving category for shaky hands.
The three carved entries here range from a two-minute face to a skull with real bone structure to a geometric dot pattern that needs no artistic skill at all, just a drill and a ruler.
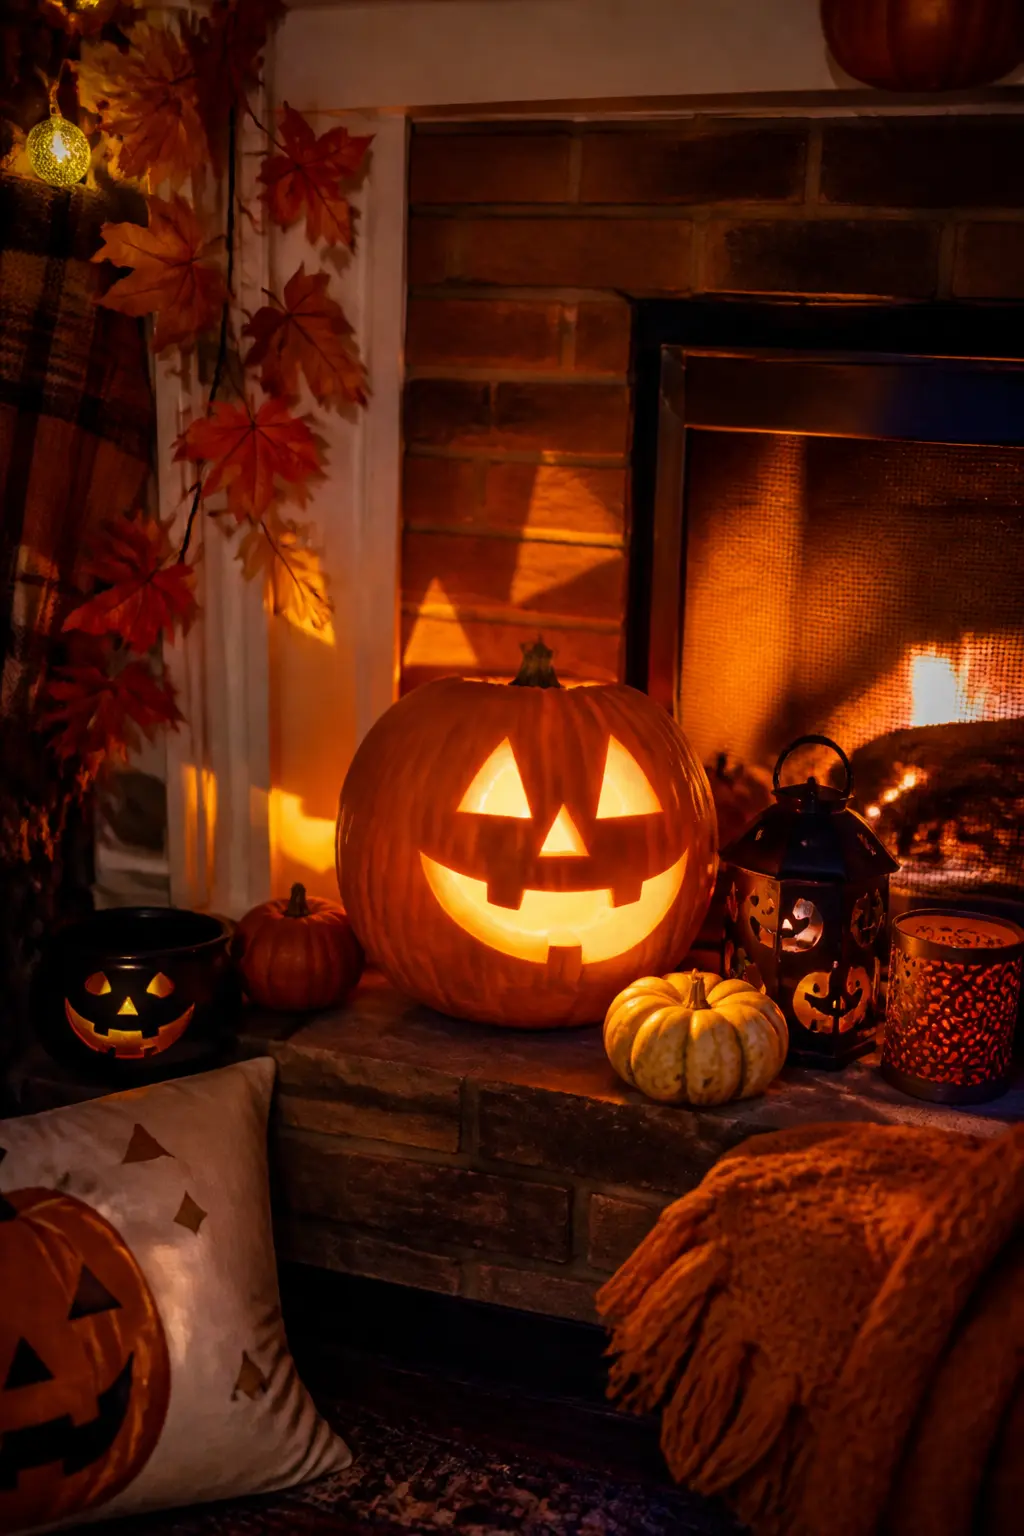
Classic Carved Jack-o-Lantern Face
This is the version everyone recognises, and it still works because the lit interior does half the decorating for you. Scoop the inside clean with a large spoon, working in circles from the cut opening until the walls are roughly an inch thick.
Draw your face in marker before touching a knife: a thick marker line is easier to follow and easy to wipe off if you change your mind. Cut at a slight inward angle so the pieces do not fall inside once removed. A battery tea light in the base keeps the look without the fire risk.
Materials: pumpkin, carving knife, large spoon, marker, tea light.
Carved Skull Face Pumpkin
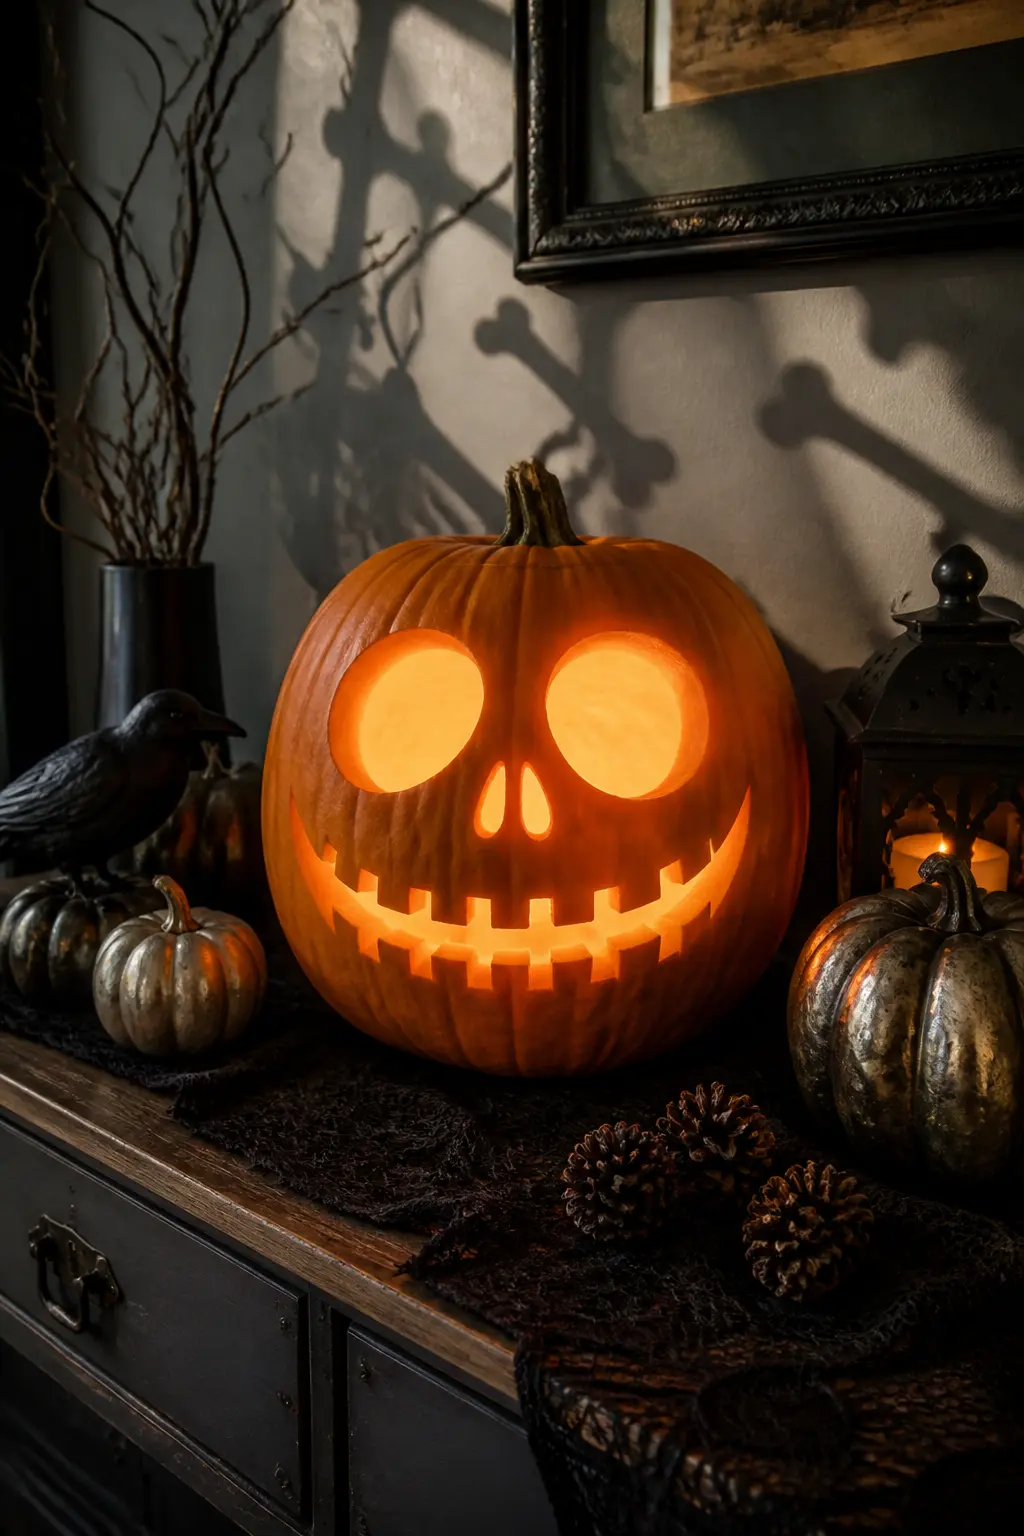
A skull reads as more sophisticated than a classic face because the carved shapes are rounder and more varied: two large oval eye sockets, a triangular nose hole, and a row of rectangular teeth gaps along the bottom arc. Scoop the pumpkin fully before drawing anything.
The trick is to draw all the shapes before you cut any of them. Step back from the pumpkin and check the proportions from a distance, the way a painter checks a canvas. The eye sockets should take up roughly a third of the face height, and the teeth row should curve with the bottom of the pumpkin rather than running straight across.
Materials: pumpkin, carving knife, large spoon, marker.
🛍 Shopping guide
Carved Star Pattern Pumpkin
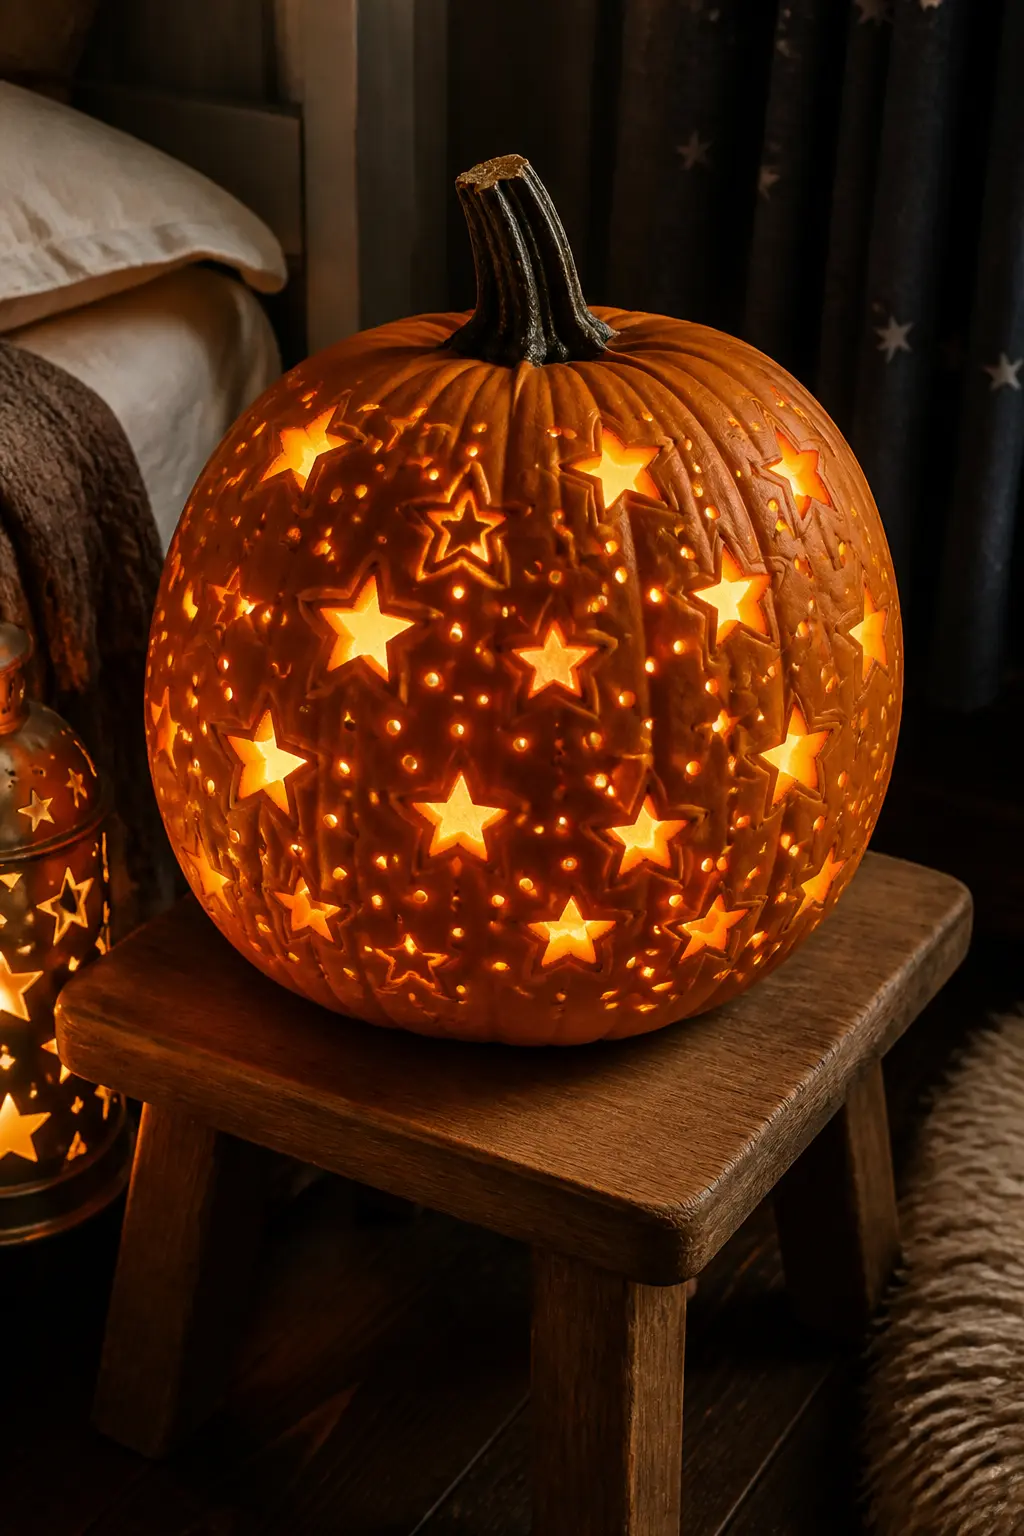
This one requires no drawing skill at all. Mark a grid of dots across the pumpkin surface with a marker, spacing them roughly an inch apart. Then use a small drill bit or an apple corer to punch straight through each dot.
The result from the outside looks like a field of tiny holes. Light the inside and those holes become a constellation across the pumpkin’s curve, with each pinpoint of light sharpened by the surrounding dark skin. A regular pattern looks intentional; a loose scatter looks celestial. Both are correct.
Materials: pumpkin, small drill or apple corer, marker.
🛍 Shopping guide
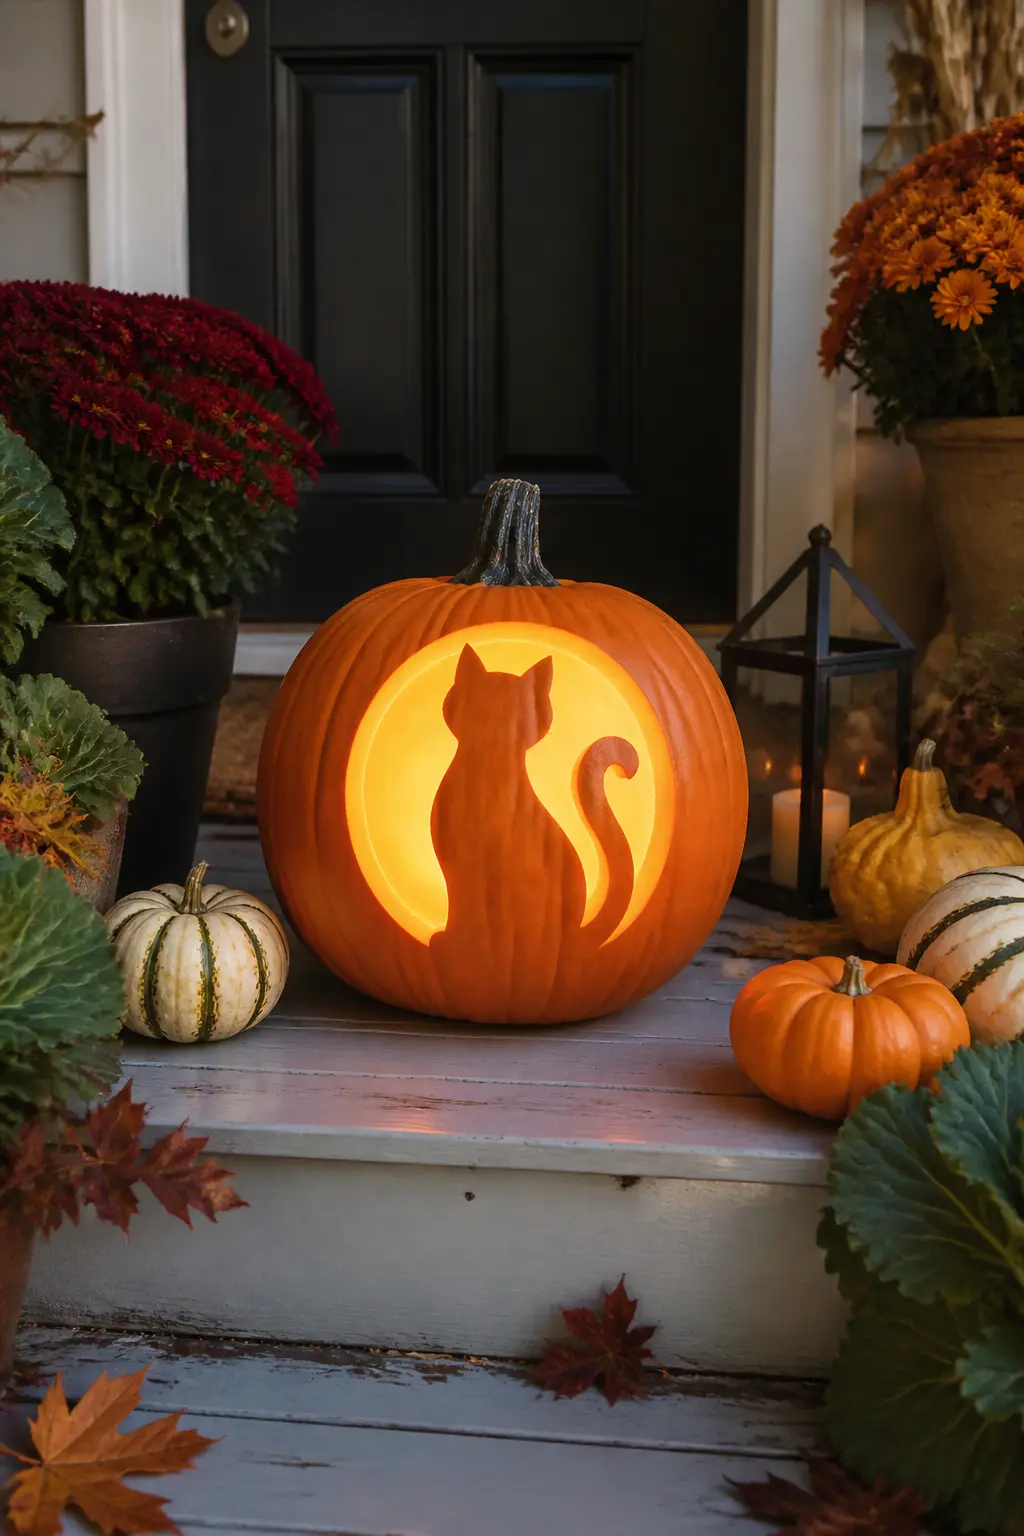
Carved Cat Silhouette Pumpkin
A sitting cat in silhouette is one of the easier freehand carving shapes because the outline is forgiving: a rounded body, a pointed ear, a curved tail. Scoop the inside first, then draw the cat as a single connected silhouette, making sure every part of the shape connects to every other part so nothing falls away when you cut.
Carve the entire outline as one continuous piece and remove it whole. The remaining pumpkin skin frames the cat shape as a glowing negative. Lit from inside, the cat reads as dark against the orange glow, a cleaner effect than carving the cat itself.
Materials: pumpkin, carving knife, large spoon, marker.
🛍 Shopping guide
Paint-Only Designs
Paint skips the mess of scooping and the danger of sharp tools entirely. These pumpkins last longer than carved ones because the skin stays intact, and they work equally well on real and faux pumpkins, so you can reuse them next season.
Acrylic is the paint of choice here: it grips the waxy skin without primer, dries fast and is water-resistant once cured. Pick up a basic craft acrylic set and you have everything you need for five of the entries below.
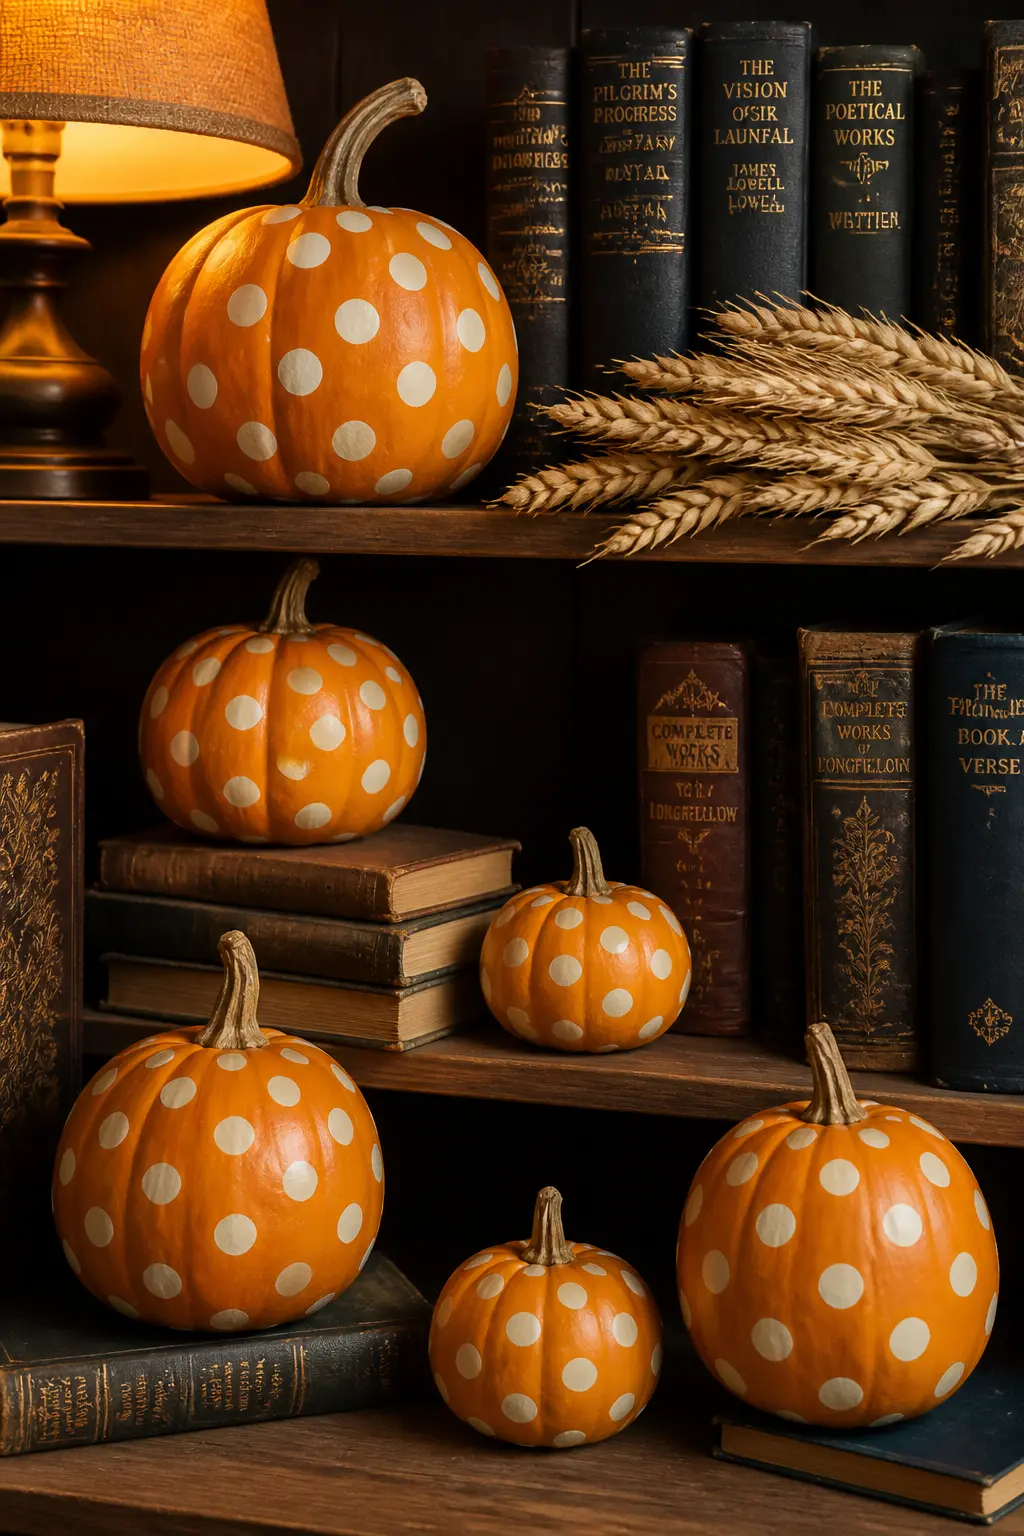
Polka Dot Painted Pumpkin
A round sponge dauber loaded with acrylic paint deposits a clean circle every time, with no brush strokes and no skill required. Start at the top of the pumpkin and work in rows down to the base, spacing dots evenly by eye. Do not measure: slight irregularity reads as handmade rather than careless.
Let one color dry before adding a second so the circles do not bleed into each other at the edges. White dots on an orange pumpkin are the simplest combination. Black, purple and gold together on a small pumpkin is more dramatic and suits a mantel or a styled shelf better than a front step.
Materials: pumpkin, acrylic paint, round sponge dauber.
🛍 Shopping guide
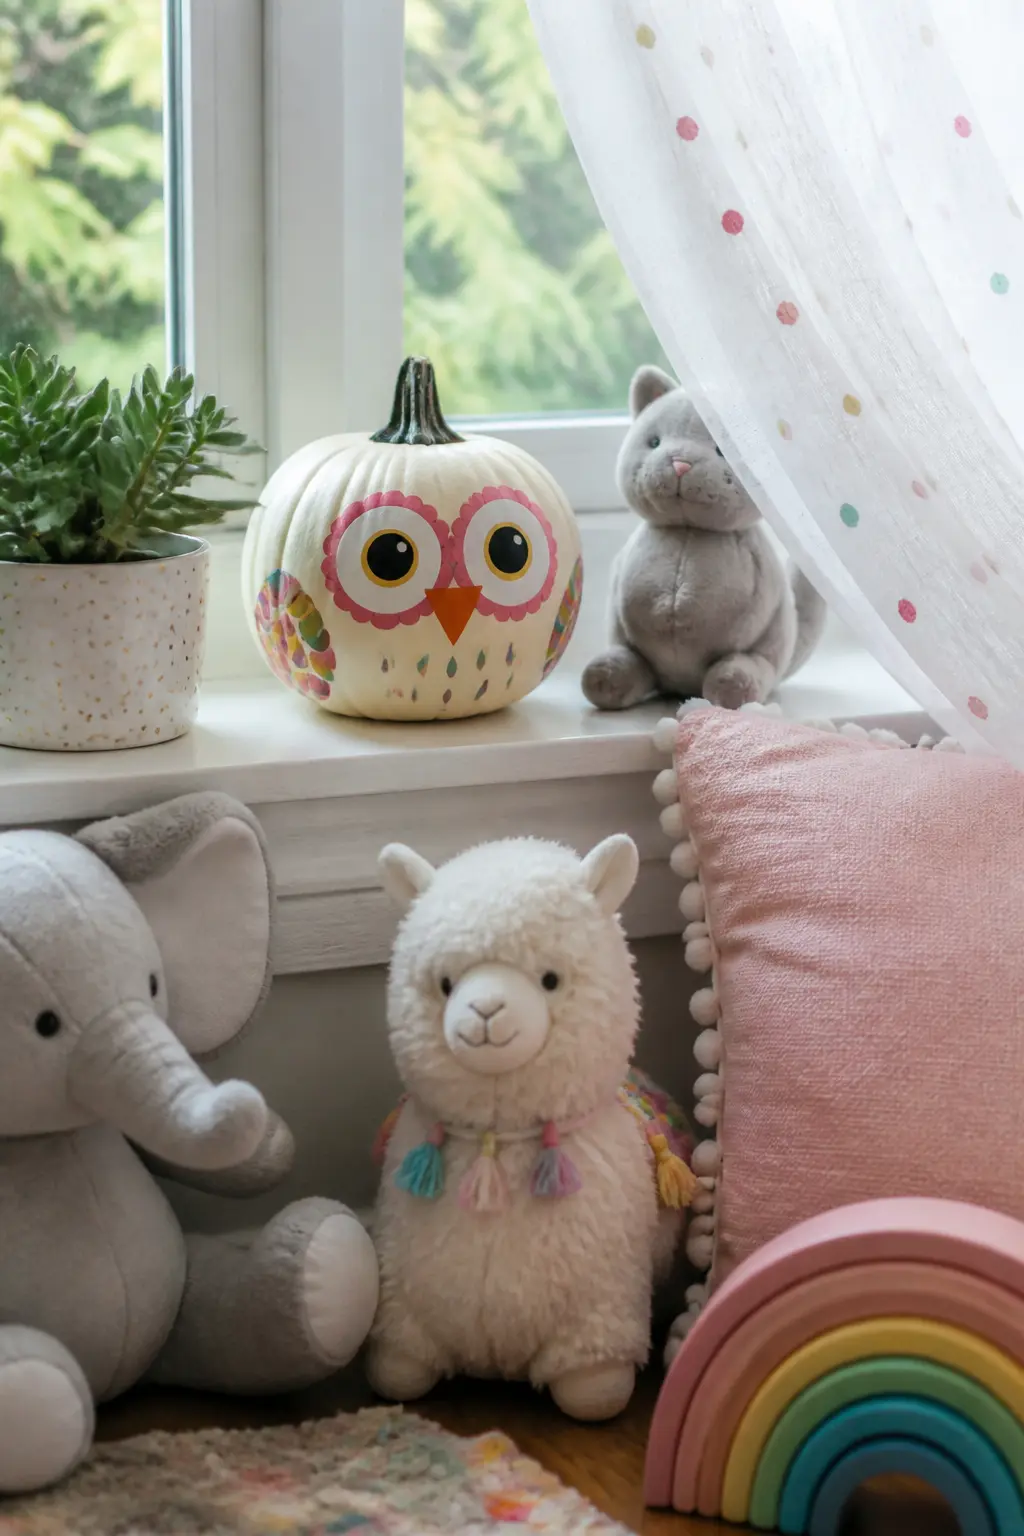
Owl Face Painted Pumpkin
Paint a large heart shape in white or cream on the front of the pumpkin: this becomes the owl’s facial disc. Add a small brown or gold triangle for the beak, pointing downward from the center of the heart. Two large circles in white for eyes, then a smaller dark circle inside each one.
Googly eyes glued over the painted circles add an instant cartoonish quality that reads well for a children’s party table; skip them for a more refined look. Painted feather details on either side of the face disc, using a dry fan brush, add texture without requiring any drawing skill.
Materials: pumpkin, brown and white acrylic paint, small paintbrush, googly eyes (optional).
🛍 Shopping guide
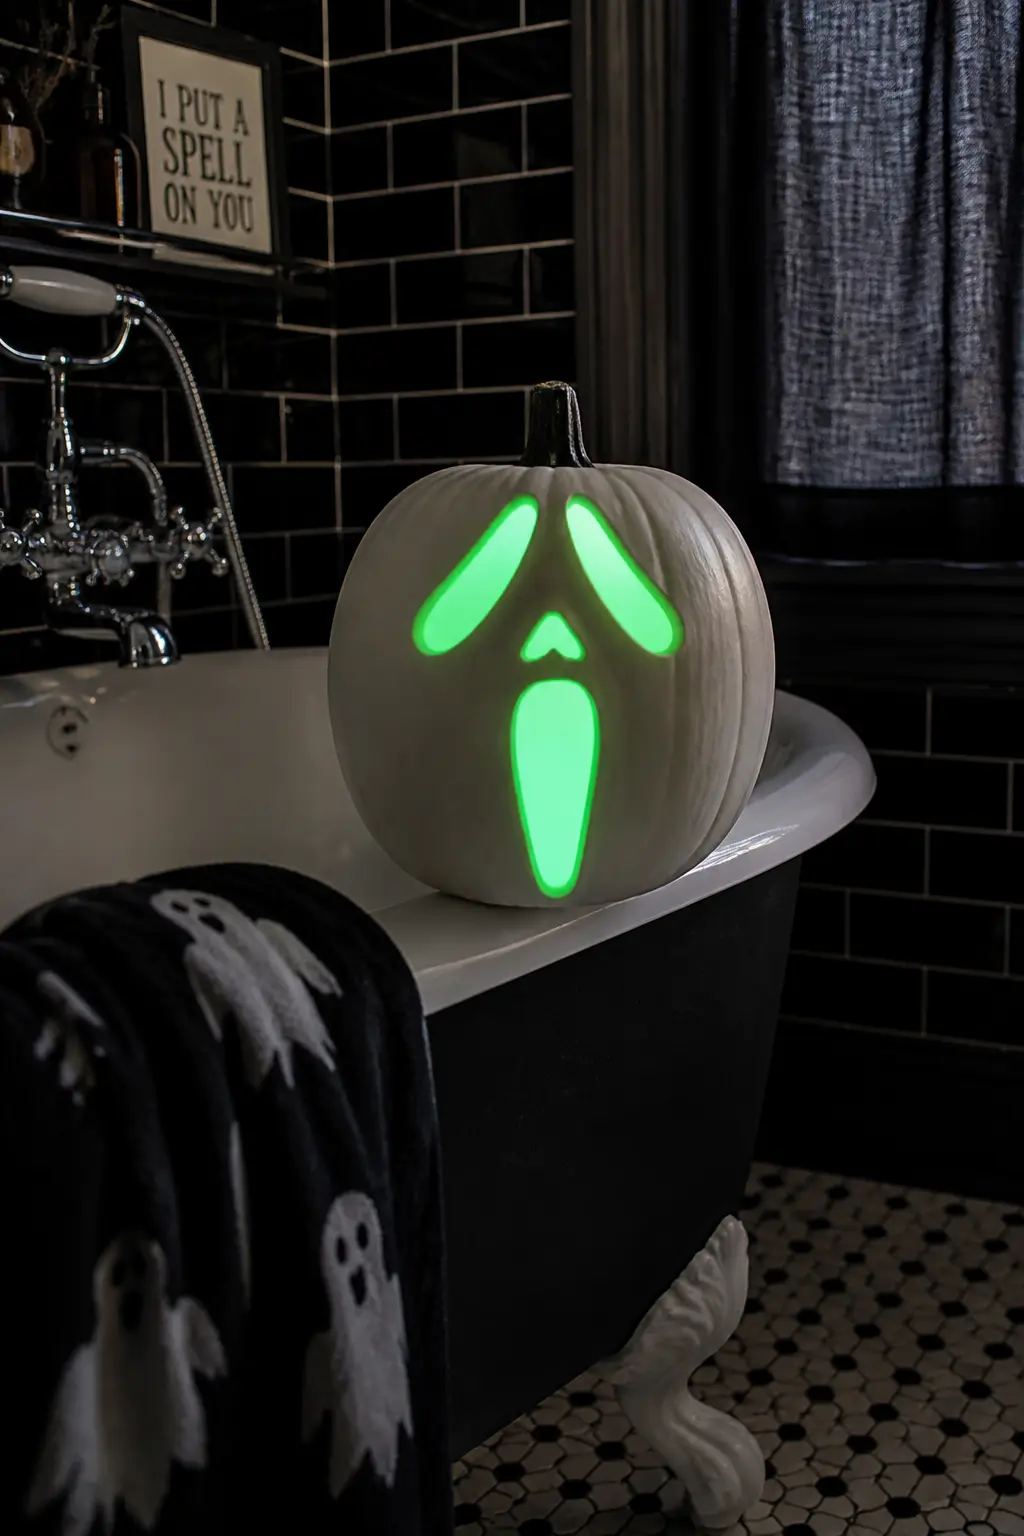
Glow-in-the-Dark Ghost Face Pumpkin
A white pumpkin is the right base here: the natural color disappears during the day and the painted face charges invisibly under daylight or lamplight. Paint a simple ghost face with glow-in-the-dark acrylic: two oval eyes and an open oval mouth. Two coats improve the intensity of the glow.
Hold the finished pumpkin under a bright lamp for about thirty seconds before bringing it into a dark room. The glow fades after several minutes, which makes it a good party trick rather than a permanent display piece. Place it in a bowl of fake moss or black gravel so the white pumpkin reads as slightly elevated and not just sitting on a bare surface.
Materials: white pumpkin, glow-in-the-dark paint, small paintbrush.
🛍 Shopping guide
Tape-and-Paint Patterns
Painter’s tape is the cheat code for anyone who cannot draw a straight line freehand. You press, paint, peel and the geometry does itself. The key is pressing the tape edges down firmly before you load the brush, and peeling while the paint is still slightly tacky rather than bone dry.
These three entries use the same two-step logic but produce completely different looks: vertical stripes, sharp chevrons and a grid check. Buy one roll of painter’s tape and all three are covered.
Striped Two-Tone Pumpkin
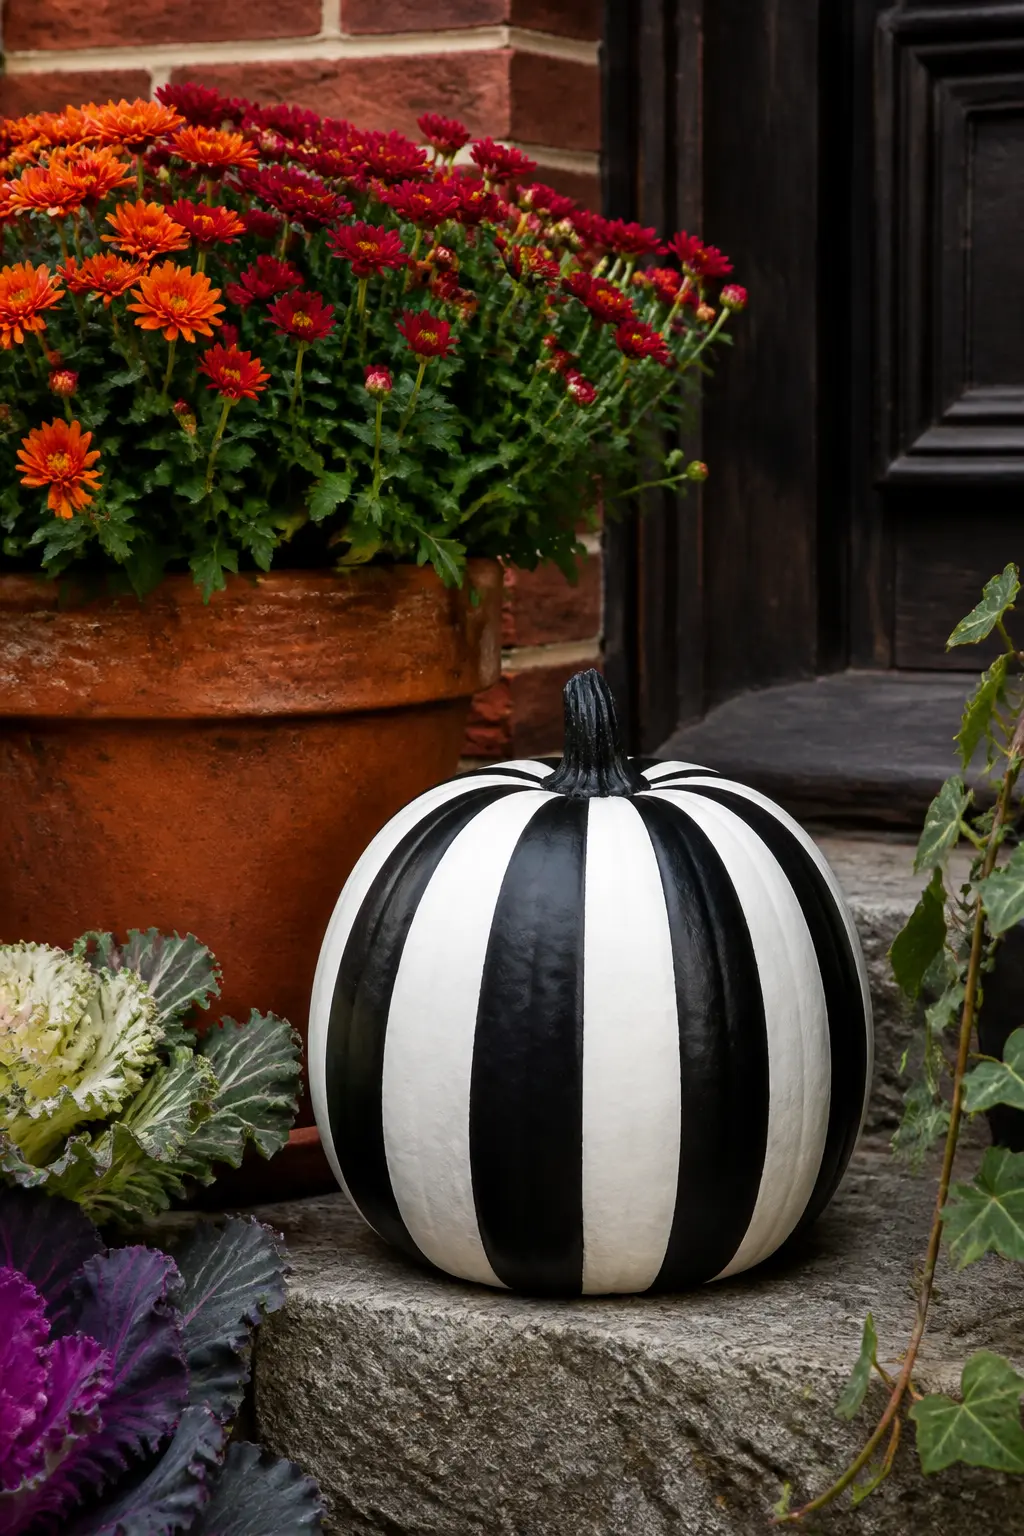
Run strips of painter’s tape down the pumpkin from stem to base, spacing them by eye along each ridge so the stripes follow the natural curve of the fruit. Paint the exposed sections in one color, let them dry, peel the tape, then tape again over the painted stripes and paint the bare sections in the second color.
Black and white is the sharpest combination and photographs well in dim light. For a softer palette, deep forest green and cream reads as less Halloween-specific and more generally autumnal, which extends the display life past the end of October. Seal with a matte craft varnish if the pumpkin will sit outdoors.
Materials: pumpkin, painter’s tape, black and white acrylic paint.
🛍 Shopping guide
Chevron Painted Pumpkin
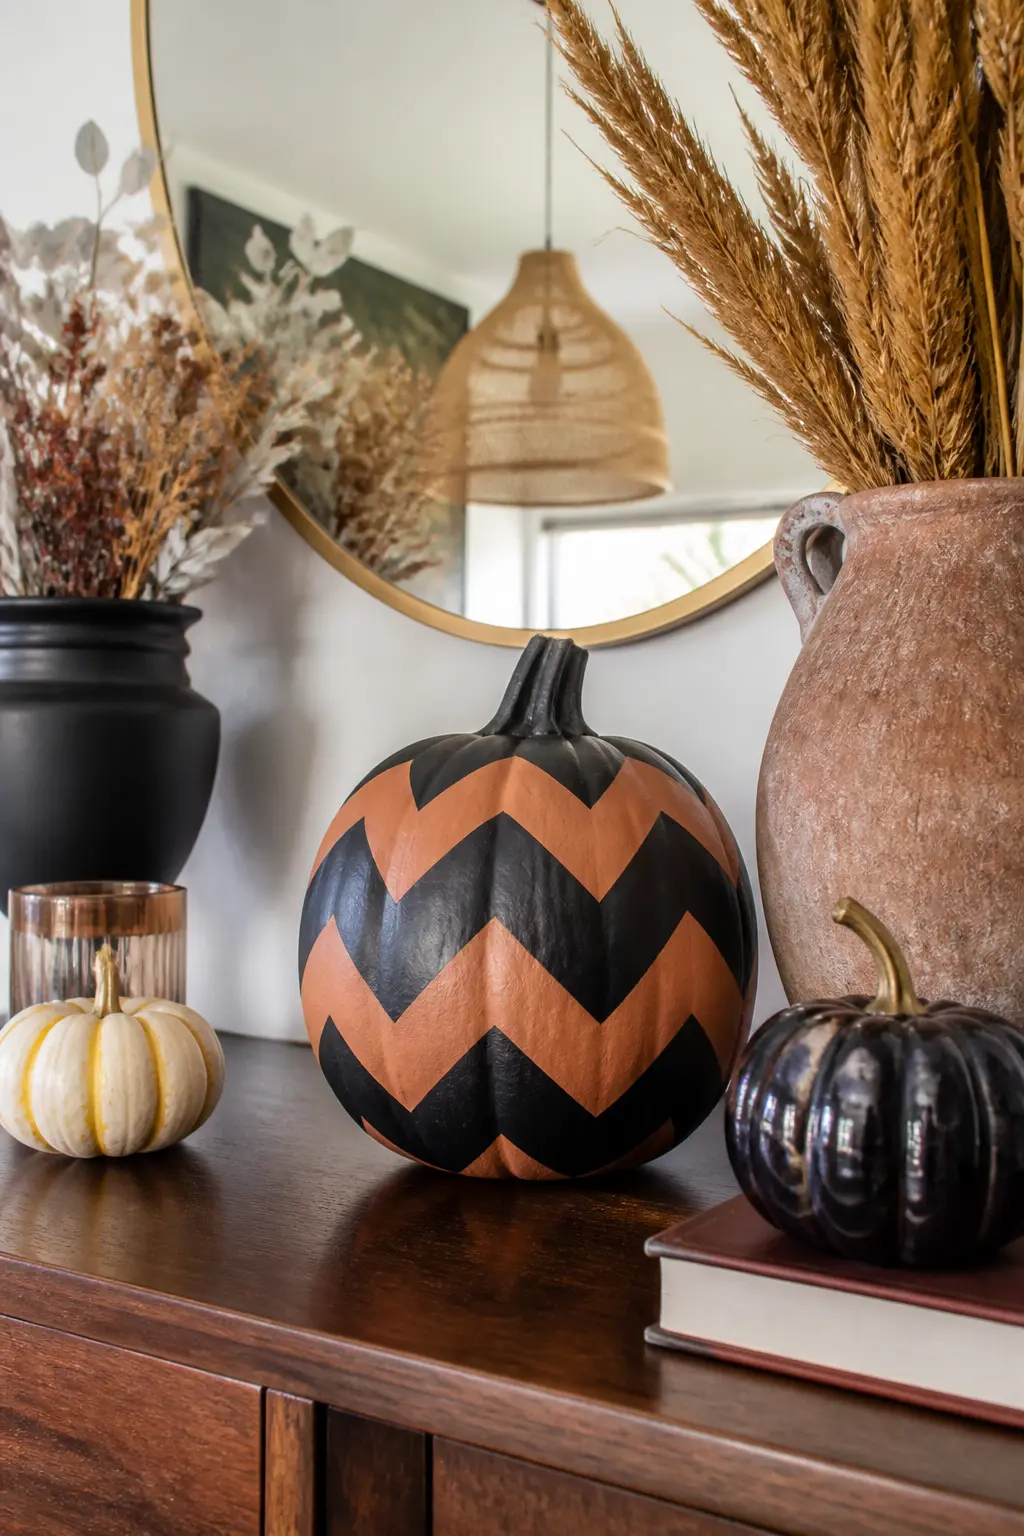
Mark a center line around the widest part of the pumpkin with a faint pencil line. Then apply strips of painter’s tape in a zigzag above and below that line, creating the V-shapes of a chevron. The sharper the angle of your zigzag, the more dramatic the finished pattern.
Paint all the exposed V sections in one color, let dry, and peel slowly. The tape leaves clean diagonal edges that look like they required a ruler. Two strong colors work better than two pale ones here: the geometry needs contrast to read clearly from a distance. Terracotta and black is a current combination that feels seasonal without being obvious.
Materials: pumpkin, painter’s tape, two colors of acrylic paint.
🛍 Shopping guide
Painted Check Pumpkin
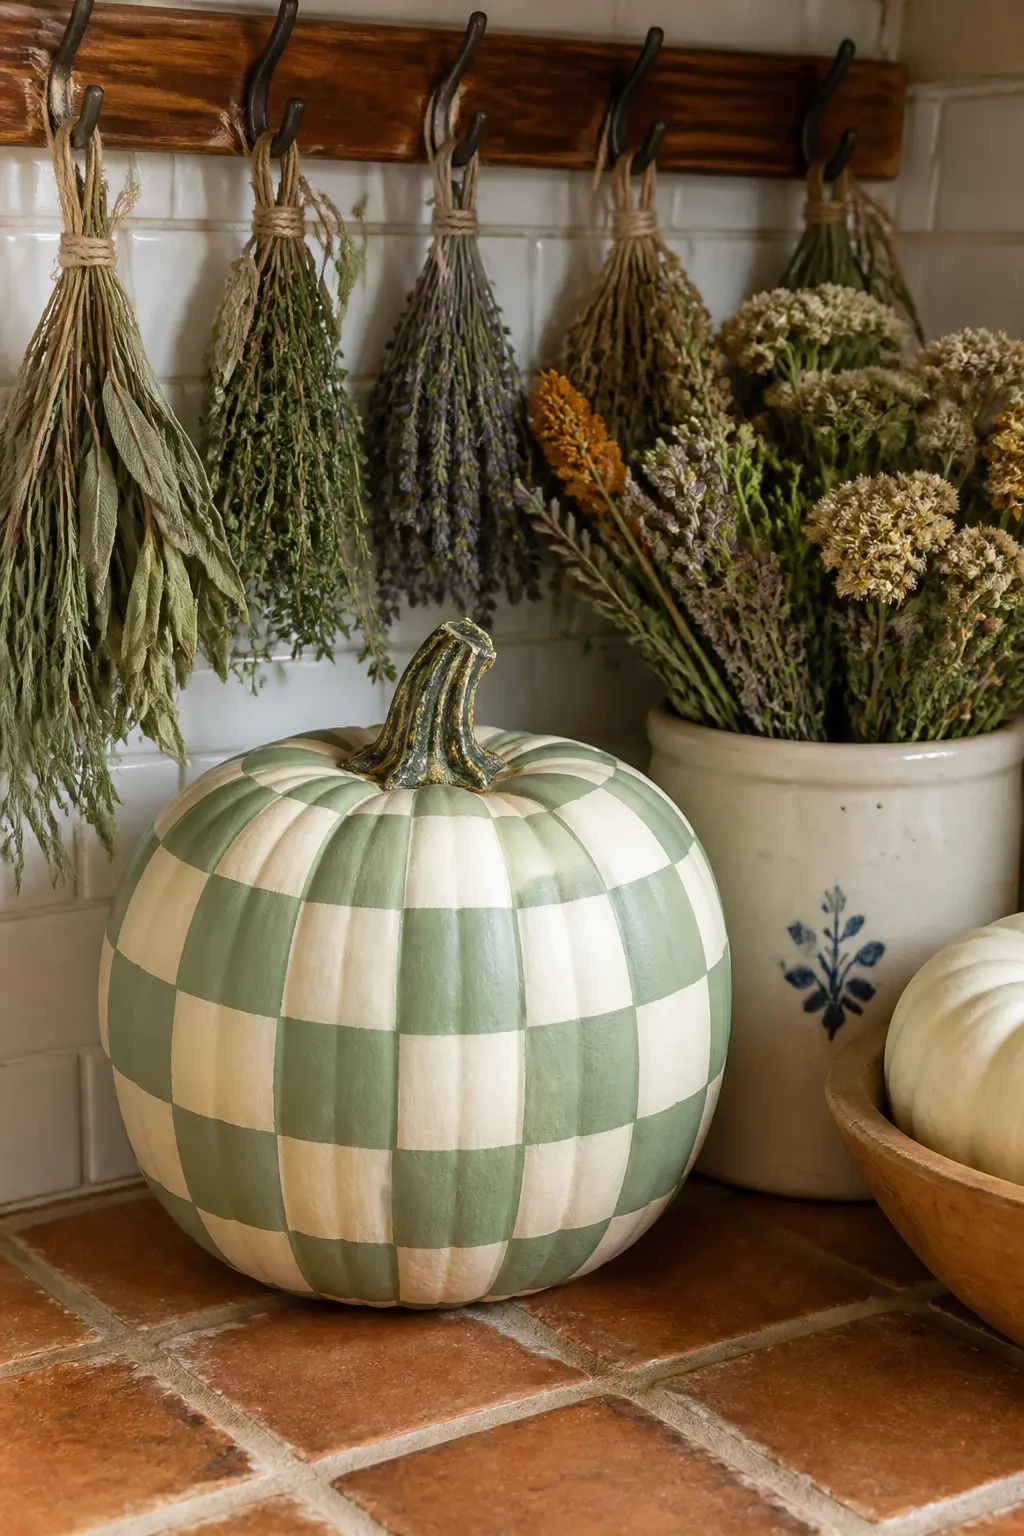
Run horizontal strips of painter’s tape around the pumpkin at equal intervals, then run vertical strips over those to create a grid. Paint all the exposed sections in your first color and let dry before peeling. The intersections where two tape strips crossed will show as squares of bare pumpkin skin, which become your second color if you tape and paint again, or leave as natural orange for a three-tone effect.
A black and orange check on a mid-size pumpkin is a seasonal classic that is faster to execute than it looks. A cream and sage check reads as more farmhouse and pairs well with dried eucalyptus and natural raffia in a styled vignette.
Materials: pumpkin, painter’s tape, two colors of acrylic paint.
🛍 Shopping guide
Mixed Media and Embellished
This category adds dimension by bringing in a second material: felt, buttons, twine or glow-in-the-dark paint. None of them require sewing or wiring, and most need only a hot-glue gun to assemble.
These are the pumpkins that photograph well in daylight, which makes them ideal for a decorating table or a mantel where carving and candles are not practical. They also travel well if you are taking a contribution to someone else’s party.
Farmhouse Natural Pumpkin
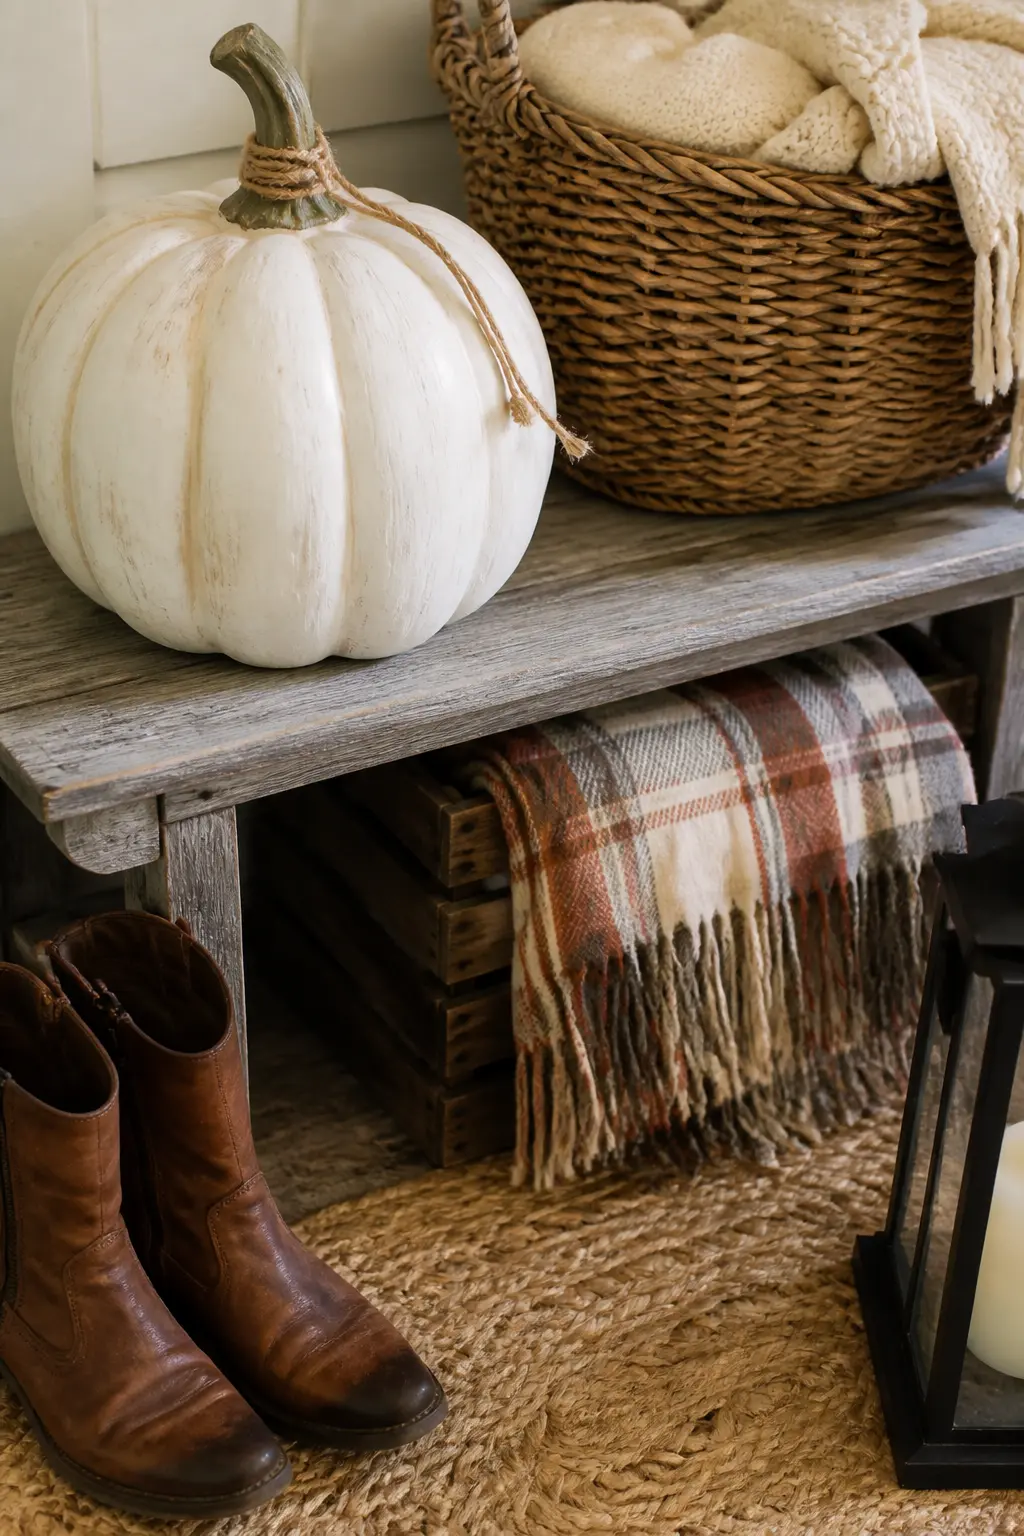
Dry-brushing means loading a brush with paint and then wiping most of it off on a paper towel before touching the pumpkin. What remains on the bristles catches only the raised ridges of the pumpkin surface, leaving the valleys in their natural color. The result is a faded, almost weathered look that suits a neutral-palette home better than a glossy painted finish.
White chalk paint over an orange pumpkin creates a warm grey tone on the ridges with burnt orange still visible in the grooves. Tie a length of natural twine in a simple knot around the stem and the pumpkin reads as styled rather than decorated. This one works just as well on a grocery-store pumpkin as on any specialty variety.
Materials: pumpkin, white chalk paint, dry brush, twine.
🛍 Shopping guide
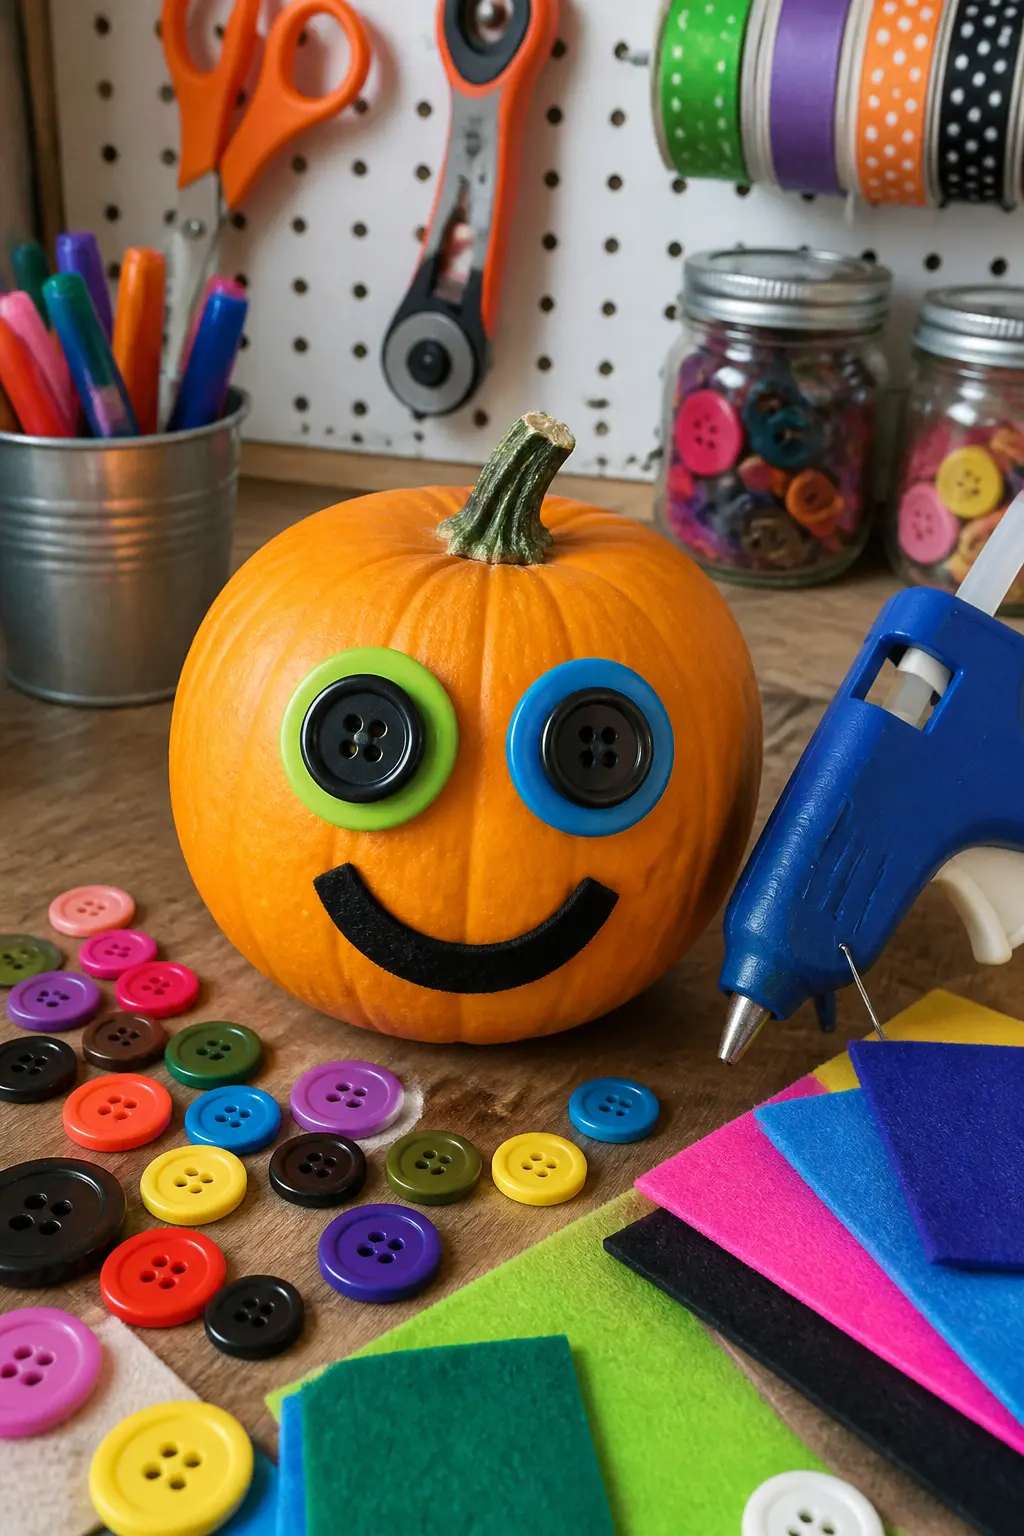
Button-Eyed Cute Face Pumpkin
Cut a simple mouth shape from felt: a long curved strip for a smile, or a jagged zigzag for something spooky. Hot-glue it directly onto the pumpkin surface, pressing flat for ten seconds until the glue sets. Then position two large buttons where the eyes should sit and hot-glue those in turn.
The appeal of this technique is that it works on any size pumpkin and is completely reversible: the hot glue peels off clean once it cools. A small felt triangle for a nose finishes the face, or skip it for a more minimal look. This is the one craft on the list that genuinely takes under ten minutes from start to finish.
Materials: pumpkin, hot glue, buttons, felt scraps.
🛍 Shopping guide
Pour and Drip Techniques
Pouring paint over a pumpkin sounds chaotic and is, briefly. The result, though, is the kind of organic marbling that looks expensive and is almost impossible to replicate badly. Two entries live here: a controlled drip effect built with a brush, and a full pour that you tilt to direct.
Work on a surface you can wipe down, use a baking rack under the pumpkin so excess paint drips off cleanly, and have paper towels within reach. Everything else is genuinely hard to get wrong.
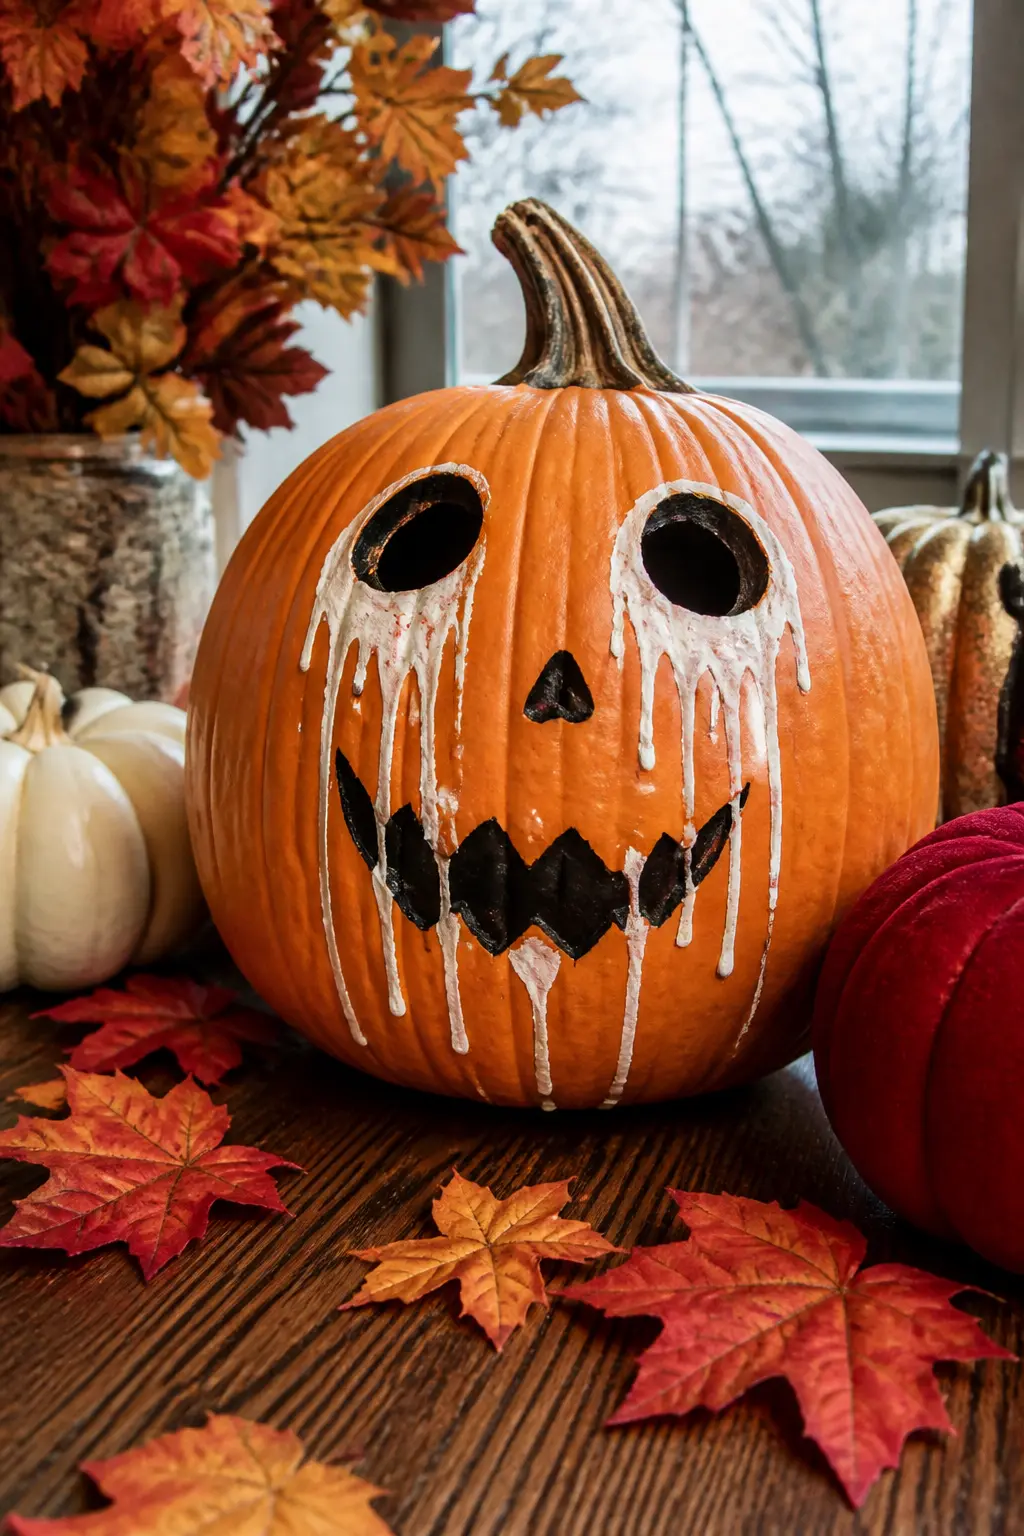
Drippy Melting Face Pumpkin
Paint a simple face in black acrylic first: two oval eyes, a nose, a mouth. Keep the strokes loose. Then load a wide, wet brush with white paint and drag it slowly downward from the bottom edge of each eye, letting gravity pull the pigment into a narrow drip trail as the brush dries out.
The white drip reads as a melting or weeping effect against the orange skin. One pass per drip is enough: going over it a second time thickens the trail and loses the transparency that makes it look liquid. Let it dry flat so the drips do not continue past where you stopped them.
Materials: pumpkin, black and white acrylic paint, thin and wide paintbrush.
🛍 Shopping guide
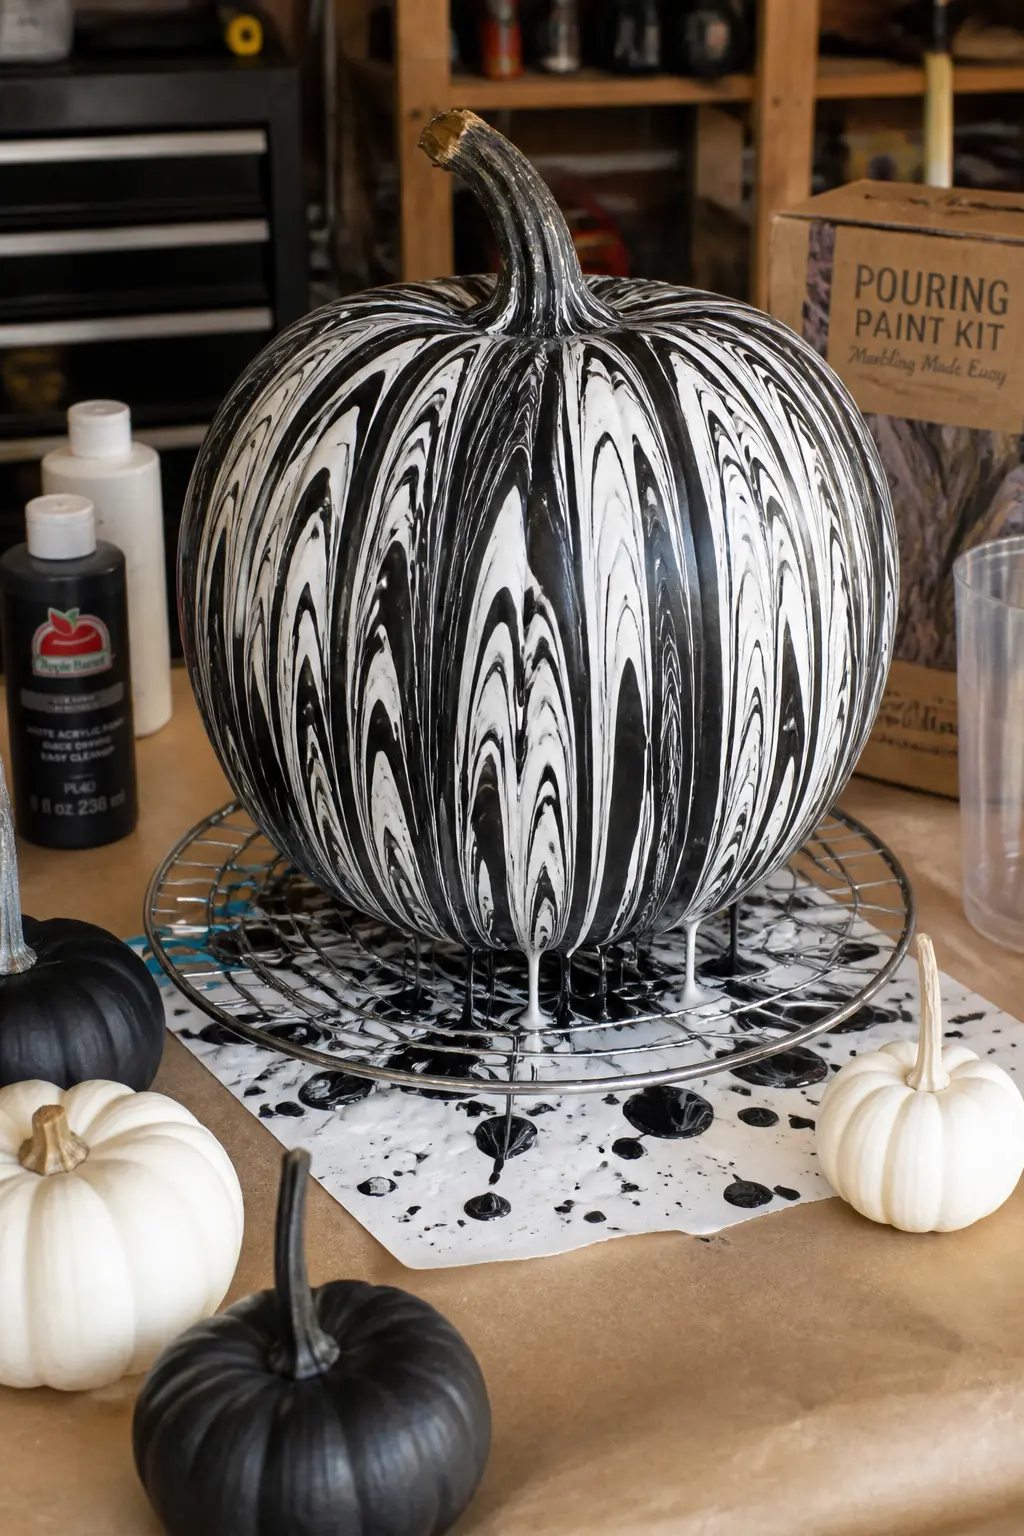
Marbled Drip Pumpkin
Pour two acrylic colors into a paper cup without stirring them together fully: you want streaks, not a blend. Holding the cup about six inches above the pumpkin, pour steadily over the crown and tilt the pumpkin slowly in different directions so the paint runs down each side before it sets.
The marbling happens in the cup, not on the pumpkin, so swirl once with a skewer just before pouring and then commit. A baking rack underneath catches the overflow and stops the pumpkin from sitting in a puddle of wet paint as it dries. Black and white is the sharpest combination; burnt orange and cream reads as more autumnal.
Materials: pumpkin, two colors of acrylic paint, paper cup, wooden skewer.
Miniature and Novelty
Mini pumpkins reward precision in a way full-size ones do not: because the canvas is small, even a simple design looks deliberate and detailed. The push-pin portrait in this section takes about twenty minutes and uses no paint at all.
Mini pumpkins are also the cheapest raw material on this list, usually sold in bags of six or eight. Buy extra: the first one is practice, the second one is the display piece.
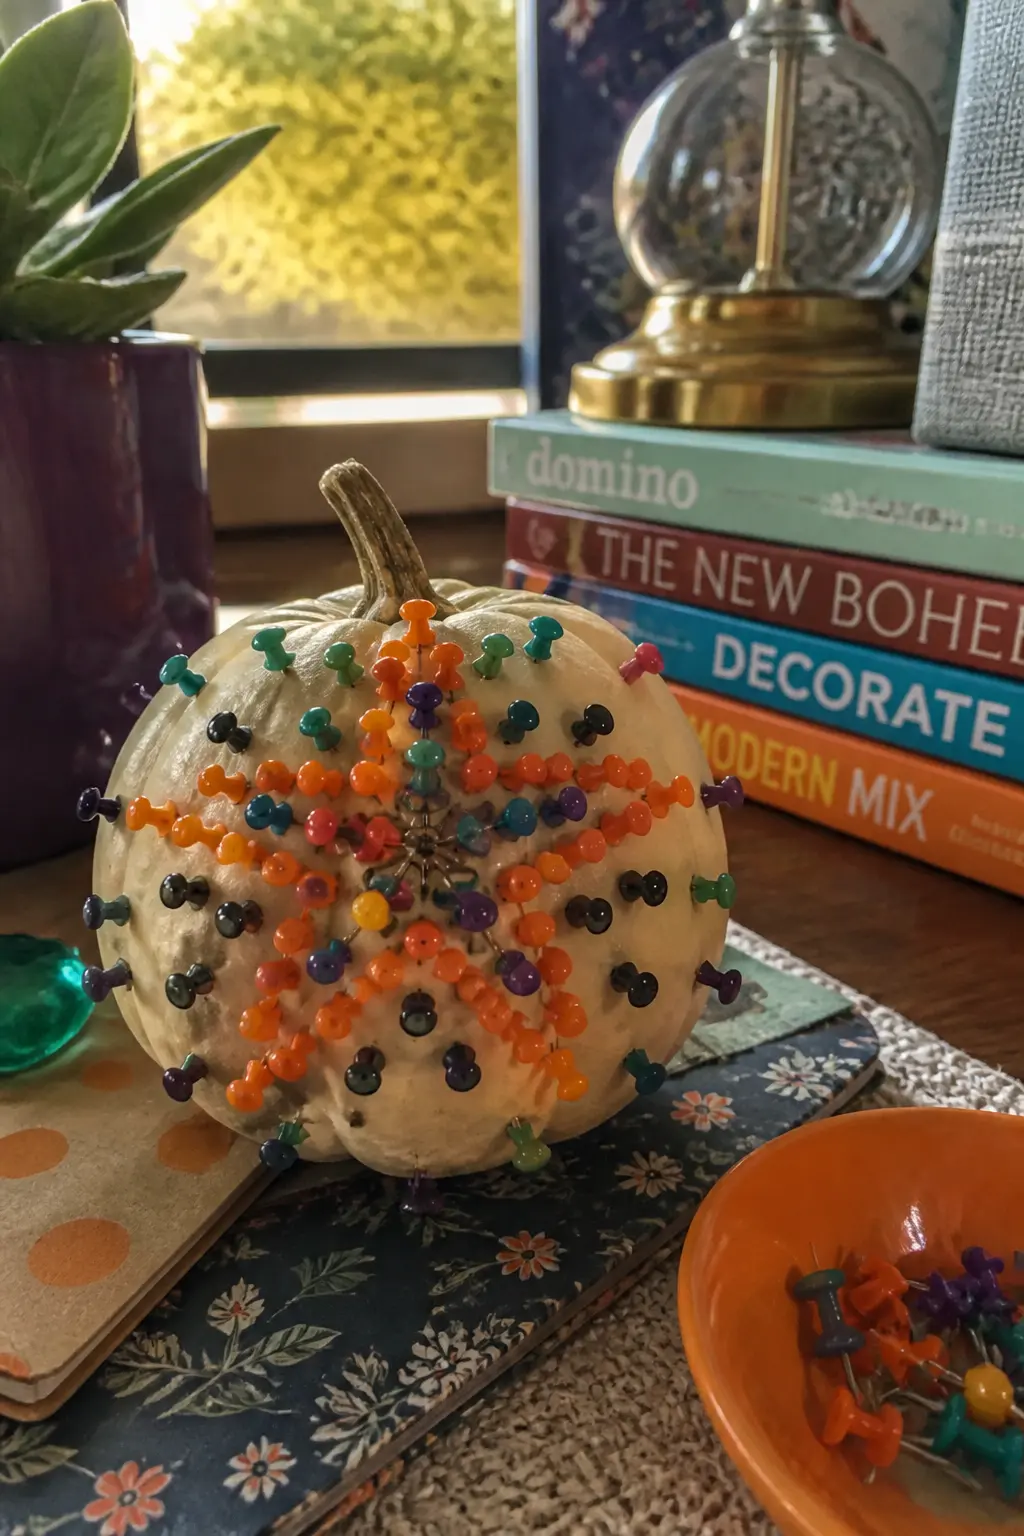
Mini Pumpkin Push-Pin Portrait
Sketch a simple design on the mini pumpkin with a fine marker: a star, a spider web, a leaf outline, or even just initials. Press colored push pins along the drawn lines so each pin sits flush against its neighbor. The pinheads catch light and the design reads as a mosaic from a short distance.
Fill the interior of any closed shape with more pins in a contrasting color: a gold-headed border with black fill for a spider, or white pins on the outline with orange fill for a sun. The skin of a mini pumpkin is firm enough to hold pins upright without splitting. Buy a mixed pin set so you have color options without committing to a single palette before you start.
Materials: mini pumpkin, colored push pins, marker.
🛍 Shopping guide
How to Display All 15 Together
A single craft is a decoration. A collection of them, grouped by height and spread across a front step or a console table, becomes a statement. Cluster odd numbers: three, five or seven look intentional where even numbers read as symmetrical and stiff.
Mix carved and painted in the same group so you get both the daylight interest of the painted ones and the after-dark glow of the lit ones. If you are making several for a party, 15 Fun Halloween Team-Building Games for Work has ideas for turning the crafting session itself into a group activity.
Frequently Asked Questions
Which pumpkin crafts last the longest without rotting?
Any technique that leaves the skin intact, such as painting, tape-and-paint or embellishing with glue, extends the pumpkin’s life significantly compared to carving. Sealed with a matte craft varnish, a painted pumpkin can last four to six weeks indoors. Carved pumpkins typically last five to ten days before the cut edges dry and shrink.
Do these crafts work on artificial foam pumpkins?
Yes, and in most cases better than on real pumpkins. Foam pumpkins hold paint more evenly, accept push pins without splitting, and last indefinitely for reuse. The only technique that does not translate is the carved star pattern using an apple corer, because foam compresses rather than cutting cleanly: use a heated skewer instead.
What acrylic paint works on a pumpkin without primer?
Standard craft acrylic in 2-oz bottles grips the waxy pumpkin skin without any primer on real pumpkins, provided you wipe the surface clean and dry before painting. On very glossy or wax-coated grocery-store pumpkins, a light sand with fine grit paper or a wipe with rubbing alcohol improves adhesion.
Can these crafts be done with children at a Halloween party?
The paint-only designs, the button-eyed face, the polka dot dauber and the push-pin portrait are all appropriate for older children with supervision. Carving is an adult task. For a mixed-age group, set up a painting station with these no-knife options and keep the carving table separate. If you want games to run alongside the crafting, 15 Fun Halloween Team-Building Games for Work adapts well to a family setting too.
How do you stop painter’s tape from pulling the paint off when you peel?
Peel at a low angle, pulling back almost parallel to the surface rather than upward at 90 degrees. Peel while the paint is still slightly tacky rather than fully cured: once acrylic hardens against tape adhesive it bonds and lifts. If you are working in a warm room and the paint dries fast, score along the tape edge lightly with a craft knife before peeling.
30 Halloween party ideas and games for every crowd — trending, active, printable, and quiet. Your
9 baby first halloween crafts that capture tiny footprints, handprints and keepsakes in under an hou
19 crochet Halloween decorations you can finish in an evening using leftover yarn: ghosts, pumpkins,
Leave a Reply