

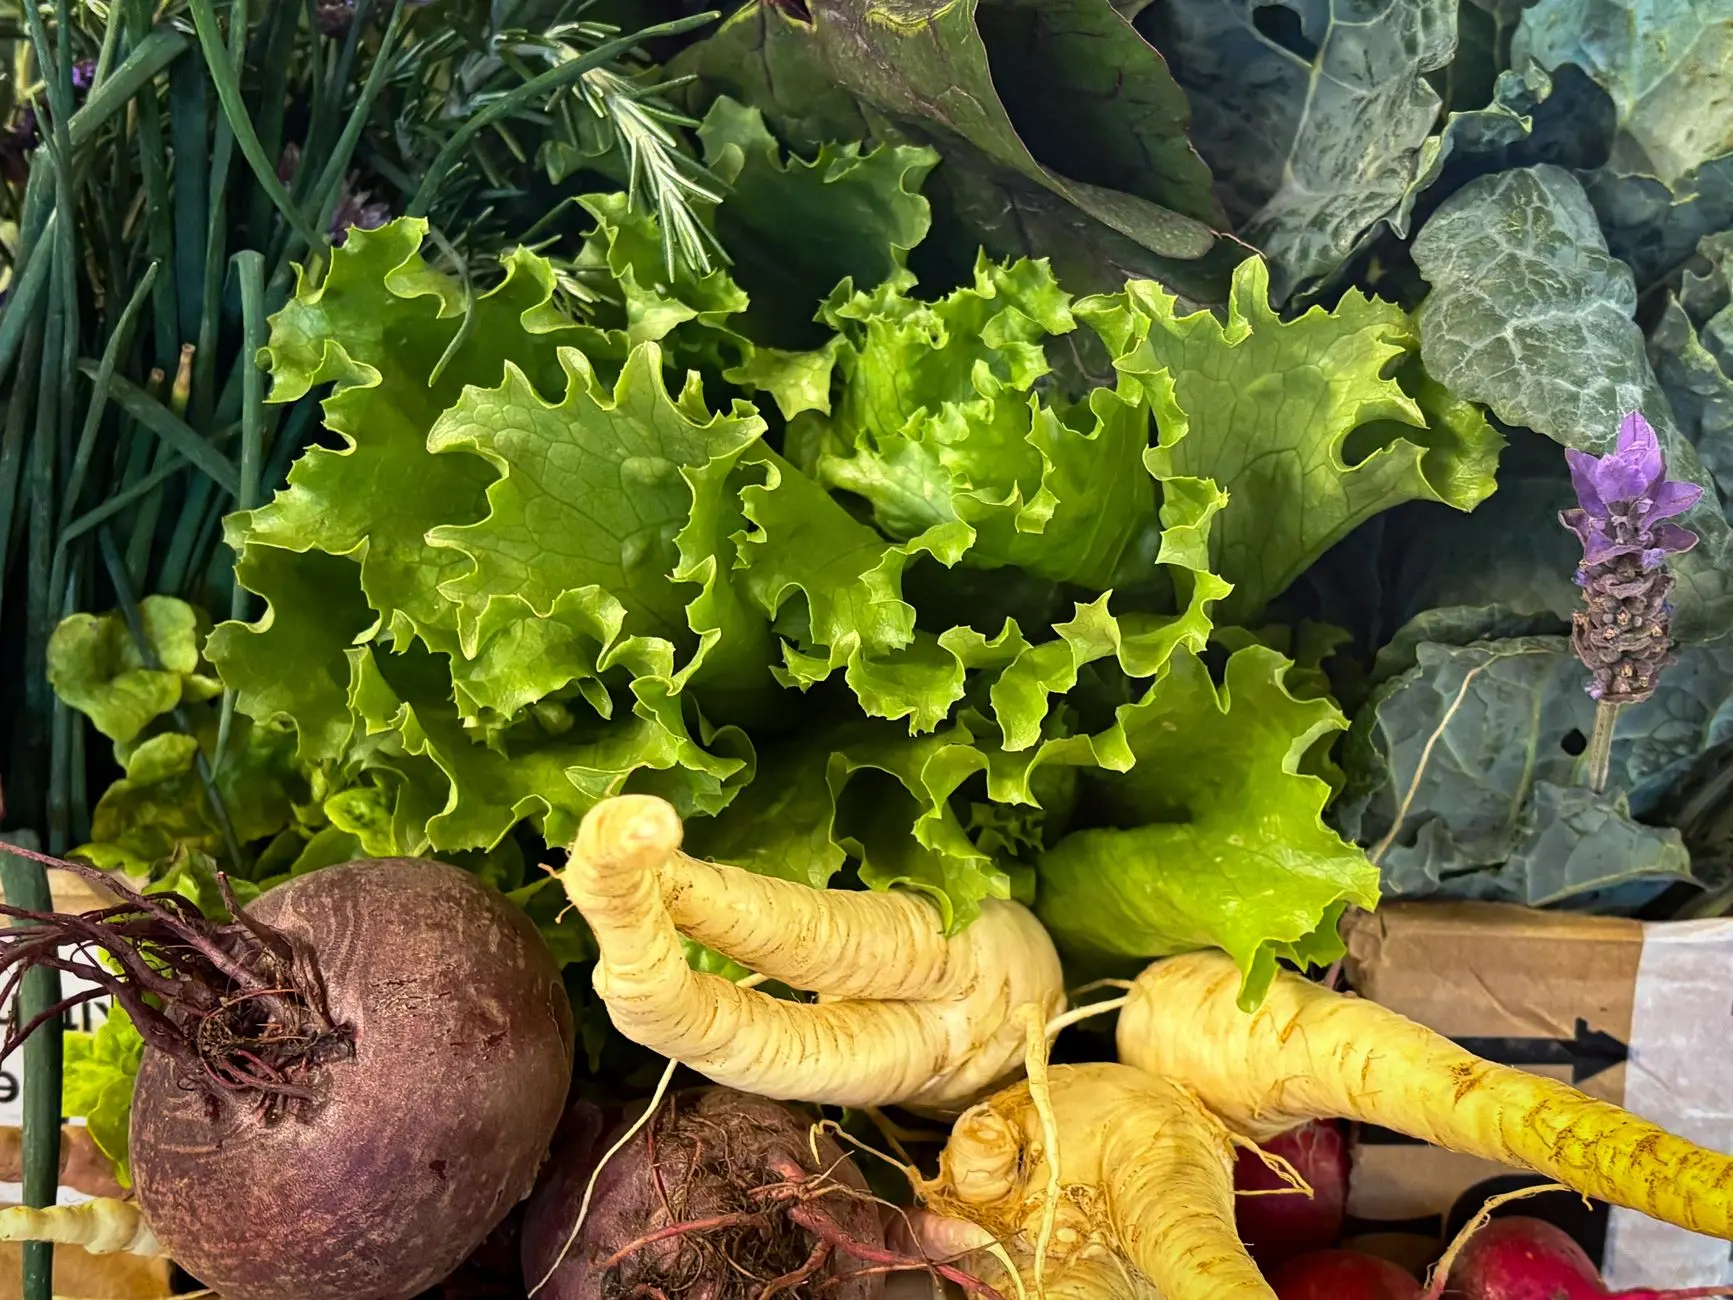
Every year the veggie tray comes back to the fridge almost untouched, and every year someone still puts one out. The problem is never the vegetables.
It is the flat oval platter, the ranch from a bottle, and the fact that nothing on the table gives anyone a reason to reach for a carrot stick when there is also a cheese ball nearby.
What actually gets a tray eaten is shape (something to admire makes people lean in), colour contrast (deep red next to pale green next to cream stops the eye), and a dip worth crossing the room for.
Mixed audience means no alcohol in any of these recipes, and allergens are noted in each intro where they matter. Every tray below can be prepped the night before, refrigerated covered, and set out in under ten minutes on the day.
While the trays are out, keep the table fun with some Thanksgiving family games everyone from grandma to the grandkids will play, or print a set of free printable Thanksgiving games to put out at the same time.
This post contains affiliate links. If you buy through them, I may earn a small commission at no extra cost to you.
- Wreath Veggie Tray with Whipped Feta Dip
- Turkey-Shaped Veggie Tray with Hummus
- White Crudite Tray with Lemon Aioli
- Cornucopia Veggie Tray from a Bread Basket
- Autumn Rainbow Rows Tray
- Individual Veggie Cups with Ranch Dip in the Base
- Vegetable and Cheese Grazing Tray
- Pumpkin Dip Bowl Tray
- Three-Dip Tray with One Set of Vegetables
- Roasted and Raw Veggie Tray
- Kids Veggie Tray with Mild Vegetables and Ranch
- Showpiece Asparagus Tray with Gribiche
- Herb-Decorated Tray with Creamy Green Goddess
- Shallow Tray: Nothing Buried, Everything Visible
- Small Tray Refilled Twice Rather Than One Large One
- Wooden Board Tray with Bagna Cauda
- Frequently Asked Questions
Wreath Veggie Tray with Whipped Feta Dip
A round platter, a small bowl in the centre, and vegetables arranged in a tight ring is all it takes to turn a crudite spread into something people photograph before they eat.
The whipped feta dip (contains dairy) is salty, creamy and sharp enough to carry even a plain celery stick.
Make the dip up to two days ahead and keep it covered in the fridge; build the wreath the morning of the party and cover loosely with a damp paper towel and cling film.
Ingredients
- 200 g feta cheese, crumbled
- 120 g full-fat cream cheese, at room temperature
- 2 tablespoons extra-virgin olive oil, plus extra to drizzle
- 1 tablespoon fresh lemon juice
- 1 teaspoon dried oregano
- 200 g broccoli florets, cut small
- 150 g sugar snap peas
- 200 g cherry tomatoes, red and yellow mixed
- 150 g radishes, trimmed and halved
- 120 g cucumber rounds, 5 mm thick
- A small bunch of fresh rosemary sprigs (for decoration)
Instructions
- Blend the feta, cream cheese, olive oil, lemon juice and oregano in a food processor for 90 seconds until very smooth. Taste and add a little extra lemon if needed. Spoon into a small serving bowl, drizzle with olive oil, cover and refrigerate.
- Set the dip bowl in the centre of a large round platter, leaving a generous ring of space around it.
- Starting with the broccoli, arrange each vegetable in a single-colour arc around the bowl, working clockwise: broccoli, snap peas, cucumber, radishes, then cherry tomatoes. Overlap pieces slightly so no platter shows through.
- Tuck short rosemary sprigs between colour groups to act as the greenery of the wreath.
- Cover with a damp paper towel and cling film and refrigerate until needed. Remove from the fridge 15 minutes before serving.

🛍 Shopping guide
Turkey-Shaped Veggie Tray with Hummus
A fan of vegetables becomes a turkey tail, a small bowl becomes the body, and suddenly the tray has a reason to exist. Children and adults both stop for it, and the shape does the marketing so you do not have to.
Store-bought hummus works perfectly here; if you want to make your own, blend 400 g canned chickpeas (drained) with 3 tablespoons tahini, 2 tablespoons lemon juice, 1 garlic clove and 4 tablespoons cold water until very smooth. Contains sesame (tahini).
Ingredients
- 350 g store-bought hummus (or homemade, see intro)
- 2 medium carrots, peeled and cut into sticks 8 cm long
- 4 stalks celery, cut into sticks 8 cm long
- 150 g yellow bell pepper strips, 8 cm long
- 150 g red bell pepper strips, 8 cm long
- 150 g broccoli florets
- 1 medium cucumber, cut into rounds
- 1 black olive, for the eye
- 1 small carrot strip shaped into a beak
- 1 small strip of red bell pepper shaped into a wattle
Instructions
- Spoon the hummus into a medium round bowl. Place it on a large rectangular board, slightly above centre, to act as the turkey body.
- Fan the carrot sticks in a wide arc behind the bowl to form the outer tail feathers.
- Layer celery sticks over the carrots, slightly shorter and inside the arc, then add yellow pepper strips, then red pepper strips, then broccoli as the innermost layer, building a full tail of five colour bands.
- Arrange cucumber rounds in a small oval below the bowl to form the feet.
- Press the black olive onto the bowl rim as an eye. Place the carrot strip as a beak and the red pepper strip below it as a wattle.
- Cover the board with cling film and refrigerate. Bring to room temperature 15 minutes before serving.

White Crudite Tray with Lemon Aioli
All-white is a genuine design choice, not a default. Cauliflower, jicama, thinly sliced apple and white radish on a pale linen board look intentional and elegant, and the pale palette makes the lemon aioli the only colour hit on the table.
Use firm, sweet apple varieties such as Honeycrisp or Pink Lady; toss the slices in a little lemon juice so they hold their colour.
The aioli contains egg and should not be served to anyone who needs to avoid raw egg: swap for a good-quality store-bought mayonnaise mixed with lemon zest and a small garlic clove if needed.
Ingredients
- 1 medium head cauliflower, cut into small florets
- 200 g jicama, peeled and cut into batons 8 cm long and 1 cm thick
- 2 firm apples, cored and sliced thin, tossed in 1 tablespoon lemon juice
- 6 white radishes (daikon), cut into rounds 5 mm thick
- 2 egg yolks
- 1 teaspoon Dijon mustard
- 180 ml neutral oil (sunflower or light olive)
- 2 tablespoons fresh lemon juice
- 1 small garlic clove, finely grated
- 1/4 teaspoon fine sea salt
Instructions
- Whisk the egg yolks, mustard and half the lemon juice together in a medium bowl for 30 seconds.
- Add the oil in a very thin, steady stream, whisking constantly, until the mixture is thick and glossy. Whisk in the remaining lemon juice, the garlic and the salt. Taste and adjust seasoning. Refrigerate in a covered jar for up to 48 hours.
- Arrange the cauliflower in a generous cluster on one side of the board. Group the jicama batons next, then the apple slices, then the daikon rounds, keeping each vegetable in its own zone.
- Set the aioli in a small bowl in an open corner of the board.
- Cover lightly and refrigerate until serving. Bring out 10 minutes before guests arrive.

🛍 Shopping guide
Cornucopia Veggie Tray from a Bread Basket
A wicker cone basket tipped on its side lets vegetables spill out naturally, which means the arrangement builds itself rather than needing to be engineered.
Fill the basket with parchment so the vegetables do not absorb any wicker smell, and keep the spill low to the board so nothing topples. The dip here is a roasted red pepper and walnut one (contains tree nuts), which is warm-toned and autumnal.
It holds well in the fridge for four days.
Ingredients
- 2 roasted red peppers from a jar (about 150 g drained weight)
- 80 g walnut halves
- 1 tablespoon pomegranate molasses
- 1 tablespoon extra-virgin olive oil
- 1/2 teaspoon ground cumin
- 1/4 teaspoon fine sea salt
- 200 g tricolour baby carrots (purple, orange, yellow)
- 150 g sugar snap peas
- 150 g small red radishes, trimmed
- 150 g cherry tomatoes
- 100 g endive leaves
- Fresh thyme sprigs, for tucking in
Instructions
- Blend the roasted peppers, walnuts, pomegranate molasses, olive oil, cumin and salt in a food processor for 60 seconds until smooth but with a little texture. Taste and adjust salt. Spoon into a bowl and refrigerate.
- Line the inside of a cone-shaped wicker basket with parchment paper.
- Tip the basket onto its side on a long board and nestle it so it sits stable. Pack the inside loosely with crumpled parchment to hold shape.
- Arrange the vegetables tumbling out of the basket opening: carrots first as the longest pieces, then snap peas, radishes, cherry tomatoes and endive, layering so each type is visible.
- Tuck fresh thyme sprigs between vegetables for colour and scent.
- Place the dip bowl at the wide mouth of the cornucopia. Cover the board with cling film and refrigerate.

Autumn Rainbow Rows Tray
Straight rows of vegetables ordered by colour from deep burgundy through to pale cream are the easiest arrangement to execute and one of the most photographable. No shaping, no cutting into special forms: just tight single-colour stripes on a rectangular board.
The key is buying enough of each vegetable so the rows look full rather than sparse. The dip is a simple smoked paprika sour cream that takes four minutes to make (contains dairy).
Ingredients
- 240 g full-fat sour cream
- 1 teaspoon smoked paprika
- 1 teaspoon garlic powder
- 1 tablespoon fresh lemon juice
- 1/2 teaspoon fine sea salt
- 200 g red cherry tomatoes
- 150 g red bell pepper strips
- 150 g orange carrots, cut into sticks
- 150 g yellow bell pepper strips
- 150 g sugar snap peas
- 150 g cucumber rounds
- 150 g cauliflower florets
Instructions
- Stir the sour cream, paprika, garlic powder, lemon juice and salt together in a small bowl. Taste and add more salt or lemon if needed. Cover and refrigerate for up to 3 days.
- Set a small bowl of dip at one short end of a rectangular board or platter.
- Starting at the other short end, lay down a tight row of cherry tomatoes, then a row of red pepper strips, then orange carrot sticks, then yellow pepper strips, then snap peas, then cucumber rounds, finishing with a row of cauliflower closest to the dip bowl.
- Press each row snug against the previous one so no board shows between them.
- Cover and refrigerate. Bring out up to 30 minutes before serving.

Individual Veggie Cups with Ranch Dip in the Base
Put the dip at the bottom of the cup and the vegetables standing upright in it, and two things happen: each guest picks up a self-contained portion, and the dip-to-vegetable ratio is automatically correct.
These are also the easiest tray to refill, because you can fill cups the night before and pull them out of the fridge in batches. The ranch here is a proper one, made with buttermilk (contains dairy).
Swap buttermilk for plain kefir or a mix of half yoghurt and half milk if needed.
Ingredients
- 180 ml full-fat buttermilk
- 120 g mayonnaise
- 1 tablespoon fresh chives, finely chopped
- 1 tablespoon fresh dill, finely chopped
- 1 teaspoon onion powder
- 1/2 teaspoon garlic powder
- 1/2 teaspoon fine sea salt
- 1/4 teaspoon black pepper
- 12 celery stalks, cut to 12 cm lengths
- 12 medium carrots, peeled and cut to 12 cm lengths
- 12 strips red bell pepper, 12 cm long
- 36 sugar snap peas
Instructions
- Whisk the buttermilk, mayonnaise, chives, dill, onion powder, garlic powder, salt and pepper together in a jug until smooth. Refrigerate for at least 30 minutes for the flavours to settle; it keeps for 5 days.
- Pour 3 tablespoons of ranch into the base of each of 12 small tumblers or clear plastic cups (about 8 to 10 oz capacity).
- Stand 1 celery stick, 1 carrot stick and 1 red pepper strip upright in the dip in each cup.
- Add 3 snap peas to each cup, tucking them alongside the other vegetables.
- Cover each cup with a small square of cling film and refrigerate in a single layer. Bring out in two batches of 6 during the party.

🛍 Shopping guide
Vegetable and Cheese Grazing Tray
Adding cheese, nuts and a few crackers to a veggie tray is not cheating: it is the reason people stay at the table.
The vegetables still take up two-thirds of the board; the cheese and nuts simply give people a reason to keep coming back for one more thing. Contains dairy and tree nuts; check cracker labels for gluten if that matters for your guests.
A good aged cheddar cut into rough chunks rather than slices looks more abundant and is easier to pick up.
Ingredients
- 180 g aged cheddar, cut into rough chunks
- 120 g creamy brie or camembert, whole or halved
- 80 g walnut halves
- 80 g dried cranberries
- 200 g baby carrots
- 150 g sugar snap peas
- 150 g radishes, halved
- 150 g cucumber rounds
- 100 g cherry tomatoes
- A small bunch of red seedless grapes
- Store-bought crackers or water biscuits, about 80 g
- 2 tablespoons runny honey, to drizzle over the brie
Instructions
- Place the brie in the centre-left of a large wooden board. Cluster the cheddar chunks on the centre-right.
- Fill in around the cheeses with the vegetables: carrots along one edge, snap peas in a cluster, radishes near the cheddar, cucumber rounds near the brie.
- Tuck the grapes and cherry tomatoes into gaps between vegetables and cheese.
- Scatter the walnuts and dried cranberries across the board in small piles rather than one big mound.
- Fan the crackers along the bottom edge of the board.
- Drizzle the honey over the brie just before serving. Cover the board (without the honey drizzle) with cling film and refrigerate; drizzle and set out when guests arrive.

🛍 Shopping guide
Pumpkin Dip Bowl Tray
A small sugar pumpkin hollowed out and filled with dip is the one prop that costs under two dollars and makes people assume you spent an hour on the table.
Use a pie pumpkin (also called sugar pumpkin) in the 1 to 1.5 kg range: big enough for a generous dip bowl, small enough to sit on a standard platter. The dip is a smoky butternut and cream cheese blend (contains dairy).
Hollow out the pumpkin up to two days before and keep it in an airtight bag in the fridge.
Ingredients
- 1 small sugar pumpkin (1 to 1.5 kg)
- 200 g cooked or canned butternut squash, drained well
- 150 g full-fat cream cheese, at room temperature
- 1 tablespoon maple syrup
- 1/2 teaspoon smoked paprika
- 1/4 teaspoon ground nutmeg
- 1/2 teaspoon fine sea salt
- 200 g baby carrots
- 150 g red bell pepper strips
- 150 g celery sticks, 8 cm long
- 150 g broccoli florets
Instructions
- Slice the top off the pumpkin with a sharp knife to make a lid. Scoop out the seeds and strings with a large spoon until the inside is clean.
- Blend the butternut squash, cream cheese, maple syrup, smoked paprika, nutmeg and salt in a food processor for 60 seconds until very smooth. Taste and adjust seasoning. Refrigerate the dip for up to 3 days.
- Set the hollowed pumpkin in the centre of a large platter and spoon the dip inside it. Rest the pumpkin lid against the side.
- Arrange the carrots, pepper strips, celery and broccoli around the pumpkin in loose clusters.
- Cover loosely with cling film and refrigerate until 20 minutes before serving.

Three-Dip Tray with One Set of Vegetables
Three small bowls of very different dips make one tray worth revisiting three times. The logic: people who have already taken a carrot stick will take another if there is a new dip to try.
Keep the dip flavours genuinely distinct (creamy, spicy, herbaceous) so there is a real reason to go back. Contains dairy and sesame. The vegetables are a simple, neutral set that works with all three dips.
Ingredients
- Dip 1: 200 g full-fat Greek yoghurt, 2 tablespoons tahini, 1 tablespoon lemon juice, 1 garlic clove grated, 1/4 teaspoon salt (tahini yoghurt)
- Dip 2: 180 g sour cream, 2 tablespoons sriracha sauce, 1 teaspoon honey, pinch of salt (spicy sriracha cream)
- Dip 3: 120 g cream cheese at room temperature, 3 tablespoons finely chopped fresh chives, 2 tablespoons finely chopped fresh parsley, 1 tablespoon lemon juice, 1/4 teaspoon garlic powder, 1/4 teaspoon salt (herb cream cheese)
- 250 g baby carrots
- 200 g celery sticks, 8 cm long
- 200 g cucumber rounds, 5 mm thick
- 150 g sugar snap peas
- 150 g radishes, halved
Instructions
- Make dip 1: whisk the yoghurt, tahini, lemon juice, garlic and salt together in a small bowl until smooth. Cover and refrigerate.
- Make dip 2: stir the sour cream, sriracha, honey and salt together in a small bowl. Cover and refrigerate.
- Make dip 3: beat the cream cheese until soft, then stir in the chives, parsley, lemon juice, garlic powder and salt until evenly combined. Cover and refrigerate. All three dips keep for 4 days.
- Space three small bowls evenly along one edge of a large rectangular board or platter.
- Fill the rest of the board with vegetables, distributing each type throughout so guests can reach them from any position.

Roasted and Raw Veggie Tray
Raw vegetables are fine; roasted vegetables are interesting.
Mixing both on one tray gives the tray a warmth and depth that a purely raw board never has, and the roasted pieces stay good at room temperature for up to two hours, which is plenty for a Thanksgiving spread.
Roast the vegetables the morning of the party and let them cool completely before building the tray. The dip is a tahini lemon sauce (contains sesame).
Ingredients
- 200 g cauliflower florets (to roast)
- 200 g broccoli florets (to roast)
- 150 g halved Brussels sprouts (to roast)
- 3 tablespoons olive oil
- 1/2 teaspoon fine sea salt
- 1/4 teaspoon black pepper
- 150 g raw cherry tomatoes
- 150 g raw sugar snap peas
- 120 g raw radishes, halved
- 60 g tahini
- 3 tablespoons fresh lemon juice
- 2 tablespoons cold water
- 1 small garlic clove, finely grated
- 1/4 teaspoon fine sea salt
Instructions
- Preheat the oven to 220 C (200 C fan, gas 7). Toss the cauliflower, broccoli and Brussels sprouts with the olive oil, salt and pepper on a large baking sheet, spreading them in a single layer.
- Roast for 22 to 25 minutes, turning once halfway through, until the edges are golden and caramelised. Let the vegetables cool completely on the tray, at least 30 minutes.
- Make the tahini dip: whisk the tahini, lemon juice, cold water, garlic and salt together until smooth and pourable. Add another teaspoon of water if it seizes; tahini varies. Refrigerate in a jar.
- Arrange the cooled roasted vegetables on one half of a large board or platter, keeping them slightly separate so they do not steam each other.
- Fill the other half with the raw vegetables: tomatoes, snap peas and radishes, in clusters.
- Set the tahini dip in a small bowl at the front of the board. Serve within 2 hours.

Kids Veggie Tray with Mild Vegetables and Ranch
Children are not going to eat raw fennel or endive, and there is no point pretending otherwise.
A tray built from the vegetables children actually like (cucumber, carrot, peas, pepper strips) arranged in something recognisable (a simple smiley face or their initial spelled out in vegetable rows) gets eaten.
The dip is the same buttermilk ranch from the individual cups recipe above: familiar, mild and not remotely spicy. No nuts, no strong flavours, no allergens beyond dairy.
Ingredients
- 240 g full-fat buttermilk ranch dip (see individual cups recipe, or store-bought)
- 200 g baby carrots
- 200 g cucumber rounds, 5 mm thick
- 150 g sugar snap peas
- 150 g red bell pepper strips, 8 cm
- 100 g yellow bell pepper strips, 8 cm
- 100 g cherry tomatoes
Instructions
- Pour the ranch into a small bowl and set it in the top centre of a round platter.
- Arrange cherry tomatoes in a curved smile below the bowl, using two tomatoes as eyes flanking the bowl.
- Frame the face with rows of carrot sticks along the sides, snap peas across the top, and cucumber rounds along the bottom.
- Fill any gaps with pepper strips, alternating red and yellow for colour.
- Cover with cling film and refrigerate. Bring out when the kids sit down.

Showpiece Asparagus Tray with Gribiche
One beautiful vegetable in peak condition beats twelve mediocre ones every time. In autumn, thick asparagus spears bunched upright in a deep vessel with a classic French gribiche poured over the tips stop the table.
Gribiche contains hard-boiled egg and capers; swap for a simple Dijon vinaigrette (no egg) if that works better for your guests. Buy the fattest asparagus spears you can find: thin ones go limp fast.
Ingredients
- 800 g thick asparagus spears, woody ends snapped off
- 2 hard-boiled eggs, peeled and finely chopped
- 1 tablespoon capers, drained and roughly chopped
- 1 tablespoon cornichons, roughly chopped
- 1 tablespoon fresh flat-leaf parsley, finely chopped
- 1 tablespoon fresh tarragon leaves
- 2 teaspoons Dijon mustard
- 2 tablespoons white wine vinegar
- 6 tablespoons extra-virgin olive oil
- 1/4 teaspoon fine sea salt
- 1/4 teaspoon black pepper
Instructions
- Trim the asparagus so all spears are the same length (about 18 to 20 cm).
- Whisk the mustard and vinegar together in a bowl, then slowly whisk in the olive oil to form a loose emulsion. Stir in the egg, capers, cornichons, parsley, tarragon, salt and pepper. Taste and adjust seasoning. Refrigerate for up to 2 days.
- Stand the asparagus upright in a tall glass, jar or cylindrical serving vessel, tips pointing up. Tie a piece of kitchen twine around the middle of the bunch to keep them standing.
- Spoon a generous amount of gribiche over the tips so it drips down the spears. Set the remainder in a small bowl beside the vessel.
- Set out within 1 hour of spooning the gribiche; the asparagus holds well at room temperature for up to 2 hours.

Herb-Decorated Tray with Creamy Green Goddess
Fresh herb sprigs (tarragon, flat-leaf parsley, dill, chervil) tucked between vegetables do the work of a florist for the cost of a supermarket bunch. The herbs frame each vegetable cluster, add scent, and make the tray look styled without any special equipment.
The green goddess dip doubles down on the herb theme: deeply green, tangy and creamy (contains dairy and anchovies; swap anchovies for 1 teaspoon capers and a dash of soy sauce for a non-fish version).
Ingredients
- 120 g full-fat mayonnaise
- 120 g full-fat Greek yoghurt
- 1 small ripe avocado
- 3 anchovy fillets (or 1 teaspoon capers plus a dash of soy sauce)
- 1 tablespoon fresh tarragon leaves
- A large handful of fresh flat-leaf parsley (about 20 g)
- 2 tablespoons fresh chives, chopped
- 2 tablespoons fresh lemon juice
- 1 small garlic clove
- 1/4 teaspoon fine sea salt
- 200 g cucumber rounds
- 200 g radishes, halved
- 150 g baby carrots
- 150 g red bell pepper strips
- Fresh tarragon, dill and parsley sprigs, for decoration
Instructions
- Blend the mayonnaise, yoghurt, avocado, anchovy, tarragon, parsley, chives, lemon juice, garlic and salt in a food processor for 90 seconds until completely smooth and vivid green. Taste; add more lemon or salt as needed. Cover and refrigerate for up to 2 days.
- Set a small bowl of green goddess dip in the centre or at one end of a large rectangular board.
- Arrange the vegetables in clusters around the bowl, placing each type in a distinct zone.
- Tuck fresh herb sprigs (tarragon, dill, parsley) between clusters, using them as organic dividers and decoration. Aim for herbs to appear every 8 to 10 cm along the board.
- Cover loosely and refrigerate until 15 minutes before serving.

Shallow Tray: Nothing Buried, Everything Visible
Depth is the enemy of a veggie tray. When things are piled four layers high, only the top layer gets taken, and everything below sits there slowly wilting under the weight of celery sticks.
A shallow rimmed baking sheet or a low-sided paella pan keeps everything in a single layer so every piece is visible, reachable and equally appealing.
The dip is a quick beetroot and cream cheese swirl (contains dairy): deep red on cream, striking on a shallow white tray.
Ingredients
- 150 g cooked beetroot (vacuum-packed, not pickled), drained
- 150 g full-fat cream cheese, at room temperature
- 1 tablespoon fresh lemon juice
- 1 small garlic clove, grated
- 1/4 teaspoon fine sea salt
- 150 g baby carrots
- 150 g sugar snap peas
- 120 g cucumber rounds, 5 mm thick
- 120 g red radishes, halved
- 100 g cherry tomatoes
- 100 g cauliflower florets, cut very small
Instructions
- Blend the beetroot, cream cheese, lemon juice, garlic and salt in a small food processor for 60 seconds until smooth. Taste and adjust seasoning. Transfer to a small bowl; the colour will be a deep magenta. Refrigerate for up to 3 days.
- Choose the shallowest tray you own: a sheet pan with a low rim, a paella pan, or a large very shallow serving platter.
- Arrange the vegetables in a single layer across the tray, with each type in its own section. Do not stack or overlap. Every piece should lie flat or at most lean on a neighbour.
- Set the beetroot dip in a small bowl at one corner of the tray.
- Cover with cling film and refrigerate. Bring out 15 minutes before serving and do not replace the empty tray with a fuller deeper one.

🛍 Shopping guide
Small Tray Refilled Twice Rather Than One Large One
A small tray that looks full is more appetising than a large tray that looks half-empty after the first wave of guests.
The strategy: make enough vegetables for a large tray but set out only a third at a time on a small board, then refill it twice. Each refill looks fresh and abundant.
Use the same smoked paprika sour cream from the rainbow rows tray (recipe above) so you are only making one dip, and simply pull pre-portioned containers from the fridge to refill.
Ingredients
- 240 g smoked paprika sour cream dip (see rainbow rows recipe)
- 300 g baby carrots, divided into 3 portions of 100 g
- 300 g sugar snap peas, divided into 3 portions of 100 g
- 250 g cucumber rounds (5 mm), divided into 3 portions of about 83 g
- 200 g red bell pepper strips, divided into 3 portions of about 67 g
- 200 g cherry tomatoes, divided into 3 portions of about 67 g
Instructions
- Prepare all the vegetables at once. Divide each type into three equal portions and store each portion in a separate small zip-lock bag or lidded container in the fridge, labelled Batch 1, Batch 2, Batch 3.
- Divide the dip into three small pots of 80 g each.
- Thirty minutes before guests arrive, pull out Batch 1. Arrange the vegetables on a small board (35 to 40 cm long) in tight clusters. Set 1 pot of dip alongside. Carry to the table.
- When the tray starts to look sparse (roughly 45 to 60 minutes later), carry it back to the kitchen, discard any dried-out pieces, and set out Batch 2 on the same freshly wiped board.
- Repeat with Batch 3 for the final refill. Three appearances of a full tray read as generous and effortless.

Wooden Board Tray with Bagna Cauda
Plastic oval trays slide. They collect condensation. They look like they came with the vegetables, which they did. A wooden board (acacia, walnut, or even a simple rubberwood board) changes the register of the whole spread.
The bagna cauda here is the dip that makes people cross the room: warm, anchovy-spiked, garlicky and rich (contains fish and dairy). It is traditionally kept warm on a tea light; a small fondue pot or ceramic warmer works too.
Guests dip raw vegetables directly into the warm oil. Contains anchovies: note for any pescatarian guests who avoid fish.
Ingredients
- 8 anchovy fillets in oil, drained
- 4 large garlic cloves, finely grated
- 150 ml extra-virgin olive oil
- 60 g unsalted butter
- 150 g baby carrots
- 150 g celery stalks, cut into 10 cm lengths
- 150 g red endive leaves
- 150 g fennel, cut into thin wedges
- 150 g radishes, halved
- 150 g cauliflower florets
Instructions
- Combine the anchovy fillets and garlic in a small saucepan over the lowest possible heat. Mash the anchovies with a wooden spoon as they warm until they dissolve into a paste, about 3 minutes.
- Add the olive oil and butter. Keep the heat very low and stir gently for 5 to 7 minutes, never letting the oil bubble hard. The dip should be fragrant, golden and unified. Do not let the garlic colour.
- Transfer to a small fondue pot, warmer or heatproof ceramic bowl set over a tea light.
- Arrange all the vegetables on a large wooden board in distinct clusters around the warmer.
- Bring the board to the table with the bagna cauda warm in the centre. Guests dip directly into it. Top up with a splash of olive oil if it reduces during the party.

Frequently Asked Questions
How far in advance can I make a Thanksgiving veggie tray?
Cut vegetables hold well for up to 24 hours in cold water in the fridge. Most dips in these recipes keep for 2 to 4 days covered. Build the tray itself the morning of the party and cover it with a damp paper towel and cling film until you are ready to serve.
What vegetables work best on a Thanksgiving veggie tray?
Carrots, celery, cucumber, radishes, sugar snap peas, cauliflower and bell peppers all hold their texture and colour well. Avoid any vegetable that wilts quickly at room temperature, such as thinly sliced lettuce or pre-cut avocado.
How do I keep a veggie tray fresh during a long party?
Keep the tray covered with cling film in the fridge until 15 to 20 minutes before serving. For a long party (3 or more hours), use the small-tray-refilled-twice method: set out only a third of the vegetables at a time and refresh the tray twice during the event.
What dip is best for a Thanksgiving veggie tray?
Anything more interesting than plain bottled ranch. Make the dip one or two days ahead so the flavour develops fully.
How much should I make for a Thanksgiving veggie tray?
Allow about 80 to 100 g of vegetables per person for a mixed appetiser spread (where other snacks are also on the table), or 150 g per person if the veggie tray is the main pre-dinner offering. Always make slightly more than you think you need: a full tray looks generous, a thin one does not.
Can I use a pumpkin as a dip bowl on Thanksgiving?
Yes, and it is one of the easiest ways to make the tray look styled. Use a small sugar pumpkin (1 to 1.5 kg), cut off the top, scoop out the seeds and strings, and fill with any thick dip. Hollow it up to two days ahead and keep it in an airtight bag in the fridge.
16 make-ahead Thanksgiving punch recipes for a crowd of 20. Apple cider, cranberry, pomegranate, was
15 free printable Thanksgiving games ready in minutes — print, play, done. Perfect for families, F
30 thanksgiving painted pumpkin ideas sorted by palette, motif, lettering and table use, so your dec
Leave a Reply