

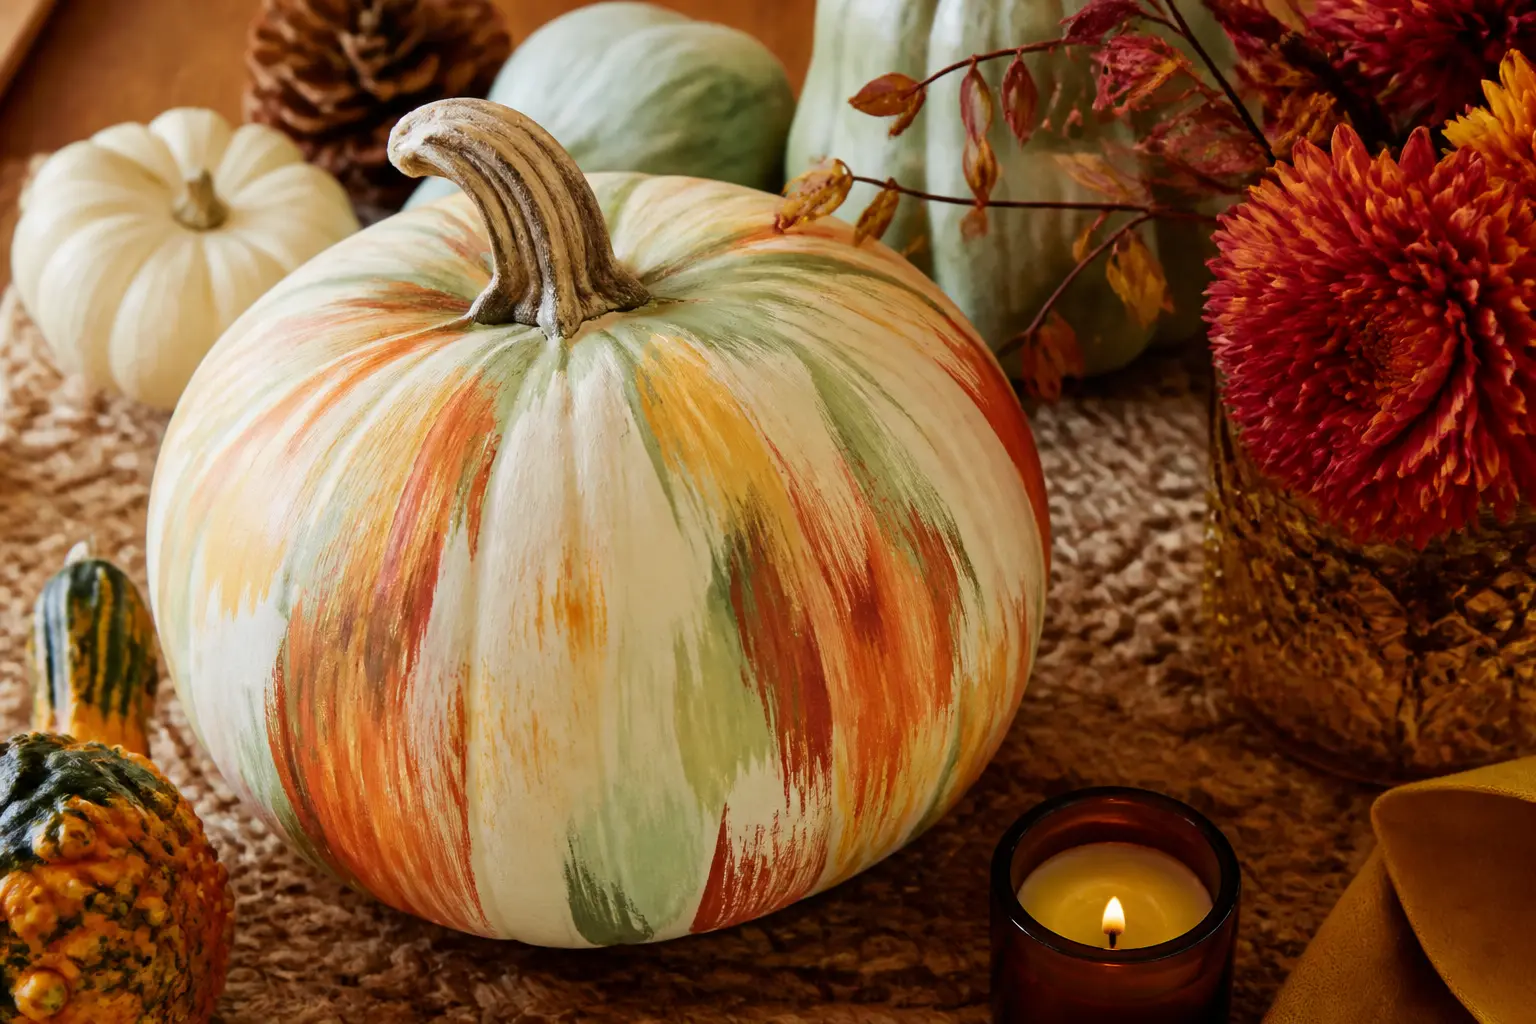
The moment November arrives, anything with a black cat or a grinning face has to go. What stays is a pumpkin that was never Halloween to begin with: one in cream, rust or sage, with a leaf or a word of thanks painted on its side. These thirty ideas start there.
Each entry is one pumpkin, and each one earns its place through palette, motif or how it functions at the table. A few cost nothing beyond craft paint. A few do double duty as place cards, candle holders or a centrepiece that guests can write on. None of them carve, and none of them wink at October.
For anyone who already owns plain faux pumpkins, this list also works as a repainting project. Grab the full pumpkin crafts guide if you want broader technique notes alongside these. Otherwise, read on and pick the ones that fit your table.
This post contains affiliate links. If you buy through them, I may earn a small commission at no extra cost to you.
Lettering and Words
Words on a pumpkin do something a pattern cannot: they tell a guest exactly where they are and why. These five entries use lettering as the main design, not an afterthought squeezed between motifs. A paint pen, a fine brush and a steady hand are all the tools needed.
The key is keeping the palette warm so the lettering reads harvest, not chalkboard-cafe. Cream on rust, rust on cream, cream on sage: those three combinations cover almost every finish here.
A Word of Thanks Hand-Lettered Across the Front
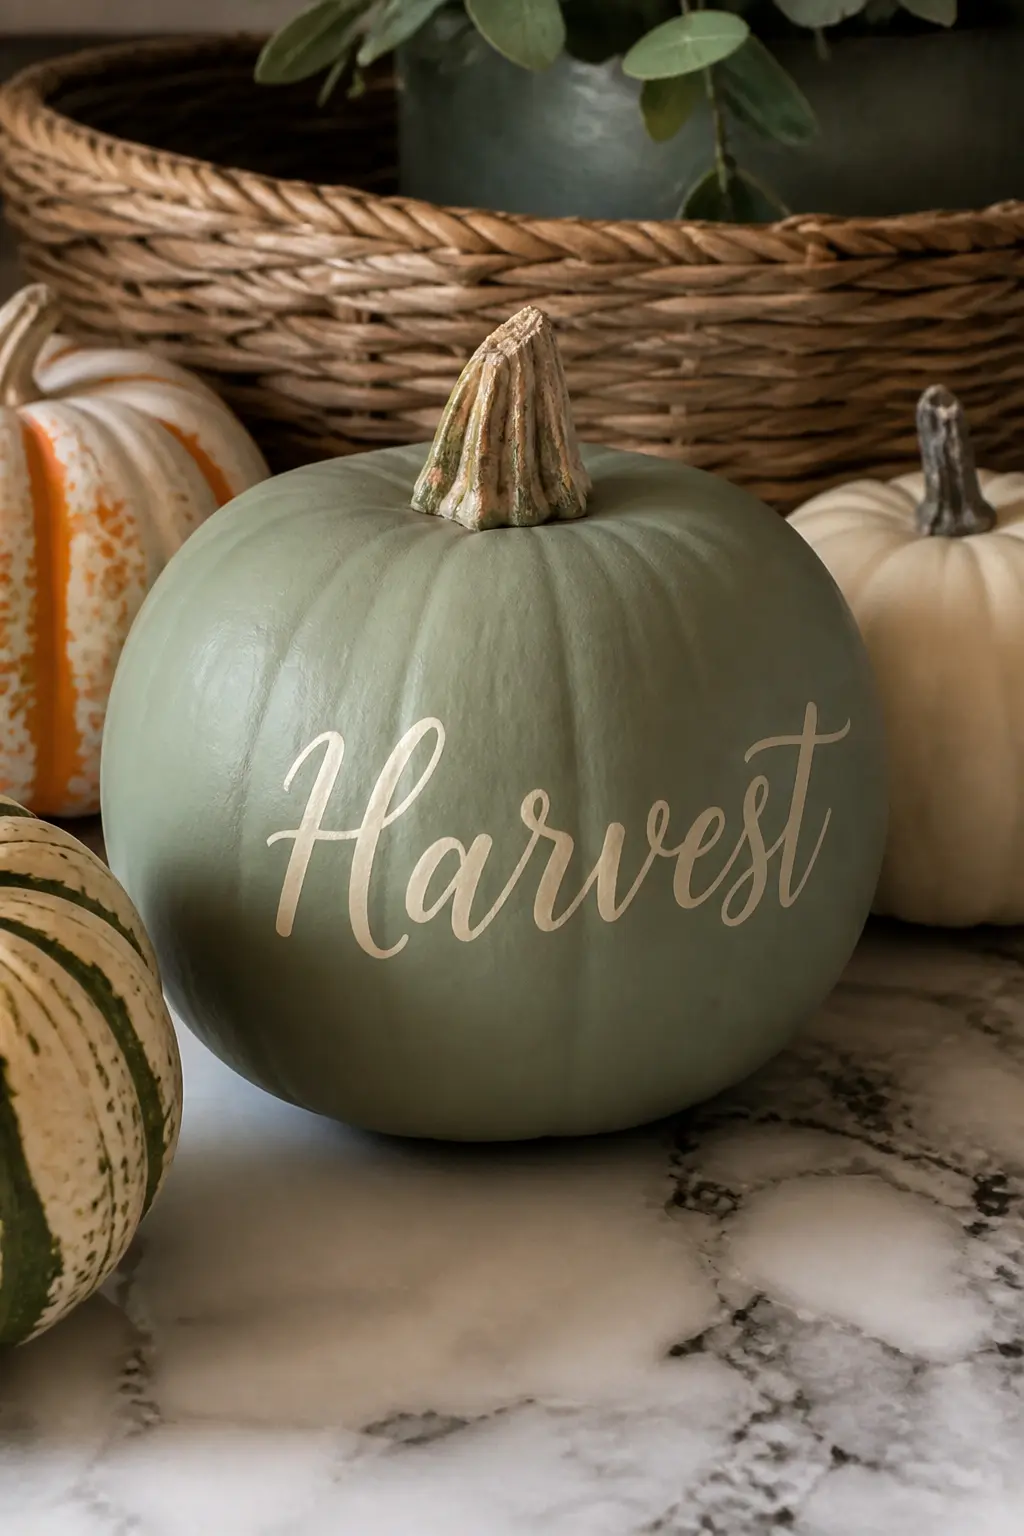
One word, centred and confident. “Grateful”, “Thankful”, “Harvest”: any of them lands without needing a border or a flourish around it. A cream pumpkin with rust lettering is the easiest read from across the table.
Use a white paint pen to sketch the letters first, then go over them in the final colour once the spacing is right. The undercoat disappears under the topcoat, so there is no penalty for adjusting.

A Gratitude Pumpkin the Family Adds to Each Day
Start with a large cream or white pumpkin. Leave most of the surface blank. Each day through November, one person adds a single word or short phrase in a fine paint pen: something they are grateful for, written small enough that thirty entries fit by the end of the month.
By Thanksgiving dinner it is covered in handwriting and becomes the most personal centrepiece on the table. Seal it after the last entry is dry and keep it year after year.
🛍 Shopping guide
Sage with Cream Lettering
Sage is the outlier in the harvest palette and exactly why it works: it reads fresh and considered next to all that rust and mustard. Cream lettering on a sage base has almost no visual noise, which means the word itself carries all the weight.
Two coats of sage paint, fully dry, then lettering in a cream paint pen. No varnish needed on a faux pumpkin unless it will sit in direct sun.
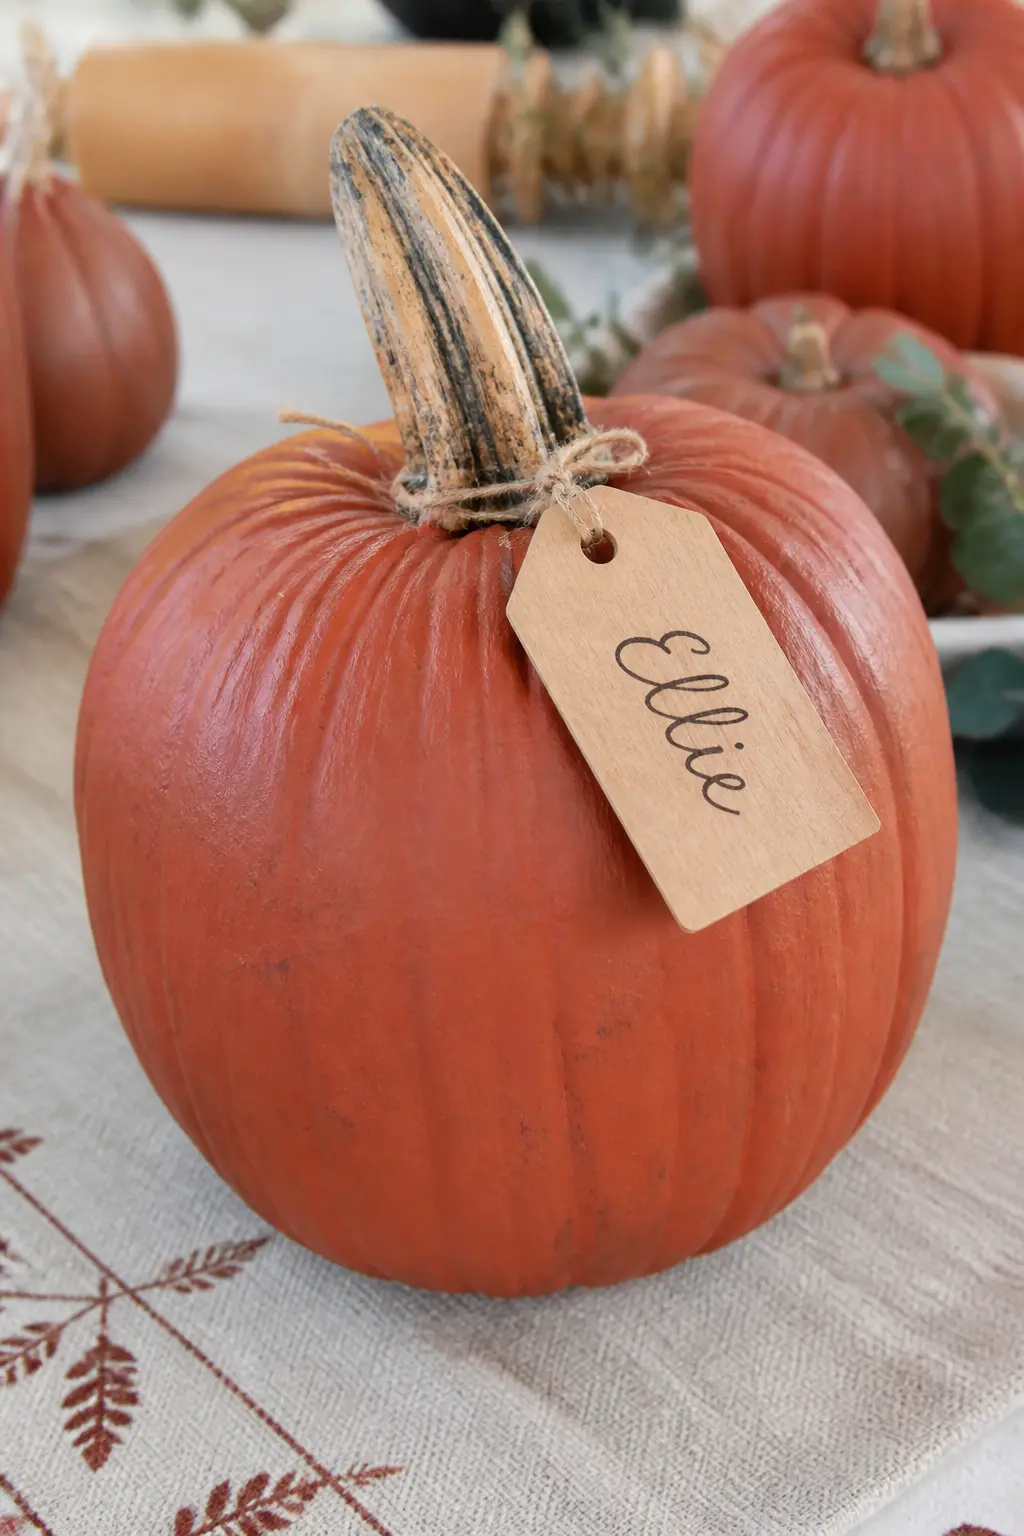
A Wooden Tag Hung from the Stem with a Name
No painting skill needed here. A plain pumpkin, any colour, with a small wooden gift tag tied to the stem by a length of twine. Write or stamp a guest’s name on the tag and the pumpkin becomes a place card without a brushstroke on its surface.
It also means the pumpkin itself can be repainted or reused while the tag changes. Buy the tags in bulk, write names in a thick marker, and finish the whole set in twenty minutes.
🛍 Shopping guide
Natural Motifs
Leaves, acorns, wheat, pinecones and vines are the vocabulary of November. Painted one at a time or layered into a band around the middle of the pumpkin, they read immediately as harvest without needing any explanation. Loose brushwork suits them better than precision: a wheat stem with a slightly wobbly stroke looks more like a wheat stem, not less.
Acrylic craft paint works for all of these. A flat brush handles the wide leaves; a liner brush draws the wheat and vine details. Neither costs more than a few dollars.
Autumn Leaves in Three Shades Overlapping
Three colours: ochre, rust and deep brown. Brush loose leaf shapes around the pumpkin, letting them overlap so the layers create depth. The shape does not need to be botanically correct. A teardrop with a central vein reads as a leaf from any distance.
Start with the lightest colour and work toward the darkest so each layer shows through where they cross. A pumpkin base in cream makes all three leaf colours pop without competing with each other.
🛍 Shopping guide
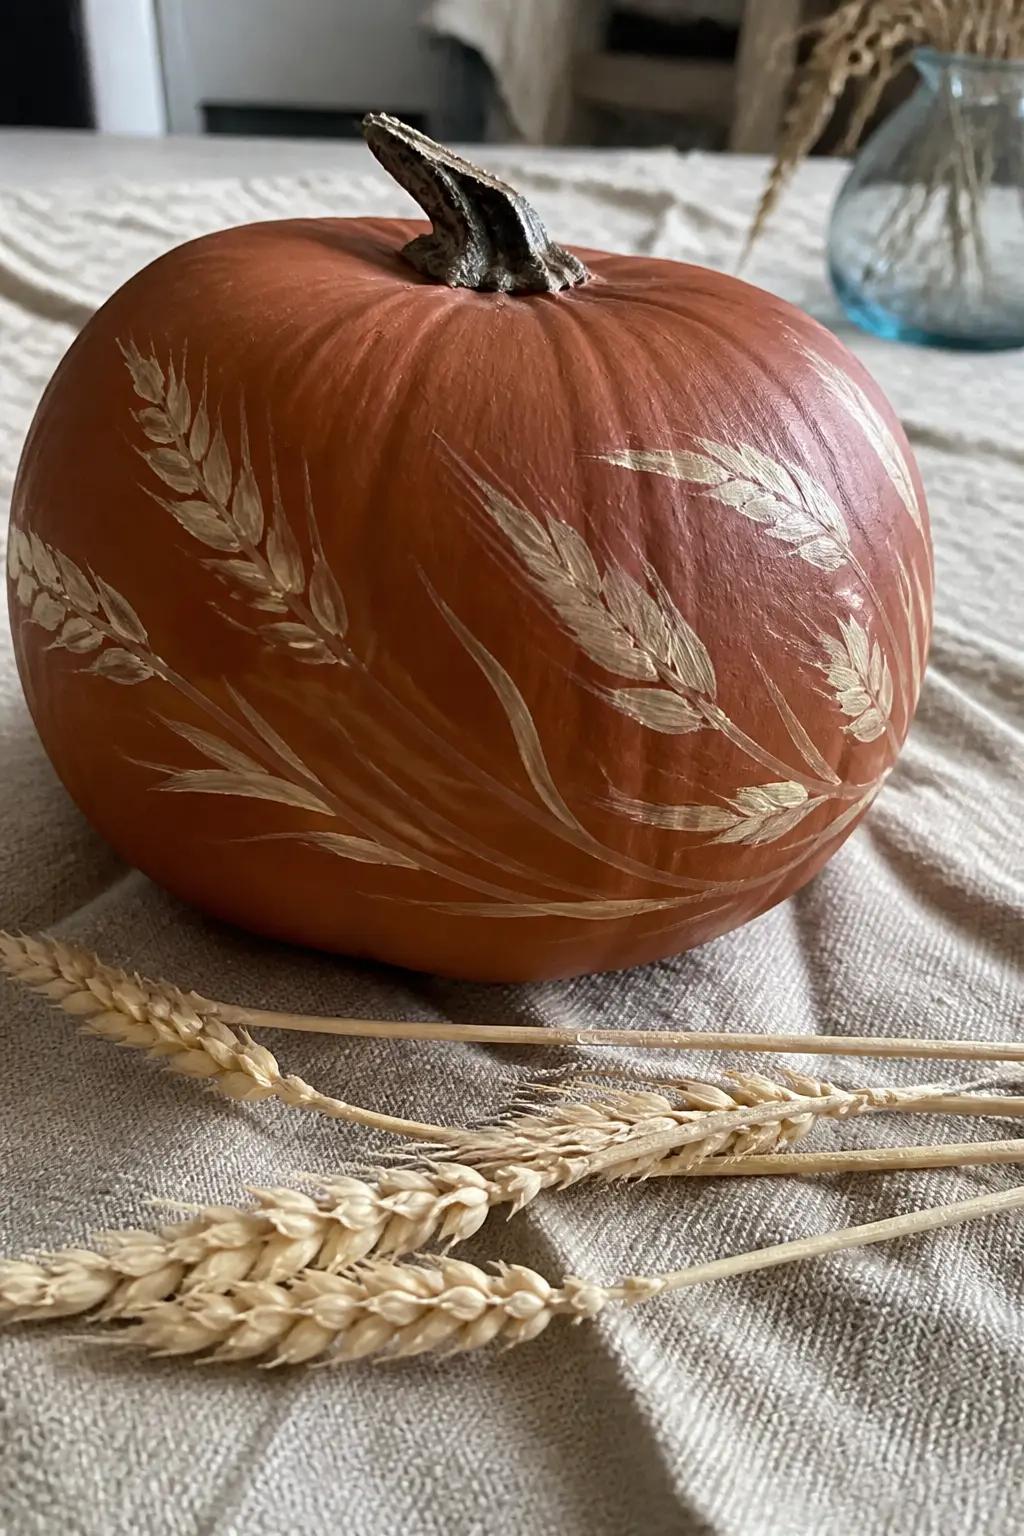
Wheat Stems in Single Brush Strokes
Load a liner brush with cream or pale gold paint and pull a single upward stroke for each wheat stem, then add tiny angled marks at the top for the grain head. Three to five strokes cluster into one stalk. A dozen clusters arranged loosely around a terracotta or rust pumpkin fill the surface without crowding it.
The imprecision is the point. Wheat drawn too carefully looks digital. Let the brush do what a brush does.
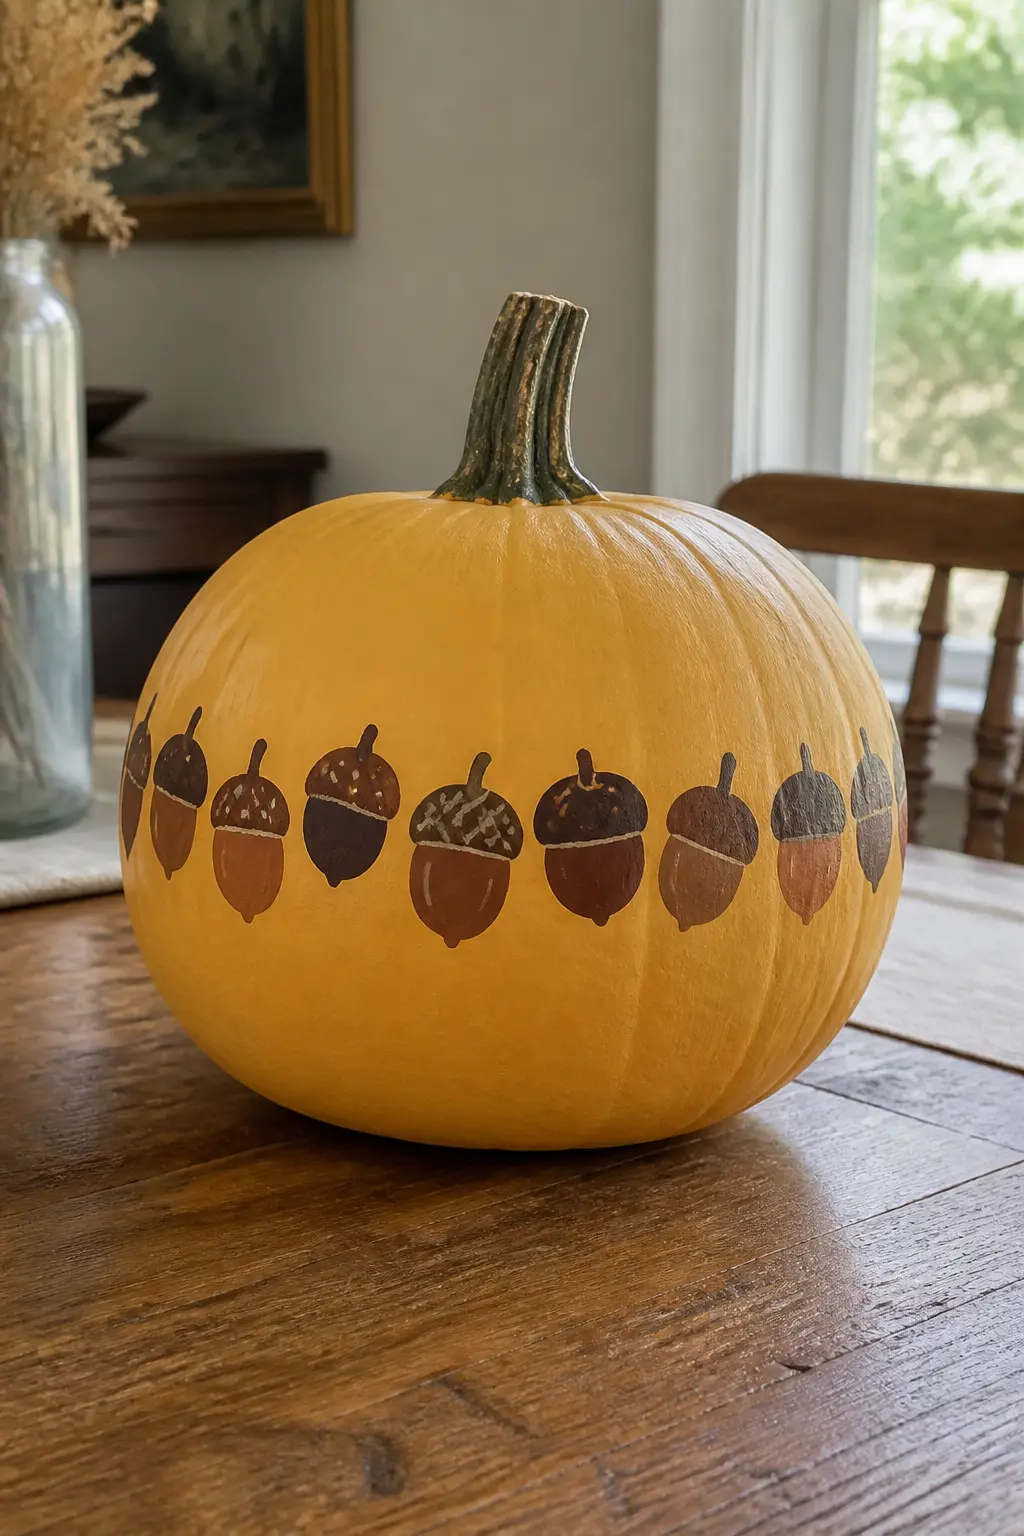
Acorns Painted Around the Middle
An acorn is two shapes: a round base and a flat cap with a short stem. Paint the base in warm brown, the cap in dark brown with a single highlight dot. Repeat them evenly around the equator of the pumpkin and the result reads as a deliberate pattern rather than a scattered doodle.
Spacing matters more than perfect acorn shapes. Measure loosely by eye, marking the cap positions in chalk first so adjustments are free.
🛍 Shopping guide
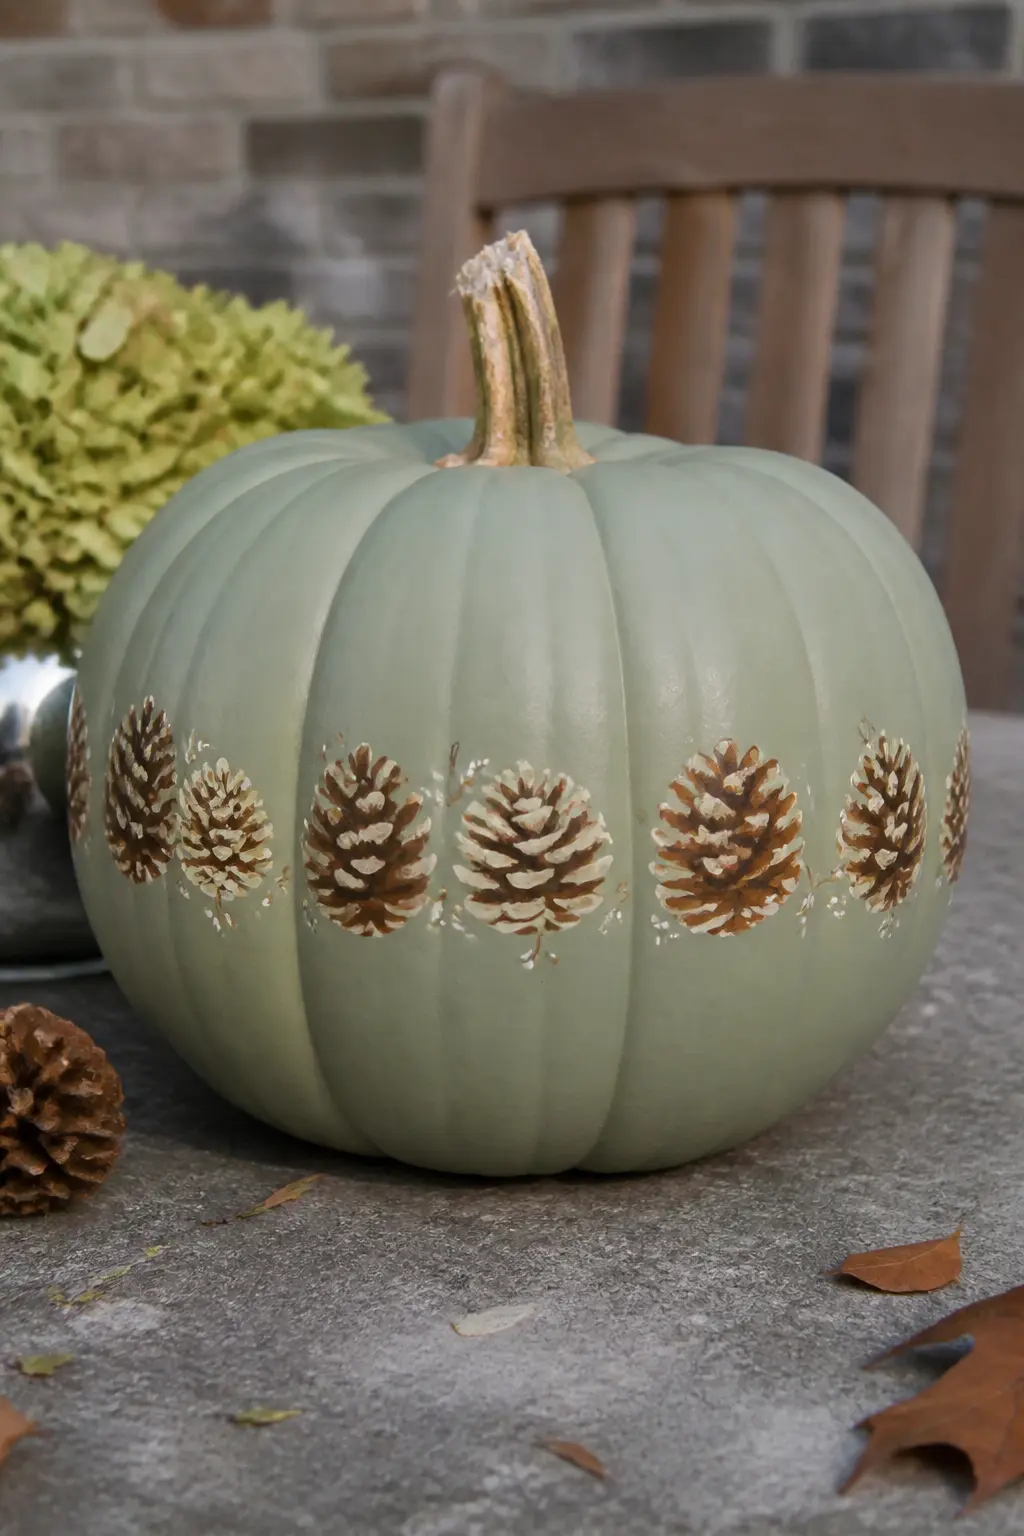
A Pinecone Motif Repeated in a Band
A painted pinecone is an oval made of overlapping curved scales, each scale a small C-shape in dark brown over a tan base. Repeat five to seven of them in a horizontal band around the widest part of a cream or sage pumpkin and the pattern has the rhythm of a botanical print.
Add a tiny stem and two short needle strokes above each cone for detail. The whole band takes about thirty minutes and needs no artistic background.
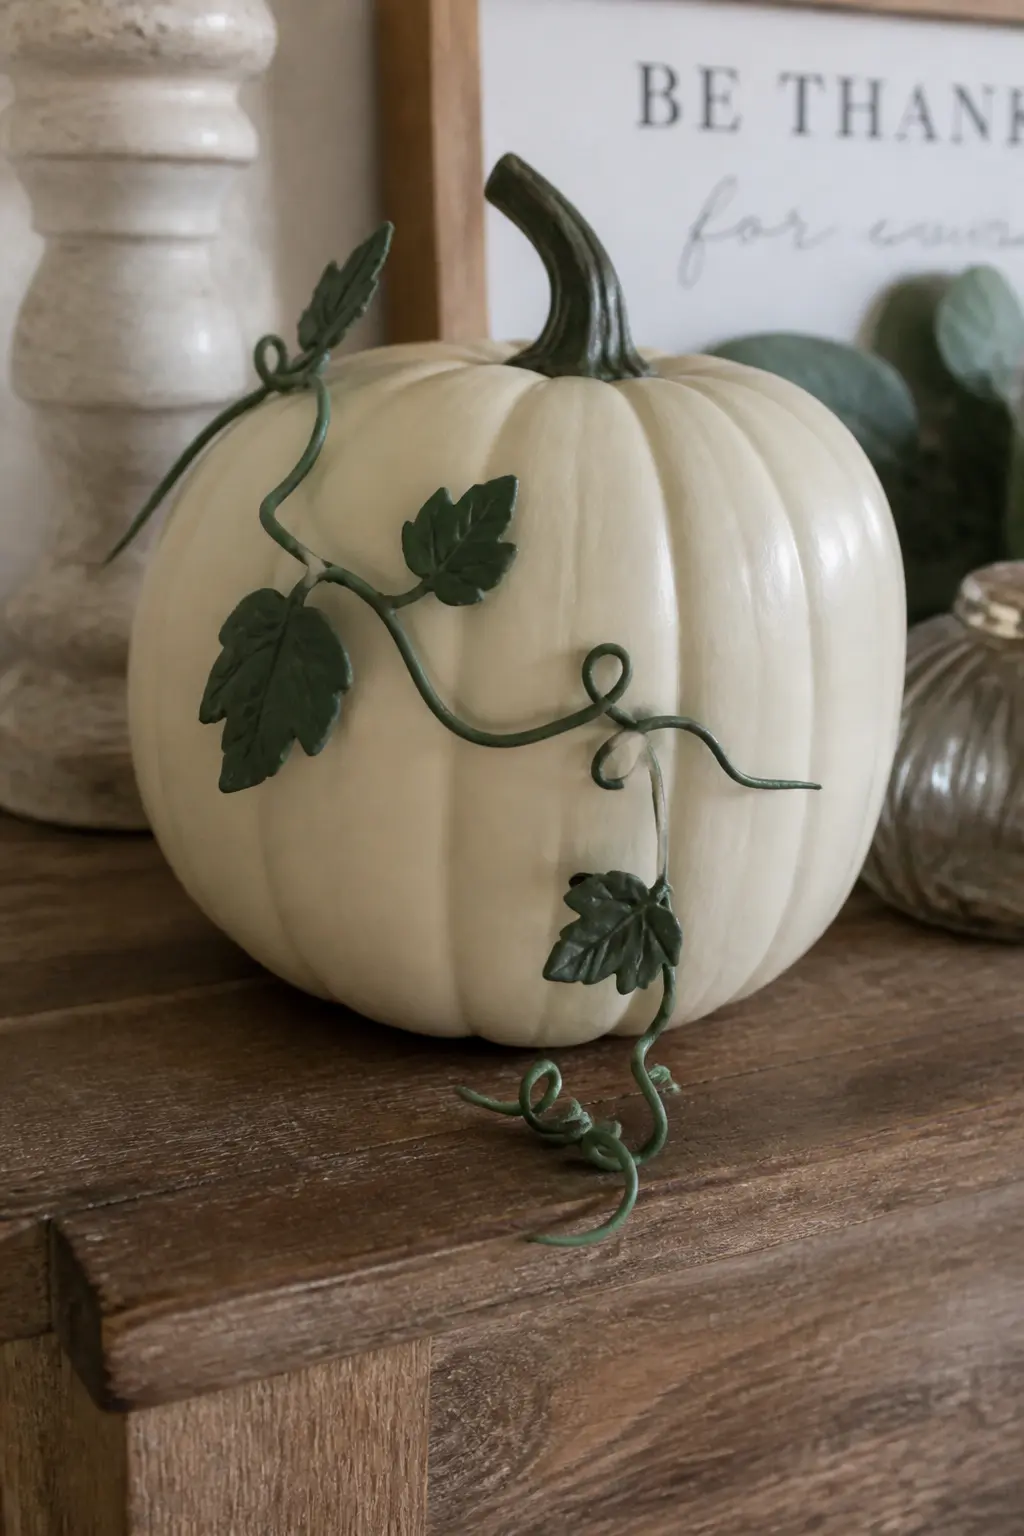
A Vine Trailing from the Stem
Start at the base of the stem and pull a curving line down and around the pumpkin with a liner brush loaded in dark green or deep brown. Add small oval leaves along the vine at irregular intervals. Let some leaves overlap the ridges so the design feels like it belongs on the surface rather than sitting on top of it.
A vine works best on a pale base, cream or warm white, where the thin lines stay legible. On a dark base, use cream paint for the vine instead.
Colour and Finish
Sometimes the colour itself is the design. A warm ombre that fades from cream to rust, a terracotta body with cream ridges dry-brushed to catch the light, a mustard base scattered with white dots: none of these need a steady hand or a reference image. They need the right paint and a willingness to let the pumpkin’s own shape do the work.
Dry-brushing is the technique that earns the most for the least effort. Load a brush, wipe most of the paint off on a paper towel, then drag it lightly across the surface. The ridges catch colour and the valleys stay dark. Done in under ten minutes.
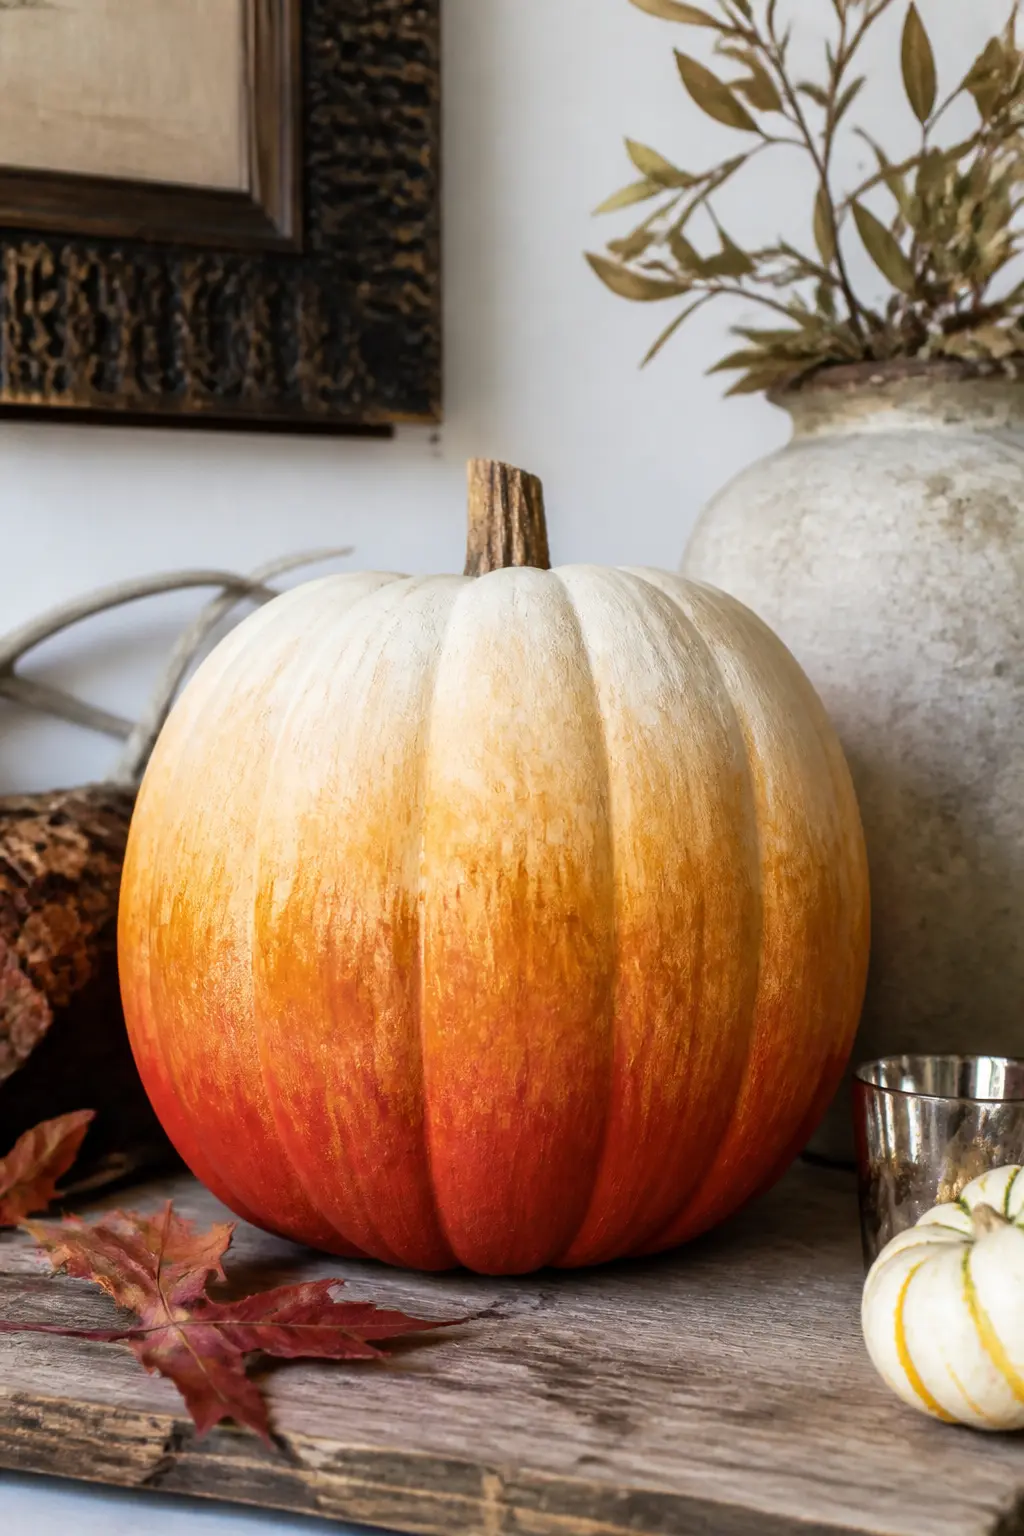
Warm Ombre from Cream at the Top to Rust at the Base
Load a wide flat brush with cream paint and cover the top third of the pumpkin. While that is still wet, blend mustard into the middle third, then rust at the base. Work quickly and use a dry brush to feather the transitions. The blending does not need to be seamless: a slight band where colours meet looks like a natural gradient.
This works on both real and faux pumpkins. On faux, the paint stays workable longer, which makes blending easier for a first attempt.
🛍 Shopping guide
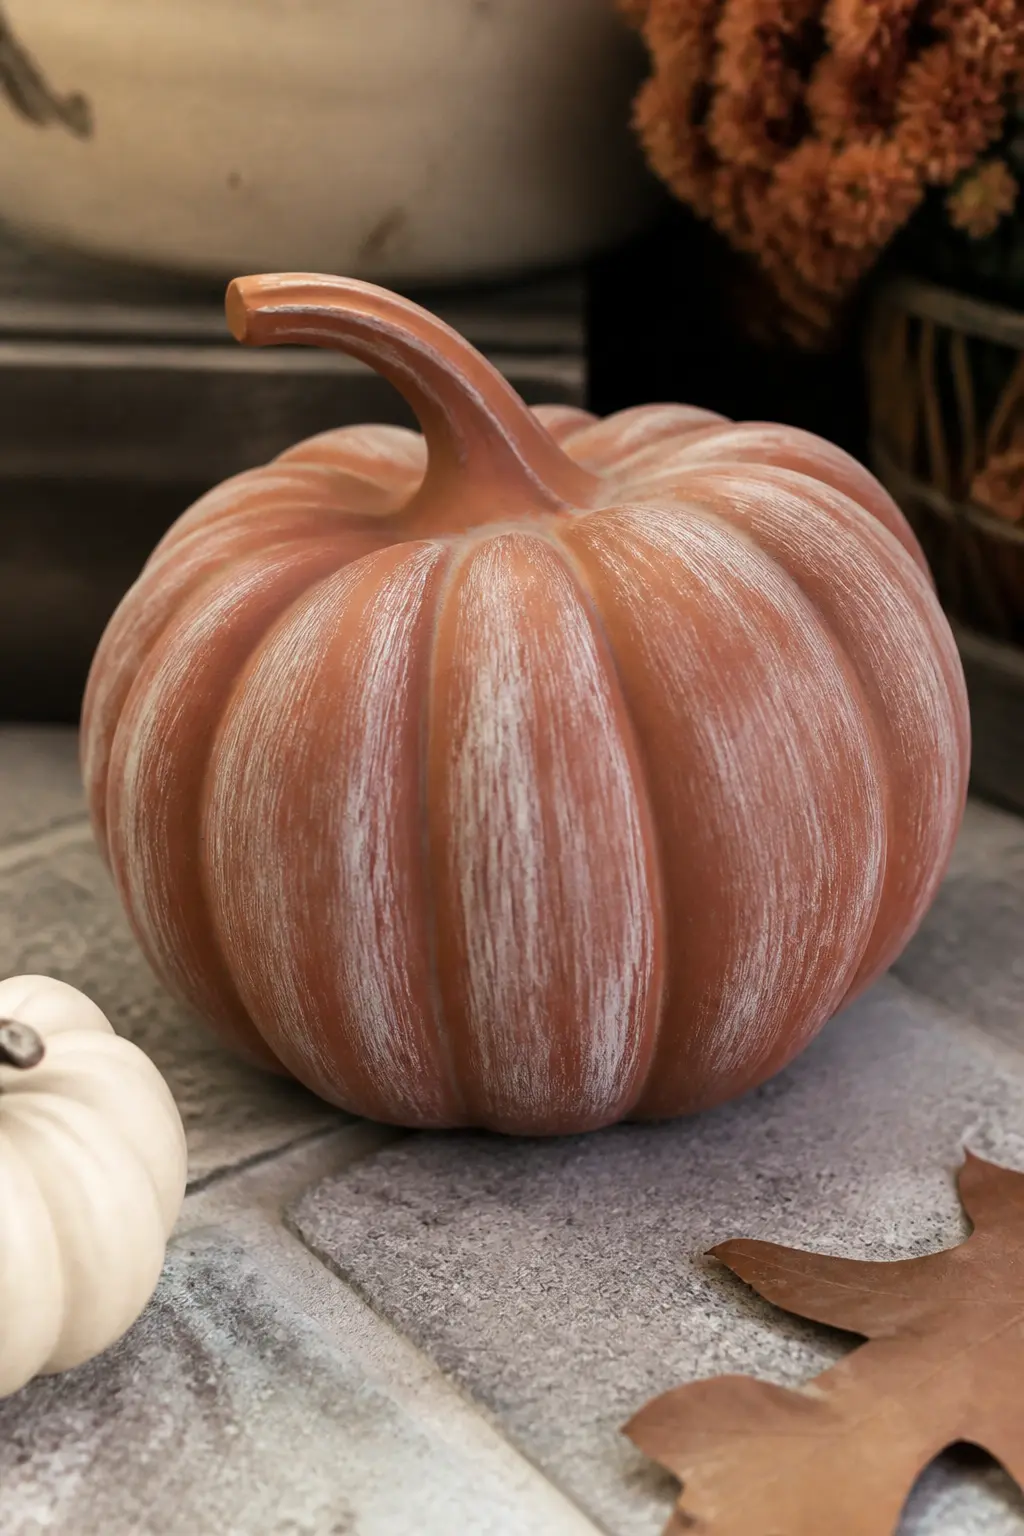
Terracotta with Cream Ridges Dry-Brushed
Base coat the whole pumpkin in terracotta. Let it dry completely. Load a flat brush with cream paint, wipe ninety percent of it off on a paper towel, then drag the near-dry brush across the ridges. The paint catches only the raised edges and leaves the valleys terracotta. Two passes over each ridge is enough.
The result mimics aged ceramic without any skill beyond patience. It takes ten minutes and no additional materials beyond two paint colours.
Mustard with White Dots
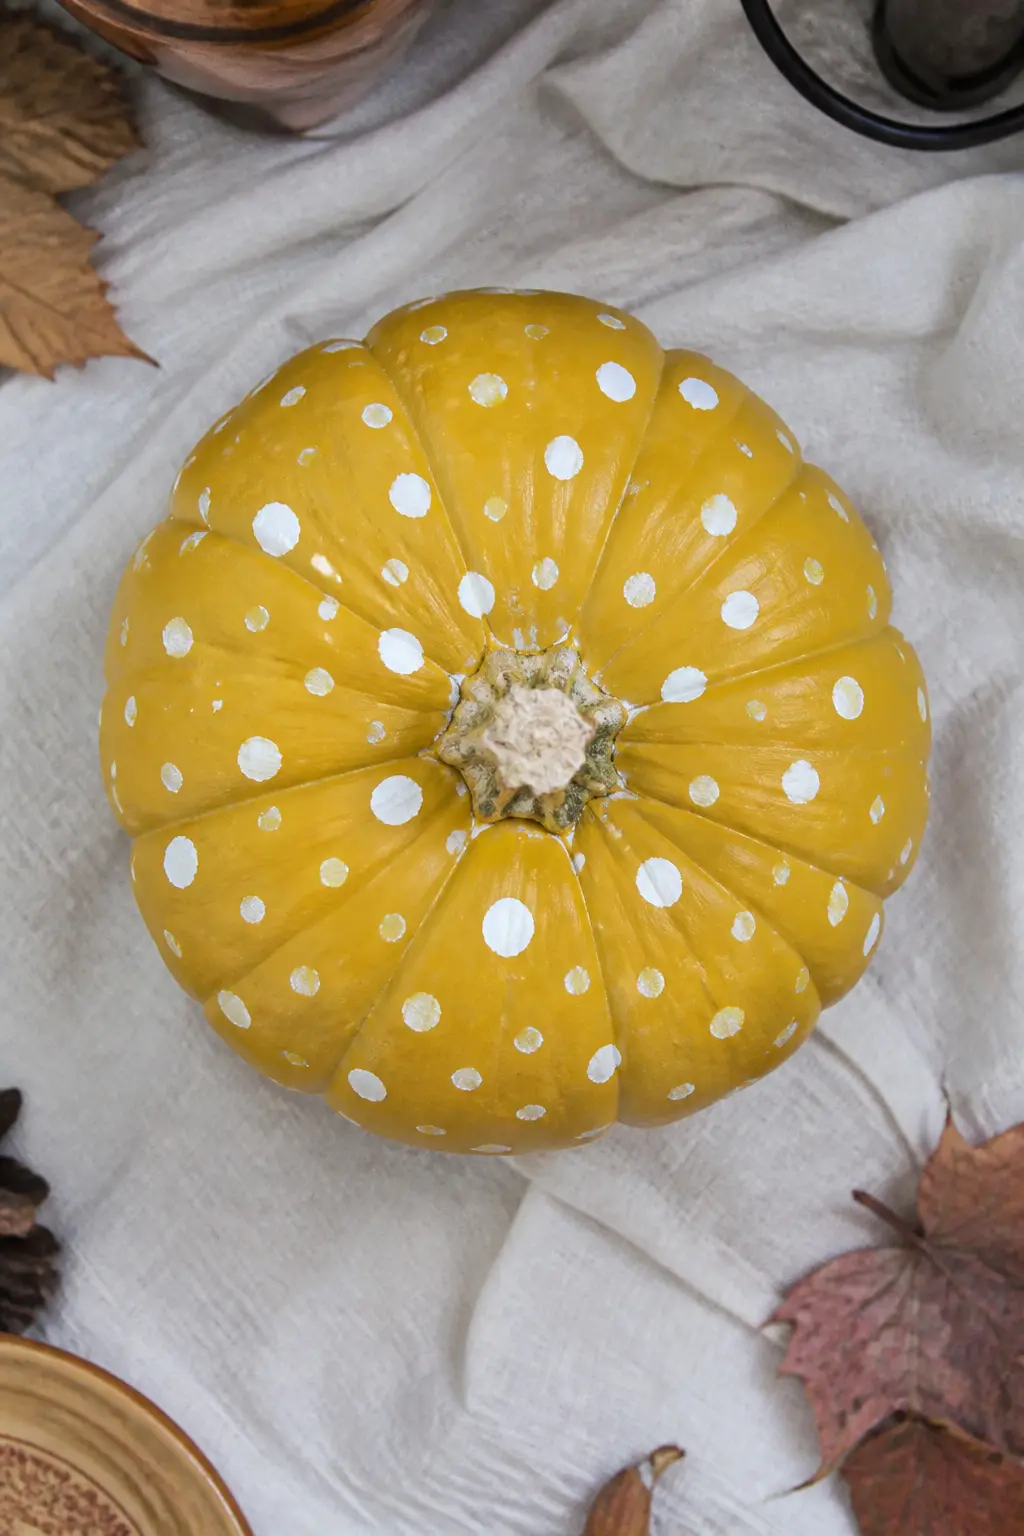
A mustard base with white polka dots is as simple as it sounds and more striking than it should be. Use the eraser end of a pencil dipped in white paint for uniform dots, or vary the sizes by using different dotting tools. Space them randomly rather than in a grid so the pattern reads organic rather than mechanical.
Three coats of mustard, fully dry, before any dots go on. One coat of dots. Seal with matte varnish and done.
Rust with a Gold Stem
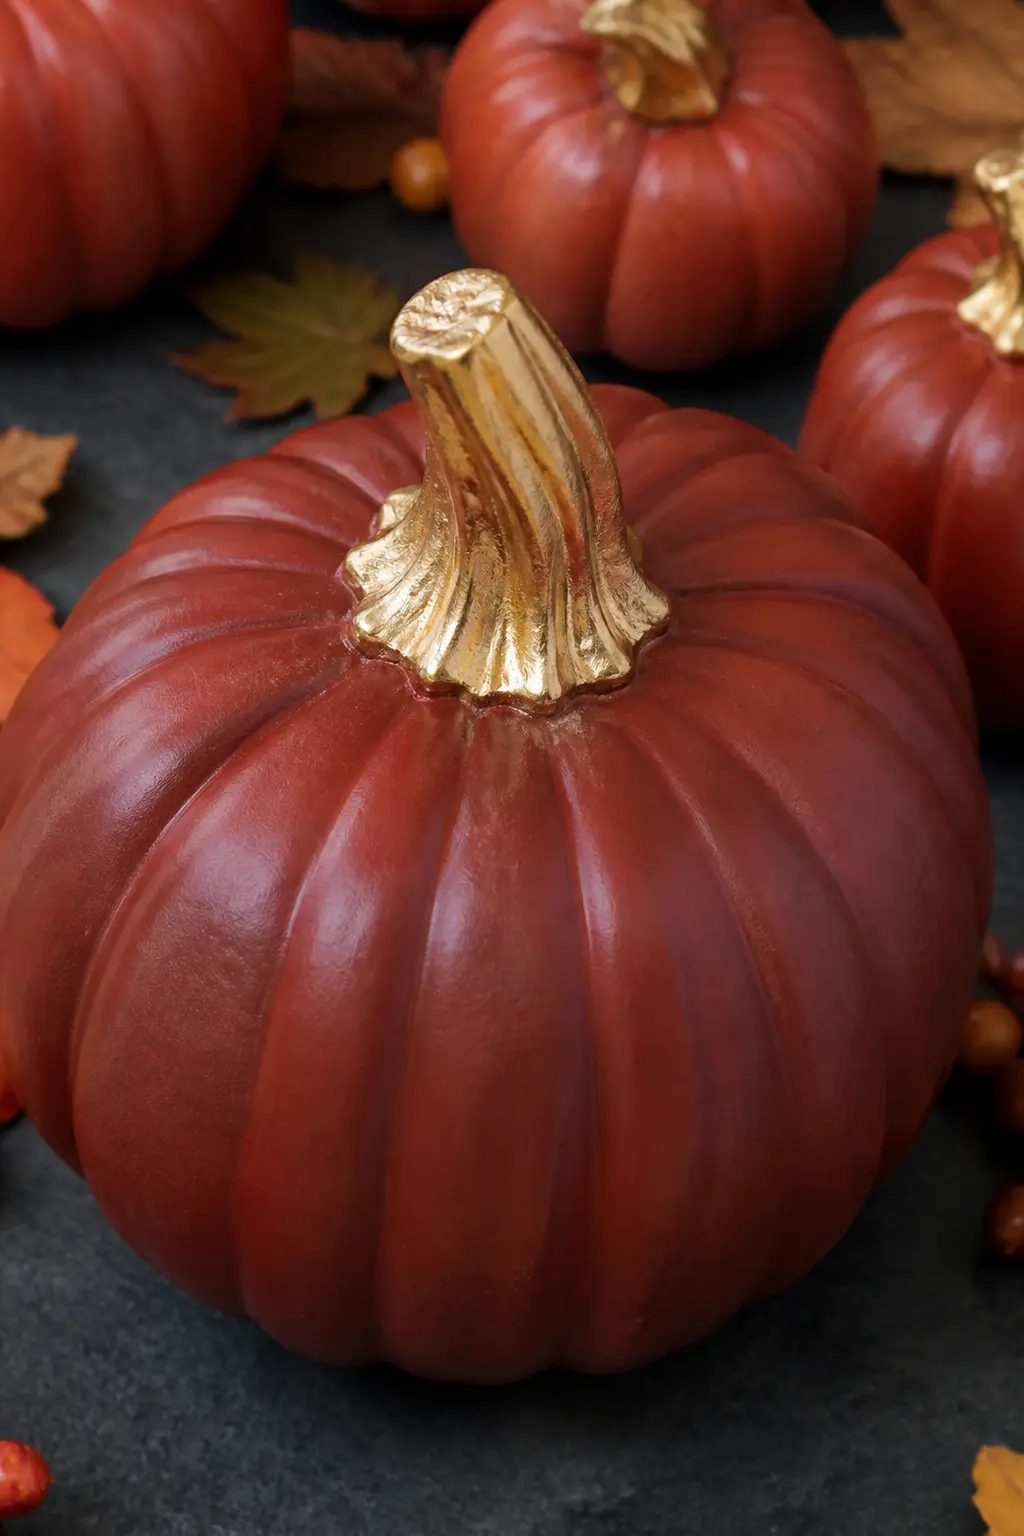
The stem is the part most people ignore. Paint it gold, let the rest of the pumpkin stay a deep rust, and the whole piece reads expensive without a single motif on the body. Two coats of gold craft paint on the stem, sealed with gloss varnish so it catches the light.
On a real pumpkin, the dried stem takes paint reluctantly. Sand it lightly first and prime with a coat of white before the gold goes on.
🛍 Shopping guide
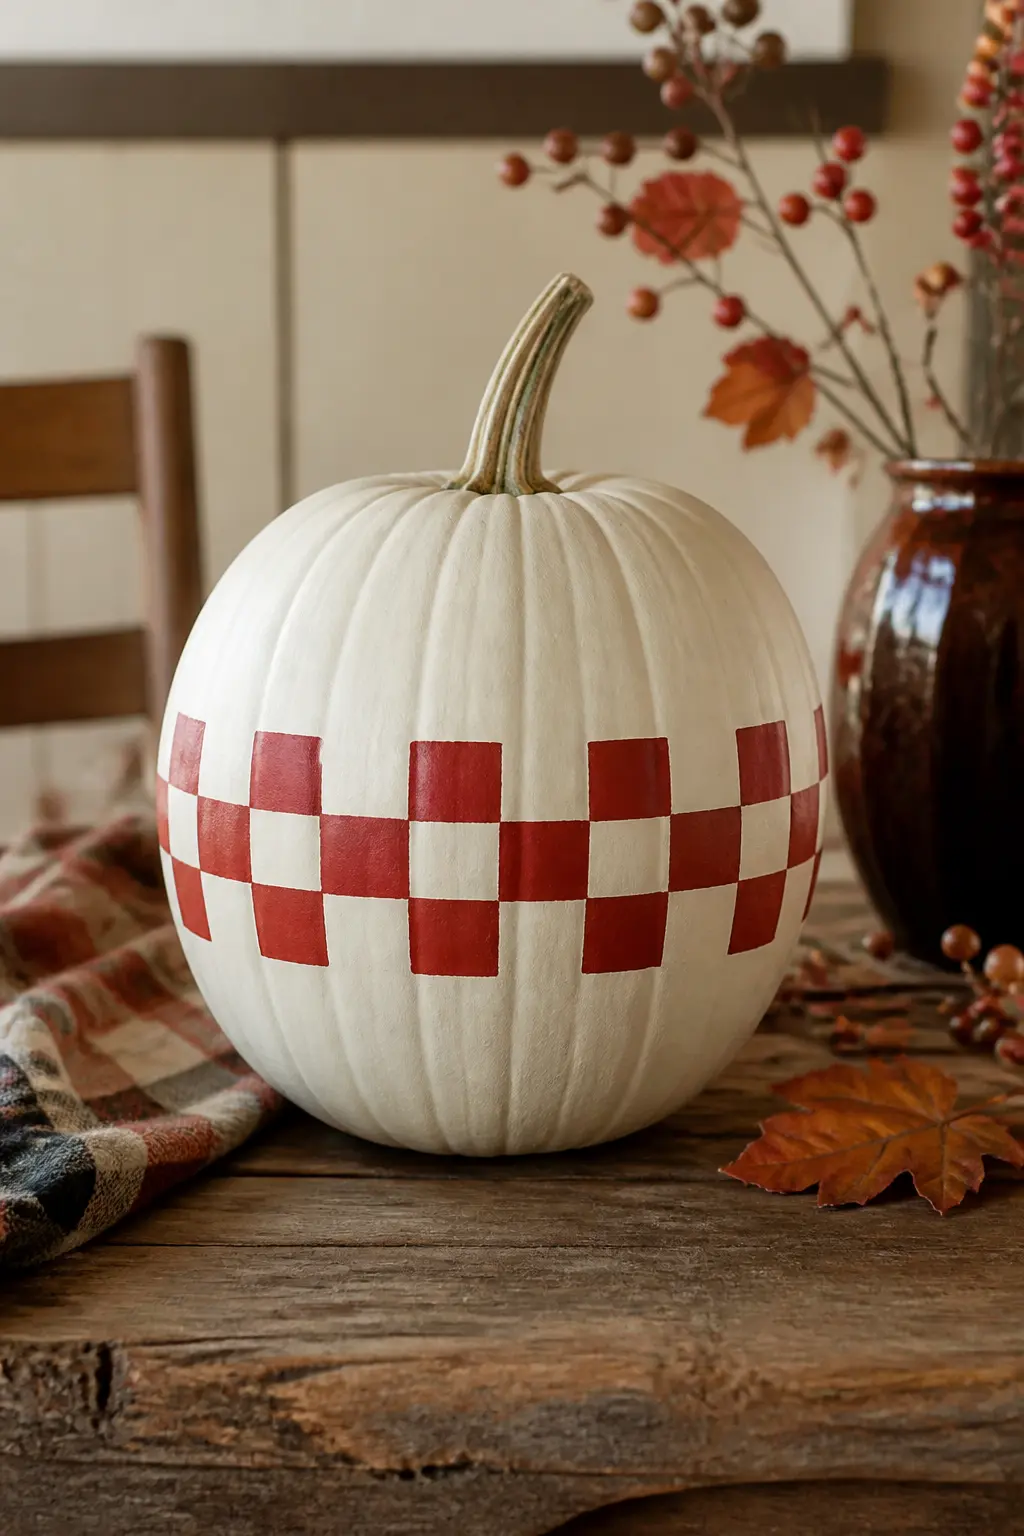
Cream with a Rust Checkerboard
Mask a grid of squares on a cream pumpkin with painter’s tape and fill alternating squares in rust. Peel the tape while the paint is still slightly tacky for cleaner edges. The checkerboard does not need to wrap the whole pumpkin: a band across the middle third reads as intentional framing rather than an incomplete pattern.
Small squares, about half an inch, suit a mini pumpkin. Larger squares, an inch or more, work on a full-size one where tiny geometry would be lost across the table.
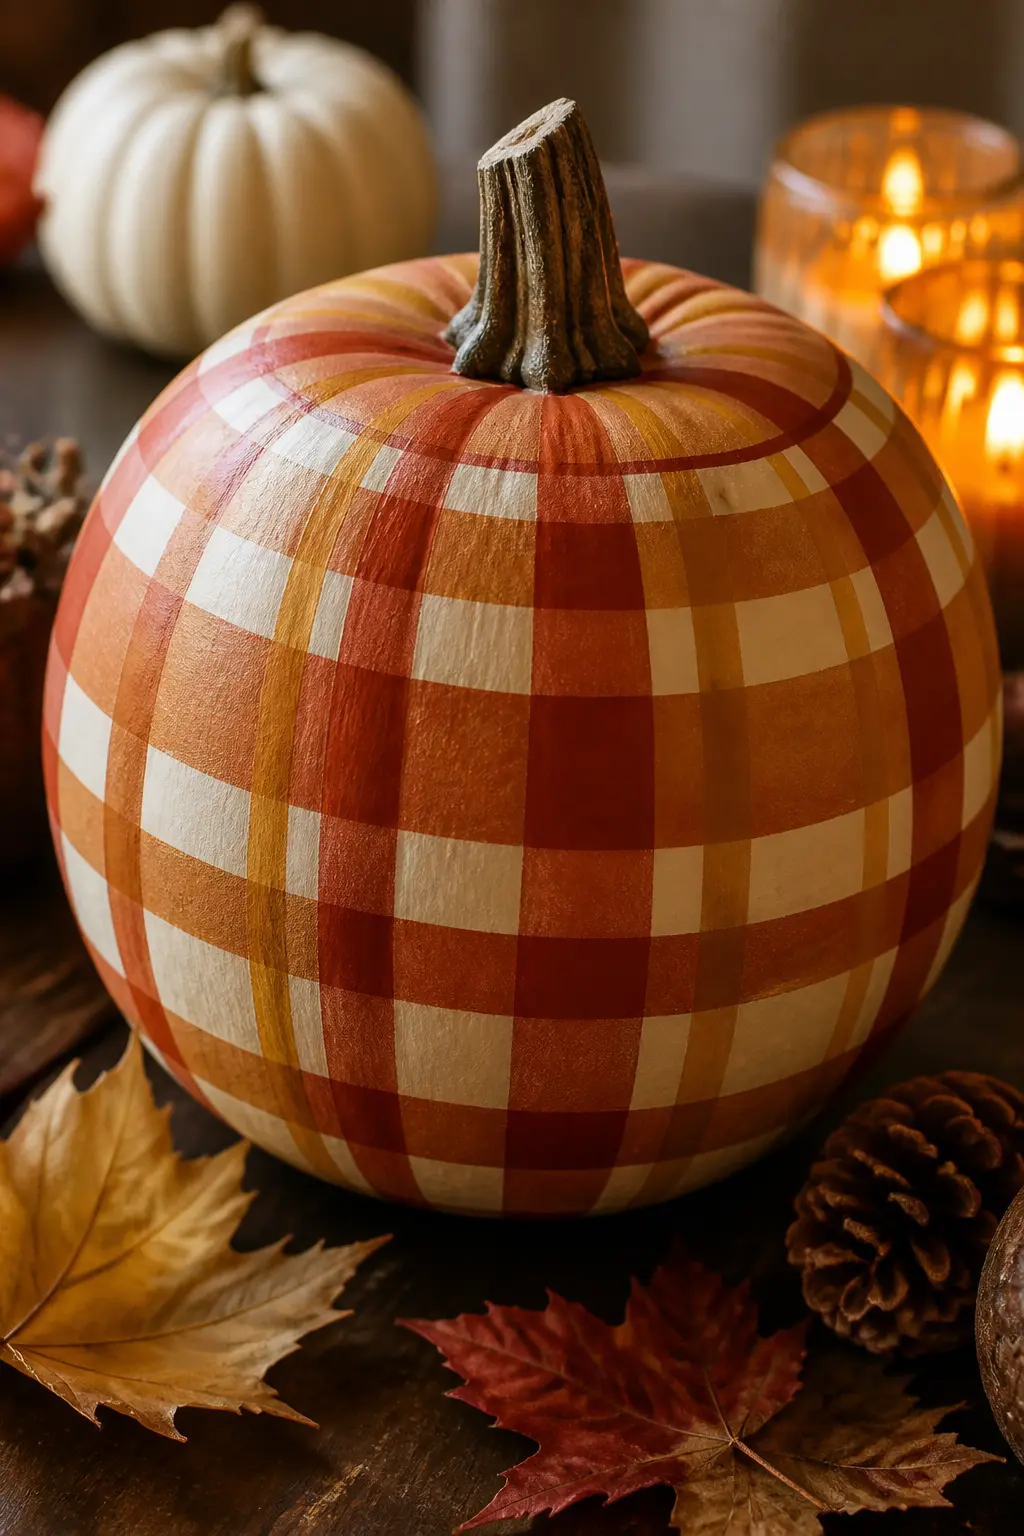
A Plaid Grid in Autumn Tones
Plaid is three or four colours of horizontal and vertical stripes layered over each other in a repeating sequence. On a pumpkin, tape the verticals first, paint, let dry, then tape the horizontals. Use rust, ochre, cream and dark brown in widths that vary: one wide stripe, two narrow ones, repeat.
The curved surface means the stripes will bend slightly. That bend is what makes it look hand-done rather than printed, so do not fight it.
🛍 Shopping guide
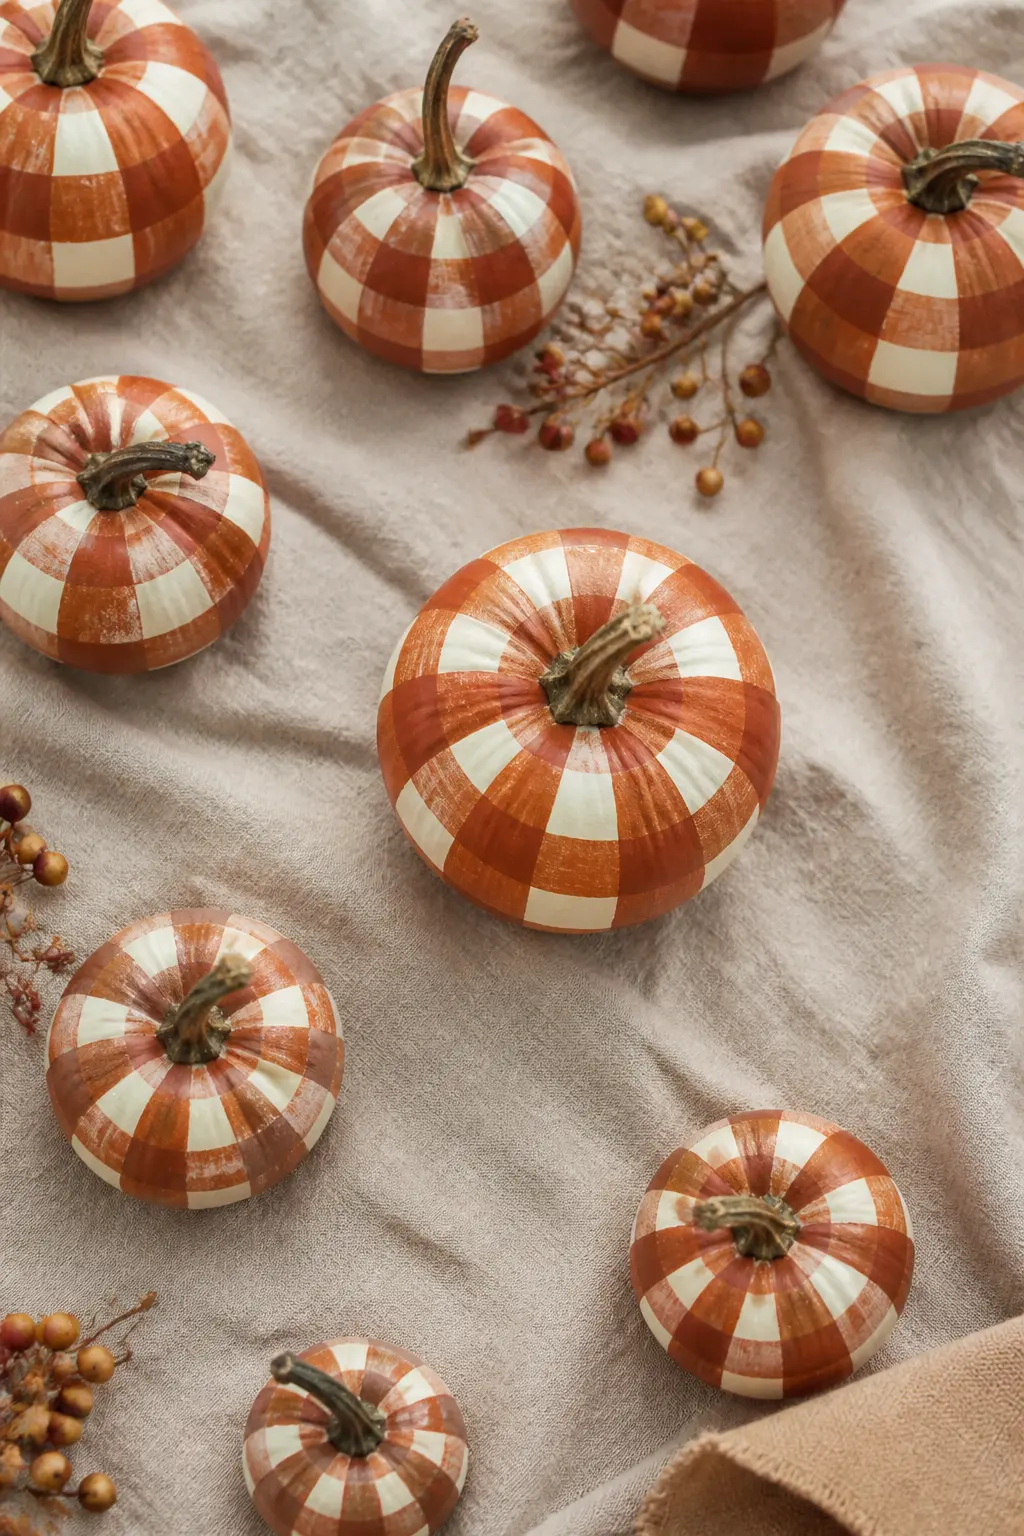
Buffalo Check in Rust and Cream
Buffalo check is an oversized two-colour plaid: equal-width stripes in two colours crossing to create a grid of solid squares, mixed squares and white squares. On a pumpkin, rust and cream is the most harvest-ready version. Two colours, two tape sessions, one hour of work.
The squares where both colours overlap will appear as a darker rust-brown. That third tone appears automatically and is exactly what makes the pattern look right.
🛍 Shopping guide
Illustrated Scenes
A flat, graphic scene painted on the widest side of the pumpkin turns it into a small piece of art that reads from across the room. Keep the line work simple: think folk art or a child’s illustrated book, not realism. Thin black or deep brown lines over a cream or mustard base are the most forgiving combination.
These are the entries best suited to a wide, flat-sided pumpkin rather than a tall, deeply ribbed one. The surface needs room for the image to breathe.
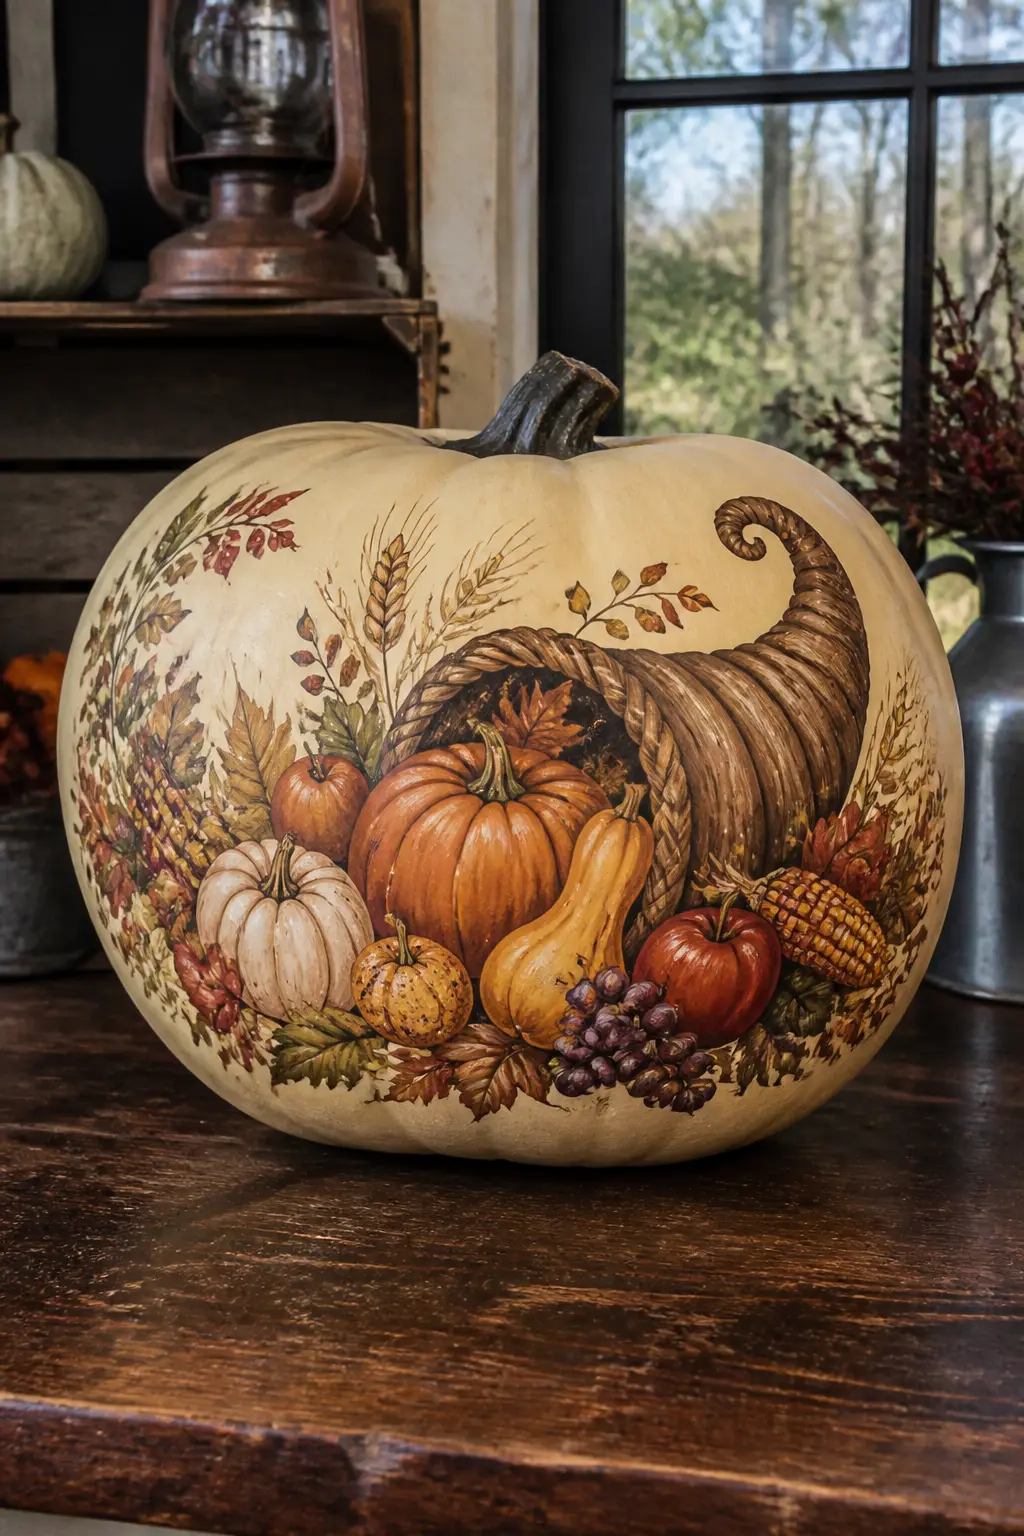
A Cornucopia Scene on the Widest Side
On a wide, lightly ribbed cream or mustard pumpkin, paint a simple cornucopia: an open basket shape on its side with small round fruits and leaves spilling from the mouth. Keep the line work thin and the palette to three colours, warm brown, rust and cream, so the image does not compete with the pumpkin’s own colour.
Transfer the outline by tracing it in chalk first, painting over the chalk lines, then dusting off any chalk that shows once the paint is dry.
🛍 Shopping guide
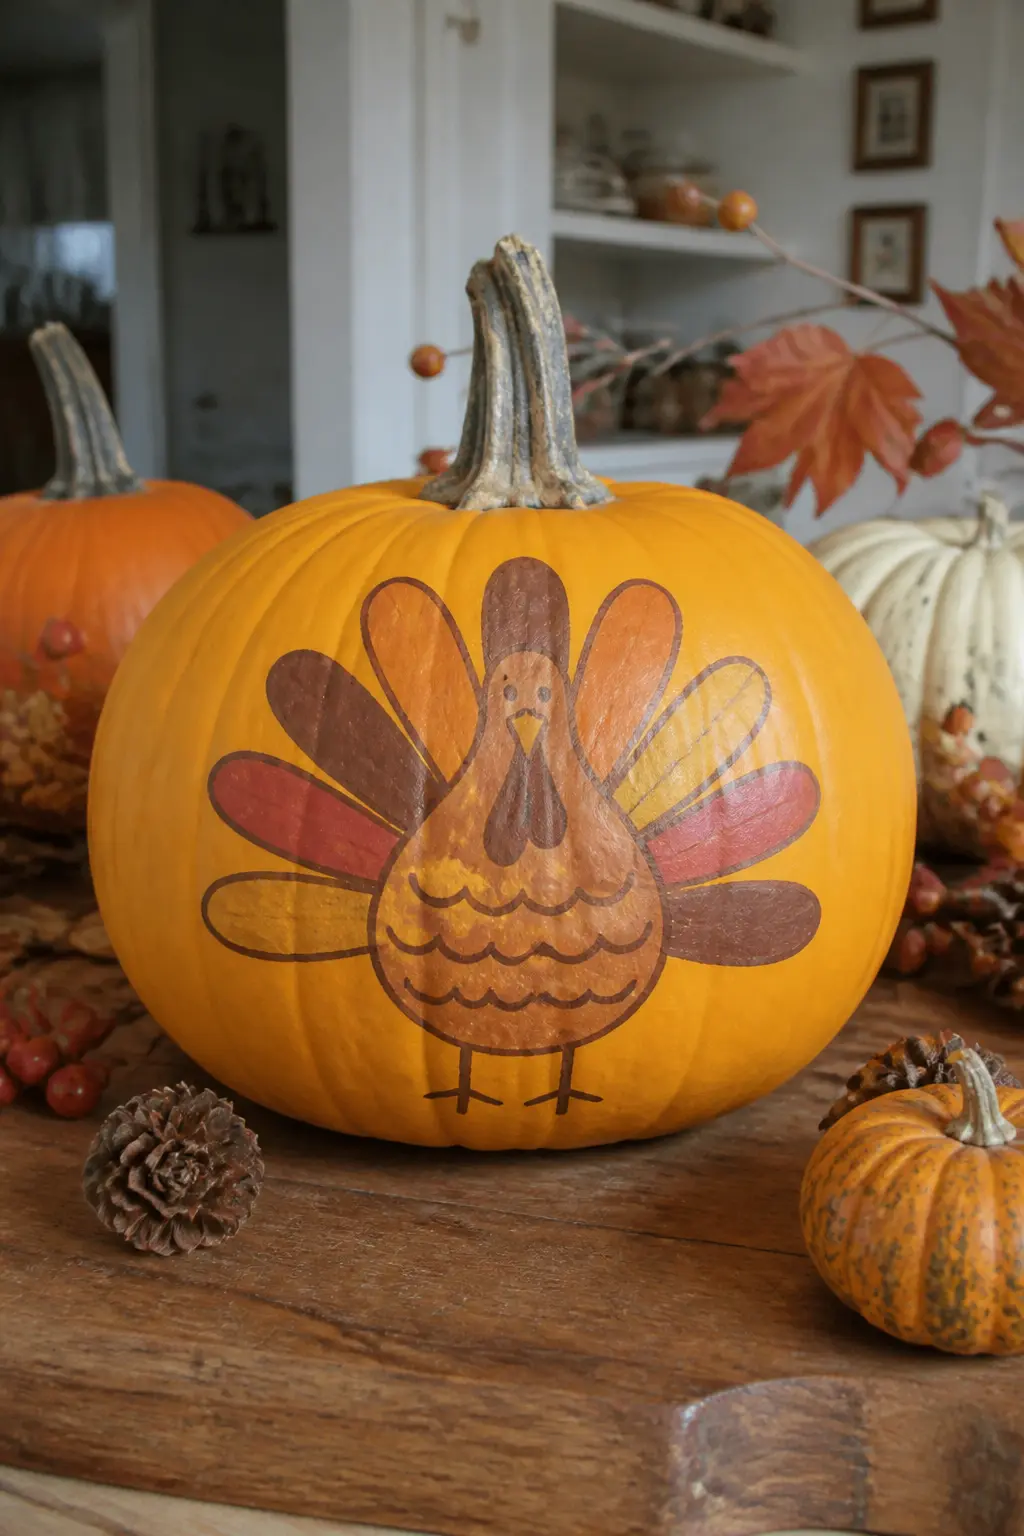
A Turkey Drawn in Simple Line Work
A folk-art turkey is a round body, a fan of tail feathers behind it, a small head with a wattle and two stick legs. That is six shapes. Draw the outline in chalk, paint the body in rust, the feathers in alternating ochre and brown, and the legs in dark brown. Outline everything with a fine black or dark brown liner.
Scale the turkey to take up most of the widest side of the pumpkin so it reads as a feature rather than a small decoration lost on a large surface.
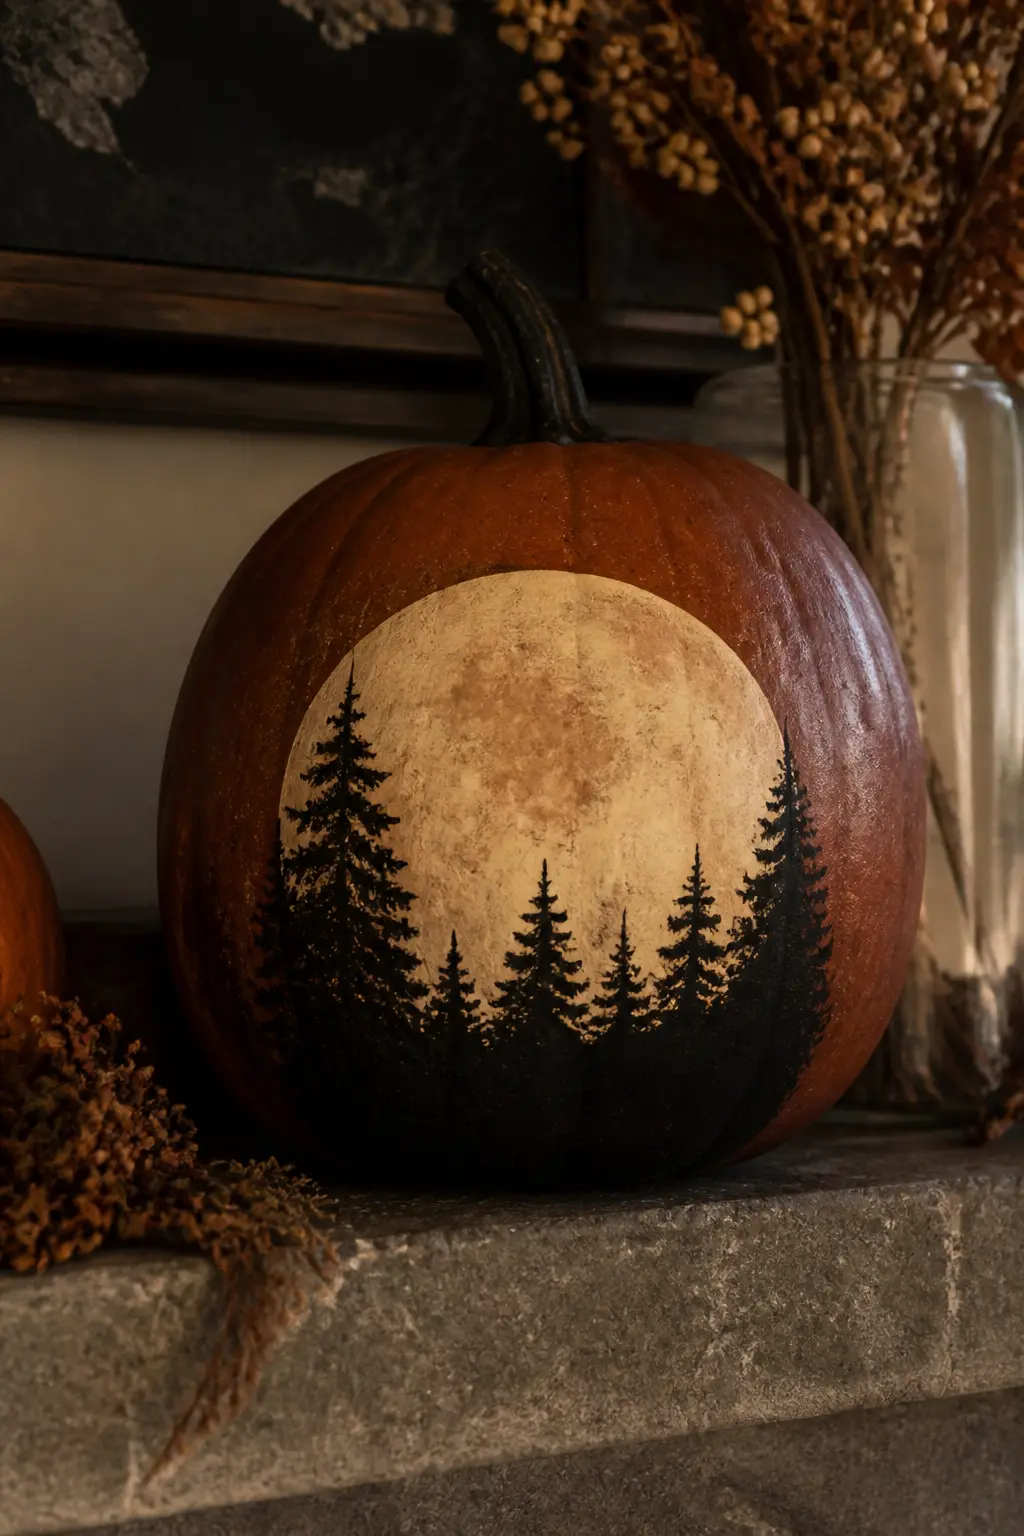
A Harvest Moon with a Silhouetted Treeline
Paint the whole pumpkin in deep rust or dark brown. Once dry, paint a large cream circle on the widest face for the moon. Beneath it, brush a jagged treeline silhouette in black or very dark brown, keeping the trees simple: triangular conifers mixed with bare deciduous shapes. The moon provides its own light source within the scene.
This reads as an autumn evening landscape from across the room. It works especially well on a tall or slightly elongated pumpkin where the scene has vertical space.
🛍 Shopping guide
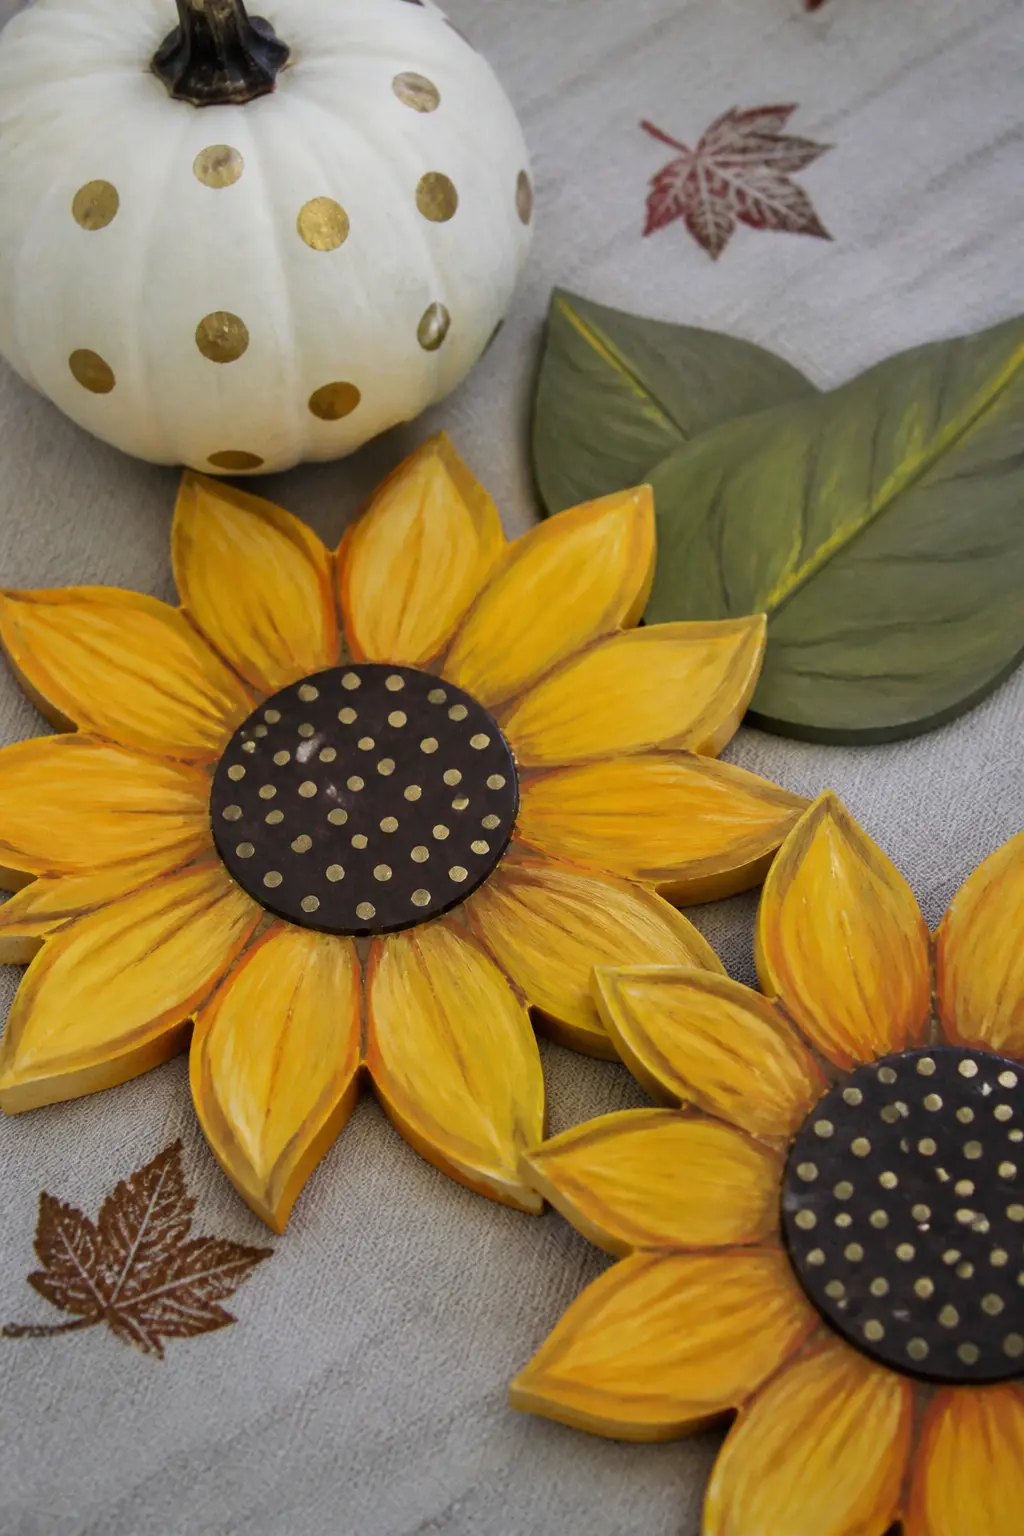
Sunflowers with Dotted Centres
A sunflower is yellow petals arranged around a dark brown circle, with the centre filled in with small dots of dark brown and ochre. Paint two or three flowers at different scales around the pumpkin, with simple green leaf shapes between them, and the surface reads like a botanical print rather than a craft project.
The dotted centre is the detail that lifts the image. Use a toothpick or the very tip of a liner brush and take your time on just that part.
🛍 Shopping guide
Texture and Embellishment
Not every effect comes from a brush. Pressed leaves sealed under varnish, dried orange slices glued in a band, cinnamon sticks wired at the stem: these bring material texture and scent that paint alone cannot. Combine one with a plain painted base and the result looks considered rather than crafted.
Embellishment also hides imperfect paint jobs. A band of twine at the base covers an uneven edge. A wooden tag hung from the stem adds personality without demanding any painting skill at all.
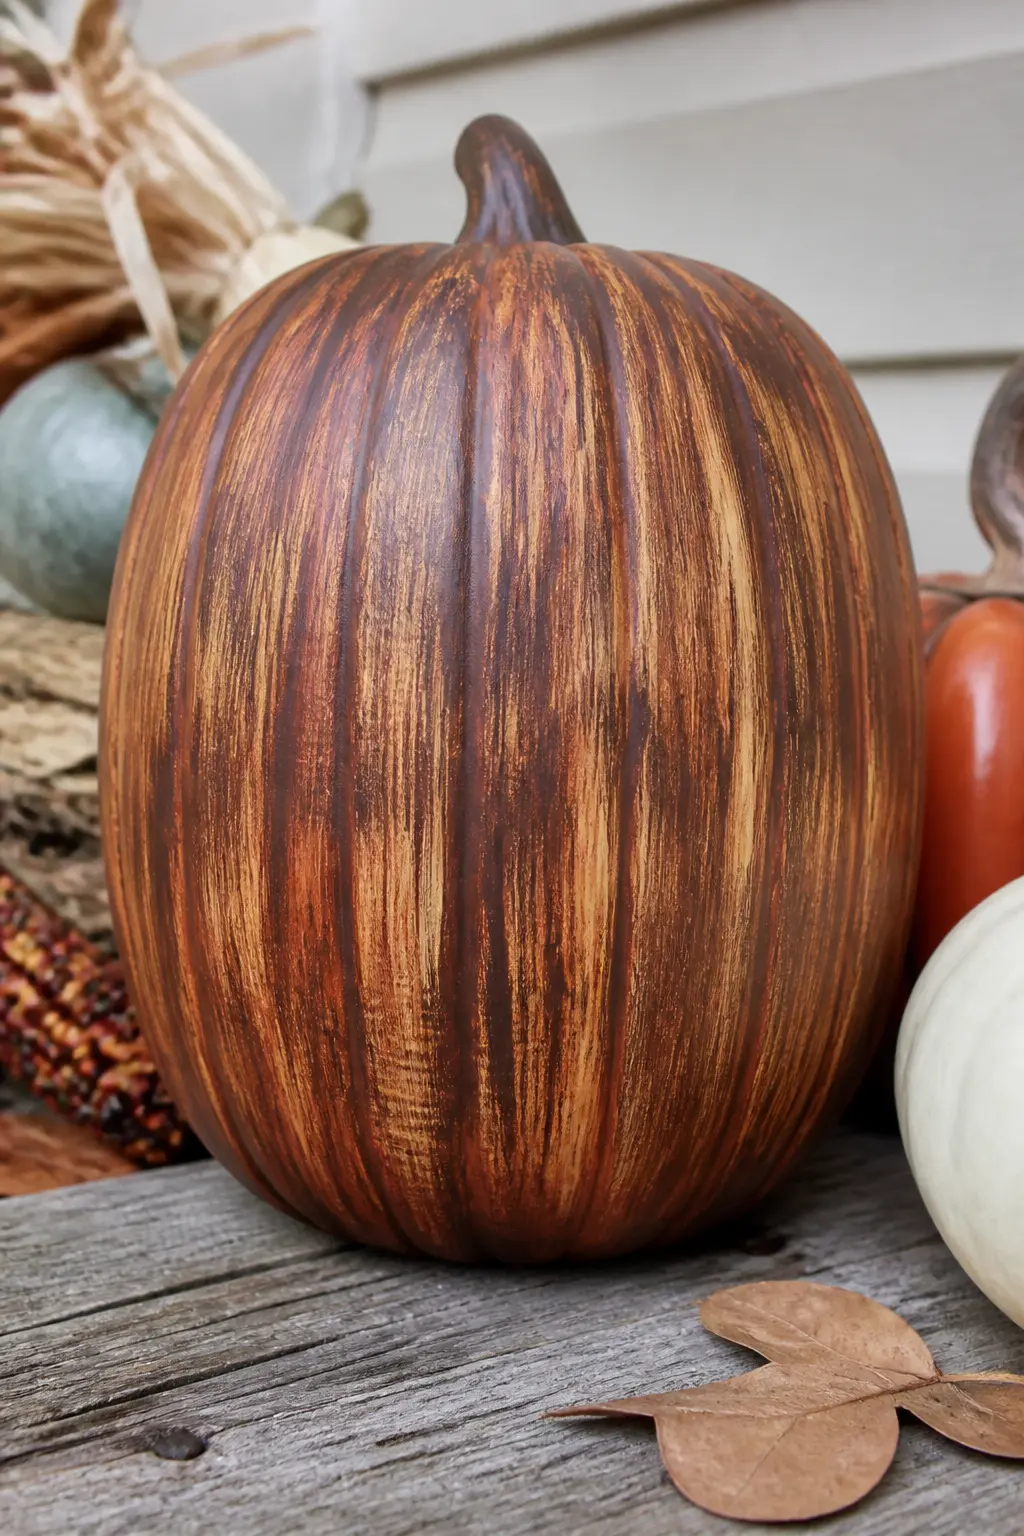
A Woodgrain Effect Dragged with a Dry Brush
Base coat in warm brown. While dry, load a stiff-bristled brush with a slightly lighter brown and drag it from top to bottom in long, slightly uneven strokes. Vary the pressure so some strokes are faint and others stronger. Add one or two curved grain lines with a liner brush for the knot detail.
The effect looks convincing on a flat-sided or lightly ribbed pumpkin. On a heavily ridged pumpkin, the ridges interrupt the grain lines too much and the illusion breaks down.
🛍 Shopping guide
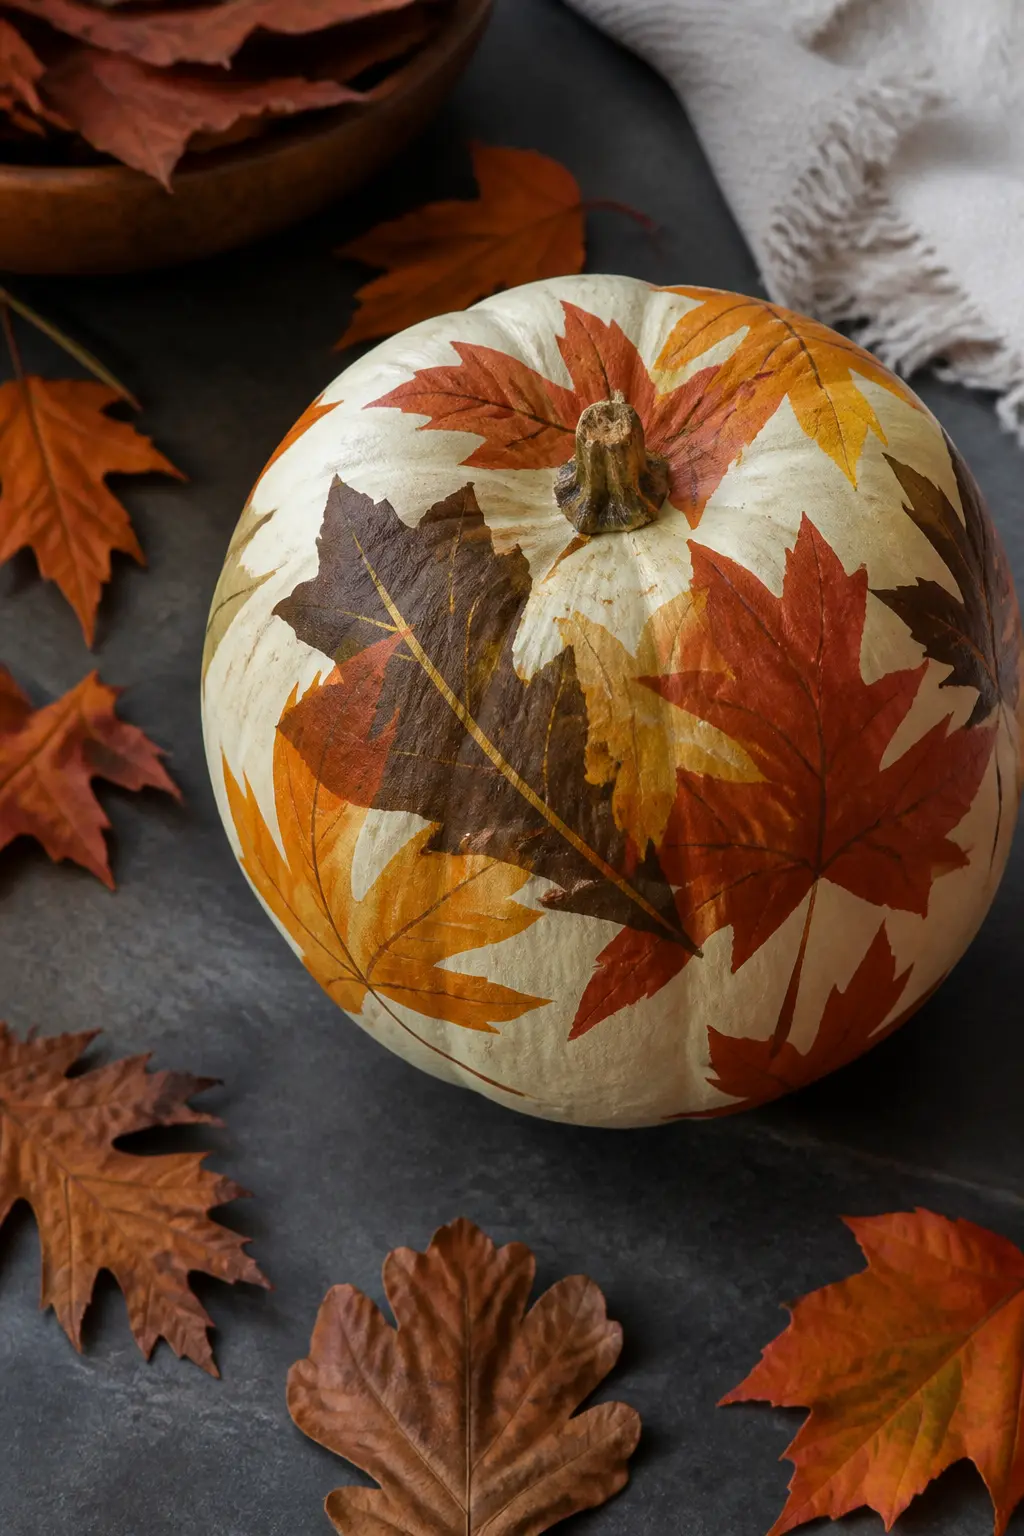
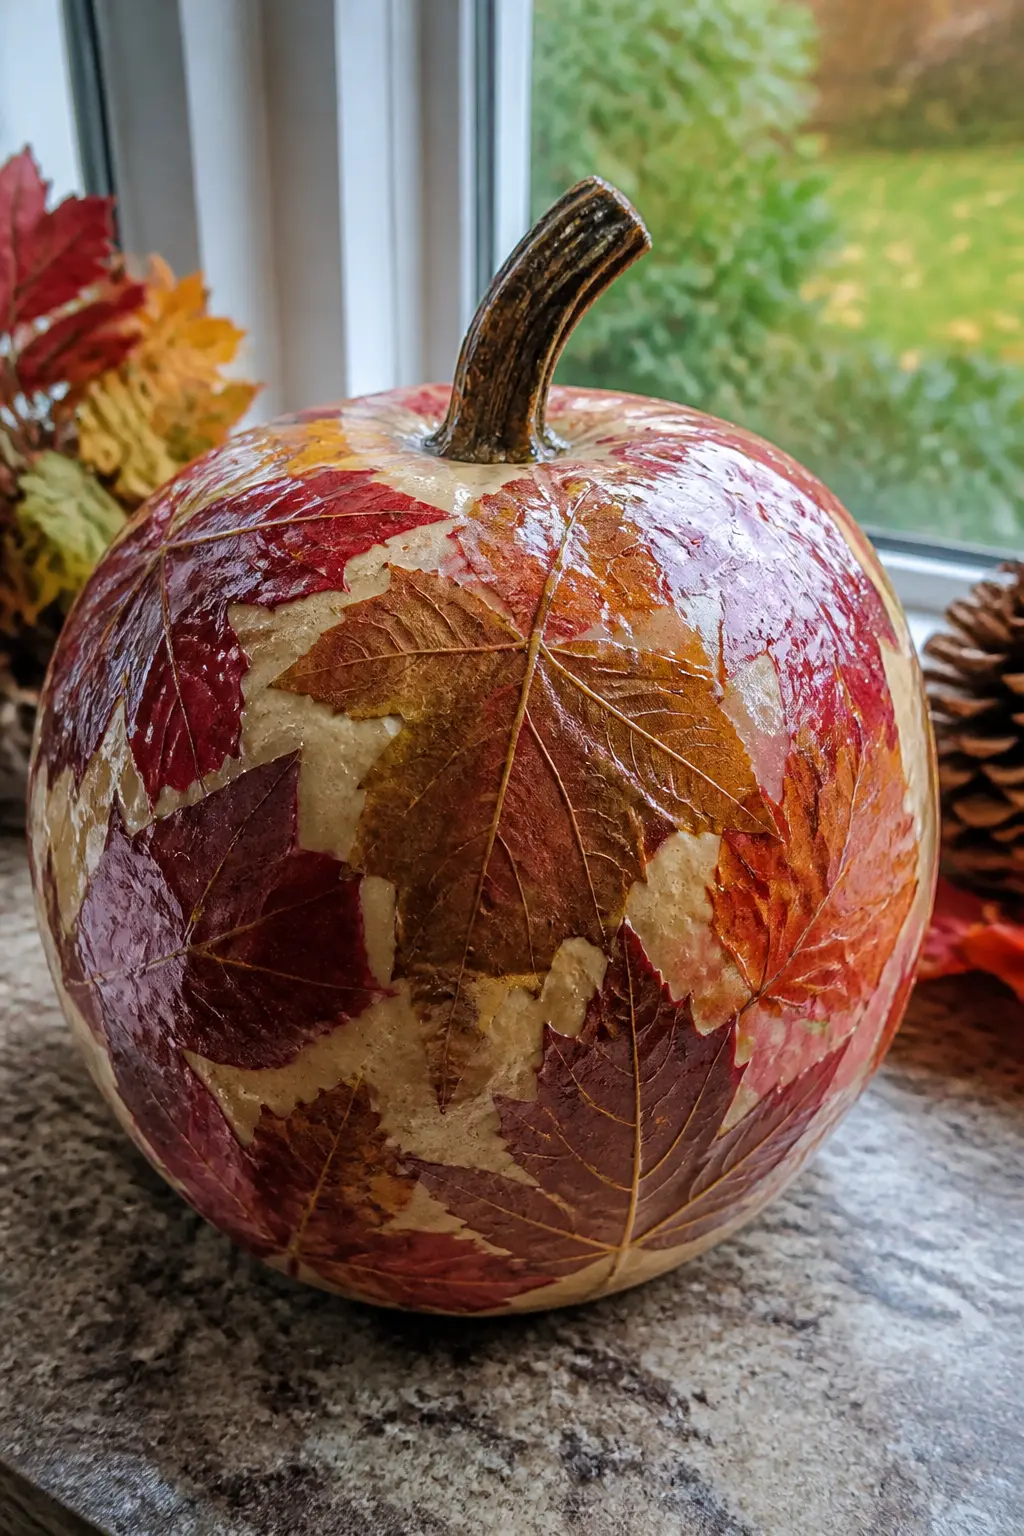
Pressed Real Leaves Sealed Under Varnish
Press autumn leaves flat in a heavy book for a week. Brush a thin coat of decoupage medium onto the pumpkin surface, lay each leaf face down, smooth out any air pockets, then brush another coat over the top. Repeat until the surface is covered or arranged to your preference, then seal with two coats of matte varnish.
Real leaves on a real pumpkin need a full varnish seal or they will brown and lift within a week. On a faux pumpkin the combination lasts indefinitely.
🛍 Shopping guide
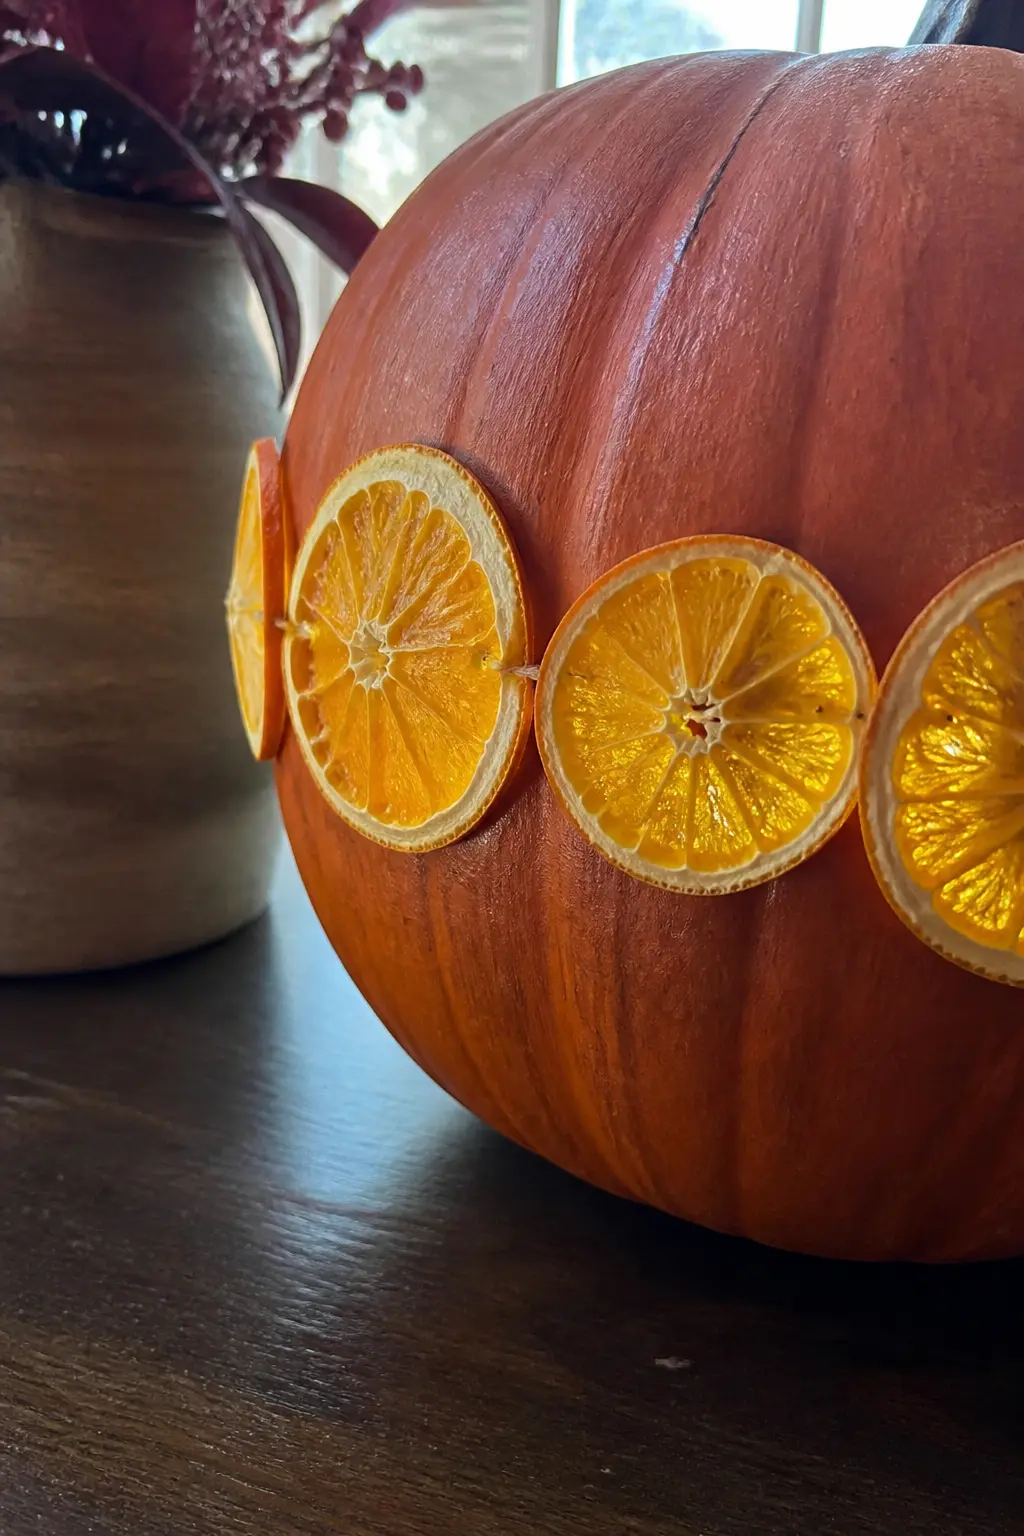
Dried Orange Slices Glued in a Band
Slice oranges a quarter-inch thick, pat them dry and bake at the lowest oven setting for two to three hours until completely dehydrated. Let them cool, then glue them around the widest part of the pumpkin with a strong craft adhesive. Alternate face-on slices with tilted ones for variation.
The dried slices carry a faint citrus scent that persists for weeks indoors. On a rust or cream base they look as though the pumpkin grew around them.
🛍 Shopping guide
Cinnamon Sticks Tied at the Stem
Bundle three to five cinnamon sticks and tie them to the base of the pumpkin’s stem with jute twine, knotting firmly so they sit upright against the stem. The scent is immediate and the effect is that of a spice market display compressed into a single object.
This works on a painted or unpainted pumpkin. On a cream or sage painted base the natural brown of the cinnamon reads as deliberate contrast rather than afterthought.
🛍 Shopping guide
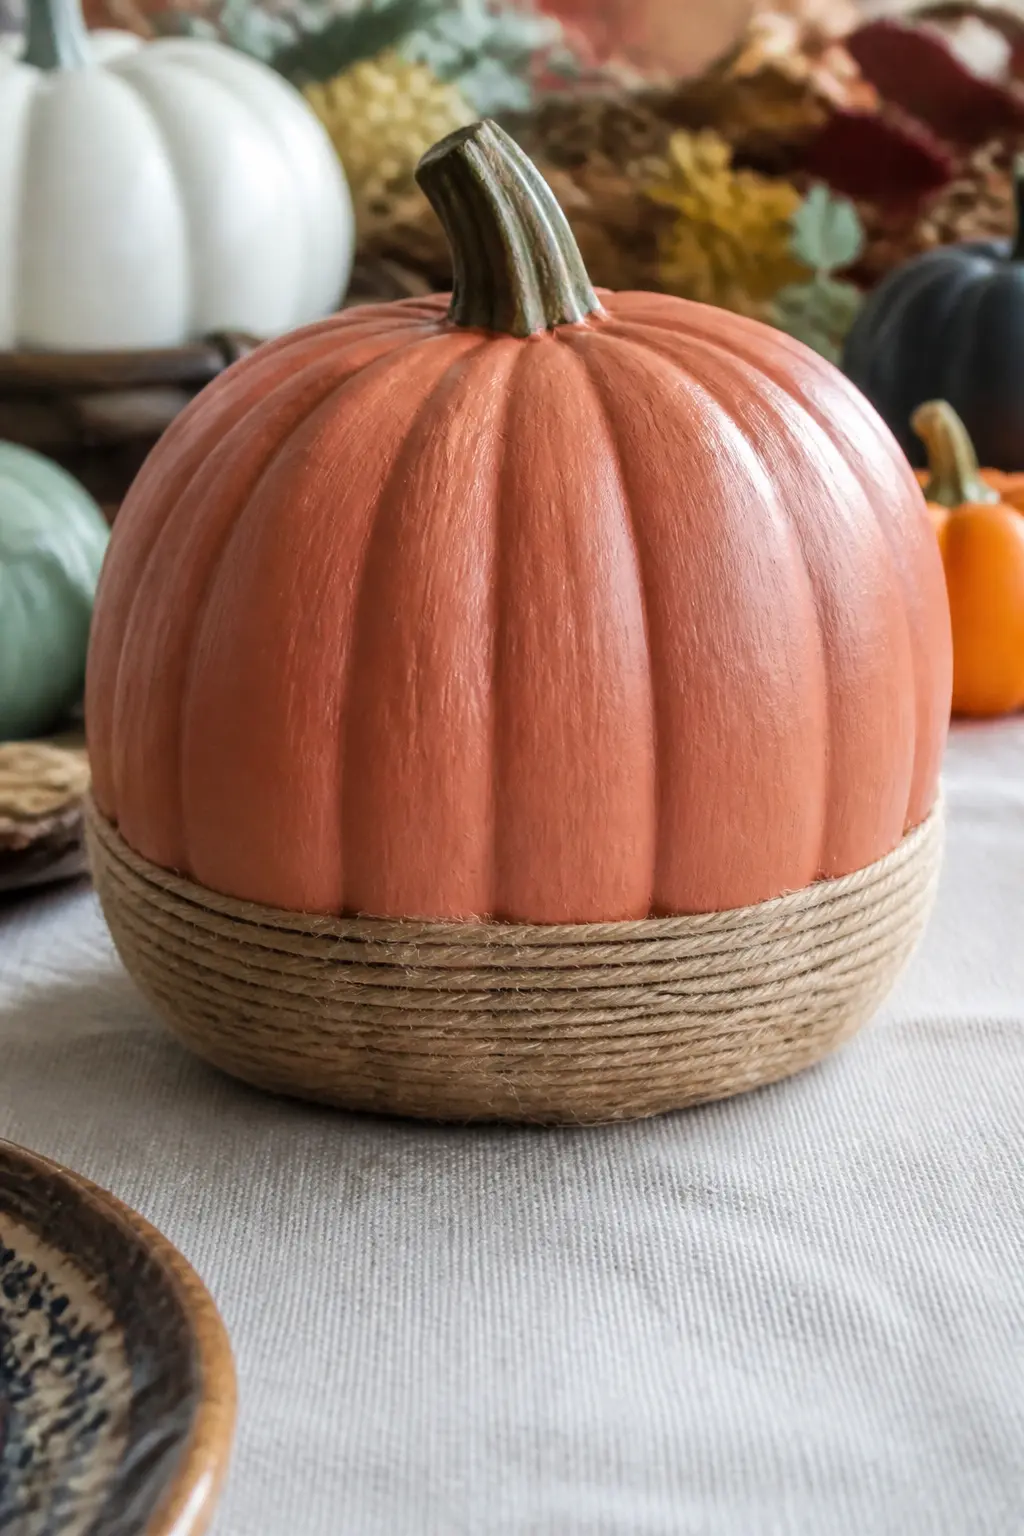
Twine Wound Around the Base
Apply a thin bead of craft glue around the very base of the pumpkin and press the first round of jute twine into it. Continue winding upward, gluing every third or fourth round, until the twine covers the lower quarter of the pumpkin. Trim and press the end firmly into the last glue pass.
This disguises an uneven paint edge at the bottom and grounds the pumpkin visually so it looks less like it is floating on the surface.
🛍 Shopping guide
Table Setting and Place Cards
A pumpkin that earns its place at the table rather than just sitting on the mantel is a pumpkin worth buying. Guest names on mini pumpkins, a candle nestled into a hollowed-out mini, a name ring on the largest pumpkin of the centrepiece: these ideas collapse the distance between decor and function.
Mini pumpkins in particular are inexpensive enough to buy one per guest and throw nothing away: guests can take theirs home. For more Thanksgiving table ideas that work at scale, the Thanksgiving party games guide has group activities that pair well with a decorated table.
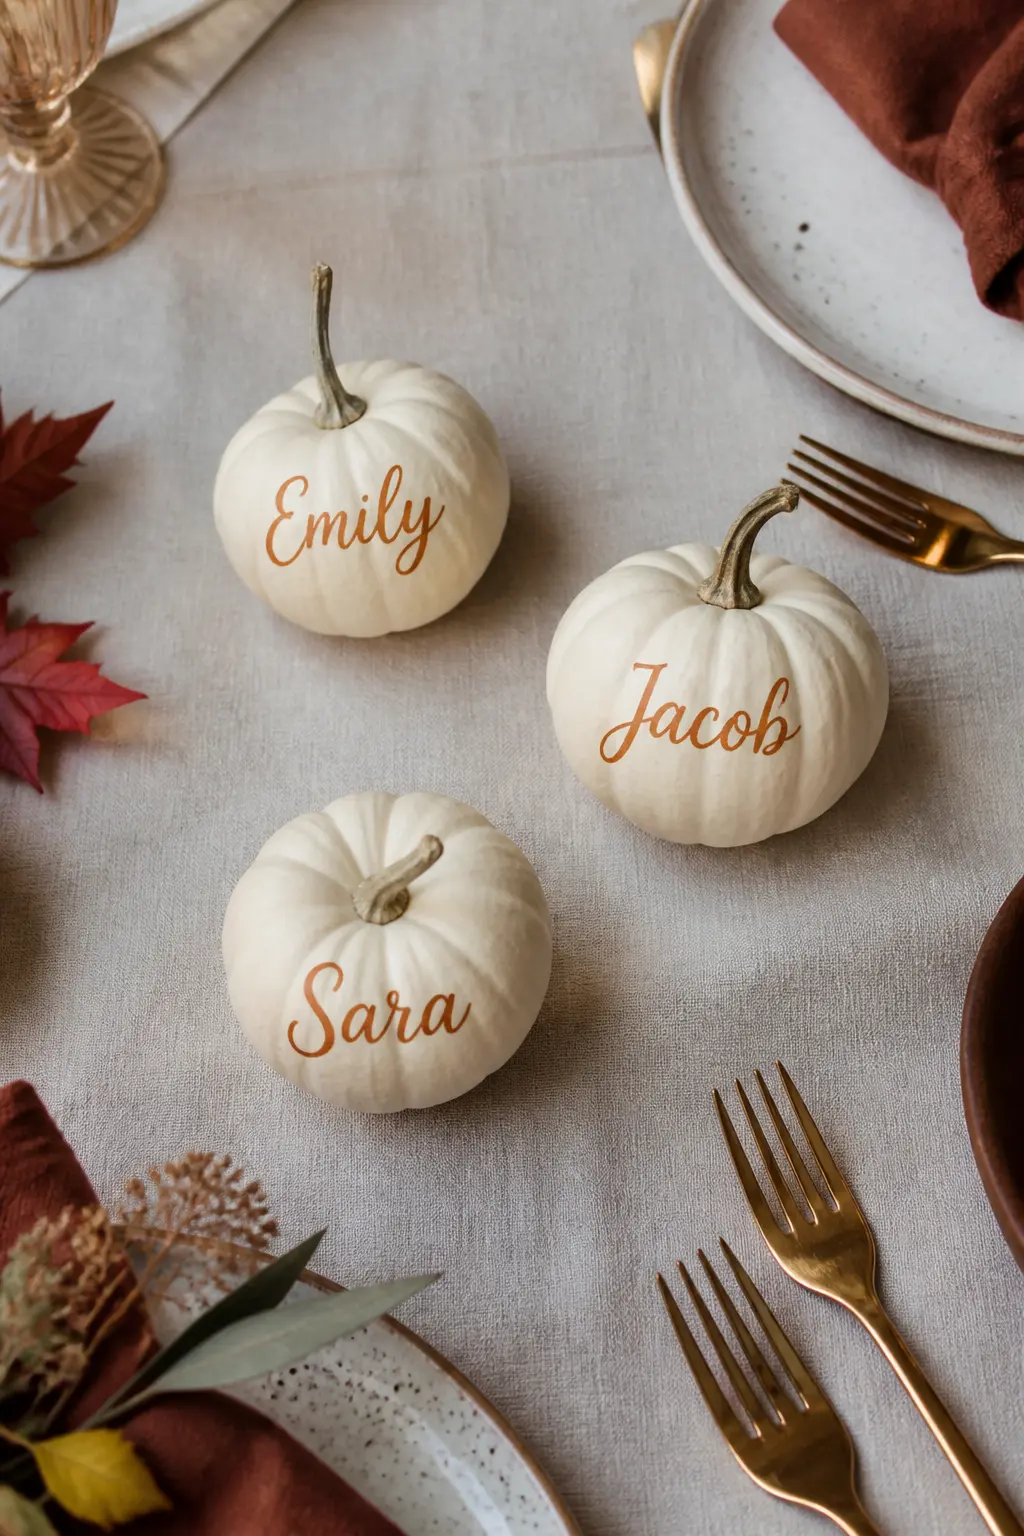
Guest Names Painted on Mini Pumpkins as Place Cards
A mini pumpkin painted cream or sage with a guest’s name in rust on the front replaces a paper card and goes home with them at the end of the evening. That alone justifies the ten minutes it takes per pumpkin.
Keep the lettering style consistent across the set: all printed, all script, never a mix. Set them at the tip of each fork so they are visible the moment guests sit down.
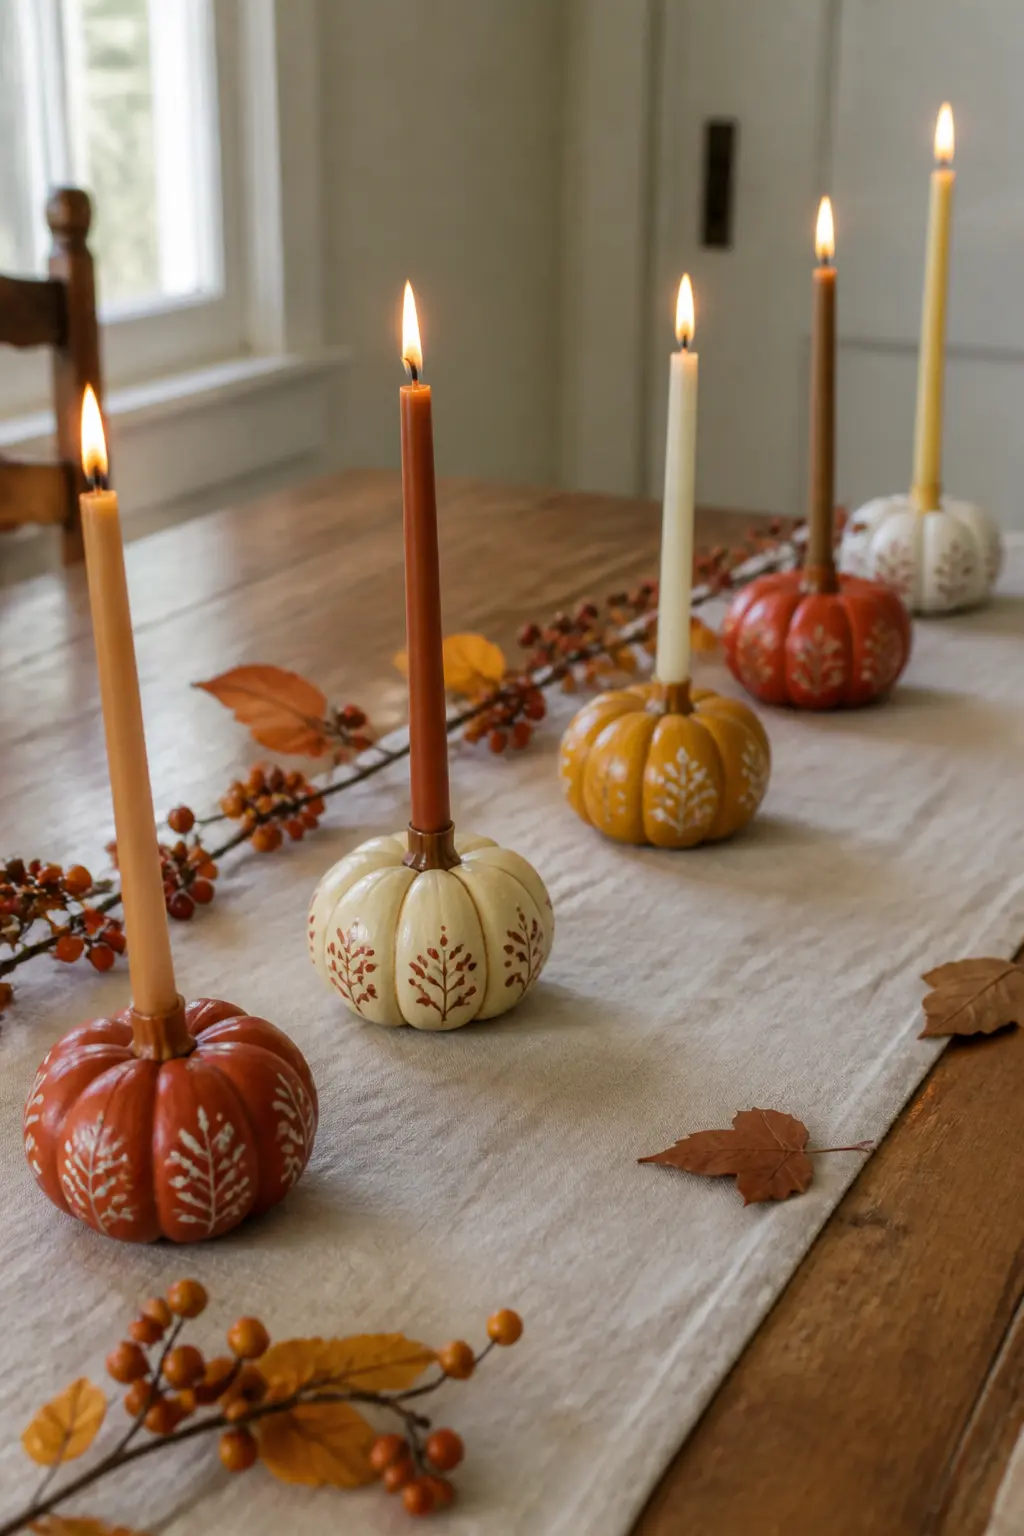
Mini Pumpkins Painted to Hold a Single Candle Each
Scoop the top of a real mini pumpkin to fit a taper or small pillar candle snugly, or buy faux mini pumpkins with a pre-formed cavity. Paint the outside in any harvest tone, then set a candle in each one and line them down the center of the table in place of a single centrepiece.
Six to eight mini pumpkin candle holders at even intervals along a runner creates a low, flickering centerline that leaves the sightline open across the table. Never leave candles unattended.
🛍 Shopping guide
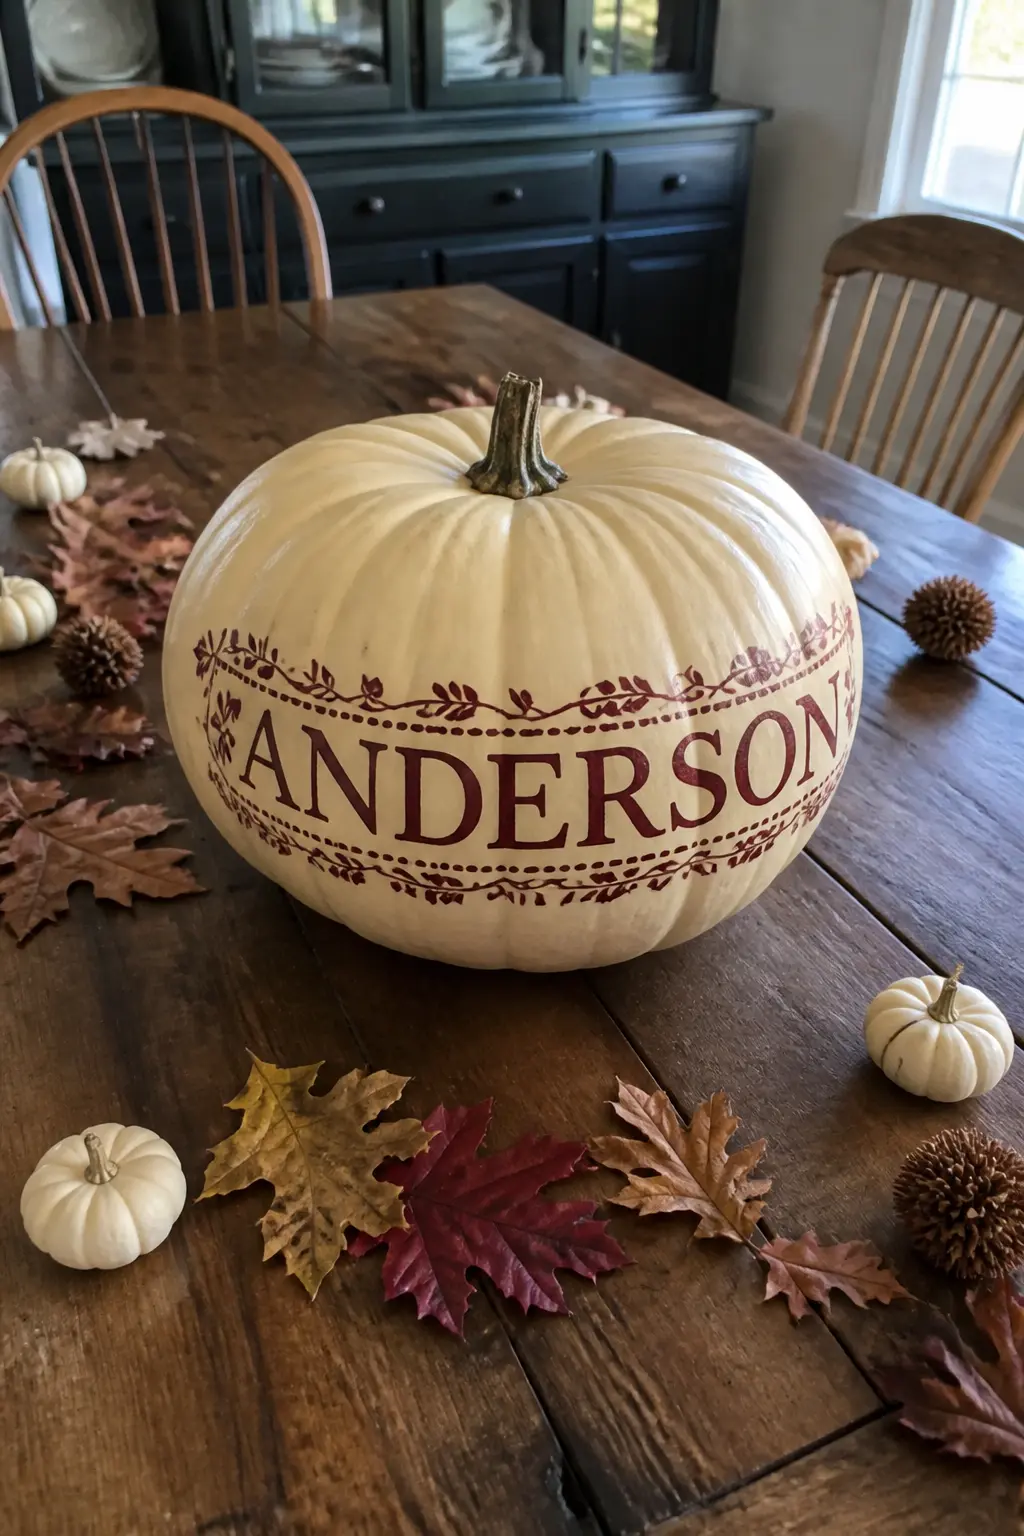
One Large Pumpkin as the Table Centrepiece with a Name Ring
Paint a large pumpkin in a single warm tone, cream or deep rust, and letter the family name or a single word around the middle as a ring of text that circles the whole equator. Guests see it from every seat. It functions as both centrepiece and signature piece for the table.
Use chalk to plan the letter spacing before committing with paint. The letters need to be evenly spaced around a curved surface, which takes a rough layout first. Measure the circumference with a piece of string, divide by the number of letters and mark the intervals in chalk before the brush goes near it.
🛍 Shopping guide
Sets and Groupings
One pumpkin makes a moment. Three or four make a vignette. The entries here work as a coordinated group: graduated sizes in one warm tone, a trio where each pumpkin carries one word of a shared phrase, a line of mini candle holders in matching paint. Buy or collect the set before you begin so the sizes and shapes relate to each other.
Odd numbers read better on a surface than even ones. Three is the minimum. Five fills a long dining table without crowding the place settings.
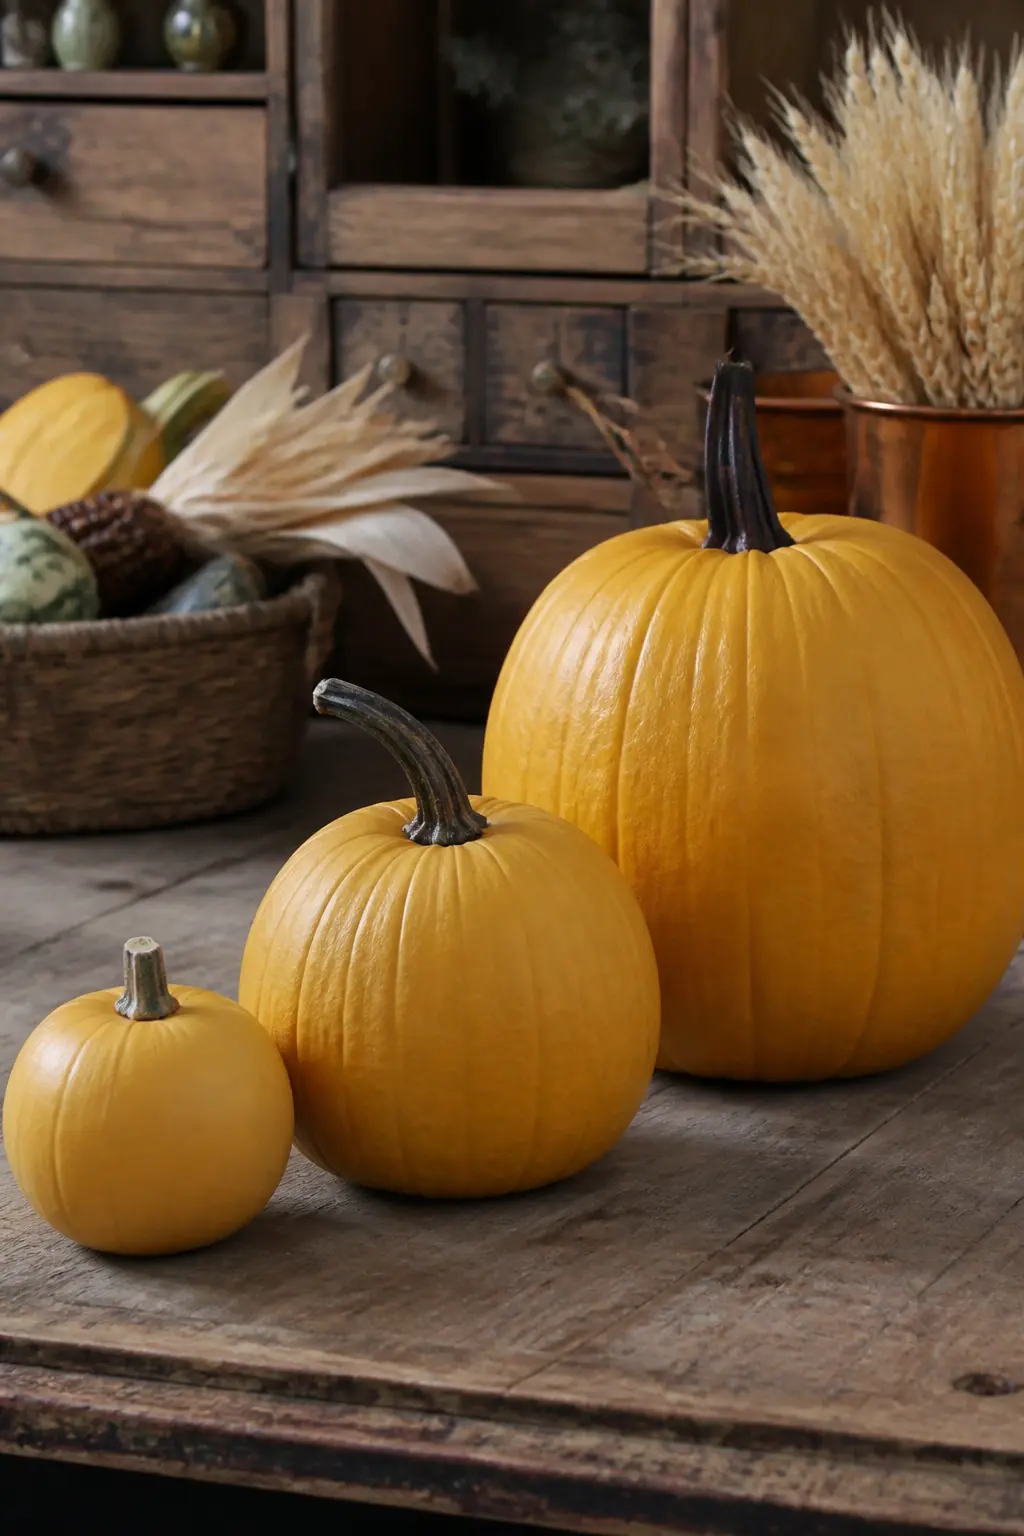
A Set of Three Graduated in One Warm Tone
Three pumpkins, small, medium and large, all painted in the same colour but in three different values: a light version, a mid tone and a deep version. Mustard, warm ochre and deep gold work. Rust, terracotta and pale coral work. Cream, warm white and off-white work.
Line them up tallest to shortest or cluster them in a loose triangle. No motifs, no lettering: the graduated tone does all the work and the set reads as designed rather than assembled.
🛍 Shopping guide
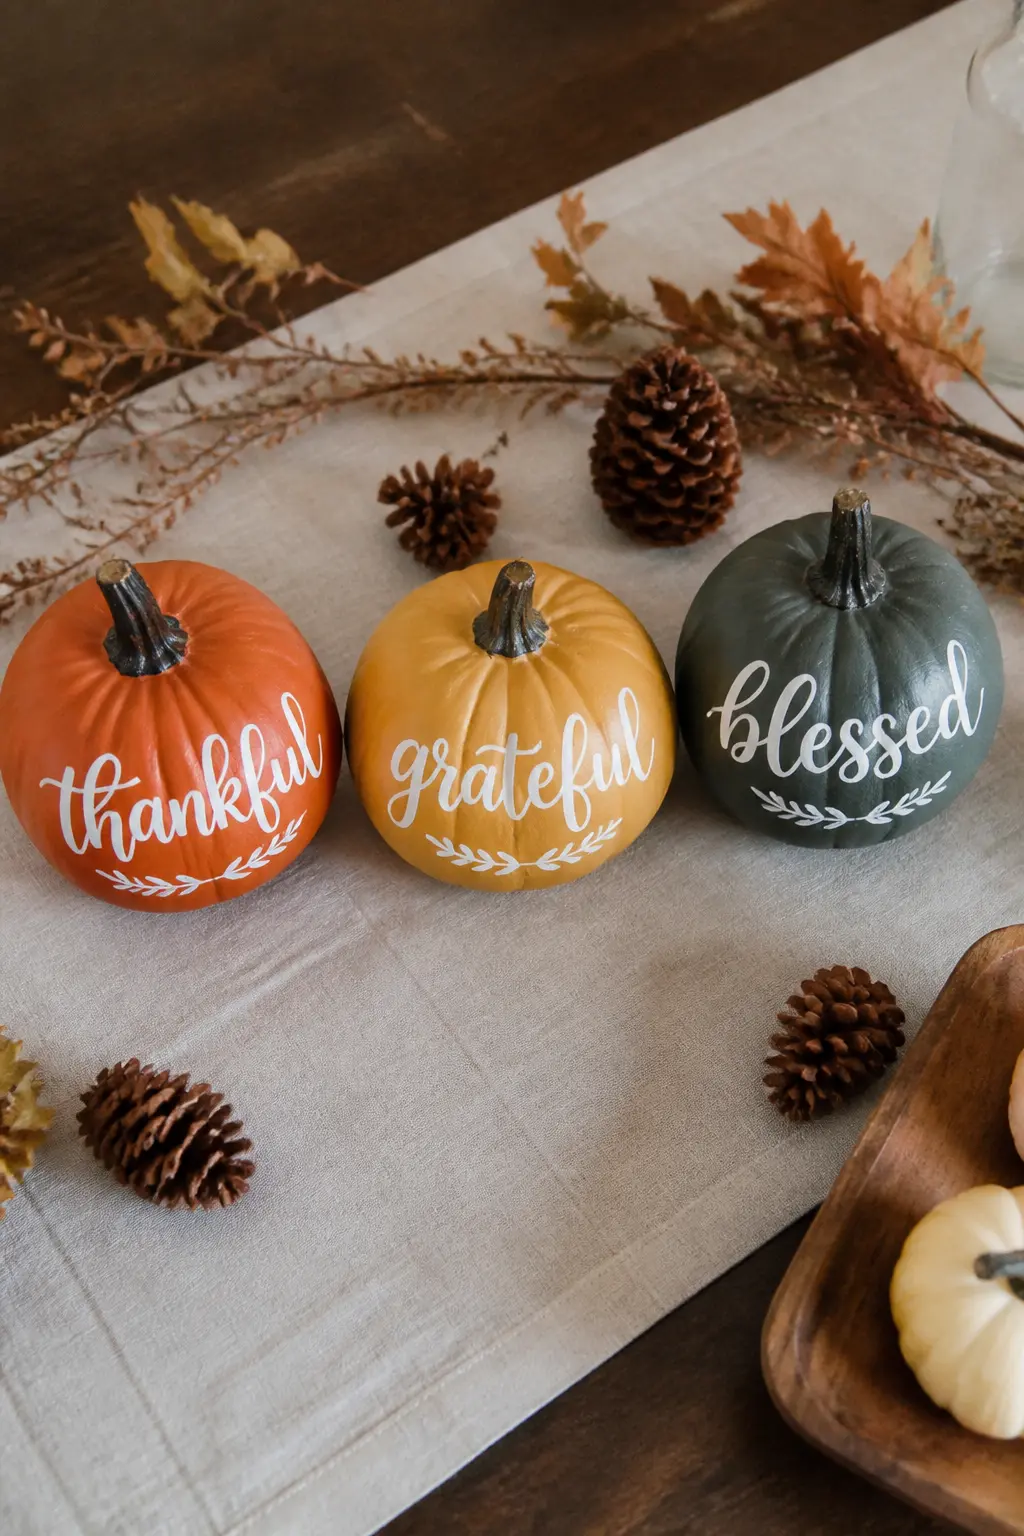
A Set Where Each Pumpkin Carries One Word of a Phrase
Three pumpkins, each painted in a different warm tone: cream, rust and sage. On each one, letter one word of a short phrase in a contrasting colour. “Give” on the cream one. “Thanks” on the rust. “Always” on the sage. Arrange them in order on the table runner.
The phrase only makes sense when all three are together, which means guests read the table as a whole before they sit down. A small, considered piece of theatre that costs almost nothing.
🛍 Shopping guide
One More Thing Before You Paint
Wipe the pumpkin with a damp cloth and let it dry completely before any paint goes on. Real pumpkins need a coat of gesso or white craft paint as a base so the colour stays true. Faux pumpkins usually take paint directly, but a light sand with fine-grit paper helps on smooth foam.
Seal everything with a matte or satin varnish once the paint is dry. That coat is what lets a real pumpkin sit on a table through November without going soft. It is also what keeps pressed leaves and dried citrus from lifting at the edges.
Frequently Asked Questions
What paint works best on a real pumpkin?
Acrylic craft paint is the most forgiving choice. Apply a gesso or white craft paint base coat first so the colour reads true and the paint bonds rather than beading on the waxy skin. Seal with matte or satin varnish once the design is dry. A sealed real pumpkin will hold through November without going soft, though the flesh beneath will still degrade eventually.
How do you stop painted pumpkins from peeling?
Two things cause peeling: skipping the base coat and skipping the sealer. Clean the surface, apply one coat of gesso or white craft paint, let it cure fully, then apply your design. Once the design is completely dry, seal with two thin coats of clear craft varnish. Thin coats dry without crazing, which is where peeling usually starts.
Can faux craft pumpkins be repainted next year?
Yes. Sand lightly with fine-grit paper, wipe off the dust and apply a fresh base coat. Most acrylic designs come off with gentle sanding or a coat of gesso painted over the top. Faux pumpkins are the better investment for anyone who wants a different design each November.
How early can you paint pumpkins for Thanksgiving?
Faux pumpkins can be painted any time. Real pumpkins are best painted in late October so they are still firm through the dinner. A sealed real pumpkin bought in mid-October will comfortably last through late November if it started firm and undamaged.
What is the easiest thanksgiving painted pumpkin for a beginner?
The dry-brushed terracotta with cream ridges requires no artistic skill at all: two colours, one brush technique, twenty minutes. The wooden tag hung from the stem requires no painting skill at all. Both look finished and deliberate on a table without asking anything of the person who made them.
How do you letter on a curved pumpkin surface without the text running uphill?
Measure the circumference of the pumpkin with a strip of paper or a flexible tape. Mark the center point at the front. Count your letters, find the center letter and place it at the front center mark, then work outward in both directions. Use chalk to sketch the letters before committing in paint, keeping each letter upright rather than angled to follow the curve.
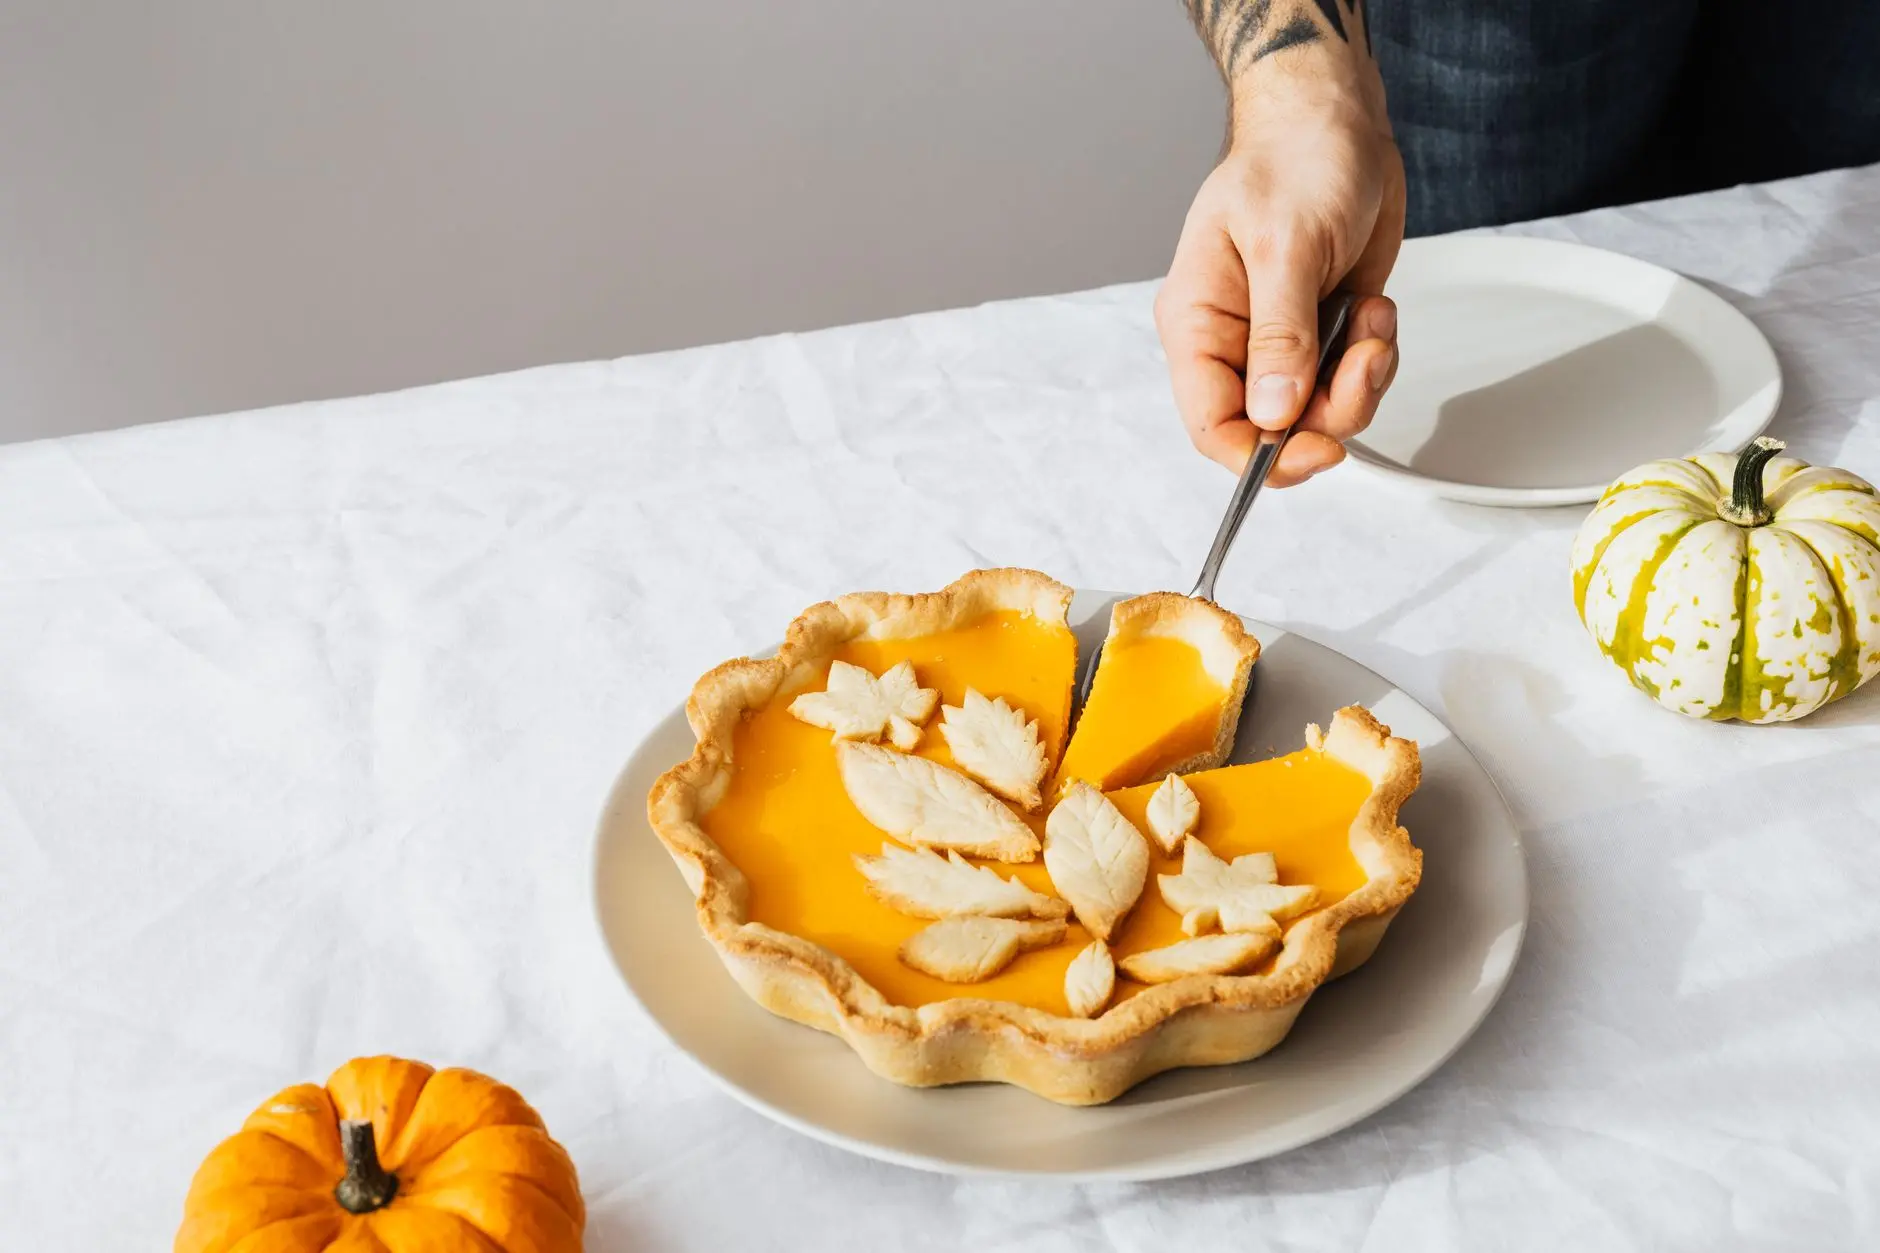
20 thanksgiving potluck ideas that assign categories, not dishes, so your table gets turkey, bread,
15 thanksgiving games for teens that are actually cool, social-media worthy, and zero cringe. They w

25 thanksgiving games for kids that burn energy, explain in 2 min & keep them busy while you cook. A
Leave a Reply