

20 Royal Icing Christmas Cookies With Flooding, Wet-on-Wet and Marbling Tricks

A tray of plain sugar cookies says effort. A tray finished in red, white and evergreen royal icing says something closer to she trained for this, even if she started last week. The trick is not talent, it is picking one technique per cookie and finishing it before reaching for the next tip.
Bake a batch of your own favourite rolled sugar cookies first, then let this list carry the icing from there: each design isolates one skill, flooding, wet-on-wet, marbling, stencilling, so a real toolkit builds cookie by cookie instead of all at once. If the tray is heading to a party rather than a tin, the gingerbread and iced cookie decor ideas make a good landing spot for the finished batch. Royal icing contains egg and the cookies underneath contain gluten, so flag both before anything goes out, and know that a wobbly first outline is completely normal.
This post contains affiliate links. If you buy through them, I may earn a small commission at no extra cost to you.
- Flooded Red Ornament Cookies
- Wet-on-Wet Polka Dot Sweater Cookies
- Marbled Blue Snowflake Cookies
- Piped Lace Doily Cookies
- Brush-Embroidered Poinsettia Cookies
- Two-Tone Candy Cane Cookies
- Dotted Wreath Cookies
- Ombre Christmas Tree Cookies
- Gingham Gift Box Cookies
- Stenciled Snowflake Cookies
- Lettered Noel Plaque Cookies
- 3D Piped Holly Cookies
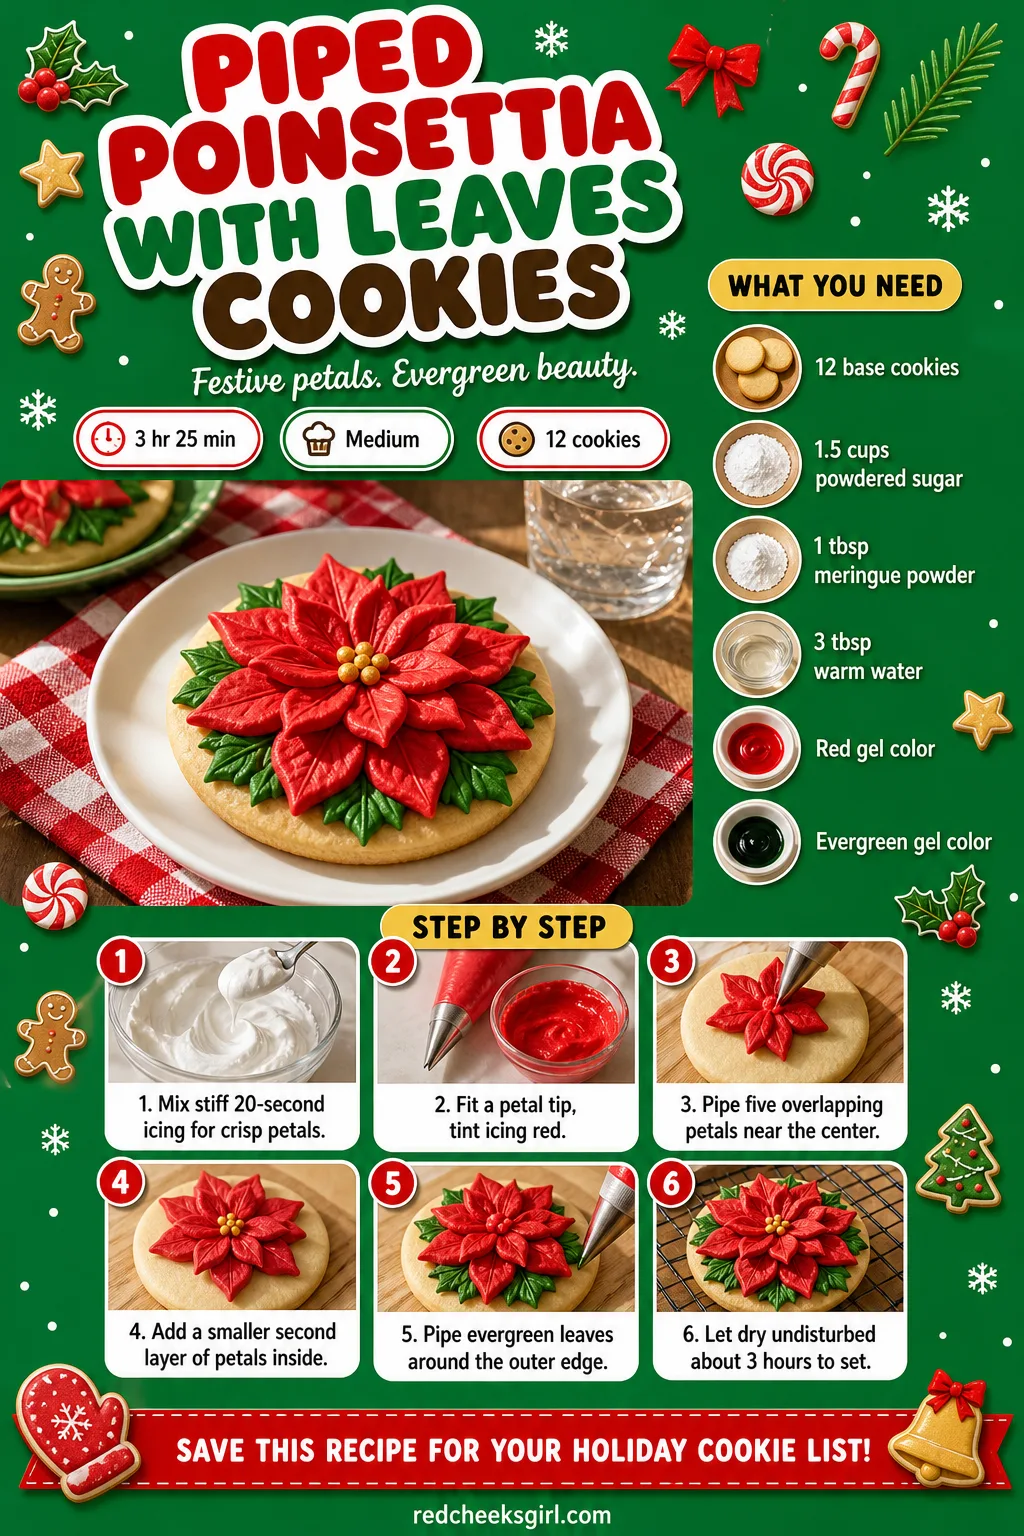
- Piped Poinsettia With Leaves Cookies
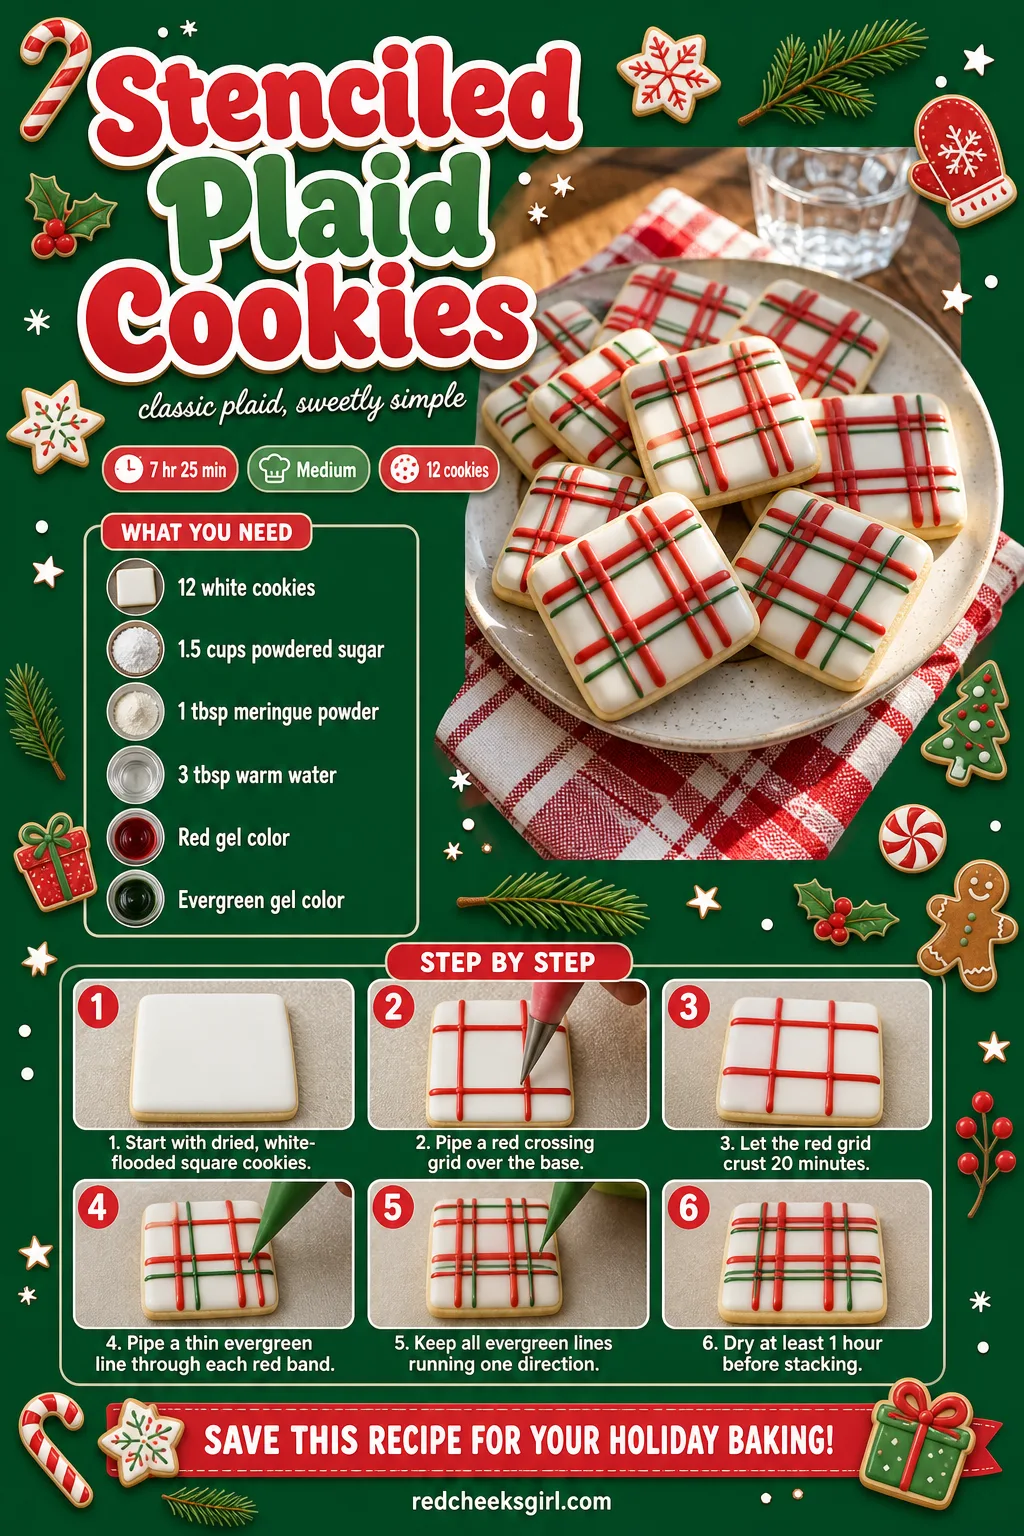
- Stenciled Plaid Cookies
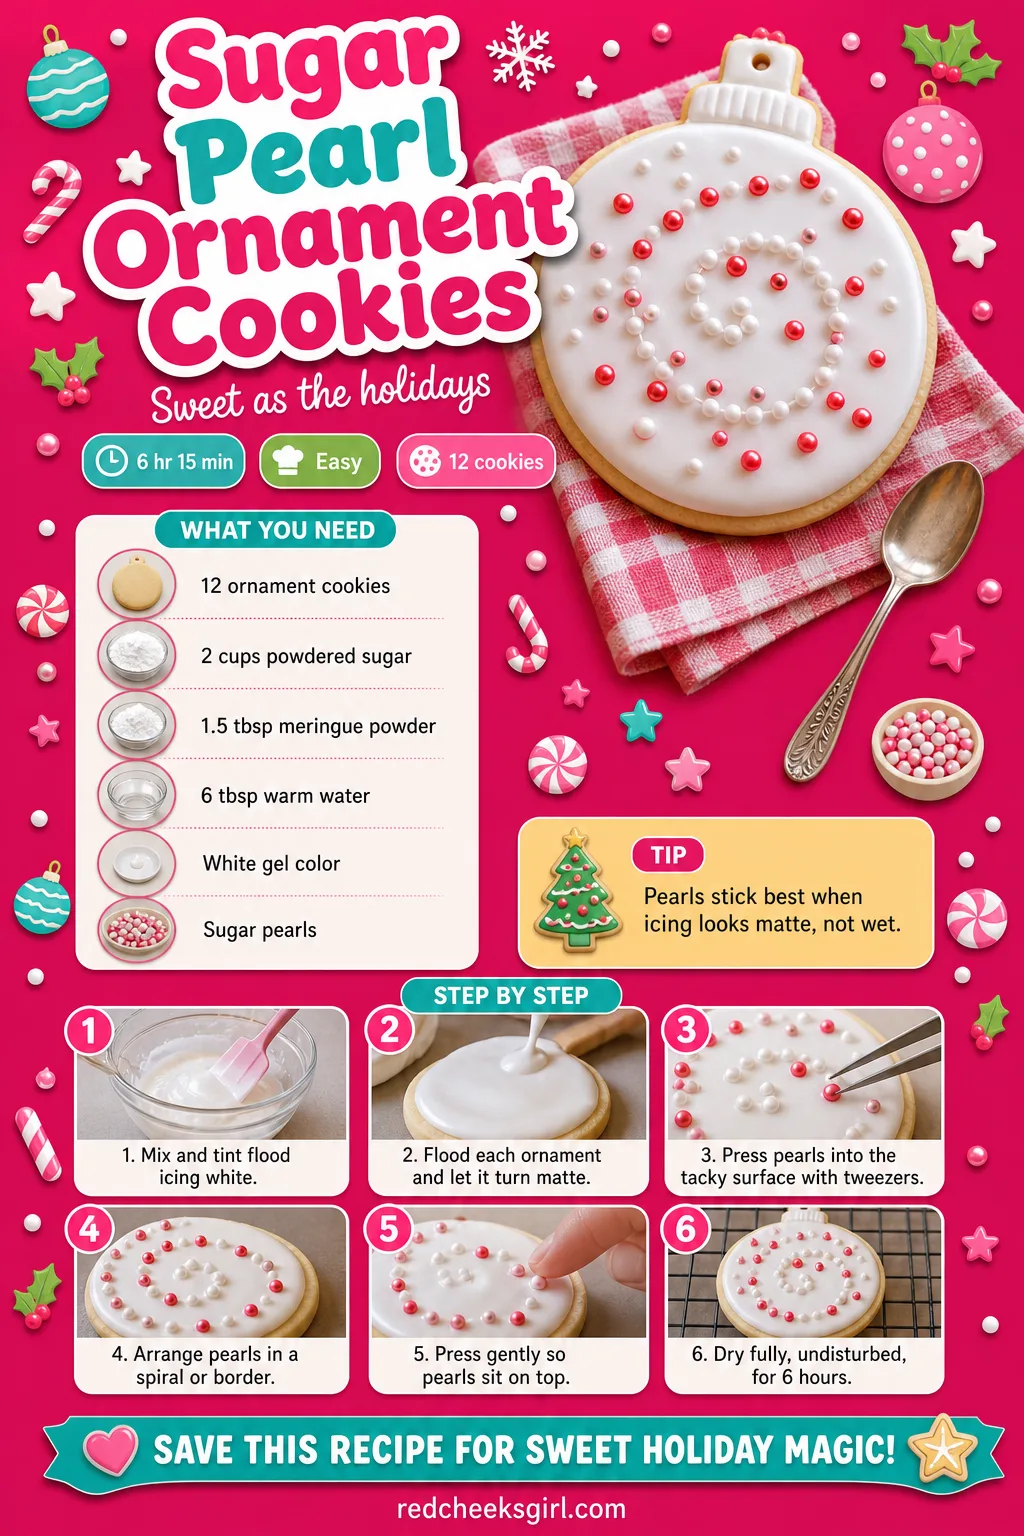
- Sugar Pearl Ornament Cookies
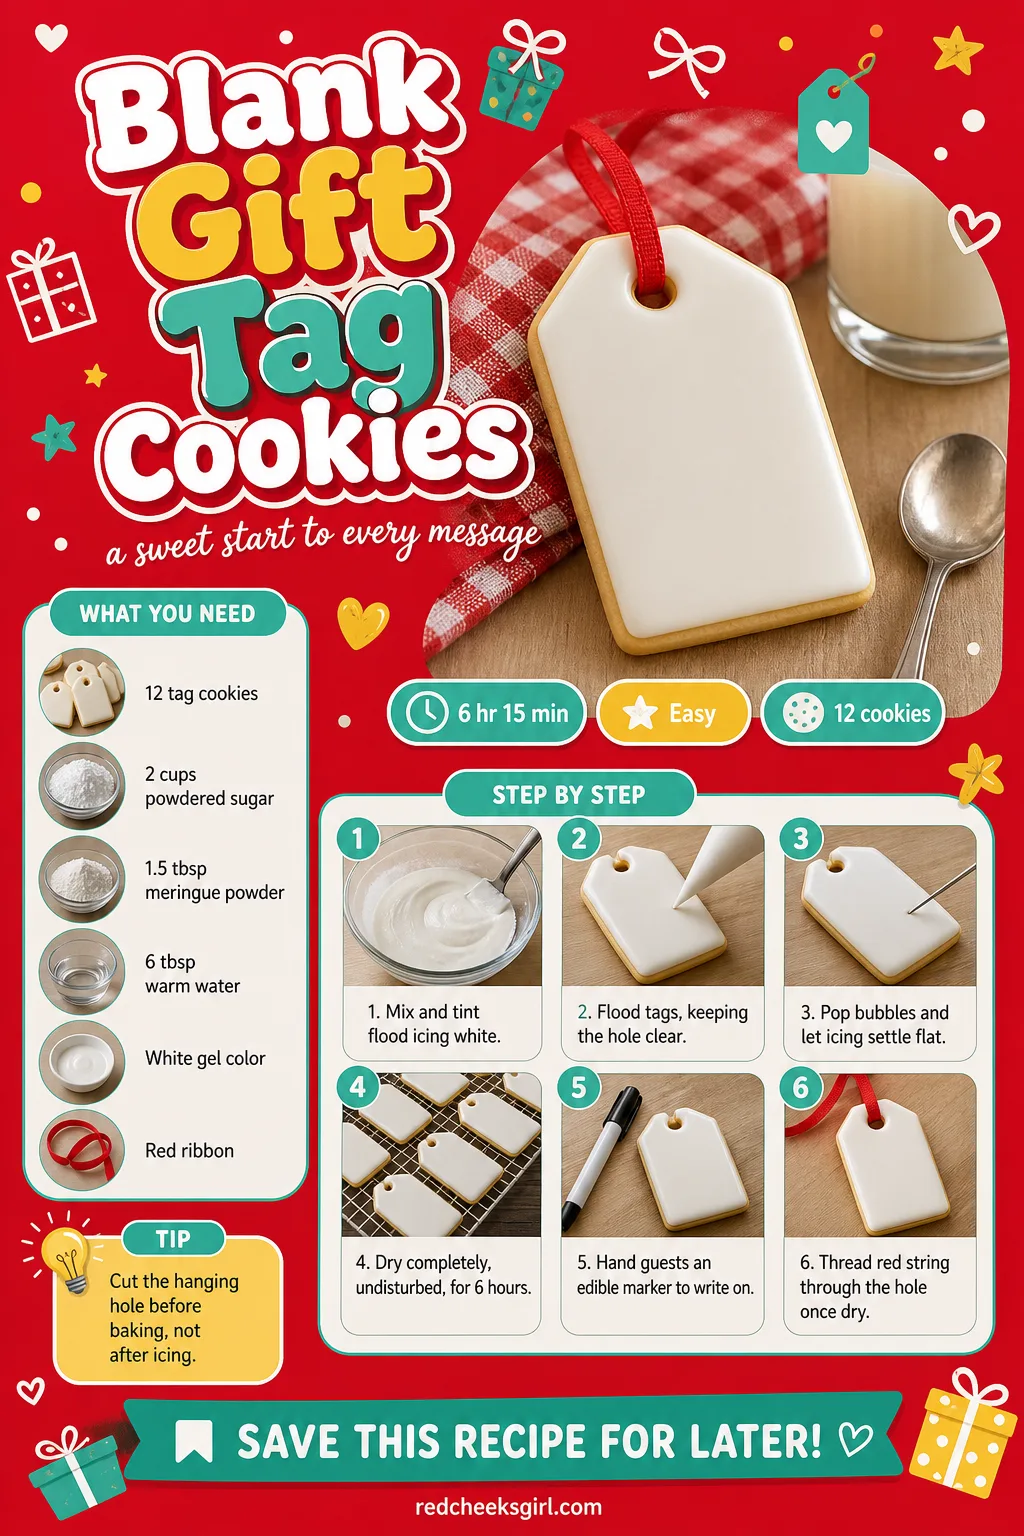
- Blank Gift Tag Cookies
- Royal Icing Transfer Snowman Cookies
- Cross-Stitch Pattern Cookies
- Watercolor Painted Cookies
- Gold Leaf Accent Star Cookies
- Frequently Asked Questions
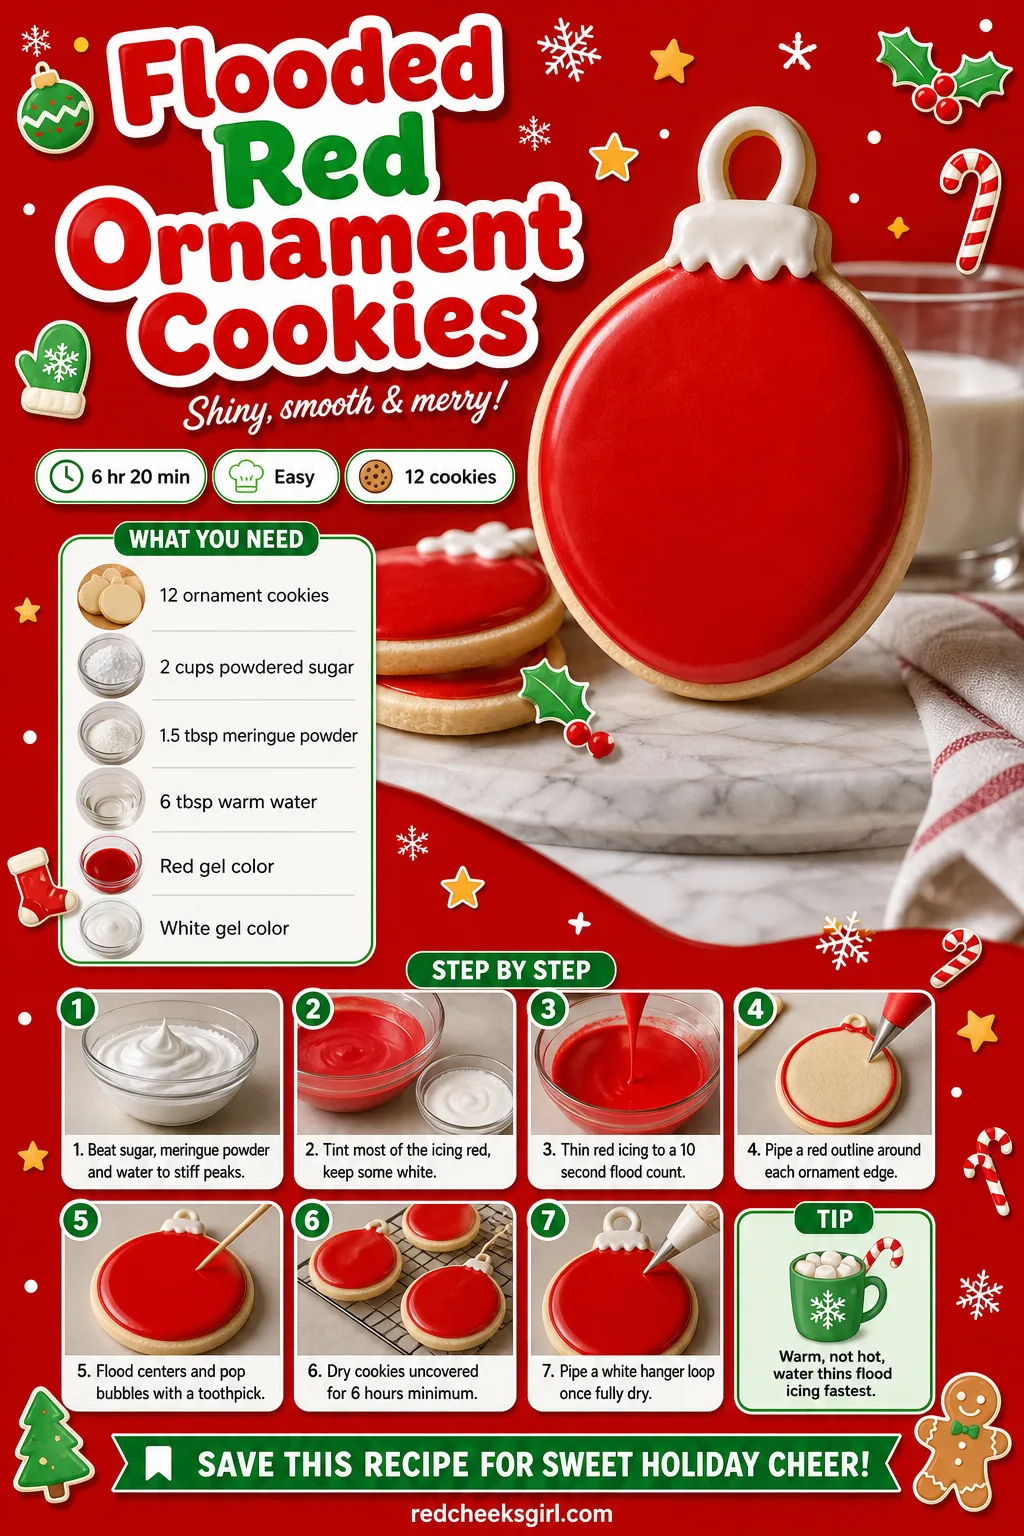
Flooded Red Ornament Cookies
A perfectly smooth red circle looks like it needs years of practice, and flooding is actually the technique that rewards a first attempt the most. Outline each ornament in a slightly stiffer red, then let a thinner version of the same icing settle flat on its own while the next cookie gets outlined. Red dries into a glossy, glass-like surface that holds for weeks in a sealed tin, which makes this the design to practice first.
Ingredients
- 12 ornament-shaped sugar cookies, baked and cooled
- 2 cups powdered sugar, sifted
- 1 1/2 tablespoons meringue powder
- 5 to 6 tablespoons warm water, divided
- Red gel food color
- White gel food color, for the hanger loop
Instructions
- Whisk the powdered sugar and meringue powder, then beat in 4 tablespoons warm water on medium speed for 4 to 5 minutes until stiff, glossy peaks form.
- Tint two thirds of the icing red and keep the rest white, covering anything not in use with a damp cloth.
- Thin the red icing with the remaining water, a teaspoon at a time, until a spoonful drizzled back in disappears in 10 to 12 seconds.
- Pipe a thick red outline around the edge of each ornament, then flood the centre with the thinned icing and let it settle flat.
- Pop any air bubbles with a toothpick and let the cookies dry uncovered for at least 6 hours.
- Once fully dry, pipe a small white loop at the top of each ornament to mimic a hanger and let it set for 20 minutes.
🛍 Shopping guide
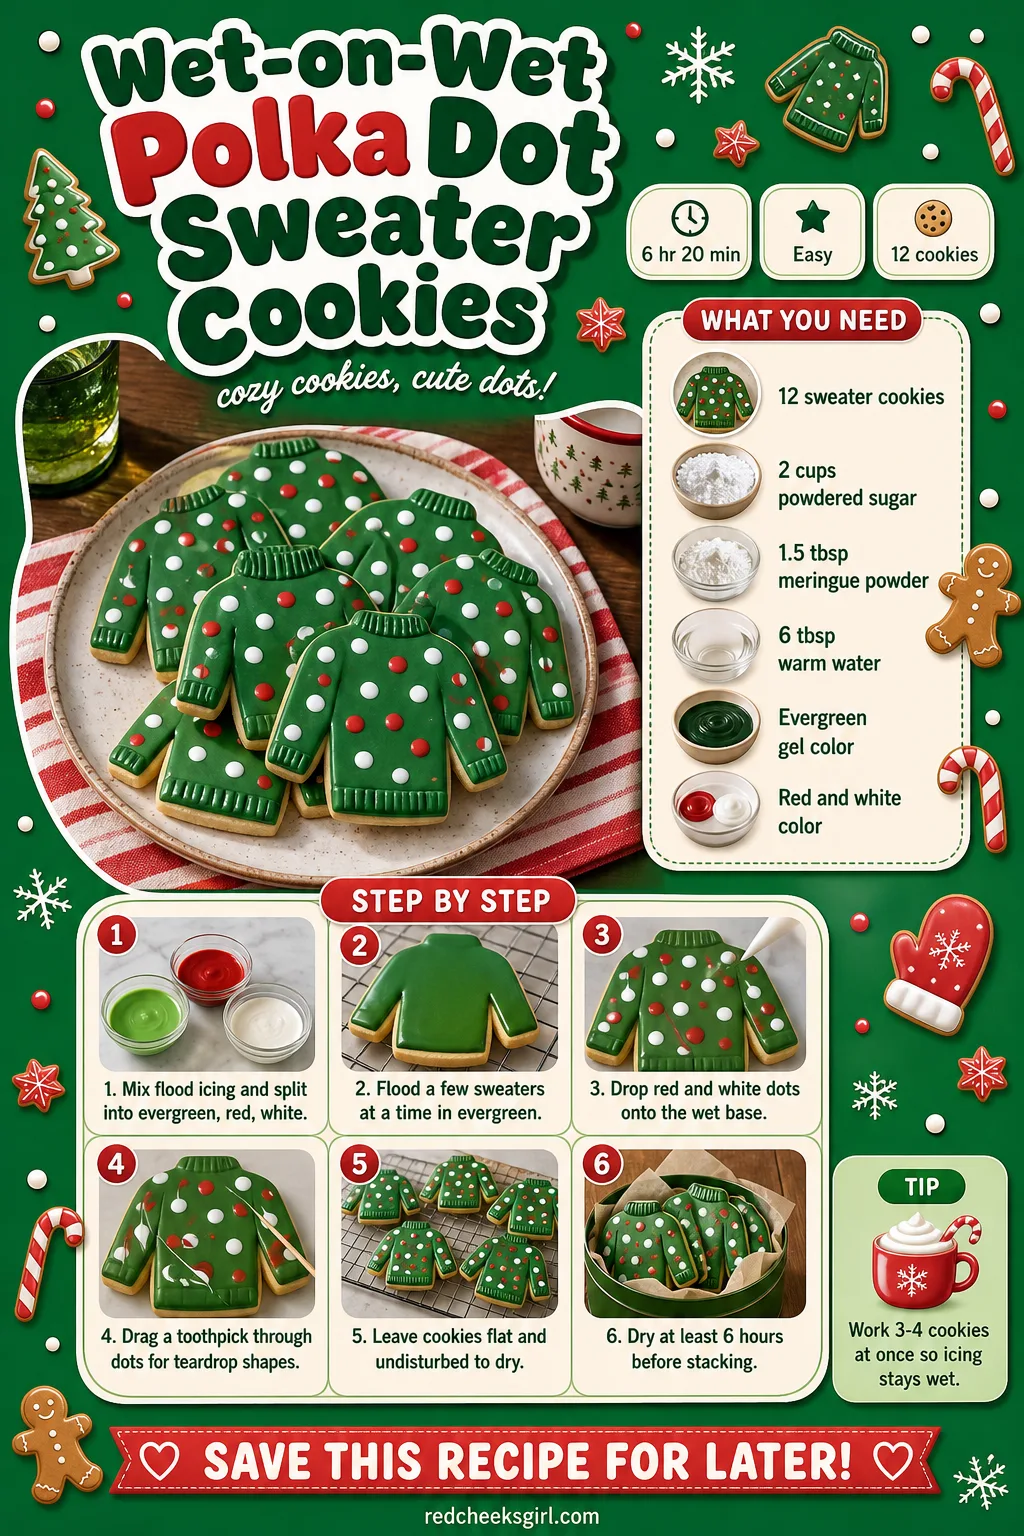
Wet-on-Wet Polka Dot Sweater Cookies
A fussy sweater with raised dots looks sweet until forty of them need piping by hand. Wet-on-wet skips that step: flood the sweater in evergreen while it is still wet, then drop dots of red and white straight onto the surface so they melt in flat instead of sitting proud. Work on three or four cookies at a time, because the whole trick depends on the base staying wet long enough to pull a toothpick through it.
Ingredients
- 12 sweater-shaped sugar cookies, baked and cooled
- 2 cups powdered sugar, sifted
- 1 1/2 tablespoons meringue powder
- 5 to 6 tablespoons warm water
- Evergreen gel food color
- Red and white gel food color
Instructions
- Make a batch of flood consistency icing, about a 10 to 12 second count, and divide it into evergreen, red and white.
- Outline and flood 3 to 4 sweaters at a time in evergreen so the surface stays wet.
- While the evergreen base is still glossy, pipe small dots of red and white directly onto it.
- Drag a toothpick lightly through any dot if you want a heart or teardrop instead of a circle.
- Let the cookies sit undisturbed and dry flat for at least 6 hours before touching them.
- Repeat in small batches until all 12 sweaters are dotted and set.
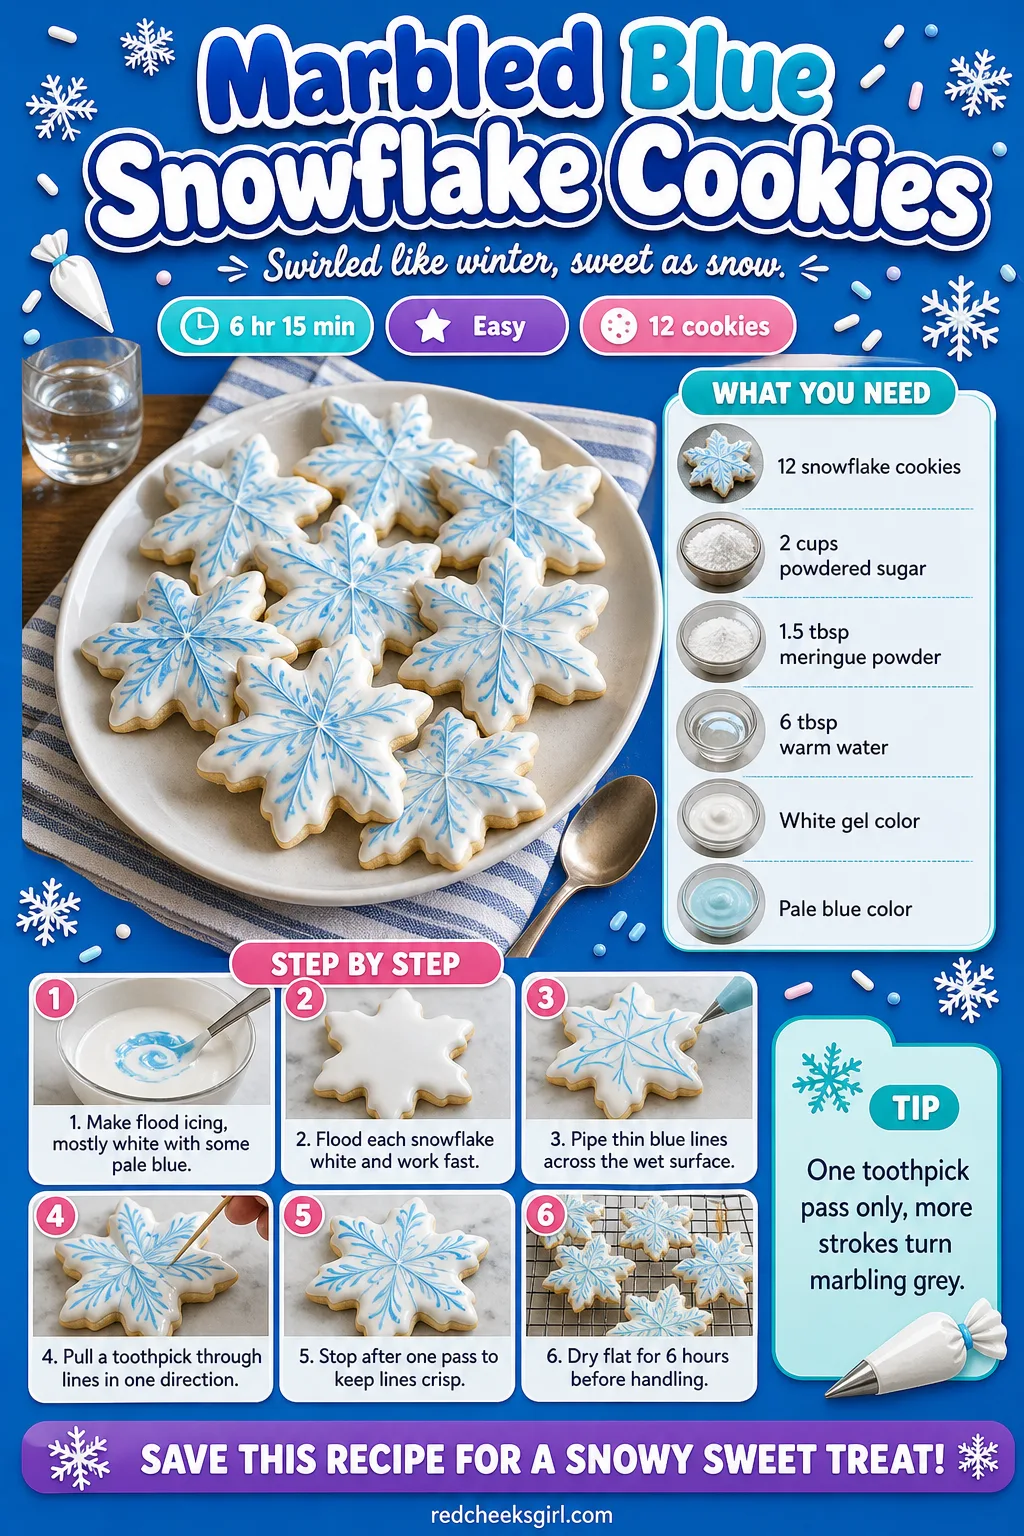
Marbled Blue Snowflake Cookies
Marbling has a reputation for looking accidental, and that is the point: there is no wrong swirl. Flood a snowflake in white, drop in thin lines of the palest icy blue while it is still wet, then draw a toothpick through in one direction so the colours feather without muddying into grey. It hides any shaky piping underneath completely, and it is one of the quickest cookies here to finish.
Ingredients
- 12 snowflake-shaped sugar cookies, baked and cooled
- 2 cups powdered sugar, sifted
- 1 1/2 tablespoons meringue powder
- 5 to 6 tablespoons warm water
- White gel food color
- Pale blue gel food color
Instructions
- Mix flood consistency icing and tint most of it white, leaving a small amount pale blue.
- Flood each snowflake in white and work quickly while the surface is still wet.
- Pipe thin lines of pale blue across the white in one direction.
- Draw a toothpick through the lines in a single pass to feather the colours.
- Avoid dragging back and forth, which turns the marble grey instead of streaked.
- Let the snowflakes dry flat and undisturbed for at least 6 hours.
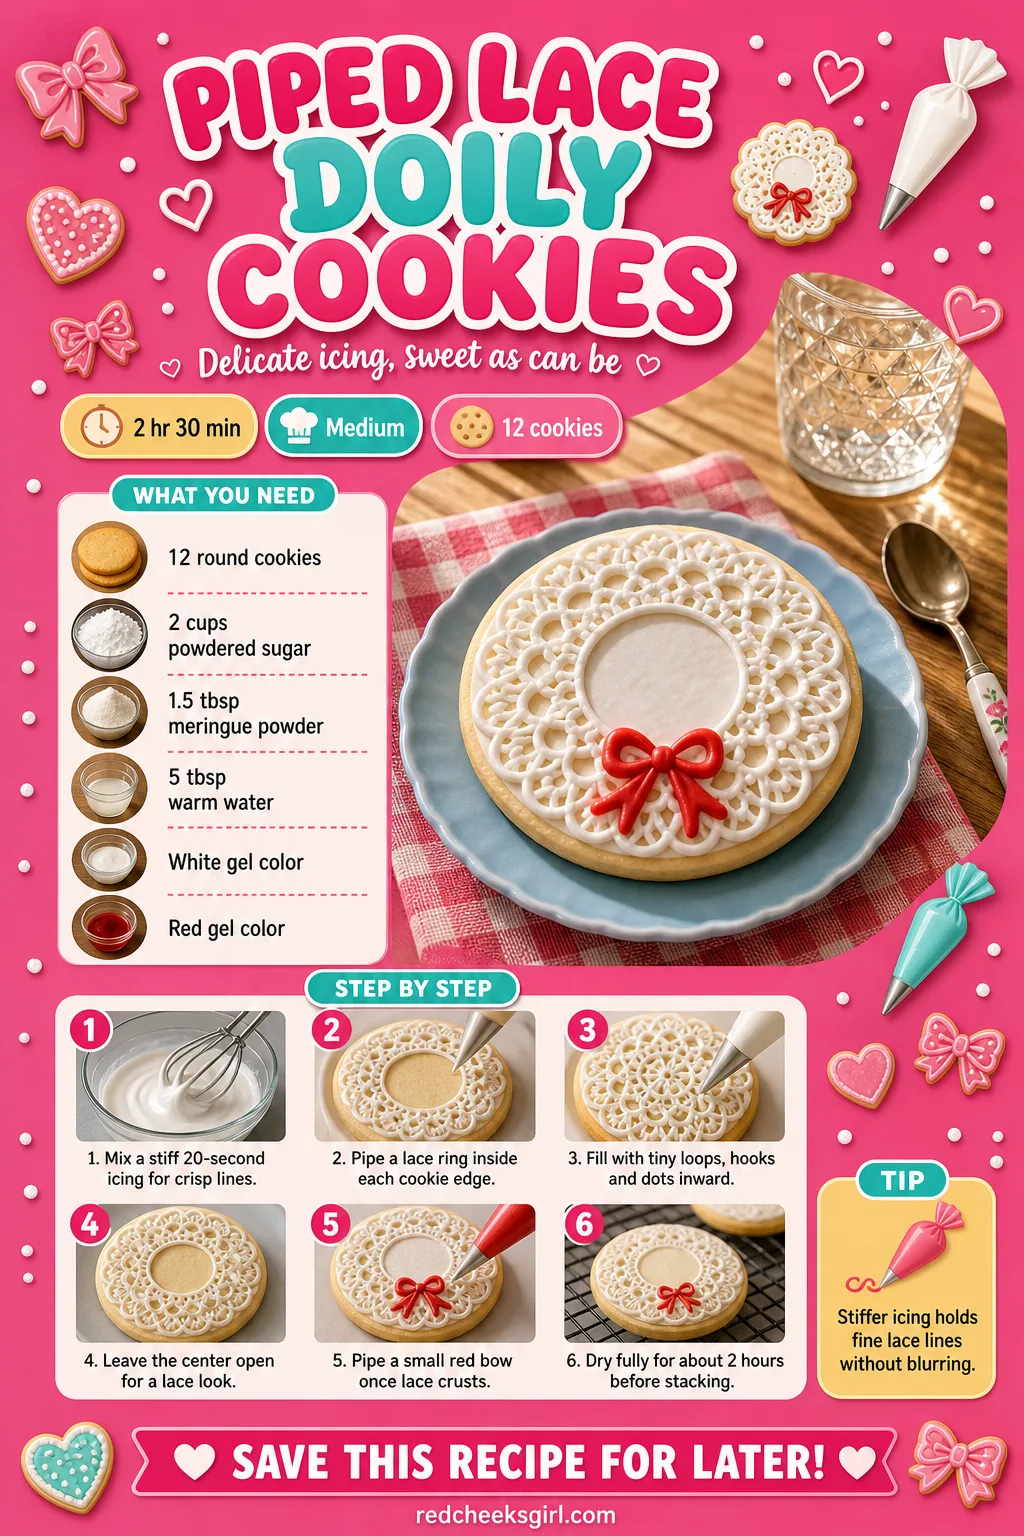
Piped Lace Doily Cookies
Lace piping looks like it needs a surgeon’s hand, but a doily pattern is really just repeated small shapes: dots, hooks and tiny loops. Keep the icing on the stiffer side so lines hold instead of spreading into each other, and work from the outside edge inward so a wrist never rests over wet piping. A round white base lets a single red bow underneath do the rest of the talking.
Ingredients
- 12 round sugar cookies, baked and cooled
- 2 cups powdered sugar, sifted
- 1 1/2 tablespoons meringue powder
- 4 to 5 tablespoons warm water
- White gel food color
- Red gel food color, for the accent bow
Instructions
- Mix a stiff, 20-second count icing so piped lines hold sharp edges without spreading.
- Fit a fine round tip and pipe a solid lace ring just inside the edge of each cookie.
- Fill the ring with tiny loops, hooks and dots, working inward in rows like a real doily.
- Leave the centre open or lightly dotted so the pattern reads as lace rather than a solid disc.
- Pipe one small red bow at the base of each cookie once the white lace has crusted, about 20 minutes.
- Let the cookies dry fully, about 2 hours, before stacking them between sheets of parchment.
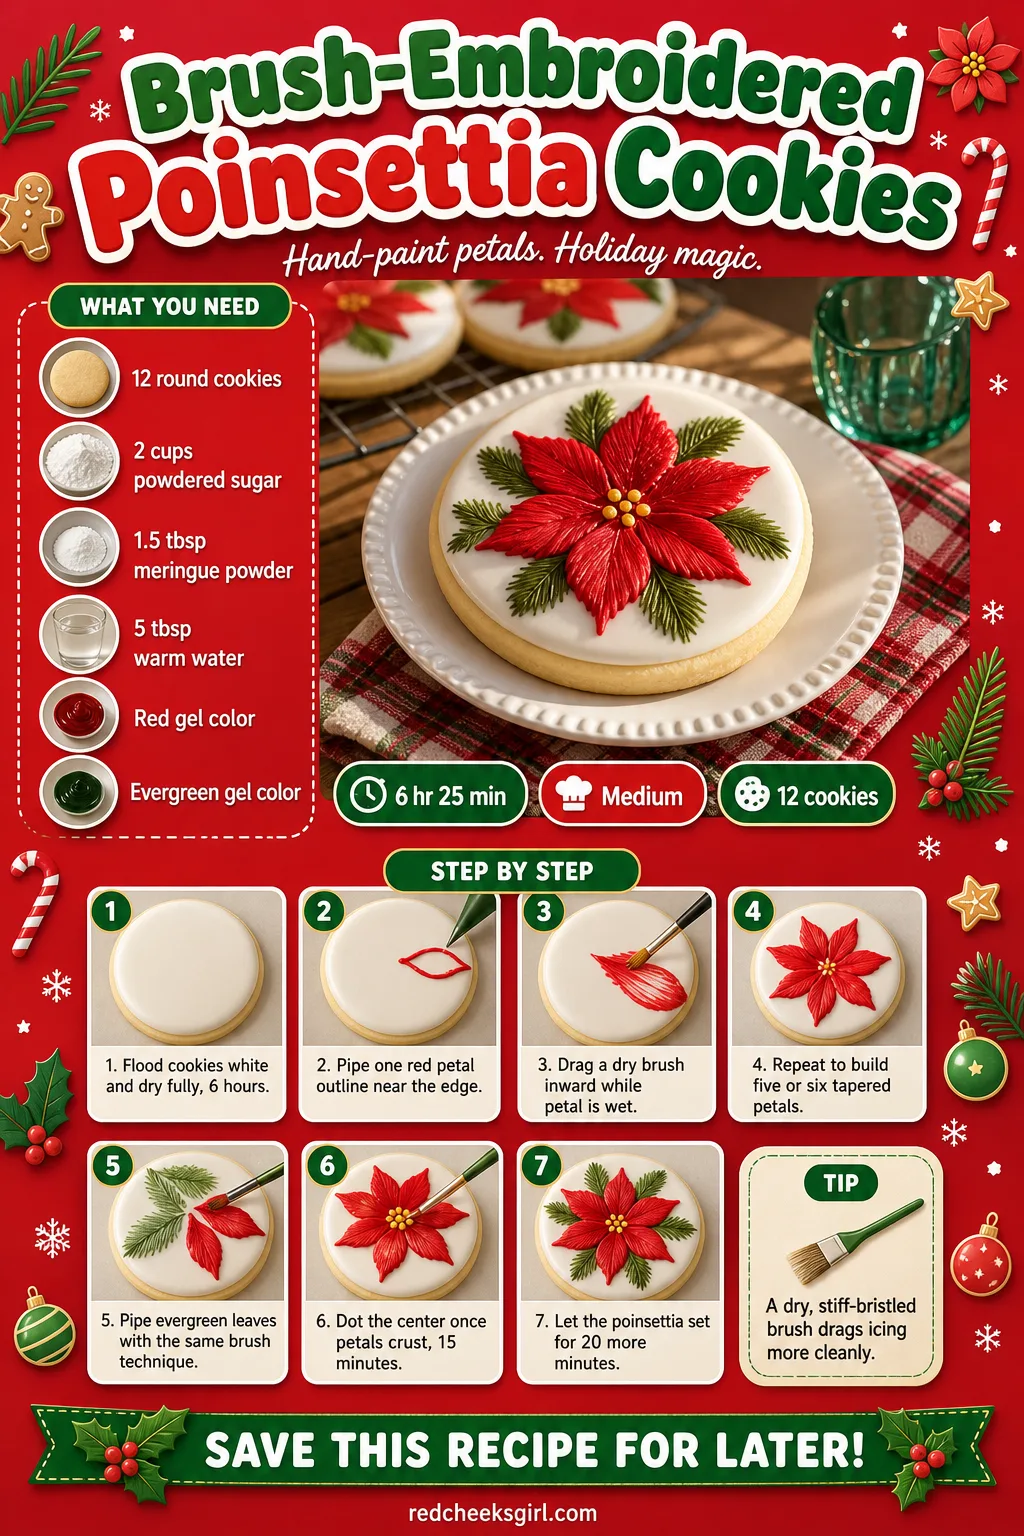
Brush-Embroidered Poinsettia Cookies
Brush embroidery borrows its name from needlework because the finished petal really does look stitched, and the only tool involved is a small, dry paintbrush. Pipe a petal outline in red, then immediately drag the wet icing inward with the brush before it crusts, so each stroke tapers like a thread pulled through fabric. The evergreen leaves get the same treatment, which is what gives this one real dimension instead of flat colour.
Ingredients
- 12 round sugar cookies, baked and cooled
- 2 cups powdered sugar, sifted
- 1 1/2 tablespoons meringue powder
- 4 to 5 tablespoons warm water
- Red gel food color
- Evergreen gel food color
Instructions
- Flood each cookie in white and let it dry completely, at least 6 hours, before adding the poinsettia.
- Mix a medium, 15-second count red icing and pipe one petal outline at a time near the edge.
- While that petal is still wet, drag a dry, flat brush from the outer tip inward toward the centre.
- Repeat around the flower to build five or six tapered petals, then pipe small evergreen leaves the same way.
- Add a few small dots at the centre once the petals have crusted, about 15 minutes.
- Let the finished poinsettia set for another 20 minutes before handling the cookies.
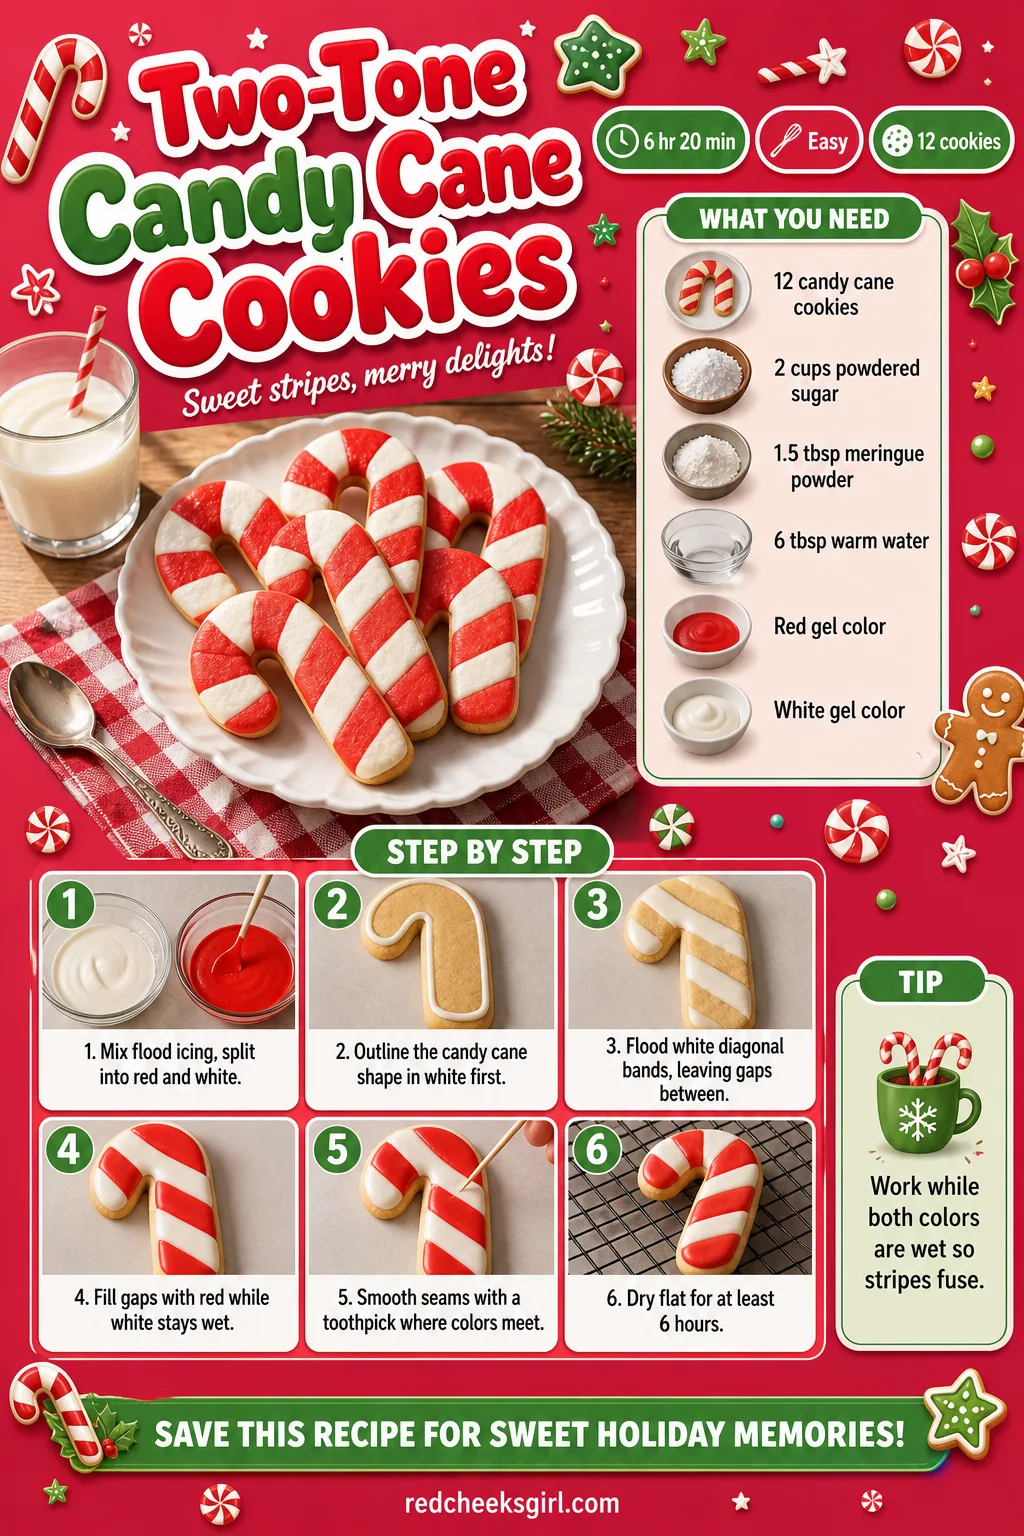
Two-Tone Candy Cane Cookies
Nobody needs a steady hand for perfectly even stripes, just a plan before the bag comes out. Pipe red and white icing in diagonal bands along a candy cane shape, letting the two colours touch while wet so they fuse into one smooth surface instead of a ridge. It is one of the fastest cookies here to finish, which makes it the one to hand a nervous first-timer at a decorating table.
Ingredients
- 12 candy cane-shaped sugar cookies, baked and cooled
- 2 cups powdered sugar, sifted
- 1 1/2 tablespoons meringue powder
- 5 to 6 tablespoons warm water
- Red gel food color
- White gel food color
Instructions
- Mix flood consistency icing, a 10 to 12 second count, and split it evenly into red and white.
- Outline the whole candy cane shape in white and let it firm up for 2 to 3 minutes.
- Flood diagonal white bands first, leaving gaps for the red stripes in between.
- Fill the gaps with red flood icing while the white is still wet so the edges merge.
- Smooth any ridges with a toothpick where the two colours meet.
- Let the cookies dry flat for at least 6 hours before packaging them.
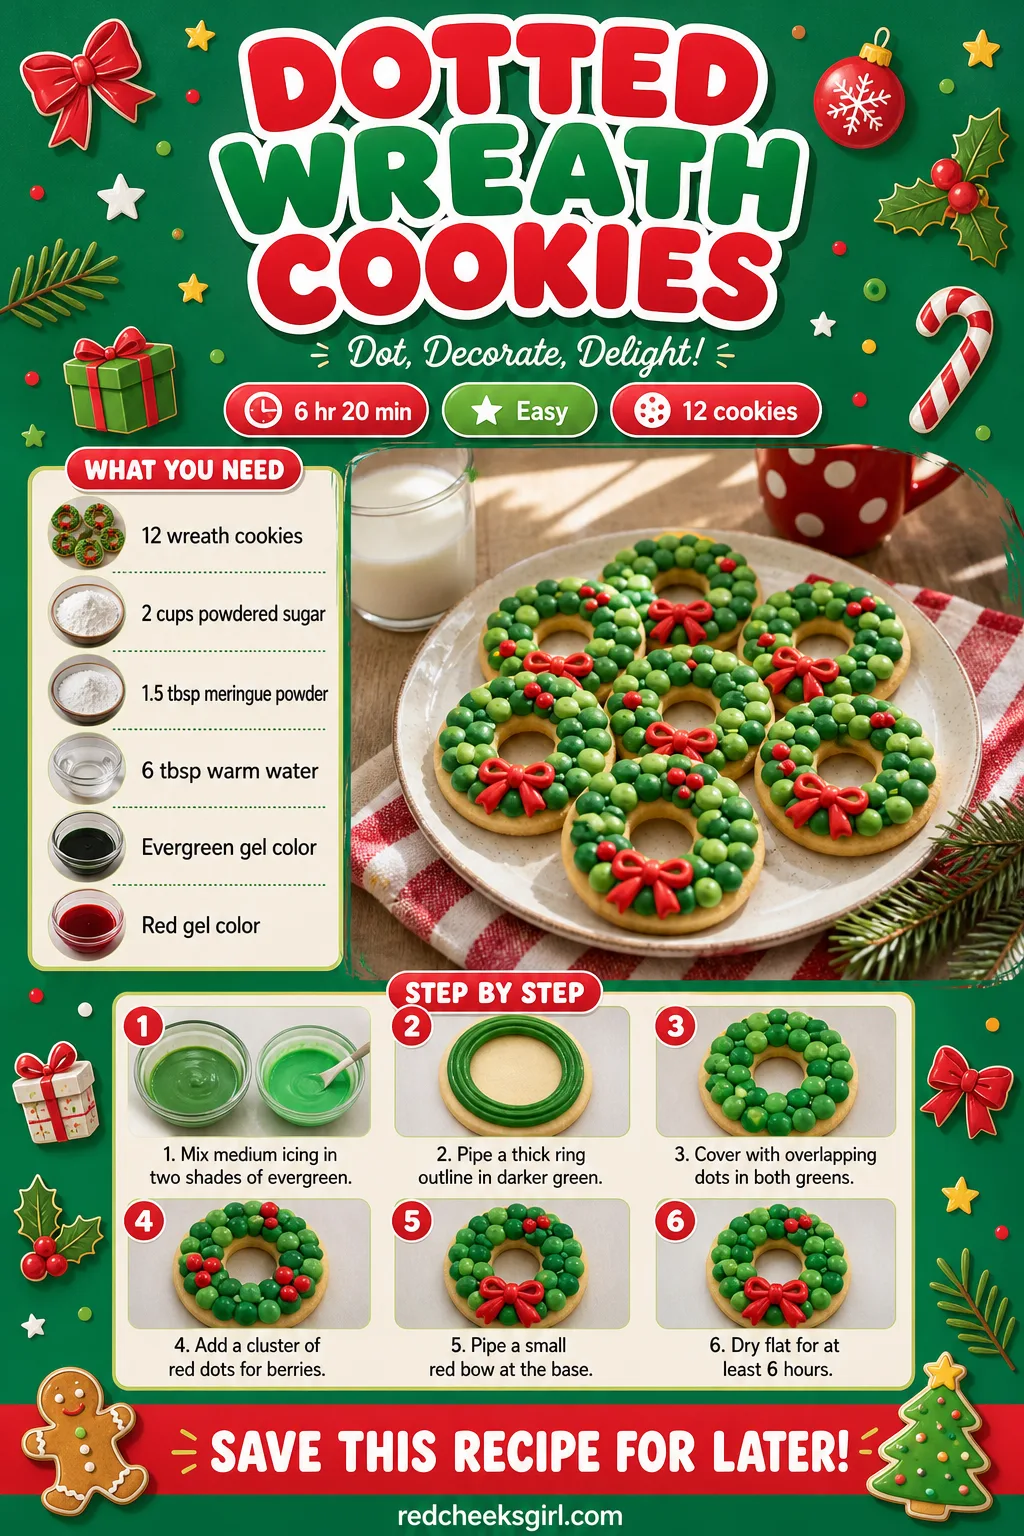
Dotted Wreath Cookies
A wreath looks like it needs dozens of individually shaped leaves, but a ring of simple dots reads just as festive from across a dessert table. Pipe a thick evergreen outline in a circle, then cover it with overlapping dots in two slightly different greens for texture without any leaf-shaping at all. Finish with tiny red dots for berries and nobody asks how long the leaves took.
Ingredients
- 12 ring-shaped sugar cookies, baked and cooled
- 2 cups powdered sugar, sifted
- 1 1/2 tablespoons meringue powder
- 5 to 6 tablespoons warm water
- Two shades of evergreen gel food color
- Red gel food color
Instructions
- Mix a medium, 15-second count icing and tint most of it evergreen in two slightly different shades.
- Pipe a thick ring outline around each wreath shape using the darker green.
- Cover the ring with overlapping dots in both greens, letting some overlap to build texture.
- Pipe a small cluster of 3 red dots in one spot to look like berries.
- Add a thin red bow at the base of the wreath with the leftover red icing.
- Let the wreaths dry flat for at least 6 hours before stacking.
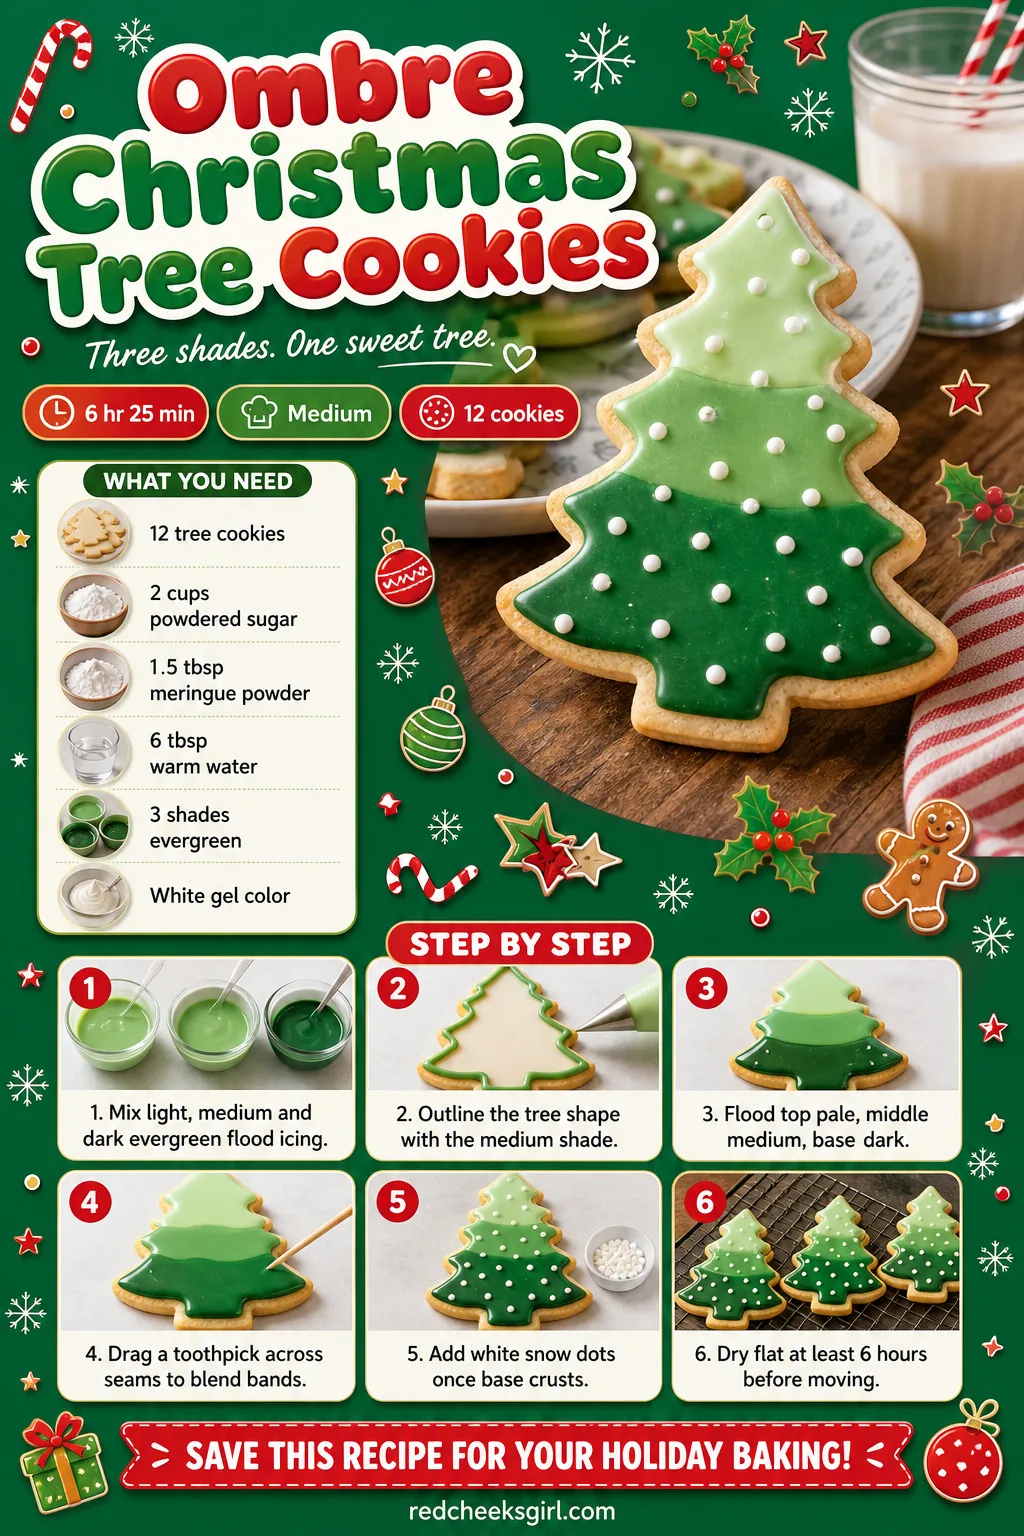
Ombre Christmas Tree Cookies
An ombre tree reads as the fussiest cookie on the tray, and it is actually just three shades of the same green piped in bands and blended while wet. Start pale at the top, deepen toward the base, and drag a toothpick lightly between each band so the colours bleed instead of sitting in hard stripes. A dusting of white dots over the top finishes the gradient without covering it up.
Ingredients
- 12 tree-shaped sugar cookies, baked and cooled
- 2 cups powdered sugar, sifted
- 1 1/2 tablespoons meringue powder
- 5 to 6 tablespoons warm water
- Evergreen gel food color, in light, medium and dark shades
- White gel food color
Instructions
- Mix three bowls of flood icing, a 10 to 12 second count, in light, medium and dark evergreen.
- Outline the whole tree shape with the medium shade and let it set for 2 minutes.
- Flood the top third pale, the middle medium and the base dark, working top to bottom.
- While all three bands are still wet, drag a toothpick lightly across each seam to blend the edges.
- Pipe a few small white dots over the top section once the base has crusted, about 20 minutes.
- Let the trees dry flat for at least 6 hours before moving them.
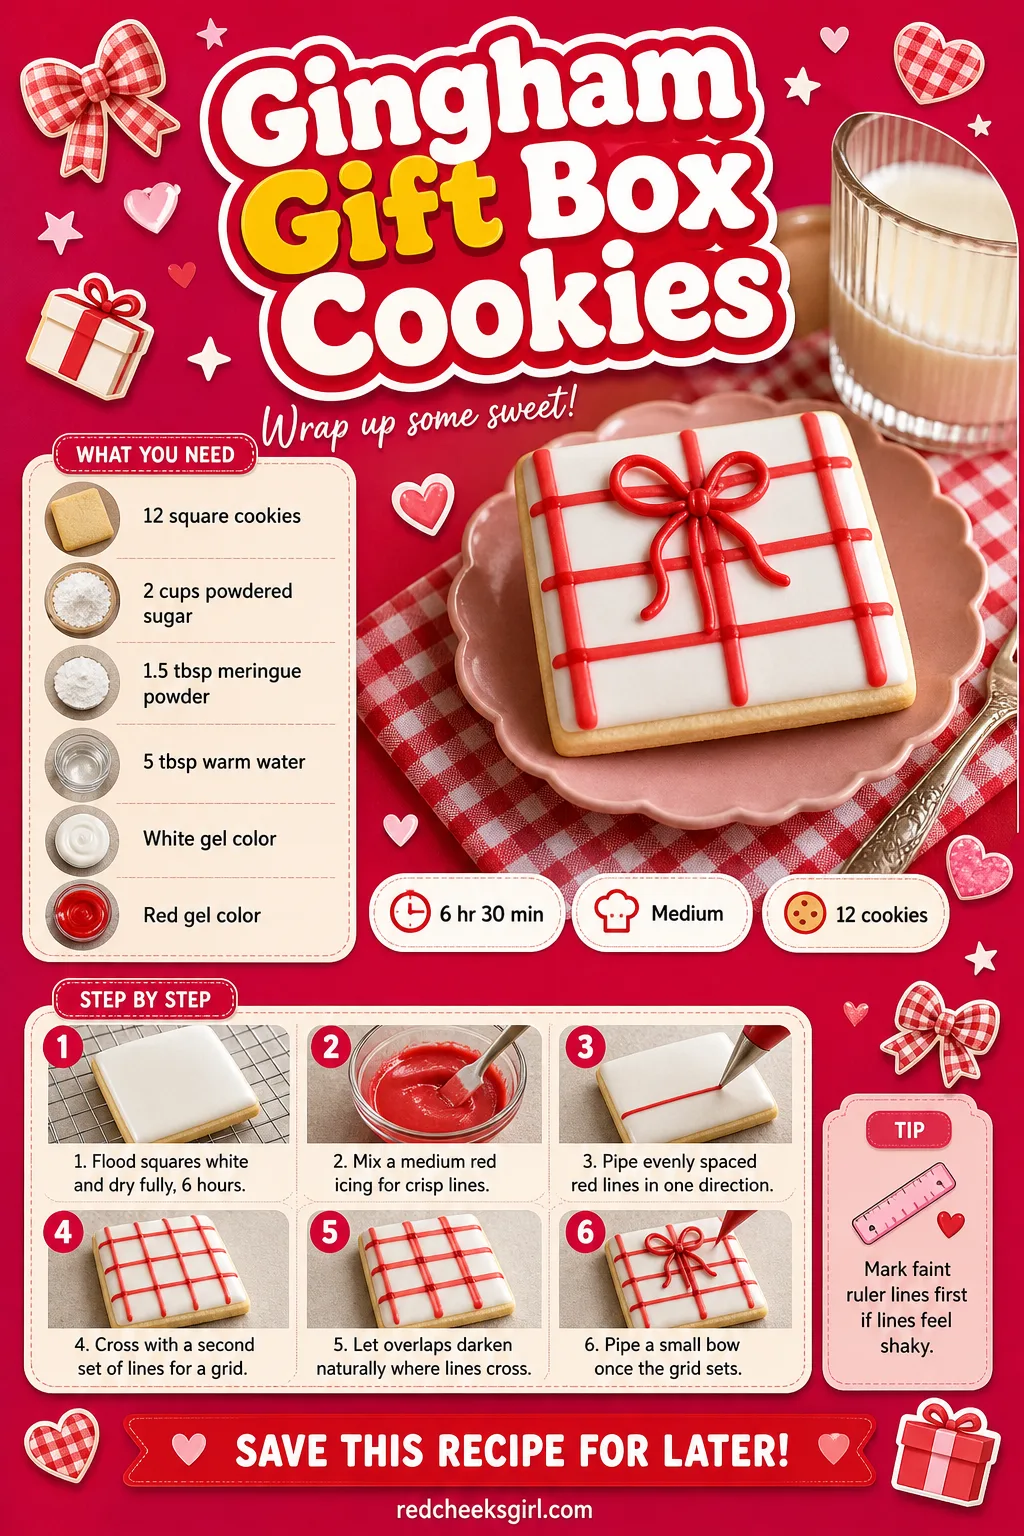
Gingham Gift Box Cookies
A gingham pattern looks like it needs graph paper and a ruler, but the eye corrects for small wobbles far more than expected. Flood the box white, let it dry completely, then pipe evenly spaced red lines in one direction and a second set crossing them, so every overlap darkens into the classic square. One piped bow at the top turns a fabric swatch into a wrapped present.
Ingredients
- 12 square sugar cookies, baked and cooled
- 2 cups powdered sugar, sifted
- 1 1/2 tablespoons meringue powder
- 4 to 5 tablespoons warm water
- White gel food color
- Red gel food color
Instructions
- Flood each square cookie in white and let it dry fully, at least 6 hours, before adding the pattern.
- Mix a medium, 15-second count red icing for crisp, controlled lines.
- Pipe evenly spaced parallel red lines across the cookie in one direction.
- Pipe a second set of lines crossing the first at a right angle to form the grid.
- Let the overlapping squares sit so the double layer deepens into a darker red naturally.
- Finish with a small red bow piped at the top edge once the grid has set, about 15 minutes.
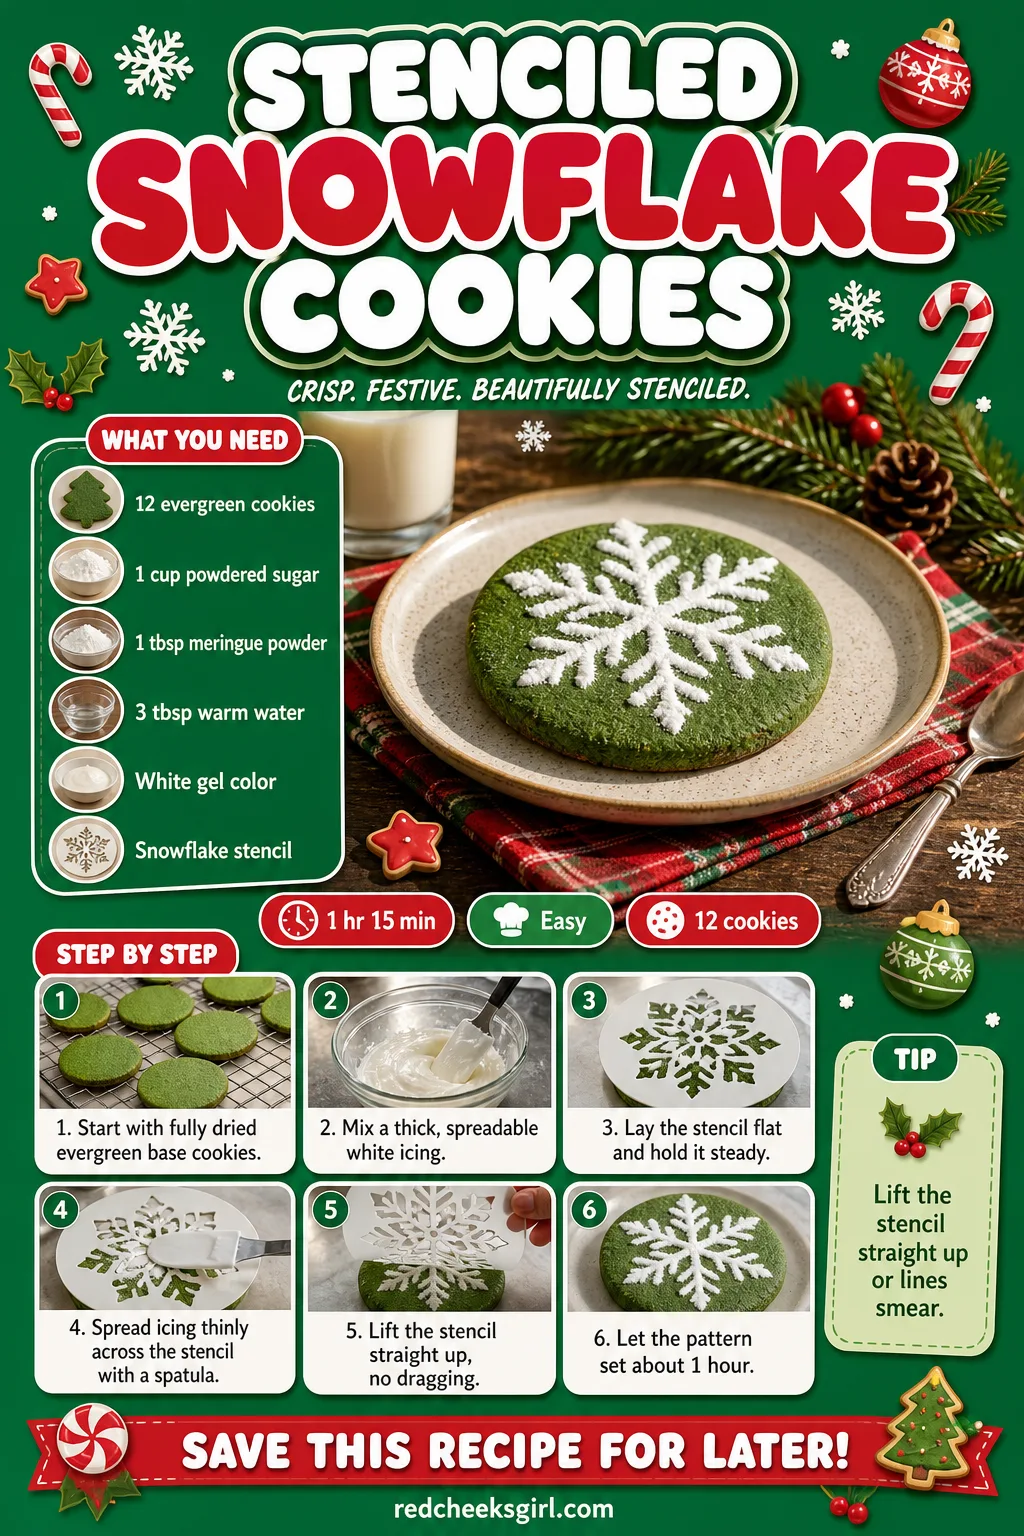
Stenciled Snowflake Cookies
A stencil is the closest this list comes to a shortcut, and there is no shame in taking it: it turns an intricate snowflake into five minutes of dabbing icing through a template. Lay a snowflake stencil flat over a dry evergreen cookie, spread a thin layer of white icing across it with an offset spatula, then lift straight up before it smudges. A paper doily works in a pinch if a proper stencil is not on hand.
Ingredients
- 12 round sugar cookies, flooded evergreen and fully dried
- 1 cup powdered sugar, sifted
- 1 tablespoon meringue powder
- 2 to 3 tablespoons warm water
- White gel food color
- 1 snowflake cookie stencil
Instructions
- Start with a batch of fully dried, evergreen-flooded base cookies so the surface is hard and smooth.
- Mix a thick, paste-like icing, just loose enough to spread rather than pipe.
- Lay the stencil flat and centred over one dry cookie and hold it firmly in place.
- Spread a thin, even layer of white icing across the stencil with an offset spatula.
- Lift the stencil straight up in one motion without dragging it sideways.
- Let the snowflake pattern set for about 1 hour before stacking the cookies.
🛍 Shopping guide
Lettered Noel Plaque Cookies
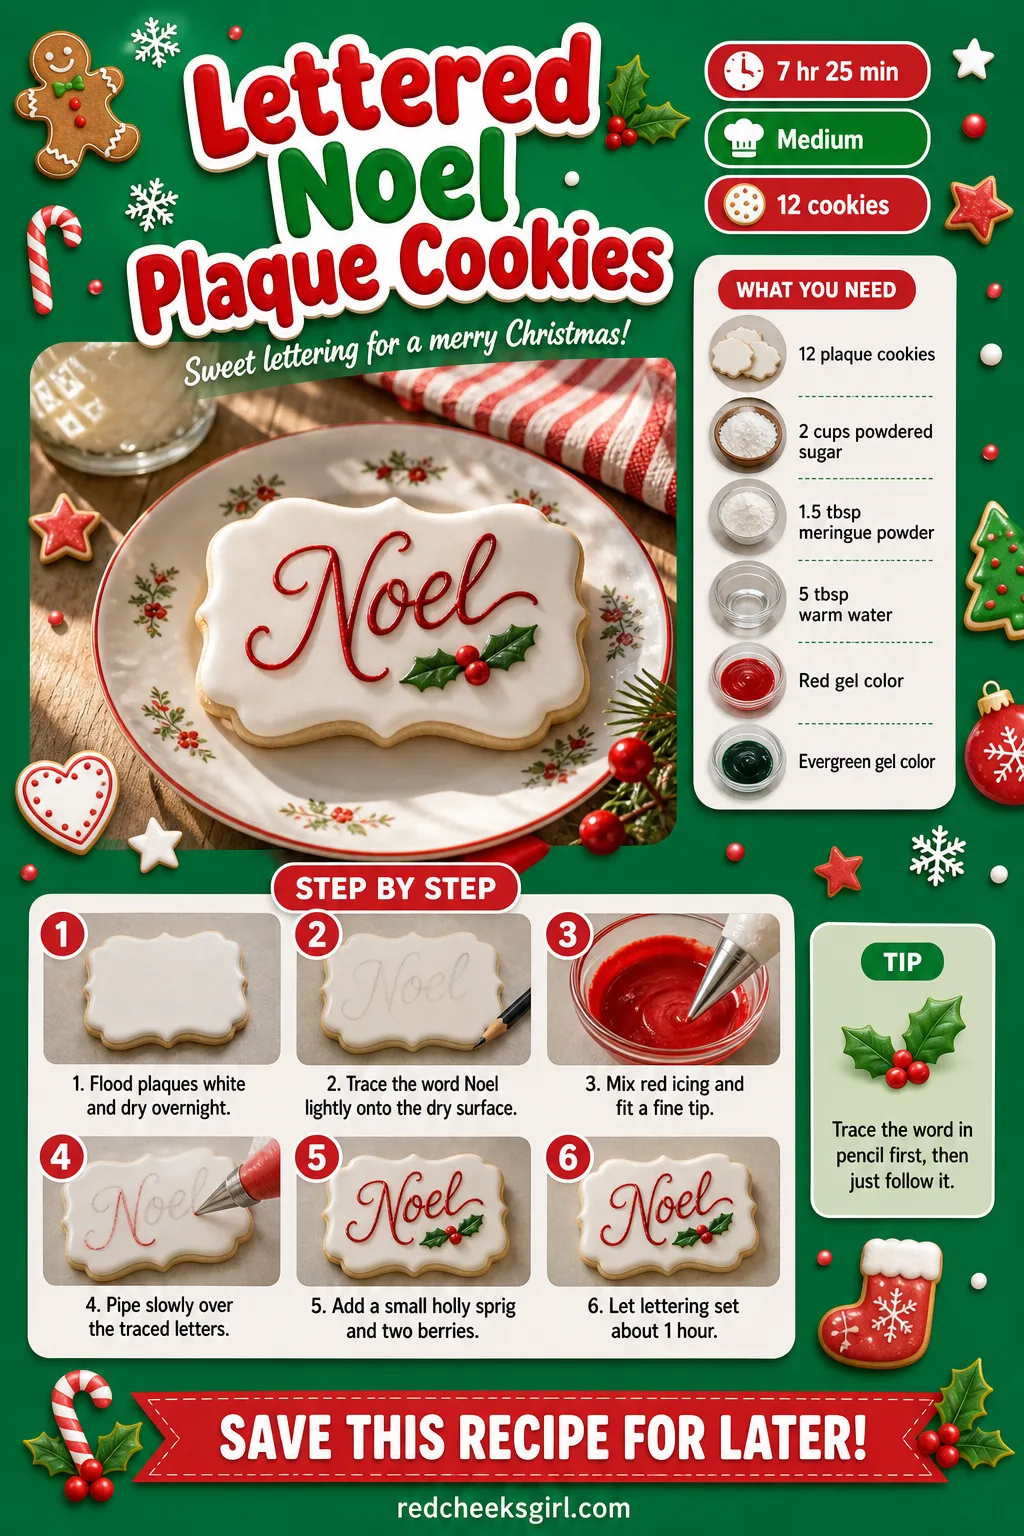
Lettering is the one skill here that improves with a pencil, not a piping bag: trace the word lightly onto the dry icing first, then just follow the line. Flood a plaque in white, let it set overnight, then pipe Noel in a steady red script and tuck one sprig of evergreen holly beside it so any wobble reads as handwriting rather than a mistake.
Ingredients
- 12 rectangular plaque sugar cookies, baked and cooled
- 2 cups powdered sugar, sifted
- 1 1/2 tablespoons meringue powder
- 4 to 5 tablespoons warm water
- White gel food color
- Red and evergreen gel food color
Instructions
- Flood each plaque in white and let it dry completely, ideally overnight or at least 6 hours.
- Lightly trace the word Noel onto the dry surface with a food-safe pencil or a toothpick.
- Mix a medium, 15-second count red icing and fit a very fine round tip.
- Pipe over the traced letters slowly, lifting the bag slightly to keep the line even.
- Pipe a small sprig of evergreen holly and two tiny red berries beside the word.
- Let the lettering set for about 1 hour before handling the plaques.
3D Piped Holly Cookies
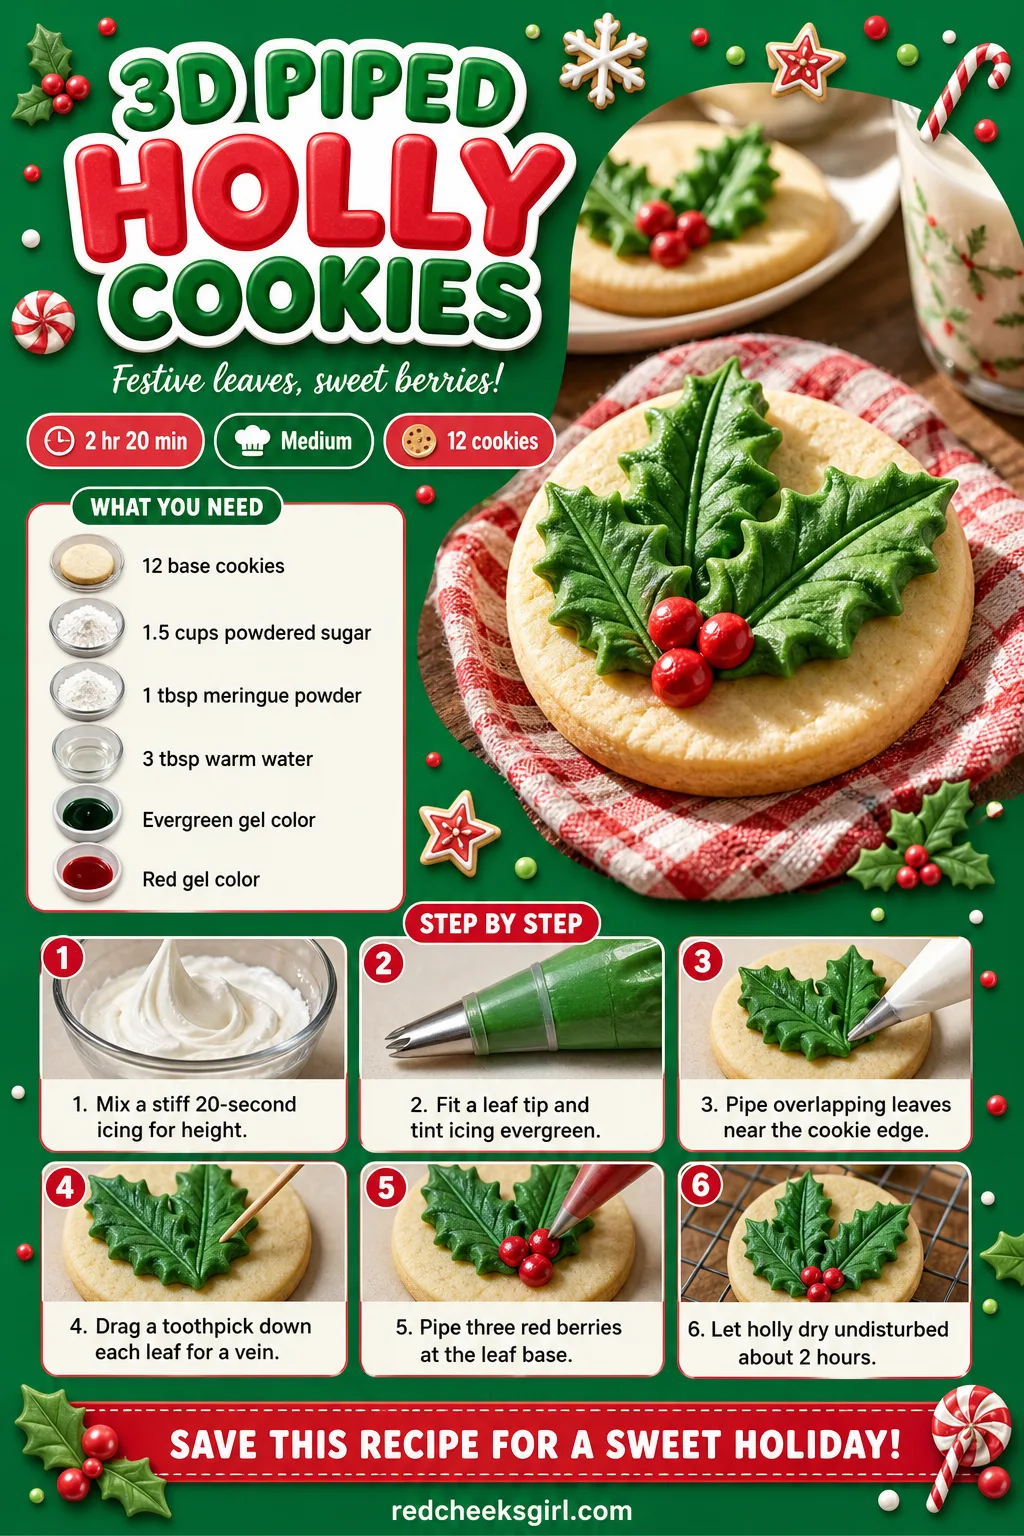
Real dimension on a cookie does not need a silicone mould, just icing stiff enough to hold a ridge instead of settling flat. Pipe two overlapping leaf shapes directly onto a plain base cookie with a leaf tip, drag a toothpick down the centre of each to add a vein, then finish with three round berries piled on top of each other. The leaves stand proud enough to cast a small shadow, which sells the whole effect.
Ingredients
- 12 round sugar cookies, flooded white and fully dried
- 1 1/2 cups powdered sugar, sifted
- 1 tablespoon meringue powder
- 2 to 3 tablespoons warm water
- Evergreen gel food color
- Red gel food color
Instructions
- Make a stiff icing, a 20 to 25 second count, so piped shapes hold their height.
- Tint most of the icing evergreen and fit a small leaf piping tip.
- Pipe two or three overlapping leaves near the edge of each dried base cookie.
- Drag a toothpick down the centre of each leaf to press in a vein line.
- Switch to red icing and pipe 3 small round berries clustered at the base of the leaves.
- Let the holly dry undisturbed for about 2 hours so it keeps its raised shape.
Piped Poinsettia With Leaves Cookies
Direct-piped flowers depend on tip choice, not steady hands: a petal tip does the shaping for you. Hold it at a slight angle and pipe five pointed red petals in a ring, slightly overlapping, then add evergreen leaves around the outside the same way. It builds real height on the cookie, so save this one for the top of a gift box rather than a flat tin where the relief would get crushed.
Ingredients
- 12 round sugar cookies, flooded white and fully dried
- 1 1/2 cups powdered sugar, sifted
- 1 tablespoon meringue powder
- 2 to 3 tablespoons warm water
- Red gel food color
- Evergreen gel food color
Instructions
- Mix a stiff icing, a 20-second count, so the petals keep a crisp pointed edge.
- Fit a petal piping tip and tint most of the icing red.
- Pipe five pointed petals in a slightly overlapping ring near the centre of each cookie.
- Pipe a smaller second layer of petals inside the first for extra height.
- Switch to evergreen and pipe pointed leaves around the outer edge of the flower.
- Let the poinsettias dry undisturbed for about 3 hours to set the raised petals.
Stenciled Plaid Cookies
Plaid looks like gingham’s complicated cousin, but it only adds one more set of thin lines over the same grid logic. Flood the base white, pipe the red grid first exactly as for gingham, then once that has crusted, pipe a thinner evergreen line through the centre of each red band. It reads as proper flannel from across the table, and nobody checks the spacing up close.
Ingredients
- 12 square sugar cookies, flooded white and fully dried
- 1 1/2 cups powdered sugar, sifted
- 1 tablespoon meringue powder
- 2 to 3 tablespoons warm water
- Red gel food color
- Evergreen gel food color
Instructions
- Start with fully dried, white-flooded square cookies as the base.
- Mix a medium, 15-second count red icing and pipe evenly spaced crossing lines to form a grid.
- Let the red grid crust for about 20 minutes before adding more detail.
- Mix a thinner evergreen line icing and pipe one fine line through the centre of each red band.
- Keep the evergreen lines straight by piping them all in the same direction first.
- Let the finished plaid dry for at least 1 hour before stacking the cookies.
Sugar Pearl Ornament Cookies
Sugar pearls do all the decorating once the timing is right: press them in a touch too early and they sink, too late and they roll off. Flood an ornament in white, wait until the surface turns matte but still gives slightly under a fingertip, then set pearls in a simple spiral or border with tweezers. It is the fastest way here to make a cookie look finished without piping one extra line.
Ingredients
- 12 ornament-shaped sugar cookies, baked and cooled
- 2 cups powdered sugar, sifted
- 1 1/2 tablespoons meringue powder
- 5 to 6 tablespoons warm water
- White gel food color
- Edible sugar pearls, red and white
Instructions
- Mix flood consistency icing, a 10 to 12 second count, and tint it white.
- Outline and flood each ornament, then let it sit until the surface turns matte, about 10 to 15 minutes.
- Press sugar pearls gently into the slightly tacky surface with tweezers before it fully crusts.
- Arrange the pearls in a spiral, border or small cluster, mixing red and white for contrast.
- Avoid pressing too hard, which pushes pearls below the surface instead of sitting on top.
- Let the cookies dry fully and undisturbed for at least 6 hours.
Blank Gift Tag Cookies
A blank tag looks like the lazy option until it turns out to be the one every guest actually wants: somewhere to write a name. Flood a tag shape in white, punch a small hole near the top with a straw before baking, and once the icing is bone dry, hand round an edible pen so people can write directly on it. Thread red string through the hole afterward so it hangs straight off a gift.
Ingredients
- 12 tag-shaped sugar cookies with a small hole near the top, baked and cooled
- 2 cups powdered sugar, sifted
- 1 1/2 tablespoons meringue powder
- 5 to 6 tablespoons warm water
- White gel food color
- Red food-safe string or ribbon
Instructions
- Mix flood consistency icing, a 10 to 12 second count, and tint it white.
- Outline and flood each tag shape, keeping the pre-cut hole clear of icing.
- Pop any air bubbles with a toothpick and let the icing settle flat.
- Let the tags dry completely and undisturbed for at least 6 hours.
- Keep a fine edible marker on hand for guests to write names or messages.
- Thread red string or ribbon through the hole once the tag is written on and set.
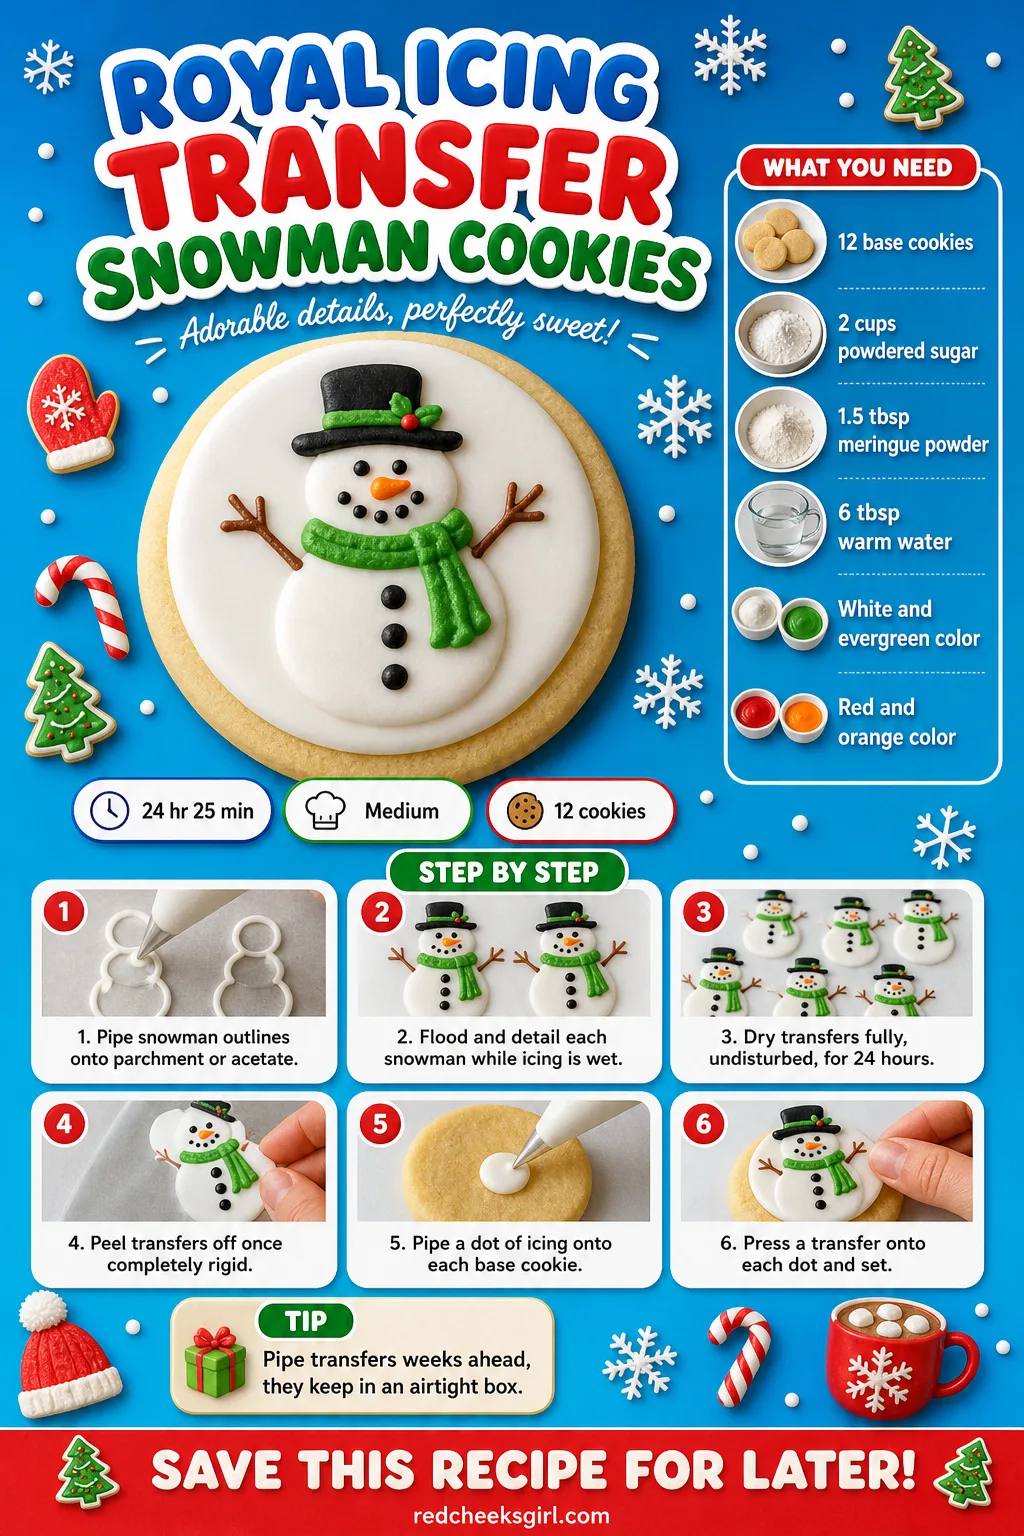
Royal Icing Transfer Snowman Cookies
A royal icing transfer is really a cookie decoration made without a cookie: pipe the whole snowman on parchment or acetate, let it dry rock hard, then glue it onto a plain iced base whenever it is actually needed. Reach for this one if cookie fatigue sets in three weeks before the party, because transfers keep for a month in an airtight box, ready to attach in under a minute each. A finished tray fits right in next to gingerbread and candy land display trees if the table is going big.
Ingredients
- 12 round sugar cookies, flooded white and fully dried
- 2 cups powdered sugar, sifted
- 1 1/2 tablespoons meringue powder
- 5 to 6 tablespoons warm water
- White, evergreen and red gel food color
- Orange gel food color, for the carrot nose
Instructions
- Mix flood consistency icing in white and pipe a snowman outline onto parchment or acetate for each transfer.
- Fill the outline with flood icing and add a small evergreen scarf, red buttons and an orange carrot nose while wet.
- Let the transfers dry completely and undisturbed for at least 24 hours before lifting them.
- Peel each dried transfer carefully off the parchment once it no longer flexes at all.
- Pipe a small dot of fresh icing onto the centre of each flooded base cookie as glue.
- Press one snowman transfer onto each cookie and let the glue dot set for 15 minutes.
🛍 Shopping guide
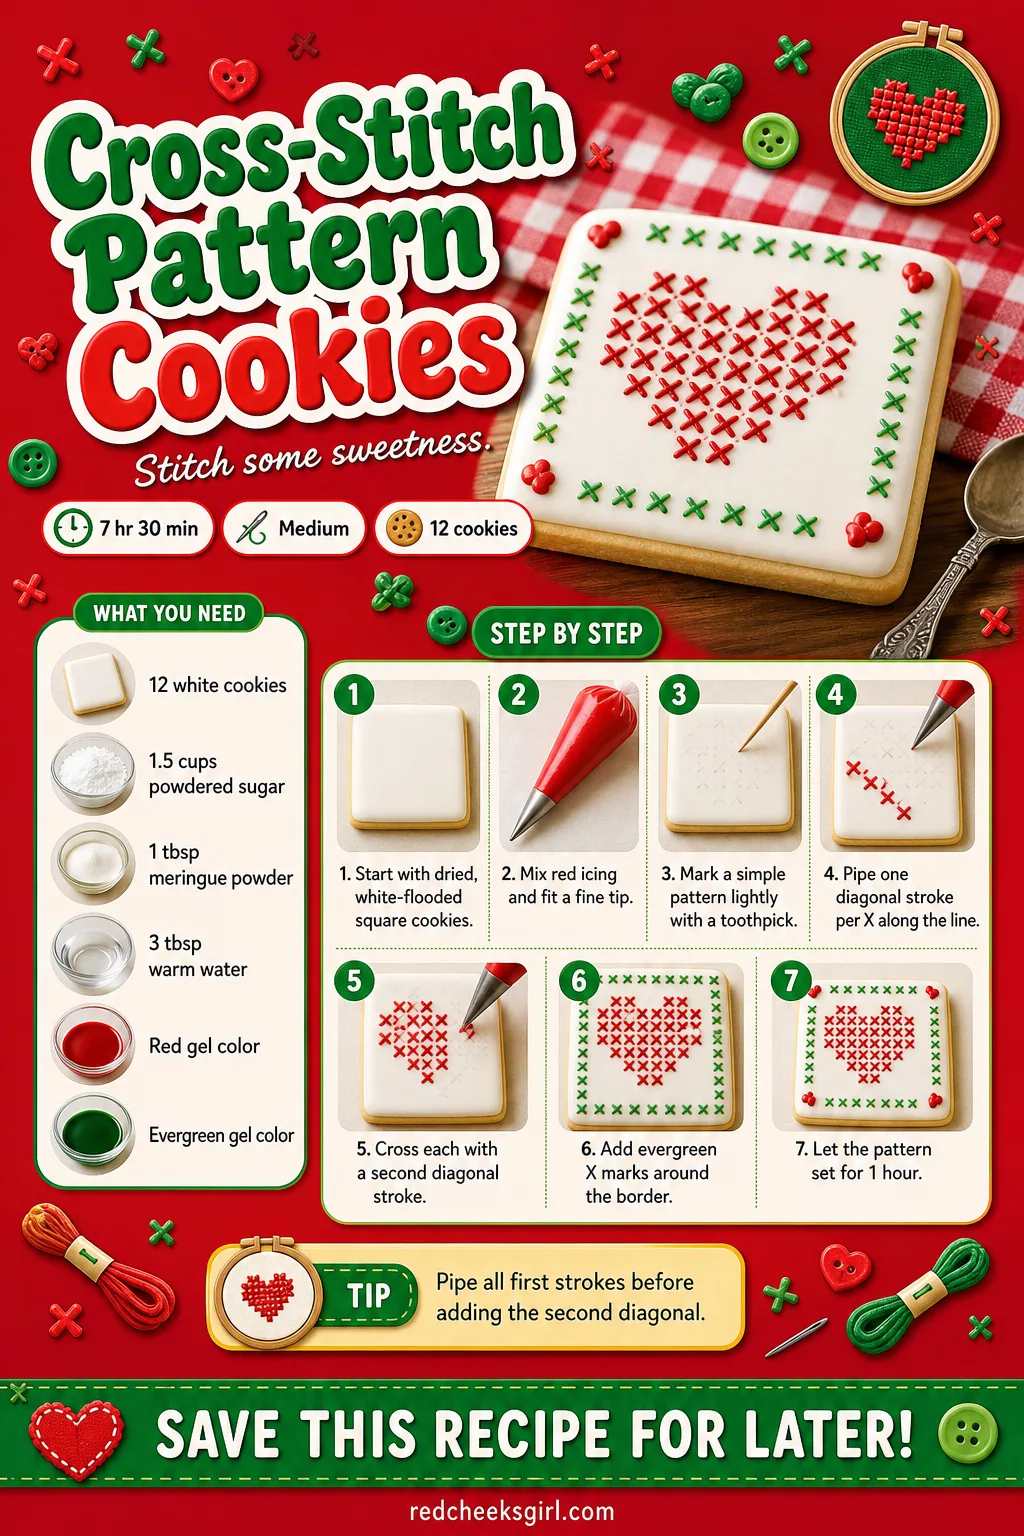
Cross-Stitch Pattern Cookies
Cross-stitch patterns look like they demand graph-paper patience, but a cookie only needs a handful of little X shapes to read as embroidery rather than icing. Flood a square in white, let it dry hard, then pipe a loose grid of small red X marks in a simple line or heart across the centre. Keep every X the same size by piping all the first strokes before going back for the second diagonal.
Ingredients
- 12 square sugar cookies, flooded white and fully dried
- 1 1/2 cups powdered sugar, sifted
- 1 tablespoon meringue powder
- 2 to 3 tablespoons warm water
- Red gel food color
- Evergreen gel food color
Instructions
- Start with fully dried, white-flooded square cookies as the fabric-like base.
- Mix a medium, 15-second count red icing and fit a very fine round tip.
- Lightly mark a simple pattern, like a heart or a star, with a toothpick as a guide.
- Pipe one diagonal stroke for every X along the guide line, keeping the spacing even.
- Go back over each mark with the second diagonal stroke to complete the X shapes.
- Add a few evergreen X marks around the border for contrast, then let everything set for 1 hour.
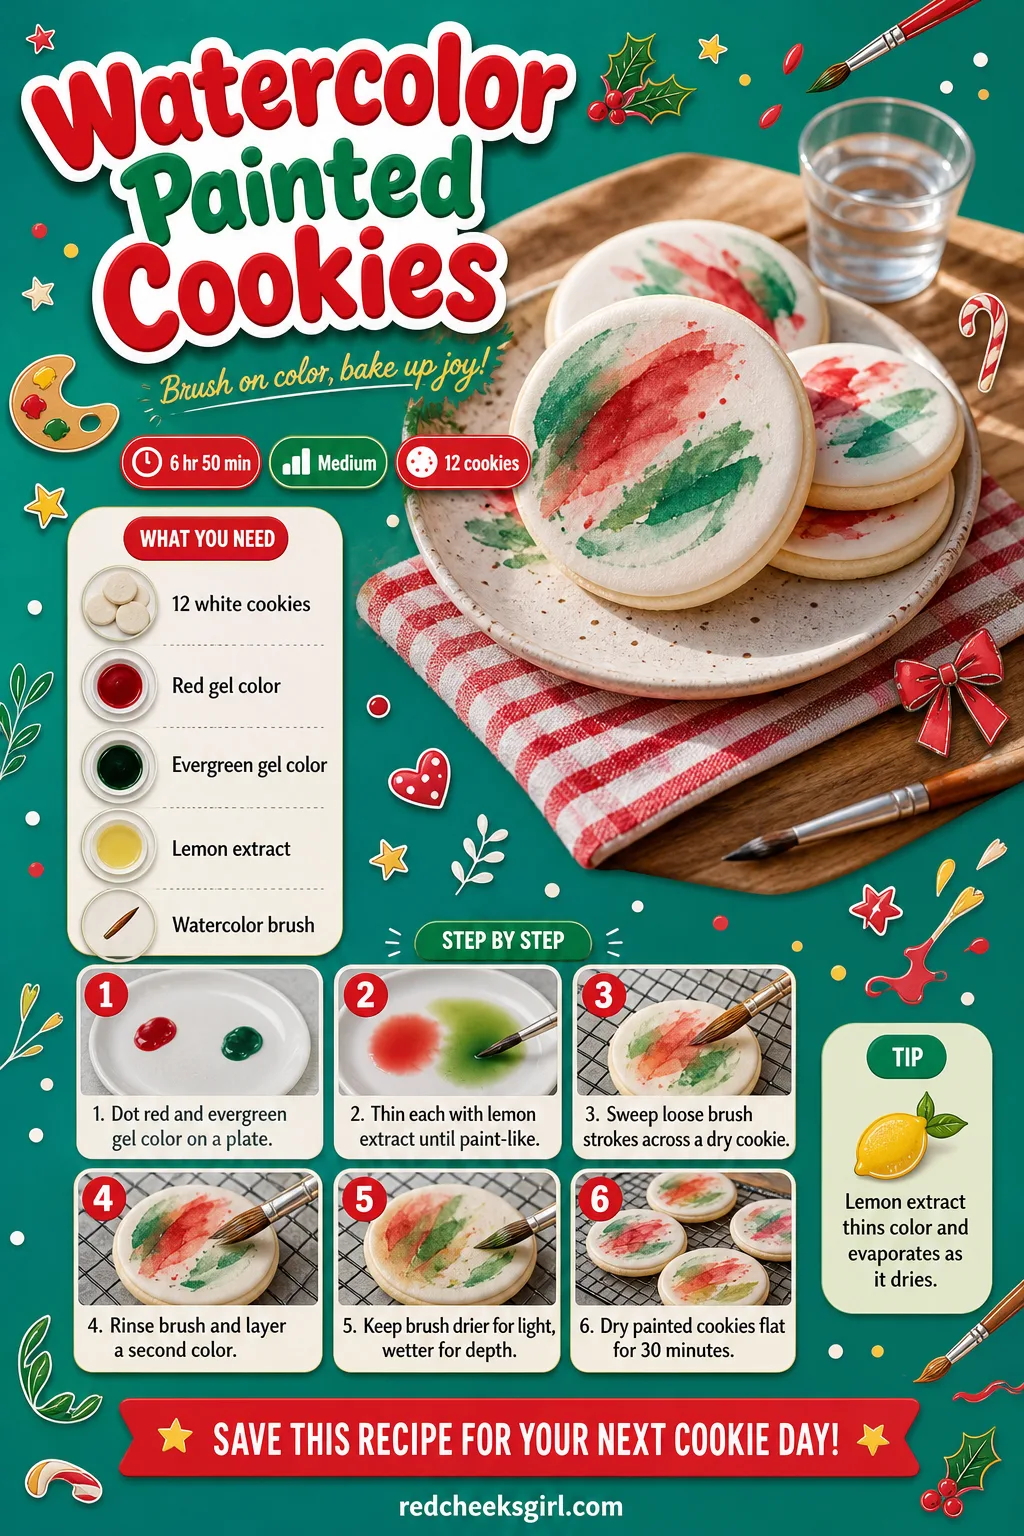
Watercolor Painted Cookies
Painting on royal icing feels like it should smear the second a brush touches it, but a fully dried base is sturdier than wet watercolour paper. Thin red and evergreen gel colours with a little lemon extract so they stay fluid, then brush loose washes across a dry white cookie the way a quick watercolour sketch gets built. The extract evaporates as it dries, so the finish stays matte and overlapping colours blend softly instead of turning to mud.
Ingredients
- 12 round sugar cookies, flooded white and fully dried
- Red gel food color
- Evergreen gel food color
- 2 teaspoons lemon extract, for thinning
- A small, soft watercolor brush
Instructions
- Place a small dot of red and a small dot of evergreen gel color onto a palette or plate.
- Thin each colour with a few drops of lemon extract until it moves like watery paint.
- Dip a clean, soft brush into one colour and sweep loose strokes across the dry white cookie.
- Rinse the brush and switch colours to layer washes, letting some edges overlap softly.
- Keep the brush nearly dry for the lightest areas and more loaded for depth.
- Let the painted cookies dry flat for about 30 minutes before stacking.
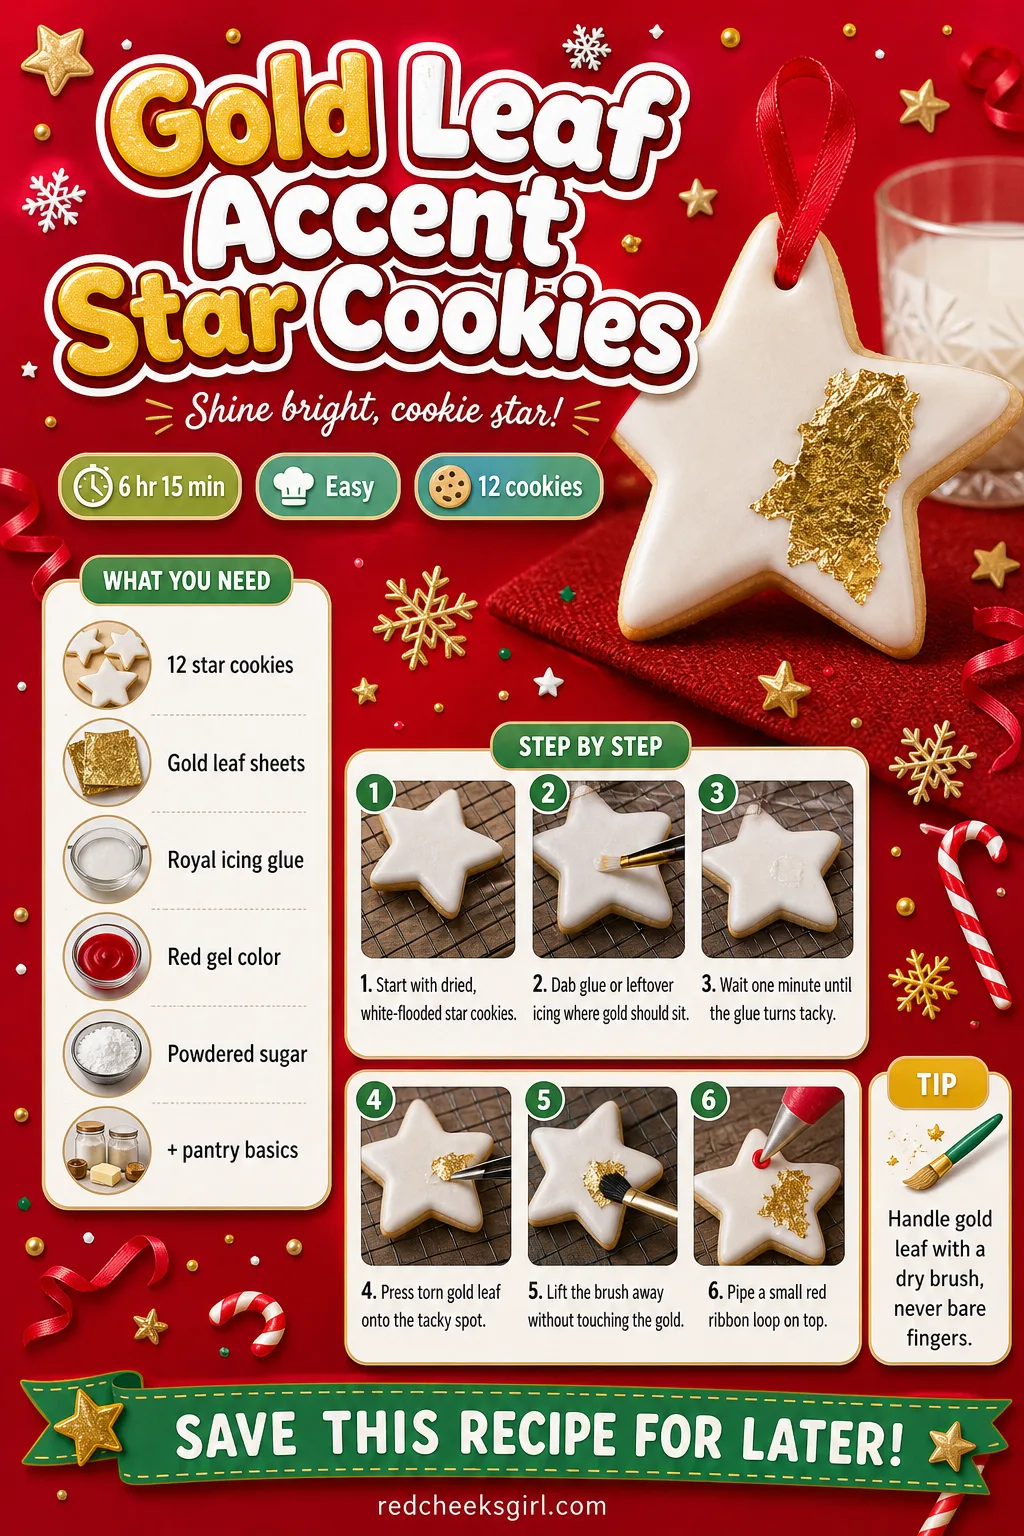
Gold Leaf Accent Star Cookies
Edible gold leaf looks like a professional patisserie flourish, and it is genuinely one of the cheapest ways to make a plain cookie look expensive, a single booklet covers dozens of cookies. Flood a star in white, let it dry completely, then paint a thin line of edible glue or leftover royal icing wherever shine is wanted and press a torn piece of gold on with a dry brush. One red ribbon loop at the top keeps it from feeling cold!
Ingredients
- 12 star-shaped sugar cookies, flooded white and fully dried
- Edible gold leaf sheets
- 1 tablespoon leftover royal icing or edible glue, for adhesive
- Red gel food color
- 1/2 cup powdered sugar, sifted, for the ribbon icing
- 1 to 2 teaspoons water, for the ribbon icing
Instructions
- Start with fully dried, white-flooded star cookies as the base.
- Dab a thin line or small shape of leftover royal icing or edible glue where gold should sit.
- Let the adhesive sit for about 1 minute until it turns slightly tacky, not wet.
- Tear a small piece of gold leaf with a dry brush and press it gently onto the tacky spot.
- Lift the brush away cleanly and discard the backing sheet, do not touch the gold with bare fingers.
- Mix the extra powdered sugar with red color and a little water, then pipe a small ribbon loop at the top point.
🛍 Shopping guide
Frequently Asked Questions
How long does royal icing take to dry on cookies?
Plan on several hours, not minutes. Flood work typically needs royal icing needs to be completely exposed to air for 6-8 hours to completely dry, and most decorators let decorated cookies dry at room temperature for at least 12 hours before storing to be safe. Humid kitchens slow this down, so give the tray extra time rather than rushing it into a tin.
What is the difference between piping consistency and flood consistency?
Piping or stiff icing has a thick texture, similar to toothpaste, and is ideal for detailed work like letters, borders and raised decorations, while flood consistency is much thinner and flows smoothly and levels out within about 15 seconds, making it perfect for filling in large areas. Most of the designs here start with a stiffer outline, then switch to a thinned version of the same icing to fill the centre.
Can I use egg whites instead of meringue powder for royal icing?
Yes, egg whites work as the traditional base, though the reverse swap is trickier: cream of tartar won’t work as a substitute for meringue powder, and the only approach that works is to use actual egg whites instead. Meringue powder is the easier, shelf-stable choice for a first attempt since it skips any raw egg handling.
Why is my royal icing not drying or staying sticky?
The most common culprit is oil: if your icing isn’t drying, you might have gotten oil into your icing, which will prevent it from setting, so keep bowls, beaters and flavorings completely oil-free. Humidity is the other big factor, and sometimes humidity will also affect your icing and it’ll take longer to dry, so a rainy day just means a longer wait, not a failed batch.
Can you freeze cookies decorated with royal icing?
Yes, with one rule: only freeze the cookies once the icing is completely dry, since dried royal can never touch water or else it will get ruined. When they come out of the freezer, let them thaw uncovered so condensation does not form directly on the icing and dull the finish.
How do you stop bubbles and craters in flooded royal icing?
Thicker icing is the main fix: use the thickest icing possible for your application, since the thicker the icing, the less likely it is naturally to crater. Popping visible bubbles with a toothpick right after flooding, and letting colored icing rest before piping, also helps keep the surface smooth as it sets.
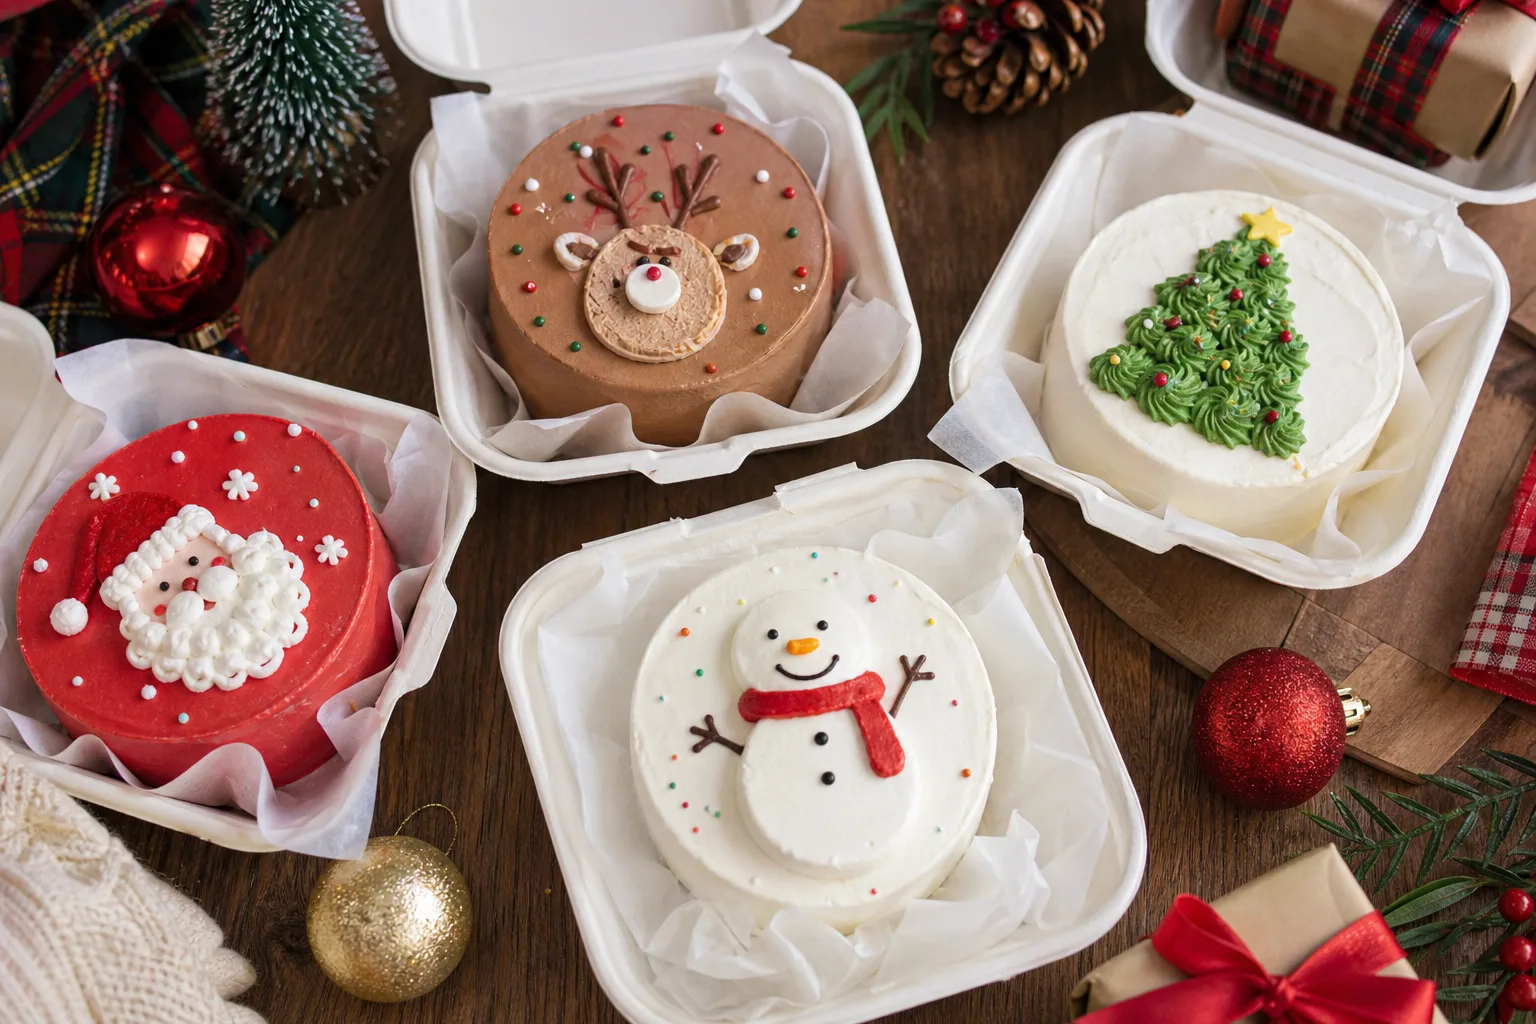
15 named christmas bento cake designs in red, white and pink, each one a tiny lunchbox cake small en

19 country Christmas decorations, room by room, built on barn red, cream and bronze with wooden sled

18 low-mess elementary Christmas party games for grades 1-5. Quick rules, easy cleanup, whole-class
Leave a Reply