

24 Decorated Christmas Cookies So Pretty Your Guests Will Photograph Them Before Eating
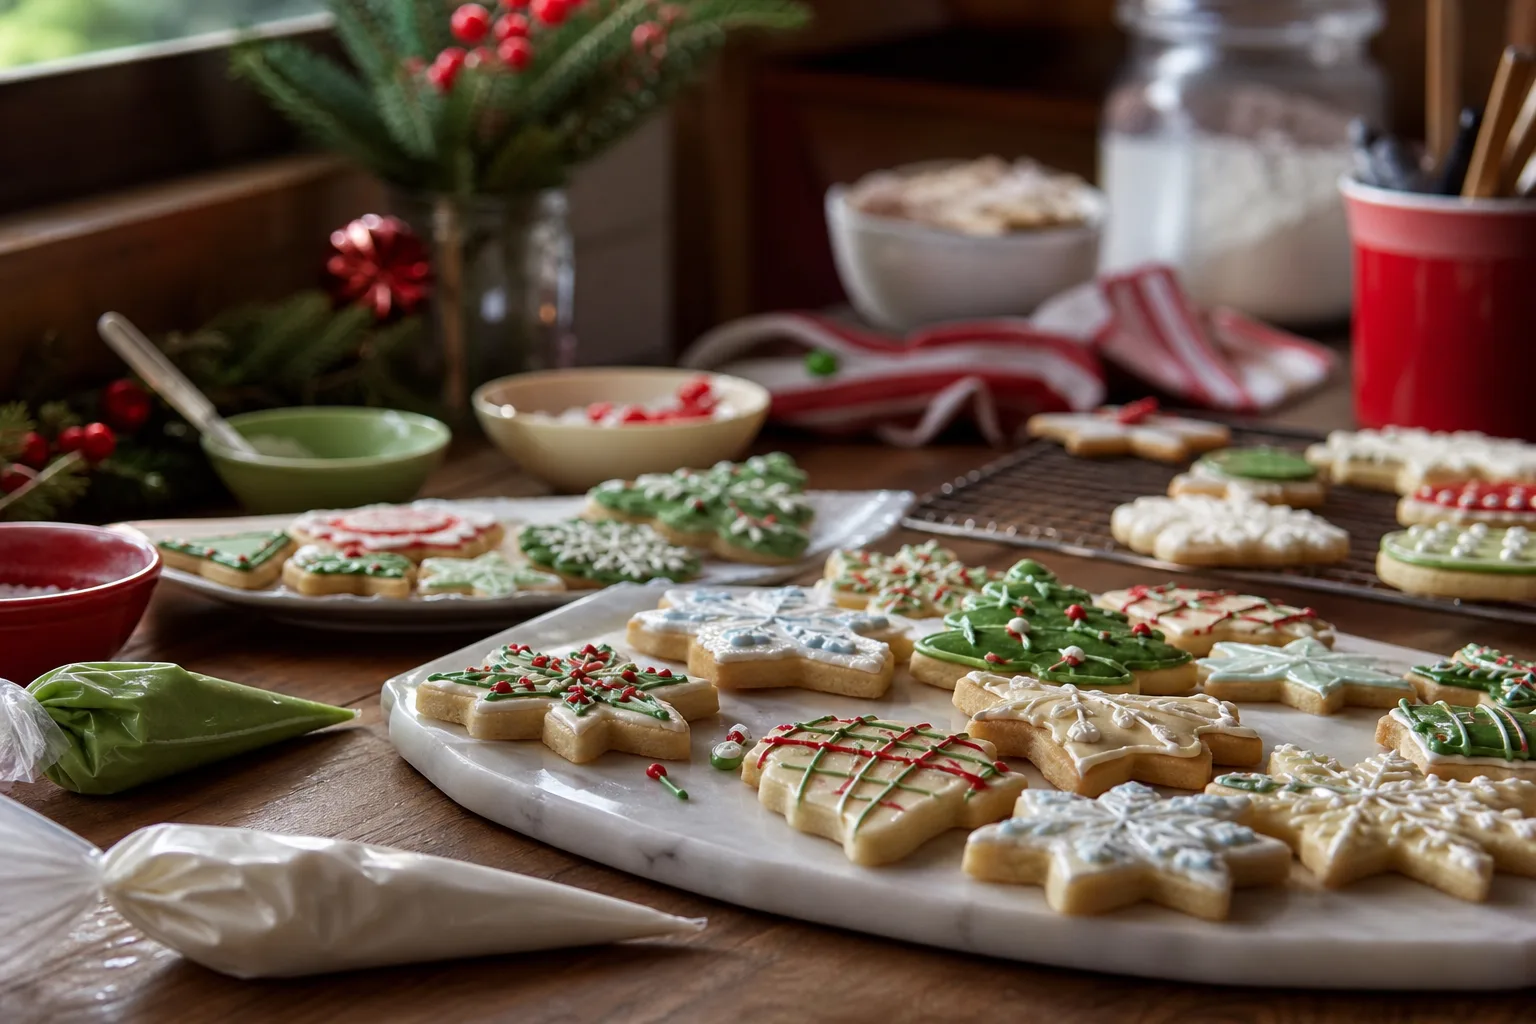
A cookie swap table forgives almost nothing. Everyone brings the same three shapes in the same red and green, and the plate that gets emptied first is never the one that tried hardest, it is the one that looks like it came from a bakery window. These twenty four designs all build from the same handful of bases, sugar cookie, gingerbread and shortbread, so the only thing that changes between them is the icing technique: royal icing lines, buttercream petals, marbled glaze, a painted plaid. Pick four or five rather than all of them and you will still walk in with the fullest plate in the room. If you are hosting the swap yourself rather than just bringing a plate, 31 Christmas Party Theme Ideas for Adults is worth a look before you send the invite.
Most of these use egg whites in the royal icing (meringue powder, so no raw egg) and all of them are wheat based, several add coconut or crushed pretzel, so flag that on the swap table card. Royal icing hardens as it sits, which is exactly why it travels so well in a shared tin: once it has crusted, nothing smudges against its neighbour.
This post contains affiliate links. If you buy through them, I may earn a small commission at no extra cost to you.
- Sweater Cookies With Royal Icing Knit Lines
- Wreath Cookies Piped With Buttercream Leaves
- Ornament Cookies With Marbled Glaze
- Gingerbread Men With White Piping
- Snowflake Cookies With Sanding Sugar
- Candy Cane Cookies With Striped Icing
- Mitten Cookies With Sprinkle Cuffs
- Christmas Tree Cookies With Star Sprinkles
- Plaid Cookies Painted With Food Color
- Mug Of Cocoa Cookies With Mini Marshmallows
- Reindeer Face Cookies With Pretzel Antlers
- Stamped Shortbread With Gold Dust
- Poinsettia Cookies With Petal Piping
- Snow Globe Cookies With Isomalt Window
- Gift Box Cookies With Ribbon Icing
- Polar Bear Cookies With Coconut
- Nutcracker Cookies With Gold Icing
- Cardinal Cookies On A Snowy Branch
- Hot Air Balloon Ornament Cookies
- Stocking Cookies With Fur-Texture Icing
- Pine Cone Cookies With Chocolate Scales
- Noel Letter Cookies
- Plaid Mitten Cookies With Fondant Cuffs
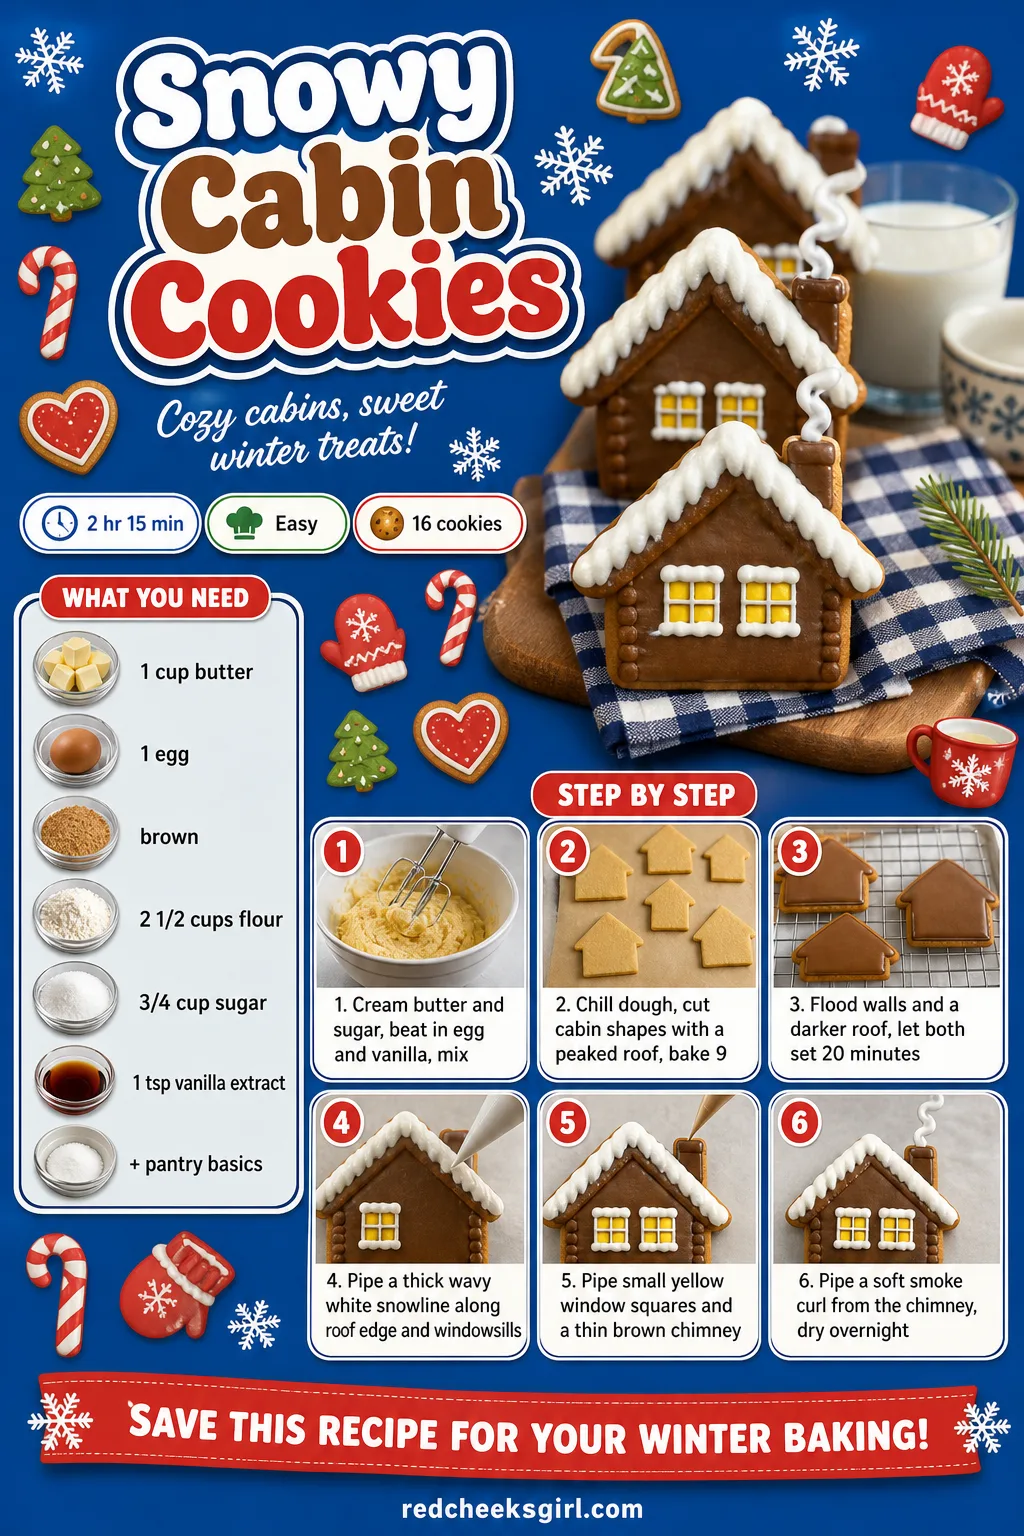
- Snowy Cabin Cookies
- Frequently Asked Questions
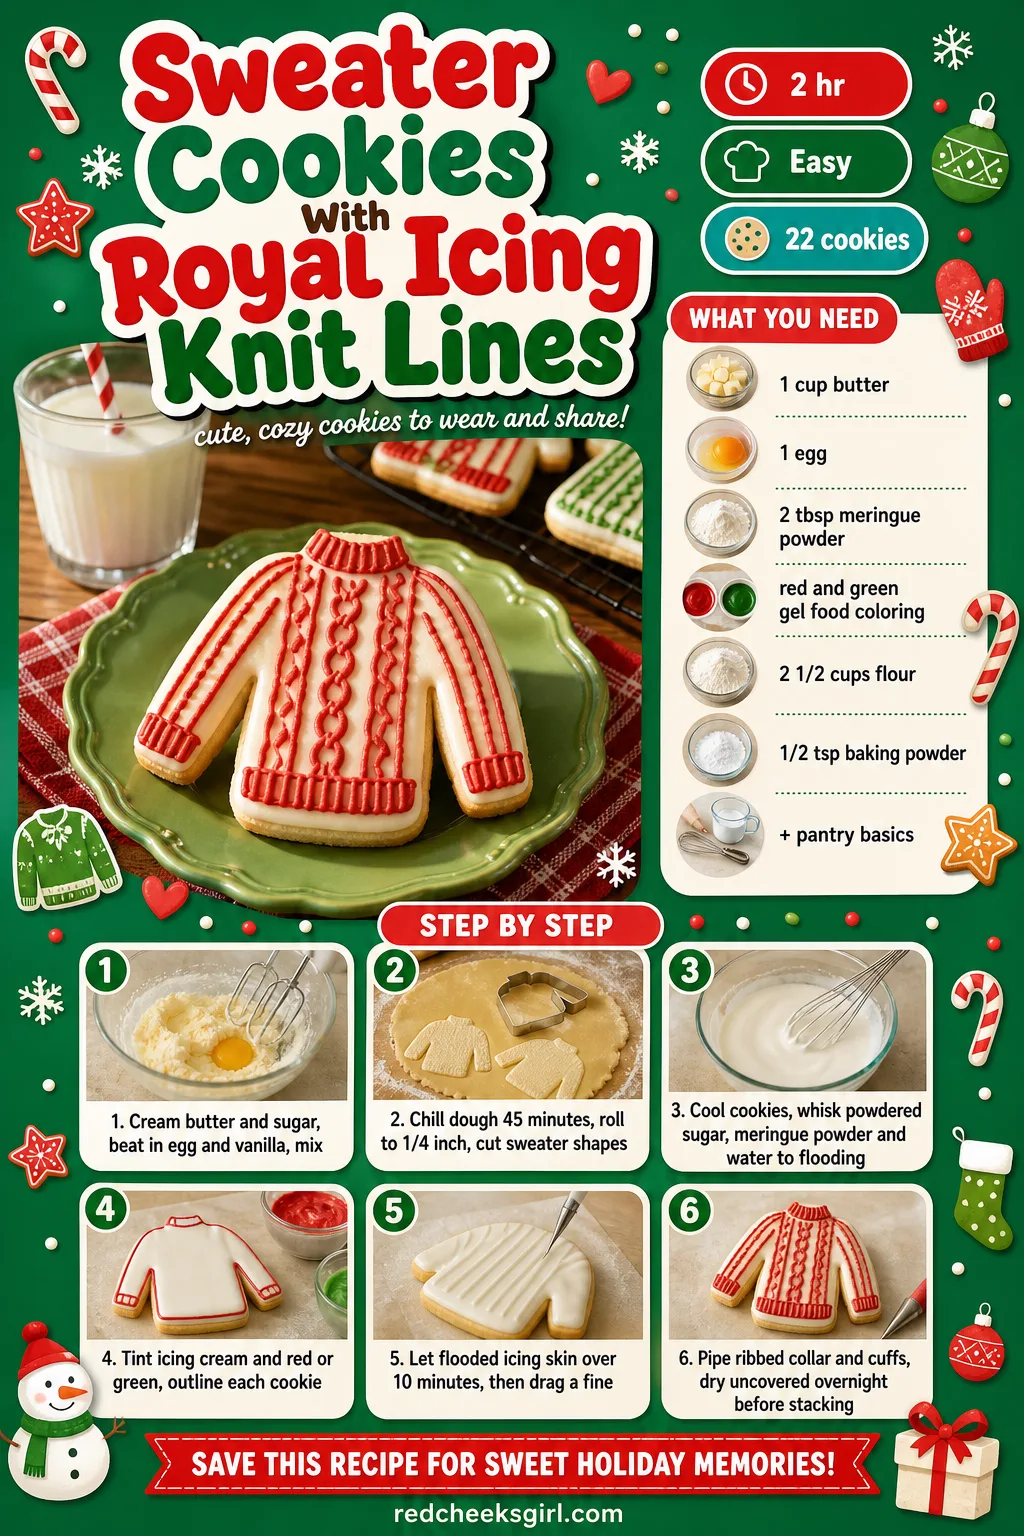
Sweater Cookies With Royal Icing Knit Lines
She will tell you piped cable knit is for people with steadier hands than hers. It is not, it is a wet-on-wet trick: flood the sweater, let it skin over for ten minutes, then drag a fine tip through in a zigzag before it sets fully and the lines read as ribbing on their own.
Cream base with a red or green zigzag feels like the actual sweater under the tree lights, not a cartoon of one. Pipe the whole batch’s outlines first, then flood in one pass: the icing stays workable longer that way.
Ingredients
- 2 1/2 cups (315g) all-purpose flour
- 1/2 tsp baking powder
- 1 cup (225g) unsalted butter, softened
- 3/4 cup (150g) granulated sugar
- 1 large egg, 1 1/2 tsp vanilla extract
- 3 cups (360g) powdered sugar
- 2 tbsp meringue powder, 5 tbsp warm water
- red and green gel food coloring
Instructions
- Cream butter and sugar, beat in egg and vanilla, then mix in flour and baking powder until a smooth dough forms.
- Chill the dough 45 minutes, roll to 1/4 inch, cut sweater shapes and bake at 350°F (175°C) for 9 minutes.
- Cool completely, then whisk meringue powder with water and powdered sugar to flooding consistency and tint half cream, half red or green.
- Outline each cookie with the thicker icing, then flood the centre and let it sit 10 minutes until a skin forms.
- Drag a fine piping tip through the wet icing in a zigzag to form knit ribbing lines across the body.
- Pipe a ribbed collar and cuffs in the contrast colour and let the cookies dry uncovered overnight before stacking.
🛍 Shopping guide
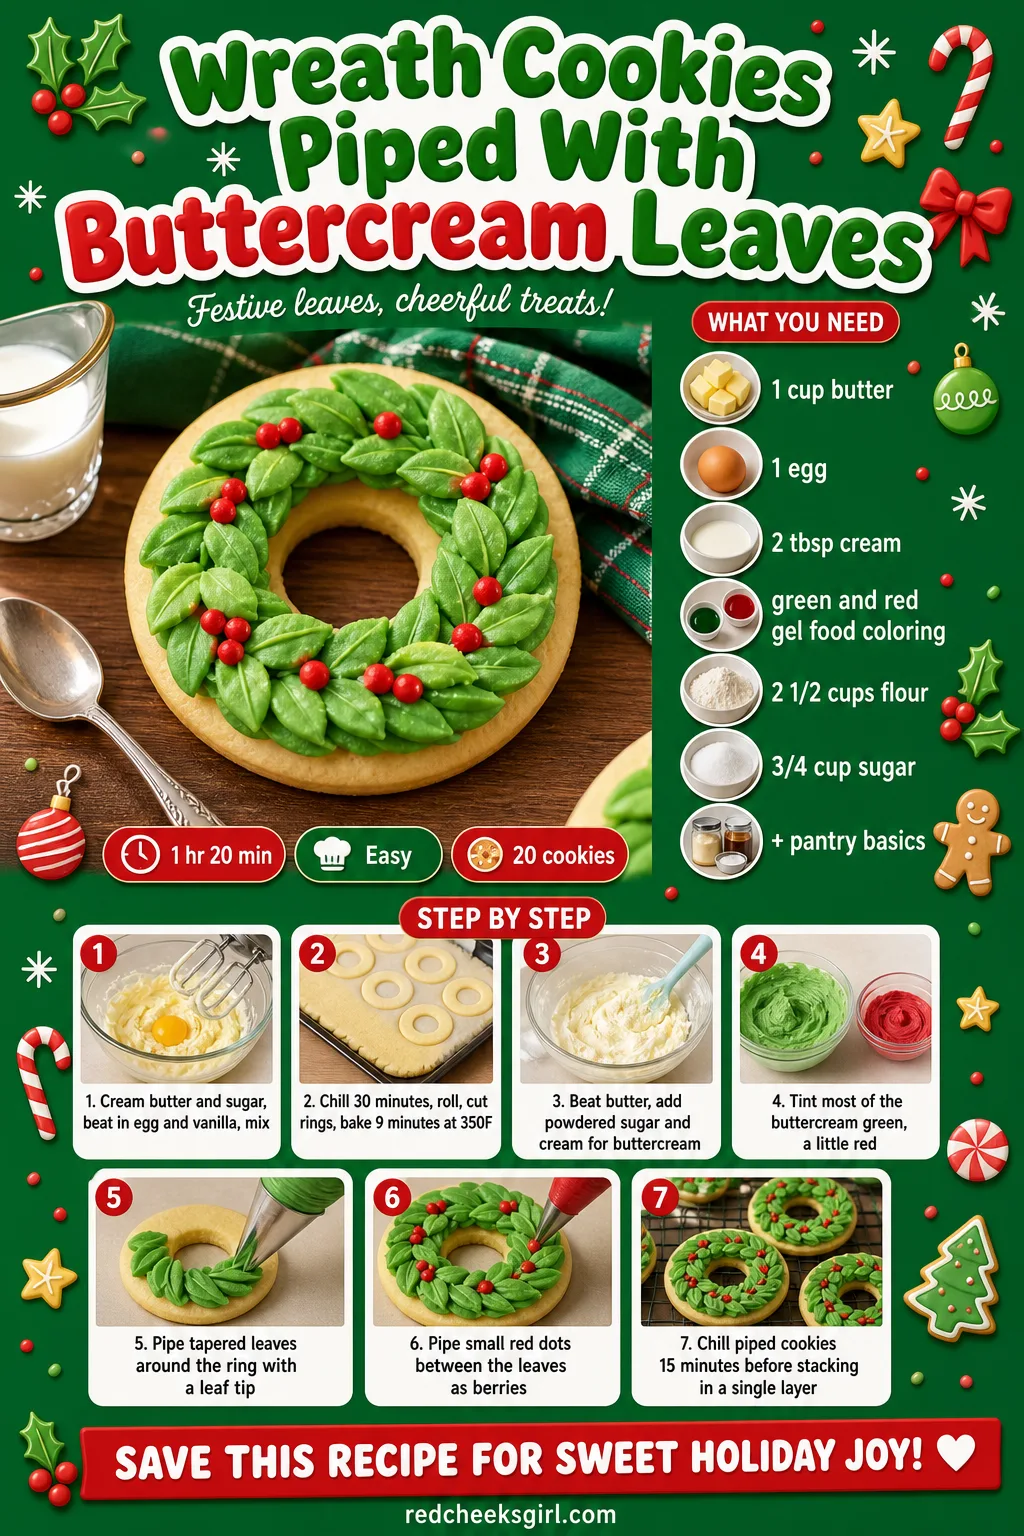
Wreath Cookies Piped With Buttercream Leaves
Of the whole table, this is the one people pick up and turn over before they bite, because the leaves look hand laid rather than piped. They are piped, just with a small leaf tip held at an angle so each one tapers on its own.
Buttercream never hardens the way royal icing does, so pack these in a single layer or freeze the undecorated rounds and pipe the morning of the swap. If you like the shape enough to want it on the door too, 22 Easy DIY Christmas Wreaths carries the same green and red elsewhere in the house.
Ingredients
- 2 1/2 cups (315g) all-purpose flour
- 1 cup (225g) unsalted butter, softened
- 3/4 cup (150g) granulated sugar
- 1 large egg, 1 tsp vanilla extract
- 1 cup (225g) unsalted butter, softened (icing)
- 3 cups (360g) powdered sugar, 2 tbsp cream
- green and red gel food coloring
Instructions
- Cream butter and sugar, beat in egg and vanilla, mix in flour to form the cookie dough.
- Chill 30 minutes, roll to 1/4 inch, cut rounds, stamp a smaller circle from the centre, bake 9 minutes at 350°F (175°C).
- Beat butter until pale, add powdered sugar and cream, then tint most of it green and a small amount red.
- Fit a leaf tip and pipe short tapered leaves around the ring, overlapping them to cover the dough.
- Pipe small red dots between the leaves to stand in as berries.
- Chill the piped cookies 15 minutes so the leaves hold their shape before stacking in a single layer.
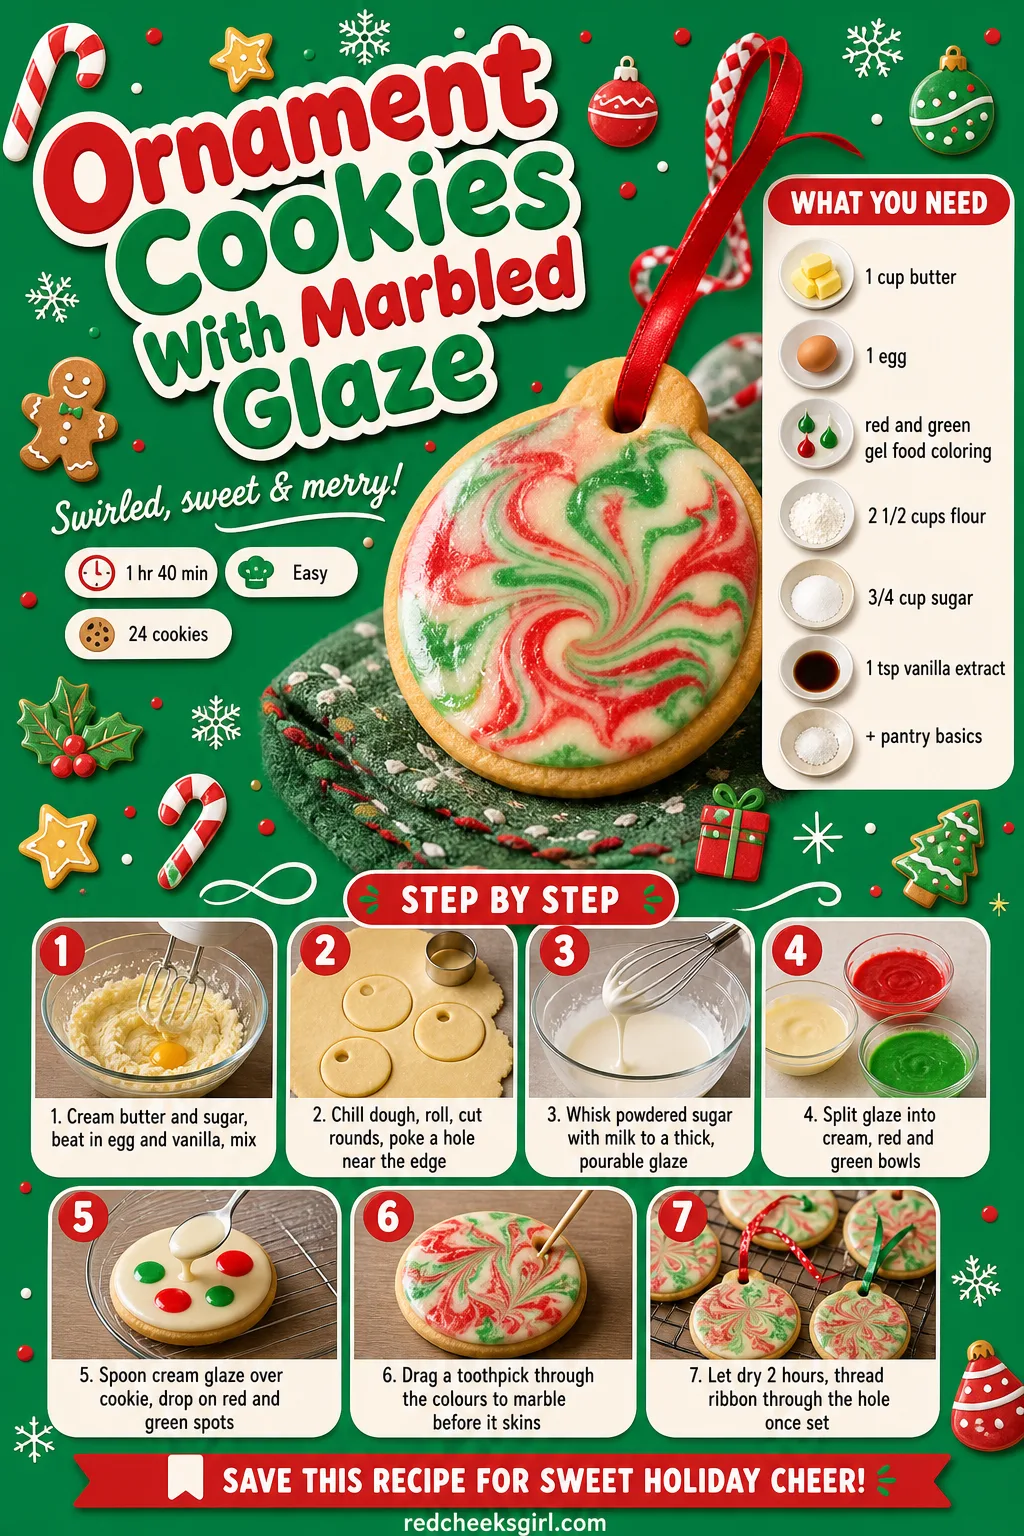
Ornament Cookies With Marbled Glaze
This is the shortcut cookie on the table and nobody needs to know it. No piping bag, no steady hand, just two colours of glaze dragged through each other with a toothpick before they set.
Work on four or five cookies at a time, glaze dries fast and a marble swirled too late just sits flat. A thin ribbon loop pressed into the top before baking turns these into actual tree ornaments if she wants to gift a box instead of a plate.
Ingredients
- 2 1/2 cups (315g) all-purpose flour
- 1 cup (225g) unsalted butter, softened
- 3/4 cup (150g) granulated sugar
- 1 large egg, 1 tsp vanilla extract
- 2 cups (240g) powdered sugar
- 3 tbsp milk or water
- red and green gel food coloring
Instructions
- Cream butter and sugar, beat in egg and vanilla, mix in flour, chill dough 30 minutes.
- Roll to 1/4 inch, cut round ornament shapes, poke a small hole near the top edge, bake 9 minutes at 350°F (175°C).
- Whisk powdered sugar with milk to a thick, pourable glaze and split into cream, red and green bowls.
- Spoon cream glaze over a cookie, then drop small spots of red and green glaze on top.
- Drag a toothpick through the colours in loose loops to marble them before the glaze skins over.
- Let the cookies sit uncovered at least 2 hours, then thread ribbon through the hole once fully set.
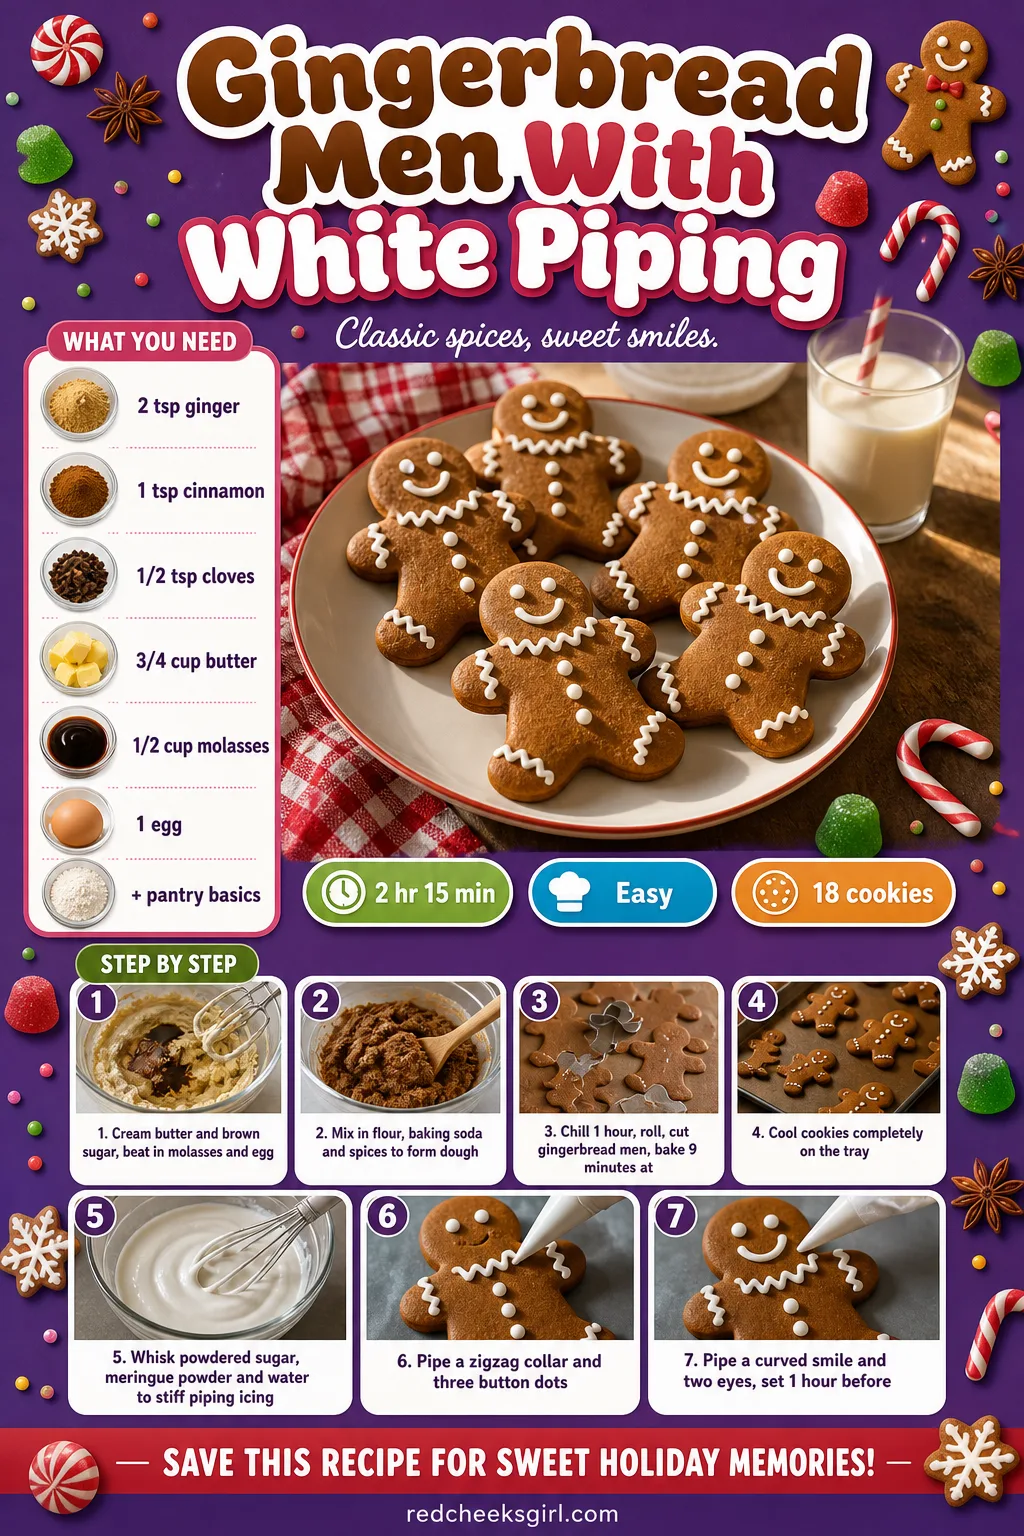
Gingerbread Men With White Piping
Plain gingerbread without the piping looks unfinished, like a sentence missing its last word. A white collar, three buttons and a smiling mouth is all it needs, and all of it is simple dot and line work with one tip.
The dough is forgiving of a day in the fridge, so cut and bake it ahead and only pipe the morning of the swap, the smell alone will do half the selling for you.
Ingredients
- 3 cups (375g) all-purpose flour
- 1 tsp baking soda, 2 tsp ground ginger
- 1 tsp cinnamon, 1/2 tsp cloves
- 3/4 cup (170g) unsalted butter, softened
- 3/4 cup (150g) brown sugar
- 1/2 cup (170g) molasses, 1 egg
- 2 cups (240g) powdered sugar
- 2 tbsp meringue powder, 4 tbsp water
Instructions
- Cream butter and brown sugar, beat in molasses and egg, mix in flour, baking soda and spices.
- Chill dough 1 hour, roll to 1/4 inch, cut gingerbread men, bake 9 minutes at 350°F (175°C).
- Cool cookies fully on the tray, gingerbread stays soft in the centre longer than sugar cookie dough.
- Whisk powdered sugar, meringue powder and water to a stiff piping consistency.
- Pipe a zigzag collar across the neck and three dots down the centre for buttons.
- Pipe a simple curved smile and two dot eyes, then let the icing set 1 hour before packing.
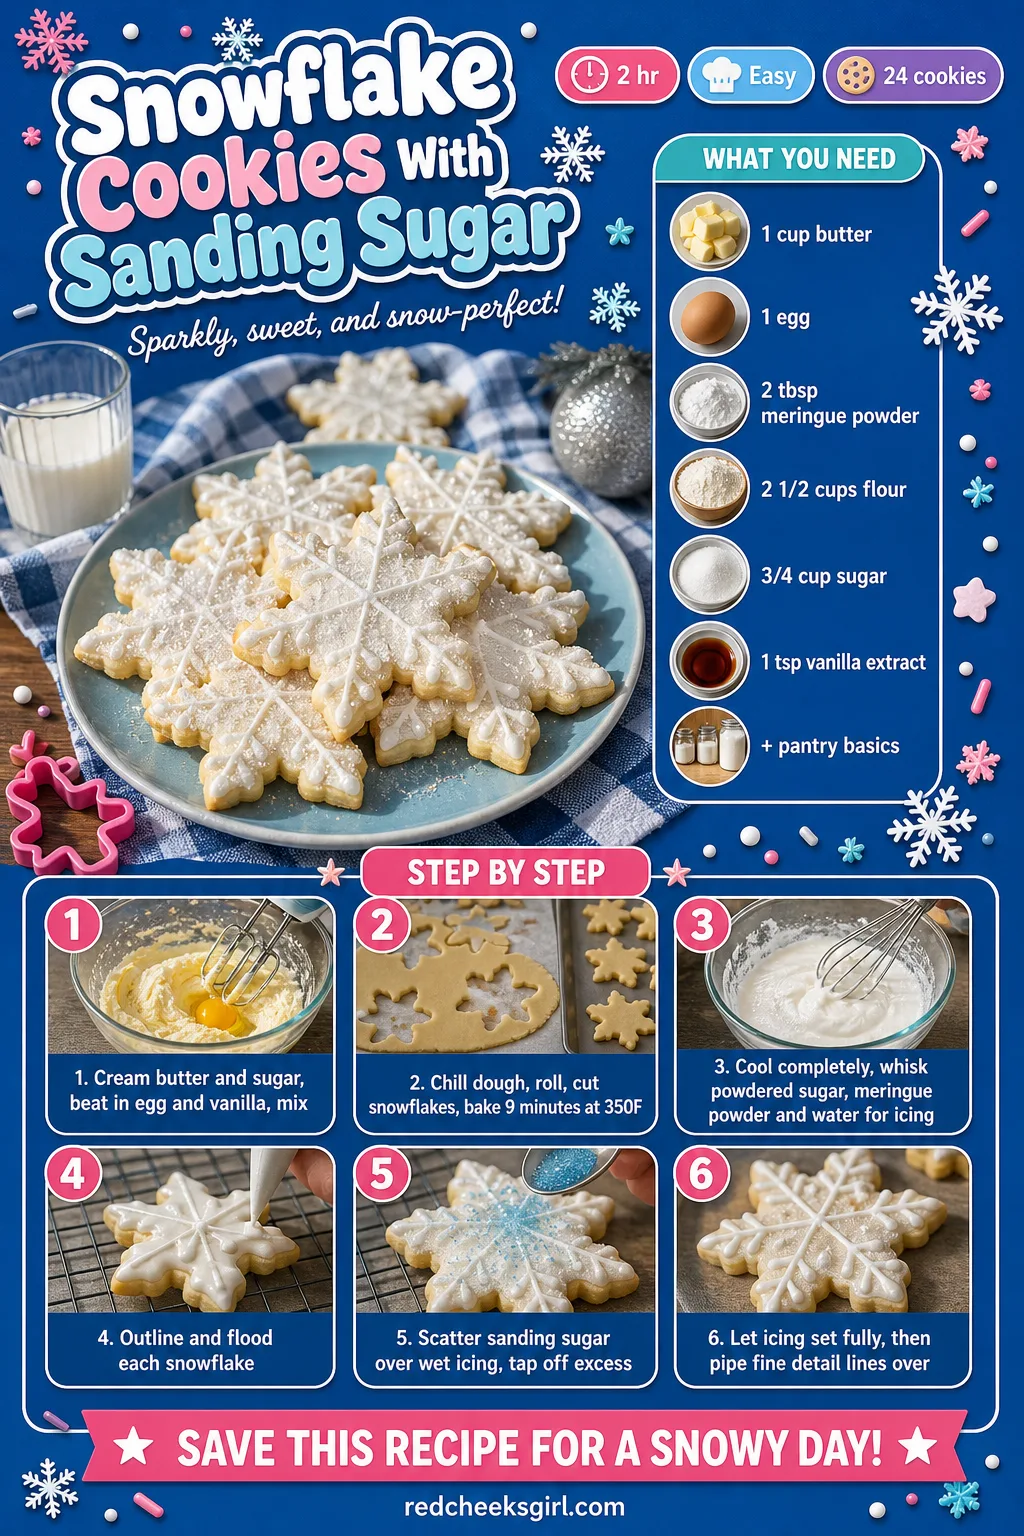
Snowflake Cookies With Sanding Sugar
A snowflake cutter does most of the visual work before any icing touches it, all those spiky points already read as winter. Sanding sugar pressed into wet icing is what makes it catch light across the table instead of sitting flat and matte.
Chunky sanding sugar reads better than fine sugar here, it holds its sparkle under indoor lighting where fine crystals tend to dissolve into the icing and disappear.
Ingredients
- 2 1/2 cups (315g) all-purpose flour
- 1 cup (225g) unsalted butter, softened
- 3/4 cup (150g) granulated sugar
- 1 large egg, 1 tsp vanilla extract
- 3 cups (360g) powdered sugar
- 2 tbsp meringue powder, 5 tbsp water
- white sanding sugar
Instructions
- Cream butter and sugar, beat in egg and vanilla, mix in flour, chill 30 minutes.
- Roll dough to 1/4 inch, cut snowflake shapes, bake 9 minutes at 350°F (175°C), cool completely.
- Whisk powdered sugar, meringue powder and water to flooding consistency.
- Outline each snowflake, flood the centre, and while still wet scatter sanding sugar generously over the whole surface.
- Tap off the excess sugar onto a tray and reuse it for the next cookie.
- Once the icing has fully set, pipe a few fine white lines across the points for extra detail.
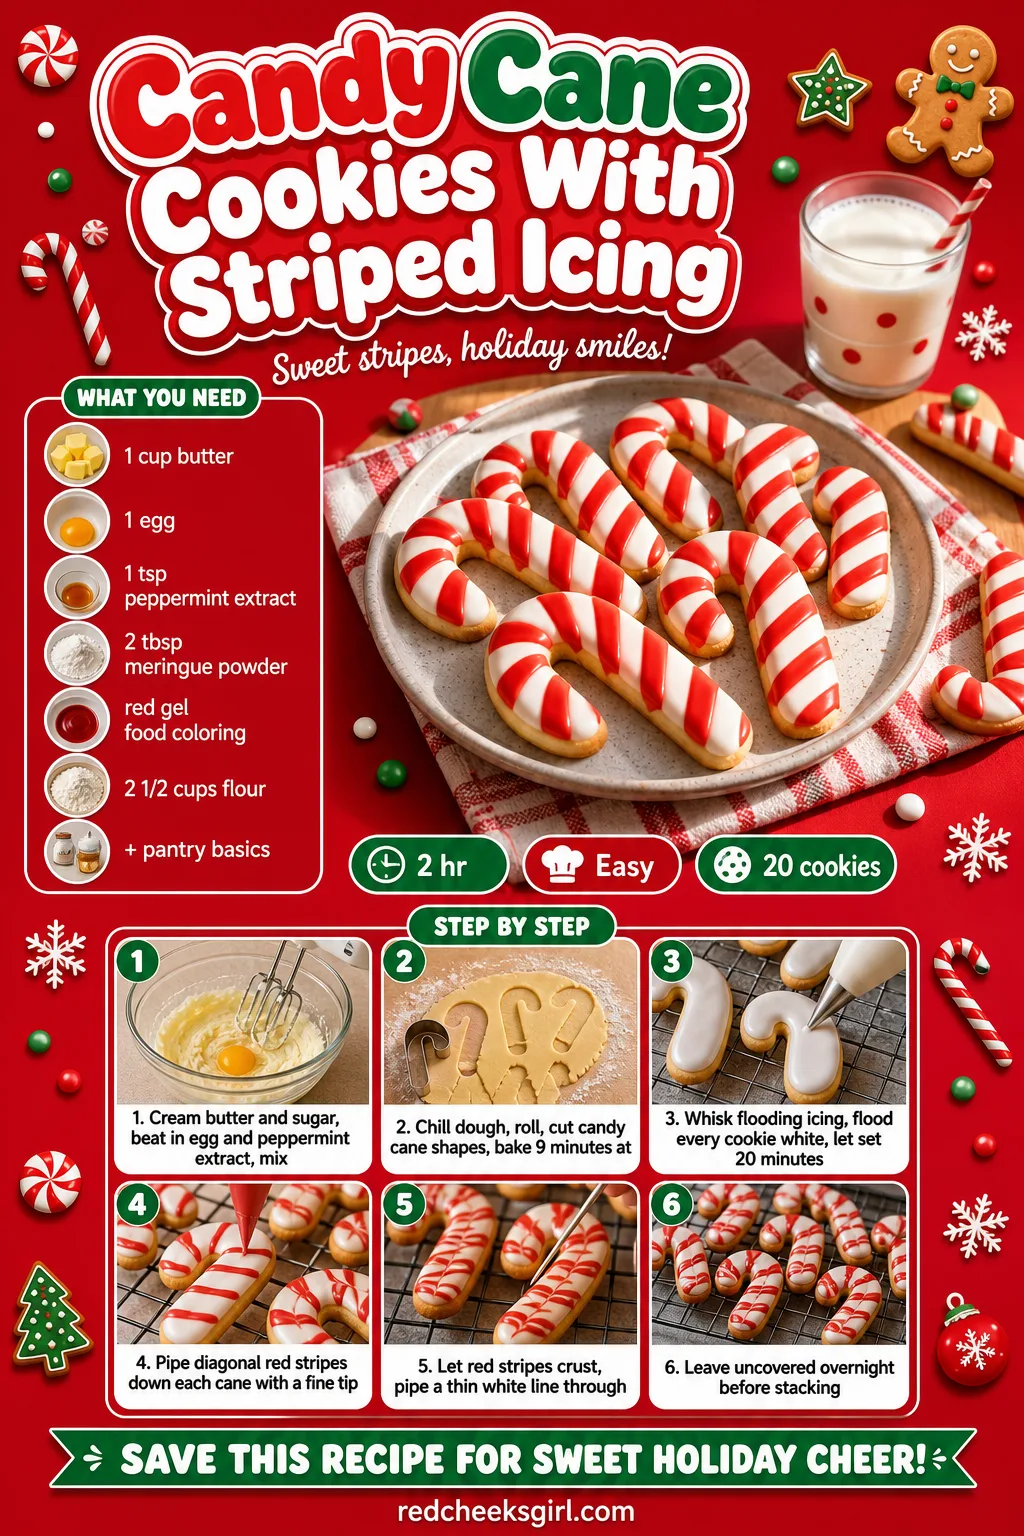
Candy Cane Cookies With Striped Icing
A curved cutter is doing the hard part here, the stripes just need a steady piping hand and patience to let each one set before the next. The payoff is a cookie that looks lifted straight off a candy cane, minus the sticky fingers.
Pipe the stripes thin rather than thick, thick red lines bleed pink into the white base before they crust and the clean candy stripe disappears.
Ingredients
- 2 1/2 cups (315g) all-purpose flour
- 1 cup (225g) unsalted butter, softened
- 3/4 cup (150g) granulated sugar
- 1 large egg, 1 tsp peppermint extract
- 3 cups (360g) powdered sugar
- 2 tbsp meringue powder, 5 tbsp water
- red gel food coloring
Instructions
- Cream butter and sugar, beat in egg and peppermint extract, mix in flour, chill 30 minutes.
- Roll dough, cut curved candy cane shapes, bake 9 minutes at 350°F (175°C), cool fully.
- Whisk powdered sugar, meringue powder and water, flood every cookie white and let it set 20 minutes.
- Fit a fine tip with red icing and pipe diagonal stripes evenly down each cane.
- Let the red stripes crust 10 minutes, then pipe a thin white line down the centre of each stripe.
- Leave uncovered overnight so both layers harden fully before stacking.
Mitten Cookies With Sprinkle Cuffs
One shape, two icing colours and a scattering of sprinkles while the cuff is still tacky, that is the entire technique. It reads as fussier than it is, which is exactly what a swap cookie should do.
Use jumbo nonpareils rather than tiny ones for the cuff, they catch more light and do not sink invisibly into the wet icing the way fine sprinkles do.
Ingredients
- 2 1/2 cups (315g) all-purpose flour
- 1 cup (225g) unsalted butter, softened
- 3/4 cup (150g) granulated sugar
- 1 large egg, 1 tsp vanilla extract
- 3 cups (360g) powdered sugar
- 2 tbsp meringue powder, 5 tbsp water
- red or green coloring, cream sprinkles
Instructions
- Cream butter and sugar, beat in egg and vanilla, mix in flour, chill 30 minutes.
- Roll dough, cut mitten shapes, bake 9 minutes at 350°F (175°C), cool fully.
- Whisk powdered sugar, meringue powder and water, flood the mitten body red or green, let set 15 minutes.
- Flood the cuff section in cream icing while the body stays untouched.
- While the cuff is still wet, scatter sprinkles across it and gently press a few in with a fingertip.
- Tap off loose sprinkles and let the whole cookie dry overnight before packing.

Christmas Tree Cookies With Star Sprinkles
Green flood icing with rows of little stars pressed in while it is wet looks suspiciously like someone strung real ornaments on, no piping skill required past a straight border. A single gold star at the top finishes the joke.
If a tree cutter is not in the drawer, a simple triangle cut from a round cookie does the same job, nobody at a swap table is measuring angles.
Ingredients
- 2 1/2 cups (315g) all-purpose flour
- 1 cup (225g) unsalted butter, softened
- 3/4 cup (150g) granulated sugar
- 1 large egg, 1 tsp vanilla extract
- 3 cups (360g) powdered sugar
- 2 tbsp meringue powder, 5 tbsp water
- green coloring, star sprinkles, gold sprinkle
Instructions
- Cream butter and sugar, beat in egg and vanilla, mix in flour, chill 30 minutes.
- Roll dough, cut tree shapes, bake 9 minutes at 350°F (175°C), cool fully.
- Whisk powdered sugar, meringue powder and water, tint green and flood each tree.
- While the icing is still wet, press small star sprinkles across the tree in loose rows.
- Press one gold star sprinkle at the very top point.
- Let the icing set overnight uncovered before stacking the cookies.

🛍 Shopping guide
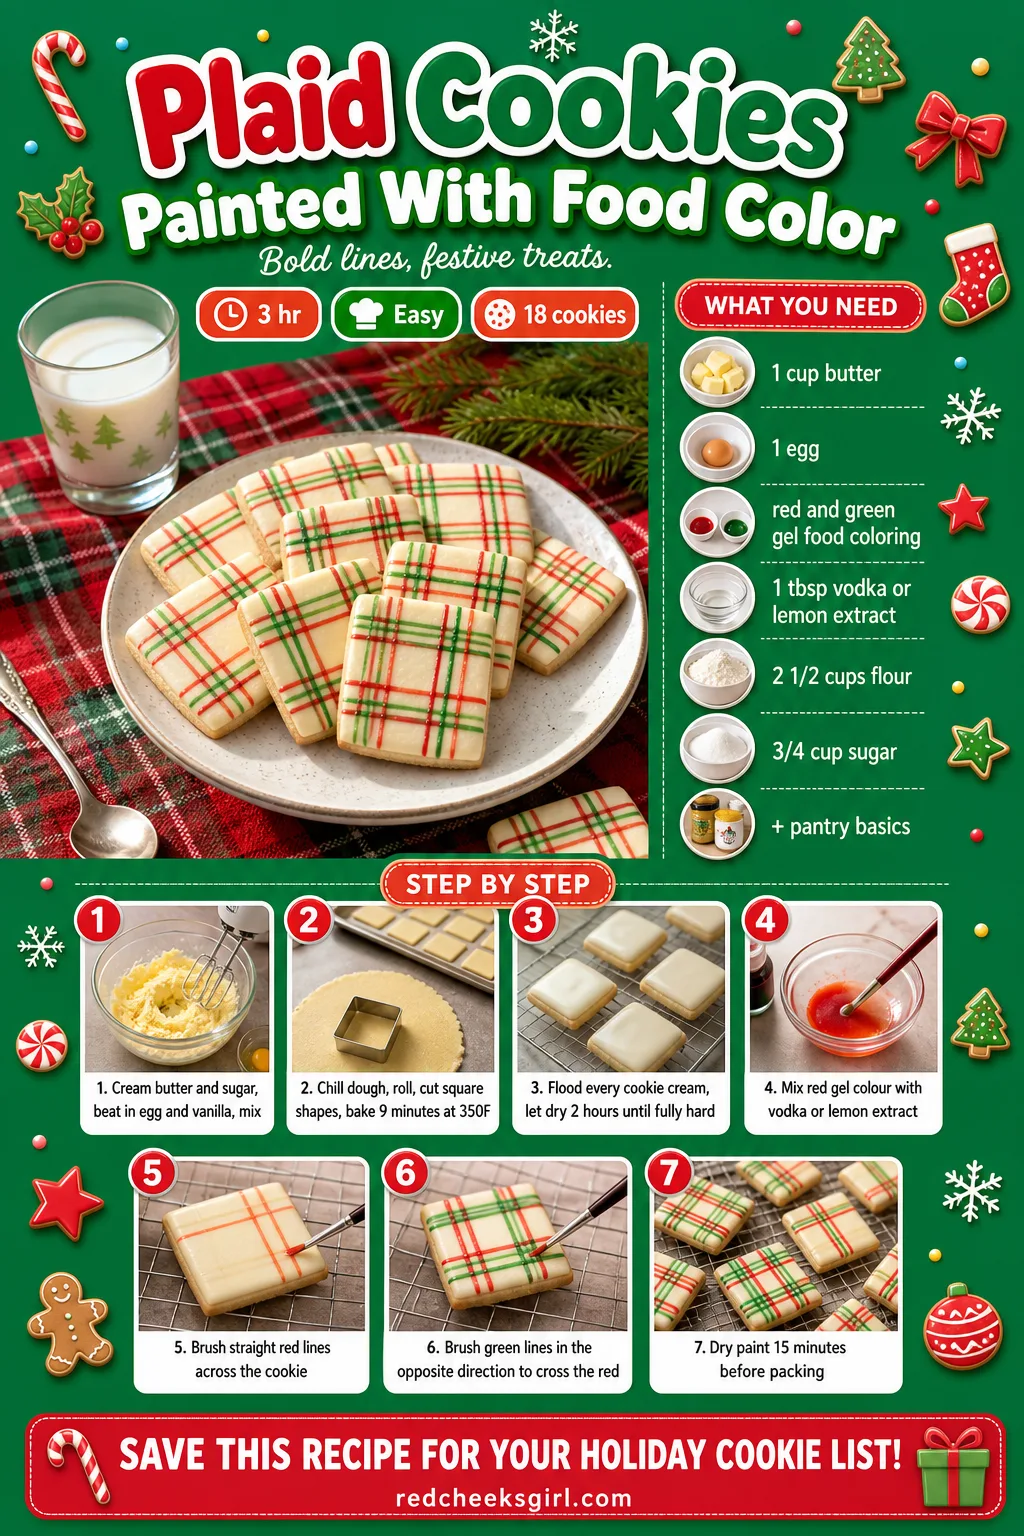
Plaid Cookies Painted With Food Color
Painting plaid onto a fully dried white cookie feels closer to watercolour than baking, and it is the one technique on this list where the base icing has to be bone dry first or the brush drags colour everywhere.
Gel colour thinned with a little clear alcohol evaporates clean and dries fast, swap in lemon extract instead if the vodka in the cupboard is better saved for something else.
Ingredients
- 2 1/2 cups (315g) all-purpose flour
- 1 cup (225g) unsalted butter, softened
- 3/4 cup (150g) granulated sugar
- 1 large egg, 1 tsp vanilla extract
- 3 cups (360g) powdered sugar, 5 tbsp water
- red and green gel food coloring
- 1 tbsp vodka or lemon extract
Instructions
- Cream butter and sugar, beat in egg and vanilla, mix in flour, chill 30 minutes.
- Roll dough, cut square or rectangle shapes, bake 9 minutes at 350°F (175°C), cool fully.
- Whisk powdered sugar and water to flooding icing, flood every cookie cream and let dry 2 hours until hard.
- Mix red gel colour with vodka or lemon extract to a thin paint and brush straight lines across the cookie.
- Repeat with green paint in the opposite direction, letting lines cross to form a plaid grid.
- Let the paint dry 15 minutes before packing, it sets much faster than wet icing.
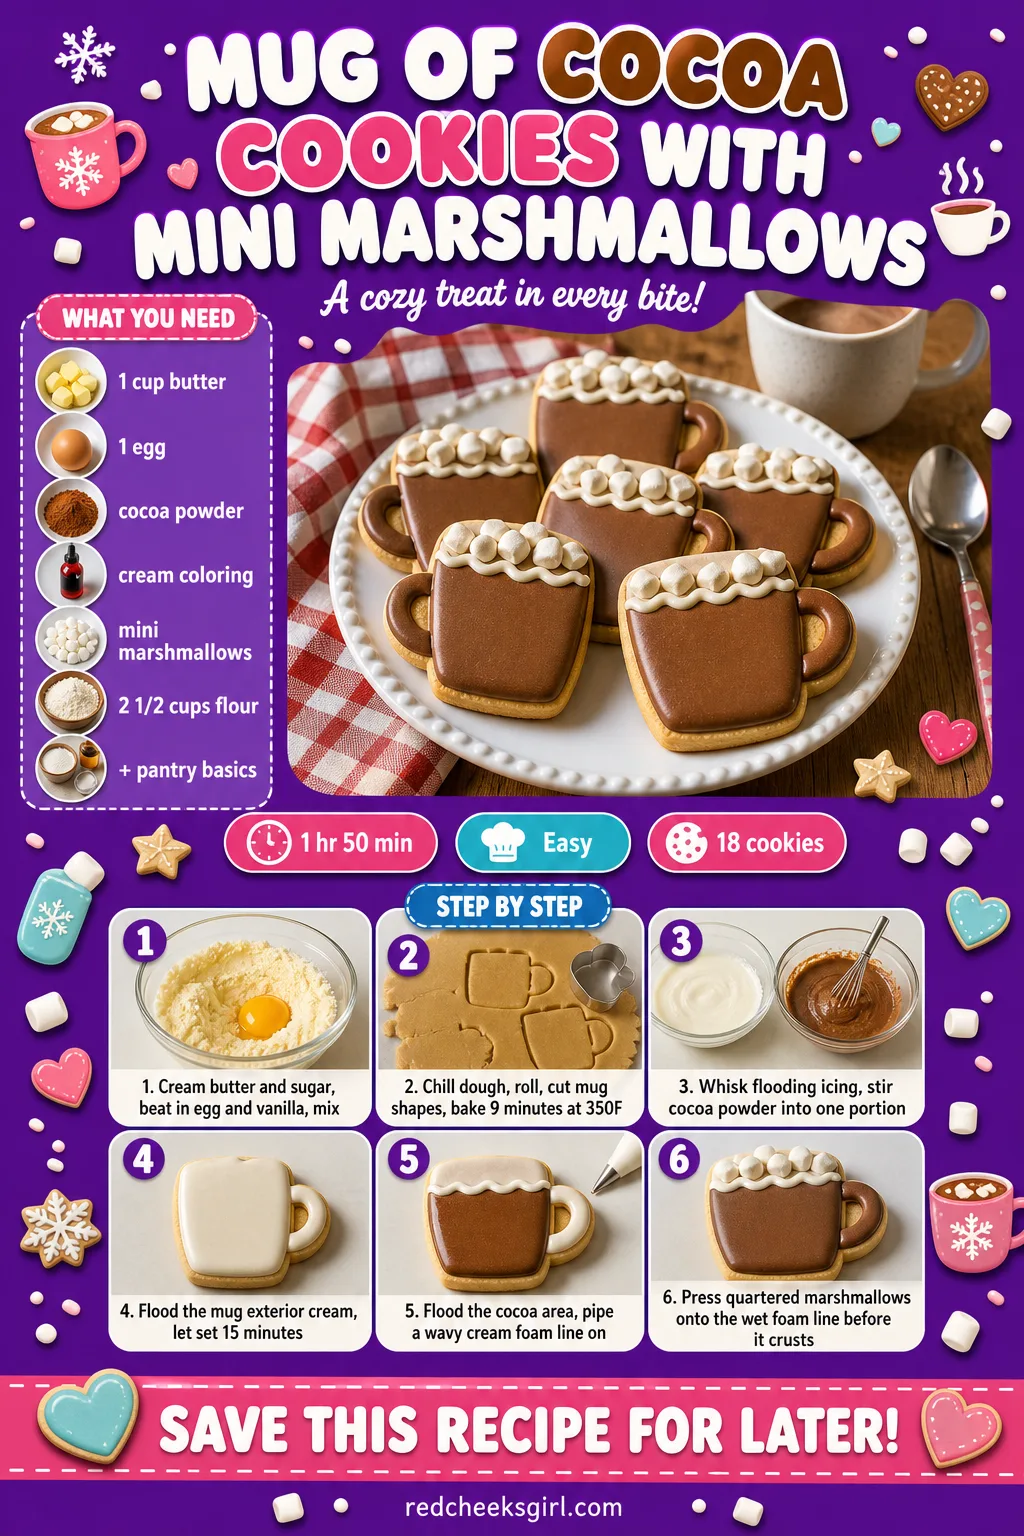
Mug Of Cocoa Cookies With Mini Marshmallows
This one tastes as cozy as it looks, brown flood icing standing in for cocoa under a foamy white top and a scatter of quartered marshmallows pressed in before anything sets. It is the shape that gets photographed before it gets eaten.
Quarter regular marshmallows with kitchen scissors dipped in water between cuts, they stick to a dry blade and tear instead of slicing clean.
Ingredients
- 2 1/2 cups (315g) all-purpose flour
- 1 cup (225g) unsalted butter, softened
- 3/4 cup (150g) granulated sugar
- 1 large egg, 1 tsp vanilla extract
- 3 cups (360g) powdered sugar, 5 tbsp water
- cocoa powder, cream coloring
- mini marshmallows
Instructions
- Cream butter and sugar, beat in egg and vanilla, mix in flour, chill 30 minutes.
- Roll dough, cut mug shapes, bake 9 minutes at 350°F (175°C), cool fully.
- Whisk powdered sugar and water, split icing and stir a little cocoa powder into one portion for the cocoa colour.
- Flood the mug exterior cream and let it set 15 minutes.
- Flood the cocoa area inside the mug outline, then pipe a thin wavy cream line across the top for foam.
- While still wet, press quartered mini marshmallows onto the foam line before it crusts.
Reindeer Face Cookies With Pretzel Antlers
Salt against sweet icing is the whole reason this one keeps getting picked off the plate first, that and the fact a broken pretzel twist looks exactly like an antler without anyone carving anything. Press them in before the icing sets and they hold on their own.
Mini pretzel twists snap cleaner than full size ones, so buy those over the big bag if the antlers need to look dainty rather than oversized.
Ingredients
- 2 1/2 cups (315g) all-purpose flour
- 1 cup (225g) unsalted butter, softened
- 3/4 cup (150g) granulated sugar
- 1 large egg, 1 tsp vanilla extract
- 3 cups (360g) powdered sugar, 5 tbsp water
- brown and cream coloring
- mini pretzel twists, red candy noses
Instructions
- Cream butter and sugar, beat in egg and vanilla, mix in flour, chill 30 minutes.
- Roll dough, cut round shapes, bake 9 minutes at 350°F (175°C), cool fully.
- Whisk powdered sugar and water, tint most brown and flood the face, leaving a cream patch for the muzzle.
- Break mini pretzel twists in half and press two pieces into the wet icing above the face for antlers.
- Press a red candy in the centre of the muzzle for the nose.
- Pipe two small black dot eyes once the base icing has crusted, then let everything dry overnight.

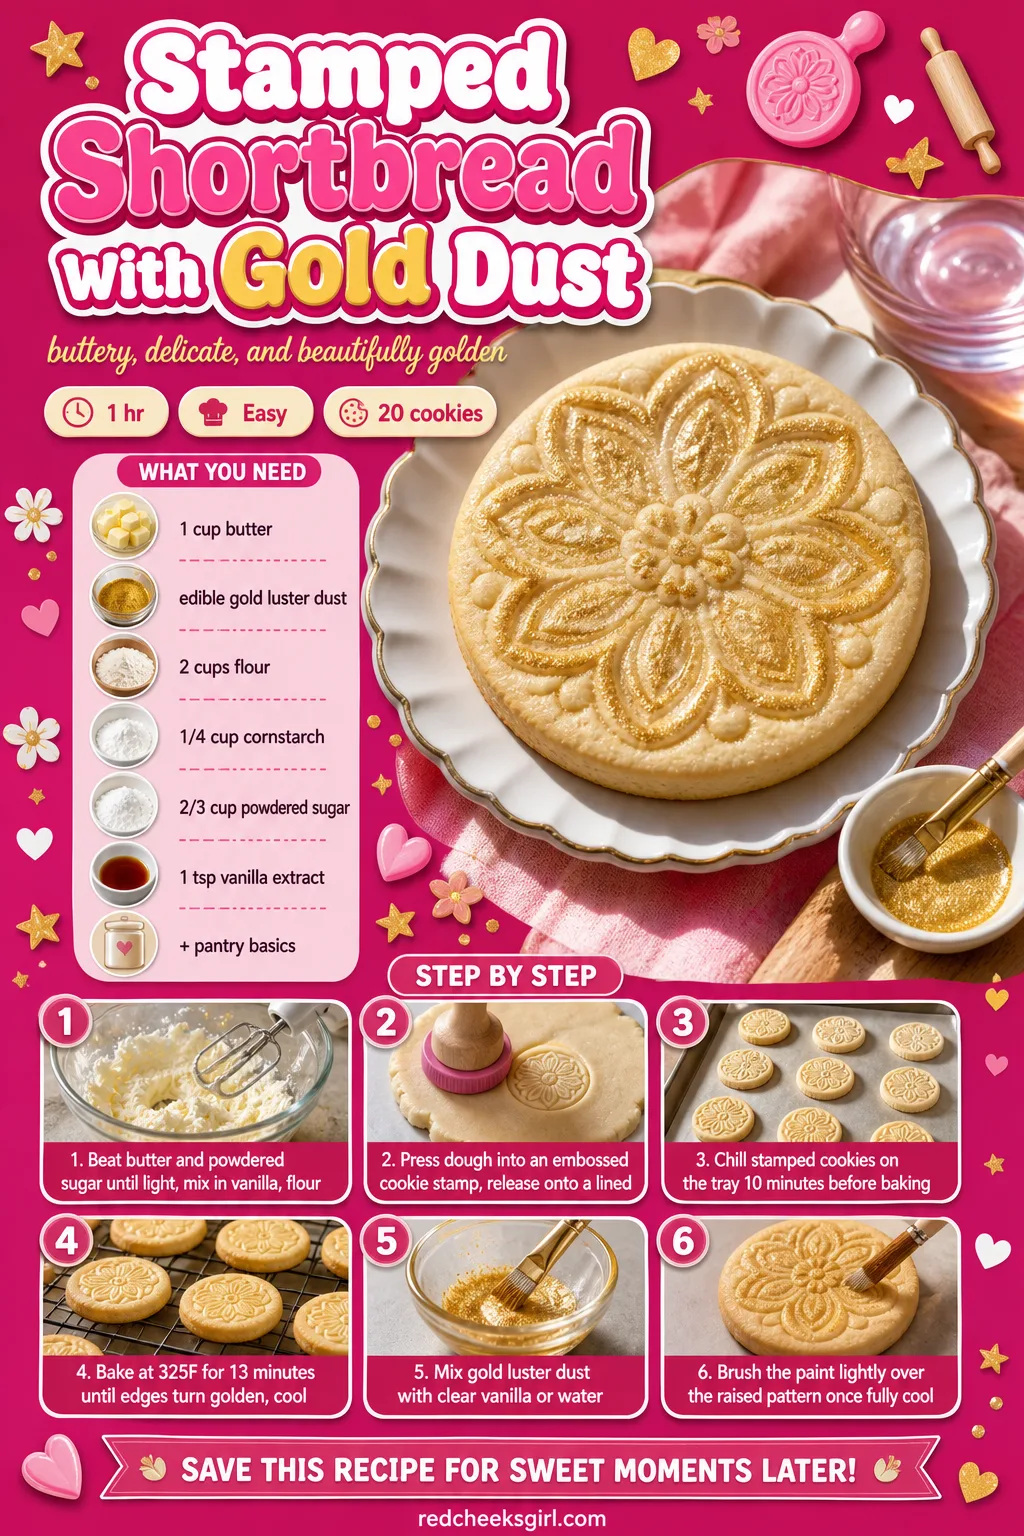
Stamped Shortbread With Gold Dust
No icing at all here, just butter, a carved stamp and a whisper of gold dust brushed on after baking, which makes this the cookie to reach for if piping is simply not happening this year. It still reads as the fanciest thing on the plate.
Chill the stamped dough on the tray for ten minutes before it goes in the oven, the pattern holds its edges instead of puffing soft and blurry.
Ingredients
- 2 cups (250g) all-purpose flour
- 1/4 cup (30g) cornstarch
- 1 cup (225g) unsalted butter, softened
- 2/3 cup (80g) powdered sugar
- 1 tsp vanilla extract
- edible gold luster dust, 1 tsp clear vanilla or water
Instructions
- Beat butter and powdered sugar until light, mix in vanilla, flour and cornstarch to a soft dough.
- Press dough into an embossed cookie stamp, release and transfer shapes onto a lined tray.
- Chill the stamped cookies on the tray 10 minutes to firm up before baking.
- Bake at 325°F (165°C) for 13 minutes until the edges turn just golden, cool completely on the tray.
- Mix gold luster dust with a few drops of clear vanilla or water into a thin paint.
- Brush the paint lightly over the raised pattern with a dry pastry brush once the shortbread is fully cool.
🛍 Shopping guide
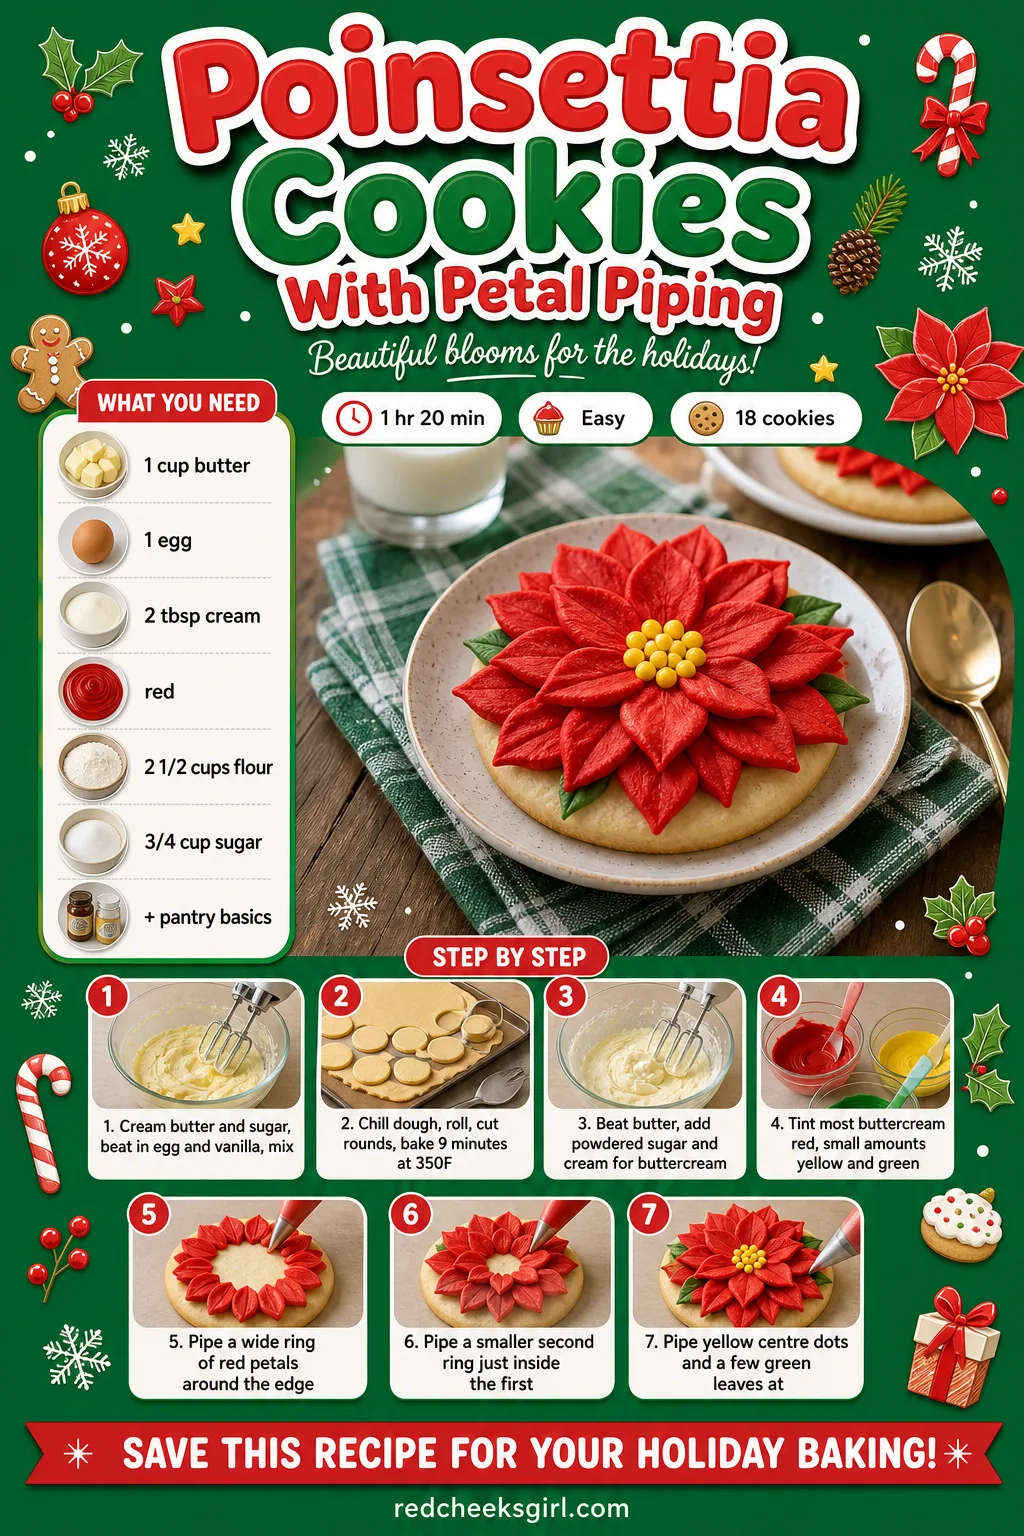
Poinsettia Cookies With Petal Piping
Red buttercream petals fanned out from a yellow centre look like something a florist arranged, not something piped in under a minute per cookie once the hand gets used to the petal tip. It is a flower with none of the upkeep.
Pipe the petals in two layers, a wider base ring and a smaller inner ring, and the flower gets depth instead of sitting flat.
Ingredients
- 2 1/2 cups (315g) all-purpose flour
- 1 cup (225g) unsalted butter, softened (dough)
- 3/4 cup (150g) granulated sugar
- 1 large egg, 1 tsp vanilla extract
- 1 cup (225g) unsalted butter, softened (icing)
- 3 cups (360g) powdered sugar, 2 tbsp cream
- red, yellow and green gel food coloring
Instructions
- Cream butter and sugar, beat in egg and vanilla, mix in flour, chill 30 minutes.
- Roll dough, cut round shapes, bake 9 minutes at 350°F (175°C), cool fully.
- Beat butter, add powdered sugar and cream, tint most red and small amounts yellow and green.
- Fit a petal tip and pipe a wide ring of red petals around the edge of the cookie.
- Pipe a second, smaller ring of petals just inside the first for depth.
- Pipe a yellow dot cluster in the centre and a few green leaves at the base.
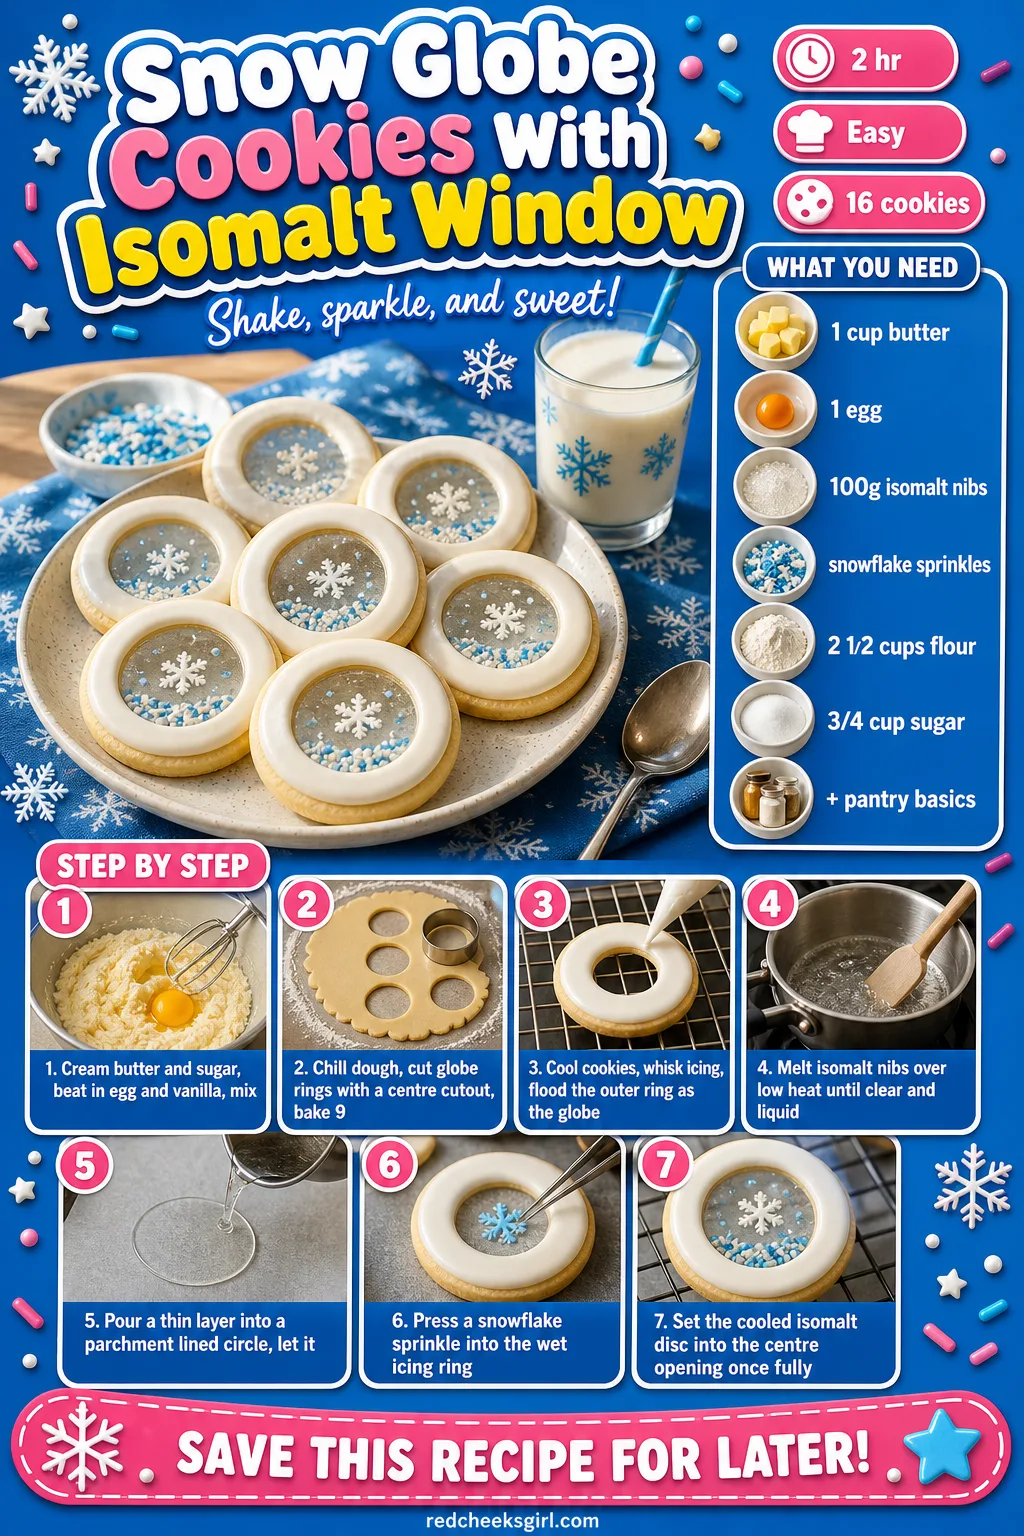
Snow Globe Cookies With Isomalt Window
Of everything on this plate, this one gets the most questions at the swap table, because that clear shiny circle is not glaze or fondant, it is melted isomalt poured and cooled hard like actual glass. It sounds like a stunt and it is, in the most forgiving way.
Work with isomalt away from little hands and pets, it cools from liquid to solid fast and holds heat far longer than it looks like it would.
Ingredients
- 2 1/2 cups (315g) all-purpose flour
- 1 cup (225g) unsalted butter, softened
- 3/4 cup (150g) granulated sugar
- 1 large egg, 1 tsp vanilla extract
- 2 cups (240g) powdered sugar, 3 tbsp water
- 100g isomalt nibs
- snowflake sprinkles for the scene
Instructions
- Cream butter and sugar, beat in egg and vanilla, mix in flour, chill 30 minutes.
- Roll dough, cut round globe shapes, cut a smaller circle from the centre of each, bake 9 minutes at 350°F (175°C).
- Cool cookies fully, whisk powdered sugar and water to a thick icing and flood the outer ring as the globe base.
- Melt isomalt nibs in a small pan over low heat until fully clear and liquid, watching closely, it burns fast.
- Pour a thin layer of melted isomalt into the centre cutout over a sheet of parchment and let it cool hard.
- Press a snowflake sprinkle onto the icing ring before it sets, then set the hardened isomalt circle into the opening once fully cool.
🛍 Shopping guide
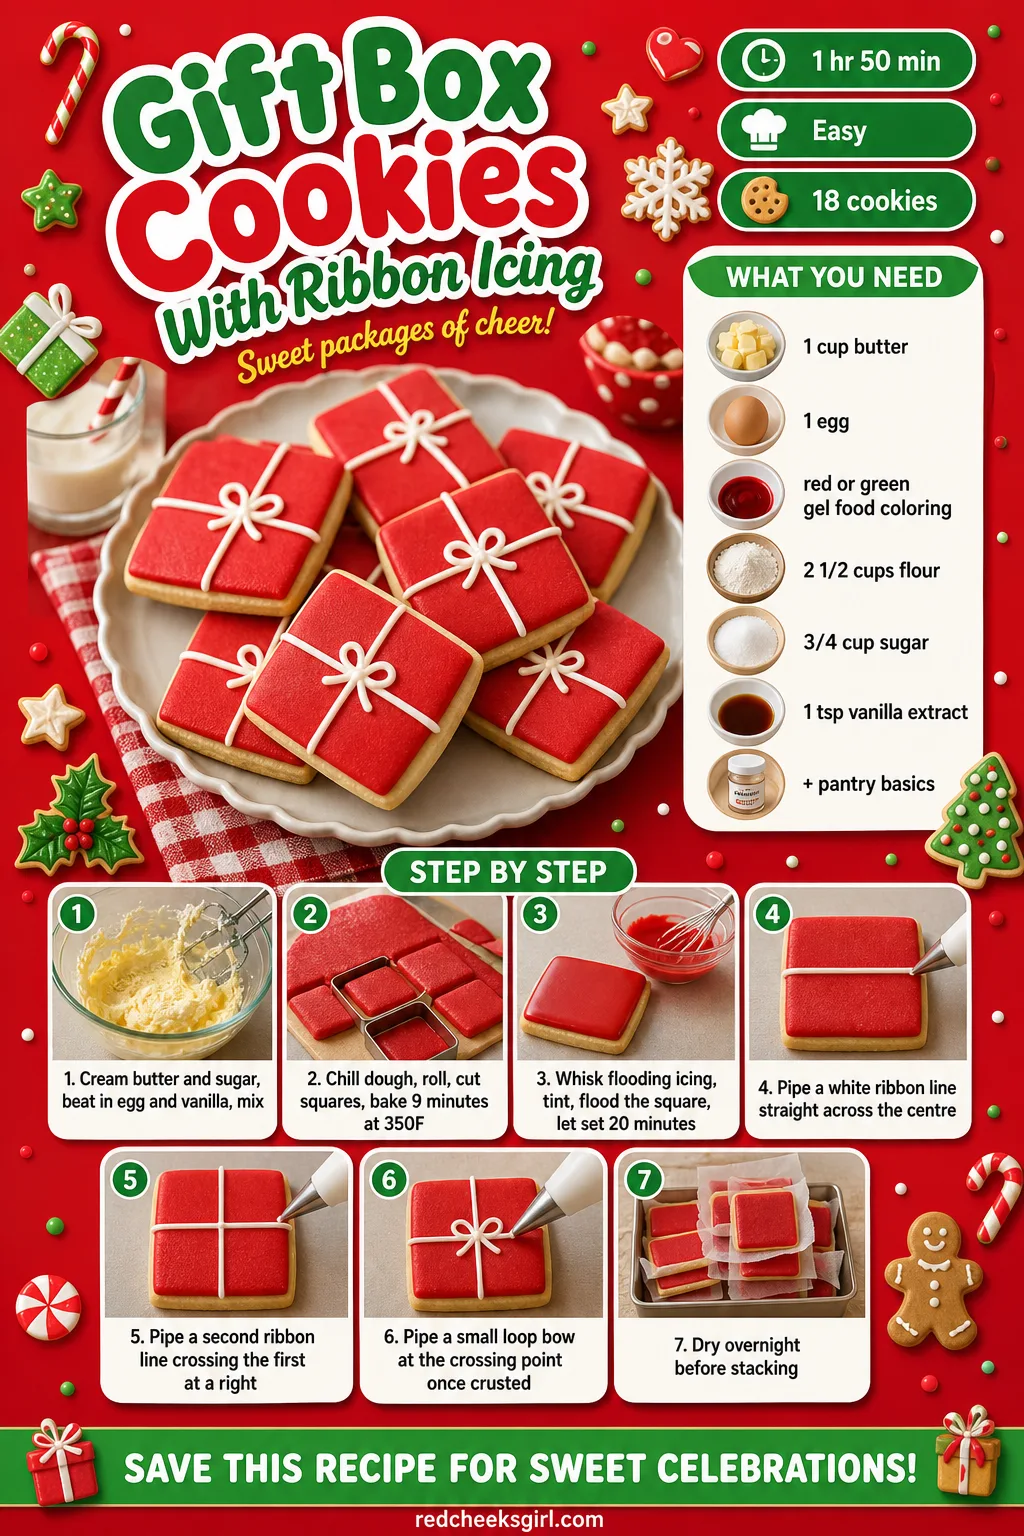
Gift Box Cookies With Ribbon Icing
A square cookie with a piped bow on top is the closest this whole list gets to actual wrapping paper, and it makes the swap plate look like it was arranged rather than just filled. Keep the ribbon lines straight and the box reads instantly.
A ruler held against the cookie as a piping guide keeps the ribbon crosses dead straight, freehand tends to drift by the second line.
Ingredients
- 2 1/2 cups (315g) all-purpose flour
- 1 cup (225g) unsalted butter, softened
- 3/4 cup (150g) granulated sugar
- 1 large egg, 1 tsp vanilla extract
- 3 cups (360g) powdered sugar, 5 tbsp water
- red or green coloring
Instructions
- Cream butter and sugar, beat in egg and vanilla, mix in flour, chill 30 minutes.
- Roll dough, cut square shapes, bake 9 minutes at 350°F (175°C), cool fully.
- Whisk powdered sugar and water, tint red or green, flood the whole square and let it set 20 minutes.
- Pipe a white ribbon line straight across the centre, then a second line crossing it at a right angle.
- Pipe a small loop bow at the centre crossing point once the ribbon lines have crusted.
- Let the cookies dry overnight before stacking into a gift box of their own.
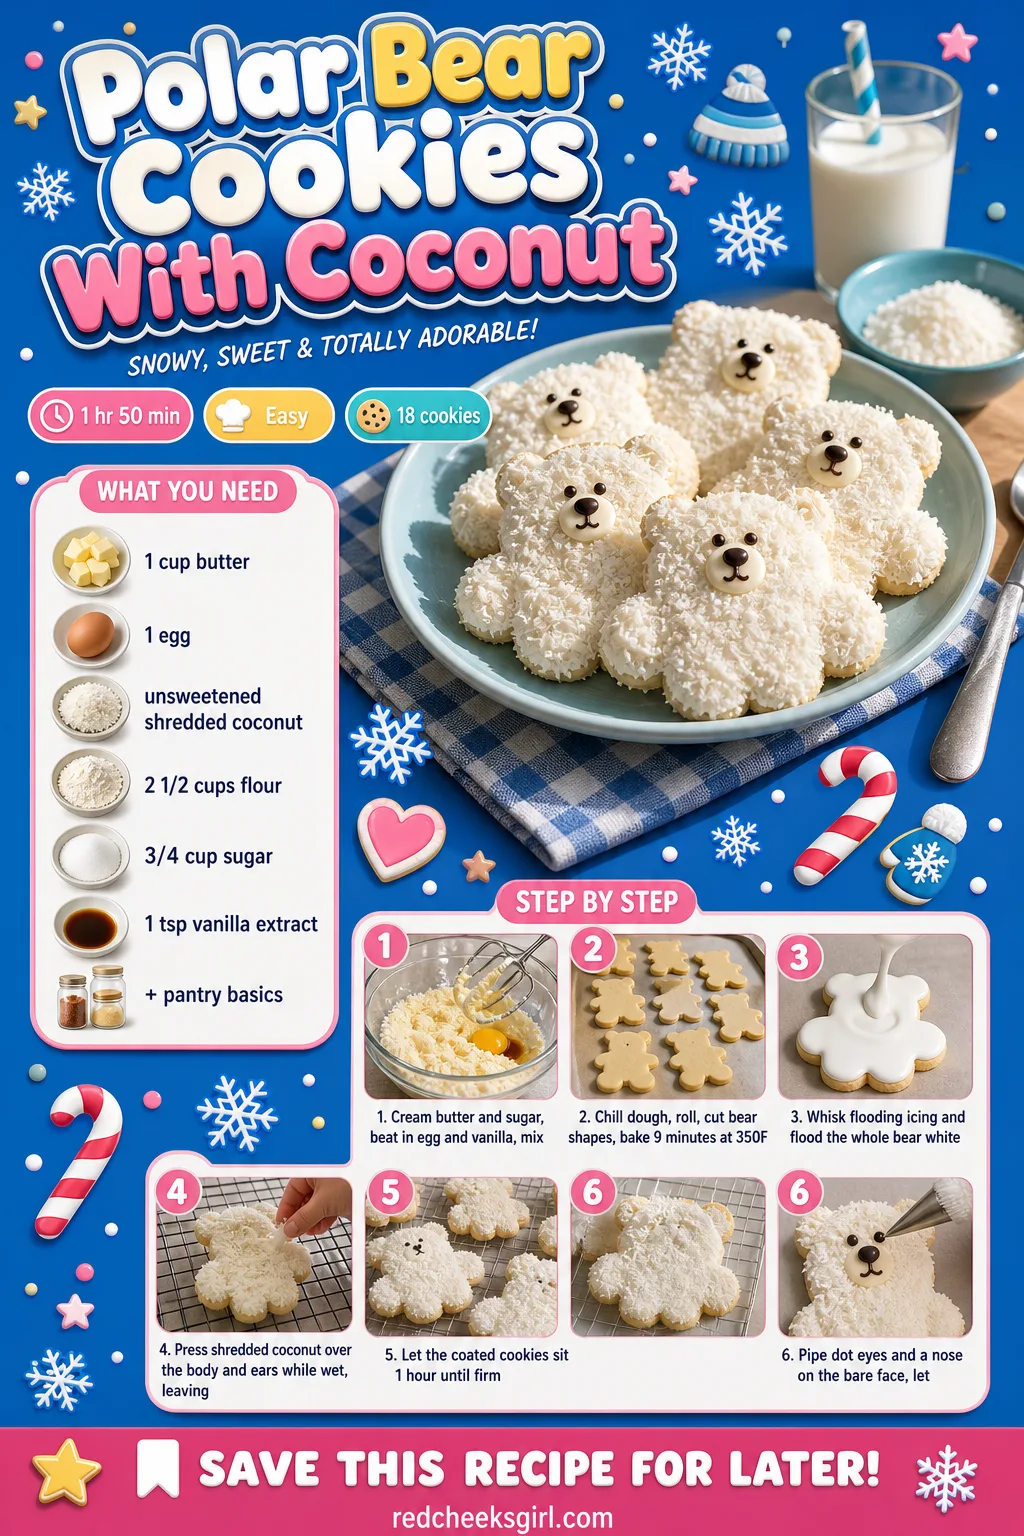
Polar Bear Cookies With Coconut
Shredded coconut pressed into white icing turns a flat bear shape into something you want to touch before you eat, it genuinely feels furry under a fingertip. That little bit of texture is doing more work than any amount of extra piping would.
Unsweetened coconut looks whiter and less yellow against the icing than sweetened shred, worth the swap if the pantry has both.
Ingredients
- 2 1/2 cups (315g) all-purpose flour
- 1 cup (225g) unsalted butter, softened
- 3/4 cup (150g) granulated sugar
- 1 large egg, 1 tsp vanilla extract
- 3 cups (360g) powdered sugar, 5 tbsp water
- unsweetened shredded coconut
Instructions
- Cream butter and sugar, beat in egg and vanilla, mix in flour, chill 30 minutes.
- Roll dough, cut bear shapes, bake 9 minutes at 350°F (175°C), cool fully.
- Whisk powdered sugar and water to flooding consistency and flood the whole bear white.
- While the icing is still wet, press shredded coconut over the body and ears, leaving the face bare.
- Let the iced, coated cookies sit 1 hour until the icing underneath has firmed.
- Pipe two small dot eyes and a dark nose onto the bare face area and let set overnight.
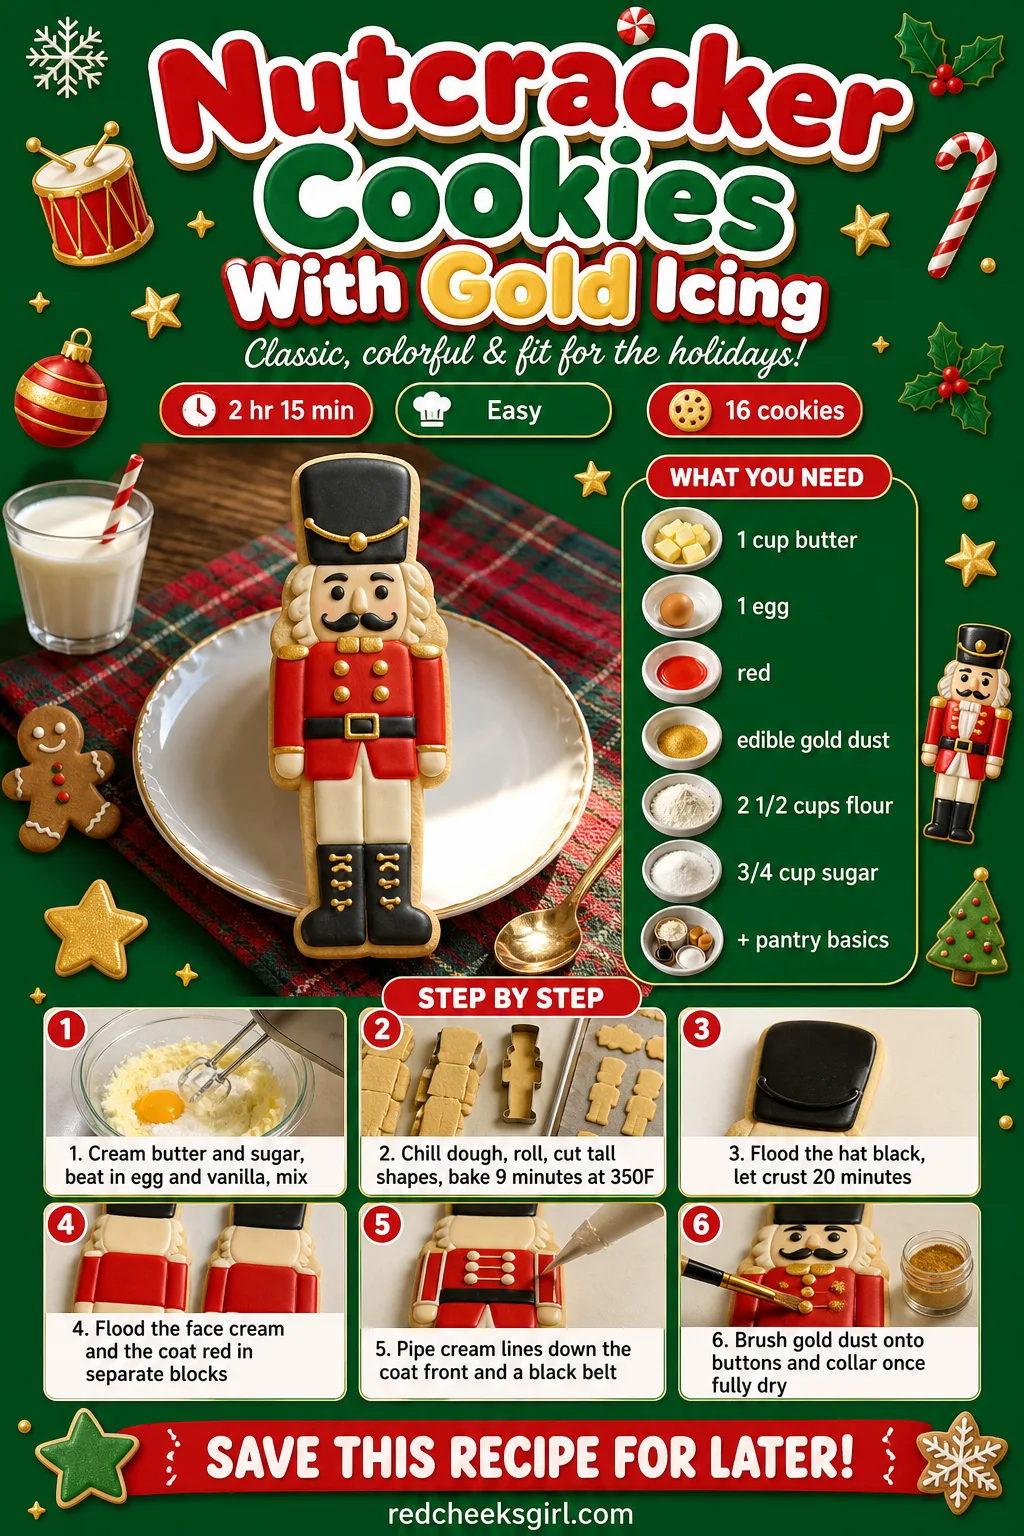
Nutcracker Cookies With Gold Icing
A tall rectangle cutter and a willingness to pipe in blocks of colour rather than freehand detail is all this needs, the uniform underneath is really just stripes with a hat on top. Gold accents on the buttons and collar push it from toy soldier to something worth a second look.
Pipe the base colours in sections and let each one crust before the next, a nutcracker has more colour changes than most cookies on the table and wet-on-wet bleeds between blocks fast.
Ingredients
- 2 1/2 cups (315g) all-purpose flour
- 1 cup (225g) unsalted butter, softened
- 3/4 cup (150g) granulated sugar
- 1 large egg, 1 tsp vanilla extract
- 3 cups (360g) powdered sugar, 5 tbsp water
- red, black and cream coloring
- edible gold dust
Instructions
- Cream butter and sugar, beat in egg and vanilla, mix in flour, chill 30 minutes.
- Roll dough, cut tall nutcracker shapes, bake 9 minutes at 350°F (175°C), cool fully.
- Whisk flooding icing and flood the hat black, let crust 20 minutes.
- Flood the face cream and the coat red, working one block at a time and letting each crust.
- Pipe cream piping lines down the coat front and a black belt line at the waist.
- Once fully dry, brush gold dust onto the buttons and collar trim with a small dry brush.
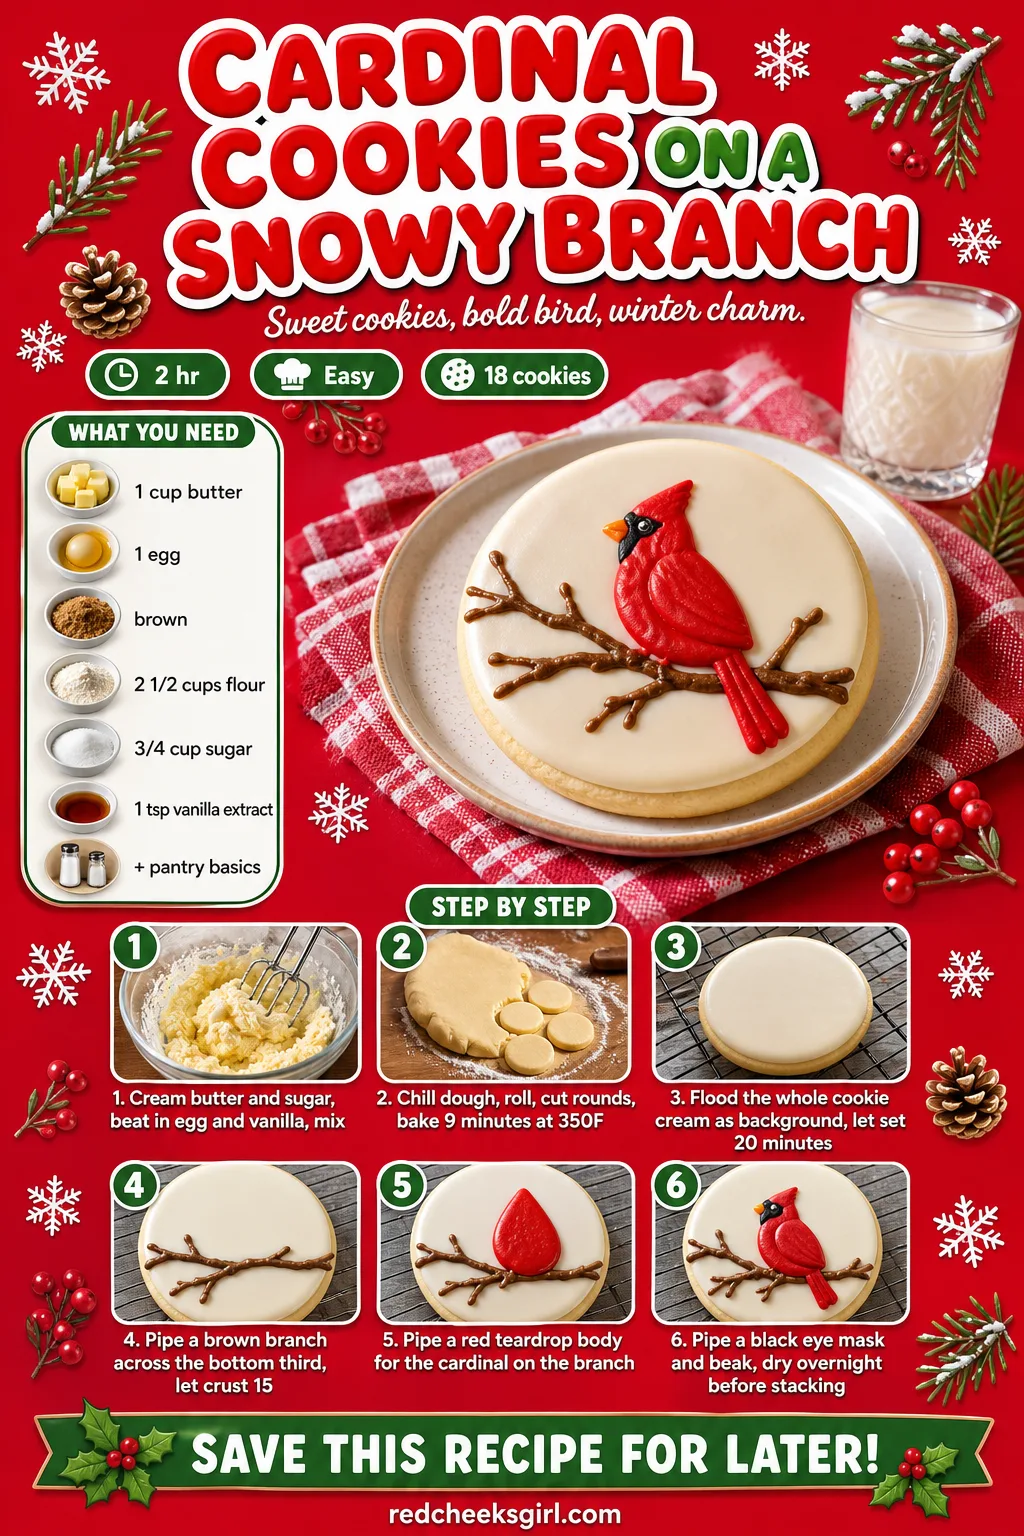
Cardinal Cookies On A Snowy Branch
Red against white and brown is the whole palette already settled for you here, just piped as a bird sitting on a branch instead of scattered trim. It is one of the few shapes on this list that looks hand painted rather than piped once the icing has fully crusted.
Pipe the branch first and let it crust, then the cardinal sits on top of it instead of smearing into the brown underneath.
Ingredients
- 2 1/2 cups (315g) all-purpose flour
- 1 cup (225g) unsalted butter, softened
- 3/4 cup (150g) granulated sugar
- 1 large egg, 1 tsp vanilla extract
- 3 cups (360g) powdered sugar, 5 tbsp water
- brown, cream, red and black coloring
Instructions
- Cream butter and sugar, beat in egg and vanilla, mix in flour, chill 30 minutes.
- Roll dough, cut round shapes, bake 9 minutes at 350°F (175°C), cool fully.
- Whisk flooding icing, flood the whole cookie cream as a snowy background, let set 20 minutes.
- Pipe a brown branch diagonally across the bottom third and let it crust 15 minutes.
- Pipe a red teardrop body for the cardinal perched on the branch, with a small pointed tail and wing line.
- Pipe a tiny black mask around the eye and a small beak, then dry overnight before stacking.
Hot Air Balloon Ornament Cookies
Striped panels in alternating red and cream make a round cookie suddenly read as a balloon rather than just an ornament with a basket drawn under it. Poke the hanging hole before baking and these double as actual tree decorations once the icing is fully set.
If the swap is leaving town with the host, these pack flatter and travel better than anything with piped detail standing proud off the surface.
Ingredients
- 2 1/2 cups (315g) all-purpose flour
- 1 cup (225g) unsalted butter, softened
- 3/4 cup (150g) granulated sugar
- 1 large egg, 1 tsp vanilla extract
- 3 cups (360g) powdered sugar, 5 tbsp water
- red, cream and brown coloring
Instructions
- Cream butter and sugar, beat in egg and vanilla, mix in flour, chill 30 minutes.
- Roll dough, cut round balloon shapes, poke a small hole near the top, bake 9 minutes at 350°F (175°C).
- Cool completely, whisk flooding icing and flood alternating vertical panels red and cream across the balloon top.
- Let the panels crust 20 minutes, then pipe a thin cream outline along each panel seam.
- Pipe a small brown basket shape at the bottom with thin lines connecting it to the balloon.
- Dry overnight, then thread ribbon through the hole once fully set.

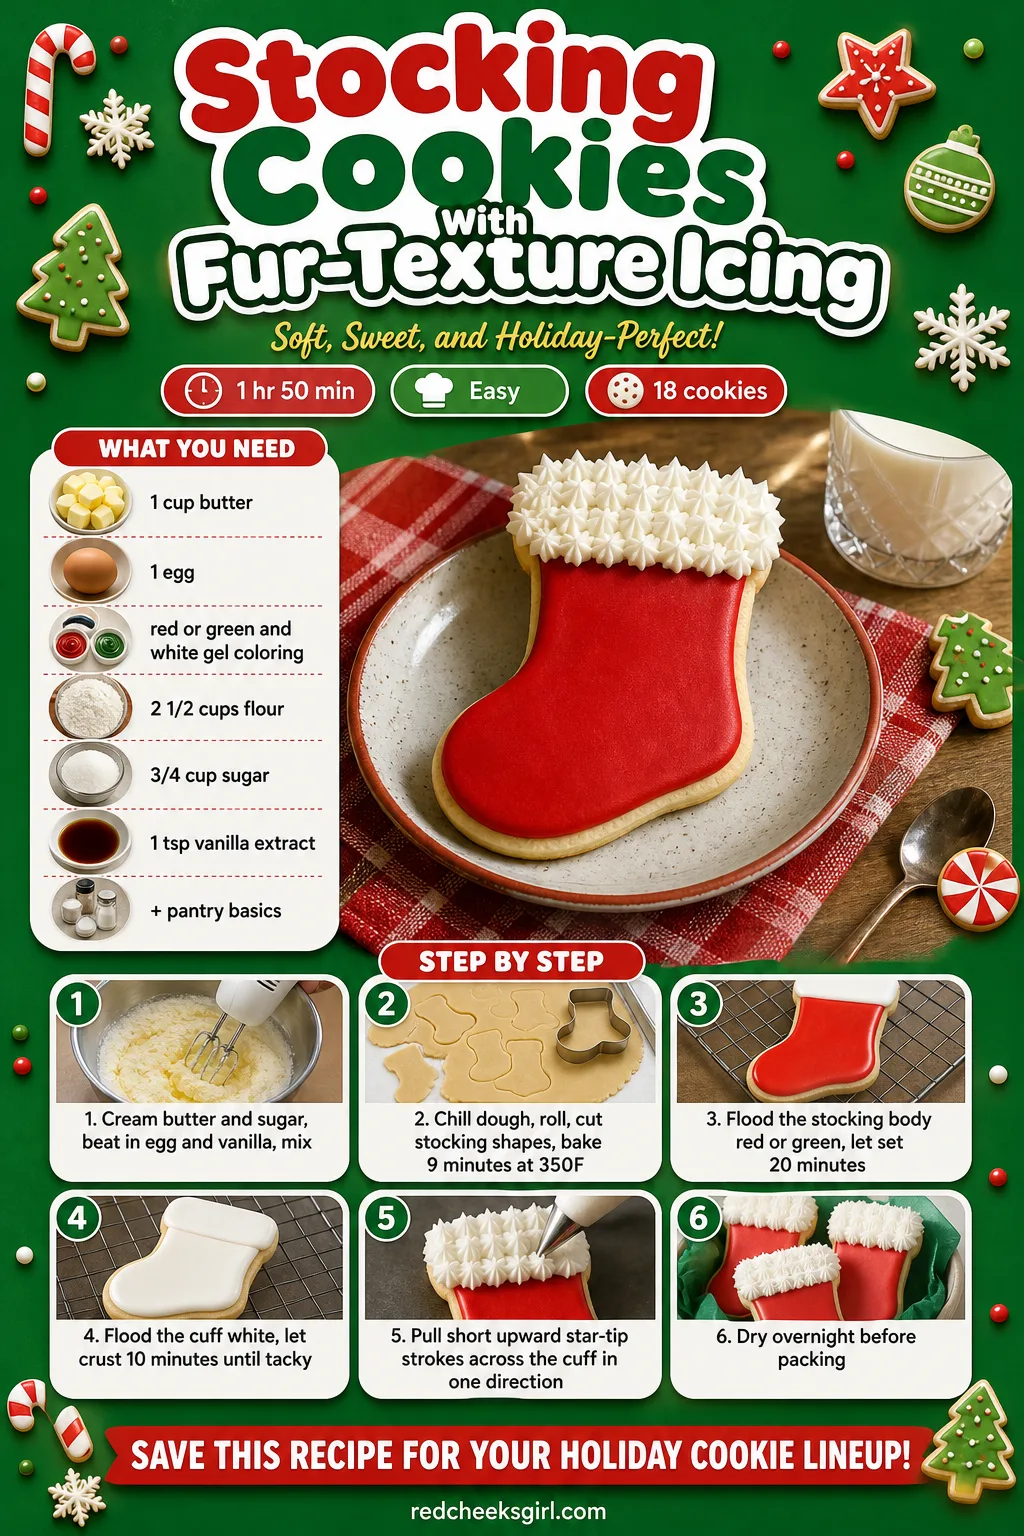
Stocking Cookies With Fur-Texture Icing
That fuzzy cuff is just a star tip pulled in short upward strokes rather than piped smooth, and once a row of them sits side by side the whole top edge genuinely looks like faux fur. It takes longer to explain than to actually do.
Work the cuff texture in one direction only, strokes crossing each other flatten the fur look instead of building it up.
Ingredients
- 2 1/2 cups (315g) all-purpose flour
- 1 cup (225g) unsalted butter, softened
- 3/4 cup (150g) granulated sugar
- 1 large egg, 1 tsp vanilla extract
- 3 cups (360g) powdered sugar, 5 tbsp water
- red or green and white coloring
Instructions
- Cream butter and sugar, beat in egg and vanilla, mix in flour, chill 30 minutes.
- Roll dough, cut stocking shapes, bake 9 minutes at 350°F (175°C), cool fully.
- Whisk flooding icing, flood the stocking body red or green, let set 20 minutes.
- Flood the cuff area white and let it crust 10 minutes until just tacky.
- Fit a star tip with stiffer white icing and pull short upward strokes across the cuff, working in one direction.
- Let the whole cookie dry overnight before packing into the swap tin.
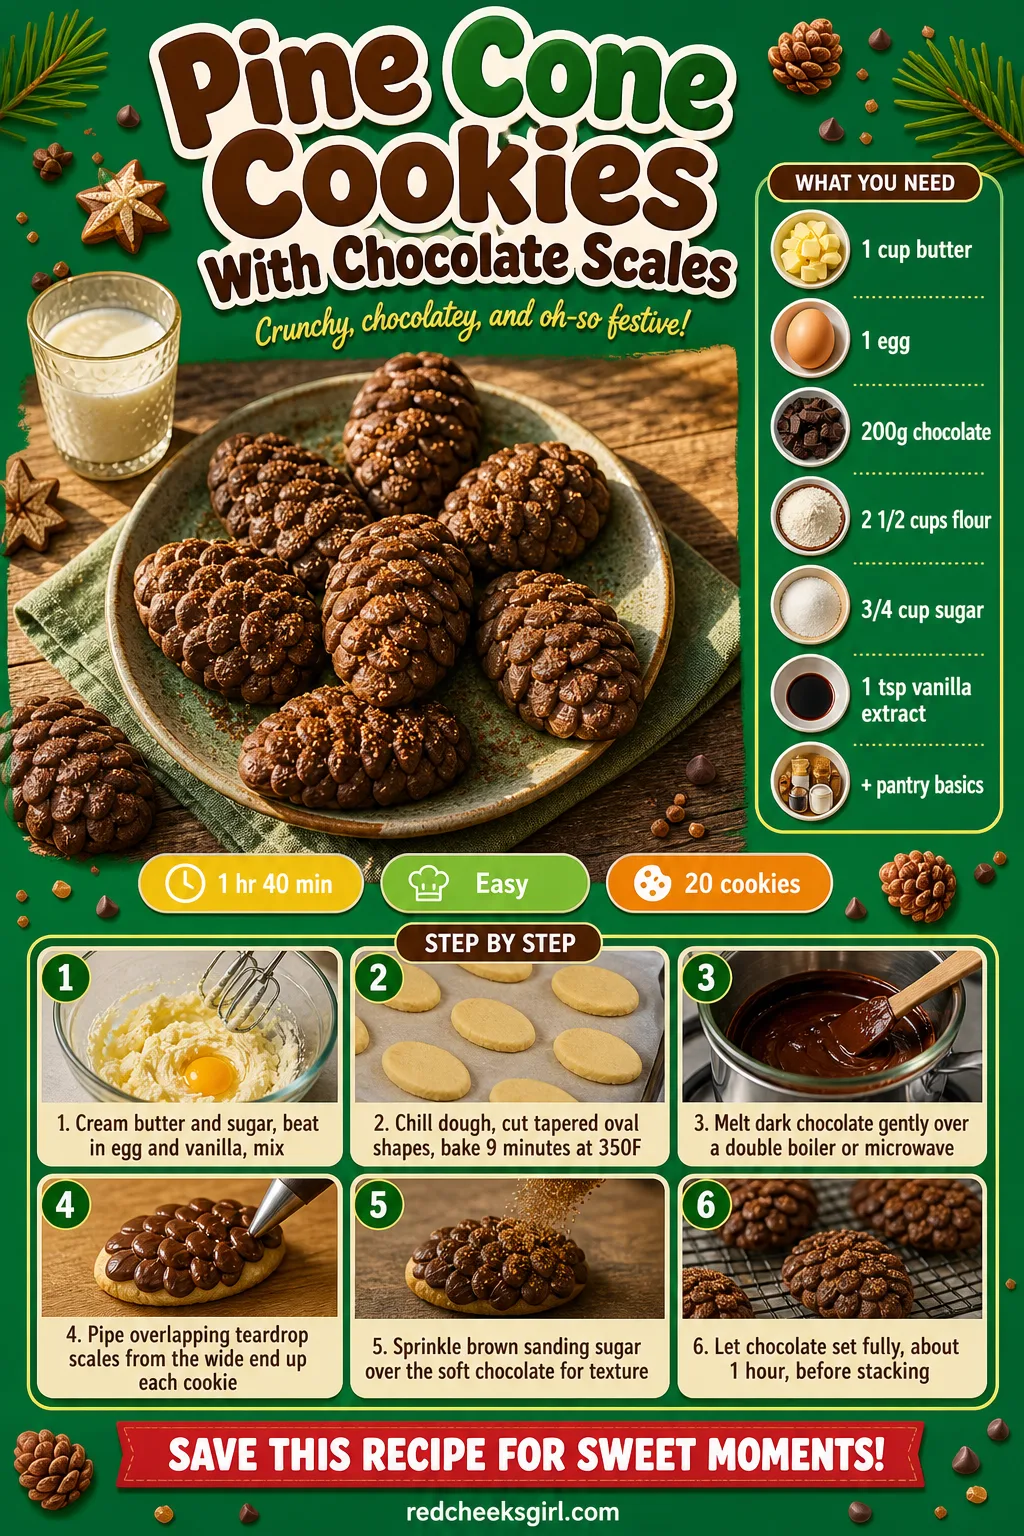
Pine Cone Cookies With Chocolate Scales
An oval cutter and rows of overlapping melted chocolate make something that looks lifted off a actual pine branch, no cutter shaped like a cone required. The scales build from the bottom up the same way real ones grow, which is the detail that sells it.
Dark chocolate reads more convincingly as bark than milk chocolate does, and it sets firmer for packing too.
Ingredients
- 2 1/2 cups (315g) all-purpose flour
- 1 cup (225g) unsalted butter, softened
- 3/4 cup (150g) granulated sugar
- 1 large egg, 1 tsp vanilla extract
- 200g dark chocolate, chopped
- brown sanding sugar
Instructions
- Cream butter and sugar, beat in egg and vanilla, mix in flour, chill 30 minutes.
- Roll dough, cut oval shapes tapered at one end, bake 9 minutes at 350°F (175°C), cool fully.
- Melt dark chocolate gently over a double boiler or in short microwave bursts, stirring until smooth.
- Starting at the wide end, pipe small overlapping teardrop scales of chocolate in rows up each cookie.
- While the chocolate is still soft, sprinkle brown sanding sugar lightly over the scales for texture.
- Let the chocolate set fully at room temperature, about 1 hour, before stacking.
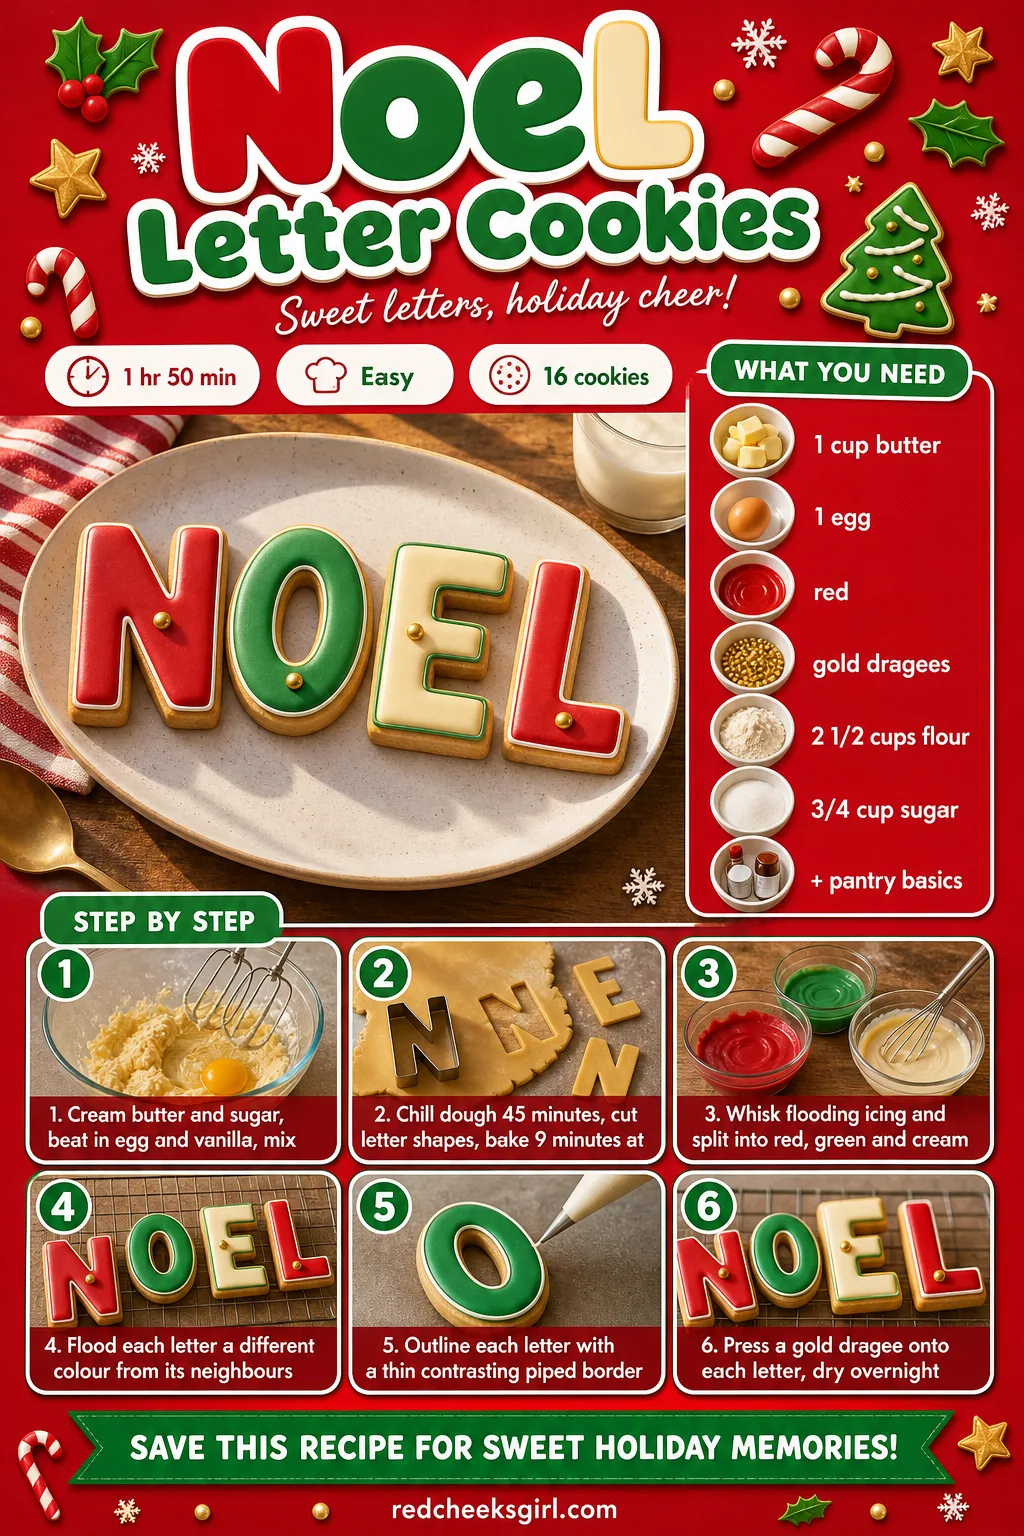
Noel Letter Cookies
Four letters, four colours from the palette, no two alike and the whole set still reads as one idea laid across the table. It is the easiest design here to split between several bakers if the swap is a group effort rather than a solo one.
Letter cutters cut thin at the joins, so chill the dough firmer than usual for these, a soft N or E will slump before it hits the oven.
Ingredients
- 2 1/2 cups (315g) all-purpose flour
- 1 cup (225g) unsalted butter, softened
- 3/4 cup (150g) granulated sugar
- 1 large egg, 1 tsp vanilla extract
- 3 cups (360g) powdered sugar, 5 tbsp water
- red, green and cream coloring, gold dragees
Instructions
- Cream butter and sugar, beat in egg and vanilla, mix in flour, chill 45 minutes.
- Roll dough, cut N, O, E and L letter shapes, bake 9 minutes at 350°F (175°C), cool fully.
- Whisk flooding icing and split into red, green and cream.
- Flood each letter in a different colour so no two sit side by side the same.
- Outline each letter once set with a thin piped border in a contrasting shade.
- Press one gold dragee onto each letter while the outline is still wet, then dry overnight.
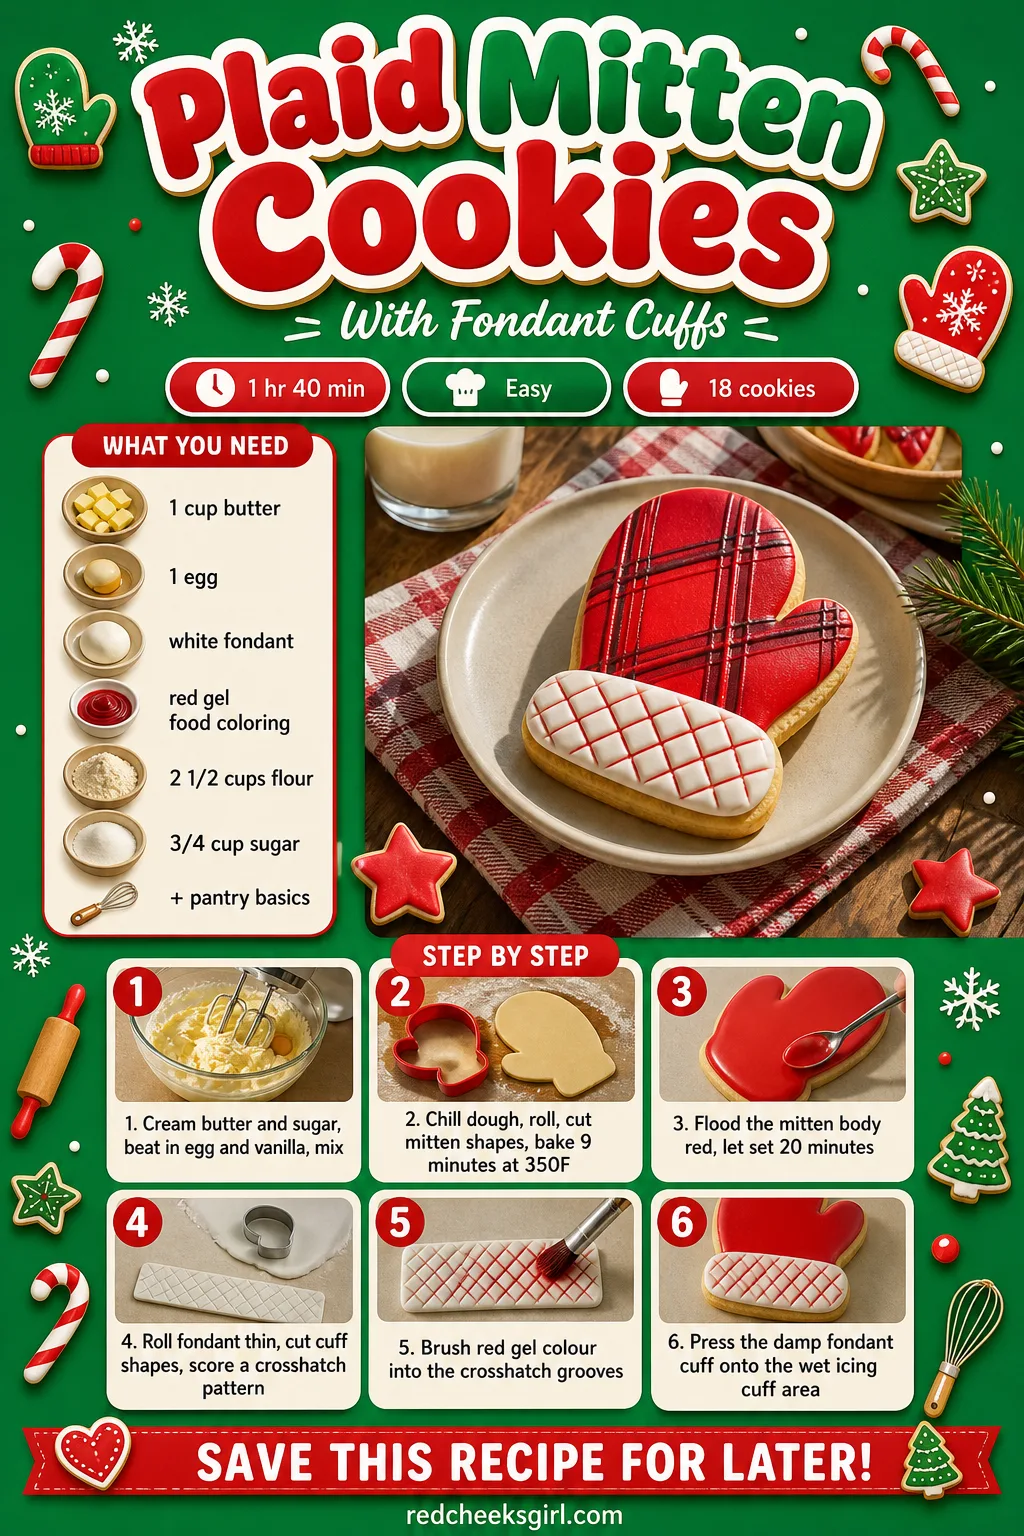
Plaid Mitten Cookies With Fondant Cuffs
Fondant does something icing cannot, it gives a clean crosshatch without a single drop of paint bleeding, cut from a rolled sheet and scored with the back of a knife before it ever touches the cookie. The cuff goes on last, almost like actual knitwear stitched to the mitten.
Roll fondant thin, a thick cuff looks like a slab rather than fabric and fights the icing underneath instead of sitting into it.
Ingredients
- 2 1/2 cups (315g) all-purpose flour
- 1 cup (225g) unsalted butter, softened
- 3/4 cup (150g) granulated sugar
- 1 large egg, 1 tsp vanilla extract
- 2 cups (240g) powdered sugar, 3 tbsp water
- white fondant, red gel coloring
Instructions
- Cream butter and sugar, beat in egg and vanilla, mix in flour, chill 30 minutes.
- Roll dough, cut mitten shapes, bake 9 minutes at 350°F (175°C), cool fully.
- Whisk flooding icing, tint red and flood the mitten body, let set 20 minutes.
- Roll white fondant thin, cut cuff shapes, and score a crosshatch pattern across each with a knife back.
- Tint thin lines of the crosshatch grooves with a touch of red gel colour on a fine brush.
- Press a damp fondant cuff onto the wet icing cuff area so it adheres as the icing sets.
Snowy Cabin Cookies
A little house cookie with a piped snowline along the roof and warm yellow windows is the one that makes people stop scrolling past the swap table photos, it looks lit from inside. It takes the longest of anything here, mostly in patience rather than skill.
Build it in layers over two sittings if time is tight, flood and crust the walls one evening, then come back for windows, roofline and smoke the next.
Ingredients
- 2 1/2 cups (315g) all-purpose flour
- 1 cup (225g) unsalted butter, softened
- 3/4 cup (150g) granulated sugar
- 1 large egg, 1 tsp vanilla extract
- 3 cups (360g) powdered sugar, 5 tbsp water
- brown, cream, yellow and white coloring
Instructions
- Cream butter and sugar, beat in egg and vanilla, mix in flour, chill 30 minutes.
- Roll dough, cut cabin shapes with a simple peaked roof, bake 9 minutes at 350°F (175°C), cool fully.
- Whisk flooding icing, flood the walls brown or cream, flood the roof a shade darker, let both set 20 minutes.
- Pipe a thick wavy white snowline along the roof edge and windowsills.
- Pipe small yellow squares for glowing windows and add a thin brown chimney at the roofline.
- Pipe a soft curl of white smoke rising from the chimney, then dry overnight before packing.
Frequently Asked Questions
How long does royal icing need to dry before you can stack decorated cookies?
Give flooded icing real time before it gets touched or packed. Royal icing needs at least 6-8 hours of drying time to thoroughly harden so that it can be touched or moved without creating imperfections, and most bakers simply let the tray sit out overnight to be safe.
Can you make decorated Christmas cookies ahead of time for a swap?
Yes, and it genuinely helps. Cookie dough will keep in the fridge for about 2-3 days, and baked (undecorated) cookies keep well for roughly two weeks if sealed properly, so bake early and save the icing session for the day or two before the swap.
Can you freeze cookies after they’ve been decorated with royal icing?
Freezing fully iced cookies works better than most people expect. As long as the icing has dried completely first, you can freeze them, just put wax paper or parchment paper between each layer before sealing the container.
Should you use royal icing or buttercream to decorate Christmas cookies?
It depends on whether the cookies need to travel or stack. For a swap plate that gets packed, boxed and handled, it’s best to use a royal icing and not buttercream, which never fully hardens and can smear in transit.
How do you stop royal icing from drying out while you’re piping?
Keep anything not actively in use sealed. Keep any icing that isn’t being immediately used covered with plastic wrap as it dries out very quickly, which matters most when working through a big cookie swap batch in stages.
How many cookies does one batch of royal icing decorate?
For a cookie about 2 to 3 inches, one standard batch of royal icing is enough to cover approximately 18 to 24 cookies with one layer of icing and some added detail, so double the batch for anything larger or more heavily piped.

23 pastel Christmas decor ideas in mint, blush and buttercream, room by room, with the exact glass,

25 christmas garland ideas for mantels, staircases and doorways, each with its own materials, palett

36 christmas decor ideas ordered by room, from the front door through the spaces that always get ski
Leave a Reply