

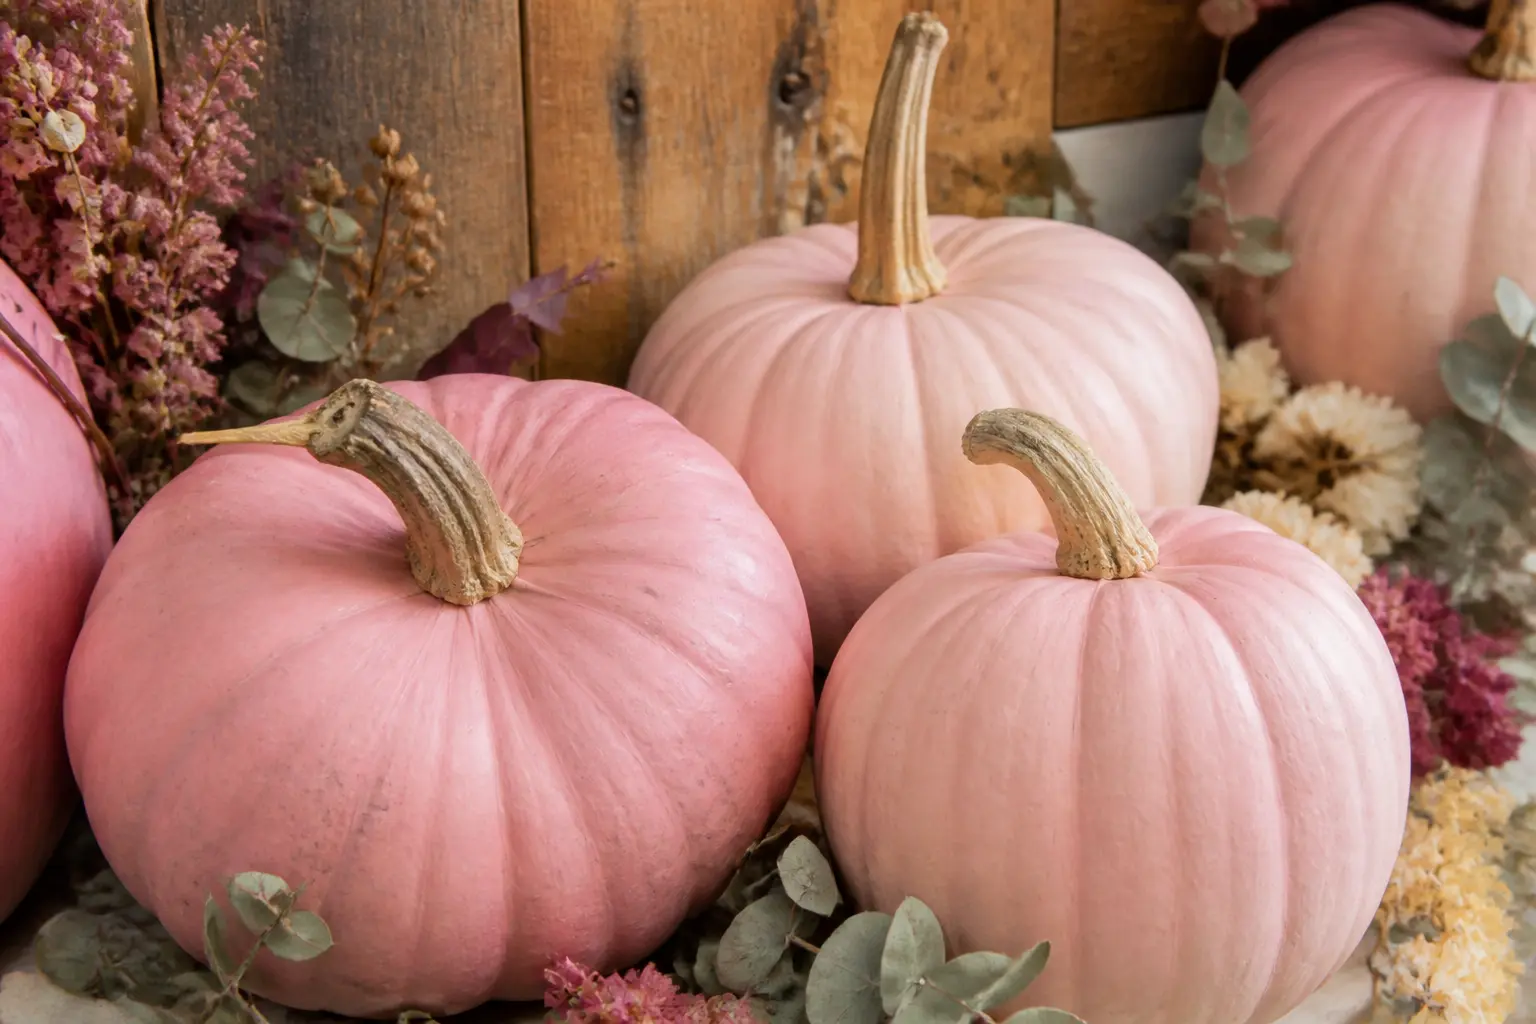
A flat coat of pink is a start, not a finish. The pumpkins that actually stop people mid-scroll have something on top: a gilded stem, a velvet ribbon, a poured swirl of gold, or a single dried flower pressed at the base as though it always grew there.
Every idea here is one pumpkin, sorted from the palest blush through dusty rose and mid pink to full hot pink, then by what gets added on top of the base coat.
After the shades come the sets and the finishing details that work across all of them. Black shows up exactly where it belongs: as a small, deliberate accent, never the main event.
Whatever your October looks like, a pink pumpkin fits. A baby shower, a Halloween table that skips the gore, a front step that needs to survive the whole season looking good. Pick the shade first, then the detail, and you have your answer.
This post contains affiliate links. If you buy through them, I may earn a small commission at no extra cost to you.
Blush Pink Pumpkins
Blush is the quietest shade here, and it earns its place. It reads as deliberately pretty rather than accidentally pastel, and it photographs beautifully against both natural wood and white linen. Two thin coats of a warm blush, sanded lightly between them, give you a surface smooth enough to take every finish below.
The seven ideas in this section work for autumn tablescapes, baby shower centrepieces and front-porch styling in equal measure. If you want something that looks as though it belongs with other considered pumpkin crafts, start here.
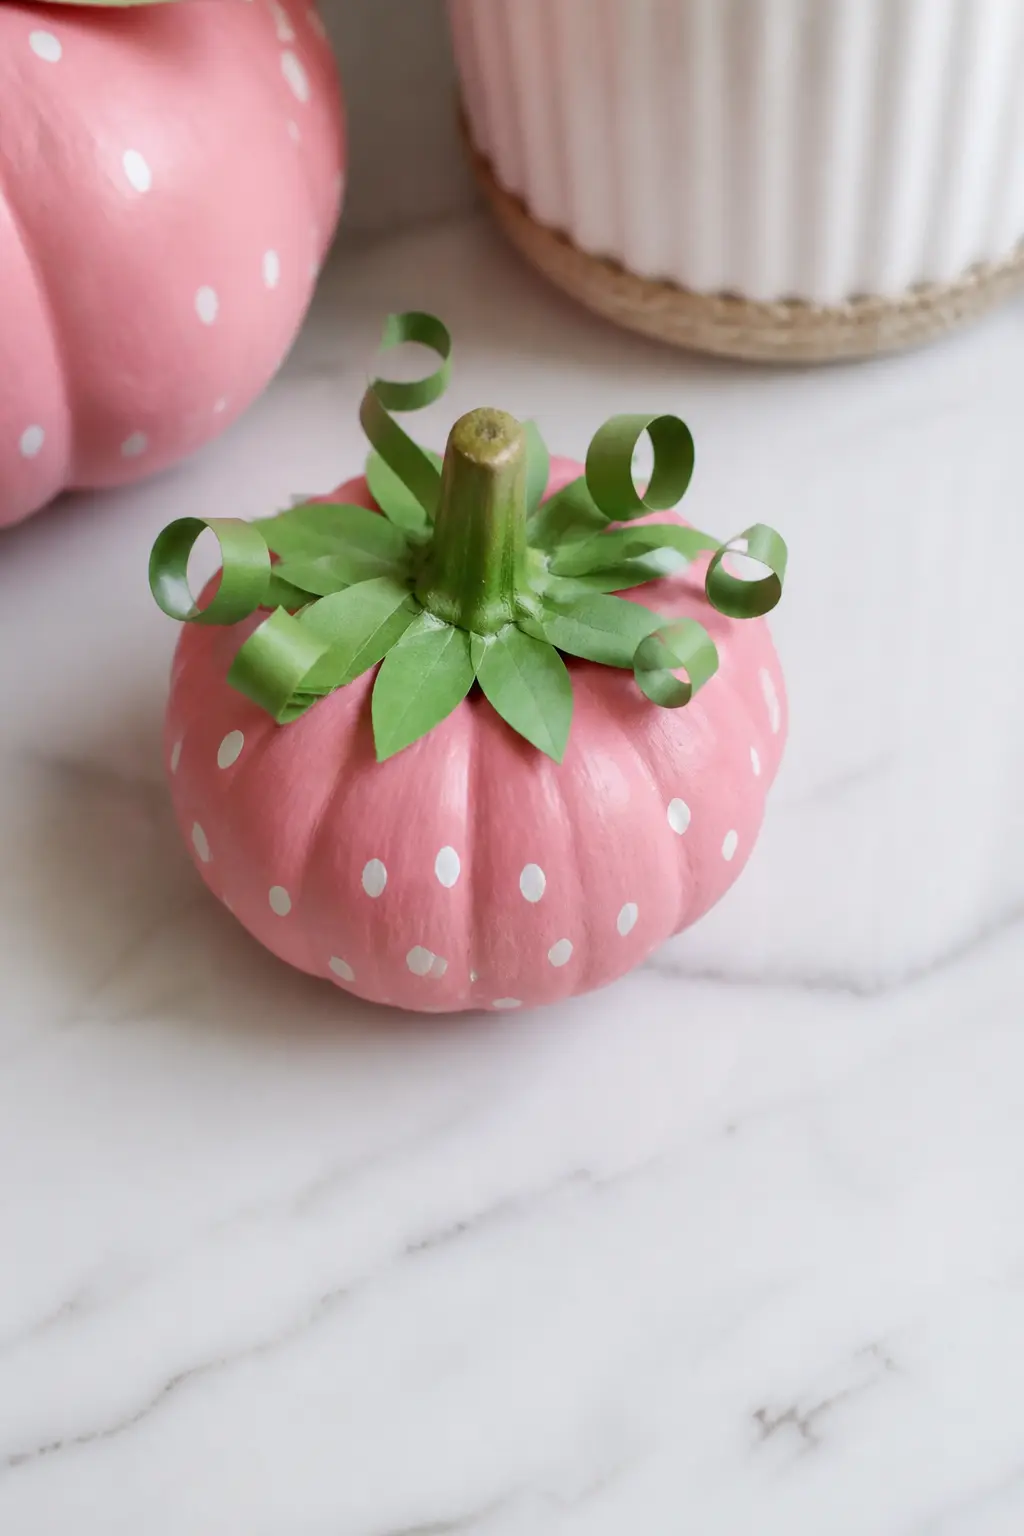
Blush Strawberry Pumpkin
Paint the pumpkin in two coats of warm blush, then add tiny red-tipped seeds across the skin with a fine brush. Cut a crown of green paper or cardstock into pointed leaf shapes, curl the tips slightly, and glue them around the base of the stem so they splay outward like a real strawberry top.
The effect reads as fruit rather than vegetable, which is exactly the point. This one works beautifully at a spring baby shower or a summer-into-autumn table where you want something unexpected.
🛍 Shopping guide
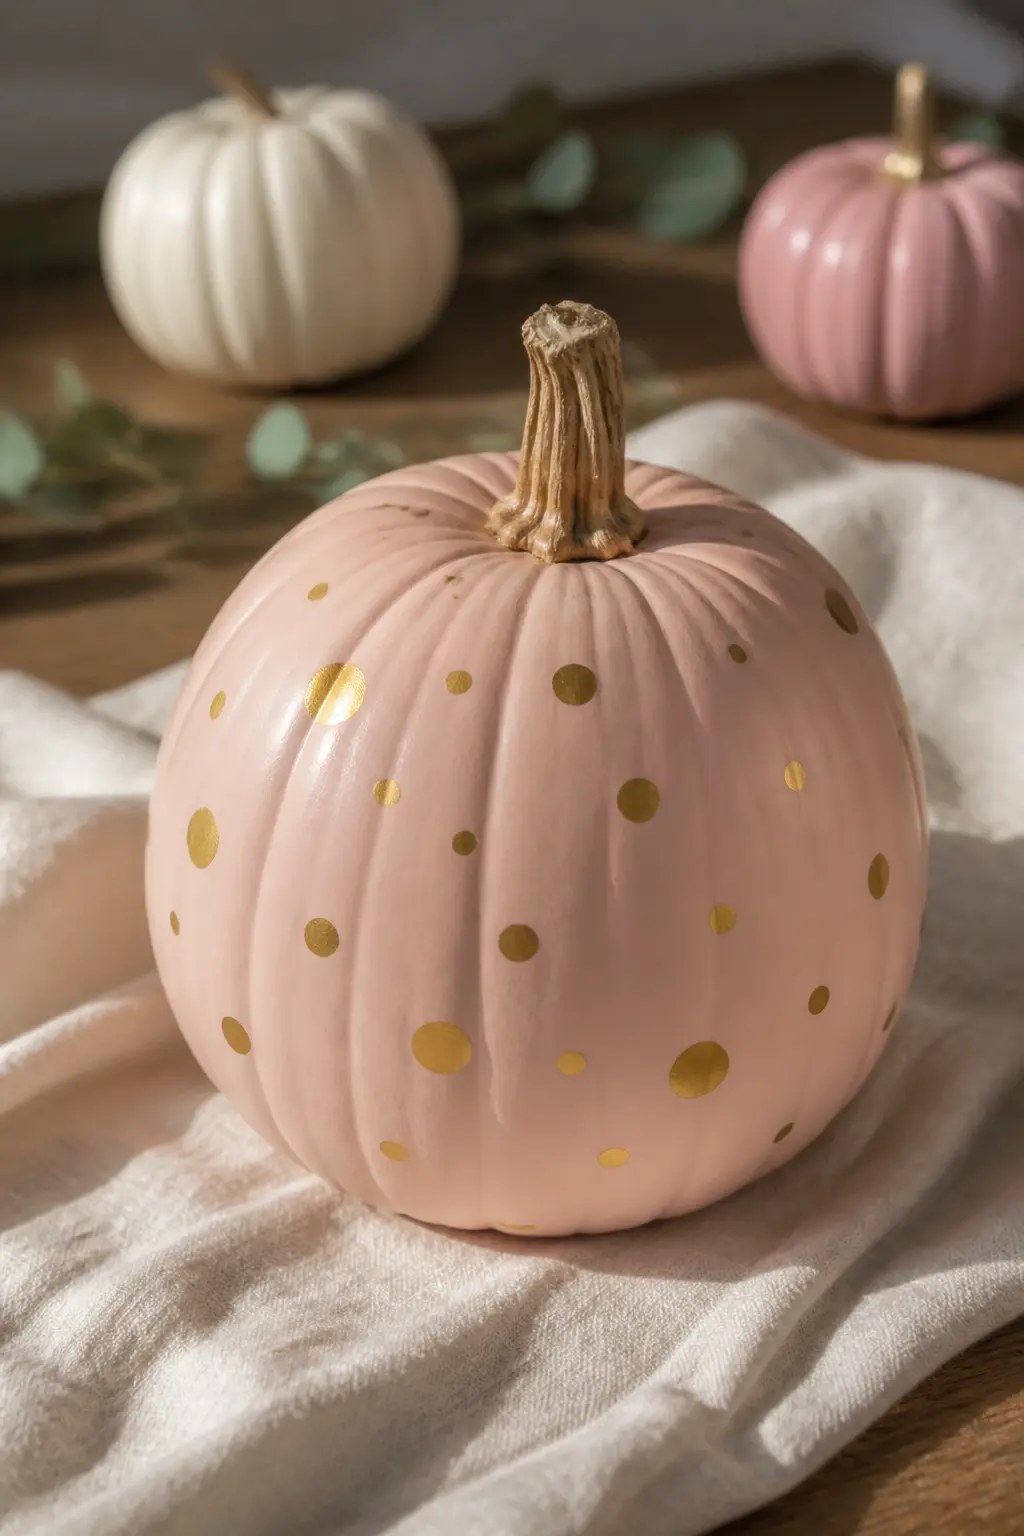
Blush With Gold Dots
Load the blunt end of a paintbrush with gold craft paint and press it straight down onto the dry blush surface to leave a perfect circle. Repeat across the whole pumpkin in a loose, uneven scatter: some clusters, some space, no ruler involved.
The imperfection is the point. Too even and it looks printed. Scattered and varied in density, it looks hand-made in the best way. Use a larger brush end for statement dots and a cocktail stick for tiny ones between them.
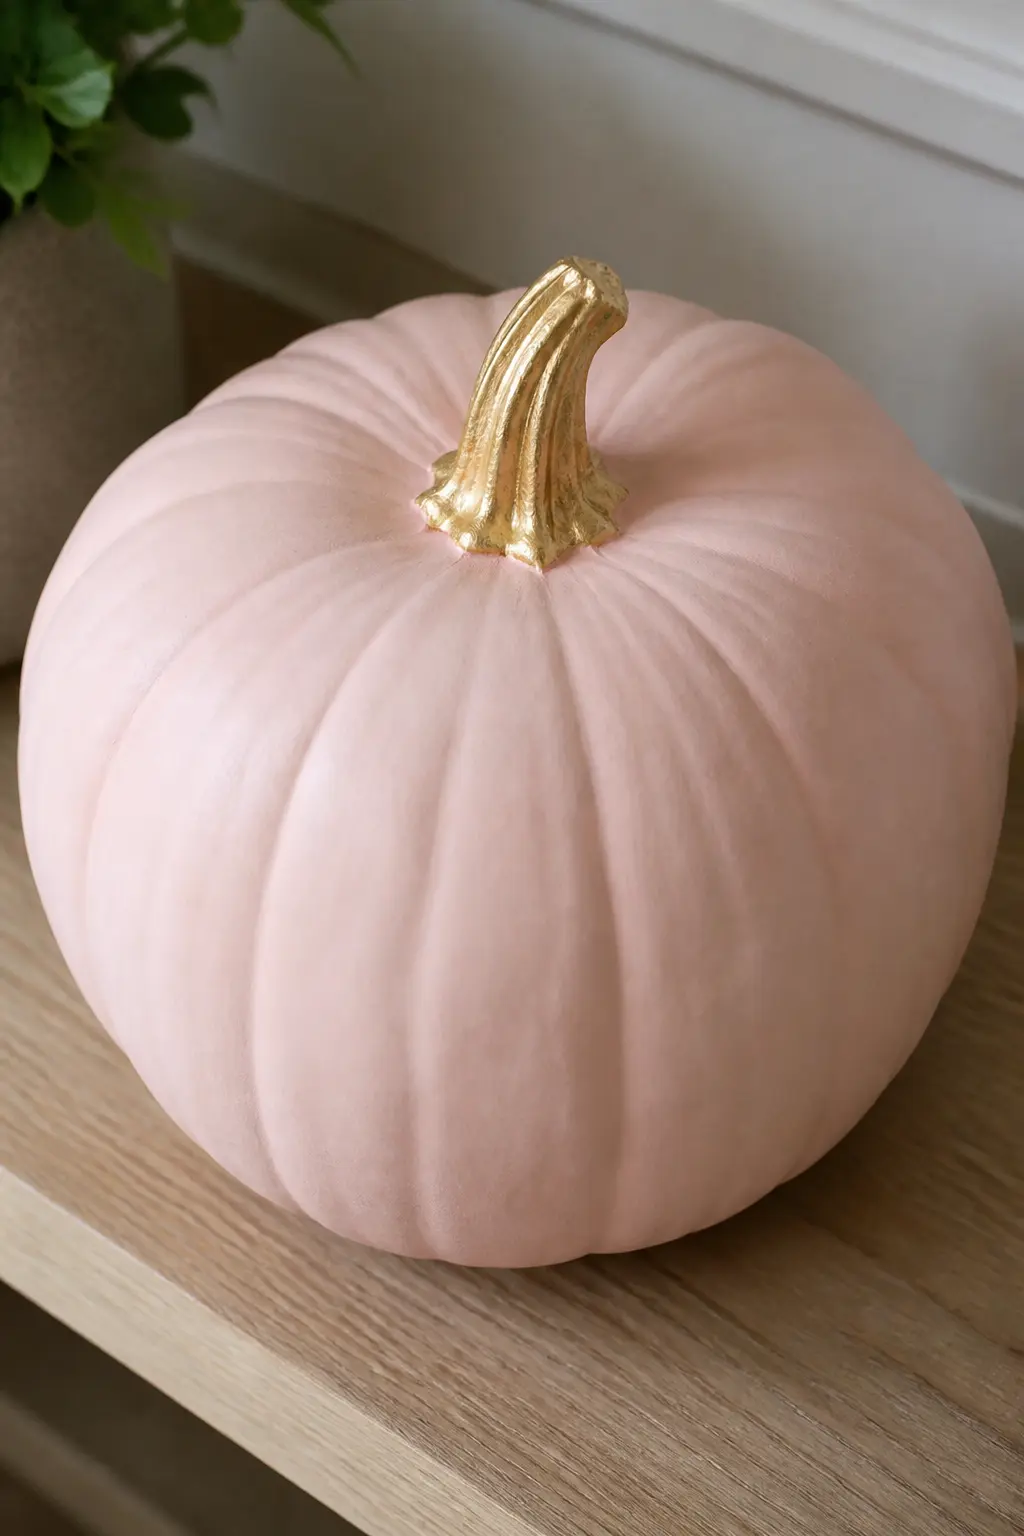
Blush With a Gilded Stem
Leave the pumpkin body in blush and paint only the stem in gold leaf paint or brush-on gilding paste. Two coats on a real stem, three on a plastic one. The contrast between the soft pink body and the metallic stem is quiet but specific: it looks like a deliberate choice rather than an accident.
This is the easiest upgrade on the list. It takes under five minutes and costs almost nothing if you already have gold paint on hand. It also works on gourds and mini pumpkins where the stem is more prominent.
🛍 Shopping guide
Blush With Pearl-Headed Pins
Push pearl-headed straight pins into the surface of a foam pumpkin in horizontal rows that follow the ridges. Space them evenly, about two centimetres apart, and let the rows stack from the base up to the shoulder. The pin heads sit proud of the surface and catch light differently as you move around the pumpkin.
This only works on foam. Real pumpkins eventually shrink and the pins fall out. Buy a white foam pumpkin, paint it blush, and let the paint cure fully before pinning so the surface is firm.
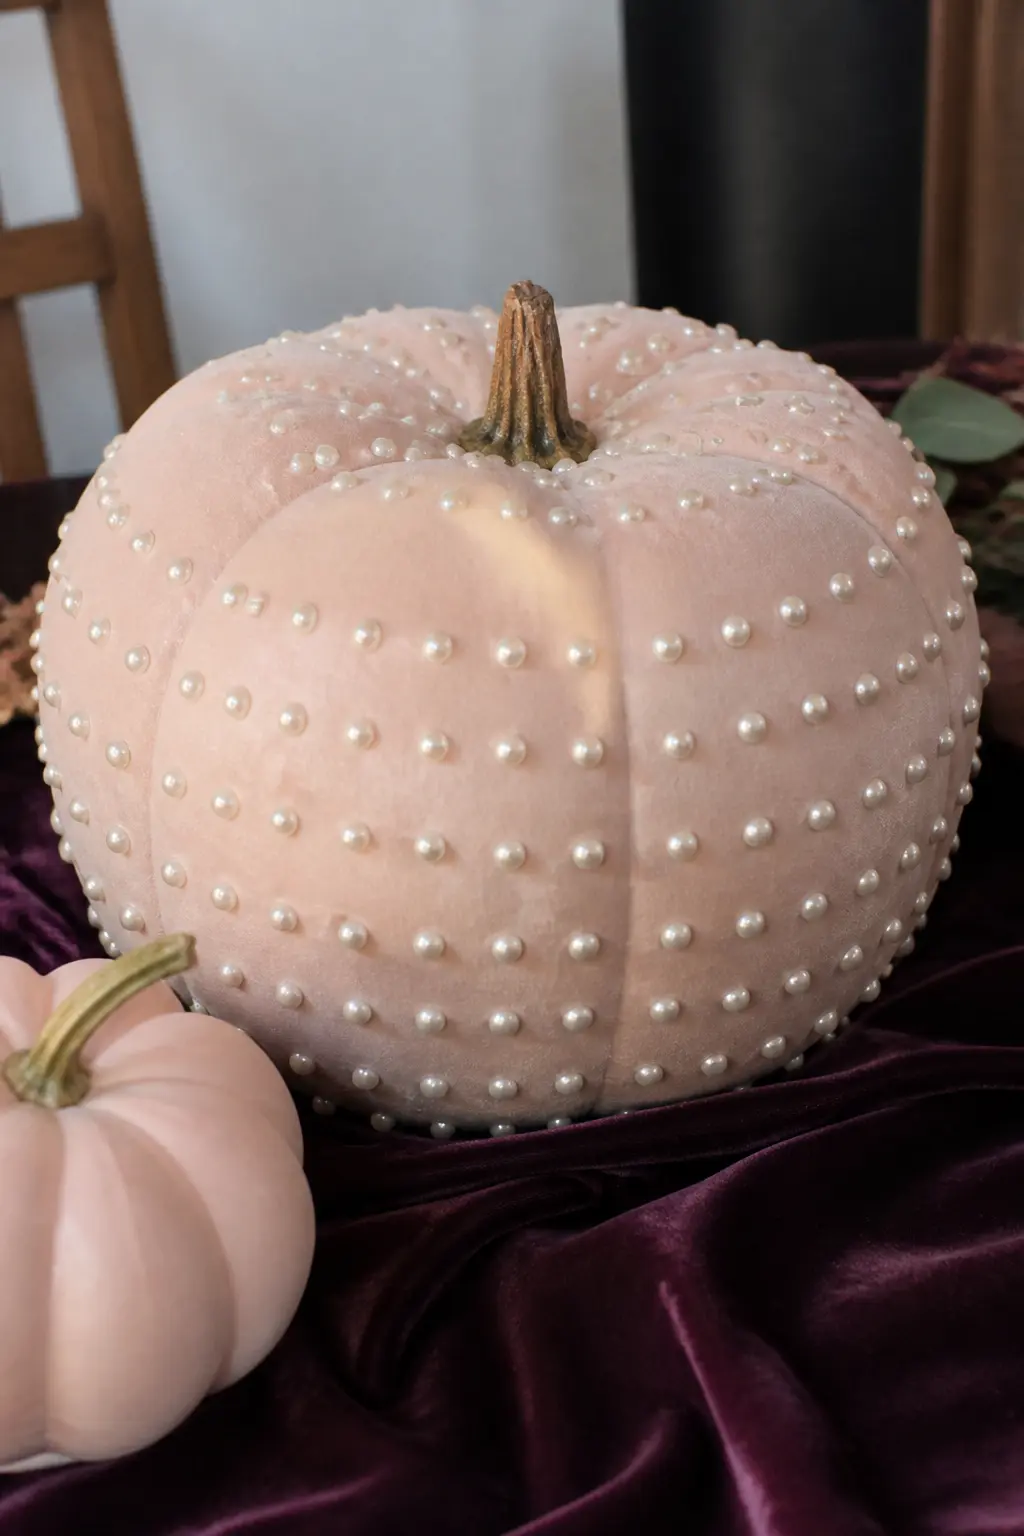
🛍 Shopping guide
Blush With a Satin Bow
Tie a wide satin ribbon in a full bow directly at the stem, keeping the loops generous and the tails long enough to trail down the first ridge on either side.
A warm ivory or champagne ribbon against blush pink is softer than a matching pink bow. A deeper mauve bow creates a deliberate colour shift that reads as more curated.
No glue needed on a real pumpkin stem. On a foam one, a single dab of hot glue on the knot keeps the bow centred. This is also the fastest finish on the list: thirty seconds of effort, immediate improvement.
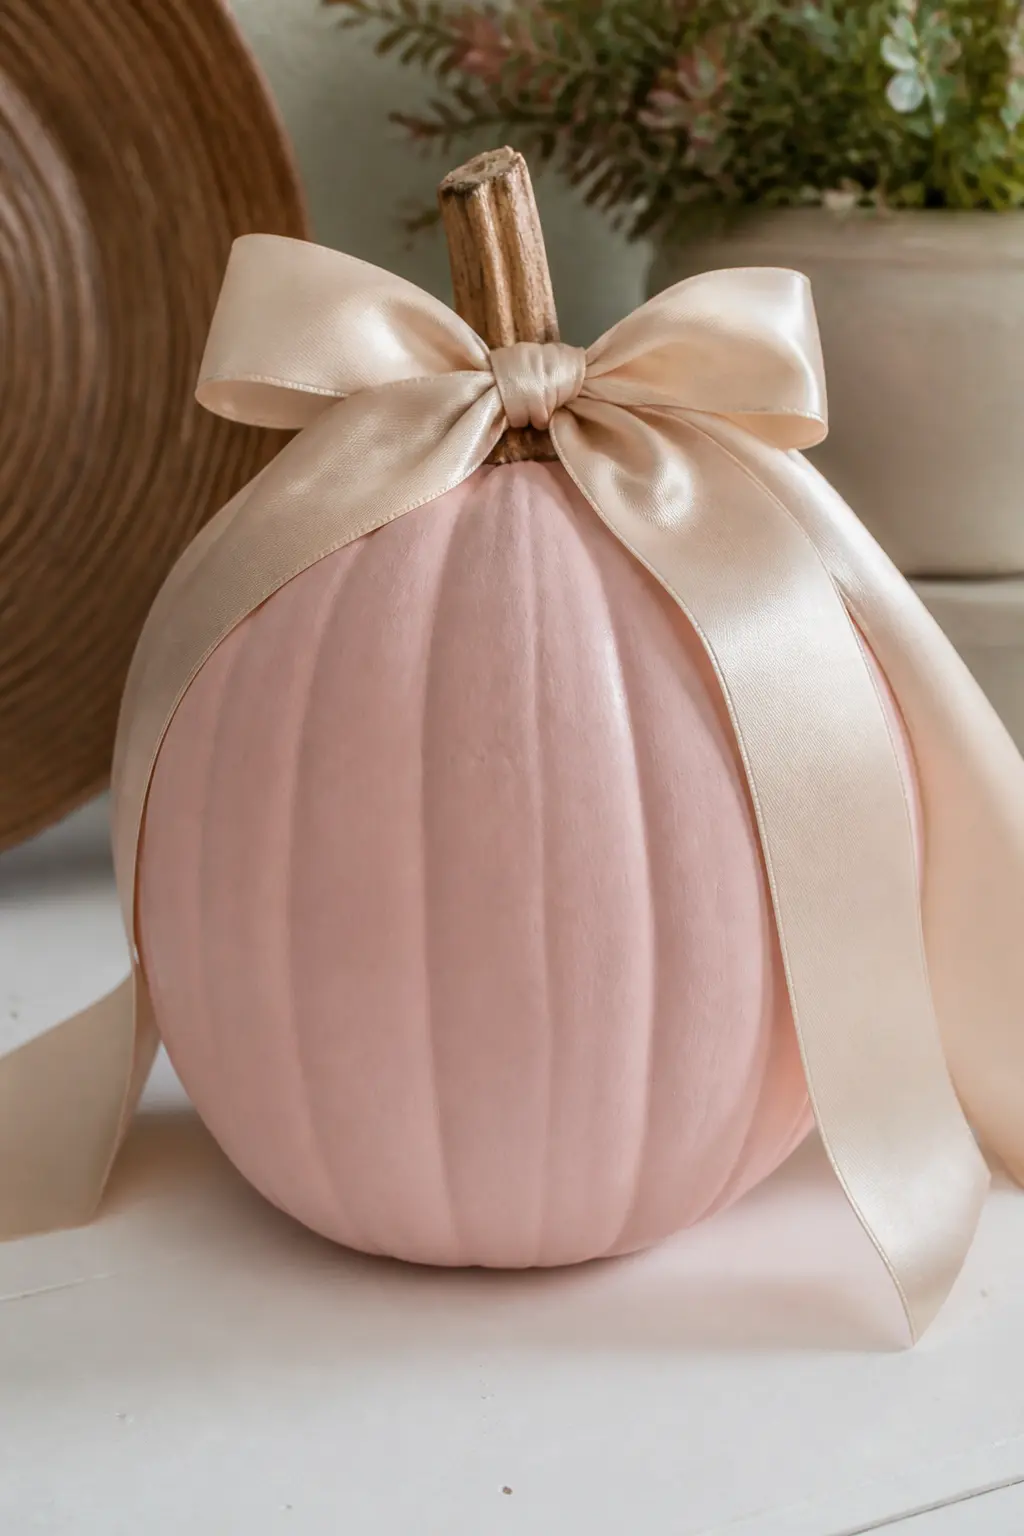
🛍 Shopping guide
Blush With Fine White Stripes
Apply painter’s tape in vertical stripes over a cured blush base, spacing the tape strips evenly around the pumpkin. Paint the exposed sections in bright white, remove the tape before the white fully dries, and the stripes stay crisp. The ridges make perfectly straight taping impossible, which gives it a hand-crafted quality that a flatter pumpkin would not have.
Scale matters here. Wide stripes read as graphic. Narrow stripes read as a pattern. For a blush pumpkin, narrow stripes keep the result feeling delicate rather than bold.
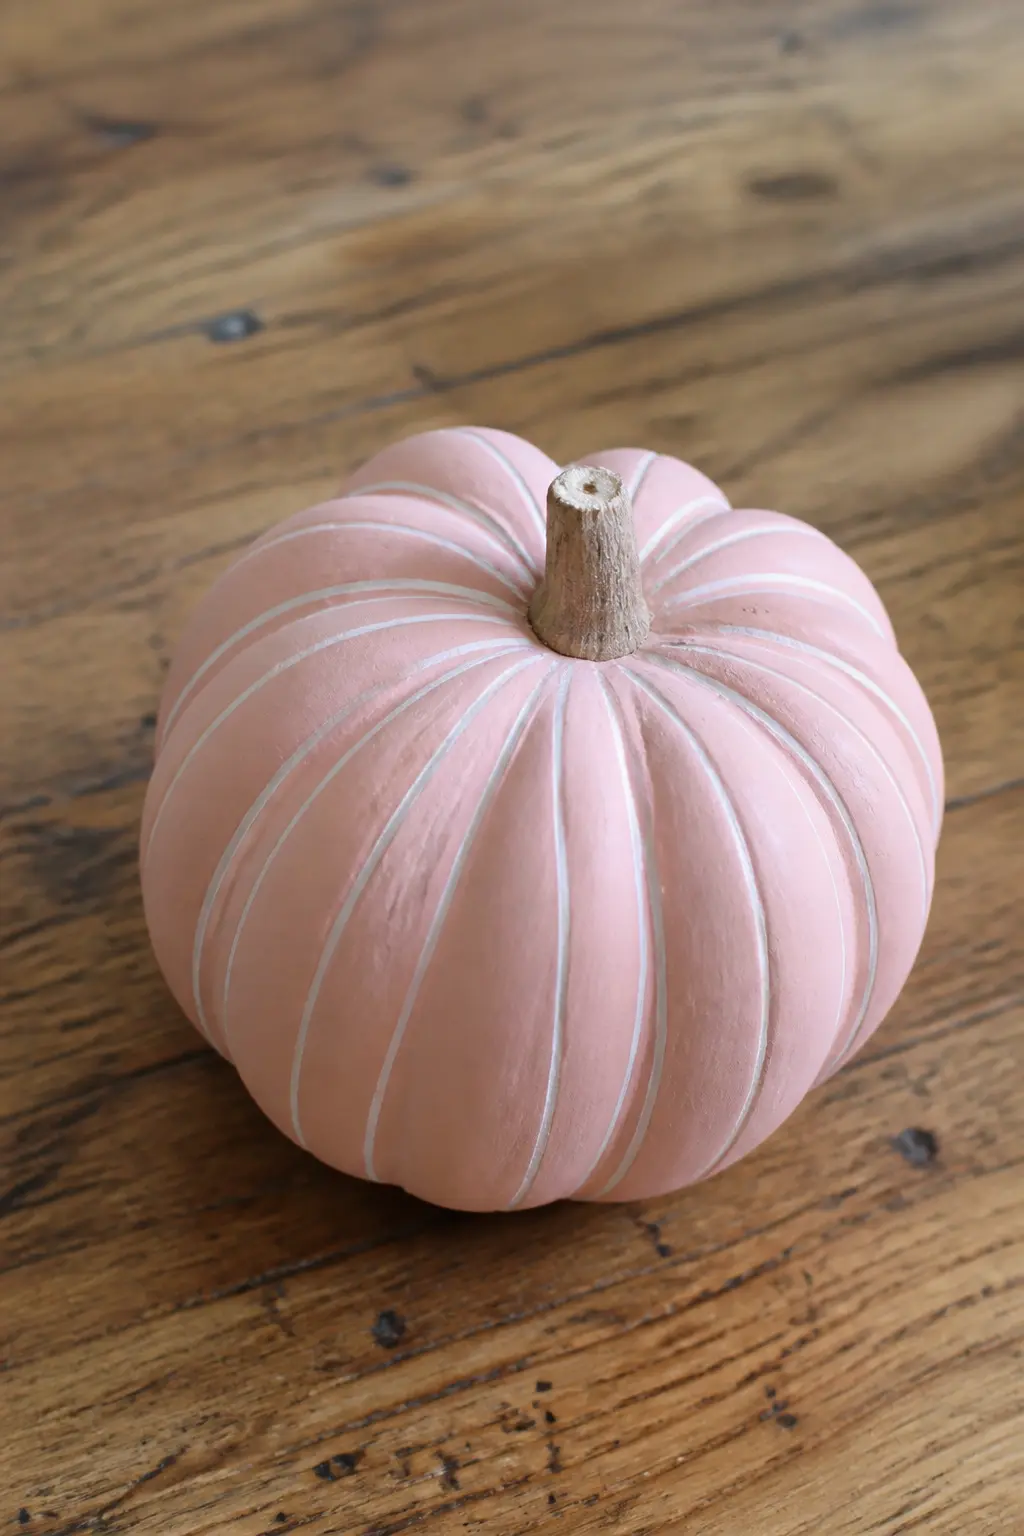
🛍 Shopping guide
Blush With a Lace Pattern
Hold a piece of lace flat against the pumpkin surface, securing it with two pieces of tape. Dab white or cream paint through the gaps with a dense sponge, working lightly to avoid bleeding under the lace. Lift the lace straight off without dragging and the pattern transfers cleanly.
The curved surface means the lace will not lie completely flat, which creates slightly softer edges at the ridges and sharper ones on the flat panels. That variation reads as intentional and adds depth. Repeat across the whole pumpkin with the same piece of lace, or use a different lace section each time for a more varied repeat.
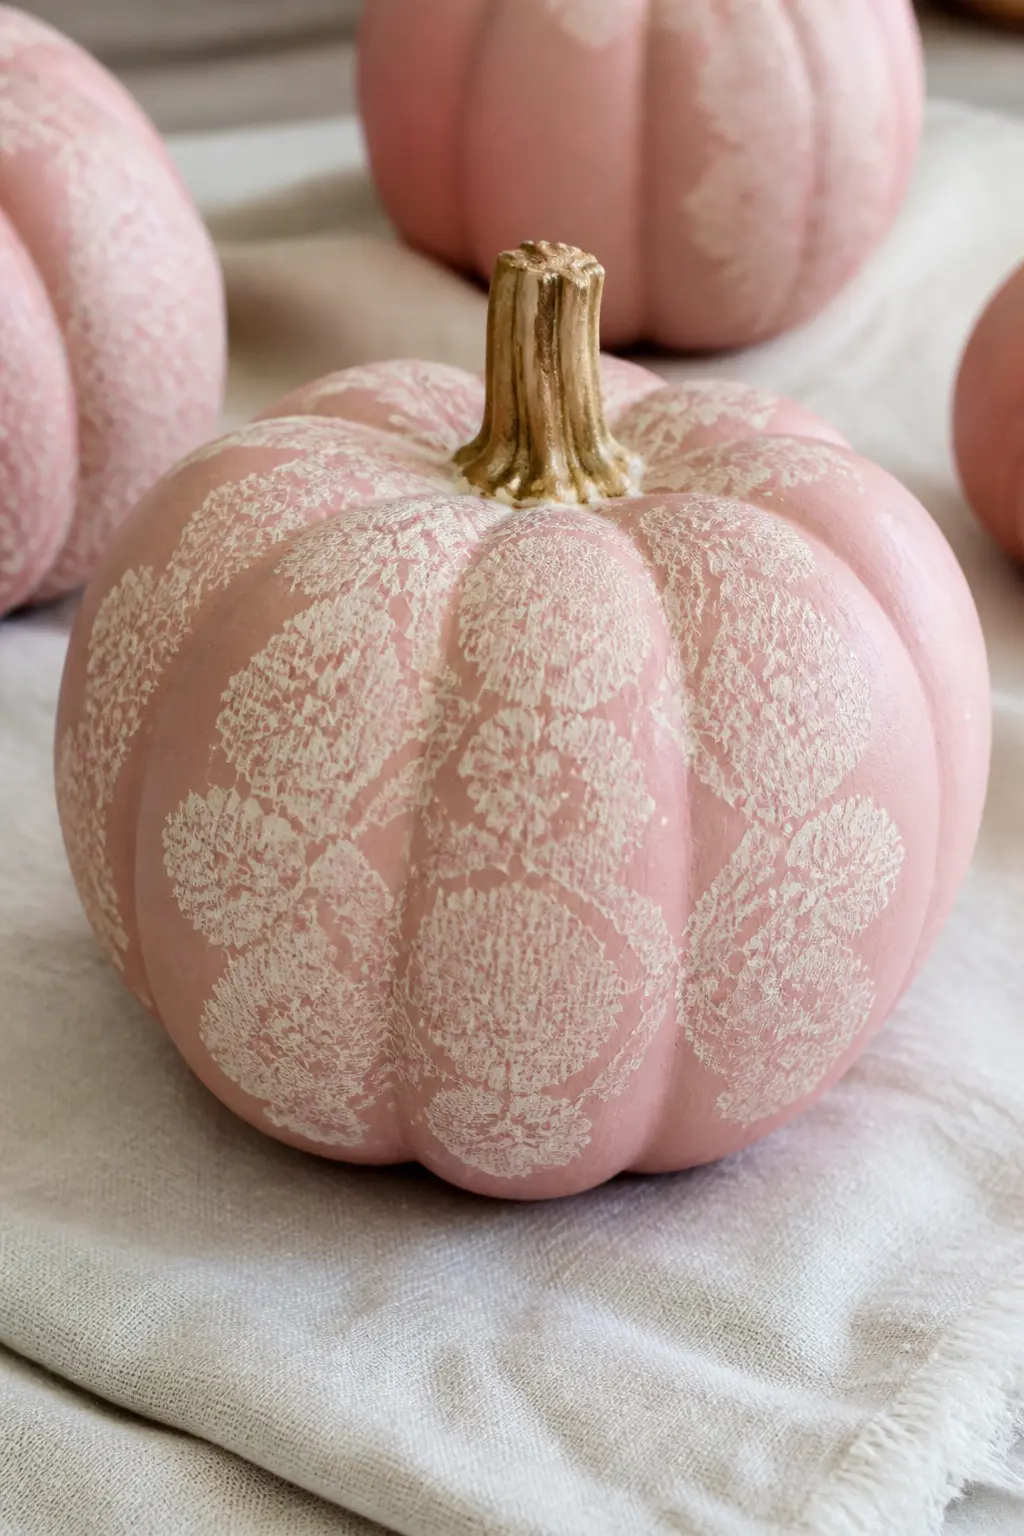
🛍 Shopping guide
Dusty Rose Pumpkins
Dusty rose sits between blush and mid pink: warm enough to read as pink but muted enough to feel grown-up. It pairs with cream, terracotta and deep burgundy without any of them fighting for attention. A matte finish works best here because it keeps the colour looking considered rather than candy-bright.
The five ideas in this section lean into texture. Dry-brushing, velvet, dried botanicals: these are the finishes that make a dusty rose pumpkin look as though it took effort, even when it did not take long.
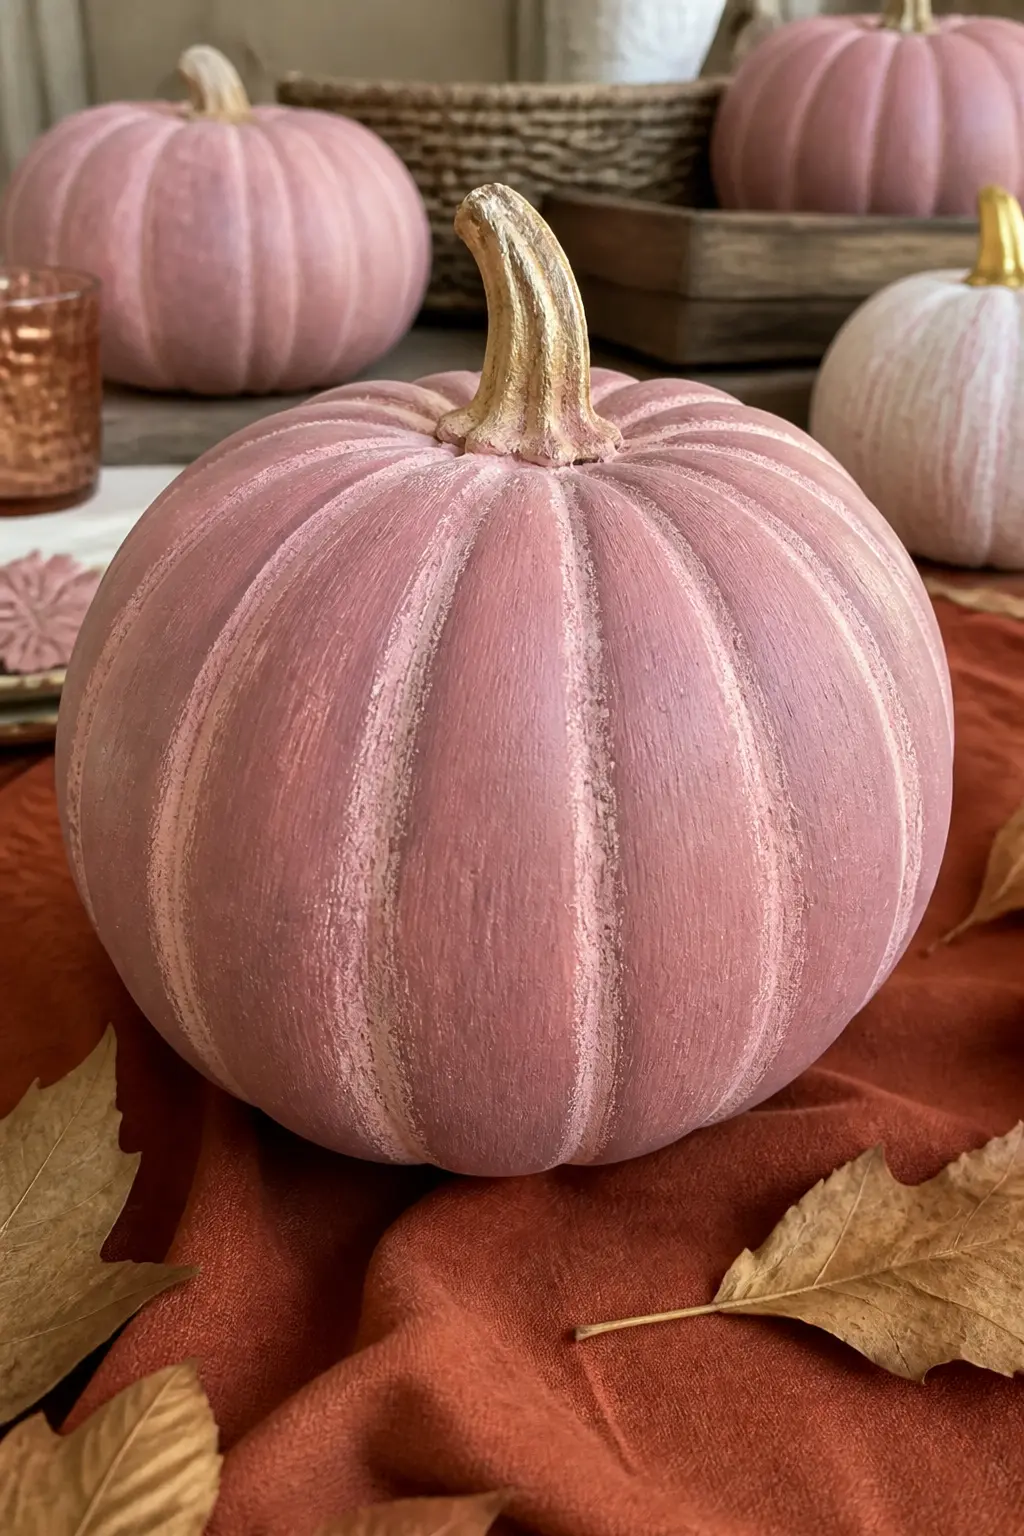
Dusty Rose With Cream Dry-Brushed Ridges
Dry-brushing is the technique that makes a pumpkin look three-dimensional rather than spray-can flat. Dip a wide, stiff brush into cream paint, wipe most of it off on a paper towel, and drag the nearly-dry brush lightly along each ridge. The paint catches the raised surface and leaves the recessed grooves in dusty rose, creating depth and shadow.
Do not over-load the brush. Too much paint fills in the grooves and you lose the effect entirely. Work ridge by ridge, wiping the brush between each pass. Stand back every few minutes to check the contrast is building evenly.
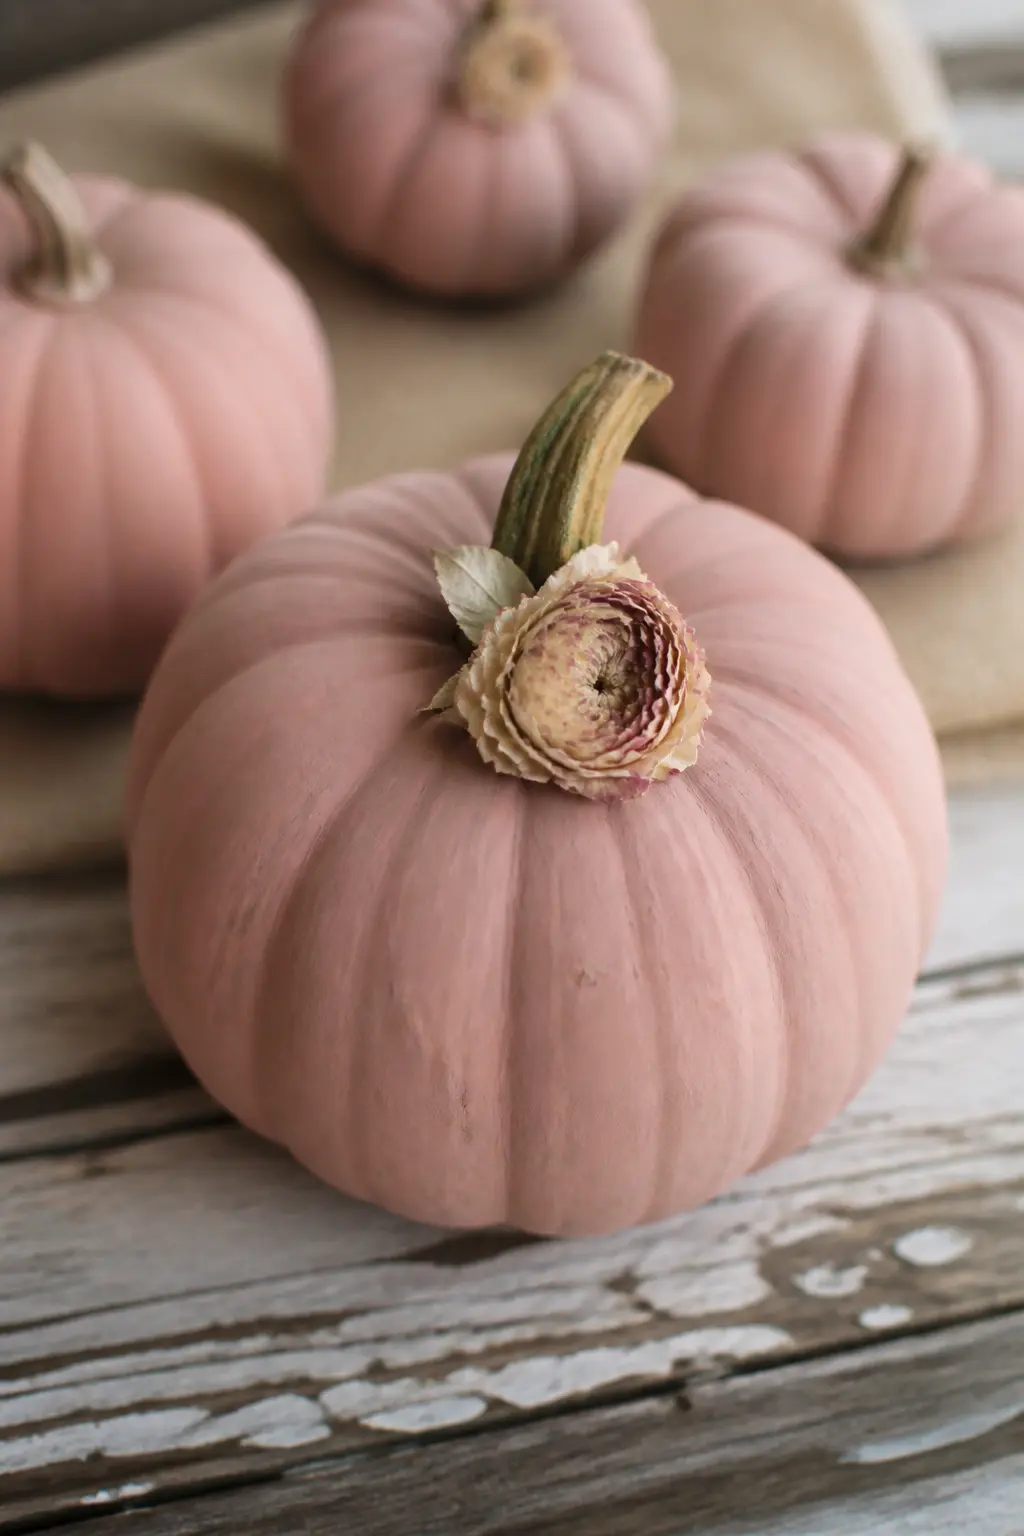
Dusty Rose With a Dried Flower at the Stem
Glue a single dried flower, or a small cluster of two or three, directly at the base of the stem where it meets the pumpkin body. Dried roses, dried lavender sprigs, pampas grass plumes or dried strawflowers all work.
The stem and the flower together become a sculptural moment at the top of the pumpkin instead of a blank disc of orange skin.
Hot glue is fast but visible if used carelessly. Use a pin to push a tiny amount of glue into the exact attachment point, hold the flower in place for thirty seconds, and the join is clean. This pairs best with pressed and dried flower work you may already have on hand.
🛍 Shopping guide
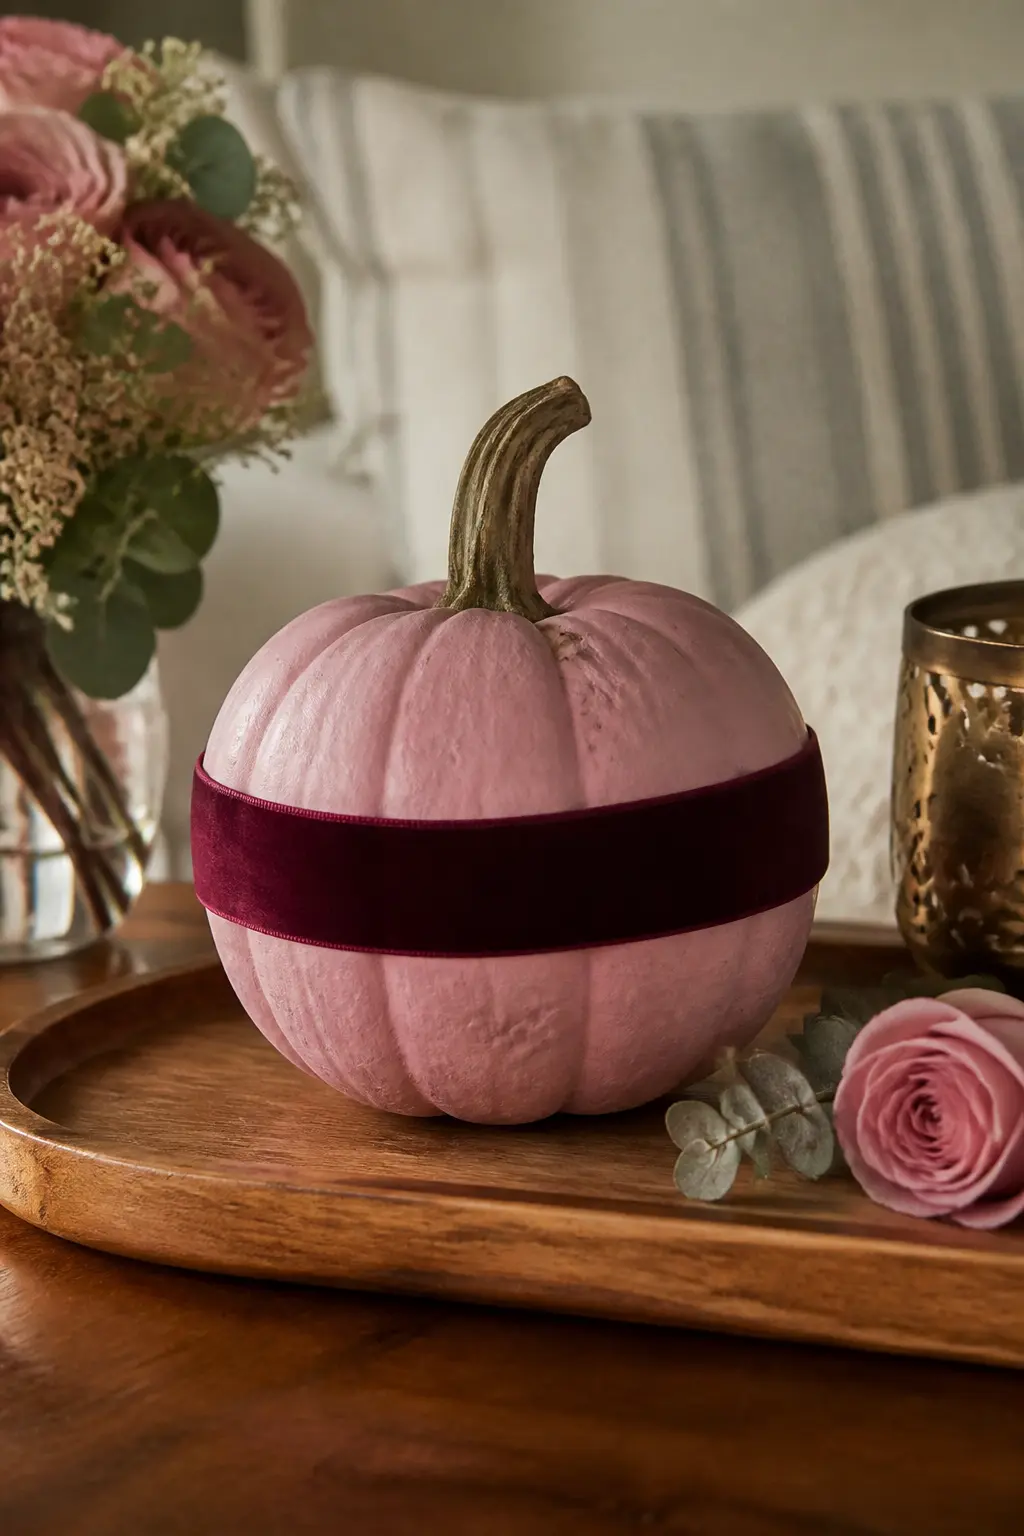
Dusty Rose With a Velvet Ribbon
Wrap a length of velvet ribbon in a single horizontal band around the widest point of the pumpkin, tucking the ends neatly and securing them with a dab of hot glue at the back.
The velvet texture against the matte painted surface creates a contrast that photographs exceptionally well. Deep burgundy velvet against dusty rose is a classic pairing. Sage green is unexpected and works just as well.
Width matters. A narrow ribbon (half an inch or less) reads as a seam. A wide ribbon (one and a half to two inches) reads as a deliberate band. Choose the wider option and the pumpkin looks more finished.
🛍 Shopping guide
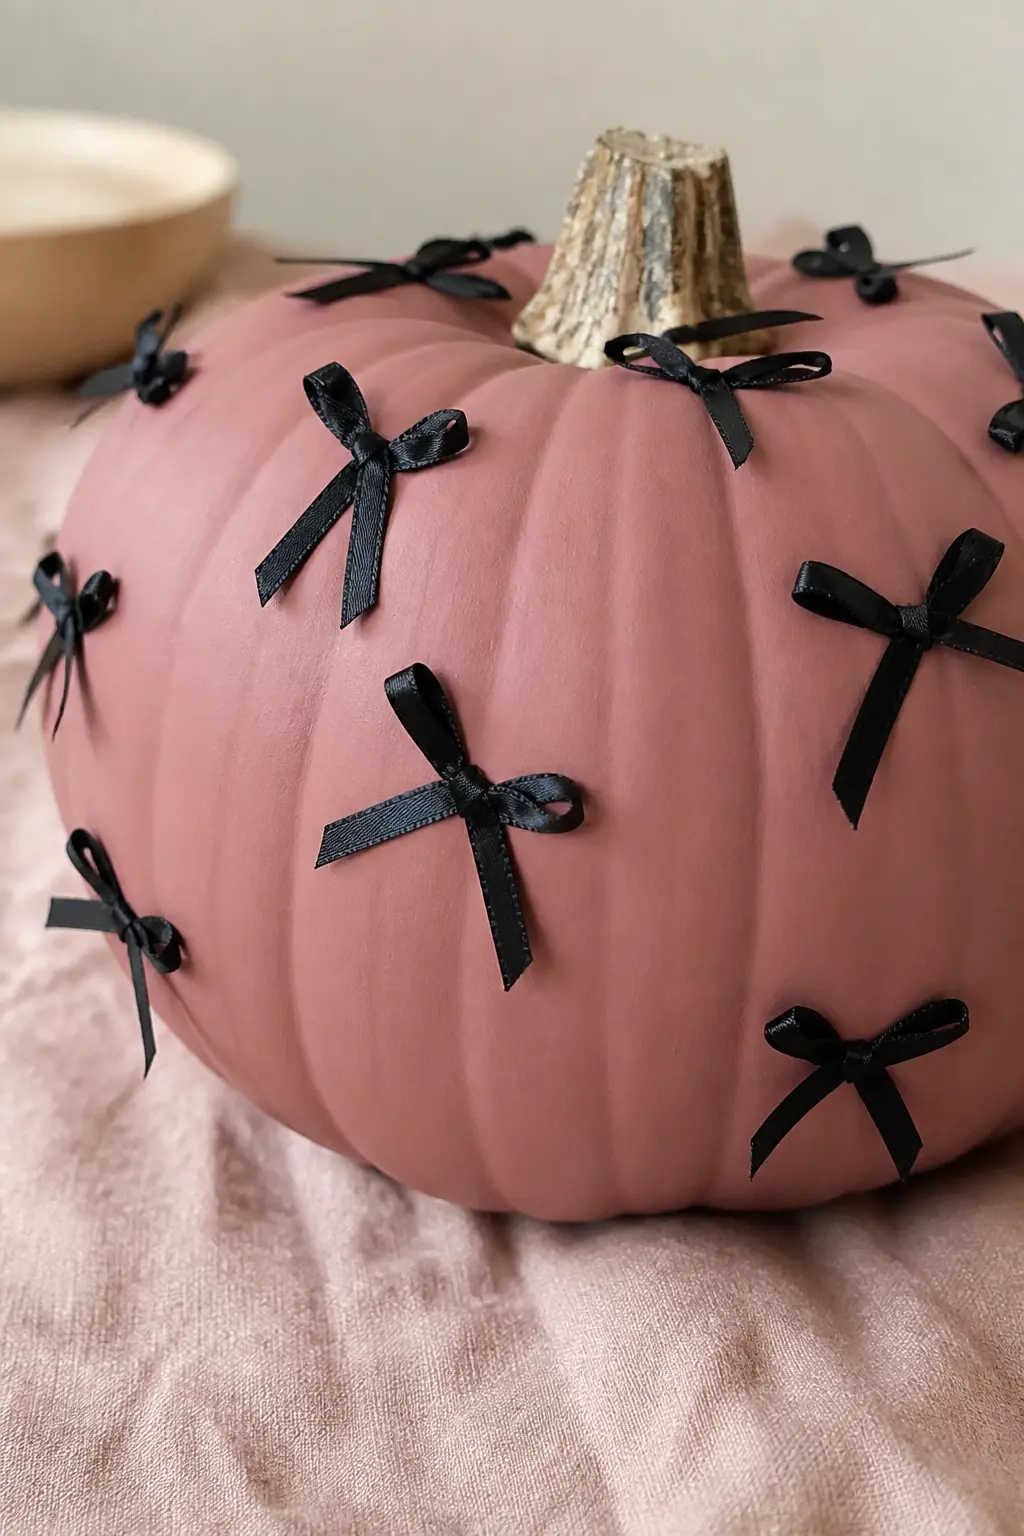
Dusty Rose With Tiny Black Bows
Scatter small pre-made black satin bows across the surface of a dusty rose pumpkin, attaching each one with a single pearl-headed pin or a dot of glue. Vary the placement so the bows fall at different angles: a few upright, a few tilted.
The soft pink ground makes each tiny black bow pop without the combination reading as heavy or Halloween-coded.
This is the entry where black earns its place through restraint. Twenty small bows across a medium pumpkin is the right density: enough to read as a pattern, not so many that the pink disappears.
🛍 Shopping guide
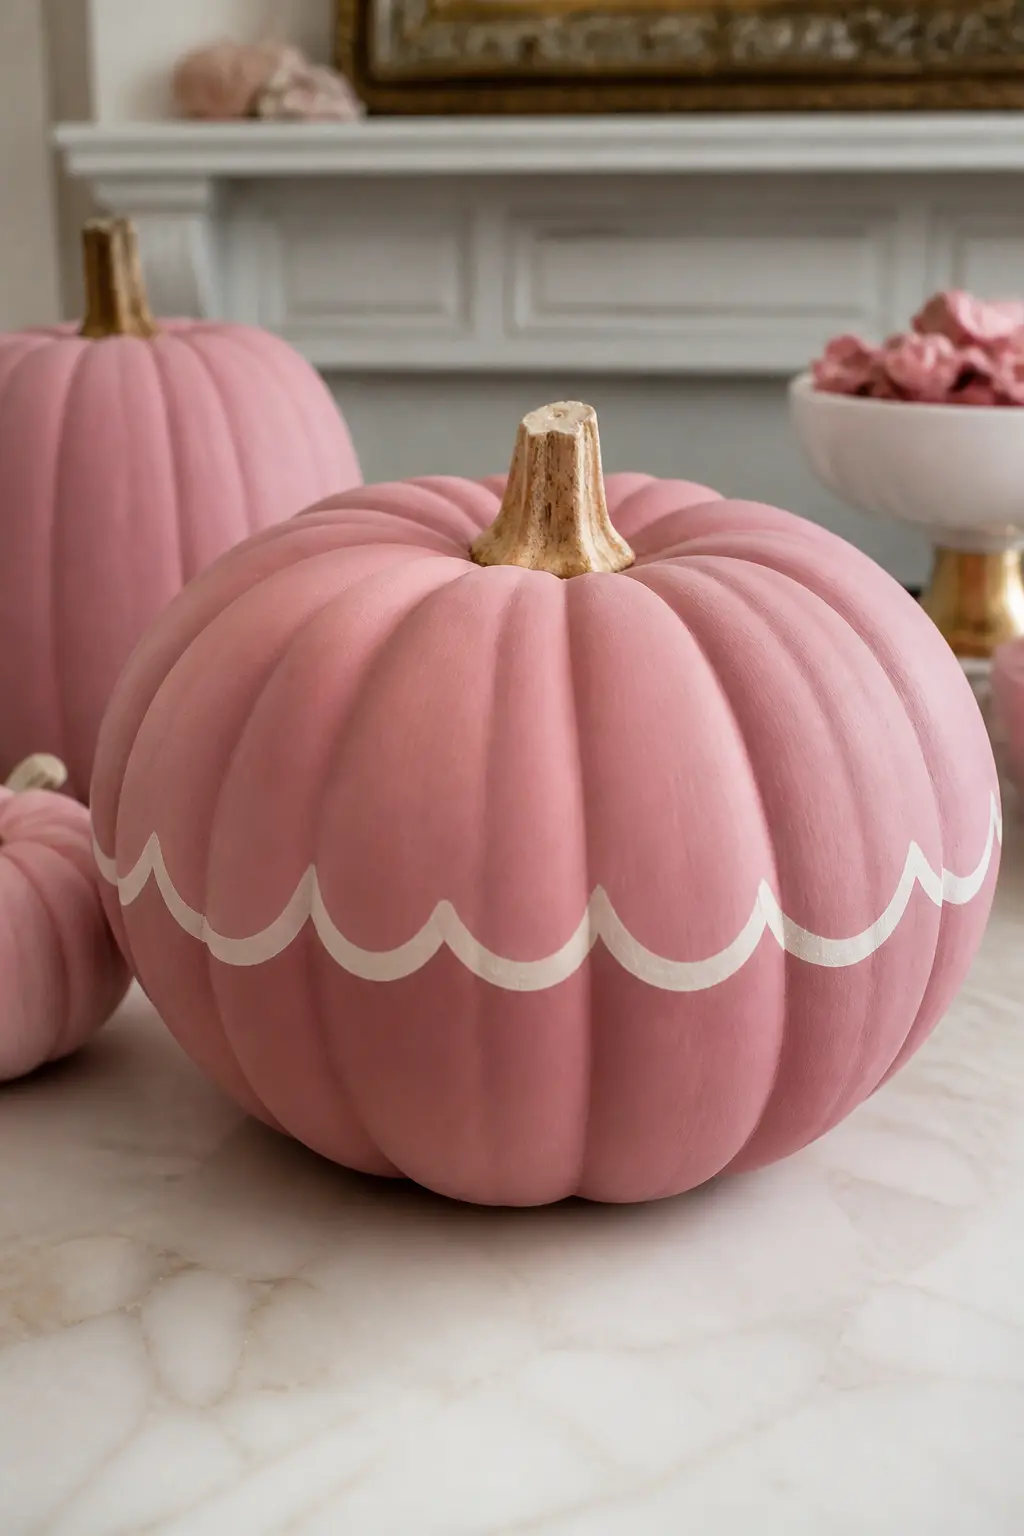
Dusty Rose With a Scalloped Edge
Mark a horizontal line around the centre of the pumpkin with a chalk pencil, then freehand a scallop (a repeating curved arch) along that line in cream or white paint using a fine brush.
The scallops do not need to be identical: slight variation looks embroidered rather than printed. Fill the area above the scallop line with a second coat in a slightly lighter or darker tone to create a two-tone effect.
This takes a steadier hand than most ideas here, but the result is genuinely distinctive. It references decorative china and vintage embroidery patterns at the same time, which is a useful combination if the rest of your table setting is in that territory.
🛍 Shopping guide
Mid Pink Pumpkins
Mid pink is the most versatile shade in the range. It is cheerful without being aggressive, and it takes both Halloween-adjacent details (a ghost face, a cat silhouette) and fully decorative ones (polka dots, gold marbling) with equal grace.
This is the shade to choose if you cannot decide whether you want a Halloween pumpkin or a decor pumpkin, because mid pink handles both.
These six pumpkins are also the easiest to photograph well. The colour pops against dark backgrounds and sits quietly on light ones, which means wherever you put it, the pumpkin does the work.
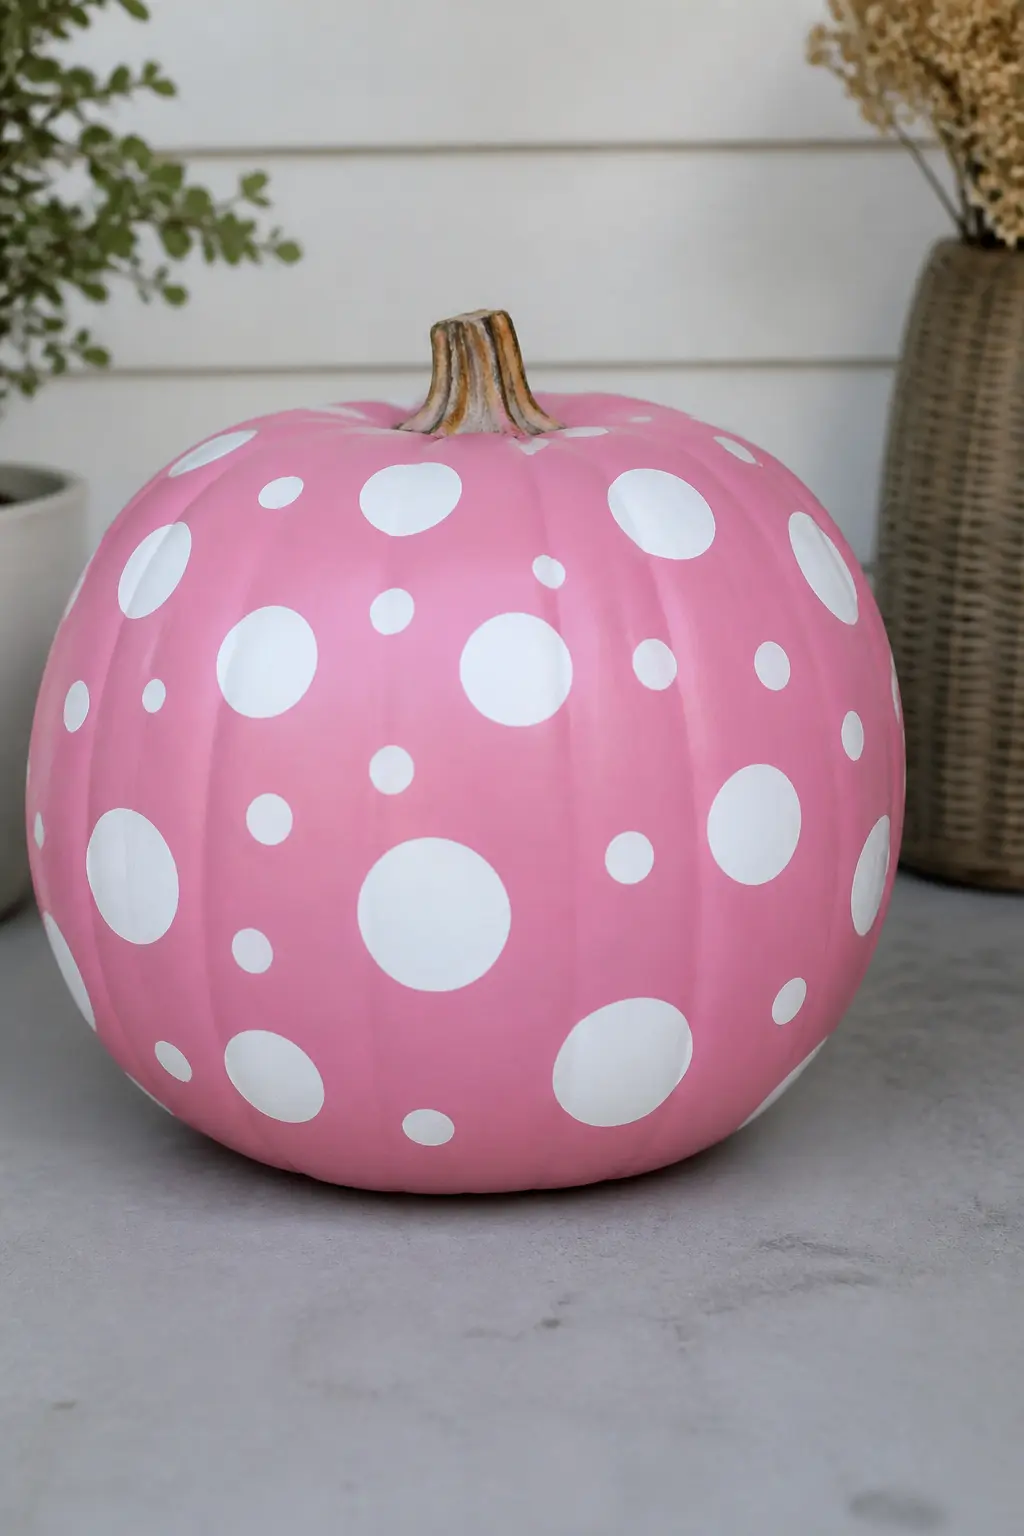
Mid Pink With White Polka Dots
Polka dots in white over mid pink are cheerful in the best way: retro, graphic, immediately readable. Use the brush-end method (load the blunt end of a brush and press straight down) for consistent circles, or use a round eraser tip for very even dots.
Three sizes of dot mixed together creates depth. One size only reads as a pattern repeat.
Cluster a few dots more densely near the top and let them thin out toward the base for a composition that feels designed rather than randomly scattered.
🛍 Shopping guide
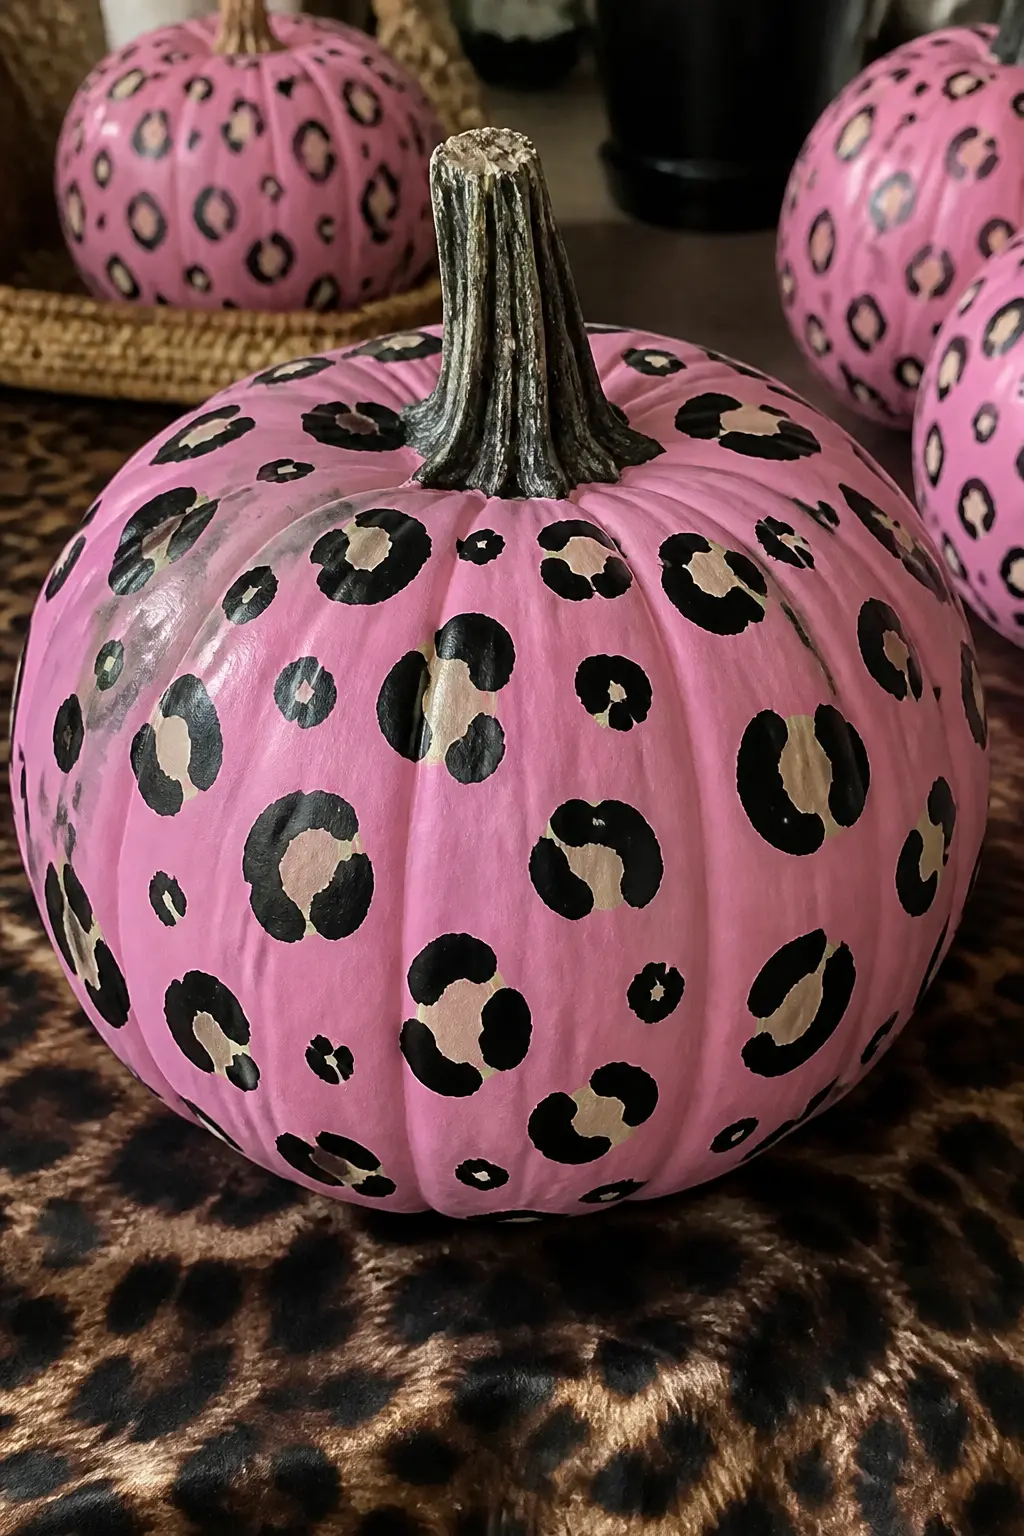
Mid Pink With Leopard Print
Leopard print on a pumpkin sounds like a lot and is actually very controlled: paint the mid pink base, add irregular oval shapes in cream, then trace a broken C-shape in black around one side of each oval. That is the whole method. The spaces between the marks are as important as the marks themselves.
This is the one entry where black appears as a more substantial detail rather than a small accent, but it is still secondary: the pink reads first, the cream second, and the black simply defines the shapes. Keep the ovals small relative to the pumpkin and the result stays graphic rather than loud.
🛍 Shopping guide
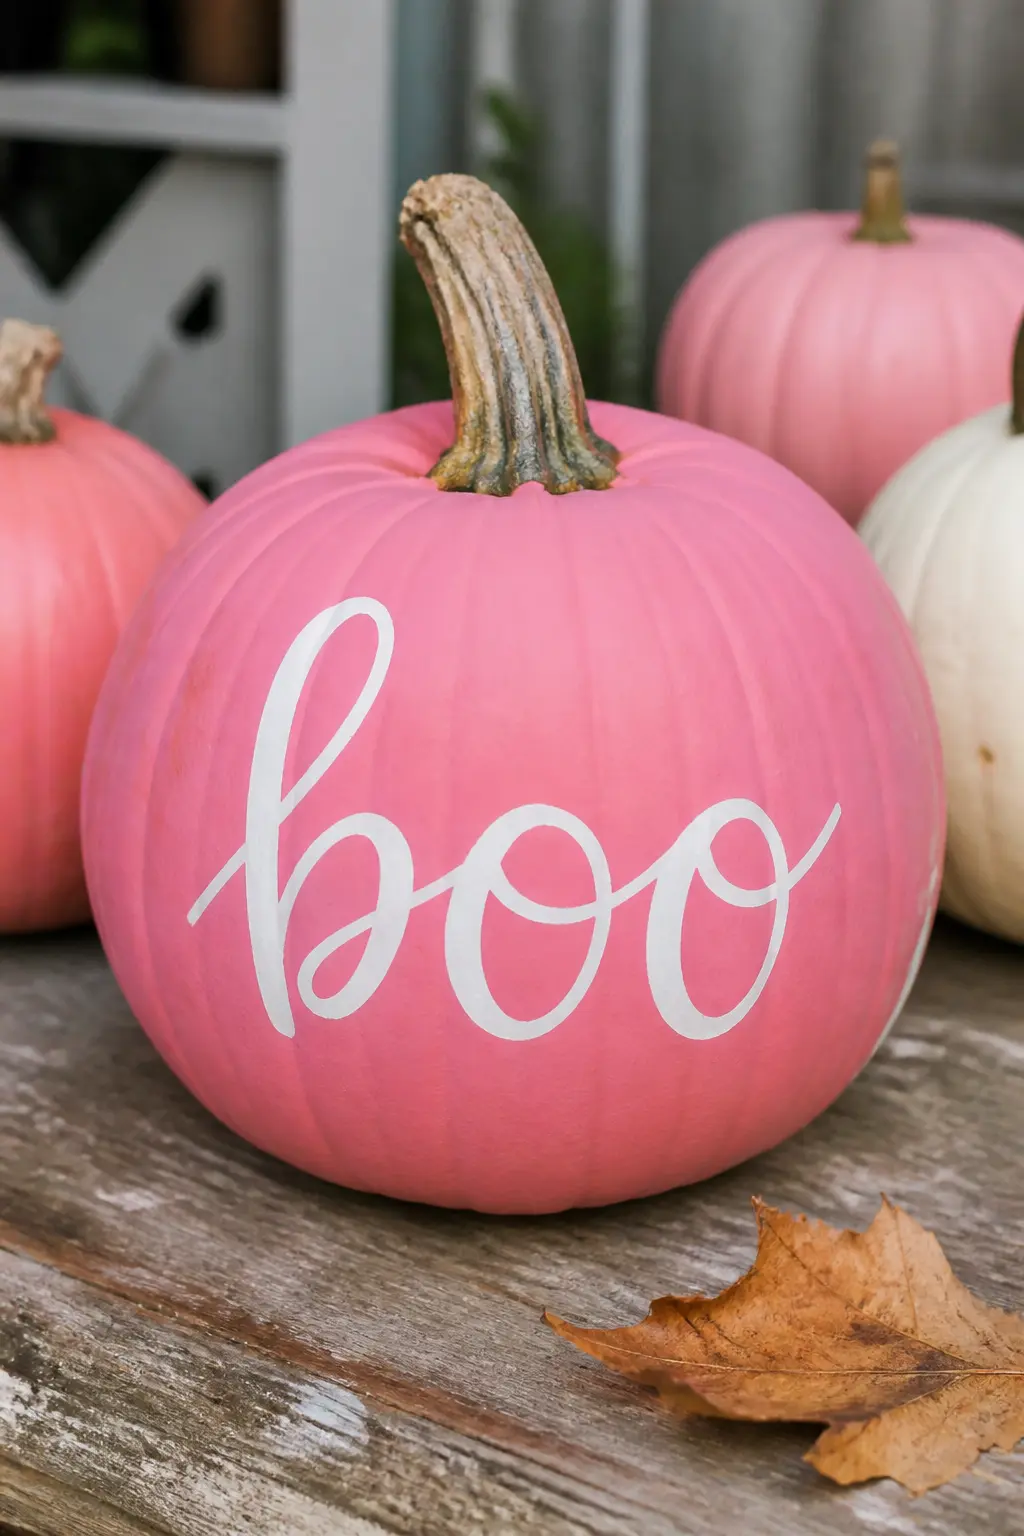
Mid Pink With a Hand-Lettered Word
Choose one word: a name, a season, a sentiment. Write it across the front panel of the pumpkin in white paint using a fine brush or a paint pen, centring it visually on the largest flat section between two ridges.
Script lettering reads warmer and more personal than block capitals. Whichever you choose, sketch it first with a chalk pencil so the placement is right before the paint goes on.
This is the most personal entry in the collection. A pumpkin that says a name or a word specific to your table becomes something guests actually remember.
🛍 Shopping guide
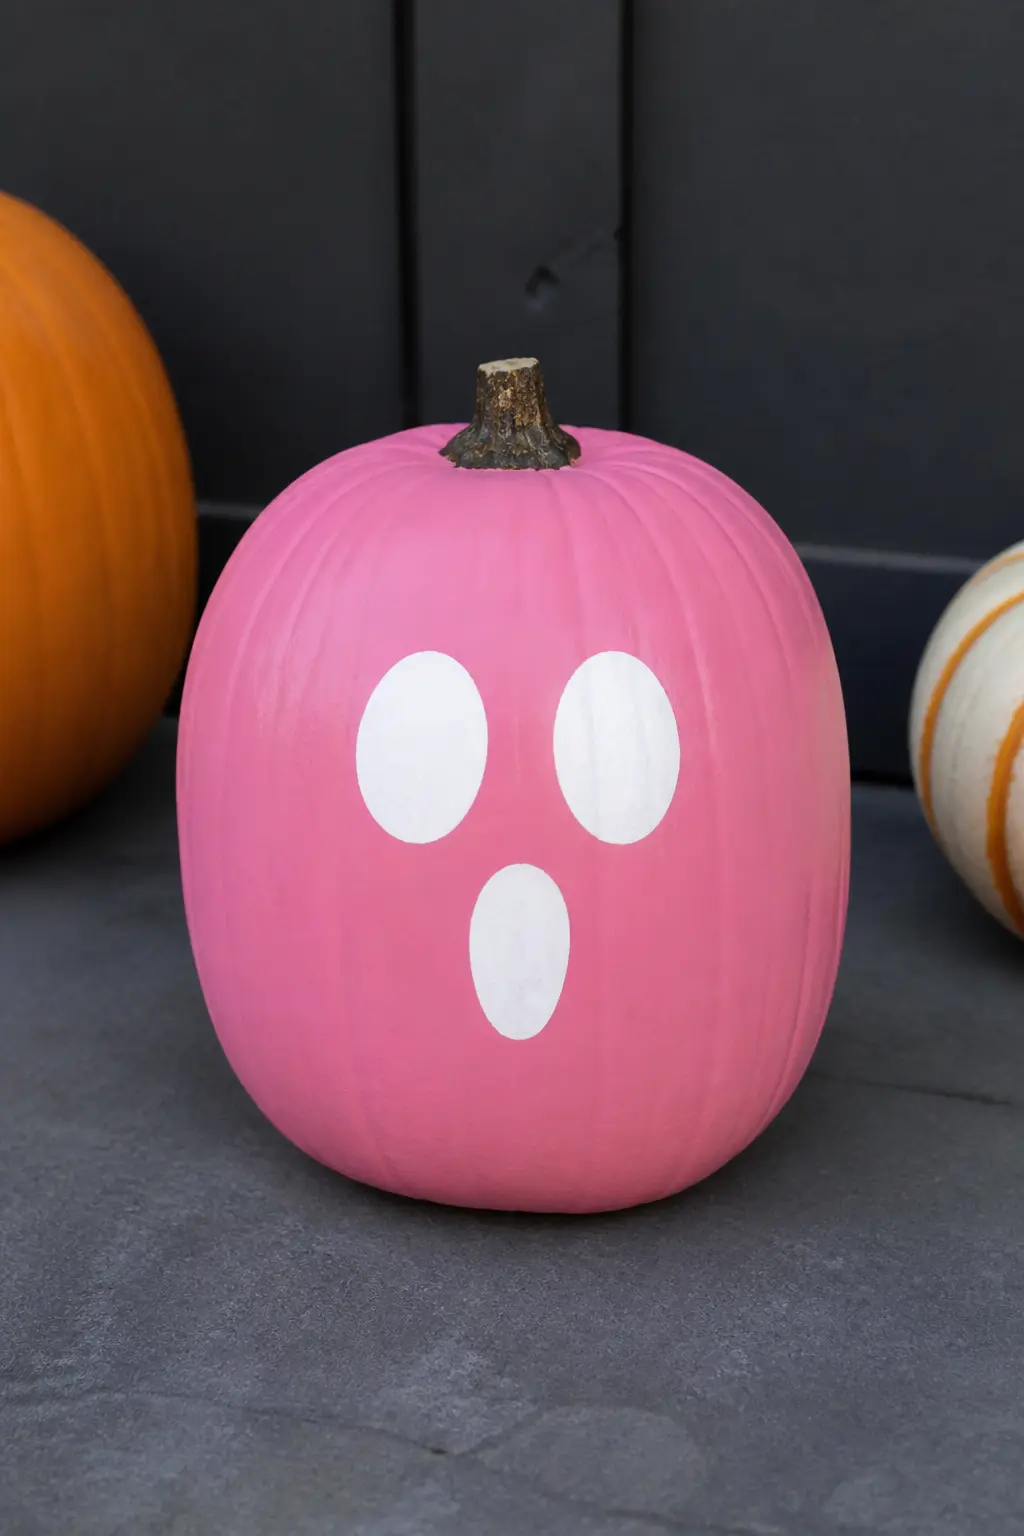
Mid Pink With a Ghost Face
Paint a simple ghost face in white on the front of the pumpkin: two round eyes and a small oval mouth, all in solid white with no outlines.
The simplicity is what makes it work on a pink base, where anything more detailed would read as busy. The ghost face is friendly rather than spooky because pink eliminates every threatening quality the image might otherwise carry.
This is the Halloween entry that still works at a baby shower or a kids party. It needs no carving, no gore and no skill beyond a steady hand for three white circles.
🛍 Shopping guide
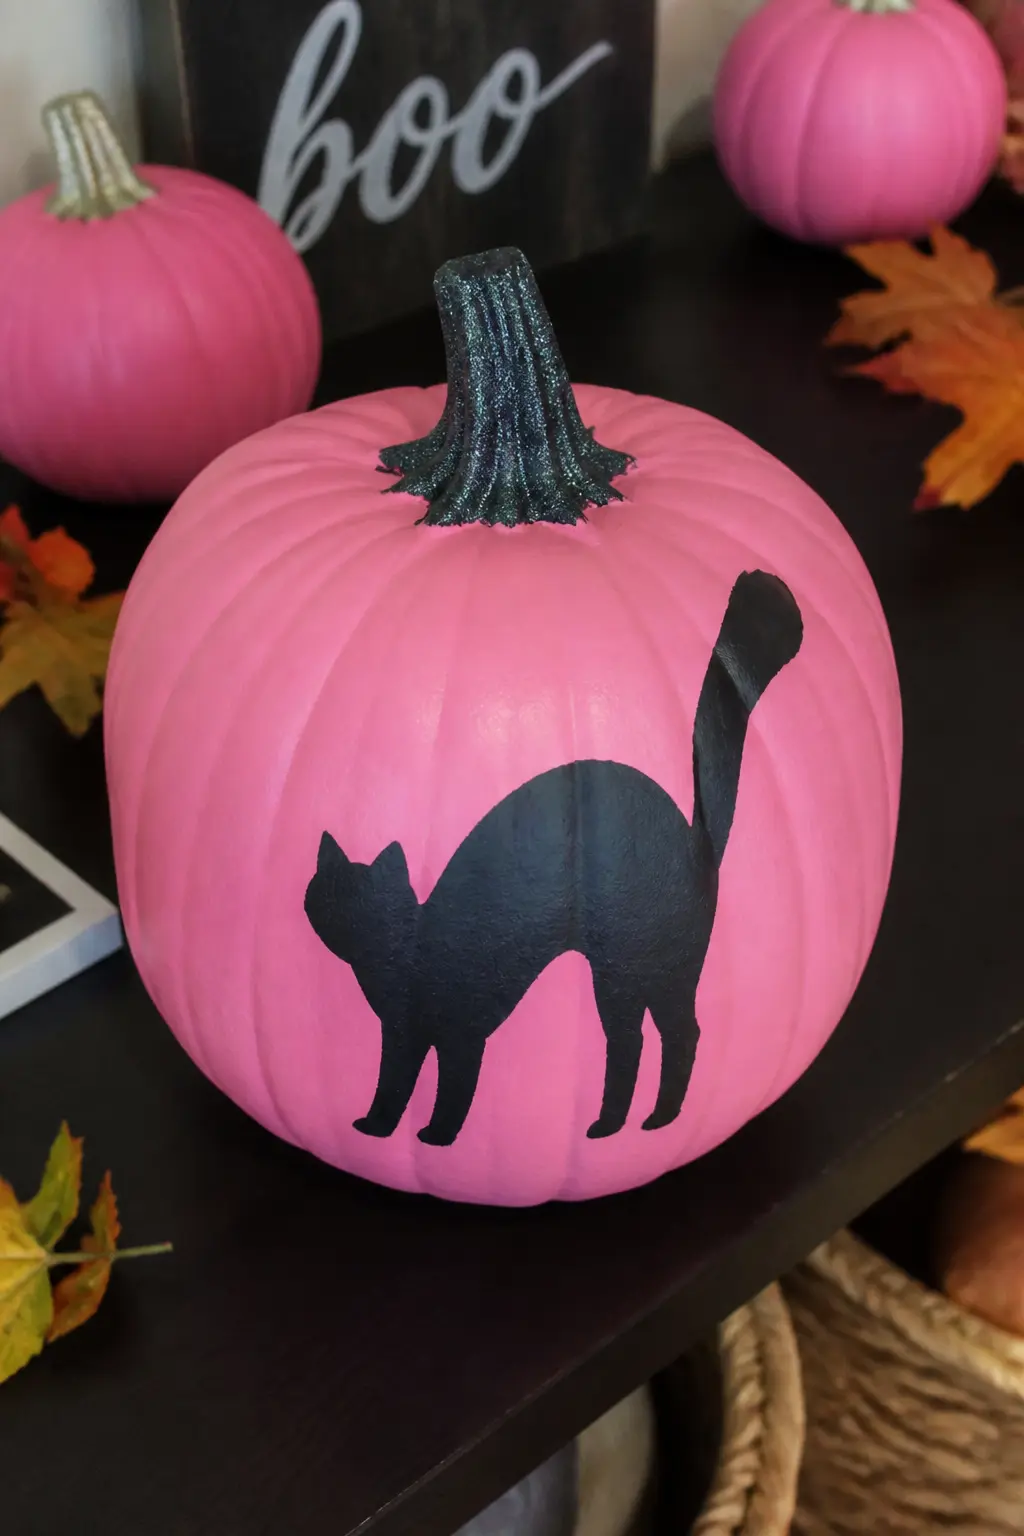
Mid Pink With a Black Cat Silhouette
Cut a simple cat silhouette from black adhesive vinyl or cardstock, including the arched back, raised tail and pointed ears that make the shape immediately readable. Press it onto the flat front panel of the pumpkin.
Vinyl adheres well to a smooth painted surface and can be repositioned before it fully sets. Cardstock needs a light coat of decoupage medium over the top to keep the edges down.
The silhouette reads as Halloween without committing to it. On a mid pink pumpkin it is more graphic illustration than seasonal decor, which extends the display window well beyond October.
🛍 Shopping guide
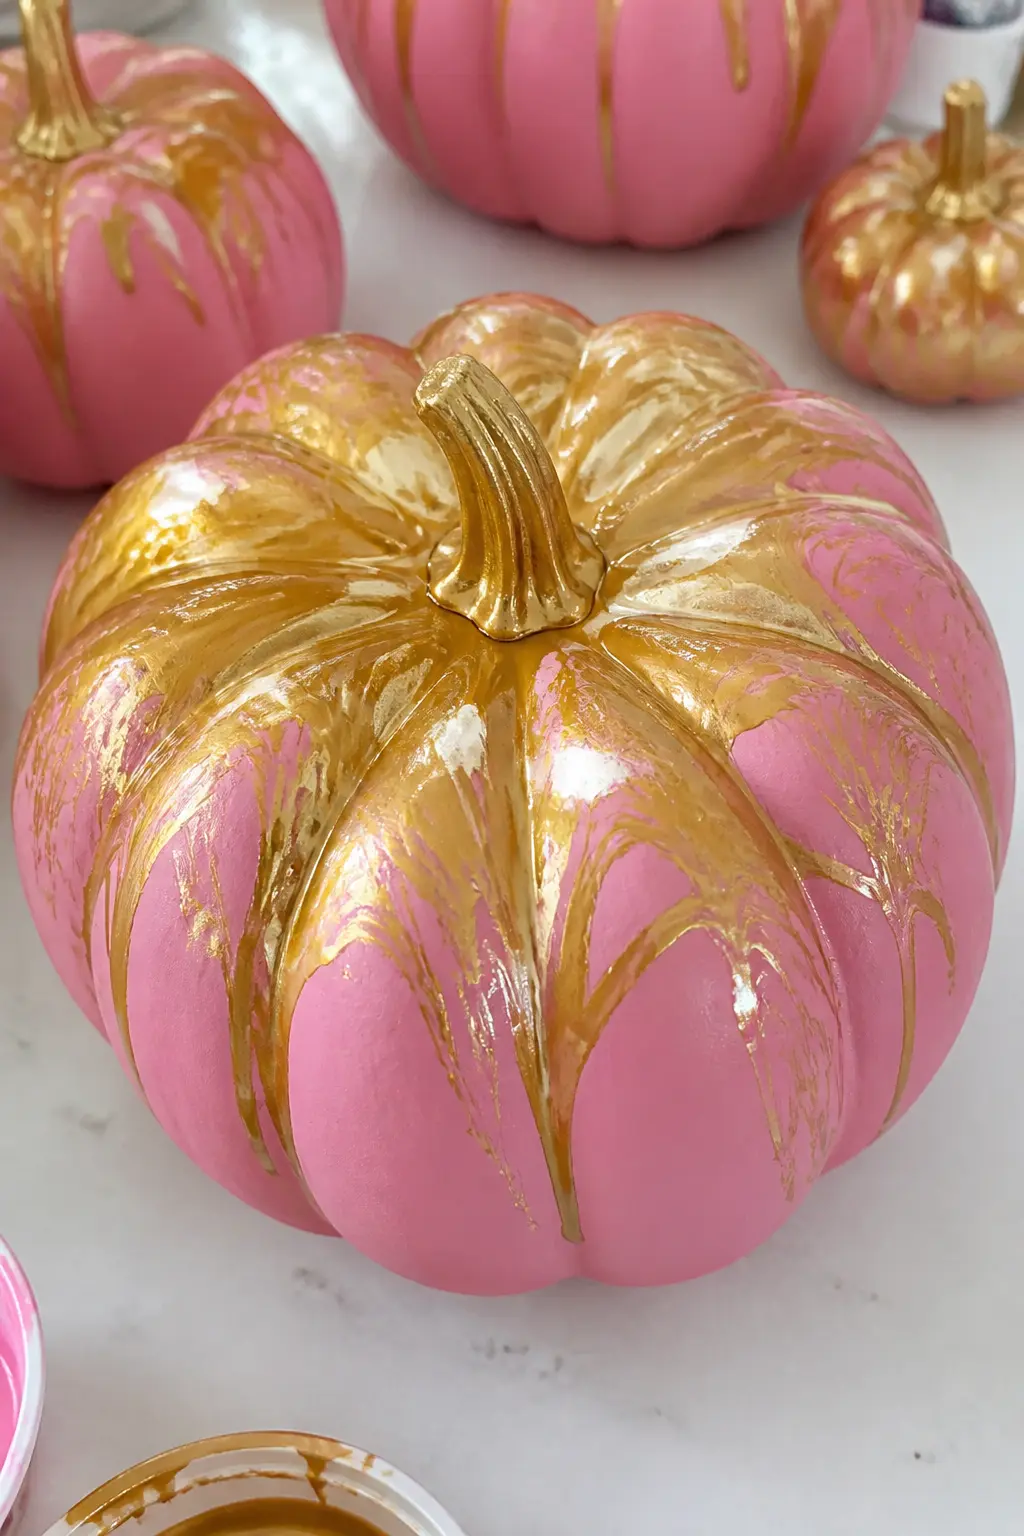
Mid Pink With Gold Marbling
Pour-and-swirl marbling gives mid pink a luxurious, gilded result that looks technically ambitious but is actually mostly patience.
Mix gold craft paint with a marbling medium or a very small amount of water until it flows freely, then pour it slowly over the top of the pumpkin and tilt the pumpkin to direct the flow down the sides.
Stop tilting when the pattern looks right and let it dry flat.
The ridges catch and redirect the pour naturally, creating a pattern specific to the pumpkin’s own shape. No two results are identical, which is the advantage of this technique over tape and stencil methods.
🛍 Shopping guide
Hot Pink Pumpkins
Hot pink makes a decision and commits to it. This is the shade for the person who wants her front step to be unmistakable from the street, or who wants one pumpkin on the table that nobody ignores. Pair it with matte black for maximum contrast, or send it fully maximalist with mirror-tile disco squares.
The six ideas here range from graphic and architectural (matte black stripes) to playful and summer-coded (watermelon slice). All of them benefit from a satin or semi-gloss base coat rather than a flat one, because the sheen keeps the colour from looking chalky at full saturation.
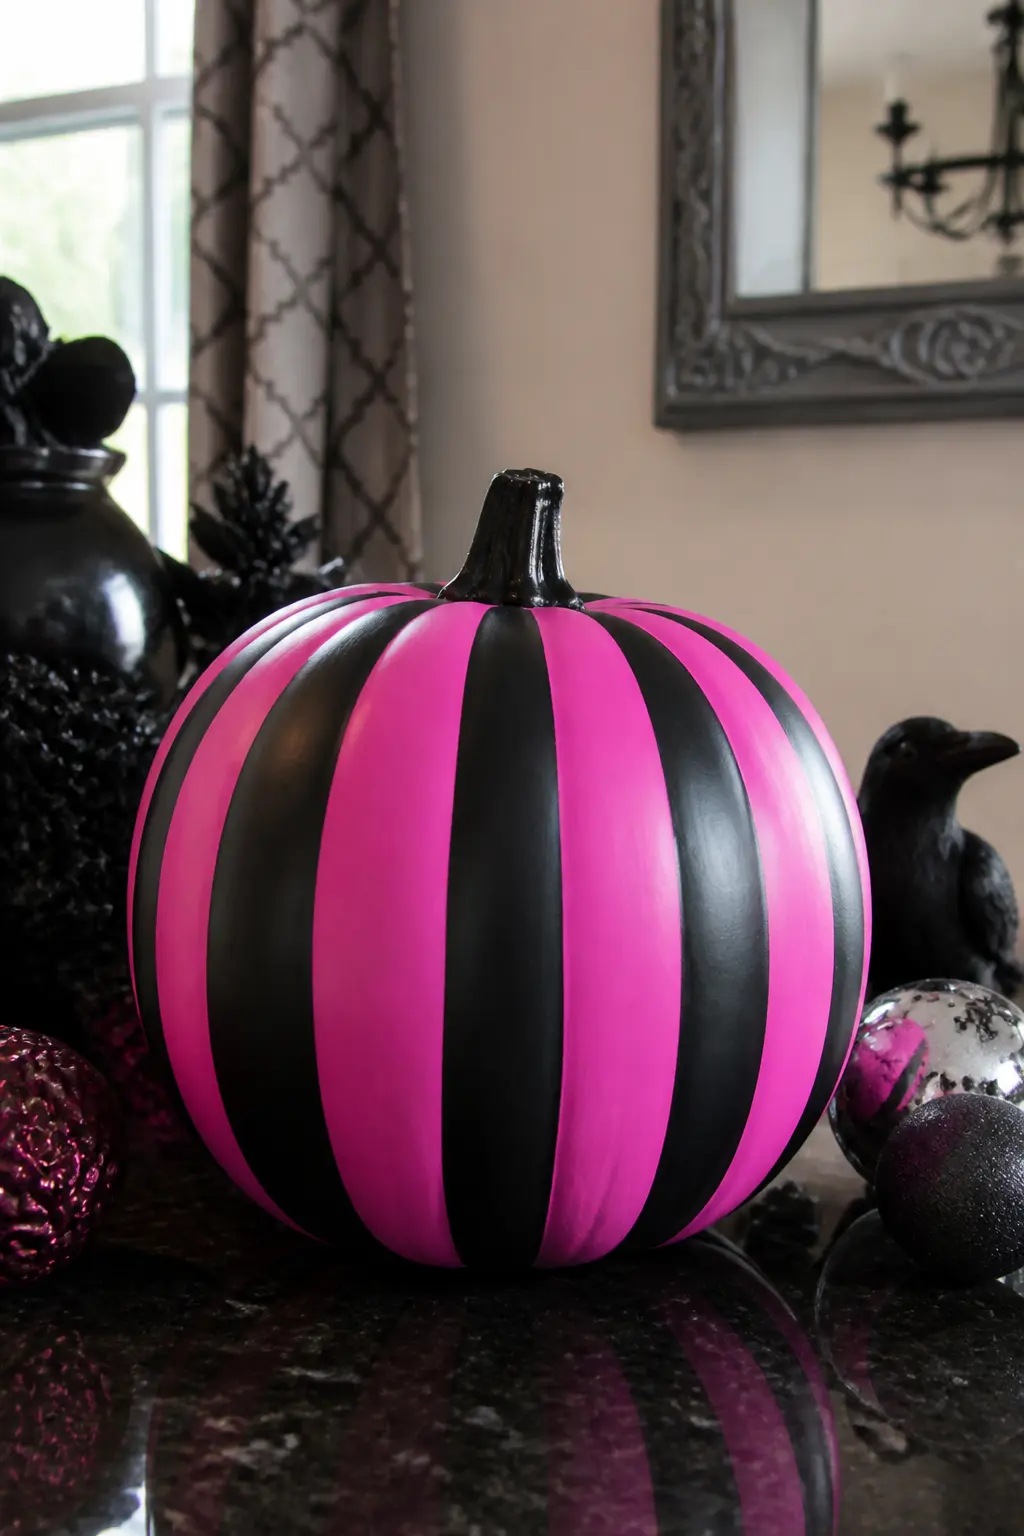
Hot Pink With Matte Black Stripes
Hot pink and matte black in equal stripes is the most graphic combination in this collection. Tape vertical stripes onto a cured hot pink base and paint the alternate sections in matte black.
The matte black next to a satin hot pink creates a contrast in texture as well as colour, which makes the stripe pattern look designed rather than just painted.
Equal widths read as maximalist. Wider pink stripes with narrow black between them keeps the pink as the dominant colour and reads as a more considered version of the same idea. The second approach also photographs better because the pink has more surface area.
🛍 Shopping guide
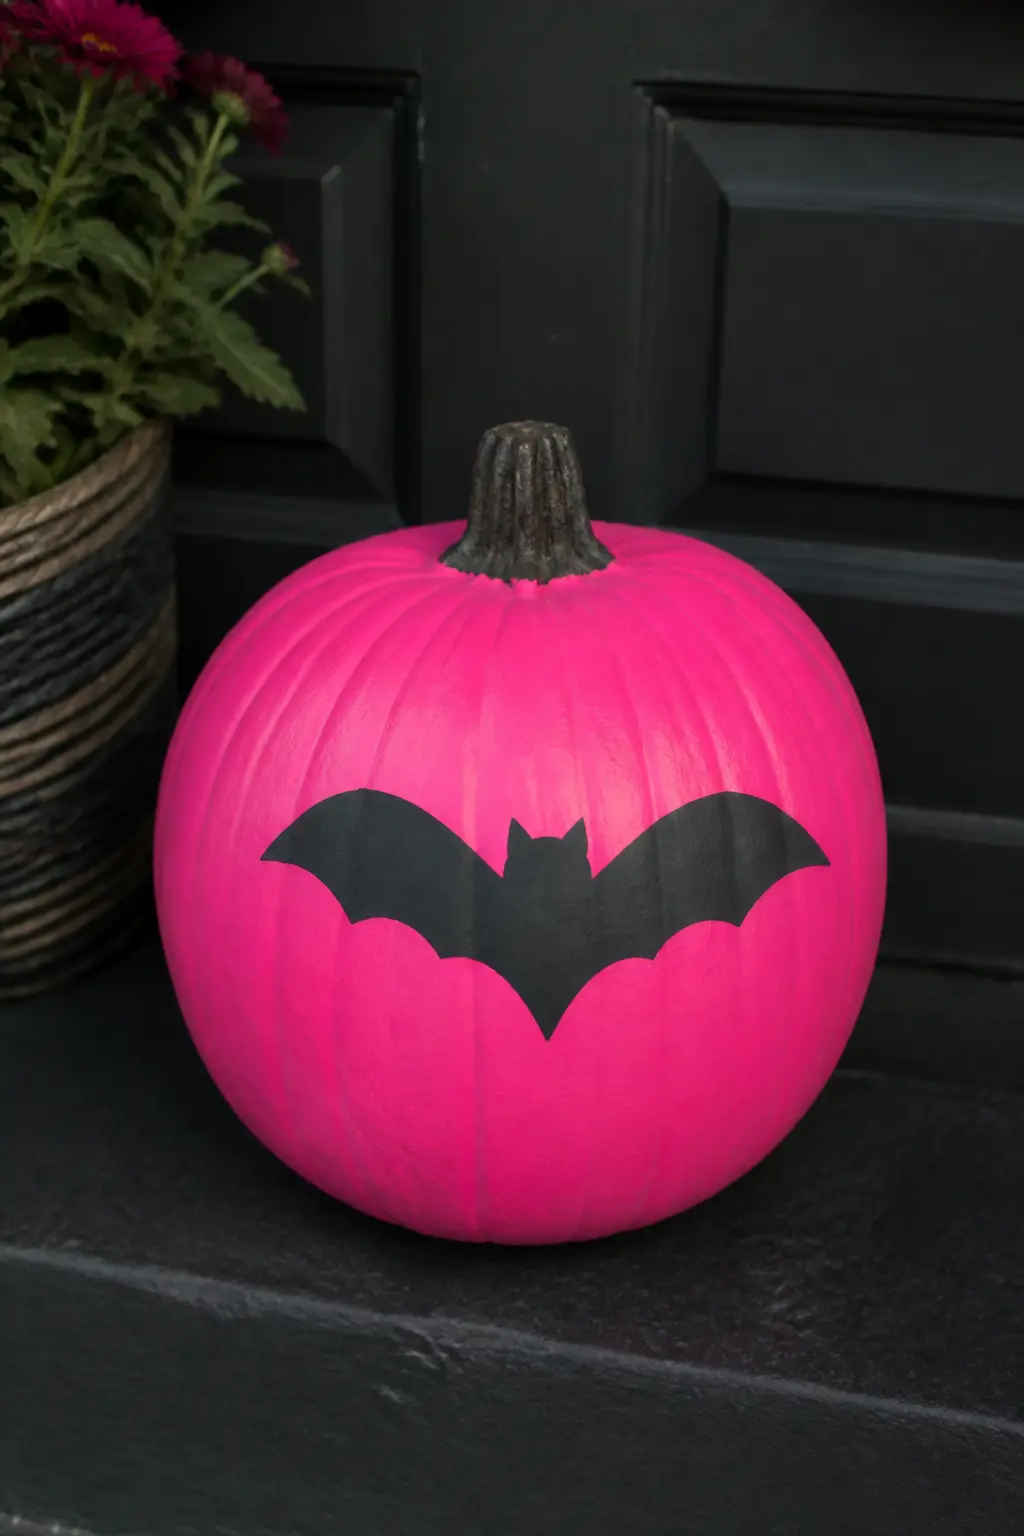
Hot Pink With a Black Bat Silhouette
A bat silhouette on hot pink is the most October-specific entry in the collection, and it works precisely because the pink removes any actual menace from the image.
Cut the bat from black adhesive vinyl: wingspan roughly one third the width of the pumpkin, wings slightly angled as though in mid-flight rather than symmetrical and flat. Stick it to the upper front panel, just below the stem.
One bat, placed deliberately, is more effective than three scattered at different angles. The placement below the stem means the stem itself becomes a sky line above the bat, which completes the composition without any additional work.
🛍 Shopping guide
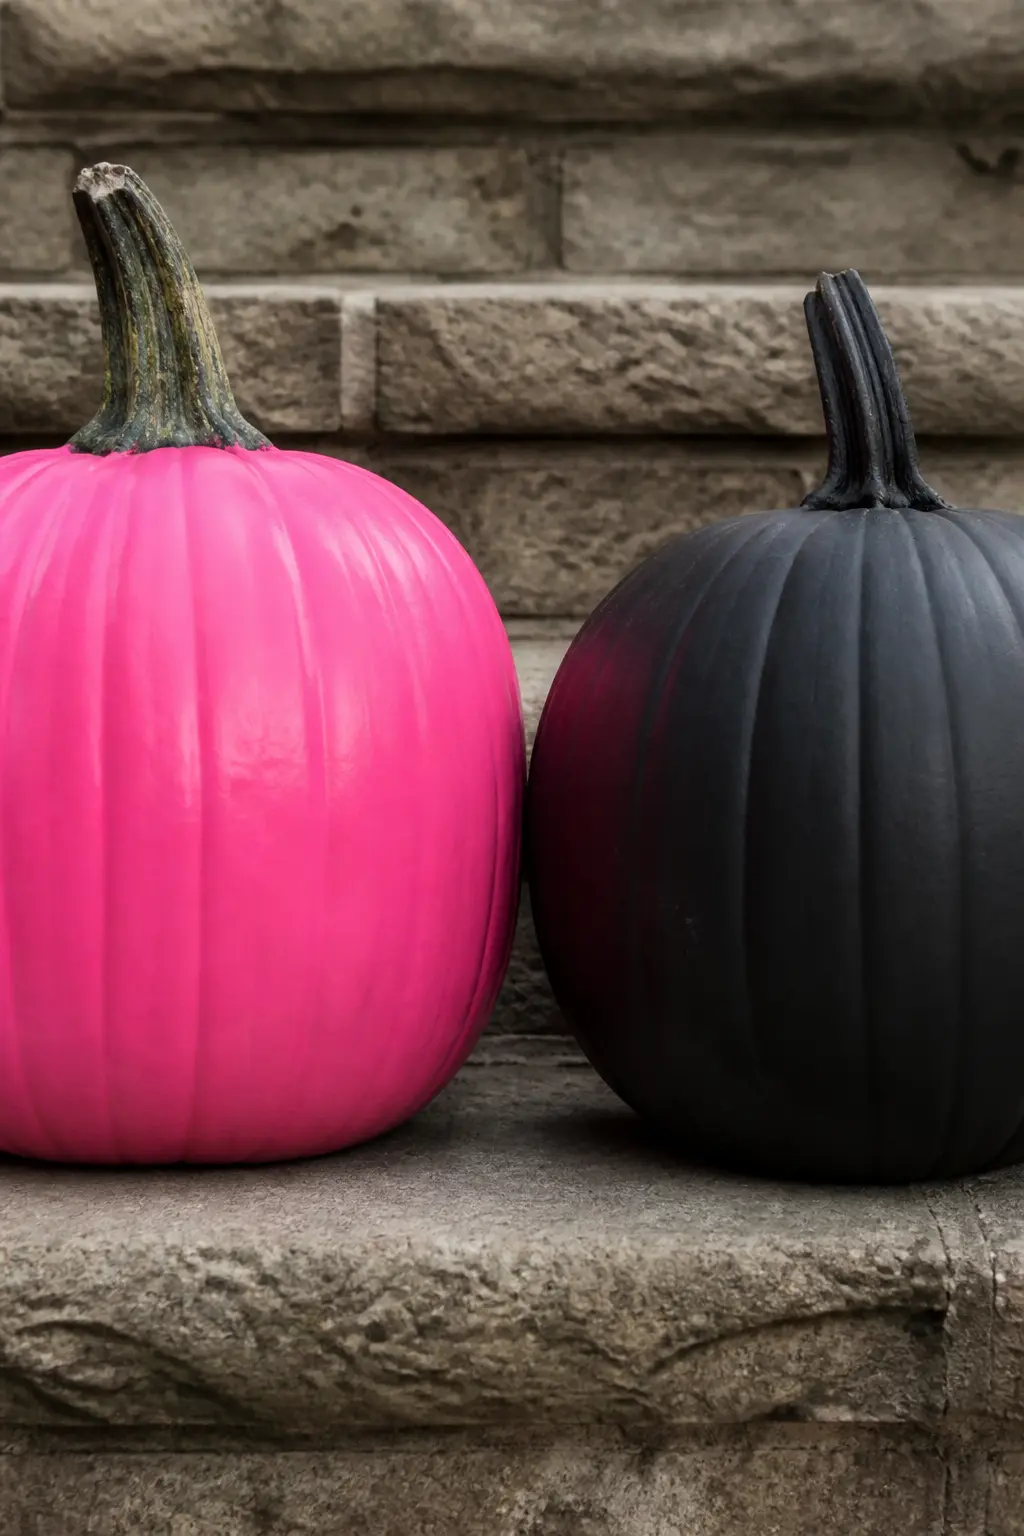
Hot Pink Paired With a Black Pumpkin
Two pumpkins: one hot pink, one matte black, both the same size and shape, placed directly side by side with no gap between them. The black pumpkin is painted with the same care as the pink one: two coats of a true matte black, stem gilded or left natural. No additional decoration on either. The pairing is the decoration.
This is the set that reads as intentional from across the room. It also requires zero additional craft supplies beyond two pots of paint. For a front-step display, add a third pumpkin in white between them and the trio becomes a full statement.
🛍 Shopping guide
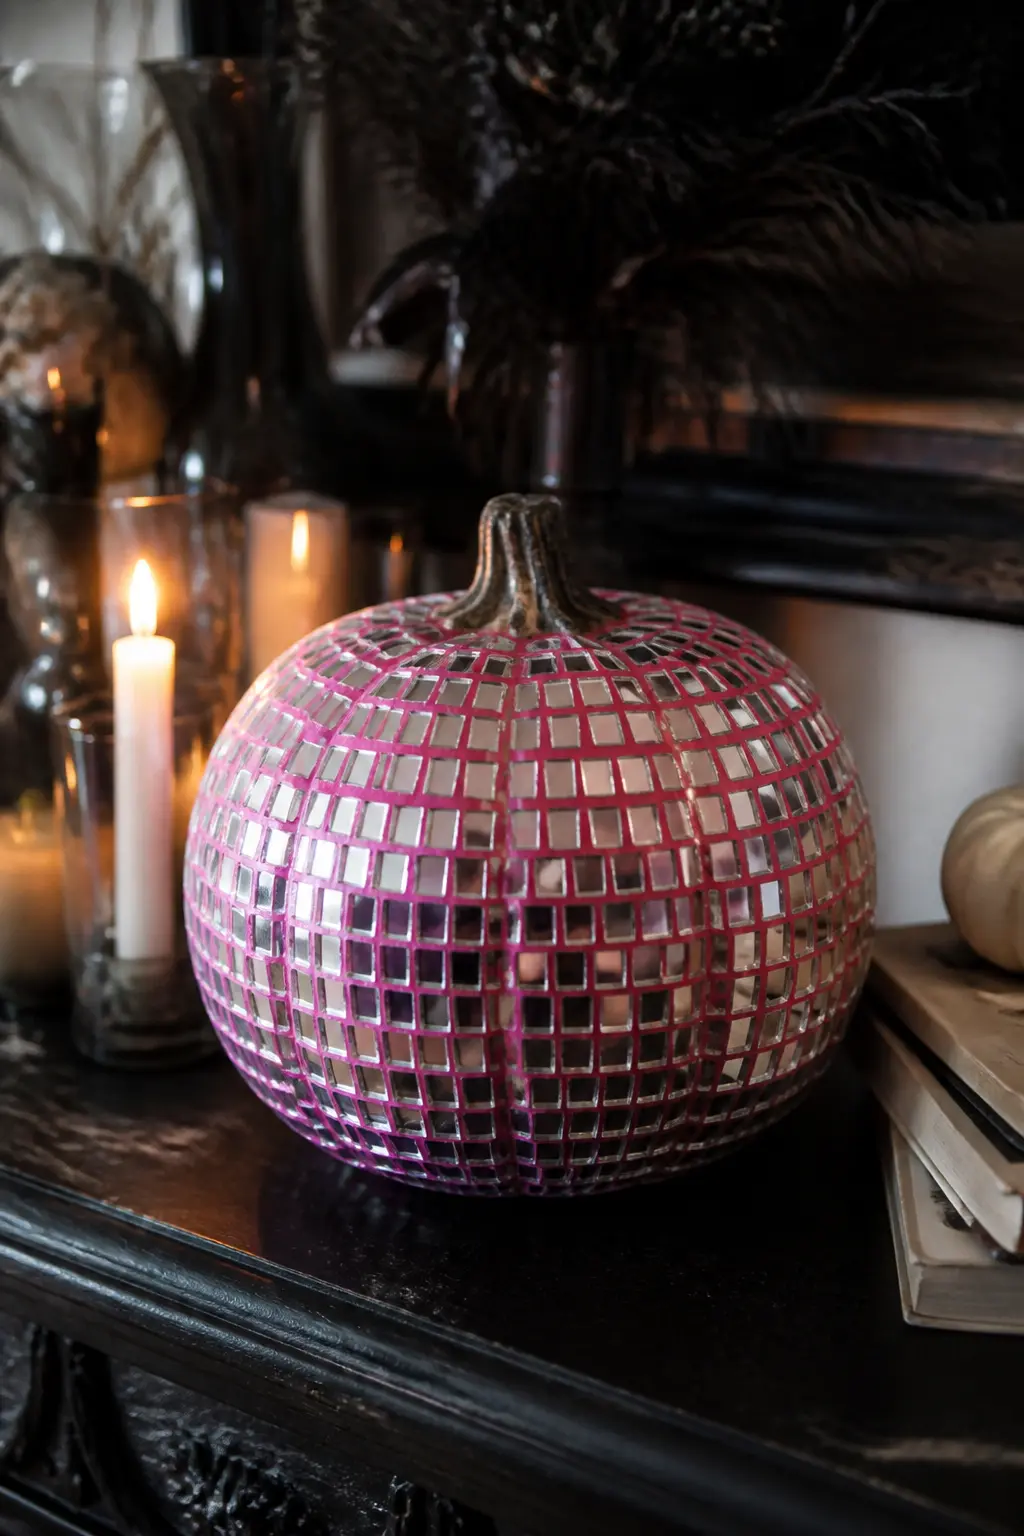
Hot Pink With a Disco Pattern
Cut small squares of mirror card or holographic silver card and glue them across the surface of a hot pink pumpkin in a dense, offset grid like a disco ball. Leave small gaps between the squares so the pink shows through as grout lines.
The mirror squares catch and scatter light as anyone moves around the pumpkin, which no other finish in this collection does.
This takes longer than most ideas here but uses only a ruler, scissors, card and glue. It is also the most photographed finish at parties because it responds to camera flash and candlelight differently from a painted surface.
🛍 Shopping guide
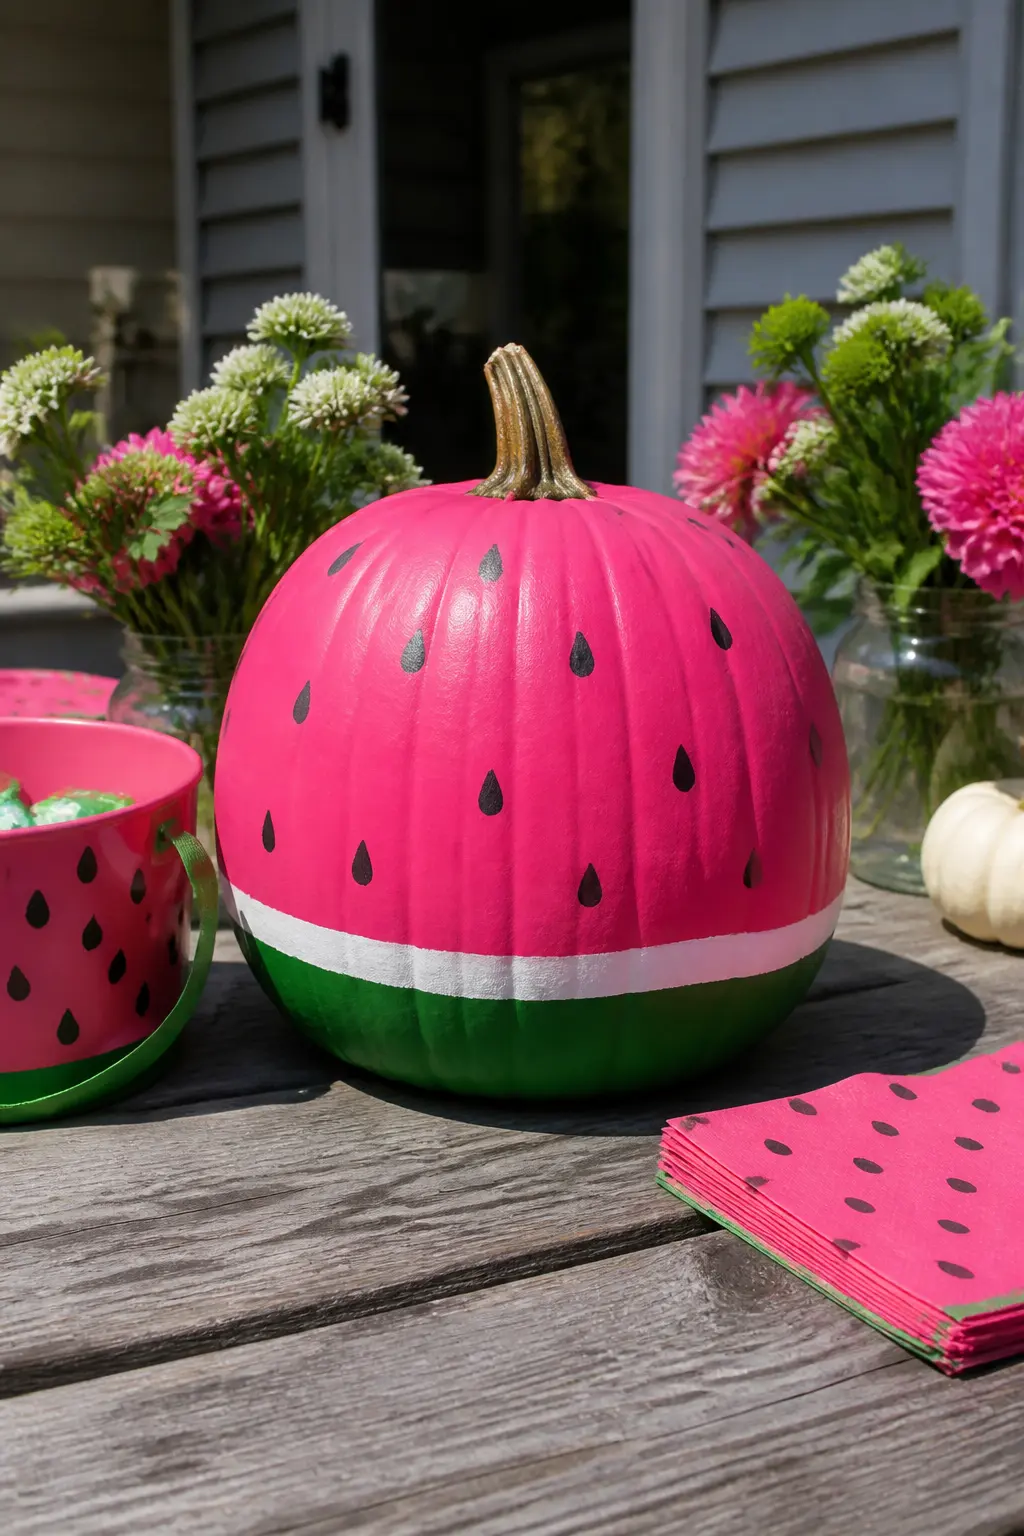
Hot Pink Watermelon Slice
Paint the whole pumpkin hot pink, then add a thin band of white around the base to suggest the rind’s white layer, and a wider band of green below that for the outer rind. Paint small black oval seeds scattered across the pink body.
The pumpkin’s round shape and the ridges read naturally as a slice of watermelon when the colours are right, which means the illusion works at close range as well as from a distance.
This is the summer-crossover entry. It sits as comfortably at a garden party in August as it does at a Halloween table in October, which makes it the most versatile painted finish in the hot-pink section.
🛍 Shopping guide
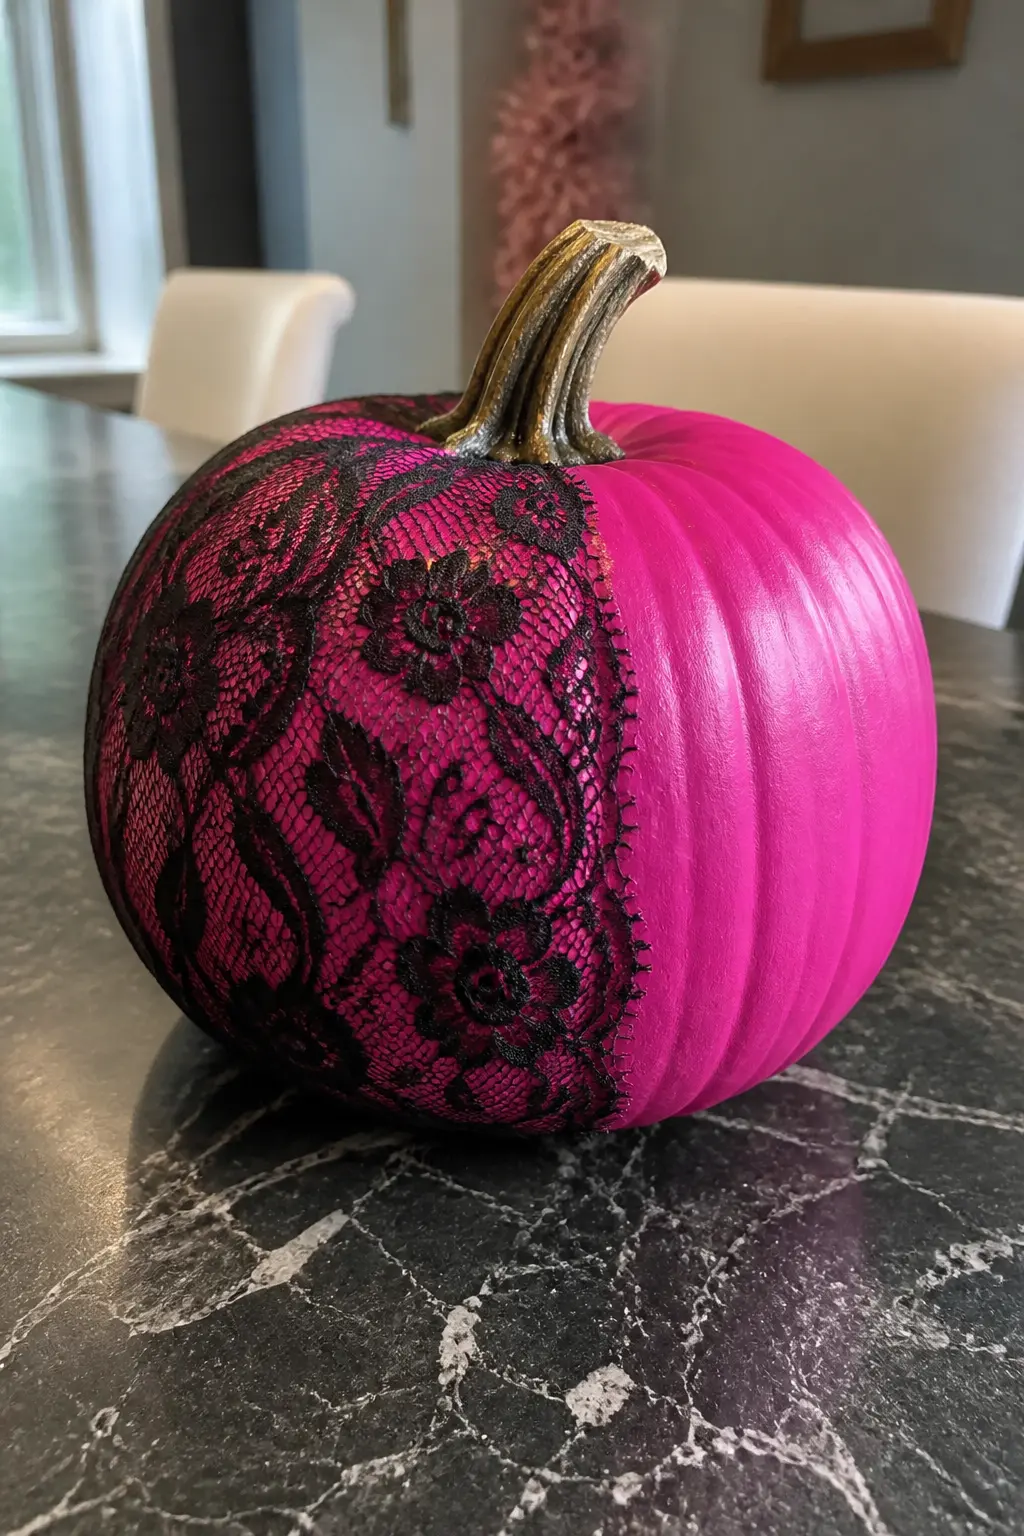
Hot Pink With Black Lace
Cut a piece of black stretch lace large enough to cover half the pumpkin, from stem to base on one side.
Glue the top edge under the stem with a thin line of hot glue, smooth the lace down over the pink surface, and glue the edges at the back where they meet.
The lace layer adds a second dimension to the surface: the hot pink shows through the pattern and the black sits on top of it.
Covering only one side creates a half-and-half effect that is more interesting than covering the whole pumpkin. It also uses less lace and shows the plain hot pink on the other side, which means the pumpkin reads differently depending on which angle you approach from.
🛍 Shopping guide
Pink Pumpkin Sets
One pumpkin is a detail. Three is a display. The sets here are grouped arrangements where every pumpkin is already listed above as an individual idea: the section is about how they are chosen and placed together, which changes the effect entirely.
Graduated sizes matter more than matching colours. A set of three identical pumpkins in three identical shades reads as a shop display. A set of three in different sizes, with a shade or material shift between them, reads as something you curated.
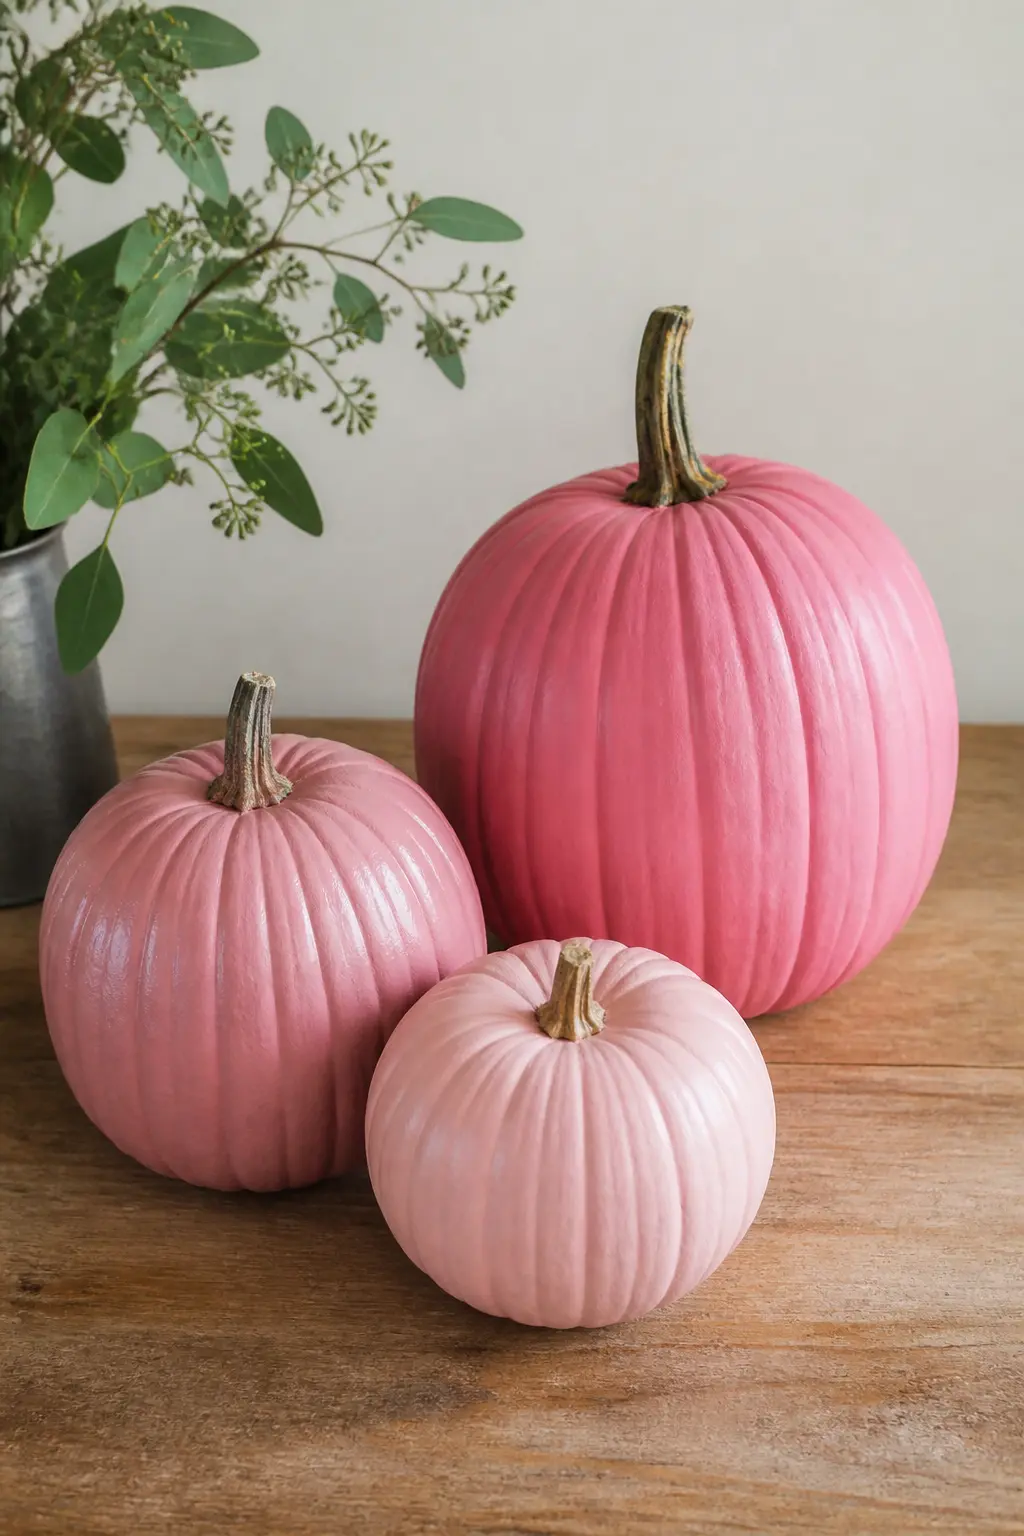
Three Pumpkins in Graduated Pink Shades
Choose three pumpkins in graduated sizes: small, medium and large. Paint them blush, dusty rose and mid pink respectively, so the colour deepens as the size increases. Place them in a cluster with the largest at the back and the smallest pulled slightly forward and to one side so all three are visible from the front.
The size progression and the colour progression together create a cohesive display without any matching decoration on any of them. Each pumpkin is left plain after its base coat: the set is the idea. This works on a mantelpiece, a table centrepiece, or a front step where the display needs to read from the pavement.
🛍 Shopping guide
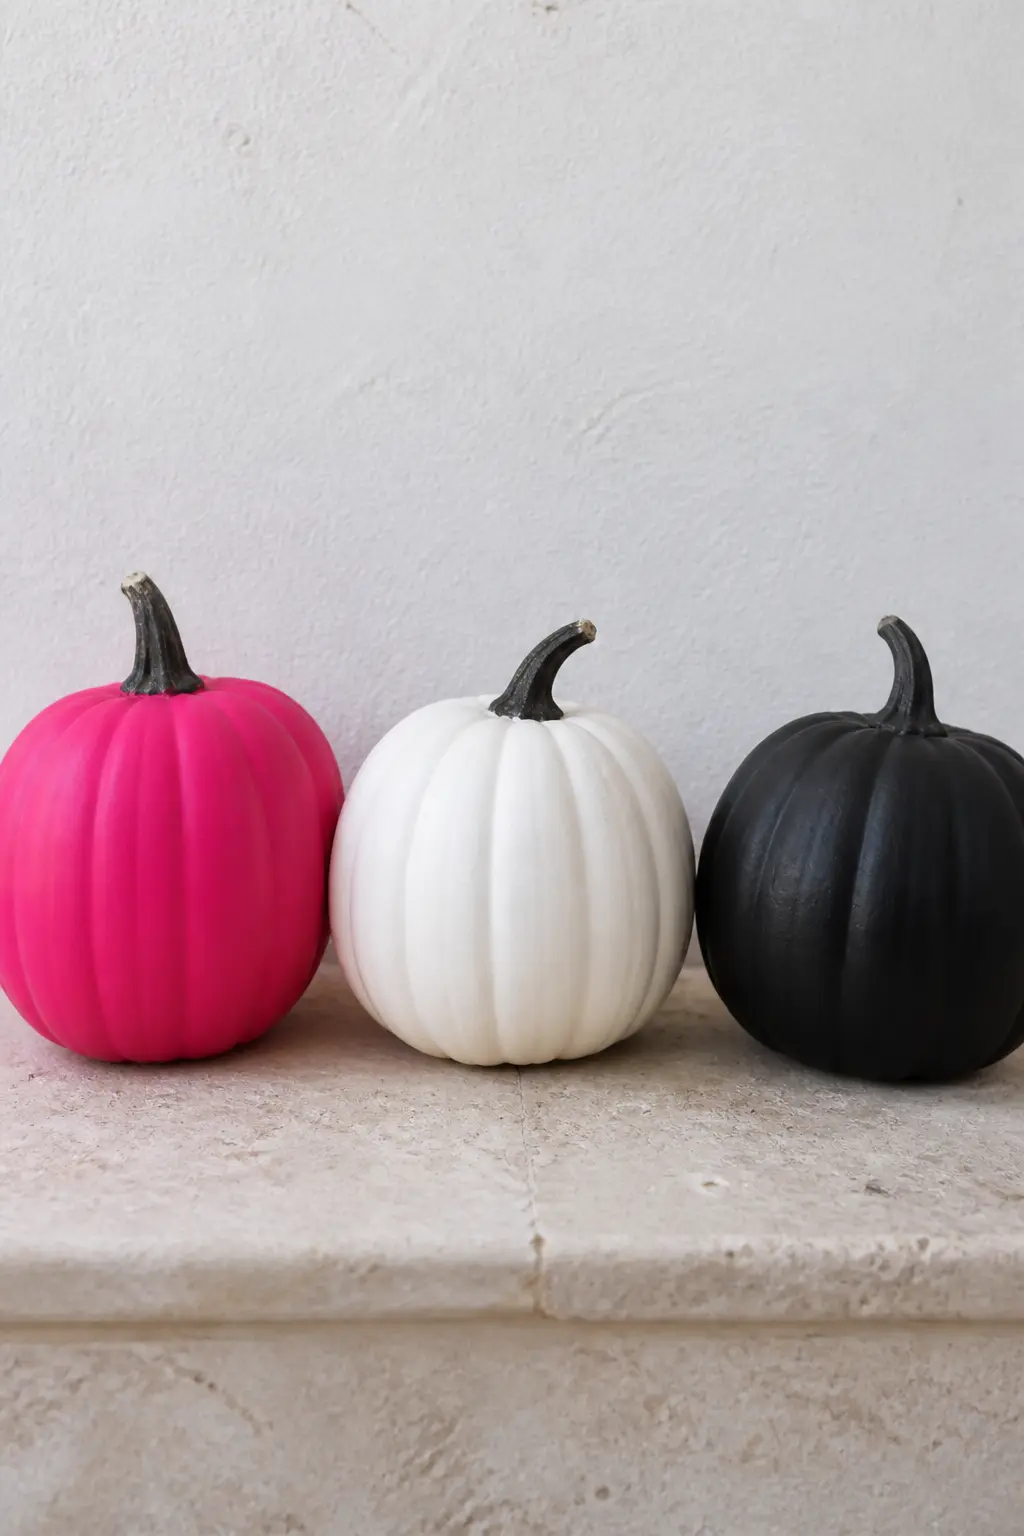
Pink With One White and One Black
Three pumpkins, all the same size: one hot pink, one white, one matte black. No decoration on any of them beyond their base coats. The trio works as a colour story rather than a Halloween display, which means it runs from September through November without looking season-specific on either end.
The placement matters. Pink in the centre flanked by white on one side and black on the other gives the pink the starring position. Pink on one end creates a strong directional read from dark to light. Both arrangements work; choose based on where the display lives in the room.
🛍 Shopping guide
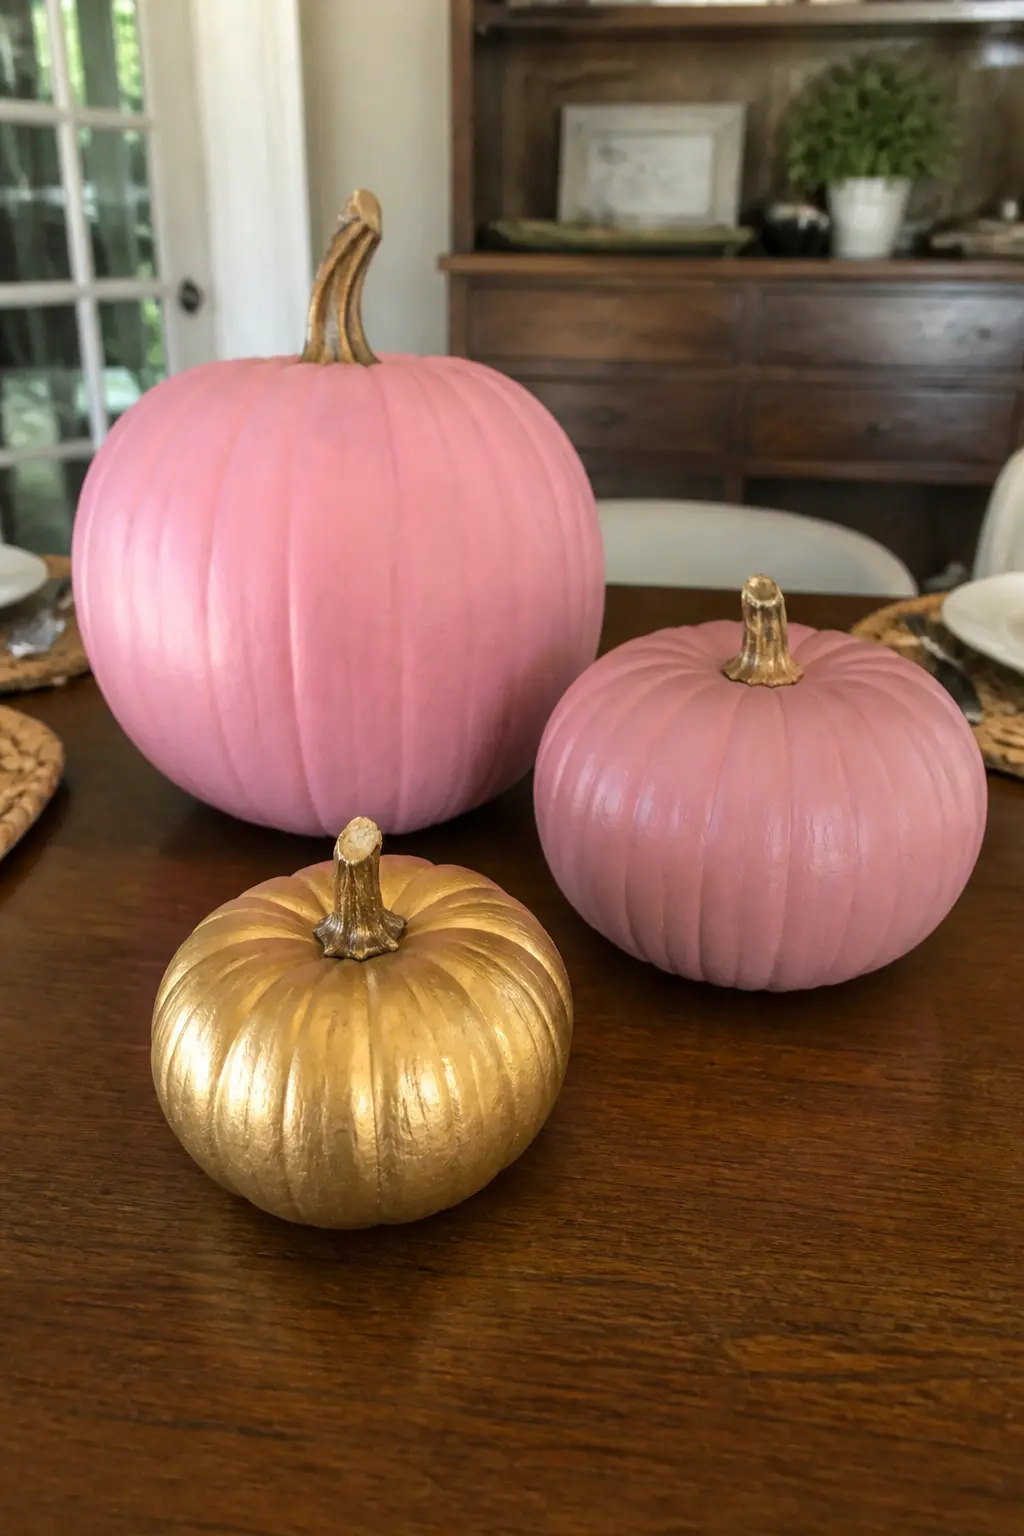
Pink With Gold in Graduated Sizes
A two-colour, three-size set: the large pumpkin in mid pink, the medium in dusty rose, and the smallest in gold paint.
The gold reads as a metallic accent rather than a colour shift, so the trio stays cohesive while the smallest pumpkin does something distinctly different. Place the gold pumpkin in front of the other two at a slight angle so its finish catches the light.
This is the set that works most naturally at a Thanksgiving table or a holiday display, where warm metallics already appear in other elements. It also pairs well with a pink Christmas tree if the styling extends into the next season.
🛍 Shopping guide
Finishing Details That Work on Any Shade
These six ideas are not tied to a single shade. They are the finishing moves that go on top of whatever base coat you have already chosen. A bow, a spiral of ribbon, a hidden heart on the back: these are the details that make someone pick up your pumpkin and turn it over.
None of them require paint skills. Most of them require only a hot-glue gun and ten minutes. Add one to any pumpkin above and it becomes a different thing entirely.
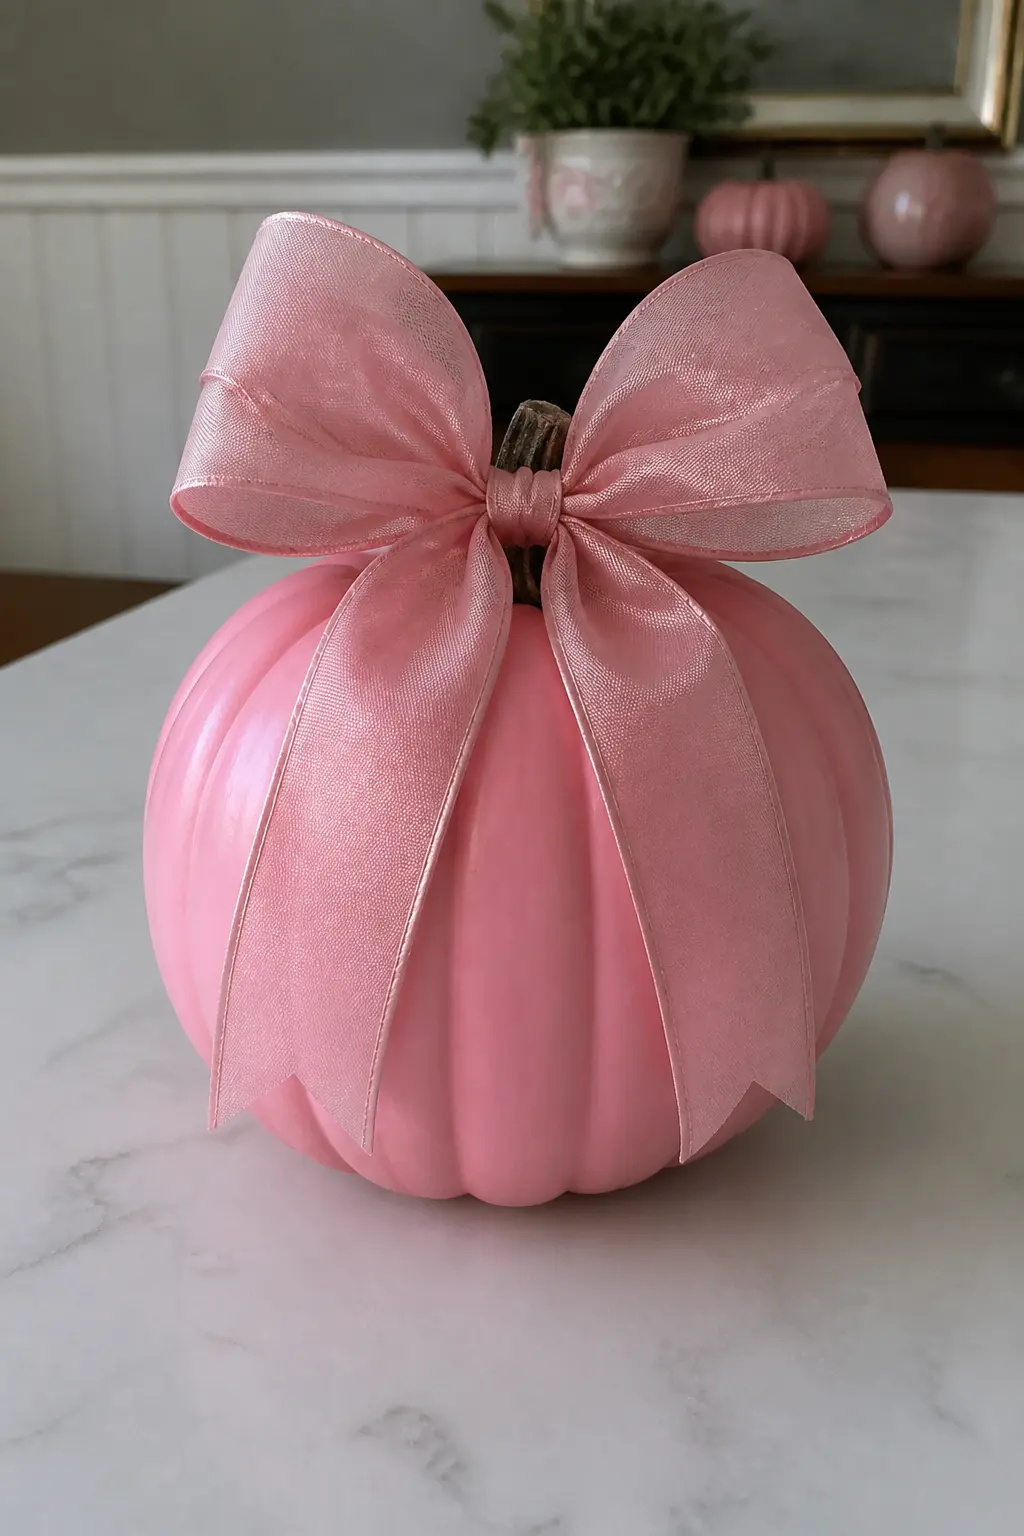
A Bow at the Stem Instead of a Face
Replace the expectation of a carved or painted face with a bow tied directly at the stem: generous loops, long tails, placed so the bow becomes the focal point of the upper third of the pumpkin.
It is a design decision as much as a decoration. A wired ribbon holds its shape through the season. A soft ribbon needs re-tying every few days but looks more natural.
This works on every shade in this collection, from the palest blush to the hottest pink. Choose the ribbon colour to contrast slightly rather than match exactly: warm ivory against blush, deep plum against dusty rose, black against hot pink. The slight contrast is what makes the detail legible from across the room.
🛍 Shopping guide
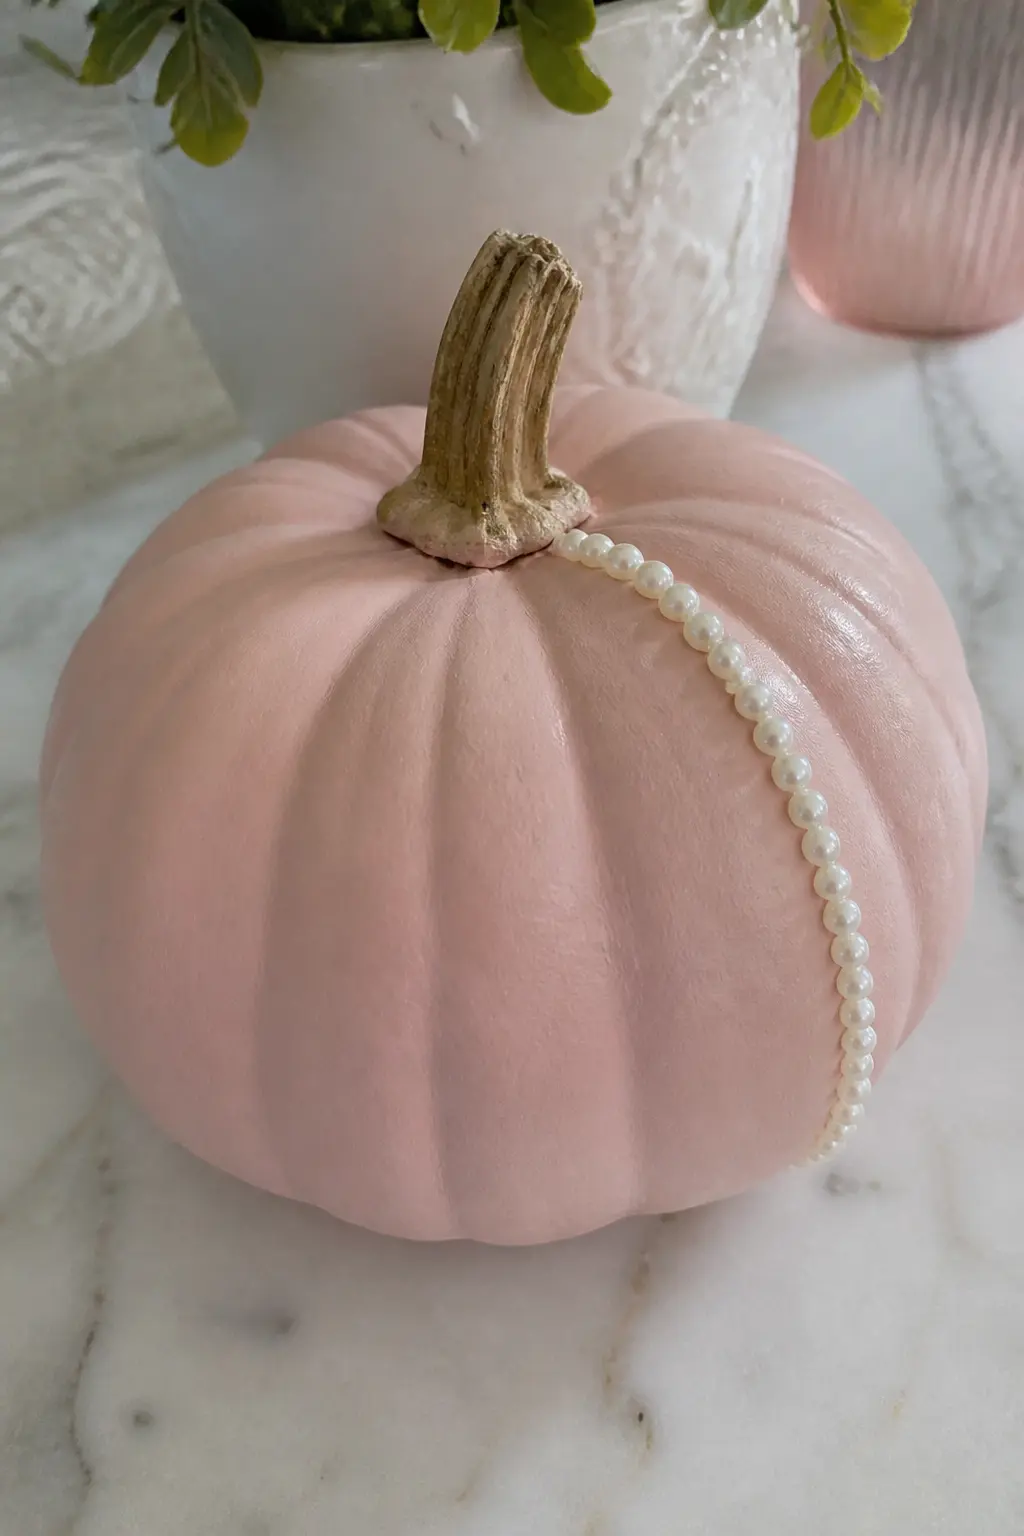
Pearls Glued in a Curving Line
Run a single curving line of pearl beads (flat-backed, so they sit flush) from the stem down one ridge and across to the front panel, ending at a natural stopping point rather than a symmetrical one. The asymmetry is what keeps it from reading as a craft project. The curve should follow the pumpkin’s own contours rather than fight them.
Use craft glue rather than hot glue for this: hot glue sets too fast to adjust the line mid-placement and the beads are too small to reposition before the glue grabs. A toothpick to place each bead gives more control than fingers.
🛍 Shopping guide
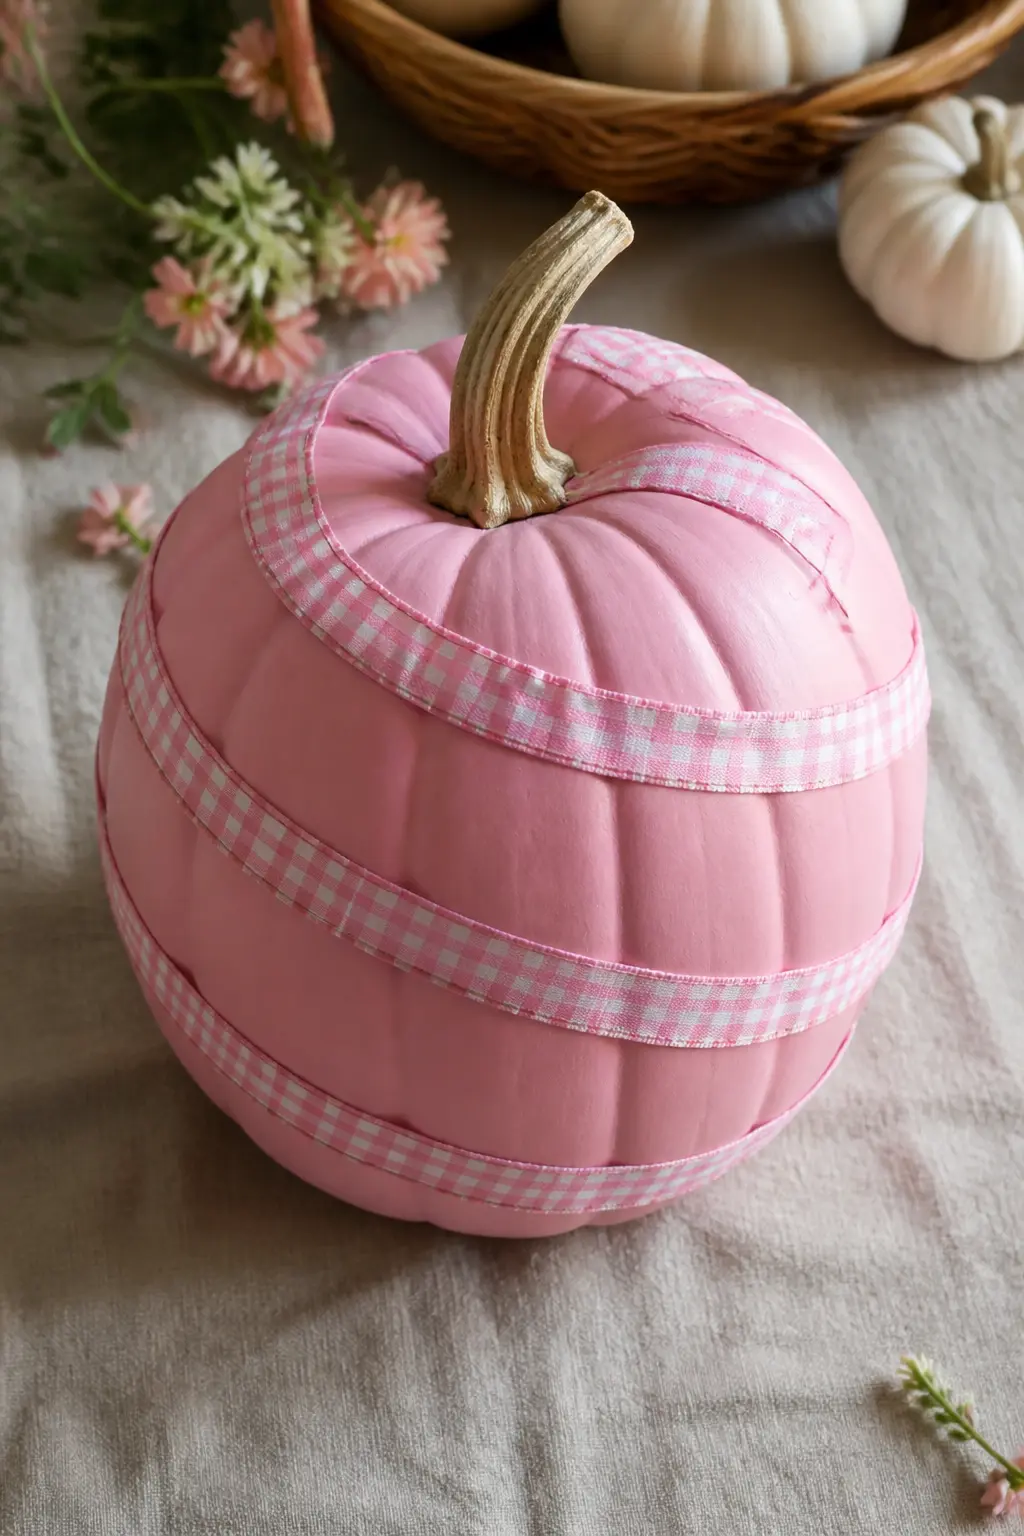
A Ribbon Wrapped in a Spiral
Start at the stem and wrap a narrow ribbon in a continuous diagonal spiral all the way down to the base, keeping the tension even so the ribbon sits flat against the surface without bunching at the ridges.
Secure the top end under the stem with a dab of glue and the bottom end at the base. The ridges will cause the ribbon to bridge slightly between them, which is the visual texture that makes this finish interesting rather than flat.
Grosgrain ribbon holds a spiral better than satin, which slips. A ribbon with a pattern (gingham, dot, stripe) adds another layer of detail to the surface without any additional work.
🛍 Shopping guide
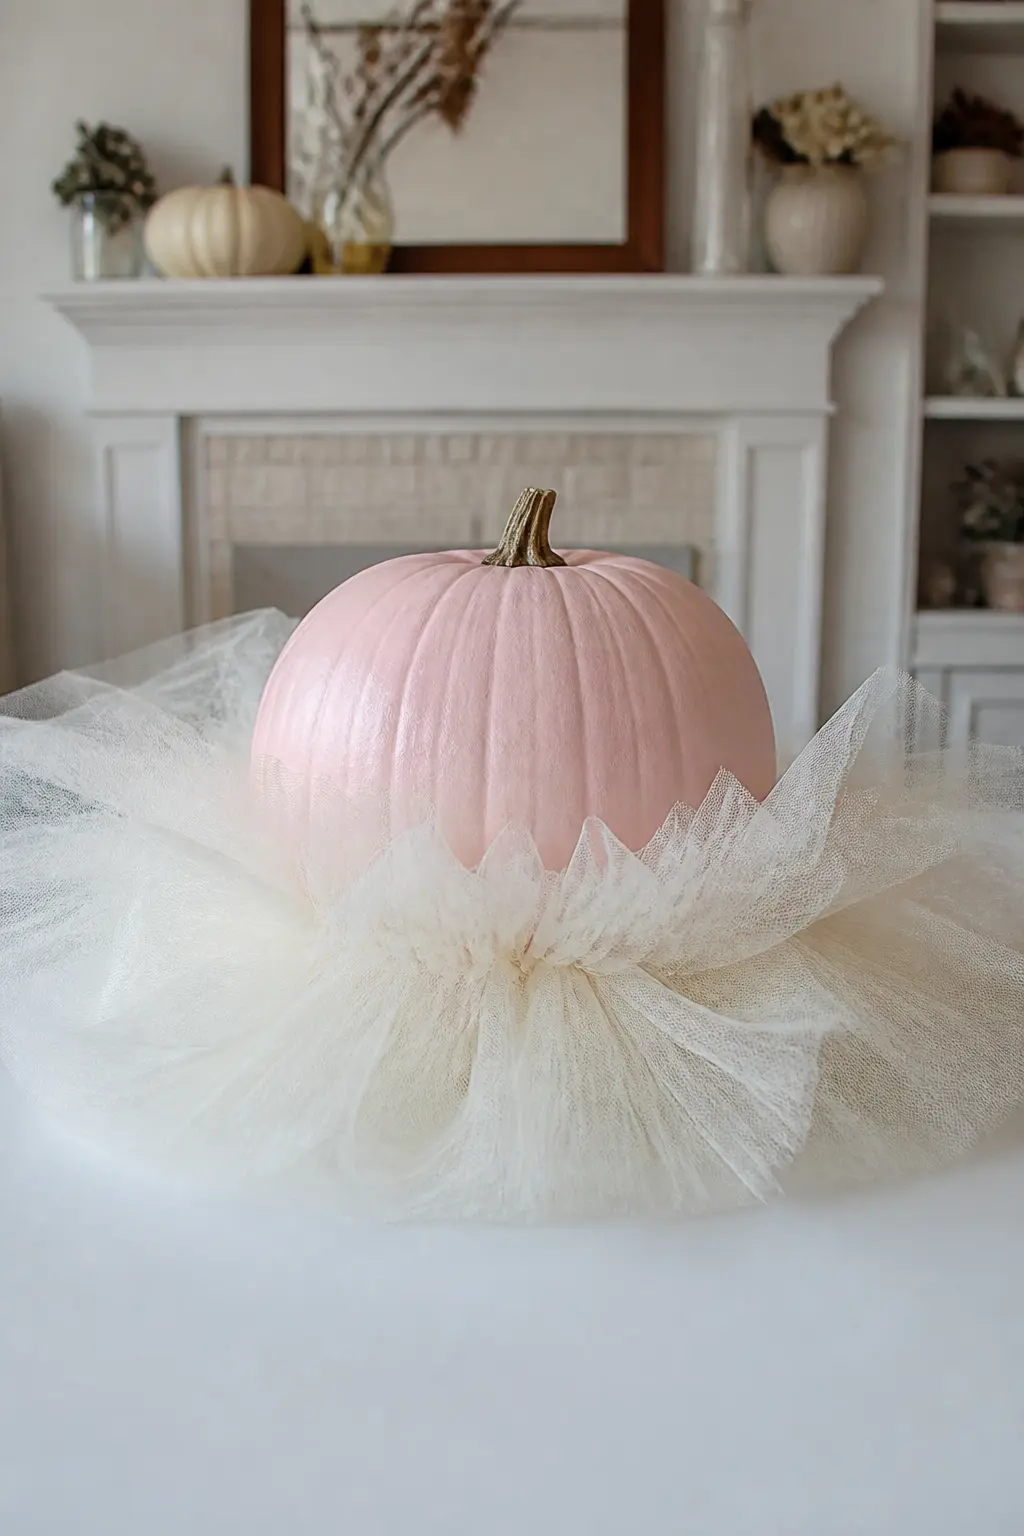
Tulle Gathered Around the Base
Cut a length of tulle wide enough to gather into a full ruffle and wrap it around the base of the pumpkin, hot-gluing the gathered edge directly to the lowest ridge so the tulle fans out below it.
Soft pink, ivory or white tulle keeps the result looking like a tutu rather than a Halloween skirt. Several layers of tulle give more volume than one.
This detail changes the silhouette of the pumpkin entirely. From above it still reads as a pumpkin. From the front it reads as a decorated object wearing something. That transformation is the whole point. It is particularly suited to a baby shower or a birthday display where the pumpkin needs to feel celebratory.
🛍 Shopping guide
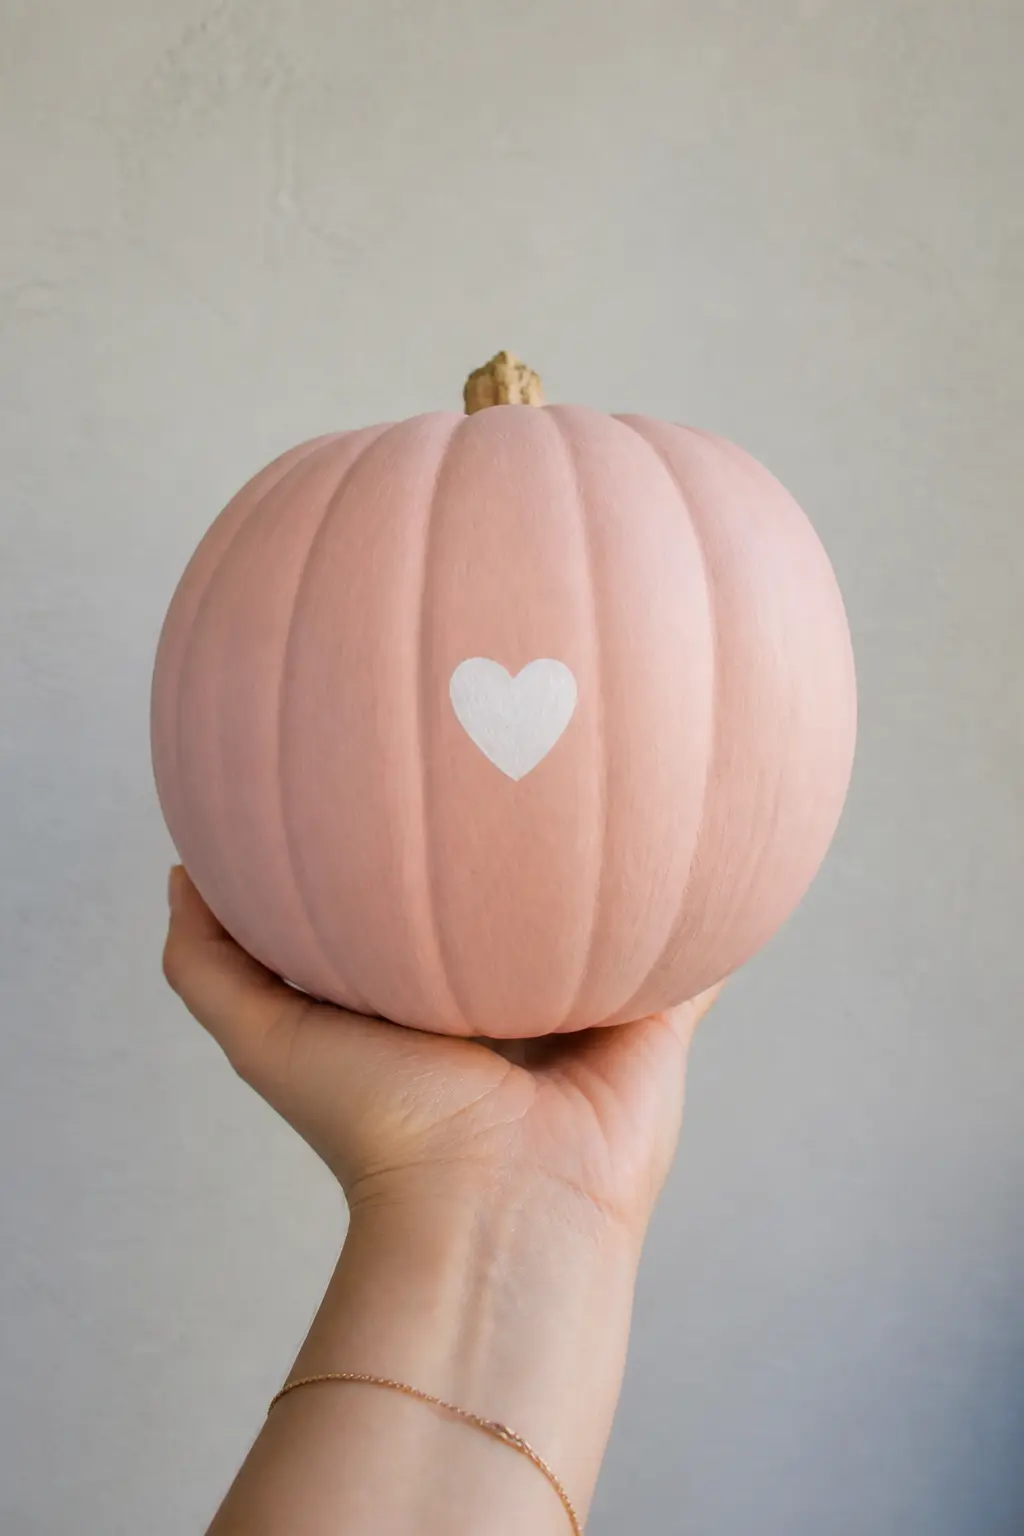
A Heart on the Back
Paint a small heart on the back panel of the pumpkin, where it faces the wall and nobody looks. No label, no announcement. The heart is for whoever turns the pumpkin around and finds it.
A white heart on blush, a gold heart on dusty rose, a black heart on hot pink: whatever reads with the base coat without competing with the front.
This is the most quietly personal entry in the collection. It costs almost nothing and takes under a minute. It also makes a pumpkin given as a gift feel completely different from a bought one, which is sufficient reason to do it.
🛍 Shopping guide
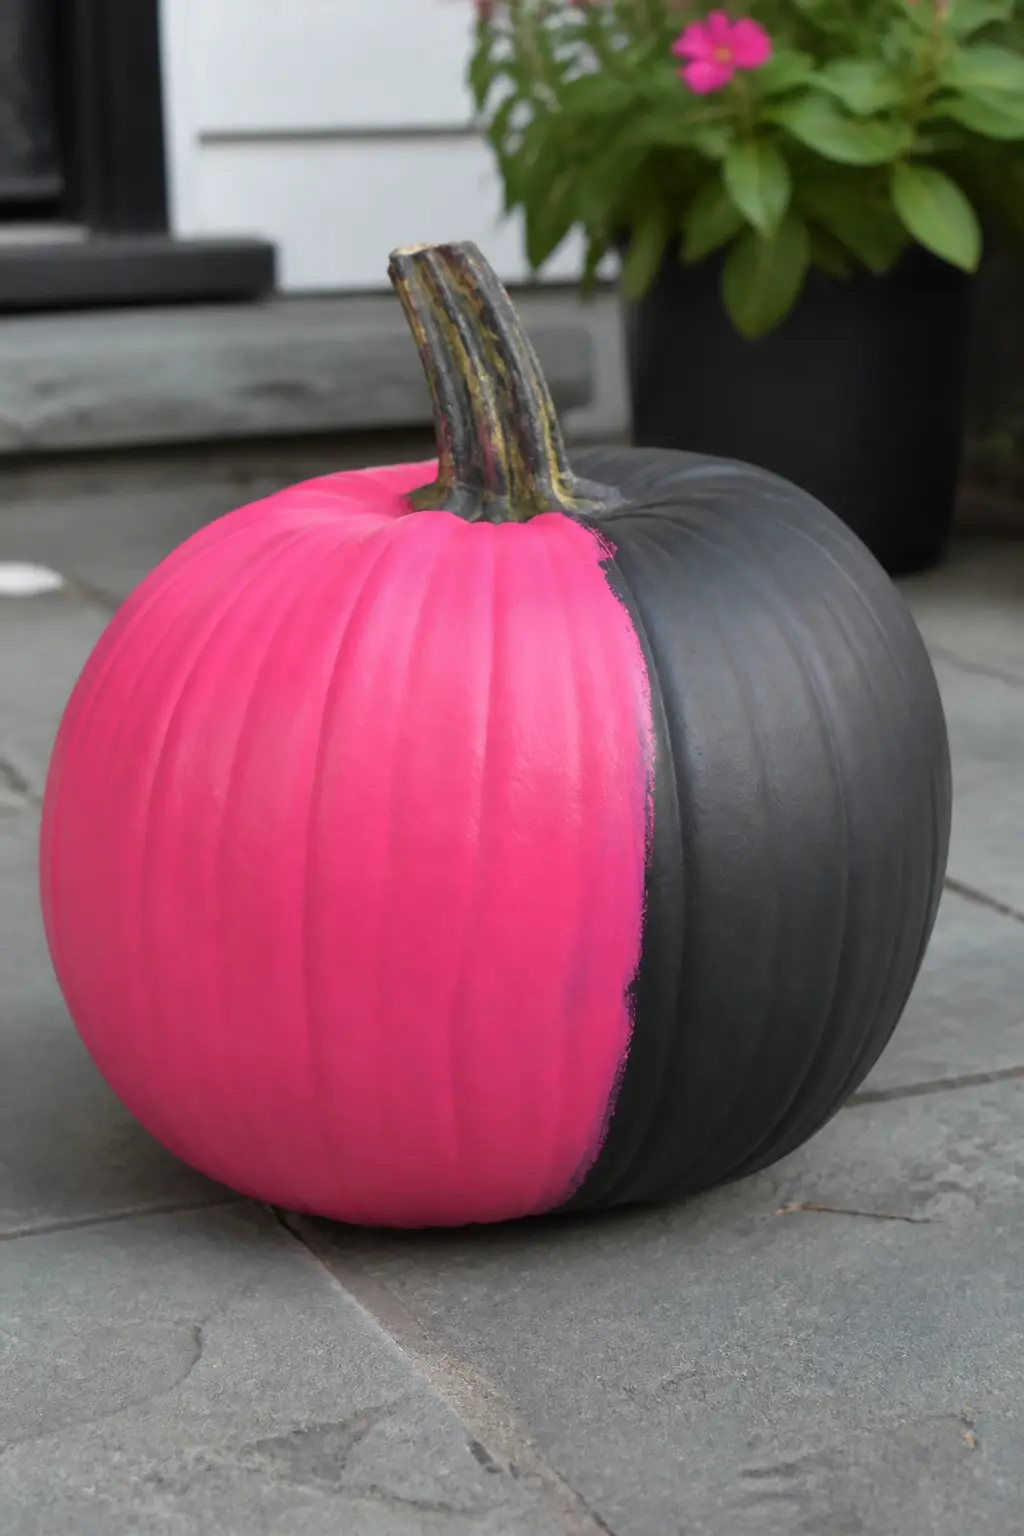
Pink on the Front, Black on the Back
Paint the front half of the pumpkin in hot pink and the back half in matte black, with the colour change happening at a ridge on each side so the division is clean rather than graduated. No blending. The two halves are distinct and intentional. From the front, the pumpkin reads as entirely pink. Turned around, it is entirely black.
This is the two-face pumpkin. It suits a display where the pumpkin will be seen from multiple angles, or where it sits in a corner and only one side is ever visible to the room.
Either way, the person who discovers the reverse is always surprised by it, which is a small, low-effort piece of design thinking applied to a painted gourd.
🛍 Shopping guide
A Few Things Worth Knowing Before You Start
Prep is everything. Wipe the pumpkin with a damp cloth, let it dry fully, then apply a thin coat of white primer before your pink goes on. This stops the orange skin from killing the blush tones and gives every shade its true colour on the first real coat.
Chalk paint and acrylic craft paint both work. Chalk paint gives a more matte, dusty finish and needs a wax sealer if it is going outside. Acrylic dries harder and is easier to layer without lifting. For hot pink especially, a satin acrylic gives the depth the colour needs.
Fake pumpkins last for years and take paint better than real ones, which can shrink and dull the finish as they dry out. Real pumpkins are cheaper and compostable, but plan for a two-to-three-week display window at most. For the sets and the detailed finishes below, a foam or craft pumpkin is worth the upfront cost.
Frequently Asked Questions
What paint works best for a pink painted pumpkin?
Chalk paint and acrylic craft paint both give good results. Chalk paint dries to a soft matte finish and needs a wax sealer if the pumpkin is going outside.
Acrylic paint dries harder, takes detail work more crisply, and comes in a wider range of pink shades. For hot pink, choose a satin-finish acrylic rather than matte so the colour reads at full depth rather than looking chalky.
How many coats of paint does a pumpkin need?
Most pumpkins need two coats of pink paint for even coverage, three for hot pink or any shade painted over an orange skin without primer. Apply a coat of white primer first and you will often need only one or two top coats instead of three or four. Let each coat dry completely before applying the next.
Do pink painted pumpkins work on real pumpkins or only foam ones?
Both work. Real pumpkins take paint well but shrink as they dry out, which can crack or dull the finish after two to three weeks. Foam craft pumpkins last for years, take paint smoothly, and hold pins and glued embellishments reliably. For detailed finishes like pearl pins or spiral ribbon, foam is the better choice.
How do you seal a painted pumpkin so it lasts?
Apply one or two coats of a clear sealer after the paint is fully cured. Matte sealer maintains the chalk paint look. Satin sealer adds a gentle sheen and is more water-resistant for outdoor displays. Spray sealers are easier to apply on a curved pumpkin surface without disturbing the paint underneath.
Can pink painted pumpkins be used for Halloween as well as general autumn decor?
Yes, and several entries here demonstrate both uses. A ghost face or bat silhouette on a pink pumpkin reads as Halloween without any of the darker or more graphic associations.
A plain graduated pink set, a bow at the stem, or a gilded stem read as autumn decor with no Halloween connotation at all. The shade and the added detail together determine which occasion the pumpkin suits.
What is the easiest pink pumpkin idea for a beginner?
The gilded stem is the simplest: paint the pumpkin body in blush, let it dry, and brush gold paint only on the stem. Two minutes of effort, immediate result, no skill required. The satin bow at the stem is equally fast and requires no paint skills at all beyond the base coat.
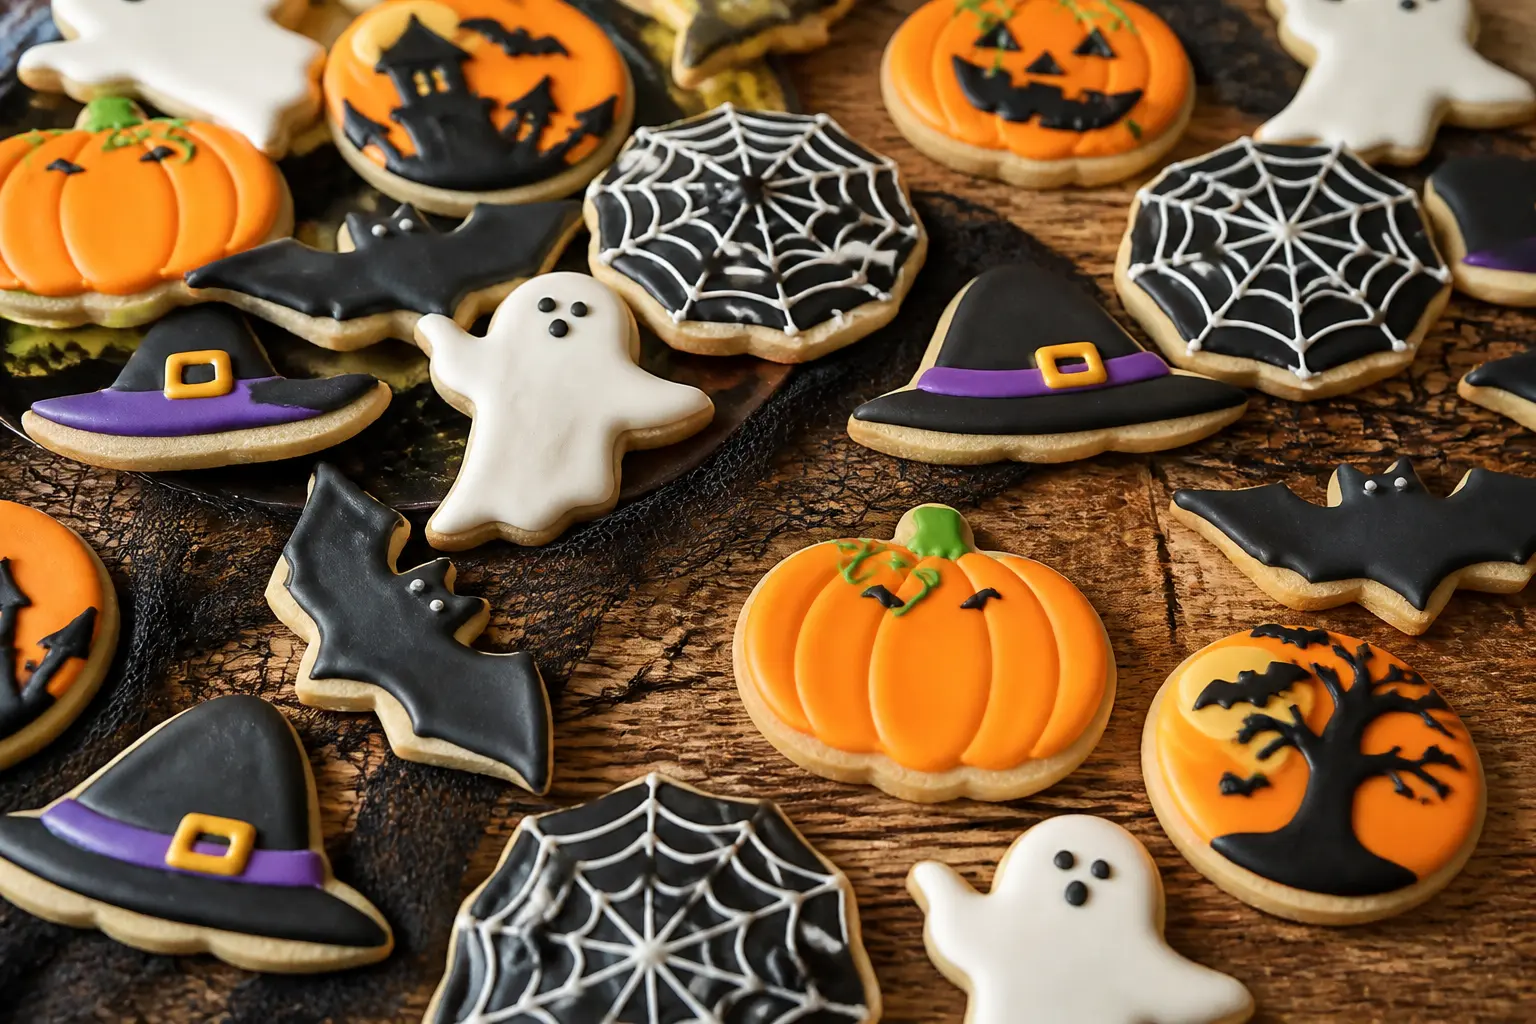
14 Halloween sugar cookies decorated with a spoon, toothpick, and zip bag. Complete recipes with exa
34 ghost painted pumpkin ideas on uncut pumpkins, sorted from toddler-friendly sweet to properly uns
Explore outdoor Halloween decorations for small porches, big yards, and busy doors across ten guides
Leave a Reply