


There’s a very specific kind of person who glues rhinestones onto a Stanley cup at 11pm on a Wednesday and calls it self-care. Turns out there are millions of them.
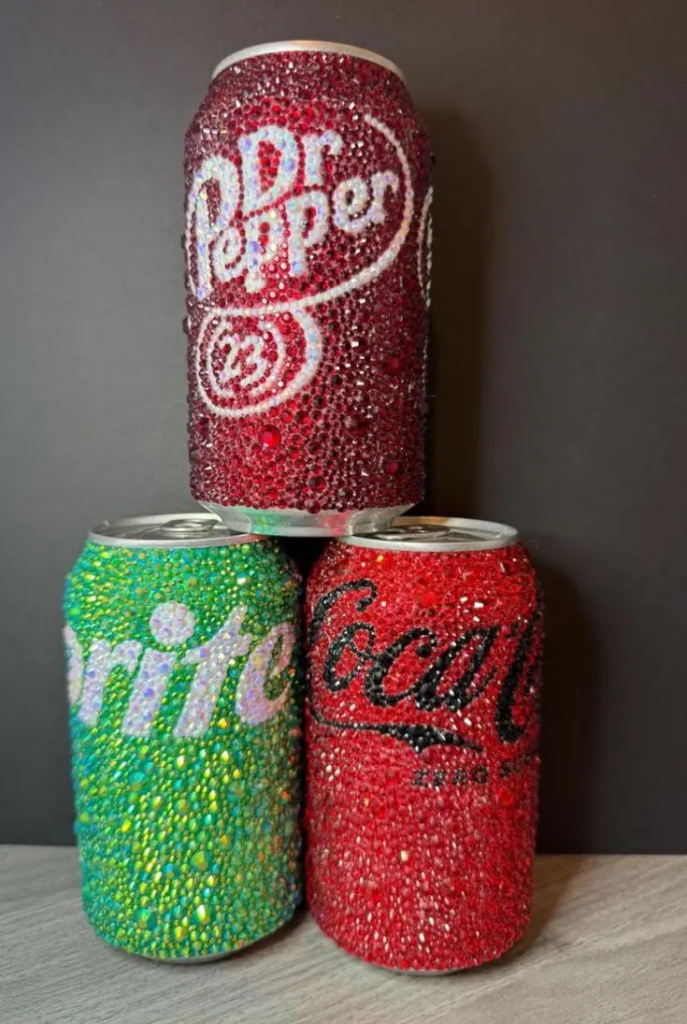
The rhinestone DIY trend has been quietly taking over TikTok and Pinterest for the past couple of years, and it’s not slowing down. What started with bedazzled phone cases has turned into full-on lifestyle — people are covering everything from hair clips to chargers to literal soda cans in flatback crystals and calling it a personality. And honestly? The results are kind of incredible.
The thing is, most of these projects cost under $20 in supplies and take an afternoon. What you end up with looks like something from a boutique Etsy shop charging $65 plus shipping.
Here’s what’s actually worth doing — and a few things to know before you start gluing.
This post contains affiliate links. If you buy something through these links, I might earn a small commission at no extra cost to you. I only recommend stuff worth your time.
The Supplies You’ll Need for Almost Everything
Before getting into the individual projects, there are a few things that show up in basically every rhinestone DIY, and it’s worth just having them on hand.
Flatback rhinestones in mixed sizes are the non-negotiable. Look for AB (aurora borealis) finish if you want that iridescent rainbow effect — it’s the one that photographs really well. Clear/crystal is the most versatile. Get a variety pack because you’ll want different sizes for different areas.
E6000 craft adhesive is what most people swear by for anything that needs to be durable — fabric, plastic, metal. It takes about 24-72 hours to fully cure and the fumes are real, so do this near a window.
Gem-Tac glue is better for fabric specifically — it stays flexible when it dries so it won’t crack when you wear something.
A rhinestone applicator wax pen makes the whole process about ten times less frustrating. You press the tip into the wax, touch it to a rhinestone, and it picks it up. Without one, you’re using tweezers and losing your mind.
Okay. Now the actual projects.
1. Rhinestone Belt
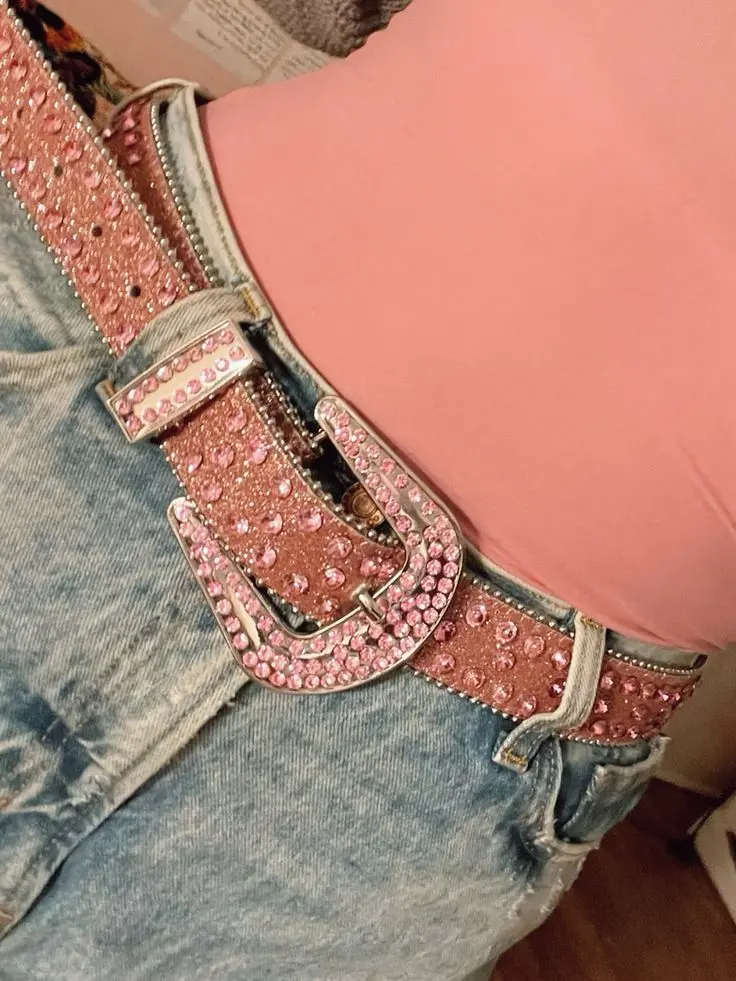
Difficulty: Medium | Cost: ~$25–40 in supplies
This is the project that started a lot of people down the rhinestone rabbit hole, and it’s not hard to see why. A simple leather or faux leather belt covered in pink crystals and finished with a silver buckle is genuinely one of those things that looks like it belongs in a boutique, not on your craft table.
The key here is going dense. Sparse rhinestones look like an accident. Full coverage looks intentional and expensive.
For a belt, E6000 is the right call. Apply small dots of adhesive, press rhinestones in, and work in small sections so the glue doesn’t dry before you get to it. A cheap plain faux leather belt from Amazon is your starting point — get one in a neutral color if you want the rhinestones to really show.
Pink crystals on a blush or tan belt is the combination that’s been everywhere. Clear AB on black leather is more versatile day-to-day.
2. Rhinestone AirPods Case
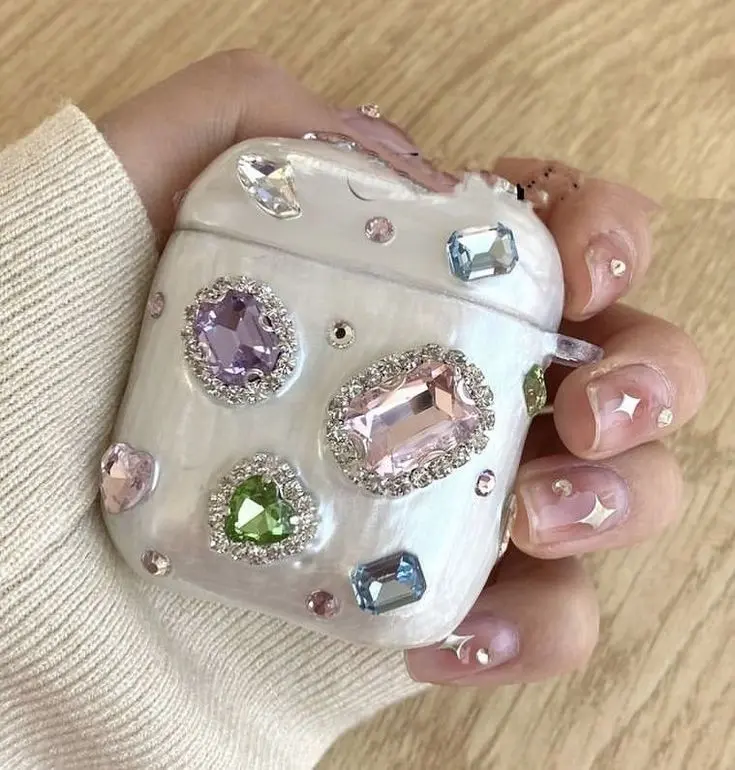
Difficulty: Easy-Medium | Cost: ~$10–20
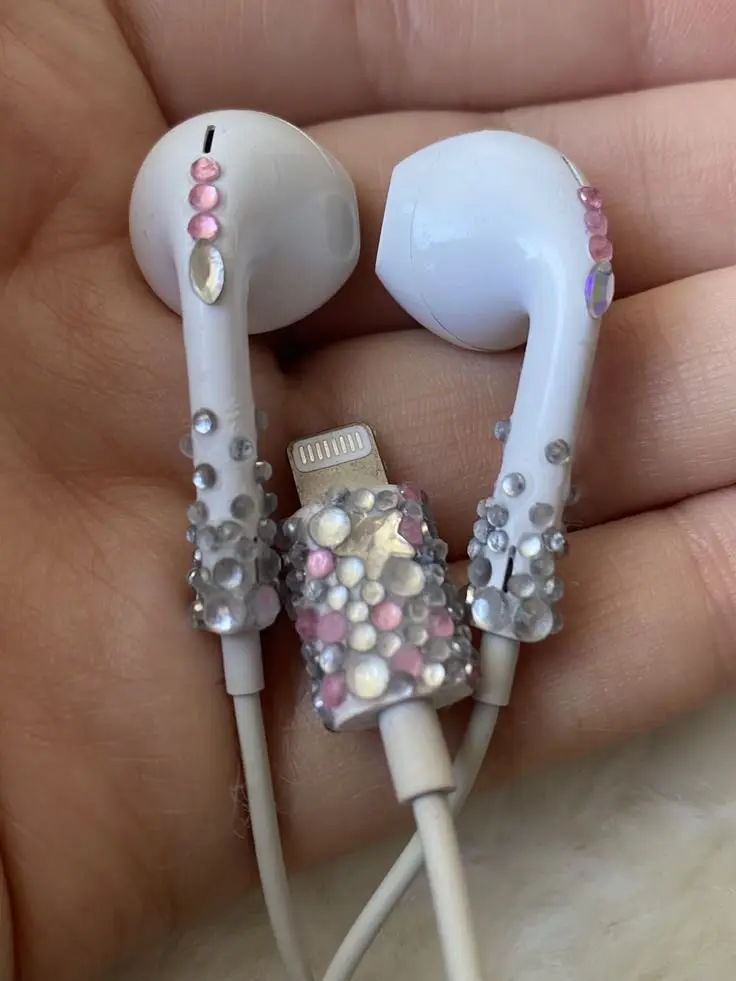
The pearl AirPods case in image 2 — the one with the pearlescent base and the colored statement gems — is a perfect example of how you don’t have to cover every inch to make something look good. That one uses a mix of smaller clear rhinestones scattered across the surface plus a few larger colored flatback gems as focal points.
Start with a plain white or pearl AirPods case. Gem-Tac works well here since the surface is smooth plastic. Let each rhinestone set for a few minutes before placing the next one nearby — otherwise they slide around.
The mixed-size, mixed-color approach with colored accent stones feels more intentional than all one color. Think of it like jewelry design: a few statement pieces, some filler, some negative space.
3. Rhinestone Stanley Cup
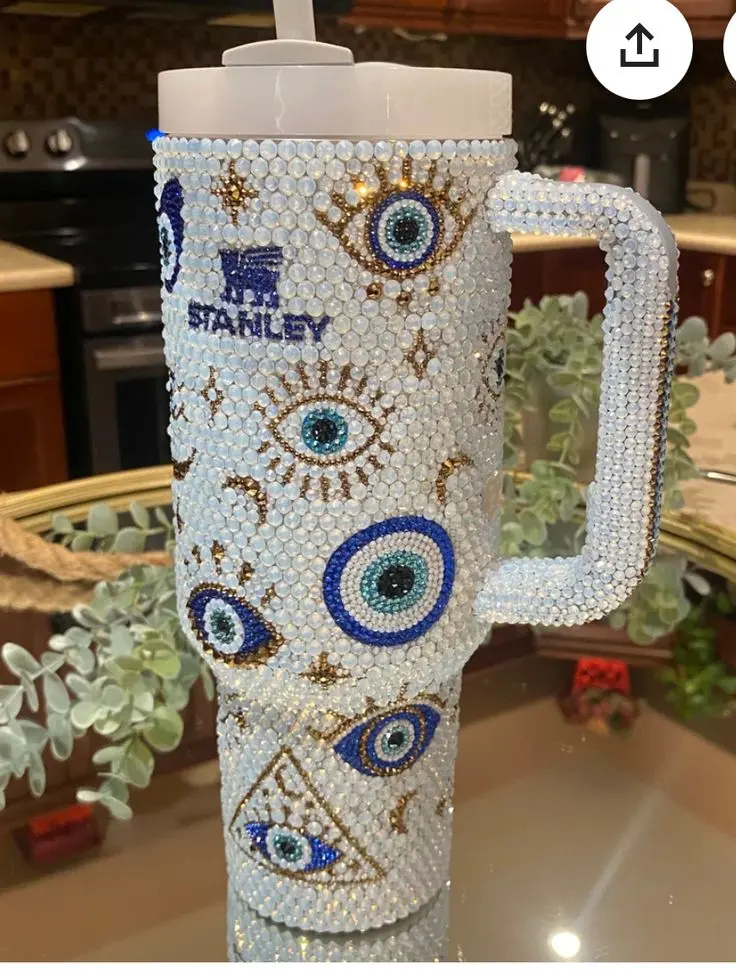
Difficulty: Medium-Hard | Cost: ~$30–60 in supplies
Two Stanley cups, completely covered — one in silver/white AB rhinestones, one in purple. They look like they belong in a display case.
Full coverage on a Stanley is a commitment. The cups are curved and the surface is coated metal, so you need a good adhesive and patience. E6000 works, but a lot of people also have luck with super glue gel for smoother surfaces like this.
The trick is working in horizontal rows and keeping your sizes consistent throughout — switching from large to small randomly makes it look patchy. The all-one-color approach (like that purple cup) tends to look cleaner than mixing too many colors on something this large.
One realistic heads up: covering a full Stanley takes several hours spread over a few sessions, probably 500–800+ rhinestones depending on size, and you’ll be hunched over your table in a way that your back will remember. Worth it if you’re into this. Not worth it if you were hoping for a quick project.
For something faster, try covering just the bottom third of the cup, or doing a pattern rather than full coverage.
4. Rhinestone Vaseline Pots
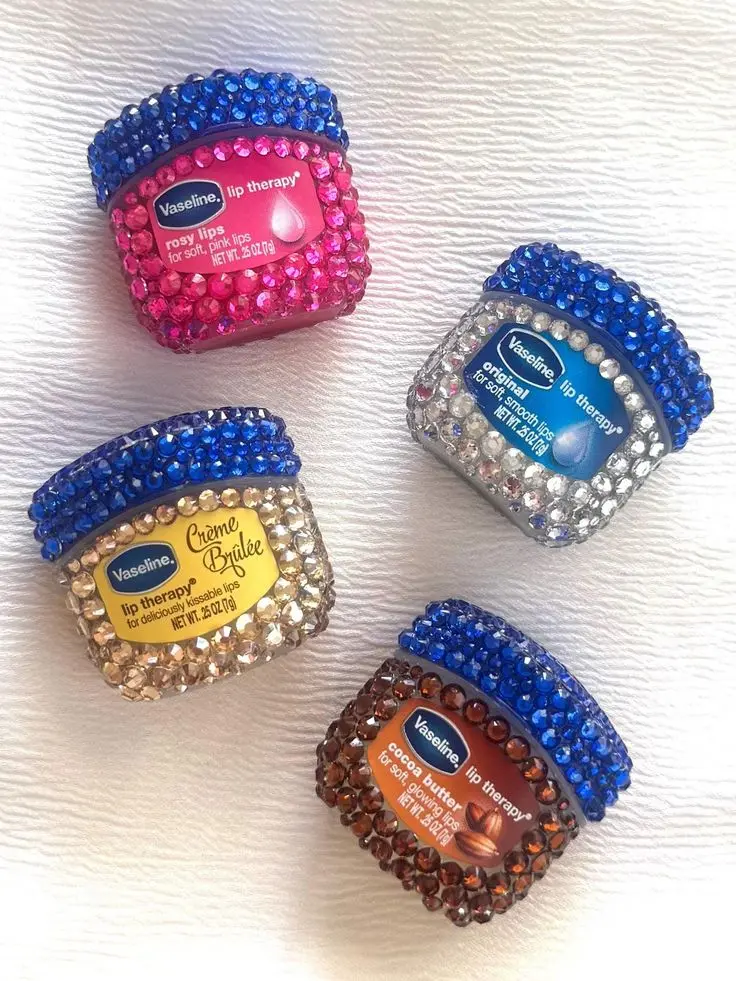
Difficulty: Easy | Cost: ~$8–15
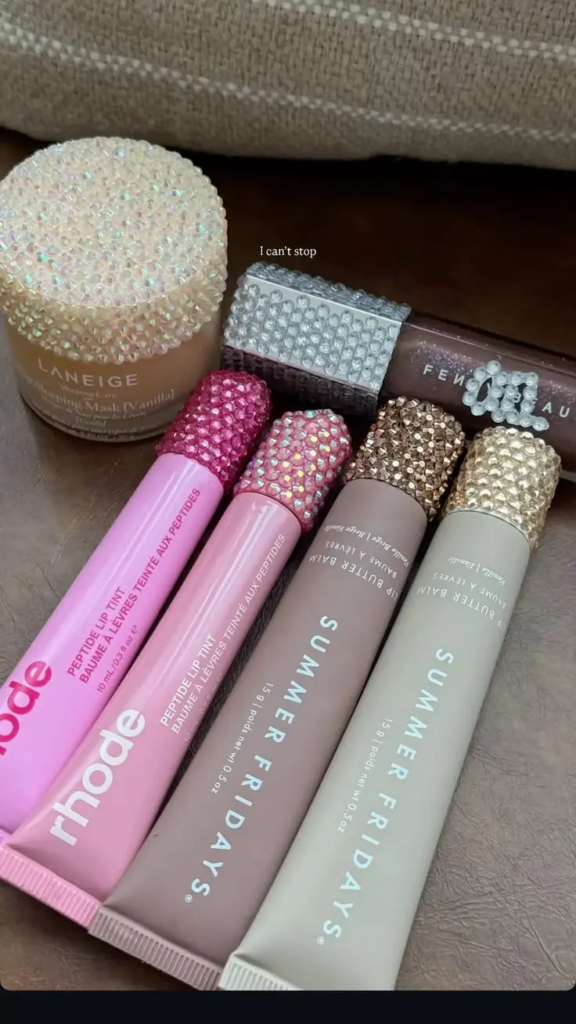
This is the beginner project that actually turns out great. Those little Vaseline lip therapy pots — already small, already cute — become something completely different when you rhinestone the entire exterior.
The version in image 7 does something smart: the rhinestone color is matched to the Vaseline flavor. Blue crystals on the “original,” pink on “rosy lips,” amber on “crème brûlée.” It makes each pot look like a coordinated set, and the visual effect is genuinely stunning.
Vaseline lip therapy mini pots are less than $2 each. The surface is small enough that you can cover an entire pot in 20-30 minutes. Gem-Tac adhesive, small flatback rhinestones, that’s it.
These are also one of the best things to make as gifts. A set of four rhinestone Vaseline pots in a little gift box costs you maybe $15 total and looks like it came from a specialty boutique.
5. Rhinestone Phone Case — Evil Eye Design
Difficulty: Hard | Cost: ~$20–35
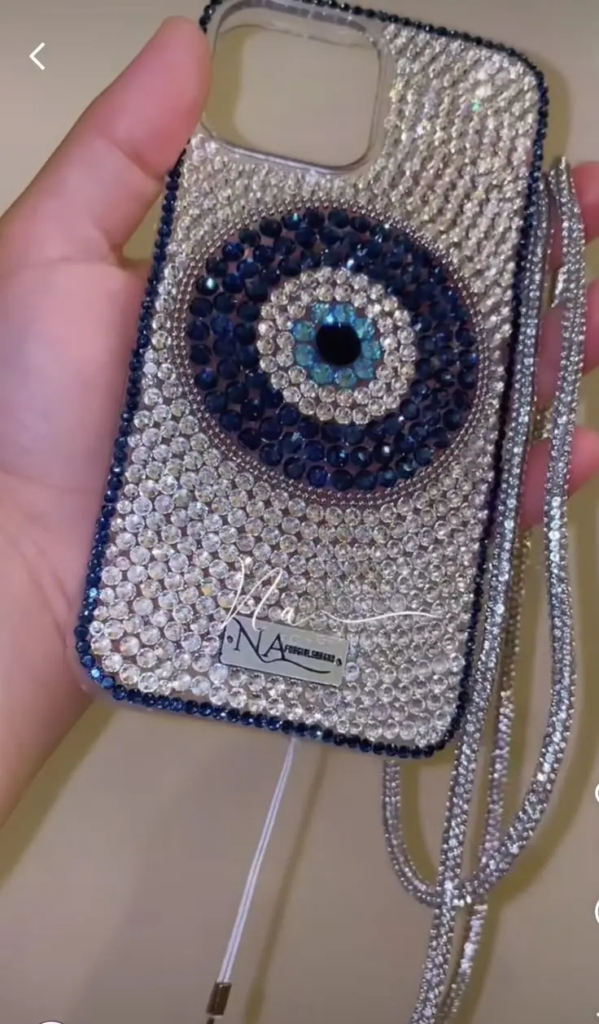
The evil eye phone case is probably the most technically challenging project on this list, and also one of the most impressive when it’s done. Concentric circles of blue, white, and teal rhinestones forming a full evil eye motif on a clear case — the whole thing is covered, and the detail work on the eye itself requires working with tiny stones in specific colors in a precise pattern.
If you want to try this, sketch the eye design lightly in pencil on a clear hard phone case before you start gluing anything. Work from the center of the eye outward, then fill in the background. Keeping your crystal sizes consistent throughout the background makes the eye pattern pop more clearly.
It’s worth knowing that if you’re new to rhinestone work, this is not the first project to try. Start with something smaller and flatter — the Vaseline pot, the AirPods case — and come back to this when you’ve got a feel for adhesive timing and stone placement.
6. Rhinestone Phone Charger
Difficulty: Easy | Cost: ~$8–15
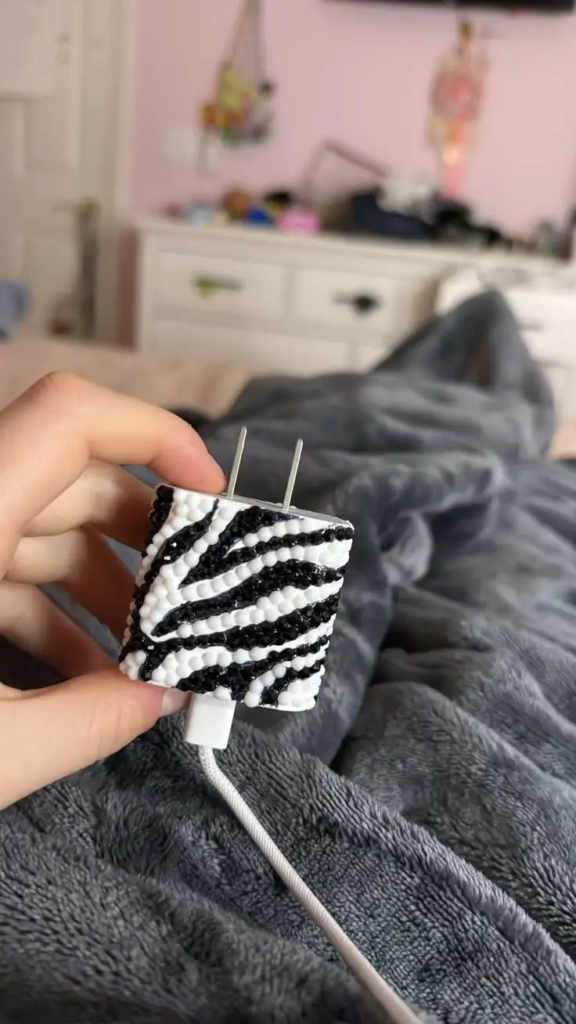
Nobody is talking about this one enough. A plain white phone charger block, completely covered in black and white rhinestones in a zebra stripe pattern. It’s one of the weirdest projects on this list and also one of the most unexpectedly cute.
The zebra charger works because of the graphic contrast. Black rhinestones in diagonal stripe shapes, white rhinestones filling in the background. On a flat square surface like a charger block, you can map out the pattern pretty easily before you start gluing.
This is a great project for using up leftover rhinestones in black and white, which tend to be in every variety pack and often go unused. E6000 is the right adhesive here since the plastic is smooth. Just make sure to let it cure fully before plugging anything in — 24-48 hours minimum.
7. Rhinestone Canvas Wall Art
Difficulty: Medium | Cost: ~$15–25
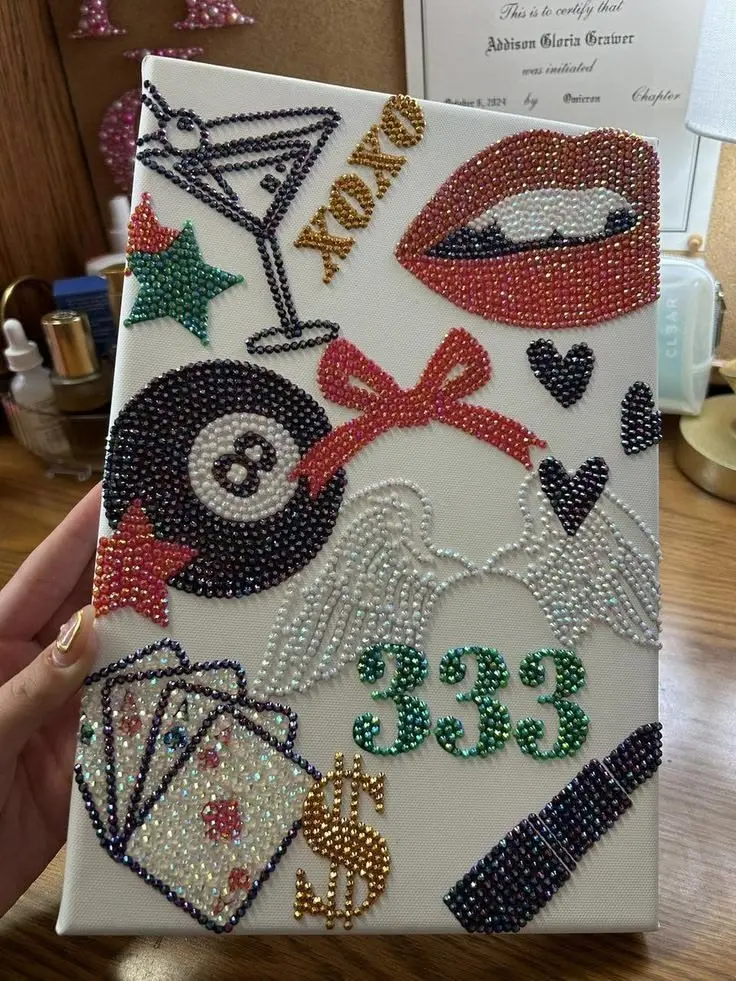
Image 15 shows a canvas that’s basically a collage of rhinestone-made icons — a martini glass, lips, an 8-ball, angel wings, playing cards, the number 333, a lipstick. Each element is its own little rhinestone drawing, and together they make something that genuinely feels like wall art, not a craft project.
The thing about canvas rhinestone art is that it’s actually more forgiving than rhinestoning a 3D object. You’re working on a flat, stable surface, and the rhinestones don’t shift around. Sketch your design in pencil first, then fill in with rhinestones in the appropriate colors.
A stretched canvas in white gives you the cleanest base. Plain E6000 works fine here, or a clear-drying craft glue if you want something less fume-heavy for this project specifically.
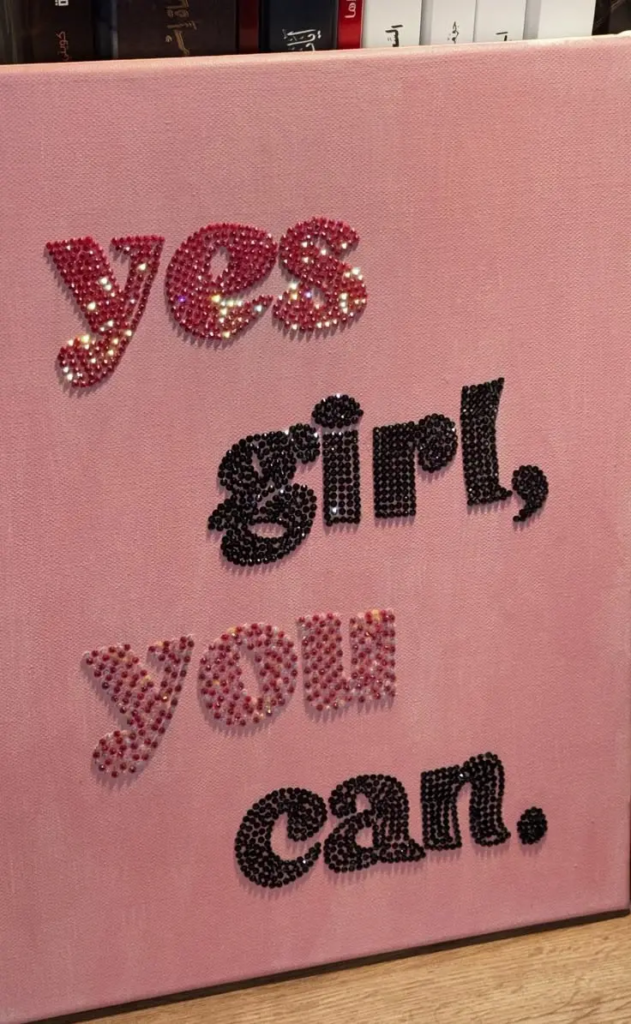
You can also do something simpler — just text, like the “yes girl, you can” canvas in image 17. Print or lightly trace your letters, then fill them in with rhinestones in two or three colors. Takes a couple of hours and looks legitimately good on a shelf or gallery wall.
8. Decorated Digital Camera
Difficulty: Easy-Medium | Cost: ~$10–20 in supplies
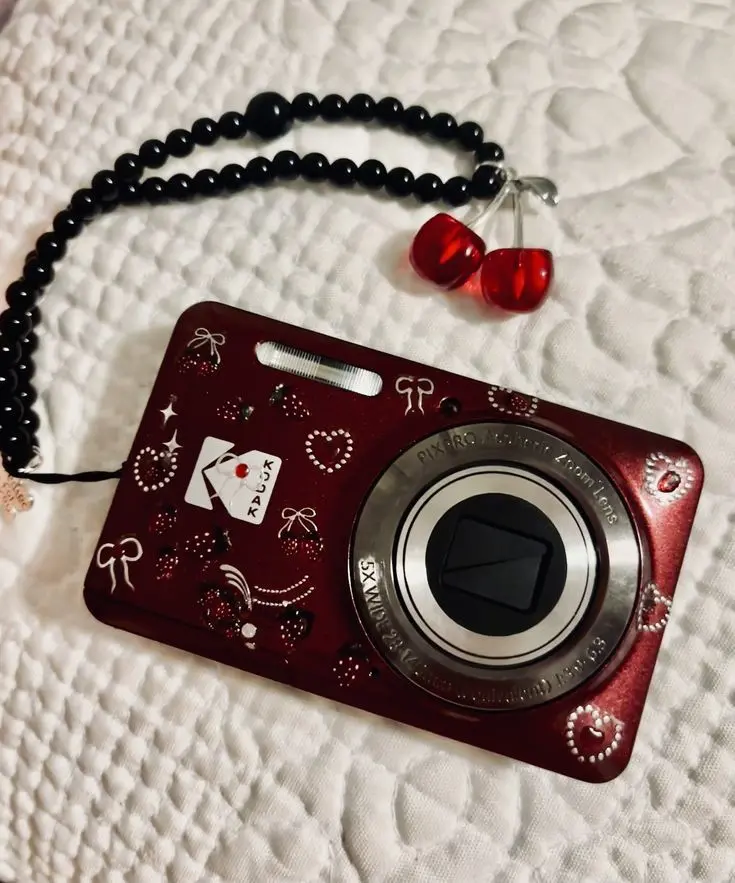
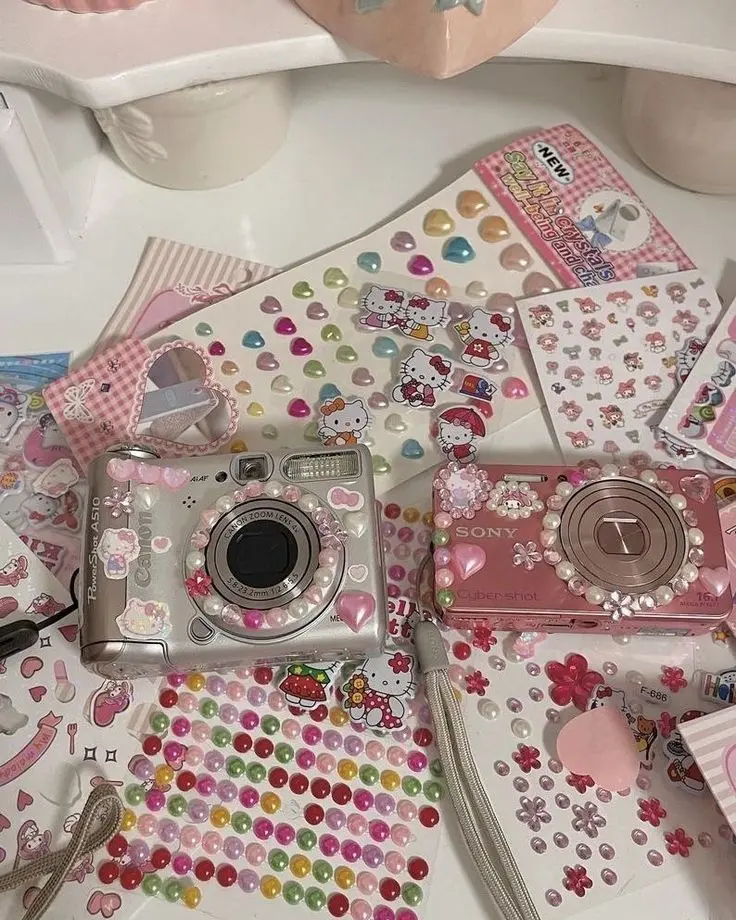
The vintage digital camera trend has been going for a while, and people are customizing them in every possible way. Rhinestones are a natural fit. Image 16 shows a Kodak camera in deep red with delicate rhinestone strawberries, ribbon bows, and small hearts scattered across the body — it looks like something from a Coquette mood board.
For this project, smaller rhinestones and more restrained placement tends to look better than full coverage. The charm is in the details: a little cluster of strawberries here, a bow outline there. It’s also faster — you’re not covering the whole surface, just adding accents.
If you don’t already have a vintage-style digital camera, small digital cameras for decoration are all over Amazon and don’t have to be expensive. The decoration is the point.
9. Monogram Hairbrush with Pearls
Difficulty: Easy-Medium | Cost: ~$12–20
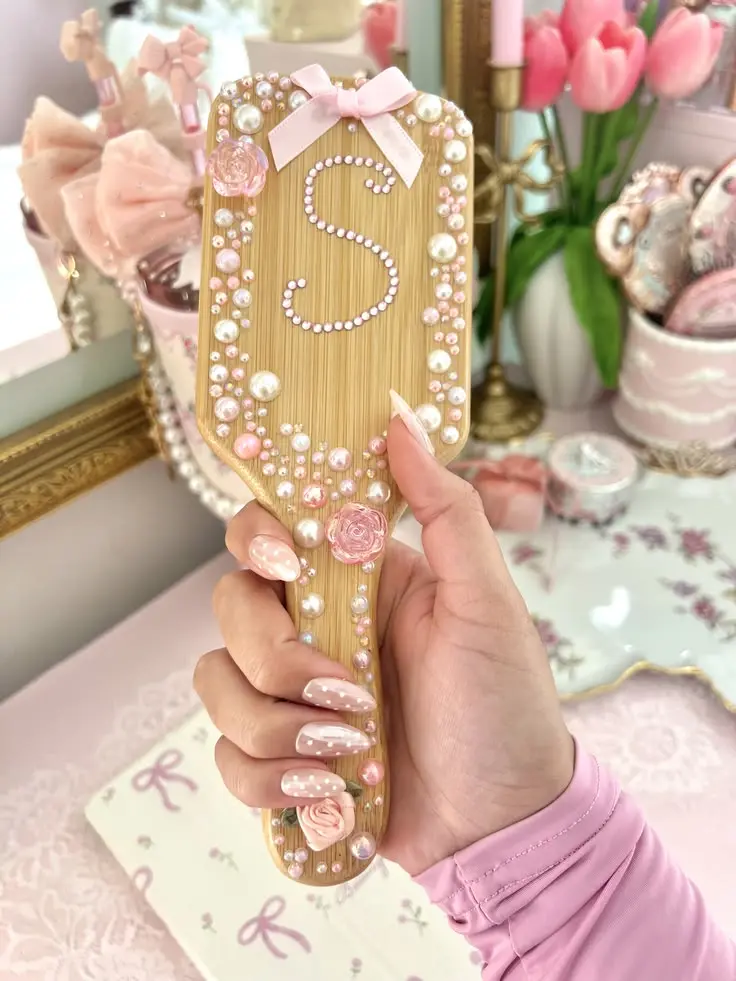
The bamboo paddle brush in image 18 is one of the most giftable things on this entire list. Covered in mixed-size pearls and pink flatback rhinestones, with a rhinestone monogram initial in the center and small resin roses as accents — it’s the kind of thing that looks like a custom gift you’d pay $50 for on Etsy.
Flat paddle brushes in wood or bamboo give you a good flat surface to work with. For this project, mixing pearl-finish and matte white rhinestones creates depth — not everything needs to be sparkly. The monogram can be done with tiny rhinestones in a slightly different color or size to make it stand out.
Gem-Tac is the right adhesive here since it stays a bit flexible — if the brush flexes at all, E6000 can sometimes cause stones to pop off.
10. Personalized Rhinestone Hair Clips
Difficulty: Medium | Cost: ~$15–30 for a set
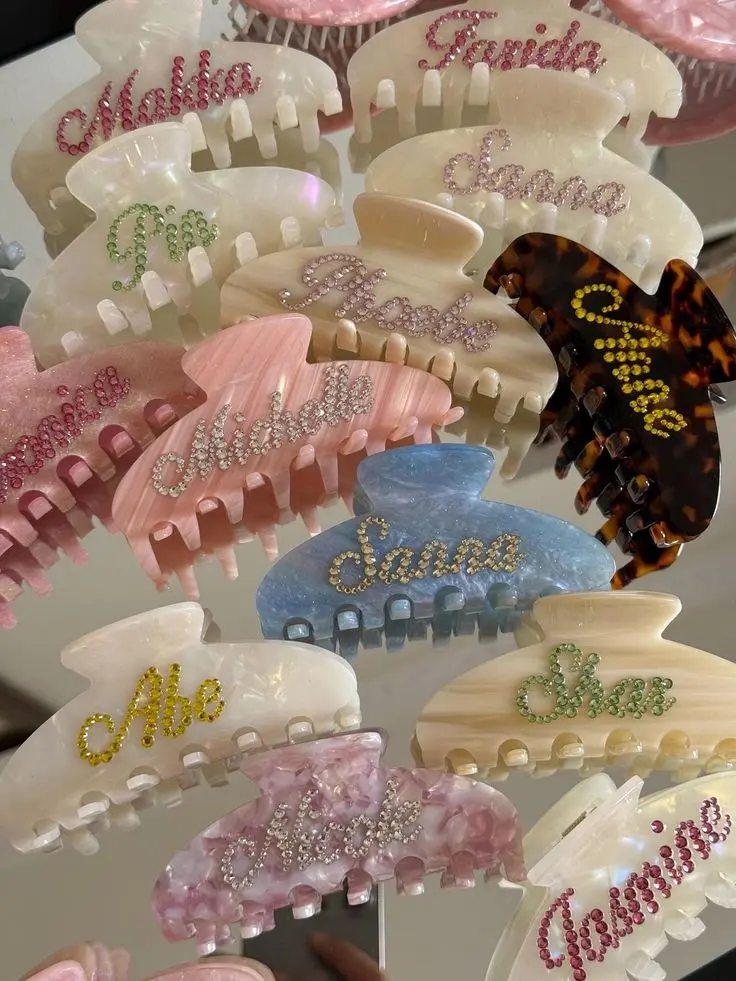
The claw clip customization trend has been running for a while, and the rhinestone name version is one of the prettiest outcomes. Image 19 shows a whole collection of them — cream, pink, blue, tortoiseshell clips, each with a different name written in rhinestones in coordinating colors. The effect is genuinely beautiful, and each one looks completely intentional.
For the name, work small: SS6 or SS8 rhinestones (small sizes) are what you need to form legible lettering. Print the name in a script font, trace it lightly onto the clip with a white pencil or chalk marker, then fill in the letters with rhinestones following the outline.
Plain acetate claw clips come in great colors and are widely available. The whole project for a personalized clip takes about 45-60 minutes once you have the hang of it. These make excellent birthday gifts, bridesmaid gifts, or just something to make for yourself in your own name for absolutely no reason at all.
What Not to Use (The Honest Version)
Hot glue is the obvious first choice for a lot of people and it’s almost always a mistake for rhinestones. It dries cloudy, doesn’t hold as well as it seems like it should, and you get those stringy white strands everywhere. E6000 and Gem-Tac take longer but they actually hold.
Nail glue works in a pinch for very small projects — a single Vaseline pot, a few stones on a clip — but it’s not durable enough for anything larger.
Super glue is fine on smooth, hard surfaces (phone cases, charger blocks) but gets brittle over time and doesn’t flex at all. If something will bend or be handled a lot, use E6000.
And one thing worth knowing: AB (aurora borealis) rhinestones are not the same as holographic rhinestones. AB has a subtle rainbow sheen. Holographic is much more intense. Both are great — they just look different. Check the photos carefully when you’re buying because the difference isn’t always obvious in product listings.
What You Actually Need to Get Started
| Item | What It’s For | Budget Option |
|---|---|---|
| Flatback rhinestones variety pack | Every project | ~$8–12 |
| E6000 adhesive | Hard surfaces, belts | ~$5–8 |
| Gem-Tac glue | Fabric, flexible items | ~$6–10 |
| Rhinestone applicator wax pen | Picking up tiny stones | ~$4–8 |
| Tweezers fine tip | Backup for placement | ~$4–6 |
| Toothpicks | Nudging stones into position | Basically free |
Total to get started: around $30–40. You’ll have supplies left over for several projects.
FAQ
Do rhinestones fall off eventually?
Some will, especially on things that get a lot of wear or handling. E6000 and Gem-Tac are the most durable options, but nothing is permanent. Keep a little tube of glue nearby and touch up as needed. It’s less annoying than it sounds.
Can I wash rhinestone-decorated items?
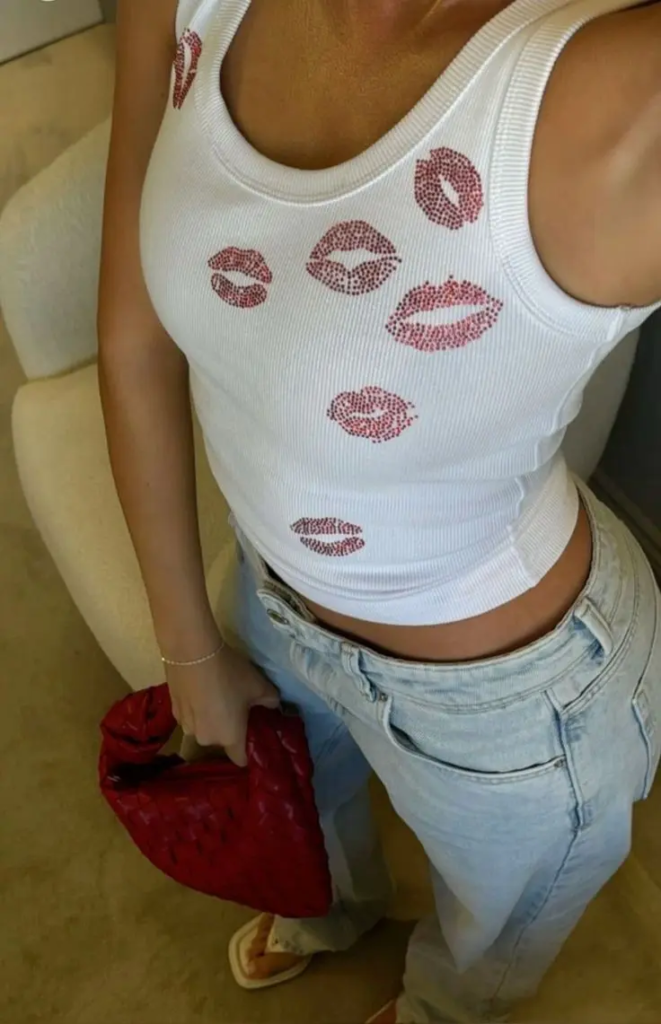
Depends on the item and adhesive. Rhinestone fabric items (like that tank top with the lip prints) are usually hand-wash only, cold water, inside out. Items covered with E6000 on hard surfaces can handle more — just no soaking. Avoid putting anything rhinestoned in the dryer.
What size rhinestones should I use?
SS16 (about 4mm) is a good all-purpose size that’s visible but not clunky. SS20 (5mm) is good for larger items like the Stanley cup. SS6 or SS8 is for fine detail work like lettering. A mixed variety pack gives you options, which is useful when you’re just starting out.
Where’s the best place to buy rhinestones in bulk?
Amazon for variety packs is the easiest starting point. Craft stores like Michaels and Hobby Lobby carry them in smaller quantities at higher prices, which is fine if you just need a specific color. For large quantities of a specific color or size, Etsy suppliers and wholesale craft sites tend to have better deals.
Is this expensive as a hobby?
The startup supplies are $30-40. Individual projects after that range from basically nothing (if you have leftover rhinestones) to $20-30 for something more elaborate. It’s one of the more affordable crafts compared to something like embroidery or resin art, and the materials are reusable.
Love DIY crafts? Check out more ideas on RedCheeksGirl: air dry clay projects and easy crochet ideas for beginners.
Sources:
Easy Mother's Day craft ideas for kids ages 2-11. From fingerprint art to clay flower mirrors, these
The air dry clay obsession has reached critical mass in 2026, and it’s not just another fleeti
I came home from the beach last summer with an entire grocery bag of shells. Just… stuffed th
Leave a Reply