

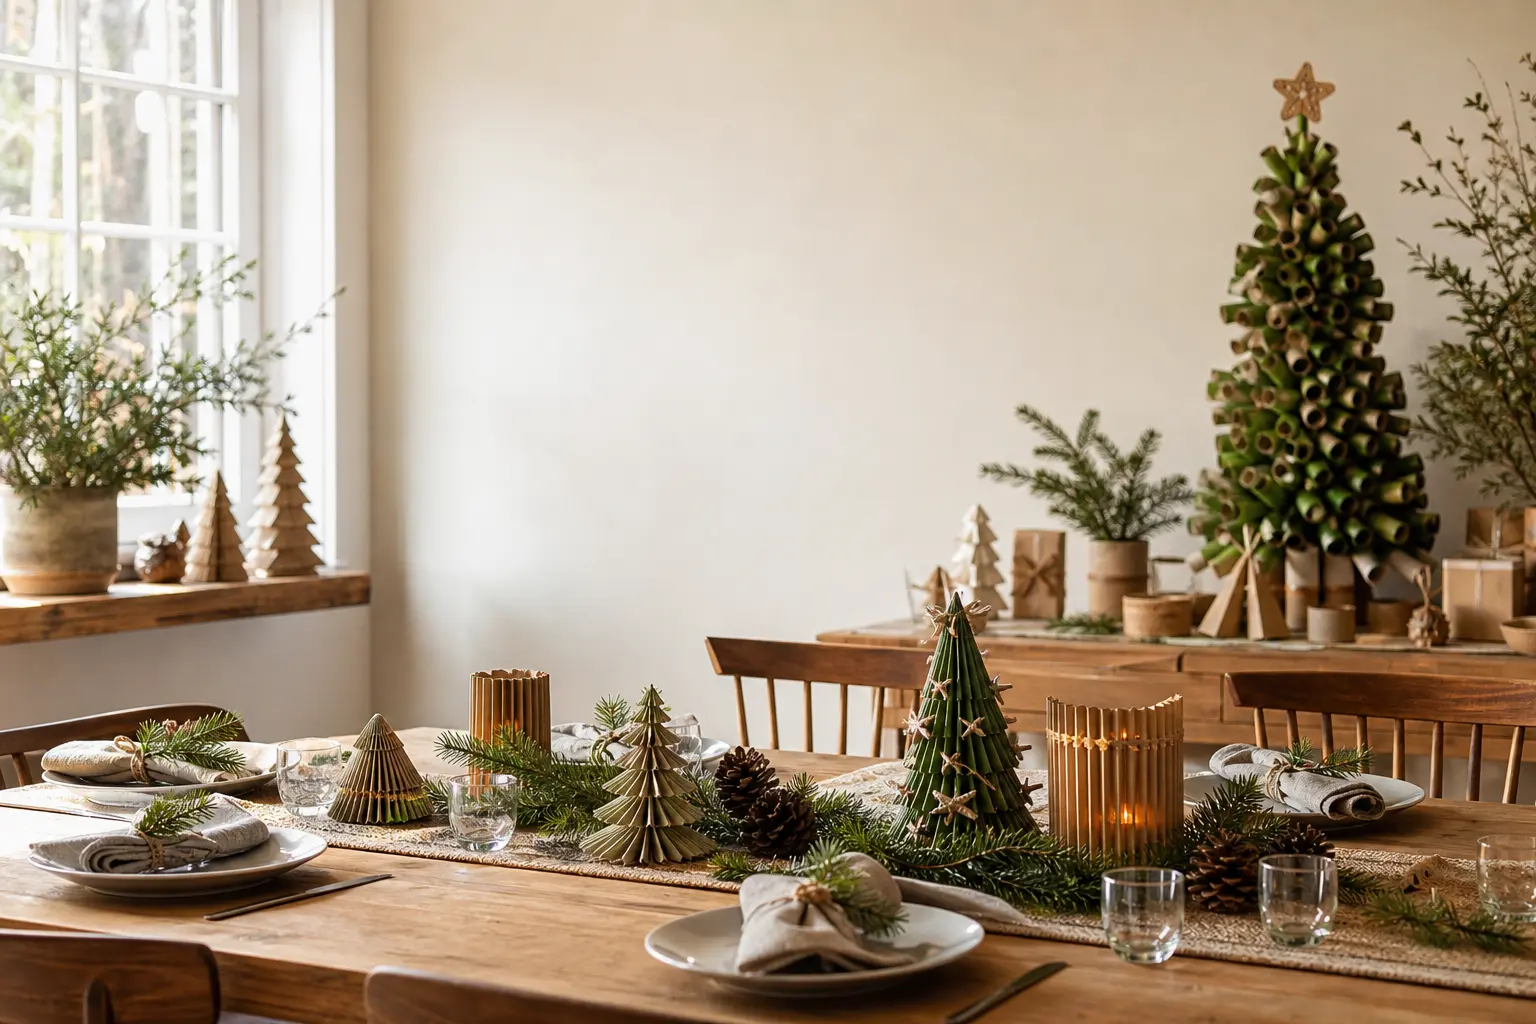
Every one of these diy christmas projects begins with something you would otherwise recycle, lose or ignore. The cereal box. The coat hanger. The sock with no partner. The point is not thrift, exactly: it is that transformation thing, where a guest picks up your decoration and says, “Wait, what is this made of?” That pause is the whole pleasure.
Nothing here needs a craft shop trip, a sewing machine or resin. Most need scissors, a glue gun or a marker. All twenty-one are doable in a free evening, and the instructions say honestly when the tricky part is tricky. For more inspiration once you have worked through this list, the hub on christmas crafts covers the wider territory, and if you want to go deeper, the guide to christmas crafts for adults has projects worth a whole weekend. There is also a focused edit on diy christmas ornaments and a beautiful collection of christmas wood crafts if you have offcuts around. But tonight, start with whatever is already on the counter.
This post contains affiliate links. If you buy through them, I may earn a small commission at no extra cost to you.
- Cereal Box House
- Wire Coat Hanger Wreath
- Playing Card Garland
- Wine Cork Tree
- Paint Chip Forest
- Egg Box Bell String
- Coffee Filter Flowers
- Book Page Cone Wreath
- Foil Coin Medallions
- Takeaway Lid Snowflake Stencil
- Bread Tag Gift Labels
- Jumper Sleeve Mug Cosy
- Broken Jewellery Star
- Stamped Pillowcase Gift Sack
- Sock Gnome
- Punched Tin Can Lanterns
- Shoe Box Village
- Ribbon Offcut Tassel Garland
- Cardboard Tube Star
- Cardboard Tube Ring Wreath
- Potato Print Wrapping Paper
- Frequently Asked Questions
Cereal Box House
One standard cereal box becomes a single glowing room with a peaked roof and cut-out windows. Lit from inside by a tea light or a battery votive, it throws warm rectangles onto a shelf in the dark. Guests squint at it for a few seconds before they get it, which is exactly right.
Store it flat after Christmas: cut the original folds back open, and it packs to almost nothing.
What You Need
- 1 standard cereal box, about 30 cm tall
- 1 sheet of white or yellow tissue paper
- Craft knife or sharp scissors (adult step)
- Black marker or dark paint, plus a small brush
- Ruler and pencil
- 1 battery-operated tea light or votive
- Low-temperature glue gun or white PVA glue
How to Make It
- Stand the sealed box upright and, with a pencil and ruler, draw the roof line on each narrow side: mark the centre top and draw two diagonal lines down to the upper corners of the wide faces to make a triangle. Score along those lines with a craft knife (adult), then fold the two wide panels inward so they meet at the peak and form a tent roof. Press them flat together and glue along the seam. The roof should hold its angle without buckling.
- On each wide face, pencil in two or three rectangular windows, spacing them evenly. An adult cuts these out with a craft knife, pressing firmly against a cutting mat or a magazine underneath. The openings should be clean-edged, not ragged.
- Cut the tissue paper into pieces slightly larger than each window opening. Glue them to the inside of the box so they cover every opening. When the glue dries, the tissue diffuses the light and glows rather than flickers.
- Paint or draw the exterior: outline the window frames, add a door shape on one wide face, tick in brick lines or timber planks if you like. The marker does this faster than paint, and imprecision reads as charm at this scale.
- Open the bottom flap just enough to slide the battery tea light inside, then press it mostly closed again. Switch the light on before you close the flap fully, so you can check the glow. Adjust the tissue if any window looks dark.
- Set the house on a shelf with the back wall against a surface: the glow comes forward and the seam stays hidden.

Wire Coat Hanger Wreath
A wire coat hanger, bent around a saucepan, becomes a true wreath circle with none of the fuss of a florist’s ring. Wind it with whatever ribbon, tinsel or evergreen sprigs are in the house, and it looks considered rather than improvised. The hook stays intact and becomes the hanging point.
After the season, unwind the decorations and hang the hanger back in the wardrobe.
What You Need
- 1 wire coat hanger
- 1 large saucepan, about 24 cm diameter
- Pliers (adult step)
- Approximately 2 m of ribbon, tinsel or strips of fabric
- Sprigs of holly, pine or rosemary, or paper leaves cut from magazine pages
- Thin florist’s wire or twist ties, around 12 pieces
How to Make It
- Using pliers, straighten the twisted neck of the coat hanger so the whole length of wire is as even as possible. Keep the hook at the top: it is your hanging point.
- Hold the wire against the outside of the saucepan and work it around the circumference with both hands, pressing the wire against the pan as you go. The wire will not be perfectly circular on the first pass, and that is fine. Ease it around a second time to tighten the curve. When you lift it off the pan, it should hold a roughly even ring about 24 cm across.
- Where the two ends of the wire overlap near the hook, twist them together twice with pliers to close the circle. The hook should point upward from the join.
- Tie your ribbon, fabric strips or tinsel at the join and wind it around the ring, overlapping slightly, until the wire is mostly hidden. Secure the end with a small knot or a twist of florist’s wire.
- Tuck sprigs or paper leaves into the wrapping at intervals, securing each one with a short length of florist’s wire twisted at the back. Odd numbers of clusters look better than even ones.
- Hang the wreath by the hook. If it tilts forward, bend the hook very slightly backward with the pliers until it sits flat against the door.

🛍 Shopping guide
Playing Card Garland
A spare deck of playing cards, pegged along a length of string with wooden clothes pegs, becomes a garland that looks like something from a clever stylist’s shoot. The back of a card is usually a repeating pattern: use that side to face outward, and paint or stamp the peg heads if you want a little extra colour. It runs along a shelf edge or above a fireplace brilliantly.
After Christmas, unclip the cards, rubber-band the deck, and coil the string back into a drawer.
What You Need
- 1 deck of playing cards (52 cards minimum)
- 26 to 30 small wooden clothes pegs
- Approximately 1.5 m of string, twine or thin ribbon
- Gold or red acrylic paint and a small brush (optional)
- Sticky tack or two small nails to fix the string ends
How to Make It
- If painting the peg heads, do that first: dab gold paint onto the rounded top of each peg and set them on a piece of scrap paper to dry. This takes about 15 minutes and makes a noticeable difference to the finished look.
- Cut your string to the length of the shelf or mantel you are decorating, plus 15 cm at each end for tying off.
- Fix one end of the string to the left side of the shelf with sticky tack pressed flat, or loop it around a small nail.
- Take the first card and fold it in half lengthways, printed side in, so the fold runs down the long edge. Crease it firmly. This fold makes the card stand slightly proud of the string and gives it a three-dimensional look along the garland.
- Clip a peg over the folded top edge of the card so the string runs through the peg and the card hangs below. Position the first card about 5 cm from the left end of the string.
- Continue clipping folded cards at even intervals of about 4 to 5 cm until the garland reaches the end of the string. Alternate the direction of the folds if you like, so some cards angle left and some angle right: it catches light differently.
- Fix the right end of the string and check the drape. The garland should dip slightly in the middle like bunting, not hang taut.

🛍 Shopping guide
Wine Cork Tree
A collection of wine corks, stacked and glued into a cone shape, becomes a standing tree that looks like something from a deli counter in a satisfying way. The natural cork tones vary just enough to add texture, and a star cut from gold card or a piece of broken jewellery at the top finishes it properly.
Store the finished tree in a zip-lock bag or a small box: it is surprisingly sturdy once the glue has set fully.
What You Need
- 60 to 80 wine corks, a mix of sizes is fine
- Low-temperature glue gun and glue sticks
- 1 sheet of A4 card, 160 gsm or heavier, for the cone base
- Scissors
- Small star cut from gold card, or a earring or brooch for the top
How to Make It
- Roll the sheet of card into a cone roughly 15 cm tall and 10 cm across the base. Overlap the edges until you are happy with the proportions, then tape or glue along the seam. Trim the base so the cone sits flat without rocking.
- Lay the cone on its side and start gluing corks to the bottom row: apply a generous dot of hot glue to the side of each cork and press it flat-end-down against the card, holding it for about ten seconds. Work around the full circumference before moving up. This bottom row is the most important one: if it is uneven, everything above it tilts.
- Continue adding rows of corks, staggering them like brickwork so each cork rests in the gap between the two below it. The rows should lean inward naturally as the cone narrows.
- As you near the top, corks will need to be tilted more steeply. Use shorter corks here, or slice one lengthways (adults only) to create a flat half-cork that sits flush against the narrow cone tip.
- Glue the star or jewellery piece to the very tip. If using a brooch, press the pin into the card beneath and add a dot of glue for security.
- Stand the tree upright and check it from all sides. Fill any gaps between corks with a small dab of glue if they bother you, though a few gaps are fine: they add shadow and depth.

🛍 Shopping guide
Paint Chip Forest
Free paint sample chips from a hardware store, fanned out and stapled at the base into tree shapes, make a graphic little forest along a windowsill or shelf. Use a run of greens from one brand’s range and the gradient is built in. Three or five trees at different heights look more interesting than a uniform row.
After the season, flatten the trees by releasing the staple, and they store in an envelope.
What You Need
- 15 to 25 paint sample chips in shades of green, gathered free from a hardware shop
- 1 stapler and staples
- Scissors
- Thin wooden skewers or pencils for trunks (optional)
- Sticky tack for anchoring the bases
How to Make It
- Sort the chips from darkest to lightest green. For each tree you plan to make, select five to seven chips in a gradient sequence.
- Fan the chips out in a triangle shape, darkest at the outside edges and lightest at the centre front. Hold them pinched at the bottom. The fan should look like a rough cone when viewed from the front.
- Staple once through all the chips, about 1 cm from the bottom. The staple is the trunk: everything fans upward from it. Trim any chips that stick out unevenly at the bottom edge so the tree stands flush.
- Bend the chips forward and back slightly to open up the fan and give it a three-dimensional shape rather than a flat silhouette.
- Press sticky tack under the base of each tree and press it onto the shelf or windowsill. Three trees grouped together, one taller than the others, reads like a small forest rather than a row of identical shapes.
- For trunks, push a wooden skewer into the sticky tack below each staple. This is optional but it helps if the trees are next to each other and you want to see negative space between them.

🛍 Shopping guide
Egg Box Bell String
The individual cups of a cardboard egg box, trimmed and painted, become convincing Christmas bells. String them on twine at different heights and they catch the light like they belong in a church. Silver and gold together look intentional: alternate the colours along the string.
These are fragile and store best in a small cardboard box with tissue between the cups.
What You Need
- 2 cardboard egg boxes, 12-cup size each
- Scissors (adult for the initial cutting)
- Silver and gold acrylic paint, plus brushes
- 1 m of thin twine or string
- 1 large-eye needle or a sharp pencil for piercing
- 12 small beads or buttons for clappers (optional but pretty)
How to Make It
- An adult cuts the egg box into individual cups, following the seams as closely as possible. Trim the rims so each cup is neat and even rather than ragged. You should have 24 cups from two boxes.
- Paint half the cups silver and half gold, working on the outside only. Two thin coats look better than one thick one: let the first coat dry for 30 minutes before adding the second.
- Once the paint is fully dry, use a needle or sharp pencil to poke a small hole through the base of each cup, right at the centre. This is the bell’s crown, where the thread will pass through.
- Cut the twine into a 90 cm length. Thread it through the needle, or if using a pencil hole, fold the twine end and push the fold through first, then catch it on the other side.
- Thread the cups one at a time onto the twine, pushing the thread through the hole so the cup hangs open-end-down like a bell. Knot the twine above each cup to hold it at the height you want, alternating silver and gold, and spacing them at different heights along the string for variety.
- If using bead clappers, tie a small bead to a separate short thread, knot it so it sits inside the bell cup when hung, then pass the main thread through the same crown hole.
- Tie a loop at the top for hanging. The string looks best hung from a curtain rail or a shelf bracket where the bells can move slightly in a draught.

Coffee Filter Flowers
Coffee filters, dyed with diluted food colouring or strong tea, then layered and gathered at the base, open into full, poufy flowers that look expensive in a vase or wired into a wreath. The dye soaks in unevenly and that is the point: it gives the petals a watercolour quality no solid-painted paper can match.
Store loosely in a box, not stacked tightly: they crush. They last indefinitely if kept dry.
What You Need
- 12 flat-bottomed coffee filters per flower
- Food colouring in 1 or 2 colours, or 2 strong brewed black tea bags
- A shallow bowl or tray for dipping
- Wire twist ties or green florist’s wire, 15 cm per flower
- Scissors
- A rack or newspaper to dry filters on
How to Make It
- Mix a few drops of food colouring into a shallow bowl of water, enough to submerge a coffee filter. The colour looks surprisingly pale in the water and much stronger once the filter dries, so start lighter than you think is right.
- Dip each filter into the dye, submerging it fully for five seconds, then lift it out and let the excess drip back into the bowl. Lay filters flat on newspaper or a rack to dry. Two hours is usually enough, but a warm room speeds this up considerably.
- Once dry, stack 12 filters in a neat pile. Fold the whole pile in half, then in half again so you have a quarter-circle wedge. Now fold it in half once more to get a narrow wedge. Round the cut tip slightly with scissors to prevent a hard pointed centre when the flower opens.
- Gather the folded wedge at the straight base and twist a length of florist’s wire tightly around it, about 2 cm from the bottom. Twist the wire ends together and leave them extending as a stem.
- Gently peel the layers apart one at a time, pulling each layer toward the centre of the flower. Work slowly: coffee filters tear if you rush. The flower opens as you go, and the last few layers should stand almost upright at the centre.
- Adjust the outer layers to give a full, rounded shape. The finished flower should be about 12 to 14 cm across. Arrange several in a jug or bundle their wire stems together into a bouquet with a rubber band.

🛍 Shopping guide
Book Page Cone Wreath
Pages from an old paperback, each rolled over a pencil into a tight cone, are glued row by row onto a polystyrene or card ring to make a wreath that looks like gathered parchment. It is quiet and graphic rather than colourful, and it suits a study wall or a kitchen door where tinsel would feel wrong.
It stores flat enough to slip behind a wardrobe if the cones do not get crushed. Wrap it loosely in a plastic bag for protection.
What You Need
- 1 old paperback book (at least 150 pages)
- 1 polystyrene wreath ring, 25 cm diameter, or a card ring cut from a cereal box to the same size
- 1 pencil
- Low-temperature glue gun and glue sticks
- Scissors
- 1 m narrow ribbon for hanging
How to Make It
- Tear or cut pages from the book and cut each page into quarters. You will need around 120 to 150 pieces in total: more than you think. Prepare a good pile before you start gluing.
- To make a cone, place a pencil at one corner of a paper piece at a diagonal angle, then roll the paper tightly around it. Slide the pencil out and the cone should hold its shape. If it unrolls, add a tiny dab of glue at the tip to fix it. The cone should be about 4 to 5 cm long and as narrow as you can get it.
- Apply a dot of hot glue inside the open base of a cone and press it flat-end against the wreath ring. Hold for five seconds. Start at the outer edge of the ring, with the cone tips pointing outward and the open bases against the ring.
- Work in a full circle around the outer edge, then start a second row slightly inside the first, with cone tips pointing inward. Alternate the direction of each row until you reach the inner edge of the ring. The surface should be dense with no polystyrene showing through.
- Tie the ribbon in a loop through the inner ring for hanging. A small sprig of dried herbs, a cinnamon stick or a bow at the top of the ring adds a finishing touch without competing with the texture.

🛍 Shopping guide
Foil Coin Medallions
Kitchen foil pressed firmly over a coin picks up every detail of the embossed design. Cut the foil into a circle slightly larger than the coin, back it with a small piece of card for rigidity, punch a hole at the top, and thread it onto a ribbon: the result looks like hammered metal gift tags or ornaments. Larger coins make better impressions.
These are purely decorative and have no monetary value once they are made, which is a cheerful thing to think about. Flat storage in an envelope is all they need.
What You Need
- A selection of coins in different sizes (no need to use good ones: old foreign currency or low-denomination coins work best)
- Kitchen foil, standard weight
- A ballpoint pen or the rounded end of a spoon for burnishing
- Small pieces of card, one per medallion, slightly larger than the coin
- PVA glue or a glue stick
- A single-hole punch or a sharp pencil for piercing
- Thin ribbon, cut into 15 cm lengths, one per medallion
How to Make It
- Tear a piece of foil roughly 6 cm square. Centre a coin underneath it, face side up. Fold the foil over the coin, pressing the edges down so the coin is enclosed on all sides.
- Using the rounded end of a spoon or the blunt end of a pen, rub firmly over the face of the foil in small circular motions. Press into the relief of the coin design. The impression transfers clearly once you apply real pressure: do not be tentative.
- Peel the coin out from the back. The foil face should now carry a clear embossed image. If any area is blurry, lay the foil back over the coin and burnish that section again.
- Glue the foil piece, embossed side up, to a small piece of card cut to match or slightly exceed the foil shape. Press flat under a book for two minutes while the glue grabs.
- Once stuck, use the hole punch or a sharp pencil to pierce a hole about 5 mm from the top edge (adult step for the pencil pierce). Thread a 15 cm length of ribbon through the hole and tie it in a knot to make a hanging loop.
- Hang these from a small branch in a vase, from the tree, or tie them directly onto wrapped gifts as tags with the coin design facing forward.

🛍 Shopping guide
Takeaway Lid Snowflake Stencil
A clear or white plastic lid from a takeaway container, cut into a snowflake shape with scissors and a craft knife, becomes a reusable stencil with the lid’s rim as a ready-made handle. You can spray, sponge or stamp through it repeatedly onto paper, fabric or a wrapped gift. Once you have made one, it takes seconds to use and saves money on tissue paper all season.
Wash it after use and store flat: it keeps for years.
What You Need
- 1 round plastic takeaway lid, at least 15 cm diameter
- Craft knife and cutting mat or a magazine underneath
- Pencil and ruler
- White or silver acrylic paint, or spray paint
- A sponge or brush for applying paint
How to Make It
- Draw a circle in the centre of the lid, leaving the rim intact: this rim is the handle and the stencil registration guide. Inside that circle, draw a six-pointed snowflake shape: fold a paper circle to the same size, mark a simple pattern, then trace it onto the lid with a pencil. A snowflake does not need to be symmetric in every arm to look convincing: it just needs at least six-fold symmetry approximately.
- Using the craft knife on a cutting mat, cut out the shapes inside the snowflake arms. Cut slowly and lift the knife fully at each corner rather than trying to drag it around the angle. Adult use only: plastic is tougher than it looks and the knife can slip.
- Peel out the cut sections. Hold the stencil up to the light to check that the arms connect properly and no section has detached that should not have.
- To use: lay your paper or fabric flat. Hold the stencil down with your non-dominant hand, or tape it in place for a more precise print. Load a sponge lightly with paint, dab off the excess on a piece of scrap paper, then dab through the stencil openings. Use minimal paint on the sponge: a thinner layer does not bleed under the edges.
- Lift the stencil straight up, not sideways, to avoid smearing. Wipe the back of the stencil clean before the next use.

🛍 Shopping guide
Bread Tag Gift Labels
The plastic bread tags that close a loaf bag are, it turns out, already punched with a hole. Write a name on them with a fine permanent marker, thread a short length of twine through the hole, and they become the most minimal gift tag possible. Against brown kraft paper or plain white wrapping they look intentional rather than improvised, especially if you collect a consistent colour or write in a consistent hand.
They are not recyclable in most schemes once written on, but they are so small the guilt is manageable.
What You Need
- 10 to 15 bread tags (white or neutral colours work best)
- 1 fine-tip permanent marker, black or gold
- Thin twine or narrow ribbon, cut into 12 cm lengths, one per tag
How to Make It
- Check that the hole in each tag is large enough for your twine. Most are: the hole is designed for the metal twist that comes with the bag. If twine does not thread through, use a darning needle to widen the hole slightly by pressing and rotating.
- Write the recipient’s name on the flat face of the tag in your neatest hand. On a tag this small, one word is usually enough, and it reads better than a full sentence. If using gold marker, the lettering shows up well on both white and coloured tags.
- Thread 12 cm of twine through the hole and knot one end to stop it pulling through. The other end ties around the gift parcel or loops under the ribbon on the package.
- For a collected look, use only one colour of tag and one colour of ink. Mix of sizes is fine: it looks curated rather than accidental.

🛍 Shopping guide
Jumper Sleeve Mug Cosy
One sleeve of a felted wool jumper (shrunk in a hot wash, or already dense from age) cuts into a tube that fits most standard mugs and keeps hands warm for an entire pot of tea. The cuff becomes the decorative edge. No sewing required if the jumper is felted: the cut edges will not fray.
It stores flat, washes on a cool cycle and makes a gift that people actually use.
What You Need
- 1 old wool jumper that has felted (shrunk) in the wash, or any thick knit where the stitches are dense
- Scissors or fabric scissors
- A mug to measure against
- Fabric glue or 2 press-stud fasteners (optional, for a closing cosy)
- Needle and embroidery thread for a simple decoration (optional)
How to Make It
- Lay the sleeve flat. Stand your mug next to the sleeve to measure the height you need: a standard mug is about 9 to 10 cm tall from base to just below the rim. Mark this measurement on the sleeve with a pin or chalk, starting from the cuff end. The cuff becomes the bottom of the cosy.
- Cut straight across the sleeve at the marked line. Adult step: fabric scissors make this much cleaner than kitchen scissors. The cut edge at the top is the raw edge, which is fine on a true felt but should be folded over and glued on a regular knit.
- Slide the tube over the mug: the cuff sits at the base and the cut edge sits near the rim. It should fit snugly enough to stay on when you pick up the mug but not so tight it is hard to slide off for washing.
- If the tube is too wide and slips, add two small press-studs on one side, overlapping the edges slightly to take in the extra width: an adult step if using a needle and thread.
- Embroider a simple motif on the outside if you like: a running stitch star or a cross-stitched initial takes five minutes and makes it look considered. This step is purely optional but it is what moves it from functional to gift-worthy.

🛍 Shopping guide
Broken Jewellery Star
Old chains, mismatched earrings, single brooches and bent rings arranged on a sheet of black card form a star shape that catches the light like a museum display. Leave the pieces loose and photograph it first: the result surprises people who see it on screen as much as in person. Only glue it once you are happy with the arrangement.
Store flat, wrapped in tissue, in a small box. It does not need to be framed, though it looks excellent framed.
What You Need
- A collection of broken or unwanted jewellery: chains, earrings, brooches, rings, beads
- 1 sheet black card, A4 or larger, 240 gsm
- Strong clear craft glue or E6000-type adhesive
- Tweezers for positioning small pieces
- A pencil for drawing the star outline lightly before placing
How to Make It
- Lightly draw a star outline on the black card: a five or six-pointed star works equally well. It does not need to be ruled precisely because the jewellery will obscure the lines anyway, but a guide stops the composition drifting.
- Lay out the jewellery pieces over the star outline without gluing anything. Chains work well for the outline of the star’s points. Brooches and larger pieces make good focal points at the centre. Small beads or earrings fill in the star body. Adjust until you are pleased with the distribution of weight and sparkle.
- Photograph the arrangement with your phone before touching it: this is your reference if pieces shift during gluing.
- Working outward from the centre, apply a small dot of craft glue to the card, then press each piece into position. Use tweezers for anything very small: hot glue gets onto your fingers and lifts pieces back off. Let each section sit for five minutes before moving on.
- Leave the piece lying flat for at least 30 minutes before hanging or standing it. Some glues take longer to cure fully, so handle it gently for the first hour.
- To display, prop it against a wall on a shelf or hang it with a loop of ribbon glued to the back of the card. The black background does most of the work: it makes every metallic piece read as jewellery rather than junk.

🛍 Shopping guide
Stamped Pillowcase Gift Sack
A clean pillowcase, stamped with a simple repeating pattern in fabric paint or acrylic, becomes a gift sack that will outlast a roll of wrapping paper by many seasons. Tied at the top with a wide ribbon, it looks like something from a boutique. The stamp is a potato, a sponge or even a jar lid dipped in paint: the simpler the shape, the better it reads on fabric.
Wash the pillowcase inside out on a cool cycle to preserve the print; it stores folded in a drawer.
What You Need
- 1 clean white or cream pillowcase
- Fabric paint or acrylic paint mixed with a textile medium
- 1 raw potato, cut in half, or a small sponge cut into a star or tree shape
- A flat tray or plate for paint
- An iron and ironing board (adult step)
- 1 m wide ribbon for tying
- Scrap paper or cardboard to slide inside the pillowcase while stamping
How to Make It
- Slide a piece of cardboard inside the pillowcase to prevent paint bleeding through to the back layer. This is the step people forget and then regret.
- If using a potato stamp: cut a raw potato in half and pat the cut face dry with a paper towel. Draw a simple shape (a star, a tree, a circle) on the cut face with a marker, then use a small knife to cut away the potato around the shape so the design stands proud. Adult step for the knife work.
- Pour a thin, even layer of fabric paint onto a flat plate. Press the potato or sponge into the paint and lift it off: the stamp face should be evenly coated but not drowning in paint. Dab once on scrap paper first to check the coverage.
- Press the stamp firmly and evenly onto the pillowcase, then lift it straight up without rocking it sideways. A rocked stamp smears. Work in a simple repeating pattern: rows, diagonals or an all-over scatter all work. Let each impression dry slightly before stamping next to it, or the edges will bleed.
- Remove the cardboard once the paint is touch-dry, about 30 minutes. Leave the pillowcase flat for a further two hours.
- Once fully dry, an adult heat-sets the paint by ironing on the reverse of the print with a hot iron (no steam) for about two minutes per section. This step is what makes the pattern survive washing.
- Fill the sack, gather the open end and tie it closed with the wide ribbon in a bow.

Sock Gnome
A single sock, closed with two elastic bands, becomes a gnome that looks like something from a Scandinavian market stall. The toe becomes the hat, the body is stuffed with rice or dried beans, and a small pompom (or a foil ball) becomes the nose. It stands on its own and does not wobble.
If using rice to stuff it, do not get it wet: store dry. It lasts for many seasons this way.
What You Need
- 1 adult-size sock in a dark or neutral colour for the body
- Approximately 200 g of dried rice, lentils or dried beans
- 2 thick elastic bands
- 1 small pompom or a ball of kitchen foil, about 2 cm, for the nose
- Strong clear glue or a glue gun (adult)
- Optional: a small piece of white fluffy fabric or cotton wool for a beard
How to Make It
- Turn the sock so the toe points up. Pour the rice or beans in through the opening at the heel end until the sock is filled about two-thirds of the way up from the toe: this is the body. The toe section stays empty and floppy for now: it becomes the hat.
- Fasten one elastic band tightly around the sock where the filling ends, to close the body section. The rice should pack down into a firm, stable cylinder below this band. If it tips, add more filling until it stands on its own.
- Fold the empty toe section down toward the body so it flops to one side like a gnome’s hat brim. Adjust the angle until it looks characterful. Fasten the second elastic band at the base of the hat to create the hat-to-face boundary.
- Glue the pompom or foil ball to the face area, just below the hat brim, slightly below centre. This is the nose. Hold it for 10 seconds against the sock until the glue grabs.
- If adding a beard, cut a small triangle of white fabric or pull a piece of cotton wool into an oval shape and glue it below the nose, wider than it is tall.
- Stand the gnome upright. The flat rice-filled base should let it stand without a prop. If it still tips, redistribute the filling by tilting the gnome and letting it settle.

🛍 Shopping guide
Punched Tin Can Lanterns
Tin cans filled with water and frozen solid, then hammered with a nail in a pattern, become lanterns that throw punctured-light patterns on the wall. Lit with a tea light, a tin of modest size fills a corner with something that looks extremely complicated and took about twenty minutes of actual work. The ice stops the can denting inward under the hammer.
After the season, the cans store nested inside each other inside a bag. Sand any sharp edges at the punch-hole rim with fine sandpaper before putting them away.
What You Need
- 3 to 5 clean tin cans, labels removed, assorted sizes
- Water to fill each can
- A hammer and a selection of nails in different widths
- A marker pen for drawing the pattern
- A towel to hold the can steady while hammering
- Fine sandpaper for smoothing the rims
- Battery tea lights, one per can
How to Make It
- Fill each tin to the brim with water and place in the freezer overnight. Full freezing takes a full 24 hours for a large can: do not rush this step or the can will dent rather than hold the punch cleanly.
- When the cans are fully frozen solid, remove one at a time and work quickly before the ice starts to melt. Wrap the can in a towel to protect your hands from the cold and to grip it steadily on a hard floor or workbench.
- Use the marker to draw your pattern on the outside of the can while it is still frozen. Simple patterns work best: rows of dots, a diagonal grid, a snowflake outline, initials. Keep the punch holes at least 1 cm apart or the metal weakens and tears.
- Using the hammer and a nail, punch through the pattern. Place the nail point on a marked dot, give it one firm tap to pierce, then move on. Do not enlarge holes by twisting: a clean single punch looks much neater than a ragged enlarged one.
- Allow the ice to melt in the sink, then dry the can completely inside and out. Check all punch holes for any inward metal burrs and press them flat with the nail from the inside.
- Place a battery tea light inside each can. An open flame in a sealed tin is a fire risk: battery candles are the correct choice here. Display the lanterns on a non-flammable surface, ideally a windowsill or a hearth.

🛍 Shopping guide
Shoe Box Village
Two or three shoe boxes stacked at different heights and fitted with windows cut from their sides, then lit from behind with a strip of battery fairy lights, create a silhouette village that glows against a wall in the dark. The light source stays inside or behind the boxes, which makes the windows look like rooms. It is the most impressive-per-effort project on this list.
Flat-pack the boxes and coil the lights into a small bag: it reassembles in minutes next year.
What You Need
- 2 to 3 shoe boxes in different sizes, lids included
- Craft knife and cutting mat (adult step)
- Black or dark grey spray paint, or dark acrylic paint and a brush
- 1 battery-operated fairy light strip, at least 20 lights, warm white
- Tracing paper or white tissue paper, cut into window-sized pieces
- PVA glue or tape
How to Make It
- Stack the boxes without any lids, tallest at the back. Arrange them so they overlap slightly and sit at different heights: this is the skyline. Decide which sides face forward before cutting anything.
- On each forward-facing side, use a pencil to draw two or three rectangular windows and one larger one. An adult cuts these out with a craft knife, pressing the box flat on a cutting mat. Cut cleanly and keep the cut-out rectangles: you can glue them back as shutters later.
- Paint the outside of all the boxes dark: spray paint is fastest and gives an even finish in one coat. If brushing, two coats is the minimum. Leave to dry fully, about 30 minutes for spray paint.
- Glue or tape a piece of tracing paper or tissue paper over each window from the inside. This diffuses the light source so you see a warm glow rather than individual bulb points.
- Thread the fairy light strip through the back of the largest box, looping the lights so they distribute through all three boxes. Secure the battery pack at the back where it is hidden.
- Reassemble the stack. Switch on the lights. From the front, the windows should glow with warm light and the dark exterior should silhouette as a village against whatever is behind it. If any window looks too bright or uneven, adjust the tissue paper behind it.

🛍 Shopping guide
Ribbon Offcut Tassel Garland
Ribbon offcuts knotted in bunches of three onto a length of twine make a full, dense tassel garland in about half an hour. The key is cutting every piece to the same length before you start: 15 cm per ribbon piece makes a satisfying tassel that hangs straight rather than flopping. Mixed widths and textures add depth; mixed colours keep it coherent if they share one tone.
Store the garland rolled loosely around a paper towel tube: it avoids tangles and keeps the tassels from creasing.
What You Need
- Ribbon offcuts of different widths and textures, cut into 15 cm lengths (you need about 60 pieces for a 1 m garland)
- 1 m of twine, string or thin ribbon for the spine
- Scissors
- 2 small nails or sticky tack for hanging
How to Make It
- Cut all your ribbon pieces to 15 cm. This is tedious but worth doing before you start knotting: consistent length is what makes the finished garland look neat. Fold each piece in half so you have a loop of about 7.5 cm.
- To attach a tassel, fold the piece in half and push the folded loop under the twine spine, then pull both ribbon ends through that loop and pull downward to tighten. This is a lark’s head knot and it stays put without any additional fastening.
- Work along the spine, knotting ribbon pieces in bunches of three: slide each group close to the previous one so the tassels are dense. Mix textures within each group of three: a velvet ribbon, a satin cut and a plain grosgrain together look richer than three pieces of the same ribbon.
- When you reach the end of the spine, tie off any loose pieces at the ends and leave about 10 cm of bare twine at each end for tying or pinning to the surface.
- Run your hand down the finished garland to fluff the tassels outward. Trim any pieces that are noticeably longer than the others. The garland should look full and slightly fluffy, not flat.

🛍 Shopping guide
Cardboard Tube Star
A cardboard tube (toilet roll, paper towel roll, wrapping paper tube: all work) flattened, cut into strips and fanned into a five-pointed star is one of those objects where the assembly method is the trick. The strips interlock rather than needing any glue, until the last step. Painted gold or silver, the finished star looks geometric and precise.
Store flat: the star disassembles by reversing the fold, which makes it very satisfying to pull apart, though you will probably remake it immediately.
What You Need
- 3 cardboard tubes (toilet roll width or wider), or 1 wrapping paper tube
- Scissors
- Gold or silver spray paint or acrylic
- A small brush if using acrylic
- PVA glue or a glue gun for the final fixing point
- A loop of thread or ribbon for hanging
How to Make It
- Flatten each tube firmly by pressing it on a table. Cut each flattened tube into strips about 2 cm wide. You need ten strips of equal width for a five-pointed star.
- Paint all ten strips on both sides in gold or silver. Let them dry completely (about 30 minutes) before assembling: wet paint smears when the strips are handled.
- To make the star: take two strips and lay them in a cross shape. Fold strip A over strip B at the centre and crease both at the crossing point to make the fold permanent. Now take strip C and weave it under strip A and over strip B at a 72-degree angle from strip A. Continue with strips D and E around the centre, each at 72-degree increments, weaving over and under to create the five-pointed shape.
- The outer ends of each strip form the tips of the star points. Fold each tip back on itself and tuck the end under the adjacent strip to lock the point. This is the fiddly step: take your time, and if a point pops loose, add a small dot of glue to fix it.
- Add a second set of five strips to the back of the star, interlocking them with the first set for a double-sided star that looks good from both angles.
- Thread a loop of ribbon through one point and knot it. The star is ready to hang on the tree or in a window.

🛍 Shopping guide
Cardboard Tube Ring Wreath
Cardboard tubes cut into rings and glued edge to edge, then painted and dressed with a ribbon bow, make a wreath that reads as ceramic or rattan until someone touches it. The secret is packing the rings very tightly: gaps look like gaps, but a dense arrangement of rings disappears into itself and becomes something else.
This one is genuinely light to hang, which is useful on a thin door or a window with a suction hook.
What You Need
- 8 to 10 cardboard tubes (toilet roll or kitchen roll tubes), cut into 2 cm rings
- Low-temperature glue gun and glue sticks
- White or gold spray paint, or acrylic and a brush
- 1 length of ribbon, about 50 cm, for a bow
- A loop of thread for hanging
- A circle template: a large plate or a bowl about 25 cm across
How to Make It
- Cut all the tubes into 2 cm rings. You need roughly 40 to 45 rings for a 25 cm wreath. Cutting through a cardboard tube produces a slight oval rather than a perfect circle, which adds texture once they are assembled.
- Trace a circle about 25 cm in diameter onto a piece of scrap card using the plate as a guide. This is your layout template, not the wreath itself: use it to arrange the rings in a donut shape before gluing anything.
- Arrange the rings in two concentric rows on the template, standing on their cut edges. They should nest against each other with the rings from the outer row filling the gaps in the inner row. Adjust until no gaps are visible when you look at the arrangement from above.
- Apply a dot of hot glue between adjacent rings (adult step), pressing each one gently until the glue grabs. Work around the full circle before trying to lift it: the glue sets quickly but the structure is fragile until every ring is connected.
- Once the structure holds together, slide it off the template. Paint all the rings in one colour: spray paint reaches into the recesses between rings better than a brush. Let dry fully, at least one hour.
- Tie the ribbon into a bow and glue or wire it to the bottom of the wreath ring. Thread a loop of thread through the top ring for hanging.

🛍 Shopping guide
Potato Print Wrapping Paper
A raw potato, carved with a sharp knife into a simple stamp, prints repeatedly onto large sheets of newspaper, brown parcel paper or the plain inside of cereal boxes to make wrapping paper that is entirely your own. The potato’s natural moisture gives each print a slight variation, which looks like a deliberately imperfect lino print rather than a clumsy mess.
Roll the finished sheets loosely around a tube for storage, or lay them flat under the bed.
What You Need
- 2 large raw potatoes
- A sharp small knife (adult step)
- Acrylic paint or ready-mix paint in one or two colours
- A flat tray or plate for the paint
- Large sheets of newspaper, brown parcel paper or the inside of flattened cereal boxes
- A marker to sketch the design on the potato before cutting
- Paper towel to dry the potato face before first dip
How to Make It
- An adult cuts each potato in half and pats the cut face dry with paper towel. Draw a simple design on the cut face with a marker: a star, a tree, a snowflake, a circle with a dot. Simple is always better for stamp carving because complex designs collapse under pressure.
- Using the sharp knife, an adult cuts away the potato flesh around the drawn design so the design stands raised above the surface. Cut straight down, not at an angle, and remove at least 5 mm of depth around the design so it prints cleanly without the surrounding potato face picking up paint.
- Lay your paper flat on a table or the floor, paper-side up. Pour a thin, even layer of paint onto the plate and press the potato stamp face-down into it. The face should be evenly coated. Dab once on a piece of scrap paper to check that the design is clear and that no excess paint blobs have built up.
- Press the stamp firmly onto the wrapping paper and lift it straight up. Reload with paint between each print. The variation between prints is desirable: do not try to make every impression identical.
- Work in a repeating pattern across the sheet: diagonal rows look more dynamic than straight grids. Leave enough space between prints so the paper still reads as paper rather than as a solid block of colour.
- Leave the printed paper flat to dry for at least 30 minutes before attempting to roll or fold it. Wet acrylic smears easily and does not come out of skin happily either, which is worth knowing before you hand it to a five-year-old to stamp freely.

🛍 Shopping guide
Frequently Asked Questions
What DIY Christmas decorations can I make in one evening?
All twenty-one projects in this list are designed for a single free evening. The quickest take under twenty minutes: the bread tag gift labels, the sock gnome and the ribbon tassel garland are all done in half an hour or less. Projects with drying time, like the coffee filter flowers or the stamped pillowcase, need a few hours to dry but only twenty to thirty minutes of your active attention. Set those going first and work on a faster project while they dry.
Can you do DIY Christmas with no craft supplies at all?
Yes, and that is exactly the point of this collection. Every project here starts from something already in the house: a cereal box, a coat hanger, a single sock, an old paperback. The only things worth buying in advance are a low-temperature glue gun if you do not own one, and a set of battery tea lights for the lit projects. Both are inexpensive and you will use them across multiple crafts here.
What is the cheapest DIY Christmas decoration?
The bread tag gift labels cost nothing beyond a marker pen you already own. The foil coin medallions use kitchen foil and spare coins. The sock gnome needs only a sock, two elastic bands and a handful of dried rice or lentils from the kitchen cupboard. All three are genuinely free to make and none of them look it.
How do I stop DIY Christmas decorations looking homemade in a bad way?
Three things make the difference between charming and rough. First, a consistent colour palette across two or three pieces on the same shelf: mixed materials look collected rather than chaotic when the tones agree. Second, finish the edges: trim ragged paper cuts cleanly, smooth punched metal burrs and fold raw edges under. Third, use black card, kraft paper or a dark background to display anything delicate: it frames the object and makes even simple shapes read as design. The projects in this list are chosen because the material itself does the visual work, which means you do not need to be a skilled crafter for the result to look intentional.

Browse christmas appetizers for every party: fast bites, make-ahead dips, charcuterie boards, trees

27 christmas crafts that start as something ordinary and end as something people photograph. Every m
Twelve elegant Christmas cards ready to print tonight, each with finished wording, a fold and a layo
Leave a Reply