

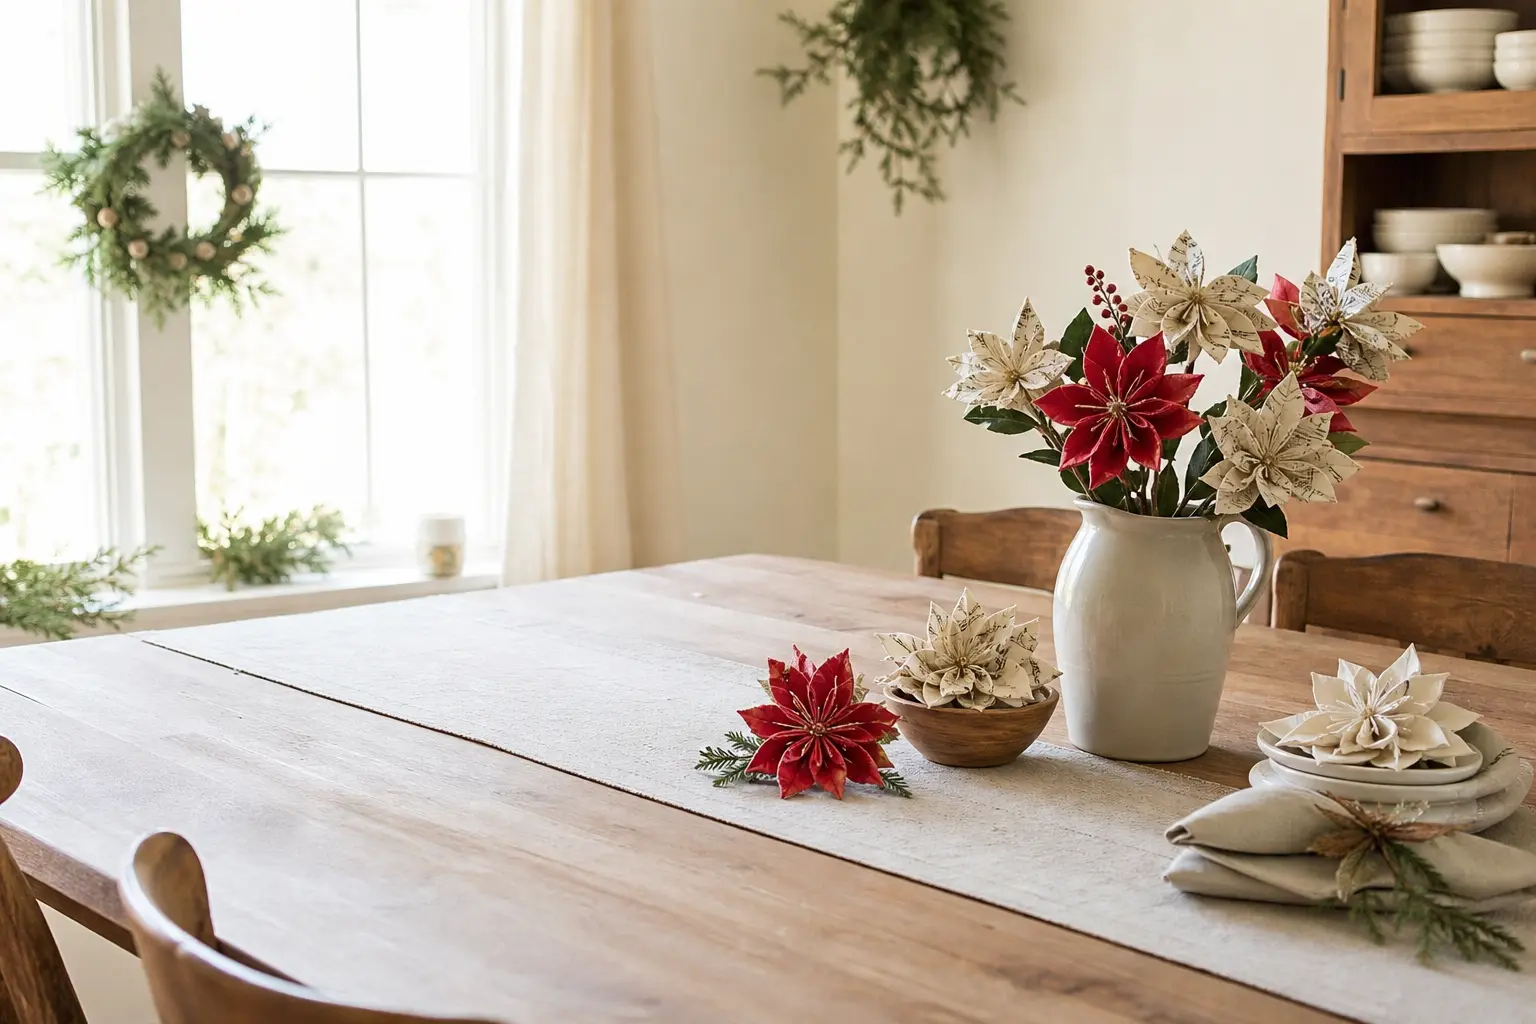
These diy christmas flowers cost almost nothing, store flat in a shoebox, and look just as good on a January table as they do in December.
Every single one is made from something you already own or can pick up in a single trip: printer paper, coffee filters, felt, fabric scraps, old book pages, ribbon.
The twenty crafts below are grouped loosely by material, and each names the one cut that makes its petal shape actually work, because that is the detail most tutorials skip.
Paper flowers fail on thickness more than on technique, so every paper craft here lists the exact card weight. Felt, fabric and natural materials like pine cone scales have their own logic, and each method explains it.
If you are building a full table, pair these with a broader plan for christmas floral arrangements, browse ideas for christmas centerpieces, or pull in a few more christmas crafts for adults and diy christmas decorations to fill the gaps.
And if you want something for the room beyond the table, the 20 Christmas Party Ideas and Games for an Unforgettable Night roundup is worth a look.
This post contains affiliate links. If you buy through them, I may earn a small commission at no extra cost to you.
- Rolled Paper Roses From a Spiral Cut
- Felt Poinsettia in Three Layers
- Sheet Music Peonies
- Coffee Filter Camellias
- Tissue Paper Anemones
- Fabric Scrap Dahlias
- Book Page Hydrangea Heads
- Ribbon Loop Chrysanthemums
- Paper Bag Magnolias
- Wool Felt Berries on Wire
- Egg Carton Bell Flowers
- Crepe Paper Amaryllis
- Muslin Roses With Raw Edges
- Pine Cone Scales Opened as Petals
- Leather Offcut Petals
- Corrugated Card Sunflowers
- Folded Paper Narcissus
- Fabric Yo-Yo Blooms
- Dyed Coffee Filter Carnations
- Paper Straw Stems With Felt Heads
- Frequently Asked Questions
Rolled Paper Roses From a Spiral Cut
A single sheet of card stock becomes a tight, layered rose when you cut it in one continuous spiral and roll it from the outside in.
The rose sits flat on the base petal, so it works as a place card holder, a napkin ring accent, or a stem bloom when skewered. Store it in a single layer in a box: it does not crush easily once the base is glued.
What You Need
- 1 sheet red or cream card, 216 gsm, A4
- Scissors (adult step)
- Low-temp hot glue gun
- A pencil
- 1 wooden skewer or floral pick, optional
How to Make It
- Draw a rough circle on the card, about 12 cm across, then draw a snaking spiral line from the outer edge to the centre, keeping each lane roughly 1.5 cm wide. The spiral does not need to be perfect.
- An adult cuts along the spiral line in one continuous cut, finishing with a small oval at the centre. That oval becomes the base.
- Starting at the outer end of the spiral, roll the strip tightly around itself. Keep the bottom edge as level as you can: uneven bottoms make a lopsided rose.
- When you reach the centre oval, loosen the coil slightly so it fans upward, then press it onto the oval base and hold it for 30 seconds. A dot of hot glue underneath fixes it permanently. It should look like a loose, layered bloom, not a tight scroll.
- To make a stemmed version, an adult presses a skewer up through the base oval before gluing the coil down.

🛍 Shopping guide
Felt Poinsettia in Three Layers
Three layers of felt petals, each a different size and cut to a pointed tip, stack into a poinsettia that looks completely at home on a wreath, a gift tag, or a table centrepiece.
Wool felt holds its shape without fraying, which is the whole reason it works here. A cluster of three blooms in a small terracotta pot, held upright with a ball of air-dry clay, is the easiest table arrangement going.
What You Need
- Red wool felt sheet, 30 x 30 cm
- Cream or white wool felt, 10 x 10 cm
- Low-temp hot glue gun
- Sharp fabric scissors (adult step)
- Small yellow seed beads or French knots in yellow thread for the centre
- A pencil and card for a simple petal template (one large, one medium, one small)
How to Make It
- Cut three petal shapes from card: large (7 cm), medium (5 cm) and small (3 cm). Each petal is roughly teardrop-shaped, pointed at the tip and rounded at the base. An adult does all cutting throughout.
- Trace and cut 5 large petals, 5 medium petals and 4 small petals from the red felt. Work slowly: the pointed tip is the shape that reads as poinsettia rather than generic bloom.
- Cut a 4 cm circle of cream felt as the base disc.
- On the cream disc, glue the 5 large petals first in a ring, then the 5 medium petals between them, then the 4 small petals on top, each layer offset slightly so all petals are visible. Press each layer flat for 20 seconds before adding the next.
- Glue a pinch of seed beads in the centre, or sew three small French knots in yellow thread.
- The finished flower should be about 10 cm across. Store flat, wrapped in tissue; it will not crush.

Sheet Music Peonies
Vintage sheet music has a warmth that plain white copy paper never quite achieves, and the printed lines add visual texture to each petal. The peony shape comes from cutting a gentle cup curve at the top of each petal strip, not a flat edge.
A handful of these in a narrow vase with some greenery from the garden looks intentional and costs almost nothing. Old hymnals from charity shops are another good source if sheet music is hard to find.
What You Need
- 3 to 4 sheets of vintage sheet music or book pages, 80 gsm minimum
- 1 wooden skewer or chopstick per flower
- Scissors (adult) and a bone folder or butter knife for curling
- Low-temp hot glue gun
- A strip of green paper or crepe tape for the stem, approx 30 cm
How to Make It
- Cut the sheet music into strips: 8 strips at roughly 2 x 10 cm for outer petals, 6 strips at 2 x 7 cm for inner petals, and 4 narrow strips at 1 x 5 cm for the centre. All cuts by an adult.
- Cut a shallow cup shape into the top of each strip: two gentle inward curves that meet at a point, like a wide V with curved sides. This is the cut that makes it read as peony rather than carnation.
- Curl each strip backward over the bone folder or the back of a butter knife so it curves gently toward you.
- Starting with the narrow centre strips, wrap them tightly around the top of the skewer and glue as you go. Each subsequent layer wraps more loosely, fanning outward. Press each layer firmly before adding the next.
- Wrap the stem with the green paper strip, gluing the end to hold it. The finished head should be 6 to 8 cm across and pleasingly full.

Coffee Filter Camellias
Basket-style coffee filters are already the right thickness, the right porosity and, when stacked and trimmed, the right shape to become a convincing camellia. The petal cut here is a single rounded scallop at the top of each folded filter.
Use them white for a winter garden look, or dip the edges in a watered-down watercolour wash and let them dry before assembling. Either way, a cluster of three in a low dish is enough to anchor a table setting.
What You Need
- 12 basket-style coffee filters per flower
- 1 wooden skewer or pipe cleaner per flower
- Low-temp hot glue gun
- Watercolour paint and a wide brush, optional
- Scissors (adult)
How to Make It
- If colouring, mix a light wash of watercolour (mostly water) and brush it around the rim of each filter. Lay flat to dry completely before cutting. Damp filters tear when cut.
- Fold each filter in quarters. Adult cuts a single rounded scallop from the top folded edge, removing about 2 cm. When unfolded, this gives a circle of soft scallops.
- Stack 4 filters and gather them at the base. Secure with a small wrap of hot glue. This is one petal cluster. Make three clusters per flower.
- Layer the three clusters together, rotating each slightly so the scallops stagger. Gather and glue all bases together onto the top of the skewer.
- Fold the inner filters upward to create a tighter centre; press the outer ones gently downward for a flatter, open camellia shape.

Tissue Paper Anemones
Tissue paper is so light that most tissue flowers collapse, but anemones get around this because the petal count is low and the dark button centre does the structural work.
The cut that matters is a long, narrow pointed oval, not a rounded petal: that sharp tip is what gives anemones their wild, slightly windswept look. Deep purple or saturated red tissue against a black button centre looks genuinely striking in a low bowl arrangement.
What You Need
- 6 sheets tissue paper, 20 gsm, in deep red, purple or white, each 15 x 15 cm
- 1 black button, about 2 cm diameter, per flower
- Low-temp hot glue gun
- Scissors (adult)
- 1 wooden skewer per flower
- A small strip of green crepe tape or paper for the stem
How to Make It
- Layer all 6 tissue squares together and fold in half, then in half again, so you have a small stack.
- An adult cuts a long pointed oval petal shape through all layers: about 12 cm long and 4 cm at the widest point. Cutting through tissue in layers is fiddly; go slowly and keep the scissors perpendicular to the paper.
- Unfold all 6 petals. You will have 6 identical pointed ovals.
- Gather them all at the base and scrunch slightly so they fan outward. Glue the base to the top of the skewer.
- Glue the black button in the centre, pressing firmly. The petals should radiate outward around it like a real anemone, about 10 cm across.
- Wrap the stem in green tape.

Fabric Scrap Dahlias
A dahlia is just a lot of petals in concentric rings, and fabric scraps in tonal shades (think burgundy, blush and rust) make a lush, layered bloom that looks expensive against candlelight.
The petal shape is a simple rectangle with one end pinched and folded to a point: that fold is the cut-free trick that gives the petal its three-dimensional tip. Any medium-weight cotton, linen or velvet scrap works; avoid anything very stretchy.
What You Need
- Fabric scraps in 2 to 3 tonal shades, each at least 20 x 20 cm
- Low-temp hot glue gun
- 1 circular card base, 8 cm diameter, cut from cereal box card
- Scissors (adult)
- A pencil
How to Make It
- An adult cuts fabric into rectangles: 20 large pieces at 4 x 5 cm and 15 small pieces at 3 x 4 cm.
- For each petal, fold the rectangle in half lengthwise, then bring the two bottom corners up to meet at the centre of the top edge, forming a triangle point. Glue the raw edges together at the base only. The tip should be sharp and the petal three-dimensional.
- Glue the large petals around the outer edge of the card circle, tips pointing outward, pressing each for 10 seconds. Pack them closely so no card shows.
- Add a second inner ring of large petals, tips pointing inward slightly and nestled between the first ring.
- Fill the centre with small petals, glued upright so their tips face straight up.
- The finished dahlia should be dense and domed. Store flat with a sheet of tissue paper over the petals to prevent crushing.

Book Page Hydrangea Heads
Hydrangea florets are tiny four-petalled squares, and a book page is exactly the right weight, about 60 to 80 gsm, to hold that small shape without flopping.
The cut is a cross snip from the corner of a small folded square: four cuts to four petals. Cluster forty or fifty of these on a foam ball and you have a hydrangea head that, from a metre away, is genuinely convincing.
Ivory book pages with a little age to them are lovelier than white printer paper.
What You Need
- Old book pages, at least 20 sheets, approx 60 to 80 gsm
- 1 foam ball, 8 cm diameter
- Sharp scissors (adult)
- Low-temp hot glue gun
- A pencil
- Green acrylic paint and a brush, for the stem area, optional
How to Make It
- An adult cuts the book pages into small squares, 4 x 4 cm each. You need at least 50 squares.
- Fold each square in half, then in half again to make a small folded square. From the corner where all folded edges meet, cut a small rounded scallop, removing about 0.5 cm. Unfold: you have a four-petalled shape with a small hole in the centre.
- Pinch the centre of each floret and push a pencil tip through the foam ball to make a guide hole. Dab glue on the pinched centre and press it into the hole. Hold for 10 seconds.
- Work outward from a starting point, covering the ball completely. Slightly overlapping florets look more natural than evenly spaced ones.
- Leave a small section at the base undecorated if you plan to mount it on a stick. Otherwise cover the whole ball.

Ribbon Loop Chrysanthemums
A chrysanthemum is all about the dense repetition of narrow petals, and a looped satin ribbon delivers exactly that without any cutting of individual petals.
The one technique that matters is the loop size: keep every loop the same length (about 4 cm) and the finished bloom will look surprisingly polished. Use wire-edge ribbon for a slightly structured look, or plain satin for softer, droopier petals.
A ribbon chrysanthemum at each place setting, pinned to a napkin, takes about 10 minutes once you have the loop rhythm.
What You Need
- 2 m satin or wire-edge ribbon, 1.5 cm wide, per flower (burgundy, gold or cream work well)
- 1 large flat button or card circle, 3 cm diameter, as the base
- Low-temp hot glue gun
- Scissors (adult)
- A pin or brooch back if using as a napkin accent
How to Make It
- Cut the ribbon into 35 to 40 strips, each exactly 8 cm long. An adult does this; uniform length is what makes the bloom neat.
- Fold each strip into a loop, bringing both ends together, and glue the ends flat to the button or card circle, starting at the outer edge. Press each for five seconds.
- Work inward in concentric rings, each ring slightly overlapping the last. Angle the outer rings outward slightly and keep the inner rings more upright.
- When the centre is nearly full, tuck two or three loops in tightly and glue a small ribbon knot or a bead on top to hide the raw ends.
- The finished chrysanthemum should be about 7 cm across and very full. Attach a brooch back with a dab of glue if using as a napkin pin.

Paper Bag Magnolias
Brown paper bags have a thickness and a slight roughness that gives magnolia petals their waxy, sculptural look.
The petal cut is a tall, narrow teardrop with a flat base, and the trick is to fold the cut petal back on itself so it curves naturally away from the centre.
Six petals per flower, wired at the base, and the flower holds its shape for years. Leave them uncoloured for a dried-magnolia effect, or brush the outer thirds with diluted caramel or blush watercolour.
What You Need
- 3 brown paper bags (standard lunch size), at least 80 gsm
- Scissors (adult)
- Low-temp hot glue gun
- 1 wooden skewer per flower
- Watercolour paint in caramel or blush, optional
- A pencil for drawing petal shapes
How to Make It
- Open and flatten each bag. Cut each bag into thirds lengthwise. From each third, an adult cuts 2 tall narrow teardrop petals, about 9 cm tall and 4 cm at the widest, with a straight flat base. You need 6 petals per flower.
- If colouring, brush diluted watercolour on the top two-thirds of each petal. Let dry completely, about 5 minutes.
- Score a light vertical line down the centre of each petal with a fingernail or a blunt knife edge and fold it gently back so the petal curves slightly inward.
- Glue the flat base of three petals around the skewer top in a ring, pressing each for 15 seconds. They should overlap slightly.
- Add the remaining three petals between the gaps of the first ring, slightly higher, so all six are visible. The centre should be tight and the outer petals should open outward, about 10 cm across at the widest.

Wool Felt Berries on Wire
Not a flower exactly, but the thing every flower arrangement on this list needs: a cluster of berries to fill the gaps and give the eye somewhere to rest.
Small balls of wool stuffing wrapped in felt and twisted onto covered wire make convincing holly berries, rose hips or snowberries, depending on the colour you choose.
Make a dozen and divide them between three small vases, or wire several into a wreath alongside the felt poinsettias above.
What You Need
- Red wool felt scraps, at least 10 x 10 cm total
- Small balls of polyester toy stuffing or cotton wool, about 1.5 cm diameter each
- Green covered florist wire, 20 gauge, cut into 15 cm lengths (adult cuts wire)
- Low-temp hot glue gun
- Sharp scissors (adult)
How to Make It
- An adult cuts the felt into circles, about 5 cm in diameter. One circle makes one berry.
- Place a small ball of stuffing in the centre of each felt circle. Gather the felt around it and pinch at the base so no stuffing is visible. The berry should look smooth and round.
- Fold over one end of a wire length to make a tiny hook about 0.5 cm long. Press the hook into the base of the berry before gluing, so the wire is anchored mechanically as well as with glue.
- Apply a small dab of hot glue to the pinched base and close it tightly around the wire. Hold for 20 seconds. An adult handles the glue gun for all berry steps.
- Twist two or three wired berries together by their stems and bend the combined wire into a gentle curve. Tuck into a vase or arrangement.

Egg Carton Bell Flowers
One egg from the carton becomes one bell flower: the cup shape is already there, you just need to trim it and paint it.
The cut that matters is a pointed petal snip around the rim of each cup, making four or five petals that flare outward when the cup is inverted. These read as snowdrops, bluebells or lily-of-the-valley depending on the colour.
Thread several onto a length of twine and hang them from a branch for a very pretty table centrepiece.
What You Need
- 1 cardboard egg carton per 12 bells
- White or cream acrylic paint
- A fine brush for detail or green paint for the outside
- Sharp scissors (adult)
- Low-temp hot glue gun
- Natural twine, 60 cm per strand
- A tapestry needle or toothpick for threading
How to Make It
- An adult cuts the egg carton into individual cups, trimming away the connecting card. Neaten the rim of each cup by snipping it roughly level.
- Still using scissors, an adult cuts 4 or 5 pointed petal shapes around the rim of each cup by making narrow V-cuts between each petal. The cuts go down about 1.5 cm. When the cup is inverted, those points flare outward like a bell flower opening.
- Paint each cup inside and out: white or cream inside, pale green outside, or all white for a snowy look. Two thin coats dry faster than one thick one. Leave to dry fully, about 30 minutes.
- Once dry, use a toothpick or tapestry needle to push a small hole in the centre base of each cup. Thread twine through the hole from inside and tie a knot inside so the cup hangs mouth-down like a bell.
- Space several cups along the twine, knotting between each, and hang from a branch or a dowel across a centrepiece vase.

Crepe Paper Amaryllis
Crepe paper amaryllis petals get their shape from a single long cut, not from stretching, which is what makes this version genuinely manageable. Each petal is a long, wide tongue with a rounded tip, and the slight crinkle of the crepe already gives it texture.
Red amaryllis against dark greenery is a classic Christmas table moment; deep coral or pale salmon works beautifully on a January table. Make one large bloom (six petals) and stand it in a single tall glass vase with a few stems of eucalyptus.
What You Need
- Red crepe paper, 1 roll (50 cm x 250 cm), grain running across the width
- 1 wooden dowel, 30 cm long and 1 cm diameter, or a thick skewer, as the stem
- Green crepe paper or florist tape for the stem wrap
- Low-temp hot glue gun
- Sharp scissors (adult)
- A little yellow tissue paper for the stamens
How to Make It
- An adult cuts 6 petal shapes from the red crepe: each petal is about 14 cm tall and 7 cm wide, rounded at the top, slightly narrowed at the base. Cut with the grain of the crepe running from base to tip so the petal has a natural flex.
- Cut 6 narrow strips of yellow tissue, each 8 cm long and 0.5 cm wide. Fold each in half and glue the folded base to the top of the dowel. These are the stamens.
- Glue the 6 red petals around the dowel, 1 cm below the stamens, in two overlapping rings of three. Each petal should flare slightly outward. Press each firmly for 15 seconds.
- Wrap the stem from the base of the petals to the bottom of the dowel with green crepe paper or florist tape, gluing the starting and finishing ends.
- To shape the petals, gently curve each one backward from the tip using your thumb. No stretching: just a gentle backward bend.

Muslin Roses With Raw Edges
Muslin frays beautifully, and that raw, undone edge is exactly what gives these roses their romantic, slightly vintage quality. The petal shape is a basic rounded rectangle, and you do not hem any edge: the fraying is the point.
Cream or unbleached muslin looks lovely as is; dye it with a cold tea soak for 20 minutes before cutting if you want a warmer, antique tone.
A bunch of five roses in a wide mason jar, stems wrapped in twine, is a table arrangement that works all winter.
What You Need
- Unbleached muslin, at least 50 x 50 cm per 3 roses
- Sharp fabric scissors (adult)
- Low-temp hot glue gun
- 1 wooden skewer per rose
- Cold tea for dyeing, optional
- Natural twine for wrapping the stem
How to Make It
- If dyeing, dip cut fabric in cold black tea for 20 minutes, squeeze out excess and let dry flat before cutting.
- An adult cuts the muslin into a long strip, 5 cm wide and at least 50 cm long, using sharp scissors. Do not pull threads to straighten: just cut directly. The fraying at the edges will happen naturally.
- Cut one short end into a rounded petal shape. Cut a long spiral from the end of the strip in the same way as the rolled paper rose (craft 1 above), keeping each lane about 5 cm wide. The muslin is more forgiving than card because it does not crease sharply.
- Roll the spiral from the outer end, keeping the frayed edge at the top. The rose builds as you roll. When you reach the centre circle, let the coil relax a little, then glue the base firmly onto the top of the skewer.
- Ruffle and separate the outer petals gently with your fingers. Wrap the skewer stem with twine, gluing the starting end.

Pine Cone Scales Opened as Petals
Pine cone scales are already petal-shaped and already textured, so this is more about assembly than making.
The technique is to warm the cone gently in a low oven (100 degrees C, 10 minutes) until the scales open fully, then remove individual scales and glue them in concentric rings onto a card circle to build a flower. It smells wonderful.
The result looks like a wooden dahlia and, once sealed with a matte varnish spray, lasts indefinitely.
What You Need
- 3 to 4 pine cones (the scales of one cone make roughly one flower)
- 1 card circle, 8 cm diameter, per flower, cut from thick card
- Low-temp hot glue gun
- Matte varnish spray, optional
- An oven, set to 100 degrees C
- A flat baking tray lined with foil
How to Make It
- An adult places the pine cones on a foil-lined tray and puts them in an oven at 100 degrees C for 10 minutes. Watch them: they only need to open, not toast. Remove and allow to cool completely before handling.
- An adult snaps or cuts the scales away from the cone base. They come off quite easily once opened. Sort them roughly by size: large, medium and small.
- Glue the large scales in a ring around the outer edge of the card circle, tips pointing outward. Press each for 10 seconds.
- Add a ring of medium scales inside the first, tips pointing outward and slightly upward. Then a ring of small scales, more upright.
- Fill the centre with the smallest scales or a few whole acorn caps. Spray with matte varnish once fully assembled and dry.

Leather Offcut Petals
Leather does not fray, does not need hemming and holds a curve once you press it: three things that make it an excellent petal material. Offcuts from a leather worker, a shoe repair shop or even an old handbag you no longer use are ideal.
The petal cut is a simple rounded teardrop, and the flower reads as a large, graphic anemone or lotus.
One leather flower in a bud vase, stem wrapped in dark washi tape, is a table decoration that goes away into a drawer and comes out next year looking exactly the same.
What You Need
- Leather offcuts, approx 30 x 20 cm total
- A craft knife and cutting mat (adult)
- Low-temp hot glue gun
- 1 wooden skewer or metal straw per flower
- Dark washi tape or leather lace for the stem
- A pencil and card for a simple petal template
How to Make It
- An adult draws and cuts a teardrop petal template from card: 7 cm tall, 4 cm wide. Cut 12 to 15 leather petals from this template using a craft knife on a cutting mat. Leather blunts scissors quickly: a knife gives a cleaner cut.
- With the round end of a pen or the back of a teaspoon, press firmly down the centre of each petal to create a shallow crease from tip to base. This lifts the sides of the petal slightly, giving it depth.
- Glue 5 petals in a star shape on a 4 cm card circle, round ends facing outward. Press each for 20 seconds; leather needs longer than paper.
- Glue 5 more petals between the first ring, slightly upright. Finish with 3 or 4 petals standing nearly vertical in the centre.
- Glue the skewer to the underside of the card base. Wrap the skewer with dark washi tape from top to bottom.

Corrugated Card Sunflowers
Corrugated card from any delivery box has a ribbed texture that makes sunflower petals look pleasingly architectural, almost sculptural. The cut is a long, narrow pointed rectangle, slightly rounded at the tip.
The corrugation runs along the length of the petal, which gives it the ridged surface that reads as a sunflower petal rather than a generic spike.
Spray the assembled flower with gold paint for a metallic winter version, or leave the natural brown for a rustic wreath filler.
What You Need
- 1 large corrugated cardboard box
- Sharp scissors or craft knife (adult)
- Low-temp hot glue gun
- 1 card circle, 8 cm diameter, as the base
- 1 smaller card circle, 4 cm diameter, for the centre
- Gold spray paint or dark brown acrylic, optional
How to Make It
- An adult cuts the corrugated card into petal strips: 20 petals, each about 8 cm long and 2.5 cm wide, with a slightly pointed tip. Check the corrugation runs along the length of each petal, not across it.
- Glue the petals around the outer edge of the large card circle, overlapping slightly. Press each for 10 seconds. Add a second ring of petals inside the first, slightly shorter if possible (trim 1.5 cm off the base of the inner petals).
- Glue the small card circle in the centre. If leaving brown, paint it with very dark brown acrylic and allow it to dry for 10 minutes.
- An adult sprays the whole assembled flower with gold spray paint in a well-ventilated area, holding the can 30 cm away. One coat is usually enough on corrugated card. Let dry for 20 minutes.
- The finished sunflower is about 16 cm across. Wire it to a wreath or glue it to a wooden skewer for a tall arrangement.

🛍 Shopping guide
Folded Paper Narcissus
A narcissus is essentially a trumpet inside a ring of petals, and folded paper handles both without any gluing of individual petals. The outer six petals fold from a single sheet; the trumpet is a rolled and glued strip.
Use 160 gsm white or pale yellow card for the petals, which is stiff enough to hold the fold without drooping. A cluster of three narcissus in a low bowl with some gravel to anchor the stems is a February-friendly arrangement that needs no explaining.
What You Need
- White or pale yellow card, 160 gsm, A4
- A small strip of orange card, 160 gsm, 4 x 10 cm, for the trumpet
- Sharp scissors (adult)
- Low-temp hot glue gun
- 1 wooden skewer per flower
- A bone folder or butter knife for scoring
How to Make It
- An adult cuts a hexagon from the white card, about 12 cm across. From each of the six sides, cut a long pointed oval petal shape, leaving all six joined at the centre hexagon, like a paper snowflake. This takes care: go slowly.
- Score a gentle crease down the centre of each petal with a bone folder and fold each petal upward slightly so the flower has dimension.
- Roll the orange strip into a short tube, about 2 cm in diameter, and glue the overlapping edge. Pinch and trim one end into a slightly scalloped rim with scissors (the front of the trumpet). This is the step people find fiddly: trim a little at a time rather than all at once.
- Glue the plain end of the trumpet to the centre of the hexagon, pointing upward and outward.
- Glue the skewer to the underside of the hexagon. The flower faces upward when the skewer points down.

Fabric Yo-Yo Blooms
A fabric yo-yo is a gathered circle of fabric pulled into a flat rosette, and it has been a quilter’s staple for a century because it genuinely works.
String several together and they read as a stylised flower cluster: use all one fabric for a graphic, modern look, or mix prints from a scrap bag for something cheerier.
The cut that matters is the circle diameter: cut your circle twice the finished yo-yo diameter plus 1 cm for the hem allowance. For a 6 cm yo-yo bloom, cut a 13 cm circle.
What You Need
- Cotton fabric scraps in festive prints, each at least 14 x 14 cm
- Sharp fabric scissors (adult)
- Needle and thread in a matching colour
- A pencil and a cup or compass for drawing circles
- Low-temp hot glue gun for assembly
How to Make It
- An adult cuts a circle 13 cm in diameter from the fabric. A mug or round tin is a good template.
- Turn in about 0.5 cm all around the edge of the circle to the wrong side and press it with your thumb as you go. Thread a needle with a double thread and knotted end, and run a large running stitch (about 0.5 cm) all the way around the folded edge.
- When you reach the start, pull the thread firmly. The fabric will gather into a flat rosette with the gathered side facing up. Secure with two or three small stitches and knot off.
- The finished yo-yo is about 6 cm across. The gathered centre is the flower centre; the smooth side is the back.
- Glue several yo-yos together side by side to form a cluster of blooms, or glue individually to a wreath, a gift wrap, or a table runner as spot decorations.

Dyed Coffee Filter Carnations
Carnations are all ruffled edges and not much else, and a basket coffee filter, accordion-folded and then cut along the top edge into a fine fringe, delivers exactly that ruffled quality. Dye the filters before cutting, not after, so the colour soaks in evenly.
Red and deep pink are the obvious choices, but pale sage green or dusty blue make unusual, wintry carnations. The dye is just food colouring dissolved in a little water: cheap, safe and surprisingly fast-drying.
What You Need
- 6 basket-style coffee filters per carnation
- Food colouring: red, pink, or any colour
- A shallow dish of water with a few drops of food colouring
- Scissors (adult)
- 1 wooden skewer per flower
- Low-temp hot glue gun
- Green crepe tape for the stem
How to Make It
- Dip each filter flat into the coloured water and lift out. Lay on kitchen paper to dry. This takes about 20 to 25 minutes at room temperature. The colour will be lighter when dry than when wet.
- Stack all 6 dry filters. Fold the entire stack accordion-style in 2 cm folds, as if making a paper fan, until the whole stack is in a narrow band.
- An adult cuts a fine fringe along both long edges of the folded band, cutting about 1.5 cm deep. Leave the very centre strip (about 1 cm wide) uncut: this is the spine that holds the carnation together.
- Gather the centre of the band and twist it gently once. Wrap a small piece of crepe tape around the twist to hold it.
- Fan out the layers on both sides, pulling them upward and separating each filter layer gently. The layers should fan into a full, ruffled carnation head.
- Glue the base to the top of the skewer and wrap the stem in green crepe tape.

🛍 Shopping guide
Paper Straw Stems With Felt Heads
Paper straws are already the right diameter for a flower stem, they take paint, they are cheap, and a bundle of twenty costs less than a single bunch of supermarket flowers.
Pair each straw with a small felt flower head, and the result is a tight, colourful posy that can live in a narrow glass or be scattered across a table in bud vases.
The felt flower here is a simple five-petal daisy: one circle punched from felt, then four cuts between the petals. Fast, tidy, repeatable.
What You Need
- Paper straws, 1 per flower, in green or white
- Wool felt sheets in red, cream, yellow or mixed festive colours
- A circle punch, 4 cm diameter, or sharp scissors (adult)
- Low-temp hot glue gun
- Small yellow or white seed beads for the centres
- Green paint, optional, to paint white straws
How to Make It
- Use the circle punch, or have an adult cut a 4 cm circle from felt.
- An adult makes four equally spaced straight cuts from the edge toward the centre, stopping 0.5 cm from the centre. This gives five petals (the spaces between the cuts). Round the tip of each petal with a small snip.
- Glue a single seed bead or a tiny rolled felt ball in the centre of the flower.
- Apply a generous dab of hot glue to the flat end of the paper straw and press the felt circle onto it, bead side up. Hold for 20 seconds.
- If using white straws, paint them green and let dry for 5 minutes before attaching the felt head.
- Arrange 10 to 15 in a small glass or mason jar. They are light enough to stand upright without any filler.

🛍 Shopping guide
Frequently Asked Questions
How do you make paper flowers for Christmas?
Choose a card weight of at least 160 gsm for petals that hold their shape, and identify the one petal cut that gives each flower its silhouette before you start.
For a rose, that is a continuous spiral cut; for a narcissus, a pointed oval from each side of a hexagon; for a peony, a cup-curve snipped into the top of each strip.
The cut and the card weight together are what separate a convincing paper flower from a limp one. Most of the paper flowers in this collection take 15 to 30 minutes each.
What paper is best for handmade flowers?
It depends on the flower. For structured petals that hold a curl, use 160 to 216 gsm card stock. For a peony or hydrangea floret where you want soft edges, 80 gsm paper (old book pages, sheet music) is ideal.
Tissue paper at 20 gsm works for anemones because the petal count is low and a button centre holds the structure. Coffee filters are already sized and textured for camellias and carnations.
As a rule: the smaller the petal, the lighter the paper you can use.
How do I make felt poinsettias?
Cut three sizes of pointed teardrop petal from red wool felt: large (7 cm), medium (5 cm) and small (3 cm). Glue them in concentric rings on a small cream felt circle, largest ring first, each ring offset so all petals show.
Finish the centre with a cluster of small yellow seed beads. The pointed tip is the detail that makes it read as poinsettia rather than a generic bloom: avoid rounding the tips.
Wool felt is the right material because it does not fray and holds its shape without any stiffening.
Can homemade flowers be reused each year?
Most of the flowers in this collection store well and last several years. Paper flowers in 160 gsm or heavier card store flat, wrapped in tissue paper, in a single layer in a lidded box.
Felt, fabric and leather flowers are robust and can be rolled loosely in tissue. Coffee filter and tissue flowers are more delicate: store them in a rigid box with space around each one so they are not compressed.
Pine cone scale flowers, once sealed with matte varnish, are essentially permanent. Avoid storing any flower in a damp garage or airtight bag, which can cause paper to buckle and fabric to mildew.

23 white Christmas tree looks, real and artificial, room by room, with the exact ornaments and count

Polar Express Christmas party decor for a whole house: navy, gold and snowy white, silver bells and

16 office Christmas decorations for cubicles, from garland on the panel top to a card line on the wa
Leave a Reply