

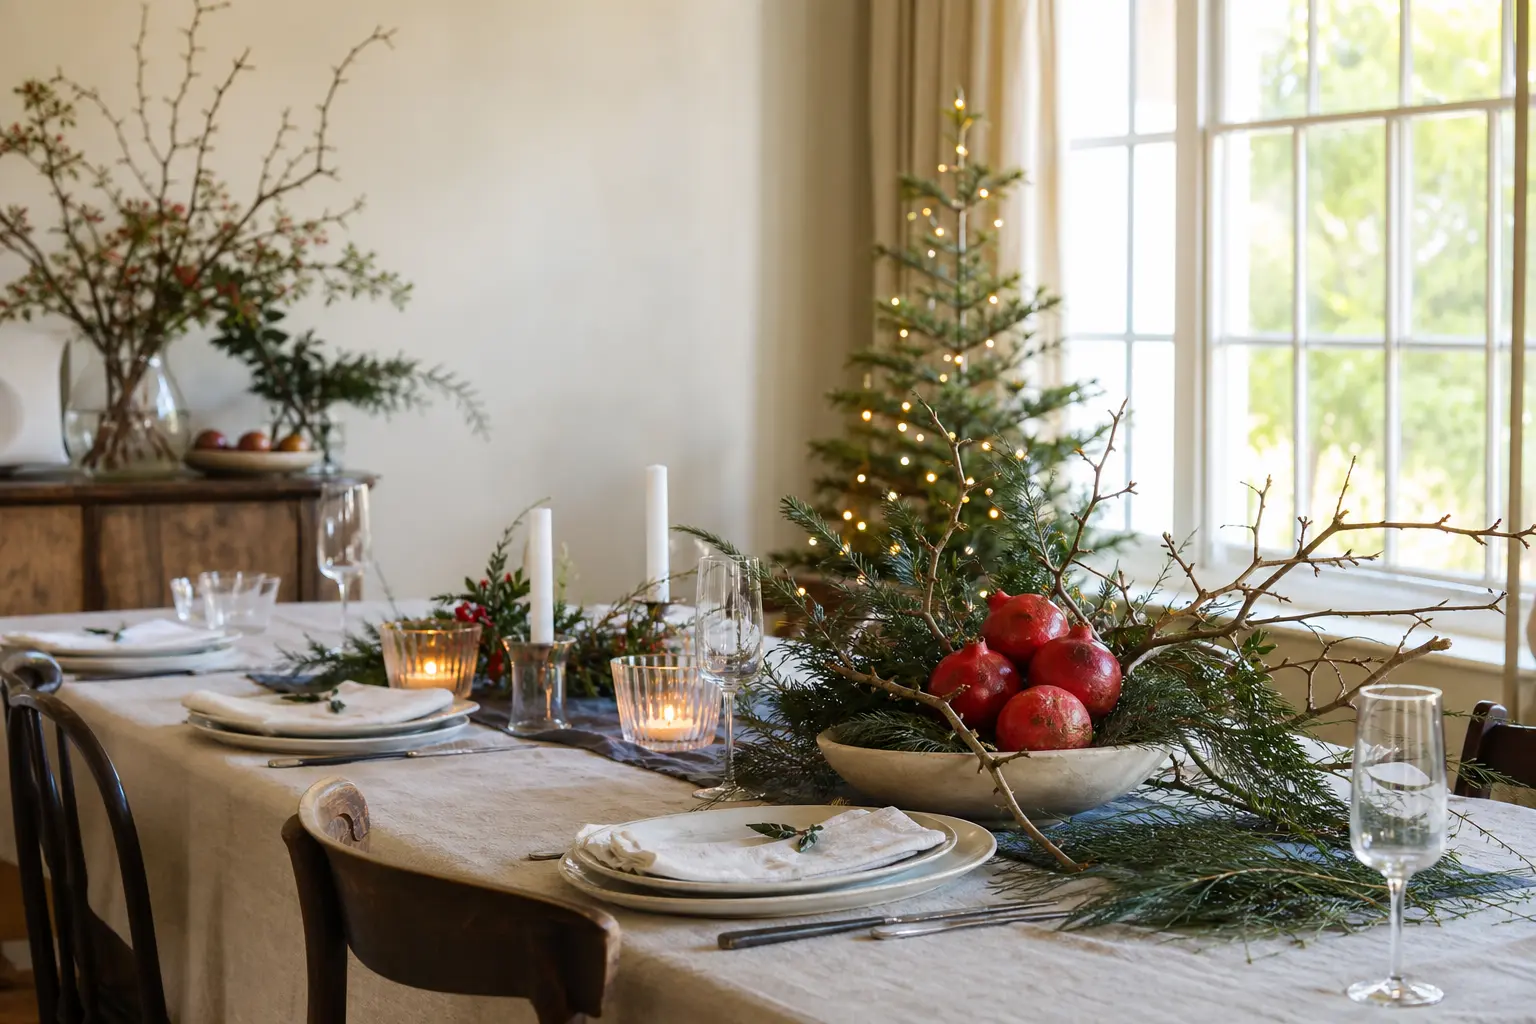
These christmas centerpieces have one rule: one container, three fillings, and the clock already running. Every single one here starts with something you already own and ends on the table before the doorbell goes.
They are ordered by time, so if you have five minutes you start at the top, and if you have a whole luxurious hour you work your way down. No floral foam. No wiring. Nothing that needs to be made the day before.
The garden, the fruit bowl, the nut dish, and the back of the cupboard are doing all the heavy lifting tonight. If you want the bigger picture on laying the whole table, the article on christmas table decorations is the place to start.
For anyone who wants to go further with flowers and greenery, there is more on christmas floral arrangements, diy christmas flowers, and christmas candles. Come back here when the turkey is resting and the guests are twenty minutes out.
This post contains affiliate links. If you buy through them, I may earn a small commission at no extra cost to you.
- Shallow Bowl of Floating Sprigs
- Wooden Box of Moss and Cones
- Cake Stand of Fruit and Foliage
- Jug of Bare Branches with Two Baubles
- Three Bud Vases in a Line
- Tray of Grouped Tealights and Nuts
- Hollowed Cabbage as a Vase
- Copper Pan of Cuttings
- Low Basket Lined with a Tea Towel
- Glass Cylinder of Cranberries
- Candle Ring on a Plate
- Footed Bowl of Citrus and Bay
- Pair of Bottles with Single Stems
- Frequently Asked Questions
Shallow Bowl of Floating Sprigs
This is the one you make while the gravy is finishing.
A wide, low bowl of cold water with a few sprigs of greenery and a berry stem or two floating on the surface reads as deliberately calm rather than thrown together, which is exactly the effect you want when everything else is loud.
It suits a side table or a windowsill better than the centre of a dining table, because it is low and still.
Fill the bowl just before guests arrive, not an hour ahead, because cut stems begin to curl at the edges when they sit in shallow water for too long. After the party, tip the water onto a plant and compost the sprigs.
What You Need
- 1 shallow bowl or wide dish, at least 25 cm across
- Cold water, enough to fill the bowl 4 cm deep
- 3 to 5 sprigs of evergreen (ivy, rosemary, eucalyptus, or box), each about 15 cm long
- 1 stem of holly, rosehip, or pyracantha with berries
- A handful of whole cloves or a cinnamon stick (optional, for scent)
How to Make It
- Pour cold water into the bowl until it sits about 4 cm deep. Tap water is fine.
- Lay the evergreen sprigs flat on the water surface, overlapping them slightly so they form a loose, informal raft. They should float freely rather than being crammed edge to edge.
- Tuck the berry stem in at one side so the berries sit just above the waterline. This is the focal point, so place it where guests will see it first.
- Drop in the cloves or lay the cinnamon stick across the sprigs if you want a scent note. The whole thing should look effortless rather than arranged.

🛍 Shopping guide
Wooden Box of Moss and Cones
A wooden crate or trug packed tightly with fresh moss and a tumble of pine cones looks like something from a smart florist and costs nothing if your garden has a mossy corner.
The trick is density: gaps read as unfinished, so press the moss in firmly and pile the cones generously. This suits a long dining table or a console in the hall.
The moss will stay green for three or four days at room temperature. After the party, tip it into the garden and store the box flat.
What You Need
- 1 wooden crate, trug, or shallow box, any size
- A carrier bag of fresh moss, pulled from the garden in handfuls
- 10 to 15 pine cones, fir cones, or any similar cones
- 3 to 4 stems of rosemary, bay, or box for height variation
How to Make It
- Line the box loosely with the moss, pressing it into the corners. It does not need to be flat: a slight mound in the middle gives the finished piece height.
- Press the herb or foliage stems upright into the moss at irregular intervals. They do not need water; they are decorative and will hold for the evening.
- Nestle the cones into the gaps between the stems, grouping two or three together rather than spreading them evenly. Uneven groupings look considered rather than scattered.
- Check from the angle guests will see it and push any exposed box edges back under the moss.

🛍 Shopping guide
Cake Stand of Fruit and Foliage
A tiered cake stand or even a single-tier stand works beautifully as a centrepiece when you treat it like a still life rather than a dessert display.
Red apples, clementines, and a few stems of dark foliage is the combination that reads most Christmassy, but use whatever the fruit bowl offers. The stand elevates everything so it holds its own visually even down a long table.
The fruit is entirely edible afterward, and the foliage can go on the compost. Wipe the stand clean before putting it away.
What You Need
- 1 cake stand, single or tiered
- 6 to 8 apples or pears, or a mix
- 6 to 8 clementines or small oranges
- 4 to 6 stems of dark foliage (holly, bay, ivy, or eucalyptus)
How to Make It
- Start with the largest, flattest fruit on the base tier. Apples sit more stably than pears, so put pears on top if using both.
- Tuck foliage stems between the fruit at the base, letting a few trail over the edge of the stand. The leaves should frame the fruit rather than hide it.
- Stack the smaller fruit on the upper tier or in the centre, building a loose pyramid. Do not balance anything that could fall: the top piece should sit in a natural cradle.
- Tuck one or two small foliage sprigs into the top of the stack. Step back and look: if any side looks flat, rotate a piece of fruit so its best face is forward.

🛍 Shopping guide
Jug of Bare Branches with Two Baubles
Bare winter branches have a graphic quality that a tree full of leaves cannot match, and a tall earthenware jug turns three or four of them into a sculptural piece that looks deliberately minimal.
The two baubles hanging from the branches are the only colour, which makes them count. This suits a sideboard or a kitchen counter more than a dining table, because the height makes conversation difficult at close range.
Strip any bark that is flaking before you bring branches indoors. After the party, the branches can go back in the garden or onto the fire.
What You Need
- 1 tall earthenware or ceramic jug, at least 25 cm tall
- 3 to 4 bare branches, 60 to 90 cm long
- 2 baubles with hooks or ribbon loops attached
- A handful of gravel, pebbles, or dried pulses to weight the base
How to Make It
- Pour the gravel or pebbles into the jug until the base is weighted: the jug will tip if the branches are too heavy for an empty vessel.
- Arrange the branches in the jug, tallest at the back. Fan them slightly so they spread rather than standing in a tight bundle. Odd numbers of branches look more natural than even ones, but with three or four the difference is small.
- Hang one bauble on a branch at about two-thirds of the height and the second one lower, on the opposite side. Asymmetry is the point: two baubles on the same branch at the same height cancels the effect.
- Step back. If the jug rocks, add more gravel. If the branches look too stiff, rotate one so it leans outward slightly.

🛍 Shopping guide
Three Bud Vases in a Line
Three small vases or bottles in a row, each holding one or two stems at a slightly different height, creates a centrepiece that works on a narrow table where a wide arrangement would block sightlines.
The key is height variation: if all three vases are the same height, use the same amount of water so the stems sit at different levels. Mix one leafy stem, one berry stem, and one single bloom if you have it.
Any narrow-necked bottle, an empty wine bottle, a jam jar, or a proper bud vase all work here. Keep them in an odd-shaped cluster rather than a dead-straight line and the whole thing lifts. After the party, empty and rinse the vases and compost the stems.
What You Need
- 3 narrow-necked vases or bottles of varying heights
- Water, enough to half-fill each vessel
- 1 to 2 stems of dark foliage (ivy, eucalyptus, or rosemary)
- 1 stem of berried branch (holly, rosehip, or snowberry)
- 1 single bloom or tight bud if available (a carnation, ranunculus, or garden rose bud works well)
How to Make It
- Fill each vessel halfway with cold water. Half-full keeps the stems supported without the water going stagnant overnight.
- Trim the foliage stems at a sharp diagonal with scissors, an adult task if children are helping, and cut them to different lengths: the tallest should be roughly one and a half times the height of its vase.
- Place one foliage stem in each of the two outer vases and the berry or bloom stem in the centre vase. That centre stem is the one that draws the eye, so make it your best piece.
- Arrange the three vases in a loose triangle rather than a straight line. Shift them forward and back by a few centimetres so they read as a group rather than a row.

🛍 Shopping guide
Tray of Grouped Tealights and Nuts
A wooden board or a low tray anchors a collection of tealights and a scatter of mixed nuts in their shells, which is the sort of centrepiece that looks finished and feels genuinely festive without a single fresh ingredient.
Group the tealights in clusters of three rather than spacing them evenly, and pile the nuts between the clusters so the whole tray reads as textured and generous.
Never leave tealights burning unattended. Blow them out before clearing the table. The nuts stay in their shells and can go straight back into the nut bowl afterward; the tealights will have burned down and can be recycled. Wipe the tray with a damp cloth.
What You Need
- 1 wooden board, enamel tray, or large flat plate
- 9 to 12 tealights in metal or glass cups
- A generous double handful of mixed nuts in their shells (walnuts, hazelnuts, Brazil nuts)
- A few sprigs of rosemary or bay for greenery (optional)
How to Make It
- Set the tray on the table first, since moving a loaded tray is fiddly.
- Place the tealights in clusters of three across the tray. Leave at least 5 cm between clusters so heat does not build up between them.
- Pile the nuts into the gaps between the clusters, mounding them slightly. A flat layer of nuts is dull; a gentle heap reads as abundance.
- Tuck a few sprigs of rosemary or bay around the edges of the tray if using. They add colour and scent without any prep.
- An adult lights the tealights just before guests sit down. Check nothing combustible sits within 10 cm of any flame.

🛍 Shopping guide
Hollowed Cabbage as a Vase
A firm Savoy or red cabbage makes a surprisingly elegant vase once the core is hollowed to hold a glass or a sturdy jar.
The outer leaves stay on and give the whole piece a dark, architectural look that works particularly well on a round table. Use it for a single generous bunch of white flowers, or fill it with rosemary and berry stems for a fully foraged version.
The cabbage will hold for one evening without any special treatment. It will begin to wilt at the leaves by the next day, so compost it after the party. Pull out the inner jar, empty it, and the cabbage goes straight on the compost heap.
What You Need
- 1 large, firm Savoy or red cabbage
- 1 glass jar or tumbler that fits inside the cabbage, roughly 8 cm across
- A sharp kitchen knife and a sturdy chopping board (adult only)
- Cold water to fill the jar
- A full bunch of flowers, or 6 to 8 stems of mixed foliage and berries
How to Make It
- An adult cuts a flat slice off the base of the cabbage so it sits without rocking. Take off just enough to create a stable flat surface, not so much that you cut into the heart.
- An adult cuts out the centre of the cabbage from the top, working around the natural layers with a small knife to create a cylinder wide enough to hold the jar. The walls should be at least two to three layers thick so the cabbage keeps its shape.
- Lower the jar into the hollow and check it is stable. If it rocks, trim the hollow slightly with the knife. Fill the jar with cold water.
- Trim your stems at a diagonal and arrange them in the jar so they spread outward over the cabbage leaves. The flowers or foliage should rise about 15 to 20 cm above the cabbage top.
- Peel back one or two outer cabbage leaves to curl them outward, which frames the arrangement and shows off the natural texture of the vegetable.

🛍 Shopping guide
Copper Pan of Cuttings
A copper or cast-iron pan that has retired from regular cooking makes a handsome container for a loose bundle of garden cuttings set in water.
The metal reads as intentionally rustic, and the cuttings, mixed herbs, berry stems, and a few seed heads, look like something a confident gardener snipped on the way inside. This suits a kitchen table or a farmhouse-style dining table perfectly.
The stems will stay fresh for the evening. Tip out the water and dry the pan thoroughly before storing it, since standing water in metal accelerates rust or tarnish.
What You Need
- 1 copper or cast-iron pan or casserole dish, 20 cm or wider
- Cold water, enough to fill the pan 8 cm deep
- 5 to 6 stems of rosemary or thyme, each about 25 cm long
- 3 to 4 berry or seed-head stems (rosehip, pyracantha, dried allium, or honesty)
- 2 to 3 larger foliage stems for height (bay, eucalyptus, or holly)
How to Make It
- Fill the pan with 8 cm of cold water. The water will show if you tilt the pan, so place it on its final spot before filling.
- Trim all stems at a sharp angle, an adult task, and strip any leaves that will sit below the waterline, since submerged leaves rot and cloud the water overnight.
- Place the taller foliage stems in first, letting them lean against the pan sides so they angle outward. The pan’s width holds them without any need for a frog or foam.
- Add the herb stems next, filling gaps in the arrangement and letting them spill over the pan rim on at least one side.
- Finish with the berry or seed-head stems, placing the most interesting shapes where they will catch the candlelight. When the arrangement looks relaxed and slightly abundant, it is done.

🛍 Shopping guide
Low Basket Lined with a Tea Towel
A flat-sided wicker or wire basket lined with a linen tea towel becomes a soft, textural centrepiece when you fill it with a combination of clementines, a few pinecones, and some fresh rosemary sprigs.
The tea towel lining does two things: it stops small items rolling out and it adds a layer of colour. Choose a red or blue and white striped towel and the whole thing looks planned.
The basket can sit directly on a cloth table without risk of scratching.
After the party, the clementines go back in the fruit bowl, the cones back in the box, and the basket is empty again in two minutes. One of the easiest packdowns of any centrepiece here.
What You Need
- 1 flat-sided wicker or wire basket, roughly 30 x 20 cm
- 1 linen or cotton tea towel
- 6 to 8 clementines or small apples
- 5 to 6 pine cones or fir cones
- 4 to 5 sprigs of rosemary or bay, each about 15 cm
How to Make It
- Drape the tea towel inside the basket so it lines the base and the two long sides, with a little fabric folding over the rim. Tuck rather than crease it: a casual fold looks more intentional than a pulled-tight one.
- Place the fruit in first, grouping them together rather than spreading them. A cluster of four clementines reads as generous; four clementines spread across the basket reads as sparse.
- Tuck the pine cones into the gaps between and behind the fruit.
- Push the rosemary or bay sprigs between the cones and fruit so the green shows at the front and sides of the basket. They do not need water for one evening.
- Fold any excess tea towel fabric back over the contents on one side, as though the basket has just been opened. That small flourish makes it look dressed rather than simply filled.

🛍 Shopping guide
Glass Cylinder of Cranberries
A tall glass vase or cylinder filled with fresh cranberries and water, with two or three white candles set on top, is one of those combinations that looks technically demanding and takes under twenty minutes.
The cranberries colour the water pink within a few hours, which is a bonus. This works on any table and the height makes it visible from across the room.
The cranberries stay firm for two to three days in cold water. After the party, tip the cranberries into a saucepan with sugar and water and you have the beginning of a cranberry sauce or compote. Rinse the vase and dry it immediately to prevent watermarks.
What You Need
- 1 tall glass vase or cylinder, at least 20 cm tall and 10 cm across
- 300 g to 400 g fresh cranberries
- Cold water, enough to fill the vase two-thirds full
- 2 to 3 white pillar candles, each roughly 8 to 10 cm tall
- A small plate or round mirror tile to set the candles on (optional but protects the table)
How to Make It
- Pour the cranberries into the vase, then add cold water slowly until the vase is two-thirds full. Pouring the water in gently keeps the cranberries from splashing out.
- Lower the candles into position: they sit on a plate or tile beside the vase rather than inside it. A single candle centred directly behind the vase and two flanking it at a slight angle is the most effective arrangement.
- Check the vase is stable and not rocking on any lip of the plate. If you are using a mirror tile, make sure none of the candle wax can drip onto it, since wax on a mirror is difficult to remove.
- An adult lights the candles just before guests are seated. The reflected light in the glass cylinder is the payoff for the whole arrangement.

Candle Ring on a Plate
A wreath ring of greenery arranged around a single pillar candle on a flat plate is the most classically Christmas of all the pieces here, and it is faster than it looks.
The technique is simply overlapping short sprigs in a circle, working outward from the candle. No gluing, no wiring: the weight of the overlapping stems holds everything in place.
Keep the candle at least 10 cm tall so the flame sits well above the greenery, and never leave it burning unattended. After the party, compost the sprigs and keep the candle for next time.
What You Need
- 1 large flat plate or wooden board, at least 28 cm across
- 1 pillar candle, at least 10 cm tall and 7 cm wide
- 10 to 12 short sprigs of mixed evergreen (holly, ivy, rosemary, eucalyptus, box), each about 10 cm long
- A small handful of pine cones, sliced oranges dried in the oven, or cinnamon sticks as accent pieces (optional)
- Scissors for trimming (adult)
How to Make It
- Set the candle in the centre of the plate. It will not be glued down: the weight of the greenery ring will keep it from shifting.
- Begin laying the first sprigs around the candle base, angling each one so the tip points outward and the cut end tucks in close to the candle. The first ring should be snug against the candle.
- Add a second outer ring of sprigs, overlapping the first so no plate shows through. Mix the varieties so you get a textured surface rather than blocks of one type of green.
- Press any accent pieces, a cone, a cinnamon stick, into the gaps of the ring. Push them in firmly so they do not slide off when the plate is moved.
- An adult trims any sprig ends that are unruly, using scissors. The finished ring should look full and slightly wild at the edges, not neatly clipped.
- An adult lights the candle and checks that no greenery is within 8 cm of the flame before guests sit down.

🛍 Shopping guide
Footed Bowl of Citrus and Bay
A compote or footed fruit bowl filled with a combination of whole citrus fruit and fresh bay leaves is one of those arrangements that photographs beautifully without any effort and smells even better in person.
The bay leaves tuck between the fruit and curl up at the sides of the bowl, and the contrast between the dark, waxy leaves and the bright citrus does all the visual work. It suits a formal dining table and will last for several days.
After the party, the fruit is perfectly edible if unscored. The bay leaves can dry out and go into cooking. This is one of the few centrepieces here that doubles as a fruit display for the whole Christmas period.
What You Need
- 1 footed bowl or compote dish, at least 25 cm across
- 4 to 5 large navel oranges or blood oranges
- 4 to 5 unwaxed lemons
- 3 to 4 clementines or kumquats
- 10 to 12 fresh bay leaves or small bay sprigs
- A small handful of whole star anise or cloves (optional, pressed into the citrus)
How to Make It
- Build the base layer in the bowl using the largest fruit, the navel oranges. Stack them so they are stable and do not shift when the bowl is carried.
- Tuck the lemons in around and between the oranges, filling the gaps. Lemons are the neutral that makes the orange of the oranges more orange, so be generous with them.
- Add the smaller fruit on top, piling them so the bowl looks overflowing rather than carefully arranged. A slightly precarious look at the top reads as abundance.
- Slide the bay leaves or sprigs between the fruit at intervals around the bowl, so the dark green shows against the citrus on all sides. Angle the leaves so they point outward and downward, framing the fruit below them.
- Press a star anise or a clove or two into the skin of an orange if you like: it adds scent as the room warms up and costs almost nothing.

Pair of Bottles with Single Stems
Two bottles of similar height but different shapes, each holding a single long stem, are the most restrained thing on this list and the one most likely to be admired by guests who usually rush past centrepieces without noticing them.
The pairing is the centrepiece: one stem that is graphic and structural, such as a bare willow or a dried cotton stem, and one that is soft, such as a single white rose or spray chrysanthemum.
Place them on either side of a central candle or a small bowl of nuts and they frame rather than dominate the table.
Washed wine bottles, olive oil bottles, or any glass bottle with a reasonably narrow neck work perfectly. After the party, the bottles can go back into recycling and the stems, if fresh, can move to a smaller vase in a bedroom.
What You Need
- 2 glass bottles of similar height but different shapes, at least 25 cm tall when bottled
- Cold water, enough to fill each bottle one-third full
- 1 long structural stem (bare willow, dried cotton stem, dried pampas, or a single long branch of eucalyptus), at least 50 cm
- 1 soft bloom on a long stem (white rose, spray chrysanthemum, ranunculus, or similar), at least 40 cm
- 1 small centrepiece between the bottles (a candle, a bowl of nuts, or a single pine cone) to anchor the pair
How to Make It
- Wash the bottles and fill each one-third full with cold water. Dry the outside completely: water marks on glass read as an unfinished detail.
- An adult trims the structural stem first, cutting it so the top of the stem will sit about 25 to 30 cm above the bottle’s rim. Cut at a sharp diagonal to maximise the water uptake surface.
- Place the structural stem in the first bottle. It should hold its position without touching the sides: if the neck is too wide, add a few small pebbles to the base of the bottle to weight it.
- Trim the soft stem to roughly 10 cm shorter than the structural stem, so the two pieces sit at noticeably different heights when placed side by side. Cut it at a diagonal too.
- Place the soft stem in the second bottle and position the two bottles about 20 to 25 cm apart on the table, with your small centrepiece piece between them.
- Step back and check the negative space between the two stems: this gap is part of the arrangement, not empty space. If the gap looks too wide, move the bottles a fraction closer.

Frequently Asked Questions
What can I use as a quick Christmas centrepiece?
A shallow bowl of water with floating evergreen sprigs takes five minutes and needs nothing more than what is in the garden.
A cake stand piled with fruit and foliage, a wooden box packed with moss and cones, or a tray of grouped tealights and nuts are all ready in under fifteen minutes.
The fastest options use one container you already own and three fillings from the fruit bowl, the garden, or the back of a cupboard.
How do I make a centrepiece without floral foam?
Most centrepieces do not need floral foam at all. Stems stay upright in a container of water without any support if the vessel is reasonably narrow, as with bud vases or bottles.
In a wide pan or copper dish, the container’s own sides support leaning stems. A candle ring holds itself together through the weight of overlapping sprigs.
A footed bowl of citrus and bay, or a wooden box of moss and cones, needs no water at all.
What flowers last on a Christmas table?
Carnations, spray chrysanthemums, and ranunculus are the most reliable cut flowers for a Christmas table. They last three to five days in fresh cold water and handle warm indoor temperatures better than roses or tulips.
If you are using garden cuttings, rosemary, bay, holly, ivy, and eucalyptus all hold well for one to three days out of water and longer if their stems sit in a vessel. Avoid anything that wilts quickly in heat, such as sweet peas or hydrangeas.
How big should a centrepiece be?
A dining table centrepiece should clear your guests’ sightlines when they are seated. As a general guide, keep the arrangement under 30 cm tall if it sits in the centre of the table, since anything taller makes conversation across the table difficult.
A very low arrangement, such as a shallow bowl or a flat tray, can be as wide as you like. If you want height, use it on a side table or console where guests are not seated on both sides.

23 christmas mantle decor ideas covering garlands, stockings and candlelight, grouped by what the ma

22 Ralph Lauren Christmas decor ideas for a whole house: hunter green, oxblood and brass, carried fr
15 vintage Christmas cake designs with retro piping, cherries, bows and pearls, plus the tips and to
Leave a Reply