

30 Christmas Baubles Ideas That Use a Trick From Somewhere Else Entirely
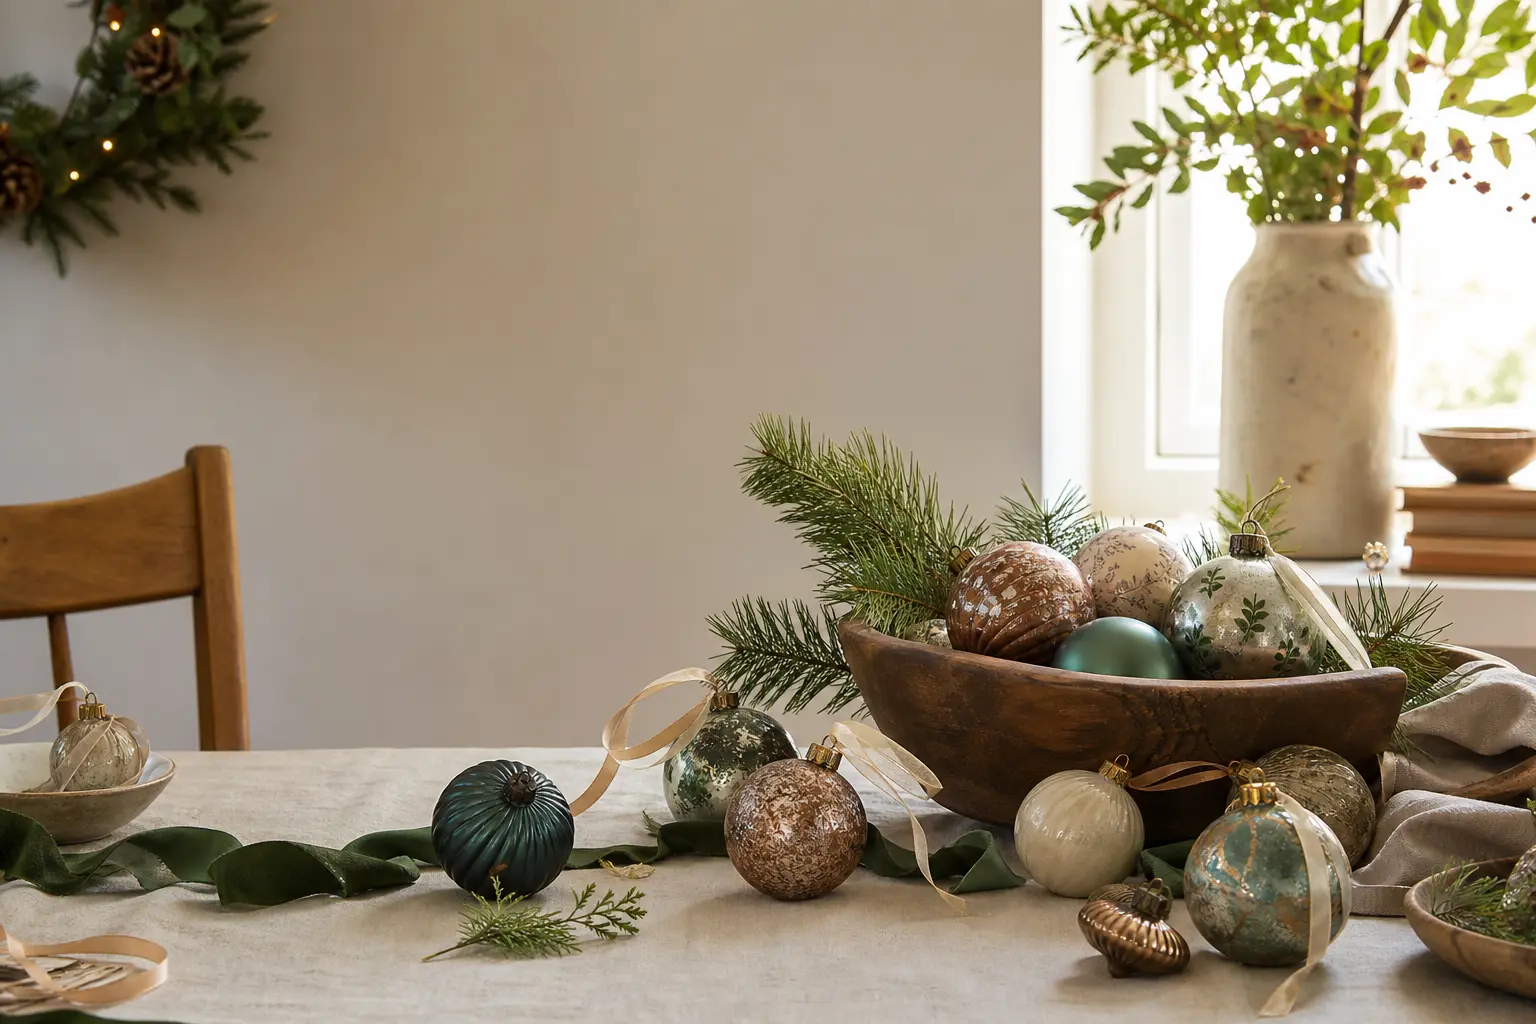
Here are 30 christmas baubles ideas that borrow their techniques from somewhere else entirely: nail art, raku pottery, watercolour painting, furniture restoration, suminagashi paper marbling.
If you are holding a pack of plain matte baubles right now and dreading another round of brush-on glitter, this is the article for you.
Every finish here uses a trick that works better on a bauble than it does on the thing it was invented for, because a smooth sphere is essentially the perfect canvas.
None of these need a spray booth or a bottle of resin. Most need materials you already own, or one inexpensive thing from a craft or hardware shop. For more starting points, the full collection of diy christmas ornaments is worth bookmarking alongside this one.
You will find links to christmas tree ornaments, felt christmas ornaments, and even a pink christmas tree to hang them all on.
This post contains affiliate links. If you buy through them, I may earn a small commission at no extra cost to you.
- Nail Varnish Water Marble Bauble
- Terrazzo Chip Bauble
- Raku Crackle Black and Gold Bauble
- Suminagashi Ink Marble Bauble
- Two-Step Crackle Glaze Bauble
- Batik Wax Resist Bauble
- Alcohol Ink Bleed Bauble
- Sgraffito Scratched Pattern Bauble
- Shibori String-Dip Bauble
- Tea-Stained Sheet Music Decoupage Bauble
- Salt Texture Watercolour Bauble
- Gold Leaf Crackle Frame Bauble
- Toothbrush Speckle Bauble
- Ombre Dip-Dye Bauble
- Stencilled Damask Bauble
- Chalk Paint Distressed Bauble
- Nail Art Foil Transfer Bauble
- Faux Enamel Layered Coat Bauble
- Woodgrain Rubber Graining Tool Bauble
- Lace Pressed Print Bauble
- Verdigris Aged Copper Bauble
- Shaving Foam Ink Marble Bauble
- Cyanotype Sun Print Leaf Bauble
- Stained Glass Tissue Paper Bauble
- Broken Eggshell Mosaic Bauble
- Brittle Top Coat Batik Crackle Bauble
- Airbrushed Two-Tone Ceramic Gradient Bauble
- Gilded Edge Book-Style Bauble
- Friendship Bracelet Thread Wrap Bauble
- Limed Whitewash Distressed Bauble
- Frequently Asked Questions
Nail Varnish Water Marble Bauble
This is the technique nail artists use to get those swirling galaxy patterns on fingernails, and it translates to a bauble surface with almost suspicious ease. The finished bauble looks like a polished stone, all fluid curves and unpredictable colour. Hang it where light catches it and it will look expensive in a way glitter never quite manages.
Store finished baubles in a single layer in an open egg box; stacking risks scratching the surface before it is fully cured.
What You Need
- 1 plain matte plastic bauble, any size
- 3 bottles of nail varnish in contrasting colours
- 1 deep bowl or container, at least 15 cm across
- Cold water to fill the bowl
- 1 wooden cocktail stick
- Masking tape to cover the bauble cap
How to Make It
- Tape over the metal cap of the bauble so it stays clean, then fill the bowl with cold water at room temperature. Warm water makes the varnish sink rather than float.
- Drop one colour of nail varnish onto the water surface and let it spread. Add drops of the second and third colours in concentric rings on top. Work fast, because nail varnish starts to skin over within about 30 seconds.
- Drag the cocktail stick through the rings in slow, sweeping strokes to pull the colours into a marble pattern. One or two strokes is usually enough; overworking turns everything grey.
- Holding the bauble by its cap, lower it slowly into the water at an angle, pressing it through the floating film of varnish. Roll it gently as you lift it out so the pattern wraps the whole surface.
- Hold the bauble over the bowl and let it drip for a minute. Set it on a piece of baking paper and leave it for at least 40 minutes before touching the surface.

🛍 Shopping guide
Terrazzo Chip Bauble
Terrazzo is the Italian flooring technique of pressing stone chips into wet cement and grinding it smooth, and the same logic applies here with paint and acrylic chips. The result is a bauble that reads as architectural rather than festive, which is exactly the point.
It sits beautifully in a bowl as a table centrepiece as well as on the tree.
Once fully dry the surface is surprisingly durable. Store in tissue paper.
What You Need
- 1 plain matte plastic bauble
- White acrylic paint, 1 small pot
- Acrylic paint in 2 contrast colours (black and terracotta work well), 1 small pot each
- 1 flat watercolour brush, size 8
- Old credit card or palette knife
- Scrap paper for mixing
How to Make It
- Paint the entire bauble in white acrylic and leave it to dry for 20 minutes. Two thin coats grip better than one thick one on a plastic surface.
- While the second coat is still slightly tacky (not wet, just not bone dry), load a little of the first contrast colour onto the edge of the credit card. Press the card flat against the bauble surface and lift it away cleanly. This deposits an irregular chip shape.
- Repeat with the second contrast colour, scattering chips across the surface at random angles. Leave gaps of white between them; the white ground is part of the design.
- Add a few chips in a third colour if you want, then leave the bauble completely undisturbed for 90 minutes. The chips will slightly sink into the tacky base and look embedded rather than stuck on.

🛍 Shopping guide
Raku Crackle Black and Gold Bauble
Raku pottery comes out of the kiln looking scorched, crackled and gilded by accident, and that is exactly the aesthetic here. A black base coat, a crackle medium, and a gold top coat produce a bauble that looks like it was pulled from a fire. It is the most dramatic thing on the tree by some distance.
Hang these individually rather than in clusters; the effect needs breathing room.
What You Need
- 1 plain matte plastic bauble
- Black acrylic paint, 1 small pot
- Crackle medium, 1 small bottle (craft shop)
- Gold acrylic paint, 1 small pot
- 1 medium round brush, size 6
How to Make It
- Paint the bauble entirely in black acrylic. Apply two coats with drying time between them; the black needs to be opaque because it shows through the cracks as the finished detail.
- Once the black is completely dry (at least an hour), apply a coat of crackle medium over the whole surface with a single pass of the brush. Do not go back over wet crackle medium or the cracks will form unevenly. Leave it to dry for 30 to 40 minutes until it feels slightly tight and tacky under your finger.
- Load the brush generously with gold paint and apply it over the crackle medium in one direction only, in long confident strokes. As the gold dries, cracks open to reveal the black beneath. The thicker the gold coat, the larger the cracks.
- Leave it completely alone for at least an hour. Touching it while it is cracking will seal the fissures.

Suminagashi Ink Marble Bauble
Suminagashi is the Japanese art of floating ink on water and lifting the pattern onto paper. The concentric ring patterns it produces are utterly different from nail varnish marbling: calmer, more minimal, closer to a woodgrain. On a bauble the result is quietly beautiful rather than showy.
Use inks labelled as ‘suminagashi’ or ‘paper marbling’; ordinary fountain pen ink sinks and will not work.
What You Need
- 1 plain matte plastic bauble
- Suminagashi marbling inks, 2 to 3 colours, small bottles
- 1 deep bowl, at least 20 cm across
- Cold still water
- 2 fine watercolour brushes, size 2
- 1 sheet baking paper to rest the bauble on
How to Make It
- Fill the bowl with cold water and let it settle for two minutes so there are no ripples.
- Dip one brush into the first ink colour and touch it very gently to the centre of the water surface. A ring of colour will spread outward. Dip the second brush into the second colour and touch it into the centre of the first ring; a new ring pushes the first one out. Alternate colours four or five times to build the concentric pattern.
- Blow very softly across the surface, or wave a piece of card beside the bowl, to elongate the rings into an oval or teardrop pattern.
- Lower the bauble into the water through the floating ink film in one slow, steady motion. Lift it out and hold it over the bowl for a moment.
- Set it on baking paper and leave it to dry for 40 minutes. The ink is very delicate wet; do not touch the surface.

🛍 Shopping guide
Two-Step Crackle Glaze Bauble
Furniture painters use this two-step drying trick to age a painted surface overnight. A slow-drying base coat under a fast-drying top coat creates tension as the top dries faster than the base can follow, and the top coat splits. The bauble ends up looking like very old, very beautiful painted wood.
Choose colours that contrast well: navy under cream, deep green under white, or terracotta under sage all work.
What You Need
- 1 plain matte plastic bauble
- Slow-drying oil-based paint, 1 small tin (the base colour)
- Fast-drying acrylic paint, 1 small pot (the top colour)
- 1 medium round brush, size 6
- White spirit for brush cleaning
How to Make It
- Apply one coat of oil-based paint to the entire bauble surface. Oil-based paint stays workable and slightly soft for several hours, which is exactly what you need.
- Leave it for 30 minutes. It should look and feel almost dry but be very slightly tacky if you press a knuckle gently against a hidden area.
- Apply one coat of acrylic paint over the top in quick, confident strokes. The acrylic dries fast; the oil base underneath is still moving slowly. This tension pulls the acrylic apart and opens cracks as it sets.
- Set the bauble somewhere still and cool for three hours. The cracks develop slowly over the first two hours; do not move it until they have finished forming.

🛍 Shopping guide
Batik Wax Resist Bauble
Batik fabric artists brush hot wax onto cloth before dyeing it, and the waxed areas resist the dye and stay their original colour. The same principle works on a bauble with a candle stub, a skewer and watered-down acrylic. The finished surface has crisp, clean white lines running through a coloured ground, exactly like a piece of indigo batik fabric.
This one takes patience but almost nothing goes wrong with it. After the season, the wax peels away cleanly and you can start again.
What You Need
- 1 plain white or light matte plastic bauble
- 1 white household candle or candle stub
- 1 wooden skewer
- Acrylic paint in 1 deep colour (navy, indigo or forest green), 1 small pot
- Water to dilute paint
- 1 medium flat brush, size 8
How to Make It
- An adult should do this step: hold the candle sideways and press its tip firmly along the bauble surface, drawing lines, spirals or geometric shapes. The wax transfers to the surface as a faint, slightly shiny mark. Press hard enough to leave a visible wax trail.
- Mix the acrylic paint with water until it is about the consistency of ink, roughly one part paint to one part water. A too-thick mix will sit on top of the wax and crack off; a watery mix soaks around the wax and leaves clean resist lines.
- Brush the diluted paint over the entire bauble in smooth, even strokes. Watch the wax areas: the paint beads and runs off them, leaving the white bauble surface showing through.
- Apply two more coats, drying between each, to build a deep colour around the wax lines. Leave to dry for one hour, then hold the bauble under warm running water and gently rub the wax away with a cloth to reveal the resist pattern.

🛍 Shopping guide
Alcohol Ink Bleed Bauble
On a resin coaster, alcohol inks are dropped onto a wet surface and pushed around with a straw or heat gun until they bloom into each other in fluid, coral-like shapes. On a bauble they do the same thing with almost no effort required.
The surface ends up looking like a slice of agate or a coral reef depending on your colour choice. It suits a modern or Scandi-style tree beautifully.
What You Need
- 1 plain matte plastic bauble, light or white base preferred
- Alcohol inks in 3 colours, small bottles
- Isopropyl alcohol (rubbing alcohol), 1 small bottle
- 1 drinking straw
- Baking paper or a disposable plate to work on
How to Make It
- Work near an open window. Drop 3 to 4 drops of the first ink colour directly onto the bauble surface. The ink spreads immediately into a soft puddle with distinct edges.
- Add drops of the second and third colours nearby but not quite touching the first puddle. They will begin to bleed into each other at the edges on their own.
- Blow gently through the straw across the ink surface to push the colours into each other and create feathered, bleeding edges. The more you blow, the more the cells break open and merge. Stop when you like what you see.
- To lift any areas that have gone muddy, drop a tiny amount of isopropyl alcohol onto them. It pushes the pigment outward into a lighter halo and reopens the cell structure.
- Set the bauble on baking paper and leave it for at least 45 minutes. Alcohol ink dries quicker than acrylic but the surface stays slightly tacky for longer.

🛍 Shopping guide
Sgraffito Scratched Pattern Bauble
Sgraffito is a ceramic and plaster technique where the top layer is scratched away to reveal a contrasting colour underneath. On a bauble it produces something that looks like engraved lacquerware: a coloured ground with crisp incised lines. The scratching is genuinely satisfying and the finished result looks painstaking even though it takes very little time.
What You Need
- 1 plain matte plastic bauble
- Acrylic paint in 2 colours that contrast strongly, 1 small pot each
- 1 medium round brush, size 6
- 1 wooden skewer or the blunt end of a paintbrush
How to Make It
- Paint the entire bauble in the first colour (the colour that will show through as the line work) and leave it to dry completely. Two thin coats are better than one thick one.
- Apply two coats of the second colour on top, letting each coat dry for 15 minutes. The top colour needs to be opaque but not so thick that it builds up into a rubbery layer that lifts in chunks rather than scratching cleanly.
- Wait until the top coat is dry but not fully cured. On most acrylics this is about 20 minutes after the final coat: the surface is dry to the touch but still slightly soft.
- Use the pointed tip of the skewer to scratch your pattern into the top colour. Lines, geometric shapes, leaves, and simple snowflake radiating lines all work well. The scratched lines reveal the base colour beneath, clean and bright. Work steadily; hesitation shows in the line.
- Leave the bauble to cure fully for one hour before handling.

🛍 Shopping guide
Shibori String-Dip Bauble
Shibori is the Japanese resist-dyeing technique where cloth is pleated, bound or wrapped with string before dyeing, so the dye cannot reach the compressed areas.
Wrapping a bauble tightly in elastic bands or string before dipping it in diluted paint produces the same crisp geometric resist lines on a curved surface. The effect looks intentional and graphic, closer to contemporary Japanese textile design than to Christmas craft.
What You Need
- 1 plain white matte plastic bauble
- Indigo or navy acrylic paint, 1 small pot
- Water for diluting
- Elastic bands or waxed string, enough to wrap the bauble tightly
- 1 deep small cup or jar for dipping
- Baking paper
How to Make It
- Wrap the bauble tightly with elastic bands or string, pulling each one firm and close to the one before. The tighter the wrap, the crisper the white resist line will be. Diagonal wrapping produces diamond patterns; parallel wrapping produces stripes.
- Mix the acrylic paint with water at roughly one part paint to two parts water, making a transparent ink-like fluid.
- Lower the wrapped bauble into the diluted paint and hold it submerged for 30 seconds. Lift it out and let the excess drip back into the cup.
- Set the bauble on baking paper still wrapped. Leave it for one hour. Removing the wrapping while wet smears the resist lines.
- Once dry, cut or slide the elastic bands off carefully. The lines underneath are clean and white against the indigo ground.

🛍 Shopping guide
Tea-Stained Sheet Music Decoupage Bauble
Decoupage is one of those techniques that looks dated until you upgrade the paper, and sheet music aged with tea is about as far from a primary-school craft as you can get. The finished bauble looks like something from a Parisian antique market: warm, sepia-toned, and quietly sophisticated. Photocopy the sheet music first so the original stays safe.
What You Need
- 1 plain matte plastic bauble
- 1 page of photocopied sheet music, printed on thin 80 gsm paper
- 1 mug of strong cold black tea
- PVA glue, 1 small bottle
- 1 flat brush, size 10
- Scissors
- Matte decoupage varnish or diluted PVA for top coat
How to Make It
- Tear the sheet music page into irregular pieces roughly 3 to 4 cm across, varying the sizes. Tearing rather than cutting gives softer edges that blend better on a curved surface.
- Submerge the torn pieces in the cold tea for 10 minutes. Lift them out carefully, lay them flat on baking paper, and leave them to dry fully, about an hour. They will be noticeably warmer and more aged-looking.
- Brush a thin layer of PVA onto a section of the bauble and press one piece of sheet music onto it, smoothing it down from the centre outward with your fingers to avoid bubbles. Overlap the next piece slightly.
- Continue until the whole bauble is covered. Overlapping edges and small wrinkles add to the aged look rather than ruining it, so do not try to make it perfectly flat.
- Once covered, brush two coats of diluted PVA or decoupage varnish over the whole surface, drying between coats, to seal everything down.

🛍 Shopping guide
Salt Texture Watercolour Bauble
Every watercolour painter knows the salt trick: sprinkle coarse salt into a wet wash and it draws the pigment toward it as the water evaporates, leaving starry, crystalline marks behind.
On a bauble painted with diluted acrylic the same thing happens, and the surface ends up looking like a frost-covered window or a satellite map of a tundra. Pale blues and silvers work best; darker colours produce something closer to a night sky.
What You Need
- 1 plain matte plastic bauble
- Acrylic paint in pale blue or silver, 1 small pot
- Water for diluting
- Coarse sea salt, 2 tablespoons
- 1 medium round brush, size 8
- Baking paper
How to Make It
- Mix the paint with water until it is very thin and fluid, closer to watercolour than to normal acrylic. It should be transparent when you hold it up to the light.
- Paint the entire bauble quickly with the diluted paint. You need to work fast enough that the surface stays wet all over.
- While the paint is still very wet, sprinkle a generous pinch of coarse sea salt over the bauble, rotating it so the salt lands on every surface. The salt granules will immediately start drawing the pigment toward them.
- Set the bauble on baking paper and leave it completely alone for one hour. Do not touch or rotate it; the salt needs time to do its work and any movement breaks the pattern.
- Once completely dry, tip the loose salt off into the bin. The marks it leaves behind are permanent and stay even after you brush the surface gently.

🛍 Shopping guide
Gold Leaf Crackle Frame Bauble
Frame restorers apply gold leaf over a red clay bole and a crackle size, then burnish until the surface looks like a Renaissance gilded frame: warm gold interrupted by fine cracks that show the red beneath.
You can reproduce the effect on a bauble using gold transfer leaf and a craft crackle medium. It is the most laborious technique in this list, but the result is genuinely extraordinary.
What You Need
- 1 plain matte plastic bauble
- Red oxide acrylic paint, 1 small pot (or any deep terracotta red)
- Crackle medium, 1 small bottle
- Gold transfer leaf, 5 to 6 sheets
- Gilding size (adhesive), 1 small bottle
- 1 soft flat brush, size 10
- 1 soft dry brush for burnishing
How to Make It
- Paint the bauble entirely in red oxide acrylic and leave it to dry completely, at least 45 minutes. This is the colour that will show through the gold cracks and it needs to be opaque.
- Apply a generous coat of crackle medium over the red and leave it to become tacky, about 30 to 40 minutes. It should feel grippy but not wet.
- Brush gilding size over the crackle medium in thin, even strokes. Leave it for the time specified on the bottle (usually 20 to 30 minutes) until it reaches the tacky stage called ‘open’.
- Lay a sheet of transfer gold leaf over a section of the bauble and press it down firmly with your fingers, then peel the backing away. The gold adheres to the size and the crackle medium simultaneously creates fine splits in it. Repeat until the whole surface is covered.
- Use the dry soft brush to burnish the gold in small circular movements and dust away any loose fragments. Leave for two hours before hanging.

Toothbrush Speckle Bauble
The Easter egg speckle technique is one of the most satisfying things you can do with a toothbrush, and it transfers to baubles with zero adaptation required.
Load a toothbrush with thinned paint and run a finger across the bristles: tiny droplets scatter across the surface in a completely random pattern that looks like a robin’s egg or a bird of prey feather.
It is faster to make twenty of these than it is to read about them.
What You Need
- 1 plain white or cream matte plastic bauble
- Acrylic paint in brown, black or gold, 1 small pot
- Water for thinning
- 1 old toothbrush
- Newspaper or bin bags to protect the work surface
How to Make It
- Cover the entire work surface with newspaper. Speckle paint travels further than you expect.
- Mix the paint with a little water until it is fluid enough to flow between the bristles but not so thin it runs. Dip the toothbrush in and shake off the excess.
- Hold the toothbrush about 10 cm from the bauble surface, bristle side toward it. Run your index finger slowly across the top of the bristles, pulling them back and releasing. A fine spray of dots covers the bauble.
- Rotate the bauble and repeat until all sides are speckled evenly. A second colour in a slightly darker tone added over the first once it is dry gives depth.
- Leave to dry for 30 minutes.

🛍 Shopping guide
Ombre Dip-Dye Bauble
Tie-dye fabric artists dip the bottom of a bound garment into dye and let it wick upward in a gradient, and a bauble held by its cap and lowered slowly into a cup of paint does exactly the same thing.
The top of the bauble fades to the original white or cream, and the bottom reaches full saturation. It is minimal, elegant, and takes five minutes of active time.
What You Need
- 1 plain white matte plastic bauble
- Acrylic paint in one colour, 1 small pot
- Water for diluting
- 1 narrow deep cup or glass, tall enough to submerge the lower half of the bauble
- Baking paper
How to Make It
- Mix the paint with water in the cup to a mid-strength wash, about one part paint to two parts water.
- Holding the bauble by its cap, lower it slowly into the paint, stopping when about two-thirds of the bauble is submerged. Hold it still for 20 seconds.
- Lift the bauble out very slowly, pausing every few millimetres. The longer you hold it at each level, the more paint deposits at that point and the more gradient bands you get. Lifting it out over about 30 seconds gives a smooth continuous gradient.
- Set the bauble cap-up on baking paper and leave it for one hour. The gradient softens slightly as it dries, which is what you want.

🛍 Shopping guide
Stencilled Damask Bauble
Damask wallpaper patterns work on baubles for the same reason they work on walls: a single repeat over a deep background looks rich and intentional. A small adhesive stencil from a craft shop and a flat stencil brush are all you need.
The trick, borrowed directly from wallpaper paste technique, is to use a nearly dry brush and build the colour in thin passes rather than one loaded stroke.
What You Need
- 1 plain matte plastic bauble in a deep colour (navy, burgundy or forest green)
- Gold or cream acrylic paint, 1 small pot
- 1 small adhesive stencil with a damask or botanical repeat pattern
- 1 flat stencil brush, size 6
- Kitchen paper for blotting
How to Make It
- Press the adhesive stencil firmly against one side of the bauble. It will curve slightly over the surface; press the edges down carefully so there are no gaps where paint can bleed underneath.
- Dip the stencil brush into the paint and then dab most of it off onto a piece of kitchen paper. The brush should feel almost dry. This is the most important step: a wet brush floods under the stencil edges and blurs the pattern.
- Stipple the nearly dry brush over the stencil opening in small circular movements until the pattern is filled with colour. Two or three thin passes beat one thick one.
- Peel the stencil away carefully while the paint is still slightly wet; dried paint can lift with the stencil if you wait too long. Reposition the stencil on another area of the bauble and repeat.
- Leave to dry for 30 minutes.

🛍 Shopping guide
Chalk Paint Distressed Bauble
Chalk paint furniture restorers sand back the edges of a painted piece to let the wood beneath show through, and the same distressing technique on a bauble creates a bleached, Gustavian look that suits a neutral or natural tree perfectly. The key is to distress before the paint is fully cured, when it is still slightly chalky and soft.
What You Need
- 1 plain matte plastic bauble
- Chalk paint in white, pale grey or duck egg, 1 small pot
- Fine grit sandpaper, 240 grit, 1 sheet
- 1 medium round brush, size 8
- Clear wax for sealing, 1 small tin (or matte varnish as an alternative)
How to Make It
- Apply two coats of chalk paint to the bauble, drying for 15 minutes between coats. Chalk paint has a naturally matte, powdery finish that grips plastic well without primer.
- Leave the final coat for 20 minutes. It should be dry to the touch but not fully hard.
- Tear the sandpaper into a small piece and rub it very gently in small circles over the areas of the bauble that would catch the most wear if it were a real object: the widest curve at the equator, and any raised detail. Do not press hard; the chalk paint removes easily.
- Use a clean dry cloth to buff away the sanding dust. The distressed areas will look slightly translucent rather than raw.
- Apply a thin coat of clear wax or matte varnish over the whole surface and leave to cure for one hour. The wax also deepens the colour slightly.

🛍 Shopping guide
Nail Art Foil Transfer Bauble
Nail artists press holographic or metallic foil onto a sticky base coat to get mirror-bright geometric coverage that no brush can replicate.
On a bauble you can do the same thing with craft foil transfer sheets, getting a finish that looks somewhere between a disco ball and a piece of Japanese lacquerware depending on which foil you choose.
This is a genuinely quick make with a result that photographs spectacularly.
What You Need
- 1 plain matte plastic bauble
- Foil transfer adhesive (foil glue), 1 small bottle
- Craft foil transfer sheets in 2 to 3 colours or finishes, at least A5 size each
- 1 soft flat brush, size 10
- A bone folder or the back of a spoon for burnishing
How to Make It
- Brush the foil adhesive over sections of the bauble in a pattern if you want (stripes, irregular patches, or the whole surface). For a full-coverage mirror finish, coat the whole bauble. Leave it to become clear and tacky, about 20 to 30 minutes.
- Press a piece of foil transfer sheet, colour side up and adhesive side against the bauble, firmly onto a glued section. Rub over it with the back of a spoon using firm pressure.
- Peel the foil sheet away slowly and steadily. The foil layer sticks to the adhesive and transfers onto the bauble, leaving the backing clear. If any areas do not transfer, press the foil back down and rub again.
- Continue with the other foil colours until the surface is covered to your liking. Small gaps between foil sections look intentional.
- Leave for 30 minutes before hanging.

Faux Enamel Layered Coat Bauble
Cloisonne and vitreous enamel get their glassy depth from multiple thin fired layers, each one transparent and slightly different in tone.
You can build a convincing faux version on a bauble using acrylic paint thinned to a glaze consistency, layering five or six coats and letting each one dry before adding the next.
By the final coat the colour has a depth that solid paint simply cannot achieve, and the surface looks almost wet even when it is bone dry.
What You Need
- 1 plain matte plastic bauble
- Acrylic paint in one saturated colour (cobalt, crimson or emerald), 1 small pot
- Acrylic glazing medium, 1 small bottle
- 1 soft flat brush, size 8
How to Make It
- Mix one part acrylic paint with three parts glazing medium. The mixture should be transparent: you can see your hand through it when you hold it up. This is your glaze.
- Apply the first glaze coat over the whole bauble in long, smooth strokes. It will look thin and slightly streaky. That is correct at this stage.
- Leave it to dry for 20 minutes, then apply the second coat in the opposite direction to the first. Alternating direction with each coat evens out any streaking.
- Repeat for five or six coats total. After the third coat the colour begins to deepen noticeably. After the fifth it starts to look glassy. After the sixth it is done.
- Leave for a final 30 minutes before handling.

Woodgrain Rubber Graining Tool Bauble
Furniture painters use a rubber graining tool, a small paddle with a textured curved edge, to drag through wet paint and produce a woodgrain pattern on any surface.
On a bauble the tool wraps around the curve and produces something between burr walnut and watercolour paper texture, depending on how you rock it. It looks far more complex than it is.
What You Need
- 1 plain matte plastic bauble
- Cream or off-white acrylic paint (base), 1 small pot
- Raw umber or dark oak brown acrylic paint (grain), 1 small pot
- 1 rubber graining tool, rocker type, small size
- 1 flat brush, size 10
How to Make It
- Paint the bauble entirely in the cream base colour and leave it to dry for 30 minutes. It needs to be fully dry before the grain coat goes on.
- Apply a thin, even coat of the brown paint over the cream base. Work in a section about the width of the graining tool.
- Immediately press the graining tool against the wet brown paint and slowly drag and rock it across the surface in a steady, slightly curving motion. As you rock the tool, the serrated edge creates grain lines and the rocking motion opens growth rings. Work around the bauble in sections while the paint is still wet.
- Leave to dry completely for one hour. A coat of matte varnish over the top deepens the woodgrain illusion considerably.

Lace Pressed Print Bauble
Printmakers press textured surfaces into wet ink to transfer the pattern, and a piece of cotton lace pressed into wet paint on a bauble does exactly the same thing.
The result is a delicate grid or floral impression over a coloured ground that looks like hand-blocked fabric. This works beautifully in white lace on a dark bauble, or in gold paint on cream lace over a black ground.
What You Need
- 1 plain matte plastic bauble in a dark colour
- White or gold acrylic paint, 1 small pot
- 1 piece of cotton lace trim, at least 30 cm long and 5 cm wide
- 1 flat brush, size 10
- A plate or tile for loading the lace
How to Make It
- Squeeze a little paint onto the plate and spread it into a thin, even layer. Press one side of the lace piece into it, coating the lace surface evenly but not thickly. Excess paint fills the holes and loses the pattern.
- Press the loaded lace firmly against the bauble surface. Hold it still for five seconds, then peel it away slowly and evenly. The lace pattern transfers as a crisp impression.
- Re-load the lace with a little more paint and press it onto the next section of the bauble, overlapping the previous impression slightly so there are no ungainly gaps.
- Continue until the whole surface is covered. Some irregularity in the overlap is fine and adds to the handmade quality.
- Leave to dry for 40 minutes.

🛍 Shopping guide
Verdigris Aged Copper Bauble
Metalwork left in the weather develops a blue-green patina as the copper oxidises, and that colour is one of the most beautiful things that happens to a material over time.
Furniture painters fake it by layering copper paint, a dark wash, and then a blue-green highlight. On a bauble the layered technique produces something that could genuinely be mistaken for aged metal.
What You Need
- 1 plain matte plastic bauble
- Copper metallic acrylic paint, 1 small pot
- Dark brown acrylic paint (burnt umber), 1 small pot
- Turquoise or teal acrylic paint, 1 small pot
- White acrylic paint, 1 small pot
- 1 sea sponge or a torn piece of natural sponge
- 1 medium round brush, size 6
How to Make It
- Paint the whole bauble in copper metallic acrylic. Two coats, with drying between, give a solid copper base.
- Mix a small amount of dark brown with water to a very thin wash. Brush it over the whole bauble and immediately wipe most of it off with a slightly damp cloth, leaving it in the recesses and any texture. This gives the copper depth and age.
- Dip the sea sponge into the turquoise paint and dab off the excess on a cloth. Stipple the sponge lightly over the bauble surface, concentrating on some areas more than others and leaving copper showing through. Real verdigris is not uniform.
- Mix a little white into the turquoise to make a pale teal highlight. Sponge this sparingly over the highest points and the top curve. Leave to dry for one hour.

🛍 Shopping guide
Shaving Foam Ink Marble Bauble
This technique comes from classroom paper marbling, where shaving foam acts as a thick, stable medium for food colouring or ink to float on before the pattern is pressed onto paper.
On a bauble it transfers differently from water marbling: the colours stay where you put them and give a bolder, more graphic swirl. Children can do most of this with adult preparation of the foam bed.
What You Need
- 1 plain white matte plastic bauble
- Shaving foam (not gel), half a can’s worth for a small tray
- Acrylic paint or food colouring in 2 to 3 colours
- 1 cocktail stick or skewer
- 1 shallow tray or baking dish large enough to hold the bauble
- A spatula or straight-edged card for scraping
How to Make It
- Spread a thick, even layer of shaving foam in the tray, about 3 cm deep. Drop small amounts of paint or food colouring across the surface in dots and lines.
- Drag the cocktail stick through the colours to swirl them into a marble pattern. As with water marbling, two or three strokes are usually enough.
- Press the bauble gently onto the foam surface and rotate it slightly so the pattern contacts the whole curve. Lift it out and hold it over the tray.
- Use the edge of the spatula or card to scrape the foam off the bauble in one smooth stroke. The marbled pattern stays on the surface beneath.
- Rinse the bauble very gently under slow running water to remove any remaining foam, then set on baking paper to dry for one hour.

🛍 Shopping guide
Cyanotype Sun Print Leaf Bauble
Cyanotype photography uses UV light to print silhouettes of objects placed on a light-sensitive surface, producing that distinctive Prussian blue with white outlines.
You can fake the aesthetic on a bauble using deep blue paint and a pressed leaf as a mask, and it reads instantly as that clean photographic botanical style. The leaf acts as a resist, exactly the way it would on cyanotype paper.
What You Need
- 1 plain white matte plastic bauble
- Prussian blue or deep cobalt acrylic paint, 1 small pot
- 1 pressed flat leaf (fern, oak or gingko work best, pressed flat for at least 24 hours under books)
- Masking tape, small pieces
- 1 flat brush, size 10
- Matte varnish for sealing
How to Make It
- Press the dried flat leaf against the bauble and hold it in place with two small pieces of masking tape at the stem. The leaf needs to lie as flat as possible against the curved surface; a flat fern frond or a ginkgo leaf with a thin profile works better than a thick holly leaf.
- Paint the Prussian blue acrylic over the entire bauble and over the leaf. Cover every part of the surface in one smooth, even coat and leave it to dry for 20 minutes.
- Apply a second coat and leave for another 20 minutes. Two coats give the deep, saturated blue that makes the silhouette readable.
- Once the second coat is dry, carefully peel the leaf away. The white bauble surface beneath it forms the leaf silhouette. Tape marks clean up with a barely damp cloth.
- Seal with matte varnish and leave for 30 minutes.

🛍 Shopping guide
Stained Glass Tissue Paper Bauble
Church stained glass works by letting light pass through coloured glass held in a dark lead matrix, and you can replicate that translucent glow on a bauble with coloured tissue paper and a coat of gloss varnish.
From the outside the effect looks like enamel; held up to a window it glows. It suits a tree positioned near natural light particularly well.
What You Need
- 1 plain white or very pale matte plastic bauble
- Coloured tissue paper in 3 to 5 colours, 1 sheet each
- PVA glue, 1 small bottle
- Black acrylic paint, 1 small pot
- 1 fine round brush, size 2
- 1 flat brush, size 10 for glue
- Gloss varnish or decoupage gloss, 1 small bottle
How to Make It
- Tear the tissue paper into irregular pieces roughly 2 to 3 cm across.
- Brush a section of the bauble with diluted PVA and press tissue pieces onto it, overlapping them and smoothing each piece flat. Where two colours overlap the tissue creates a third mixed colour, just like glass. Cover the whole bauble this way.
- Once the tissue is dry (about 30 minutes) and the surface feels crisp, use the fine brush and black acrylic to paint thin dividing lines between and around some of the tissue pieces, imitating the lead caming in real stained glass.
- Once the black lines are dry, apply two coats of gloss varnish over the whole surface with the flat brush, drying between coats. The gloss deepens the colour and gives the finished surface its characteristic glassy look.

🛍 Shopping guide
Broken Eggshell Mosaic Bauble
Mosaic artists embed broken tile or glass into grout for a surface made of fragments, and the same principle scales down to a bauble with broken eggshell and paint.
The result is a crackled, textured surface with a surprisingly refined look once it is painted in a single colour: the variation in the shell pieces catches the light at different angles and the whole thing glows in a way a smooth surface cannot.
What You Need
- 1 plain matte plastic bauble
- Shells from 3 to 4 eggs, cleaned and dried, broken into pieces roughly 1 cm across
- PVA glue, 1 small bottle
- Acrylic paint in one colour, 1 small pot
- 1 soft flat brush, size 10
- Fine grit sandpaper, 240 grit (optional, for any sharp edges)
How to Make It
- An adult should prepare the eggshell: wash the shells, let them dry completely for at least two hours, then break them into rough pieces about 1 cm across. Remove any thin membrane from inside the shell by soaking briefly in warm water and peeling it away.
- Brush a section of the bauble with PVA glue and press pieces of eggshell into it, curved side up, close together but not quite touching. Leave small gaps between pieces. Work in sections because PVA skins over quickly.
- Continue until the whole bauble is covered. Let it dry for two hours. If any shell pieces feel loose or sharp once dry, an adult can sand them gently.
- Paint the whole covered surface in one coat of acrylic paint, pressing the brush into the gaps between shell pieces. The paint fills the cracks and unifies the patchwork. Two coats give a solid finish.
- Leave to cure for one hour.

🛍 Shopping guide
Brittle Top Coat Batik Crackle Bauble
Batik crackle happens when you crumple a piece of waxed fabric before dyeing: the wax cracks along the fold lines and dye seeps in, leaving that characteristic spiderweb of fine dark lines.
You can replicate the look on a bauble by painting it in a flexible base colour and then coating it in a layer of clear nail polish, which dries brittle and splits as the bauble surface flexes slightly with handling.
The crack lines fill with a second colour applied in a wash.
What You Need
- 1 plain matte plastic bauble
- Pale acrylic paint (base), 1 small pot
- Clear nail polish, 1 bottle
- Dark acrylic paint thinned to a wash (the crackle fill colour), 1 small pot
- 1 medium flat brush, size 8
- 1 fine round brush, size 2
How to Make It
- Paint the bauble entirely in pale acrylic. Two coats, dried between, give an opaque base.
- Open a window. Apply two coats of clear nail polish over the whole bauble, drying for 30 minutes between coats. The nail polish layer needs to be thicker than a single coat to crack well.
- Leave the nail polish to cure for one hour. Fine cracks will begin to appear as the brittle lacquer reacts to any slight flex in the plastic underneath.
- Mix a small amount of dark acrylic with enough water to make a very thin wash. Brush it over the whole crackled surface. The wash seeps into the cracks and pools there, making them visible as dark lines.
- Wipe the surface gently with a barely damp cloth to remove the wash from the flat surfaces, leaving the colour only in the cracks. Leave to dry for 30 minutes.

🛍 Shopping guide
Airbrushed Two-Tone Ceramic Gradient Bauble
Studio ceramics are often glazed in two tones applied with a spray gun, the colours blending in the middle into a soft third zone that is the most beautiful part of the piece.
You can fake an airbrush with a piece of sponge and careful feathering at the boundary, and the result on a bauble is a gradient clean enough to look machine-made.
This is the most satisfying thing you can do with two colours and five minutes of actual work.
What You Need
- 1 plain matte plastic bauble
- Acrylic paint in 2 colours, 1 small pot each (choose colours that blend well: navy and teal, or blush and terracotta)
- 2 small sea sponges or 2 pieces of kitchen sponge torn to roughly 4 cm squares
- A plate for loading paint
- Matte varnish, 1 small bottle
How to Make It
- Apply the first colour to the upper half of the bauble using a sponge in stippling movements, dabbing gently rather than wiping. Stop halfway down and let the colour taper out rather than stop with a hard line.
- Before the first colour dries, apply the second colour to the lower half from the bottom upward, again tapering out where it meets the first colour in the middle zone.
- Use a clean sponge or your finger to blend the meeting point of the two colours with very light, quick stippling until the hard edge dissolves into a soft gradient. Work fast; once both colours start to dry they will not blend.
- Leave the bauble to dry for 30 minutes and then apply a coat of matte varnish to even out the sponge texture.

🛍 Shopping guide
Gilded Edge Book-Style Bauble
The pages of luxury books and Bibles are gilded at the edges so the closed book glows like a solid block of gold.
On a bauble the same treatment along the equator and the top cap turns a plain sphere into something that looks like a very good piece of stationery design. Gold ink applied with a fine brush along a masked-off band gives the sharpest edge.
What You Need
- 1 plain matte plastic bauble in deep green, navy or burgundy
- Gold ink or gold acrylic paint, 1 small pot or bottle
- Masking tape, 1 roll
- 1 fine round brush, size 2
- Matte varnish for sealing
How to Make It
- Lay two strips of masking tape around the widest equator of the bauble, parallel to each other with a gap of about 6 mm between them. Press the tape edges down firmly so no paint can bleed underneath.
- Paint gold ink or paint carefully into the exposed band between the tape strips, keeping the brush strokes in line with the band and not across it. Two thin coats give a more solid gold line than one thick one.
- Peel the tape away while the gold is still slightly wet for the cleanest possible edge. Dried gold paint sometimes lifts with the tape.
- Paint a second thin gold band around the base of the cap fitting at the top of the bauble using the fine brush freehand. This does not need tape; a small circle just requires a steady hand and a couple of practice strokes on paper first.
- Seal with matte varnish and leave to dry for 30 minutes.

🛍 Shopping guide
Friendship Bracelet Thread Wrap Bauble
Friendship bracelets are made by wrapping embroidery thread in a repeating diagonal pattern around a core, and the same knotting logic wraps a bauble in a dense, woven surface with no glue required. The thread cap holds everything in tension once the wrapping is finished.
This is meditative to make and produces a textile-look bauble that belongs on a maximalist tree or in a bowl with other texture-heavy pieces.
What You Need
- 1 plain matte plastic bauble
- Embroidery thread in 3 to 5 colours, 1 skein each (approximately 8 metres per colour)
- Craft glue or a small piece of masking tape to secure the thread start
- Scissors
How to Make It
- Secure the end of the first thread colour at the top of the bauble just below the cap, using a tiny dot of craft glue or a small piece of masking tape folded over the thread end.
- Wrap the thread tightly around the bauble in close, parallel rows, working downward from the cap. Keep each row tight against the previous one so no bauble surface shows between them. An adult should help keep tension consistent at the start.
- To change colour, cut the first thread and tuck the end under two or three of the previous wraps with a blunt needle or toothpick. Start the new colour the same way.
- Continue wrapping and changing colours until the whole bauble is covered. At the bottom, tuck the final thread end under the last few wraps to secure it without a knot.

Limed Whitewash Distressed Bauble
Liming is the furniture technique of rubbing white wax or diluted white paint into the grain of bare wood so the white sits in the texture and the natural colour shows on the raised surface.
On a bauble that has been given a textured base coat, the same dragging and wiping technique produces a bleached, driftwood look that is quietly beautiful in a natural or coastal-style scheme.
What You Need
- 1 plain matte plastic bauble
- Coarse-grain texture paste or sand mixed into PVA glue, enough to coat the bauble
- White acrylic paint, 1 small pot
- Raw sienna or grey-brown acrylic paint, 1 small pot
- 1 medium flat brush, size 8
- A dry cloth for wiping
How to Make It
- Apply a thin coat of texture paste, or PVA mixed with fine sand, over the whole bauble surface. Leave to dry for one hour. The surface should feel slightly rough and porous, not smooth.
- Apply a base coat of the raw sienna or grey-brown paint over the texture. Let it dry for 20 minutes.
- Dip the flat brush into white paint, then wipe most of it off on the cloth until the brush is nearly dry. Drag the brush across the textured surface in long, straight strokes. The white paint catches on the peaks of the texture and leaves the dark colour sitting in the lower areas.
- Build up the white in three or four dry-brush passes until you reach a balance you like: more white dragging gives a more bleached look, less gives a darker, less weathered result.
- Leave to dry for 30 minutes. No varnish needed; the matte, chalky surface is the whole point.

🛍 Shopping guide
Frequently Asked Questions
What can I do with plain Christmas baubles?
Plain matte baubles are the ideal base for techniques borrowed from other crafts: water marbling with nail varnish, suminagashi ink floating, crackle glazing with crackle medium, sgraffito scratching through layered paint, foil transfer, alcohol ink bleeding, decoupage with tea-stained sheet music, and many more.
The matte surface grips paint, ink and adhesive better than a shiny factory finish, which is exactly why they are the better starting material.
How do you decorate plastic baubles so the paint sticks?
Start with a matte-finish bauble rather than a shiny one: the matte surface is slightly porous and gives paint something to grip. If your baubles are shiny, a very light sanding with 400 grit sandpaper dulls the surface enough to help adhesion.
Use acrylic paint rather than oil-based for most techniques, and avoid thick single coats: two or three thin coats adhere better and are less likely to peel. A coat of matte varnish after painting seals everything and protects it during storage.
How do you marble a bauble at home?
There are two main approaches. The first uses nail varnish floated on water: drop colours in rings on the water surface, drag a cocktail stick through them, then dip the bauble through the floating film and lift it out slowly.
The second uses shaving foam as a medium: spread foam in a tray, drop acrylic paint colours onto it, swirl lightly, press the bauble into the foam and then scrape the foam away to reveal the pattern beneath.
Both methods take under 20 minutes of active time and need no special equipment.
What Christmas baubles ideas work without glitter?
The strongest glitter-free options include: suminagashi ink marbling (concentric rings lifted from water), alcohol ink bleeding (fluid cell patterns in jewel colours), sgraffito scratching (incised line patterns through layered paint), the foil transfer technique (mirror-bright sections of metallic foil), the verdigris aged copper finish, the stained glass tissue paper bauble, and the woven embroidery thread wrap.
All of these create surfaces that read as interesting and considered rather than simply sparkly.
25 Christmas paper crafts for mantels, windows, trees and gift wrap, with full materials, timings an
22 green Christmas decor ideas for every room, in sage, olive and jewel emerald with brushed pewter
15 gentle preschool Christmas party games for toddlers — no reading, under 10 min, safe & silly fu
Leave a Reply