

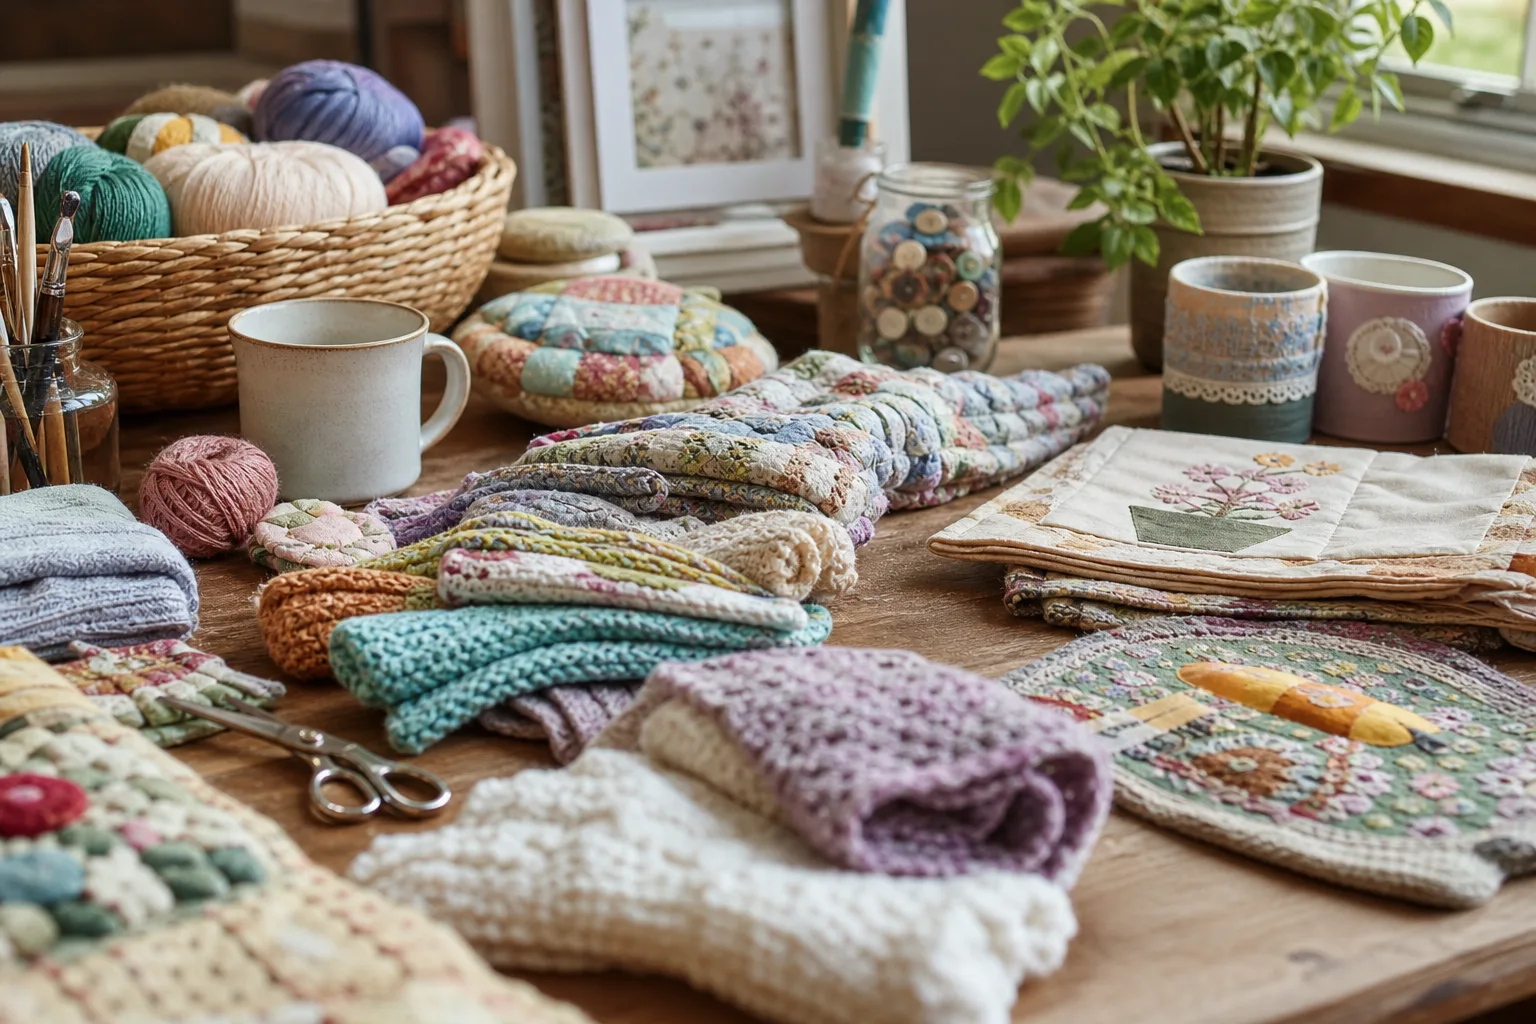
A grandchild does not want another candle from a catalogue, and everyone involved already knows it. What lands, every single time, is something made by an actual hand: a towel with a small palm print on it, a jar of handwritten memories, a mug with her own name looped across it in marker. None of it needs a workshop, a sewing machine, or a trip to three different shops.
Every craft below uses 4 to 6 things you can buy in one aisle, takes three real steps, and comes with its own printable card for the fridge. Keep the glue gun or the oven as the only job for someone else in the room, and the rest is just time at a table. Pair the afternoon with 18 Games for Seniors That Are Social, Not Patronising and the whole visit more or less runs itself.
This post contains affiliate links. If you buy through them, I may earn a small commission at no extra cost to you.
- Handprint Tea Towel
- Painted Rock with a Message
- Recipe Card in Their Handwriting, Framed
- Fabric Bookmark
- Decorated Photo Frame
- Button Art Initial
- Painted Wooden Spoon
- Knitted Pom Pom Garland
- Pressed Flower Card
- Story Jar with Written Memories
- Painted Mug with Markers
- Felt Ornament with a Name
- Hand-Painted Terracotta Herb Pot
- Thumbprint Family Tree Print
- Decoupage Memory Keepsake Box
- Hand-Stamped Clay Name Coaster
- Finger-Knit Scarf
- Painted Wooden Disc Wind Chime
- Photo Transfer Wood Slice Coaster
- Painted Wooden Birdhouse
- Handprint Clay Trinket Dish
- Hand-Lettered Recipe Apron
- Handprint Garden Stepping Stone
- Painted Canvas Tote with a Name
- Frequently Asked Questions
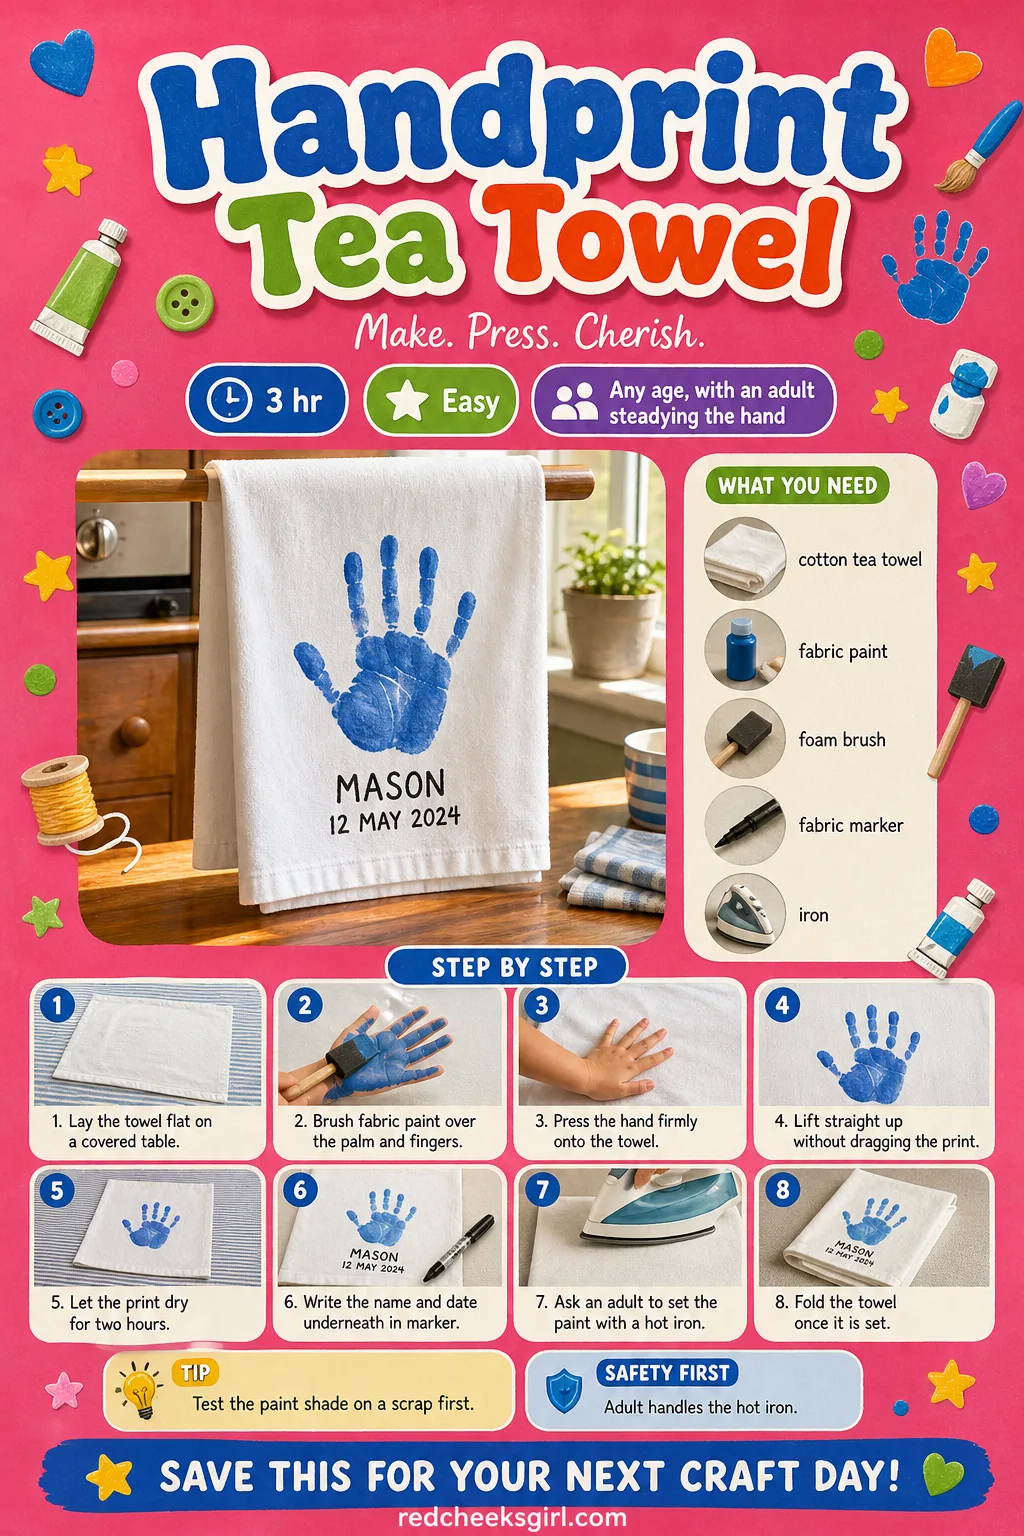
Handprint Tea Towel
A tea towel with a small handprint on it earns its keep twice over: it actually dries dishes, and it turns into the thing nobody can throw away once that hand has grown three sizes bigger. Hang it over the oven rail and it does its job in plain sight, not tucked in a drawer.
Fabric paint forgives a wobbly print far better than a straight line ever would, so there is no version of this that looks wrong once a name and date go underneath.
What You Need
- 1 plain cotton tea towel, washed and dried
- Fabric paint, 1 small pot
- 1 foam brush, 5 cm wide
- Fine black fabric marker
- Iron, for setting the paint
How to Make It
- Lay the towel flat on a covered table and brush an even coat of fabric paint over the palm and fingers.
- Press the hand firmly onto the towel, lift it straight up without dragging, then let the print dry for at least two hours.
- Write the name and date underneath in fabric marker, and once everything is dry, an adult sets the paint with a hot iron through a cloth before folding the towel to give.
🛍 Shopping guide
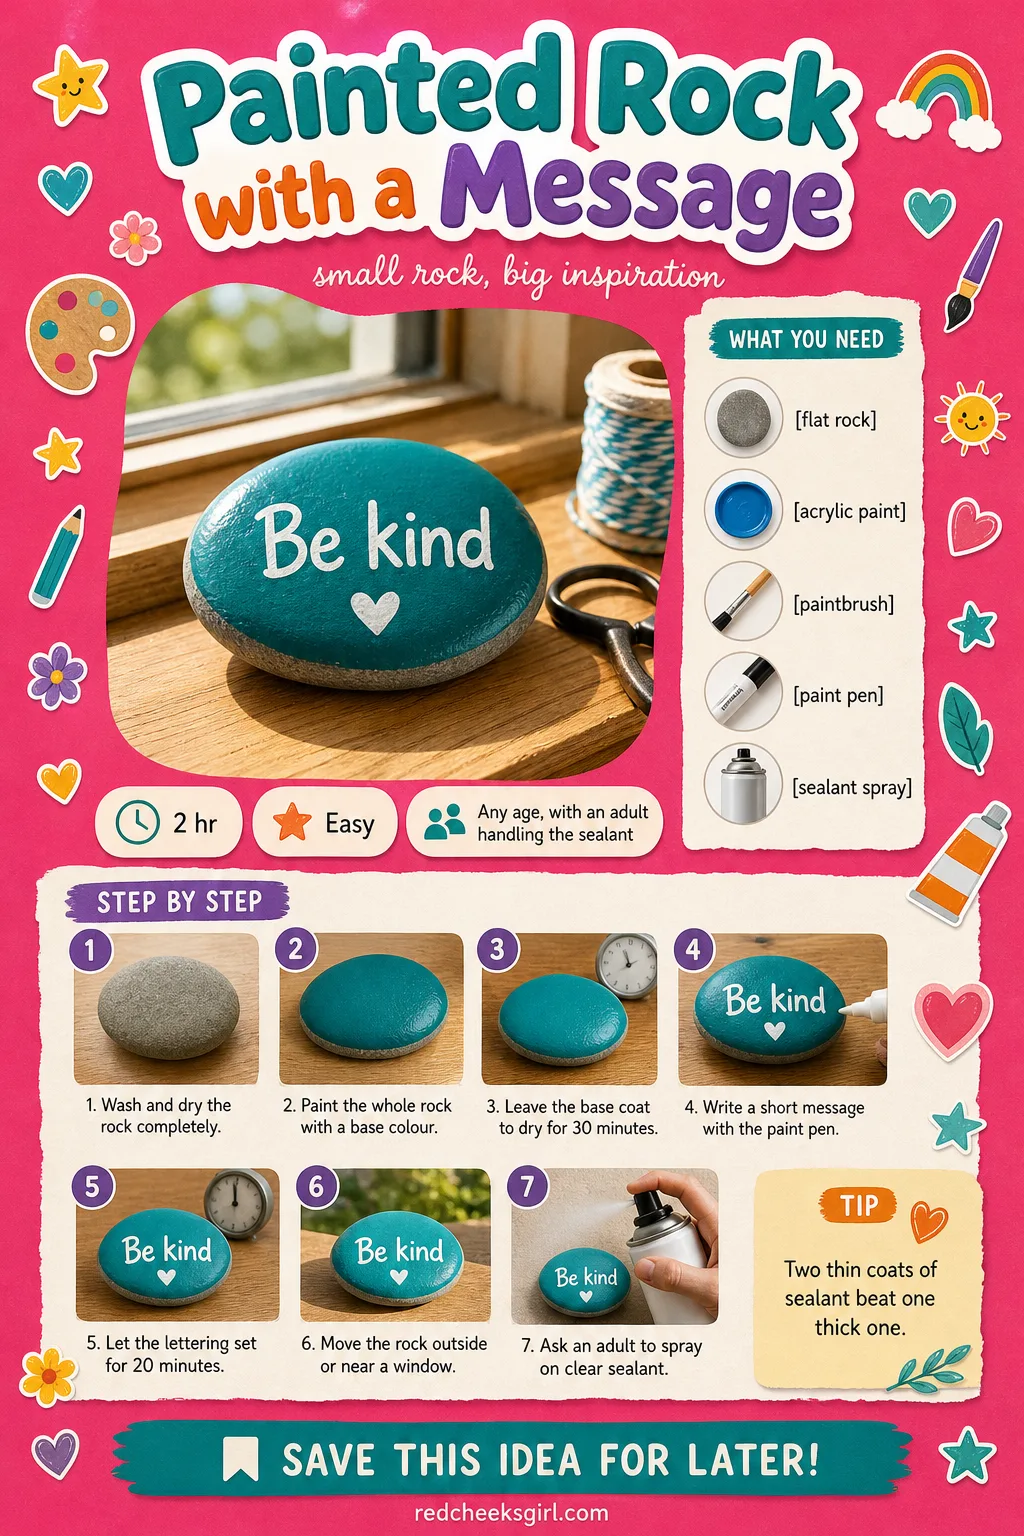
Painted Rock with a Message
A rock does not ask to be good at painting. One coat of colour, one line of a message, and it already looks finished, which makes this the craft for anyone who insists she cannot draw.
Set it on a windowsill or tuck it into a grandchild’s school bag, and the stone just sits there being solid and permanent in a way paper never quite manages.
What You Need
- 1 smooth flat rock, about palm sized
- Acrylic paint, 2 colours
- 1 small round paintbrush
- Fine paint pen, white or black
- Clear outdoor sealant spray
How to Make It
- Wash and dry the rock completely, then paint the whole surface with a base colour and leave it to dry for 30 minutes.
- Use the paint pen to write a short message or name across the dry base coat, and let the lettering set for 20 minutes.
- Once fully dry, an adult sprays on a light coat of outdoor sealant in a ventilated spot so the message survives rain or handling.
🛍 Shopping guide
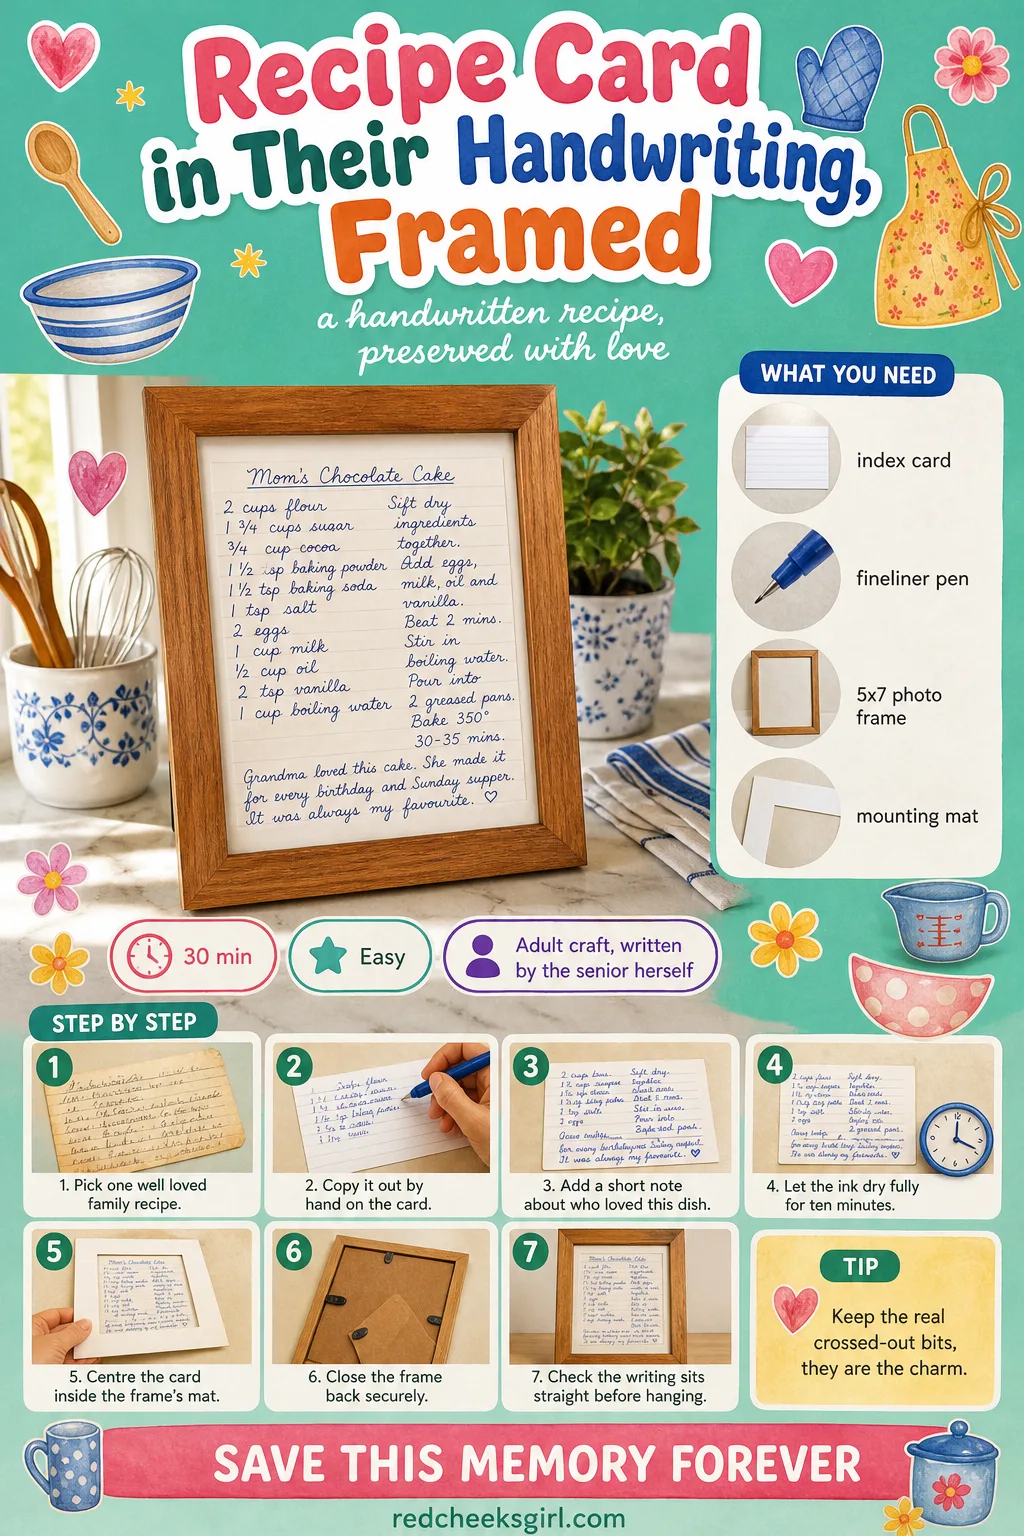
Recipe Card in Their Handwriting, Framed
Nobody wants a printed font standing in for her actual handwriting, loops and all, on the card that taught half the family to cook. This keeps the handwriting exactly as it is, crossed-out ingredient included, safely behind glass instead of in a recipe box collecting gravy stains.
It costs almost nothing if a frame is already sitting in a drawer, and it goes straight onto the kitchen wall rather than back into storage.
What You Need
- 1 index card or piece of cardstock, 4×6 inch
- Fountain pen or fine fineliner
- 1 photo frame, 5×7 inch
- Mounting mat or extra card for backing
How to Make It
- Choose one well-loved recipe and copy it out by hand on the card, keeping the natural handwriting rather than a careful ‘best’ version.
- Add a small note at the bottom, such as who used to ask for this dish most, and leave the ink to dry fully for 10 minutes.
- Centre the card in the frame against the mounting mat and close the back, checking the writing sits straight before hanging it.
🛍 Shopping guide
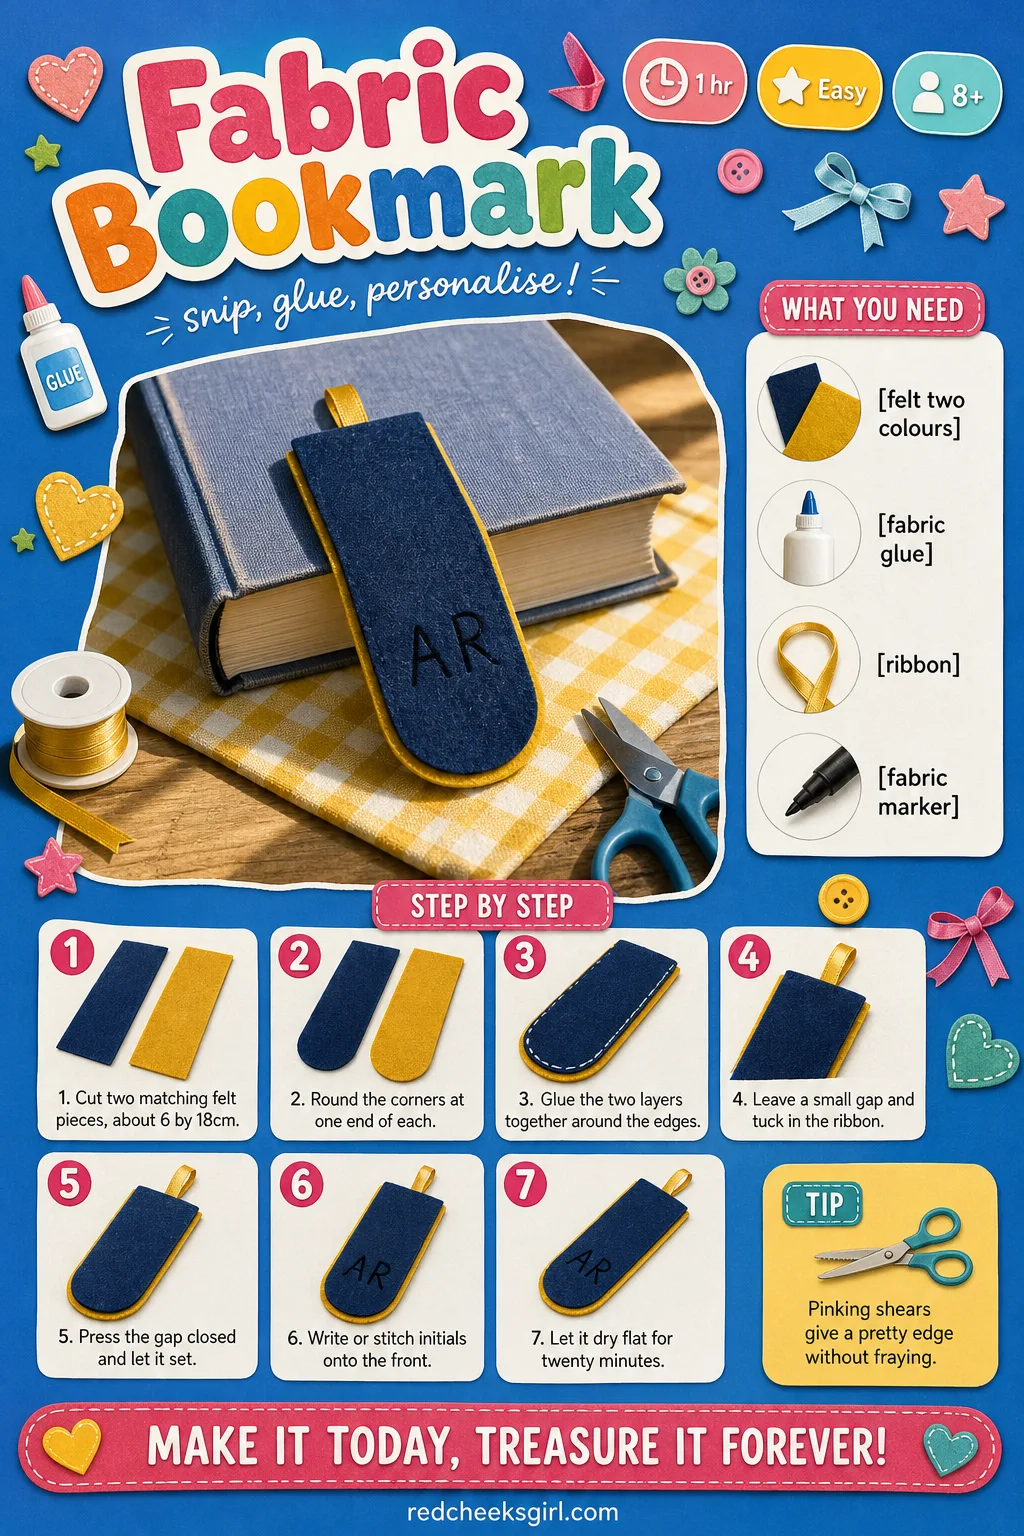
Fabric Bookmark
A bookmark gets picked up every single evening, which makes it one of the few gifts that actually gets used rather than displayed. Felt holds its shape without fraying at the edges, so there is no hemming and no machine to wrestle with.
It works just as well cut from an old wool jumper if felt is not to hand, and it fits in an envelope for anyone who lives too far away to visit.
What You Need
- Felt, 2 colours, one 10×20 cm piece each
- Fabric glue, 1 small bottle
- Ribbon, 15 cm length
- Fabric marker or embroidery thread for initials
How to Make It
- Cut both felt pieces into matching bookmark shapes, roughly 6 by 18 cm, with rounded corners at one end.
- Glue the two layers together around the edges, leaving a small gap at the top, and tuck the ribbon into that gap before pressing it closed.
- Once the glue has set for 30 minutes, write or stitch initials onto the front, then let it dry flat for a further 20 minutes before using it.
🛍 Shopping guide
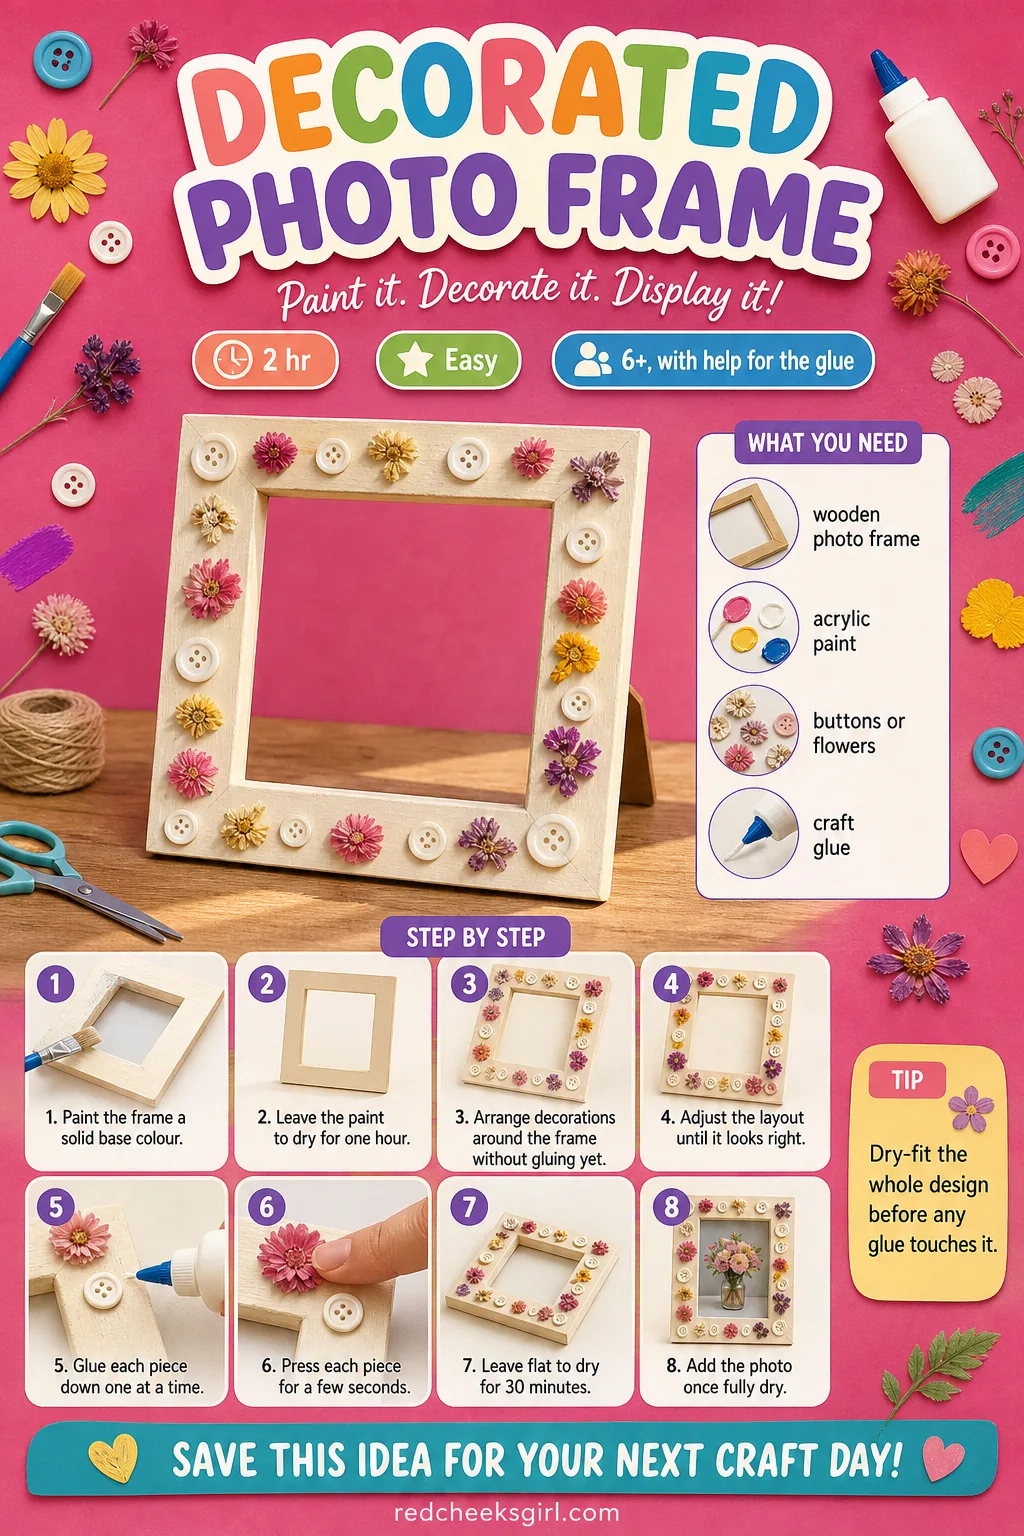
Decorated Photo Frame
A frame from a shop says nothing. One decorated by hand says this particular grandchild sat still long enough for a photo and somebody thought that was worth marking.
Plain wooden frames take almost anything glued to them, so this works equally well with pressed flowers, buttons or a strip of ribbon if paint feels like too much commitment.
What You Need
- 1 plain wooden photo frame, 4×6 inch opening
- Acrylic paint, 1 or 2 colours
- Small decorations: buttons, ribbon offcuts or dried flowers
- Craft glue, 1 small bottle
How to Make It
- Paint the frame a solid base colour and leave it to dry for an hour before touching it again.
- Arrange the buttons, ribbon or flowers around the frame before gluing anything down, so the layout can still change its mind.
- Glue each piece in place one at a time, pressing for a few seconds, then leave the finished frame flat to dry for 30 minutes before adding the photo.
🛍 Shopping guide
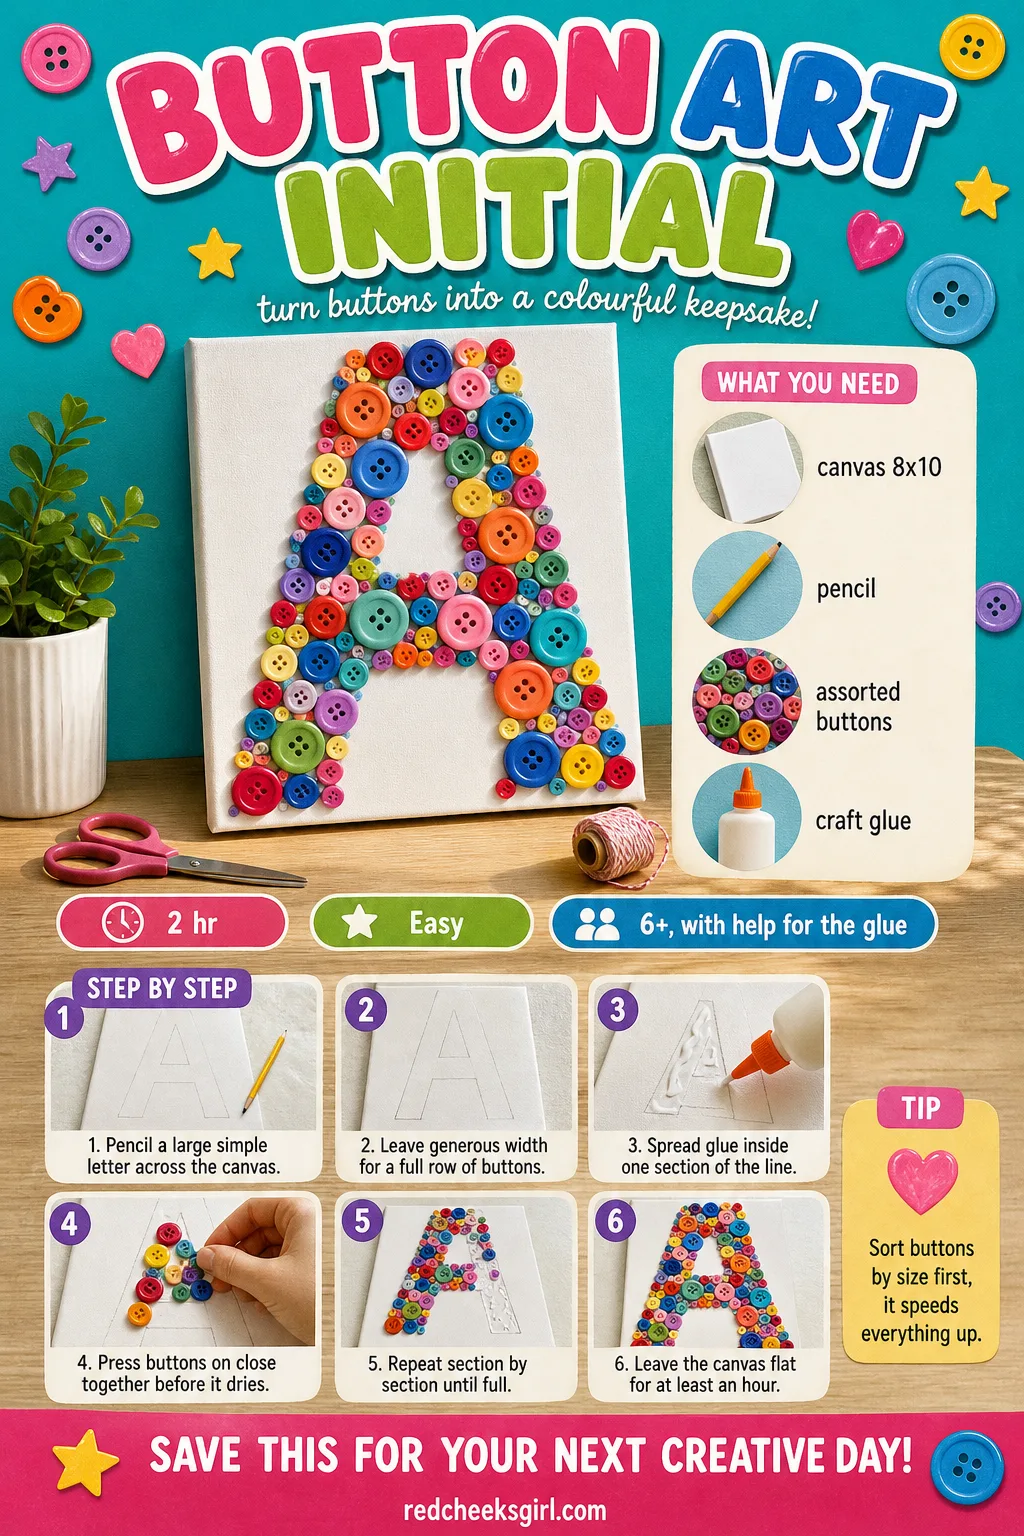
Button Art Initial
A single letter picked out in mismatched buttons looks deliberate rather than messy the moment it goes on canvas, and it uses up exactly the kind of button jar that has been sitting in a sewing basket for years with no other purpose.
Choose the grandchild’s first initial rather than a full name, since one letter is far easier to fill evenly and still reads clearly from across the room.
What You Need
- 1 small canvas, 8×10 inch
- Pencil, for drawing the initial
- Assorted buttons, about 40 to 60, mixed sizes
- Craft glue, 1 small bottle
How to Make It
- Pencil a large, simple letter across the canvas, leaving generous width so there is room for a full row of buttons.
- Working in sections, spread a thin layer of glue inside the pencil line and press buttons on close together before it dries.
- Fill the whole letter this way, then leave the canvas flat for at least an hour so every button sets before it hangs.
🛍 Shopping guide
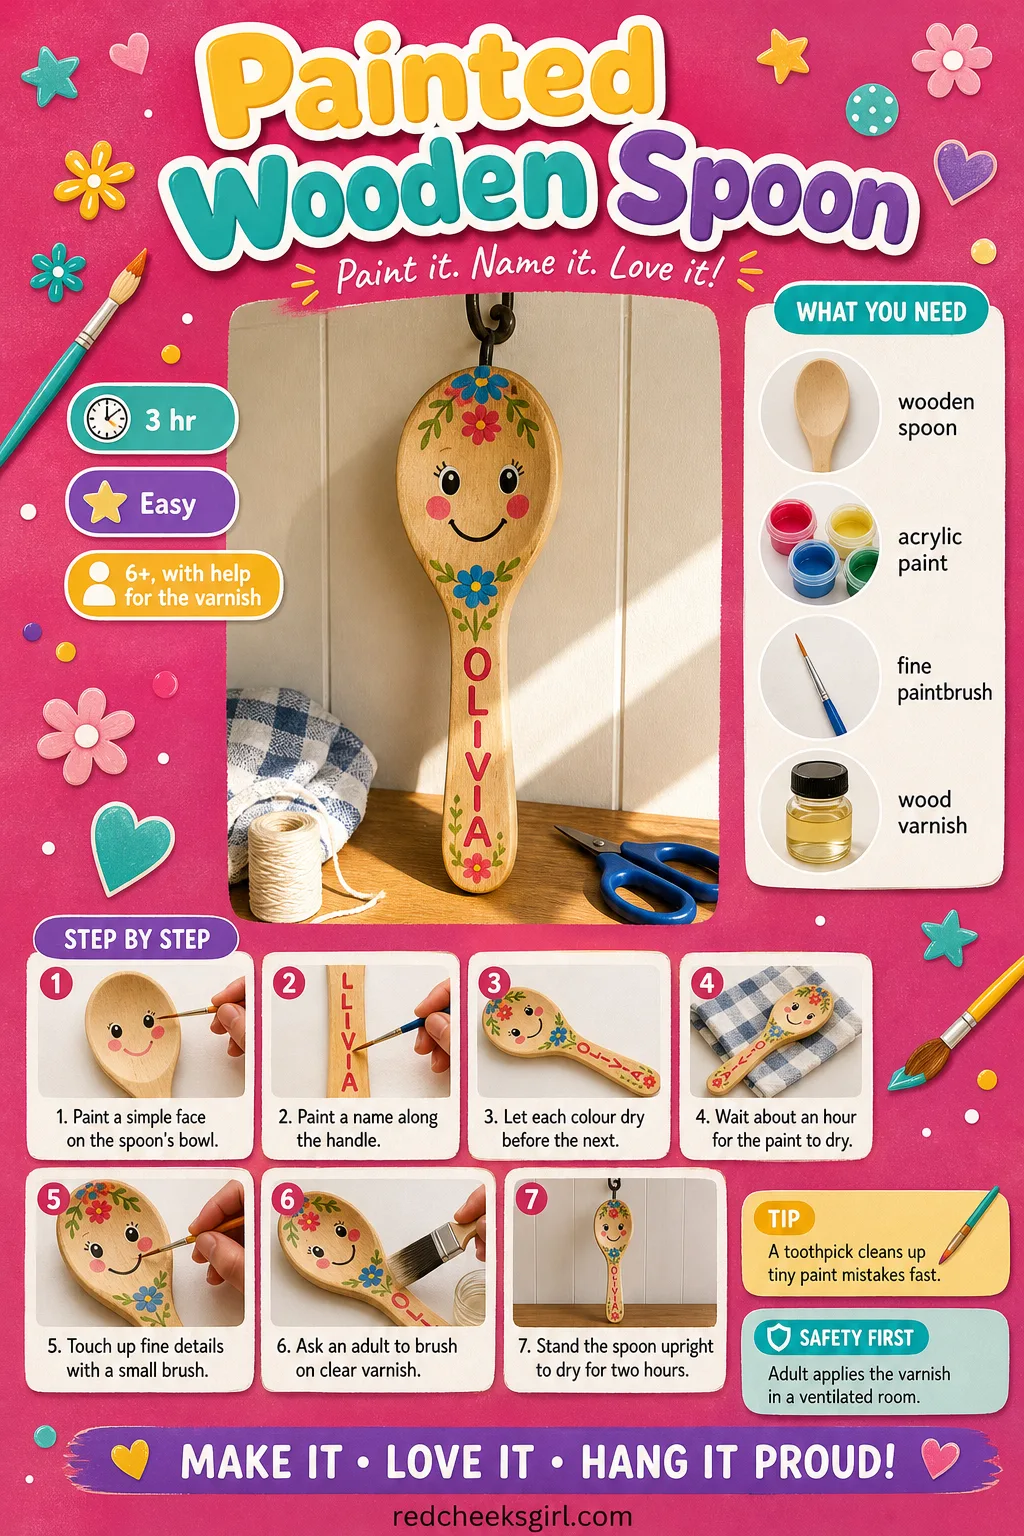
Painted Wooden Spoon
A wooden spoon with a painted face and a name on the handle turns into the one utensil nobody is allowed to actually stir soup with, which is sort of the point. It hangs from a hook rather than living in a drawer, doing its job as decoration instead.
It works equally well as a pretend microphone for a toddler or a kitchen wall piece for a grandchild who has just moved into their own place.
What You Need
- 1 large wooden spoon, plain and unvarnished
- Acrylic paint, 2 to 3 colours
- 1 fine paintbrush
- Clear wood varnish, 1 small bottle
How to Make It
- Paint a simple face on the bowl of the spoon and a name along the handle, letting each colour dry before adding the next.
- Once the paint is fully dry, about an hour, go over any fine details with a small brush for a cleaner line.
- An adult brushes on a thin coat of clear varnish to protect the paint, then stands the spoon upright to dry for about two hours.
🛍 Shopping guide
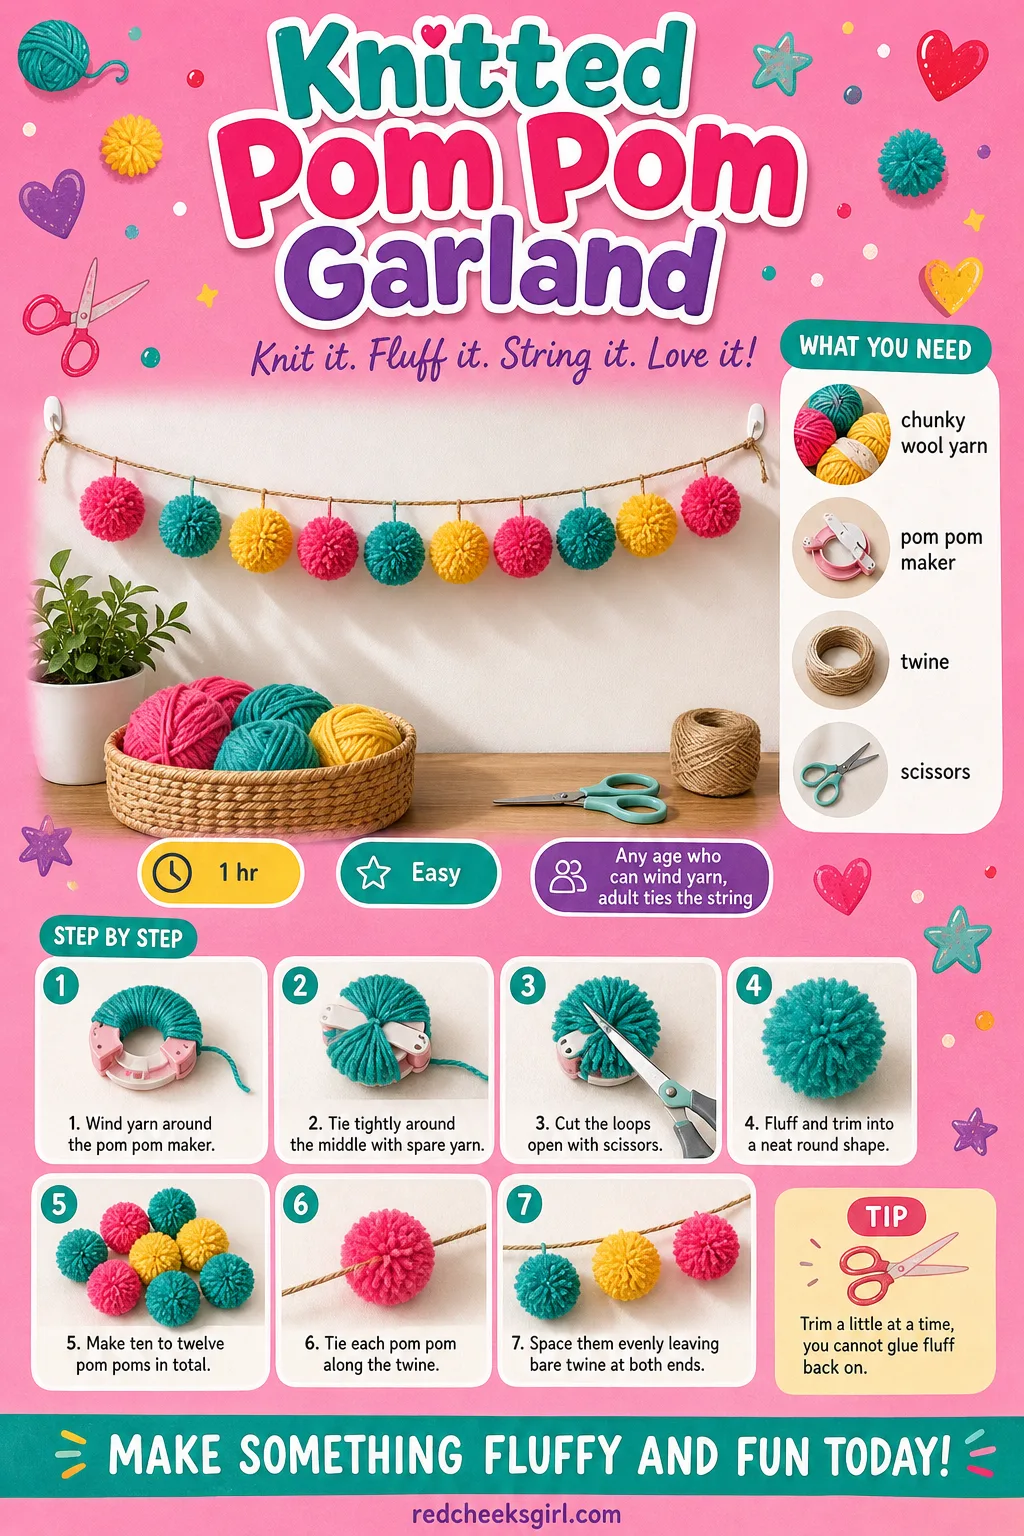
Knitted Pom Pom Garland
Nobody needs to actually knit for this, despite the name everyone uses for it. A garland of fat wool pom poms strung along a length of twine turns a bare wall or a bedhead into something soft to look at, and it comes down again in seconds when the theme changes.
If winding pom poms by hand feels too slow, a plastic pom pom maker speeds the whole thing up without changing the finished look at all.
What You Need
- Chunky wool yarn, 3 colours, 1 small ball each
- Pom pom maker or a sheet of stiff card
- Twine or yarn for stringing, 2 metres
- Scissors
How to Make It
- Wind yarn around the pom pom maker or card until it feels thick and full, then tie tightly around the middle and cut the loops open.
- Fluff and trim each pom pom into a neat round shape, making about 10 to 12 in total across the three colours.
- Tie the pom poms along the length of twine at even spacing, leaving bare twine at each end for hanging.
🛍 Shopping guide
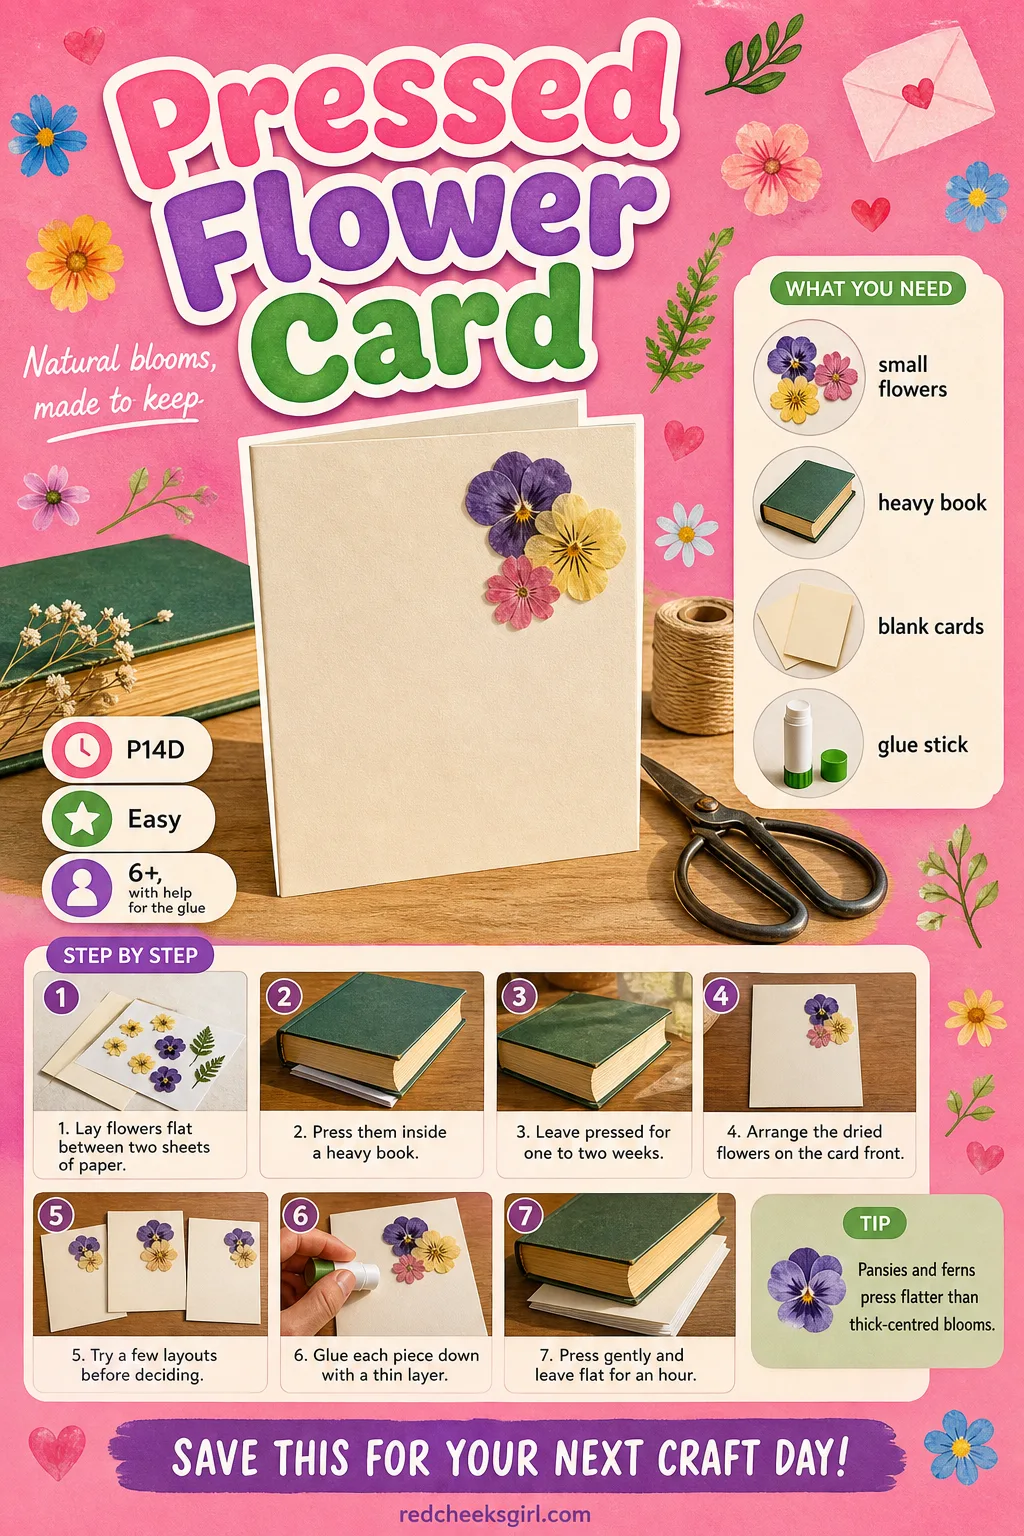
Pressed Flower Card
A pressed flower looks like patience, which is exactly what it is, and that is half the gift. One flattened bloom glued to the front of a plain card reads as considered rather than last minute, even on a Tuesday with nothing special to celebrate.
Garden flowers work, so do ones pulled from a bunch about to be thrown out, and a heavy book does the pressing with nothing extra to buy.
What You Need
- 2 to 3 small flowers or leaves
- A heavy book, for pressing
- Blank folded cards, 1 per gift
- Craft glue or a glue stick
How to Make It
- Lay the flowers flat between two sheets of paper inside a heavy book and leave them pressed for one to two weeks until papery and flat.
- Arrange the dried flowers on the front of the card, trying a few layouts before deciding on one.
- Glue each piece down with a thin layer of glue stick or craft glue, pressing gently, then leave the card flat for an hour before closing it.
🛍 Shopping guide
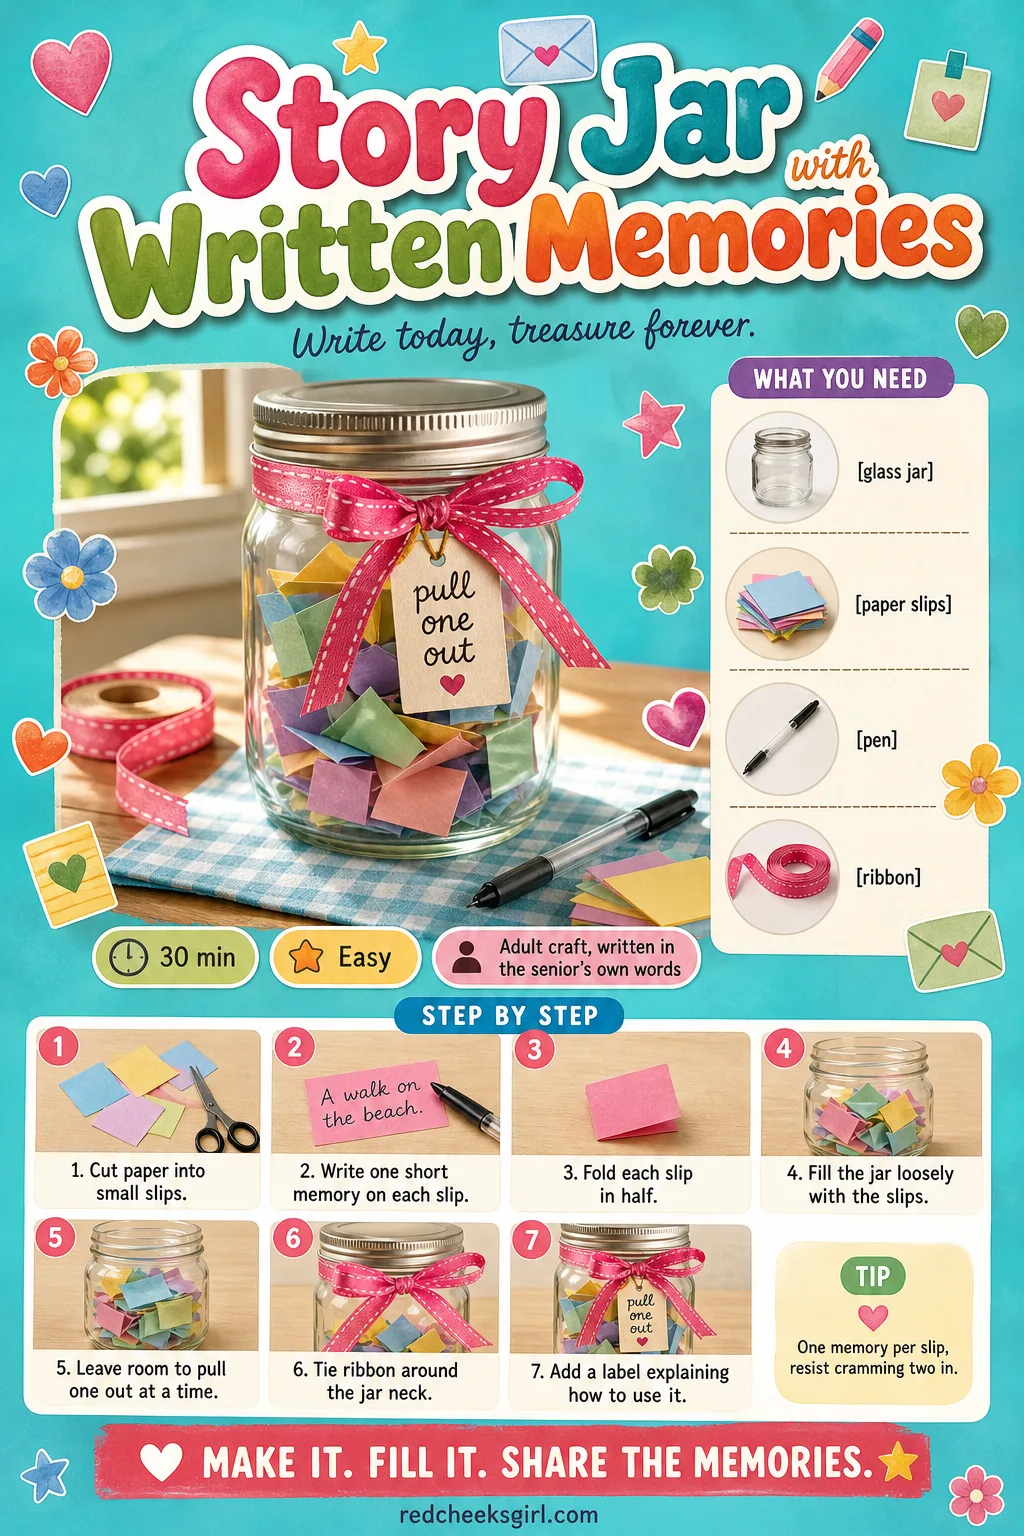
Story Jar with Written Memories
A jar full of small folded memories gets opened one slip at a time for years rather than all at once in front of everybody, which suits anyone who finds a direct ‘I love you’ a bit much to say out loud.
Keep it on a bedside table or a shelf, and pull one paper out whenever there is time for a story. Pair a visit around it with 20 Memory and Trivia Games for Seniors for an afternoon that runs on its own.
What You Need
- 1 clean glass jar with a lid
- Small paper slips, about 20, cut to 5×10 cm
- Pen
- Ribbon or twine, for the jar neck
How to Make It
- Write one short memory, piece of advice or funny story on each paper slip, folding it in half once it is done.
- Fill the jar loosely with the folded slips so there is room to pull one out without emptying the rest.
- Tie a ribbon around the jar neck and add a label explaining the slips are for pulling out one at a time, not all at once.
🛍 Shopping guide
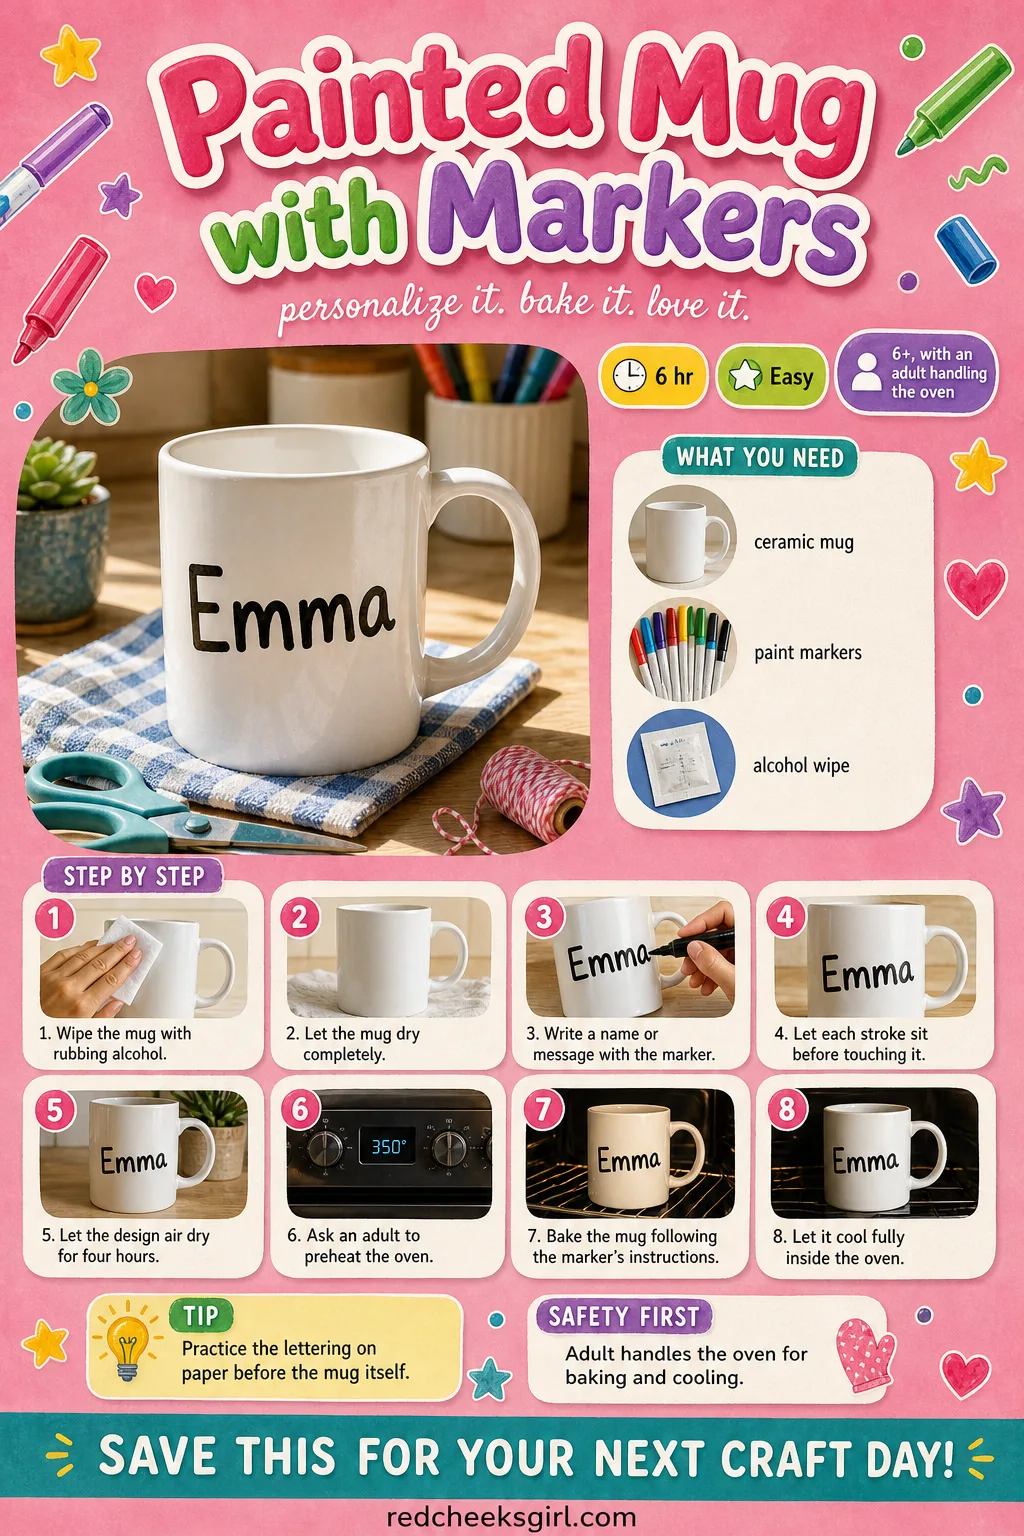
Painted Mug with Markers
A plain mug says nothing until somebody writes on it in the specific, slightly uneven handwriting that only exists on this particular morning. It then becomes the mug that gets reached for before all the others, every day, no occasion required.
Porcelain paint markers write like a normal pen but bake permanent, so this skips the fiddly glaze-and-kiln route and still survives the dishwasher.
What You Need
- 1 plain ceramic mug, clean and dry
- Porcelain paint markers, 1 to 2 colours
- Rubbing alcohol wipe, for the surface
How to Make It
- Wipe the mug all over with rubbing alcohol to remove any grease, then let it dry completely before drawing anything.
- Write a name, date or short message with the marker, letting each stroke sit for a few seconds before touching it again.
- Let the design air dry for about 4 hours, then an adult bakes the mug following the marker’s instructions and lets it cool completely inside the oven before handling.
🛍 Shopping guide
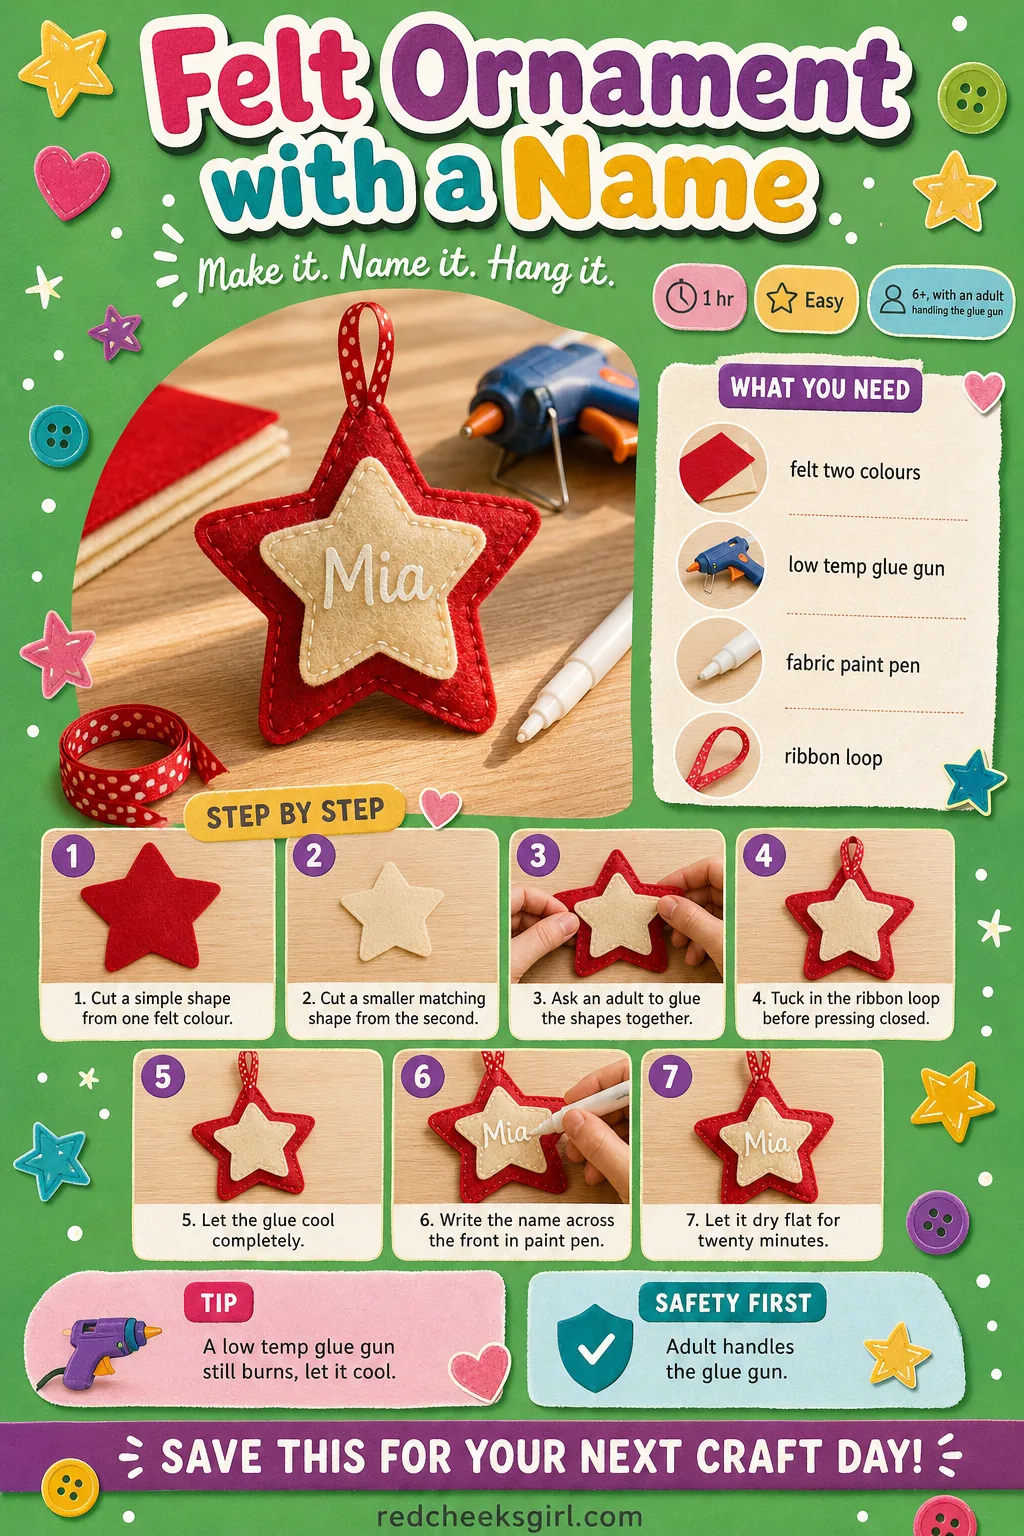
Felt Ornament with a Name
A felt shape with a name glued across it earns a permanent spot on the tree, pulled out and hung first every year after this one. It is small enough to post, light enough that nothing about shipping it feels risky.
Make a batch while the family is visiting over the holidays and tie it in with 15 Christmas Party Games for Seniors That Spark Memories for an afternoon that covers both.
What You Need
- Felt, 2 colours, 1 small sheet each
- Low-temperature glue gun
- Fabric paint pen, for the name
- Ribbon loop, 10 cm, for hanging
How to Make It
- Cut a simple shape, such as a star or a stocking, from one felt colour and a slightly smaller matching shape from the second.
- An adult glues the smaller shape onto the larger one with the glue gun, tucking the ribbon loop into the top seam before pressing it closed.
- Once the glue has cooled fully, write the name across the front in fabric paint pen and let it dry flat for 20 minutes.
🛍 Shopping guide
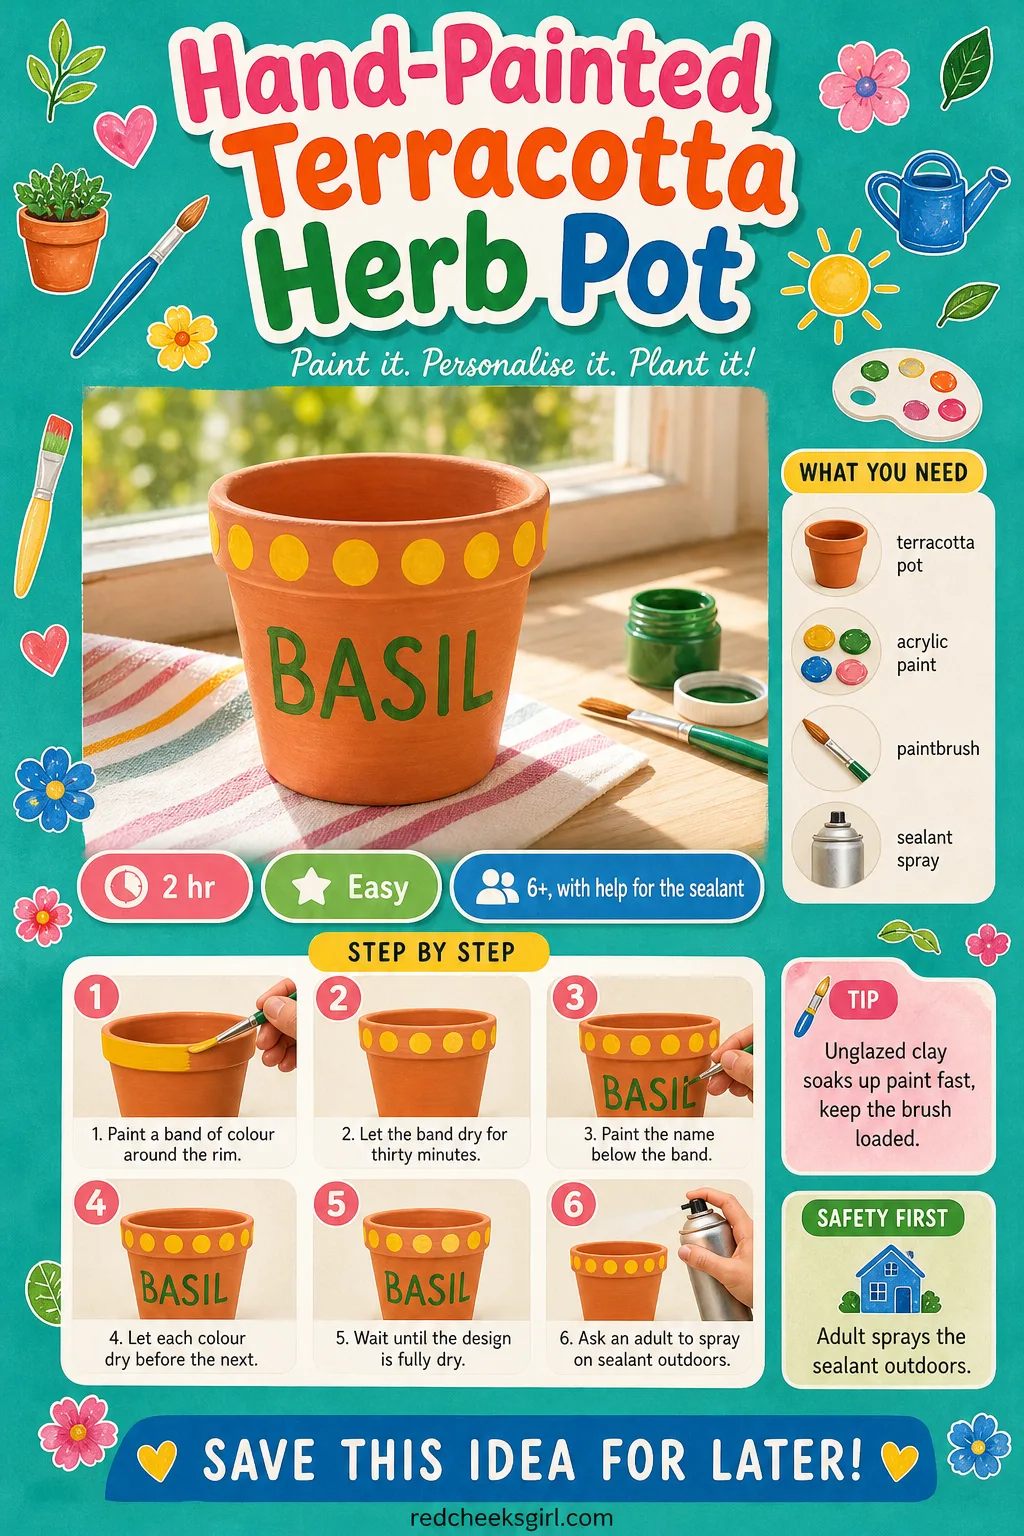
Hand-Painted Terracotta Herb Pot
A bare terracotta pot looks like a trip to the garden centre. Painted with a name and left on a windowsill, it looks like somebody thought about the grandchild’s new kitchen specifically, basil or no basil inside it.
Unglazed pots take acrylic paint without any primer, so there is genuinely nothing to buy beyond the pot and the paint already on the shelf.
What You Need
- 1 unglazed terracotta pot, 10 to 12 cm
- Acrylic paint, 2 colours
- 1 small paintbrush
- Clear acrylic sealant spray
How to Make It
- Paint a band of colour around the rim and let it dry for 30 minutes before adding any detail over it.
- Paint the name or a small pattern below the band, letting each colour dry before the next goes on.
- Once fully dry, an adult seals the pot outdoors with a light spray coat so the colour survives watering.
🛍 Shopping guide
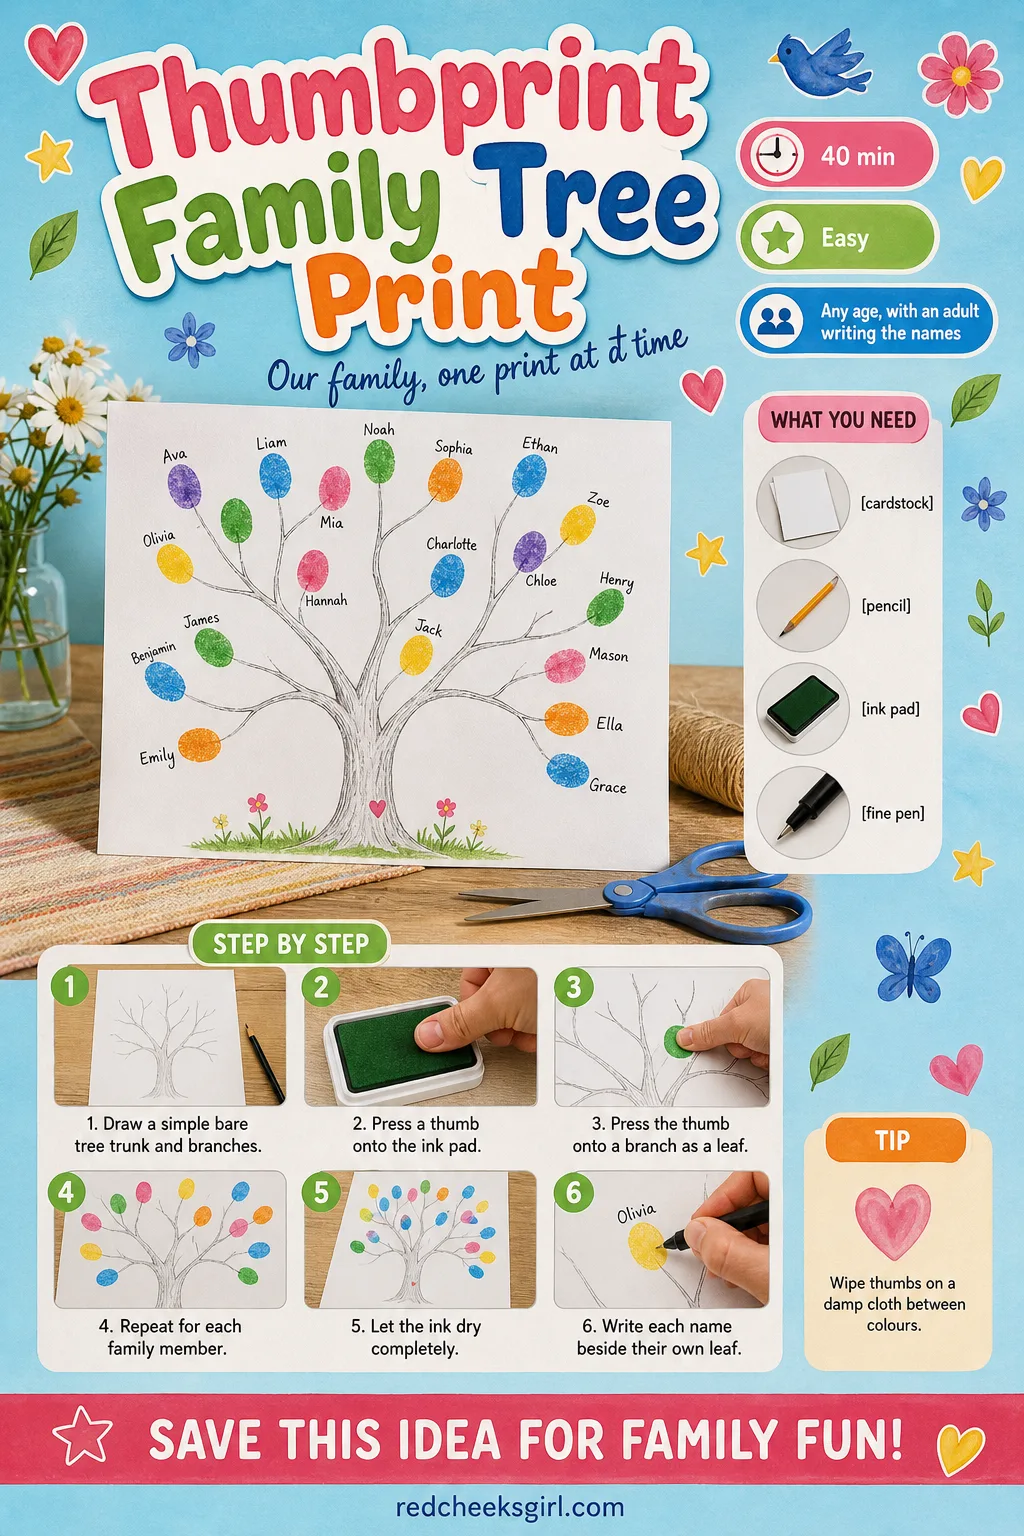
Thumbprint Family Tree Print
A tree drawn in ink and filled in with everybody’s thumbprint for leaves says more about who belongs to this family than any photo manages, and it costs one ink pad and an afternoon.
Frame it for the hallway, or leave it unframed and add a new thumbprint every visit, which turns it into a piece that is never quite finished.
What You Need
- 1 sheet of heavy cardstock, A4 or letter size
- Pencil, for the tree outline
- Ink pad, 2 to 3 colours
- Fine pen, for writing names
How to Make It
- Draw a simple bare tree trunk and branches in pencil across the lower half of the page.
- Have each family member press a thumb onto the ink pad and then onto a branch, rotating or layering colours to build it out as leaves.
- Once the ink is fully dry, write each name in fine pen beside their own thumbprint leaf.
Decoupage Memory Keepsake Box
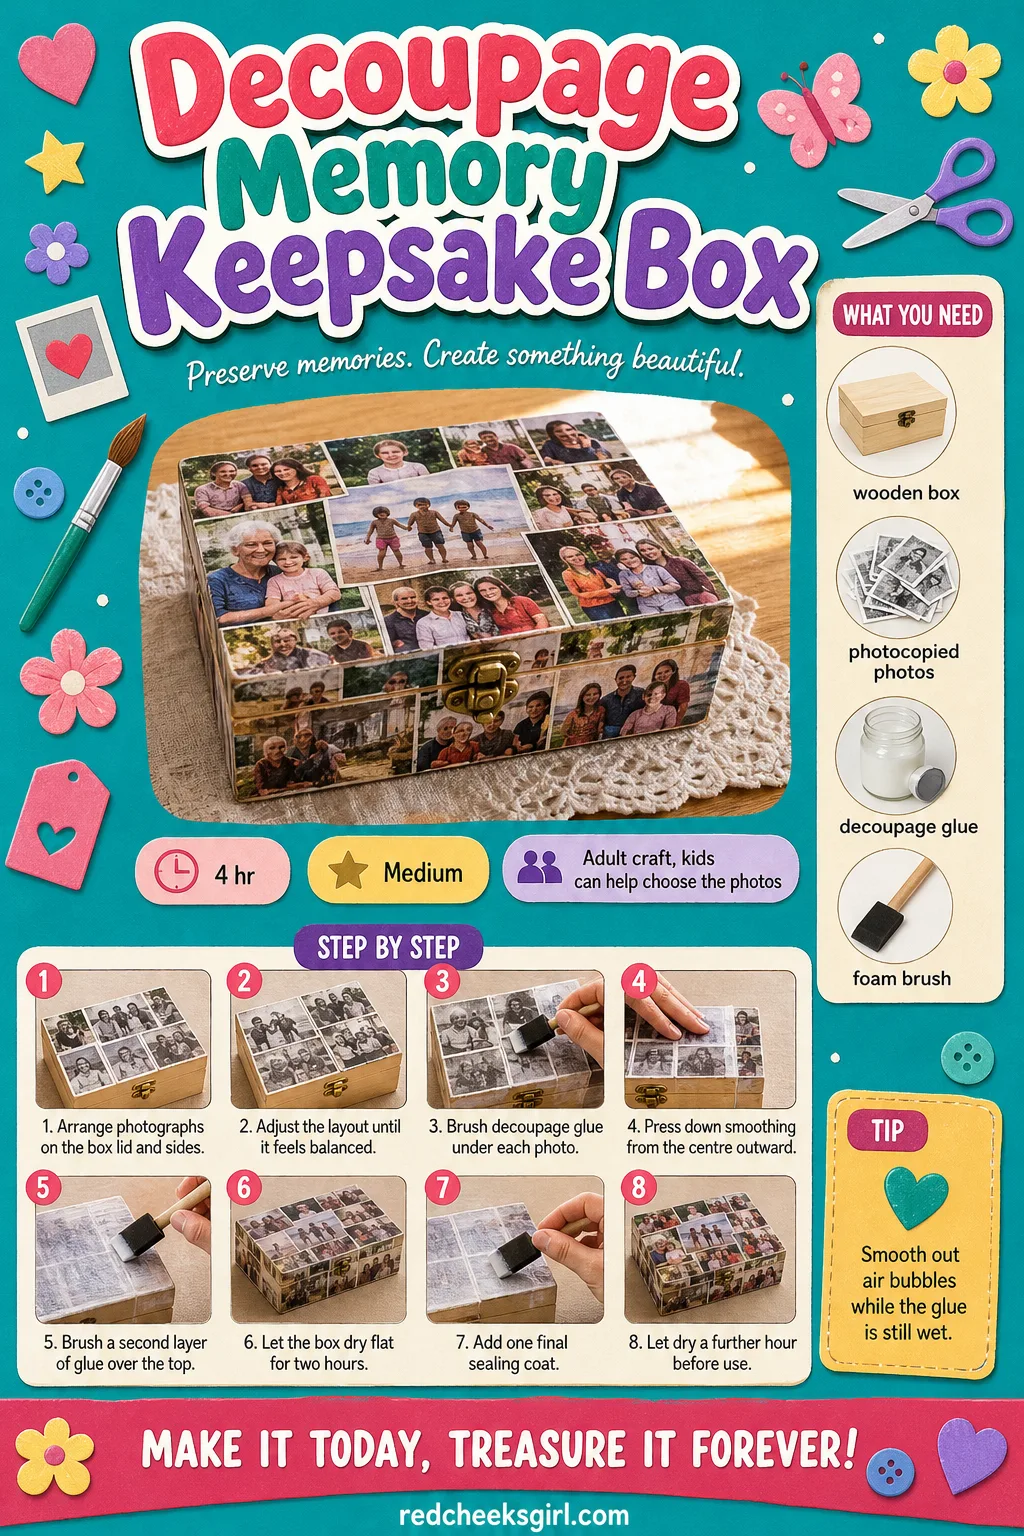
A shoebox full of loose photographs says ‘someday I’ll sort these’. A small wooden box with those same photographs decoupaged onto the lid says it already happened, and it sits deliberately on a dresser instead of apologetically in a cupboard.
Photocopies work just as well as originals here, so nothing irreplaceable has to get cut up or glued down.
What You Need
- 1 plain wooden box, about 15×10 cm
- 4 to 6 photocopied photographs, trimmed to fit
- Decoupage glue (mod podge), 1 small bottle
- 1 foam brush
How to Make It
- Arrange the photographs on the lid and sides of the box until the layout feels balanced, overlapping edges slightly if it helps.
- Brush a layer of decoupage glue under each photo, press it down smoothing from the centre out, then brush another layer over the top.
- Let the box dry flat for at least two hours, then add a final sealing coat and let it dry a further hour before use.
🛍 Shopping guide
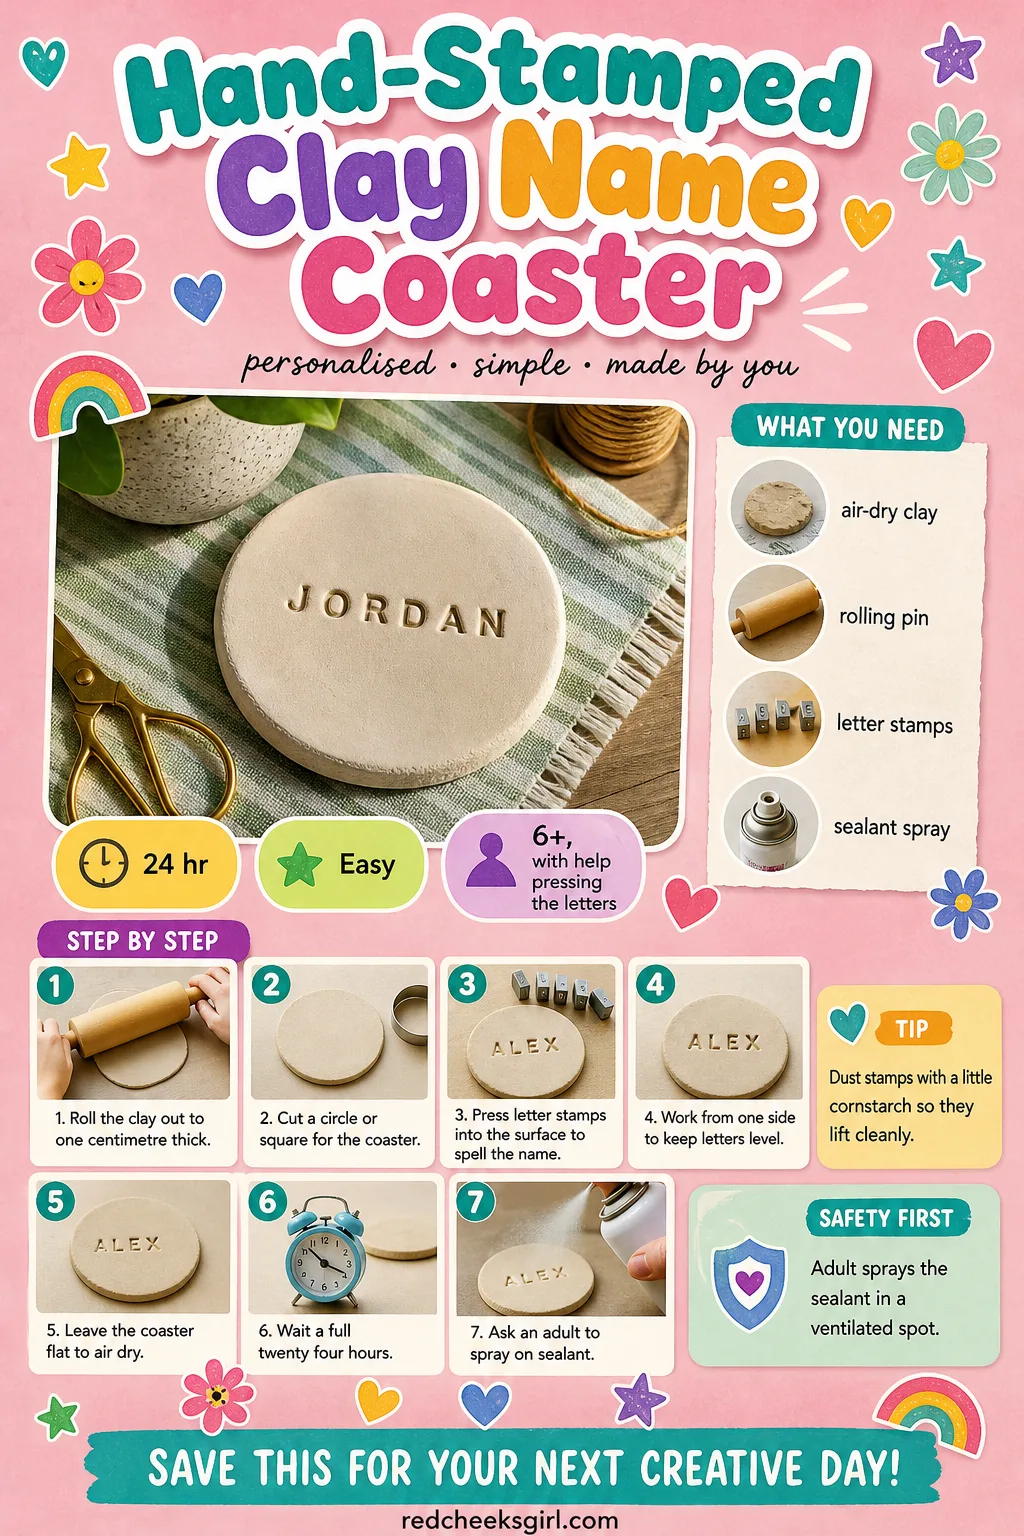
Hand-Stamped Clay Name Coaster
Air-dry clay skips the kiln entirely, which means this coaster can happen on a Tuesday afternoon rather than needing a pottery studio booked weeks out. Pressed letters catch the light at an angle, so the name reads even without any paint.
Make two or three at once since the clay goes further than expected. If the clay catches on, 14 Christmas Clay Crafts Charming Enough to Give as Gifts keeps the momentum going into the holidays.
What You Need
- Air-dry clay, 1 block (about 500g)
- Rolling pin
- Alphabet letter stamps
- Clear acrylic sealant spray
How to Make It
- Roll the clay out to about 1 cm thick and cut a circle or square shape for the coaster base.
- Press the alphabet stamps firmly into the surface to spell out the name, working from one side to keep the letters level.
- Leave the coaster flat to air-dry for 24 hours, then an adult seals it with a light spray coat once fully hardened.
🛍 Shopping guide
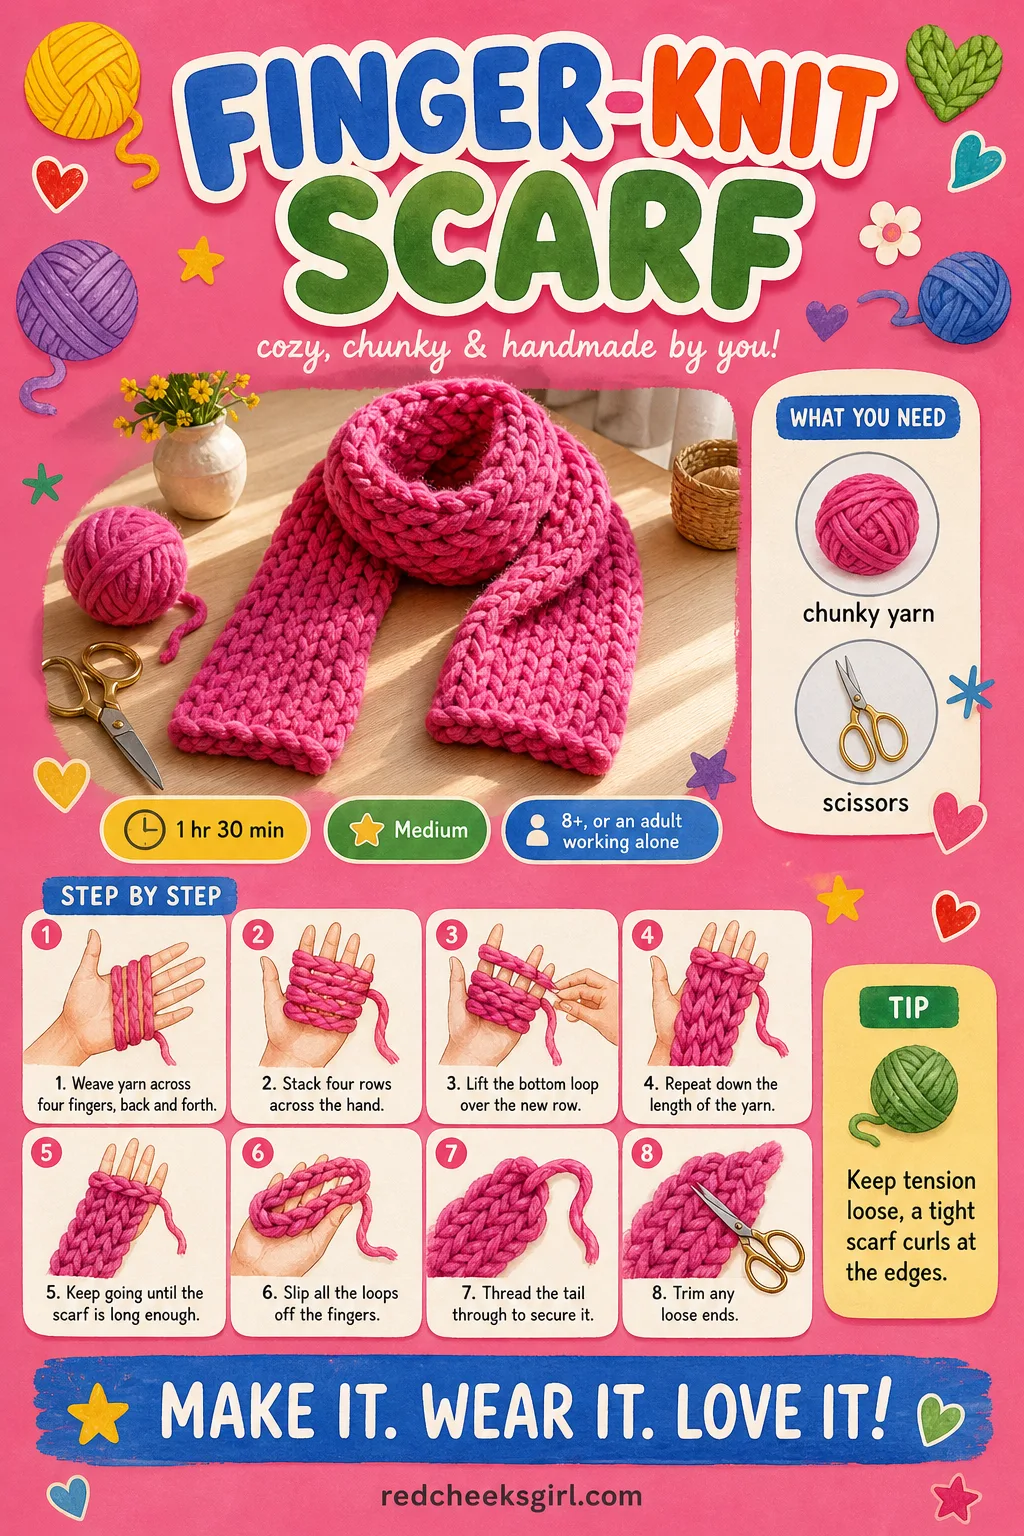
Finger-Knit Scarf
Finger-knitting skips needles entirely, which matters for anyone whose hands ache after ten minutes of fiddly stitches. A loop of yarn worked across four fingers grows into a length of soft, slightly chunky scarf faster than it sounds, and there is no dropped stitch to fix because there is no stitch to drop.
It travels well too, since nothing about it needs a table: this is the craft for a waiting room or the back seat of a car.
What You Need
- Chunky yarn, 1 large skein
- Scissors, for trimming ends
How to Make It
- Weave the yarn in and out across four fingers, back and forth, until four rows sit stacked on the hand.
- Lift the bottom loop on each finger up and over the new row, repeating this all the way down the yarn to build length.
- Once the scarf reaches the desired length, slip the loops off the fingers, thread the tail through them to secure, and trim any loose ends.
🛍 Shopping guide
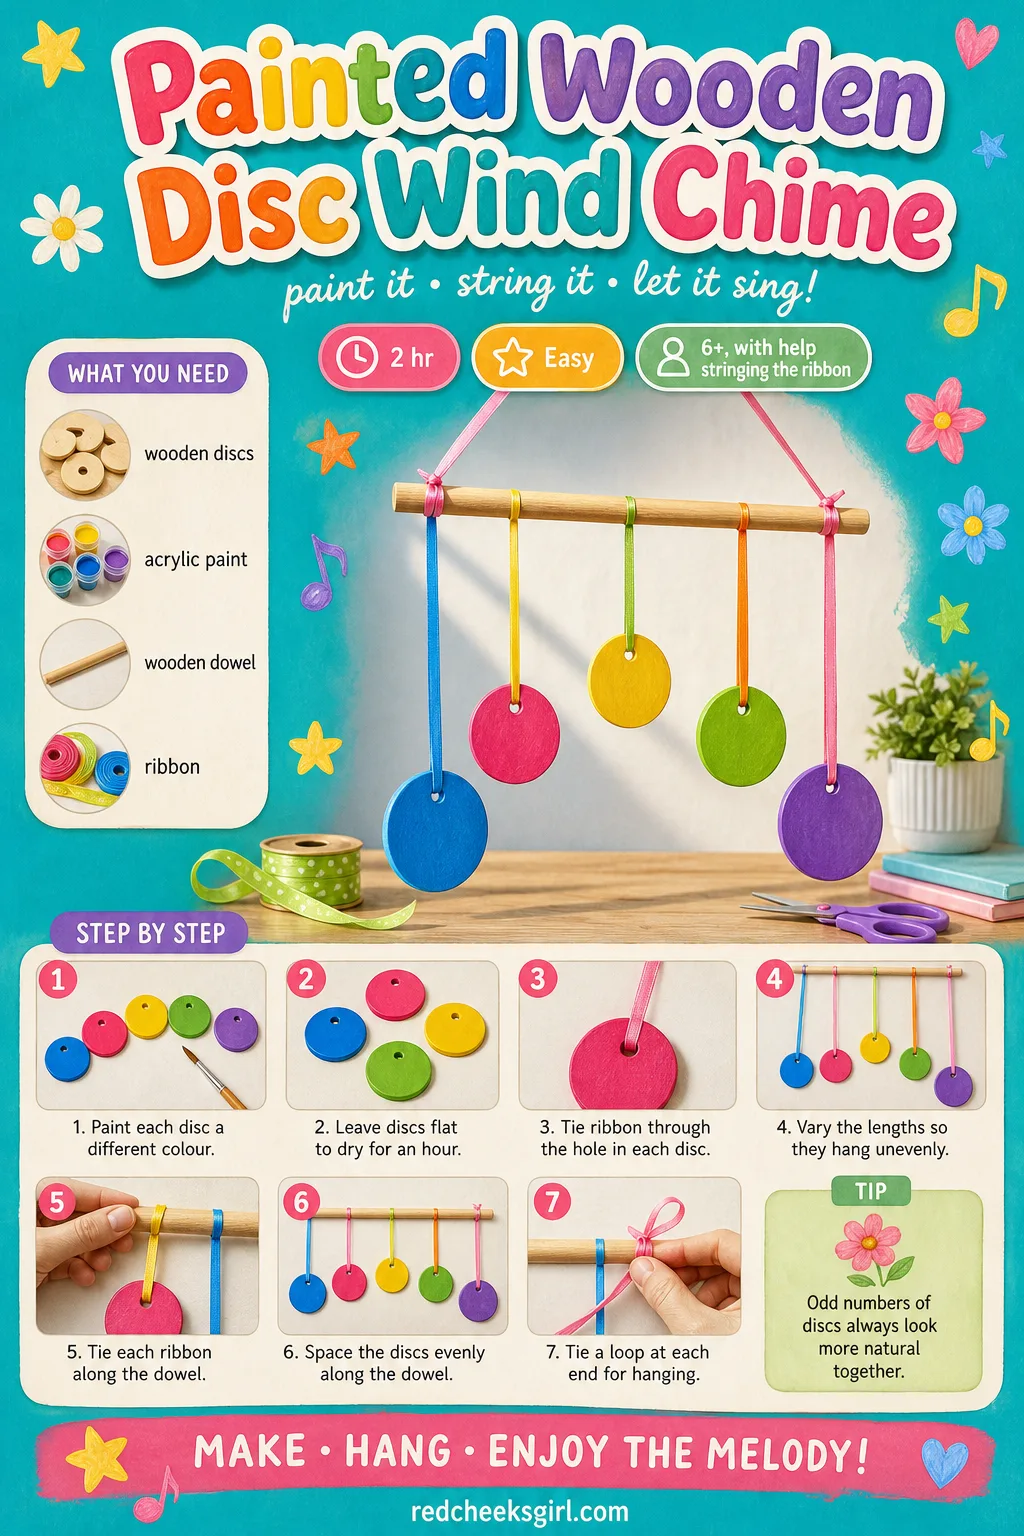
Painted Wooden Disc Wind Chime
A row of painted wooden discs knocking gently against each other outside a window does something a framed photo cannot: it makes a small sound every time somebody walks past, which is its own kind of being remembered.
No wire and no drilling needed if the discs already come with a hole punched through, so this is mostly paint and patience, strung along plain ribbon instead.
What You Need
- 5 to 7 wooden discs, pre-drilled, about 5 cm
- Acrylic paint, 3 colours
- 1 wooden dowel or stick, 25 cm
- Ribbon, 2 metres total
How to Make It
- Paint each disc a different colour or pattern and leave them flat to dry for an hour before handling again.
- Tie a length of ribbon through the hole in each disc, varying the lengths slightly so they hang at different heights.
- Tie each ribbon along the dowel at even spacing, then tie a longer ribbon loop to each end of the dowel for hanging.
🛍 Shopping guide
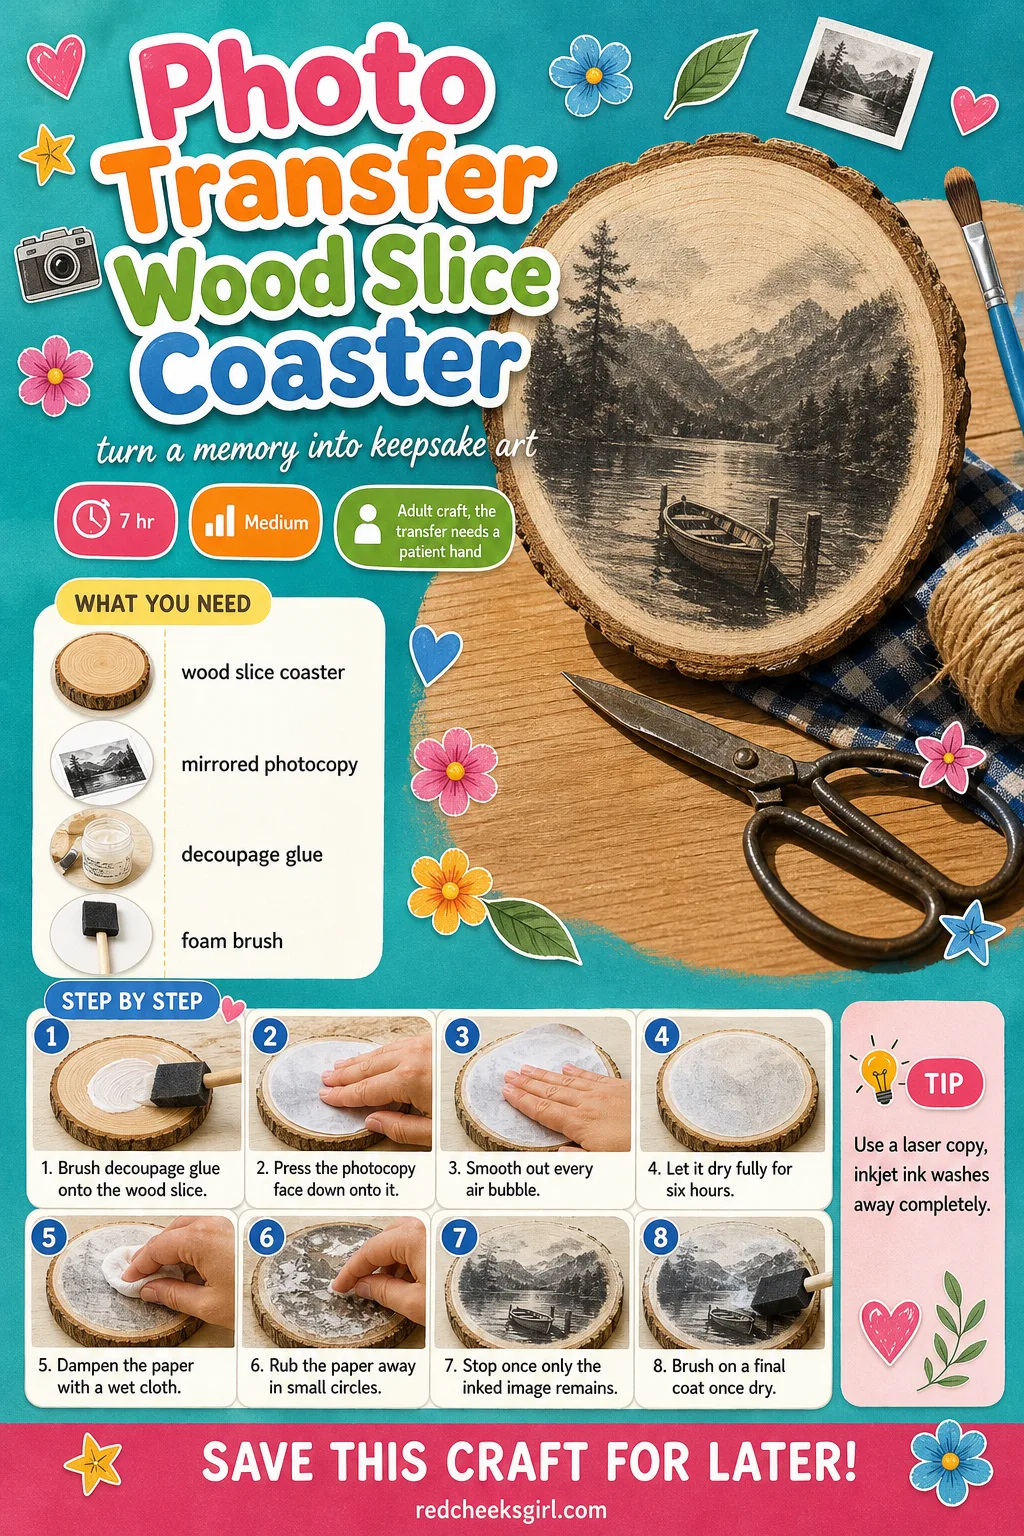
Photo Transfer Wood Slice Coaster
A photograph soaked straight into a slice of wood looks like it grew there rather than got glued on, which makes this the keepsake that gets asked about on the coffee table. It takes patience more than skill, and the slow rubbing-off part is oddly satisfying rather than tedious.
Use a photocopy rather than an original photo, since the image gets rubbed away from the paper and only the ink is left behind.
What You Need
- 1 wood slice coaster, sanded smooth
- 1 laser-printed photocopy of a photo, mirrored
- Decoupage glue (mod podge), 1 small bottle
- 1 foam brush
How to Make It
- Brush a layer of decoupage glue onto the wood, press the photocopy face down onto it, and smooth out every air bubble before it dries.
- Leave it to dry fully for at least 6 hours, then dampen the paper with a wet cloth and begin rubbing the paper away in small circles.
- Keep rubbing gently until only the inked image remains on the wood, let it dry, then brush on a final protective coat of glue.
🛍 Shopping guide
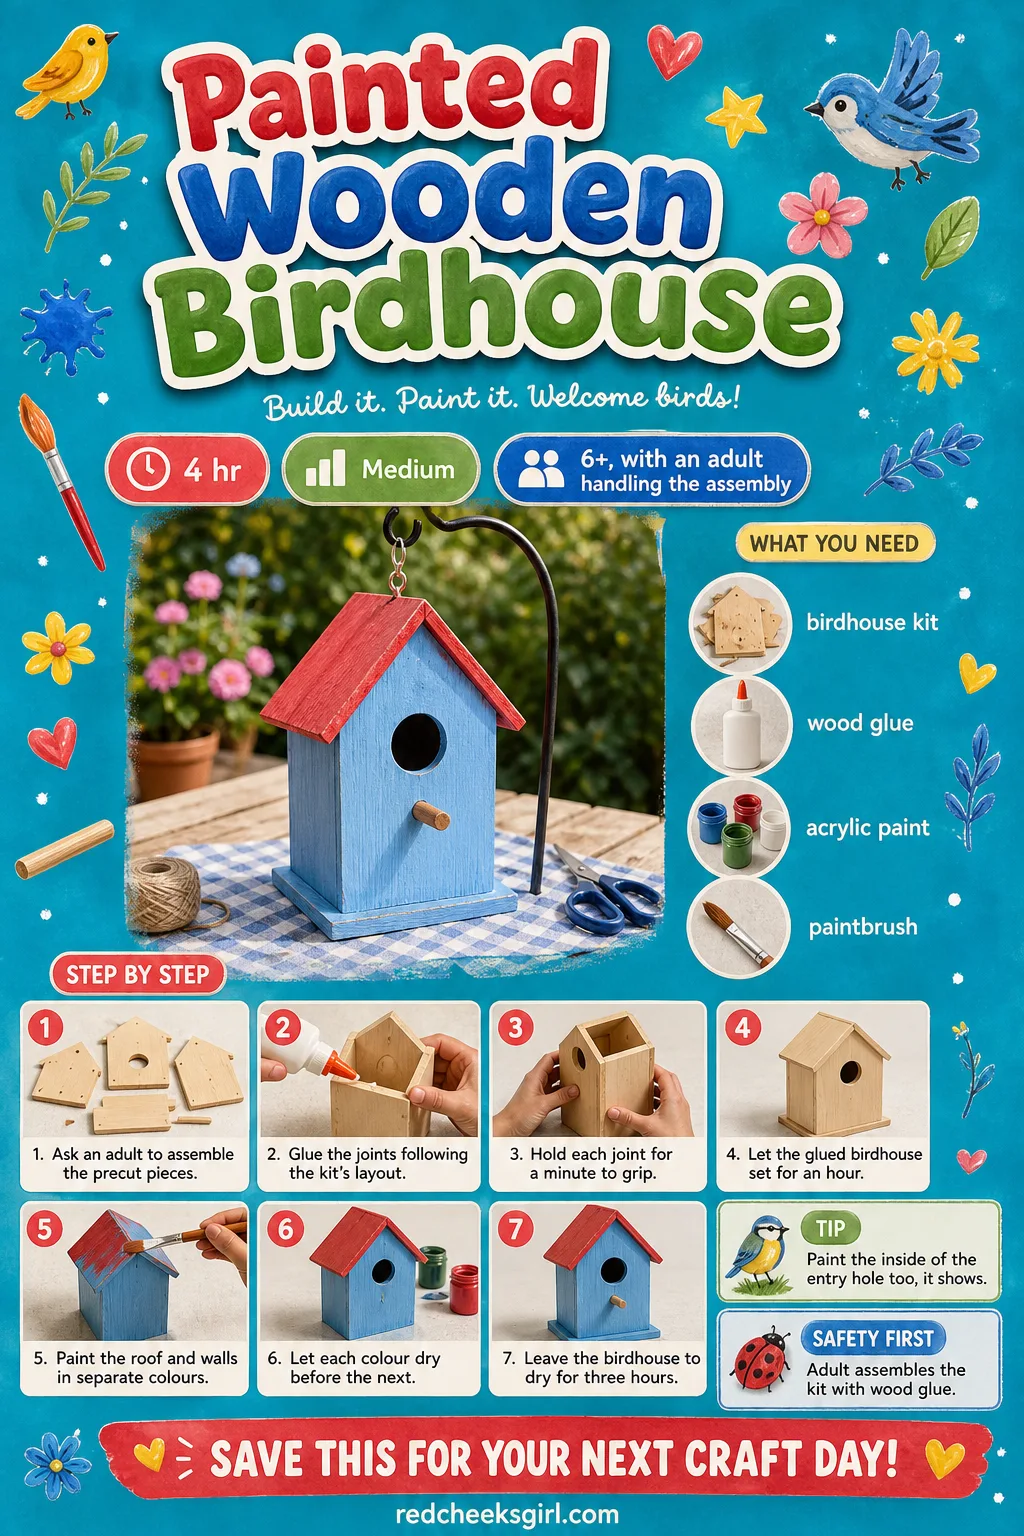
Painted Wooden Birdhouse
A birdhouse kit arrives already cut and ready to glue together, so the only real decision left is colour, which makes this the craft for anyone who wants a finished, useful object without facing raw lumber and a saw.
Hang it in the garden, and it gives the grandkids a reason to visit specifically to check whose has moved in.
What You Need
- 1 unfinished wooden birdhouse kit, pre-cut
- Wood glue, 1 small bottle
- Acrylic paint, 2 to 3 colours
- 1 small paintbrush
How to Make It
- An adult assembles the pre-cut pieces with wood glue following the kit’s layout, holding each joint for a minute until it grips.
- Leave the glued birdhouse to set for at least an hour before painting anything, so nothing shifts under a wet brush.
- Paint the roof, walls and perch in separate colours, letting each dry for 30 minutes before the next, then leave the birdhouse to dry for three hours before hanging it outside.
🛍 Shopping guide
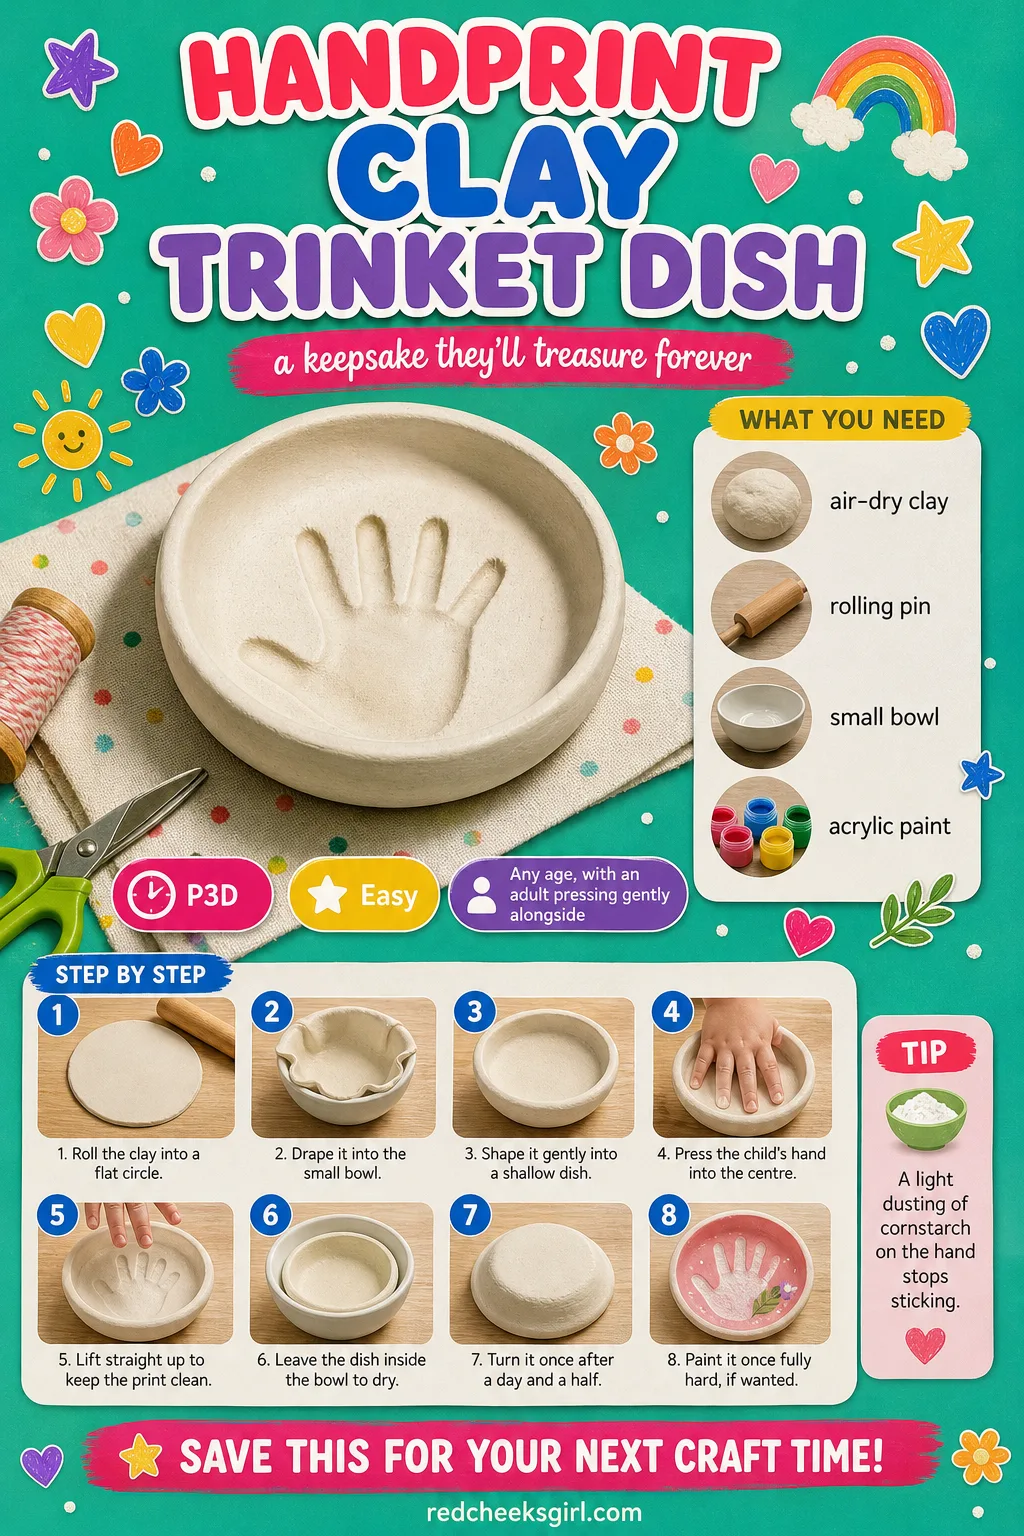
Handprint Clay Trinket Dish
A small dish with a child’s handprint pressed into the bottom holds rings or loose change for decades after that hand has grown up entirely, which is the whole appeal of air-dry clay over paper: it keeps the actual shape, not just a copy of it.
No oven and no kiln, just a few days of patient waiting while it hardens on its own.
What You Need
- Air-dry clay, 1 small block (about 300g)
- Rolling pin
- A small bowl, for shaping the dish
- Acrylic paint, 1 colour, optional
How to Make It
- Roll the clay into a flat circle about 1.5 cm thick, then drape it gently into the small bowl to form a shallow dish shape.
- Press the child’s hand flat into the centre of the clay for a few seconds, lifting it straight up to keep the print crisp.
- Leave the dish inside the bowl to air-dry for about 3 days, turning it once halfway through, then paint it if wanted once fully hard.
🛍 Shopping guide
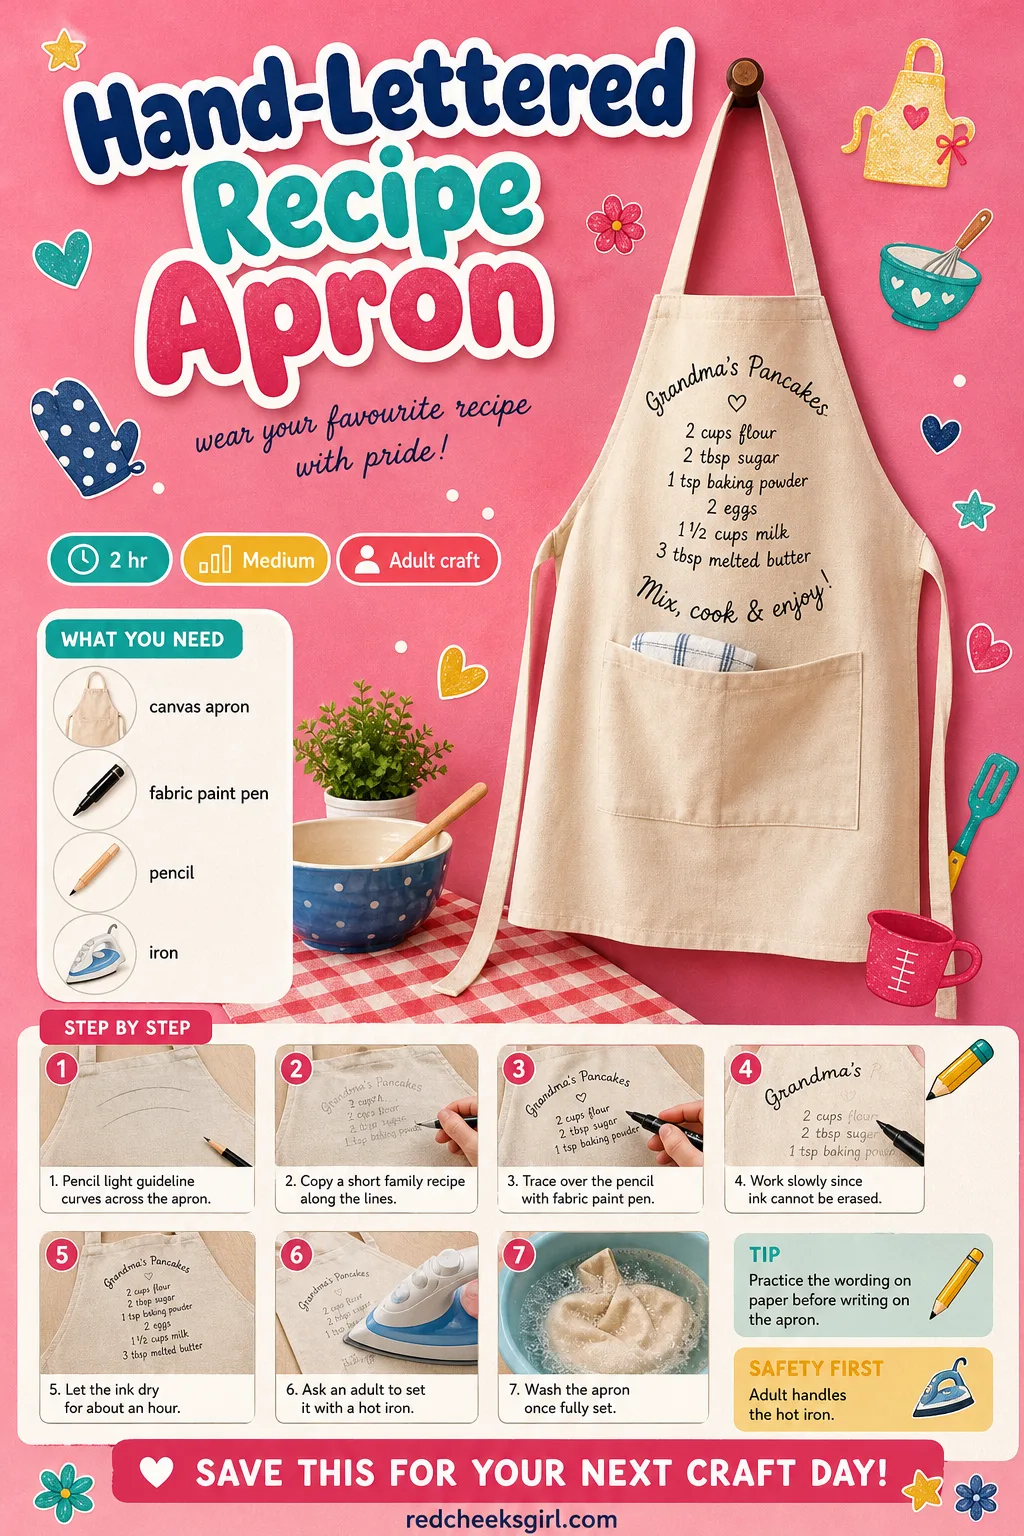
Hand-Lettered Recipe Apron
An apron with a handwritten recipe looping across the front turns the kitchen into the place where that handwriting lives on, read over and over while somebody actually cooks the dish rather than just looking at it.
Plain canvas aprons take fabric paint pen beautifully with no sewing involved, and it is sturdy enough to survive actual flour and butter.
What You Need
- 1 plain canvas apron
- Fabric paint pen, 1 or 2 colours
- Pencil, for a light guideline
- Iron, for setting the ink
How to Make It
- Lightly pencil guideline curves across the apron front, then copy out a short family recipe along them in handwriting.
- Go over the pencil writing with the fabric paint pen, working slowly since there is no erasing an inked line.
- Let the ink dry for about an hour, then an adult sets it with a hot iron through a cloth, following the pen’s instructions, before its first wash.
🛍 Shopping guide
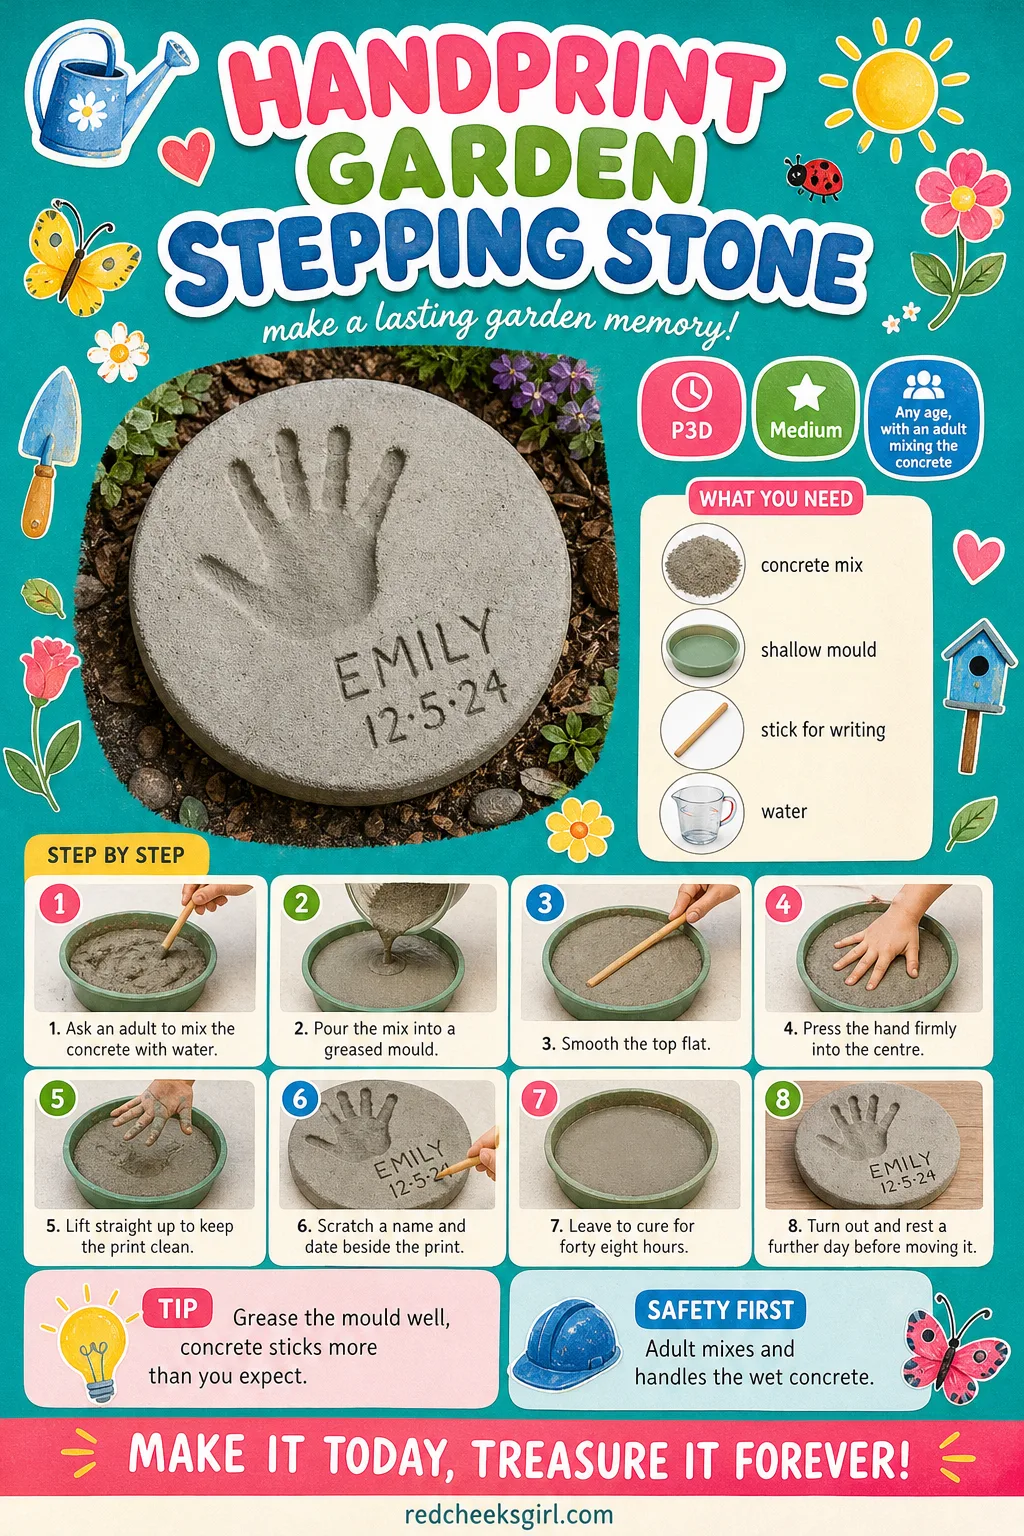
Handprint Garden Stepping Stone
A stepping stone with a small handprint pressed into wet concrete sits outside through every season for years, weathering in a way no photograph does, and it genuinely holds the shape of a hand rather than just an image of one.
Tuck it beside a garden path or a potted plant, and it becomes the thing a grandchild points out to friends without anybody prompting.
What You Need
- Quick-setting concrete mix, 1 small bag
- A shallow mould or pie tin, about 25 cm
- A stick, for writing a name
- Water, following the bag’s ratio
How to Make It
- An adult mixes the concrete with water to a thick, scoopable paste and pours it into the greased mould, smoothing the top flat.
- While it is still soft, press the child’s hand firmly into the centre and lift it straight up, then scratch a name and date beside the print with a stick.
- Leave the stone in the mould to cure for 48 hours, then turn it out carefully and let it sit a further day before moving it into the garden.
🛍 Shopping guide
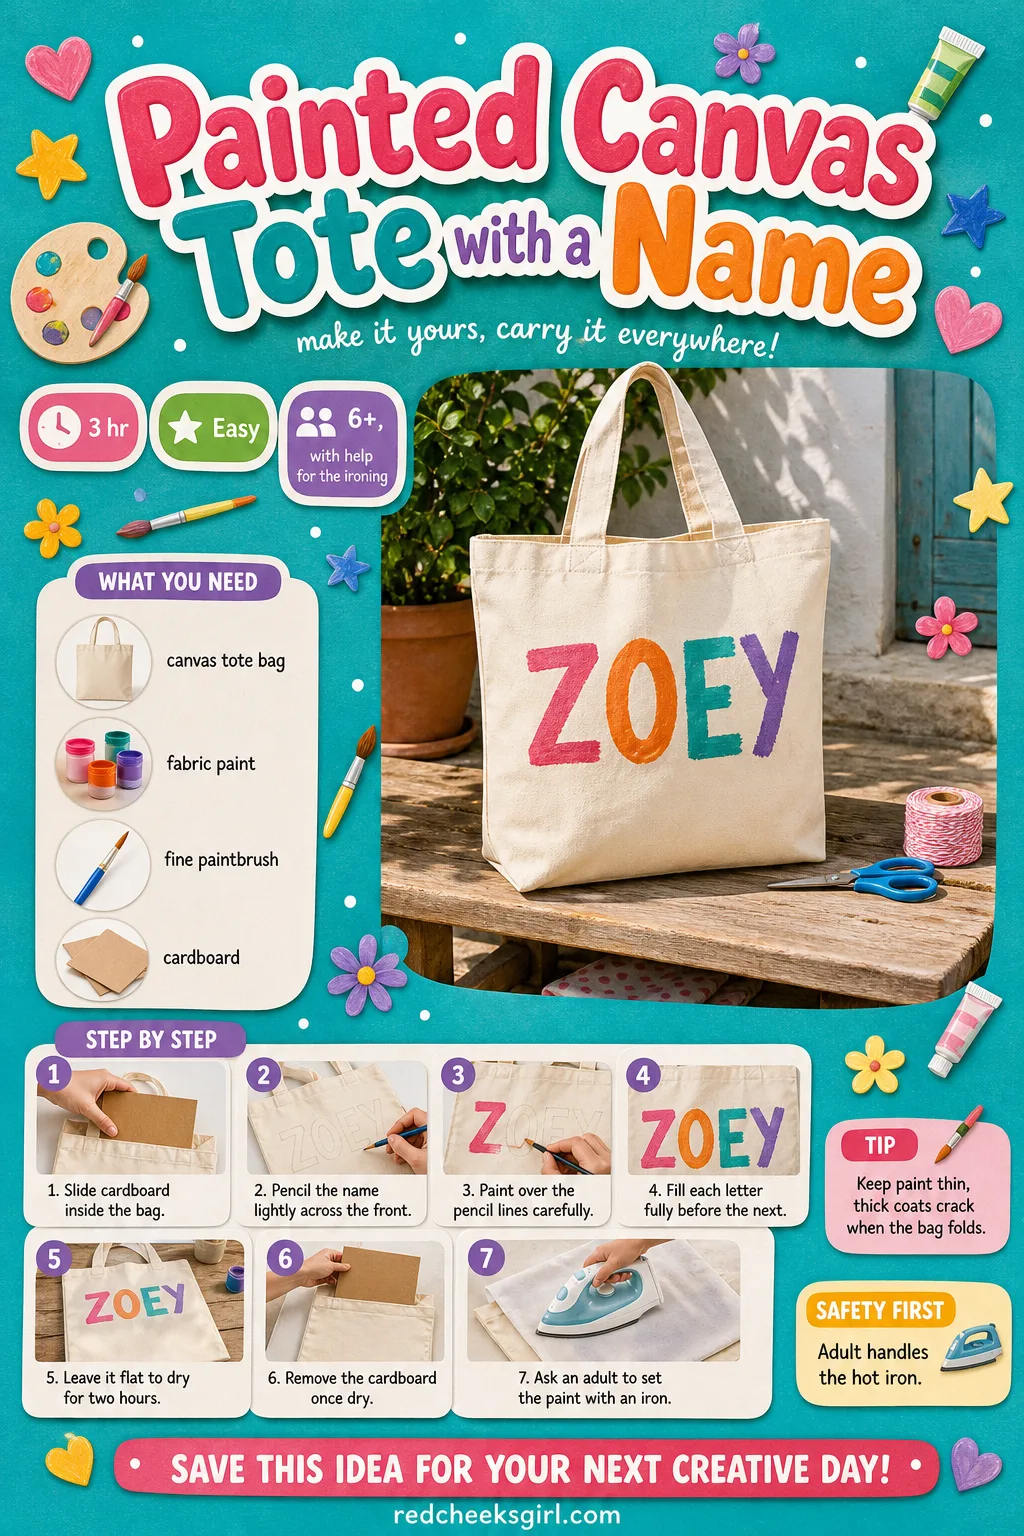
Painted Canvas Tote with a Name
A plain tote bag with a name painted across it stops being ‘the free bag from somewhere’ and starts being the one a grandchild actually reaches for, for library books or swimming kit or whatever needs carrying that week.
Fabric paint on canvas survives a genuine amount of handling, so this is one keepsake that does not need to stay precious and untouched on a shelf.
What You Need
- 1 plain canvas tote bag
- Fabric paint, 2 colours
- 1 fine paintbrush
- Cardboard, to slip inside the bag
How to Make It
- Slide the cardboard inside the bag so paint cannot bleed through to the back, then pencil the name lightly across the front.
- Paint over the pencil lines carefully, filling each letter fully before moving to the next, and leave it flat to dry for 2 hours.
- Once fully dry, remove the cardboard and an adult sets the paint with a hot iron through a cloth before the bag goes into use.
🛍 Shopping guide
Frequently Asked Questions
What are the best crafts for seniors to make?
The best crafts for seniors are rewarding rather than frustrating, like simple painting, card making or collage, since the goal is enjoyment and connection, not perfection. Keepsake projects that use a photo, a handprint or someone’s own handwriting work especially well because they give the craft a clear, personal purpose.
What crafts can seniors make as gifts for family?
Seniors can make handwritten greeting cards, pressed flower pieces, painted dishes, decoupage boxes and knitted or crocheted items as gifts for family or to sell at a craft fair. A short, personal project like a recipe card or story jar often means more than anything bought from a shop.
What crafts are good for seniors with arthritis or limited hand strength?
Crafts with large, easy to grip materials work best for arthritic or stiff hands, such as sponge painting, chunky yarn projects and button art rather than fine detail work. Foam brushes and paint pens are far easier to hold than a standard thin paintbrush or pen.
Can these crafts be done sitting at a table or in a wheelchair?
Yes, every craft in this kind of list can be designed to be done entirely while seated, at a table or on a lap tray, with no standing or heavy lifting required. Most of the keepsakes here use light materials and short sittings rather than one long session.
What supplies should I keep on hand for crafting with a senior?
Keep cardstock, markers, colored pencils and glue sticks on hand, along with easy grip scissors, yarn, fabric scraps, buttons, ribbon and paint. Nothing on this list needs anything more specialised than what a single craft aisle already stocks.
What crafts work for seniors with dementia?
Repetitive, sensory, fail proof crafts work best for memory care, such as sorting buttons, simple stamping or painting with a sponge, since the process matters more than a finished result. Several keepsakes here, like button art or a painted pot, can be simplified this way.

Thirteen men's 60th birthday party ideas built around a table, real food and something to do after t

Discover 20 fun housewarming party games that help new neighbours and guests mingle, laugh, and cele

72 never have i ever questions for seniors, sorted into 6 themed rounds with free printable card she
Leave a Reply