

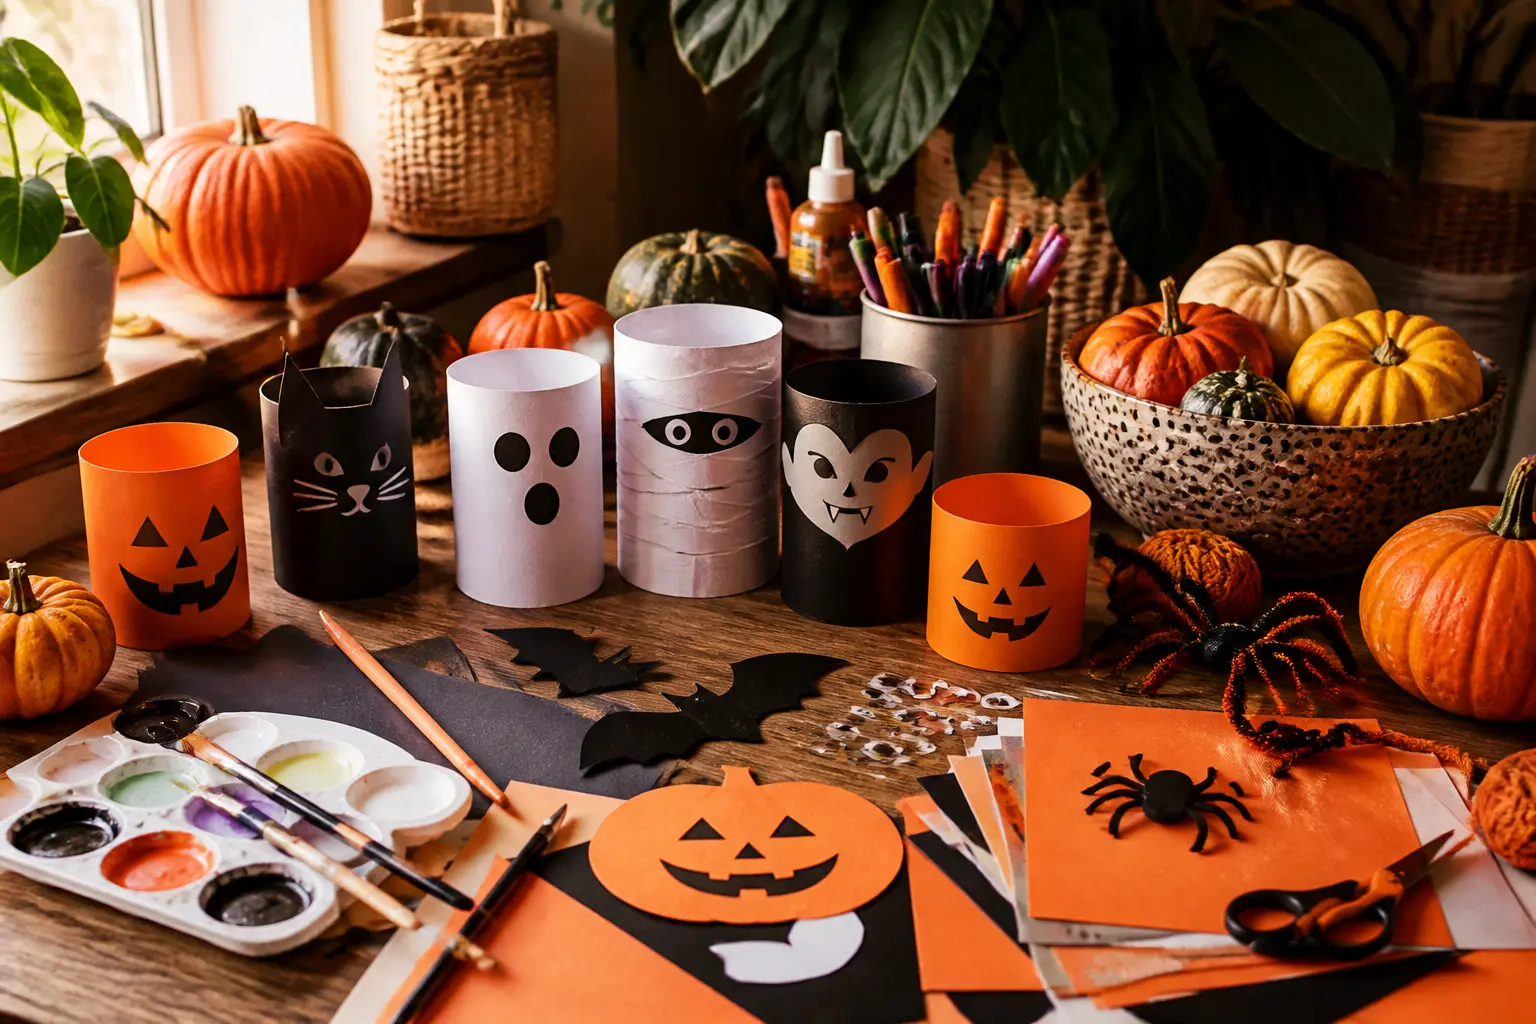
Twenty projects, four weekends, zero repeating techniques. That is the logic behind this list of halloween arts and crafts, which moves from quick paper work to slow-drying builds so a family or a group never does the same thing twice. Some land in ten minutes.
Others need a night to dry and a second sitting to finish, which is exactly the point when you want to stretch the season.
Age notes and adult-only steps are written into every method, so you can hand the list to a mixed group without squinting at the fine print. Shop links sit under each craft for the one or two things you probably do not already own. Everything else lives in a junk drawer or a kitchen cupboard.
If you want something to do with the finished decorations once the night is over, check out 20 Effortless Easy Halloween Party Games and 30 Unforgettable Halloween Party Ideas and Games for ways to use the room you just decorated.
This post contains affiliate links. If you buy through them, I may earn a small commission at no extra cost to you.
- Paper Plate Spider Web
- Painted Rock Ghosts
- Cardboard Tube Bats
- Tissue Paper Stained Glass
- Egg Carton Spiders
- Salt Dough Skulls
- Paper Bag Monster Puppets
- Yarn-Wrapped Pumpkins
- Coffee Filter Ghosts
- Handprint Spider Art
- Popsicle Stick Frames
- Paper Chain Garland
- Clothespin Bats
- Painted Pumpkin Canvas
- Mason Jar Luminaries
- Felt Finger Puppets
- Paper Mache Pumpkin
- Pipe Cleaner Spiders
- Leaf Rubbing Ghosts
- Cardboard Haunted House
- Frequently Asked Questions
Paper Plate Spider Web
A paper plate spider web costs almost nothing and looks sharp strung across a doorway or window. The finished ring is cream-white against the wall, roughly 23 cm across, with yarn running in spoke-and-cross patterns that read as a proper web from across the room. Store it flat in a folder between uses.
What You Need
- 1 standard paper plate (23 cm)
- 1 ball white yarn, at least 10 m
- 1 hole punch
- Scissors
How to Make It
- Cut the flat centre from the plate so you are left with a ring about 4 cm wide. An adult should do this with scissors or a craft knife; the rim is tough.
- Space holes evenly around the ring, roughly every 2 cm. Punch each one cleanly so the yarn slides through without tearing. Twelve to sixteen holes gives a dense web; eight gives a looser one, which is equally good.
- Knot the yarn at one hole, then run it across the ring to the hole more or less opposite, thread through and angle to the next hole, crossing back. Keep the tension even but not tight enough to bow the plate. When every hole is connected and the centre looks like a proper web, knot the end and trim. Hang it from a loop of the same yarn tied through any hole.

🛍 Shopping guide
Painted Rock Ghosts
Smooth river rocks painted white with simple ghost faces sit well on a windowsill, along a path, or grouped on a side table. They look deliberately understated next to busier decorations, which is part of their charm.
Sealed rocks survive rain if you want to line them up outside, and they store in a bowl year after year without any fuss.
What You Need
- Smooth rocks, palm-sized, as many as you like
- White acrylic paint
- 1 black paint pen (medium nib)
- Clear acrylic sealant spray (outdoor use only)
- A flat brush, about 2 cm wide
How to Make It
- Wash and dry each rock. Apply a coat of white acrylic paint with the flat brush and leave it completely flat so it does not run. One coat usually looks patchy; let it dry for 30 minutes, then add a second. The rock should be opaque and matte when it is ready.
- Once the paint is bone dry, use the black paint pen to draw a ghost face. A wide oval mouth and two dot eyes reads as a ghost from two metres away. Wobbly lines are fine; they add character. Leave the ink to dry for 10 minutes before touching.
- If the rocks are going outdoors, an adult should take them outside and spray a light even coat of clear acrylic sealant. Two thin coats, with five minutes between them, hold up better than one heavy one. Let them cure for at least an hour before handling.

🛍 Shopping guide
Cardboard Tube Bats
Cardboard tube bats are the kind of thing that looks better in a cluster than alone. Line five or six of them along a shelf, hang them from a length of string at different heights, or tape them to a wall in a swooping arc.
The finished bat is roughly 10 cm tall with spread wings about 20 cm across, and the folded-corner ears give it a silhouette that reads immediately as a bat, not a tube.
What You Need
- Cardboard tubes (toilet roll cores), 1 per bat
- Black acrylic or poster paint
- Black card or construction paper, at least 1 A4 sheet per 2 bats
- PVA glue or a hot glue gun
- A small flat brush
How to Make It
- Paint the outside of each tube black and set them upright on a piece of scrap card to dry. Two thin coats cover better than one thick one; 20 minutes between coats is enough. The tube should be uniformly black with no grey cardboard showing through.
- Cut two wing shapes from the black paper per bat: think a long curved triangle, roughly 10 cm at the widest point. An adult should handle cutting for younger children. Fold the top corners of the tube inward and crease them firmly; those two points become the ears. An adult uses the hot glue gun to fix the wings to the sides of the tube, one on each side, while the tube stands upright. Press each wing flat against the tube for 30 seconds until the glue sets.
- Pinch two small triangles from a scrap of black paper and glue them inside the folded ear tips if the ears look rounded rather than pointed. A dot of white paint on each ear and two tiny dots for eyes on the front of the tube finishes the face, though leaving it plain is equally effective.

🛍 Shopping guide
Tissue Paper Stained Glass
Tape one of these to a window and it glows. The coloured tissue paper catches the daylight and the black cardstock frame holds the shape, so the whole thing looks far more considered than a ten-minute make deserves.
Cut a pumpkin, a ghost, a bat, or a simple arch: any silhouette with a clean outline works. Flat-store it between two sheets of plain paper so the tissue does not crease.
What You Need
- Black cardstock, A4, 200 gsm minimum
- Coloured tissue paper (orange, yellow, purple)
- 1 glue stick
- Craft knife and cutting mat
- Clear tape for hanging
How to Make It
- Draw your shape lightly in pencil on the black cardstock, keeping it roughly centred and at least 3 cm from every edge so the frame stays sturdy. An adult then cuts along the pencil line with the craft knife on the cutting mat, removing the shape and leaving the framed opening. Erase any visible pencil marks on the frame.
- Flip the frame face-down. Cut squares of tissue paper slightly larger than the opening and layer two or three colours over it, overlapping them for a stained-glass mix of tones. Run the glue stick around the inside edge of the opening and press the tissue firmly in place. Smooth out air bubbles with a fingertip from the centre outward. Let it sit flat for five minutes.
- Turn it right side up and hold it to a light. Trim any tissue that sticks out beyond the frame with scissors. Tape it to a window with a strip of clear tape on each corner, tissue side facing the glass. The light does the rest.

Egg Carton Spiders
One egg carton makes twelve spiders, which is just the right number to scatter across a table, perch on a bookshelf rim, or pile into a bowl as a centrepiece.
Each spider is a single cup from the carton with eight pipe cleaner legs and a pair of googly eyes, and the result is sturdy enough to last the season without falling apart.
The fiddliest part is poking the legs through cleanly; the rest is satisfyingly quick.
What You Need
- 1 cardboard egg carton (12-cup)
- Black poster or acrylic paint
- Black pipe cleaners, 4 per spider
- Googly eyes, 2 per spider (8-10 mm size works well)
- PVA or craft glue
How to Make It
- An adult cuts or tears the egg carton into individual cups, trimming any ragged edges with scissors so each cup sits flat. Paint each cup black inside and out and stand them on a piece of scrap card to dry, ideally for 30 minutes. One coat is enough; poster paint covers cardboard well at this scale.
- Poke four pipe cleaners through the sides of each cup, two on each side, spaced evenly. Push each one through until the legs are roughly equal on both sides, then bend the ends down and curl the tips slightly so the spider stands at a slight crouch. This is the step that tests patience: go slowly and the cup does not tear. If a hole appears, a dot of glue seals it.
- Apply a small blob of craft glue to the front of the cup and press two googly eyes into it. Set each spider aside for 10 minutes without touching it so the eyes do not slide. Once dry, bend the legs into final position.

🛍 Shopping guide
Salt Dough Skulls
Salt dough skulls air-dry to a satisfying solidity over 48 hours, or bake firm in two hours, making them the most patient project on this list in the best possible way: the actual making takes twenty minutes and the oven does everything else.
Paint them or leave them natural. They look handsome hung on a ribbon, stacked in a dish, or lined along a mantelpiece, and they store in a box for years.
What You Need
- 240 g plain flour
- 120 g table salt
- 120 ml cold water
- Rolling pin
- Skull-shaped cookie cutter (any size)
- Baking tray lined with parchment (if baking)
How to Make It
- Combine the flour and salt in a bowl, then add the water gradually, stirring as you go. Once the dough comes together, turn it onto a clean surface and knead for two or three minutes until it is smooth and not sticky. If it cracks, add water a teaspoon at a time. If it sticks, add a pinch of flour. The dough should feel like soft clay and hold a clean edge when you press a finger in.
- Roll the dough out to about 5 mm thick on a lightly floured surface. Press the skull cutter firmly down, lift it straight up, and transfer each shape to the lined tray with a palette knife or spatula. Use a cocktail stick to poke a small hole near the top of each skull if you plan to hang them.
- To air-dry, leave the shapes on a flat surface for 48 hours, turning them once halfway through so the undersides dry evenly. To bake, an adult places the tray in an oven set to 120 C (fan 100 C) for two hours, checking every 30 minutes. The skulls are done when they feel hard all the way through and sound hollow when tapped. Cool completely on a rack before painting.

🛍 Shopping guide
Paper Bag Monster Puppets
A paper bag puppet takes fifteen minutes and entertains for the rest of the afternoon, especially if you are keeping a mixed-age group busy.
Each finished puppet is a flat-bottomed paper lunch bag with a monster face built across the fold, so the bag’s flap becomes a moving mouth when a hand goes inside. Make a whole cast and put on a show.
What You Need
- Paper lunch bags (flat-bottomed), 1 per puppet
- Construction paper in assorted colours
- PVA or a glue stick
- Markers in black, white and assorted colours
- Scissors
How to Make It
- Lay the bag flat with the flap facing up. The flap is the folded-over bottom of the bag, and that becomes the top jaw of the monster. Cut two large round eyes from white construction paper, then cut pupils from black or coloured paper. Cut teeth from white paper: jagged triangles look menacing, rounded bumps look friendly. Cut ears, horns, or antennae from whatever colours appeal.
- Glue the eyes above the flap fold on the main body of the bag. Glue the teeth along the bottom edge of the flap so they point downward. Glue a second row of teeth along the top of the opening below the flap so they point upward; when the flap lifts, the mouth opens wide. Press everything flat and let the glue dry for five minutes before handling.
- Use markers to add nostrils, wrinkles, spots, scales, or fur lines across the face. A few lines go a long way. Slip a hand inside the bag so fingers curl under the flap; moving the fingers up and down opens and closes the mouth. No additional steps needed.

Yarn-Wrapped Pumpkins
Yarn-wrapped pumpkins belong on a shelf or a table in a cluster of two or three. They are tactile in a way that paper decorations are not, and the orange yarn catches the light pleasingly.
The finished piece is a flat cardboard silhouette roughly 20 cm tall, solidly wrapped in yarn so no card shows through, with a short green stem at the top. Stack them in a bag when October is over.
What You Need
- Corrugated cardboard or thick card, at least A4 size
- Orange yarn, approximately 20 m per pumpkin
- Green yarn or felt for the stem, approximately 1 m
- PVA glue or a hot glue gun
- Scissors
How to Make It
- An adult draws a simple pumpkin shape on the cardboard (three rounded lobes, about 20 cm wide) and cuts it out. Notch a small rectangular tab at the top for the stem, or cut a separate stem piece to glue on later. The edge should be smooth so the yarn wraps without snagging.
- Apply a line of PVA around the outer edge of the card and begin wrapping the orange yarn tightly around the shape from the outside in, row by row, keeping rows snug against each other. Every few rows, press the yarn flat and add another thin line of glue underneath to keep rows from slipping. Continue until the whole pumpkin is covered and no card is visible. Knot the end and tuck it under the last row with a dab of glue.
- Wrap the stem tab tightly with green yarn in the same way, or cut a small stem from green felt and glue it to the top of the pumpkin. A hot glue gun makes this bond instant; PVA needs 30 minutes under a light weight. Stand the pumpkin upright once dry.

🛍 Shopping guide
Coffee Filter Ghosts
A string of coffee filter ghosts crosses a mantelpiece or a bookcase beautifully, and the translucent white of the filter paper gives them a wispy, genuinely ghostly quality that solid paper cannot match. Each ghost is one filter, pinched and tied, with a marker face. Make ten in twenty minutes and string them at uneven heights for the best effect.
What You Need
- White basket-style coffee filters, 10 per garland
- White string or thin twine, 1.5 m per garland
- Black marker, fine tip
- PVA glue
How to Make It
- Open each coffee filter fully and lay it flat. Pinch the centre upward with two fingers so the filter gathers into a rough head-and-skirt shape: the pinched point is the top of the head and the ruffled edges fan out below. The shape should look like a small bell with a rounded crown.
- Cut a 10 cm length of string and tie it tightly around the pinched neck of each ghost, leaving a tail long enough to tie to the garland string. Knot it twice so the filter cannot unfold. Use the fine marker to draw two dot eyes and a small round mouth on the upper dome of the filter, just below the neck tie. The ink spreads slightly on filter paper, which suits the look well.
- Tie each ghost to the main garland string at different heights by knotting the tail. Space them 10 to 15 cm apart. Hang the garland by both ends and adjust the ghosts so they face outward. A dot of PVA at each neck knot stops them spinning if your space is draughty.

🛍 Shopping guide
Handprint Spider Art
Handprint art has a genuine keepsake quality, and this version is tidier than most because the two handprints mirror each other and the body is defined by a pair of googly eyes rather than any painting skill.
The finished piece on A4 paper shows a symmetrical black spider roughly 30 cm wide, and it looks intentional framed or pinned to a corkboard. The black paint washes off hands quickly with soap and warm water.
What You Need
- White or cream A4 paper, 90 gsm or heavier
- Black acrylic or poster paint
- A shallow tray or plate for loading paint
- 2 googly eyes, 15-20 mm
- PVA glue
How to Make It
- Pour a thin, even layer of black paint into the tray, enough to coat a palm without pooling. Have the child press one hand flat into the paint, making sure every finger is coated, then press that hand firmly onto the centre-left of the paper, fingers pointing left. Lift straight up. Repeat immediately with the other hand, placing it thumb-to-thumb with the first so the palms meet in the middle and the fingers spread right. The two palm prints together form the spider’s body and the eight spread fingers form the legs.
- Set the paper flat and leave it to dry completely, at least 30 minutes. Do not move it while wet or the print will smear. The paint should be uniformly matte black with crisp finger edges when it is dry; any tacky patches need more time.
- Apply a small dot of PVA glue to the centre of each palm print and press a googly eye into each. Leave flat for 10 minutes until the glue grips. Done.

🛍 Shopping guide
Popsicle Stick Frames
Four craft sticks glued into a square make a frame that holds a polaroid, a printed photo, or a child’s drawing. Paint it orange with black details and it becomes a Halloween keepsake worth keeping on a desk long after the season ends. The frames also look good in a group on a corkboard, all at slightly different angles.
What You Need
- Large craft sticks (150 mm), 4 per frame
- Orange and black acrylic paint
- Hot glue gun
- A small flat brush
- A photo or drawing to fit (approximately 9 x 9 cm)
How to Make It
- Lay four craft sticks into a square, overlapping the corners so each stick rests on top of the one before it and the frame is stable. An adult applies a dot of hot glue at each corner joint and holds it for 20 seconds. When cooled, the frame should not flex. If it wobbles, add more glue at the weak corner.
- Paint the whole frame orange with the flat brush and leave it flat to dry for 30 to 40 minutes. Once dry, use the tip of the brush or a cocktail stick dipped in black paint to add thin stripes, dots, or a jack-o-lantern face to the frame face. Leave this coat to dry for another 20 minutes.
- Turn the frame face-down and apply a thin line of PVA along the inner top and side edges. Press the photo or drawing face-down into position so it shows through the frame from the front. Leave flat under a light weight for 20 minutes to bond. Add a loop of tape or string to the back to hang it.

🛍 Shopping guide
Paper Chain Garland
A paper chain garland is the fastest decoration on this list and the most flexible: make it three metres long and loop it above a doorway, or keep it short and tape it across a mirror.
The alternating orange and black links look graphic and clean, and children from age three upward can handle the looping and gluing without any adult supervision once the strips are cut.
What You Need
- Orange construction paper or card, 3 sheets (A4)
- Black construction paper or card, 3 sheets (A4)
- Glue stick
- Scissors
How to Make It
- An adult cuts each sheet of paper into strips roughly 2 cm wide and 20 cm long. A paper trimmer makes this faster, but scissors work fine. Six sheets of A4 produce approximately 72 strips, which makes a garland a little over 1.4 metres long.
- Take the first strip and form it into a loop, overlap the ends by about 1 cm, and press the glue stick across the overlap. Hold for five seconds. Thread the next strip (a different colour) through the completed loop before you close it, then glue its ends together. The logic is: loop, thread, glue, repeat, alternating orange and black each time. The chain builds quickly once the rhythm clicks.
- When the chain is as long as you need it, hang it from two points with a strip of tape at each end. Do not stretch it taut: a little drape looks better. Store it loosely coiled in a zip bag between uses.

🛍 Shopping guide
Clothespin Bats
Clothespin bats clip onto curtain edges, a string of fairy lights, a shelf lip, or the pages of a book sitting on a table.
They are three-dimensional in a way that most paper crafts are not, and the spring clip means they go up and come down without any tape marks. A cluster of six on a string looks like bats roosting in a row.
What You Need
- Wooden spring clothespins, 1 per bat
- Black acrylic paint
- Black card or construction paper
- Googly eyes, 6-8 mm, 2 per bat
- Hot glue gun
How to Make It
- Paint each clothespin entirely black, working the paint into the spring coil as much as possible. Stand the clothespins upright, clip-end down, on a sheet of scrap card and leave for 30 minutes. One coat is usually sufficient on wood.
- Cut two wing shapes from the black card per bat: each wing should look like a stretched crescent, roughly 5 cm at its widest point, with scalloped lower edges if you want a detailed silhouette. Fold each wing slightly along its length so it curves upward rather than lying flat; this gives the bat a mid-flight look. An adult uses the hot glue gun to fix a wing to each side of the clothespin body, pressing firmly for 20 seconds.
- Glue two small googly eyes to the rounded top of the clothespin (the non-clip end) and leave flat for five minutes. The bat is done. Clip it onto anything thin enough for the spring to grip.

🛍 Shopping guide
Painted Pumpkin Canvas
A painted canvas is a permanent decoration that improves a wall long after the pumpkins on the doorstep have gone. This version uses a small canvas, orange and green paint, and a black outline, so the finished pumpkin looks confident and graphic rather than fussy.
It suits beginners: the pumpkin shape forgives imperfect circles and slightly wobbly lines add rather than subtract from the charm.
What You Need
- Small stretched canvas, 20 x 20 cm
- Orange acrylic paint
- Green acrylic paint
- Black acrylic paint
- Round brush, size 8
- Fine liner brush, size 1
How to Make It
- Load the round brush with orange paint and block in a simple pumpkin shape: three overlapping circles or ovals sitting side by side, with the middle one slightly taller. Do not aim for perfection; a casual, rounded shape reads as a pumpkin perfectly well. Fill it in solidly, leaving the canvas white around the pumpkin. Dry for 30 minutes.
- Add a short curved stem in green at the top centre of the pumpkin: a thick brushstroke pulled upward and slightly curved is enough. Let it dry for 20 minutes.
- Once both colours are completely dry, switch to the fine liner brush and black paint to outline the pumpkin shape, add a triangle or carved face in the centre lobe, and separate the three lobes with a thin vertical line. A thinner outline looks more deliberate than a thick one. Let the black dry for at least 30 minutes before hanging.

Mason Jar Luminaries
A mason jar luminary lit from inside by a battery tealight glows warmly on a windowsill or a dining table. The tissue paper surface diffuses the light and the cut-paper face makes it distinctly Halloween rather than generically autumnal. The jar can be peeled and soaked clean after the season and reused for something else entirely.
What You Need
- Mason jar or clean glass jar, any size
- Coloured tissue paper (orange, purple, or yellow)
- Mod Podge (or 50:50 PVA and water)
- A flat brush, 2 cm wide
- Black card for the face
- Battery-operated tealight
How to Make It
- Tear the tissue paper into irregular pieces roughly 4-6 cm across: torn edges blend better than cut ones once the Mod Podge dries. Brush a thin coat of Mod Podge onto a section of the jar and lay a tissue piece over it, smoothing it flat with the brush. Work in sections around the jar, overlapping pieces by about 1 cm. Cover the whole jar except the base. Leave some overlaps where colours meet for a mosaic effect. Let the whole jar dry for 20 minutes.
- Once dry, apply a second thin coat of Mod Podge over the entire surface to seal the tissue and give it a slight sheen. This coat also strengthens it. Dry for another 15 minutes. The surface should feel smooth and the tissue should not lift at the edges.
- An adult cuts a simple face from black card: two triangular eyes, a triangle nose, and a jagged mouth. Brush a little Mod Podge onto the jar where the face will sit and press the black pieces in position. Once dry, drop the battery tealight inside. Switch it on and dim the room.

🛍 Shopping guide
Felt Finger Puppets
Felt finger puppets are compact, durable, and genuinely reusable: pop them in a small tin and they travel to waiting rooms, long car journeys, and next year’s Halloween without complaint.
Each finished puppet is a small felt tube about 6 cm tall, stitched closed on three sides and open at the bottom for a finger. Make a ghost, a pumpkin, and a bat for a set of three characters.
What You Need
- Felt sheets in white, orange, and black (minimum A5 size)
- Needle and thread in matching colours
- Googly eyes, 6-8 mm
- Craft glue
- Scissors
How to Make It
- Cut two identical puppet shapes from the felt: a rounded rectangle about 5 cm wide and 6 cm tall, with a rounded top. The simplest approach is to fold the felt in half and cut both pieces at once so they match exactly. The bottom edge stays open for the finger; everything else gets stitched. An adult or older child should handle the cutting and sewing.
- Hold the two pieces together, edges aligned, and stitch around the sides and top with a simple running stitch or whip stitch, leaving about 3 mm from the edge. Keep stitches small and even so the seam does not gap. Tie off the thread inside. Turn the puppet right-side out; it should slip neatly onto a finger with a little resistance. If it is too tight, trim the seam allowance on the inside slightly.
- Glue googly eyes near the top of the puppet with craft glue and leave flat for 10 minutes. Add extra felt details: a small orange triangle nose for a ghost, a tiny bat-wing strip of black felt for the bat version, or a green felt stem glued to the top of the orange pumpkin puppet. Features are most secure when glued rather than stitched at this scale.

🛍 Shopping guide
Paper Mache Pumpkin
A paper mache pumpkin is the project that takes the most patience and produces the most satisfying result. The finished piece is a hollow painted orb roughly the size of a grapefruit, sturdy enough to sit on a shelf for years.
It is a multi-session make by nature: the layering and drying alone takes two days, which makes it perfect for a week when the group meets more than once.
What You Need
- 1 round balloon, inflated to roughly grapefruit size
- Newspaper, torn into strips roughly 2 cm x 10 cm
- Flour paste: 1 part plain flour to 2 parts water, stirred until smooth
- Orange acrylic paint
- Green pipe cleaner for the stem
- A flat brush
How to Make It
- Blow up the balloon and tie it off. Dip a newspaper strip into the flour paste, run it through your fingers to remove excess, and smooth it over the balloon. Cover the whole balloon except a small circle at the knot end (you need to get the balloon out later). Aim for three to four overlapping layers in the first sitting; the finished covering should feel papery and substantial, not thin. Set it on a cup or bowl to dry for 24 hours. The surface should feel hard and not damp before you continue.
- Once fully dry, apply two or three more layers of paste-soaked strips. Let these dry for another 24 hours. Five to seven layers total produces a pumpkin that will not dent when pressed firmly. An adult then pops the balloon through the small opening at the base with a pin and carefully pulls it out. If the shell flexes when the balloon is removed, add another layer and dry again.
- Paint the shell orange in two coats, drying between them. Coil the green pipe cleaner around a pencil to curl it, then poke one end into the top opening and fold the outer end outward to sit flat; a dot of craft glue inside the hole holds it. The pumpkin is stable and can be left hollow, filled with sweets, or given a face with a black marker.

🛍 Shopping guide
Pipe Cleaner Spiders
Pipe cleaner spiders take ten minutes each and cost almost nothing. They look good perched on the rim of a glass, curled around a pencil, or sitting in the middle of the paper plate spider web from earlier in this list. The pom-pom body gives them a slightly cuddly quality that makes them less frightening for younger children.
What You Need
- Black pipe cleaners, 4 per spider
- Black pom-poms, 25-30 mm, 1 per spider
- Googly eyes, 6-8 mm, 2 per spider
- Craft glue or a glue gun
How to Make It
- Bundle four pipe cleaners together and twist them once around their centre point so they fan out into eight equal sections: four on each side. Hold the bundle by the twist and spread the eight arms out evenly, like a star. Bend each arm down at roughly the halfway point to create a knee joint, then curl the end of each leg slightly upward so the spider stands without tipping over. Adjust until it balances on a flat surface.
- Apply a generous blob of craft glue to the twisted centre of the pipe cleaners and press the pom-pom firmly down over it. Hold for 30 seconds. If you use a hot glue gun, an adult handles this step and the bond is instant. PVA takes about 10 minutes to grip; leave the spider flat during that time.
- Once the body is secure, glue two googly eyes to the front of the pom-pom and leave flat for five minutes. Done. Bend the legs into final position after the glue is fully dry.

🛍 Shopping guide
Leaf Rubbing Ghosts
Leaf rubbing ghosts use actual autumn leaves to make the ghost outline, which means every finished print is slightly different and completely original. The technique is older than most people realise and produces results that genuinely look like art, not a craft table activity.
Lay them under a sheet of glass or in a clip frame and they become proper wall pieces.
What You Need
- Real autumn leaves in varied shapes, at least 5
- White or cream cartridge paper, A4, 90 gsm
- White or light grey crayon
- Black marker, fine tip
How to Make It
- Place a leaf vein-side up on a flat hard surface. Lay the paper over it and hold the paper firmly with one hand so it does not shift. With the white or grey crayon held almost flat, use the side of the tip and rub firmly and evenly over the area where the leaf sits below. The leaf outline and vein pattern will emerge through the paper as a textured impression. Lift the paper and check: the shape should be clear and complete. If any edges are faint, replace the leaf and rub those areas again.
- Choose the best rubbing on the page and look at its shape. Decide which part of the leaf silhouette reads most like a ghost. A large round-based leaf with a tapered tip, for instance, becomes a ghost with a billowing body and a wispy top. Once you see it, use the fine black marker to draw two dots for eyes and a small open mouth directly onto the rubbing. The ghost face should sit in the upper third of the shape.
- Repeat with different leaves on the same page or on separate sheets to build a collection of ghost characters. Each one will look distinct because each leaf is distinct. Frame them, pin them, or string them on a length of twine for a garland.

🛍 Shopping guide
Cardboard Haunted House
A cardboard haunted house is the biggest build on this list and the one that rewards a group effort most visibly.
Use a single large box (a cereal box, a shoebox, or a removal box depending on how ambitious the group feels) and the result is a centrepiece that children can light from inside with a battery torch and play with as a prop all month.
An adult handles all the cutting; everyone else does the painting.
What You Need
- Large cardboard box, any size, with the lid attached or taped shut
- Craft knife and cutting mat
- Black acrylic or poster paint
- Yellow tissue paper or yellow card for the windows
- PVA glue
- Battery-operated torch or tealight for the interior
How to Make It
- Close and tape the box so it is solid. An adult uses the craft knife on the cutting mat to cut irregular window shapes into the sides and front of the box: a tall arched door opening, several square or pointed-arch windows, and a round window near the top if the box is tall. Do not cut all the way through the base panel. Flip the box over and cut a small hatch in what is now the bottom panel so you can reach inside to place the light.
- Paint the entire exterior of the box black in two coats, working into the window reveals as much as possible. Let each coat dry for 30 minutes. The box should be uniformly black with no brown card showing; a second coat almost always needs to cover the first on corrugated card.
- Cut squares of yellow tissue or card slightly larger than each window opening. Apply PVA around the inside edge of each window and press the yellow material over it from inside the box, smoothing it flat. The yellow will glow warmly when the light is inside. Drop the battery torch or tealight through the hatch at the base, seal the hatch with a strip of tape, and stand the haunted house upright in a dim corner. Disassemble and flatten the box for storage at the end of the season.

Frequently Asked Questions
Which of these halloween arts and crafts work best for very young children, age 3 to 4?
The Paper Chain Garland, Coffee Filter Ghosts, Handprint Spider Art, and Pipe Cleaner Spiders all suit children from age three upward. They need no cutting, no heat, and no waiting for glue to cure before the next step. An adult sets up the materials and the child does the whole making.
Which projects can you prepare across several sessions rather than finishing in one sitting?
The Paper Mache Pumpkin and Salt Dough Skulls both need 24 to 48 hours of drying between sessions, making them natural two or three-sitting projects. The Painted Pumpkin Canvas and Mason Jar Luminaries also benefit from a second session once paint or Mod Podge has dried fully.
How do you store these decorations after Halloween?
Paper and card pieces store flat inside a large folder or a reusable zip bag. Three-dimensional pieces such as the Salt Dough Skulls, Mason Jar Luminaries, and Painted Rock Ghosts sit safely in a cardboard box lined with tissue paper.
The Cardboard Haunted House flattens for storage. Yarn-wrapped pumpkins and felt finger puppets go into a small cotton bag or tin.
Which crafts are suitable for a classroom or large group setting?
The Paper Chain Garland, Paper Bag Monster Puppets, Egg Carton Spiders, Pipe Cleaner Spiders, Leaf Rubbing Ghosts, and Handprint Spider Art all work well in groups of ten or more. They use low-cost materials, need no specialist equipment, and each child works independently at their own pace.
Can the Mason Jar Luminaries be used with real candles?
No. The tissue paper and Mod Podge surface is not fire-safe. Use battery-operated tealights only, as specified in the method. They produce the same warm glow and last several hours on a single set of batteries.
20 Halloween class party games for 20+ kids — minimal mess, no chaos, all the fun. Perfect for any
32 halloween outdoor decorations scaled for a real lawn, not just a porch. Stage tombstones, fog, li
31 easy Halloween decorations that need no ladder, no tools, and no helper. Put the whole house toge
Leave a Reply