

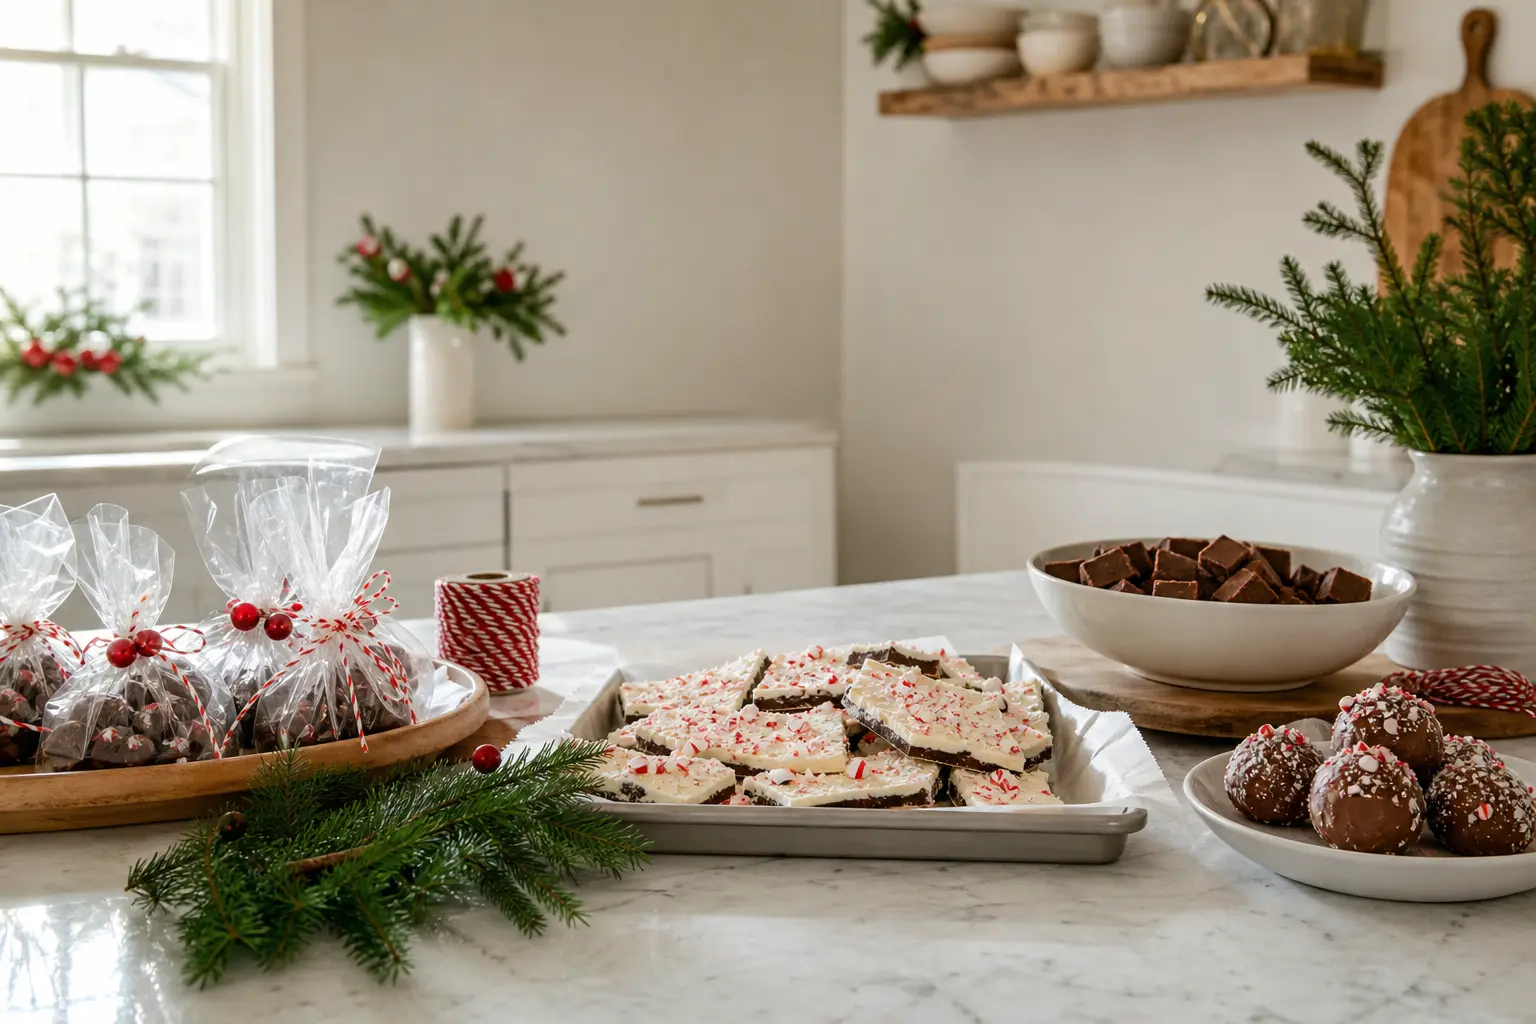
The best diy christmas candy gifts are the ones you can actually finish before the last post. Every recipe here sets in the fridge or at room temperature, uses one saucepan at most, and needs no sugar thermometer.
Each entry tells you exactly how long it takes to set and how long it keeps, because making a batch of truffles two weeks too early is how you end up with a tin of grey dust.
These are part of a wider collection of diy christmas gifts if you want to mix edible and non-edible presents on the same list.
Some of these suit a production line: double the batch, line up your tins, and work through the list over a weekend. Others are one-bowl affairs that take twenty minutes and look expensive wrapped in a square of brown paper.
A few travel beautifully in a diy christmas gift basket. All of them are genuinely handmade, which is the point.
This post contains affiliate links. If you buy through them, I may earn a small commission at no extra cost to you.
- Chocolate Bark with Three Toppings
- Peppermint Creams Pressed with a Fork
- Condensed Milk Fudge
- Dipped Pretzel Rods
- Rocky Road Slabs Cut into Squares
- Coconut Ice in Two Layers
- Chocolate Dipped Orange Slices
- Cornflake Clusters
- Truffles Rolled in Cocoa
- Marzipan Fruits Shaped by Hand
- Salted Caramel Cups in Paper Cases
- White Chocolate and Cranberry Discs
- Honeycomb Shards Folded in Chocolate
- Stuffed Dates Rolled in Nuts
- Spiced Nut Brittle Broken by Hand
- Frequently Asked Questions
Chocolate Bark with Three Toppings
Chocolate bark is the gift that looks like you spent the afternoon on it when you spent twenty minutes. Snap it into irregular shards and layer it in a cellophane bag tied with ribbon, and it reads as a proper present.
Make three batches with different toppings and you have gifts for fifteen people from one afternoon. It keeps for three weeks at cool room temperature, so it is the safest one to make first.
What You Need
- 300g dark, milk or white chocolate, broken into pieces
- Topping set 1: 2 tbsp dried cranberries, 1 tbsp pistachios, roughly chopped
- Topping set 2: 2 tbsp crushed candy cane, 1 tsp flaky sea salt
- Topping set 3: 2 tbsp toasted coconut flakes, 1 tbsp freeze-dried raspberries
- 1 large baking sheet
- Baking parchment
How to Make It
- Line the baking sheet with parchment. Break the chocolate into a heatproof bowl and set it over a saucepan of barely simmering water, making sure the base of the bowl does not touch the water. Stir gently until the chocolate is completely smooth, then remove from the heat.
- Pour the chocolate onto the lined sheet and spread it with a palette knife or the back of a spoon to a rough rectangle about 5mm thick. It does not need to be perfect: uneven edges look intentional.
- Scatter your chosen topping over the surface while the chocolate is still wet. Press the larger pieces in lightly so they do not fall off when you snap the bark.
- Leave the sheet at cool room temperature for one hour, or slide it into the fridge for twenty minutes if your kitchen is warm. The bark is set when it lifts cleanly off the parchment without bending.
- Snap into roughly palm-sized shards. Store in an airtight tin between layers of parchment at cool room temperature for up to three weeks.

🛍 Shopping guide
Peppermint Creams Pressed with a Fork
Peppermint creams have a pleasingly old-fashioned quality that makes them feel like a proper confectionery gift. The dough is stiff enough to roll and press with a fork, so the finished pieces have a ridged surface that holds up beautifully.
They set firm at room temperature in about an hour and keep for two weeks in a cool tin, which makes them an excellent early batch to have ready.
What You Need
- 250g icing sugar, sifted, plus extra for dusting
- 1 tsp peppermint extract (not essence, which tastes artificial)
- 2 tbsp double cream (or 1 small egg white as an alternative binder)
- A few drops of green or pink food colouring (optional)
How to Make It
- Tip the icing sugar into a bowl. Add the peppermint extract and the double cream, then stir until the mixture comes together into a stiff dough. It should hold its shape when pressed and not stick to your fingers. If it is too soft, add icing sugar a teaspoon at a time.
- If you want two colours, divide the dough in half and knead a drop of food colouring into one portion on a dusted surface until the colour is even throughout.
- Dust a clean surface lightly with icing sugar and roll the dough to about 8mm thick. Cut into rounds using a 3cm cutter, or pinch off walnut-sized pieces and roll them into balls.
- Press the tines of a fork gently onto each piece to leave a ridged pattern. The dough should not crack: if it does, knead in a tiny drop more cream.
- Lay the creams on a parchment-lined tray and leave at room temperature for one hour until the surface is dry to the touch. Store in an airtight tin between layers of parchment for up to two weeks.

🛍 Shopping guide
Condensed Milk Fudge
Condensed milk fudge is the no-thermometer version that actually works, because the condensed milk provides enough structure to set the fudge firm without boiling to a precise temperature.
The one rule: keep the heat low and stir constantly, because the base catches if you walk away. Cut it into squares while still slightly warm, or it will crumble at the edges.
It keeps for three weeks in an airtight tin and is one of the more generous gifts in terms of yield.
What You Need
- 397g tin of sweetened condensed milk
- 450g soft light brown sugar
- 115g unsalted butter, cut into cubes
- 120ml whole milk
- 1 tsp vanilla extract
- A 20cm square tin, greased and lined with baking parchment
How to Make It
- Put the condensed milk, brown sugar, butter and whole milk into a large, heavy-based saucepan over a low heat. Stir continuously with a wooden spoon until the butter is melted and the sugar has dissolved completely. You will feel the grittiness disappear as it becomes a smooth liquid.
- Raise the heat to medium-low and continue stirring without stopping for about fifteen minutes. The mixture will thicken, darken slightly, and begin to pull away from the sides of the pan. Test it by dropping a small amount into a glass of cold water: if it forms a soft ball you can squash between your fingers, it is ready. This is the soft-ball stage without needing a thermometer.
- Remove the pan from the heat and add the vanilla extract. Beat the mixture vigorously with a wooden spoon or hand-held electric whisk for three to four minutes until it becomes slightly lighter in colour, loses its gloss, and starts to look grainy at the edges of the bowl. This is the point most people stop too soon.
- Pour quickly into the lined tin, smooth the surface with the back of a spoon, and leave at room temperature for two hours. Cut into 3cm squares while it is just barely set: a sharp knife pressed straight down, not dragged. Store in an airtight tin for up to three weeks.

🛍 Shopping guide
Dipped Pretzel Rods
Pretzel rods dipped in chocolate are one of those gifts that look more effortful than they are, which is a quality worth treasuring in December. The salt in the pretzel does something very good against the sweetness of the chocolate.
Stand them upright in a tall glass while they set, so the chocolate does not pool at the bottom, and once firm, wrap three or four together in cellophane. They keep for two weeks at cool room temperature.
What You Need
- 20 pretzel rods
- 200g milk or dark chocolate, broken into pieces
- Toppings: 3 tbsp each of any combination of rainbow sprinkles, crushed candy cane, toasted chopped nuts, or freeze-dried strawberry pieces
- A tall glass or jar, lined with parchment
- Baking parchment for setting
How to Make It
- Set out your toppings in shallow dishes so they are ready before the chocolate sets. Line a baking sheet with parchment.
- Melt the chocolate in a heatproof bowl over a pan of barely simmering water, stirring until smooth. Remove from the heat but keep the bowl over the warm water to maintain the consistency.
- Hold a pretzel rod by the uncoated end and dip it two-thirds of the way into the chocolate, turning it slowly to coat evenly. Let the excess drip back into the bowl for a few seconds.
- Immediately roll the chocolate-coated section through your chosen topping, pressing gently. Work quickly because the chocolate begins to firm within a minute of leaving the bowl.
- Stand the rod upright in the parchment-lined glass while it sets. Repeat with remaining rods, working in batches of four or five so the chocolate in the bowl stays workable. If it thickens, return the bowl to the heat briefly.
- Leave to set fully for thirty minutes. Store in a cool, dry place, standing upright or lying flat between parchment layers, for up to two weeks.

🛍 Shopping guide
Rocky Road Slabs Cut into Squares
Rocky road is the great leveller: it uses whatever is in the biscuit tin, it never fails to set, and people are always delighted to receive it.
The key to a good rocky road is keeping the add-ins chunky so each square has a different texture.
Cut it into neat squares with a warm knife (run it under hot water and dry it between cuts) and wrap in squares of baking parchment tied with kitchen twine. It keeps for two weeks in the fridge or one week at cool room temperature.
What You Need
- 300g dark chocolate (70% cocoa), broken into pieces
- 100g unsalted butter, cubed
- 3 tbsp golden syrup
- 150g digestive biscuits, broken into rough 2cm pieces (not crumbs)
- 100g mini marshmallows
- 75g glacé cherries, halved
- 50g roasted salted peanuts or whole almonds
- A 20x30cm baking tin, greased and lined
How to Make It
- Melt the chocolate, butter and golden syrup together in a large saucepan over the lowest heat, stirring until completely smooth. Remove from the heat and let it cool for five minutes, otherwise the marshmallows will melt into the mixture rather than staying whole.
- Tip in the biscuit pieces, marshmallows, cherries and nuts. Fold everything together with a spatula until every piece is coated in chocolate. The mixture should look generously packed, not sloppy.
- Tip into the lined tin and press down firmly with the back of a spoon so there are no air gaps. Smooth the surface as flat as you can.
- Refrigerate for two hours until completely firm. Lift out using the parchment and cut into 4x4cm squares with a warm, dry knife. Store in an airtight container in the fridge for up to two weeks.

🛍 Shopping guide
Coconut Ice in Two Layers
Coconut ice is exactly what it sounds like: dense, sweet, and very pretty when you cut through to reveal the white and pink layers. It sets completely without any cooking and firms up overnight in the fridge.
The pink layer goes in first, then the white, so the cut squares show the pink at the top when stacked. It keeps for three weeks in a cool tin, making it one of the furthest-ahead options on this list.
What You Need
- 397g tin of sweetened condensed milk
- 450g icing sugar, sifted
- 300g desiccated coconut
- Pink food colouring (gel is more reliable than liquid)
- A 20cm square tin, lined with cling film or parchment
How to Make It
- Combine the condensed milk and sifted icing sugar in a large bowl and stir until you have a thick, smooth paste. Add the desiccated coconut and work it in with your hands until everything is evenly combined. The mixture will be stiff and slightly sticky.
- Divide the mixture in half. Leave one half white. Add a small amount of pink food colouring gel to the other half and knead it in until the colour is even throughout. Start with less than you think you need: the colour deepens as you knead.
- Press the pink mixture into the bottom of the lined tin in an even layer about 1.5cm thick. Use the back of a spoon or your palm to press it as firmly and flat as possible.
- Press the white layer on top, again smoothing it flat. The two layers should look distinct and even when you press down the edges.
- Cover the tin and refrigerate overnight, or for at least eight hours. Cut into 3cm squares with a sharp knife. Store in a cool, dry tin between parchment layers for up to three weeks.

🛍 Shopping guide
Chocolate Dipped Orange Slices
Dried orange slices half-dipped in dark chocolate look as though they came from a chocolatier’s window display. Use shop-bought dried orange slices to keep things simple, or dry your own in a very low oven if you have the time.
The chocolate sets firm in about thirty minutes and the finished pieces keep for two weeks at cool room temperature. They are best packaged lying flat in a box between parchment layers so the chocolate does not chip.
What You Need
- 12 dried orange slices (shop-bought or home-dried)
- 150g dark chocolate (70% cocoa), broken into pieces
- 1 tsp flaky sea salt or 1 tbsp finely chopped pistachios, for finishing (optional)
- Baking parchment
How to Make It
- If using home-dried slices, make sure they are completely dry and at room temperature before dipping. Any moisture will cause the chocolate to seize.
- Melt the chocolate in a heatproof bowl over a pan of barely simmering water, stirring until smooth. Remove from the heat.
- Hold each orange slice by the rind and dip the lower half into the chocolate. Let the excess drip back into the bowl and lay the slice on a parchment-lined sheet. The chocolate should coat the lower half cleanly with no drips running across the orange flesh.
- While the chocolate is still wet, scatter a pinch of flaky salt or a few pistachio pieces onto the dipped section if using.
- Leave to set at cool room temperature for thirty minutes, or in the fridge for fifteen. Store flat in a tin or box between parchment layers at cool room temperature for up to two weeks.

🛍 Shopping guide
Cornflake Clusters
Cornflake clusters are fast, forgiving, and genuinely satisfying to eat. Coat them in milk chocolate for a classic result, or use dark chocolate and add a pinch of cayenne if you are making for someone who likes heat.
They set at room temperature in about forty minutes. Pile them into a small jar with a ribbon and they look charming. They keep for ten days at cool room temperature.
What You Need
- 200g milk or dark chocolate, broken into pieces
- 100g cornflakes
- Pinch of cayenne pepper (optional, for a dark chocolate version)
- Baking parchment and a teaspoon or small ice cream scoop
How to Make It
- Line a baking sheet with parchment. Melt the chocolate in a heatproof bowl over a pan of barely simmering water, stirring until smooth. Remove from the heat.
- If using cayenne, stir it into the melted chocolate now. Tip the cornflakes into the bowl and fold them in gently with a spatula, turning the bowl rather than pressing down so you do not crush the flakes. Every flake should be coated.
- Use a teaspoon or small scoop to drop rough mounds of the mixture onto the parchment, spacing them so they do not touch. Work quickly before the chocolate starts to firm.
- Leave at cool room temperature for forty minutes until completely set. They should lift cleanly off the parchment. Store in an airtight tin for up to ten days.

🛍 Shopping guide
Truffles Rolled in Cocoa
A truffle is just a ganache that has been chilled and rolled, and a ganache is just chocolate and cream heated together. That is the whole secret.
The tricky part is not the recipe but the rolling: your hands warm the ganache quickly, so work fast and in small batches, returning the mixture to the fridge between rounds. The finished truffles look exactly like the kind sold in expensive boxes.
They keep for two weeks in the fridge, making them a good mid-list item to make about a week before you need them.
What You Need
- 200g dark chocolate (70% cocoa), finely chopped
- 100ml double cream
- 1 tbsp unsalted butter
- 1 tsp vanilla extract or 1 tbsp liqueur of your choice
- 4 tbsp good-quality cocoa powder, for rolling
How to Make It
- Put the chopped chocolate in a heatproof bowl. Heat the cream and butter in a small saucepan over a medium heat until it just begins to simmer. Pour it over the chocolate and leave undisturbed for two minutes.
- Stir from the centre outward with a spatula until the mixture is completely smooth and glossy. Add the vanilla or liqueur and stir in. Cover the bowl with cling film pressed against the surface and refrigerate for two hours, until the ganache is firm enough to scoop.
- Sift the cocoa powder into a shallow bowl. Use a teaspoon to scoop portions of ganache roughly the size of a large marble. Roll each one briefly between your palms to make a rough ball. It does not need to be perfect: slight irregularity looks artisan, not amateur.
- Drop each ball into the cocoa and roll it around until fully coated. Transfer to a parchment-lined tray. Return batches of ganache to the fridge for five minutes if they become too soft to roll.
- Refrigerate the finished truffles for thirty minutes before packaging. Store in the fridge for up to two weeks, in a container that seals well to prevent them absorbing other flavours.

🛍 Shopping guide
Marzipan Fruits Shaped by Hand
Marzipan fruits look elaborate but the technique is just rolling, pinching and painting, and the whole batch can be done in under an hour once the marzipan is ready. Use ready-made marzipan to skip the grinding step entirely.
A cocktail stick poked into the top of a lime-shaped piece, then pulled out, gives you the stem indent. A fine paintbrush and food colouring does the rest.
These keep for three weeks at cool room temperature, uncovered, on a tray, so the surface hardens nicely.
What You Need
- 500g ready-made marzipan
- Food colouring gels in red, green, yellow and orange
- A fine food-safe paintbrush
- Cocktail sticks
- Whole cloves, to use as stalks (optional)
- A little icing sugar for dusting the work surface
How to Make It
- Divide the marzipan into portions depending on how many fruits you want to make: roughly 15g per fruit gives a generous size. Dust the work surface lightly with icing sugar.
- To colour the marzipan, flatten a portion into a disc, add a tiny amount of gel colouring to the centre and knead until the colour is uniform. Wash your hands between colours or use disposable gloves.
- For a strawberry: roll a portion into a teardrop and use a cocktail stick to press tiny indentations over the surface. Brush with red food colouring diluted slightly with water for a matte finish. Press a whole clove into the top as a stalk.
- For an orange or lemon: roll into a ball or elongate slightly. Roll the surface very lightly over a fine grater to give it a textured skin. Insert a clove at the top.
- For a lime: colour marzipan dark green and roll into a small ball. Use a cocktail stick to make a shallow indent at each end.
- Set the finished fruits on a tray and leave uncovered at room temperature overnight to allow the surface to dry and firm. Store in a single layer in a cool, dry place for up to three weeks.

Salted Caramel Cups in Paper Cases
These are a proper chocolatier’s product and they take under thirty minutes of active work. A chocolate shell, a spoonful of shop-bought salted caramel sauce (or a very easy butter-cream-condensed milk version), and a chocolate lid.
The trick is getting the chocolate shell thick enough to hold the caramel without leaking: two coats of chocolate in the case is the answer. They keep for ten days in the fridge.
These are ideally made as part of the christmas treats you are planning, since they look beautiful in a mixed selection box.
What You Need
- 200g dark chocolate, broken into pieces
- 12 small foil or paper sweet cases (4cm diameter)
- 6 tbsp good-quality salted caramel sauce (shop-bought is fine)
- Pinch of flaky sea salt, for topping
How to Make It
- Melt the chocolate in a heatproof bowl over simmering water. Place the paper cases in a 12-hole mini muffin tin so they hold their shape during filling.
- Spoon about half a teaspoon of melted chocolate into each case. Use a small brush or the back of a teaspoon to paint the chocolate up the sides to the rim, coating as evenly as you can. Refrigerate for fifteen minutes until the first coat is completely firm.
- Apply a second coat of chocolate in the same way, covering any thin patches. Refrigerate for another fifteen minutes. The shell should look even and opaque with no visible paper through the chocolate.
- Spoon about half a teaspoon of salted caramel sauce into each chocolate shell, filling to just below the rim.
- Cover each cup with a thin layer of remaining melted chocolate to seal the top. If the chocolate in the bowl has started to firm, return it to the heat briefly. Scatter a tiny pinch of flaky salt onto each lid while the chocolate is still wet.
- Refrigerate for thirty minutes until the lids are set. Store in the fridge for up to ten days. Remove them ten minutes before serving so the chocolate loses its chill.

🛍 Shopping guide
White Chocolate and Cranberry Discs
White chocolate and cranberry discs are bark’s more refined cousin: neat rounds, not shards, which means they stack and package with zero fuss. Use a tablespoon to make each disc directly onto parchment.
They are done in under an hour including setting time and keep for three weeks at cool room temperature.
If you want to make them feel especially considered, these sit beautifully alongside a note in a small gift box alongside the other diy christmas gifts kids might make for teachers.
What You Need
- 200g white chocolate, broken into pieces
- 3 tbsp dried cranberries
- 2 tbsp shelled pistachios, roughly chopped
- 1 tsp freeze-dried raspberry pieces (optional, for colour contrast)
- Baking parchment
How to Make It
- Line a baking sheet with parchment. Melt the white chocolate in a heatproof bowl over a pan of barely simmering water, stirring until completely smooth. White chocolate scorches more easily than dark, so keep the heat low.
- Drop tablespoon-sized pools of chocolate onto the parchment, spacing them 4cm apart. Use the back of the spoon to nudge each pool into a rough circle about 6cm across. Work quickly because white chocolate sets fast.
- Immediately scatter a few cranberries, pistachio pieces and freeze-dried raspberry fragments over each disc while the chocolate is still liquid. Press them in very gently.
- Leave at cool room temperature for thirty minutes until completely set. The discs should lift cleanly off the parchment. Store in a cool, dry place between parchment layers for up to three weeks.

🛍 Shopping guide
Honeycomb Shards Folded in Chocolate
Honeycomb is the one recipe here that involves a chemical reaction, and that is the part people find alarming. In practice: you melt sugar and syrup, add bicarbonate of soda, and the mixture foams up dramatically and then sets into a brittle, aerated slab.
The whole active process takes six minutes. No thermometer is needed because you use the colour as your guide: a deep amber, like old whisky. Fold the broken shards into dark chocolate and you have something that looks seriously impressive in a gift tin.
It keeps for one week in a cool, dry place.
What You Need
- 100g caster sugar
- 4 tbsp golden syrup
- 1.5 tsp bicarbonate of soda, sifted
- 150g dark chocolate, broken into pieces
- A 20cm square tin, greased lightly with oil
- A large, deep saucepan (the mixture triples in volume)
How to Make It
- Grease the tin lightly with a neutral oil and set it on a heatproof surface near the hob. Have the sifted bicarbonate ready in a small dish.
- Put the sugar and golden syrup into the large saucepan over a medium heat. Stir once to combine, then leave without stirring until the mixture melts and turns a deep amber colour, about four to five minutes. Watch it: it goes from pale gold to amber quickly.
- Remove from the heat and immediately tip in the bicarbonate of soda. Stir quickly with a long-handled wooden spoon: the mixture will foam dramatically and double or triple in volume. Pour it straight into the greased tin. Do not spread it; just let it settle.
- Leave the honeycomb to set completely at room temperature for thirty minutes. It will harden as it cools. Break it into irregular shards by pressing firmly with your fingers or the back of a spoon.
- Melt the dark chocolate in a heatproof bowl over simmering water. Dip each shard halfway into the chocolate, drain the excess, and lay on parchment to set for twenty minutes. Store in an airtight tin in a cool, dry place for up to one week (humidity softens honeycomb quickly).

🛍 Shopping guide
Stuffed Dates Rolled in Nuts
Stuffed dates are the gift for someone who finds most sweets too sugary, and they are genuinely beautiful when cut in half to reveal the filling. Use Medjool dates, which have a naturally soft, toffee-like flesh.
Fill them with a log of marzipan, a whole toasted almond, or a teaspoon of nut butter, then press the sides closed and roll in finely chopped pistachios or toasted coconut. They keep for two weeks in the fridge.
No cooking involved, which also means no washing up to speak of.
What You Need
- 20 Medjool dates
- 100g ready-made marzipan, or 20 whole toasted almonds, or 4 tbsp smooth almond butter
- 4 tbsp finely chopped pistachios
- 2 tbsp toasted desiccated coconut
How to Make It
- Slit each date along one side with a sharp knife and remove the stone. Take care: the stone is slippery. Open the date gently without splitting it in half.
- For a marzipan filling: pinch off a small log of marzipan, about 2cm long and 1cm wide, and press it into the cavity of the date. Squeeze the sides of the date gently to close around the filling.
- For a nut filling: press a whole toasted almond into the cavity and close the date around it. For a nut butter filling: use a teaspoon to fill the cavity, then close the date as much as possible.
- Roll each filled date in the chopped pistachios or toasted coconut, pressing gently so the coating sticks to the outside of the date. The natural stickiness of the date will hold the coating without any extra glue.
- Arrange in paper sweet cases for gifting. Store in the fridge for up to two weeks.

🛍 Shopping guide
Spiced Nut Brittle Broken by Hand
Nut brittle without a thermometer works because you use the cold-water test instead.
It is a little more watchful but entirely doable: the mixture is ready when a drop forms a hard, glassy thread in cold water, which happens at around five to seven minutes of bubbling.
Add smoked paprika, cinnamon and a generous pinch of cayenne and the result is the kind of brittle that disappears from a party table before anyone has their coat off.
Broken into irregular shards and wrapped in parchment parcels, it makes a gift that suits people who do not have a sweet tooth. It keeps for two weeks in an airtight tin.
What You Need
- 200g caster sugar
- 4 tbsp water
- 150g mixed nuts (cashews, almonds and pecans work well), roughly chopped
- 1 tsp smoked paprika
- 1 tsp ground cinnamon
- Pinch of cayenne pepper
- 1 tsp flaky sea salt
- A large baking sheet, greased with a neutral oil
How to Make It
- Grease the baking sheet and set it on a heatproof surface. Mix the spices and salt together in a small bowl so they are ready to add quickly.
- Put the sugar and water in a heavy-based saucepan over a medium heat. Stir until the sugar dissolves, then stop stirring and let the mixture boil. It will turn from pale gold to amber over about five to seven minutes.
- Test for the hard crack stage without a thermometer: drop a small amount from a spoon into a glass of cold water. If it forms a rigid, brittle thread rather than a soft ball, it is ready. If it is still pliable, boil for another minute and test again.
- Working quickly, stir in the nuts and spice mixture. The sugar will spit slightly: stand back. Stir to coat the nuts, then pour the mixture onto the greased sheet in one go. Tilt the sheet to spread it, or press it flat with a greased spatula.
- Leave to cool and harden completely for thirty minutes. Break into shards by pressing firmly with your hands or a rolling pin. Store in an airtight tin at cool room temperature for up to two weeks.

🛍 Shopping guide
Frequently Asked Questions
What homemade sweets keep the longest?
Coconut ice, chocolate bark, peppermint creams and marzipan fruits last the longest, keeping for up to three weeks at cool room temperature in an airtight tin. Truffles and condensed milk fudge keep well for two weeks in the fridge. Honeycomb is the most time-sensitive: it softens in humidity and is best made within a week of giving.
How do I make fudge without a thermometer?
Use the cold-water test. Drop a small amount of the boiling mixture from a spoon into a glass of cold water.
If it forms a soft ball you can squash between your fingers, it has reached the soft-ball stage and is ready to beat and set. If it dissolves into threads or stays liquid, continue cooking for another minute and test again.
Condensed milk fudge is more forgiving than traditional fudge because the condensed milk helps the mixture set without precise temperature control.
How far ahead can I make edible gifts?
Up to three weeks ahead for coconut ice, chocolate bark, peppermint creams and marzipan fruits stored correctly. Condensed milk fudge, rocky road and chocolate-dipped items last two weeks. Truffles and salted caramel cups keep for ten days to two weeks in the fridge.
Honeycomb is best made within a week of giving. Making a production schedule and working through the longest-keeping items first means the whole list is manageable across two or three weekends.
How do you package homemade sweets?
Cellophane bags tied with ribbon work for most items and let the sweets show through. Stiff-sided tins lined with parchment are better for anything fragile like bark, brittle or honeycomb shards. Small glass jars suit cornflake clusters and truffles.
Foil sweet cases keep individual pieces tidy inside a box. Paper parcels of parchment tied with kitchen twine look particularly good for fudge squares and rocky road, and are inexpensive to make in quantity.

48 christmas would you rather questions in 4 escalating rounds, plus printable cards, for a grown-up

18 diy christmas gifts grandparents will actually keep out: a dated clay handprint, a sound wave fra

Jump beyond generic presents and discover 15 heartfelt Christmas gifts that will make your grandpare
Leave a Reply