

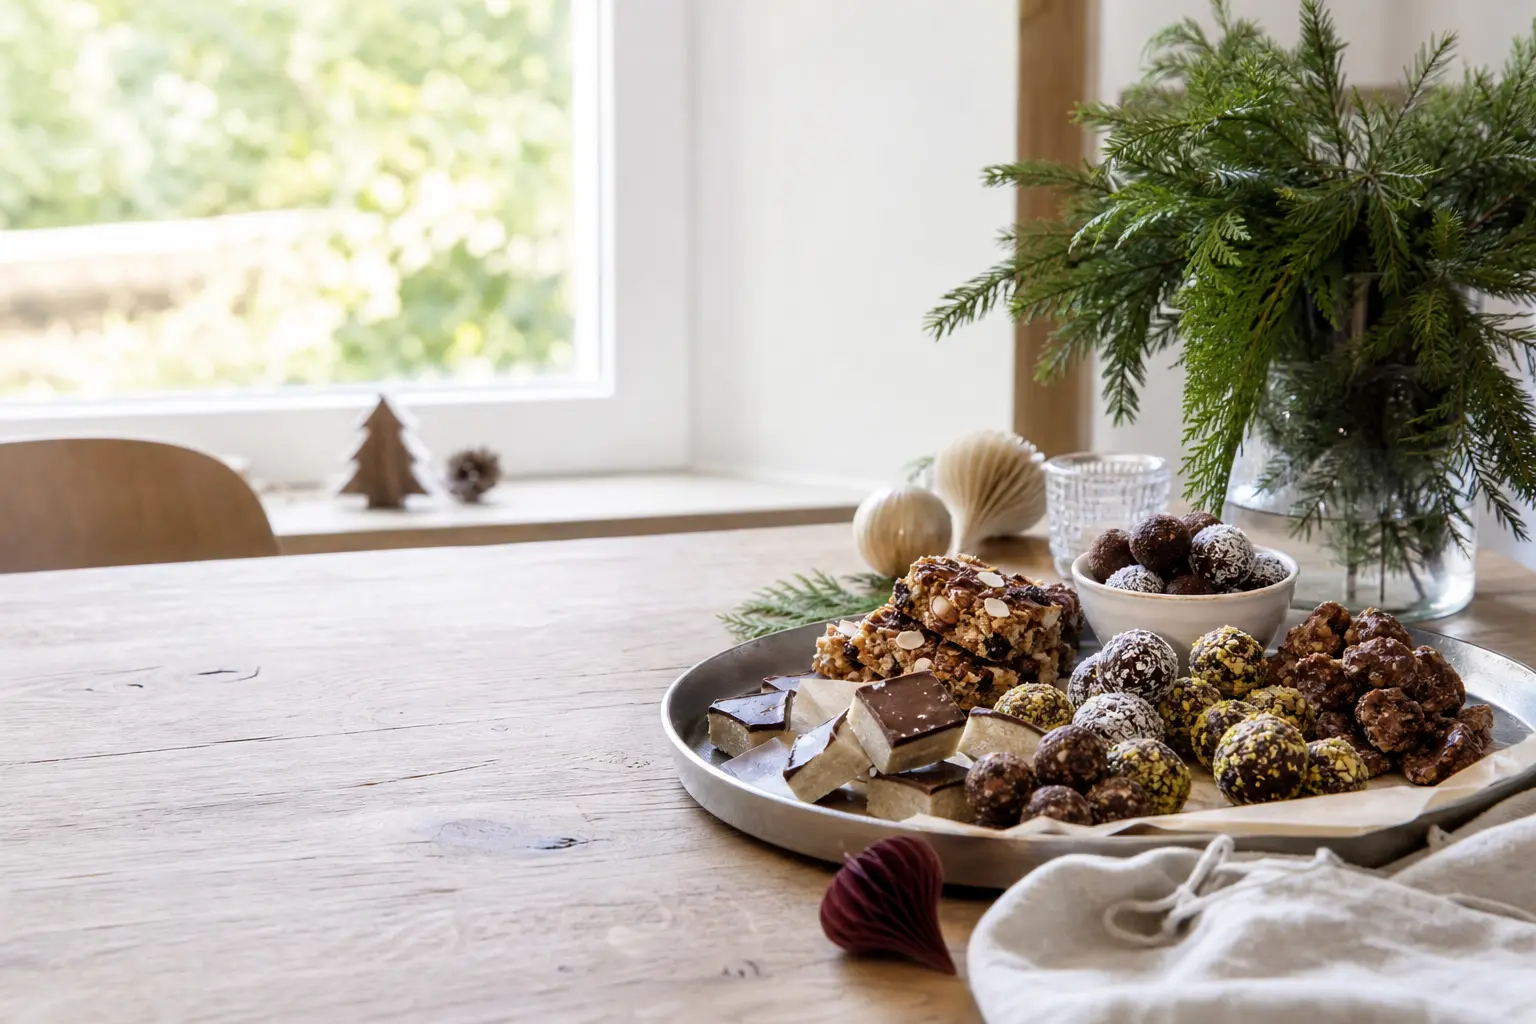
The oven is locked around a slow-roasting joint for two days straight, and yet someone still expects something sweet on the table. These christmas treats are the answer: sixteen recipes built entirely by dipping, layering, threading or dusting. No baking step, no stand mixer, no thermometer.
Every recipe here uses bought components as its starting point. Sponge fingers, meringue nests, puff pastry sheets, shortbread fingers from a tin: all fair game. What you add is assembly, a sharp eye for colour and about twenty minutes of calm counter time. Results look deliberate. That is the point.
The sixteen recipes are grouped loosely by technique so you can scan for what fits your skills and your fridge. Need something for the dessert board? Start with the dipping section. Feeding a crowd who want individual portions? The layering recipes travel beautifully in glasses. Looking for a centrepiece that photographs well? The chocolate salami and the snow slab both earn their space.
A note on drinks: no alcohol appears in these recipes. Guests who want a cocktail can find ideas in our christmas recipes dessert easy guides. For more grazing ideas before the sweet course, the christmas snacks ideas roundup has you covered, and if you want something to bake when the joint finally comes out, the christmas cupcakes and diy christmas candy gifts articles pick up from there.
This post contains affiliate links. If you buy through them, I may earn a small commission at no extra cost to you.
- Dipped Fruit Platter With Dark, Milk and White Chocolate
- Layered Trifle in a Glass
- Chocolate Salami Rolled in Cocoa
- No-Bake Cheesecake in a Glass
- Frozen Yoghurt Bark With Pomegranate and Pistachio
- Dipped Shortbread Fingers With Three Finishes
- Threaded Fruit and Marshmallow Skewers
- Tiramisu Tray for a Crowd
- Snow Slab of White Chocolate With Cranberry and Almond
- Pavlova Assembled From Bought Meringue
- Chocolate Log Rolled From Bought Sponge
- Fruit and Nut Clusters in Paper Cases
- Caramel and Apple Dipping Board
- Biscuit and Cream Stack With Raspberry and Mint
- Coconut Snowball Tray
- Chilled Chocolate Mousse Pots
- Frequently Asked Questions
Dipped Fruit Platter With Dark, Milk and White Chocolate
A platter of dipped fruit is the fastest centrepiece on this list. The three chocolates give guests a genuine choice, and the colour contrast between ruby strawberries, pale banana and dark chocolate reads beautifully at a distance. Contains dairy and soy if using standard chocolate; check labels if serving guests with allergies.
Make the dips up to four hours ahead and keep the platter uncovered in the fridge. Bring it out fifteen minutes before serving so the chocolate loses that straight-from-the-fridge sheen.
Ingredients
- 300 g dark chocolate (70%), broken into pieces
- 200 g milk chocolate, broken into pieces
- 200 g white chocolate, broken into pieces
- 250 g large strawberries, hulls on
- 2 bananas, peeled and cut into 3 cm chunks
- 150 g seedless grapes, cut into small clusters
- 100 g dried apricots
- 1 tablespoon freeze-dried raspberry pieces, for finishing
- 1 tablespoon gold sprinkles, for finishing
Instructions
- Melt each chocolate separately in a heatproof bowl set over a saucepan of barely simmering water, stirring until smooth. Remove from the heat.
- Line two large baking sheets with non-stick baking paper.
- Hold each strawberry by its hull and dip two-thirds of it into dark chocolate. Let the excess drip back into the bowl, then place on the lined sheet.
- Dip banana chunks halfway into milk chocolate and lay flat on the sheet. Press freeze-dried raspberry pieces onto the wet chocolate immediately.
- Dip dried apricots halfway into white chocolate and scatter gold sprinkles over the wet surface.
- Leave grape clusters undipped but nestle them on the platter as fresh contrast.
- Refrigerate the sheet for 15 minutes until the chocolate sets firm.
- Arrange everything on a large board or platter and serve within 4 hours.

🛍 Shopping guide
Layered Trifle in a Glass
Individual trifles in glasses solve the serving problem entirely: no spoon wars, no soggy bottom from sitting too long. Each layer stays visible through the glass, which is the whole visual argument for this format. Contains gluten (sponge fingers), dairy and eggs (custard). Ready-made custard from a carton keeps this genuinely no-cook.
Assemble up to six hours ahead and cover each glass with a small square of cling film. The sponge softens into the jelly overnight, which is actually better.
Ingredients
- 12 sponge fingers (savoiardi), each broken in half
- 4 tablespoons medium-dry sherry or orange juice (100 ml)
- 200 g raspberry jelly, made to packet instructions and just set to a soft wobble
- 400 ml ready-made vanilla custard (carton)
- 300 ml double cream, whipped to soft peaks by hand
- 150 g fresh raspberries
- 2 tablespoons toasted flaked almonds
- 1 tablespoon icing sugar, sifted
Instructions
- Lay two sponge finger halves in the base of each glass. Spoon over the sherry or orange juice evenly across all six glasses.
- Spoon 2 tablespoons of barely-set jelly over the sponge in each glass. Refrigerate for 30 minutes to firm slightly.
- Pour 60 ml of custard over the jelly in each glass, tilting the glass to cover evenly.
- Whip the double cream with the icing sugar by hand using a large balloon whisk until it holds soft peaks.
- Spoon the cream over the custard layer.
- Top each glass with 4 or 5 raspberries and a pinch of flaked almonds.
- Chill for at least 1 hour before serving.

Chocolate Salami Rolled in Cocoa
Chocolate salami is the most convincing trick in the no-bake repertoire. Sliced on a board it genuinely resembles cured meat, which is half the fun and all of the conversation. The biscuit pieces give it crunch without any baking. Contains gluten, dairy, eggs and nuts if you use hazelnuts. Swap the hazelnuts for dried cranberries for a nut-free version that reads just as well at Christmas.
The salami keeps in the fridge for five days wrapped in foil, or freeze for up to a month. Slice straight from frozen for cleanest edges.
Ingredients
- 200 g dark chocolate (70%), broken into pieces
- 80 g unsalted butter, cut into cubes
- 2 tablespoons golden syrup
- 2 eggs, beaten
- 150 g digestive biscuits, roughly crushed into uneven pieces
- 60 g blanched hazelnuts, roughly chopped
- 40 g dried sour cherries
- 4 tablespoons unsweetened cocoa powder, for rolling
- Pinch of flaky sea salt
Instructions
- Melt the chocolate and butter together in a heatproof bowl over barely simmering water, stirring until glossy. Remove from the heat and stir in the golden syrup.
- Let the mixture cool for 5 minutes, then beat in the eggs one at a time, stirring quickly so they incorporate without scrambling.
- Fold in the crushed biscuits, hazelnuts, sour cherries and sea salt until evenly coated.
- Tip the mixture onto a large sheet of cling film. Shape into a rough log about 25 cm long.
- Roll the cling film tightly around the log, twisting both ends to compact it into a firm cylinder. Refrigerate for at least 3 hours, or overnight.
- Unwrap the log, dust it generously all over with cocoa powder, pressing it in with your palms.
- Wrap in a sheet of baking paper and tie with kitchen string to mimic a salami for presentation. Slice into 1 cm rounds to serve.

🛍 Shopping guide
No-Bake Cheesecake in a Glass
Cheesecake in a glass is forgiving in a way that a set cheesecake on a springform base is not. There is no worrying about whether it will hold when sliced. Each portion is already individual, already tidy, and the digestive crumb base stays crunchy because it never has time to go soggy between assembling and serving. Contains gluten and dairy.
The cream cheese mixture can be made the night before and stored covered in the fridge. Add the crumb and fresh fruit within two hours of serving.
Ingredients
- 300 g full-fat cream cheese, at room temperature
- 200 ml double cream
- 3 tablespoons icing sugar, sifted
- 1 teaspoon vanilla extract
- Zest of 1 lemon
- 120 g digestive biscuits, finely crushed
- 50 g unsalted butter, melted
- 200 g mixed berry compote (from a jar or carton)
- Fresh mint leaves, to garnish
Instructions
- In a large bowl, beat the cream cheese, icing sugar, vanilla and lemon zest together with a hand whisk until smooth and lump-free.
- Pour in the double cream and whisk by hand until the mixture holds its shape when the whisk is lifted. This takes about 3 minutes of firm stirring.
- Stir the crushed biscuits and melted butter together in a separate bowl until every crumb is coated.
- Press 2 tablespoons of the biscuit mixture into the base of each glass.
- Spoon or pour the cream cheese mixture over the biscuit base in each glass, filling to about two-thirds full.
- Refrigerate for at least 1 hour.
- Just before serving, spoon 2 tablespoons of berry compote over the top of each glass and add a mint leaf.

Frozen Yoghurt Bark With Pomegranate and Pistachio
Frozen yoghurt bark looks like something from a patisserie window and costs almost nothing to make. The pomegranate seeds dot the white surface with jewel-bright red, the pistachios add green, and the whole slab reads as a snow scene. Contains dairy and nuts. Use coconut yoghurt for a dairy-free version, though the bark will be slightly softer.
The bark keeps frozen for up to two weeks. Pull it from the freezer five minutes before serving so it cleaves cleanly when you break it.
Ingredients
- 500 g full-fat Greek yoghurt
- 3 tablespoons runny honey
- 1 teaspoon vanilla extract
- 80 g pomegranate seeds (from 1 small pomegranate)
- 50 g shelled pistachios, roughly chopped
- 2 tablespoons dried cranberries
- 1 tablespoon desiccated coconut
Instructions
- Line a large baking sheet with non-stick baking paper.
- Stir the honey and vanilla into the Greek yoghurt until fully combined.
- Pour the yoghurt mixture onto the lined sheet and spread it out with a spatula to an even layer about 1 cm thick.
- Scatter the pomegranate seeds, pistachios, cranberries and coconut evenly across the surface.
- Press the toppings in very lightly with the flat of your hand so they adhere.
- Freeze for at least 4 hours, or overnight, until completely solid.
- Lift the bark off the paper and break into rough shards. Serve immediately on a cold platter.

🛍 Shopping guide
Dipped Shortbread Fingers With Three Finishes
Shortbread fingers from a good tin need no apology. What lifts them is the dip and the finish: one third dark chocolate and sea salt, one third white chocolate and freeze-dried raspberry, one third milk chocolate and gold sugar. They go onto a board that looks like it took an hour. It took fifteen minutes. Contains gluten and dairy.
Dip them up to a day ahead and store in a single layer in an airtight tin. Do not refrigerate or the chocolate will bloom.
Ingredients
- 24 bought shortbread fingers
- 150 g dark chocolate (70%), melted
- 150 g white chocolate, melted
- 150 g milk chocolate, melted
- 1 teaspoon flaky sea salt
- 2 tablespoons freeze-dried raspberry powder
- 2 tablespoons gold sugar sprinkles
Instructions
- Line a large tray with baking paper.
- Dip the first 8 shortbread fingers halfway into dark chocolate. Lay on the tray and immediately pinch a small amount of flaky sea salt over each one.
- Dip the second 8 fingers halfway into white chocolate. Dust with freeze-dried raspberry powder while still wet.
- Dip the final 8 fingers halfway into milk chocolate. Scatter gold sugar sprinkles over the wet surface.
- Leave undisturbed at room temperature for 15 minutes until the chocolate sets completely.
- Arrange on a board, alternating the three finishes for maximum visual effect.

Threaded Fruit and Marshmallow Skewers
Skewers are the easiest way to serve fruit at a party without providing plates. Thread them in a repeating pattern and they read as intentional rather than casual. The marshmallow adds a visual pop of white against red and green fruit, which is an unplanned Christmas palette. Contains no common allergens beyond sugar. Use bamboo skewers pre-soaked in water to avoid splinters.
Assemble up to two hours ahead and cover with a damp piece of kitchen paper to keep the fruit from drying out.
Ingredients
- 250 g large strawberries, hulls removed
- 200 g green grapes, left whole
- 150 g large marshmallows (about 24 pieces)
- 1 medium kiwi fruit, peeled and cut into 12 thick rounds
- 1 tablespoon runny honey, for drizzling
- 12 bamboo skewers (25 cm), soaked in water for 10 minutes
Instructions
- Pat all the fruit completely dry with kitchen paper. Wet fruit slips and will not hold on the skewer.
- Set out all components in separate bowls to make threading fast and rhythmic.
- Thread each skewer in this order: 1 marshmallow, 1 strawberry, 1 grape, 1 kiwi round, 1 marshmallow, 1 strawberry, 1 grape.
- Press each piece firmly toward the centre of the skewer as you thread, leaving 3 cm bare at each end for safe handling.
- Lay finished skewers on a serving tray in a single layer.
- Drizzle a thin line of honey over all the skewers just before serving.

🛍 Shopping guide
Tiramisu Tray for a Crowd
A tray tiramisu is the large-format version of the classic, and it travels far better than individual glasses when you are moving the dessert from kitchen to table. The espresso soak gives depth without any cooking; the mascarpone layer stays airy from a few minutes of hand-whisking. Contains gluten, dairy, eggs and caffeine. Swap the espresso for strong decaffeinated coffee if caffeine is a concern.
This genuinely improves overnight. Assemble the night before, cover with cling film and refrigerate. Dust with cocoa powder just before serving.
Ingredients
- 400 ml strong espresso or very strong coffee, cooled completely
- 3 tablespoons dark rum or 2 teaspoons rum extract
- 300 g savoiardi (sponge fingers), about 36 fingers
- 500 g mascarpone
- 4 eggs, separated
- 100 g caster sugar
- 1 teaspoon vanilla extract
- 4 tablespoons unsweetened cocoa powder, for dusting
Instructions
- Stir the rum or rum extract into the cooled espresso and pour into a shallow dish wide enough to dip the biscuits.
- Beat the egg yolks and caster sugar together in a large bowl with a hand whisk until the mixture is pale and thickened, about 3 minutes.
- Beat the mascarpone into the egg yolk mixture one spoonful at a time until smooth. Add the vanilla and stir.
- In a separate clean bowl, whisk the egg whites with a clean hand whisk until they hold stiff peaks.
- Fold the egg whites into the mascarpone mixture in three additions, using a large metal spoon and a cutting motion to keep the mixture light.
- Dip each sponge finger briefly into the espresso mixture, one second per side, and lay in a single layer in a 30 x 20 cm serving dish.
- Spread half the mascarpone cream over the first layer of biscuits.
- Add a second layer of dipped biscuits, then spread the remaining cream on top.
- Cover and refrigerate for at least 6 hours. Dust generously with cocoa powder just before serving.

Snow Slab of White Chocolate With Cranberry and Almond
The snow slab is the most gifted recipe on this list in both senses: it photographs like a shop window display and it packs into a box as a present. Two or three slabs cost less than a box of handmade chocolates from a deli. Contains dairy, nuts and soy (standard white chocolate). Use nut-free decorations for an allergen-reduced version.
Pour the slab and scatter the toppings within the first minute before the chocolate starts to set. After that, pressing toppings in will crack the surface.
Ingredients
- 400 g good-quality white chocolate, broken into pieces
- 60 g dried cranberries
- 50 g flaked almonds
- 30 g shelled pistachios, roughly chopped
- 2 tablespoons freeze-dried raspberry pieces
- 1 teaspoon edible gold or silver dust
Instructions
- Line a large baking sheet with non-stick baking paper.
- Melt the white chocolate in a heatproof bowl over barely simmering water, stirring gently until smooth. White chocolate scorches easily: keep the heat very low.
- Pour the melted chocolate onto the lined sheet and tilt gently in all directions until it forms an even layer roughly 30 x 20 cm and about 5 mm thick.
- Working quickly, scatter cranberries, flaked almonds, pistachios and freeze-dried raspberry pieces across the entire surface.
- Dust the edible gold or silver over the slab with a dry pastry brush or a small sieve.
- Leave to set at cool room temperature for 1 hour, or refrigerate for 20 minutes if the kitchen is warm.
- Break into irregular shards and serve on a board, or pack into a box with tissue paper as a gift.

🛍 Shopping guide
Pavlova Assembled From Bought Meringue
A bought meringue base and thirty minutes of assembly produce a pavlova that looks entirely homemade. The whipped cream and layered fruit do all the visual work. Peak season clementines and pomegranate make this feel very December. Contains dairy and eggs. The meringue contains egg whites, so double-check packaging for guests with egg allergies.
Assemble no more than one hour before serving: after that, the cream softens the meringue and the whole thing loses its contrast of textures. If that is a problem, serve the cream and fruit alongside in bowls and let guests assemble their own.
Ingredients
- 1 large bought meringue nest base (25 cm diameter) or 8 individual nests
- 400 ml double cream
- 2 tablespoons icing sugar, sifted
- 1 teaspoon vanilla extract
- 3 clementines, peeled and separated into segments
- 80 g pomegranate seeds
- 2 passion fruits, halved and seeds scooped out
- Small handful of fresh mint leaves
Instructions
- Place the meringue base on a large flat plate or board.
- Pour the double cream, icing sugar and vanilla into a large bowl and whisk by hand until the cream just holds soft floppy peaks. Stop before it stiffens fully.
- Spoon the cream over the meringue base, spreading it to within 2 cm of the edge.
- Arrange the clementine segments over the cream in a loose, overlapping layer.
- Scatter pomegranate seeds over the clementines.
- Spoon the passion fruit seeds and their juice over the top.
- Tuck mint leaves into the gaps for colour and serve within 1 hour.

Chocolate Log Rolled From Bought Sponge
A bought Swiss roll sponge sheet is the shortcut that makes a proper-looking yule log achievable on a weeknight. What you supply is the filling, the ganache coating and the decoration. The fork-dragged surface imitates bark convincingly. Contains gluten and dairy. Use coconut cream instead of double cream for a dairy-free ganache.
The assembled log keeps in the fridge for two days. Dust with icing sugar just before serving so it looks freshly snowed on.
Ingredients
- 1 large bought plain sponge sheet (35 x 25 cm, unfilled)
- 250 ml double cream
- 200 g dark chocolate (70%), finely chopped
- 3 tablespoons chocolate hazelnut spread
- 200 ml double cream, whipped to soft peaks, for the filling
- 2 tablespoons icing sugar, for dusting
- Sprig of fresh rosemary and a handful of cranberries, for decoration
Instructions
- Heat 250 ml double cream in a small saucepan until it just begins to steam. Pour it over the chopped dark chocolate in a heatproof bowl and leave for 2 minutes without stirring.
- Stir from the centre outward until the ganache is smooth and glossy. Set aside to cool to a spreadable consistency, about 20 minutes at room temperature.
- Unroll the bought sponge sheet gently on a clean work surface. Spread the chocolate hazelnut spread evenly over the surface, leaving a 2 cm border at the far long edge.
- Spread the whipped cream over the hazelnut layer.
- Roll the sponge tightly away from you using the paper it came in to guide a firm, even roll. Wrap tightly in cling film and refrigerate for 30 minutes to firm up.
- Unwrap the log and set it seam-side down on a serving board. Cut a thin slice from one end on the diagonal and position it against the side of the log to suggest a branch stub.
- Spread the cooled ganache all over the log with a palette knife, then drag the tines of a fork along the length to create a bark pattern.
- Refrigerate for 30 minutes. Dust with icing sugar and add the rosemary sprig and cranberries just before serving.

Fruit and Nut Clusters in Paper Cases
Clusters are the most efficient gifting confection on this list: under thirty minutes, zero specialist equipment, and they look professional in a small paper case. Dark chocolate, dried fruit and toasted nuts is the ratio that works. Contains dairy, nuts and soy. For a nut-free version, replace the nuts with extra puffed rice or sunflower seeds.
The clusters keep at cool room temperature in an airtight tin for up to ten days. Do not refrigerate: the chocolate will bloom and streak.
Ingredients
- 300 g dark chocolate (60-70%), broken into pieces
- 80 g toasted whole almonds
- 60 g dried cranberries
- 40 g puffed rice cereal
- 30 g shelled pistachios
- Pinch of flaky sea salt
- 24 small paper or foil sweet cases
Instructions
- Melt the chocolate in a heatproof bowl over barely simmering water until smooth. Remove from the heat.
- Add the almonds, cranberries, puffed rice and pistachios to the melted chocolate and stir until every piece is thoroughly coated.
- Arrange the paper cases on a flat tray.
- Use two teaspoons to drop rough mounds of the mixture into each case, filling them generously.
- Pinch a tiny amount of sea salt over each cluster.
- Leave at cool room temperature for 30 minutes until the chocolate is completely set.
- Store in an airtight tin between layers of baking paper.

Caramel and Apple Dipping Board
A dipping board anchors the table during that awkward gap between the main course and the formal dessert. This one is mostly raw apple with a warm caramel sauce at the centre and a ring of accompaniments around it. The caramel comes from a good-quality shop-bought jar: no thermometer, no crisis. Contains dairy. Use coconut caramel sauce for a dairy-free board.
Slice the apples up to two hours ahead and toss them with a tablespoon of lemon juice to prevent browning. Keep covered with cling film until the board goes out.
Ingredients
- 3 crisp eating apples (Braeburn or Pink Lady), cored and cut into 8 wedges each
- 1 tablespoon lemon juice
- 200 g shop-bought salted caramel sauce, warmed
- 50 g toasted chopped pecans
- 50 g desiccated coconut, lightly toasted in a dry pan
- 30 g mini chocolate chips
- 6 gingersnap biscuits, for scooping
Instructions
- Toss the apple wedges with lemon juice in a bowl so every cut surface is coated.
- Pour the warmed caramel sauce into a small shallow bowl and set it at the centre of a large board or plate.
- Arrange the apple wedges in fan shapes around the caramel bowl.
- Place the pecans, coconut and chocolate chips in three separate small dishes or directly in piles on the board.
- Prop the gingersnap biscuits upright between the apple fans.
- To eat, guests dip apple wedges into the caramel, then roll them in their chosen topping.

Biscuit and Cream Stack With Raspberry and Mint
Biscuit stacks are the Italian diplomat cake simplified to its most honest form. The biscuits soften into the cream overnight and the whole column becomes sliceable, which is the point. For a party, build individual stacks in a glass or on a small plate for each guest. Contains gluten and dairy. Any thin, crisp biscuit works here: Rich Tea, petit beurre or vanilla wafers all hold up well.
Build the stacks at least two hours ahead so the biscuits soften properly. Cover loosely with cling film and refrigerate until needed.
Ingredients
- 36 Rich Tea or petit beurre biscuits
- 400 ml double cream, whipped to stiff peaks with a hand whisk
- 2 tablespoons icing sugar
- 1 teaspoon vanilla extract
- 150 g fresh raspberries
- 2 tablespoons raspberry jam, loosened with 1 teaspoon warm water
- Fresh mint leaves, to finish
Instructions
- Whip the double cream with the icing sugar and vanilla until it holds stiff peaks.
- Place one biscuit flat on a small plate. Spread a generous teaspoon of cream over it, spreading right to the edges.
- Add a second biscuit, press gently, and spread with cream.
- Continue until you have 6 biscuits in the stack for each portion. Finish the top layer with cream.
- Press 3 or 4 raspberries lightly into the top cream layer of each stack.
- Drizzle a small spoonful of the loosened raspberry jam over the top.
- Cover and refrigerate for at least 2 hours. Finish with a mint leaf per stack just before serving.

Coconut Snowball Tray
Coconut snowballs are the no-bake confection that actually looks like a professional box of chocolates, especially lined up on a dark slate board. The centres are cream cheese and white chocolate, the coating is fine desiccated coconut. Contains dairy. Add half a teaspoon of peppermint extract to the centre mixture for a mint snowball that works beautifully at Christmas.
The snowballs keep refrigerated for four days. Roll in a second coat of fresh coconut just before serving if the first coat has absorbed into the surface.
Ingredients
- 200 g white chocolate, melted and cooled slightly
- 150 g full-fat cream cheese, at room temperature
- 1 teaspoon vanilla extract
- 3 tablespoons icing sugar, sifted
- 150 g fine desiccated coconut, for rolling
- Pinch of fine sea salt
Instructions
- Beat the cream cheese, icing sugar, vanilla and sea salt together in a bowl with a hand whisk until completely smooth.
- Pour in the cooled melted white chocolate and stir until the mixture is uniform and glossy.
- Cover and refrigerate for 45 minutes until the mixture is firm enough to roll.
- Spread the desiccated coconut on a flat plate.
- Scoop level tablespoons of the chilled mixture and roll each one briefly between your palms to form a smooth ball.
- Roll each ball through the coconut until evenly coated, pressing gently so the coconut adheres.
- Set on a tray lined with baking paper and refrigerate for 15 minutes before serving.

Chilled Chocolate Mousse Pots
Chocolate mousse in small pots is the most reliable dinner-party dessert because every portion is identical and pre-plated, which means the serving moment is calm. This version uses no raw egg white: the lift comes from whipped double cream folded through melted dark chocolate. Firm, glossy and deeply chocolatey. Contains dairy. For a dairy-free version, coconut cream whips to soft peaks and works in the same ratio.
The mousse can be made two days ahead, covered in the fridge. Top with cream and gold sprinkles within an hour of serving.
Ingredients
- 200 g dark chocolate (70%), finely chopped
- 400 ml double cream, divided: 100 ml for melting, 300 ml for whipping
- 2 tablespoons caster sugar
- 1 teaspoon vanilla extract
- Pinch of flaky sea salt
- Gold sugar sprinkles, to finish
Instructions
- Heat 100 ml of the double cream until it steams. Pour over the chopped chocolate in a heatproof bowl and leave for 2 minutes.
- Stir from the centre out until you have a smooth, glossy ganache. Add the caster sugar, vanilla and sea salt and stir again. Cool for 10 minutes.
- Whip the remaining 300 ml double cream to soft peaks with a hand whisk.
- Fold one large spoonful of whipped cream into the chocolate ganache to loosen it, using a cutting motion.
- Add the remaining whipped cream and fold gently until just combined, with no visible streaks of white.
- Divide the mousse among six small glasses or ramekins. Cover each with cling film.
- Refrigerate for at least 3 hours until set. Scatter gold sprinkles over each pot just before serving.

Frequently Asked Questions
What Christmas treats can you make without an oven?
Dozens: dipped fruit platters, chocolate salami, no-bake cheesecake in glasses, frozen yoghurt bark, coconut snowballs, fruit and nut clusters, tiramisu trays and chocolate mousse pots all need nothing more than a hob ring, a fridge and a freezer. Most require only a bowl and a whisk.
What desserts can be made ahead?
The tiramisu tray, no-bake cheesecake glasses, chilled chocolate mousse pots and layered trifle glasses all genuinely improve with an overnight rest in the fridge. The chocolate salami and coconut snowballs keep refrigerated for four to five days. The dipped shortbread fingers, snow slab and fruit and nut clusters all keep in an airtight tin at cool room temperature for up to ten days, making them the best candidates for assembling early in the week.
What Christmas treats travel well?
The chocolate salami travels wrapped in foil and sliced at the destination. Fruit and nut clusters travel in a tin between layers of baking paper. Dipped shortbread fingers travel in a single layer in an airtight box. Coconut snowballs travel in a cool bag. Avoid transporting anything with whipped cream or set jelly: those are best assembled at the destination or served at home.
What can I make when the oven is full?
The only heat sources required are a small saucepan for heating cream and a heatproof bowl over simmering water for melting chocolate. If even the hob is occupied, the frozen yoghurt bark, fruit and marshmallow skewers, dipped shortbread fingers (using pre-bought biscuits dipped in shop-melted chocolate) and the caramel and apple dipping board require no heat at all.

18 boho christmas decor ideas in terracotta, cream and sage, carried room by room with rattan stars,

14 christmas clay crafts that read as bought, not made: ornaments, earrings, ring dishes and table p

22 Christmas party games for family — grandkids to grandparents, nobody left out. Active, printabl
Leave a Reply