

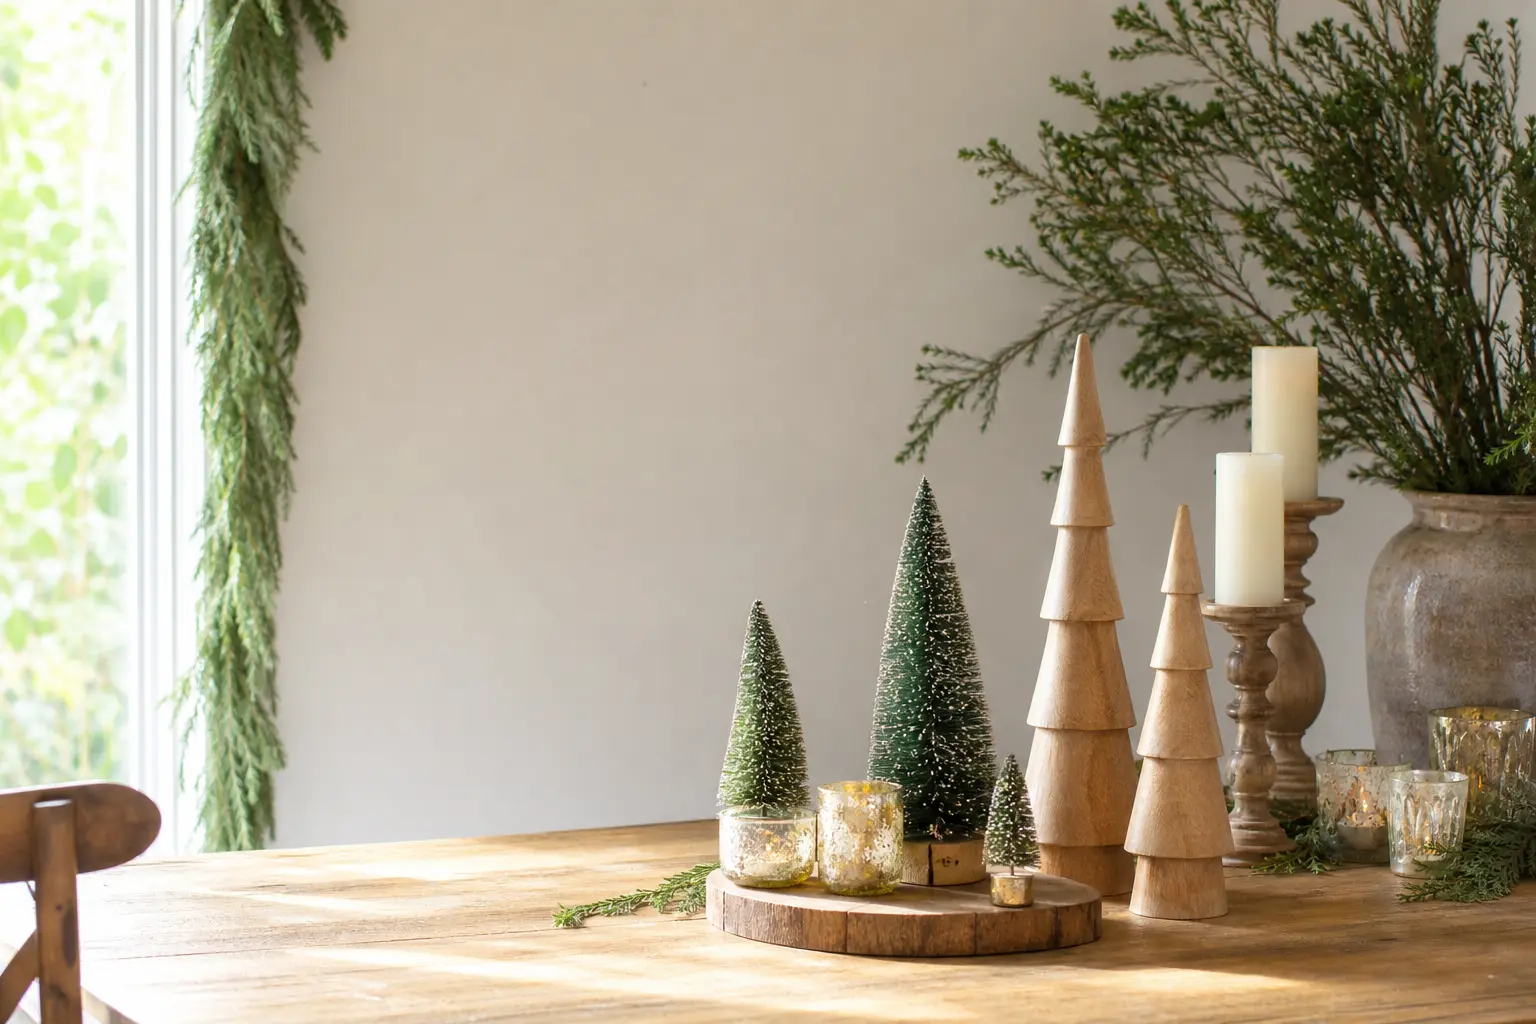
The problem with a shelf of diy christmas decorations is not the decorations. It is the arrangement. One thing, gap, one thing, gap, and somehow the whole shelf still looks bare even when it is technically full. The fix is not more objects.
It is depth: things at different heights, pushed into loose groups of three, with smaller pieces tucked in front of taller ones.
Every project here is assigned a height tier so you can build a cluster without guessing. Tall pieces anchor the back. Mid-height pieces carry the eye across. Low pieces pull the front of the shelf forward and make the whole thing feel intentional rather than accidental. For more inspiration on putting it all together, browse the full christmas decor hub.
The fifteen crafts below cover paper, fabric, plaster, glass, wood and wire, because a shelf that uses only one material always reads as a craft project rather than a room. Mix at least three textures in every cluster and the result looks less like you made it and more like you meant it.
This post contains affiliate links. If you buy through them, I may earn a small commission at no extra cost to you.
- Paper Cone Tree Cluster
- Plaster Candle Risers
- Wrapped Card Houses
- Stacked Wooden Rounds
- Rolled Magazine Wreath
- Painted Glass Jar Lanterns
- Fabric Covered Boxes as Plinths
- Bottle Brush Forest on a Tray
- Wire and Paper Star Mobile
- Pleated Paper Fans
- Painted Tin Can Vases
- Pinecone Pyramid in a Bowl
- Felt Hanging Banner
- Hessian Bows on Wire
- diy christmas decorations
- Frequently Asked Questions
Paper Cone Tree Cluster
Three cones in graduated sizes give you a ready-made group that already has height variation built in. The tallest sits at roughly 35 cm, the middle at 22 cm, and the shortest at 14 cm.
Cover them in the same paper and they read as a set; use slightly different textures of the same colour family and they read as curated. Tier: tall and mid.
They store flat if you slice each cone open along one seam after the season and keep the card template. Reassemble with a fresh strip of tape next year.
What You Need
- A2 card, 300 gsm, 3 sheets in forest green
- Decorative paper or tissue paper, 2 sheets in gold or cream
- PVA glue
- Masking tape
- Ruler and pencil
- Scissors (adult step)
- Small star stickers or a brass paper fastener for the tip, 3
How to Make It
- Draw a quarter-circle on each sheet of green card using a pencil tied to a string: 35 cm radius for the large, 22 cm for the medium, 14 cm for the small. An adult cuts along the arc and the two straight sides.
- Roll each quarter-circle into a cone shape, overlapping the straight edges until the base sits flat. Secure with masking tape on the inside seam first, then run a thin line of PVA along the outside seam and press. Hold for two minutes. The base should not rock when you set it down.
- Tear the decorative paper into strips roughly 2 cm wide. Working from the base of the cone upward, brush PVA onto a small section of green card and press a strip of decorative paper over it, letting it wrinkle slightly for texture. Overlap each strip by about half a centimetre.
- Continue wrapping upward in a loose spiral. You do not need to cover every millimetre of green; showing a little card at the back adds depth. Leave the tip bare for now.
- Press a star sticker or push a brass fastener through the very tip to finish it. Let the whole cone rest on its side for 15 minutes until the PVA is set and no strips are lifting.

Plaster Candle Risers
A candle riser is just a solid plaster disc or cylinder that lifts a taper or pillar candle to a different height, and making three in different thicknesses costs almost nothing.
The trick is casting them in yoghurt pots or short tin cans so you get a consistent round shape without a mould. Left plain white, they look like something from a Scandinavian homeware shop. Tier: low and mid.
Store them in a cardboard box with a sheet of tissue paper between each one. They will not absorb moisture as long as you seal the top face with a thin coat of PVA before use.
What You Need
- Plaster of Paris, 500 g bag
- Water
- Yoghurt pots or short tin cans, 3 different heights (4 cm, 6 cm, 9 cm approximately)
- Petroleum jelly
- Mixing bowl and old spoon
- Sandpaper, 120 grit, one sheet
- White chalk paint, small pot, for finishing (optional)
How to Make It
- Coat the inside of each pot or can generously with petroleum jelly. This is what lets the set plaster release without cracking. Do not skip it.
- Mix plaster of Paris with water in the bowl following the ratio on the packet, usually two parts plaster to one part water. Stir slowly for about two minutes until it looks like thick cream with no dry lumps at the bottom.
- Pour into each mould to the top. Tap the mould gently on the table three or four times to bring any air bubbles to the surface. Leave completely undisturbed for at least 45 minutes. The plaster will feel warm and then cool as it sets: that warming phase is normal and is why children should not handle it at this stage.
- Once cool, flex the plastic pots slightly to release the disc. For tin cans, run a palette knife around the inside edge before tipping out. If a riser cracks at the edge, mix a tiny quantity of fresh plaster, press it into the crack and smooth with a damp finger.
- Sand the top face lightly with 120-grit paper so a candle sits level. If you want a matte white finish brighter than raw plaster, apply one coat of chalk paint with a dry brush and let it cure for 2 hours before placing a candle.

Wrapped Card Houses
A row of three card houses wrapped in different papers gives you a mini village that earns its place in a cluster rather than a straight line. Build each house to a different scale: roughly 8 cm, 12 cm and 16 cm tall.
Wrap them the way you wrap a gift, folding the paper neatly over the card walls, and the result looks deliberate rather than decorated. Tier: low, mid and tall.
Flatten after the season by removing the base card and the houses collapse to store in an envelope.
What You Need
- Corrugated card or thick cereal box card, 3 pieces
- Wrapping paper or kraft paper, 2 sheets
- Bone folder or butter knife for scoring
- PVA glue and glue stick
- Ruler and craft knife (adult step)
- Small pieces of white paper for windows
- Black fineliner pen
How to Make It
- For each house, draw a net on the card: a rectangle for the front and back, two side rectangles, a base square, and a separate triangular roof section. An adult scores all fold lines with a bone folder and craft knife, then cuts the net out.
- Fold and dry-fit the box shape first without glue to check proportions. The house should feel stable when you press the sides together. Then glue each tab with PVA, hold for 30 seconds per join, and let it stand for 10 minutes.
- Cut your wrapping paper a centimetre larger than each face of the house. Apply a glue stick to one face, press the paper on, and fold the overhang neatly to the inside just as you would wrap a box. Repeat for all faces before the roof.
- For the roof, fold the card triangle into a ridge and wrap it separately in a contrasting paper or the same paper on the bias so the pattern sits at a diagonal. Glue the roof to the top of the house with PVA.
- Cut small rectangles from white paper for windows and draw a simple grid of panes with the fineliner. Glue them to the front face. A door is just a taller rectangle with a half-circle top, drawn and glued the same way.

🛍 Shopping guide
Stacked Wooden Rounds
Slice a log into three rounds at different thicknesses, stack them off-centre, and you have a riser that costs about two pounds and looks architectural. The stack doubles as a plinth for a candle, a small bottle, or a little paper tree.
It works at the back of a cluster as a natural anchor. Tier: tall (as a group) or mid.
Sand them back to pale wood each January and store in a dry spot. They last indefinitely.
What You Need
- Thin log or large branch, approximately 8-10 cm diameter
- Handsaw (adult step)
- Sandpaper: 80 grit and 180 grit, one sheet each
- Clear furniture wax or matte varnish, small tin
- Soft cloth for waxing
How to Make It
- An adult uses the handsaw to cut three rounds from the log: one at 5 cm thick, one at 3 cm, one at 1.5 cm. Cut slowly and keep the saw vertical so the faces come out level. Uneven cuts mean the stack wobbles.
- Work through the grits starting with 80 to remove any saw roughness, then 180 to smooth. Sand in small circles on the face and with the grain on the bark edge. Brush the sawdust away between grits.
- Stack the three rounds with the thickest at the bottom and each successive one placed slightly off-centre toward the back. This offset is what creates the shadow and the sense of depth. Step back and look: each disc should be visible from the front.
- Apply a thin coat of clear wax or matte varnish to the top face of each round with a soft cloth, working it in with a circular motion. This prevents moisture from the candle base or vase staining the wood. Leave to cure for 20 minutes before placing anything on top.

Rolled Magazine Wreath
Old magazines become a textured wreath with a moody paper-toned palette that works better with dark walls and natural wood than tinsel ever could. Roll each page into a tight tube, glue the edge, and pack the tubes into a ring.
The result is dense and graphic, and it costs nothing if you have the magazines already. Hang it, lean it, or wire it flat to a wall. Tier: wall piece, or lean it behind a cluster as a backdrop circle.
Spray with hairspray to stiffen after construction, then store flat in a bag. The rolls will last two or three seasons.
What You Need
- Old magazines, 2-3 issues
- Card ring base, 30 cm outer diameter, cut from cereal box card or a pre-cut wreath base
- Hot glue gun and glue sticks (adult step)
- Spray paint in one colour, optional: white, gold or forest green
- Thin ribbon, 50 cm, for hanging
How to Make It
- Tear or cut magazine pages in half lengthwise. Take one half-page and roll it tightly from the short edge around a pencil to form a tube about 1 cm in diameter. Slide it off the pencil and dab a spot of hot glue on the loose end to hold it. This is the fiddly part: the first dozen feel slow, but by the twentieth you have found a rhythm. Make at least 80 tubes before you start gluing them to the base.
- Cut a ring from cereal box card: draw two circles, one at 30 cm diameter and one at 20 cm inside it, and cut along both lines. An adult cuts the inner circle with a craft knife.
- Arrange a few tubes on the ring without glue first to judge spacing. Then, working in short sections, an adult applies a bead of hot glue to the card ring and presses a tube in, standing it upright so the open ends face the viewer. Pack tubes close together so no card shows between them.
- Build up two or three layers if you have enough tubes, pressing the second row between the gaps of the first. This is what gives the wreath its dense, expensive look.
- Once dry, spray the whole wreath in one colour if the mixed print is too busy. One light coat of white or gold unifies it without filling the tube openings. Tie ribbon through the top for hanging.

Painted Glass Jar Lanterns
The exclusion here is putting a candle straight into an untouched jar, and this is not that.
The transformation is a painted interior: brush diluted glass paint or thinned acrylic on the inside of the jar so the colour glows from within rather than sitting on the surface.
Three jars in graduating heights, amber, forest green and deep red, placed together look like a still life. Tier: low and mid.
The paint inside the jar protects it from chipping during display. Wash by hand only when storing.
What You Need
- Glass jars in 3 different heights, clean and dry
- Glass paint or acrylic craft paint, small pots in amber, forest green and deep red
- PVA glue (if using acrylic: mix 1 part paint to 1 part PVA to make it translucent)
- A soft foam brush or flat watercolour brush
- Tea lights, battery-operated, 3
How to Make It
- If using acrylic paint, mix it with an equal measure of PVA glue in a small cup. This thins the pigment enough to let light through. Glass paint can be used straight from the bottle. Test on a scrap piece of glass if you have one: the right consistency flows on the brush without dragging but is not so thin it runs immediately.
- Pour about a tablespoon of the paint mixture into the jar and rotate the jar slowly, tilting it so the paint travels across the interior walls. Let gravity do the work. If you see a thick pool forming at the base, tip the jar upside down over a cup for a minute to drain excess, then right it again.
- Set the jar upside down on a sheet of baking paper for 30 minutes to drain. Then right it and leave it to cure for at least 2 hours. The paint will look patchy while wet; it evens as it dries. If a bare patch remains after drying, add a second rotation of colour.
- Once cured, place a battery tea light inside each jar. Battery rather than flame tea lights are the right call here because the painted interior is not food-safe and some acrylics are not heat-safe. Group the three jars in a loose triangle, tallest at the back.

Fabric Covered Boxes as Plinths
A stack of fabric-covered boxes in two or three sizes is the most versatile thing you can add to a shelf cluster because it is also functional storage.
The fabric is glued directly onto the box with a fabric glue or watered-down PVA; no sewing, no zip ties.
Cover each box in a different texture of the same tone: boucle, linen and velvet in cream, for example, and the group reads as a deliberate palette rather than a jumble sale. Tier: any height, which is the point.
Strip the fabric before storing by soaking the box in warm water to loosen the glue. Dry the box flat and re-cover next year in a different colour if you want a change.
What You Need
- Sturdy cardboard boxes with lids, 3 different sizes (shoe boxes work well)
- Fabric pieces: one each of a textured fabric type, each piece at least 5 cm larger on all sides than the box face you are covering
- Fabric glue or PVA glue thinned with a little water
- A flat brush, 3 cm wide
- Scissors
- Bulldog clips or clothes pegs to hold while drying
How to Make It
- Measure and cut fabric for each face of the box, adding 3 cm on each edge for folding over. Label your cut pieces in pencil on the reverse if you have several boxes so they do not get mixed up.
- Brush a generous, even coat of diluted PVA over one face of the box. Lay the fabric piece over it and smooth from the centre outward with the flat of your hand to push out any air bubbles. The fabric should look taut, not puckered.
- Fold the edge allowances over to the inside of the box and glue them down. At corners, fold one side first, press it flat, then fold the adjacent side over it like gift wrap. Secure with bulldog clips while it dries.
- Repeat for each face, working on opposite sides so the box is not pushed out of square by wet glue. Leave the base for last as it is the least visible.
- Cover the lid separately using the same method. When everything is dry (allow at least 90 minutes), press any lifting edges back down with fresh glue and a fingertip.

Bottle Brush Forest on a Tray
Bottle brush trees are the one bought element allowed here because the making is in the arrangement and the landscape you build around them: a tray covered in sheet moss, small plaster risers or flat stones tucked underneath some trees to vary the height, and a dusting of fake snow over the whole thing.
This is a composed scene, not a product display. Tier: low, as a tray sits on a coffee table or at the front of a mantel cluster.
Store the whole tray assembled in a large zip bag. The moss and trees survive several seasons undisturbed.
What You Need
- Wooden or enamel tray, approximately 30 x 20 cm
- Bottle brush trees in at least 3 different heights, 5-7 trees
- Sheet moss or preserved moss, one small bag
- Small flat stones or cork discs to use as risers, 3-4
- Artificial snow spray or fine white glitter, one can or small pot
- Hot glue gun (adult step) to anchor trees if needed
How to Make It
- Lay the moss across the tray base, pressing it into the corners. It does not need to be glued if the tray has raised edges; the trees will anchor it. Tear the moss to fit rather than cutting, as torn edges look more natural.
- Place the stones or cork discs under the moss in two or three spots before fully settling the moss. These create small rises in the landscape so the trees planted on them sit higher. The effect is subtle but stops the scene looking flat.
- Arrange the trees in a loose cluster, tallest toward the back and left of centre. Leave gaps between trees rather than packing them in; negative space in the scene is what makes it look composed rather than crammed. Step back and look before committing.
- If any tree wobbles, an adult can add a small blob of hot glue to the base before pressing it into the moss.
- Hold the snow spray or glitter 30 cm above the tray and apply a light, sweeping pass. Less is more: a dusting reads as frost, a heavy coat reads as craft class. Let the tree colours show through.

Wire and Paper Star Mobile
A hanging mobile of paper stars on wire takes up vertical space above a cluster and stops the eye dropping to the shelf and staying there.
Make the stars from gold or white cartridge paper folded into five-point forms, and hang them at three different drop lengths from a single horizontal wire so they sway at different planes. This is the piece that makes a static shelf arrangement feel alive.
Tier: overhead, hung from a cup hook above the shelf or from a beam.
Lay flat in a folder to store. The wire frame hangs on one hook year after year.
What You Need
- Gold or white cartridge paper, 160 gsm, 3 sheets
- Florist wire or craft wire, 0.8 mm, one 10-metre reel
- Fine thread or invisible nylon thread, 3 m
- Wire cutters (adult step)
- A pencil and a star template (trace any five-point star 8-12 cm across)
- PVA glue
How to Make It
- Trace your star template onto the cartridge paper and cut out at least 9 stars: 3 large at 12 cm, 3 medium at 9 cm, 3 small at 6 cm. Each finished 3D star needs two identical flat stars glued together, so cut in pairs and make sure your pairs match.
- On one star of each pair, cut a slit from the tip of one point to the centre. On its partner, cut a slit from the base of the opposite point to the centre. Slide the two slits together to form a 3D star that locks without glue. If the points splay out rather than holding, the slits may not be centred; gently re-cut.
- Thread a needle with nylon thread and pierce through the top point of each star. Knot the thread at the entry point so the star cannot slide down. Cut threads at lengths of 10 cm, 20 cm and 30 cm for the three size groups.
- An adult cuts a length of wire at 40 cm and bends a small loop at each end using pliers. This is your horizontal bar. Tie the stars to the bar at intervals, mixing sizes and drop lengths so no two adjacent stars hang at the same height.
- Attach a thread to the centre of the bar to hang the mobile. Adjust the hang point left or right until the bar balances level before fixing it to the hook.

🛍 Shopping guide
Pleated Paper Fans
Pleated paper fans are one of those deceiving crafts that look as though they take skill and take almost none. Three fans in different diameters, overlapped slightly as they lean against a wall or hang flat, fill a large vertical space without weight or expense.
Use heavyweight tissue paper in one or two tones: ivory and dusty rose, or forest green and gold, and the fans become architecture rather than party decor. Tier: wall, behind a shelf cluster, or hung as a trio above a mantelpiece.
Store flat between sheets of tissue in a cardboard sleeve. Do not fold or the pleats crease at the wrong place.
What You Need
- Tissue paper, 3 sheets per fan, in your chosen colours (standard 50 x 70 cm sheets)
- Stapler and staples
- Sticky tape
- String or twine, 1 m, for hanging
How to Make It
- Stack three sheets of tissue paper together. Starting at the short end, fold the whole stack accordion-style in 3 cm pleats. Keep the pleats as even as you can; uneven pleats make the fan look lopsided when open. Run your thumb firmly along each fold to crease it cleanly.
- Once the whole sheet is folded into a striped accordion, fold the whole thing in half at the midpoint, bringing the two folded ends together.
- Staple across the folded midpoint twice, close to the centre, so the two halves are locked together. This is the hinge of your fan.
- Open the two outer ends and press them together, taping them firmly with a 5 cm piece of sticky tape on both front and back. The fan should now spring open into a full semicircle. If it only opens to about two-thirds, the tape at the base needs to go a centimetre further out from the centre.
- Thread string through the top pleat for hanging, or simply lean the fan against the wall. Make a large fan at 70 cm, a medium at 50 cm (using the paper cut down), and a small at 35 cm, and arrange them overlapping at different heights.

Painted Tin Can Vases
Three tin cans in different sizes, painted in chalky tones and filled with dried foliage or a tight bunch of eucalyptus, give you the mid-height element that a cluster almost always needs and usually lacks.
The trick to making tins look intentional is coating the outside with chalk paint and then distressing the top edge slightly with sandpaper, so they look like something found rather than something made. Tier: mid.
Remove the foliage and store the cans stacked inside each other. Repaint in a new colour next year if the mood has changed.
What You Need
- Tin cans in three sizes, labels removed, clean and dry (a standard baked bean can, a chopped tomato can, and a large coffee can work well)
- Chalk paint in cream, sage or terracotta, small pot
- A flat paintbrush, 2 cm wide
- 120-grit sandpaper, one sheet
- Clear wax or matte craft varnish, small pot, for sealing
- Dried foliage, eucalyptus or cotton stems for filling
How to Make It
- If the cans have any sharp rim edges from opening, press these flat with the back of a spoon before you start. Sand the outside of each can lightly with 120-grit paper so the paint has something to grip. Wipe with a damp cloth and let it dry completely.
- Apply the first coat of chalk paint in long, smooth strokes going in the same direction. The paint will look streaky and thin; that is fine. Let it dry for 30 minutes. Chalk paint dries quickly, which is why it works well for a project like this.
- Apply a second coat working in the opposite direction to the first. This cross-hatching fills the streaks from coat one. Let it dry again for 30 minutes. Two coats is usually enough, but a third gives a more solid finish if you prefer it.
- Once fully dry, sand the very top edge and any raised seam lines lightly with 120-grit paper. You are aiming for a worn-in look at the edges, not bare metal all over. Wipe the dust away.
- Apply a thin coat of clear wax or varnish with a soft cloth to seal the paint and protect it from moisture from the stems. Let it cure for 1 hour before adding foliage. Fill each can to a different height: foliage level with the can rim on the shortest, just above on the middle, and a generous spray extending 15 cm above the tallest.

Pinecone Pyramid in a Bowl
Stack pinecones in a low bowl the way a fruit bowl stacks oranges: densely, with the cones interlocking rather than sitting separately.
The pyramid shape is architectural and the natural texture is rich enough that it needs nothing added, though a light dust of gold spray across the top third of the pyramid gives it the warmth of candlelight even in daylight.
Tier: low, as an anchor piece at the front of a cluster.
The cones last indefinitely. Store the bowl assembled, covered with a bag.
What You Need
- Pinecones, approximately 20-30 depending on bowl size (foraged or bought)
- A wide, low bowl, at least 25 cm in diameter
- Gold spray paint, one can (optional)
- Dried moss or cranberries to fill gaps at the base (optional)
How to Make It
- Lay the largest pinecones in the base of the bowl first, packing them tightly so they cannot roll. The base layer should be stable before you add anything on top.
- Add a second layer with slightly smaller cones, turning each one so its base sits in a gap between two cones below. This interlocking is what holds the pyramid together without any glue. If you have foraged cones of very different sizes, sort them by size before you start: large at the base, medium in the middle, small at the top.
- Build up three or four layers, narrowing the diameter at each level, until you reach a rough peak. Tuck a single small cone at the top pointing upward to finish the apex.
- Tuck dried moss or a few fresh cranberries around the base of the first layer to cover the bowl edge and make the cones look as though they are sitting in a landscape rather than a dish.
- If spraying: take the bowl outside or to a well-ventilated space and apply one light pass of gold spray across the upper third of the pyramid only. Leave the lower two-thirds dark for contrast. Dry for 15 minutes before bringing inside.

Felt Hanging Banner
A banner made from triangular felt pennants on a length of twine reads as graphic rather than folksy if you keep the colour palette tight: two tones of green and one of cream, for example, or all white with a single deep red.
Cut the pennants from stiff wool felt so they hold their point without drooping, and stamp or hand-draw a single letter on each one to spell a word or just leave them plain. Tier: wall or overhead, hung across a shelf or along a mantel.
Fold the pennants flat to store; they press back into shape with a cool iron over a damp cloth.
What You Need
- Wool felt sheets, 3 mm thick, 30 x 30 cm, in your chosen colours: 3-4 sheets
- Jute twine, 2 m
- Fabric scissors (adult step)
- A cardboard pennant template, 15 cm wide at the top, 22 cm tall
- Fabric paint or a rubber stamp and stamp pad for lettering (optional)
- A hole punch
How to Make It
- Cut your cardboard template and trace it onto the back of each felt sheet with a light pencil line. An adult cuts along the traced lines with fabric scissors. You need about 8-10 pennants for a 2-metre banner, alternating colours as you go.
- If adding letters, now is the easiest time, before the pennants go on the twine. Use fabric paint with a small brush, or press a rubber stamp inked with a stamp pad onto the felt. Let the paint dry completely before the next step; at least 20 minutes for fabric paint.
- Punch two holes at the top corners of each pennant, about 1 cm from the edge. This is what the twine threads through. A standard hole punch reaches easily to 1 cm from the edge; if yours does not, use the tip of a pen to pierce the felt instead.
- Thread the twine through the two holes on the first pennant, leaving a 20 cm tail at one end for tying. Thread the next pennant leaving a 5 cm gap of twine between them. Continue across the full length.
- Hang from two points. Pull the twine taut enough that the pennants hang flat rather than bunching together.

Hessian Bows on Wire
A hessian bow wired to a dowel or tucked into a wreath has a texture that no satin ribbon can replicate: coarse, warm, a little imperfect, and it photographs beautifully against dark or pale backgrounds.
Make five or six bows in different widths (3 cm ribbon and 6 cm ribbon) and attach each to a short length of florist wire so you can push them into a bottle brush forest, a pinecone pyramid or the base of a candle cluster.
They are not decorations in isolation. They are the connective tissue that links objects in a cluster. Tier: tucked into any arrangement.
Store curled loosely in a box so the loops do not flatten. Press back into shape with fingers; hessian does not need ironing.
What You Need
- Hessian ribbon, 3 cm wide and 6 cm wide, 2 m of each
- Florist wire, 0.6 mm, one small reel
- Wire cutters (adult step)
- A ruler
How to Make It
- Cut a length of hessian ribbon at 40 cm for a medium bow, 55 cm for a large one. Run a thin line of water along the edges of the cut end with a wet finger to prevent fraying while you work. You do not need to sew or hem it.
- Form the ribbon into a figure-eight shape, bringing both ends to the centre and leaving two loops of roughly equal size. Pinch the centre firmly between your fingers.
- Cut a 15 cm length of florist wire (adult step). Fold it in half and wrap it tightly twice around the pinched centre of the bow. Twist the two wire ends together two or three times to lock them. The bow should now hold its shape when you release it.
- Separate and fluff the loops with your fingers, pulling each one out slightly to make it round rather than flat. Trim the two ribbon tails to a V shape by folding each tail in half lengthwise and cutting at a diagonal from the fold.
- Push the wire tail into your arrangement or wrap it around a dowel, a wreath wire or the handle of a basket. The wire gives you complete flexibility about where the bow sits.

diy christmas decorations
Every project above is designed around one idea: that depth beats quantity every time. A shelf with three objects at different heights and two textures will always outperform a shelf with nine objects in a line.
Start with the tallest piece, add the mid-height piece 10 cm in front and slightly to one side, then bring the lowest piece forward again.
That diagonal line from back-tall to front-low is the arrangement that professional stylists use because it creates shadow, creates movement, and makes the eye travel rather than stop.
If you want more ideas for putting a room together, the full guide to christmas decor covers every surface in the house. For projects that take less time, see the list of diy christmas decorations easy enough to make in an evening.
If the decorating is happening at work rather than at home, the ideas in diy christmas decorations office are scaled for a desk and a budget.
And if the mantel is the focus, christmas fireplace decor has the layering approach applied specifically to that one shelf.
The fifteen projects here also pair well with a Christmas gathering.
If you are hosting and need something for guests to do while the room fills up, 15 DIY Christmas Games You Can Make from Dollar Store Finds has activities that take as little setup as these decorations.
And if you want the party itself planned in minutes, 18 Easy Christmas Party Games You Can Set Up in Minutes is a useful companion piece.
Frequently Asked Questions
What DIY Christmas decorations look expensive?
Plaster candle risers, fabric-covered boxes and chalk-painted tin cans are the three that most reliably read expensive because they use a single tone and a tactile material.
The rule is: limit the colour palette to two or three tones across the whole cluster, and choose one material that has real texture, wool felt, raw linen, matte plaster, natural wood.
Mixed shiny finishes and too many colours are what makes handmade work look busy rather than intentional.
How do I make DIY Christmas decorations look styled, not homemade?
Group in odd numbers at three different heights rather than spacing things evenly across a surface. Place the tallest piece at the back, offset the mid-height piece to one side and slightly forward, and bring the lowest piece to the front.
This diagonal line creates shadow and movement. Restrict yourself to two textures and two or three colours per cluster, and use at least one natural element, a pinecone, a dried stem, a wood slice, to anchor the group.
What DIY Christmas decorations can I make in bulk?
Pleated paper fans, hessian bows on wire, rolled magazine wreath tubes and paper cone trees scale up well because each one uses a repeated action.
Set up a production line: cut all materials first, then work through one step across all pieces before moving to the next. Felt pennants for a banner are also fast to cut in bulk from stacked felt sheets.
The bottle brush forest trays are good for gifting because each tray is a self-contained arrangement that travels well in a box.
How far ahead can I make DIY Christmas decorations?
Plaster candle risers, stacked wooden rounds, rolled magazine wreaths and pinecone pyramids can all be made and stored months ahead. Paper and fabric projects are best made two to four weeks before display to avoid creasing in storage.
Painted tin can vases and glass jar lanterns keep indefinitely once sealed. Leave any foliage filling until a few days before display so stems stay fresh. Store flat items in folders, three-dimensional items in boxes with tissue between layers.
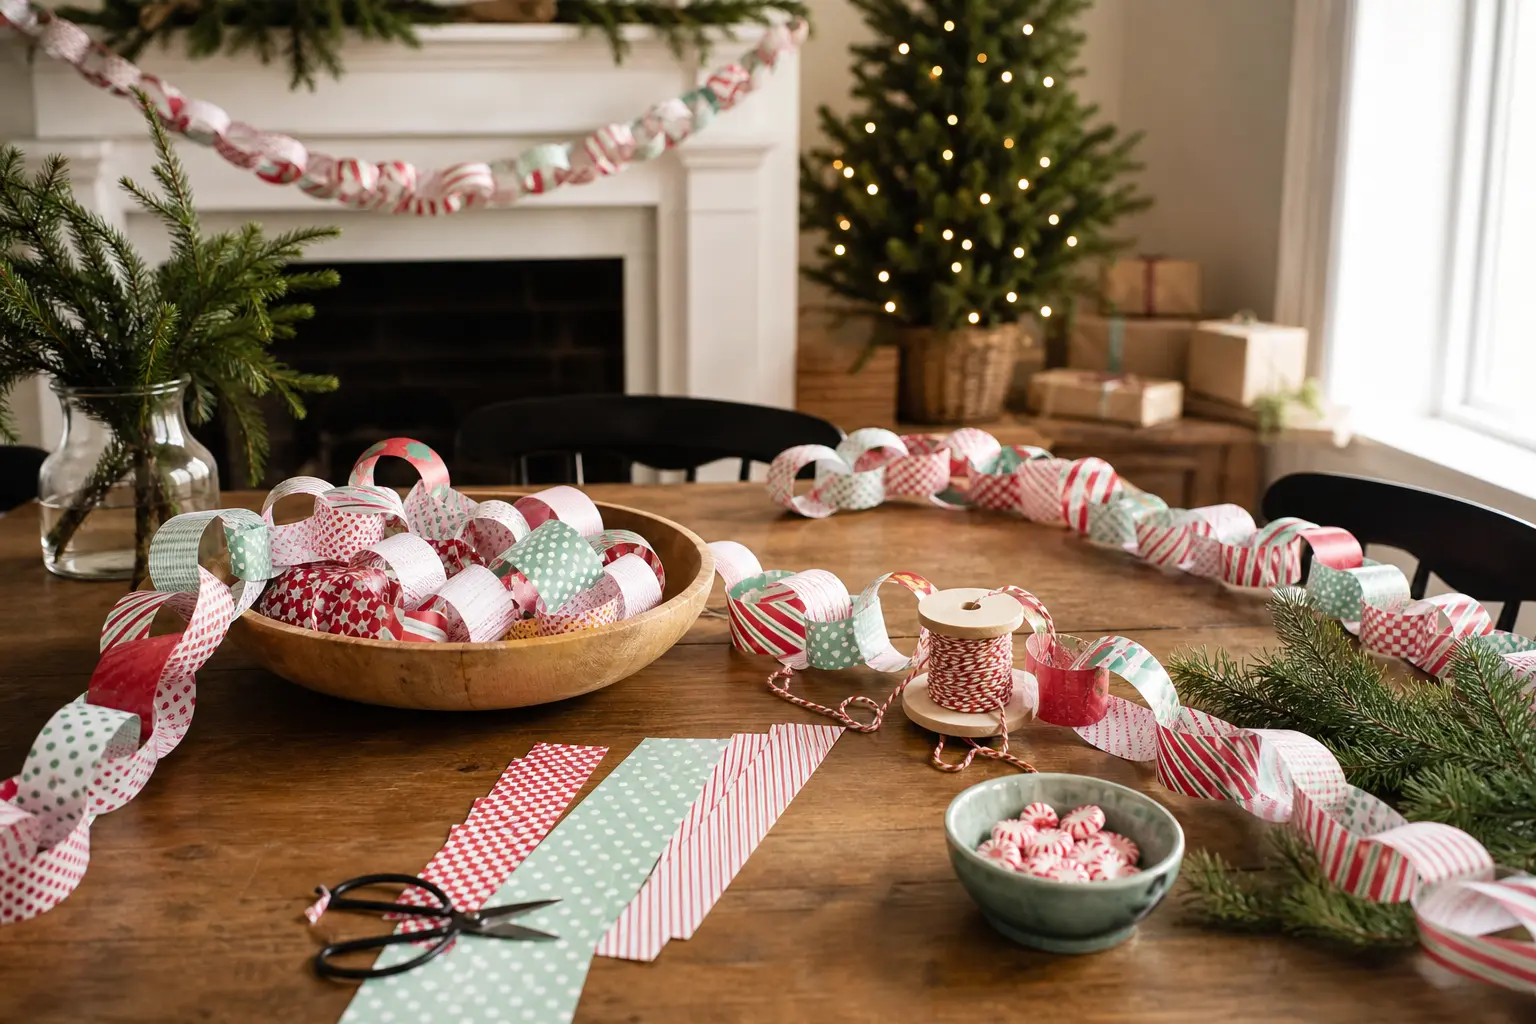
12 free printable paper chain christmas decorations: candy stripes, gingham, tartan and shape garlan

14 Christmas balloon arch ideas for doors, tables and corners you have not decorated yet, with palet

16 diy felt christmas ornaments, from five-minute no-sew cuts to stitched keepsakes, each with its o
Leave a Reply